

Step-by-Step Guide to Run Your PTaaS Pro Program
Who can use this feature
- Available as an Add-On for all plans. Contact your CSM to know more.
This guide walks you through the complete customer workflow for PTaaS Pro, from adding your first target to receiving your audit-ready report.
Before you begin, here is what your program looks like across the year.
What You Do vs. What Scrut Does
| Your responsibilities | Scrut's responsibilities |
|---|---|
| Add targets via the Scrut platform | Validate your target configuration |
| Review verified findings | Trigger and run all scans |
| Remediate vulnerabilities in your application | Review every finding before publishing it to you |
| Submit findings for verification | Post expert advisory on each finding |
| Manage governance decisions (Ignore, Accept Risk) | Verify your remediation within the SLA |
| Download and share your audit-ready report | Generate and upload the audit-ready report |
Step 1: Add Your Targets
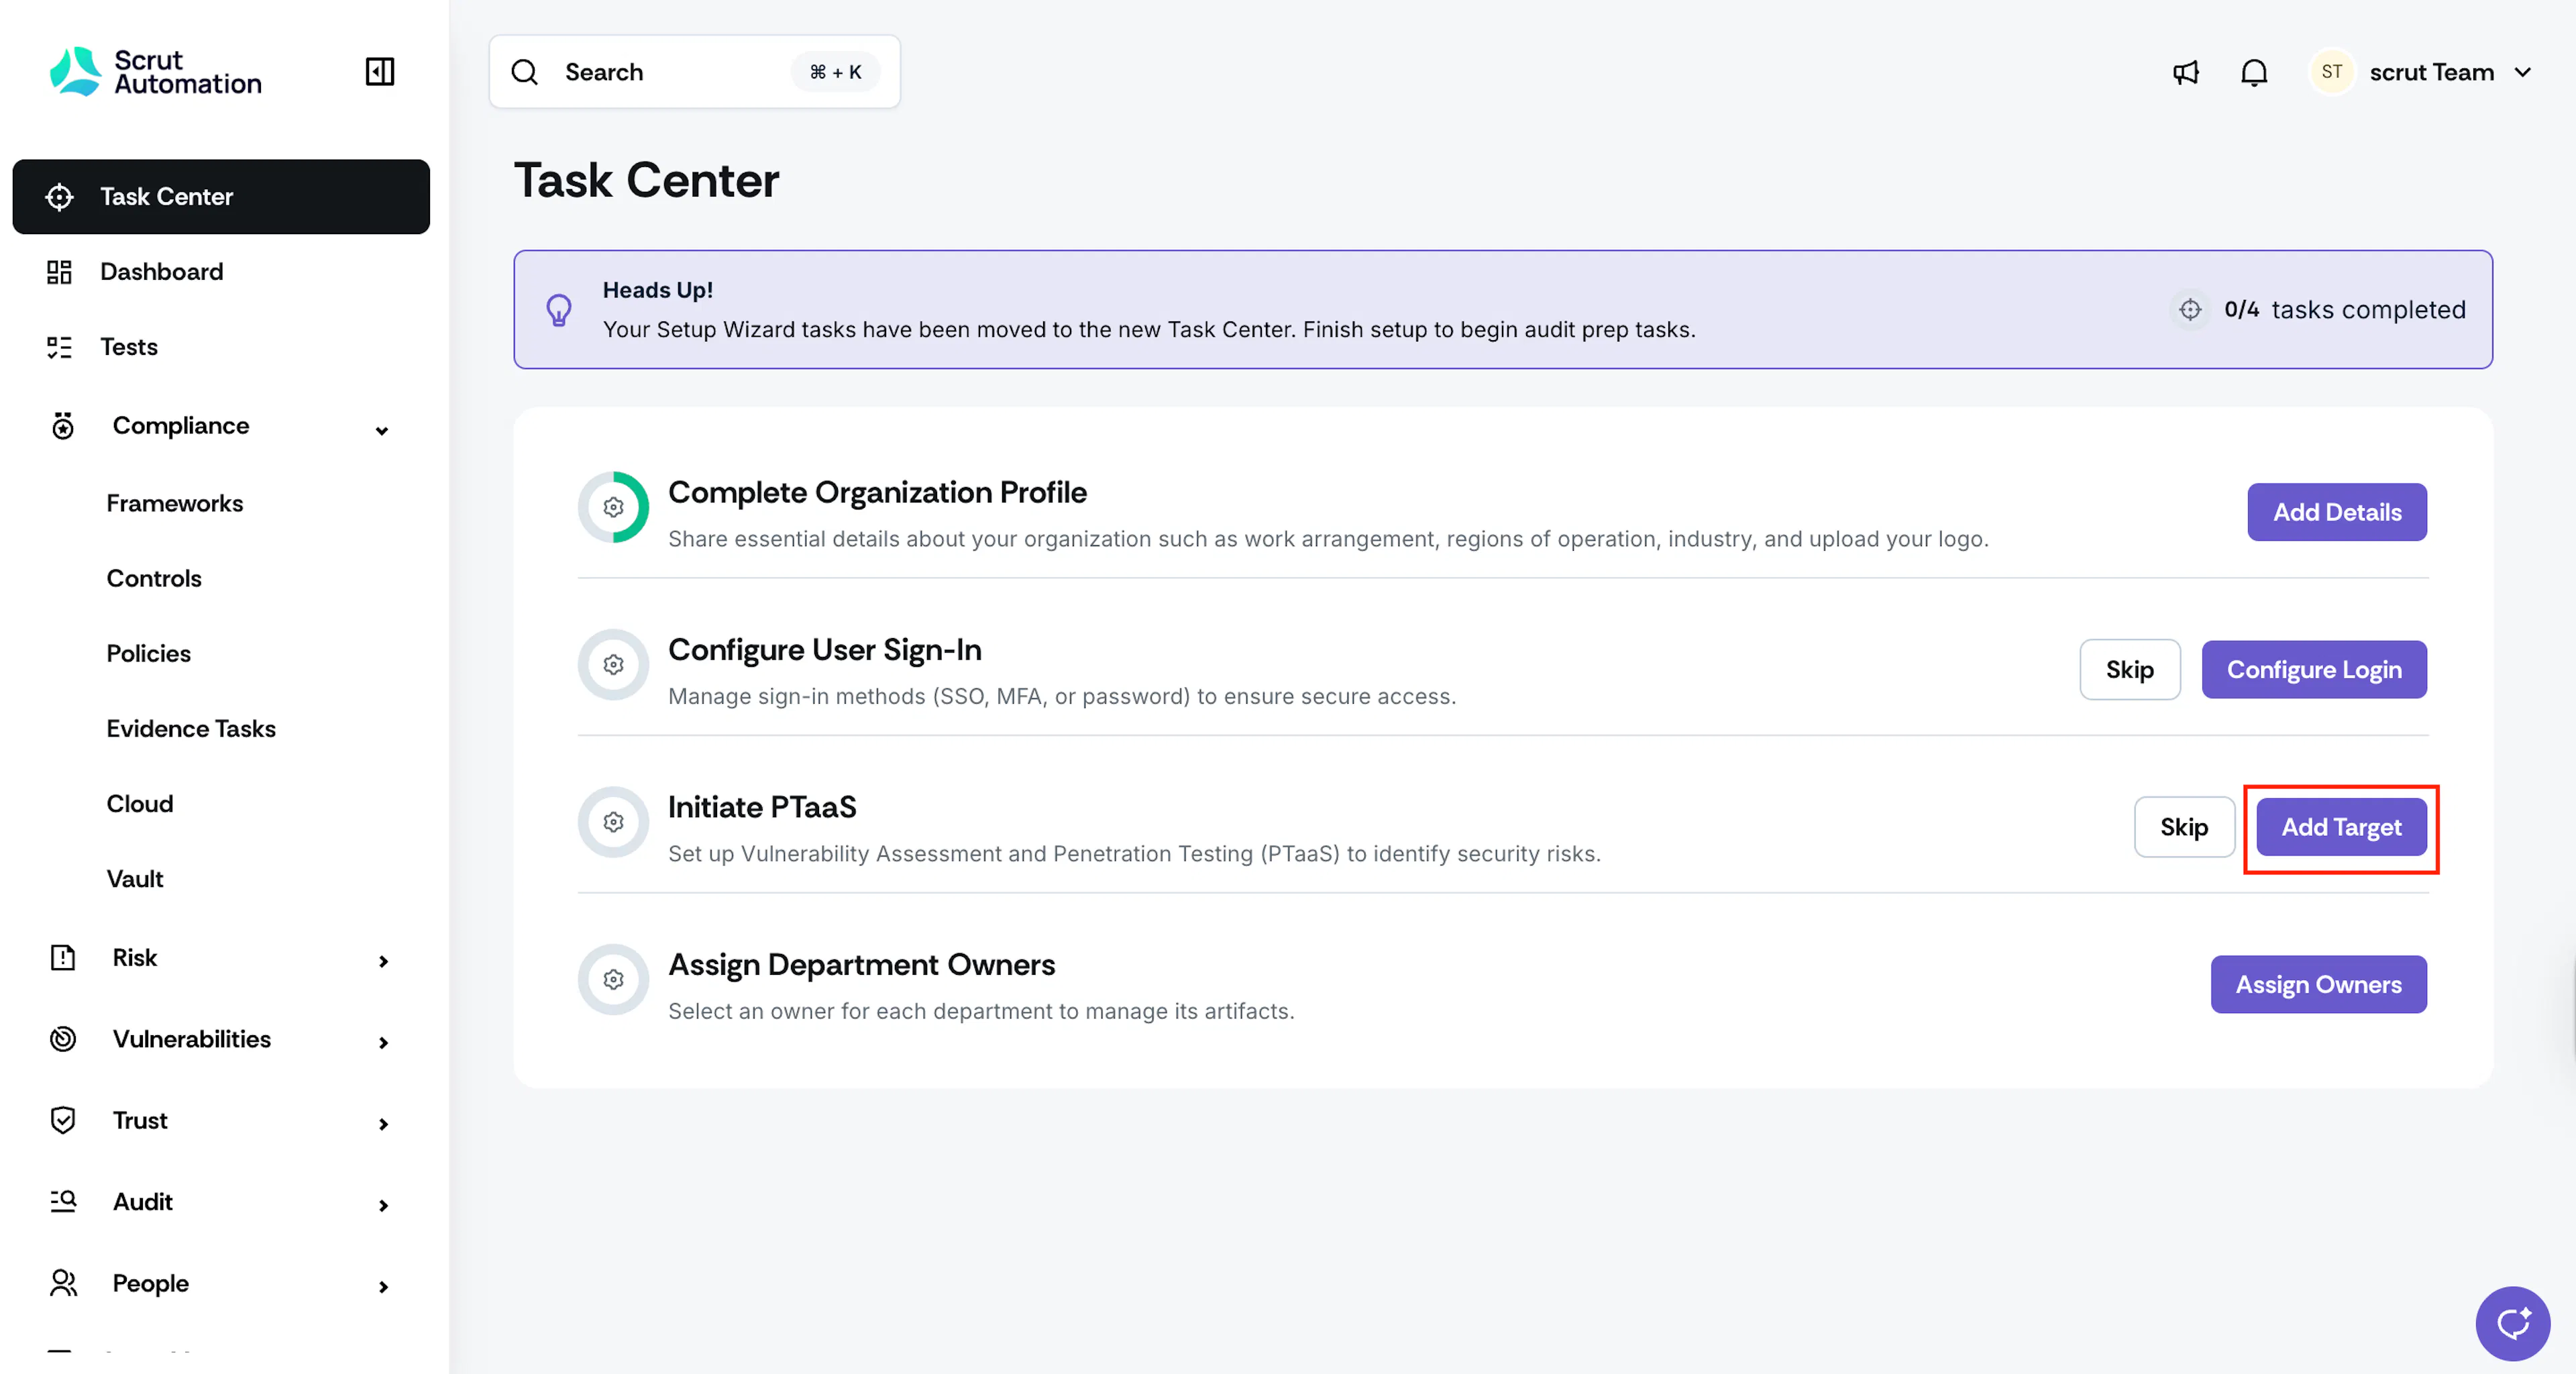
Your CSM enables PTaaS Pro for your account and configures the number of targets for your account. Once PTaaS Pro is enabled, an Initiate PTaaS task appears in your Task Center.
- Sign in to Scrut and navigate to the Task Center.
- Click Add Target in the Initiate PTaaS card. This redirects you to Vulnerabilities → Targets.
- Click Add Target.
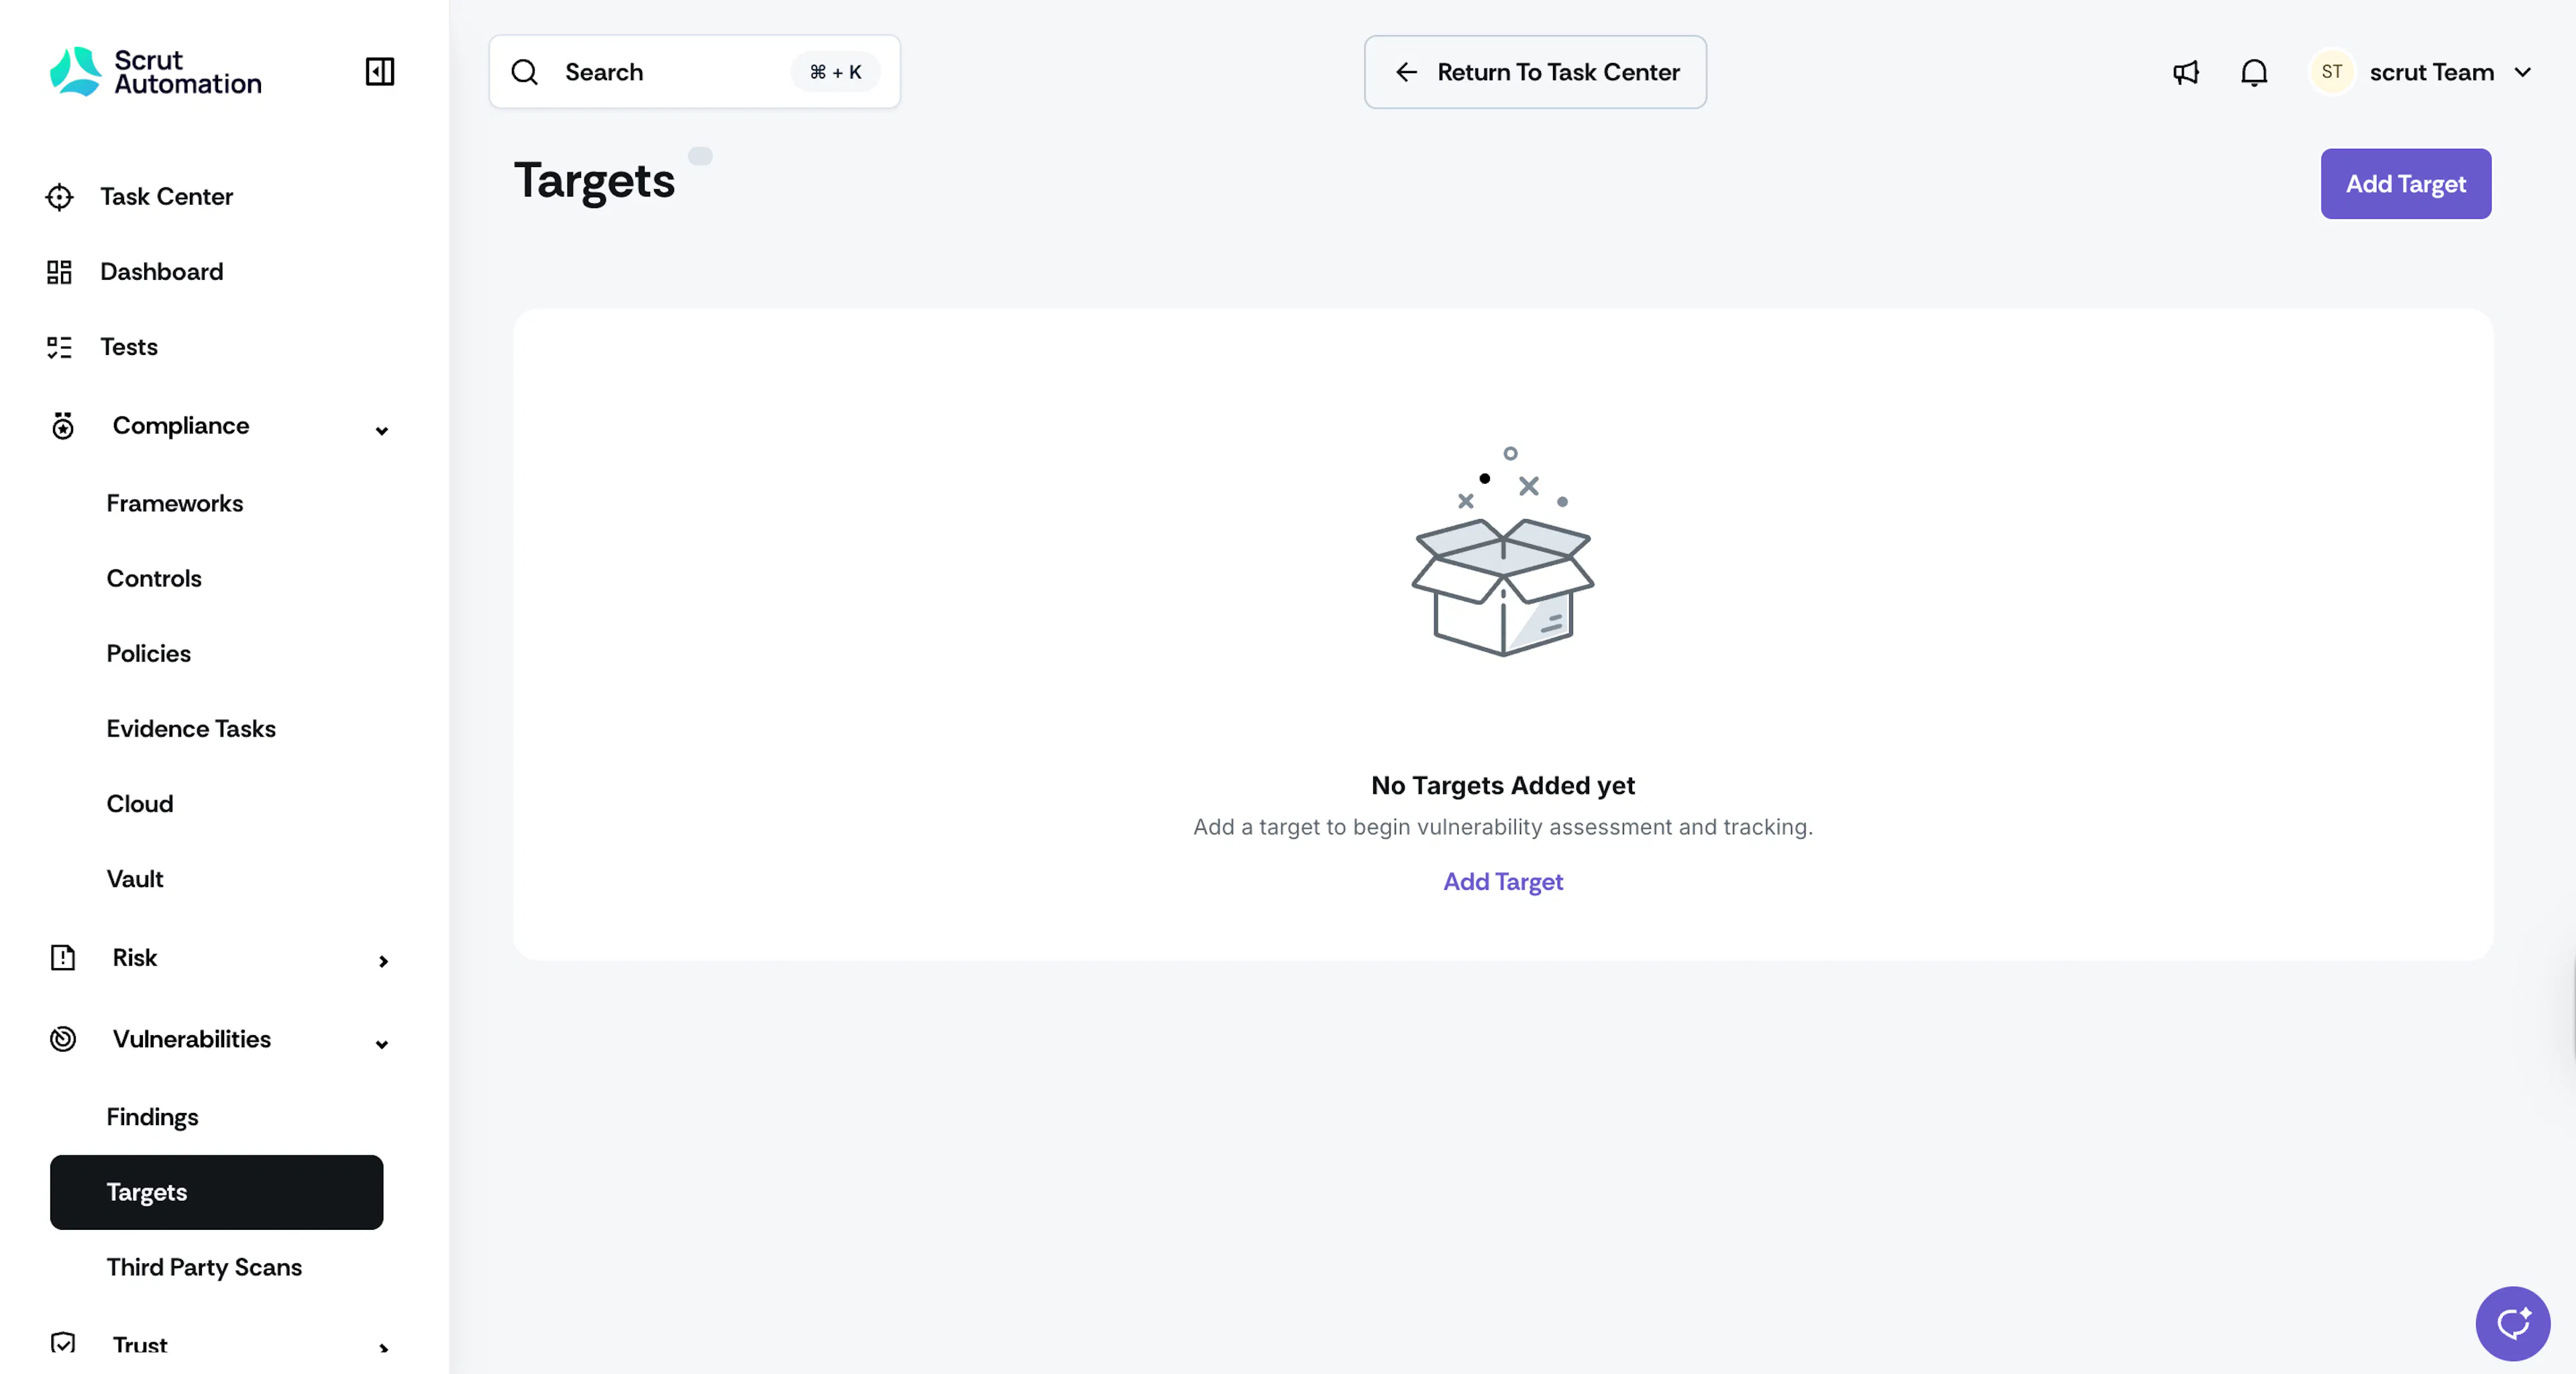
The wizard has three steps: Target Details, Authentication, and Configuration. You can go back to any previous step without losing your entries.
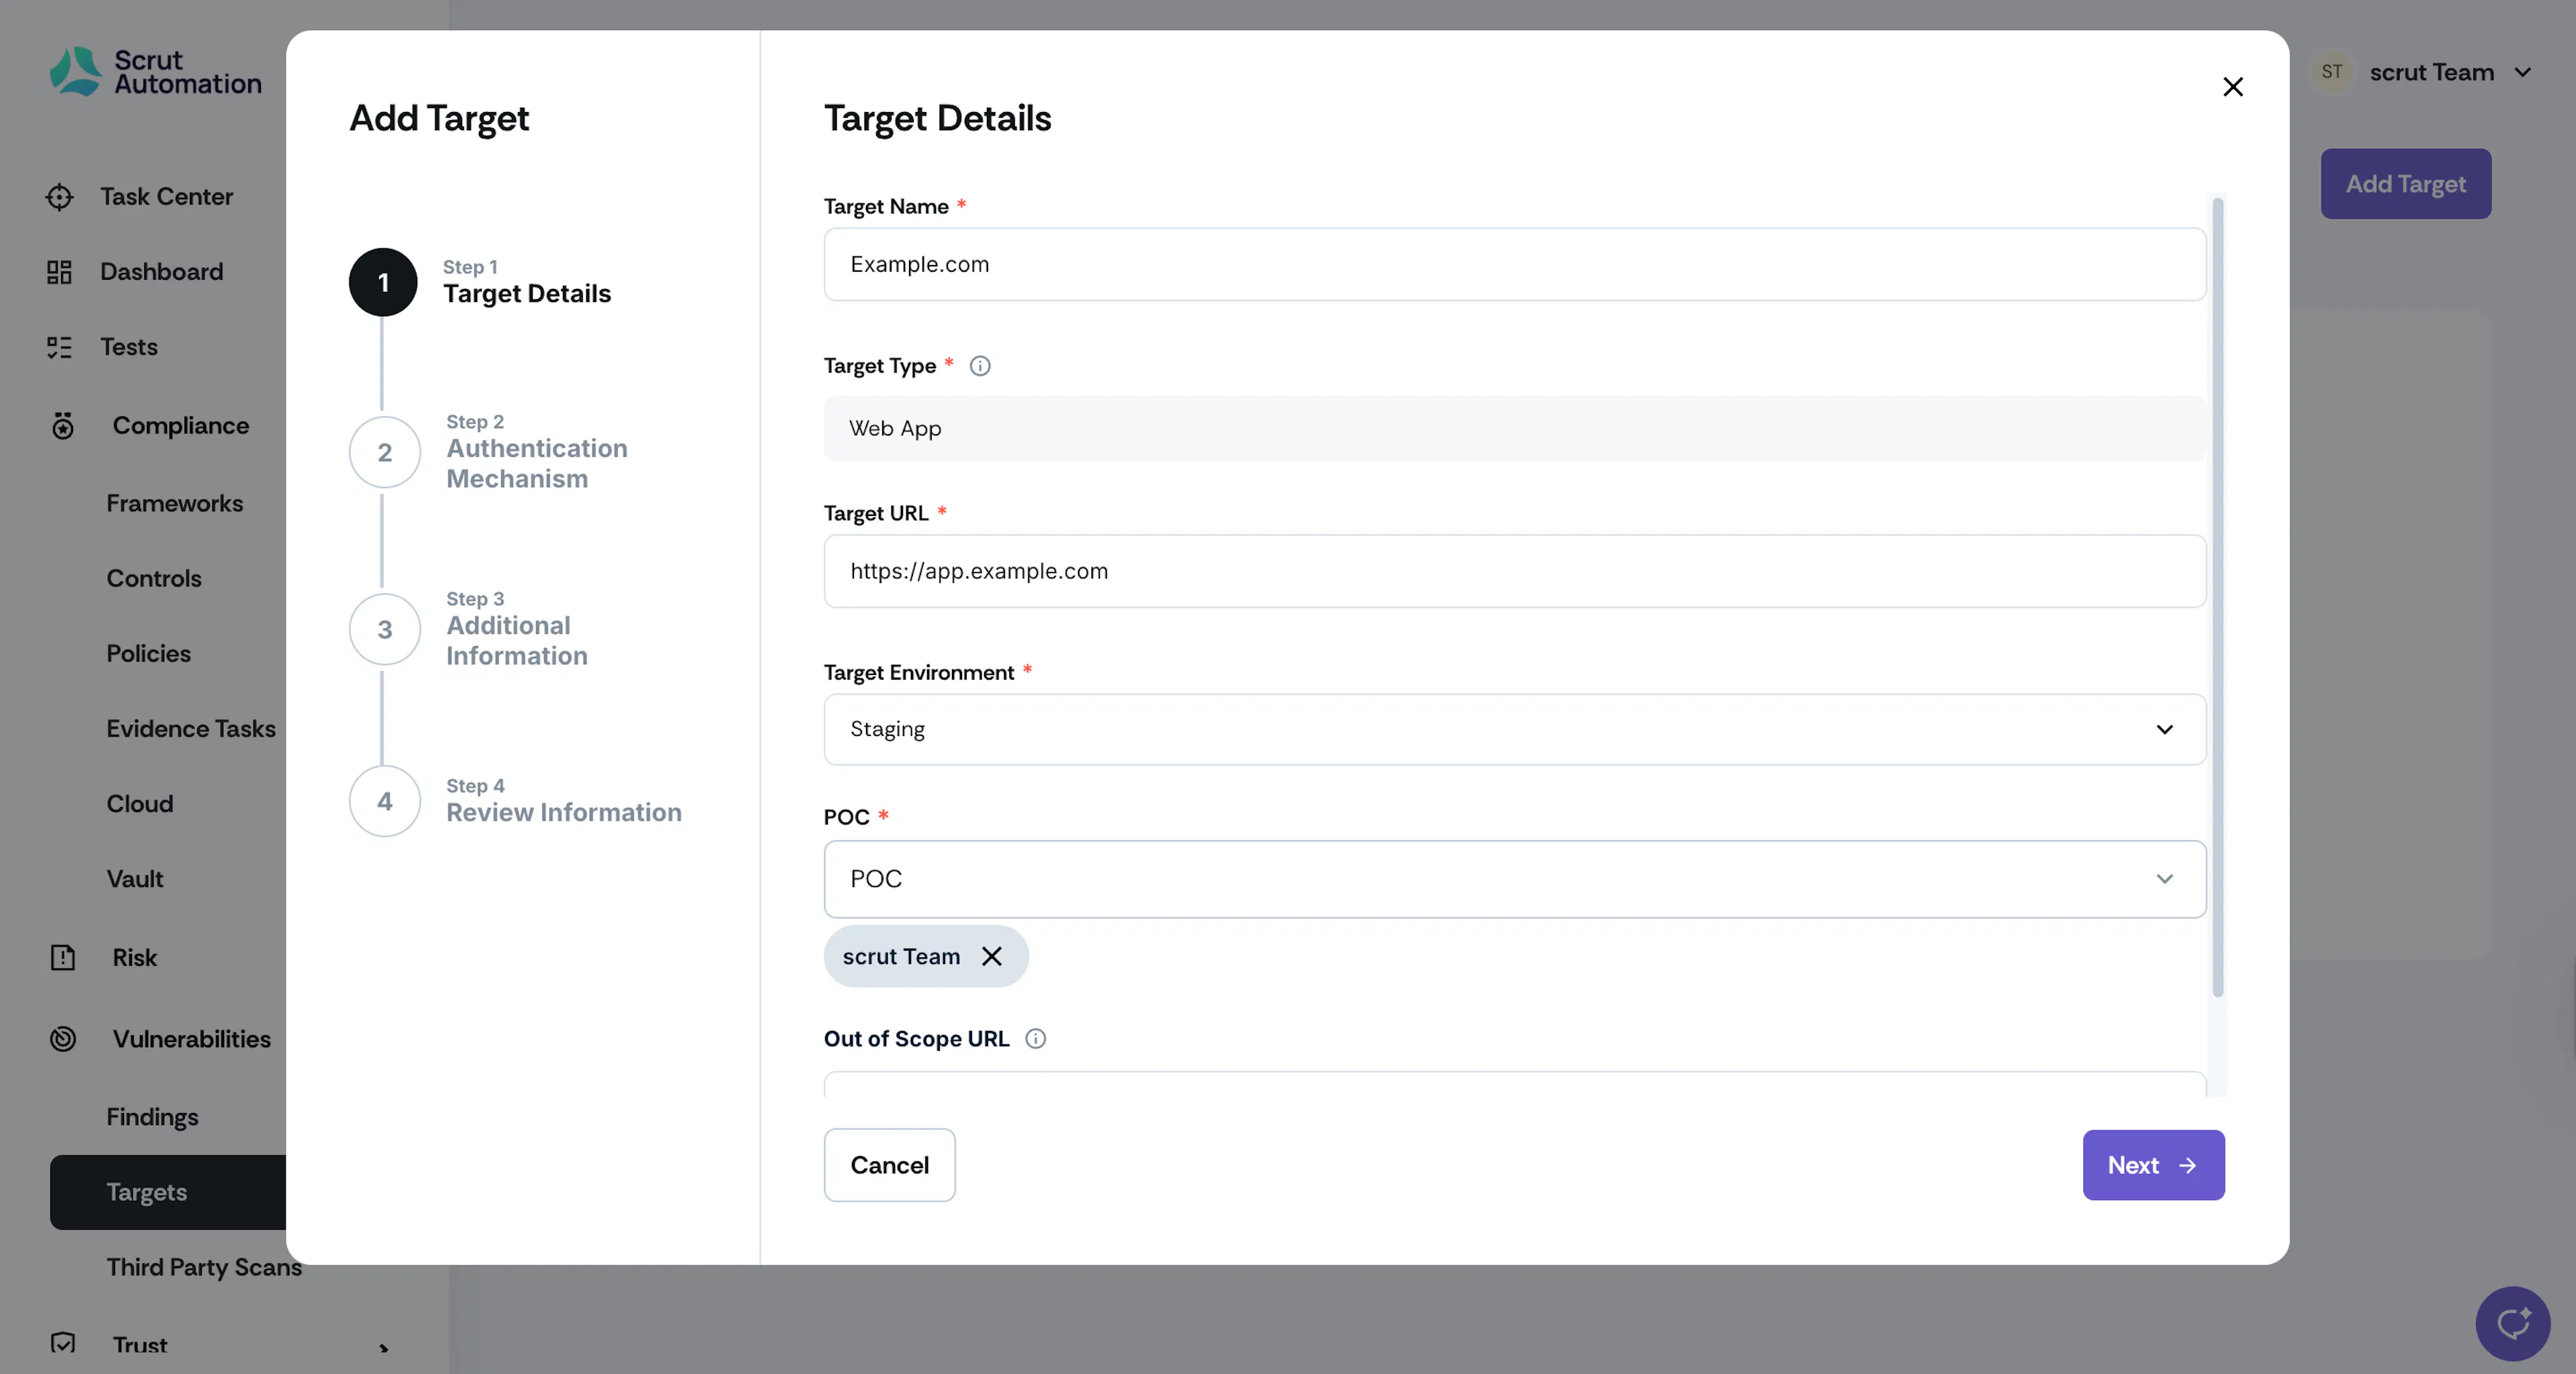
Step 1.1: Target Details
-
Enter a name for your target in the Target Name field.
-
Enter the target URL in the Target URL field.
Heads Up! Ensure the target URL doesn't include a trailing slash.
-
Select the target type from the Target Type dropdown.
Heads Up! Web App is the only target type supported currently. Other target types, such as Mobile App, API, Network & Infrastructure, and Source Code Review, are coming soon.
-
Select the target environment. If you select Production, two additional fields appear:
- Preferred Start Date: Enter the date you would like testing to begin.
- Preferred Testing Window: Enter your preferred time window (for example, Weekdays 10 am to 6 pm IST).
-
Enter the POC Name and POC Email for this target. The POC receives notifications about new findings and verification outcomes.
-
Enter URLs to exclude from testing in the Out of Scope URL field. You can enter multiple URLs here.
-
Click Next.
Step 1.2: Authentication
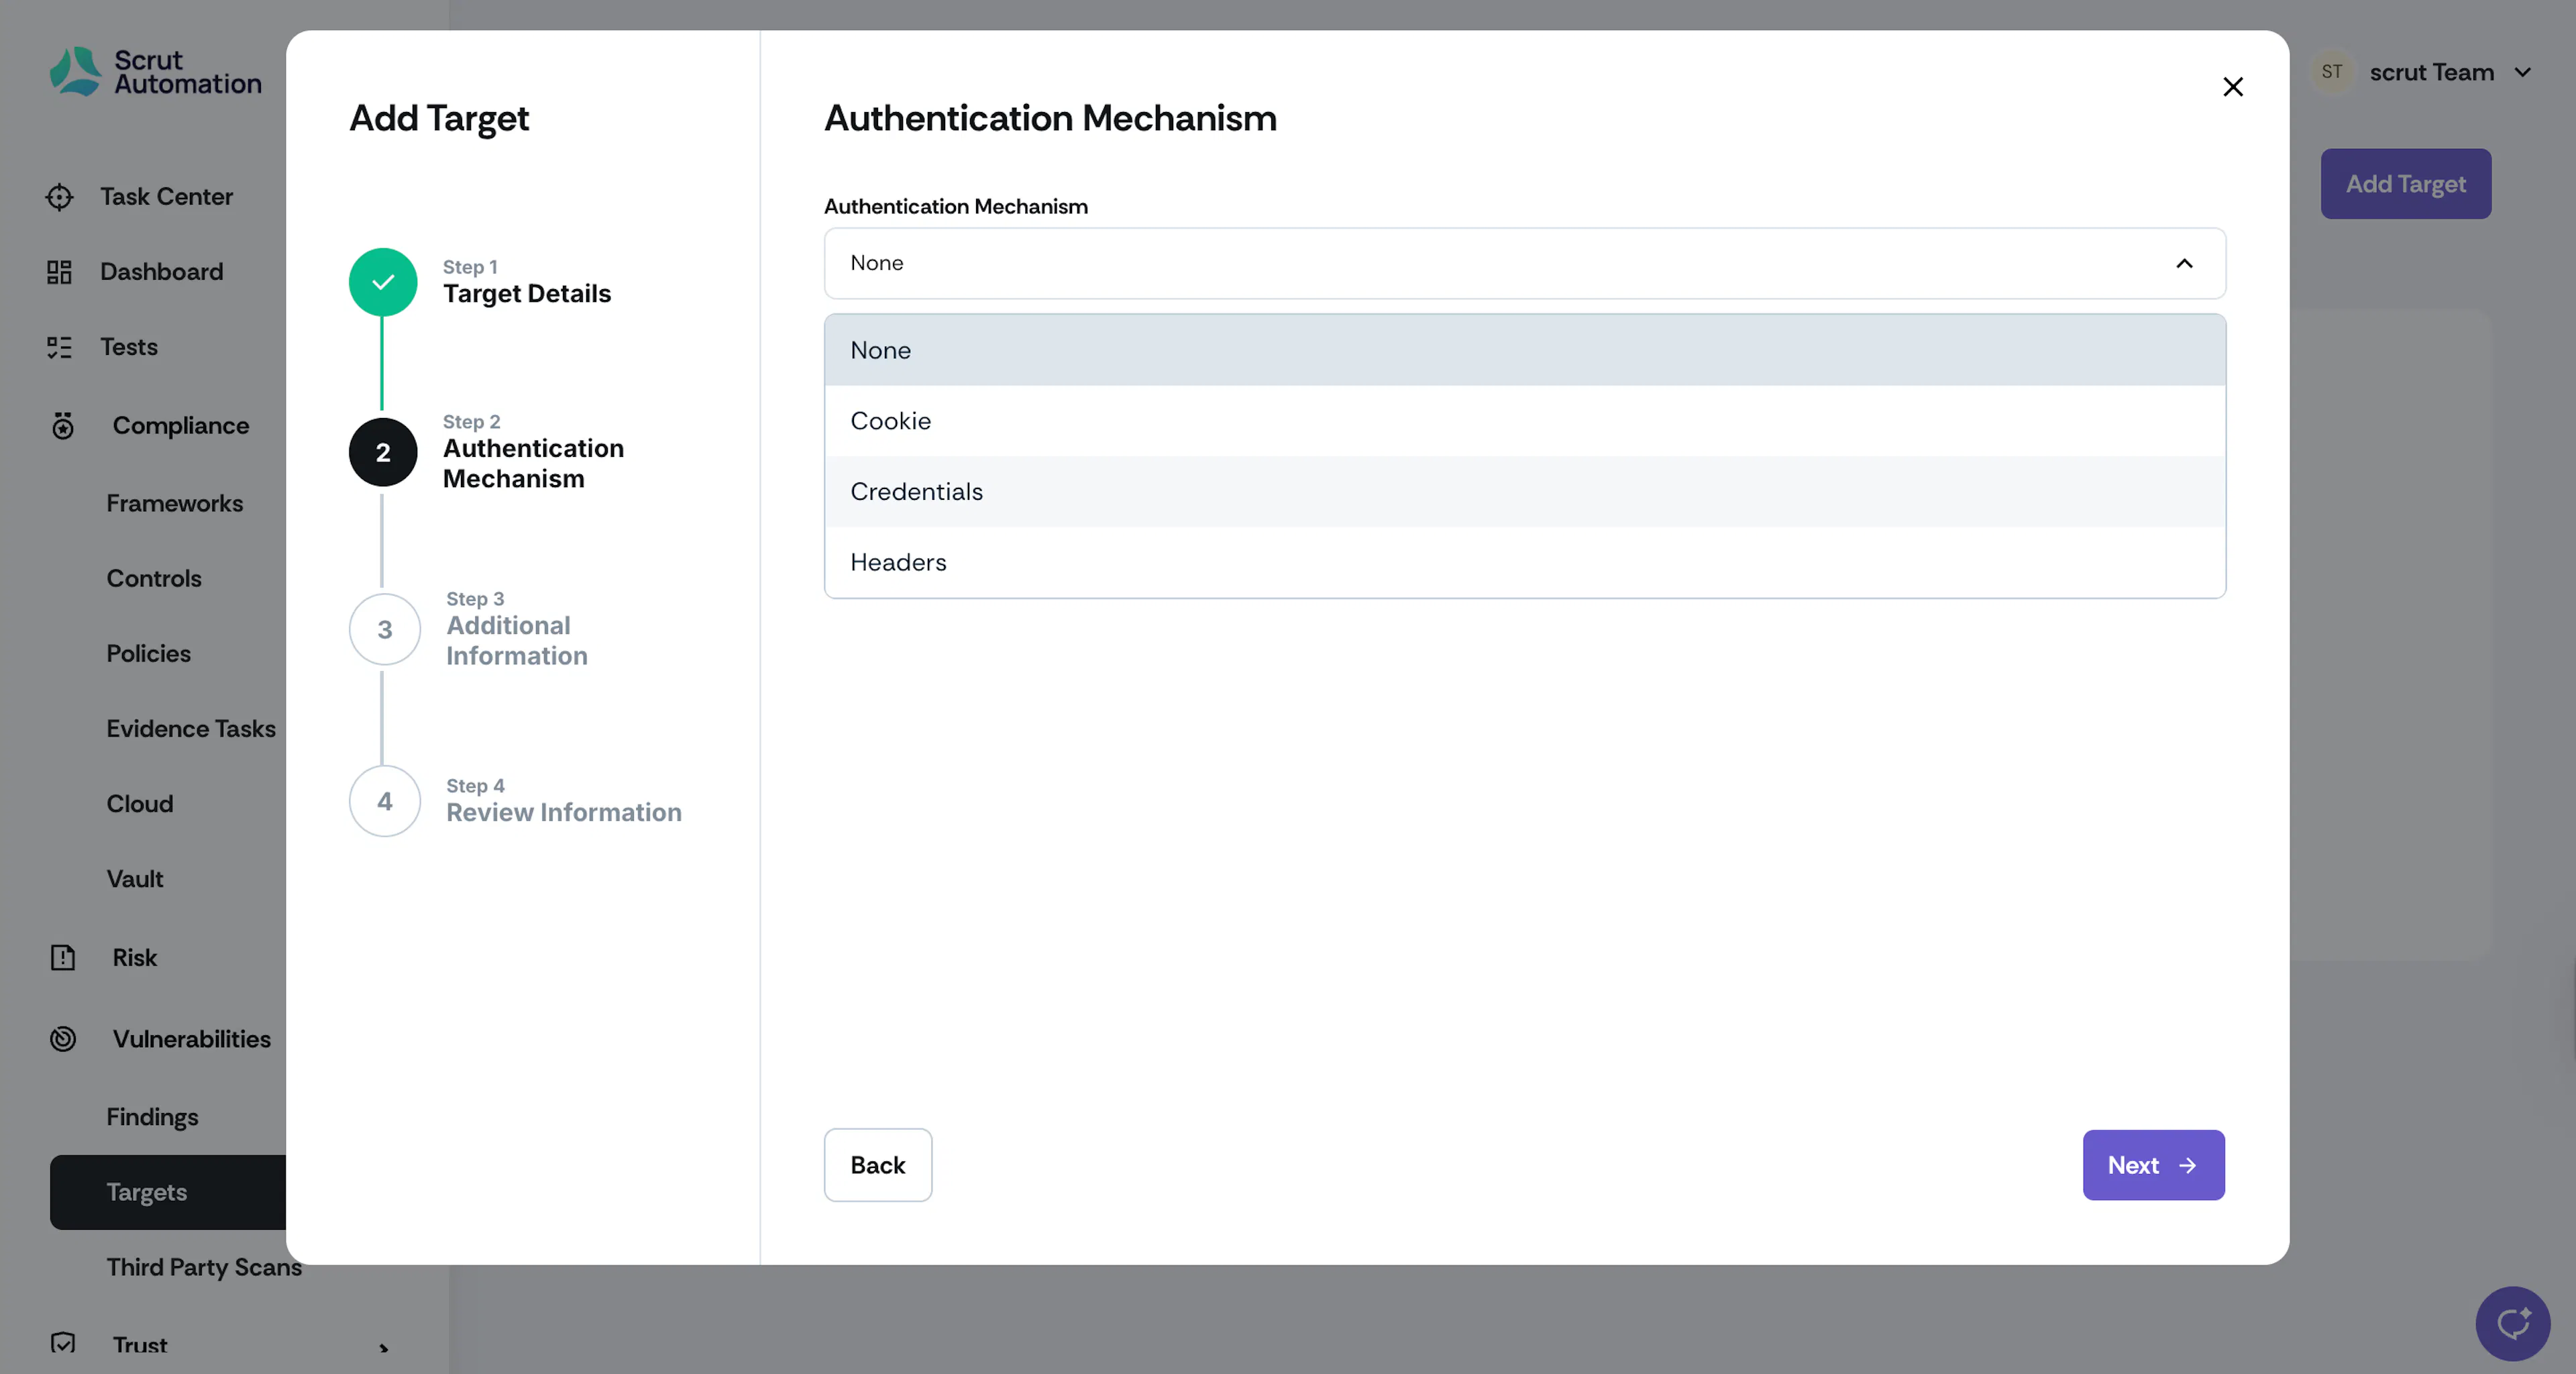
- Select your authentication method from the Auth Method dropdown.
| Auth Method | Fields required |
|---|---|
| None | No fields required |
| Cookie | Role, Cookie Name, Cookie Token |
| Header | Role, Header Name, Header Value |
| Credentials | Role, Username, Password, Login Path, Logged-in Indicator (Optional) |
- If your application has multiple user roles that need to be tested separately, click Add Credentials to add a credential set for each role. You can add up to 10 credential sets.
- Click Next.
Step 1.3: Additional Information
- Upload supporting documentation (architecture diagrams, API specs, test plans) using the file upload area. 14. Share any docs that explain how your app is built, deployed, or accessed. 15. The more context agents have, the deeper and more targeted the test. 16. Accepted formats: PDF, DOCX, and images.
- Click Next.
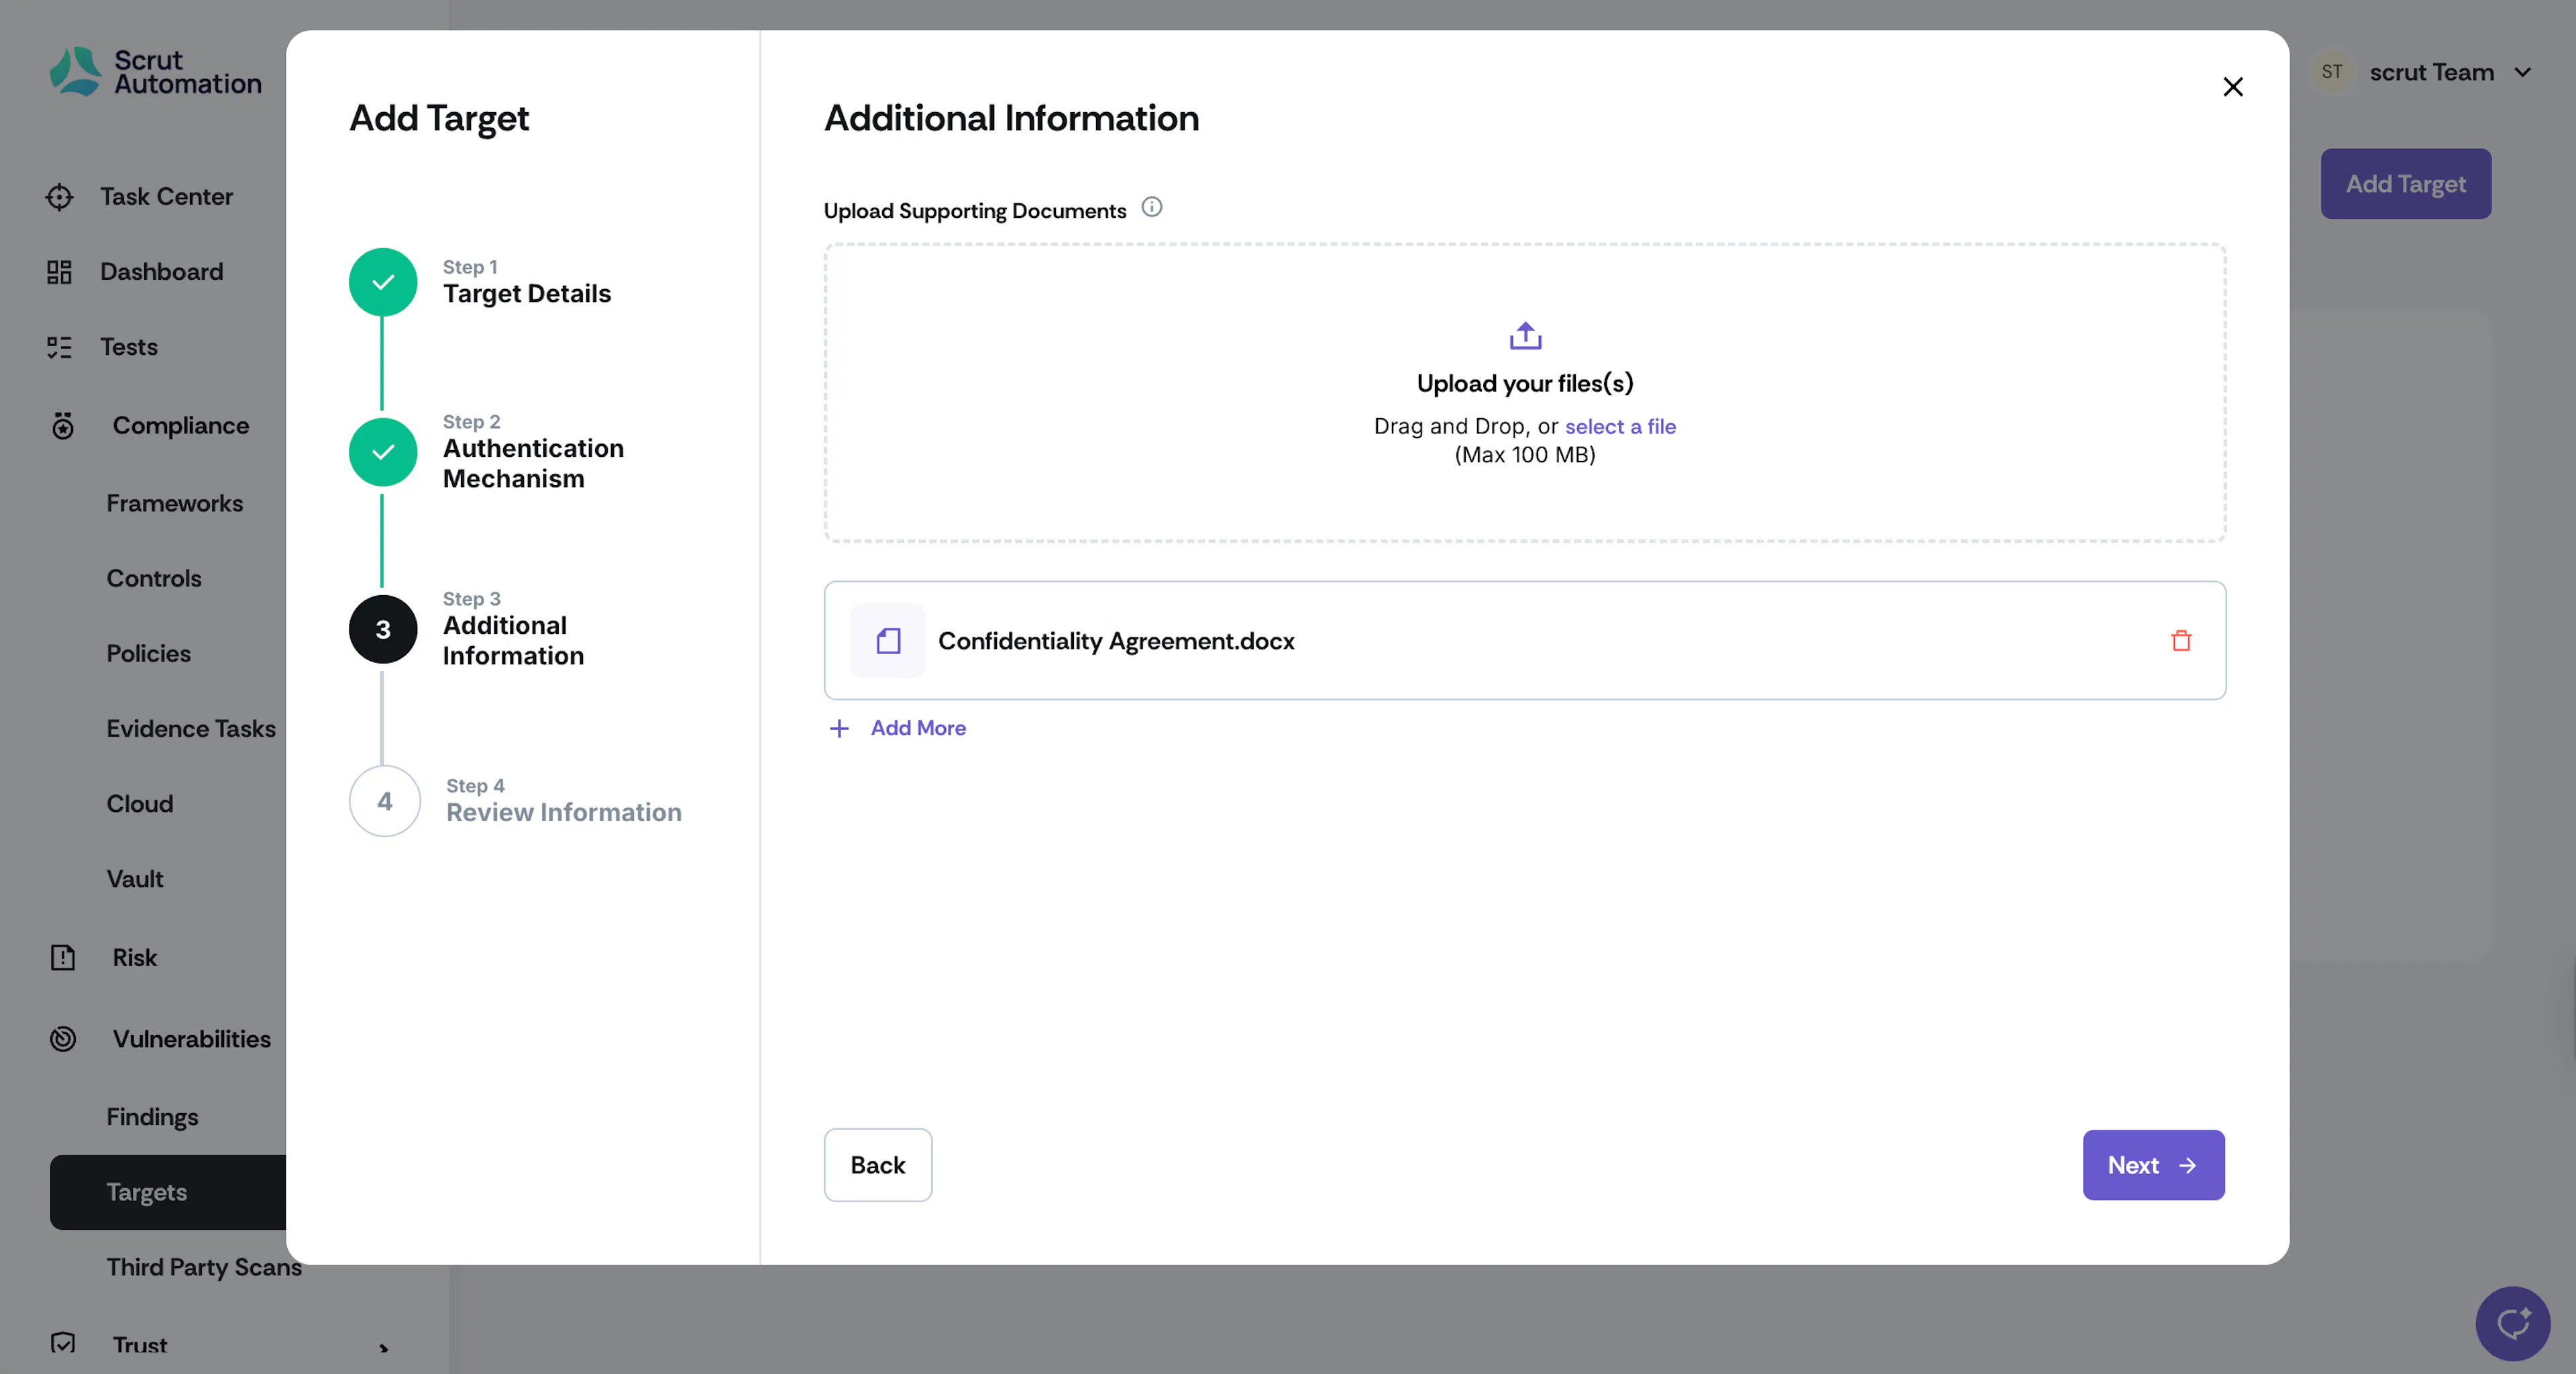
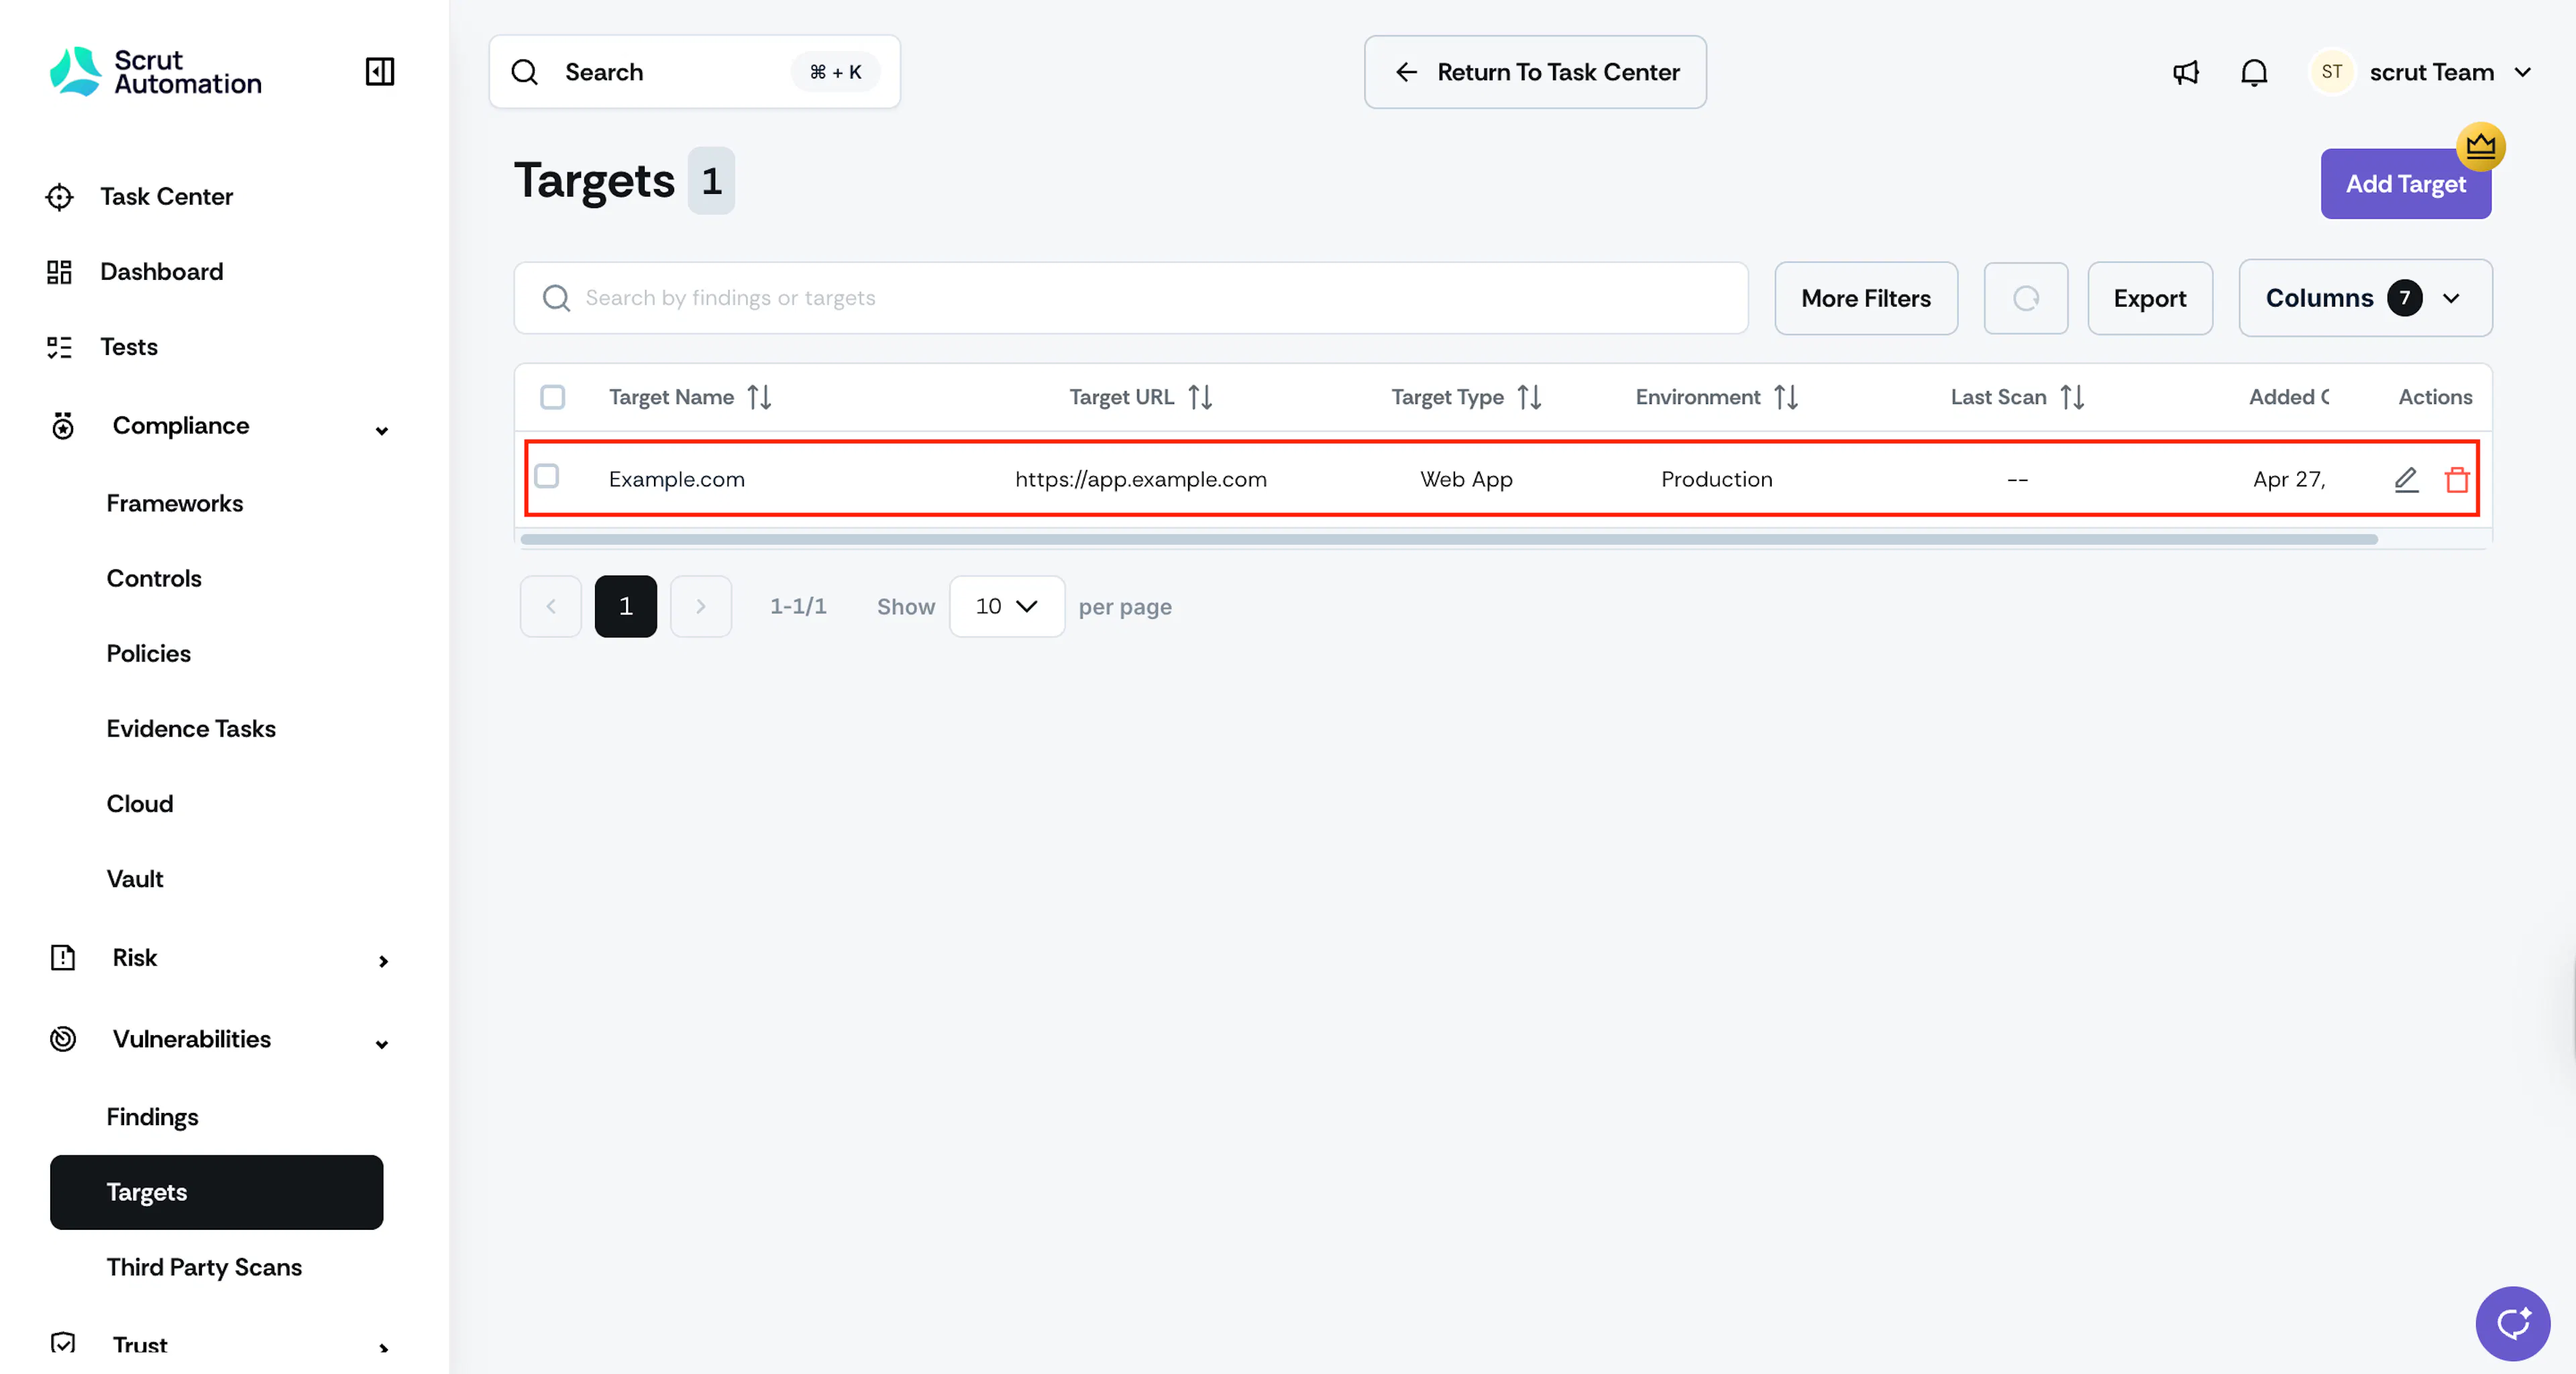
Review the information you entered in the previous steps and click Save. Your target appears in the Targets table.
Pro Tip!
To edit a target's details after saving: Navigate to Vulnerabilities → Targets, click the target row, and click Edit Target.
View Your Program Calendar
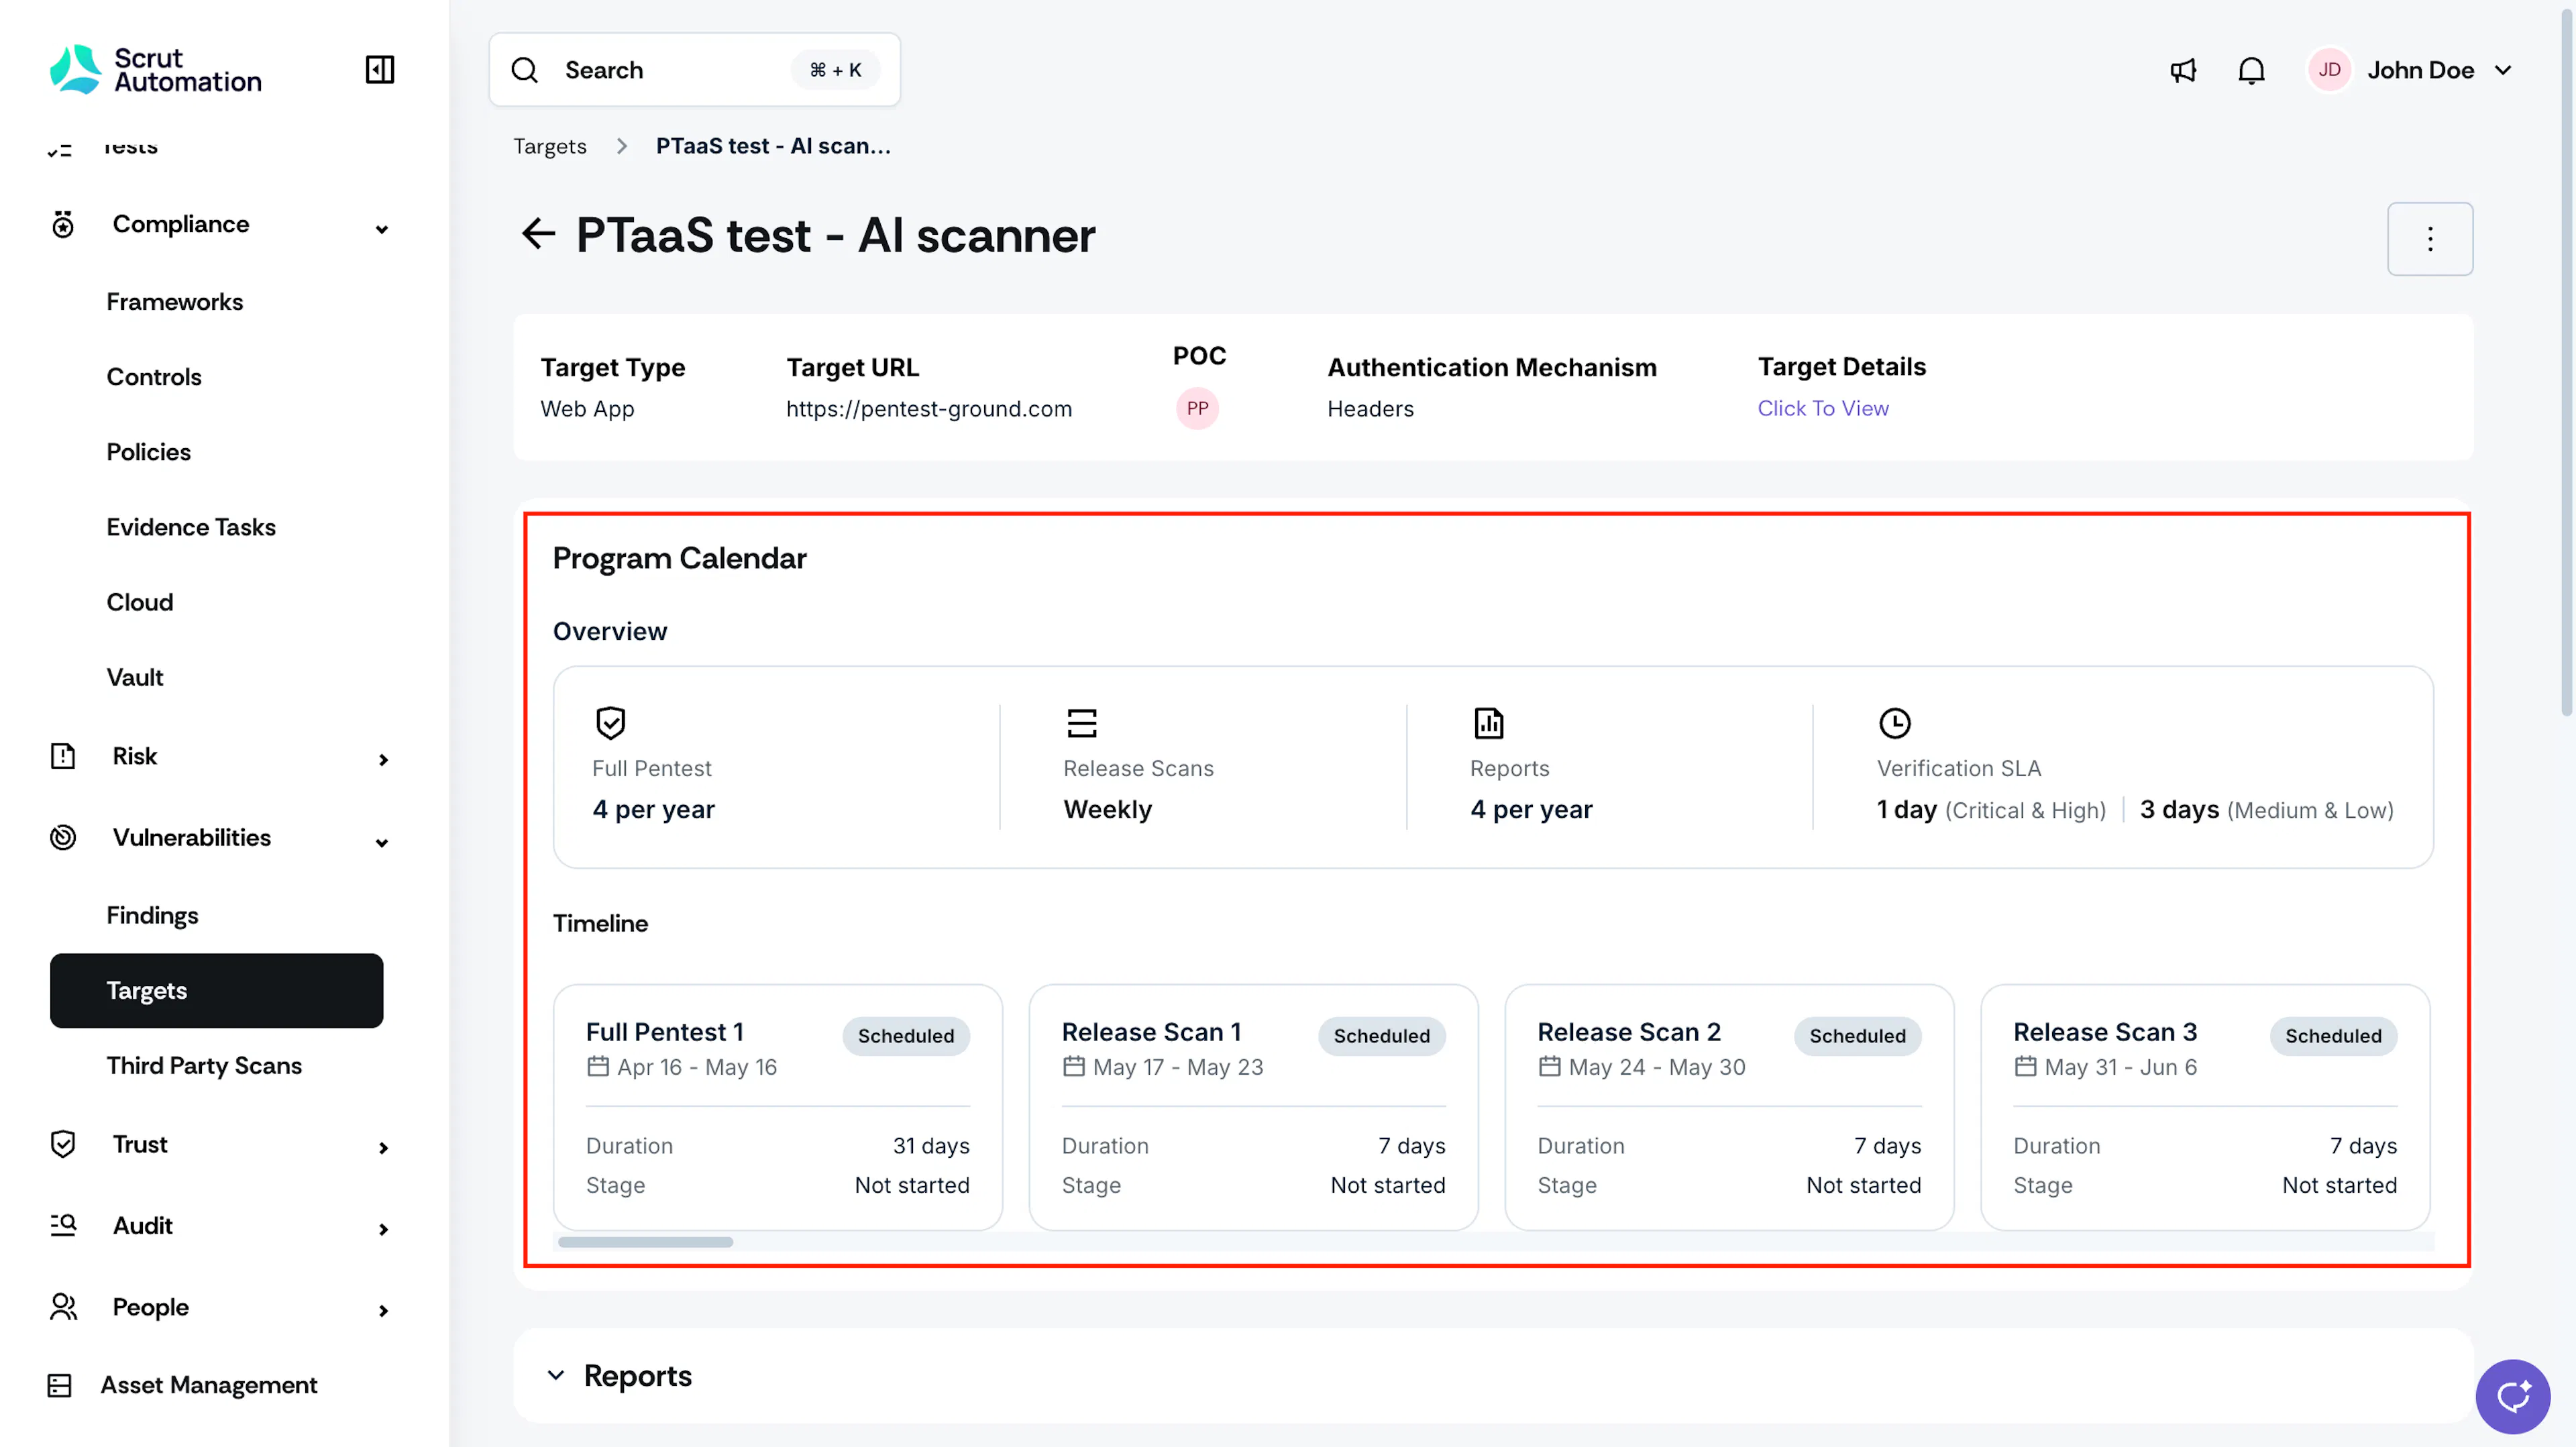
Once you add a target, its Program Calendar starts populating on the Target Detail page. Use it to see what your program includes and where each phase currently stands.
- Navigate to Vulnerabilities → Targets.
- Click the target you want to review.
The Program Calendar appears near the top of the Target Detail page.
Heads Up!
The Program Calendar is read-only. Scrut's Security Expert team manages scheduling and phase details on your behalf.
Step 2: Review Findings
Scrut's Security Experts review and validate all findings before publishing them to your account. When new findings are available, you receive an in-app notification and an email to the target's POC.
- Navigate to Vulnerabilities → Findings to see all findings across all targets in a single table.
- The Findings table includes all details such as: Finding Name, Target Name, Target Type, Finding Status, Severity, SLA, Assignees, First Seen, and Scan Frequency.
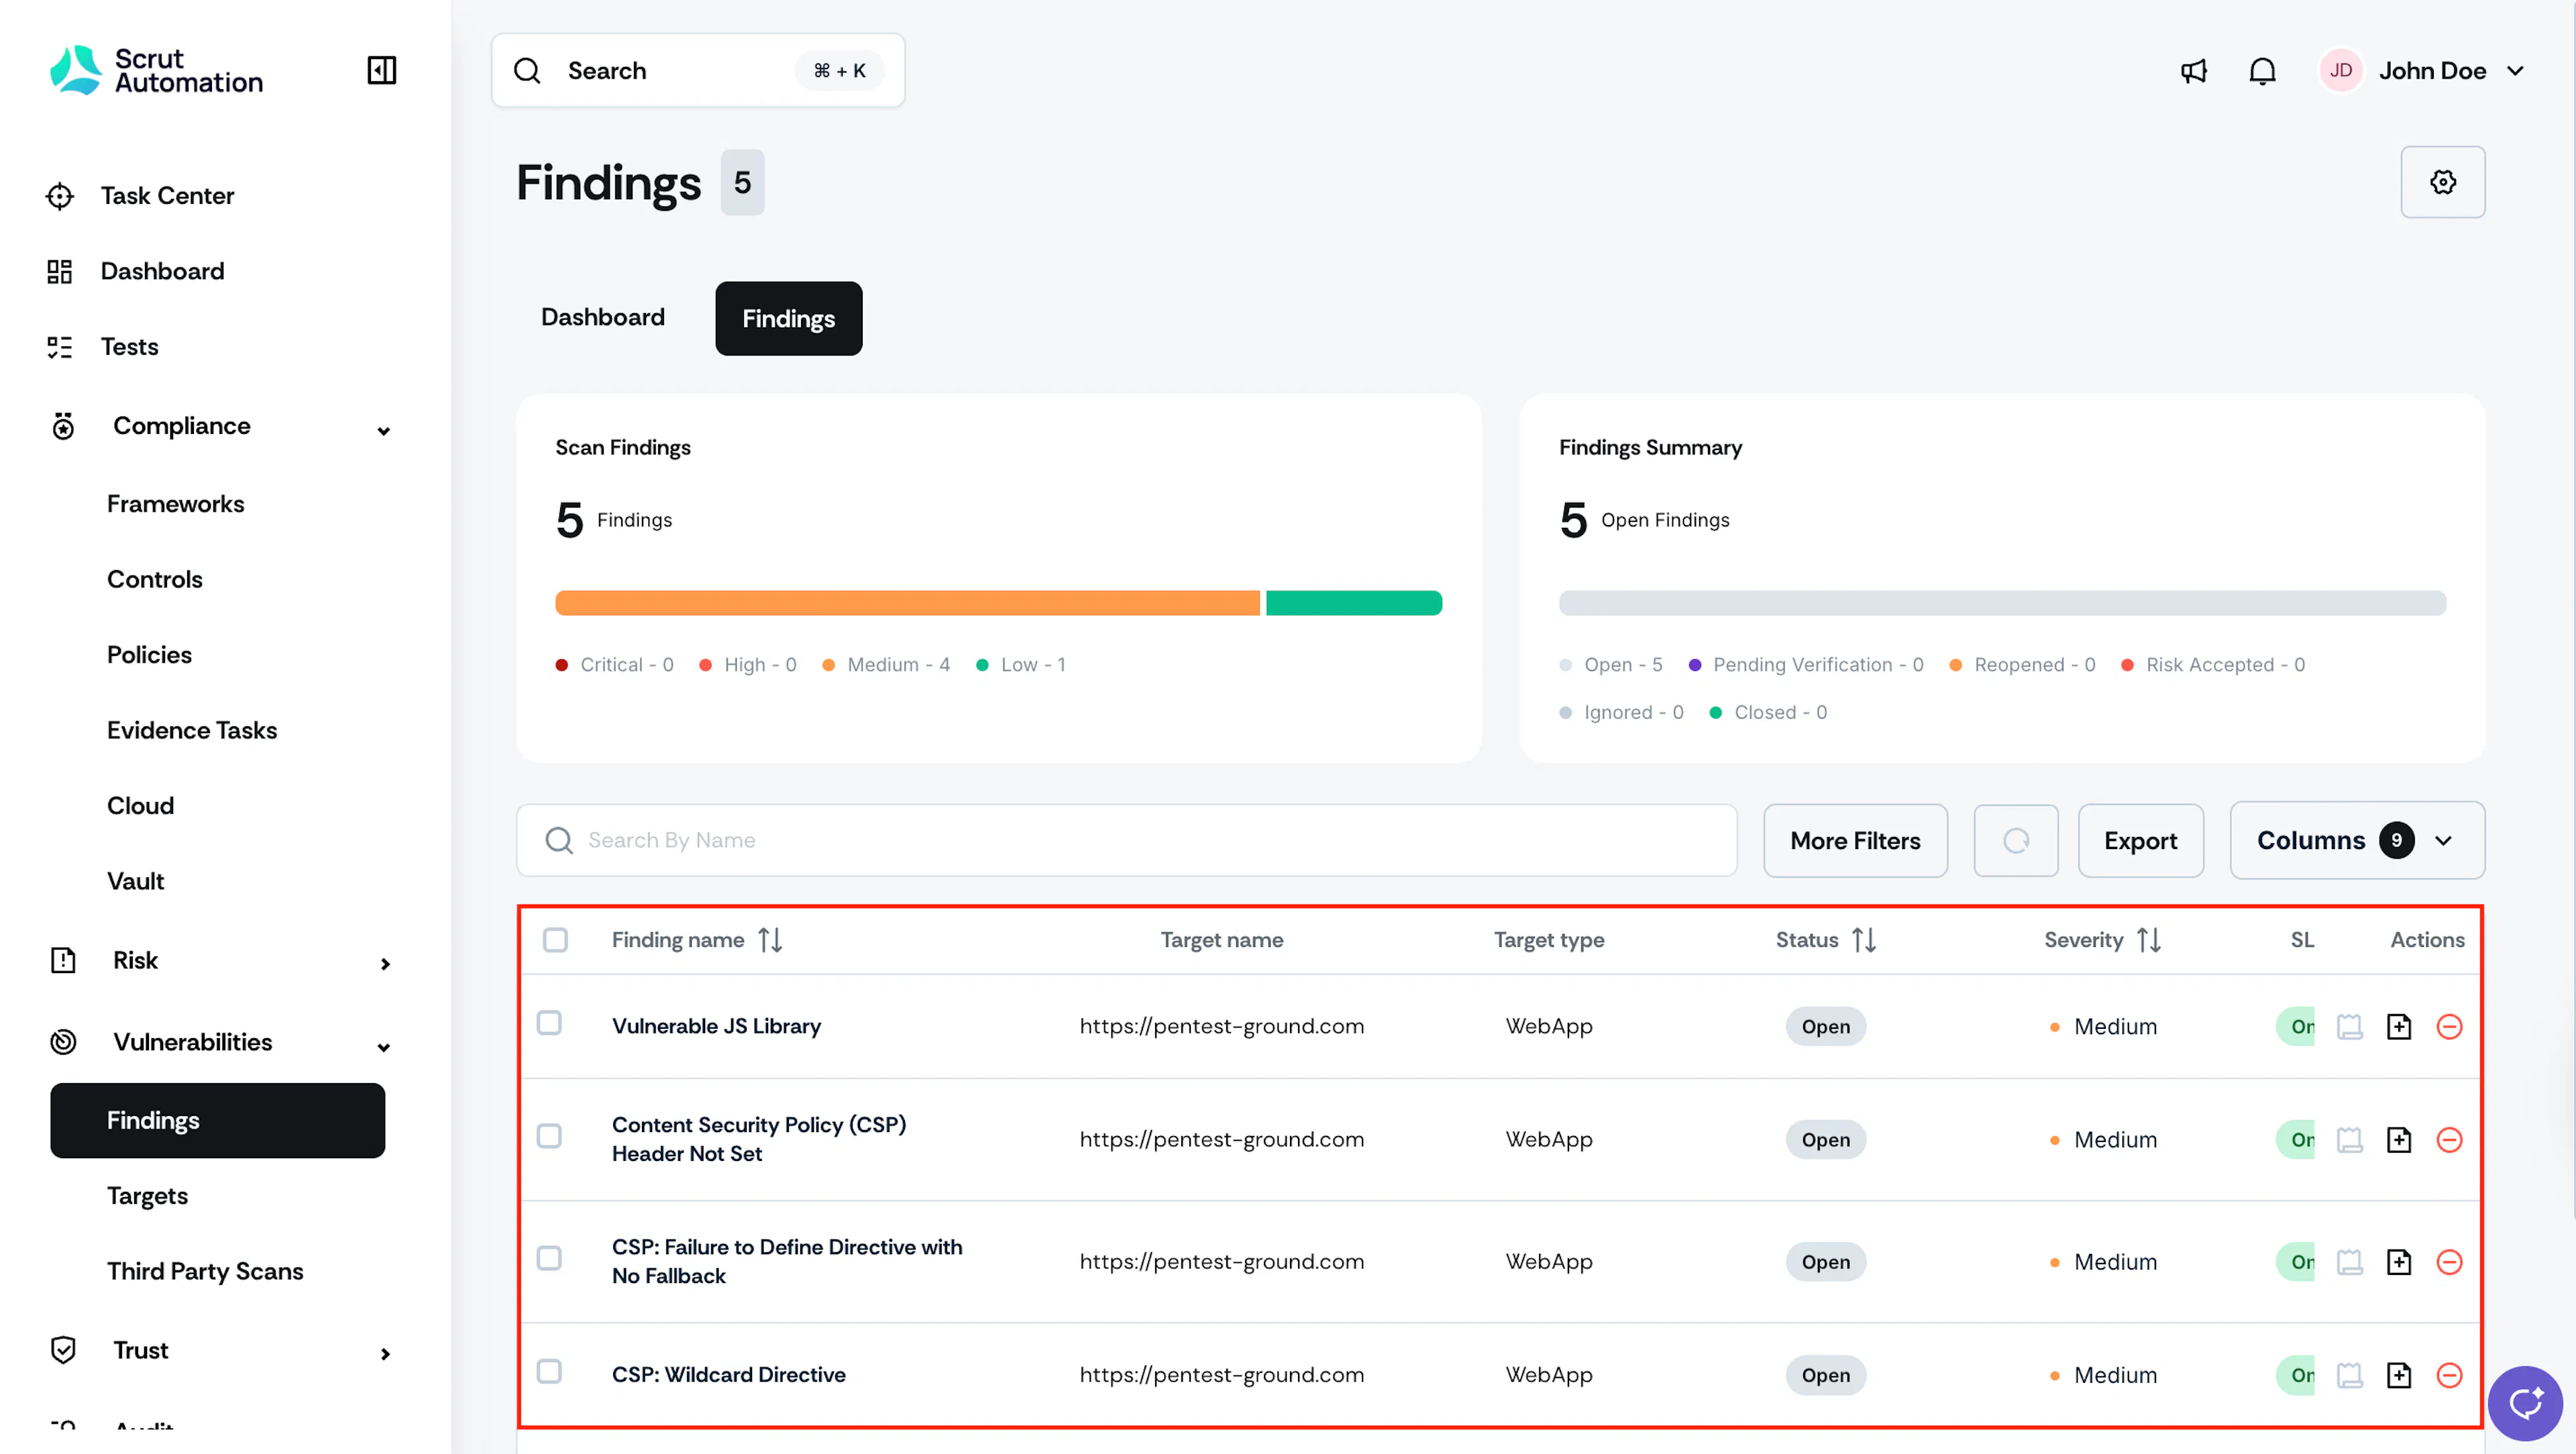
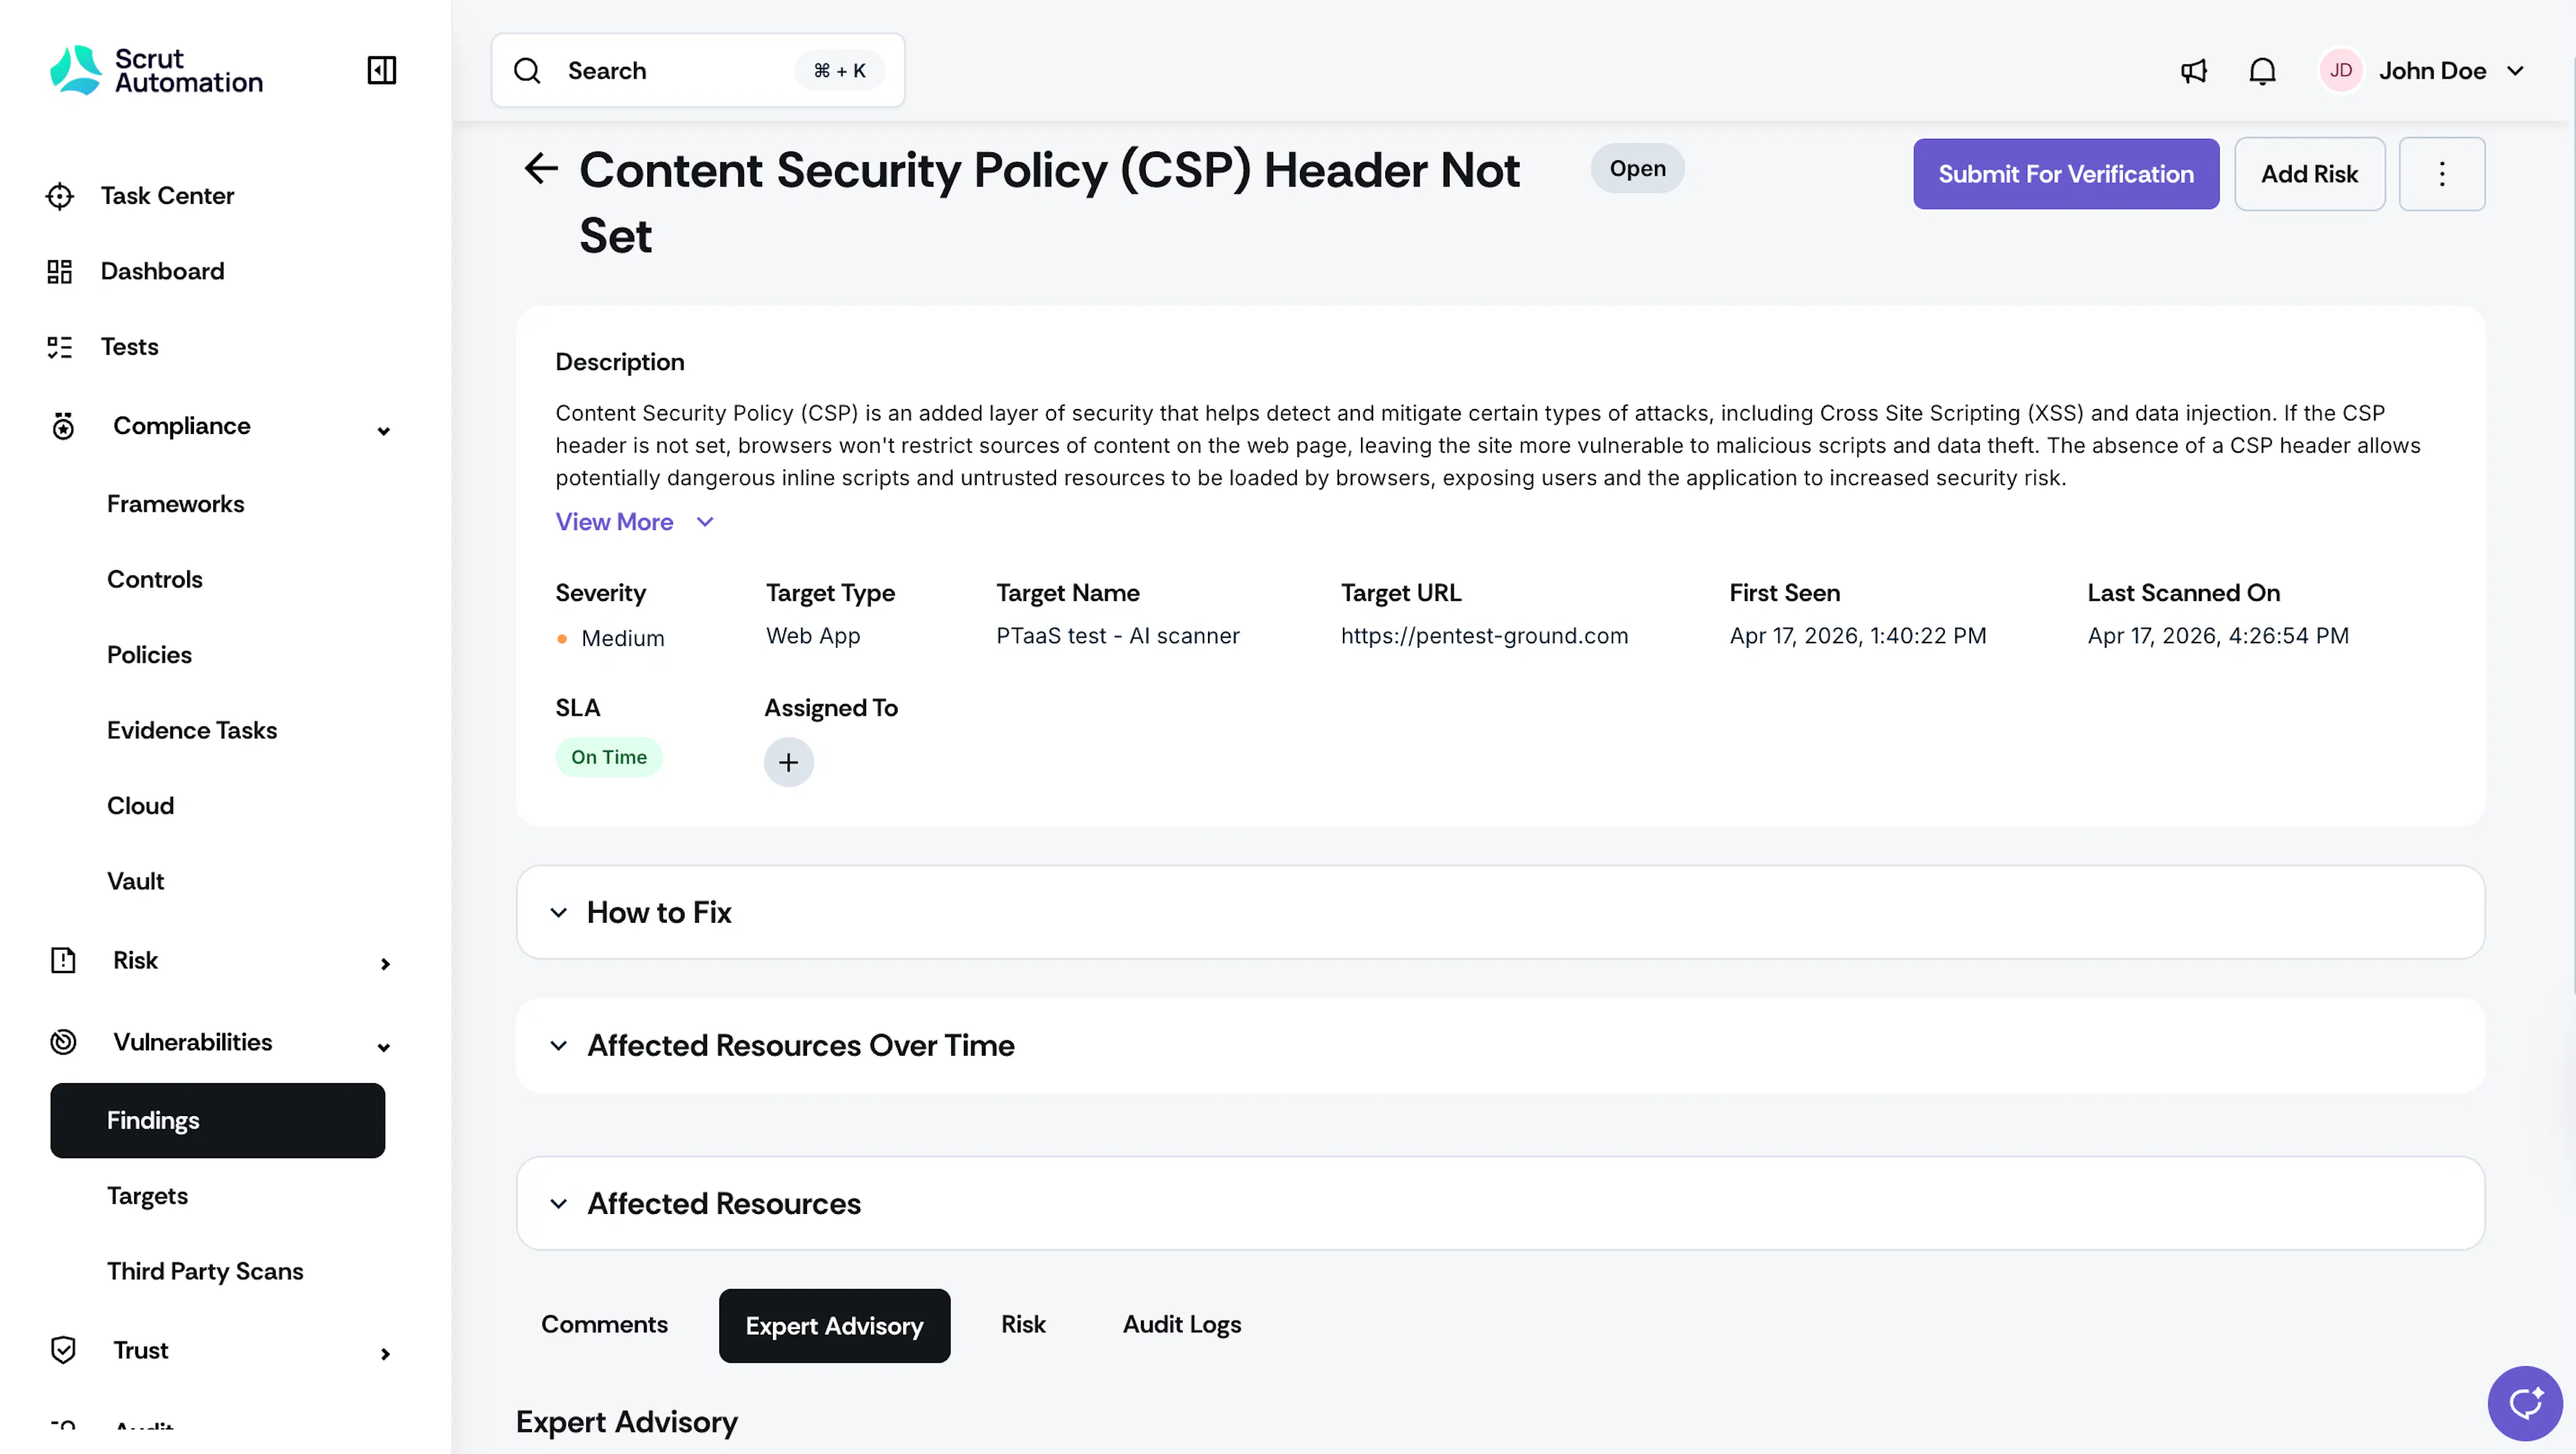
- Click a finding title to open the Finding Detail page.
On the Finding Detail page, you will see additional info, including:
- Description: The vulnerability details and technical context.
- How to fix: Remediation steps to fix the vulnerability.
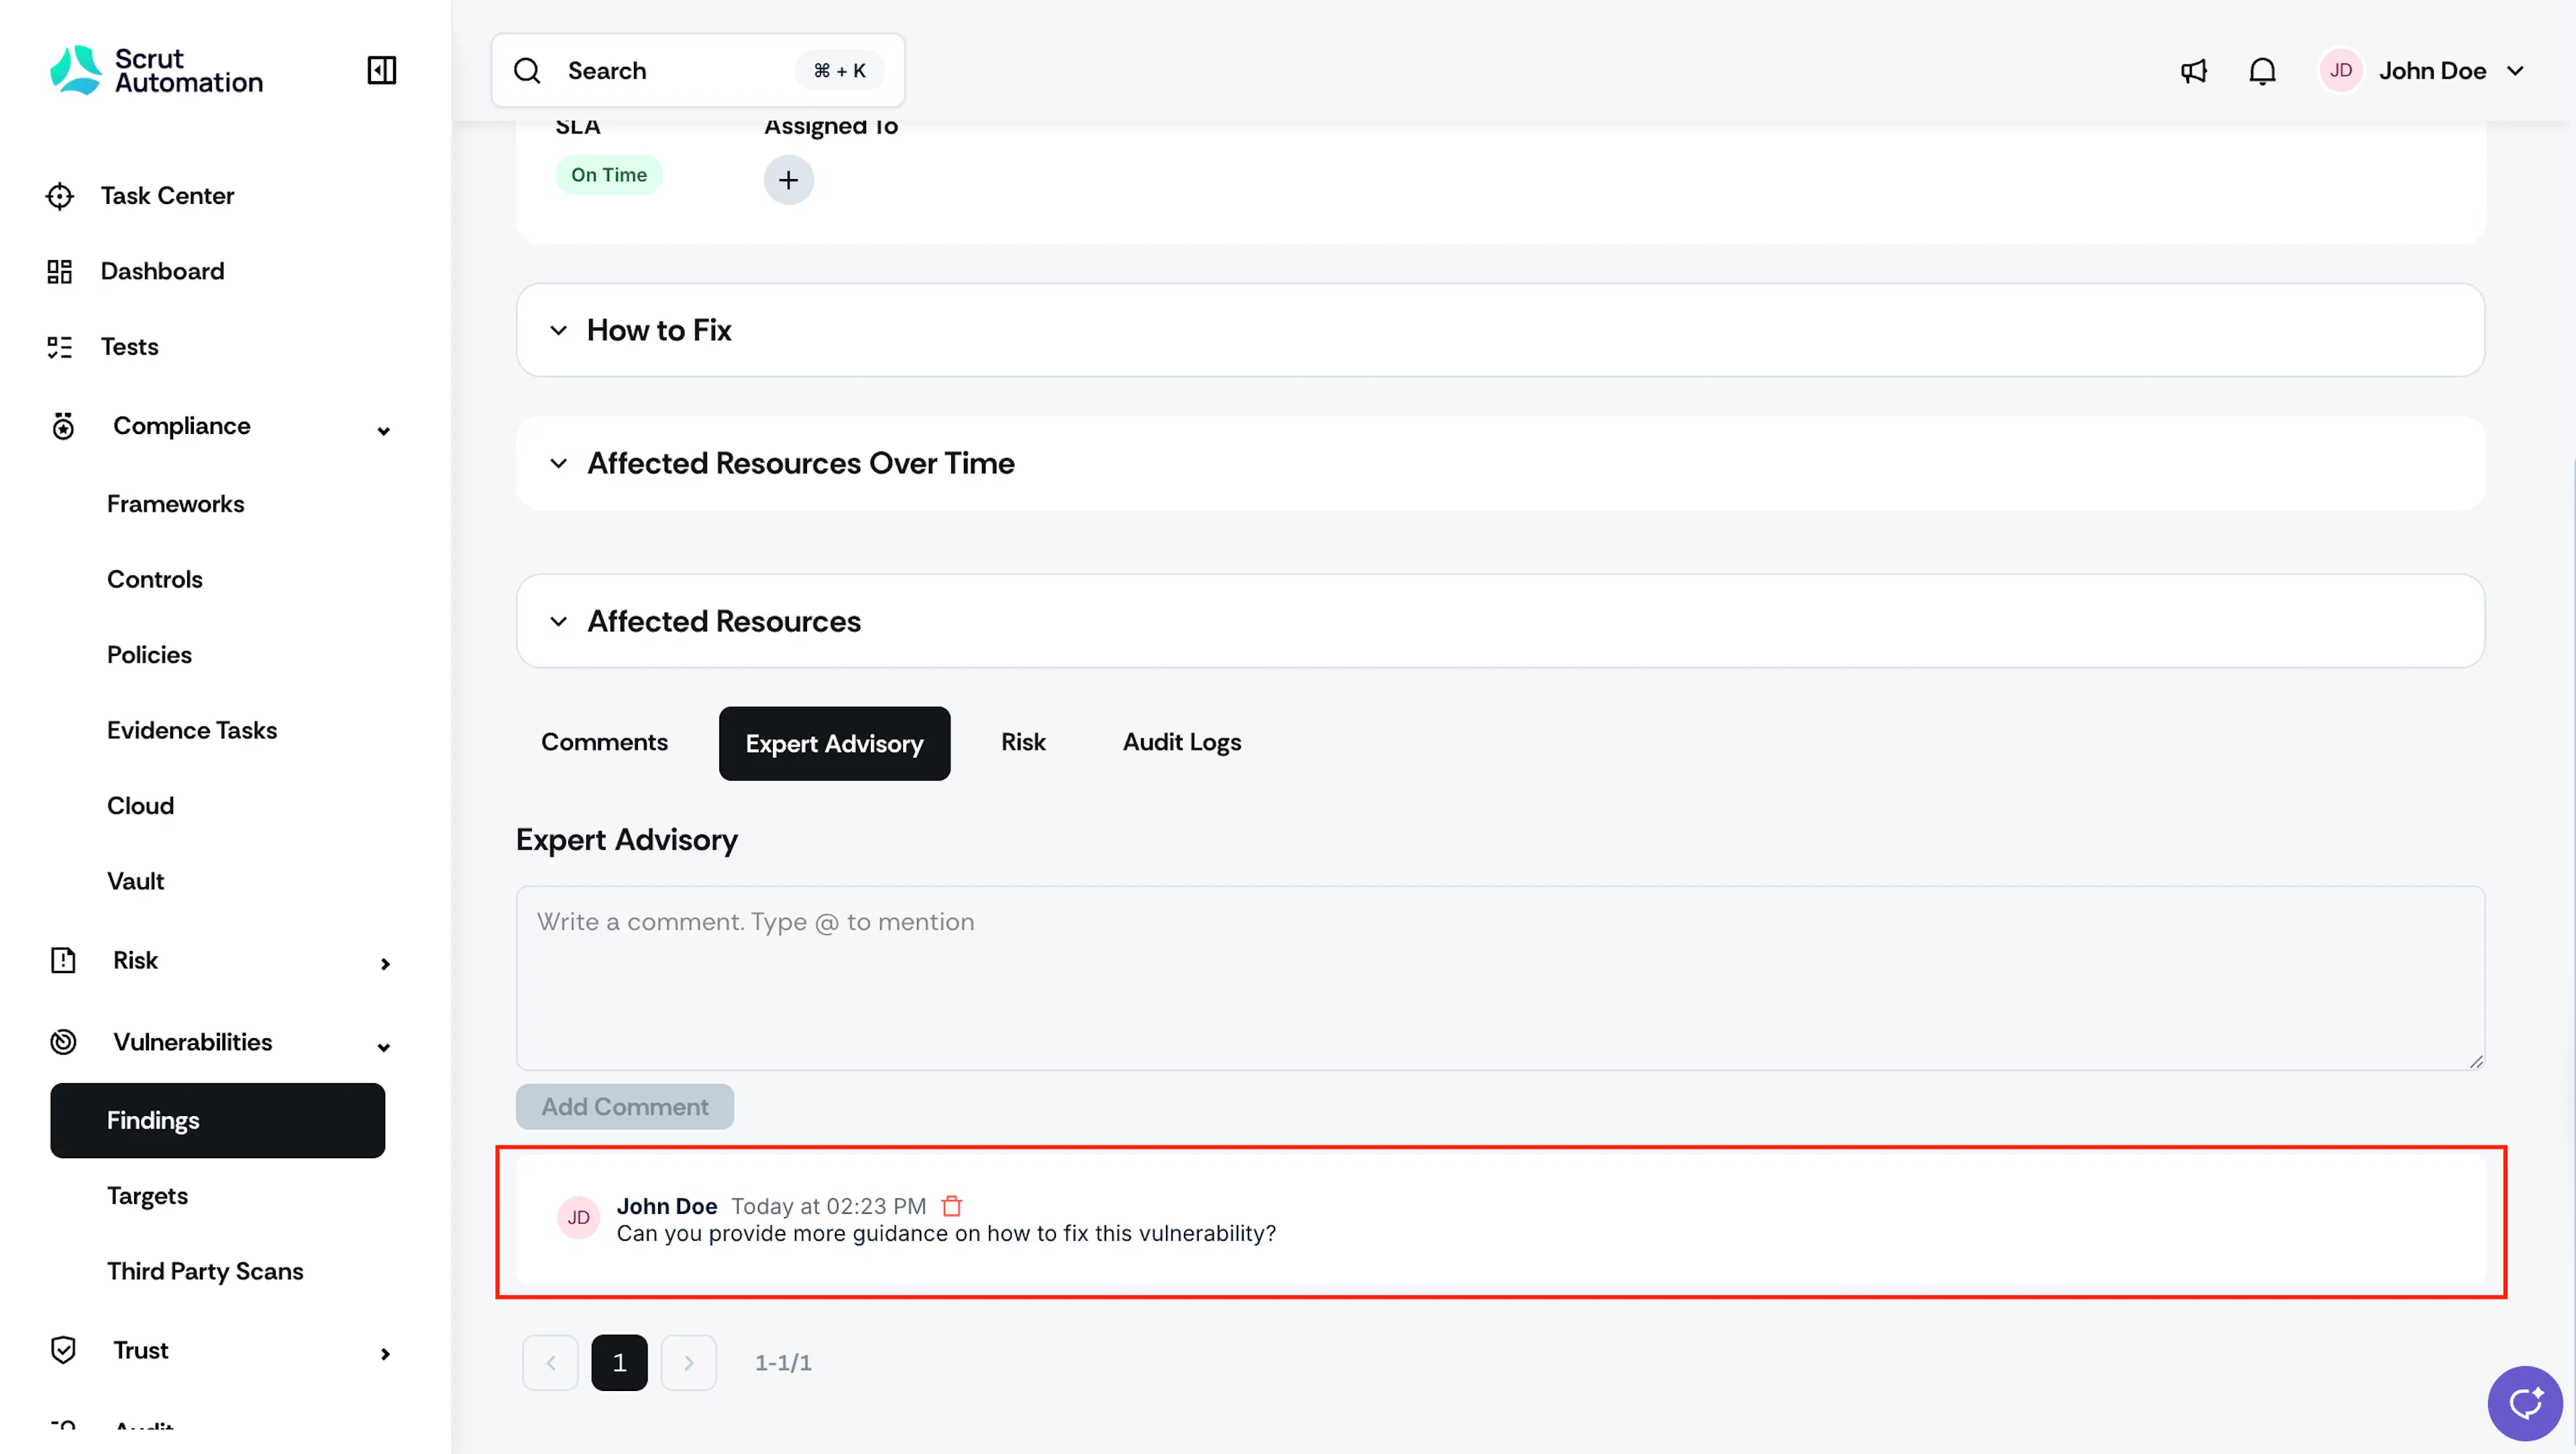
- Expert Advisory tab: Remediation guidance, business impact context, and code-level suggestions authored by a Scrut Security Expert. The expert's first comment is pinned at the top of this tab.
- SLA indicator: The remediation deadline and days remaining.
Important:
SLA timelines are set when a finding is published and never reset, even if a finding is reopened after a failed verification attempt. Prioritize high-severity findings as soon as they appear.
The recommended remediation windows by severity are:
| Severity | Recommended remediation window |
|---|---|
| Critical | 7 days |
| High | 14 days |
| Medium | 21 days |
| Low | 28 days |
- To ask a question or request clarification from Scrut's Security Expert team, add a comment in the Expert Advisory tab. Your comment triggers a notification to the Scrut team.
Pro Tip!
The Expert Advisory tab is your direct channel to Scrut's Security Expert team. Use the Comments tab for internal team discussion (for example, assigning the fix to a colleague or sharing remediation context). The Scrut team can view your Comments in read-only mode for verification context but does not participate there.
Step 3: Remediate Findings and Submit for Verification
Refer to the expert advisory and fix the vulnerability in your application. When the fix is in place, return to the finding in Scrut and submit it for verification.
- Navigate to Vulnerabilities → Findings.
- Click the finding you have fixed.
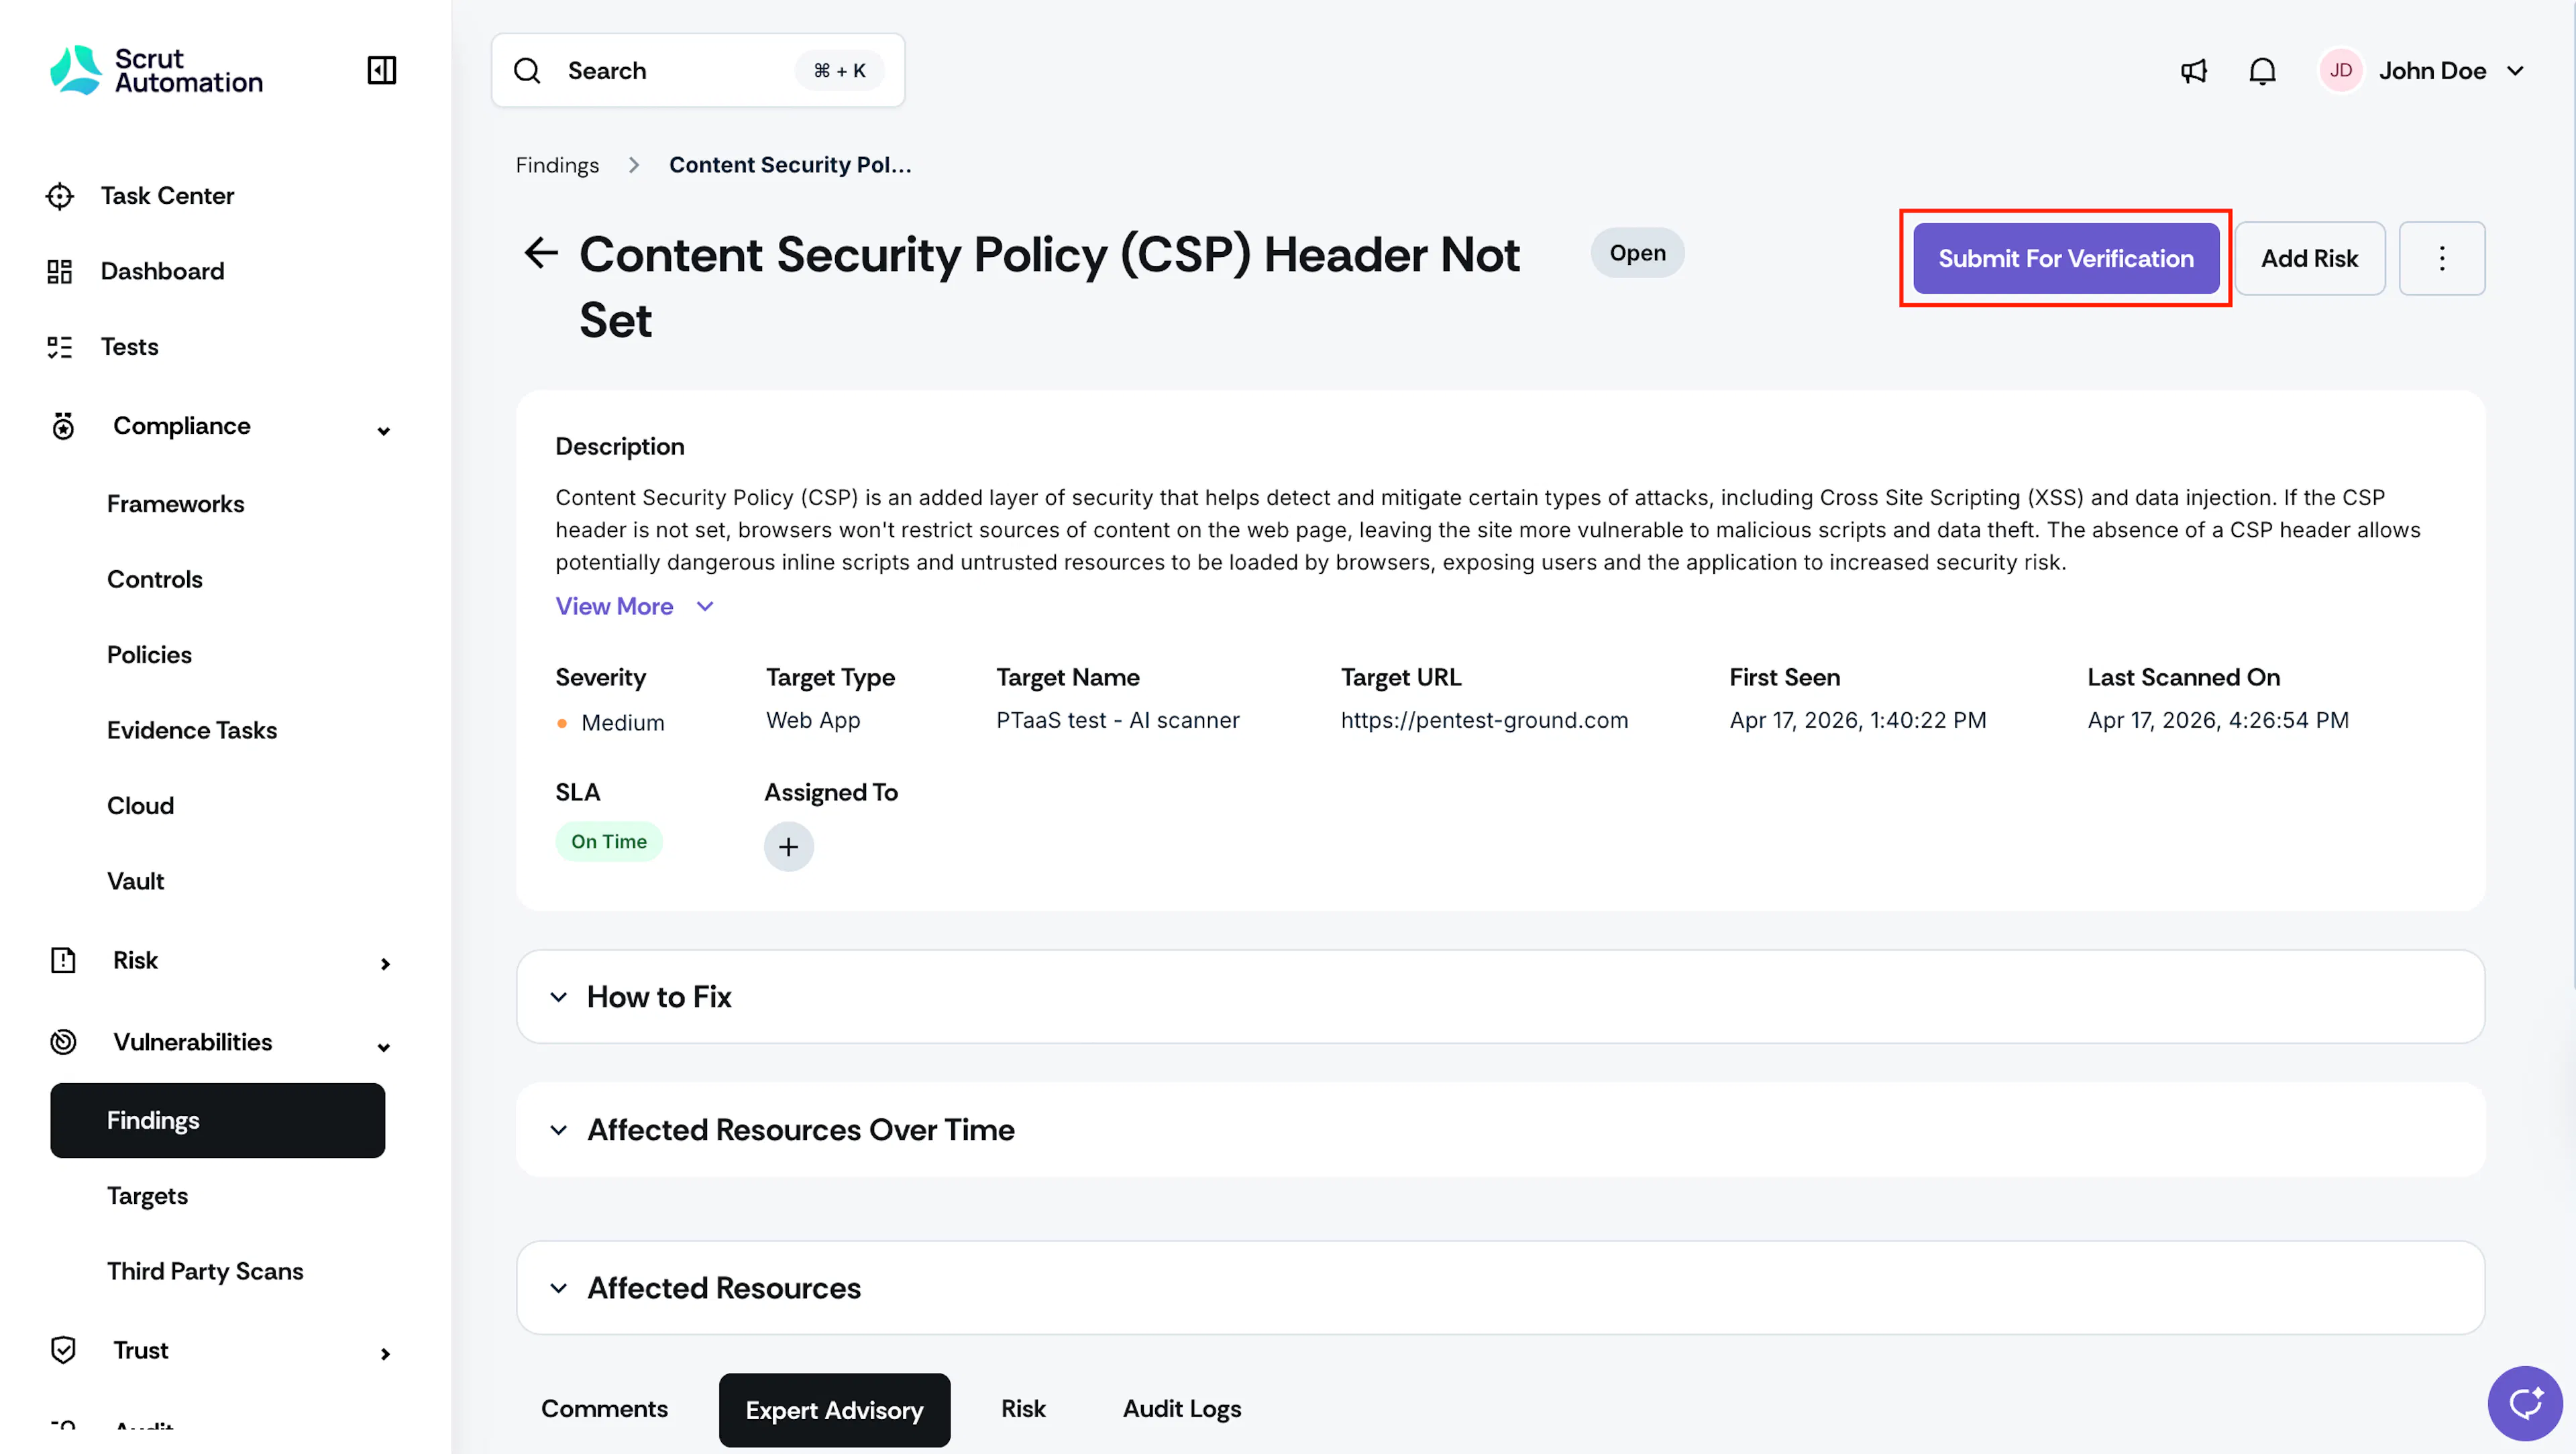
- Click Submit for Verification on the Finding Detail page.
- A confirmation modal appears showing the verification SLA for this finding's severity.
- Click Submit.
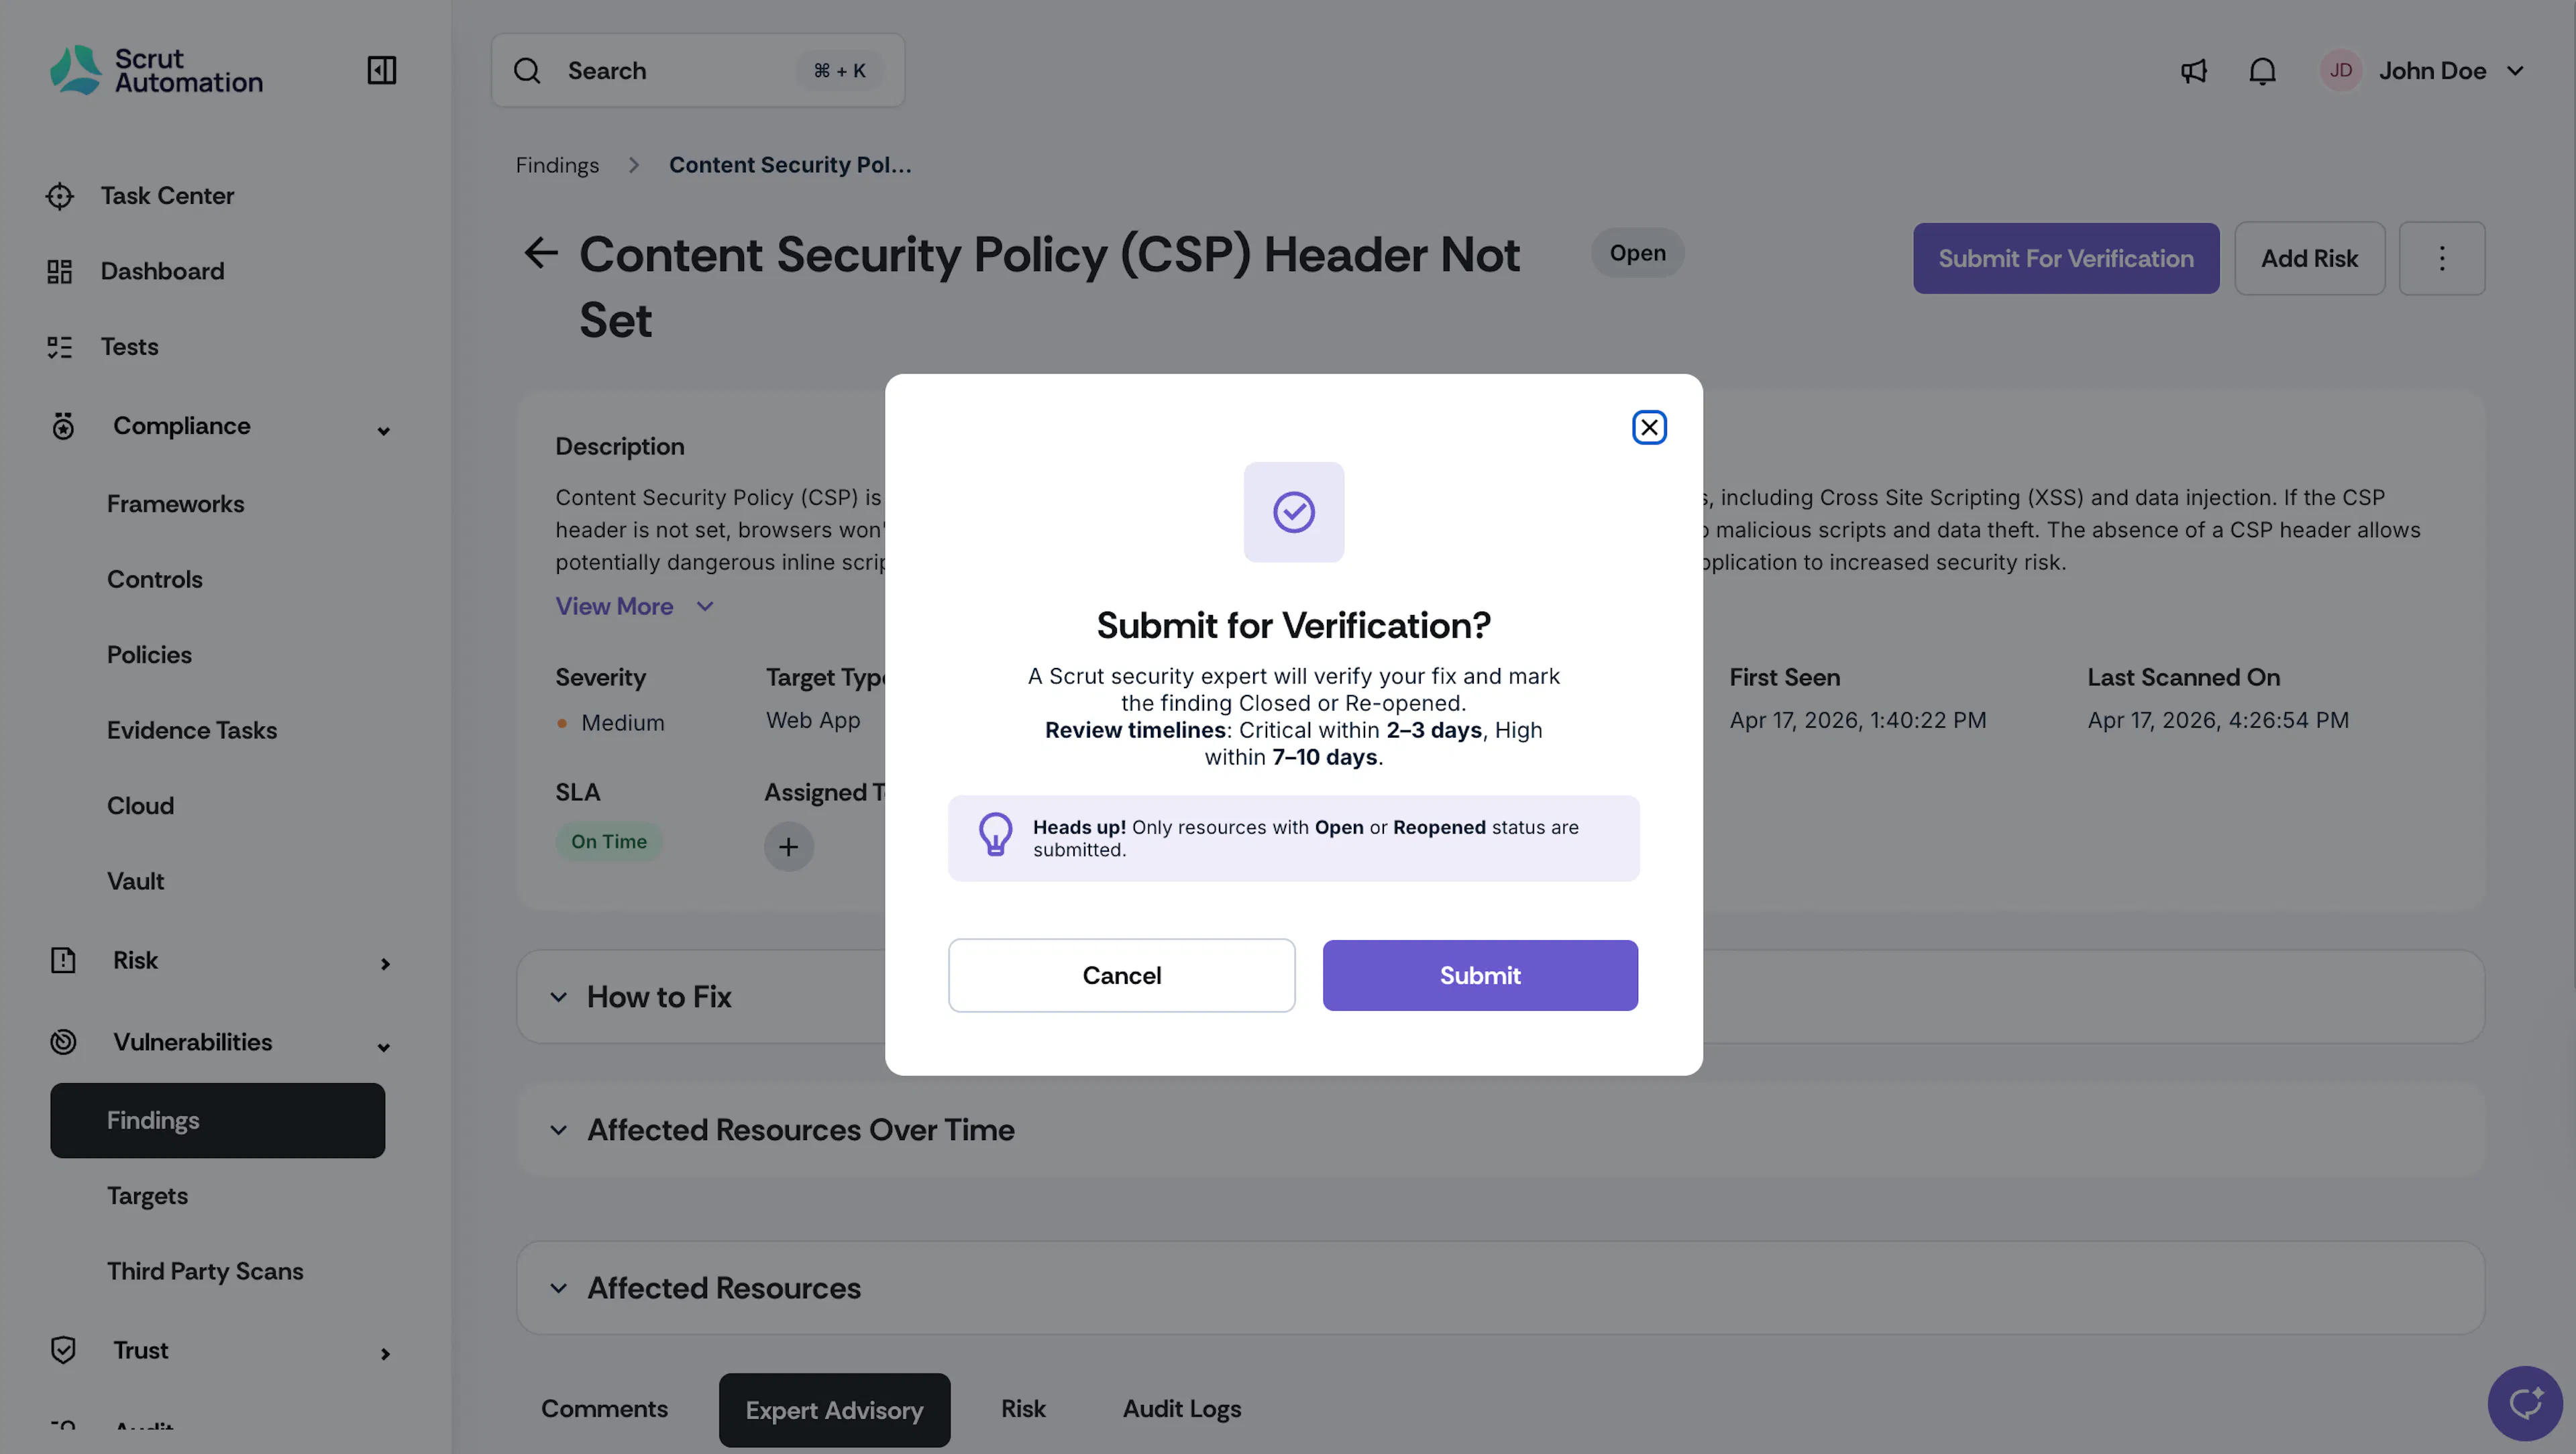
The finding status changes to Pending Verification.
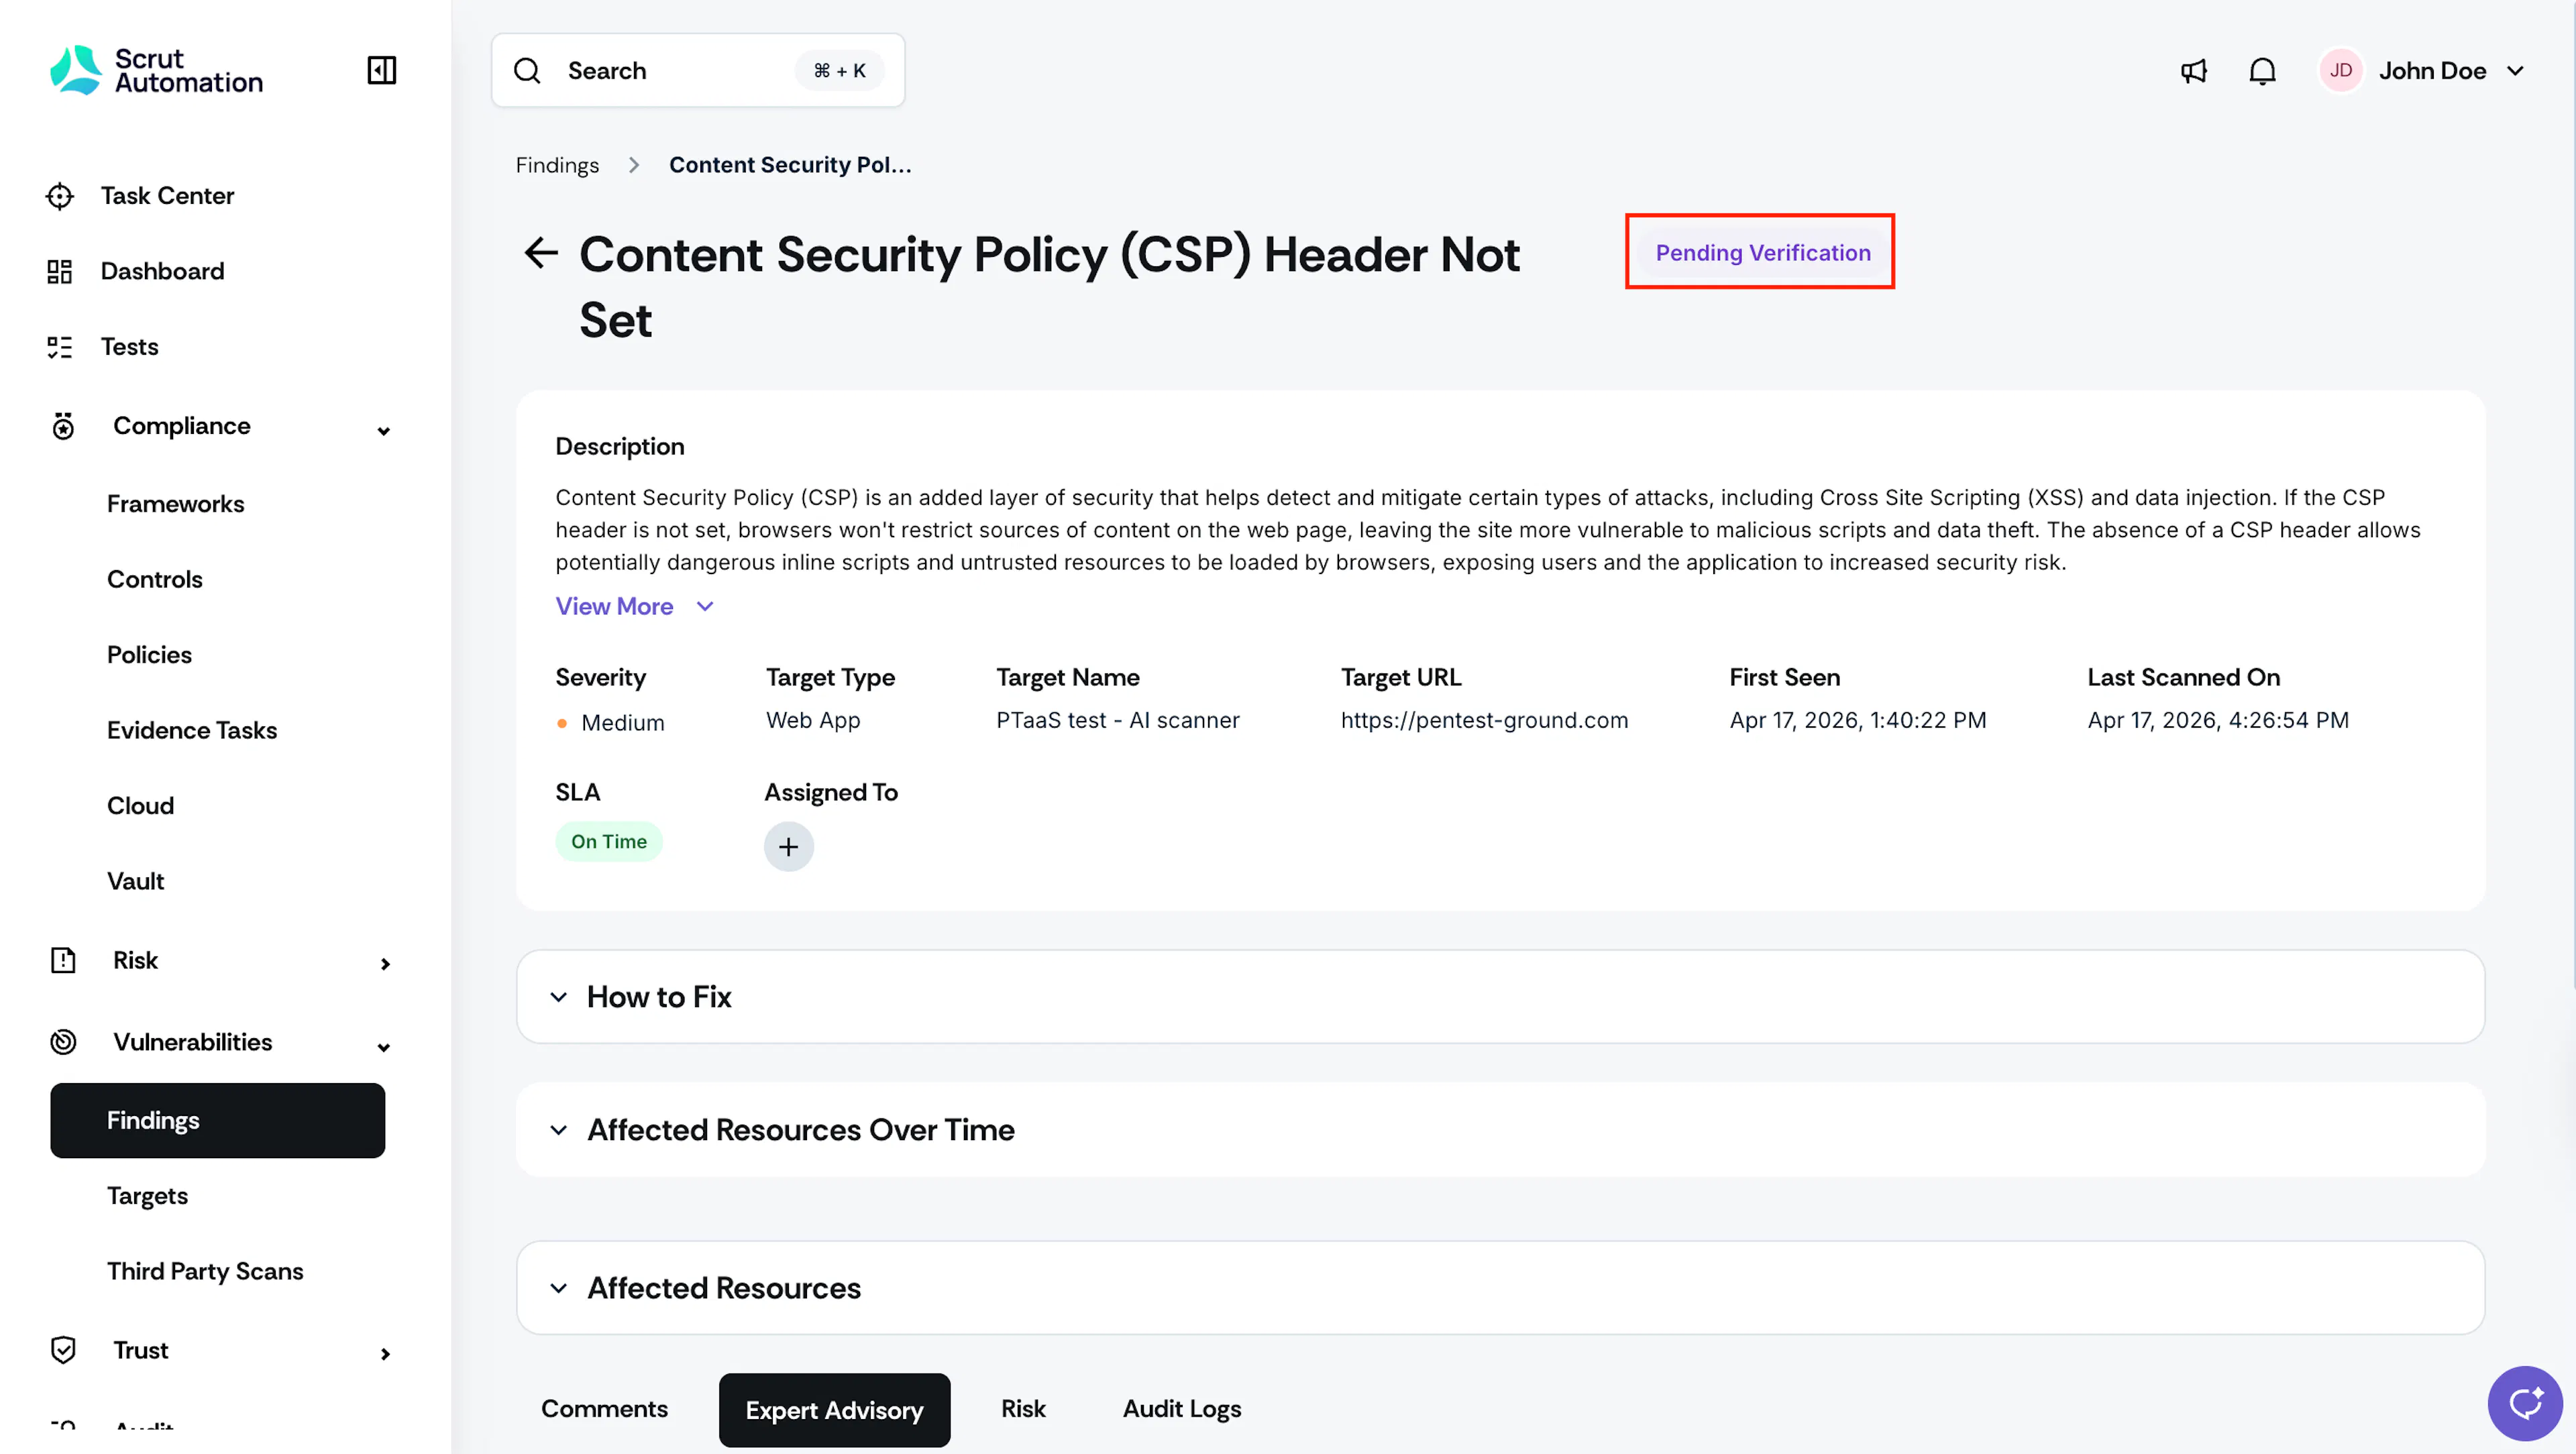
Scrut's Security Expert team is notified and will verify your fix within the SLA window below.
| Severity | SE verification SLA (from submission) |
|---|---|
| Critical | 2 - 3 business days |
| High | 7 - 10 business days |
You receive an in-app notification and an email when verification is complete.
- Once the Security Expert reviews and confirms the fix, the finding status changes to Closed.
- If the vulnerability persists, the finding status changes to Reopened with a comment from the Security Expert explaining what still needs to be addressed.
Heads Up!
If a finding is reopened after a failed verification, the SLA countdown continues from the original discovery date. The clock does not restart.
To fix and resubmit a reopened finding, repeat steps 1 through 5 above.
Step 4: Manage Findings You Cannot or Choose Not to Fix
For findings your team cannot remediate or has formally assessed as acceptable risk, you have two options: Ignore or Accept Risk.
Ignore a Finding
Use Ignore when a finding does not apply to your environment, or when your team has decided not to act on it. Ignored findings will be excluded from all future scans.
- Open the finding, click the three-dots icon in the finding details page, and click Ignore.
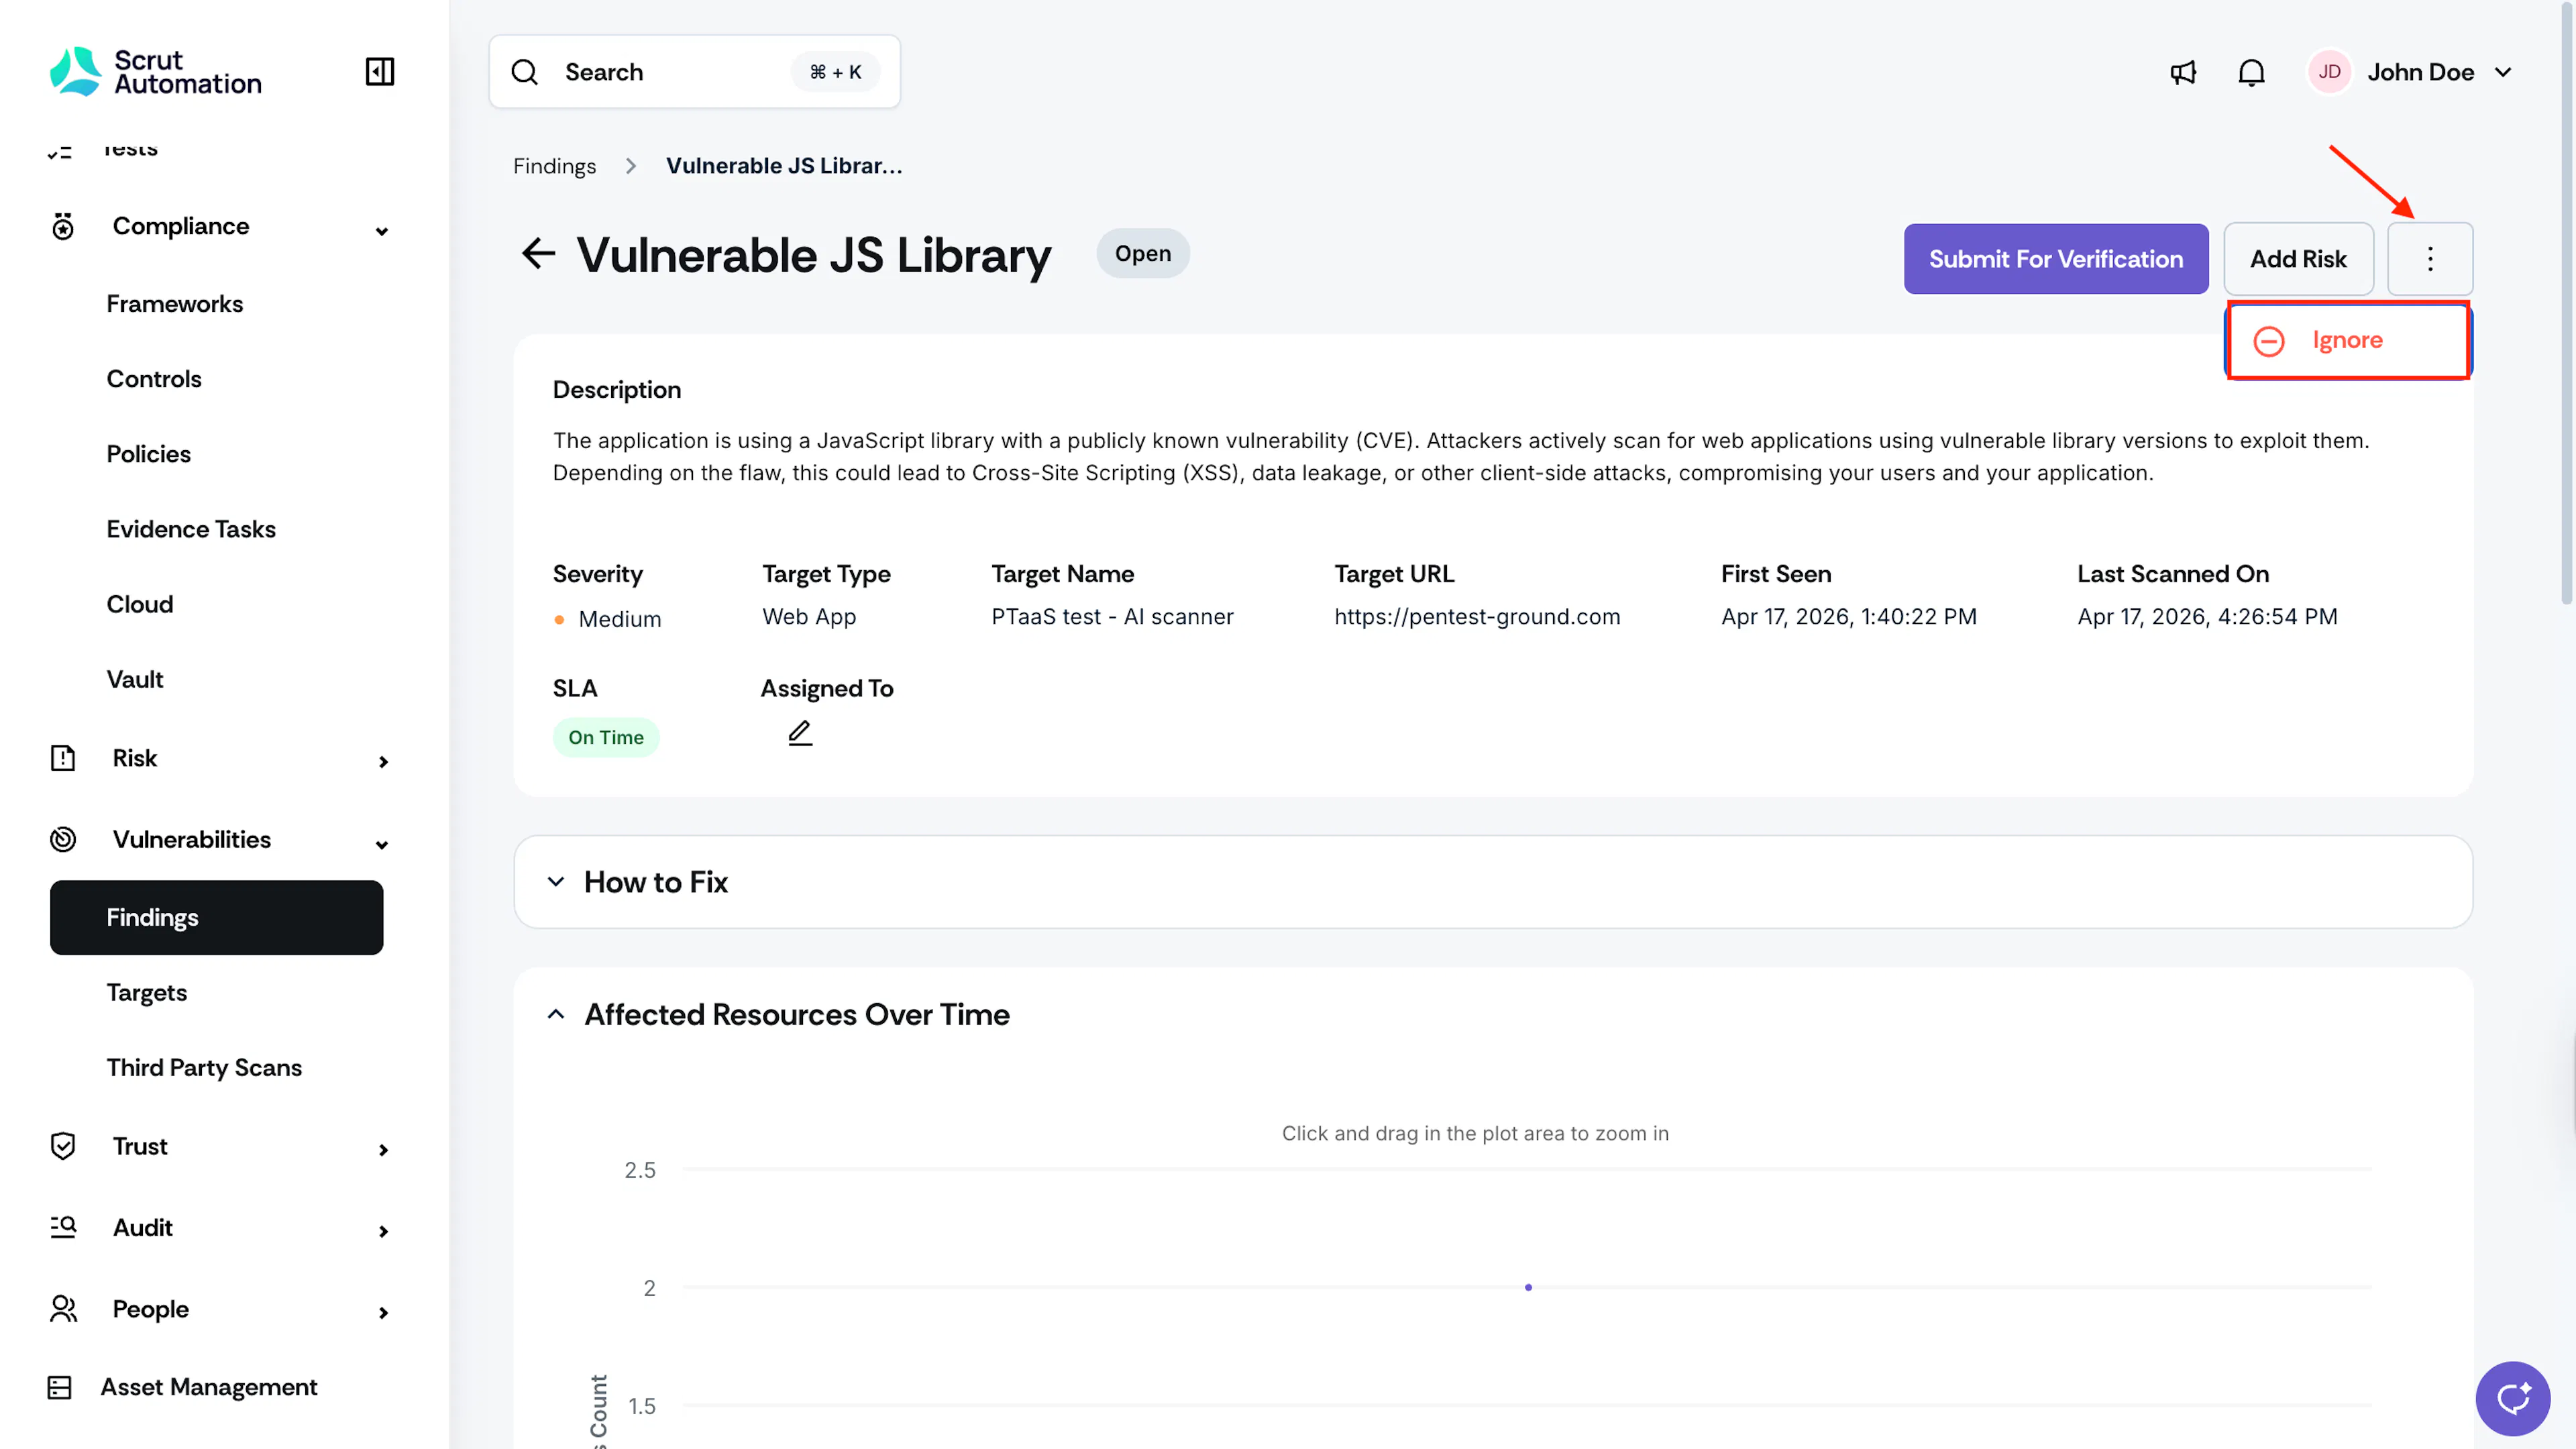
- Enter the justification for why you're ignoring it.
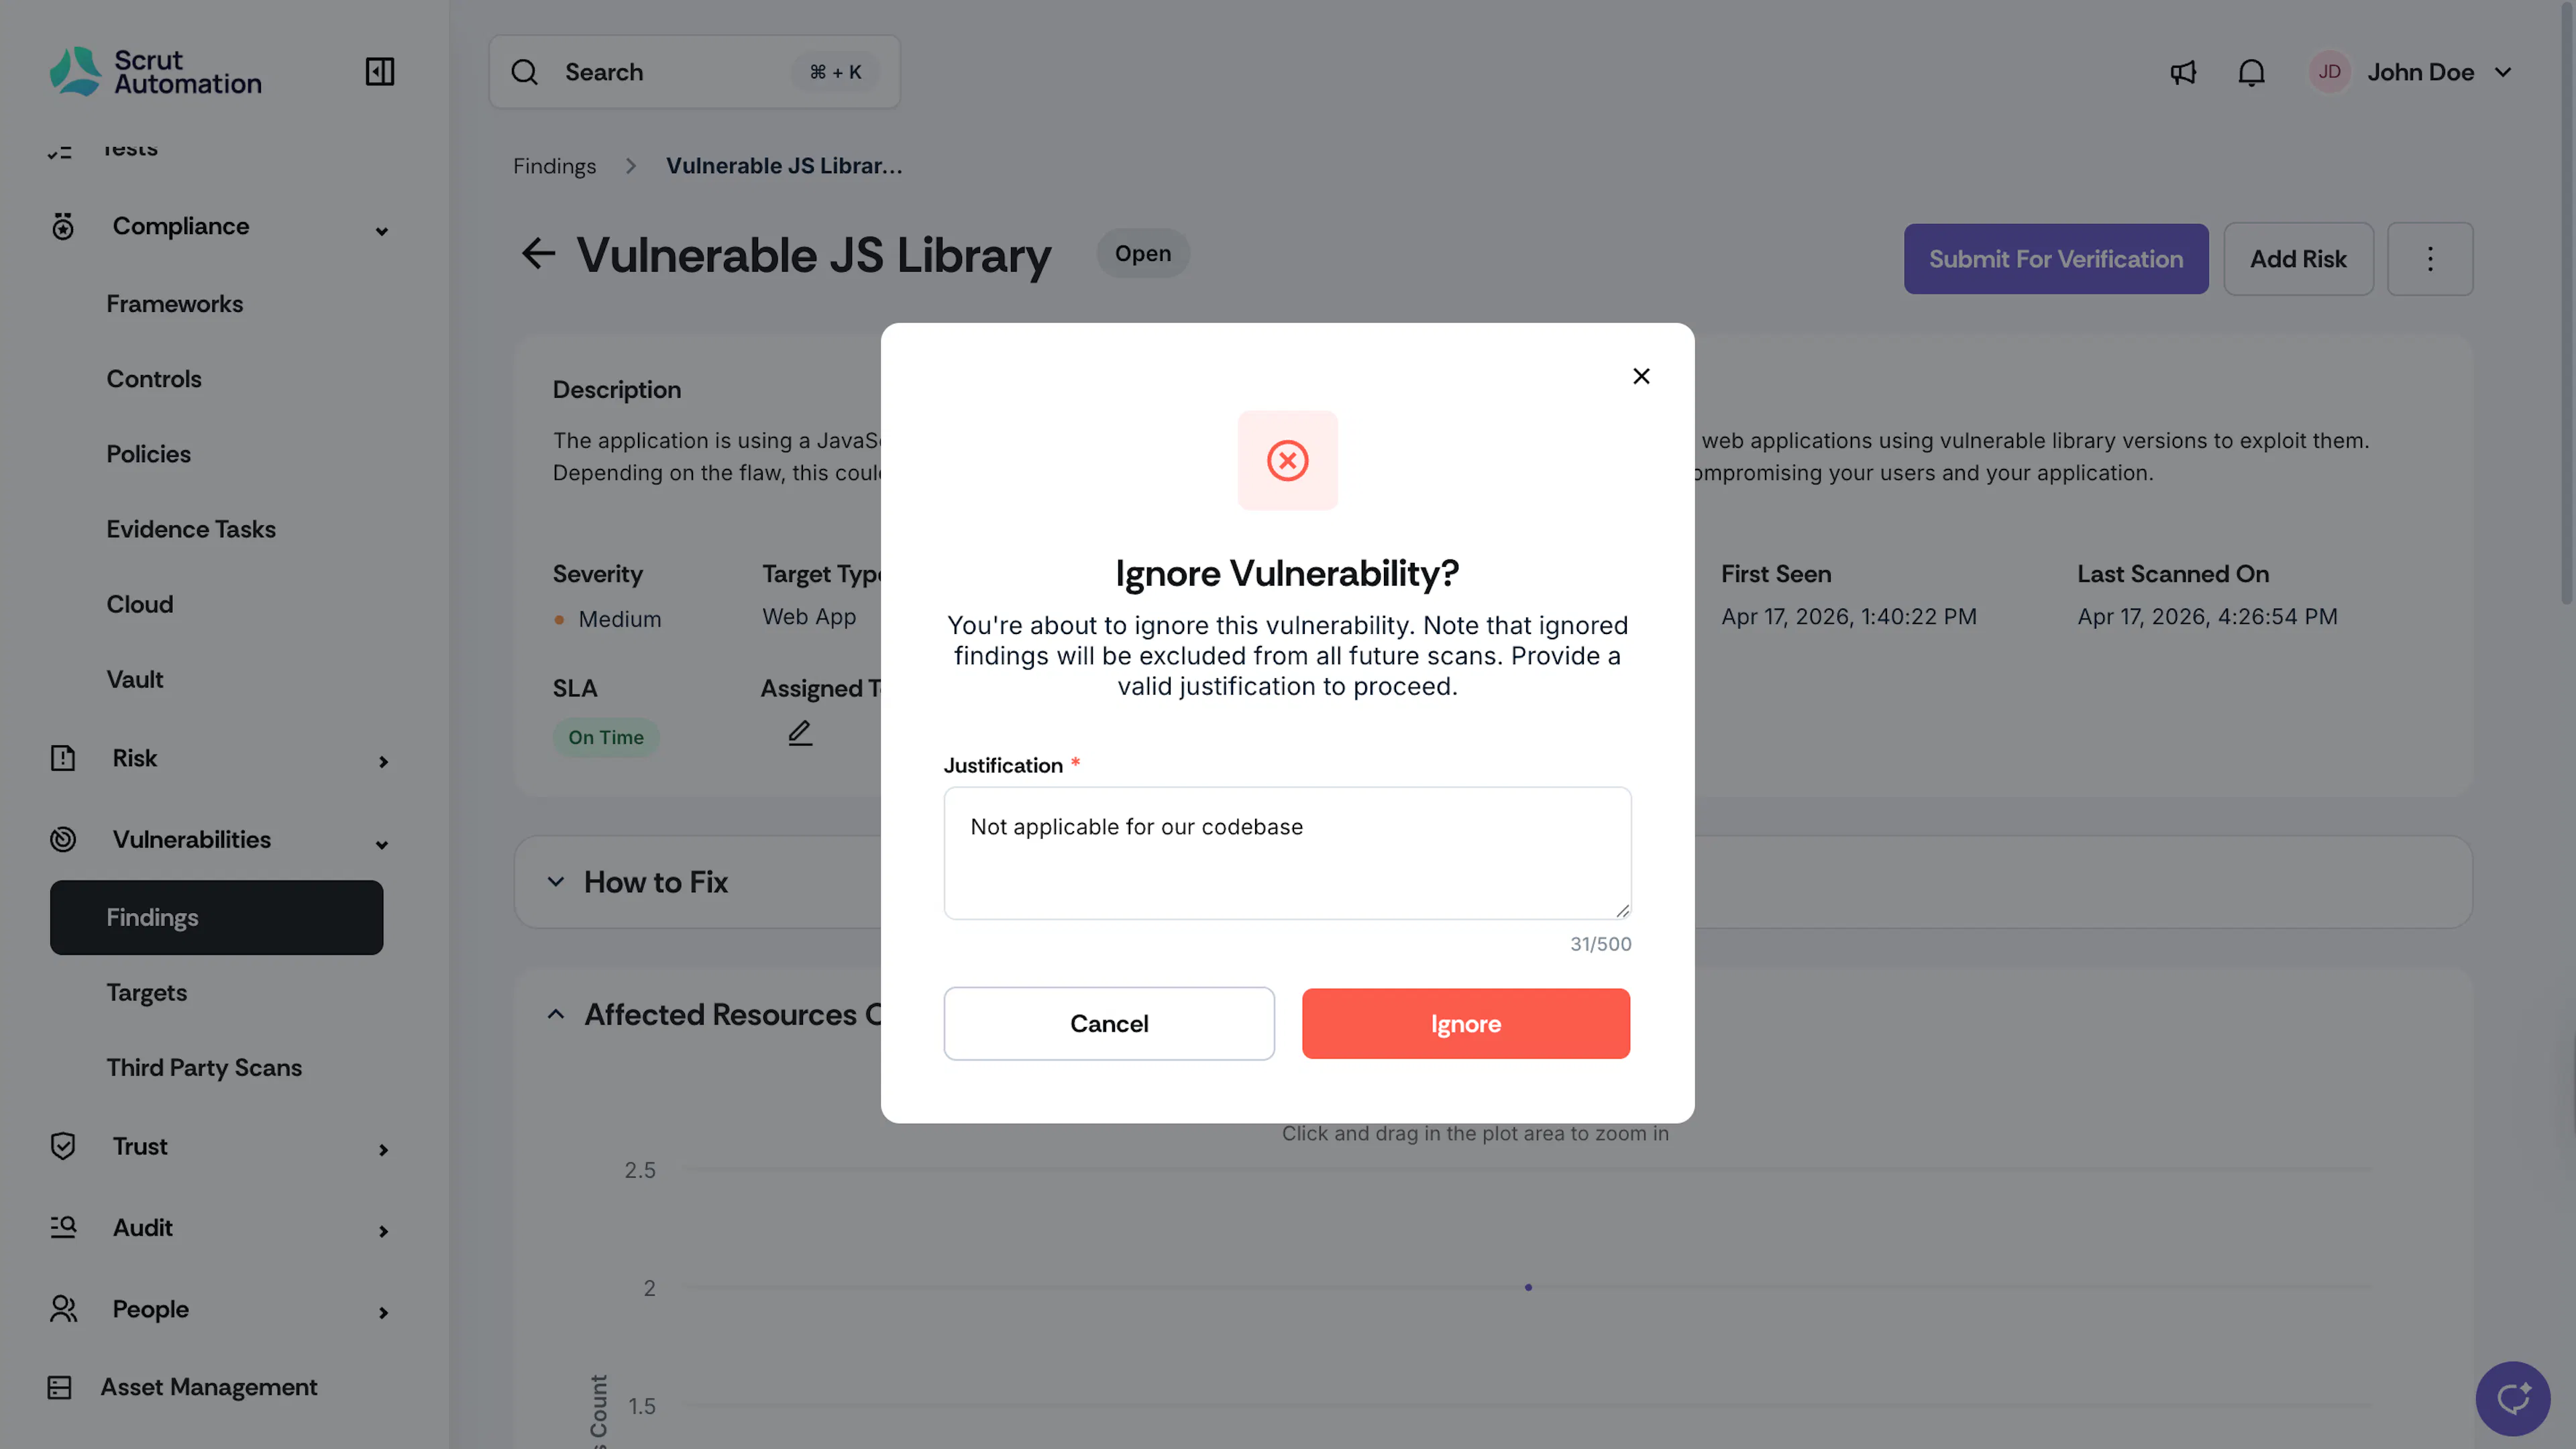
- Click Confirm. The finding status changes to Ignored.
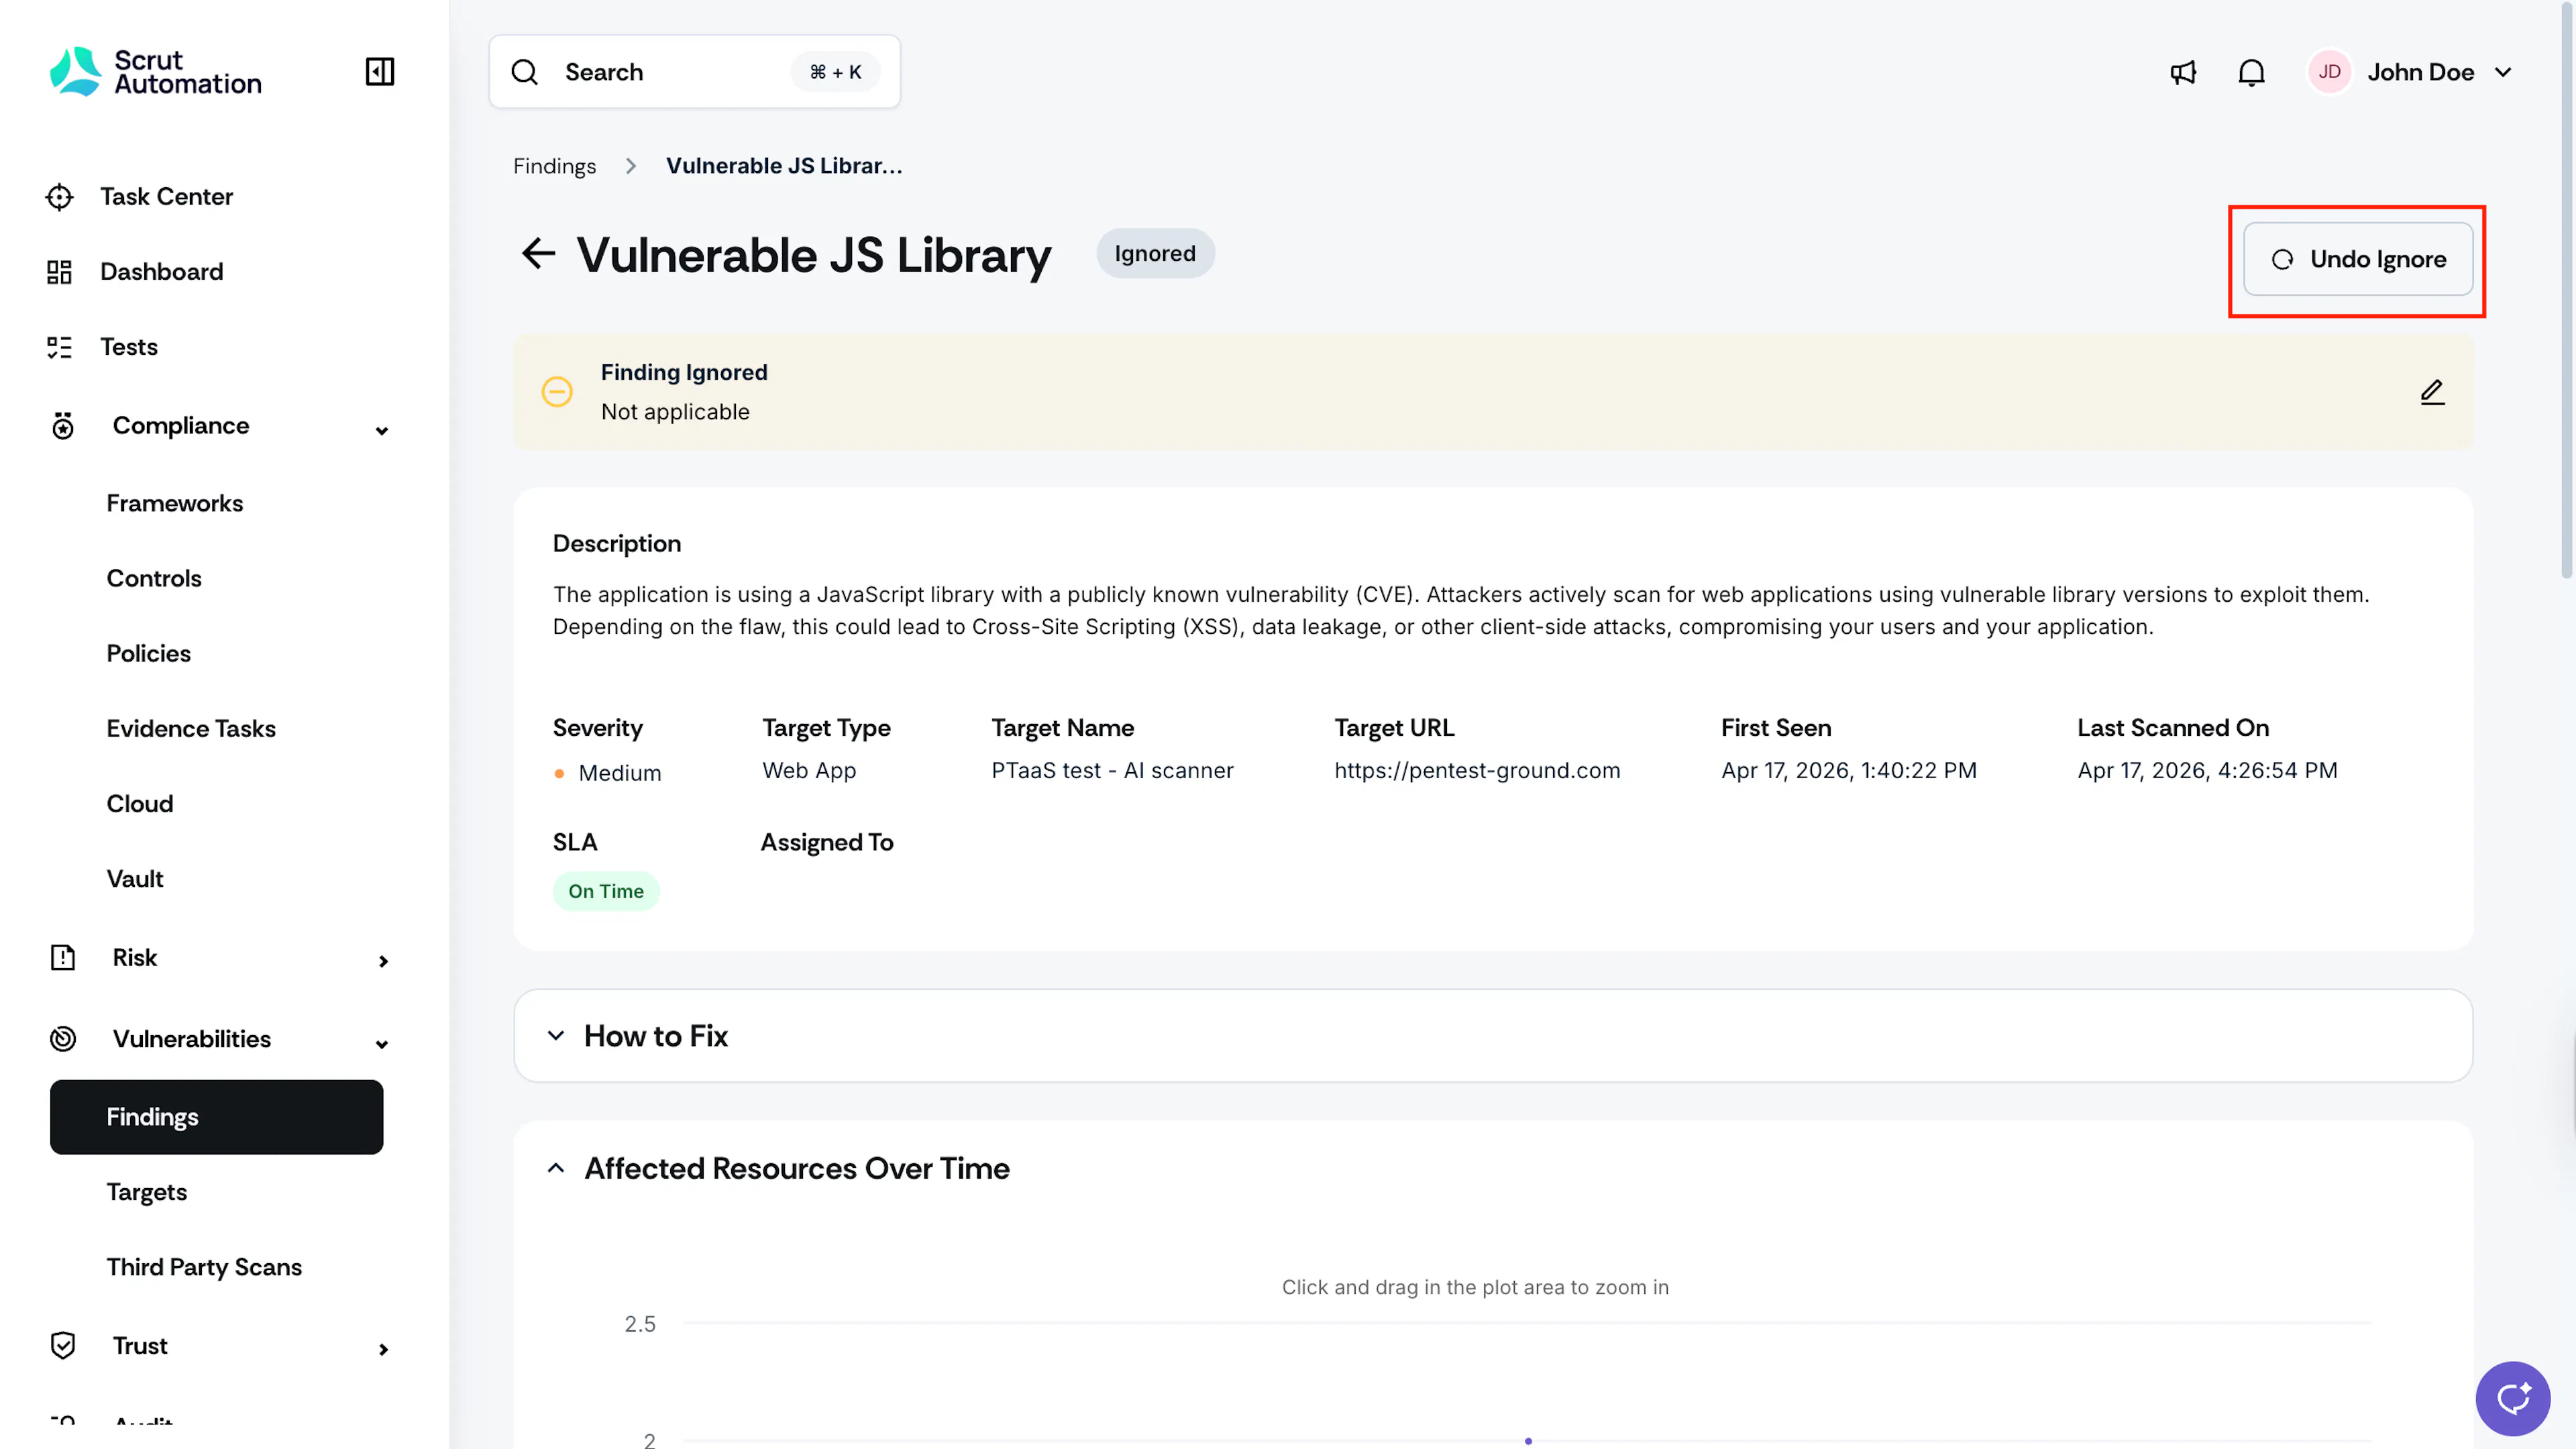
To undo an Ignore at any time:
- Open the ignored finding.
- Click Undo Ignore.
Add a Finding as a Risk
Use Add Risk when you have assessed the finding and chosen to formally acknowledge the risk without remediating it. This creates a linked risk record in the Risk Register.
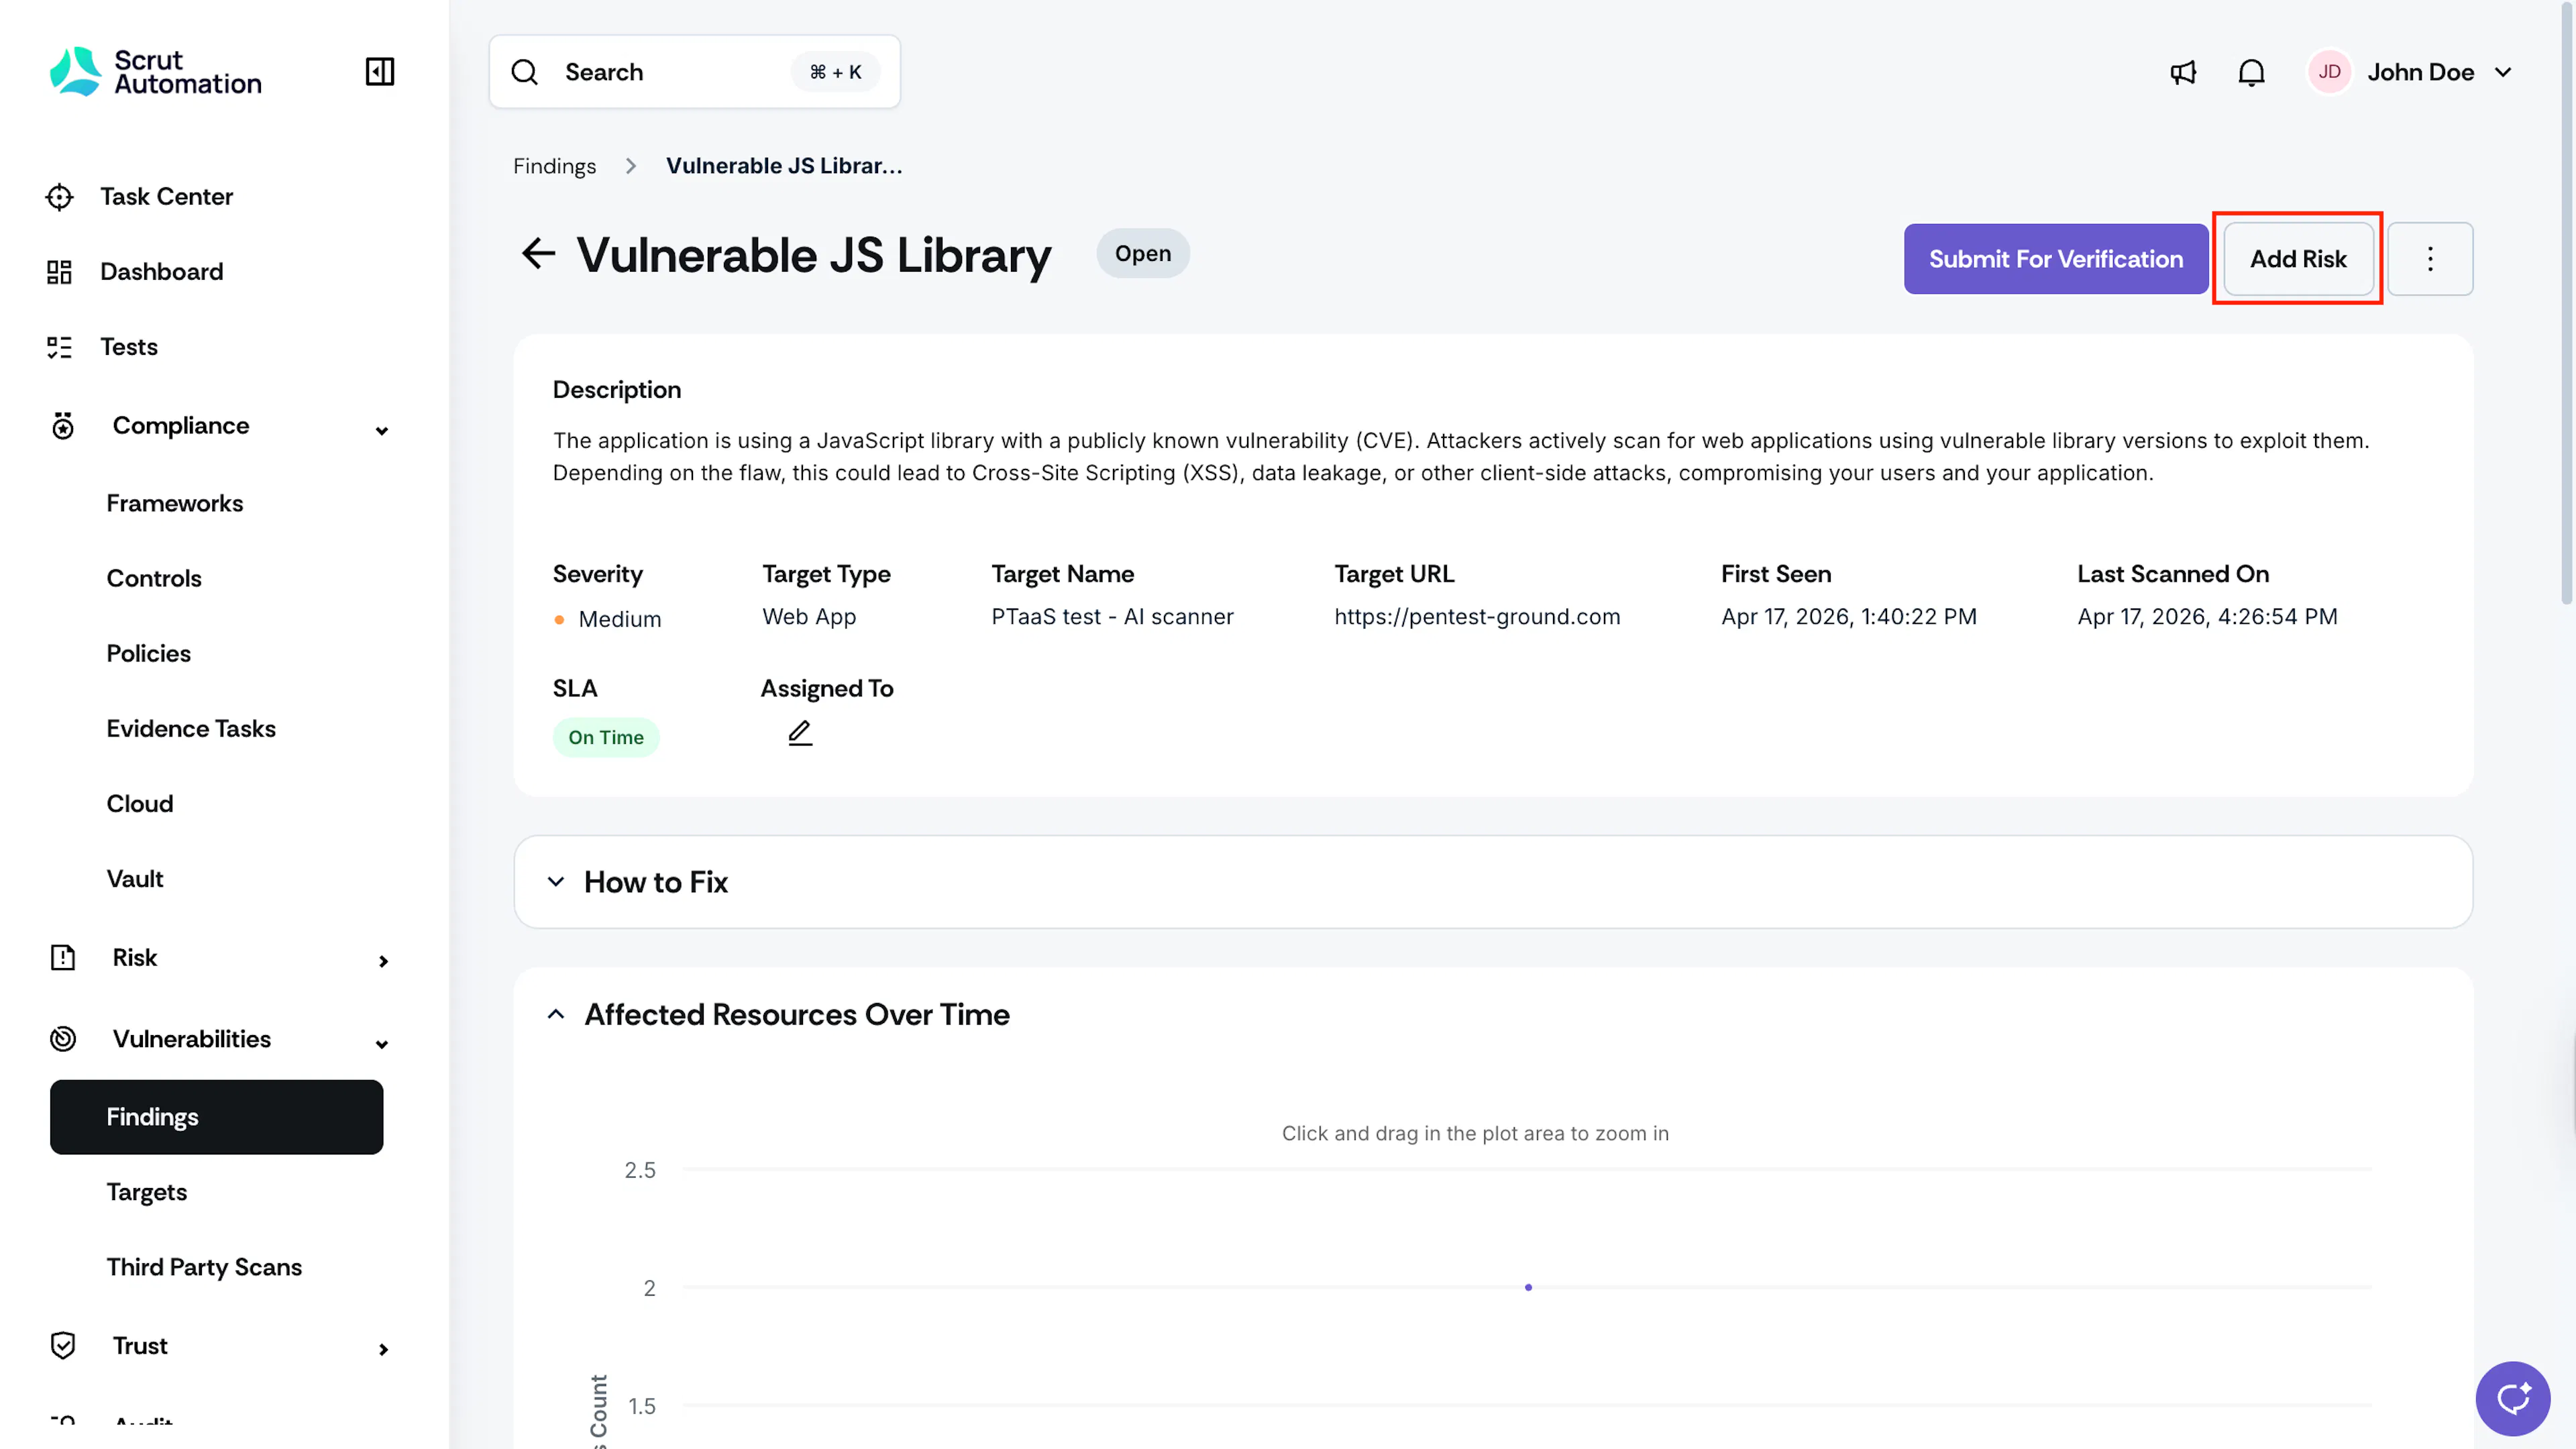
- Open the finding. Click Add Risk.
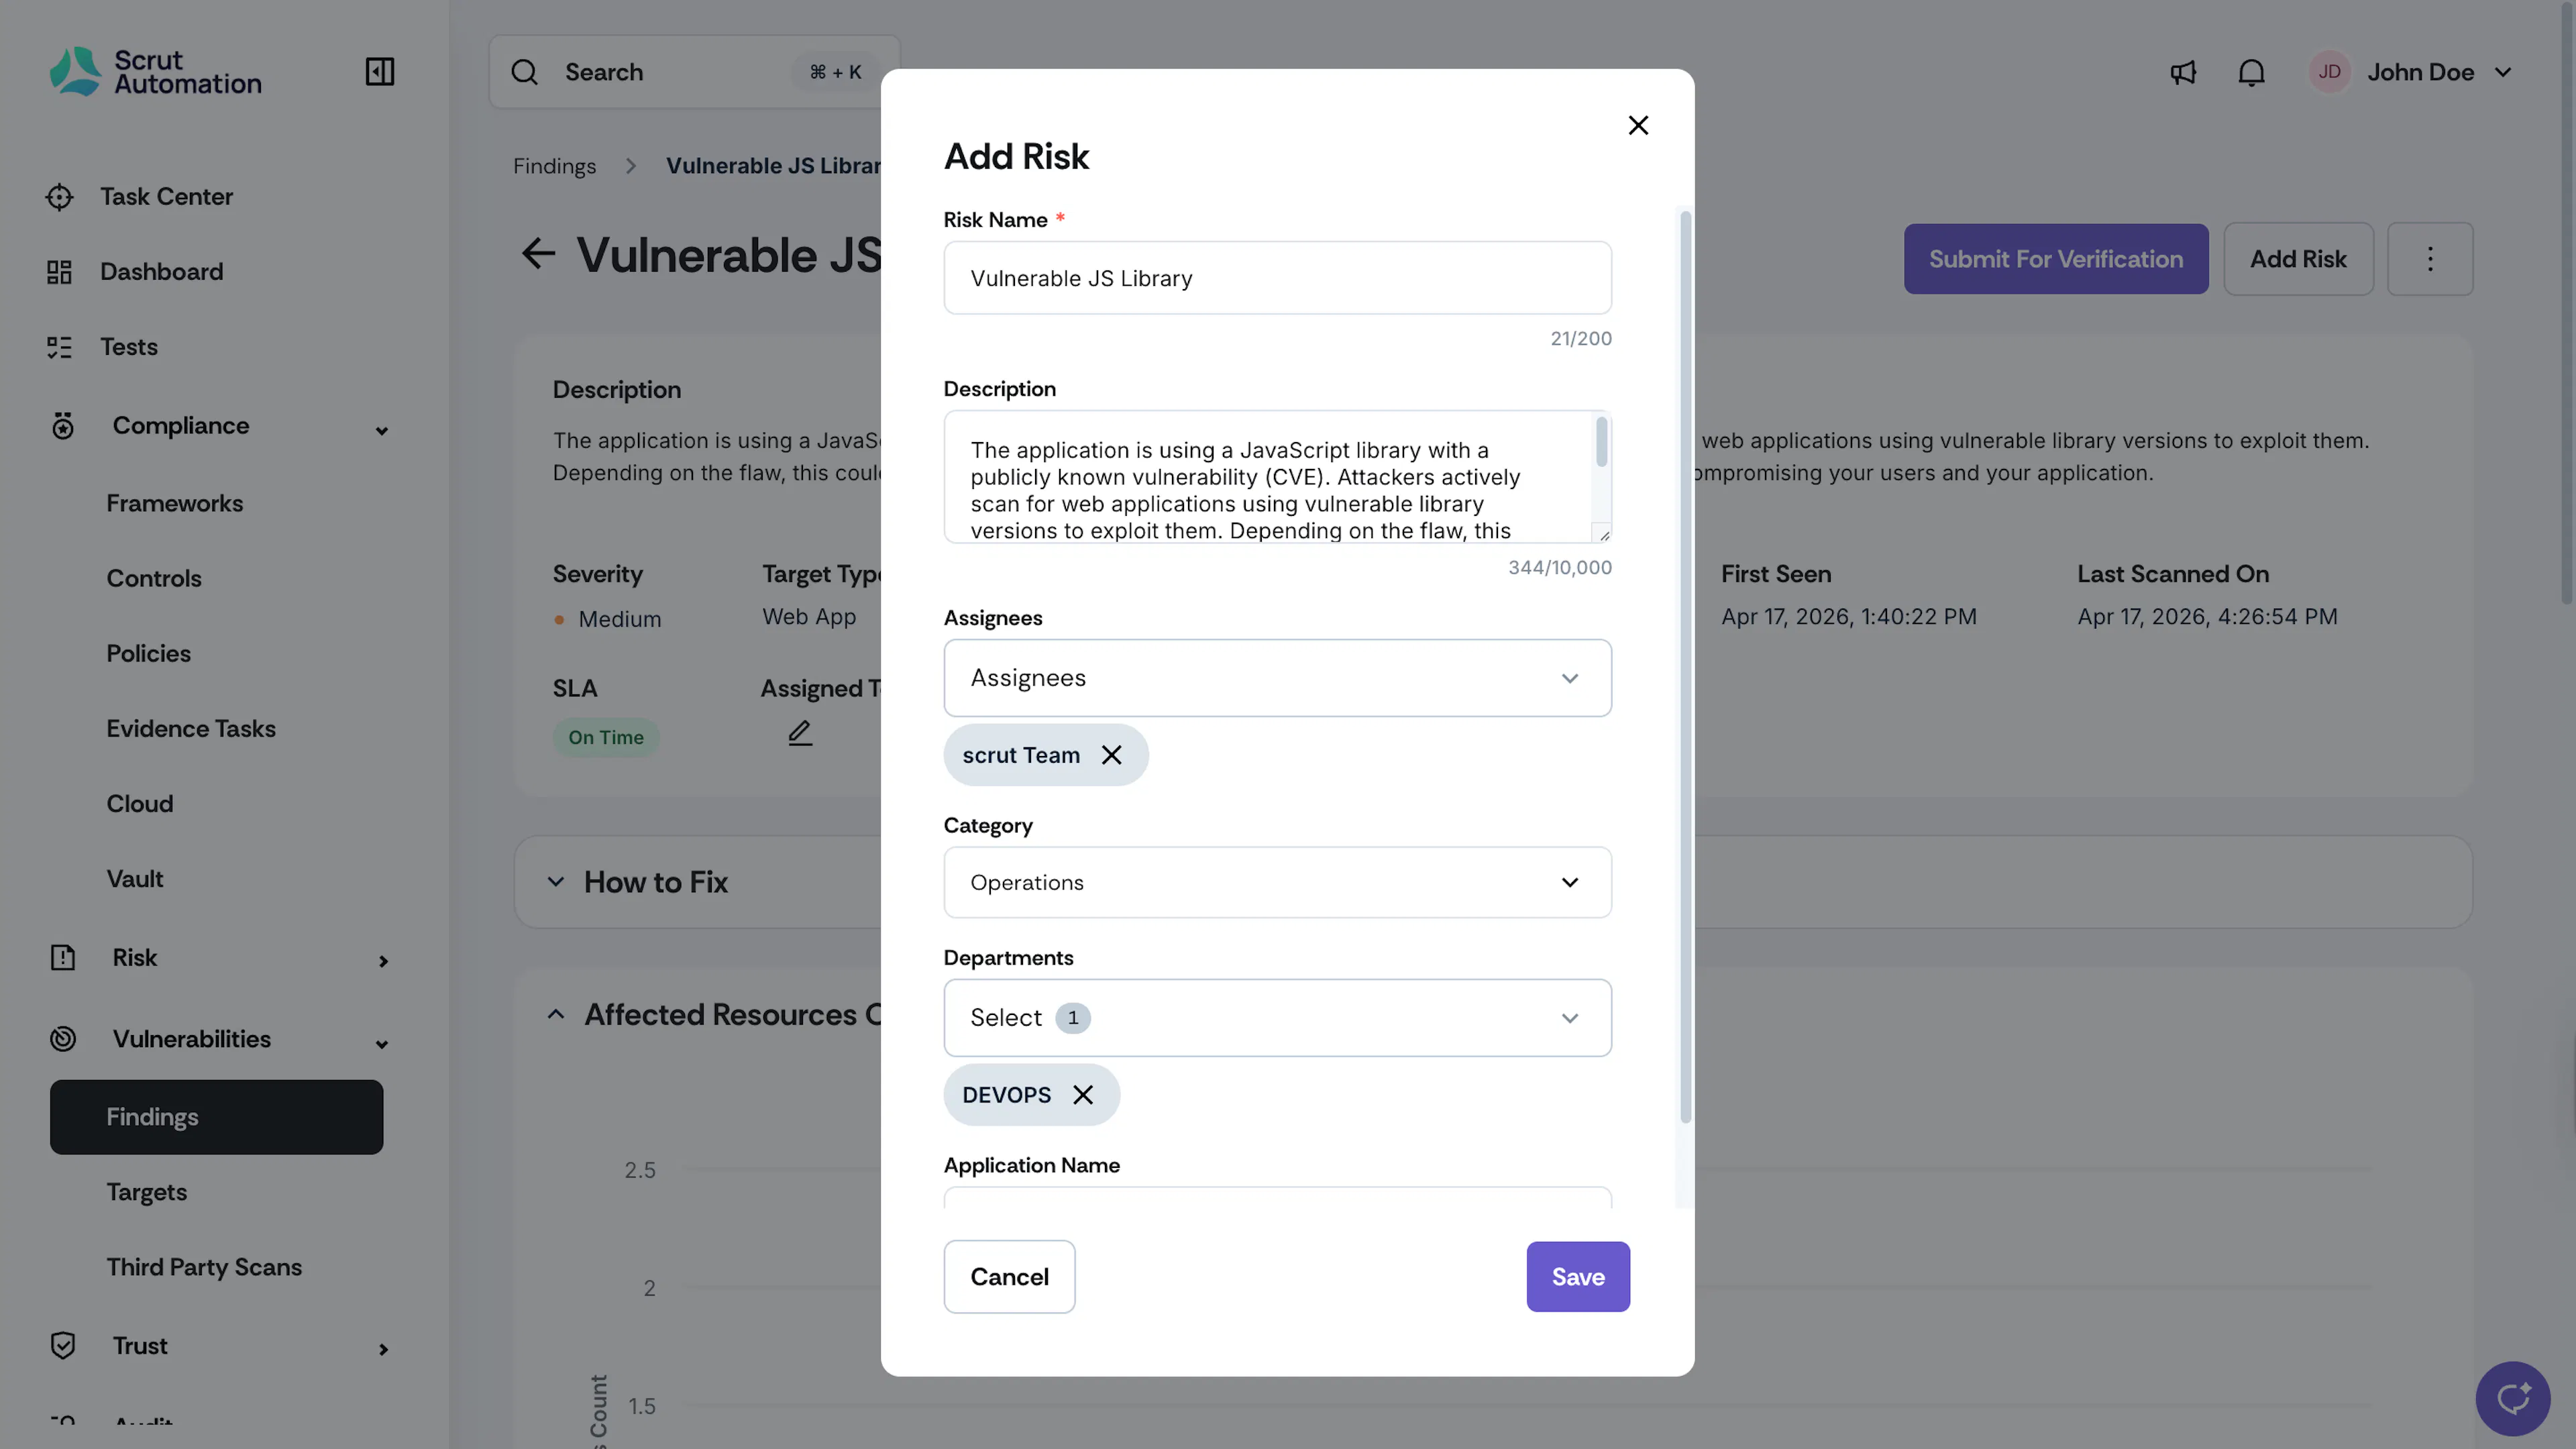
- Enter the risk details and click Save.
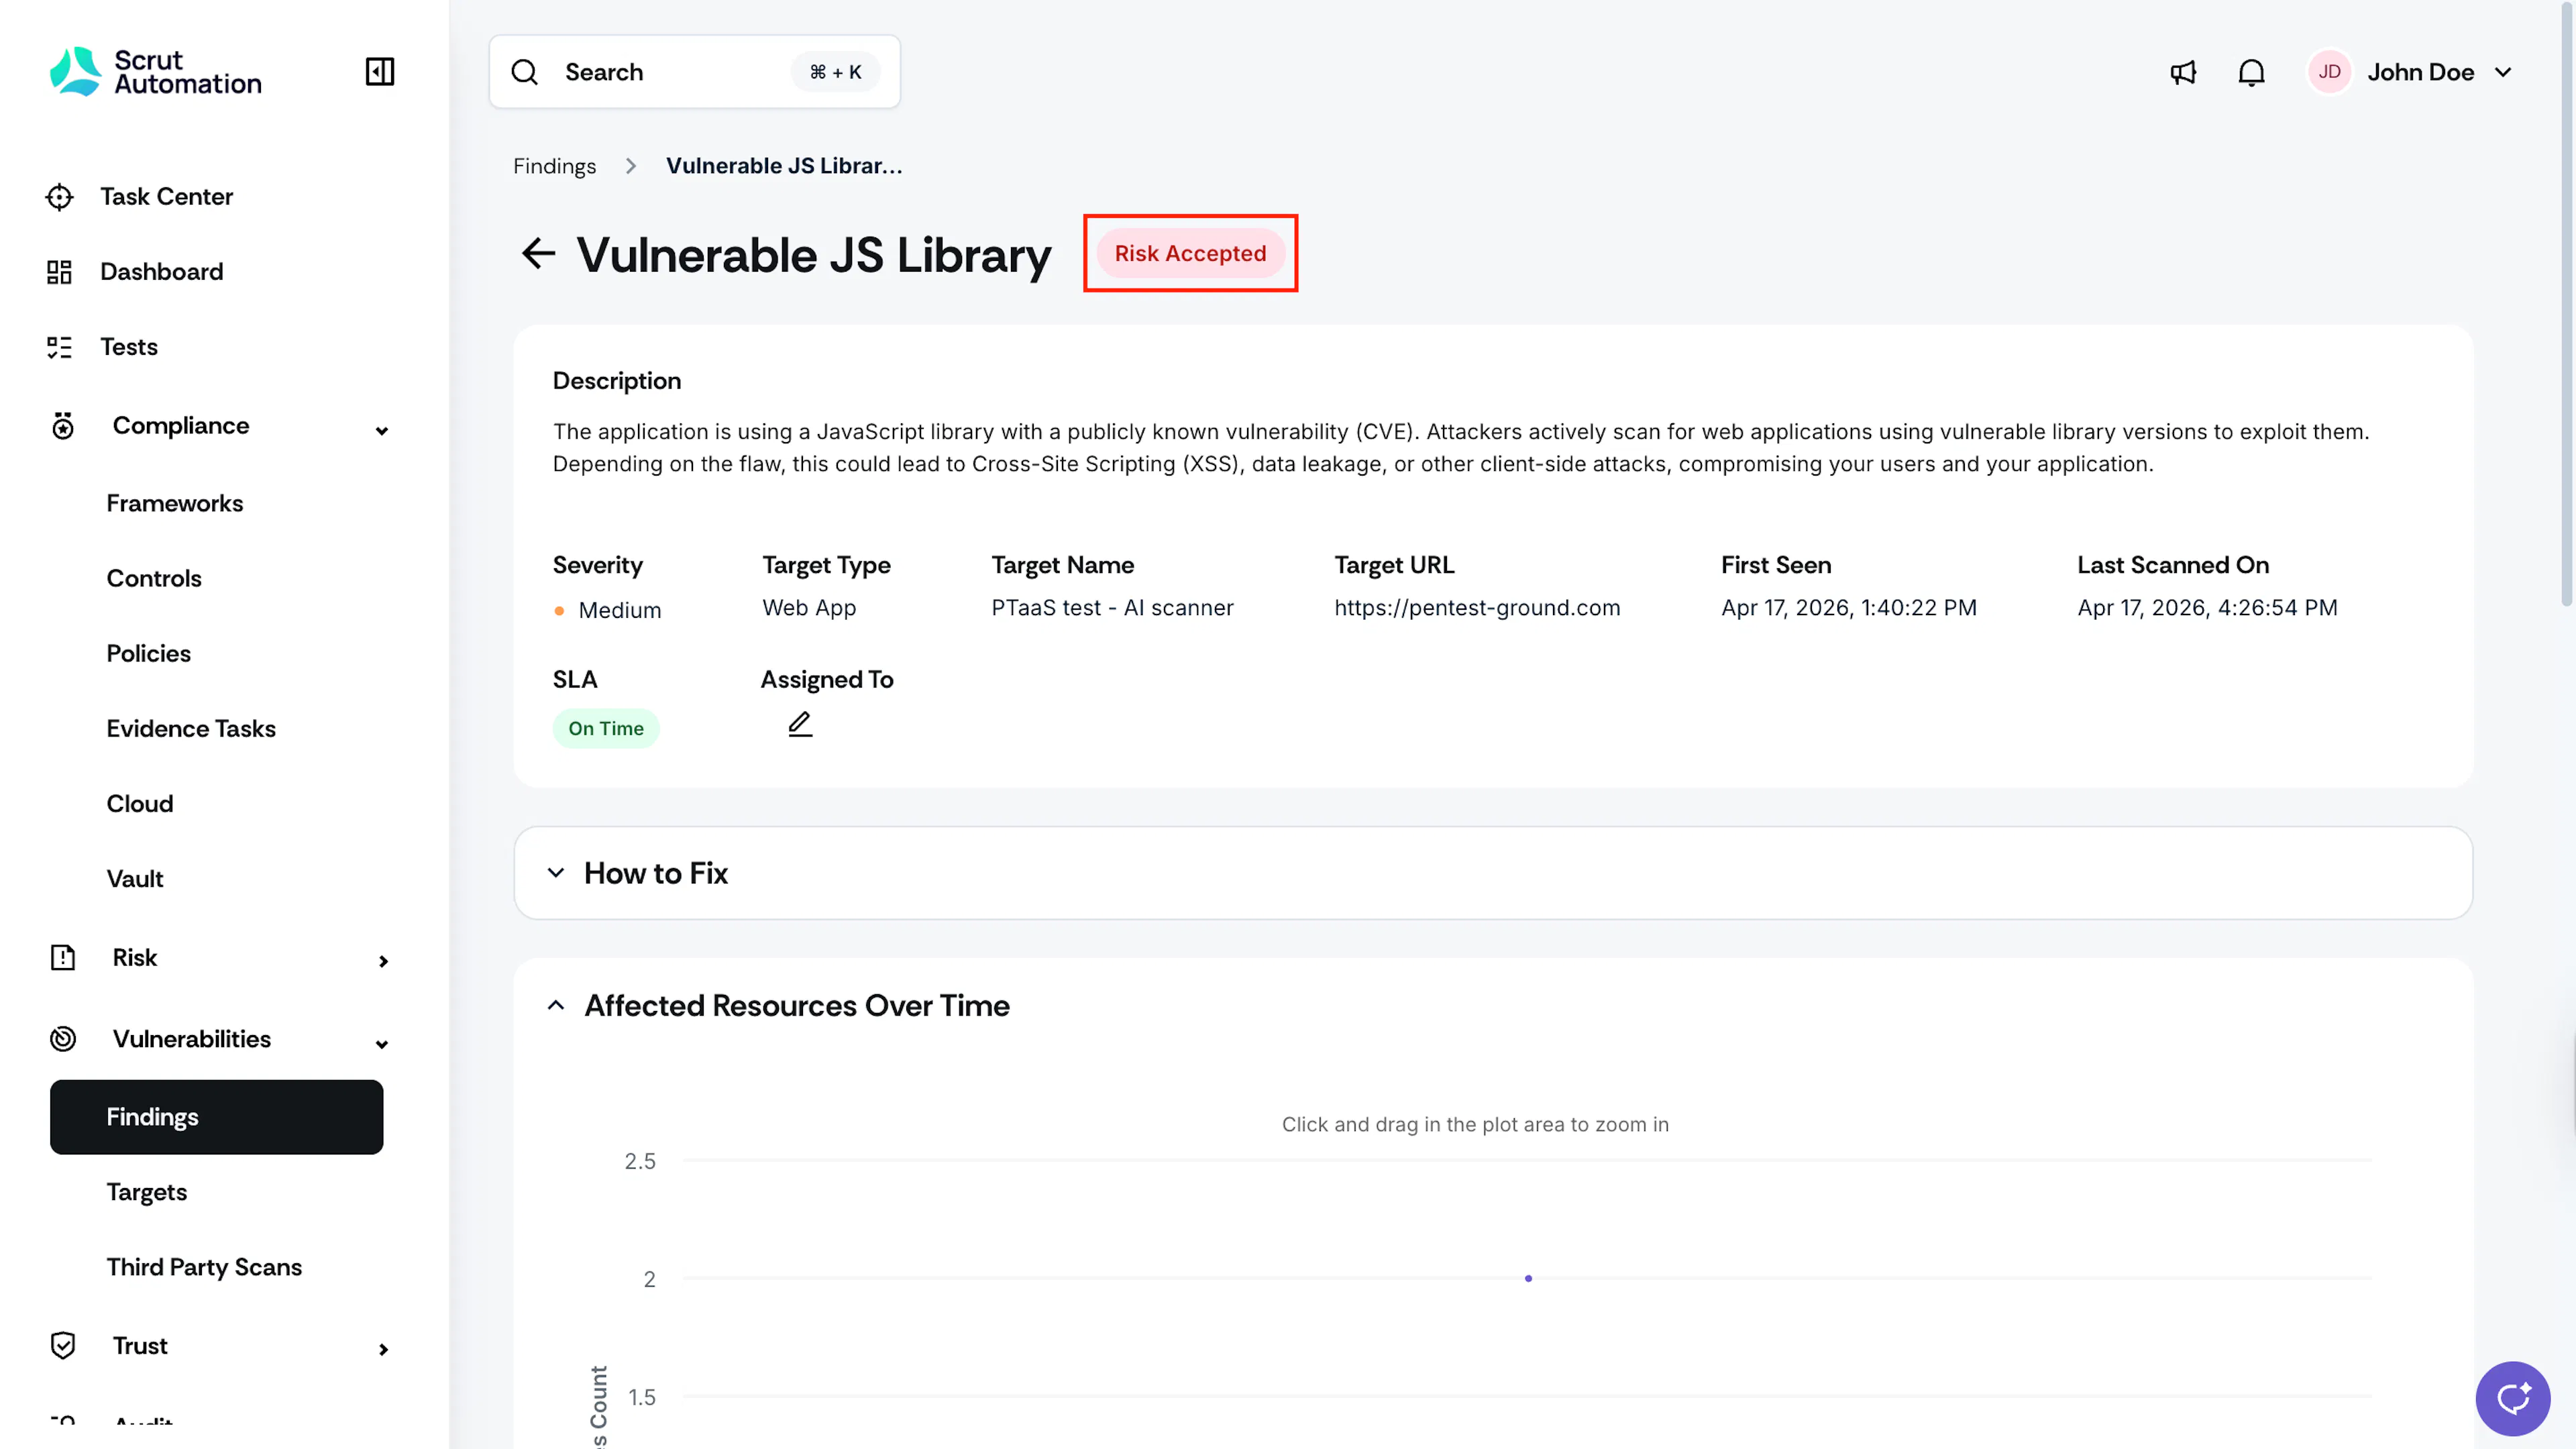
- The finding status changes to Risk Accepted.
- A linked risk record is created in the Risk Register.
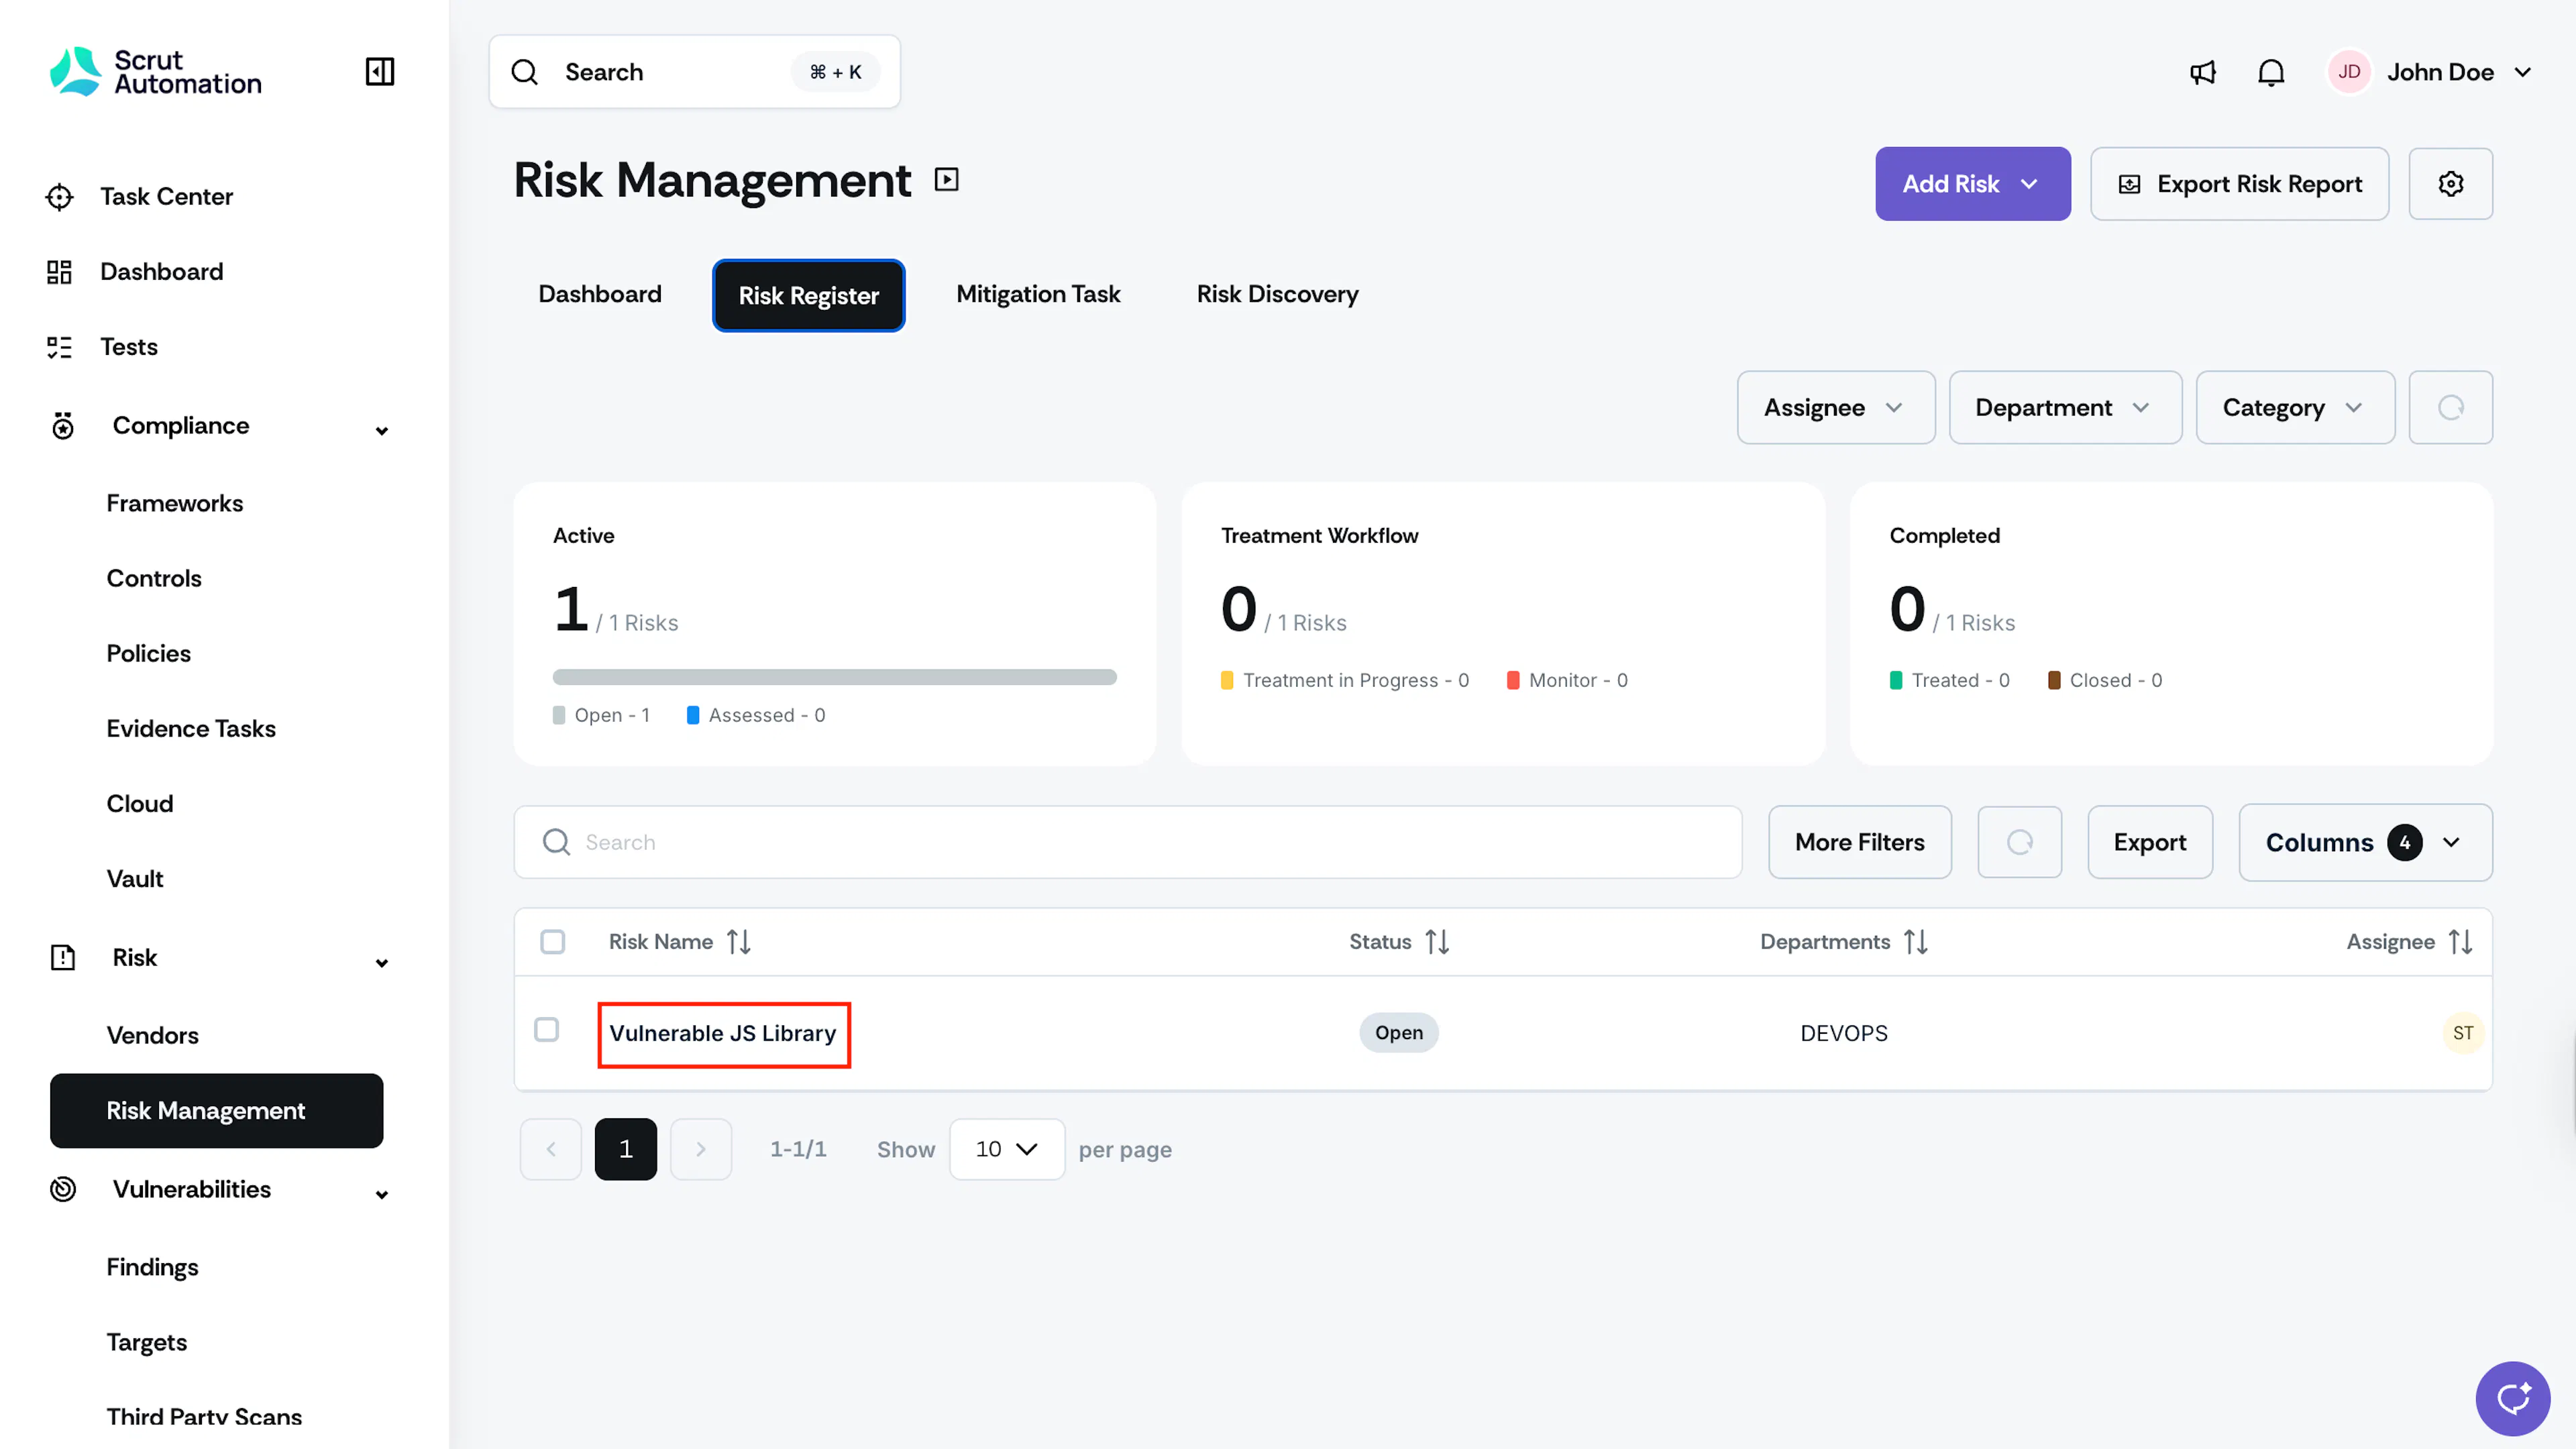
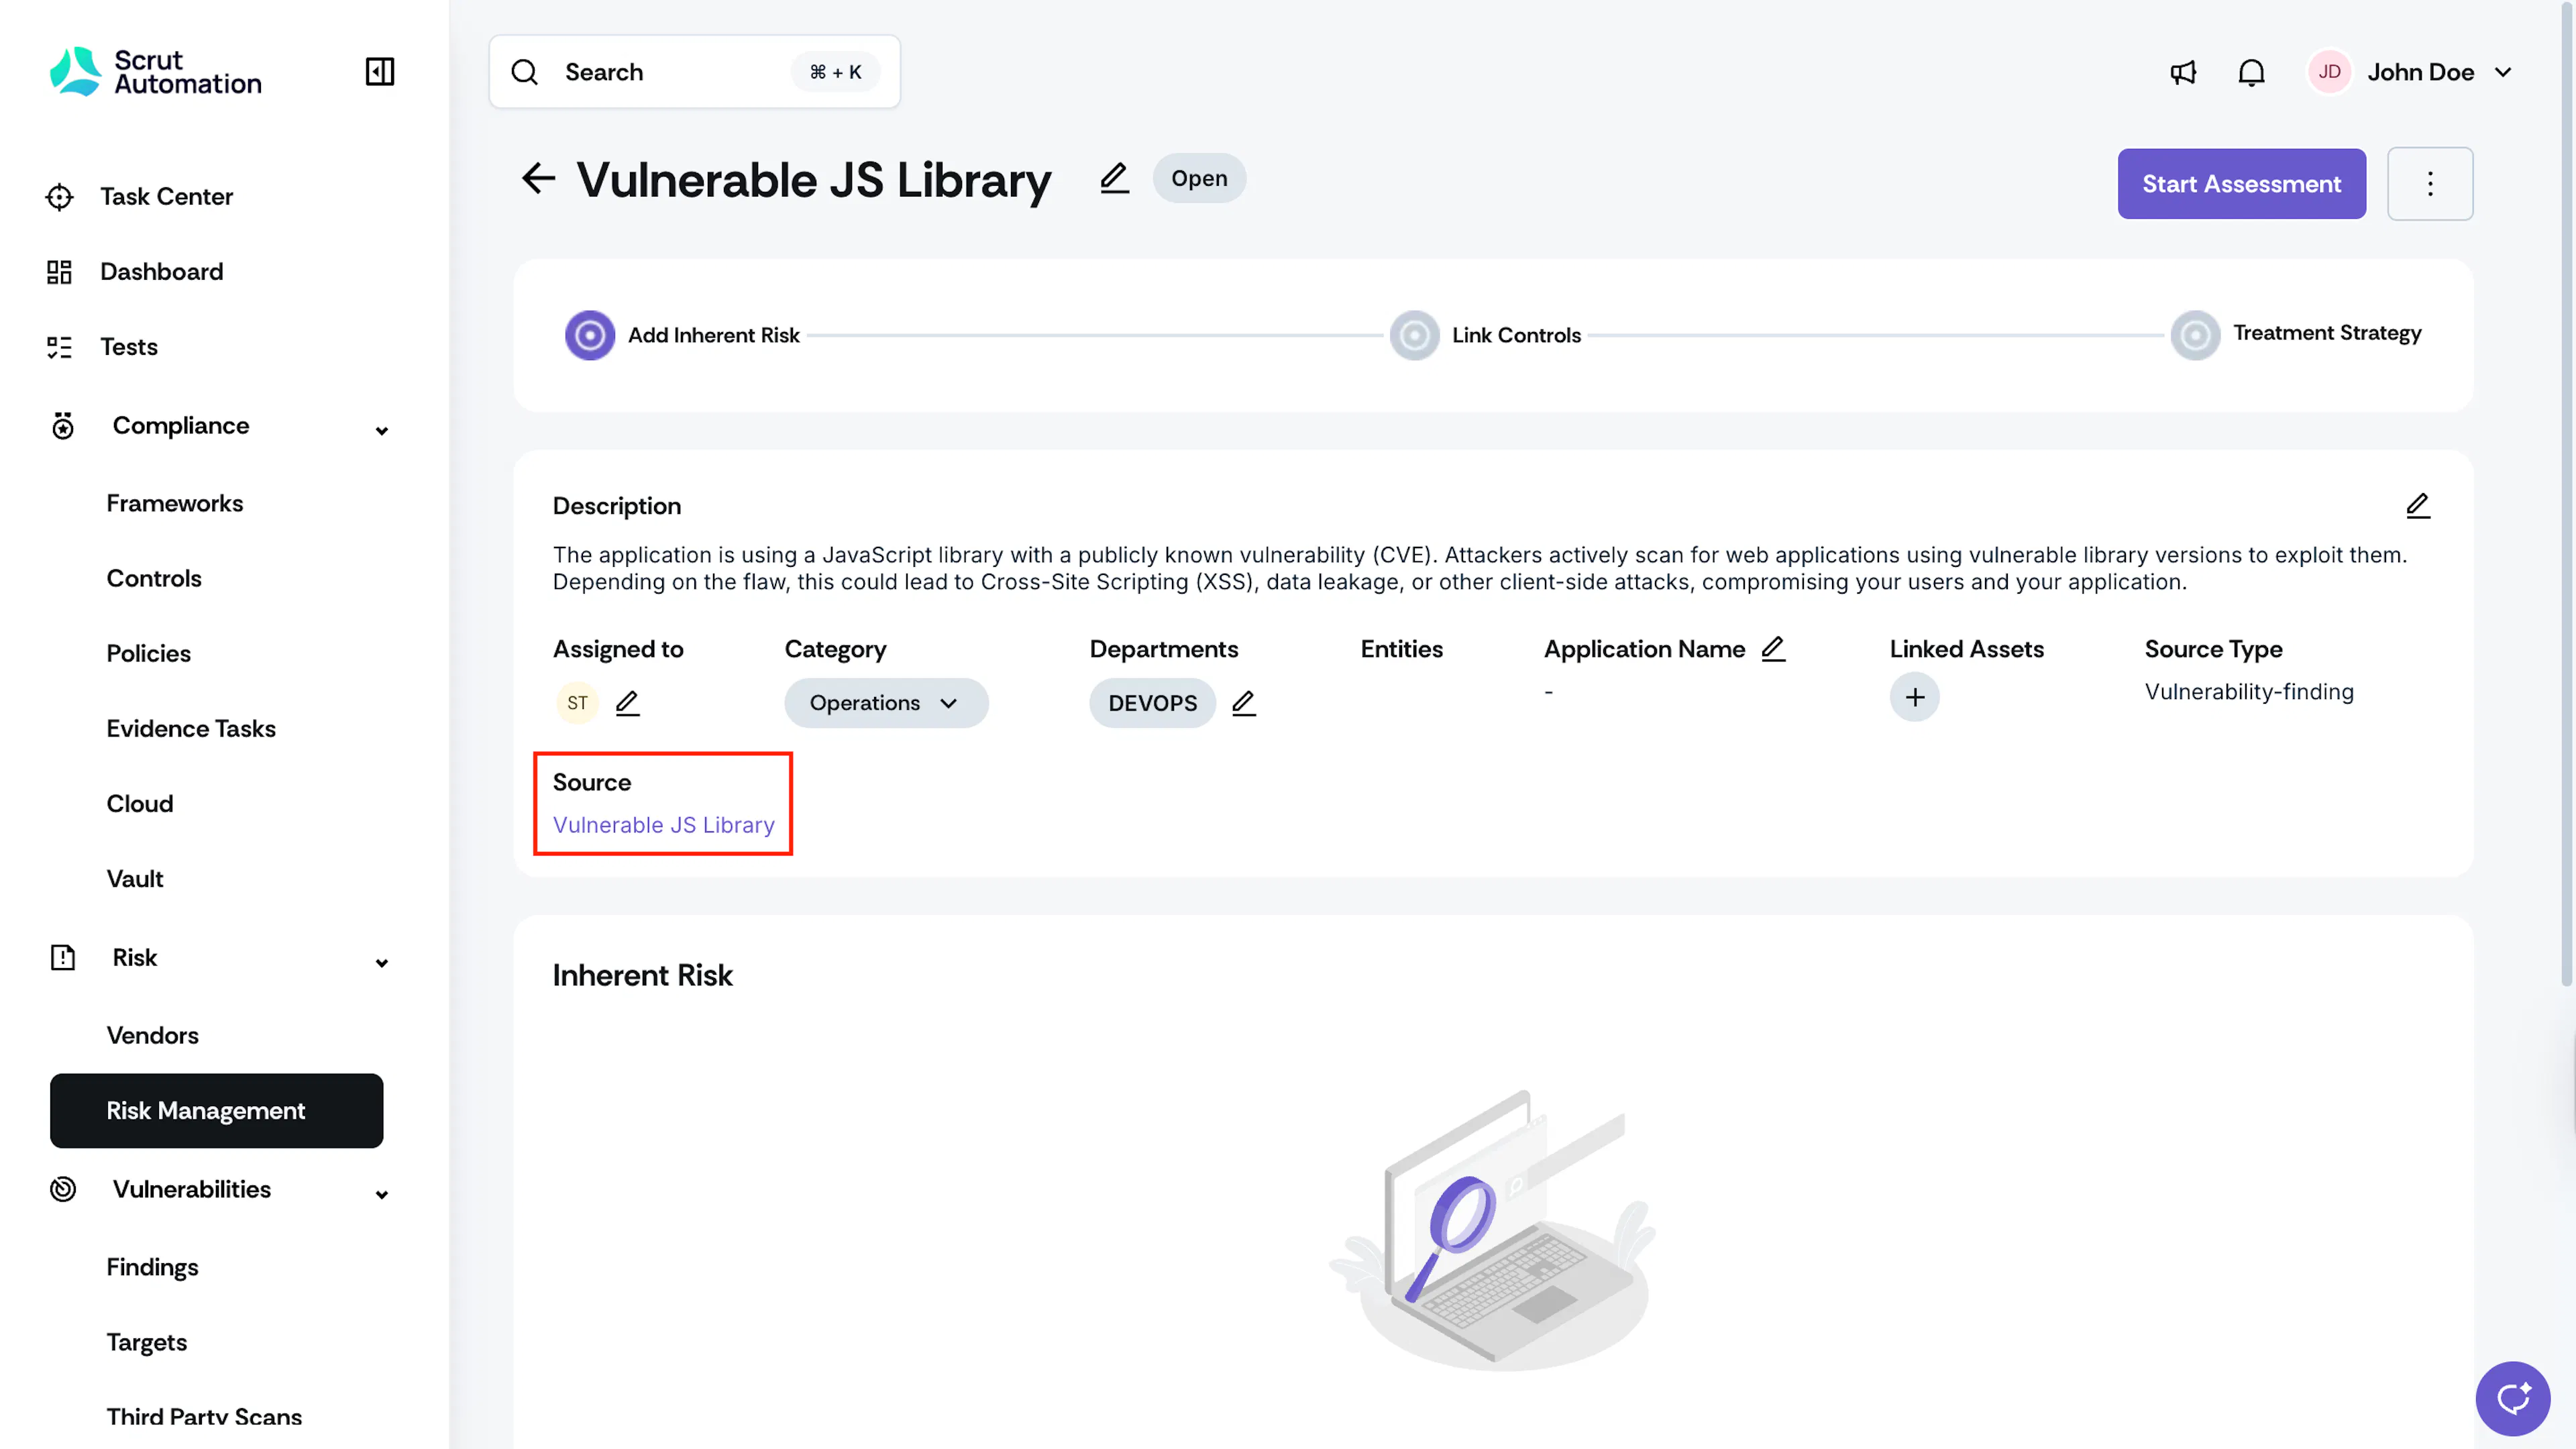
- Clicking the Source field for the risk takes you to the findings details page.
Step 5: Access and Use Your Audit-Ready Report
After every Full Pentest, Scrut generates two reports and uploads them to your Target Detail page. You can share these reports with your auditors, enterprise customers, and other stakeholders.
Preliminary Report
Generated once all findings (automated, AI agent, and manual pentest findings) are published. This is a point-in-time snapshot of the assessment. Scrut delivers this automatically, regardless of your remediation progress. Use the Preliminary Report to unblock compliance timelines, share with prospects during security reviews, or provide interim evidence to auditors while remediation is in progress.
Final Report
Generated after you complete remediation and request it. The Final Report captures the full remediation outcome and is your primary compliance deliverable.
To Access Scan Reports
- Navigate to Vulnerabilities → Targets.
- Click the target to open the Target Detail page.
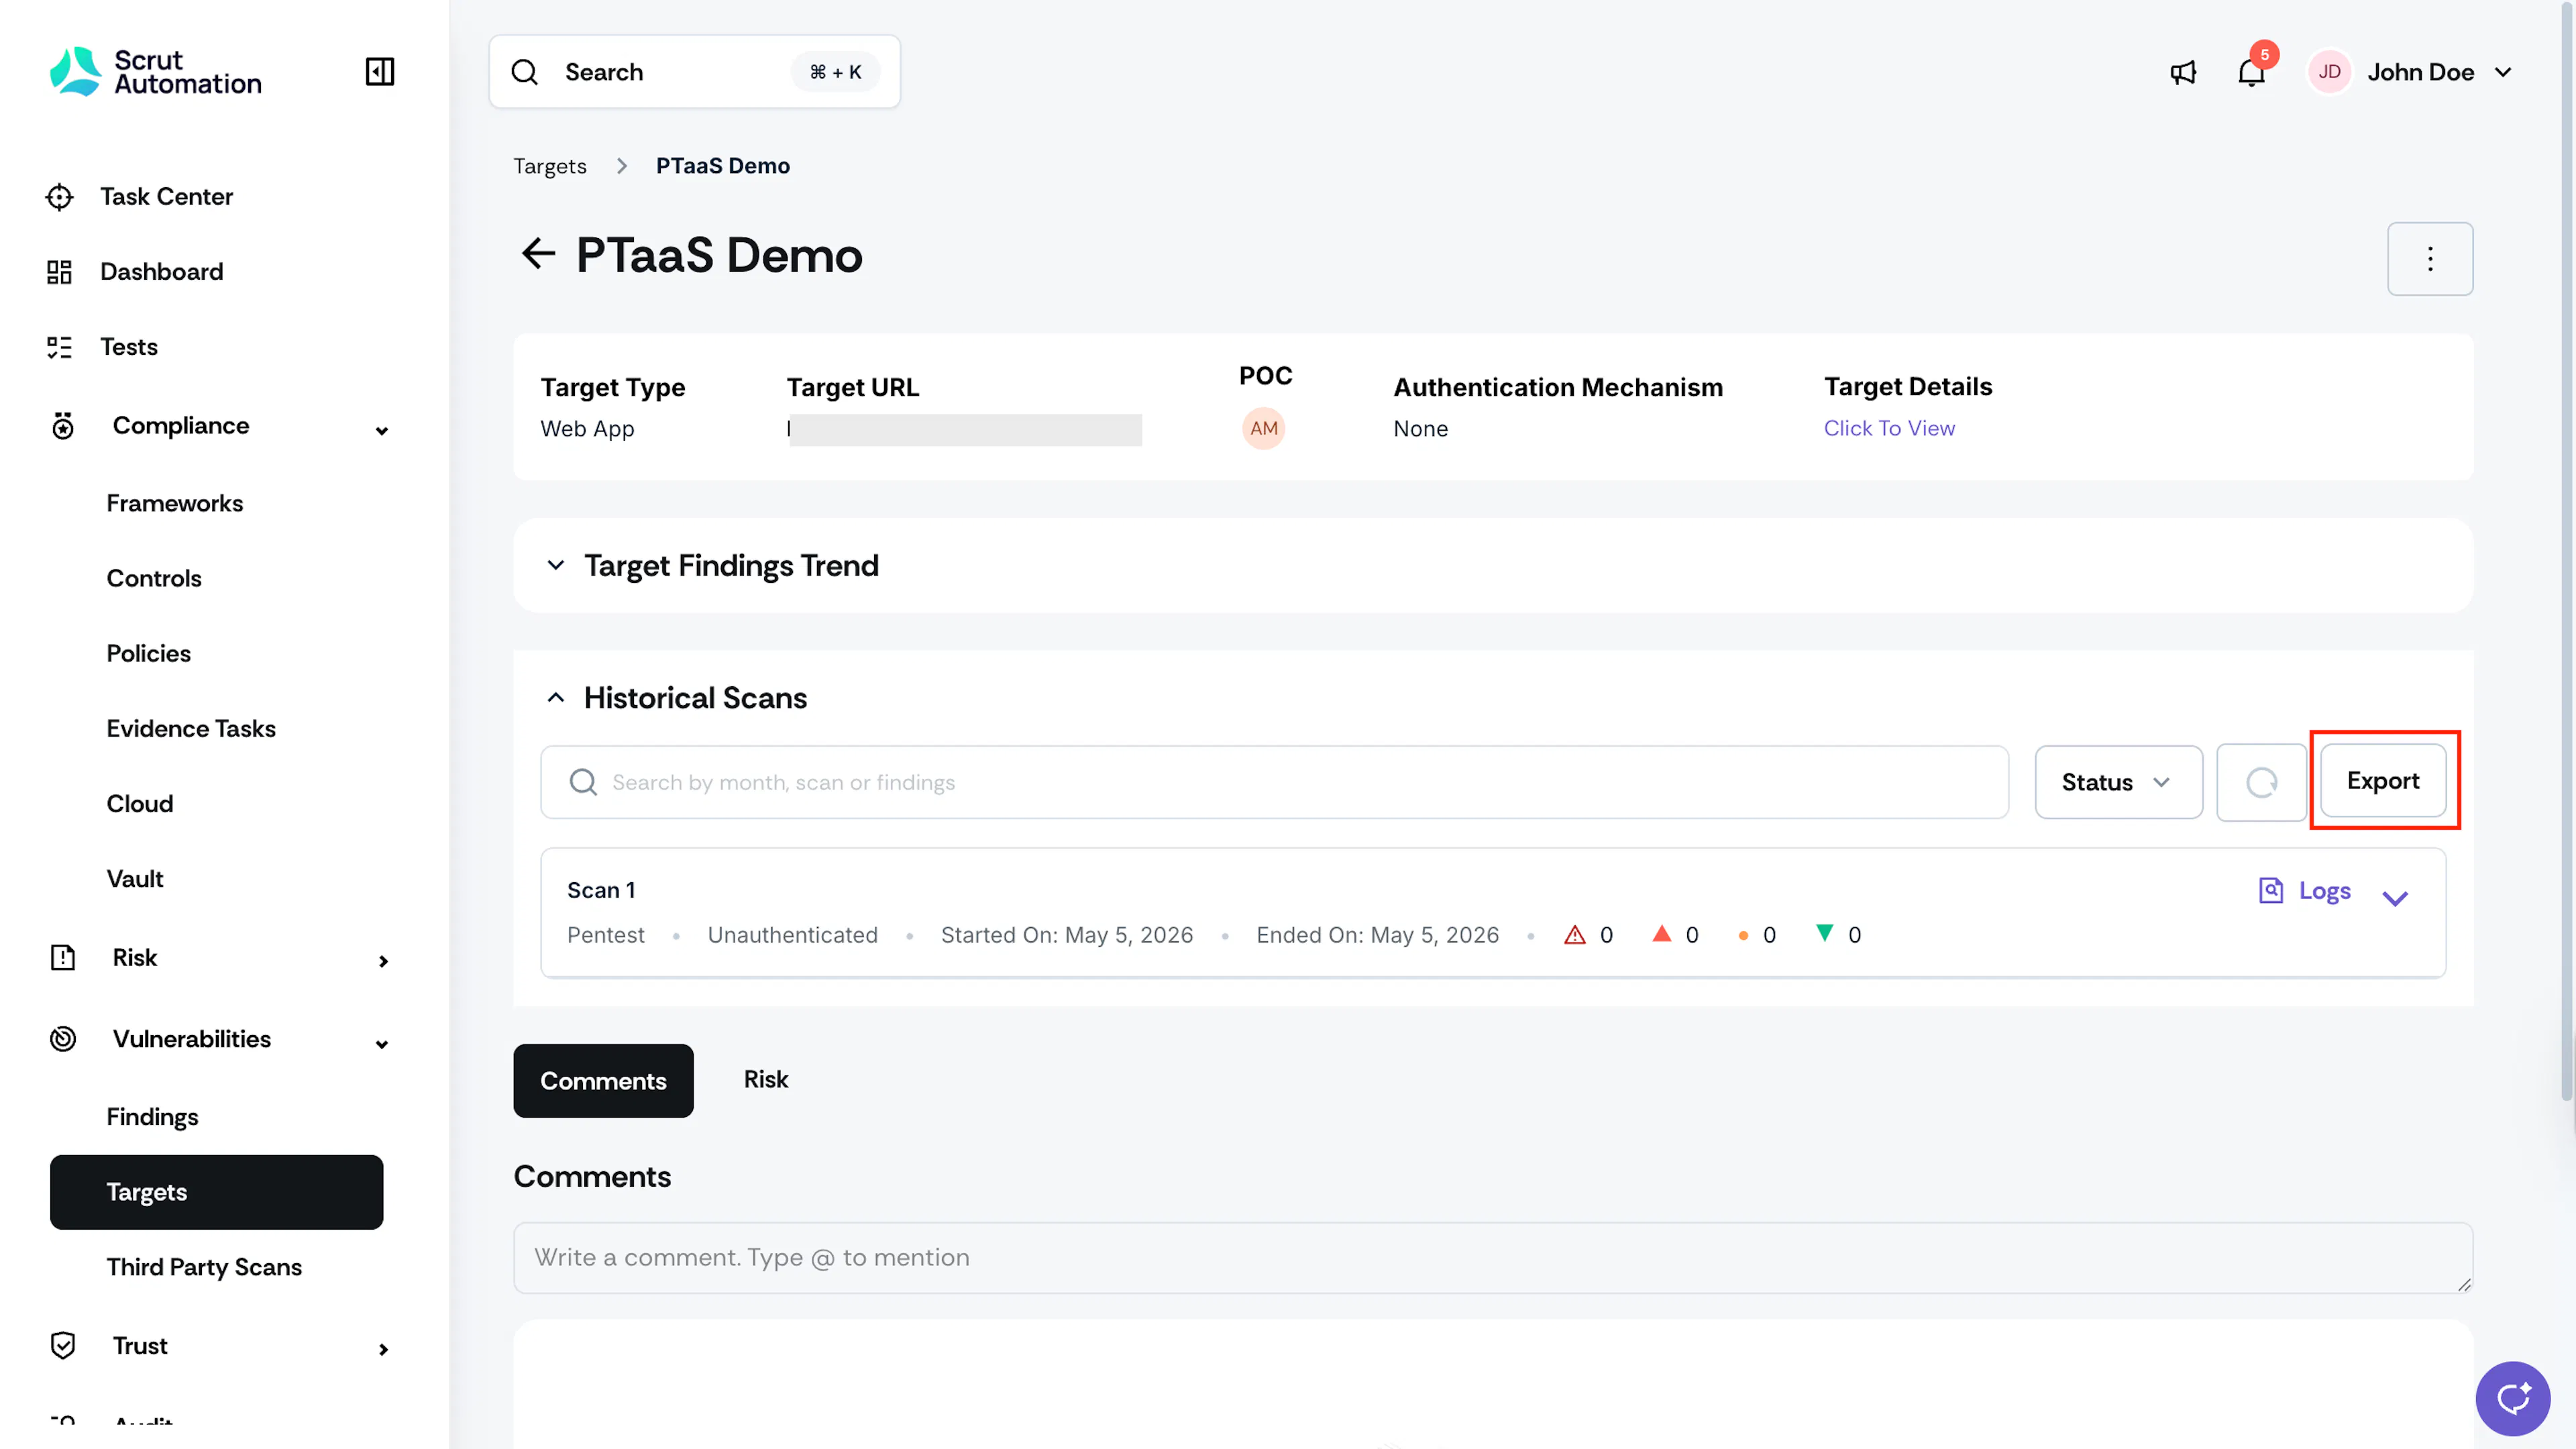
- Scroll to the Historical Scans and click Export.
To Request Your Final Report
- Confirm that your findings are in a Closed, Ignored, or Risk Accepted state.
- Contact your CSM to request the Final Report. Scrut delivers the Final Report within 3 business days.
The final report includes:
- Executive summary
- Scope and methodology
- Findings summary by severity and status
- Detailed findings with evidence and expert advisory
- Remediation status for each finding
- Risk posture assessment
- Testing timeline
Note: At any point in time, your most recent Full Pentest report is at most six months old (with the default two-pentest-per-year cadence). This satisfies the evidence requirements for most compliance frameworks, including SOC 2, ISO 27001, and PCI DSS.