

Contact Scrut Support
Scrut offers three channels to raise a support request. All channels route into the same support inbox, so you can choose whichever works best for your situation.
Access our help articles directly from our Help Center
Reach out to our support team via email at support@scrut.io
Track your tickets at the Scrut support site
Method 1: Via the Help Widget in Scrut
The Help Widget is the fastest way to get help. When you raise a ticket while logged in, your account and workspace details are captured automatically.
-
Log in to app.scrut.io.
-
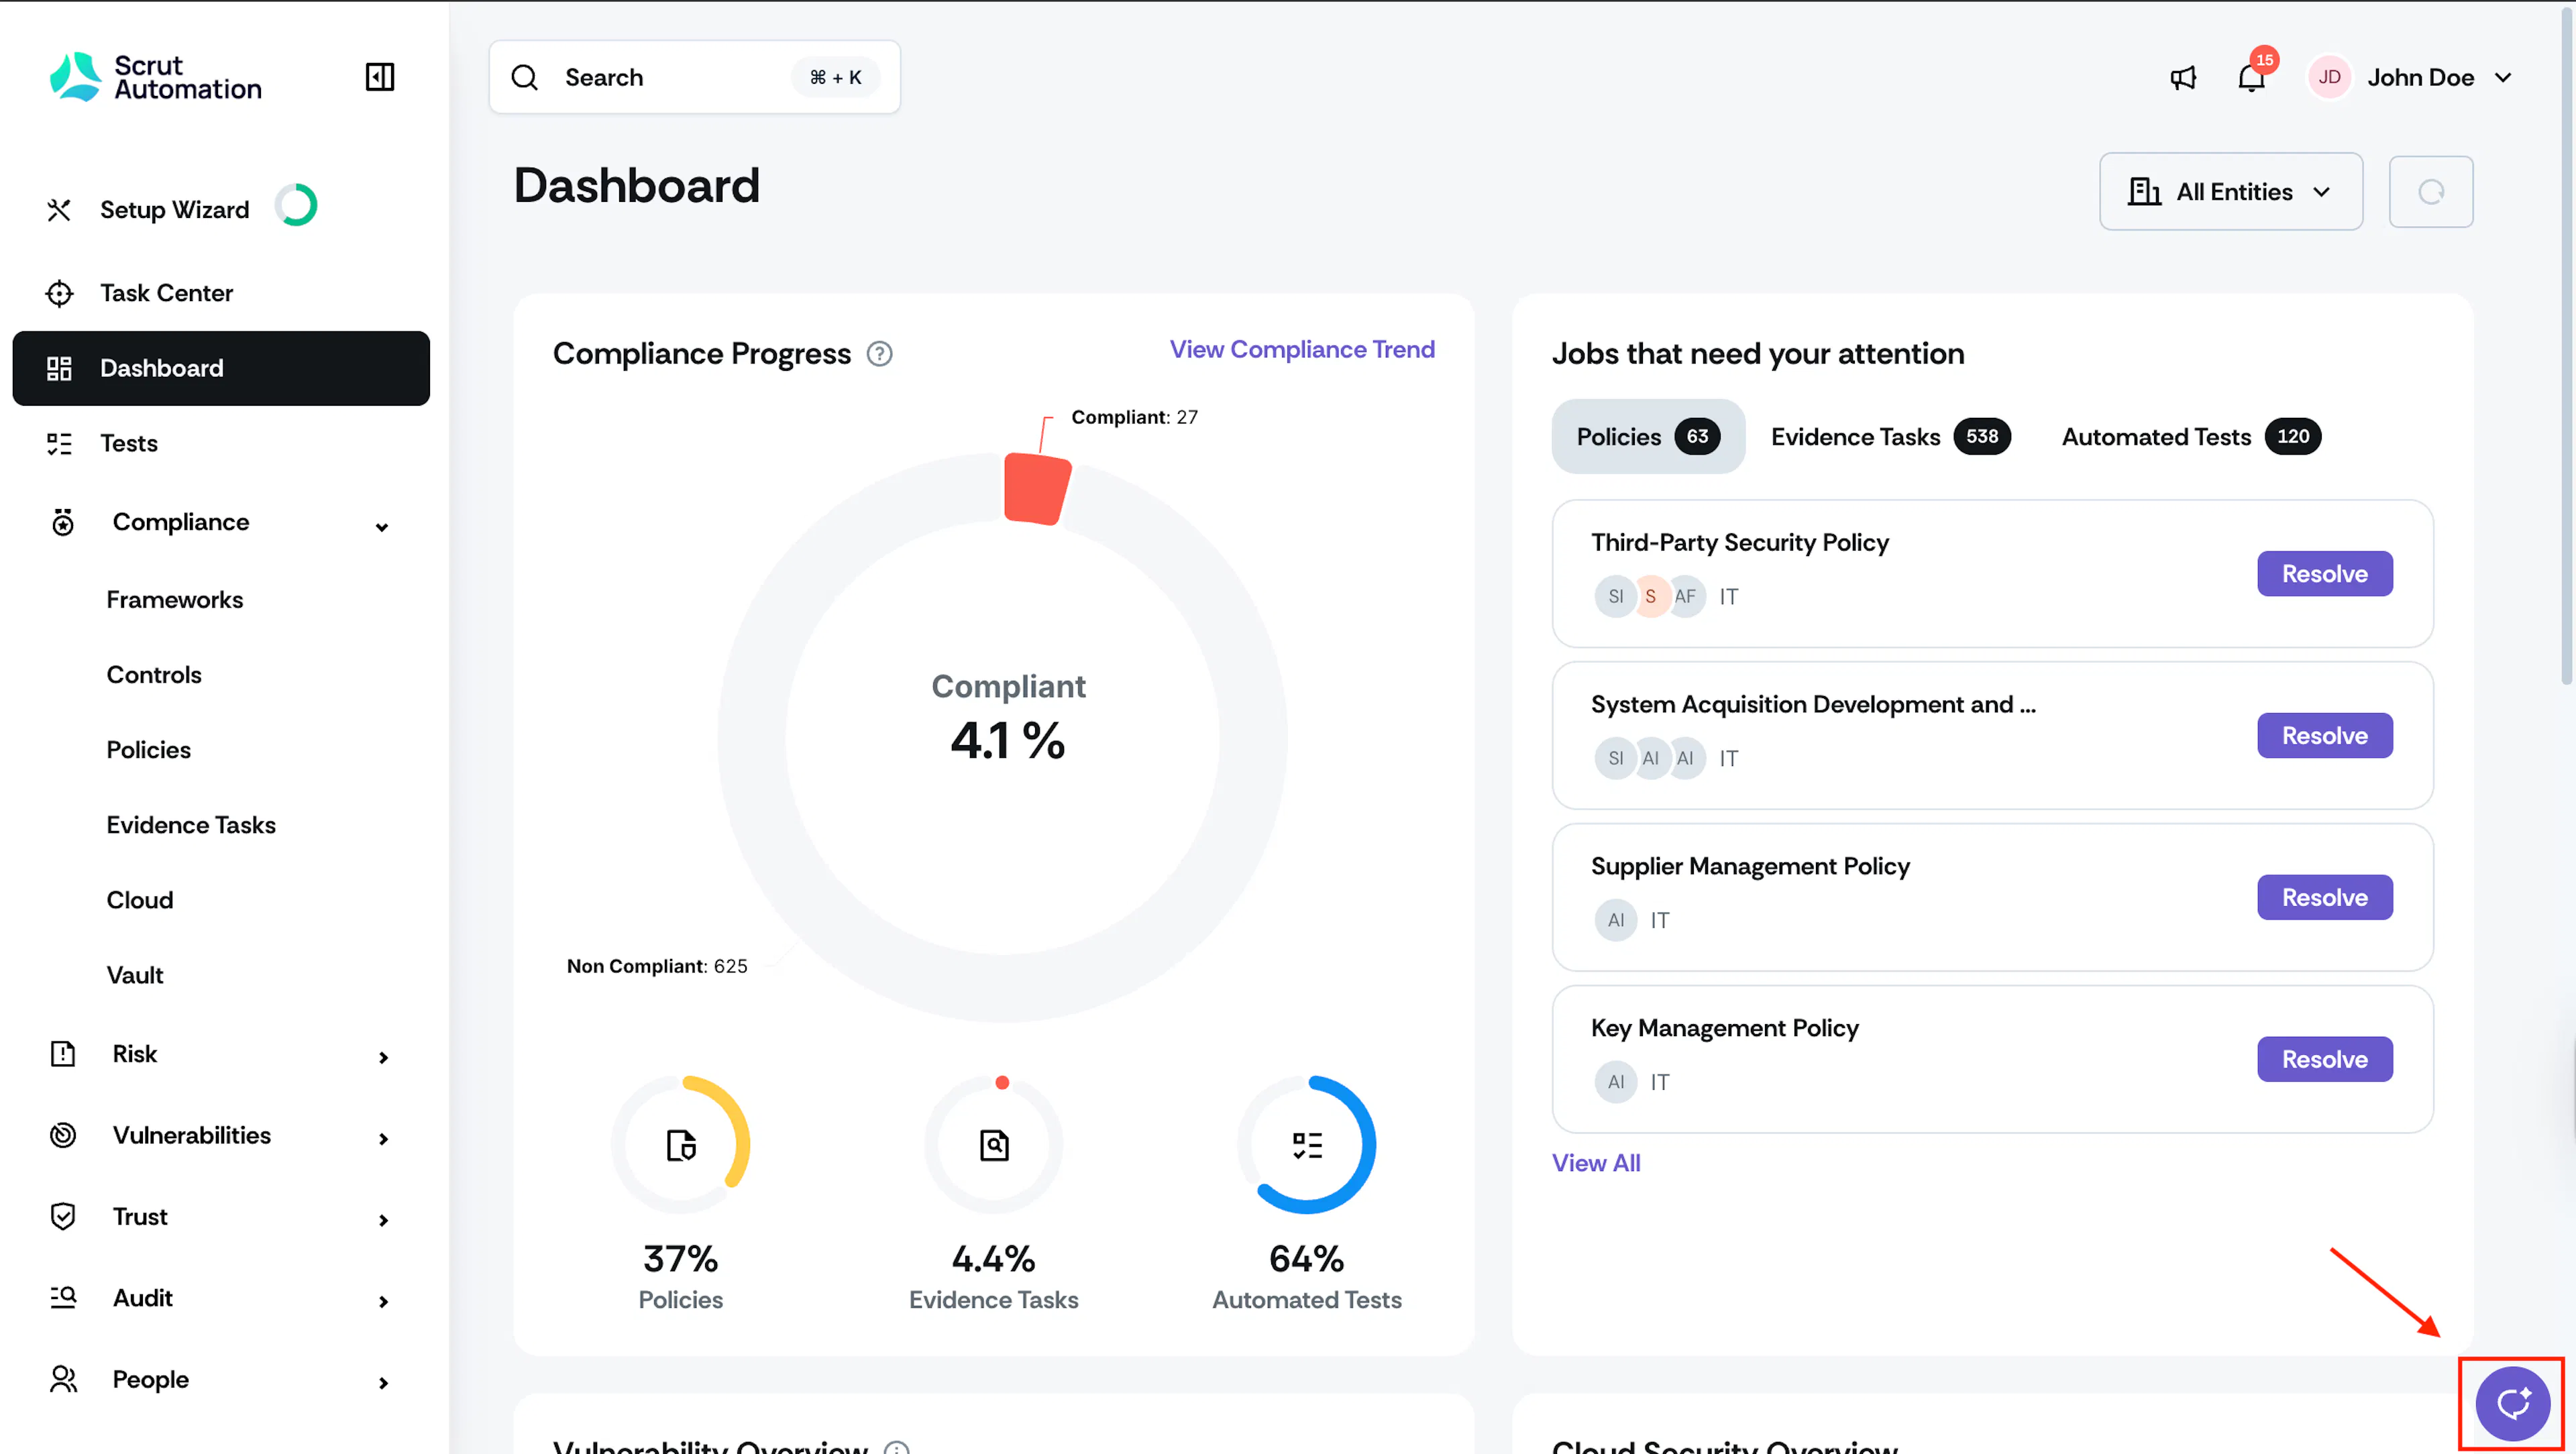
Click the circular help icon at the bottom-right corner of the screen to open the Scrut Teammates panel.
-
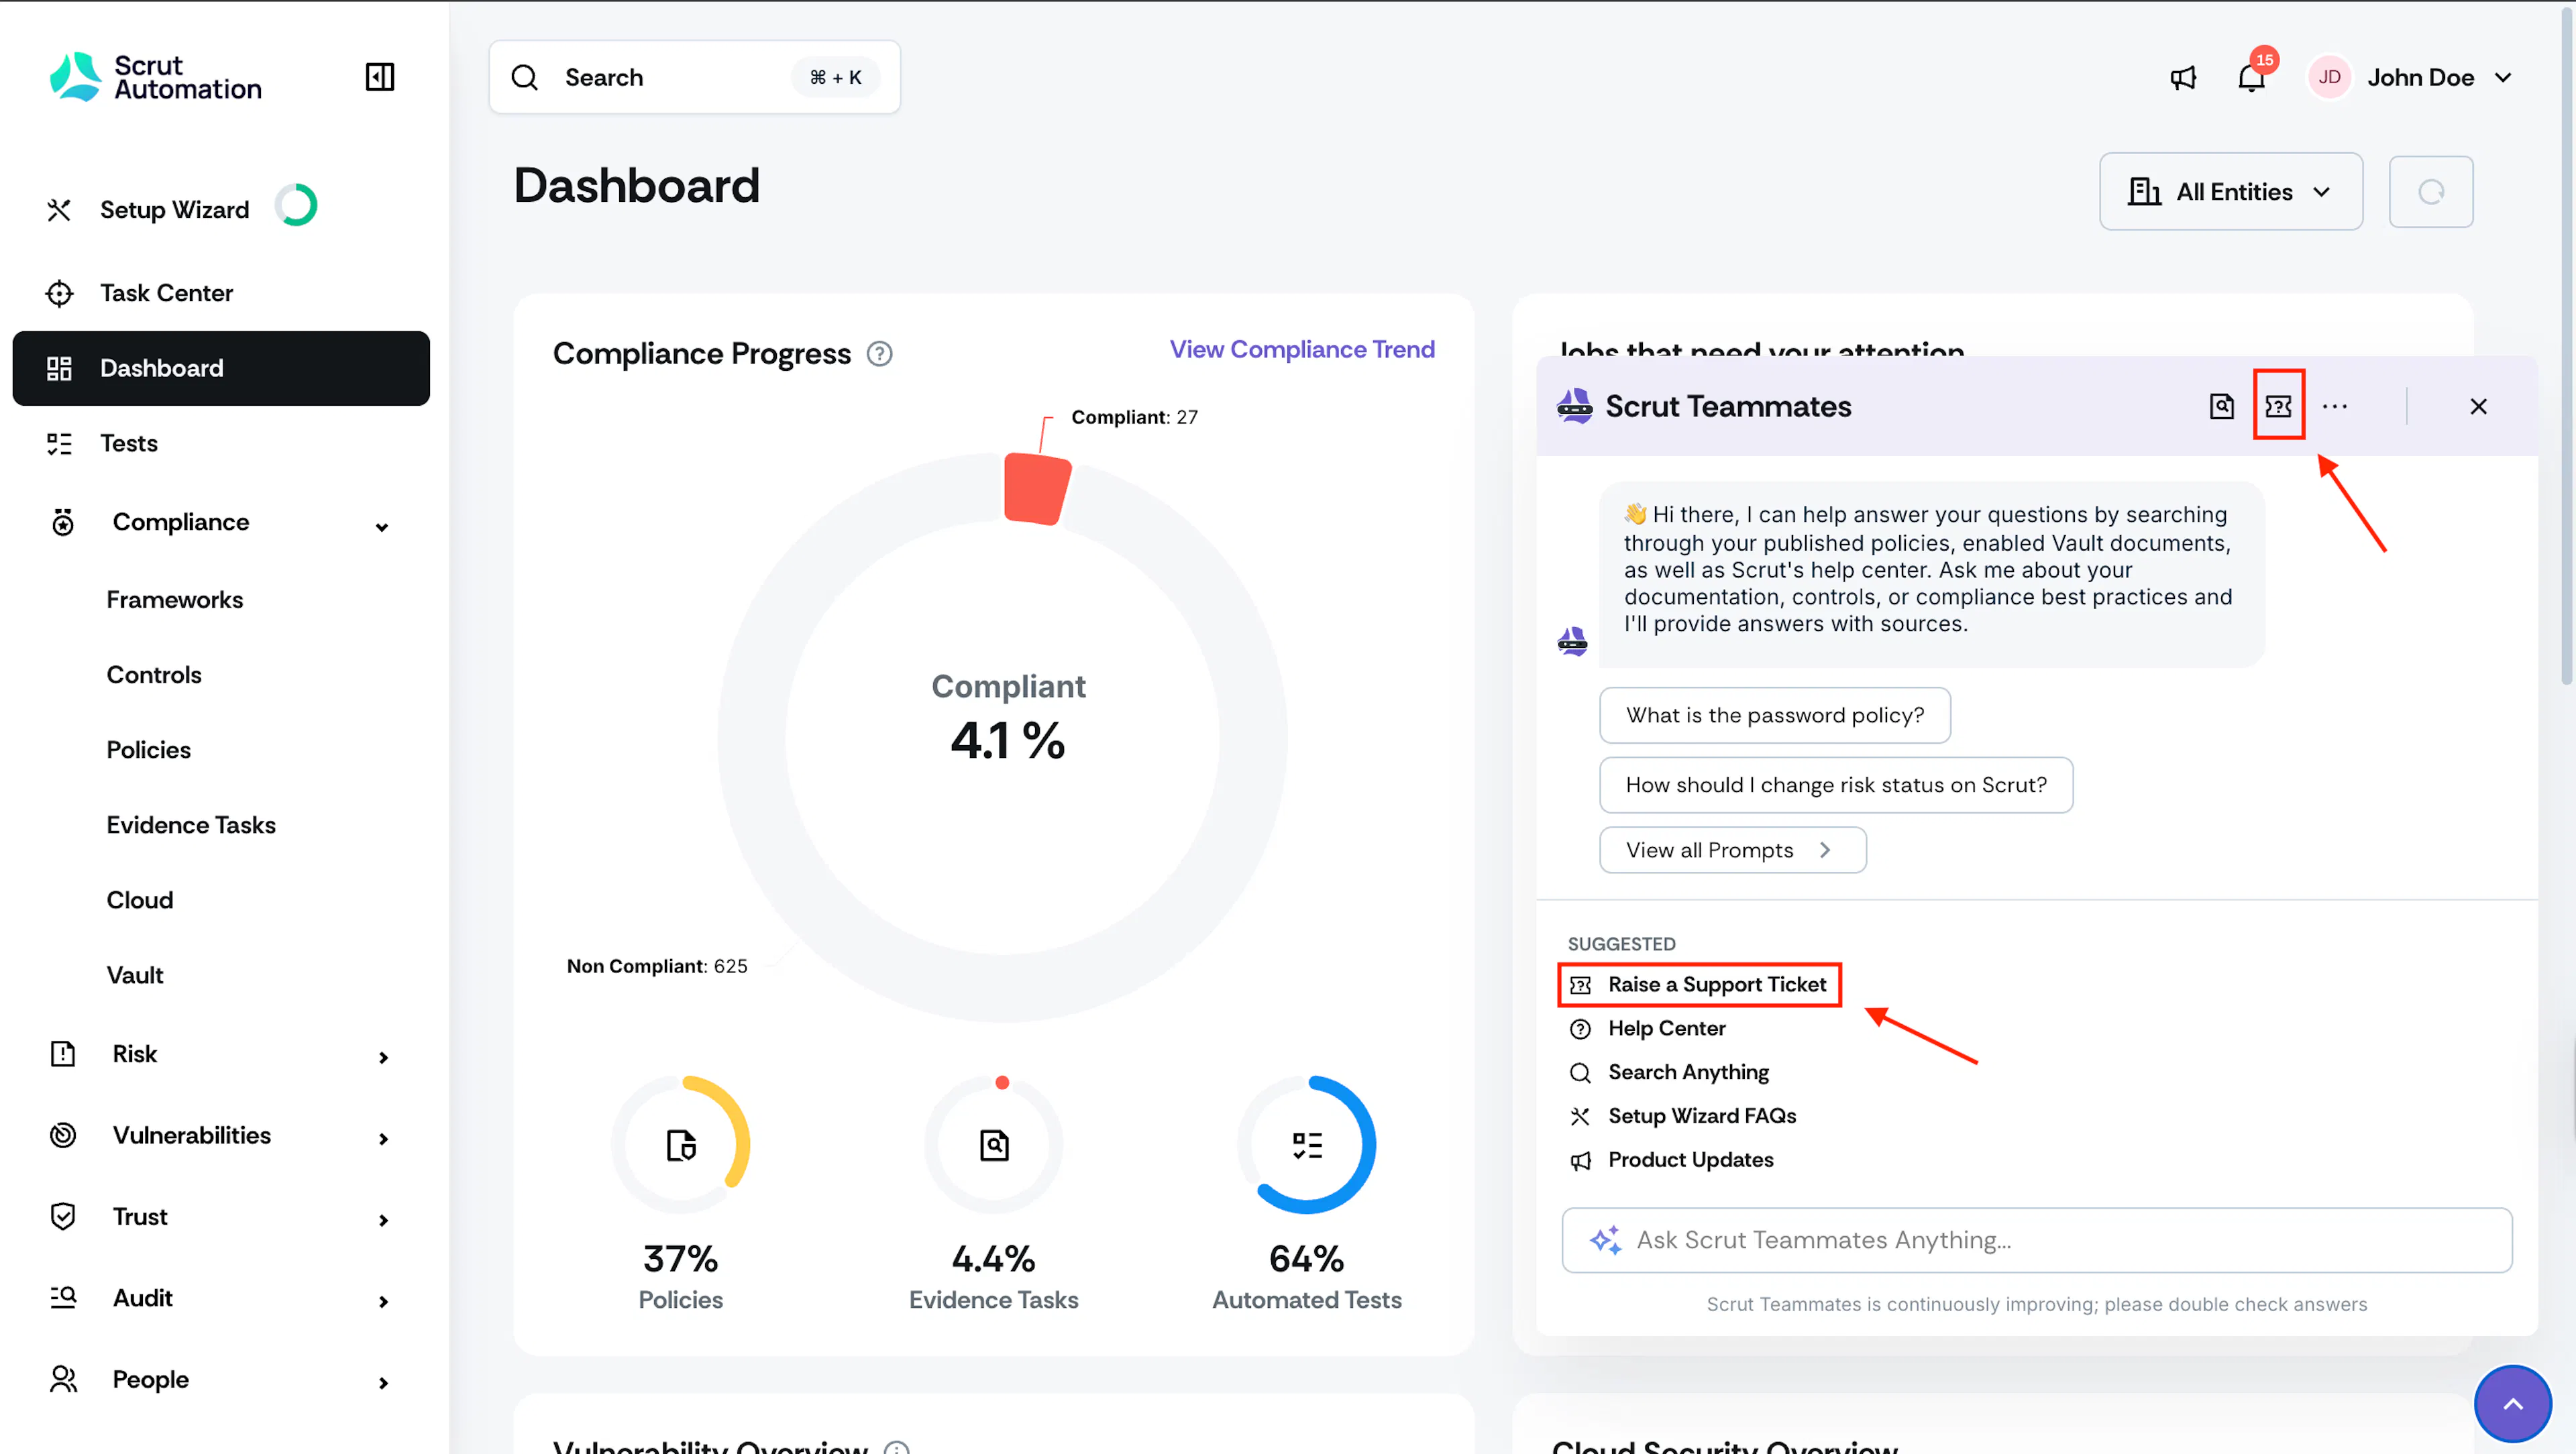
Select Raise a Support Ticket. This option appears under the suggested actions list or via the menu icon within the panel.
-
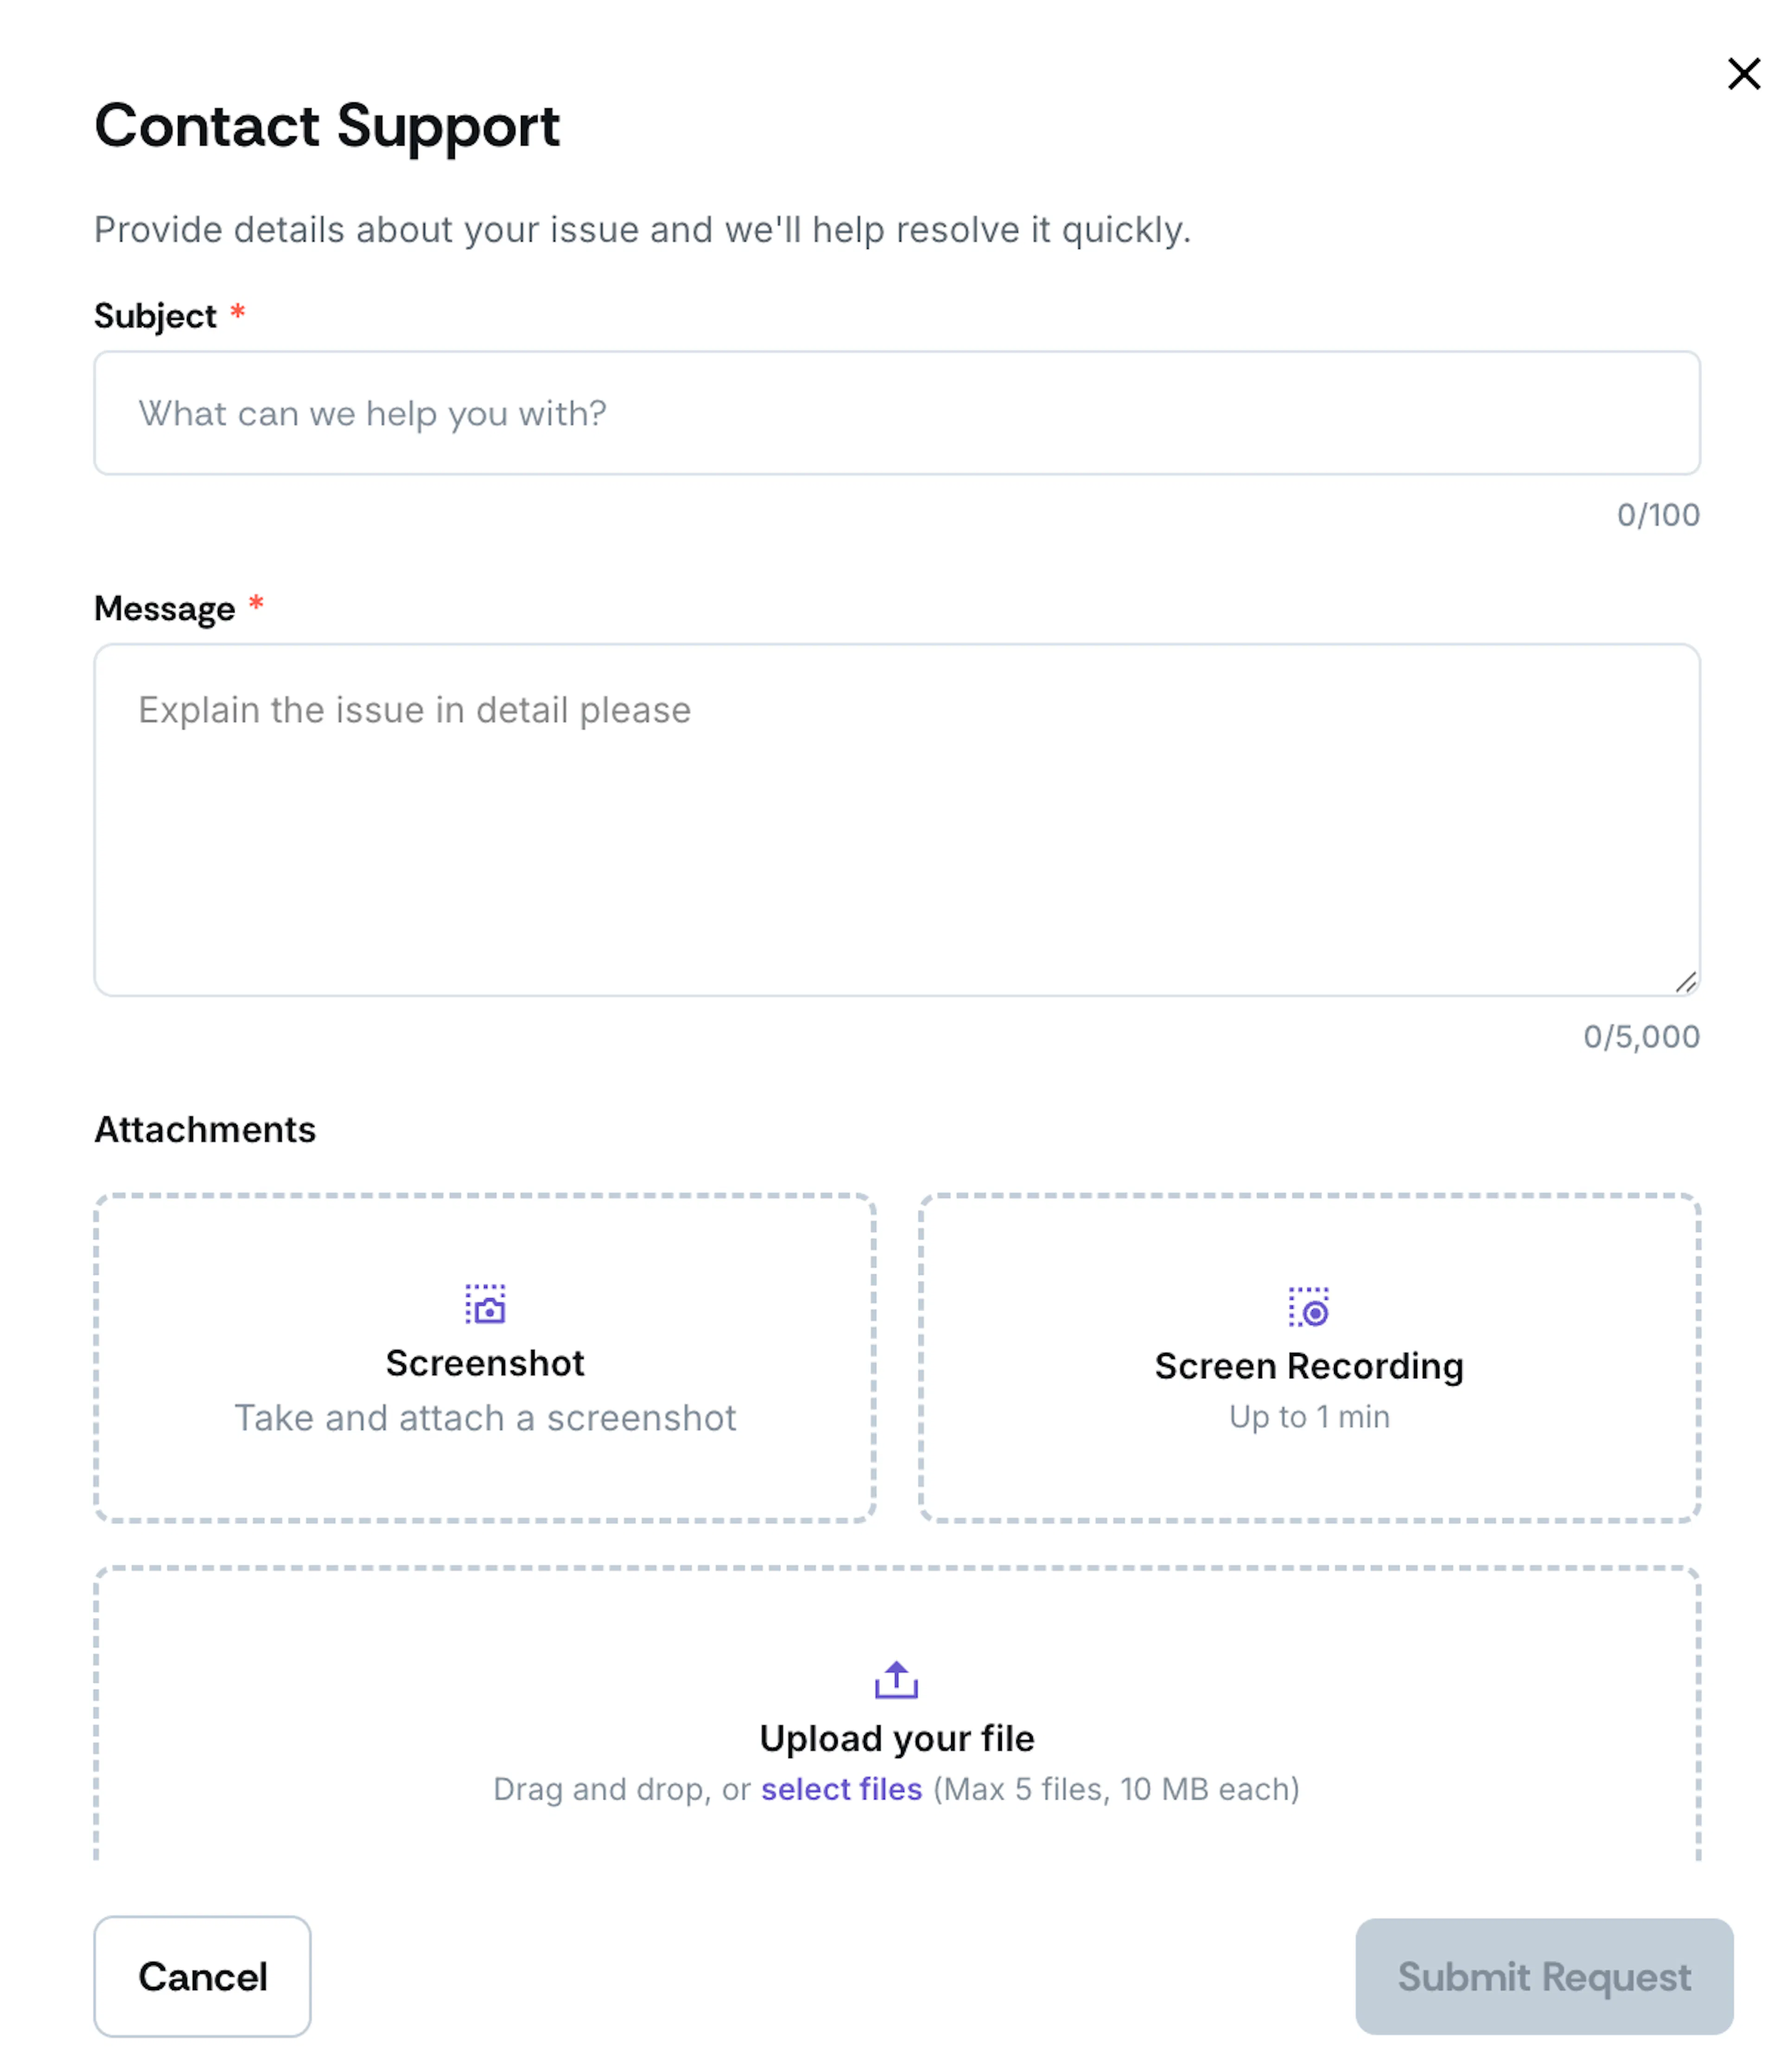
Fill in the ticket form:
- Subject: State the issue clearly in one sentence. Avoid vague subjects like "Issue with Scrut."
- Message: Describe the issue, the expected behavior, and what happened instead. Include steps to reproduce.
- Attachments: Attach screenshots, screen recordings, HAR files, exported logs, or other relevant files.
-
Click Submit Request.
Heads Up!
If you raise a ticket mid-conversation with Scrut Teammates, you'll be prompted to attach your chat history. Click Yes, Attach Chat to share the full transcript with the support team. This gives them complete context without you having to re-describe the issue.
Your ticket is created immediately, and a confirmation is displayed.
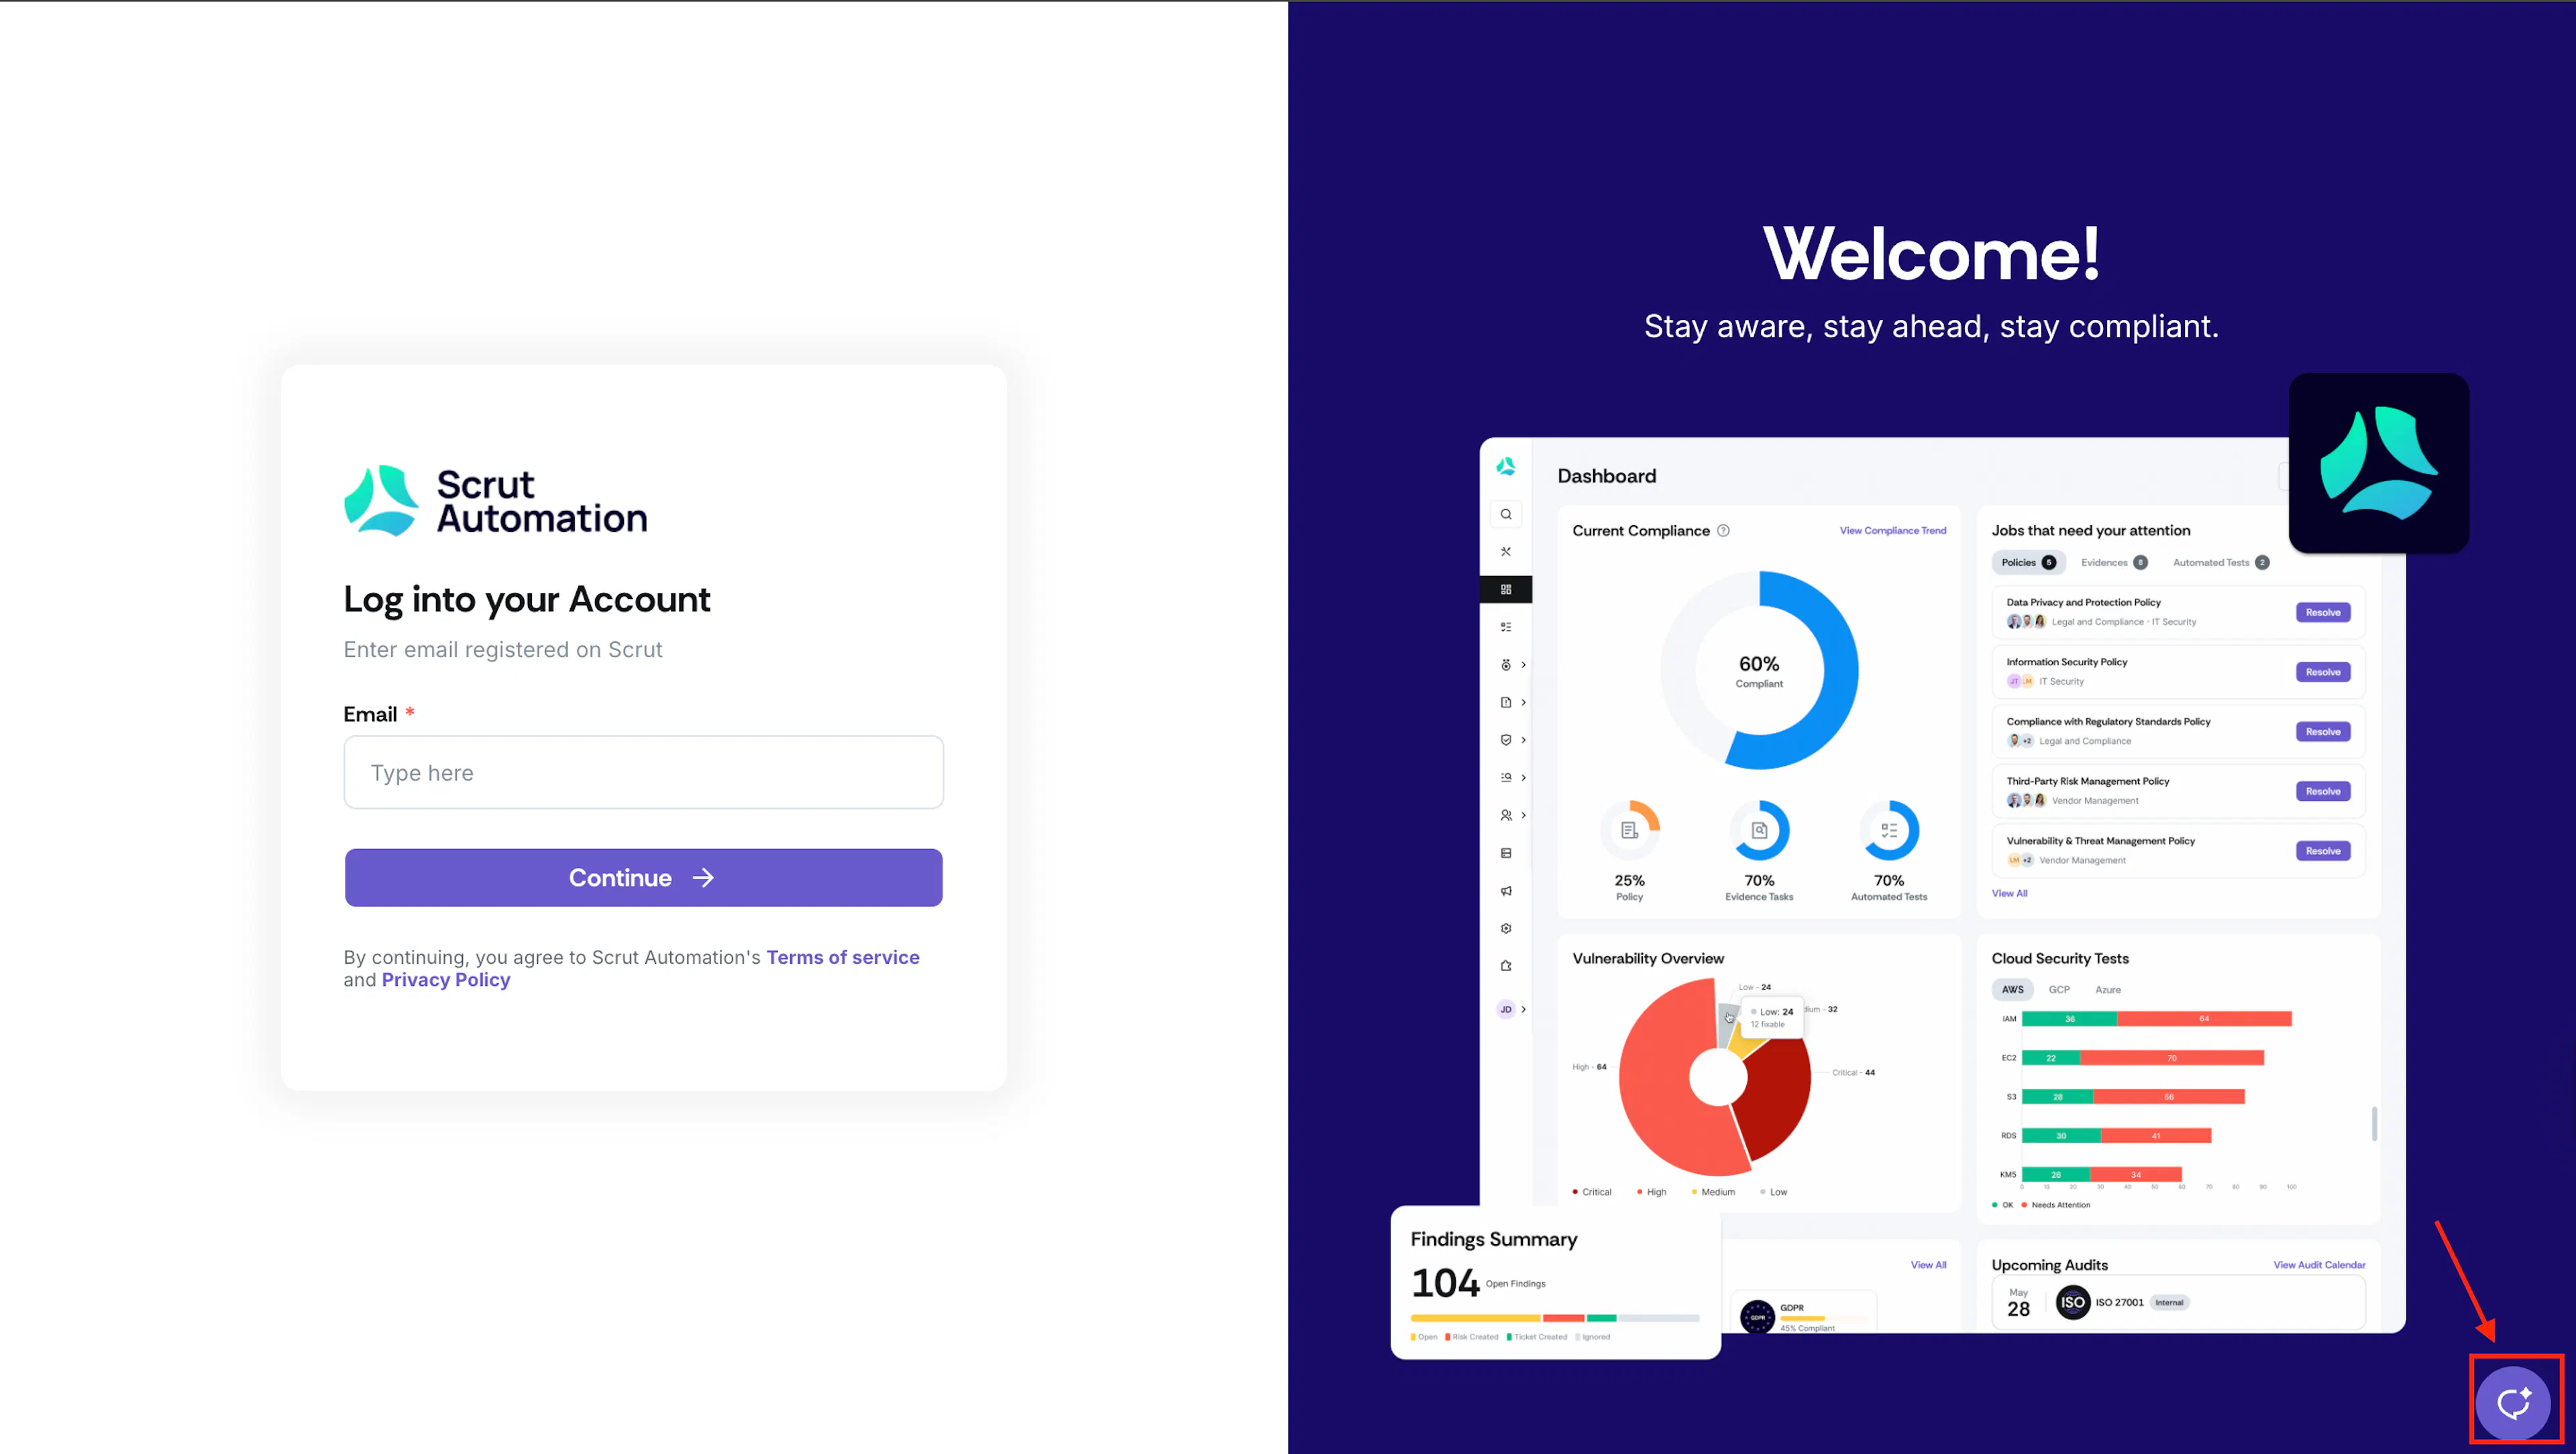
Note: The Raise a Support Ticket option is also available on the app.scrut.io login page. If you access it before signing in, your name and email will not be pre-filled. Enter them manually in the form.
Method 2: Via Email
Email is available at all times and does not require you to be logged in to the platform. Use it for non-urgent requests or when you cannot access the platform.
-
Compose a new email to support@scrut.io.
-
Set the subject using this format:
- [Module] - Brief description of the issue.
- Example: [Integrations] - AWS connector failing to sync after credential rotation.
-
Include the following in the email body:
- Your company name and Scrut workspace URL.
- A detailed description of the issue and steps to reproduce.
- The exact error message or error code, if one appears.
-
Attach screenshots, screen recordings, HAR files, exported logs, or other relevant files.
-
Send mail.
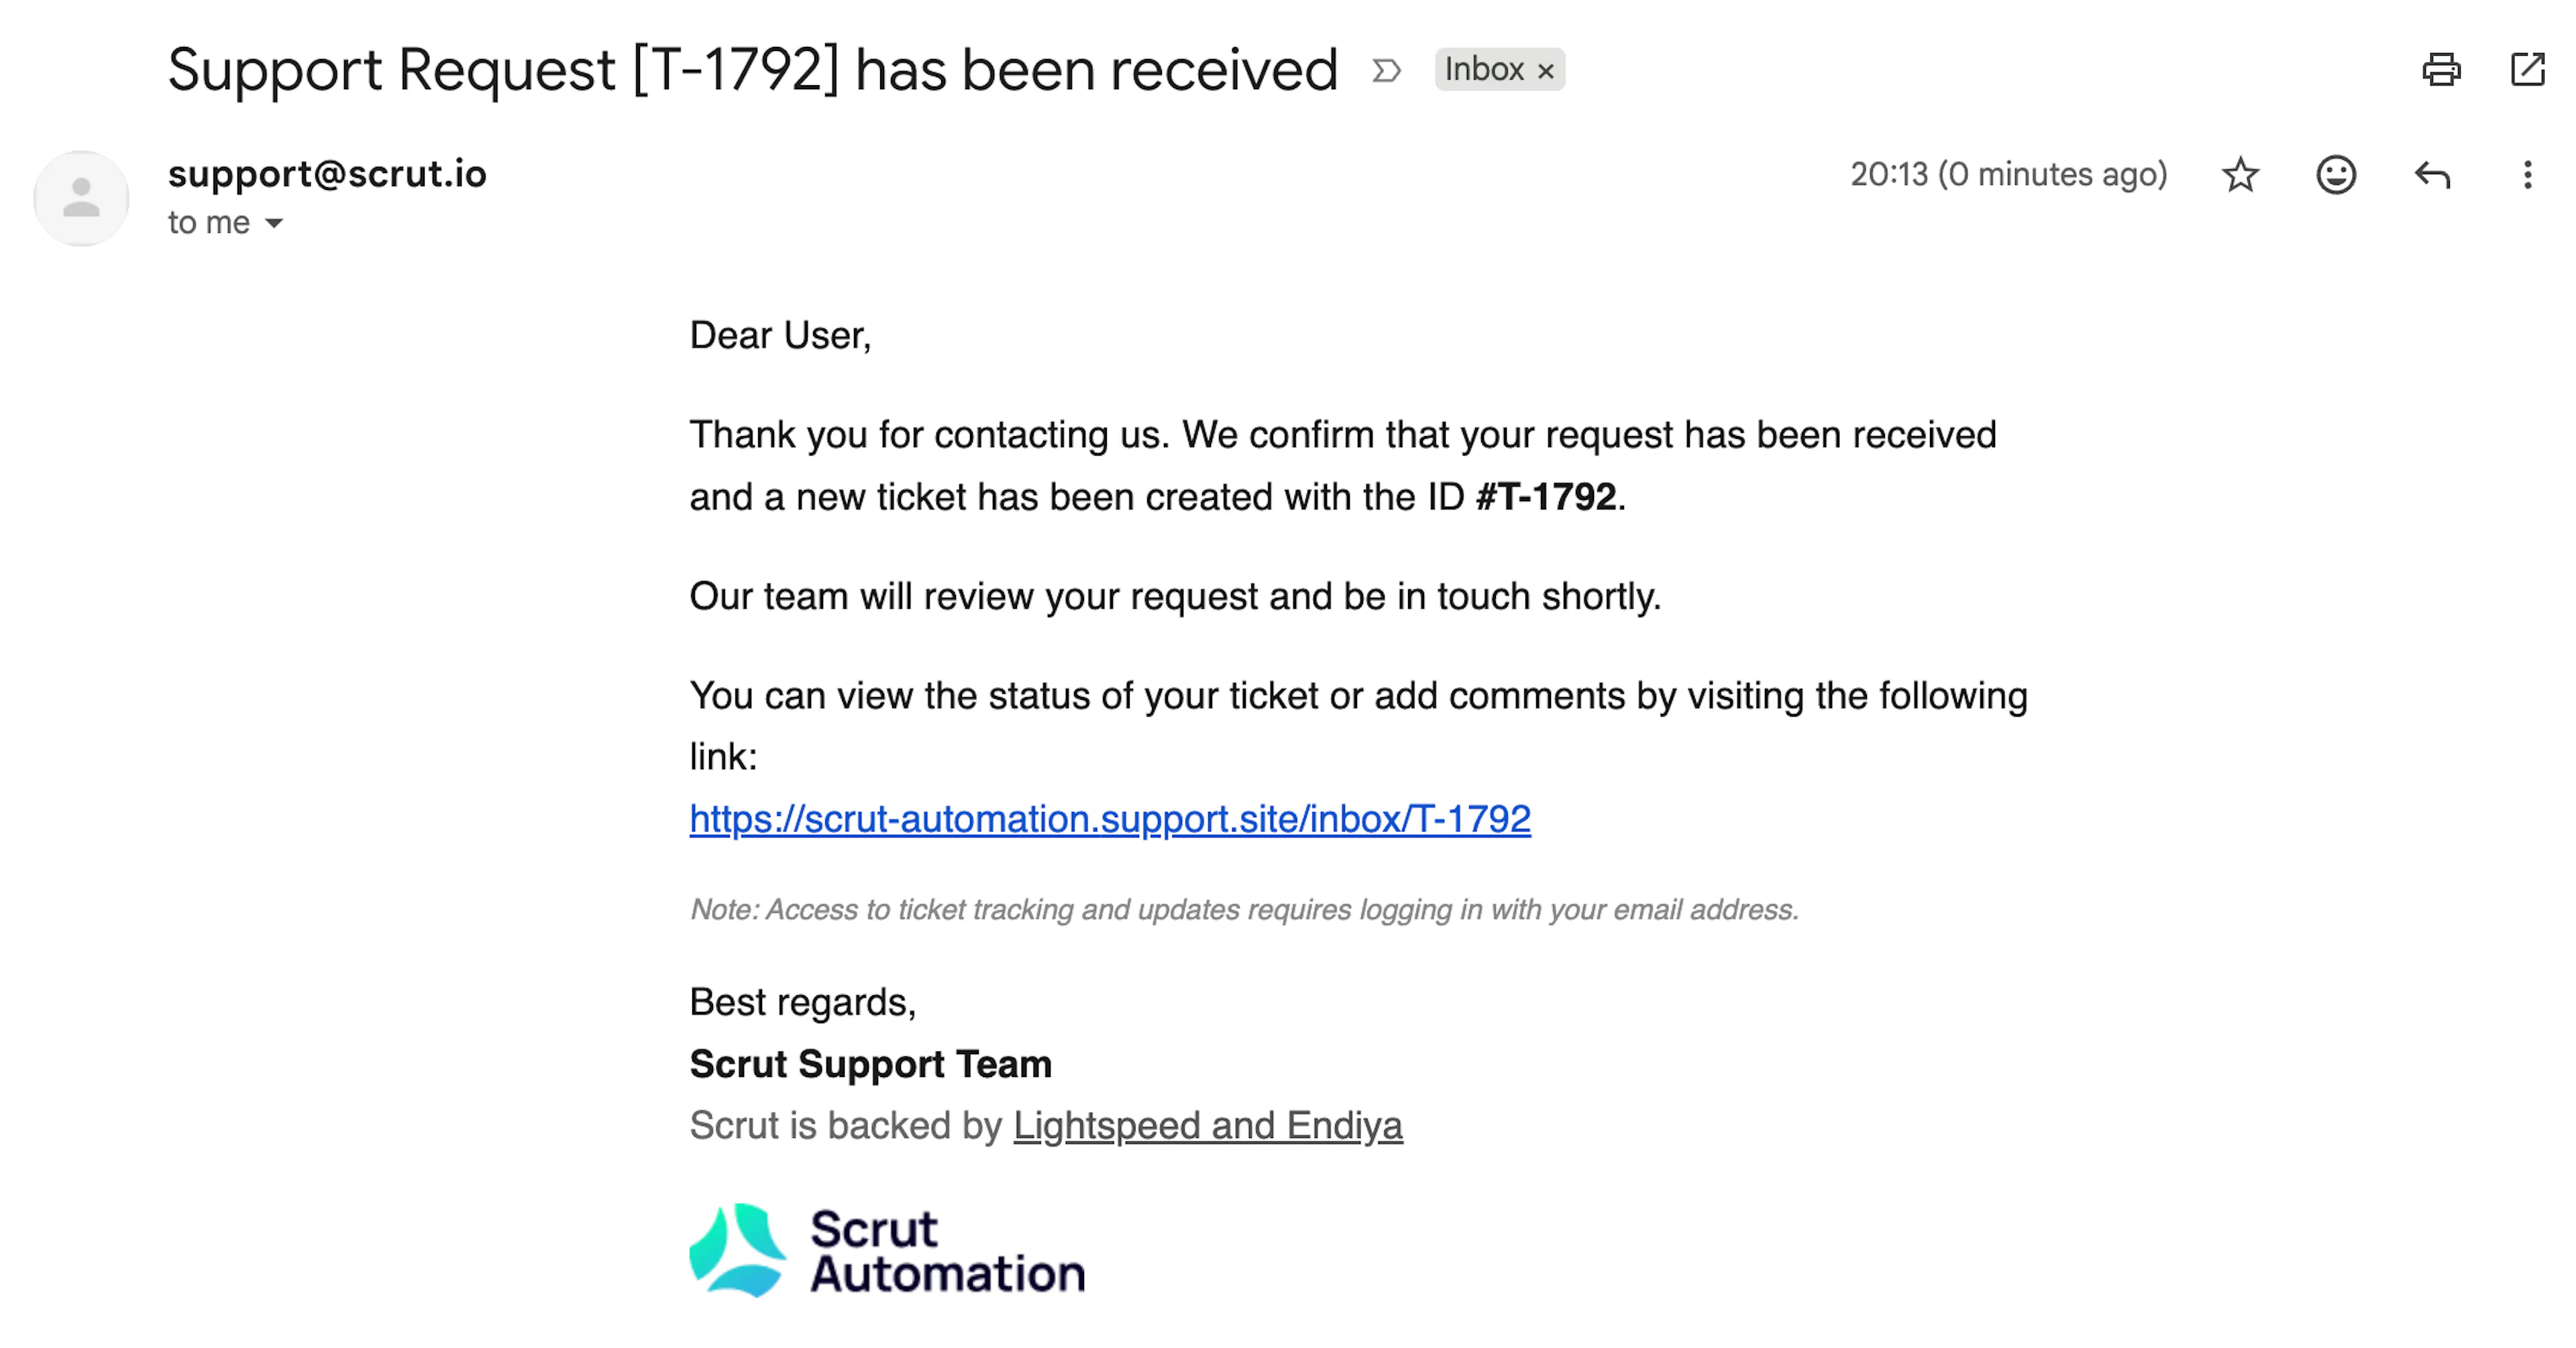
Your ticket is created immediately, and a confirmation is sent to your inbox.
Method 3: Via Slack
Important:
You need a dedicated Scrut support channel for your organization to use this method. Contact your CSM to get one enabled for your organization
Once your organization has a dedicated support channel for Scrut on Slack, you can submit support requests directly there.
- Post your request as a new top-level message in the channel. Include a clear description of the issue, the affected module, and any relevant attachments.
- A Scrut support agent or CSM in the channel will react to your message with the memo emoji (📝). This logs the message as a tracked ticket.
- All replies within that Slack thread are synced with the Scrut support team. Agent responses appear directly in your Slack thread.
Pro Tip!
To follow-up on an existing issue, always reply within the original Slack thread. A new top-level message creates a separate, new ticket.
Track & Manage Your Tickets
Once you raise a support ticket, you'll receive an email with your ticket ID. Click the link to view ticket status or to add additional details.
View Your Tickets
Note:
Your inbox shows all tickets from your organization, regardless of the channel used to raise them.
All tickets raised from your organization are visible in one place at the Scrut Support Site (https://scrut-automation.support.site/). You can track status, reply to the support team, add additional details, and view resolved tickets.
-
Go to the Scrut Support Site and click Inbox in the top navigation bar.
-
Enter your work email address when prompted.
-
Check your inbox for a 6-digit verification code from Scrut and enter it to sign in. No password is required.
-
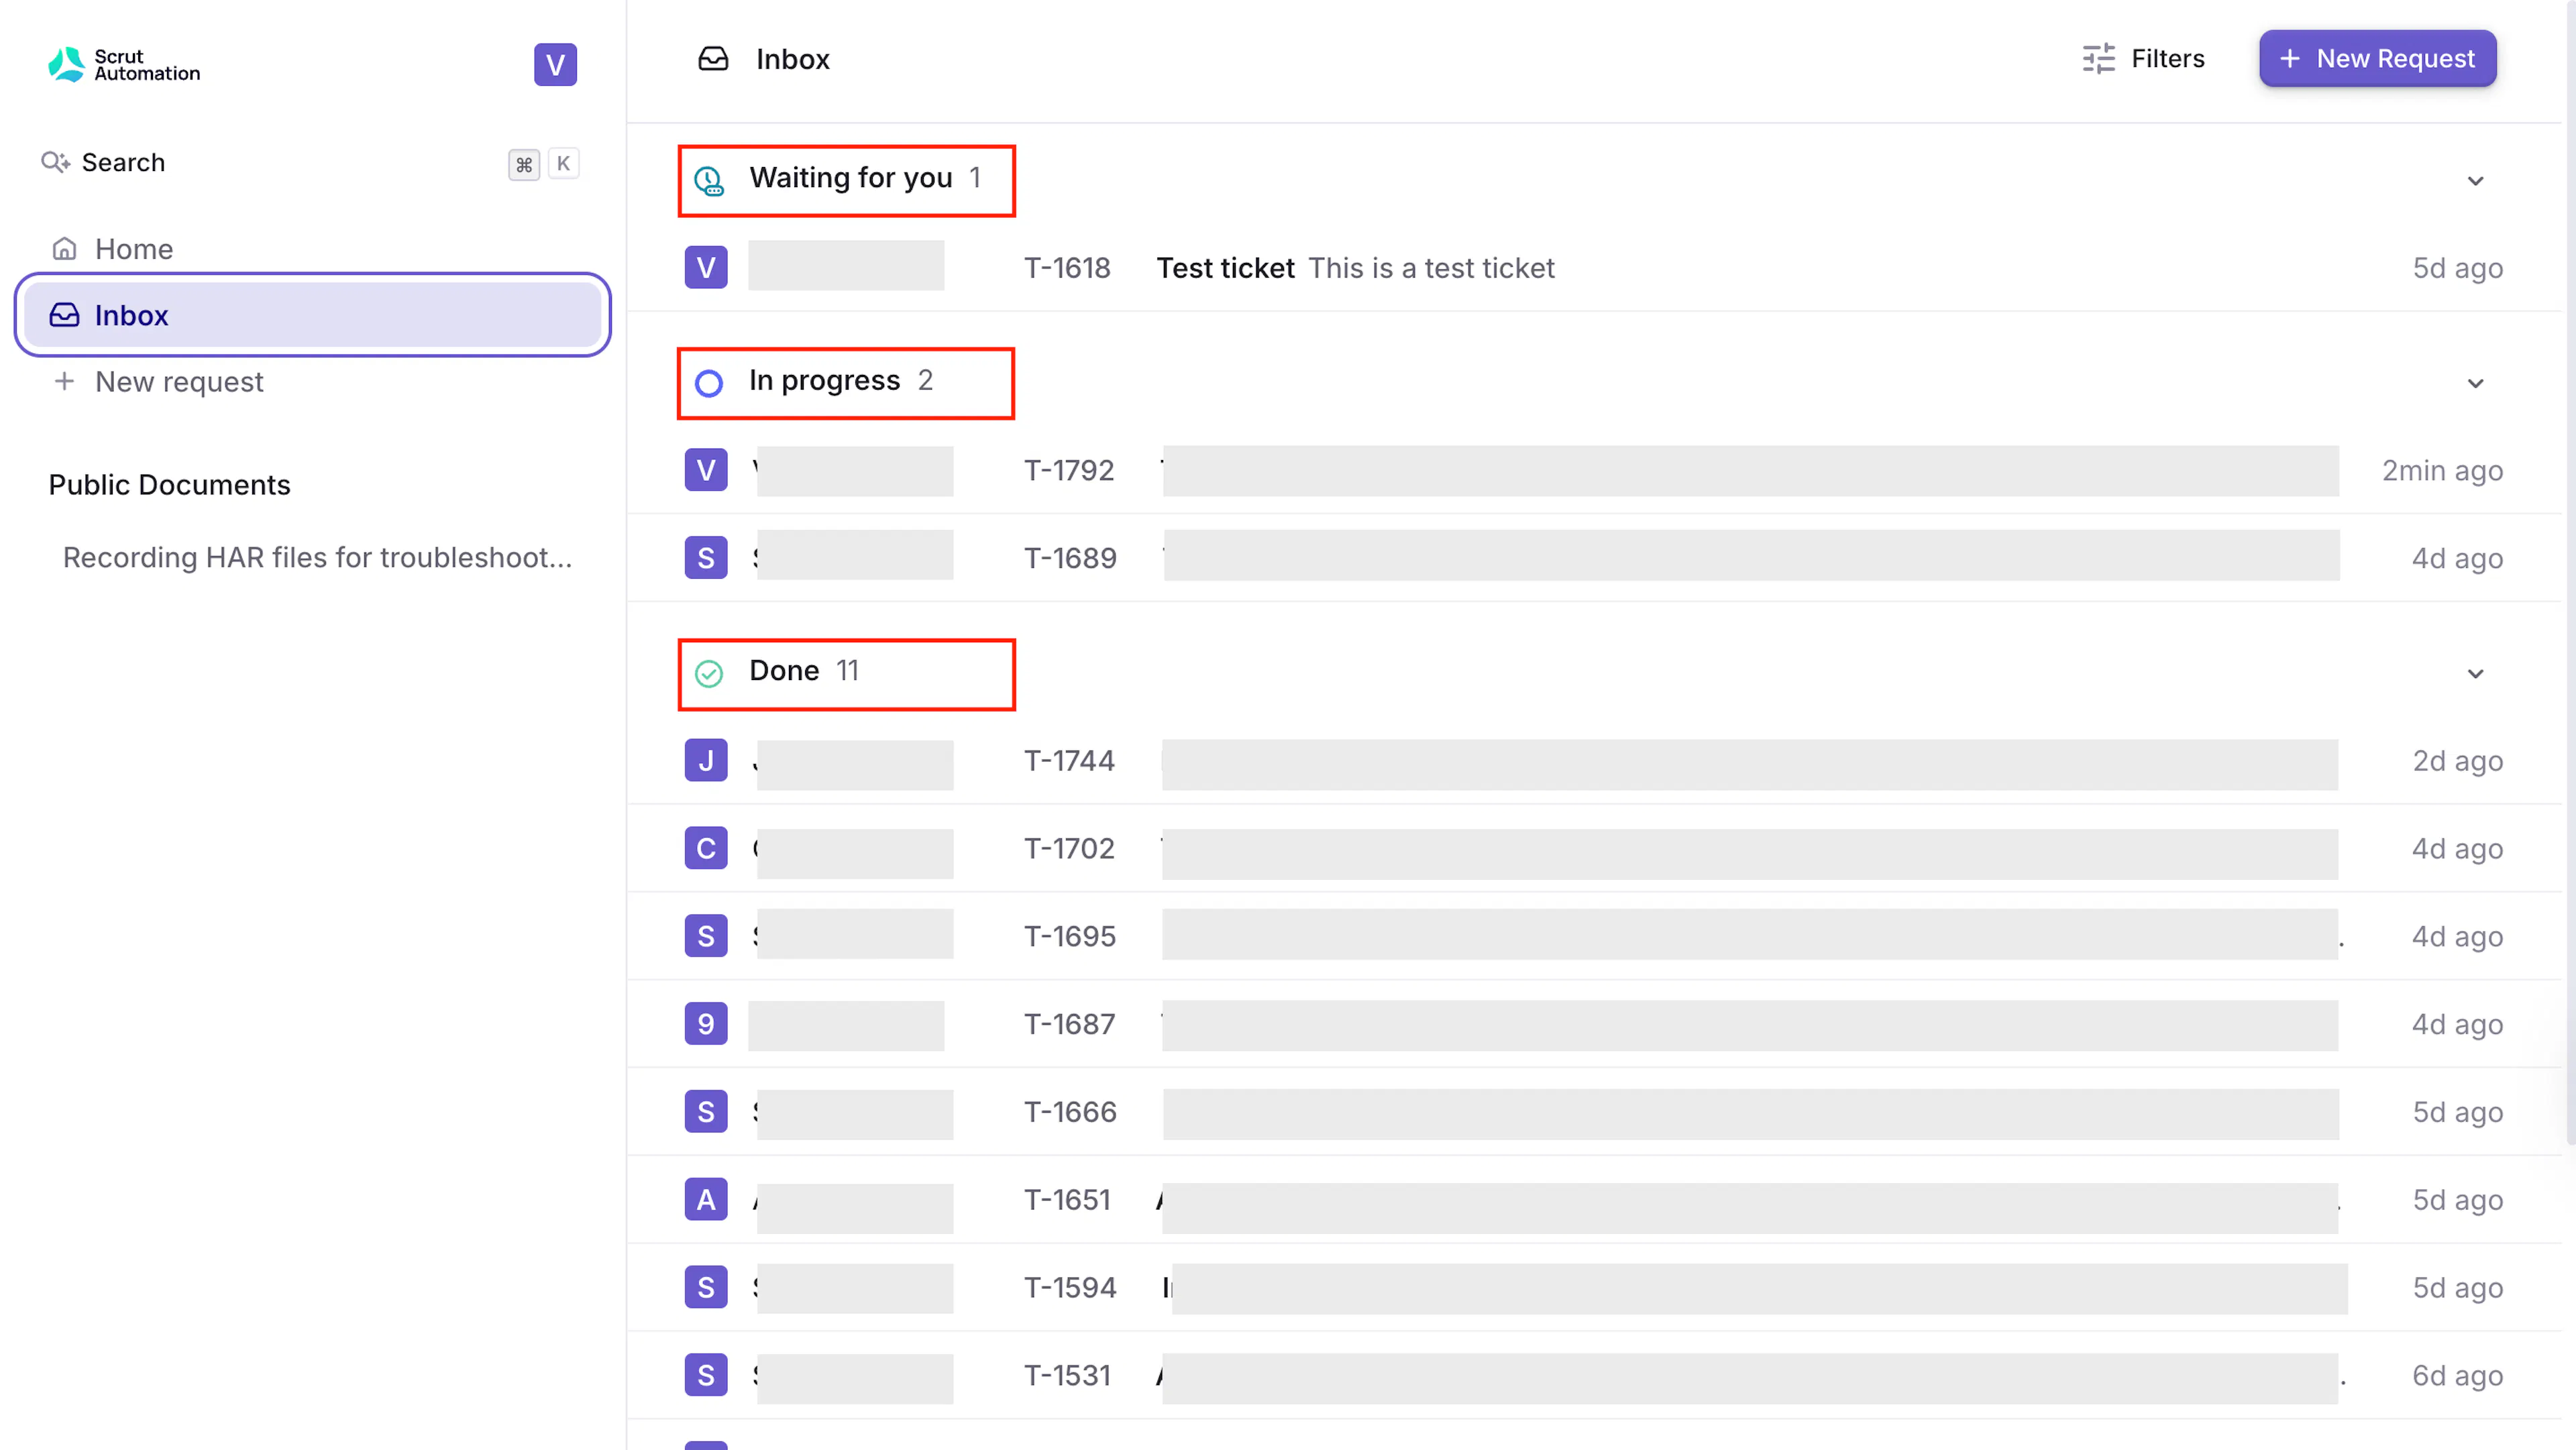
Your inbox list displays all open and resolved tickets across your organization, categorized by status.
-
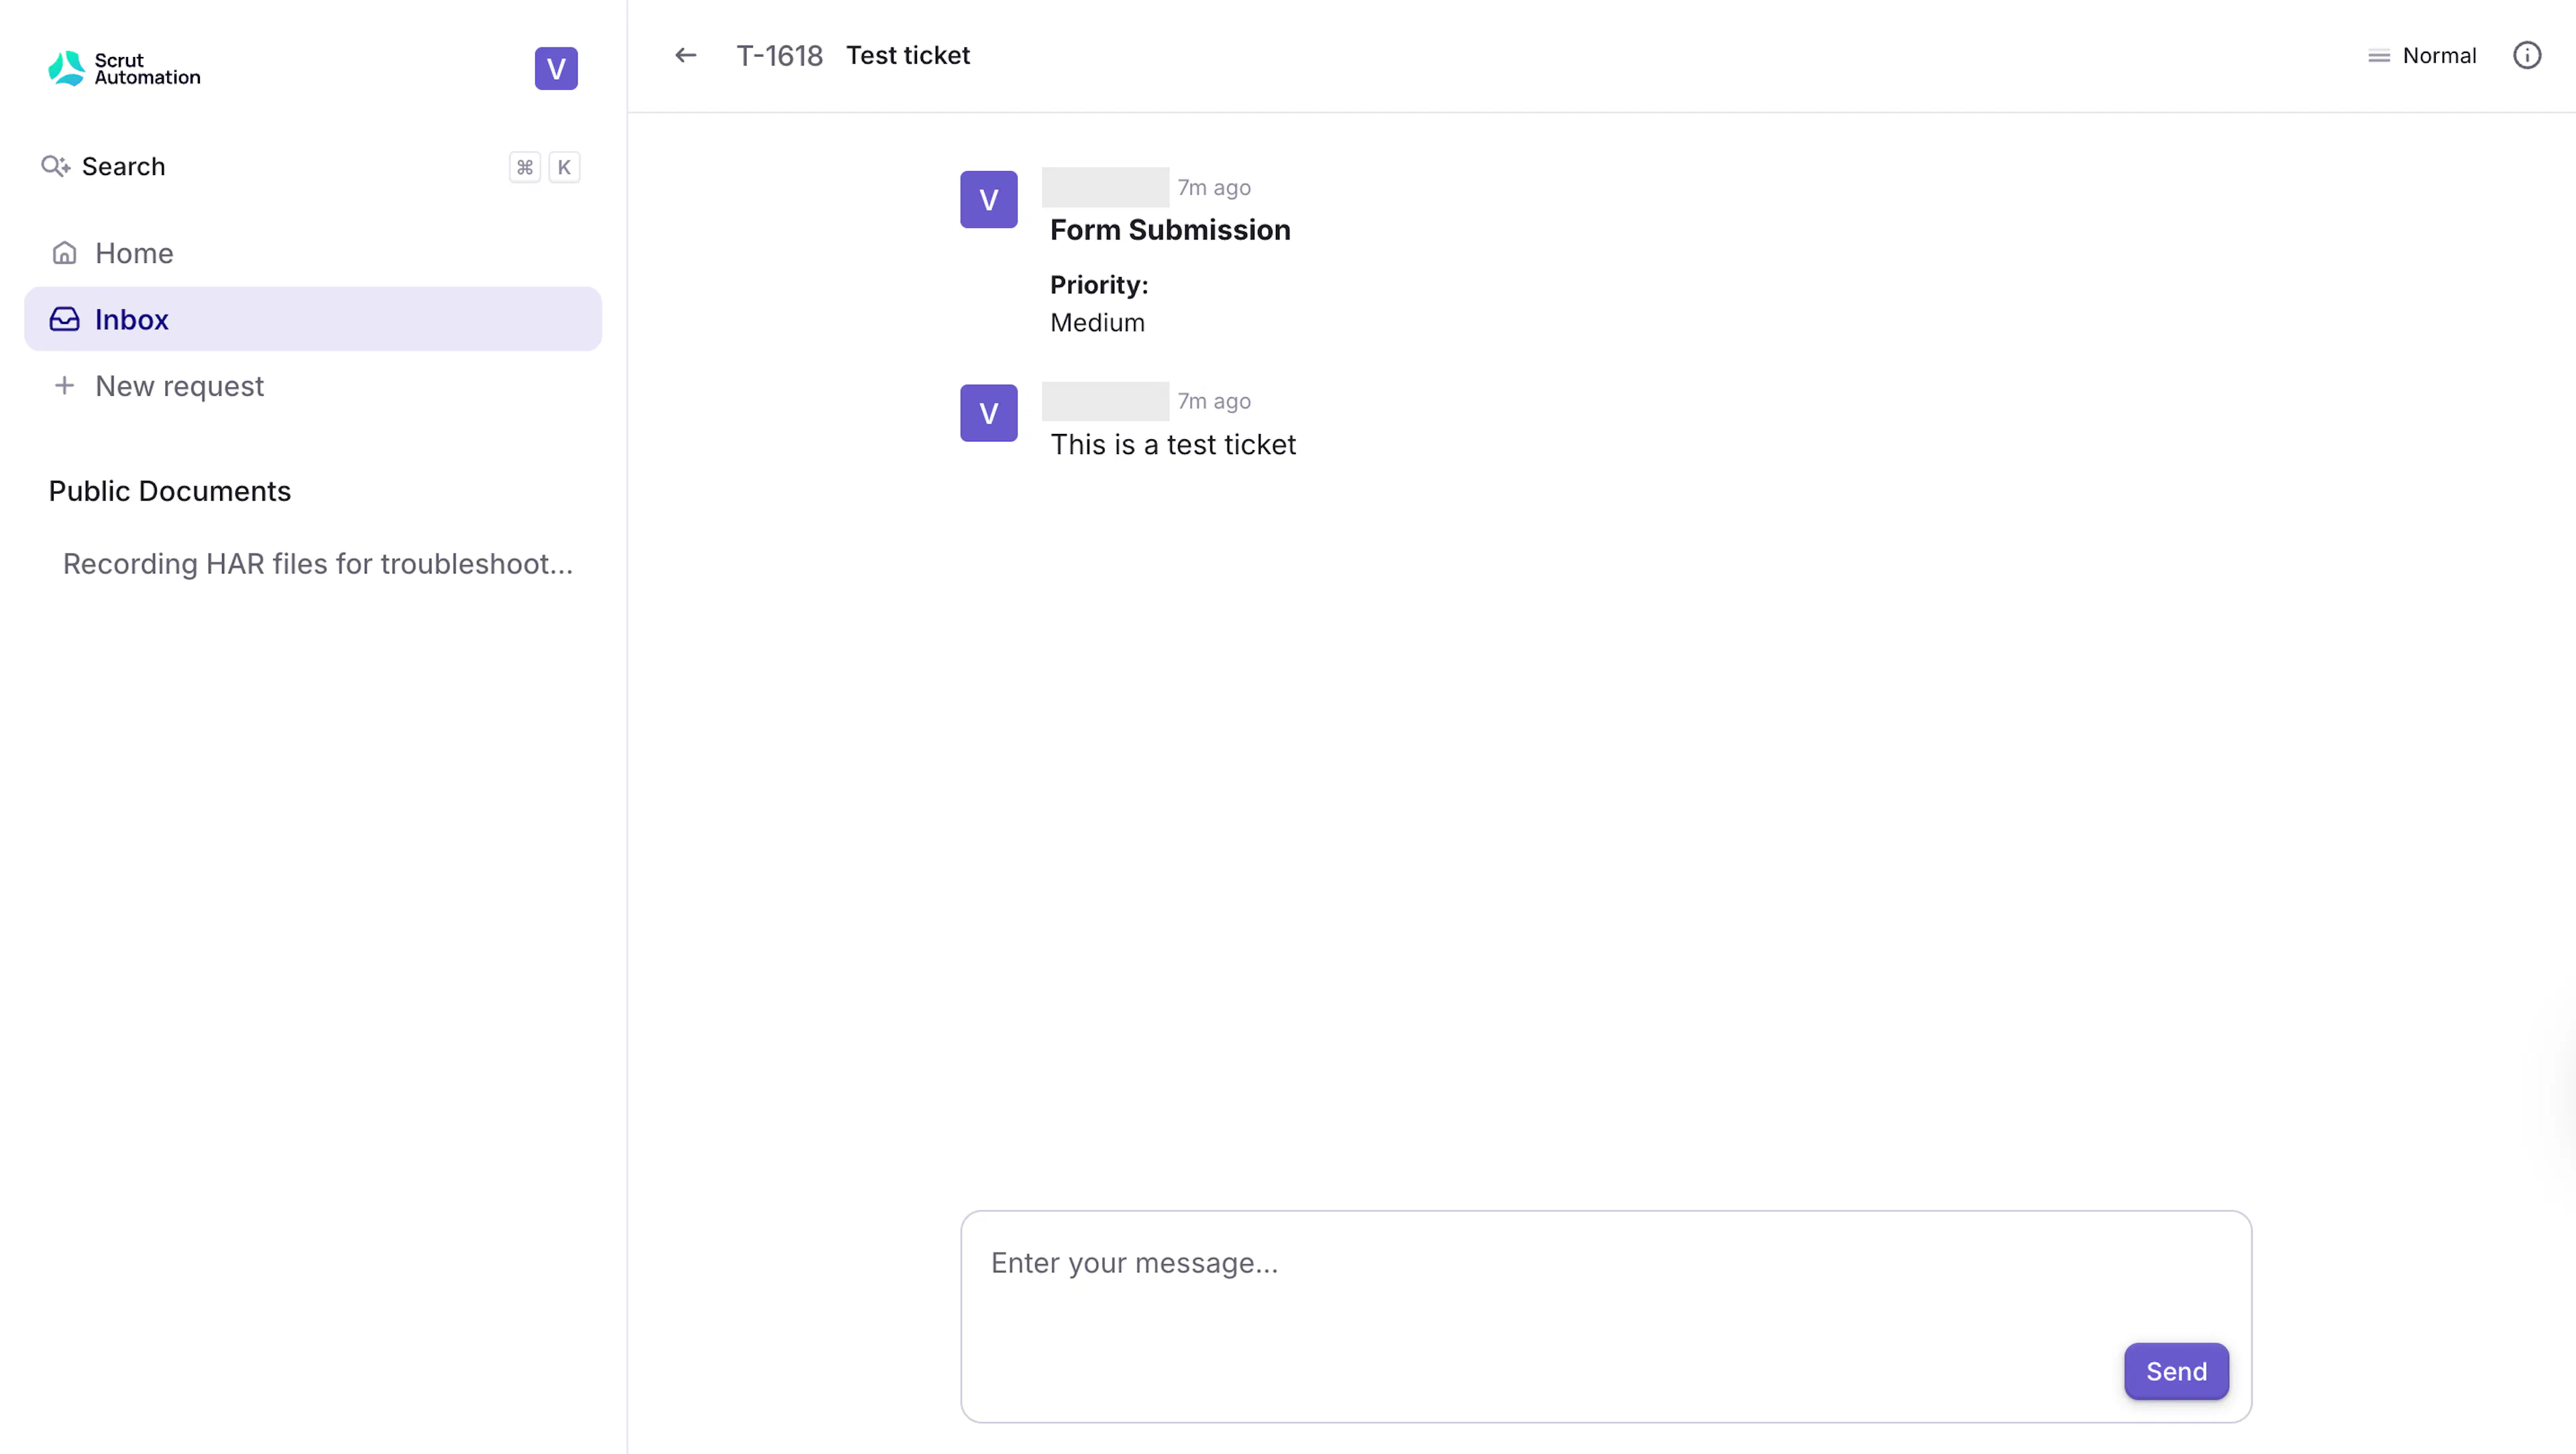
Click any ticket to view its full details, including current status, priority, date created, and the full conversation thread.
-
To reply or add more information, type directly in the thread and submit.
Ticket Statuses
Your tickets are grouped by status in the inbox.
- Waiting for you: The support team has responded and is waiting for more information or a reply from you.
- In progress: The support team is actively investigating your request. No action is needed from you at this point.
- Done: Your ticket has been resolved and closed.
Filtering Your Tickets
Use the Filters option at the top-right of the inbox to narrow down your ticket list. The following filters are available:
- Created by: Filter tickets by who submitted them. Select Created by me to view only tickets you raised.
- Status: Filter by ticket status. Select one or more of Waiting for you, In progress, or Done.
- Priority: Filter by urgency level. Options are Urgent, High, Normal, and Low.
- Created at: Filter tickets by the date they were created. Select a specific date from the calendar to view tickets raised on that day.

Raise a Ticket from the Support Site
You can also submit a support request directly from the Scrut Support Site without going through the platform.
-
Go to the Scrut Support Site and click New request in the left navigation bar, or click the + New Request button at the top-right of the inbox.

-
In the What can we help you with? field, describe your issue in detail. Include the affected module, steps to reproduce, and any relevant error messages.
-
Select a Priority level from the dropdown. Choose the option that best reflects the urgency and impact of your issue. This field is optional.
-
In the Additional recipients field, add any other email addresses that should receive updates on this ticket. This field is optional.
-
Click Create support request.
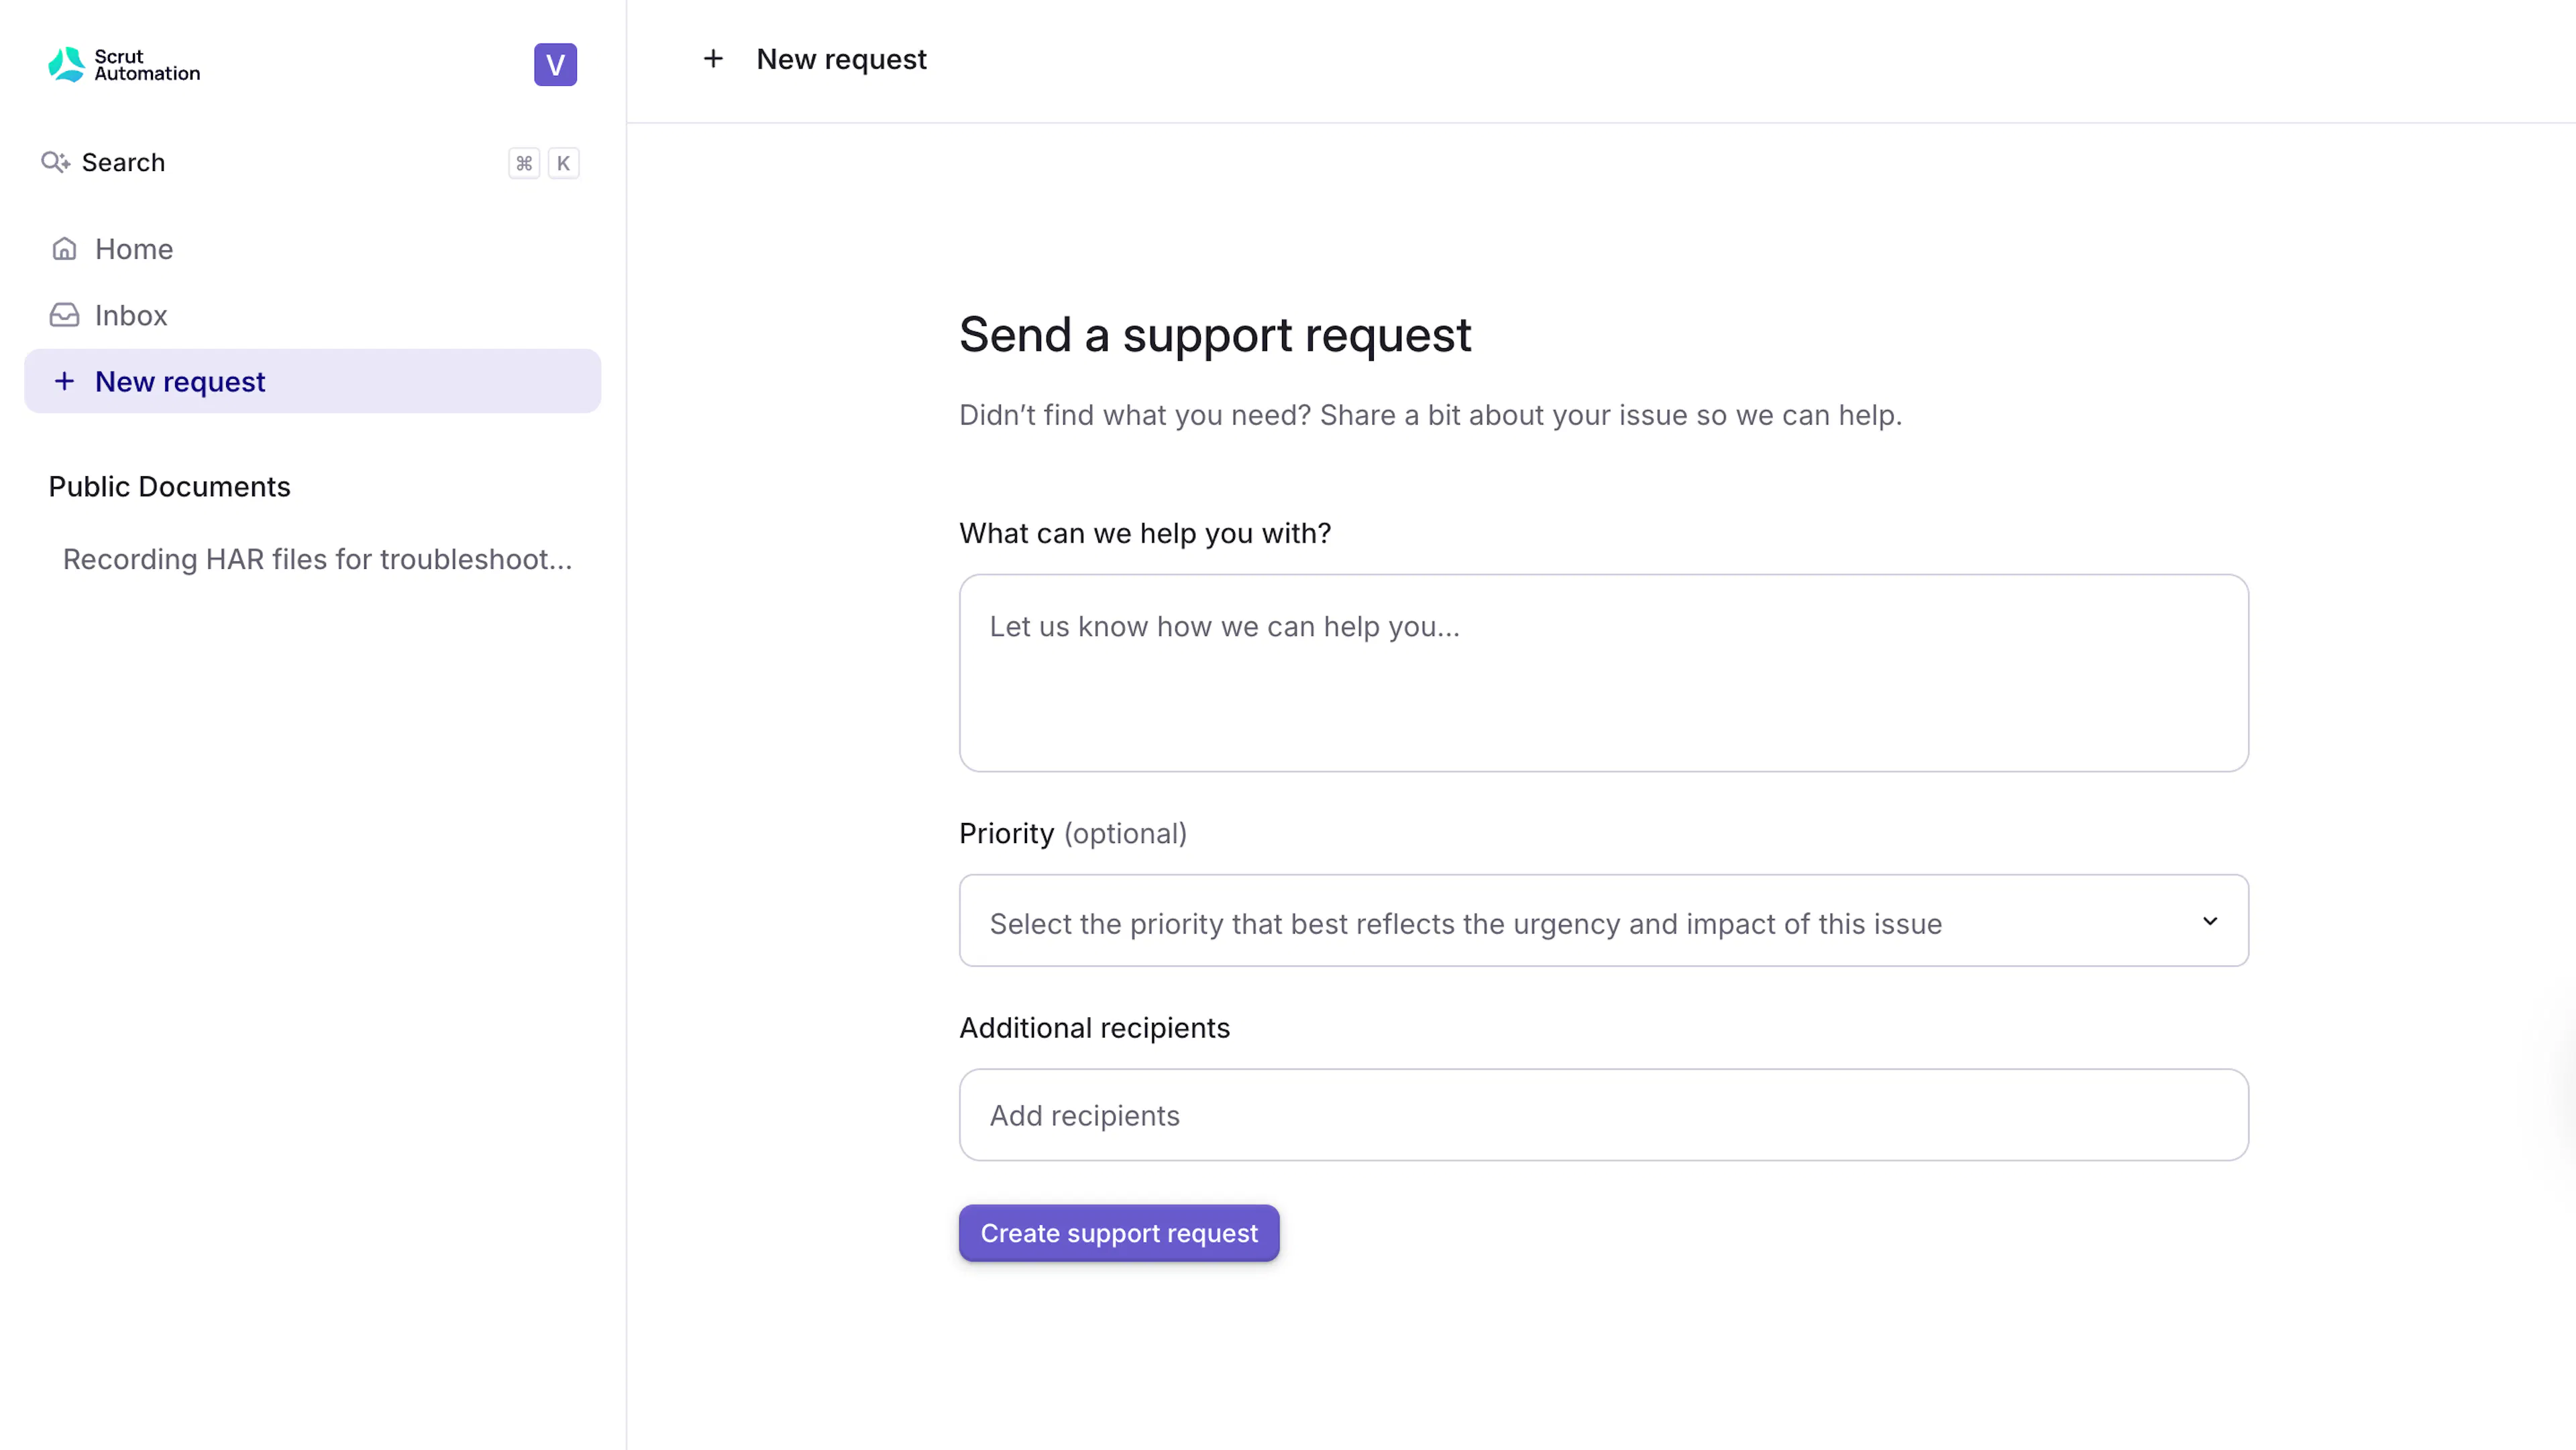
Your ticket is created immediately, and a confirmation is sent to your email with the ticket ID.
Reach out to support@scrut.io or contact your CSM for further assistance.