

Evaluate Vendor Responses
Who can use this feature
- Supported on Foundation, Growth, and Scale plans
Once a vendor submits their questionnaire, you review their responses, assess risk, and finalize the assessment in Scrut. This guide covers the complete evaluation workflow, from accessing the submitted questionnaire to reviewing the final risk scorecard. Whether you used Scrut Teammates to create the questionnaire or created it manually, the evaluation process is the same.
Note:
Only questionnaires in Submitted status can be evaluated.
Step 1: Access the Submitted Questionnaire
You can access the submitted questionnaire in two ways:
Method 1: Via the Vendor Details Page
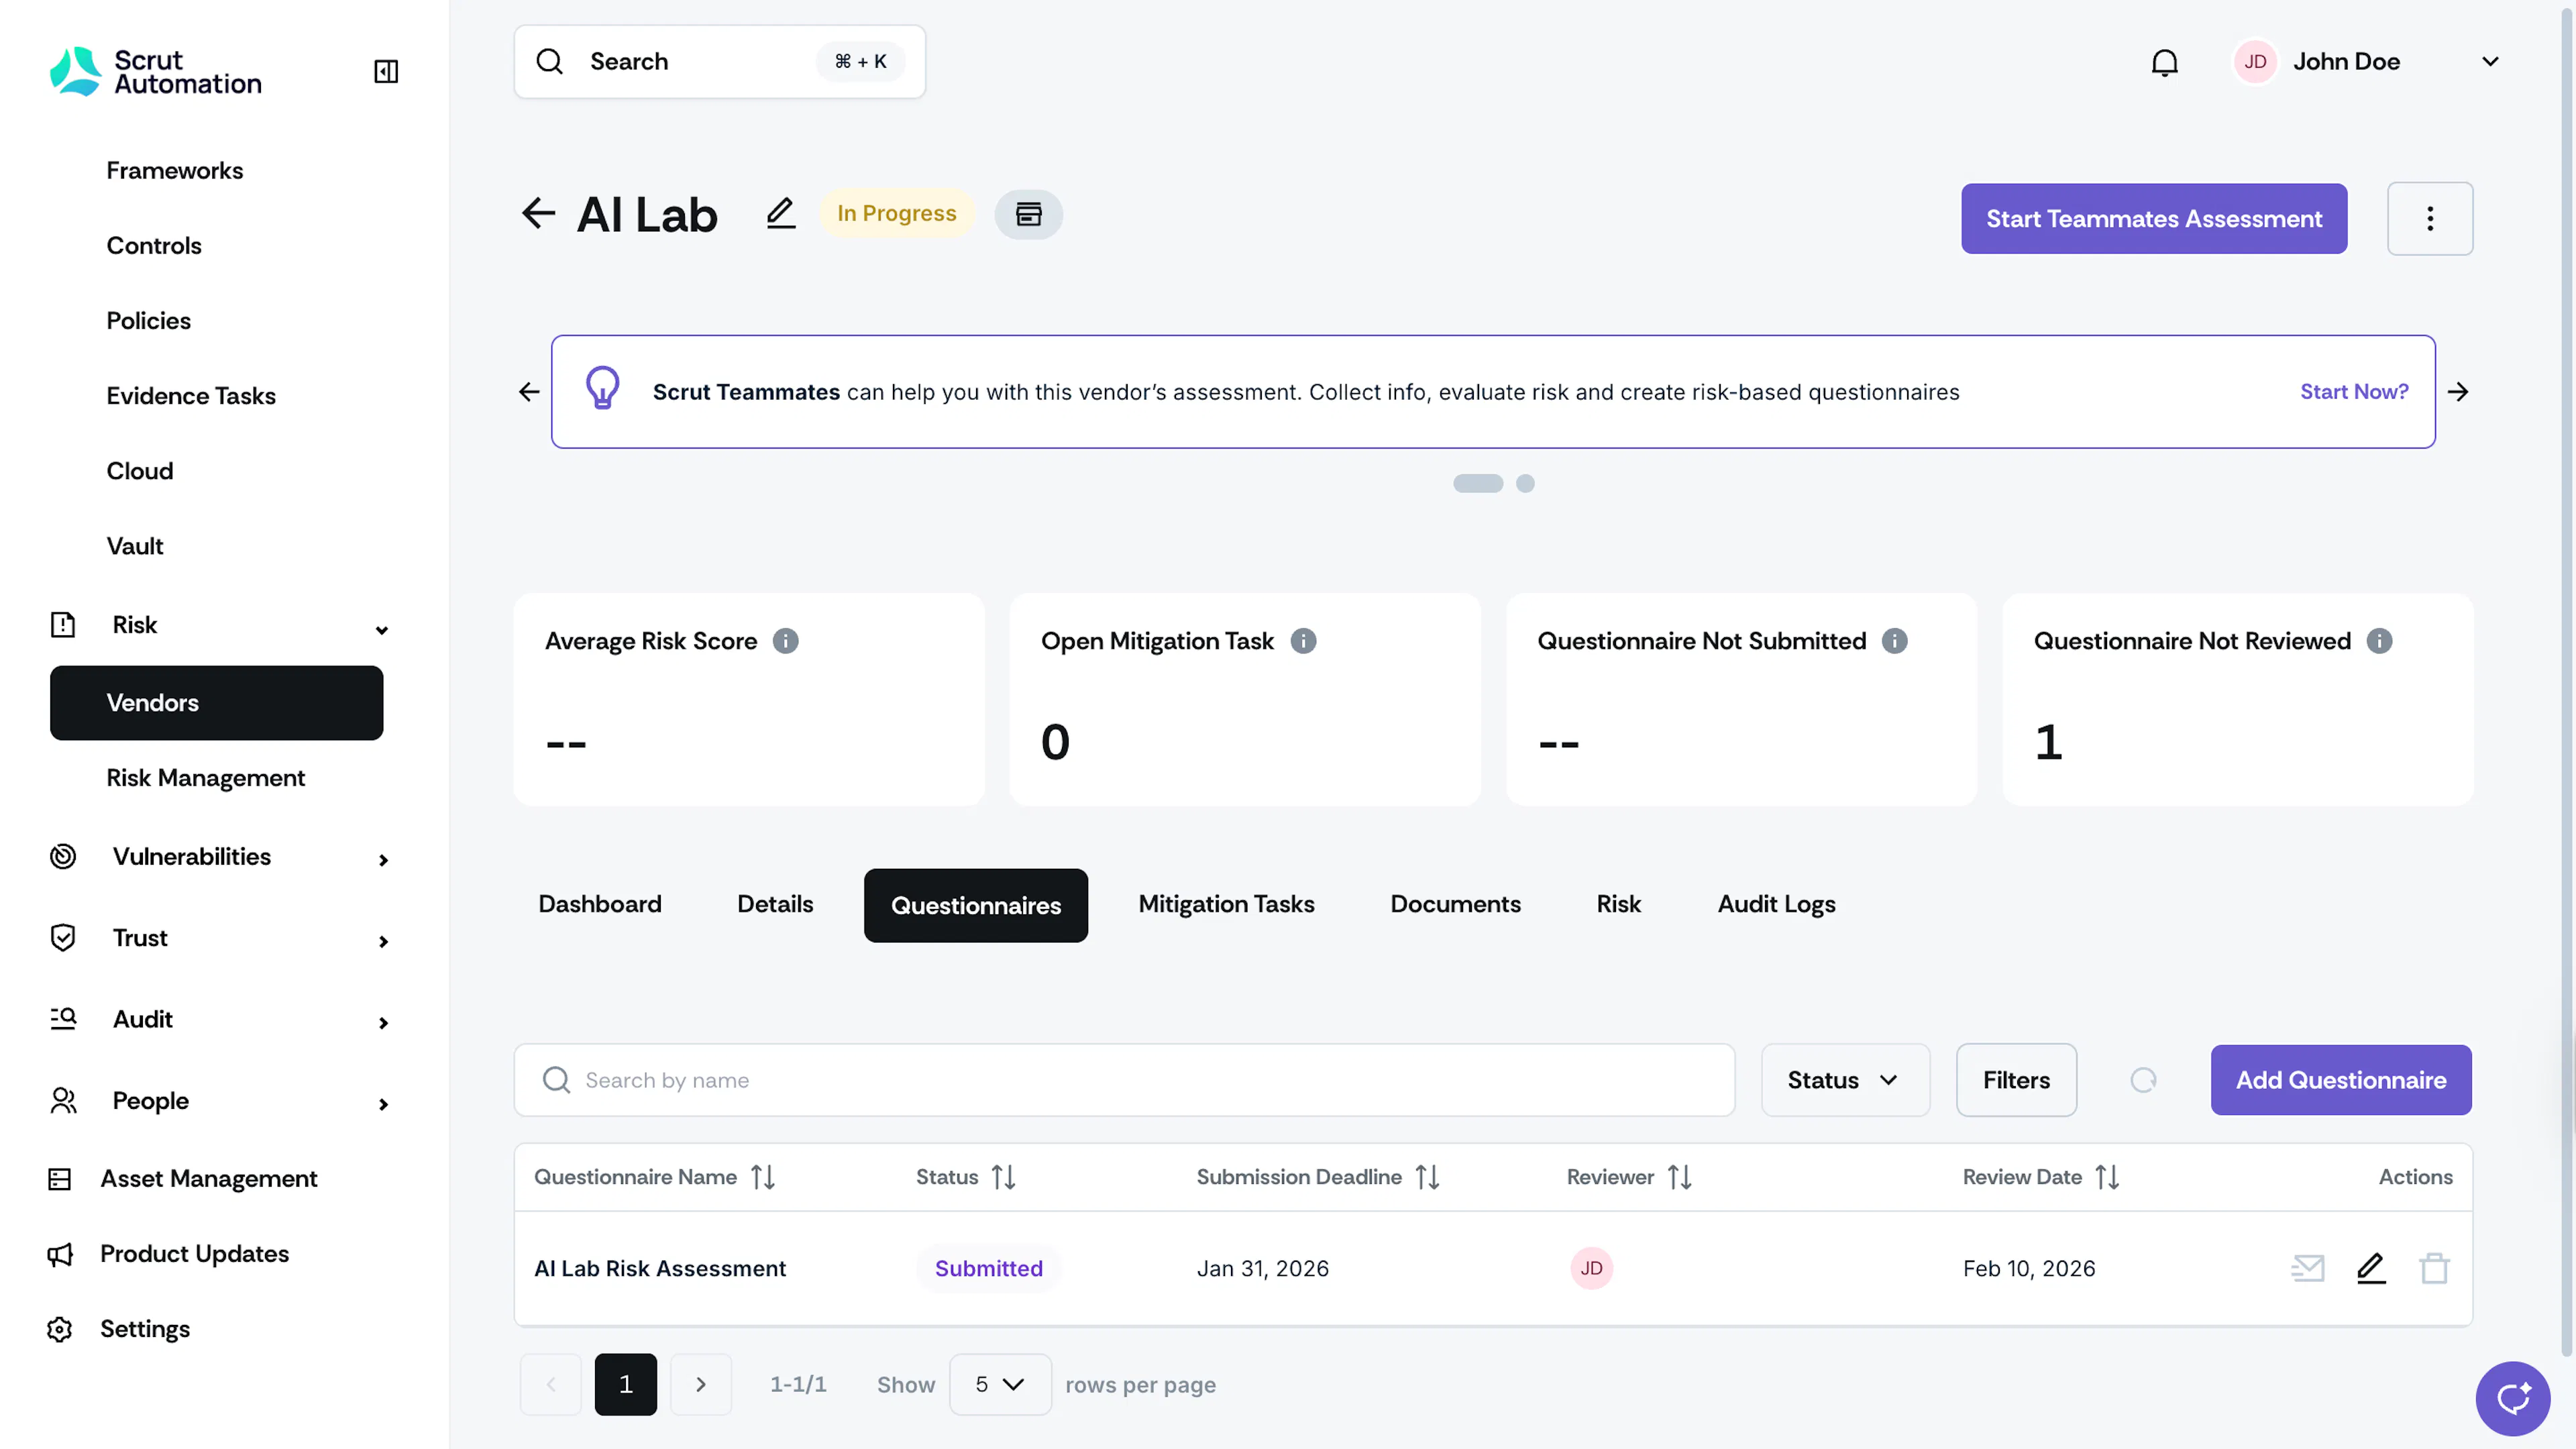
- Navigate to Risk → Vendors on the left navigation panel.
- Go to the Vendors tab and click the vendor you want to evaluate.
- Scroll to the Questionnaires tab and click the questionnaire you want to evaluate.
Method 2: Via the Questionnaires Tab
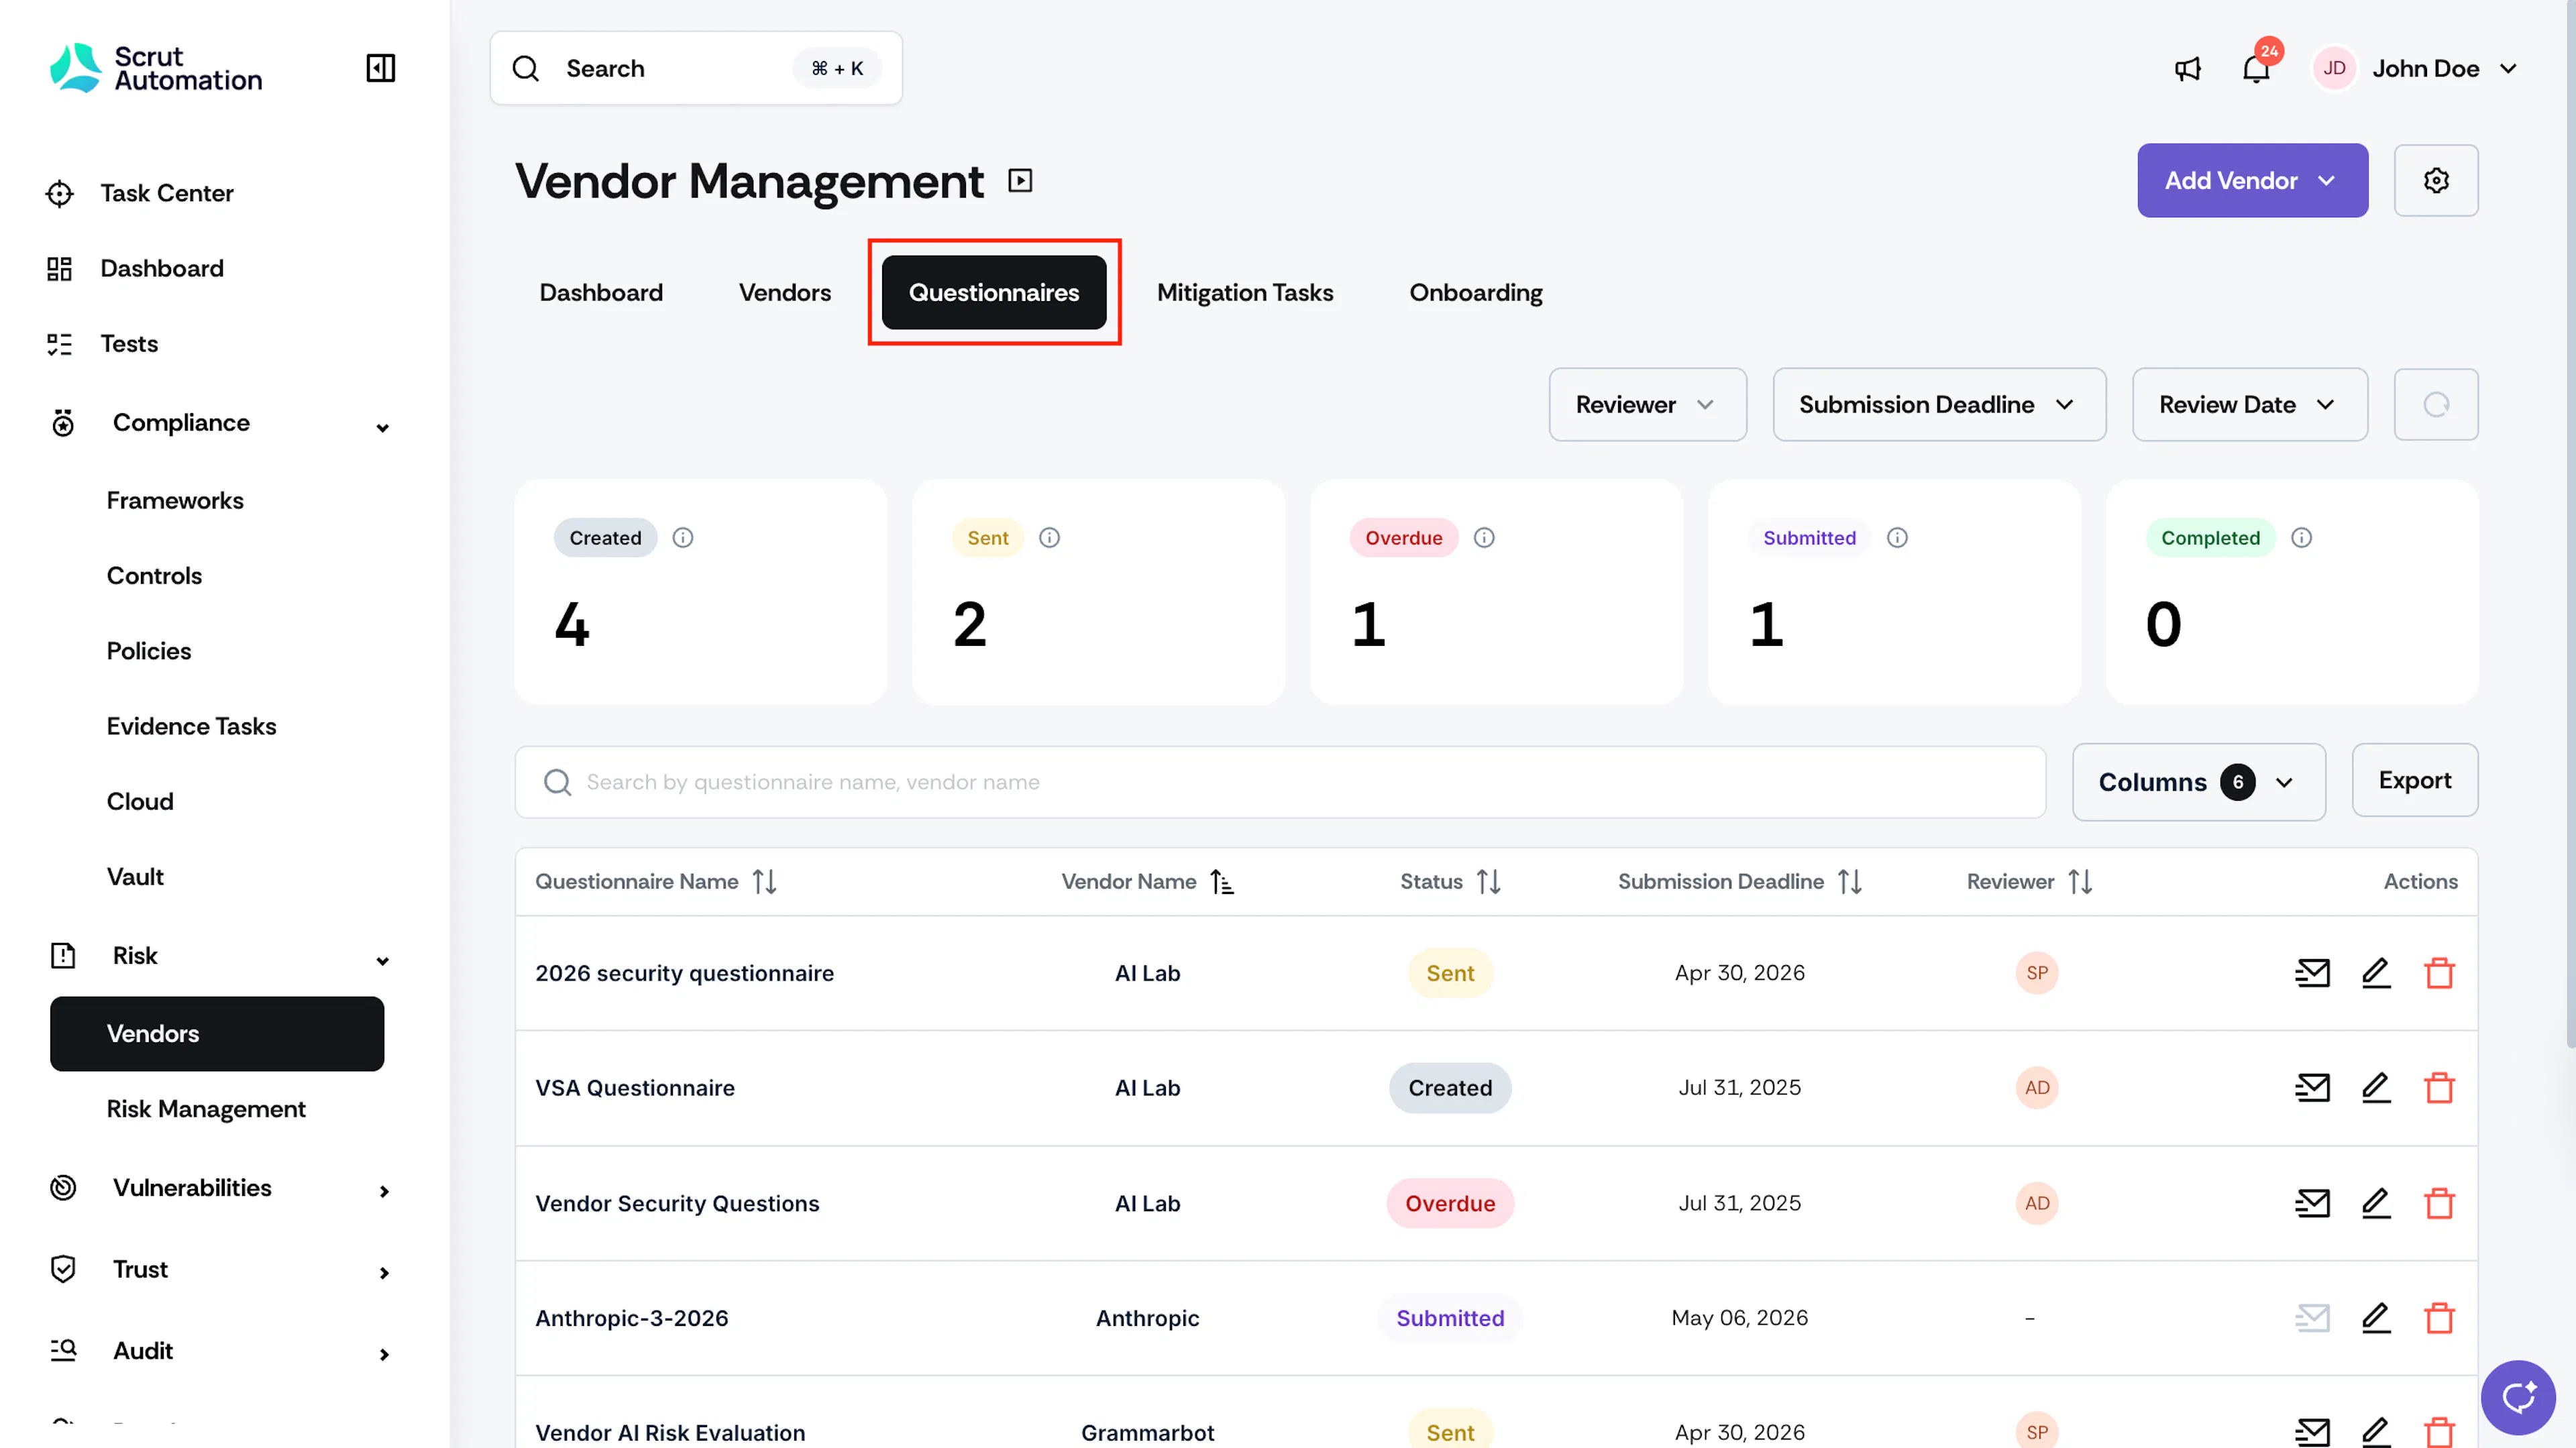
- Navigate to Risk → Vendors on the left navigation panel.
- Go to the Questionnaires tab and click the questionnaire you want to evaluate.
- Use the search bar at the top to quickly find the questionnaire you want to evaluate.
Step 2: Assign Reviewers for Each Question (Optional)
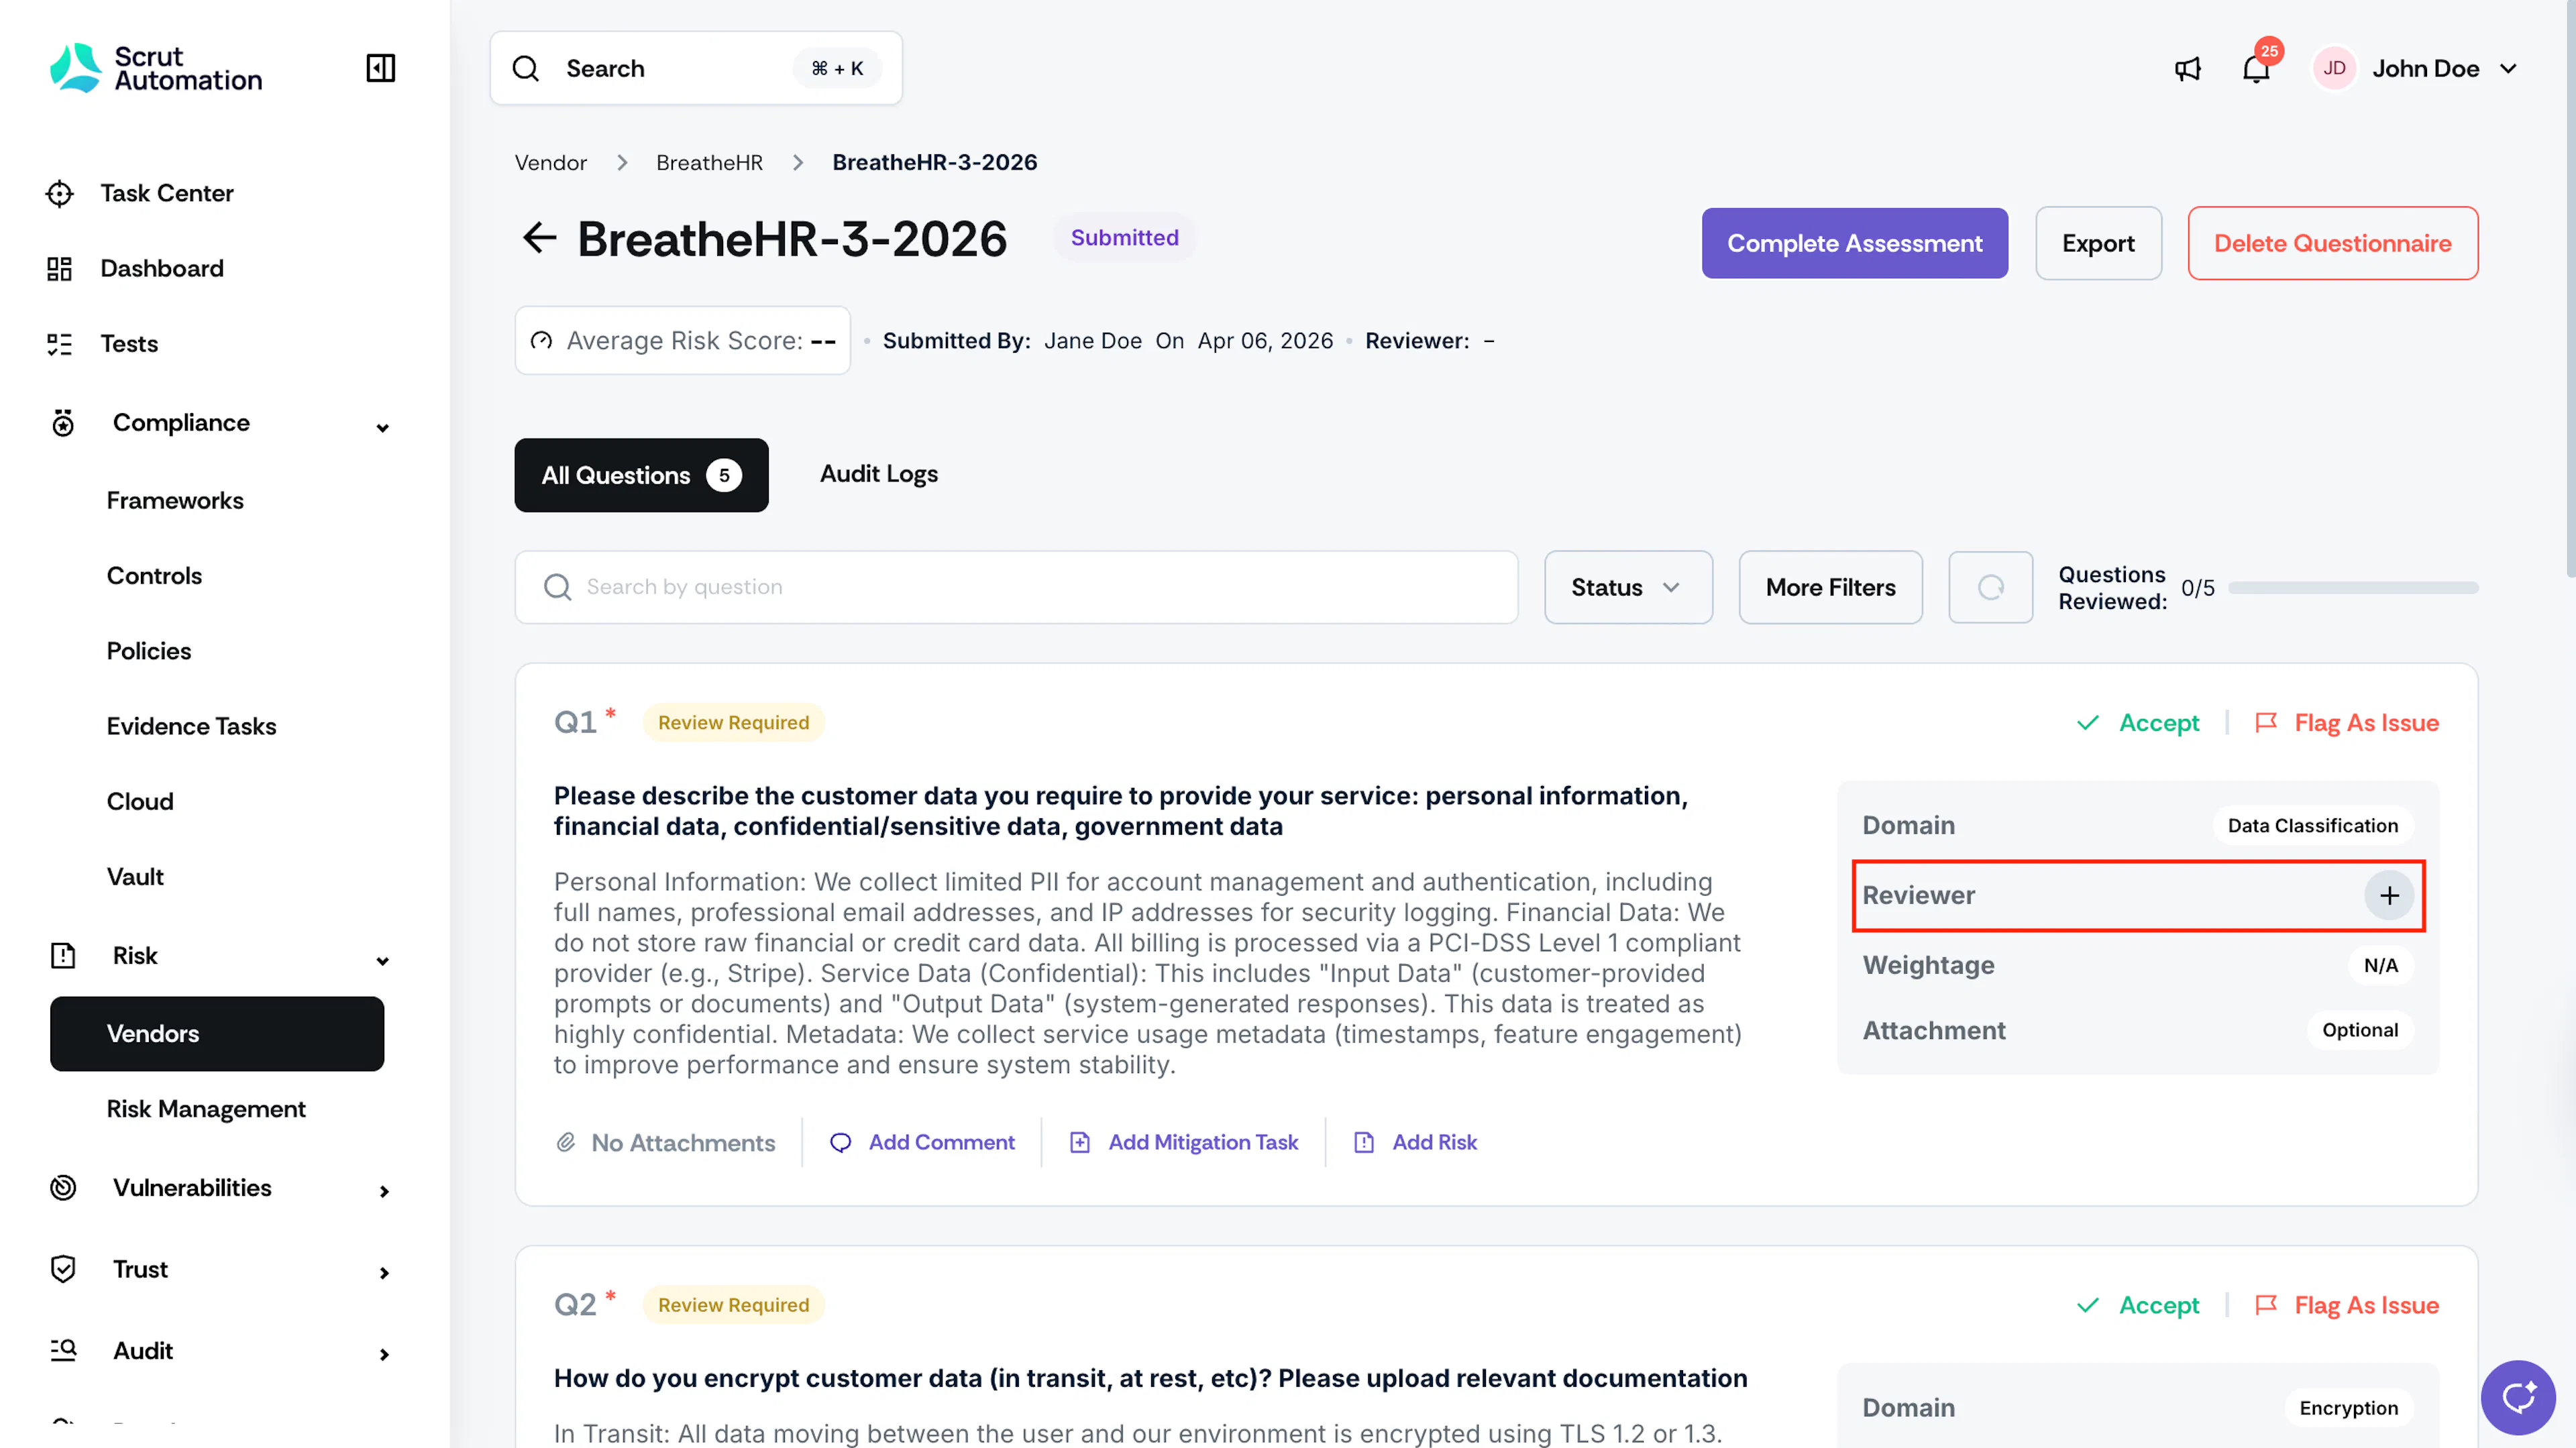
Before you begin reviewing responses, assign a Reviewer to each question. The Reviewer is the team member responsible for evaluating that question's response. Select them from the Reviewer dropdown on the question card.
Step 3: Evaluate Responses
The questionnaire page displays all vendor-answered questions. For each response, you have up to five actions available.
Action 1: Accept Answer
Use this when the vendor's response meets your requirements.
-
Click Accept next to the question.
-
In the Accept Question modal:
- Confirm the Weightage setting.
- Select a Risk Score for the response. 0 represents the lowest risk, and 5 represents the highest.
-
Click Accept.
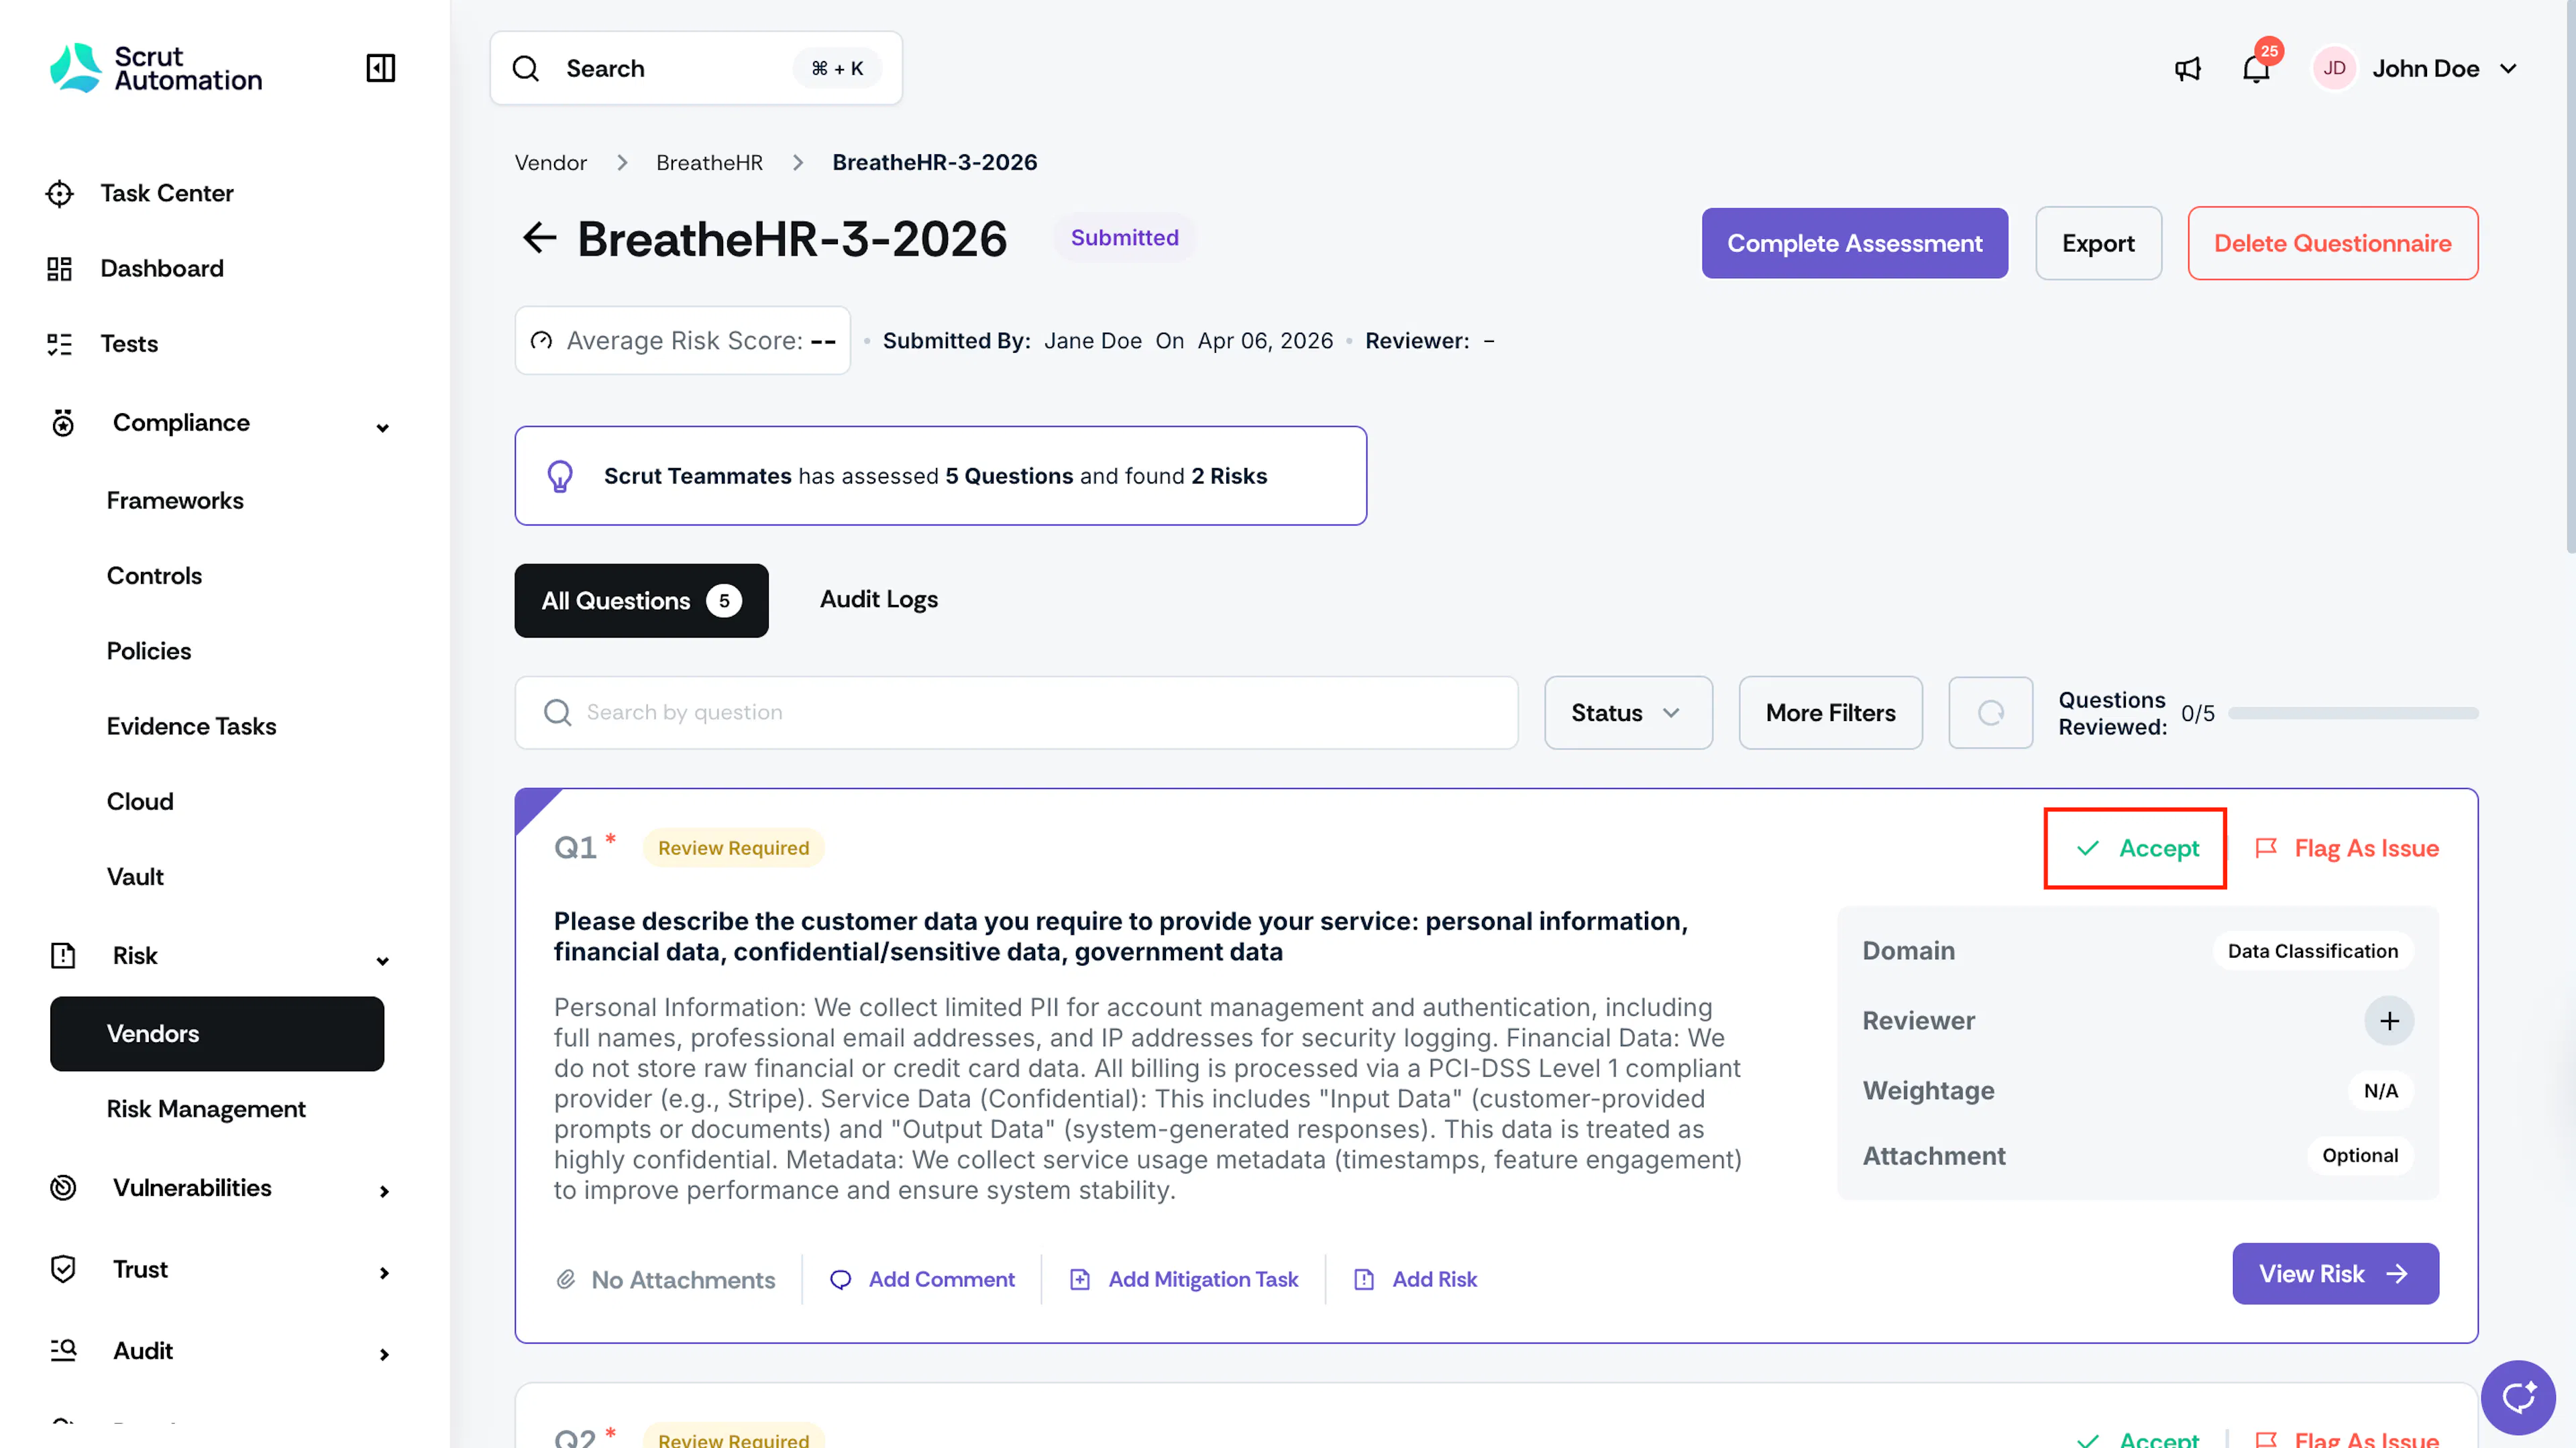
The question status changes to Accepted.
Note:
Accidentally accepted a response? No worries! Click Undo Accept to reverse the action.
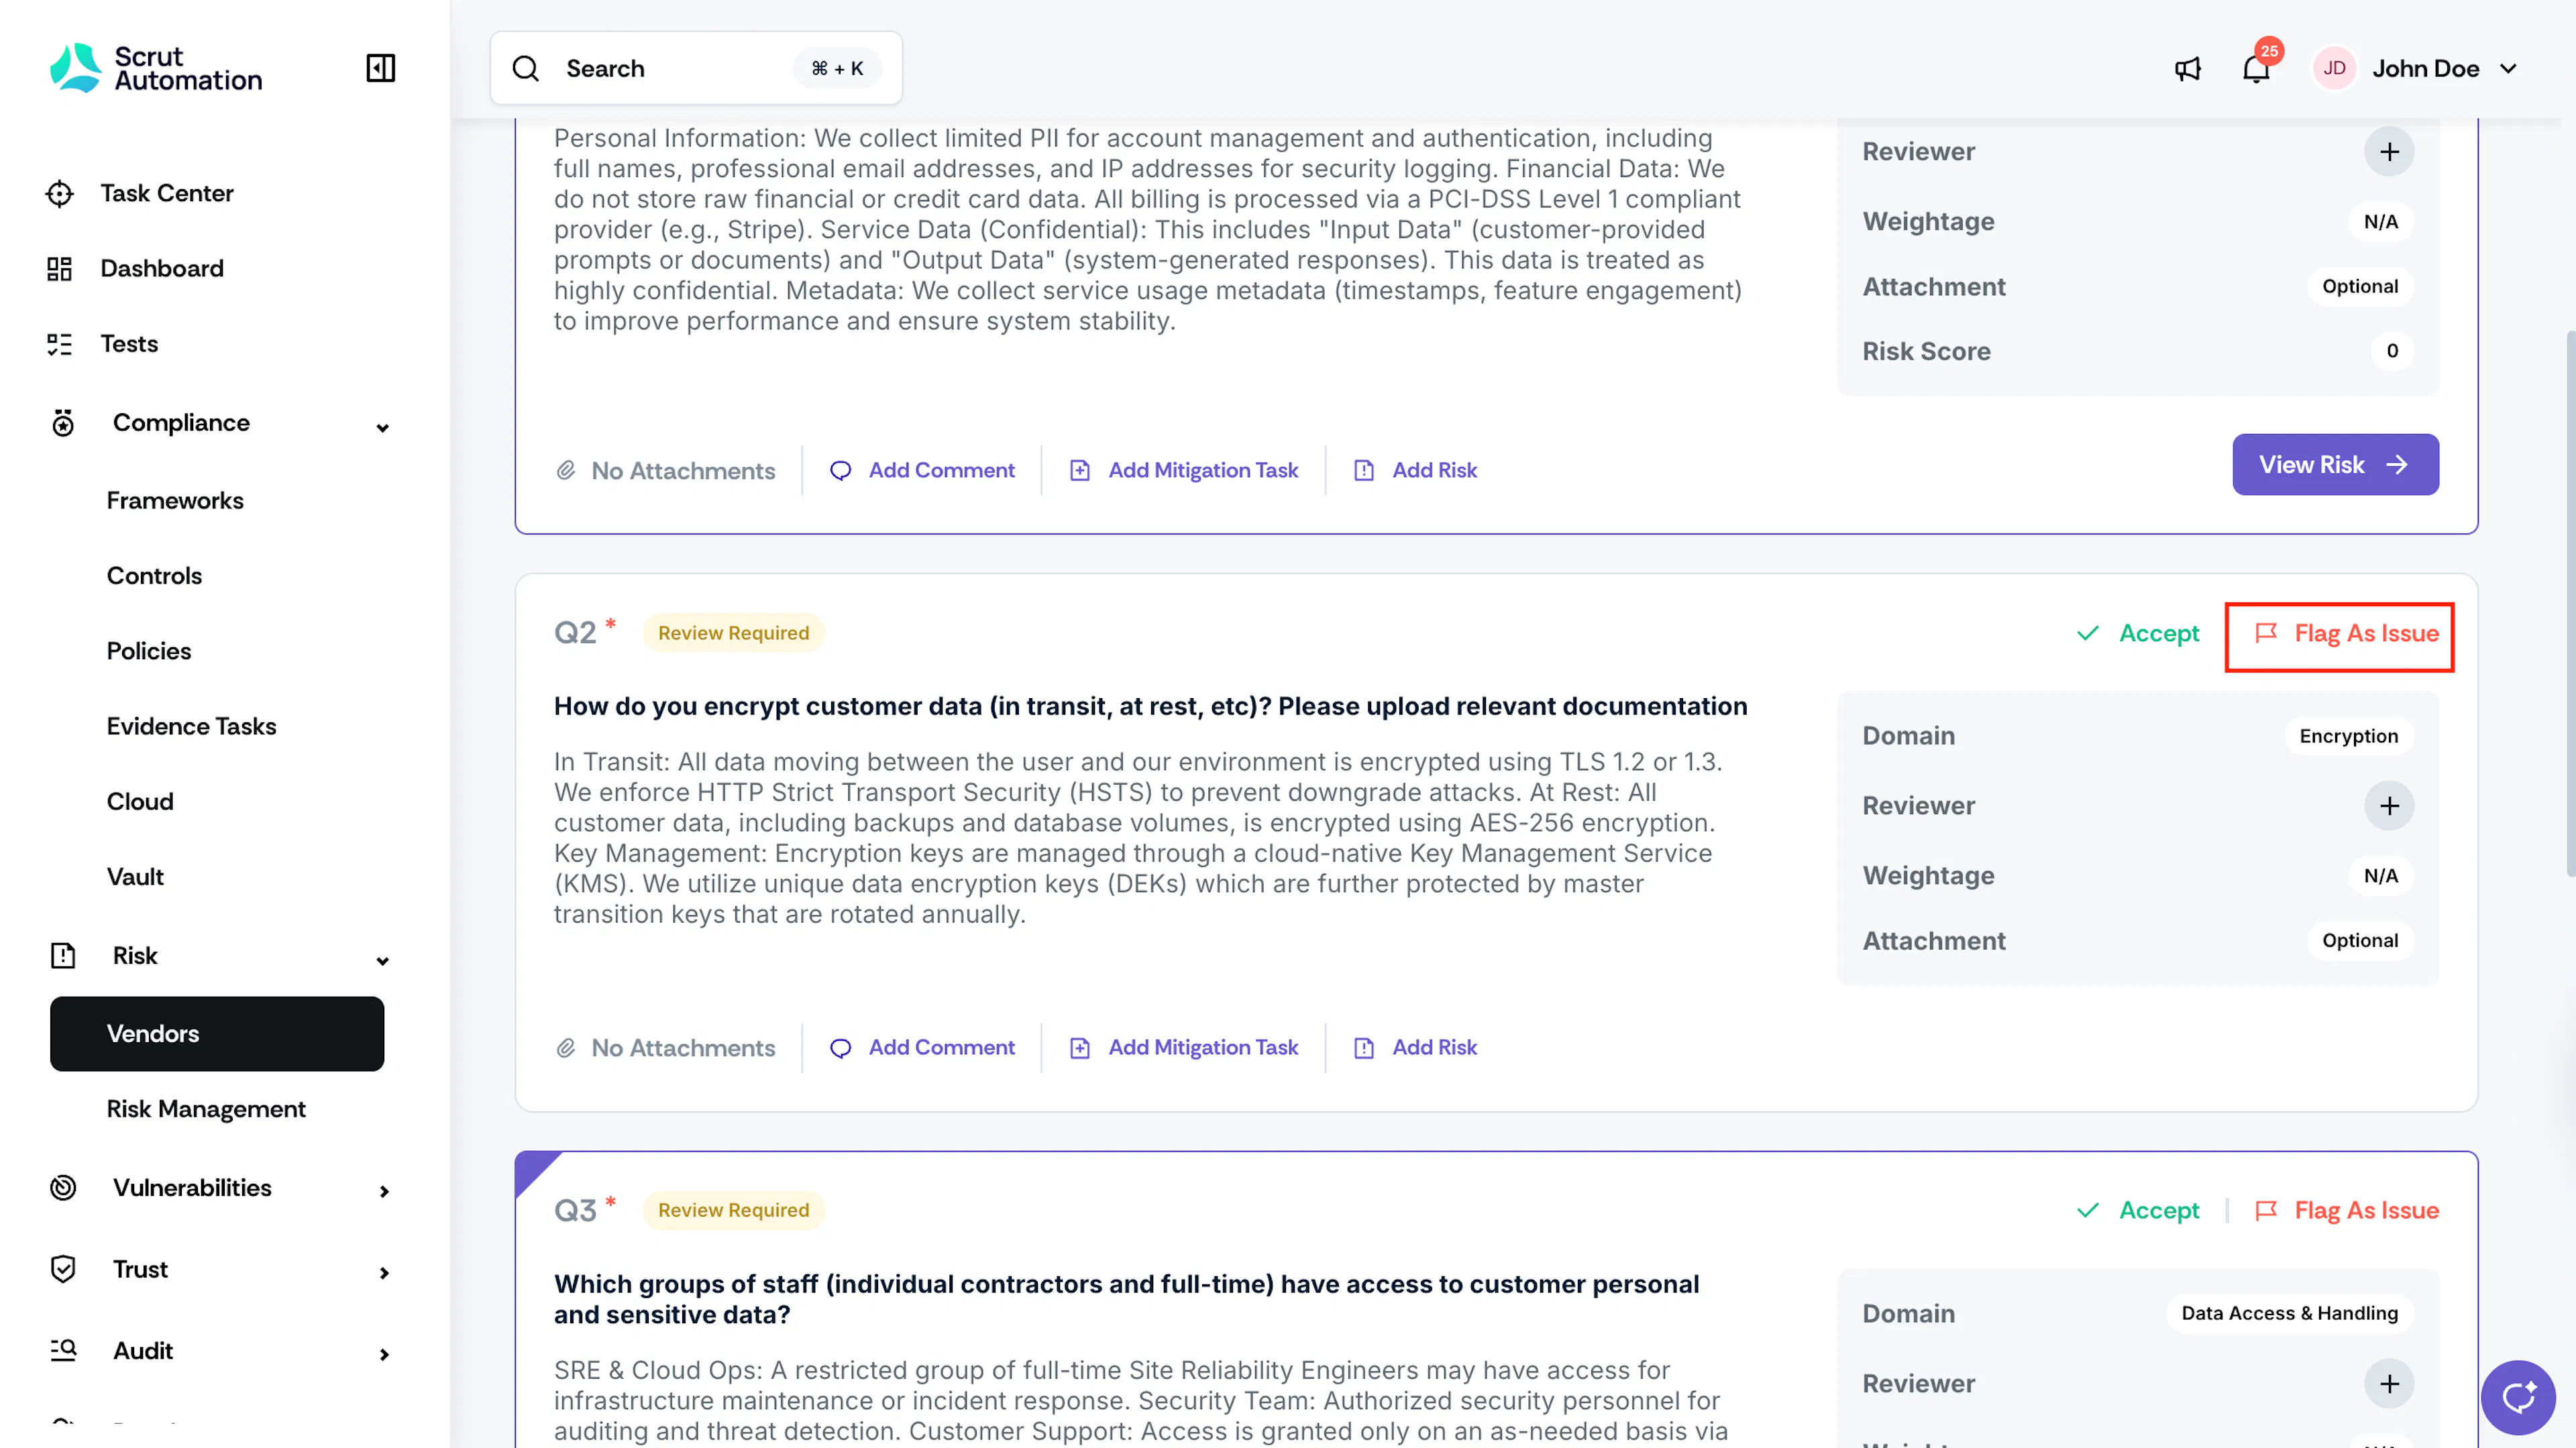
Action 2: Flag as Issue
Use this when a response is inadequate, incorrect, or requires vendor attention.
-
Click Flag as Issue next to the question.
-
Enter the reason for flagging in the Flagging Reason field.
-
Select Notify Vendor to send an automatic email notification to the vendor.
-
Select the vendor Point of Contact (POC) who should receive the notification.
Note: Only the flagging reason is shared with the vendor POC. Risk scores are not shared.
- Click Flag.
- The question status changes to Flagged, and an email notification is sent to the vendor.
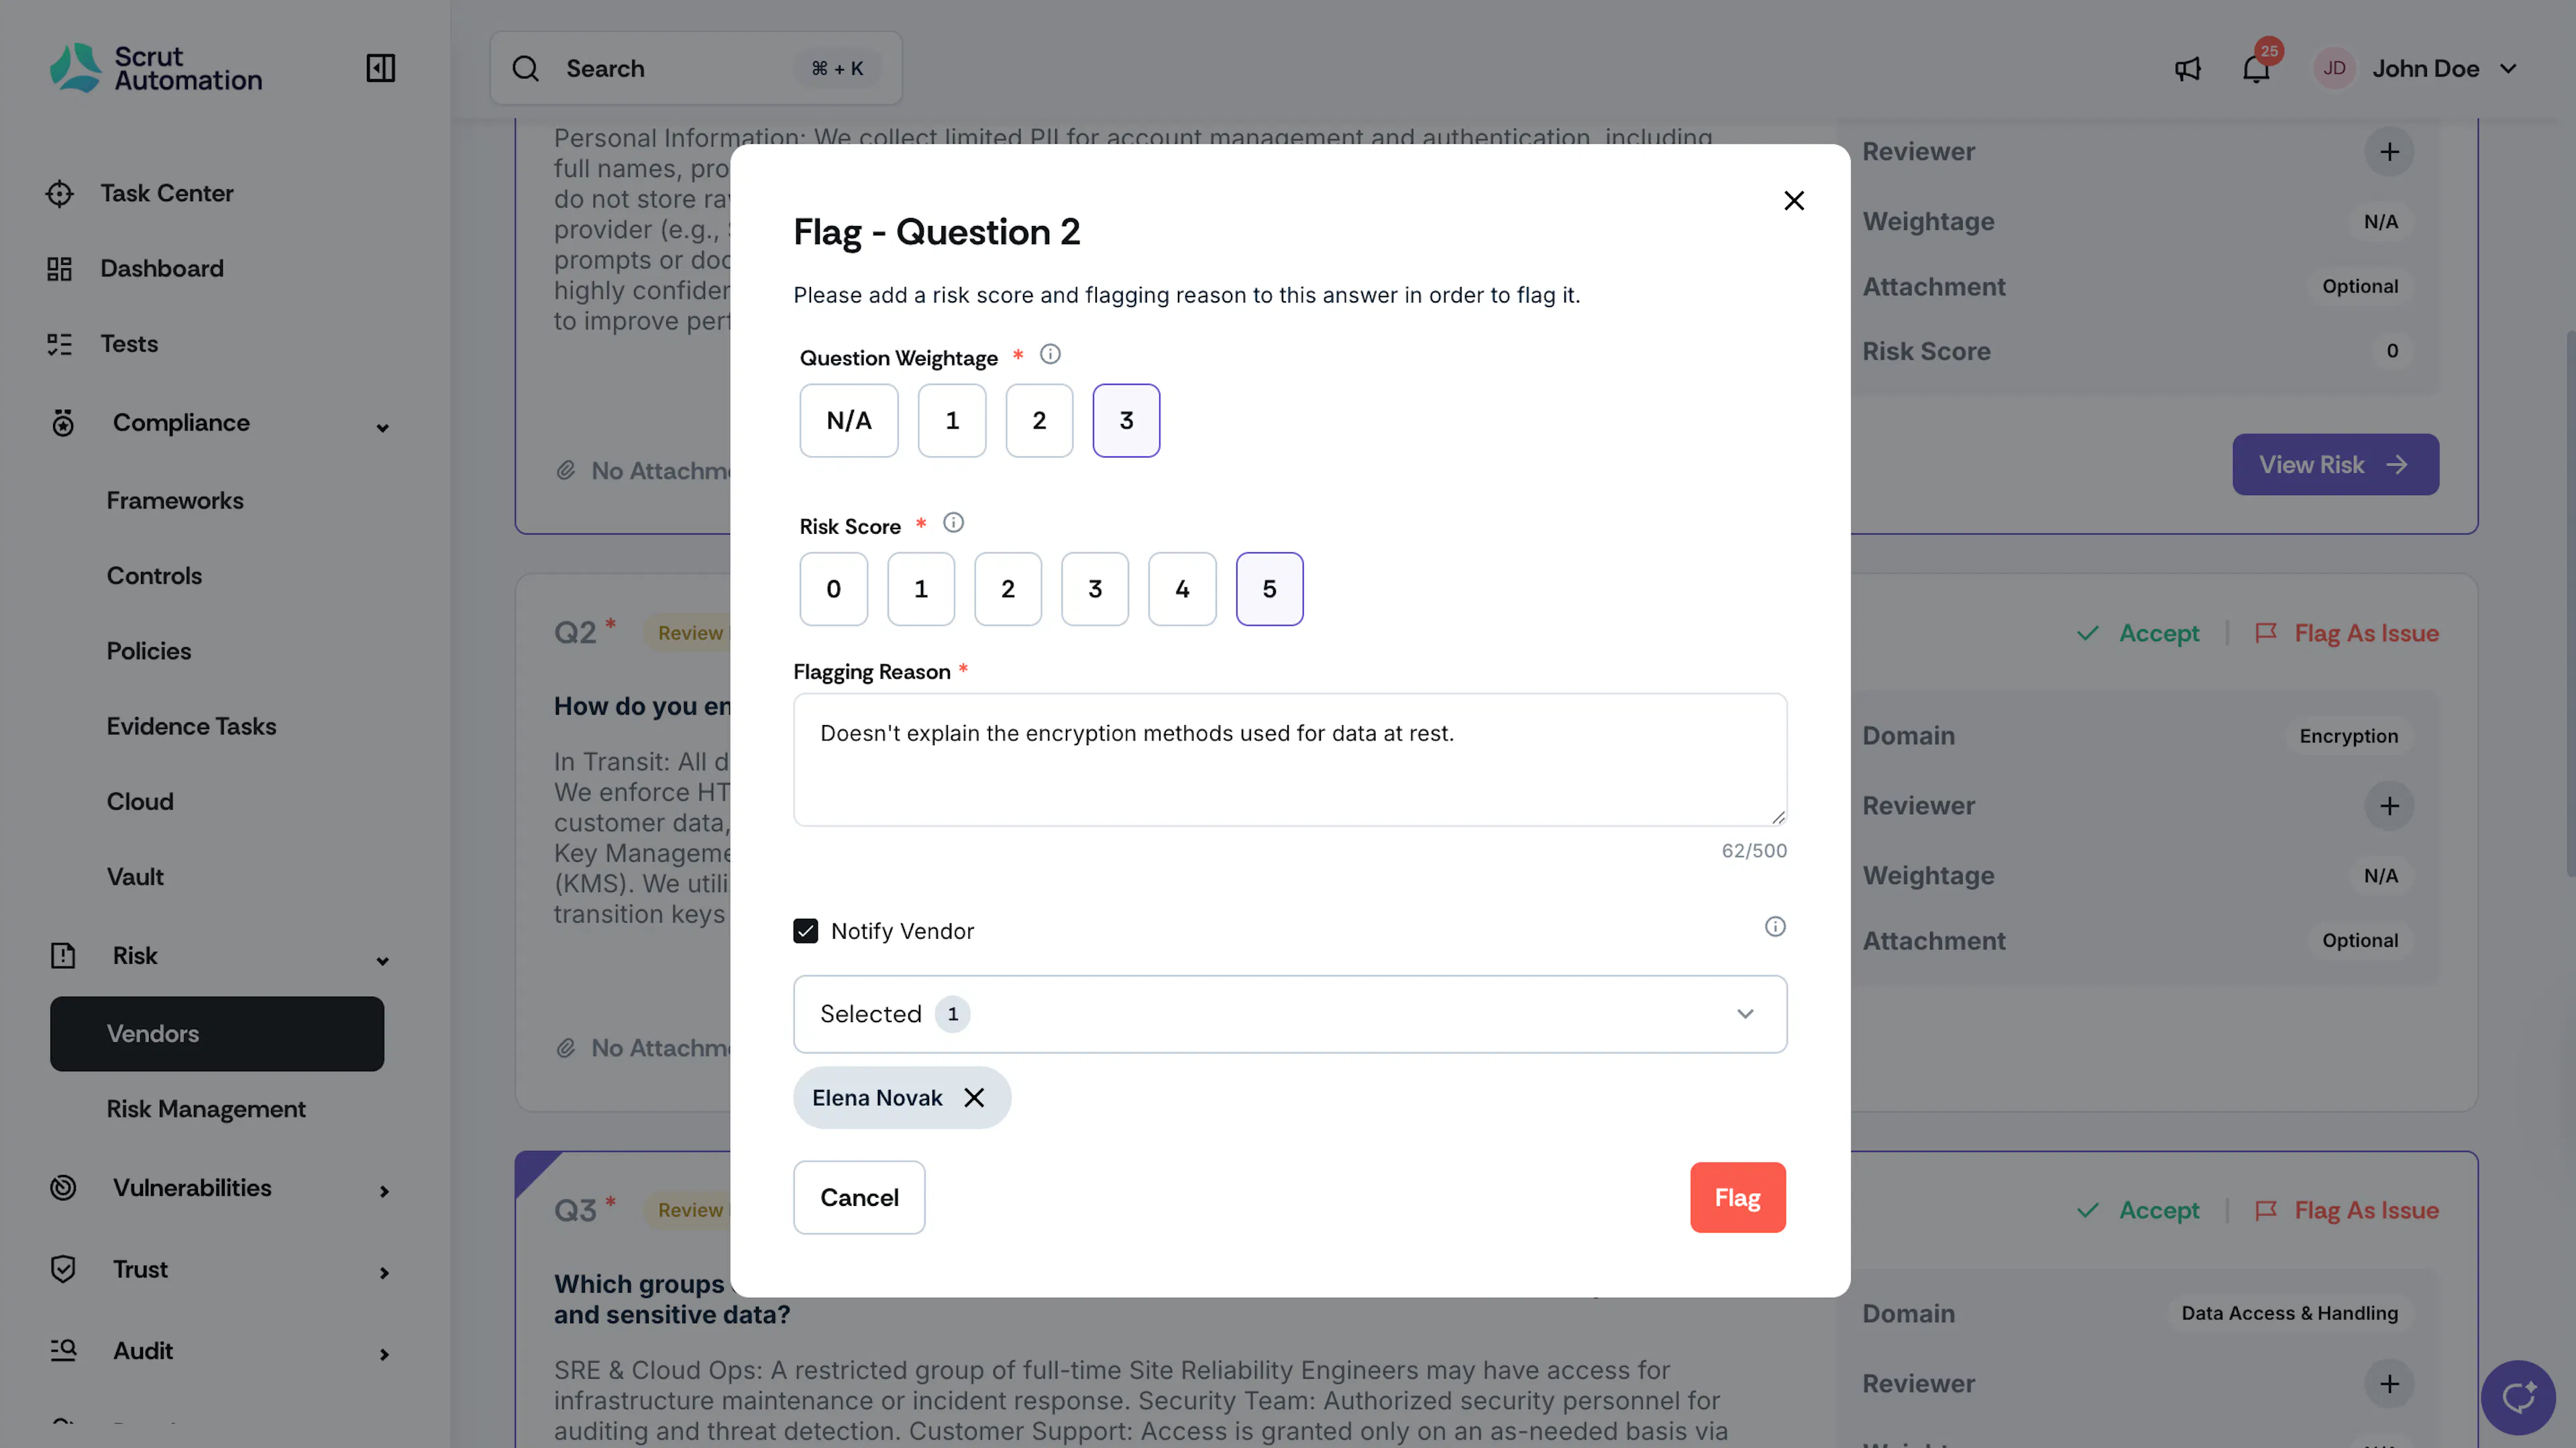
Heads Up! To reverse this decision, click Undo Flag.
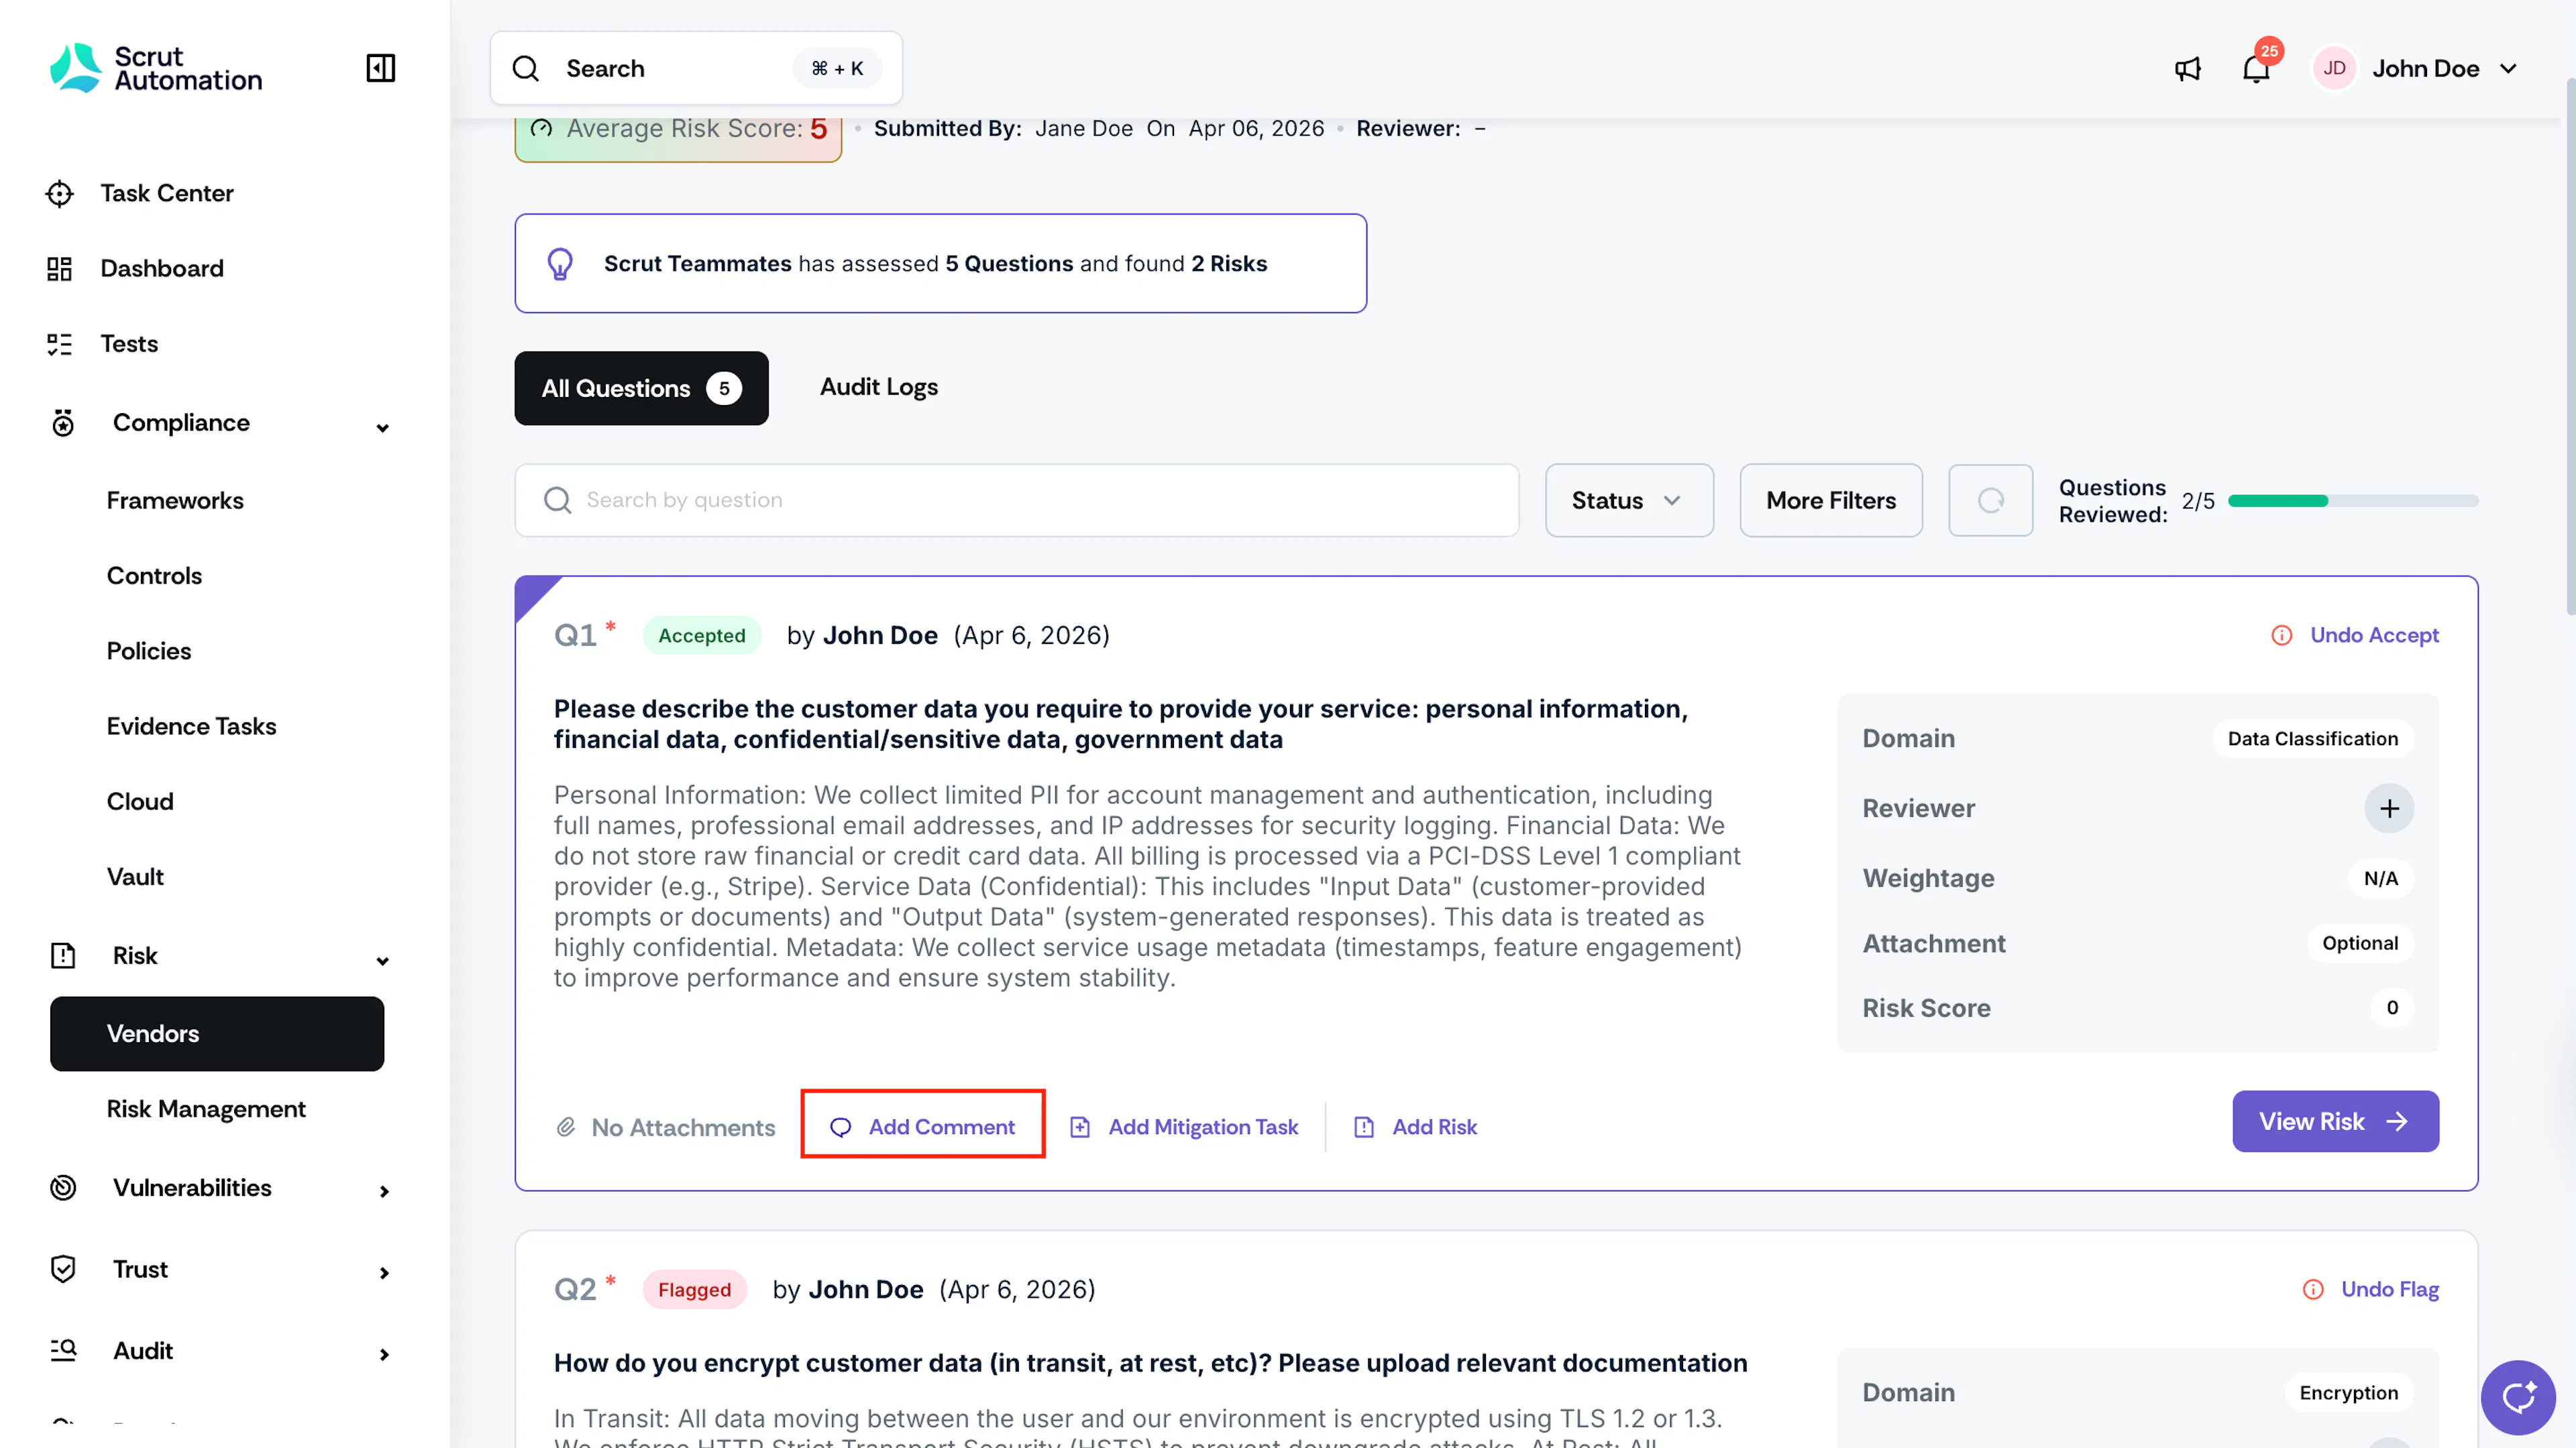
Action 3: Add a Comment
Use this to communicate with vendors about their responses or document internal notes.
-
Click Add Comment below the question.
-
Enter your comment and click Add Comment to submit.
The comment is added below the response, and an email notification is sent to the vendor.
Pro Tip!
Use comments for clarification requests, feedback, or collaborative discussions with the vendor POC or with your team. Keeping communication within Scrut eliminates back-and-forth emails and maintains a clear audit trail.
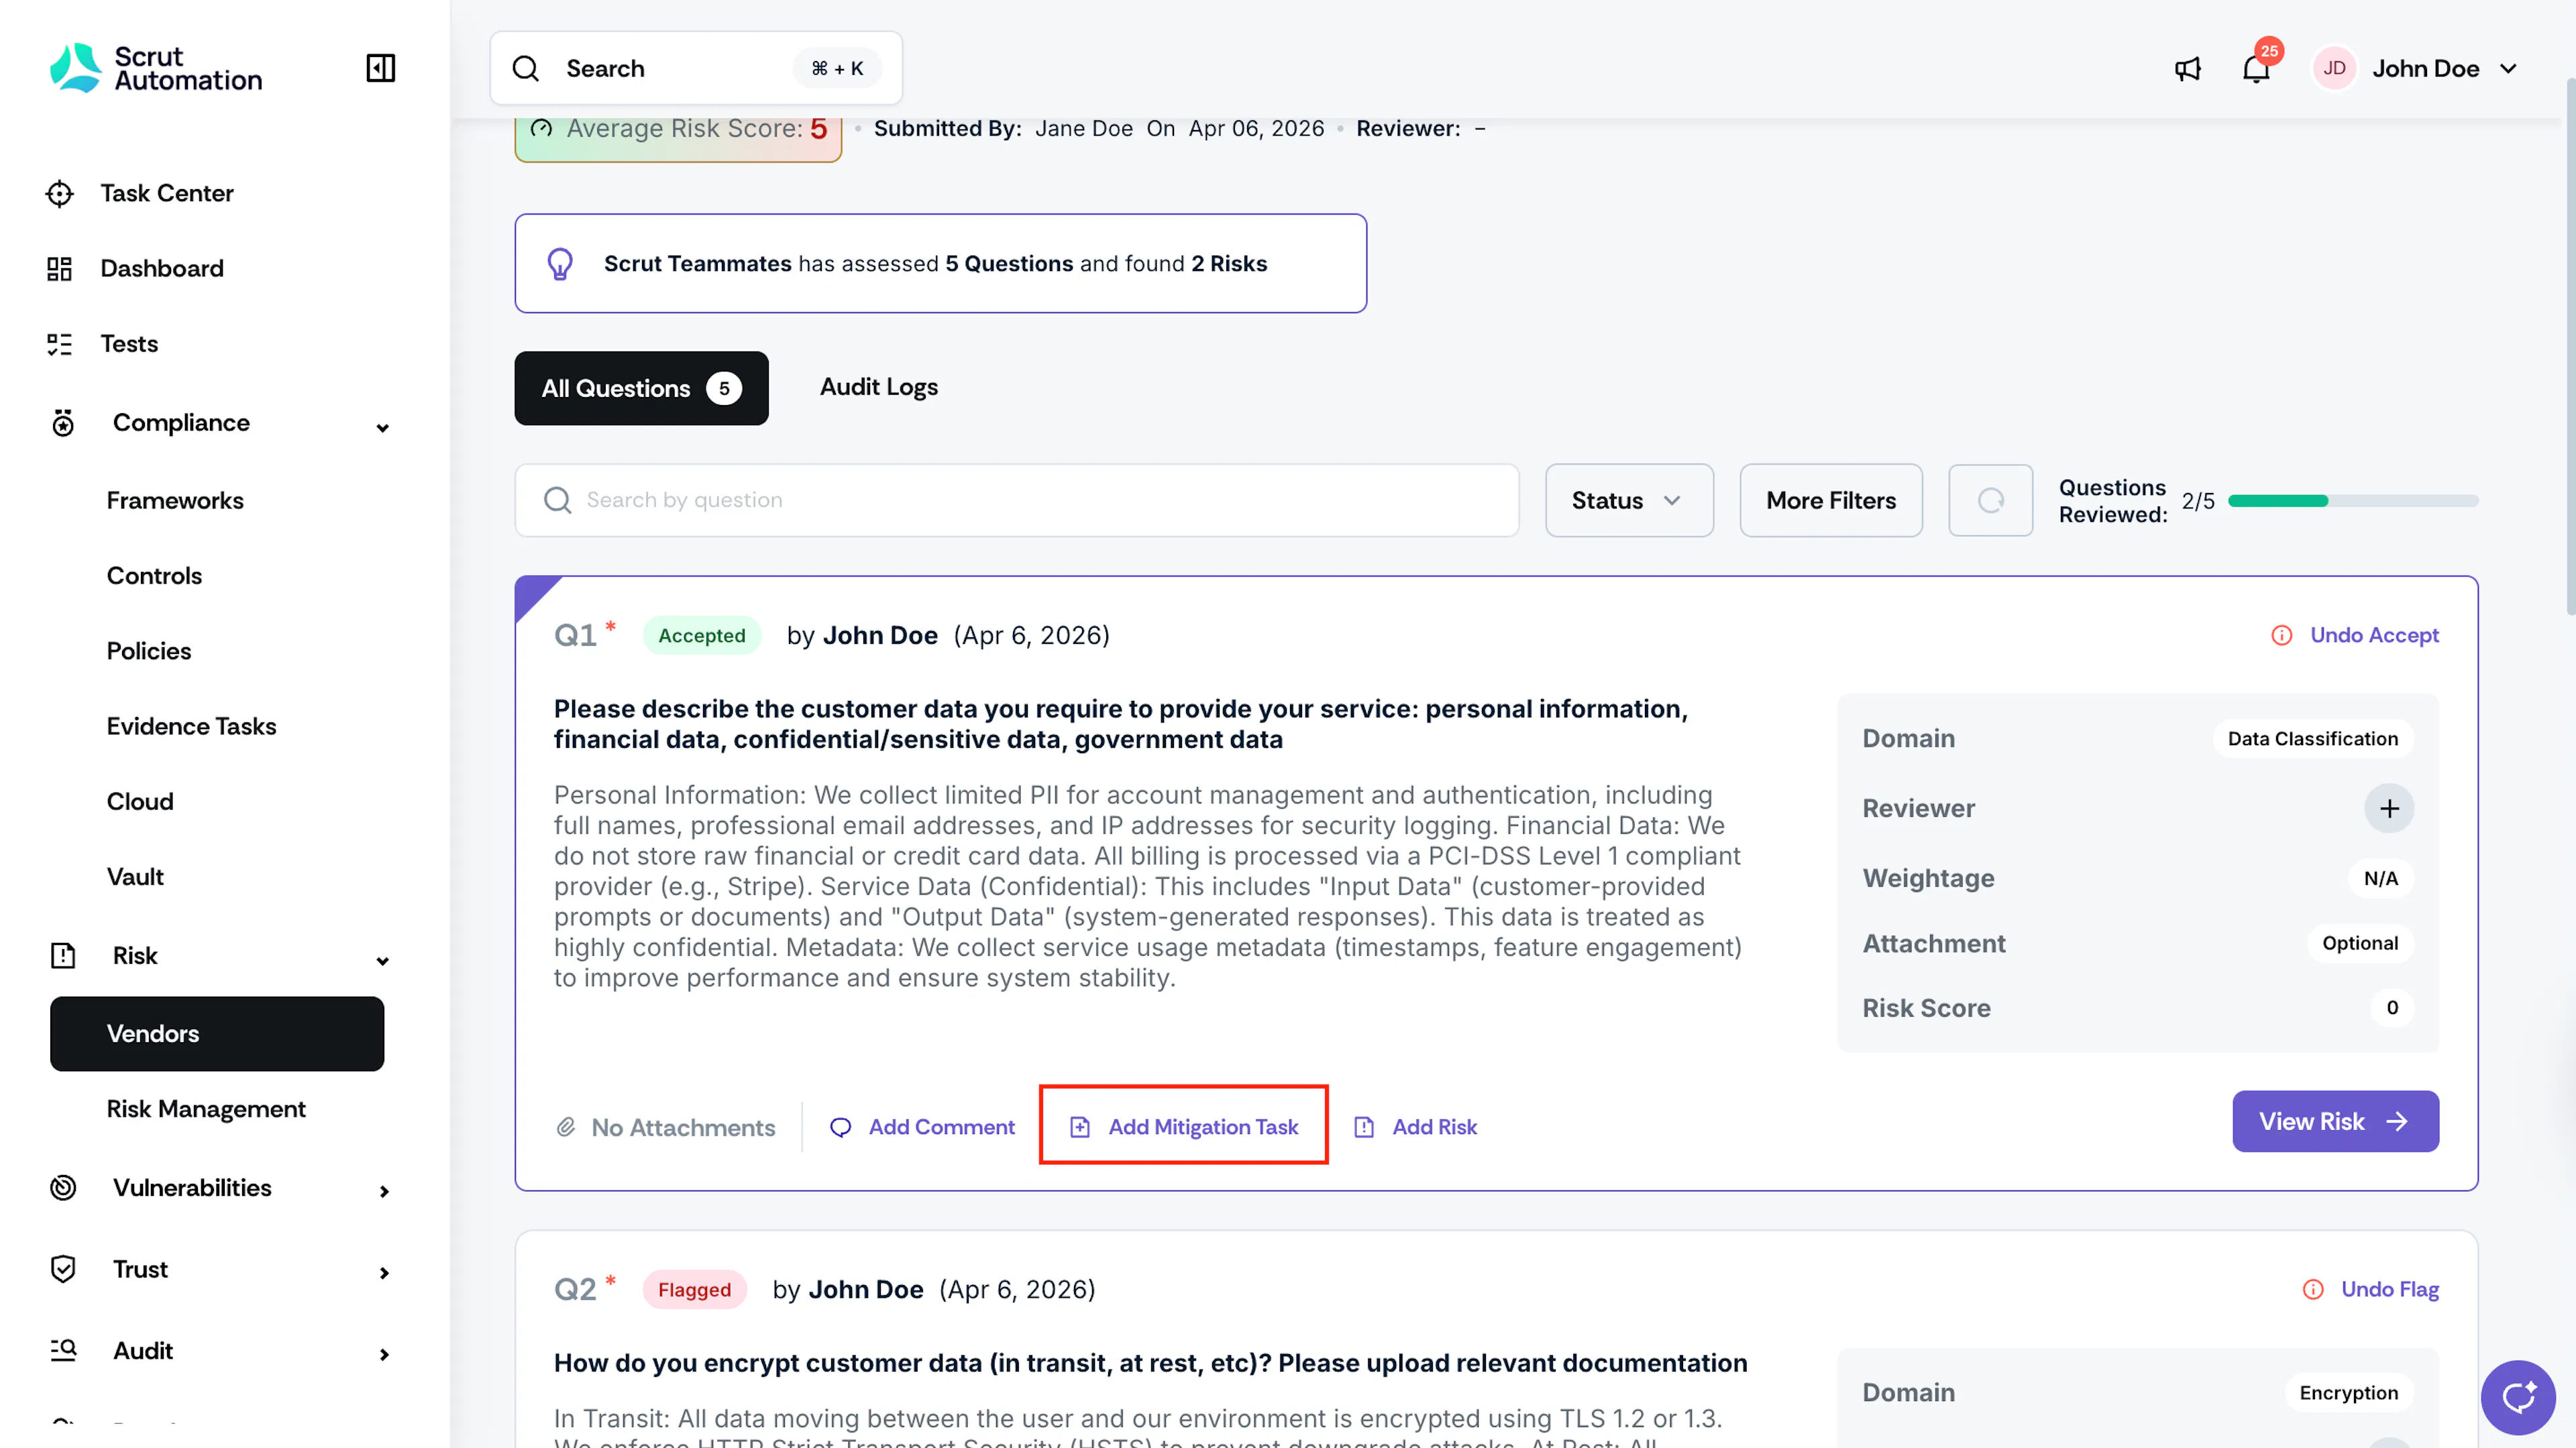
Action 4: Create a Mitigation Task
Use this when a response identifies a risk that requires specific action.
-
Click Add Mitigation Task below the question.
-
Enter:
- Task Name: A clear title describing the mitigation action.
- Description: (Optional) Detailed context about the risk and required actions.
- Assignee: The team member responsible for completing the task.
- Due Date: The deadline for task completion.
-
Click Save.
A mitigation task is created and linked to the question. To view it, click the task name within the question, or access all mitigation tasks from the Mitigation Tasks tab on the vendor page.
Important:
Creating a mitigation task does not complete the question review. You must still Accept or Flag as Issue to move forward.
Action 5: Create a Risk
Use this when a vendor's response reveals a potential security, compliance, or operational risk that needs to be tracked in your risk register.
-
Click Add Risk below the question.
-
In the Create Risk modal, enter:
- Risk Name: A clear, concise description of the identified risk.
- Risk Description: Detailed explanation of the risk, its potential impact, and relevant context.
- Assignees: Team members responsible for monitoring and managing this risk.
- Category: Select the appropriate category (e.g., Security, Compliance, Operational, Financial).
- Department: Select the department to which the risk belongs.
- Entities: Select the organizational entity or entities to which this risk applies. By default, all risks are organization-wide. However, you can change this setting and limit it to one or more entities.
- Application Name: Enter the application name associated with this risk.
- Linked Assets: Select the assets impacted by this risk.
-
Click Create Risk.
A risk entry is created, linked to the questionnaire, and tracked in your organization's risk register. Click the risk name within the question to view full details, or access all vendor-related risks from the Risk module.
Important:
Creating a risk does not complete the question review. You must still Accept or Flag as Issue to move forward.
Pro Tip!
When to use each action:
- Create a Risk when you've identified a potential threat that requires ongoing monitoring and strategic management.
- Create a Mitigation Task when specific actions are needed to address or reduce an identified issue.
- You can create both for the same question when the situation warrants tracking and immediate action.
Step 4: Request and Update Attachments (Optional)
During your review, you may need additional documentation or find that submitted attachments are insufficient or outdated. Vendors can update attachments after submission as long as the questionnaire is still under review.
To request updated attachments:
- Use Add Comment or Flag as Issue to notify the vendor about the attachment requirement.
- Specify which documentation is required or why the current attachments are insufficient.
The vendor receives an email notification with your request.
Once notified, the vendor can:
- Access the submitted questionnaire via the vendor portal at vendor.scrut.io.
- Navigate to the specific question with the attachment requirement.
- Re-upload or replace attachments directly within the platform.
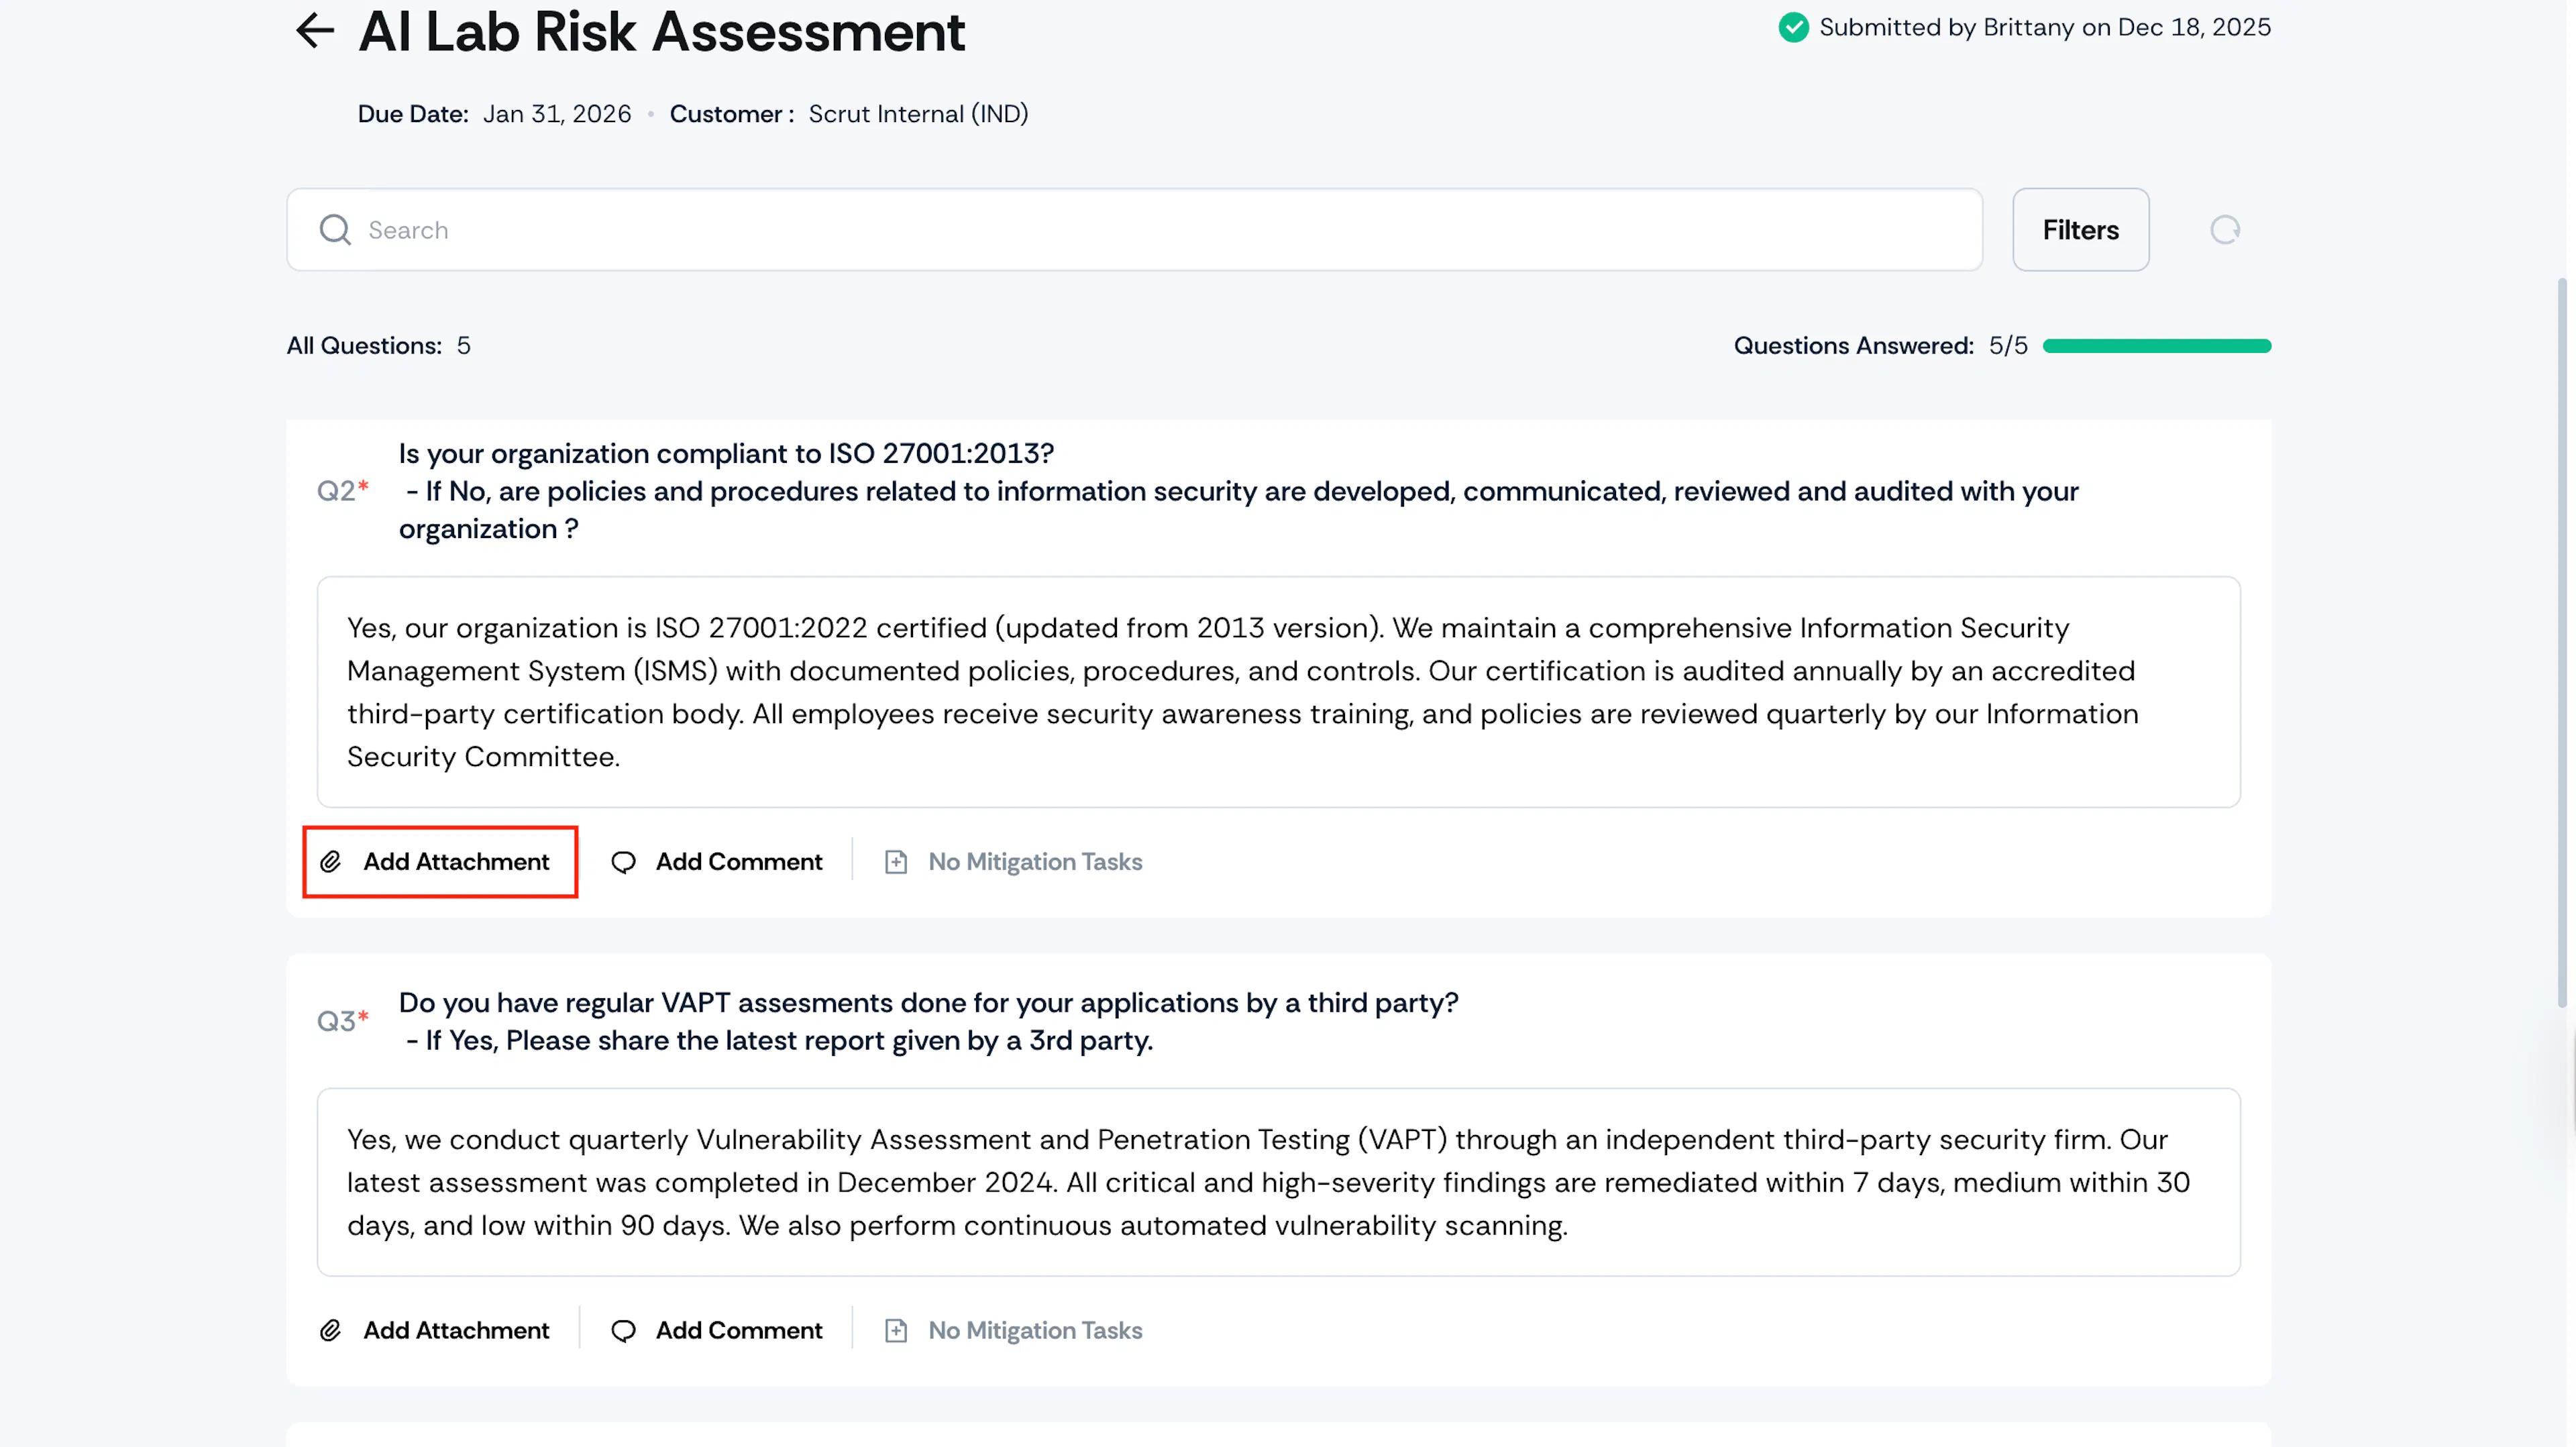
You receive a notification when the vendor updates their attachments.
Important:
Attachments can only be updated while the questionnaire is still under review. Once you mark a question as Accepted or the questionnaire as Assessed, attachment updates are no longer possible. Address all documentation requirements before completing the assessment.
Step 5: Complete the Assessment
Once you've reviewed all questions and received all necessary documentation:
-
Click Complete Assessment at the top of the questionnaire.
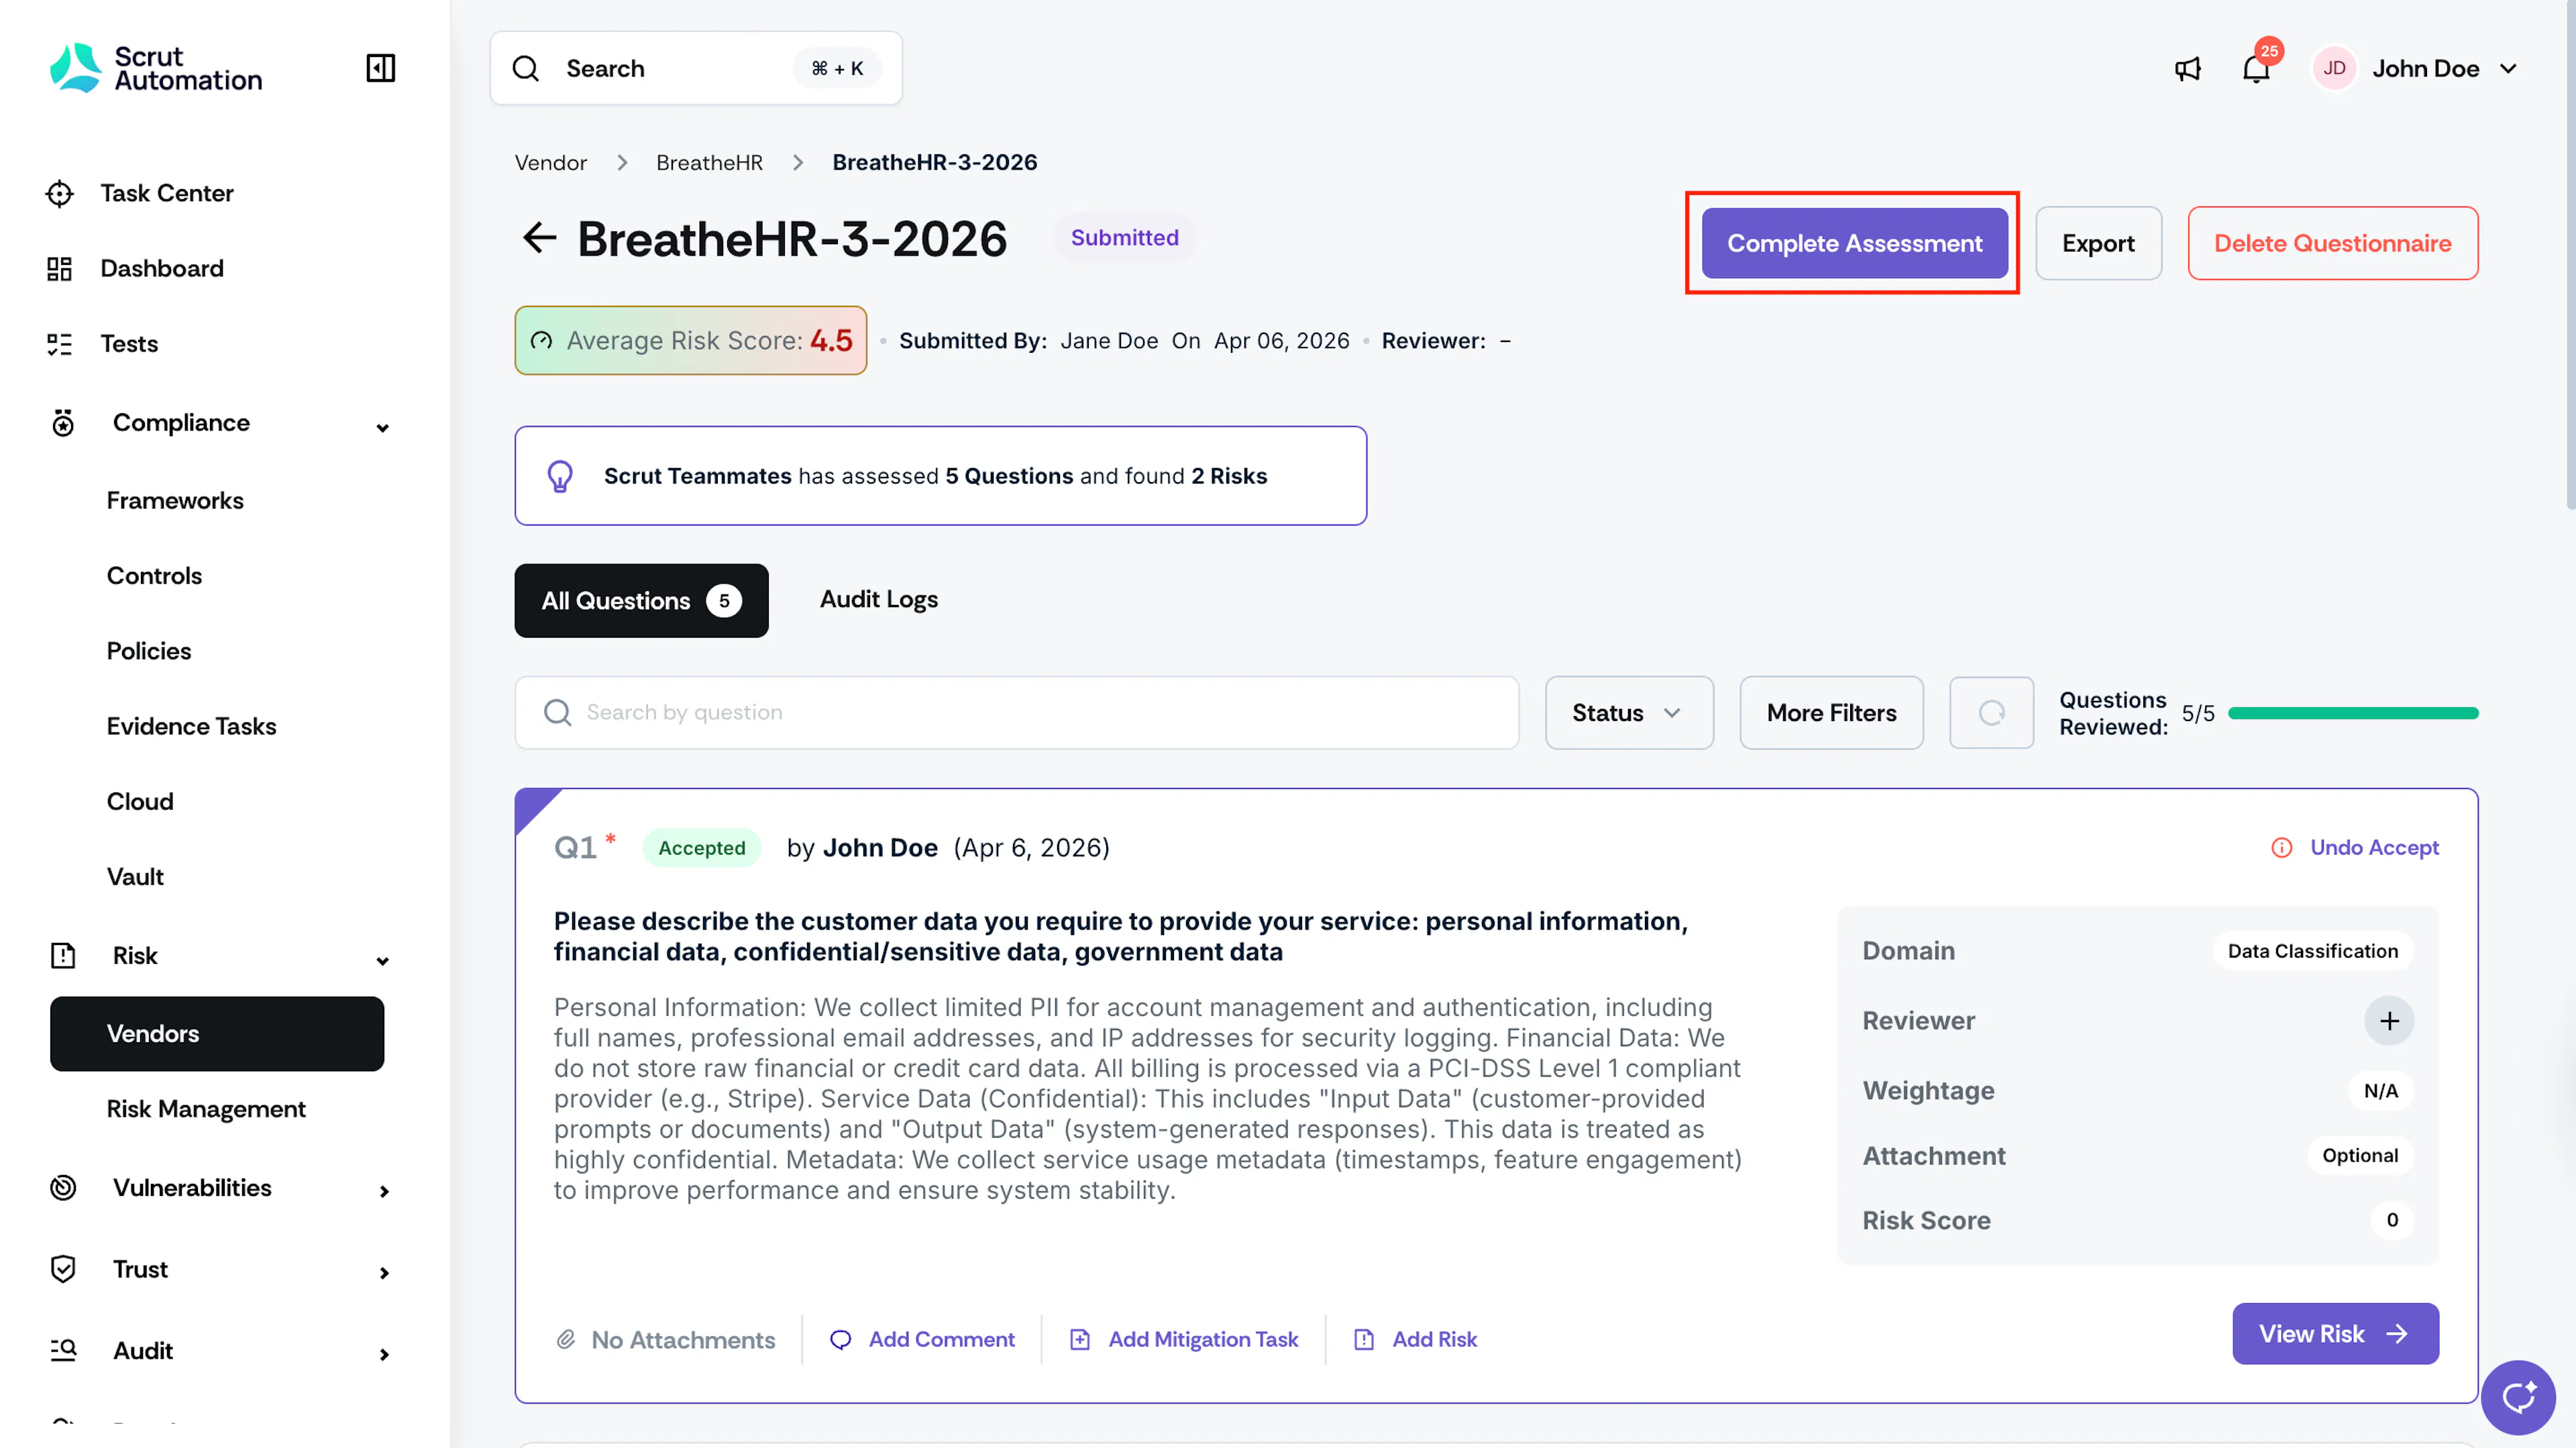
-
(Optional) Enter an Assessment Summary to capture your key observations about the vendor.
Note: The assessment summary appears in the final vendor assessment report, right after the vendor details. It gives executives and external stakeholders a quick view of your findings without requiring them to read through each question and response. You can edit the summary at any time, even after completing the assessment, by clicking the edit icon next to it.
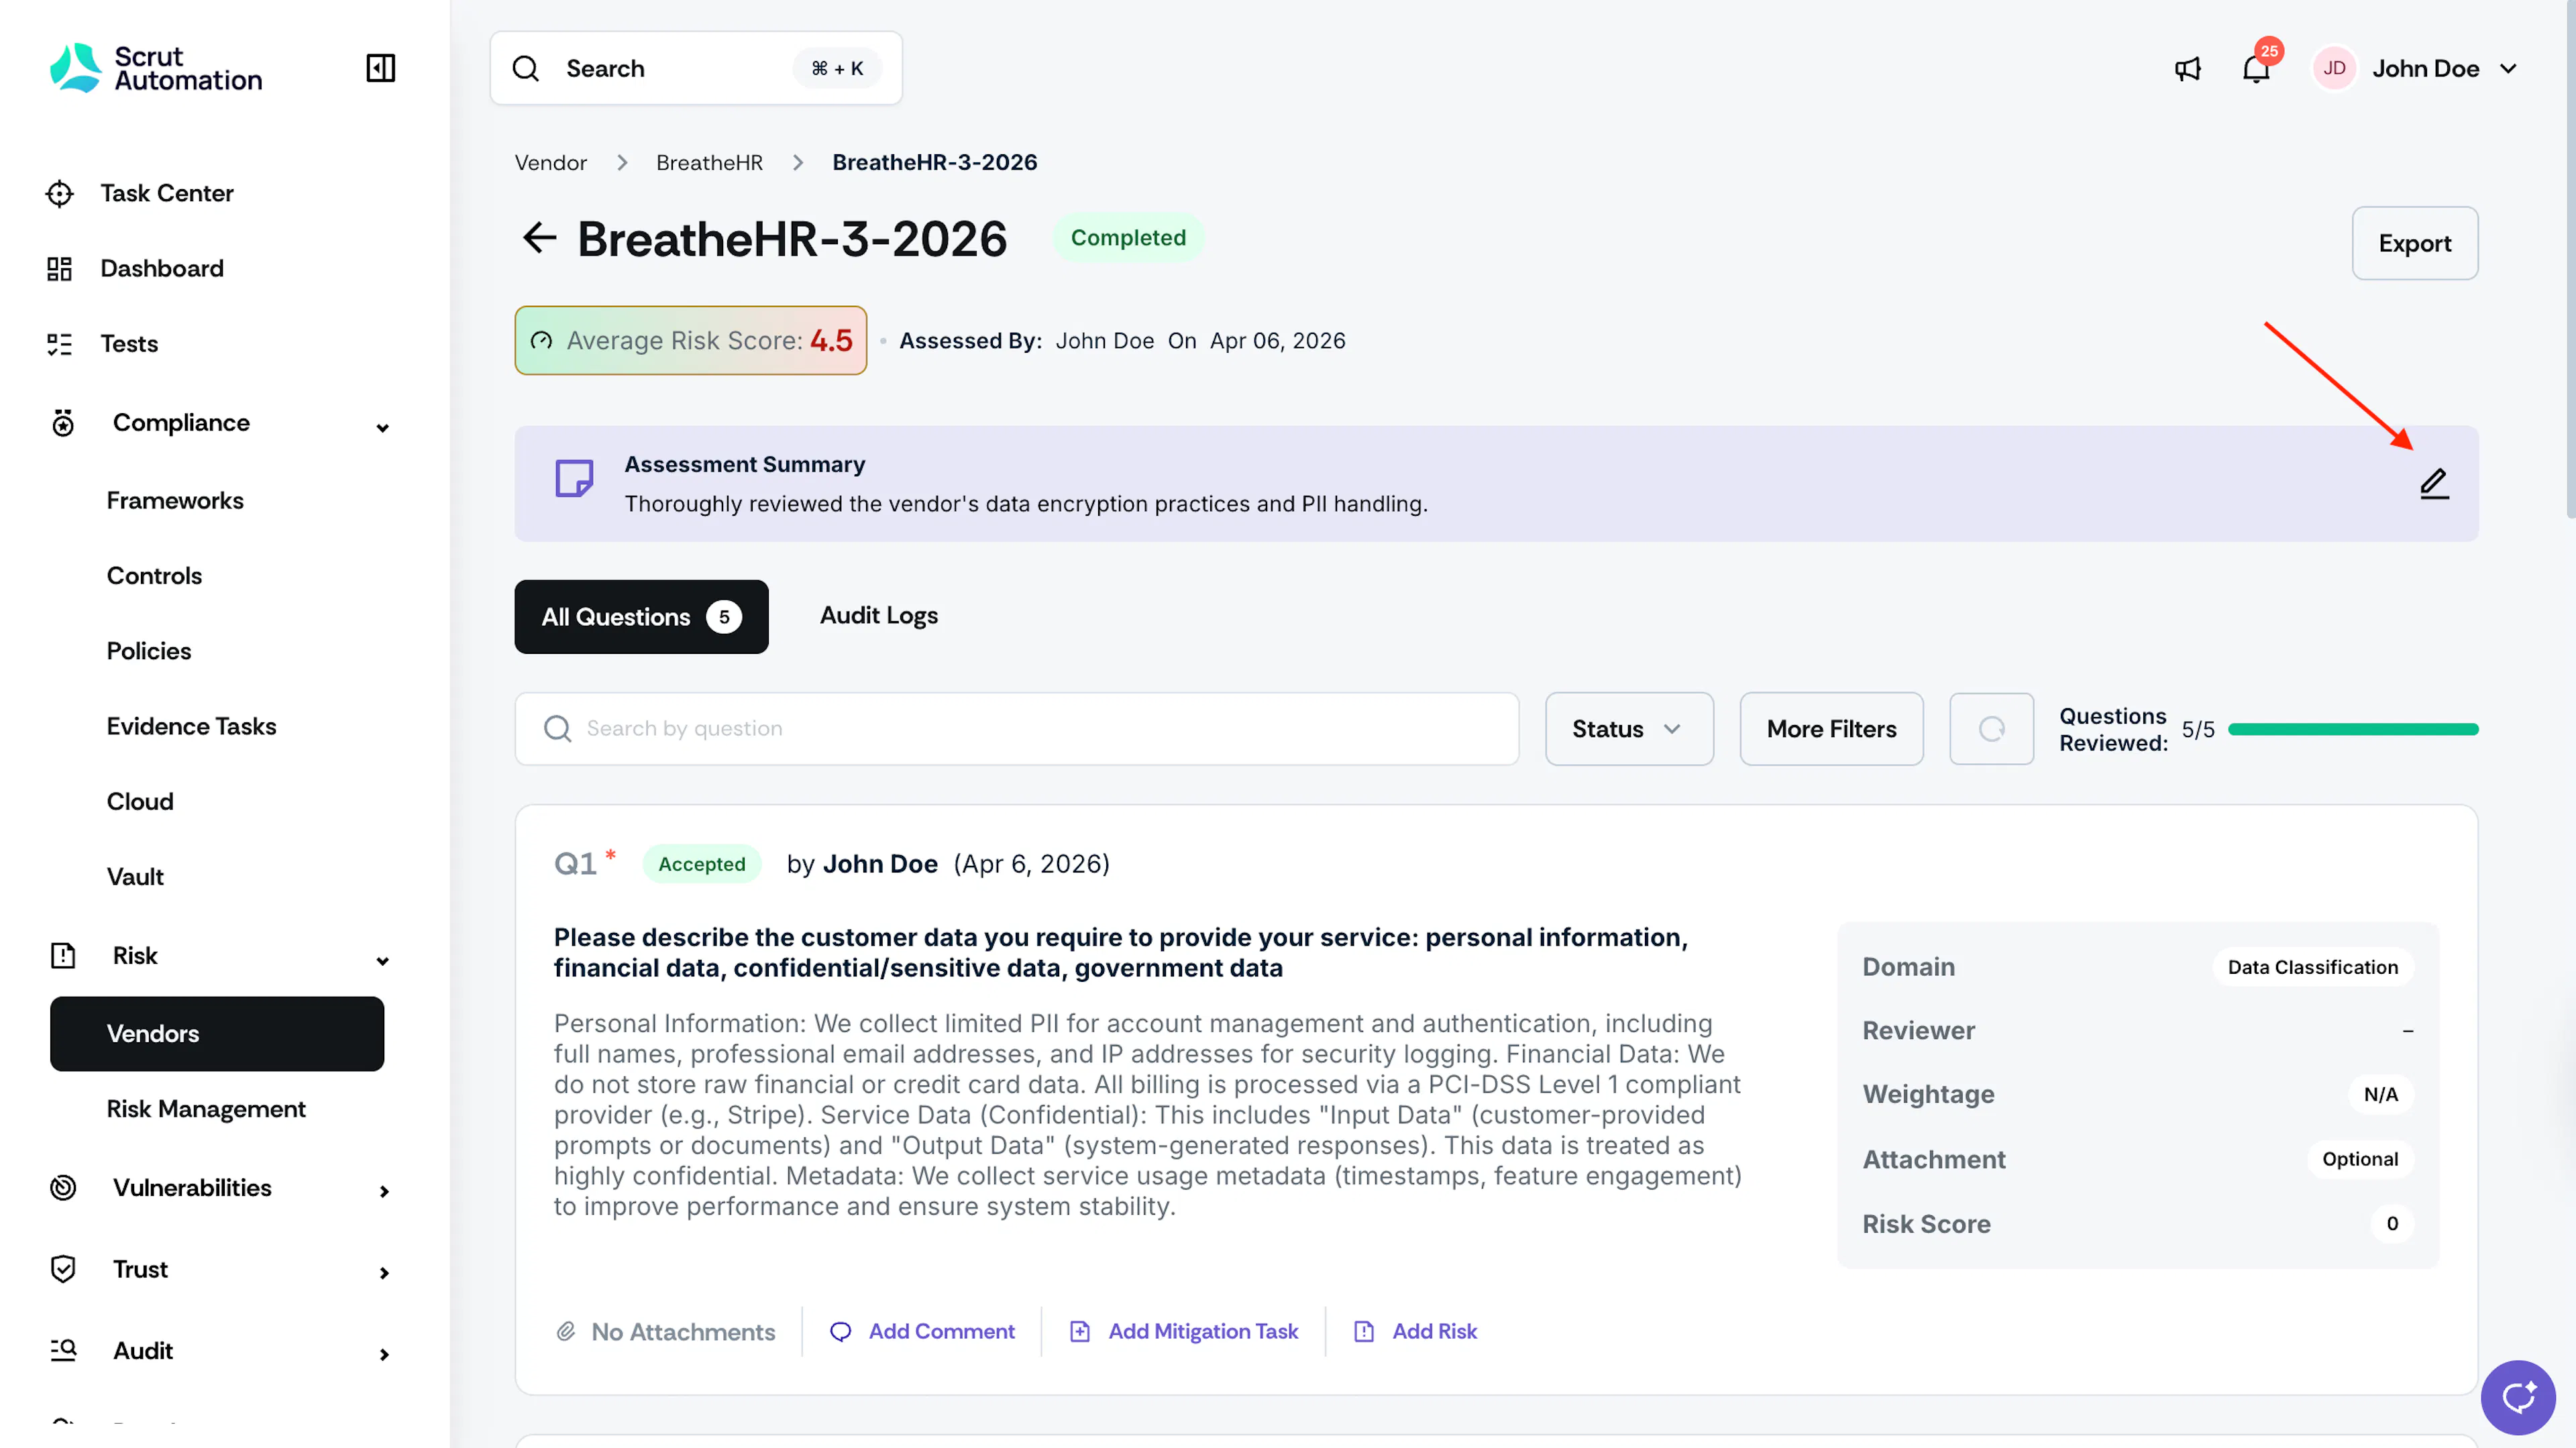
- Confirm your completion.
The questionnaire status changes to Assessed, indicating the evaluation is finalized.
Heads Up!
Once you mark as Assessed, vendors can no longer update attachments or responses, so ensure all requirements are met before completing.
Step 6: Review the Risk Scorecard
After completing the assessment, review the vendor's overall risk profile.
-
Click Scorecard at the top of the questionnaire.
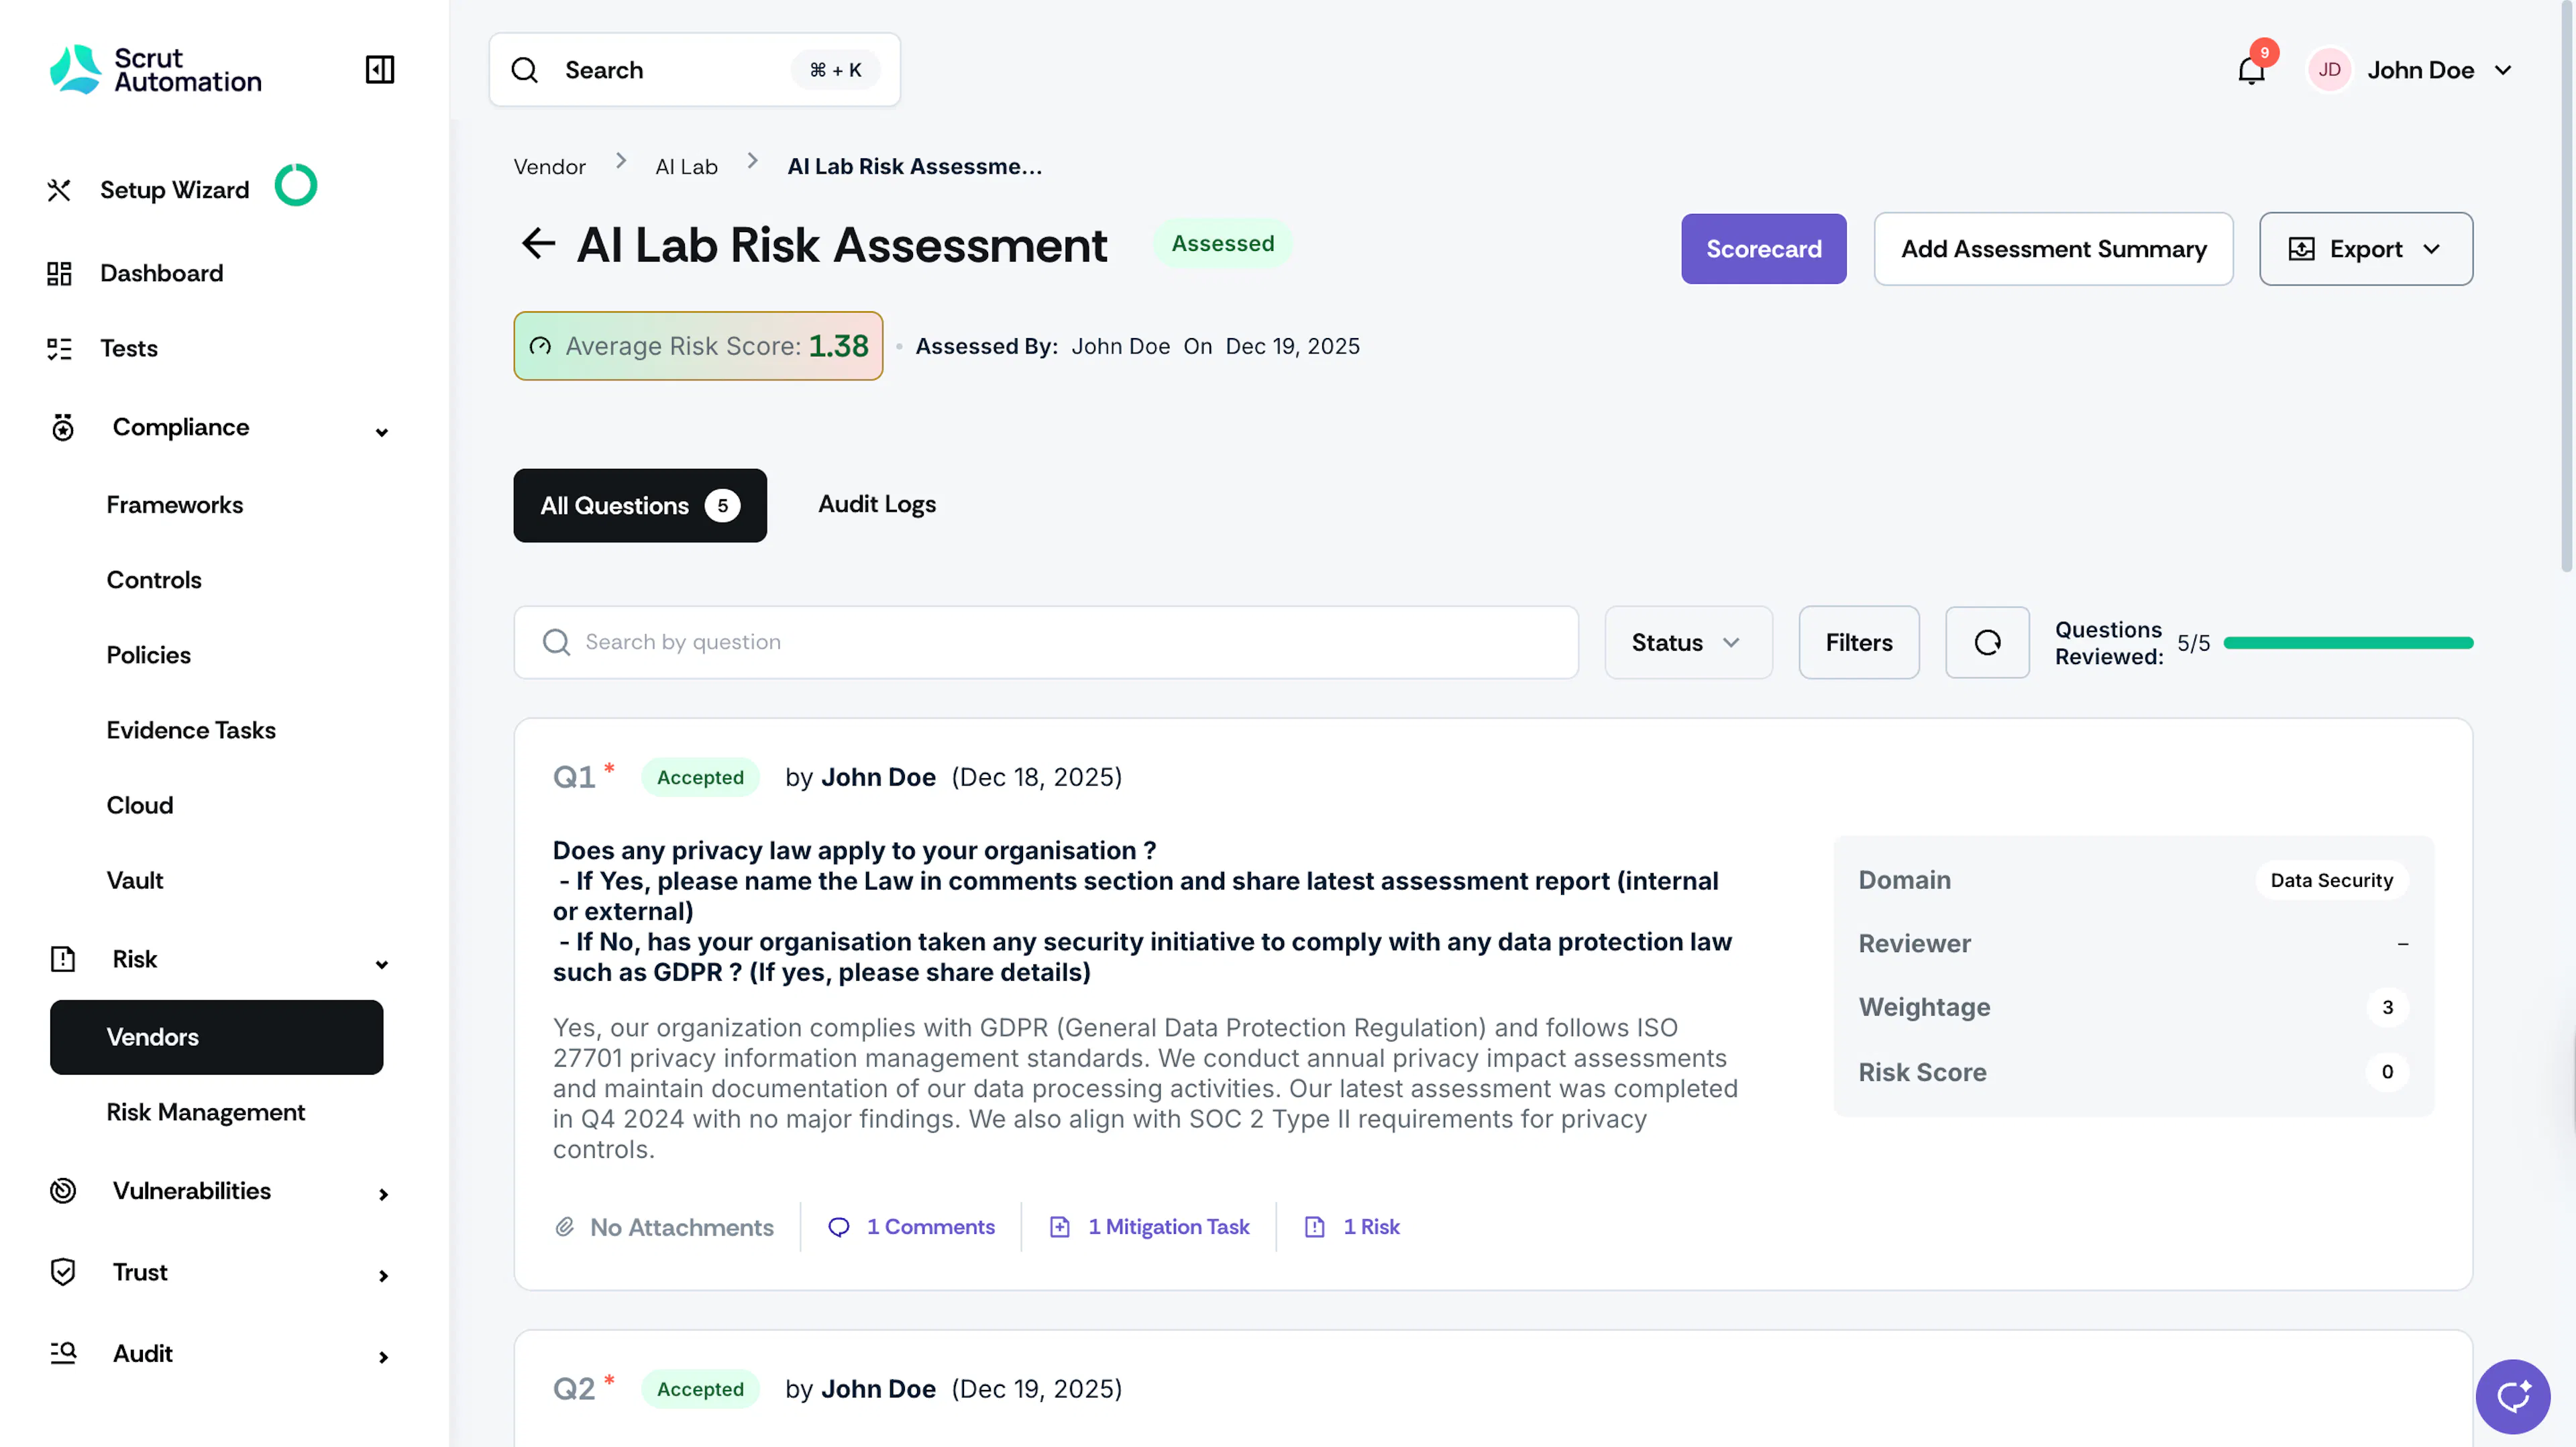
-
Review the risk scores broken down by domain in the Scorecard window.
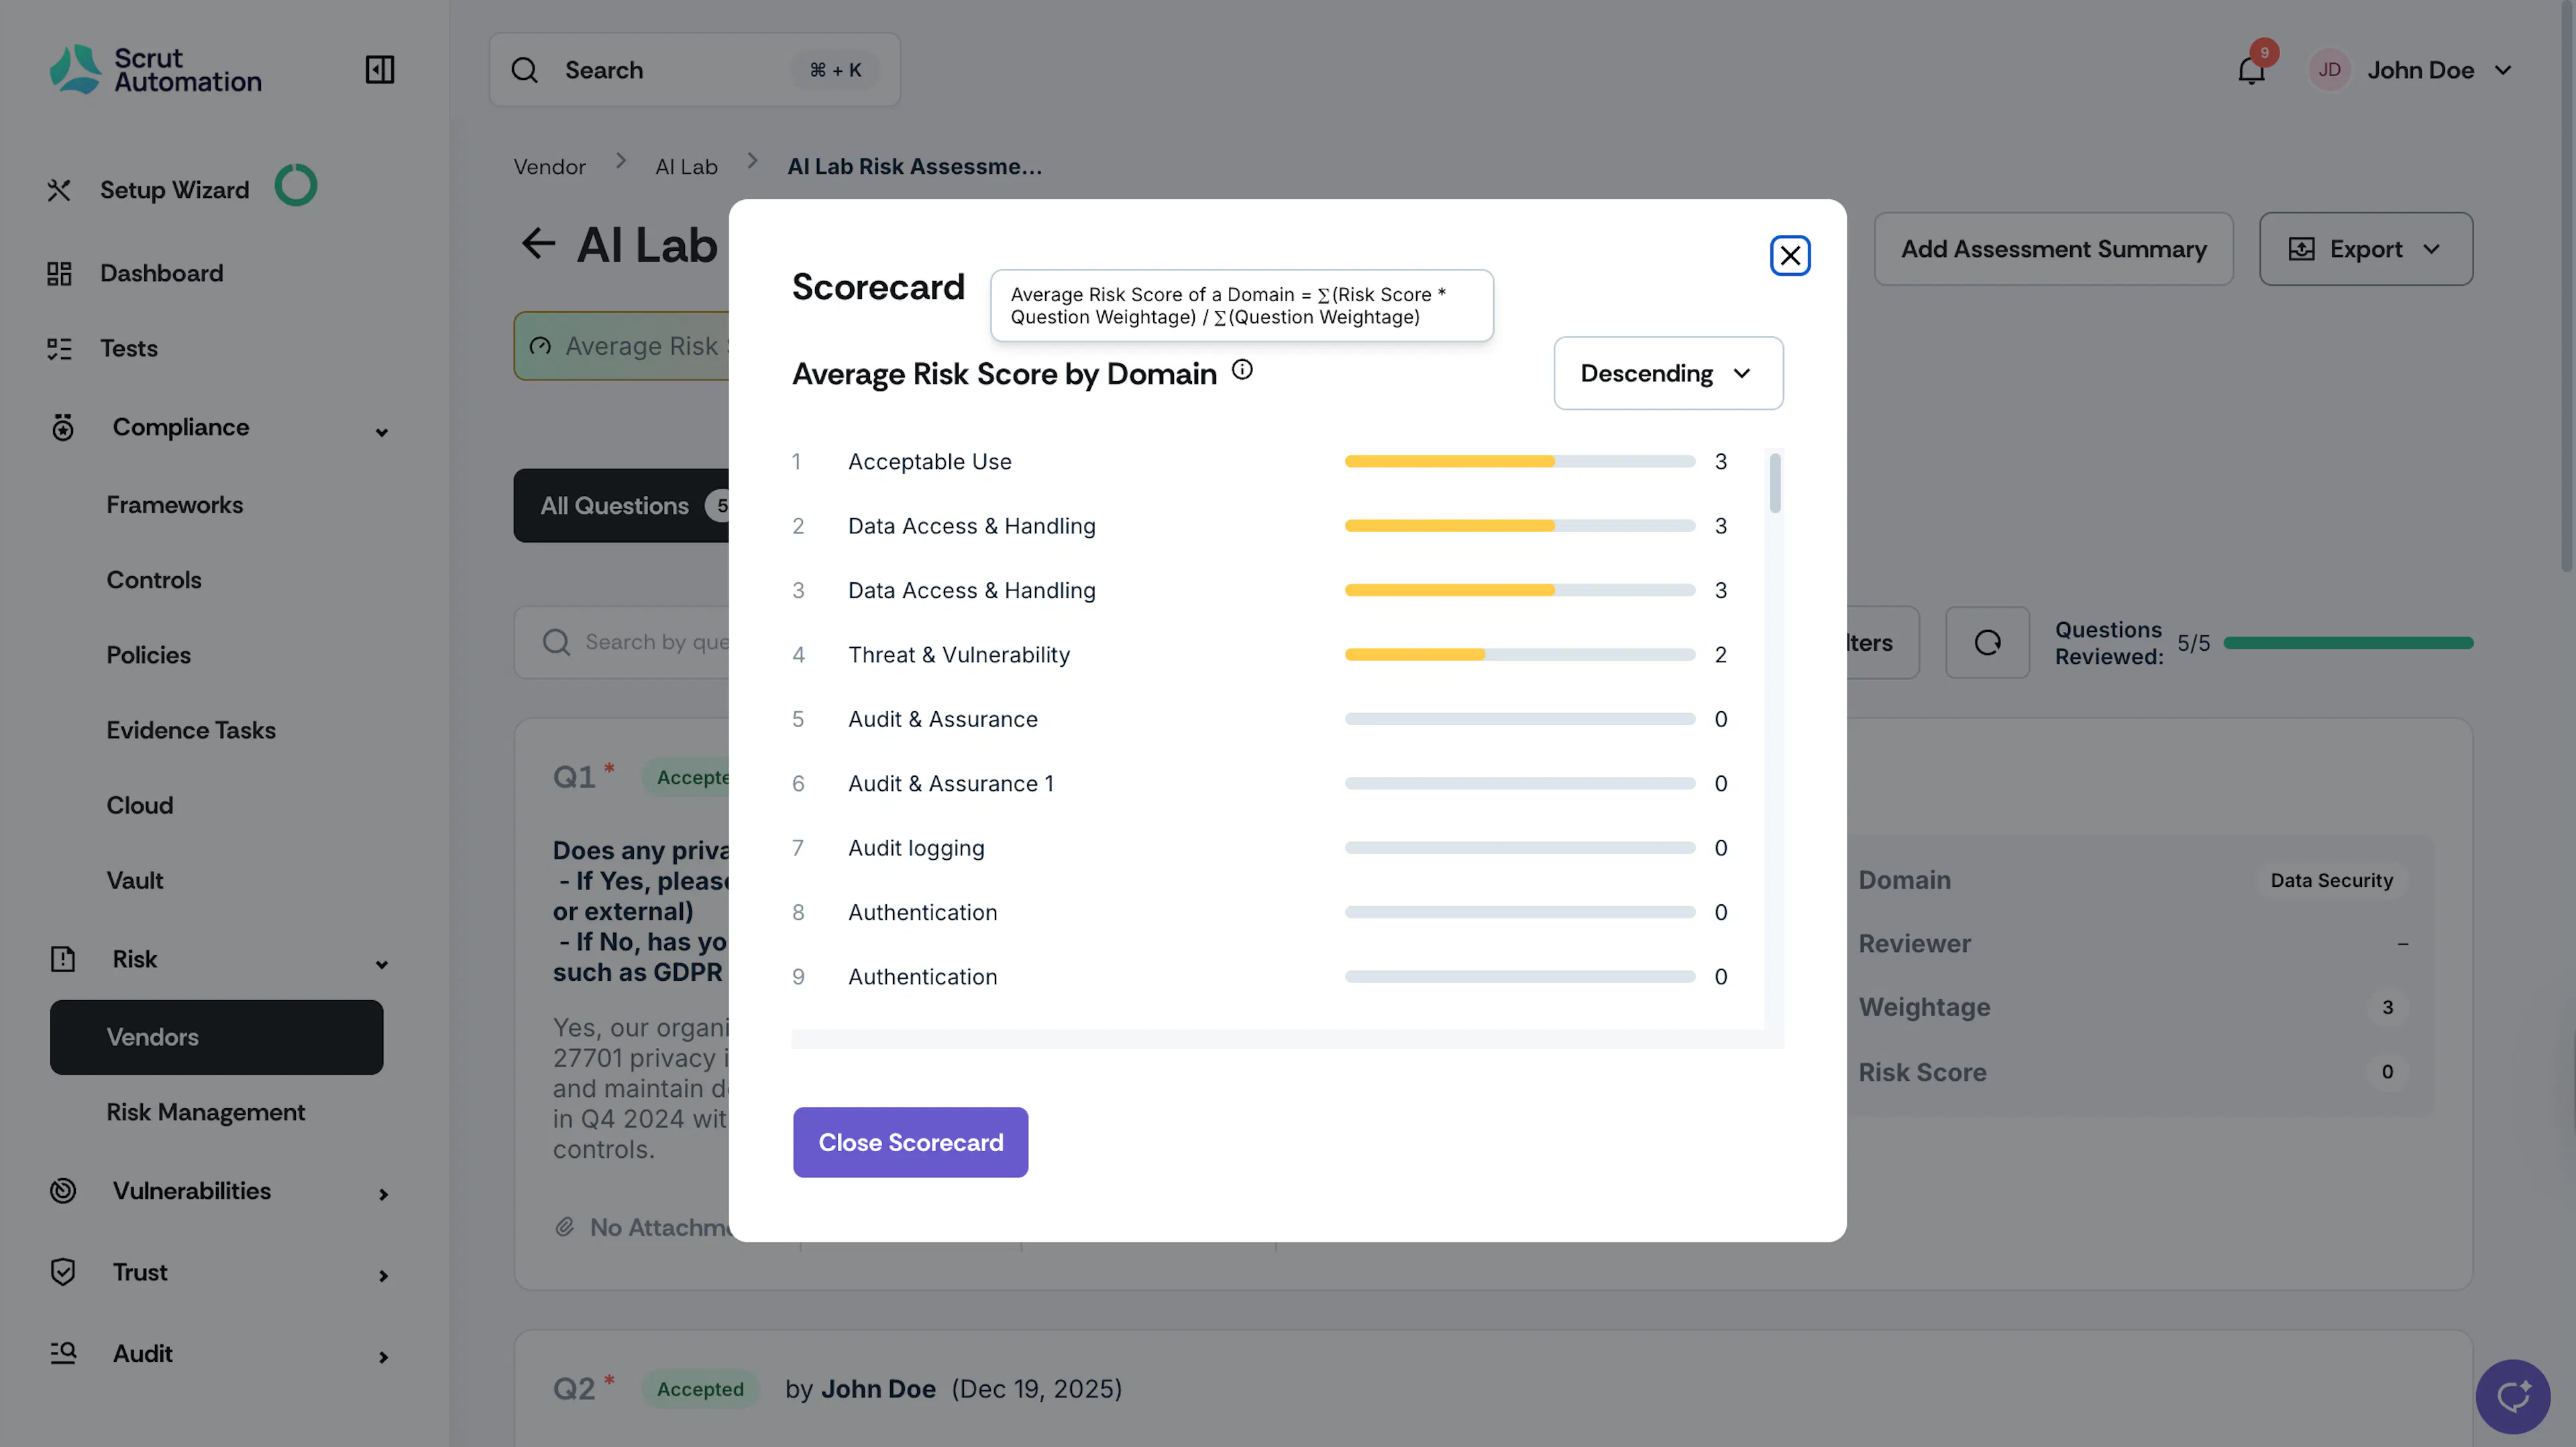
Use the scorecard to make informed decisions about vendor relationships, onboarding approvals, or risk mitigation actions.
Common Scenarios and Recommended Workflows
Scenario 1: Requesting Additional Documentation
- Review vendor response and identify missing documentation
- Add a Comment specifying required attachments
- Optionally, Flag as Issue if the documentation is critical
- Vendor receives notification and uploads updated attachments
- Review new attachments and Accept the response
Scenario 2: Replacing Outdated Certificates
- If you notice that a compliance certificate has expired or is outdated
- Flag as Issue with reason: "Please provide the current certificate."
- Vendor uploads updated certificate
- Verify the new attachment and Accept the response
Scenario 3: Insufficient Evidence
- The vendor provides a generic policy document instead of specific evidence
- Add Comment: "Please provide evidence of implementation, such as screenshots, audit reports, or configuration examples."
- Vendor updates the attachment with appropriate evidence
- Review evidence, Accept response, and update risk score accordingly
Best Practices
For Collaboration:
- Use comments to facilitate discussion with vendors and internal teams
- Keep Vendor POCs updated on flagged issues
- Leverage the platform's centralized communication features instead of external email
During Evaluation:
- Document your reasoning in comments for future reference
- Request all necessary attachments before completing the assessment
For Attachment Requests:
- Be specific about what documentation is required
- Explain why current attachments are insufficient
For Risk Management:
- Assign appropriate weightage based on your organization's risk priorities
- Involve domain experts as reviewers for technical questions
- Track mitigation tasks diligently through to completion
- Regularly review scorecards to monitor vendor risk profiles over time
Need help? Contact support@scrut.io or your CSM.