

Assess Vendors with Scrut Teammates
Who can use this feature
- Included in the Scale plan
- Available in the Vendor Advanced Add-on for Foundation and Growth plans
Learn how to use Scrut Teammates to complete vendor risk assessments.
Scrut Teammates is Scrut's AI-powered assessment assistant that helps you evaluate vendors more quickly and thoroughly. It classifies vendor risk, generates a tailored questionnaire, quality-checks vendor responses in real time, and surfaces risks from submitted answers.
Before You Begin
- If you haven't added the vendor to Scrut yet, add the vendor details before starting the assessment.
- Ensure that you have enabled Scrut Teammates for your organization.
Step 1: Start the AI Assessment
- Navigate to Risk → Vendors on the left navigation panel and go to the Vendors tab.
- Click the vendor you want to assess.
- Click Start Teammates Assessment.
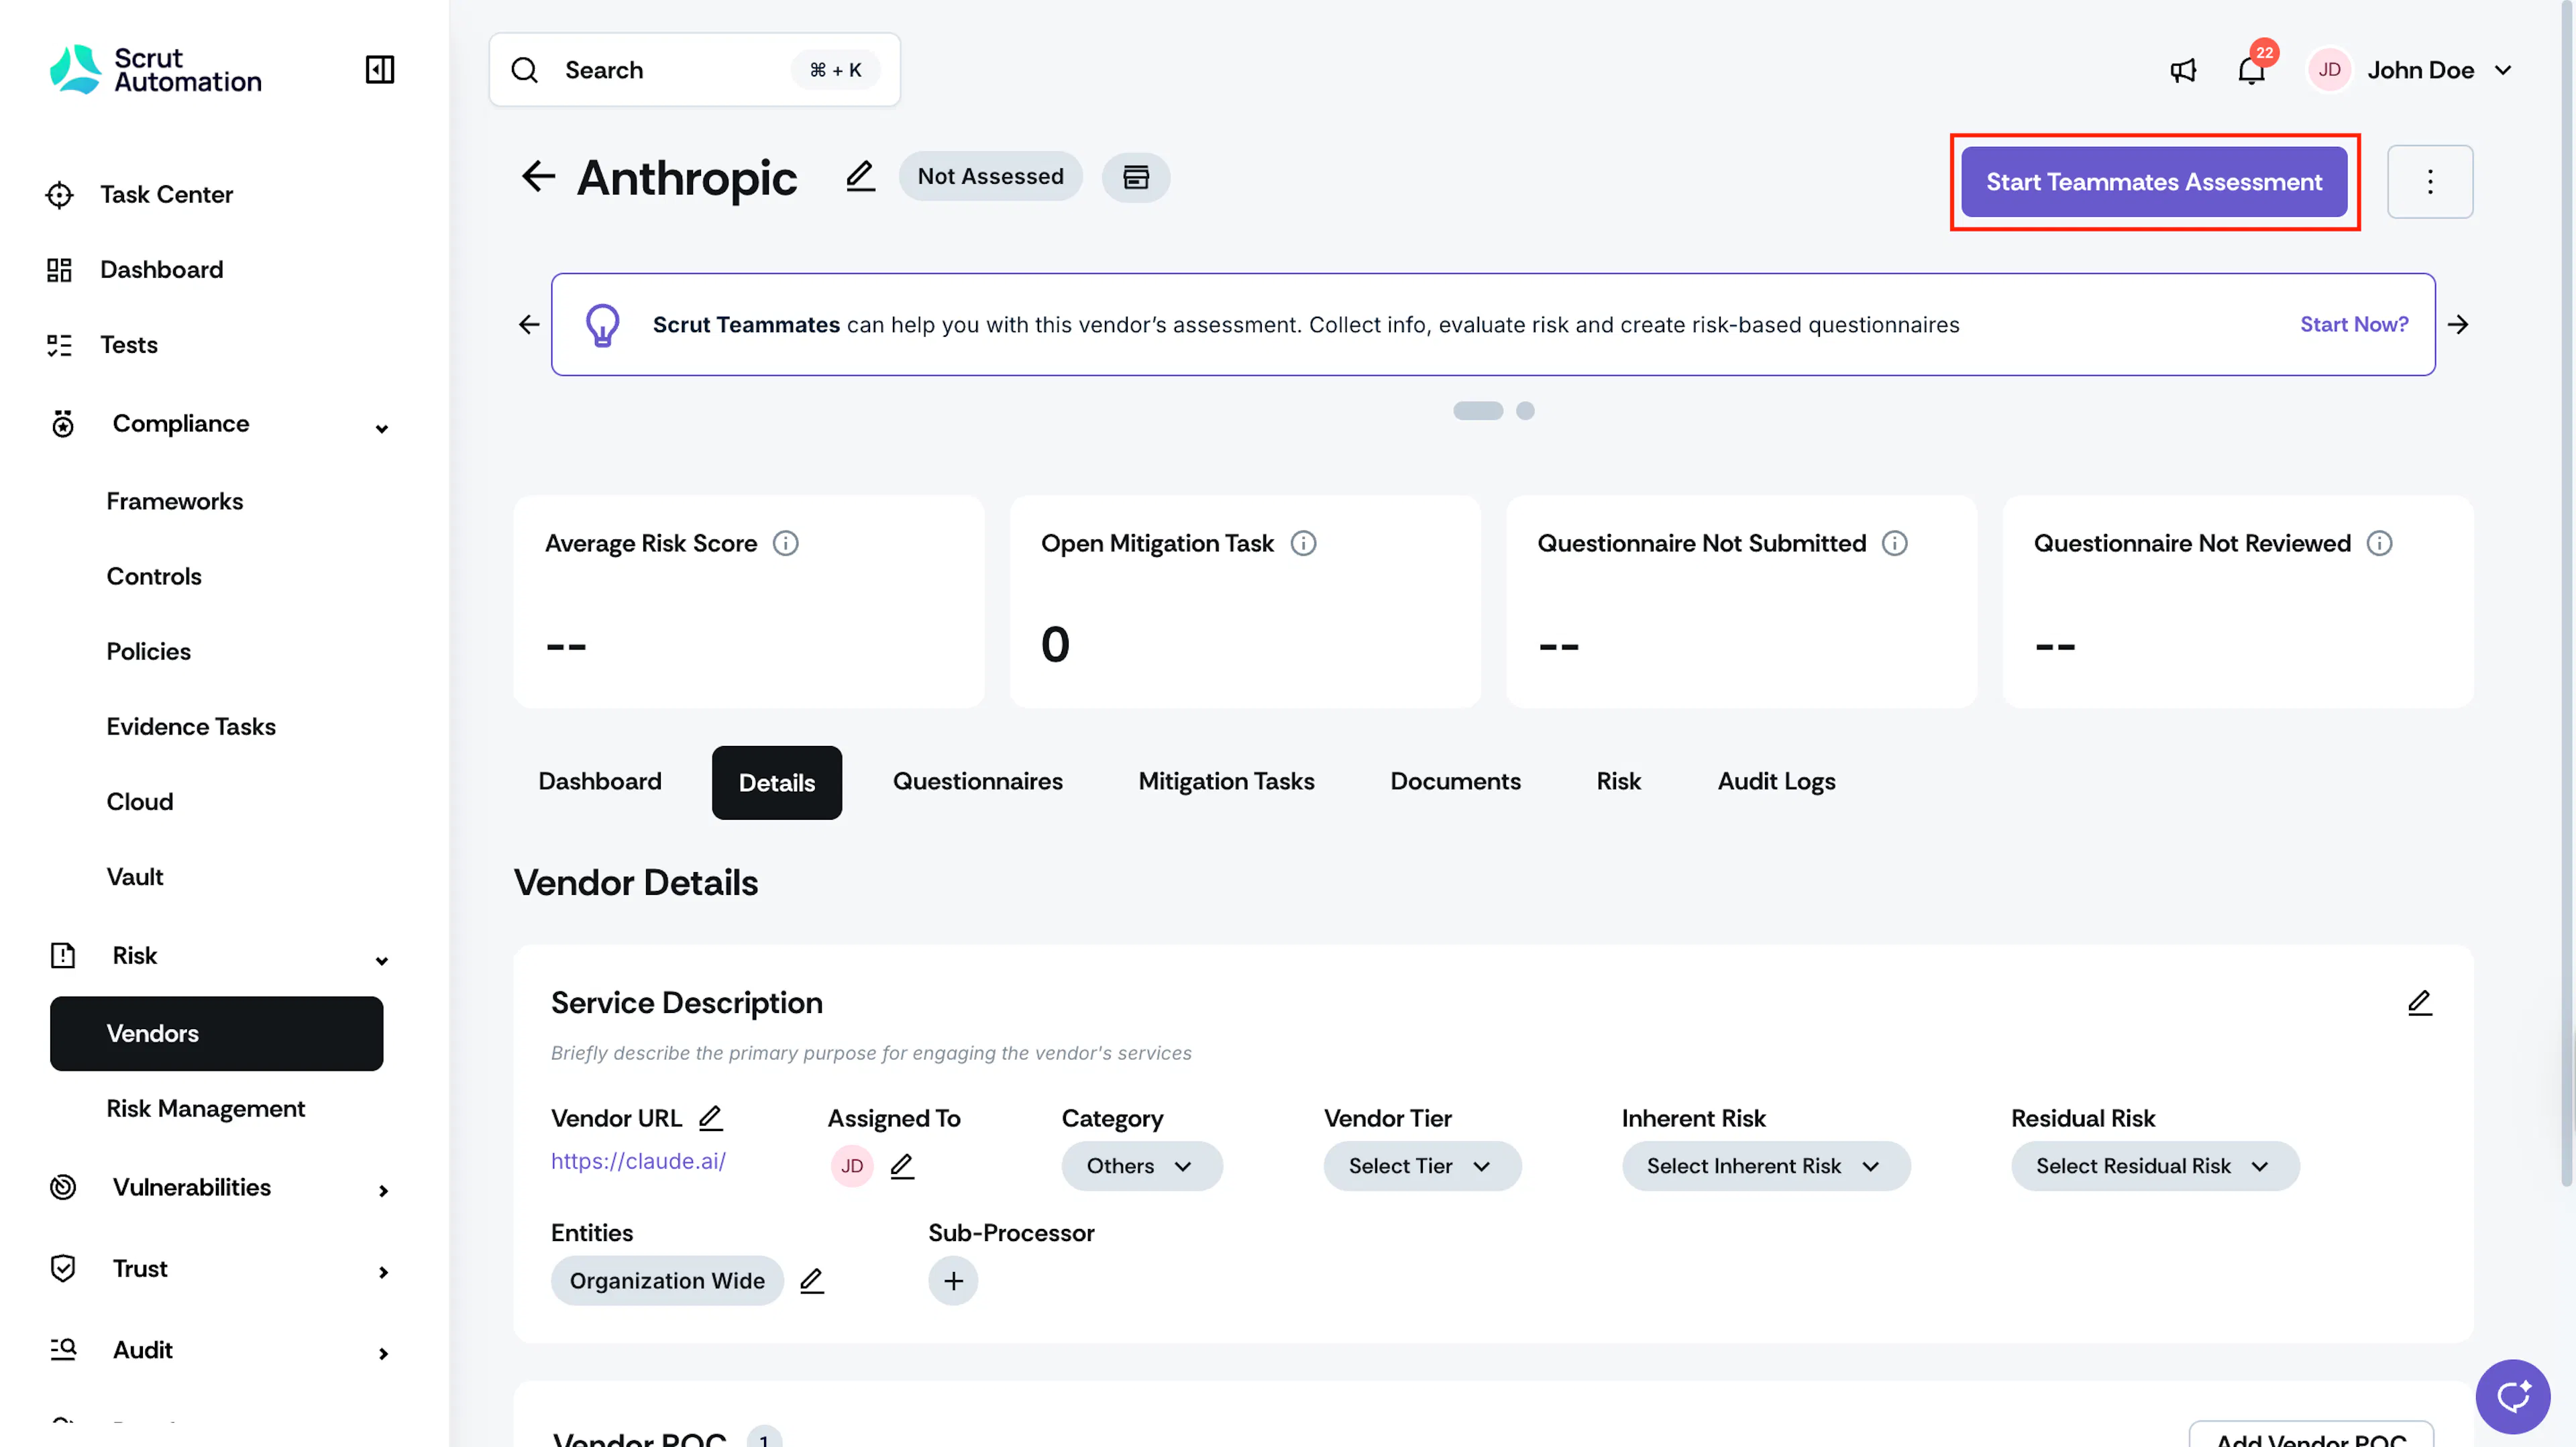
- In the Vendor Assessment panel, enter the following details about the vendor.
- Vendor Name: Enter the full legal name of the vendor.
- Product Name: If the vendor offers multiple products, specify which product you're assessing.
- Data Assessed by the Vendor: You can choose from:
- Your customer’s data
- Your data that doesn’t contain sensitive information
- Your data with sensitive information
- Vendor Type: Select the classification that best describes the vendor:
- UI/Reporting: Tools offering dashboards and reporting features.
- API: Vendors offering APIs integrated with your systems.
- Application: Vendors providing standalone software with a user interface.
- SDK: Vendors whose SDKs embed features into your application.
- Services: Vendors providing business services (Eg, HR, consulting, training).
- Hosting Details: Choose from:
- Private, On-Prem
- Hosted and managed by the vendor, single-tenant
- Hosted and managed by the vendor, multi-tenant
- Business Scope: Choose from:
- Directly impacts customers (of the buyer) and revenue
- Indirectly impacts customers (of the buyer) and revenue
- Reason for Engagement: Select one or more reasons for working with this vendor.
- Improve revenue
- Reduce costs
- Add new capability
- Other
Note: If you're unsure about any of the details above, check with the vendor before proceeding. Scrut Teammates uses this information to determine the vendor's risk classification and generate the questionnaire, so accuracy matters here.
- Click Confirm.
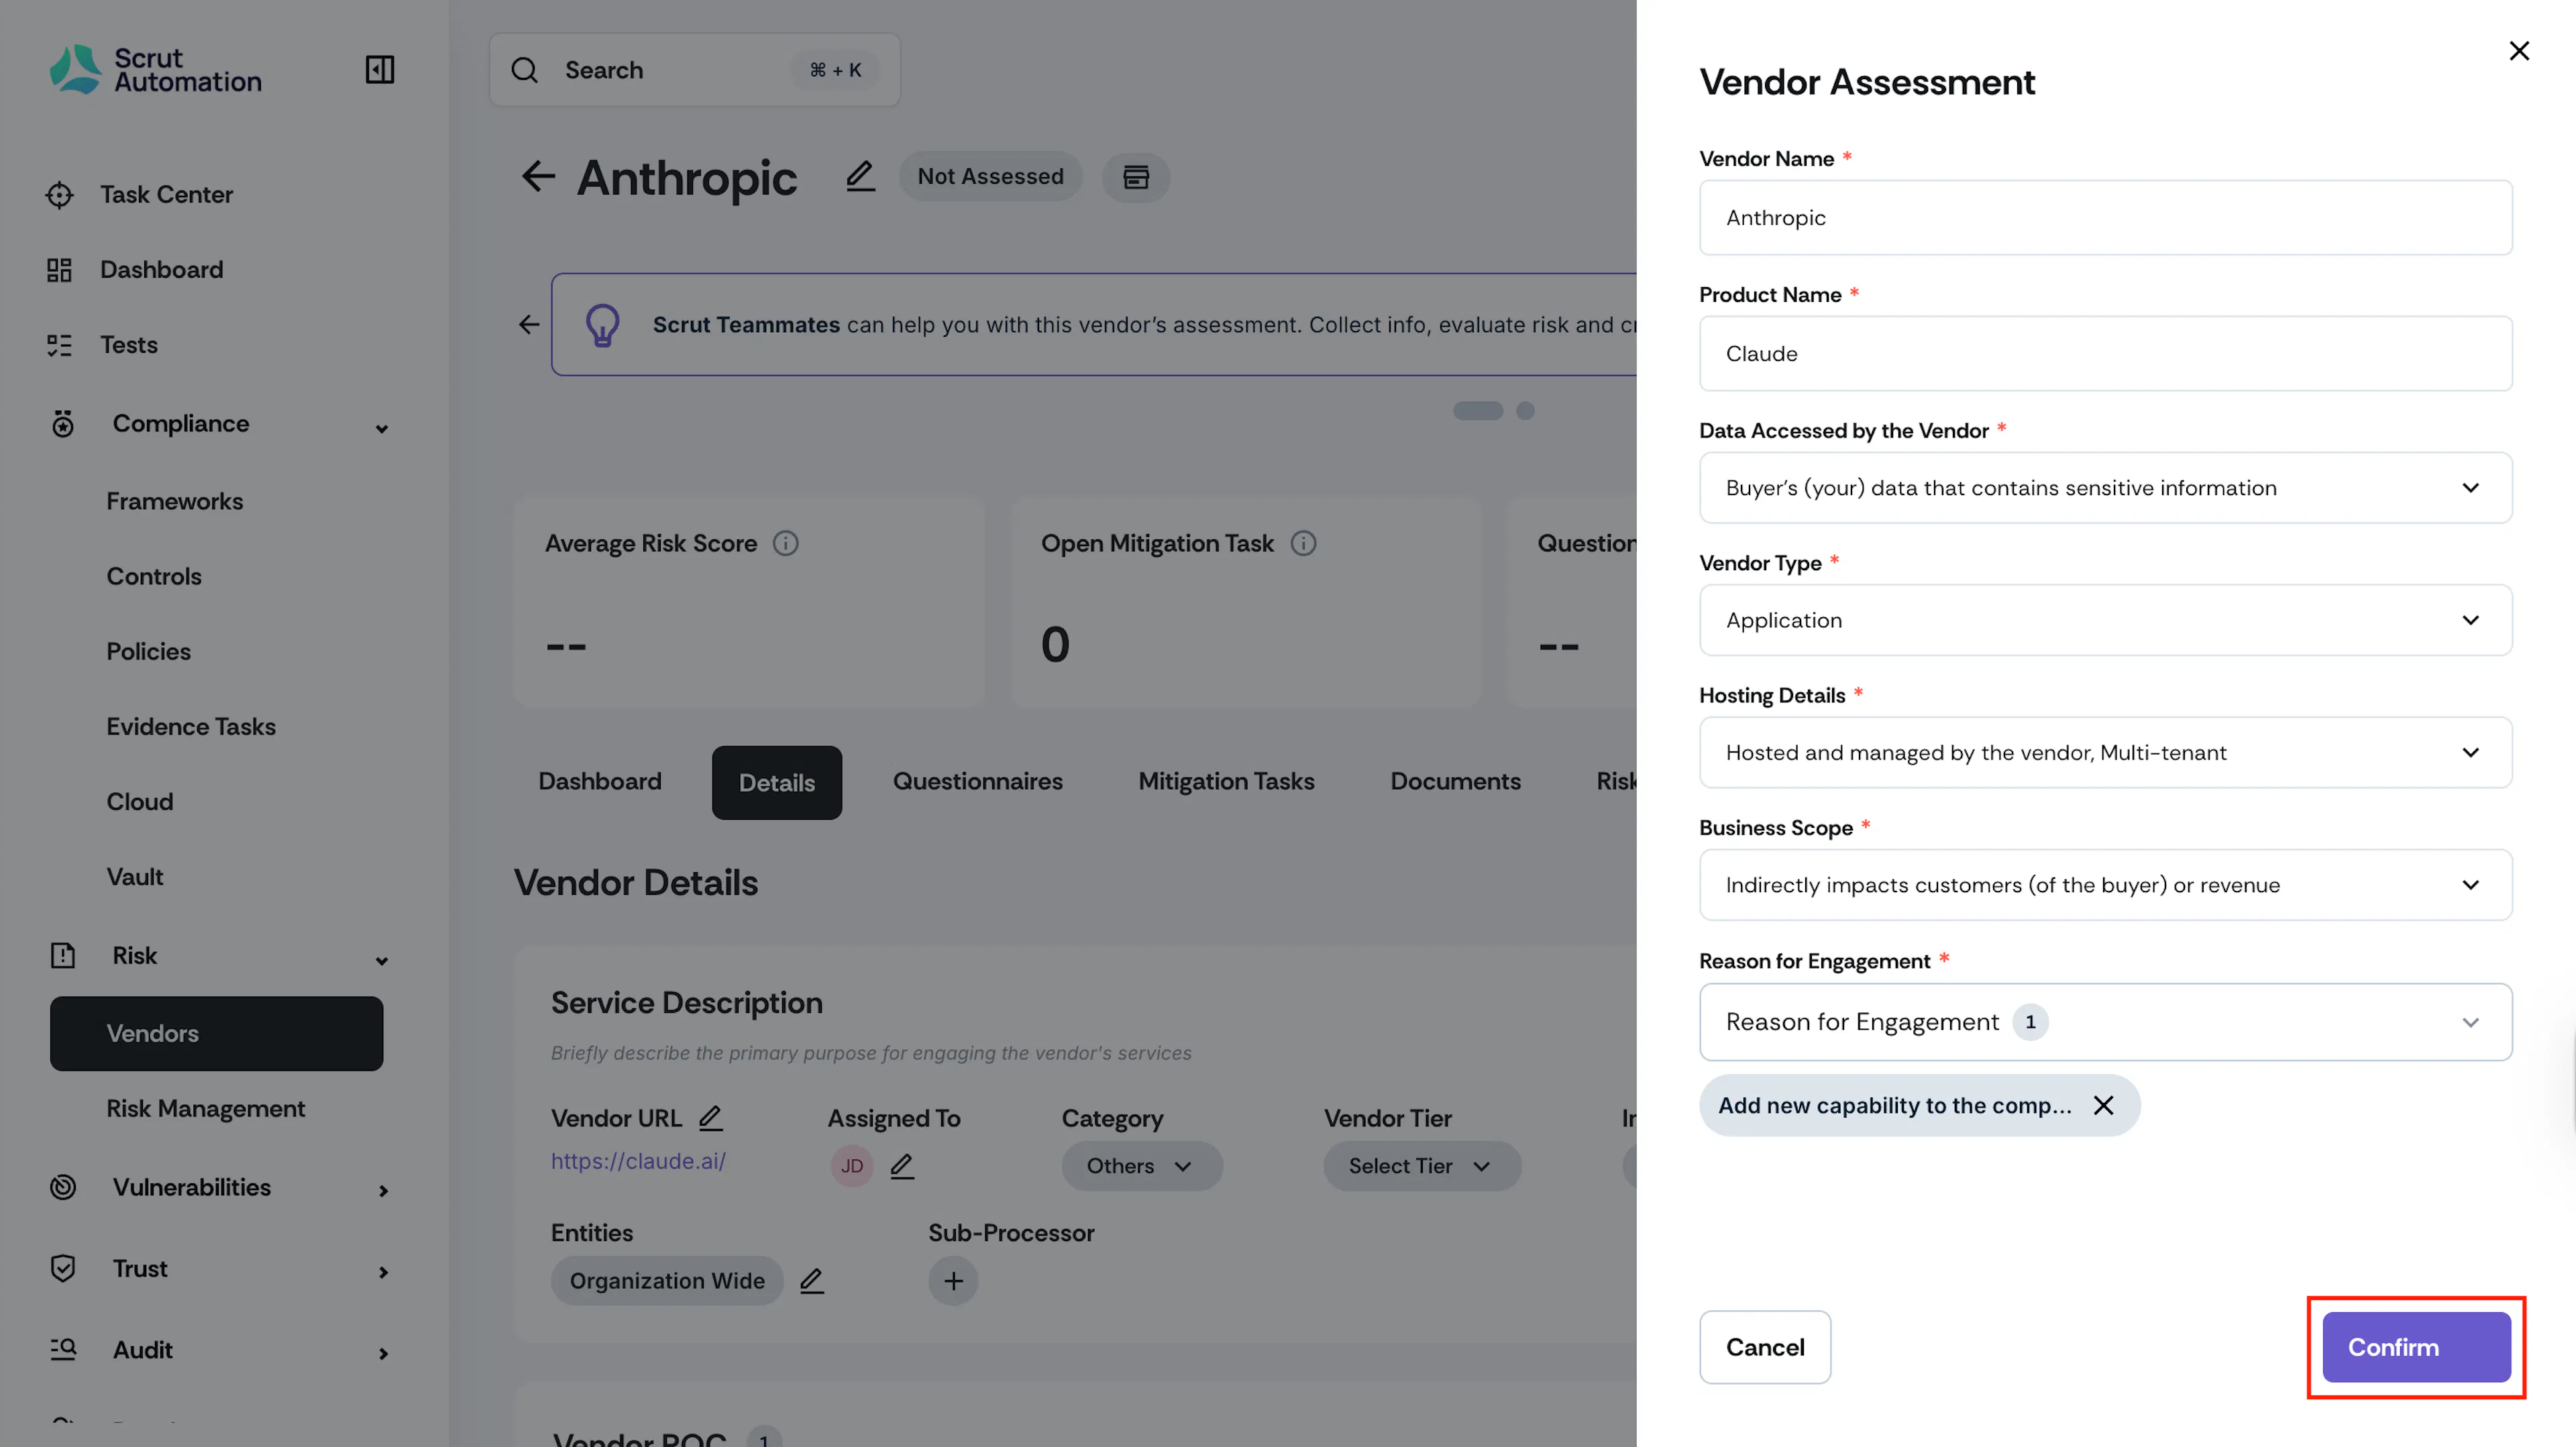
Watch out for the AI Assessment Completed notification.
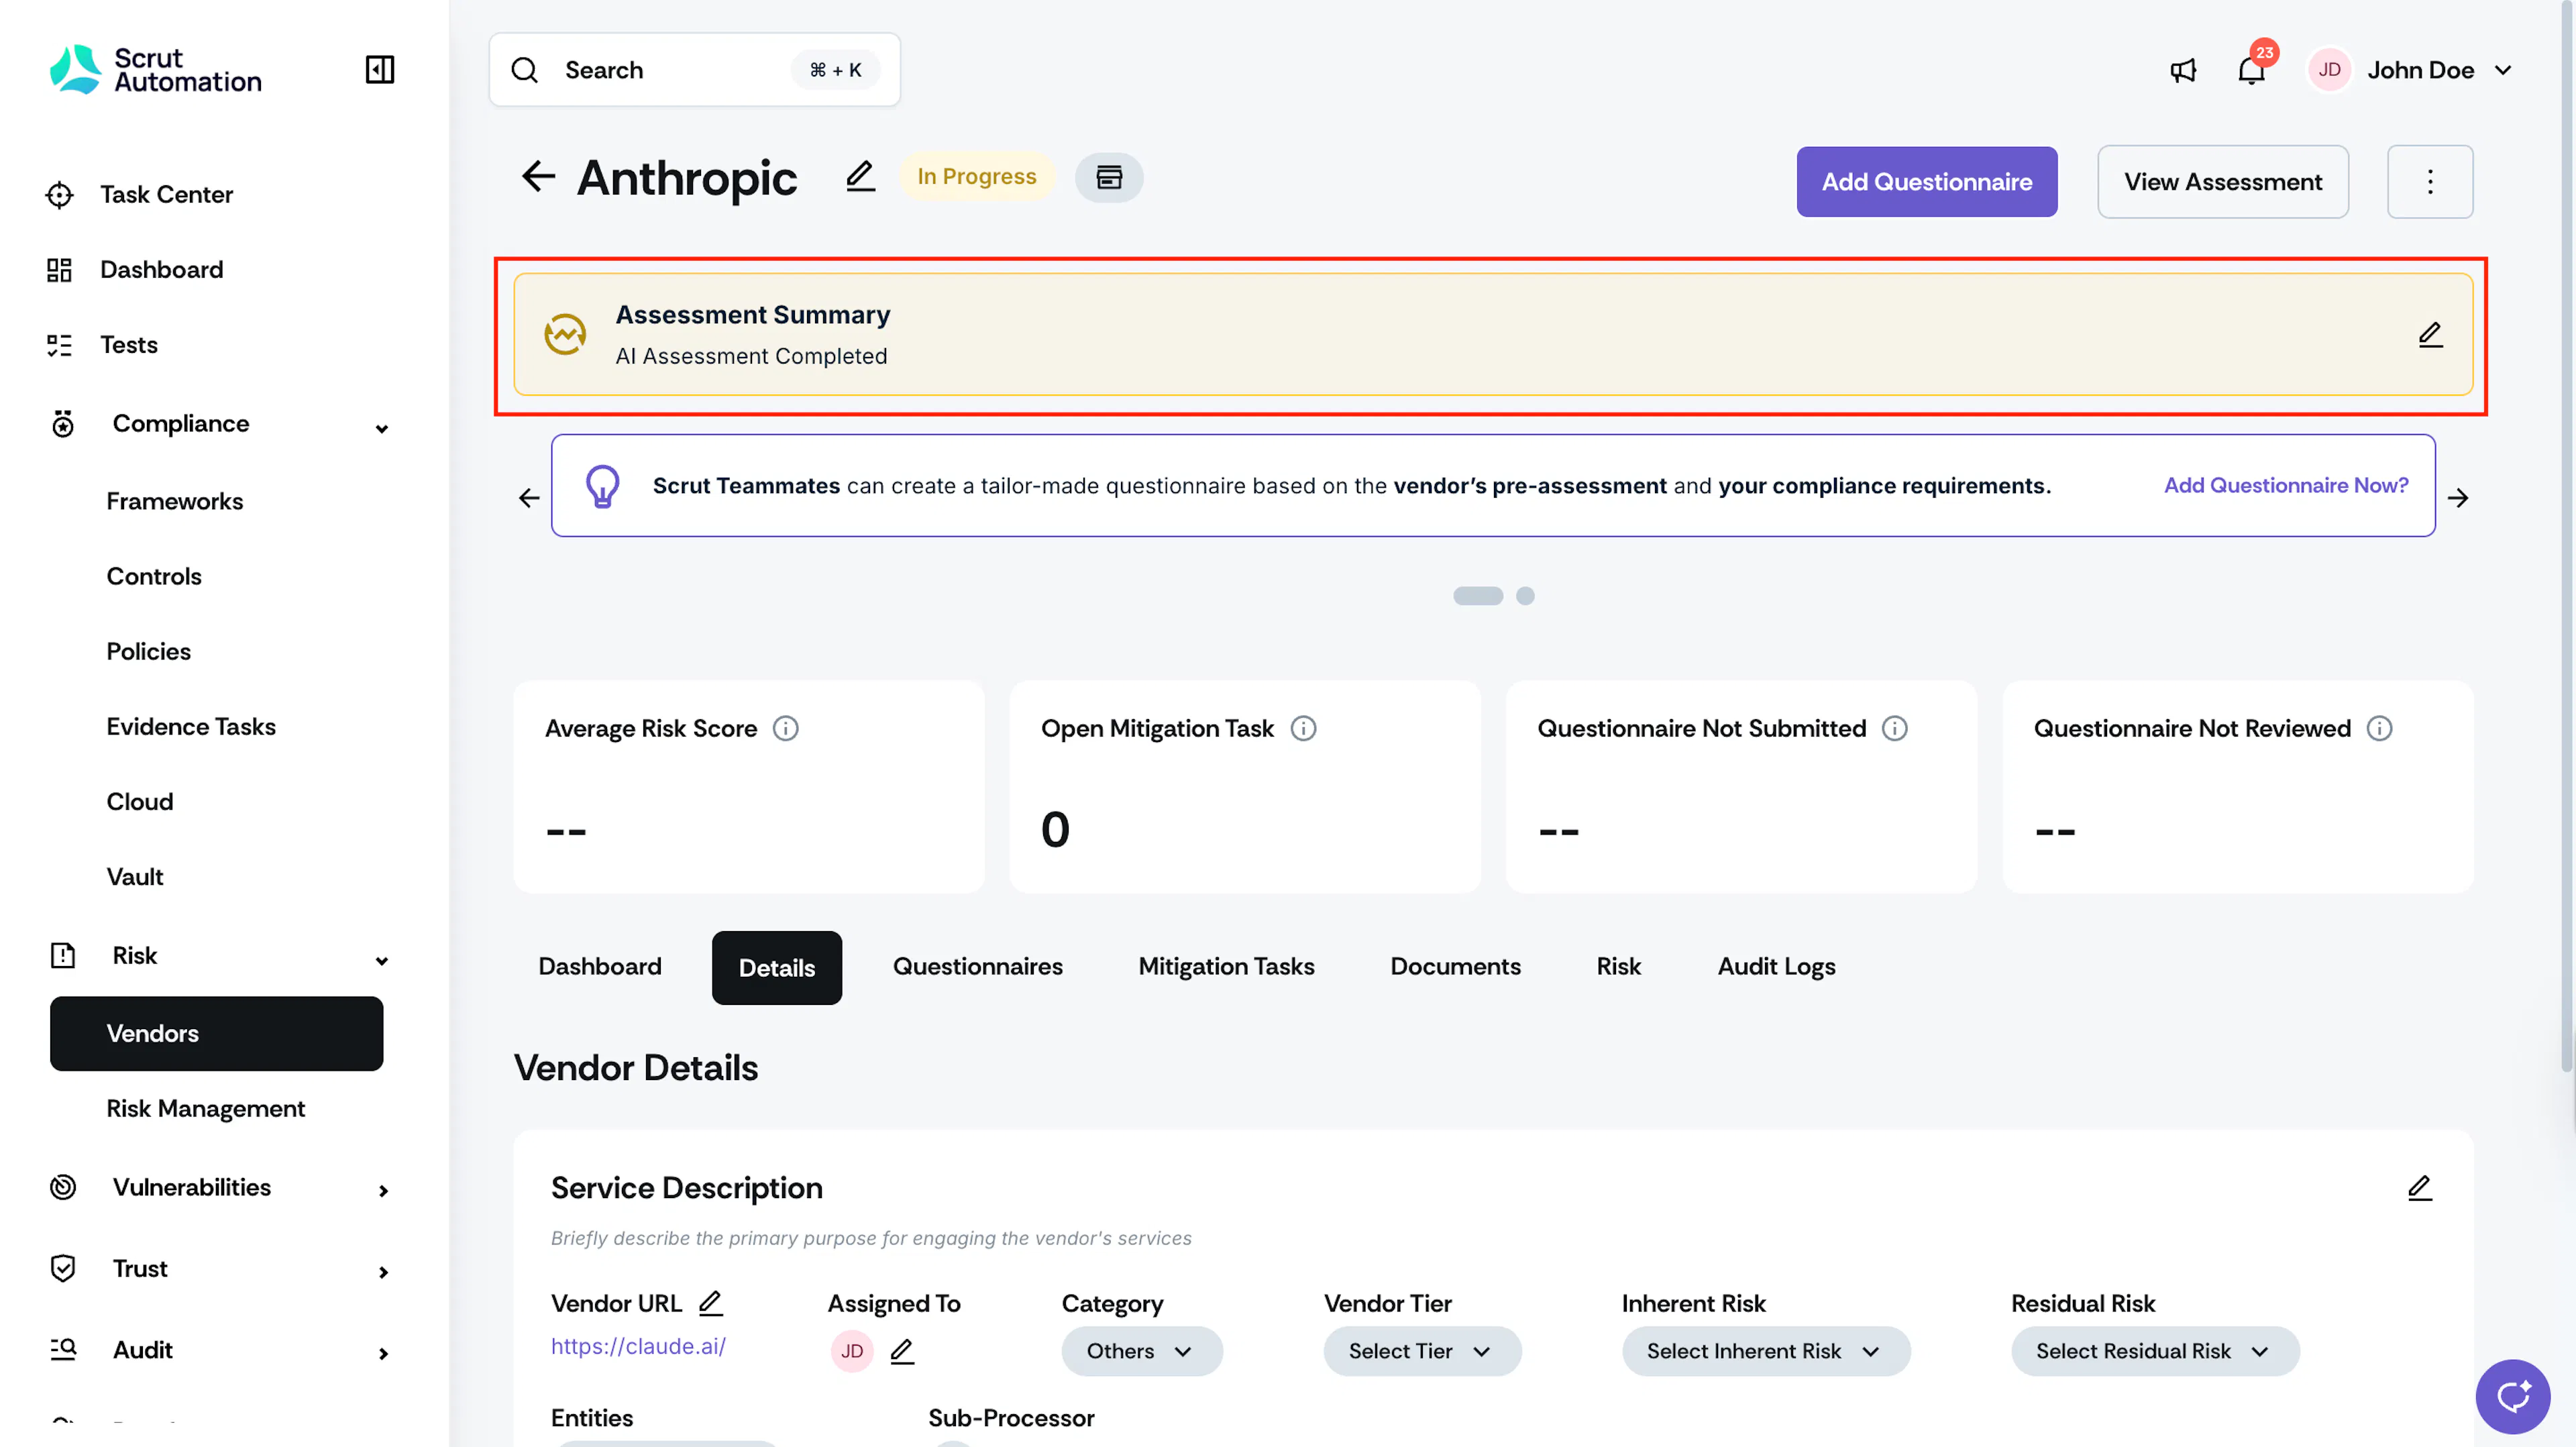
Step 2: Review the AI Risk Evaluation
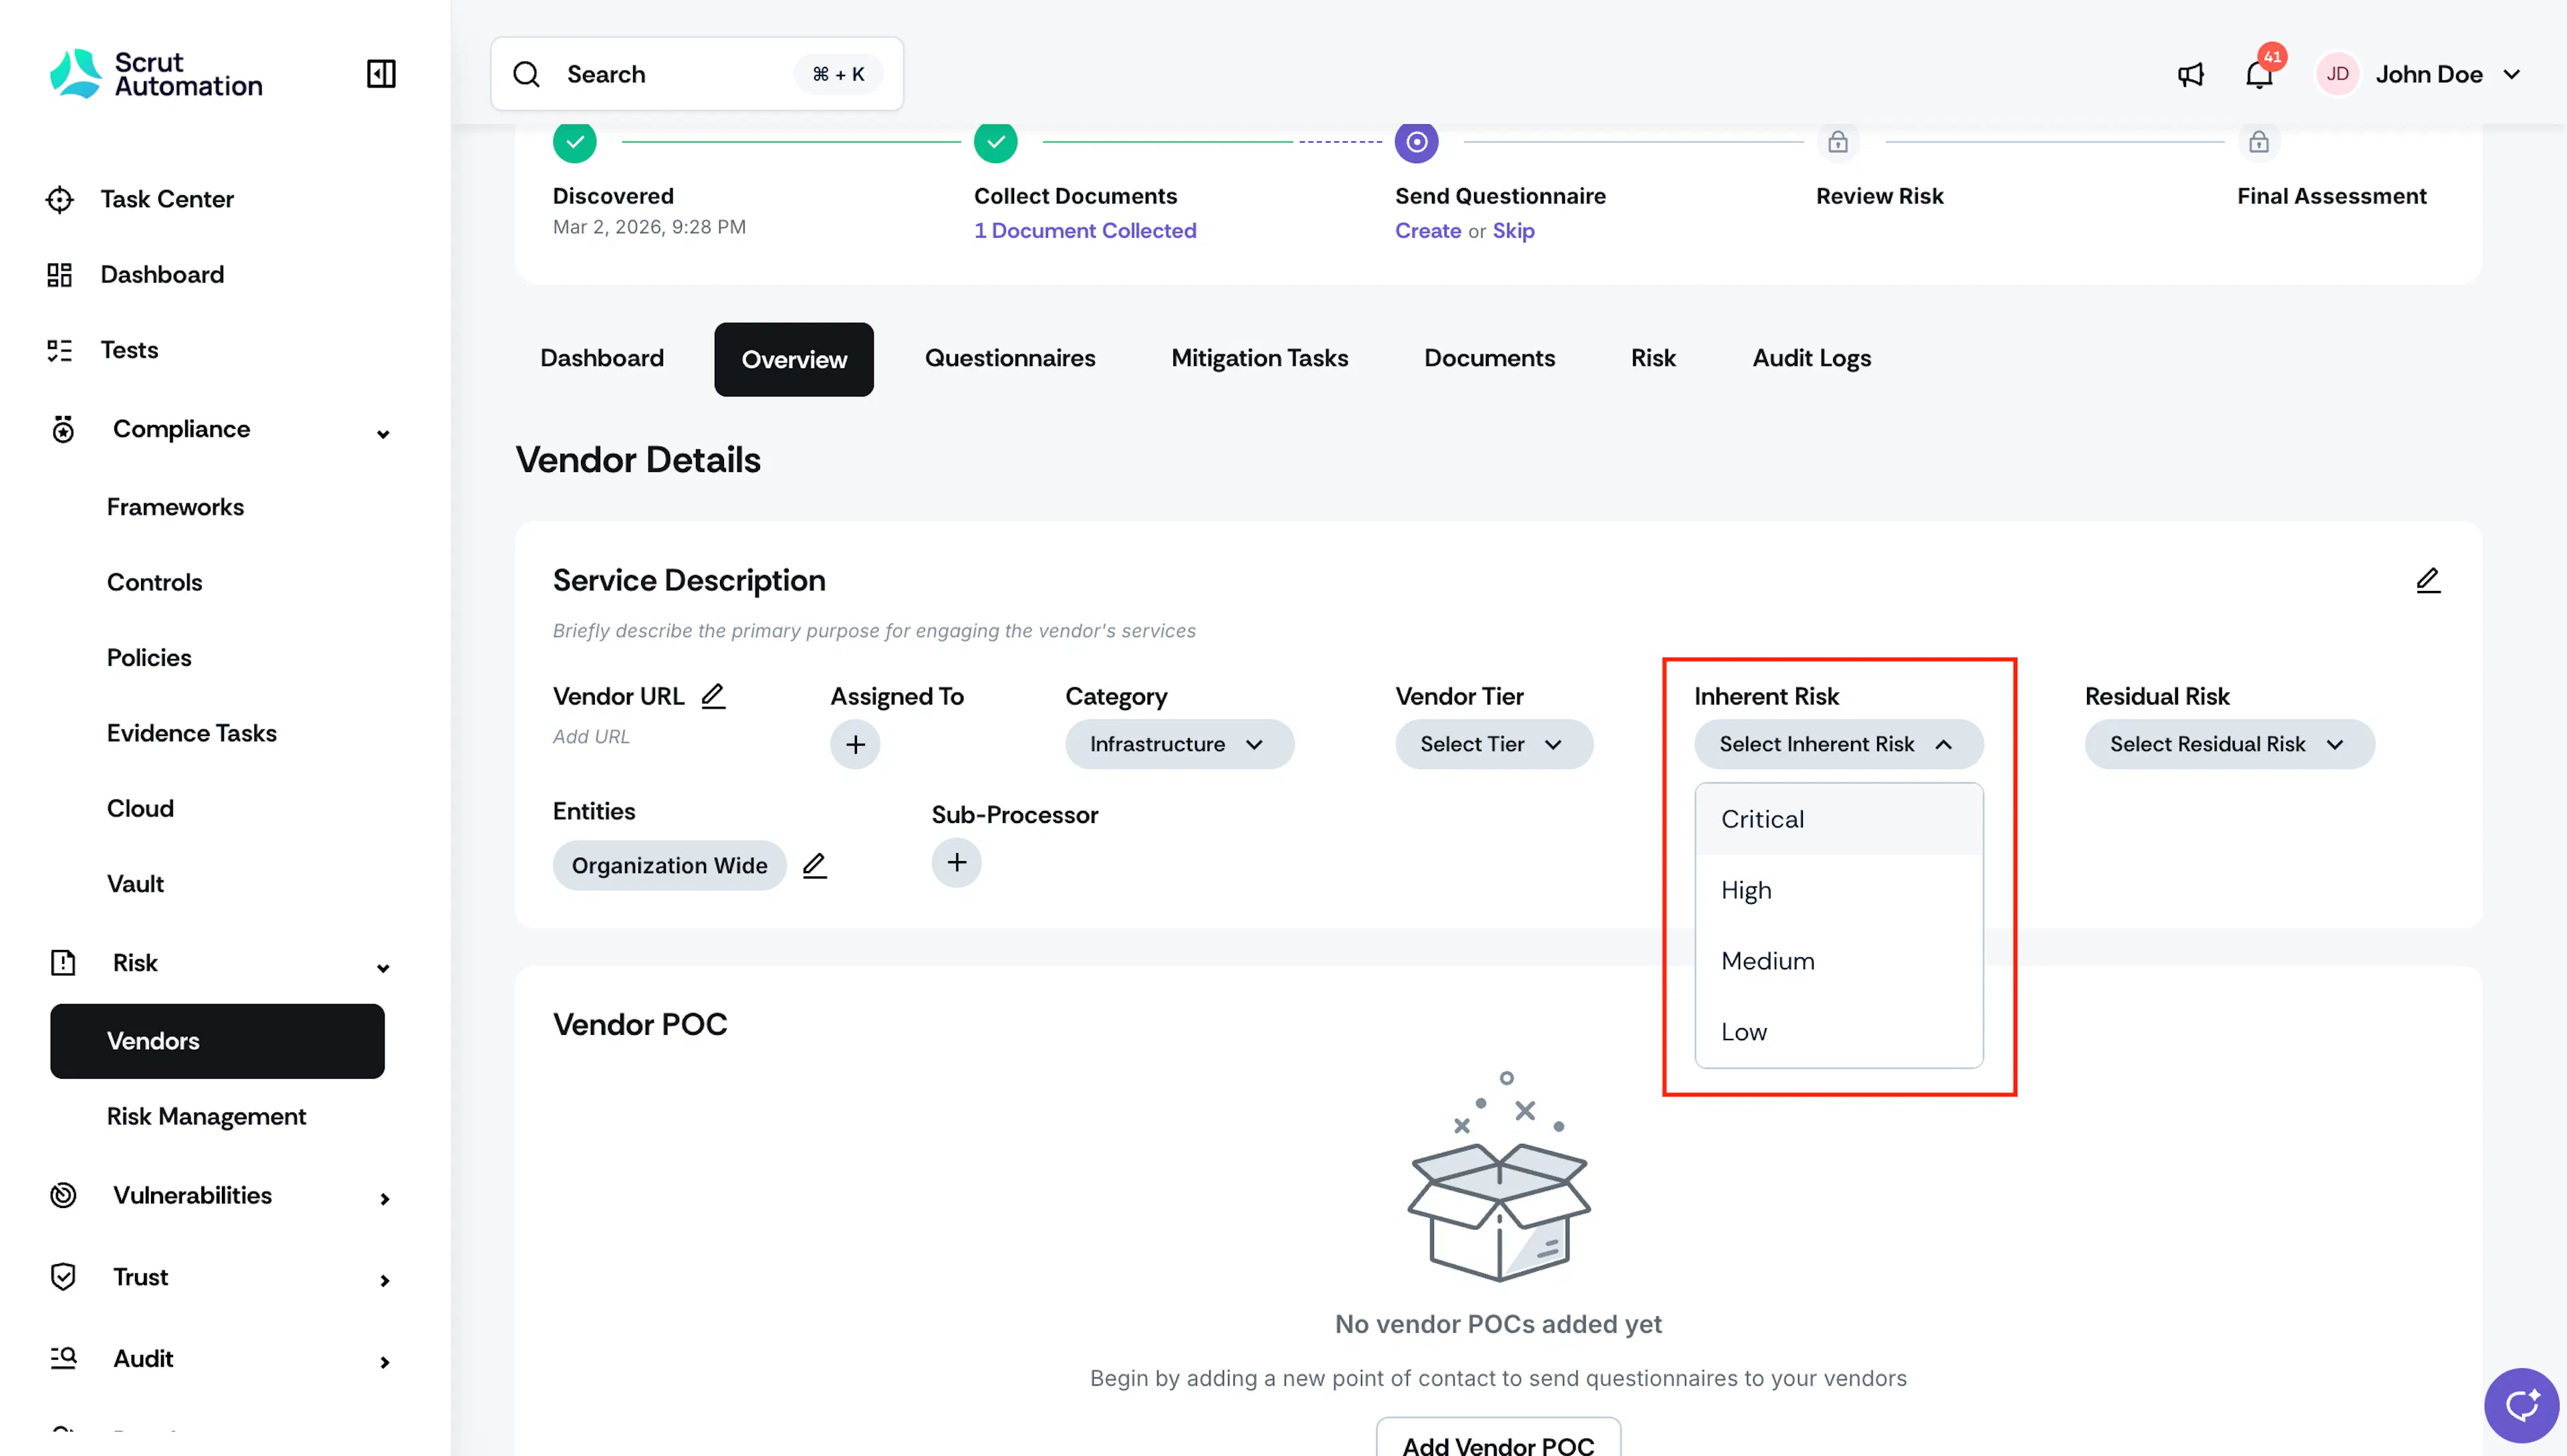
Using the information you provided in the previous step, Scrut Teammates evaluates the vendor and assigns an inherent risk level. It classifies the vendor as Low, Medium, High, or Critical risk based on:
- What data is accessed by the vendor
- Whether your customers are affected
- Whether they manage the application
For example, in the screenshot below, Scrut Teammates evaluates the vendor’s risk as Medium.
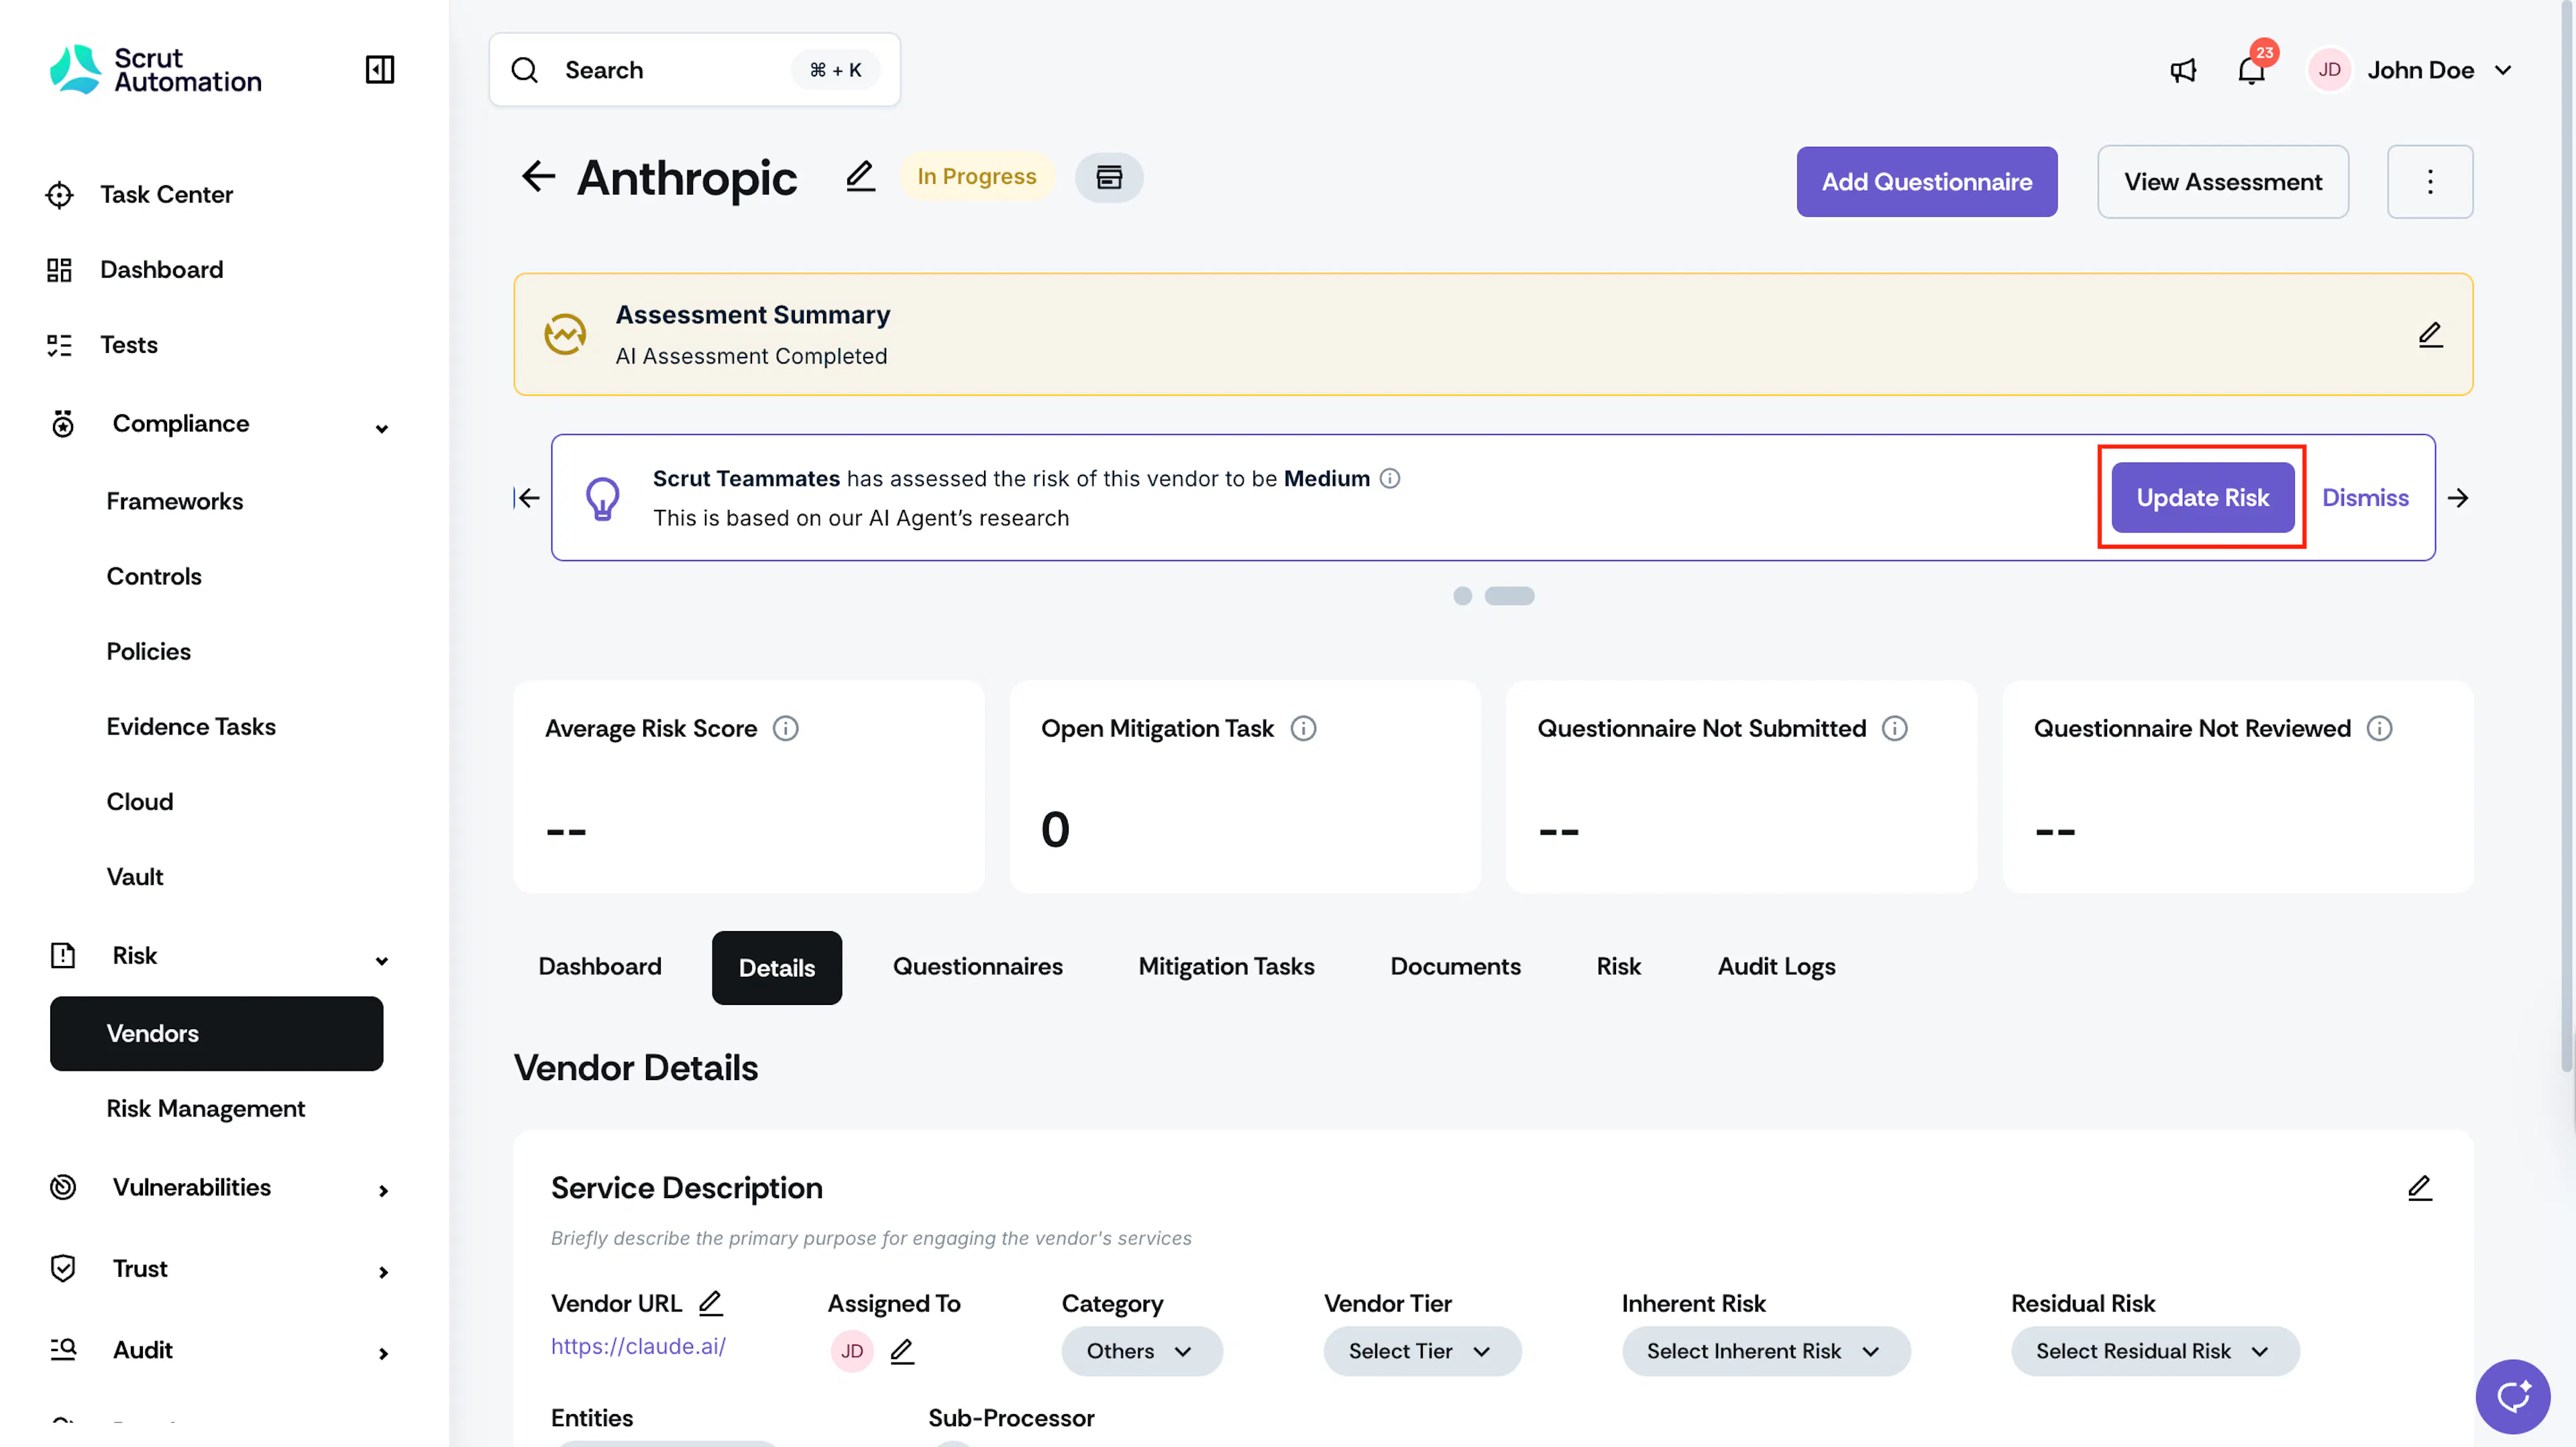
- Click the Info icon next to the risk classification to read the reasoning behind it.
- Click Update Risk to save the inherent risk level to the vendor's profile.
Note:
- If the vendor's intake form response to Vendor Dependency Level is Complete Service Disruption, Scrut Teammates automatically classifies the vendor as Critical, regardless of the other assessment inputs.
- If you disagree with the AI's classification, you can update the inherent risk field on the vendor's Details tab manually.
Step 3: Use AI to Generate the Vendor Questionnaire
Scrut Teammates uses the Consensus Assessment Initiative Questionnaire (CAIQ) framework to generate a customized security assessment for the vendor. It analyzes the vendor profile information (provided in Step 1) and maps it to relevant CAIQ control domains. It then:
- Customizes questions based on vendor type, data access, and business impact
- Aligns questions with your specific compliance requirements (e.g., SOC 2, PCI, GDPR, HIPAA, etc.)
- Organizes questions by risk category and relevance
- Uses Vendor Security Assessment (VSA) best practices to remove questions that aren't relevant to this vendor's type or risk profile.
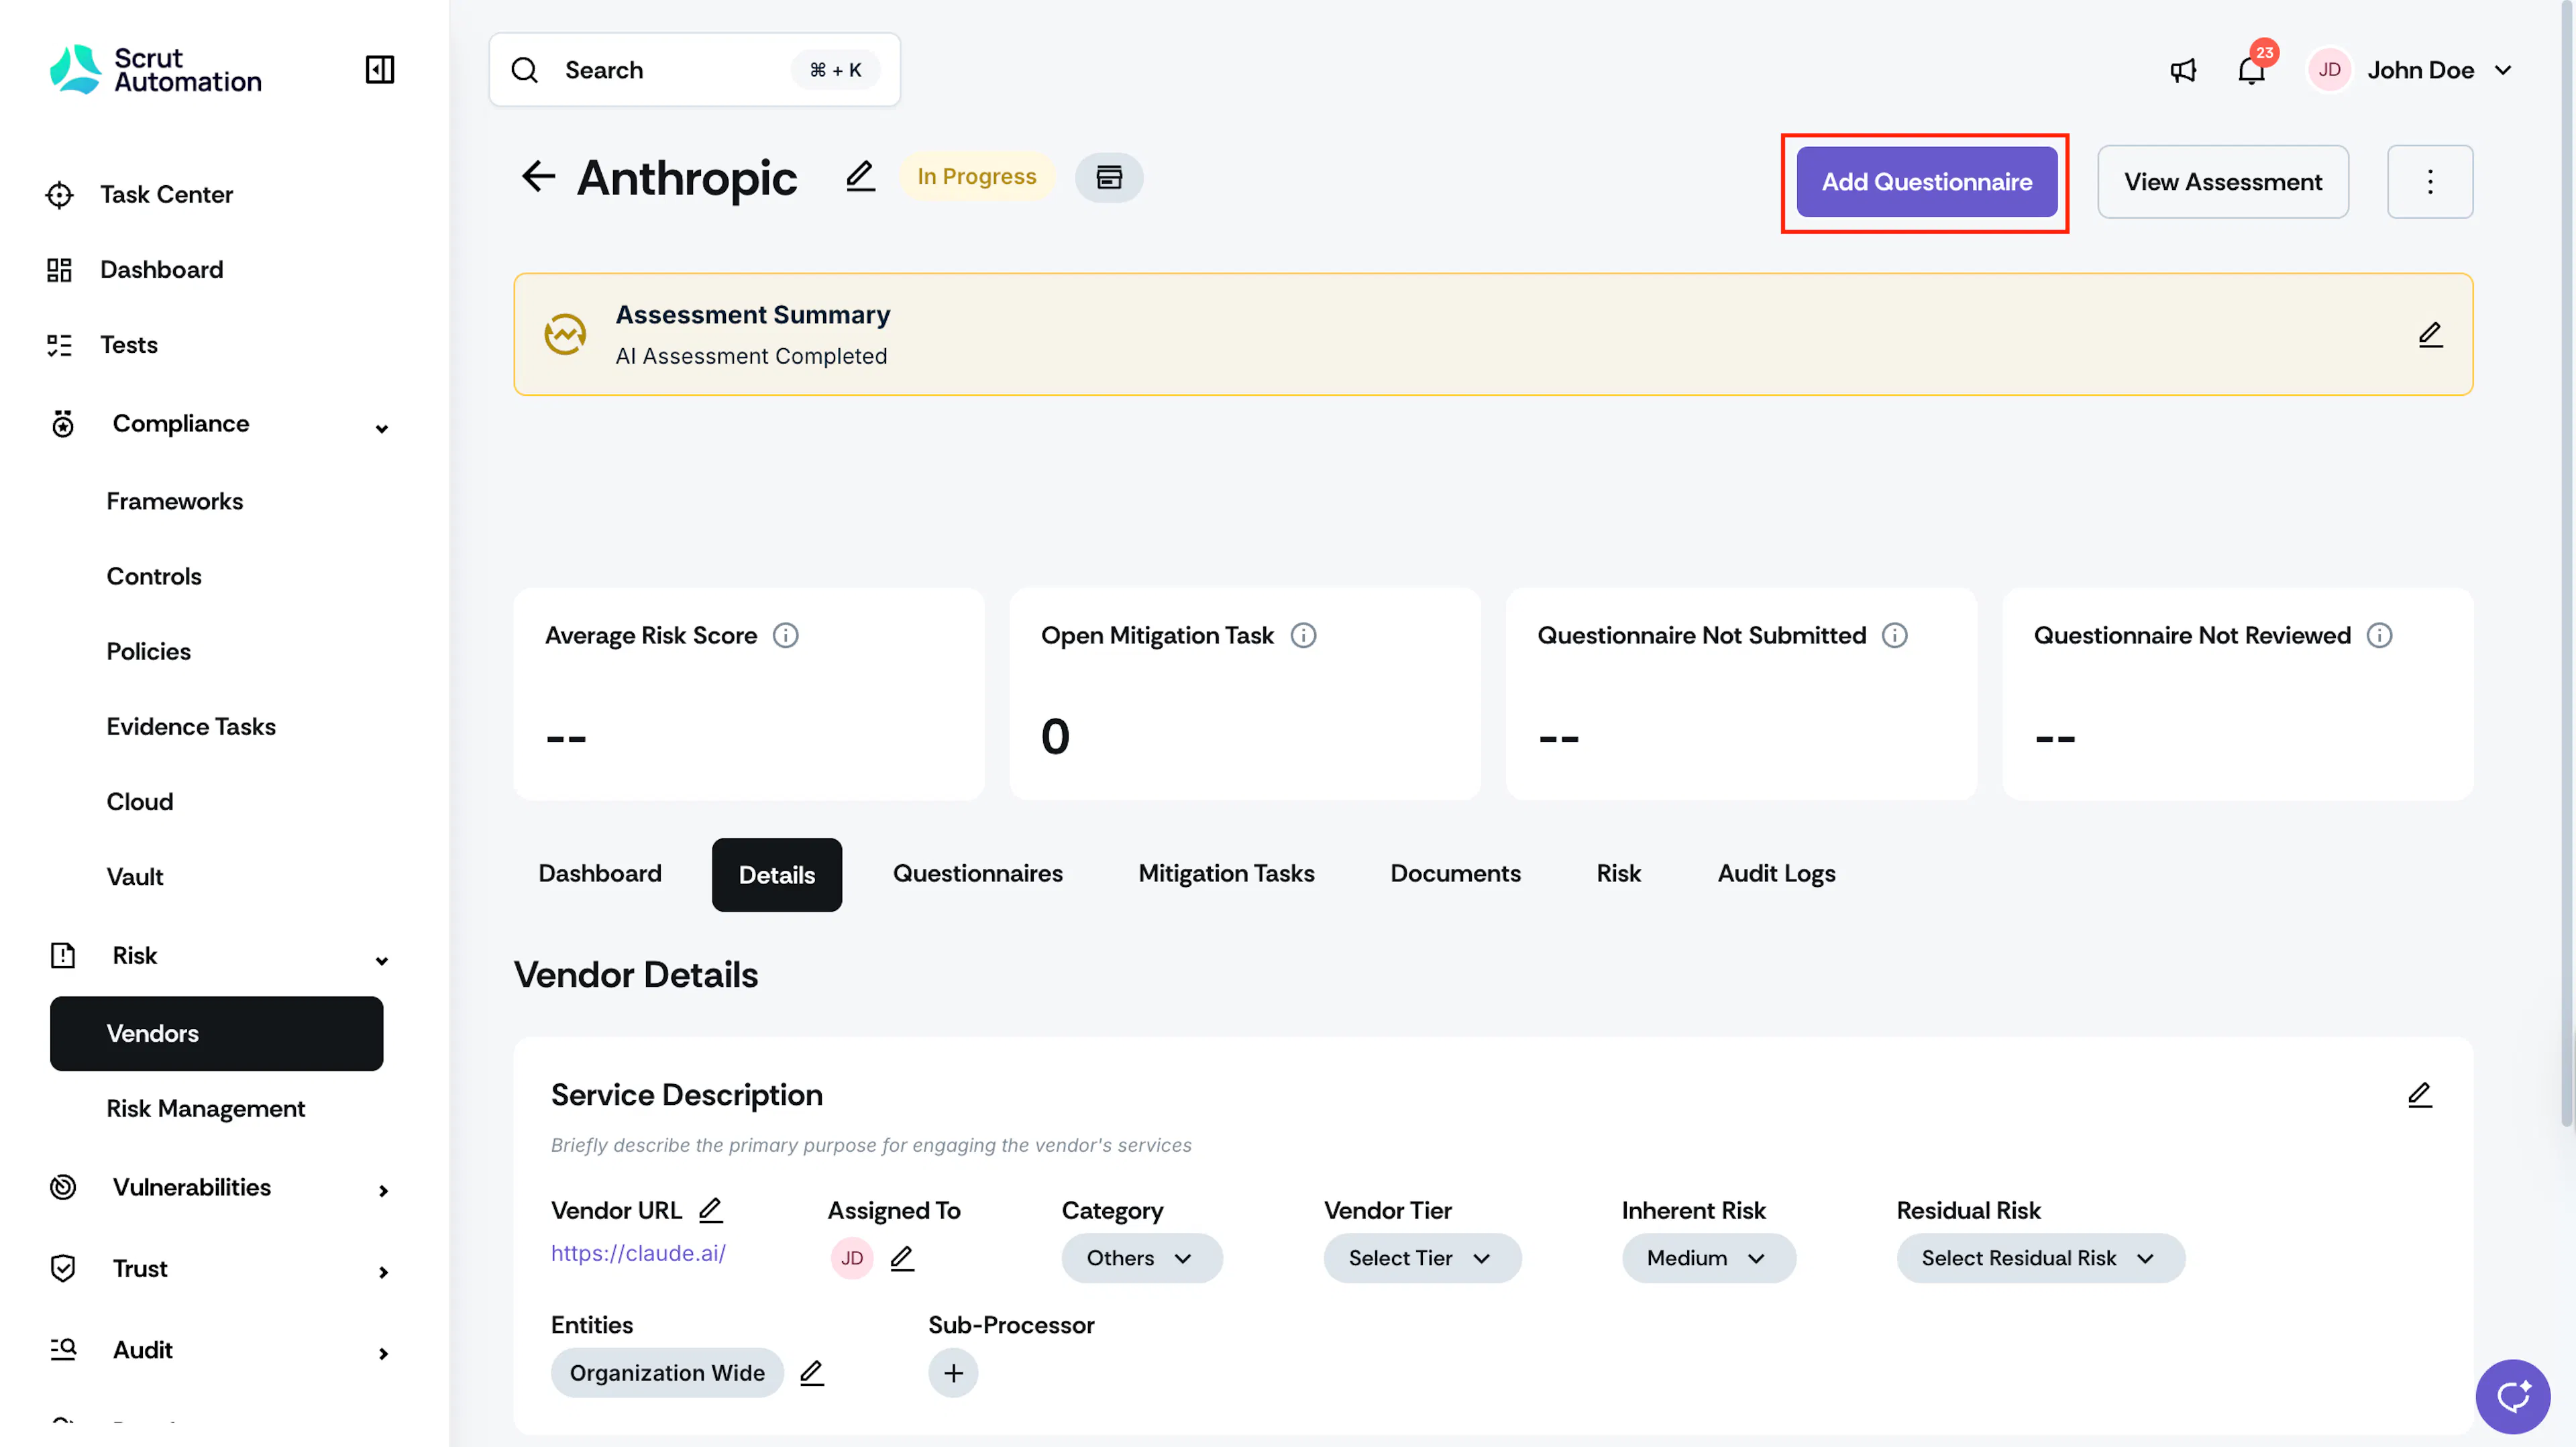
- Click Add Questionnaire.
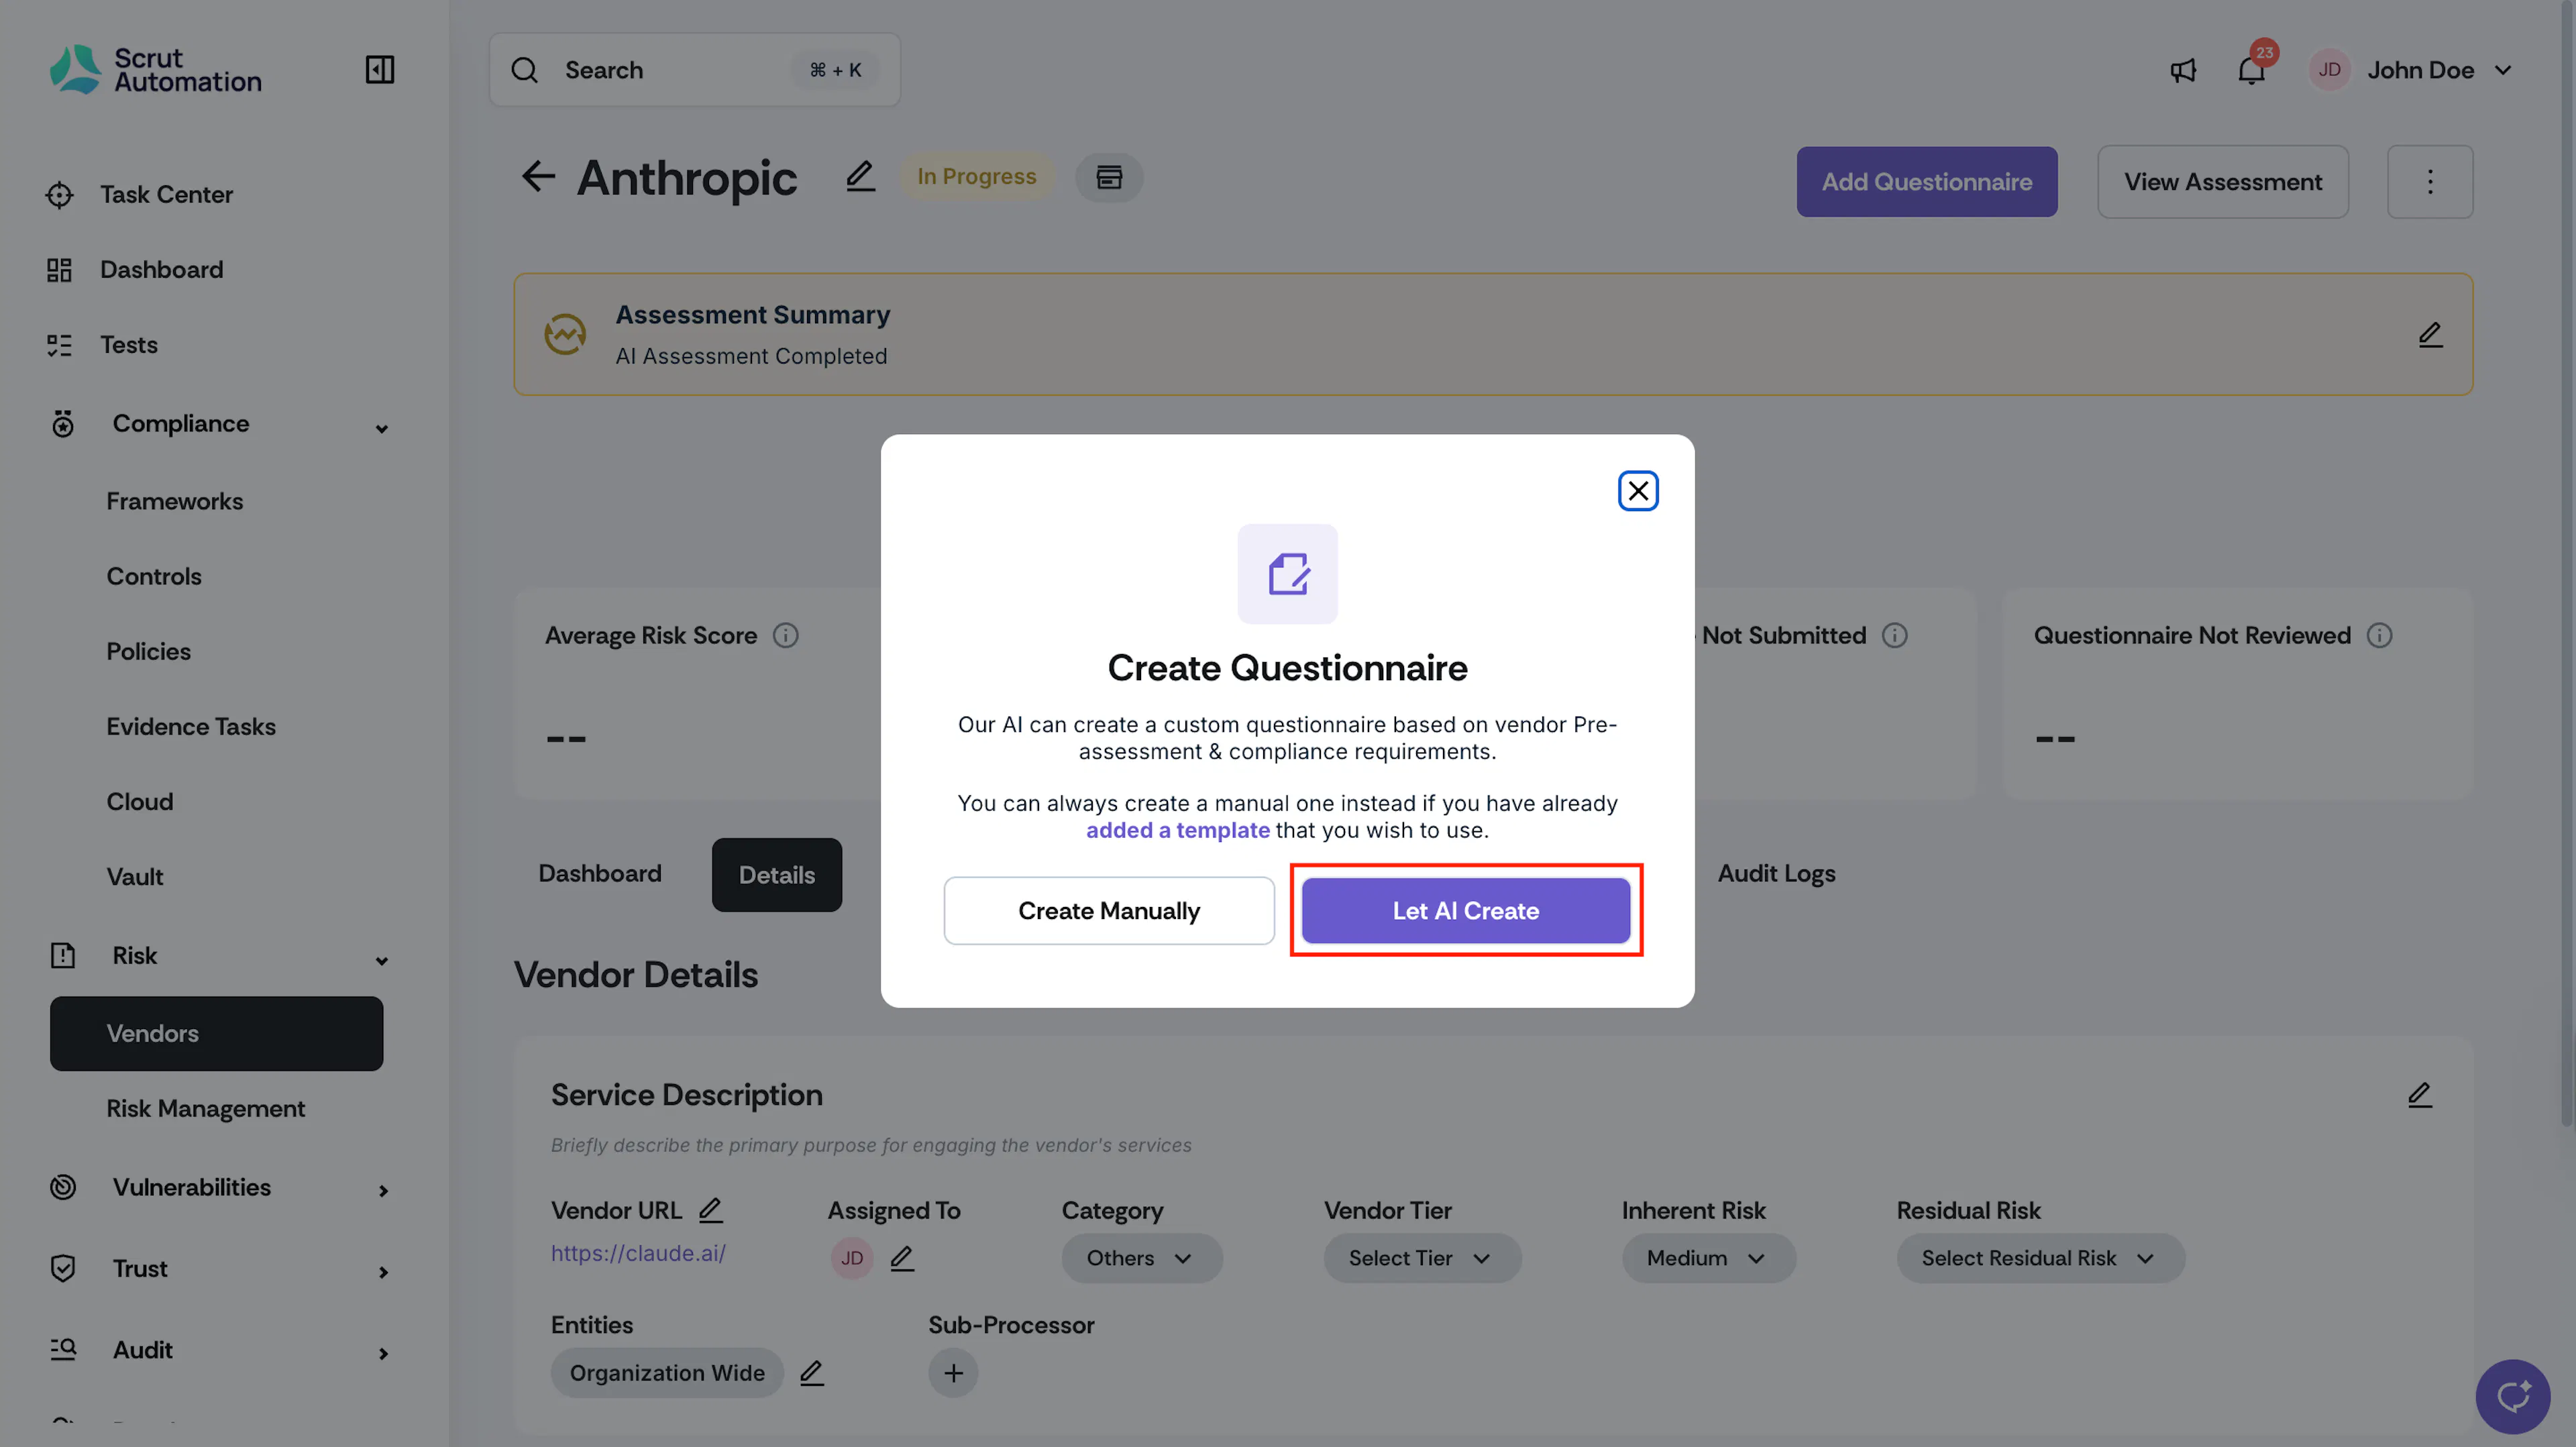
- Select Let AI Create.
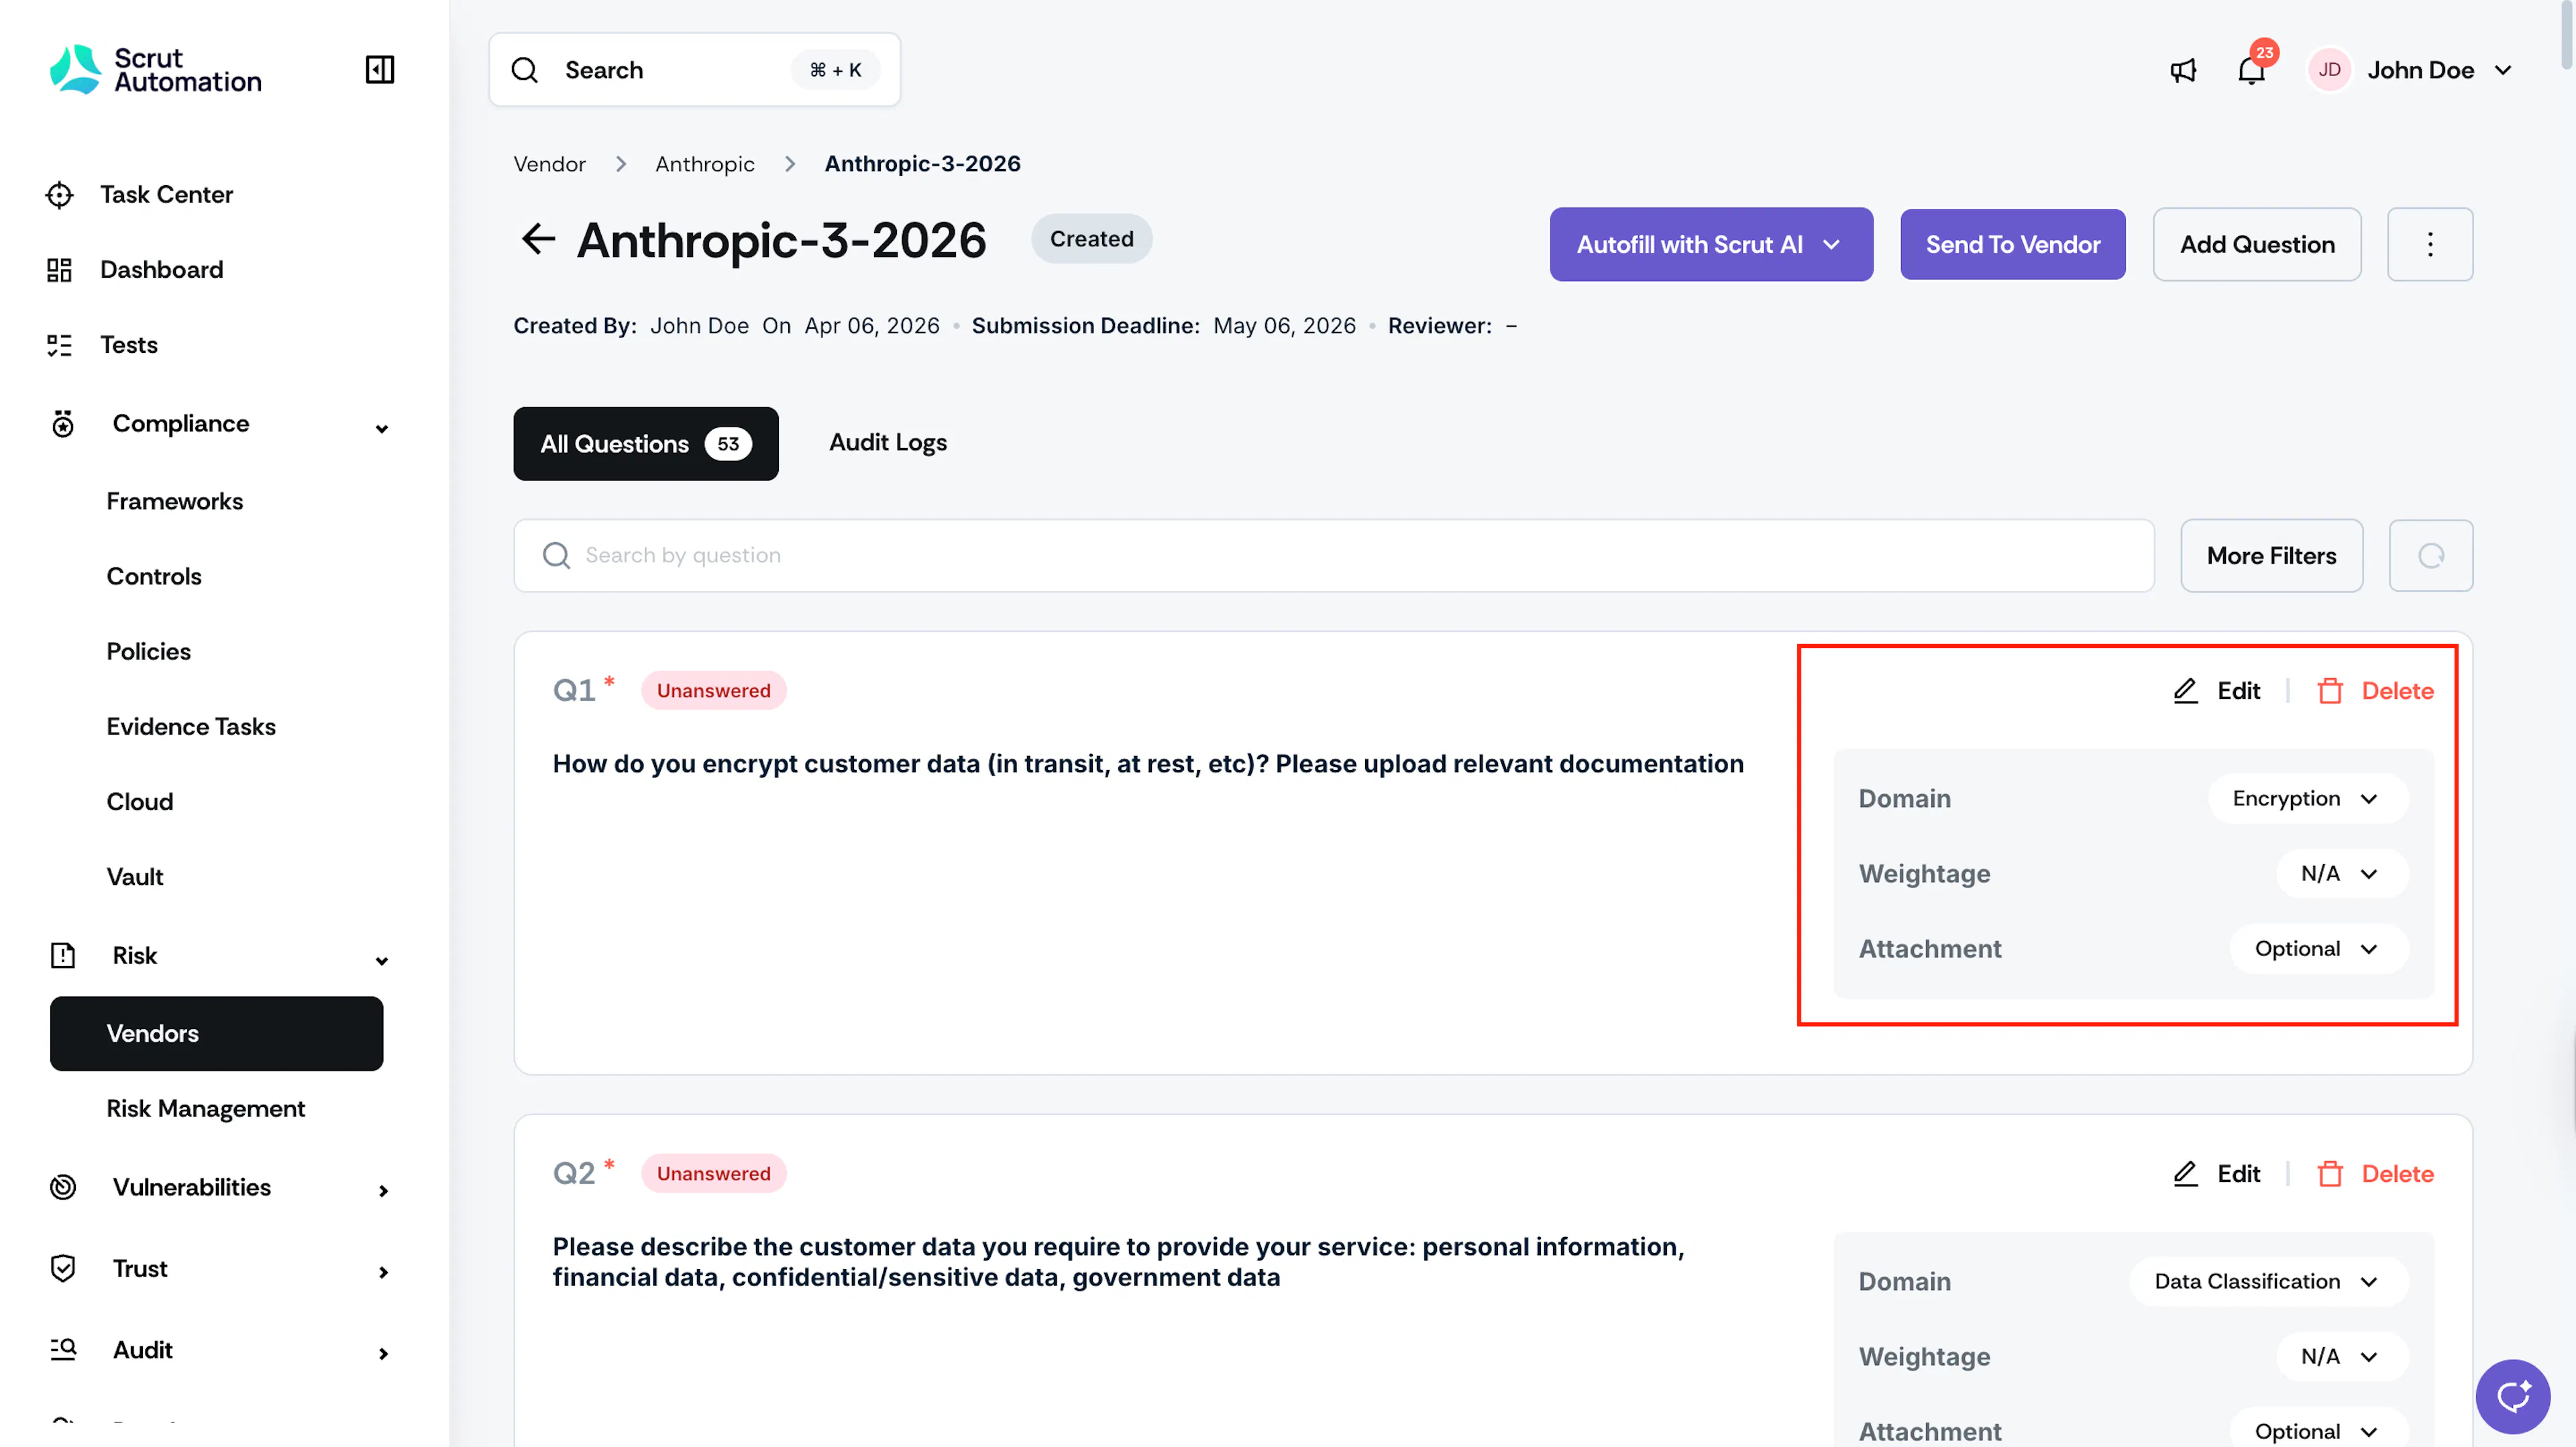
- Scrut Teammates generates the questionnaire and displays all questions with their assigned Domain and Weightage values.
- Review the generated questions.
- Update the question parameters, as needed:
- Domain: Categorize the question by selecting its relevant domain. This helps organize risk scores by business area.
- Weightage: Set the importance level of the question. Higher weightage questions have a greater impact on overall risk scores.
- Attachment: Select if an attachment is mandatory or optional for a question.
- Use the Delete icon to remove any irrelevant questions.
- Click Edit to make changes to the question, if needed.
- Click Add Question to enter an additional question, apart from the ones generated by the AI.
Step 4: Autofill with Scrut AI
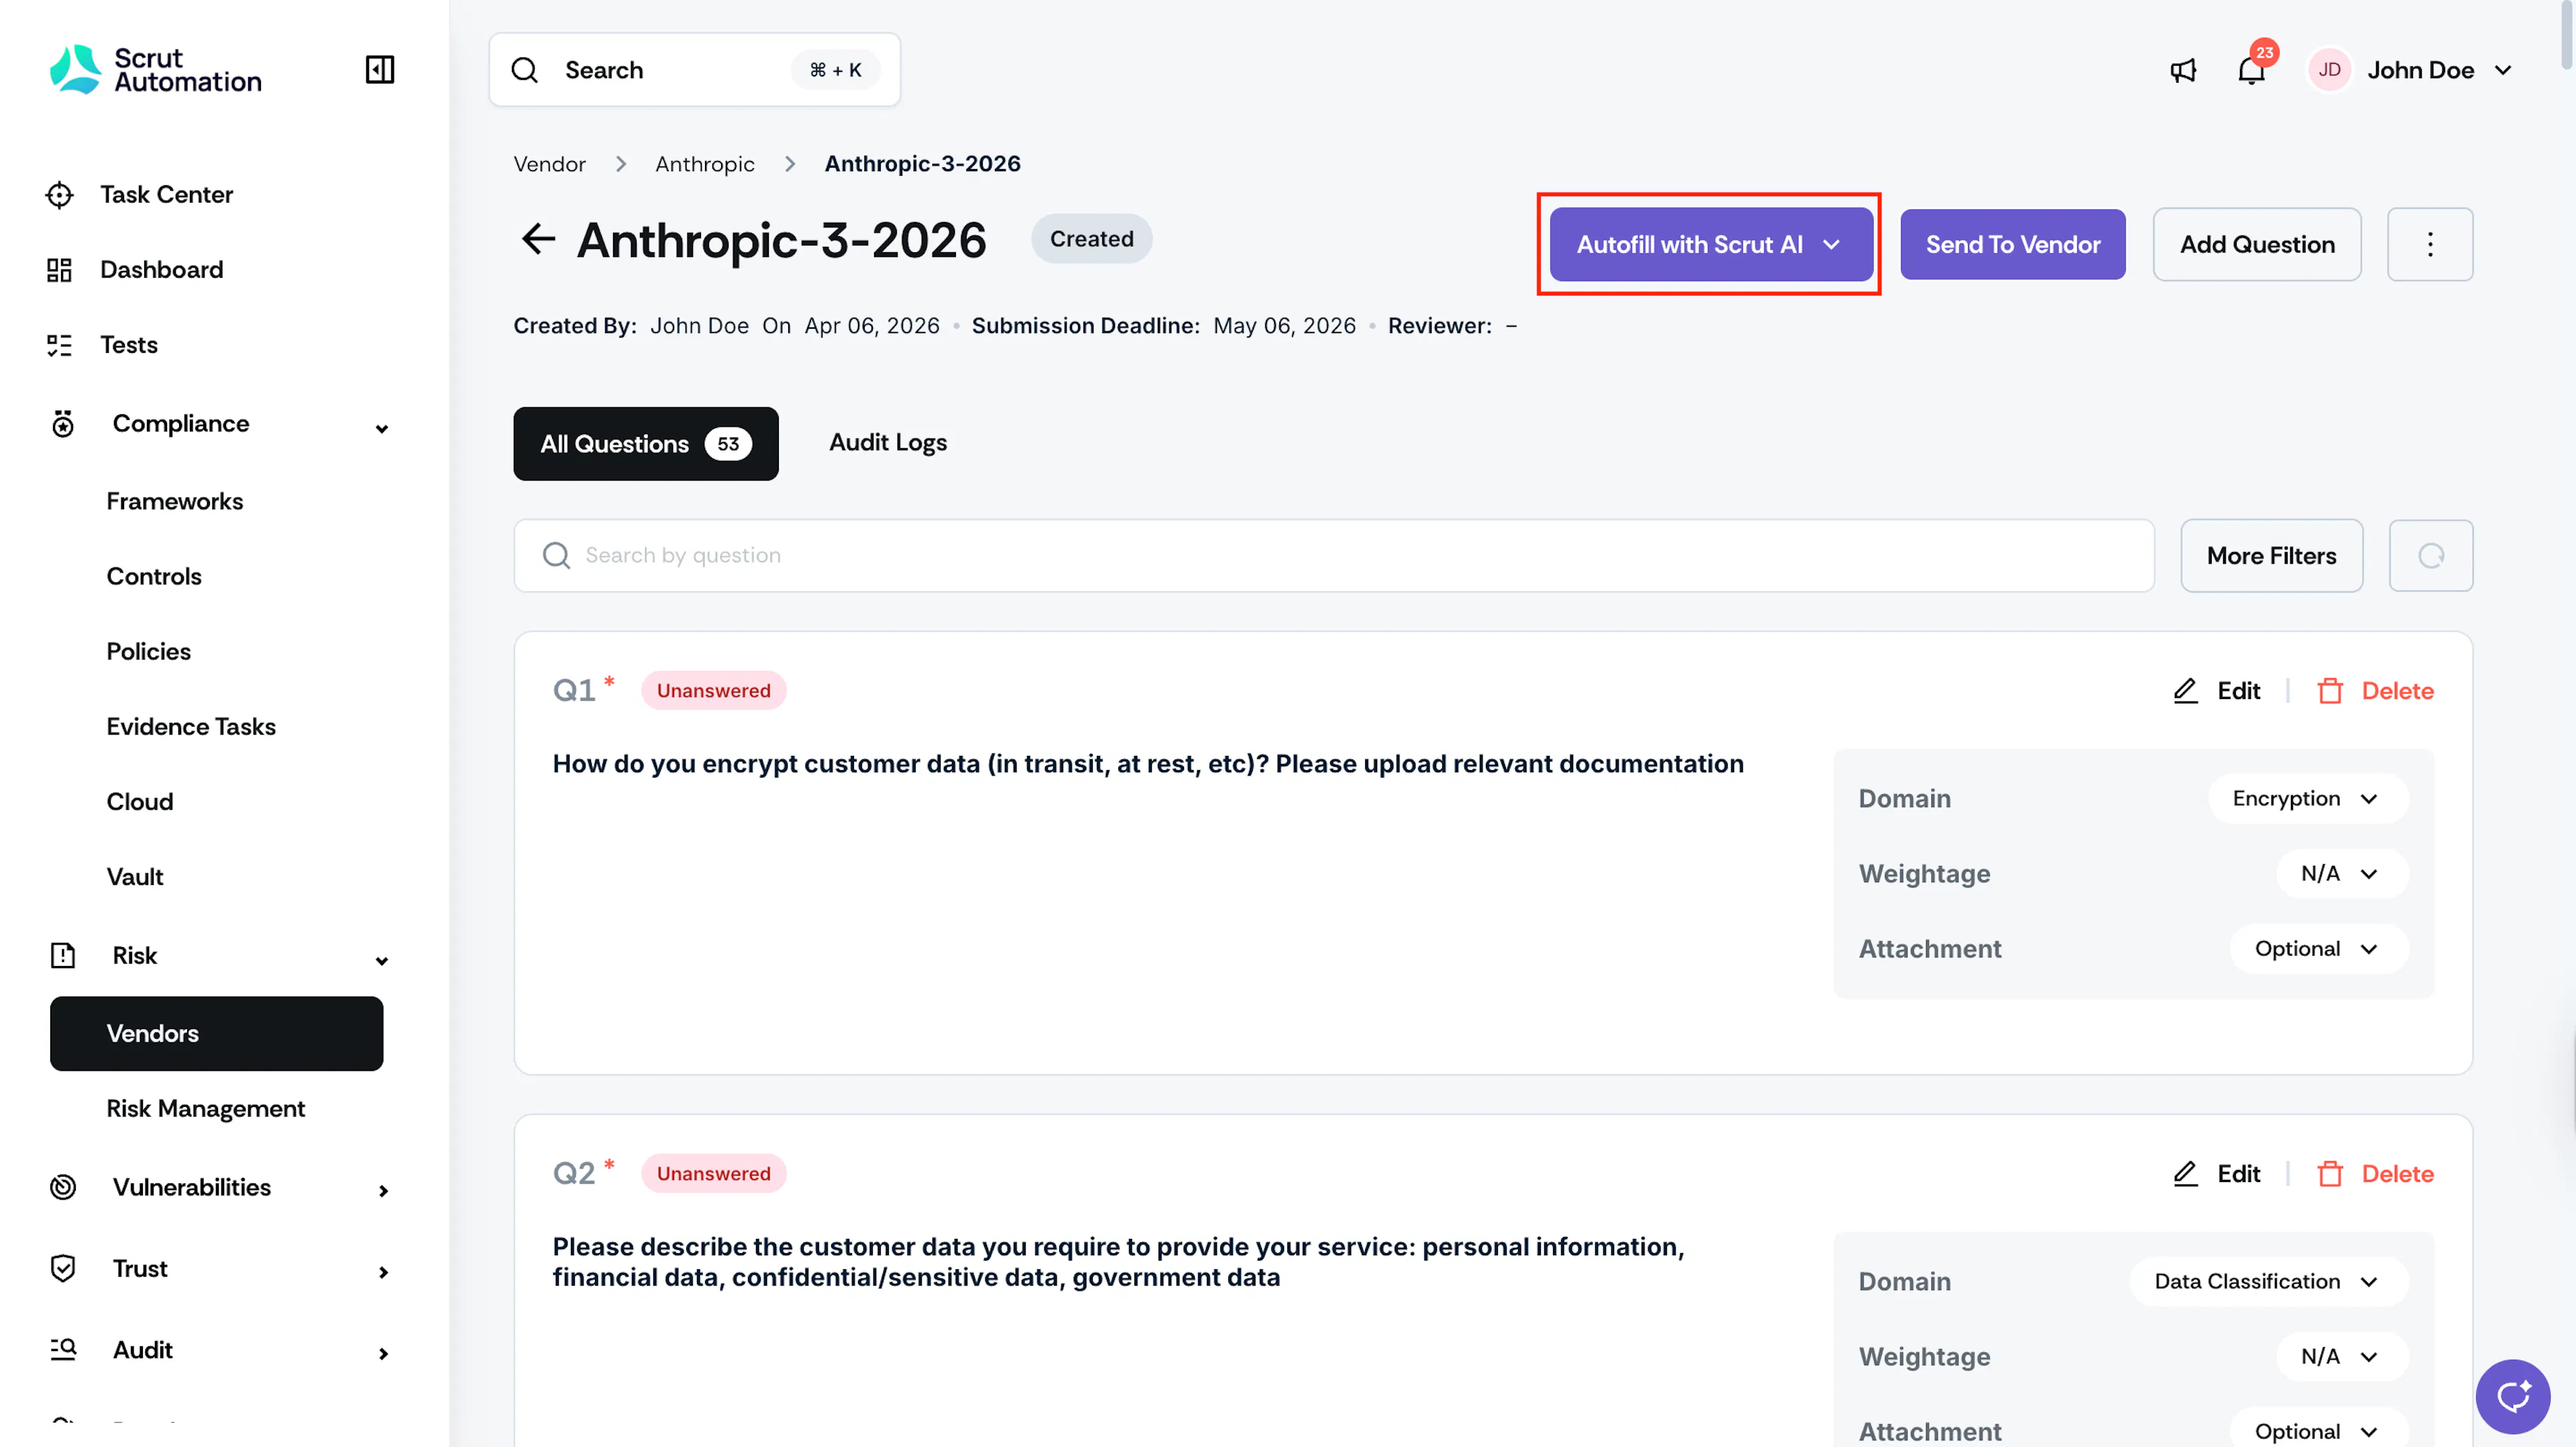
Before sending the questionnaire to the vendor, you can use Scrut Teammates to pre-populate answers automatically. Scrut Teammates refers to the documents added to the Documents tab on the vendor's details page. It uses the information in those documents to fill in answers wherever a match is found.
Click Autofill with Scrut AI to run the autofill. Scrut Teammates fills in answers where information is available. Only unanswered questions are sent to the vendor POC. Questions already answered by AI are not included in what the vendor sees.
Pro Tip!
Use Autofill to reduce the number of questions the vendor has to answer manually. It reduces vendor effort and time, and keeps the focus on questions that AI couldn’t resolve and needs direct vendor input.
Step 5: Send the Questionnaire to the Vendor
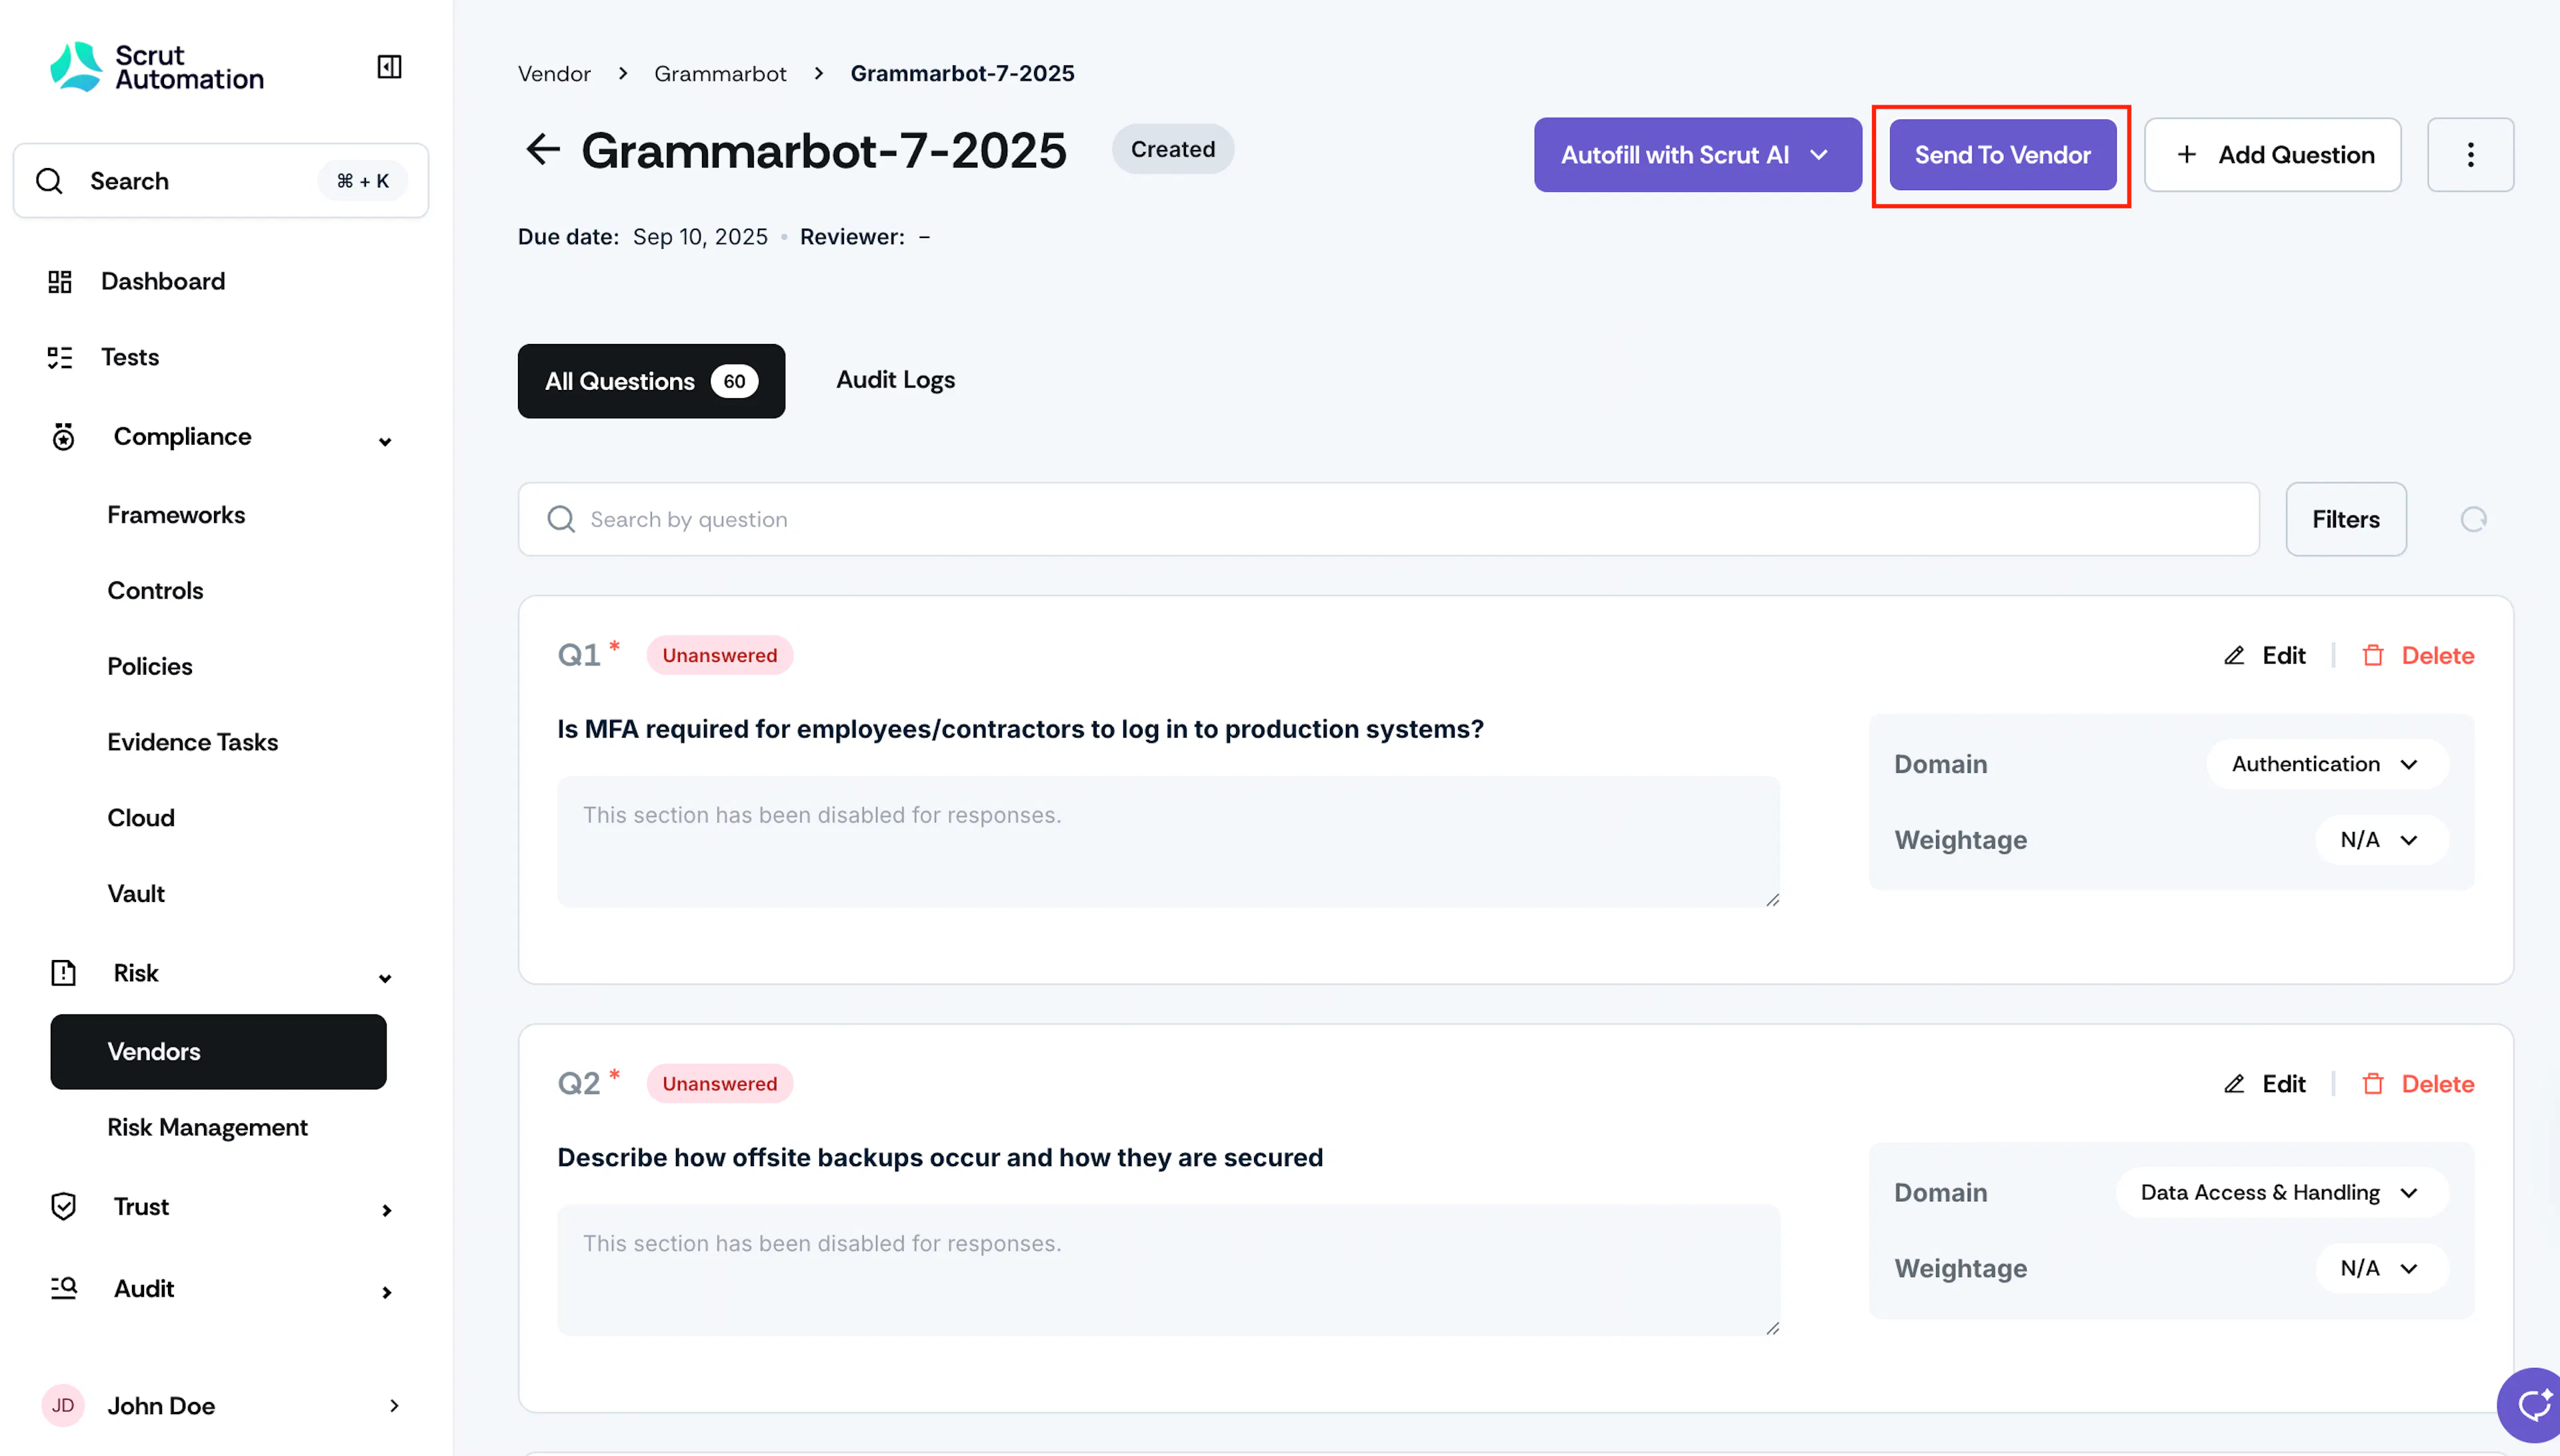
- Click Send to Vendor.
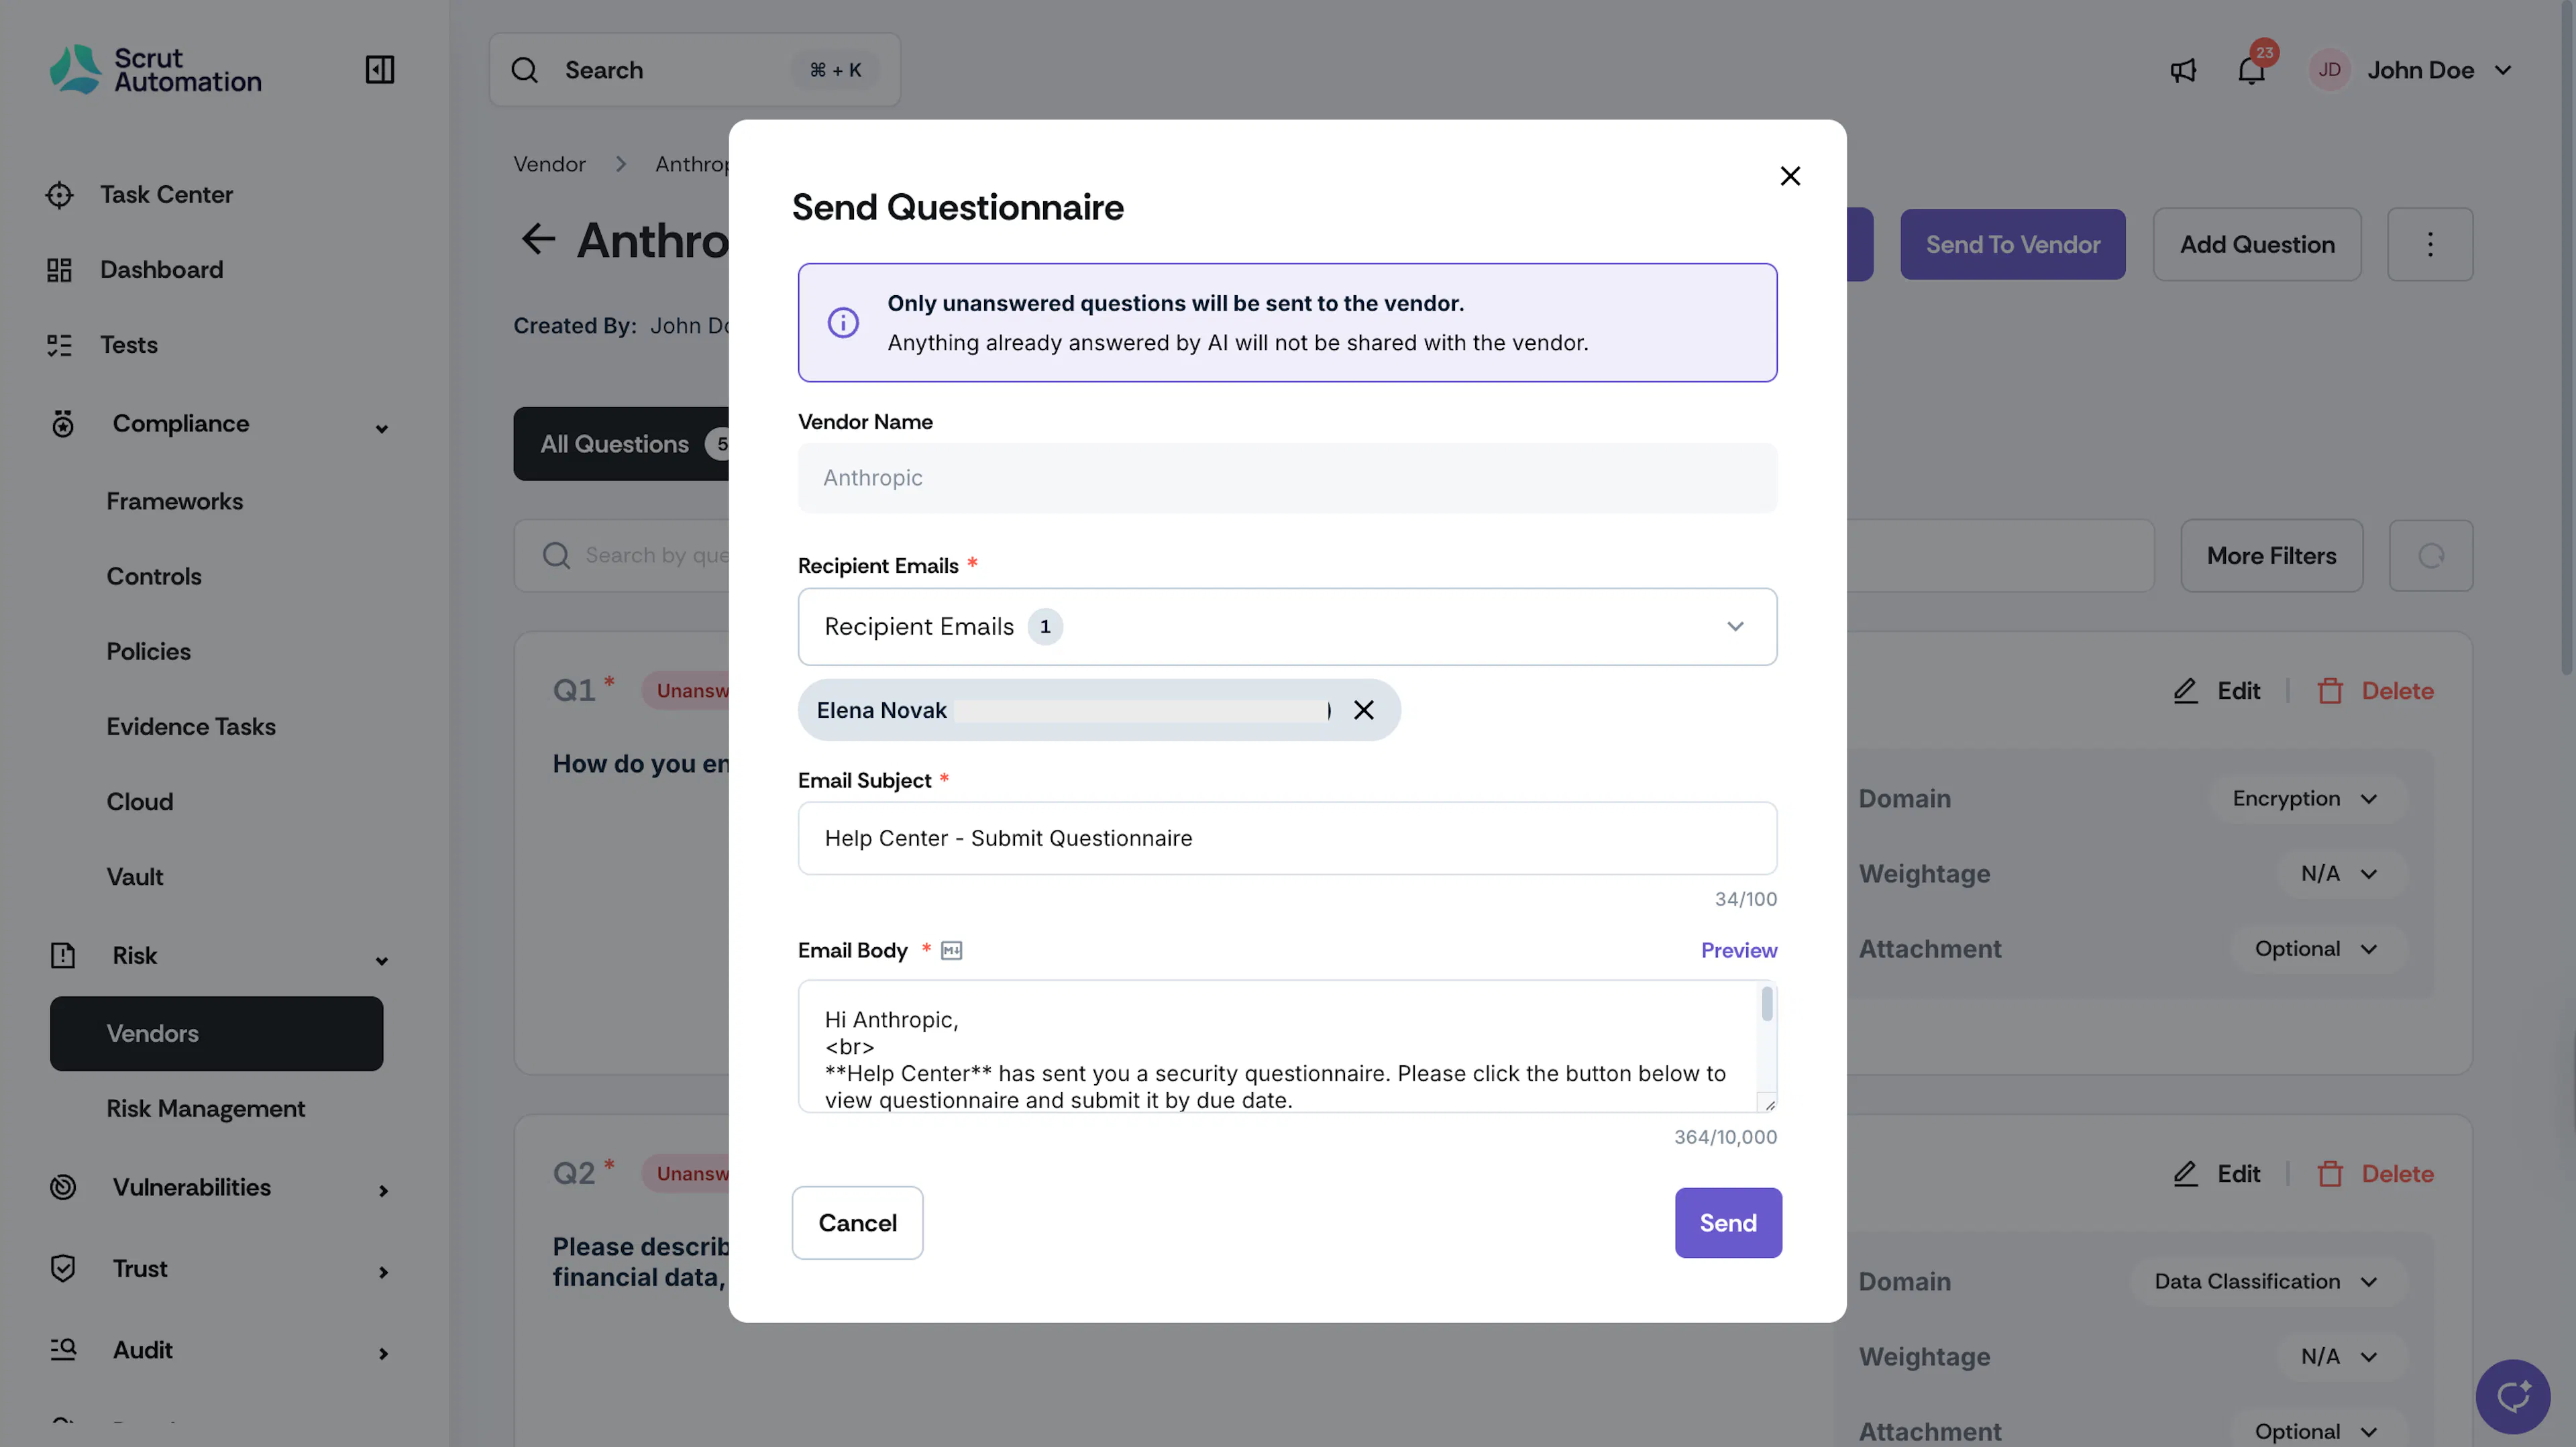
- Select the vendor POC from the Recipient Emails dropdown. If you haven't added a POC yet, click + Add POC to add one.
- Review the prefilled Email Subject and Body. Edit the content if needed. The Email Body field supports markdown formatting. Click Preview to see how the email will appear to the recipient.
- Click Send.
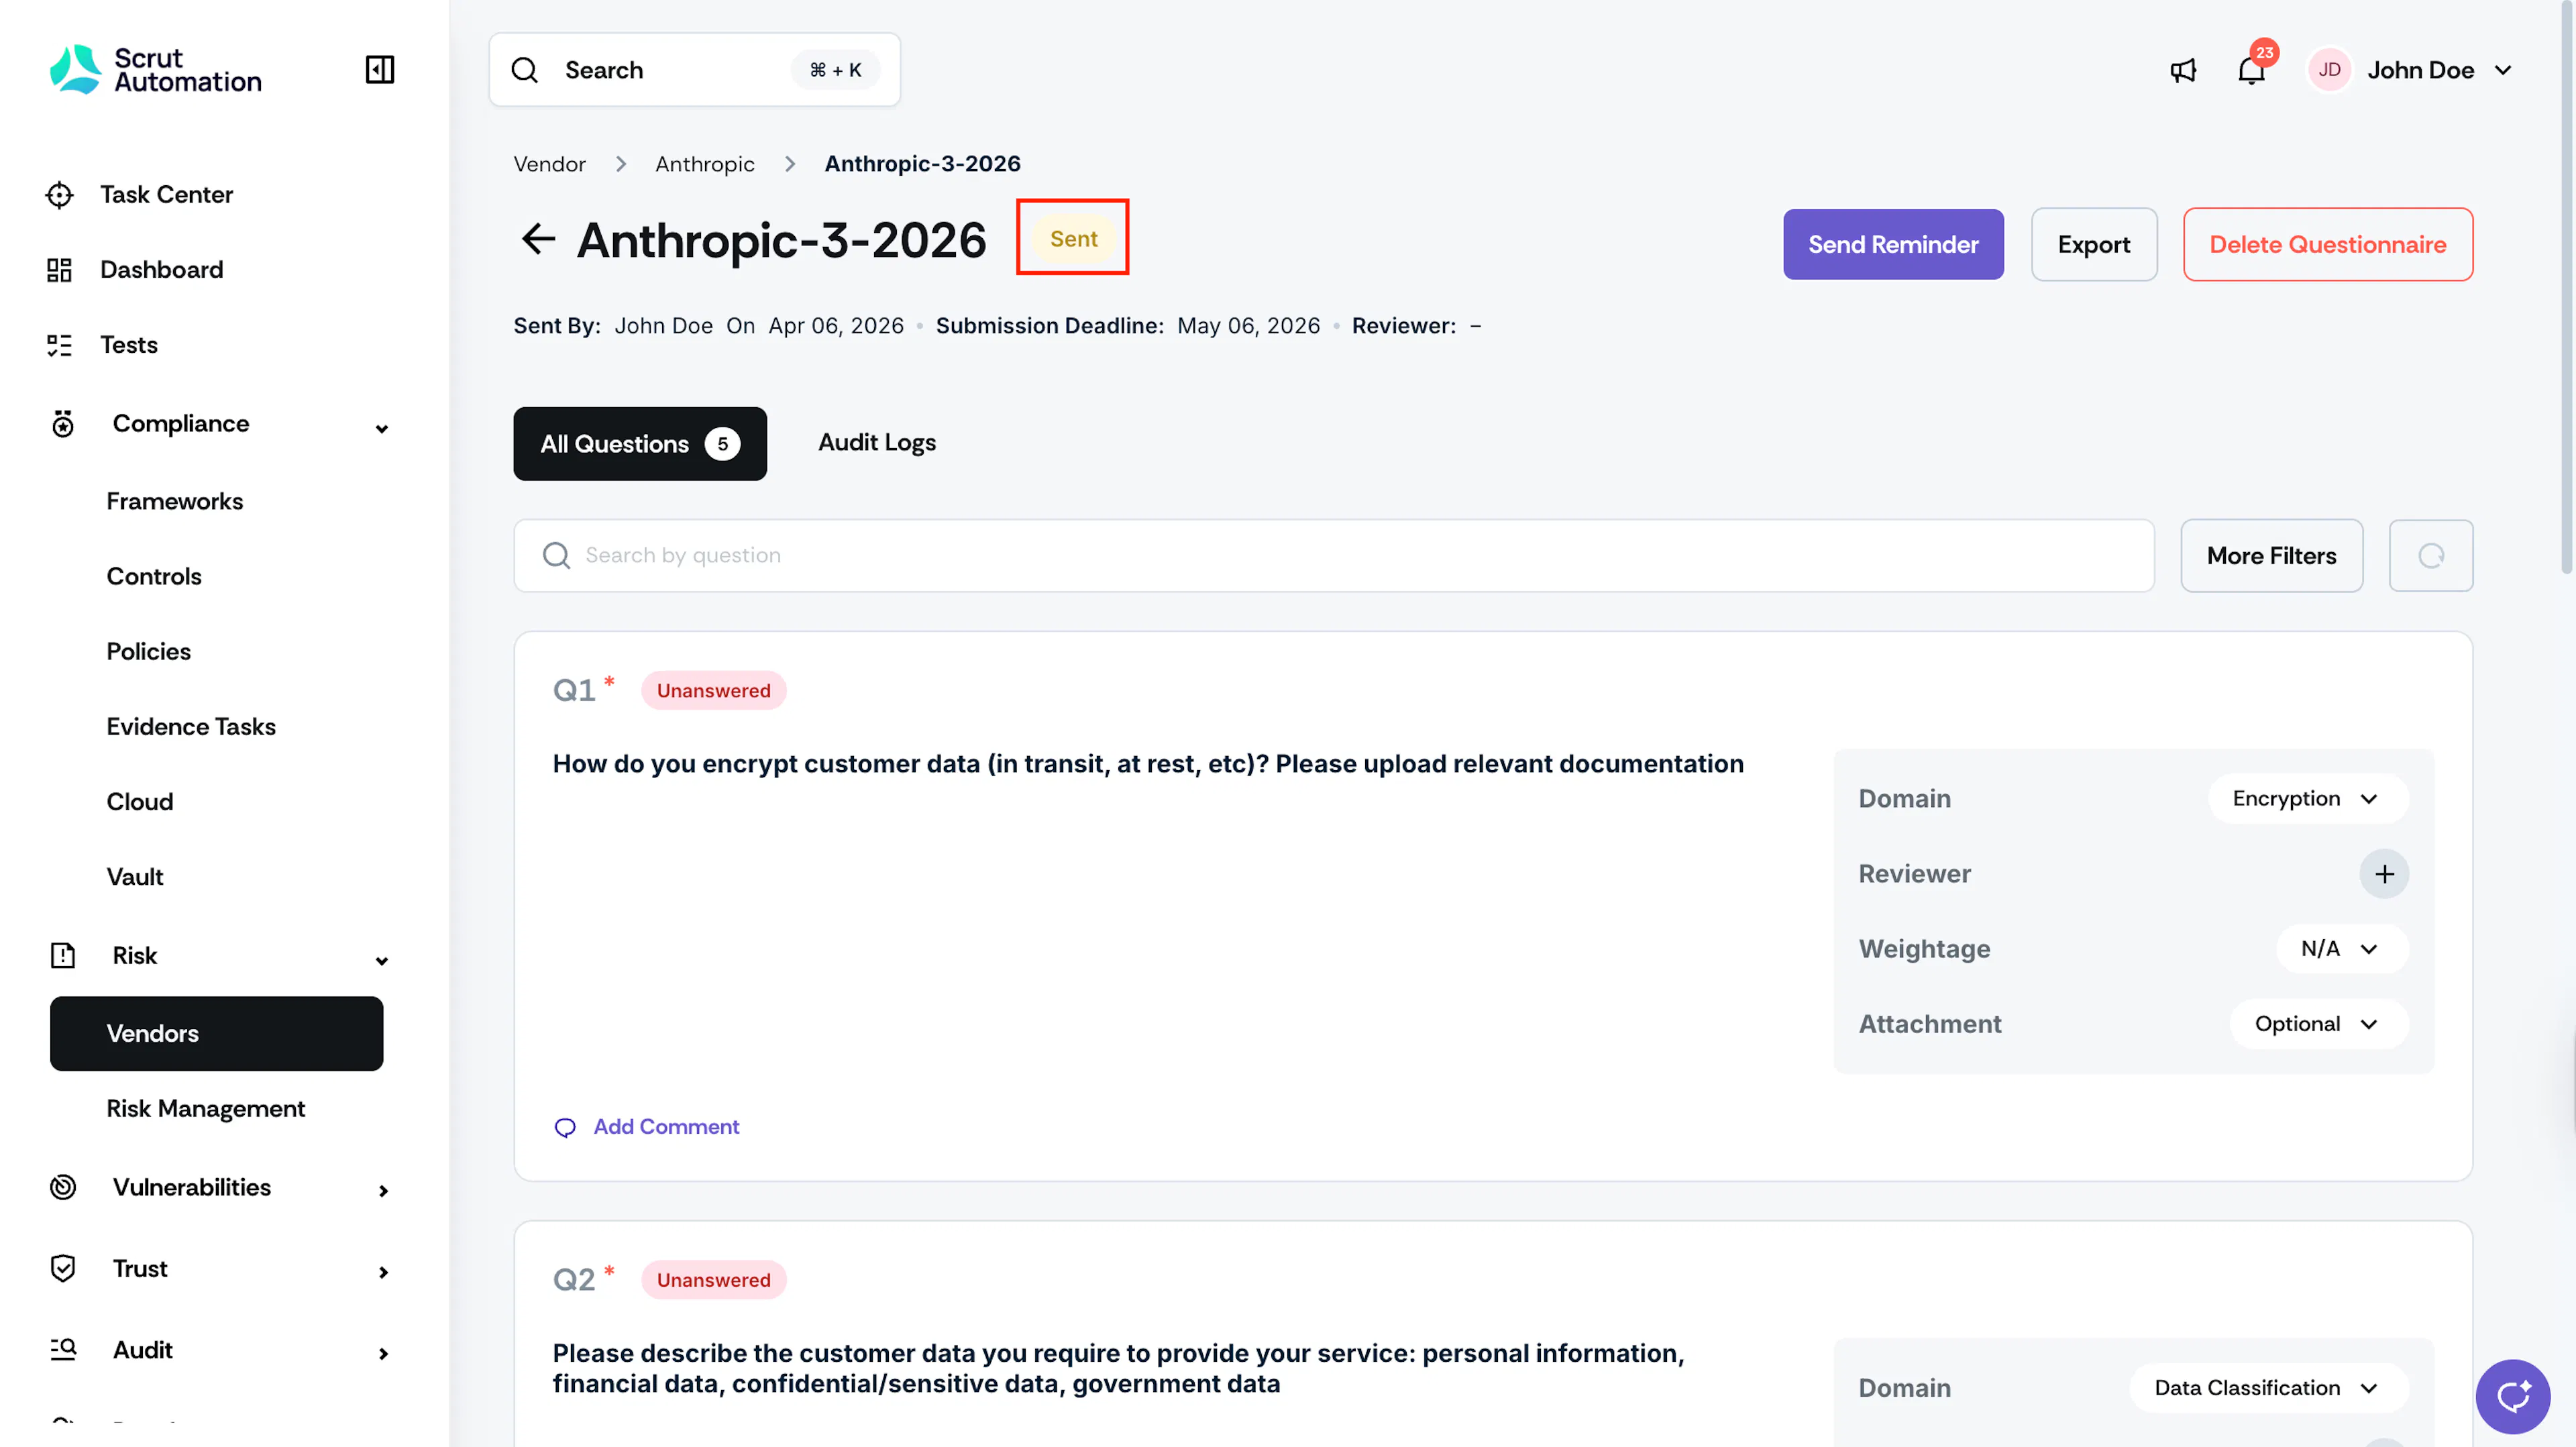
The questionnaire status changes to Sent in Scrut.
Step 6: Scrut Teammates Quality-Checks Vendor Responses
The vendor POC receives an email with a link to view the questionnaire on the Scrut Vendor Portal.
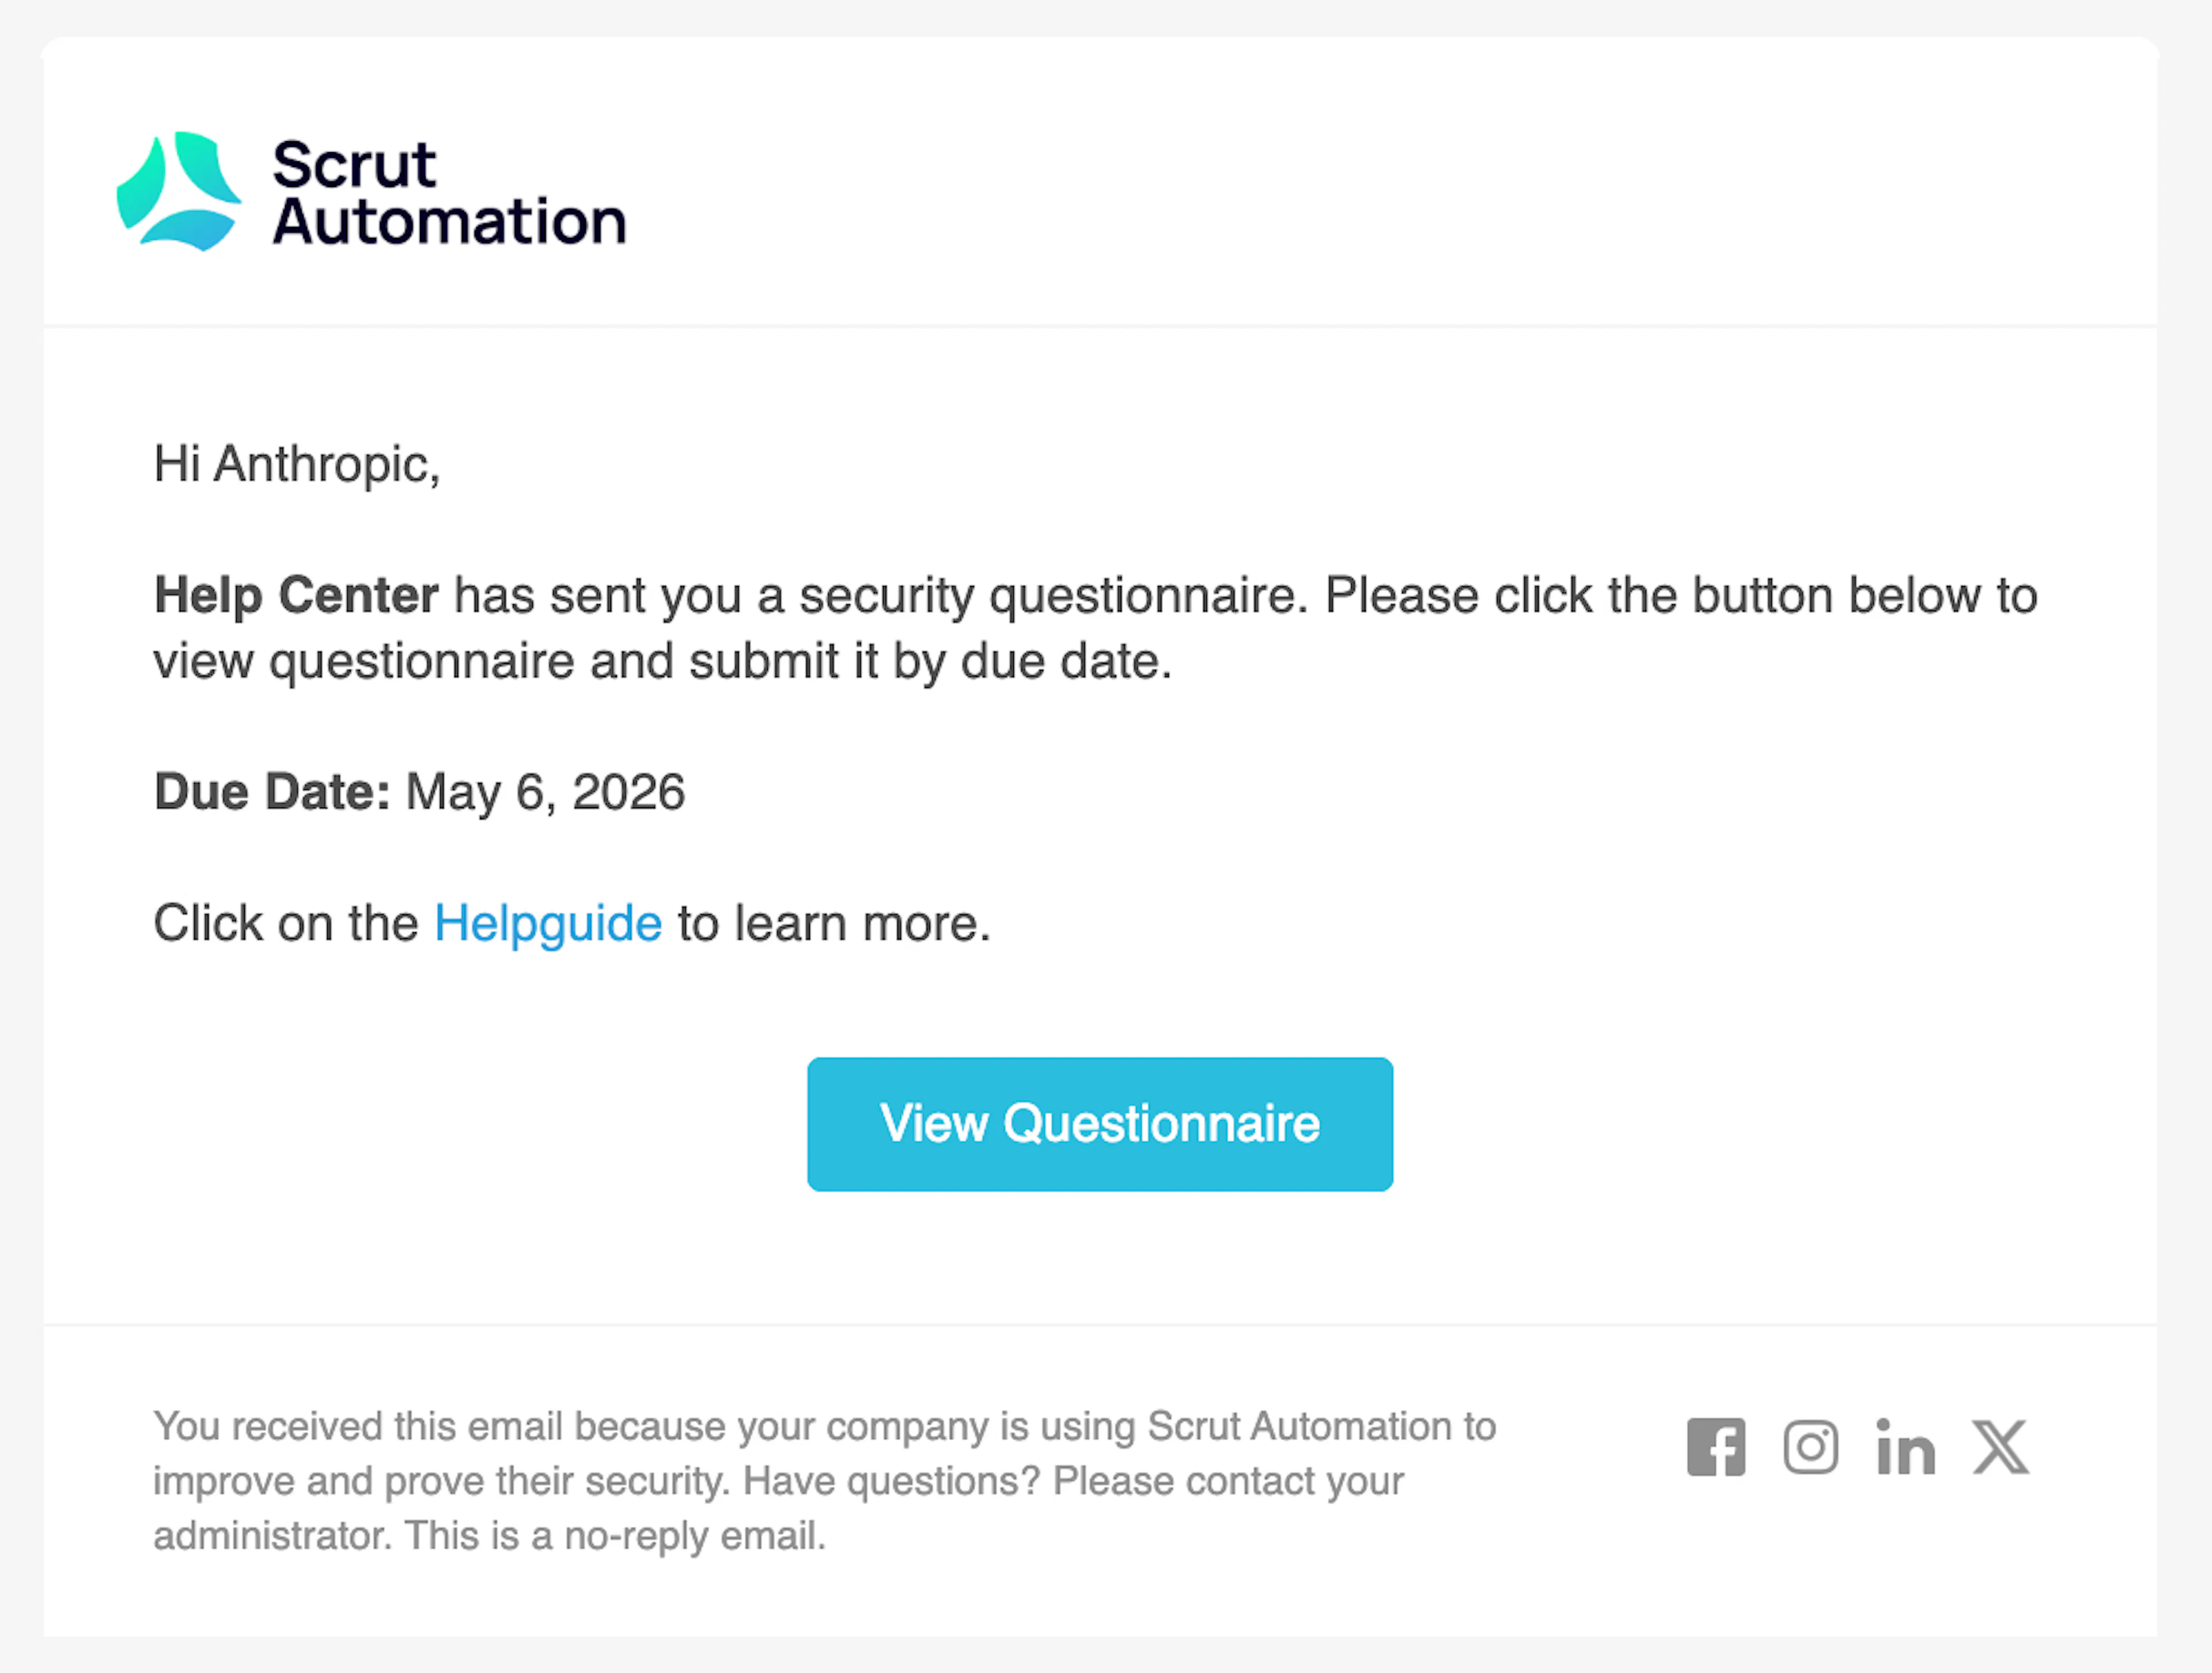
The Vendor POC clicks View Questionnaire to open the Scrut Vendor Portal, where they can enter their responses. Once they have added their answers, they can click Review Answers.
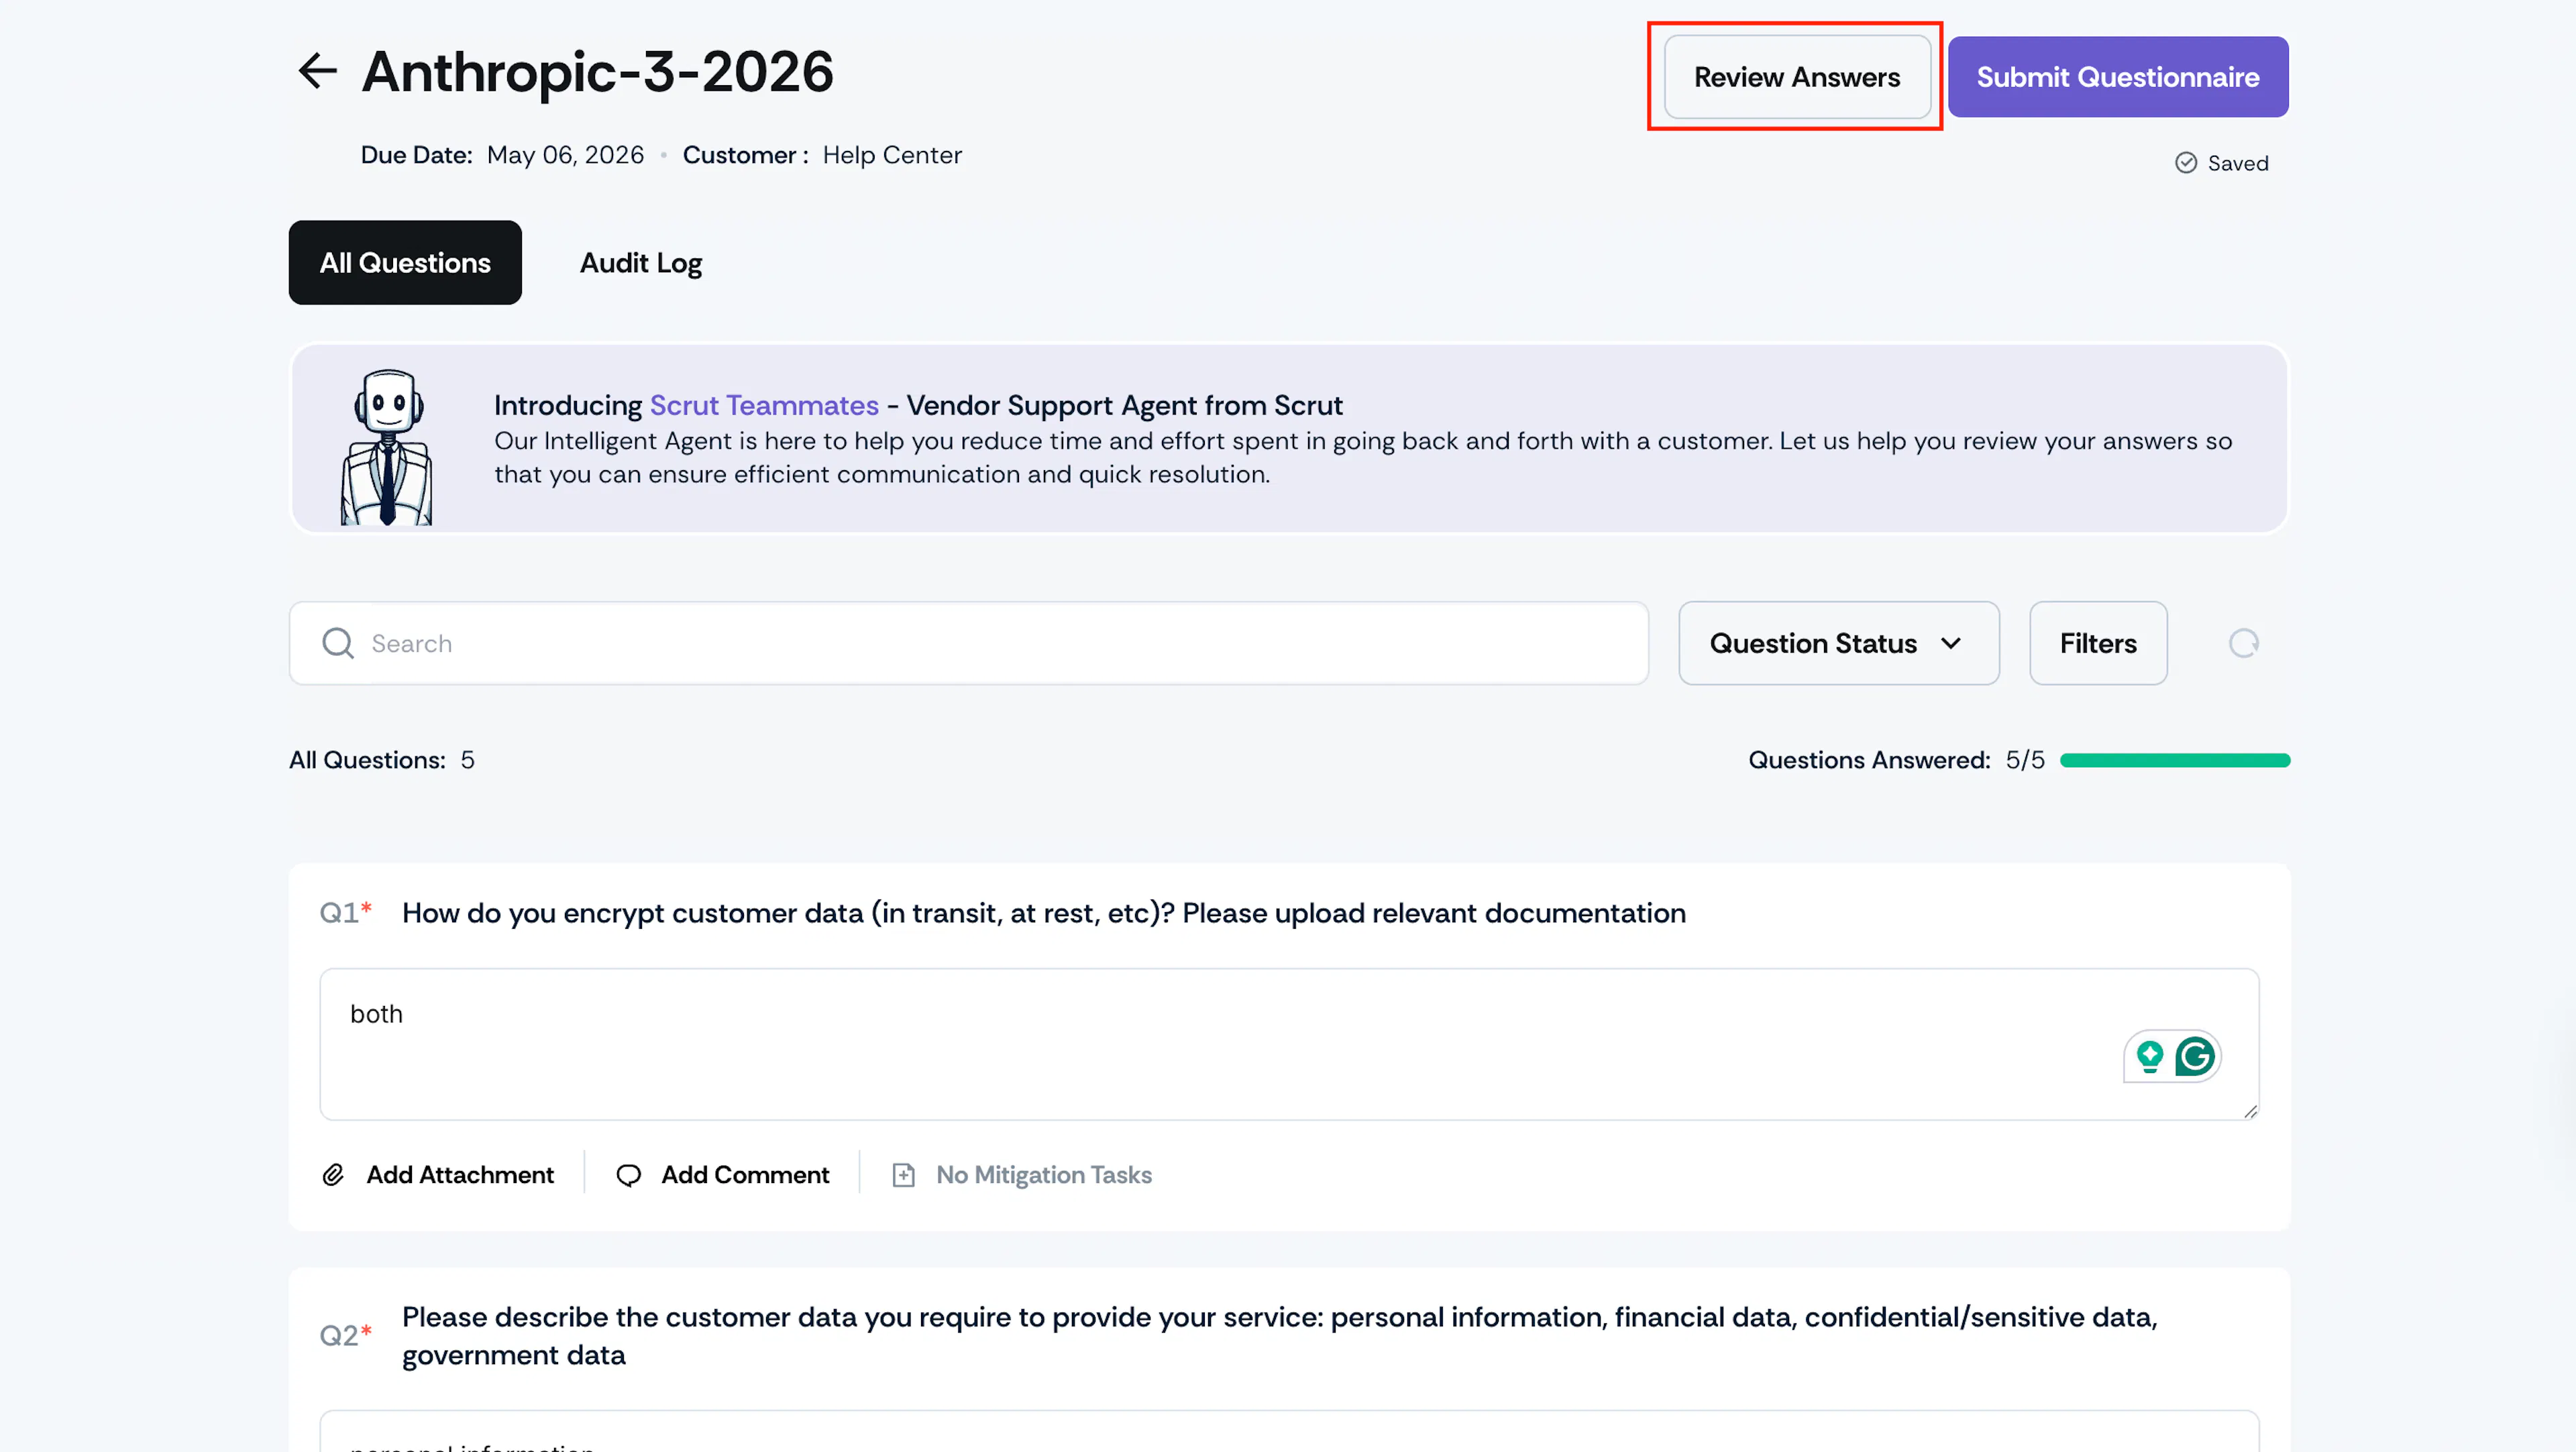
Scrut Teammates then analyzes the submitted responses, flags vague or incomplete answers, and prompts the POC to provide more specific information before they submit. It acts as an on-screen quality-checker, ensuring you receive clear and complete responses from vendors. This significantly reduces the typical back-and-forth with vendors, which typically extends assessment timelines.
For example, if a vendor responds with "Yes, we use encryption," the portal will prompt them to specify:
- What type of encryption is used?
- Which platforms or services provide the encryption (e.g., AWS)?
- What data is encrypted and when?
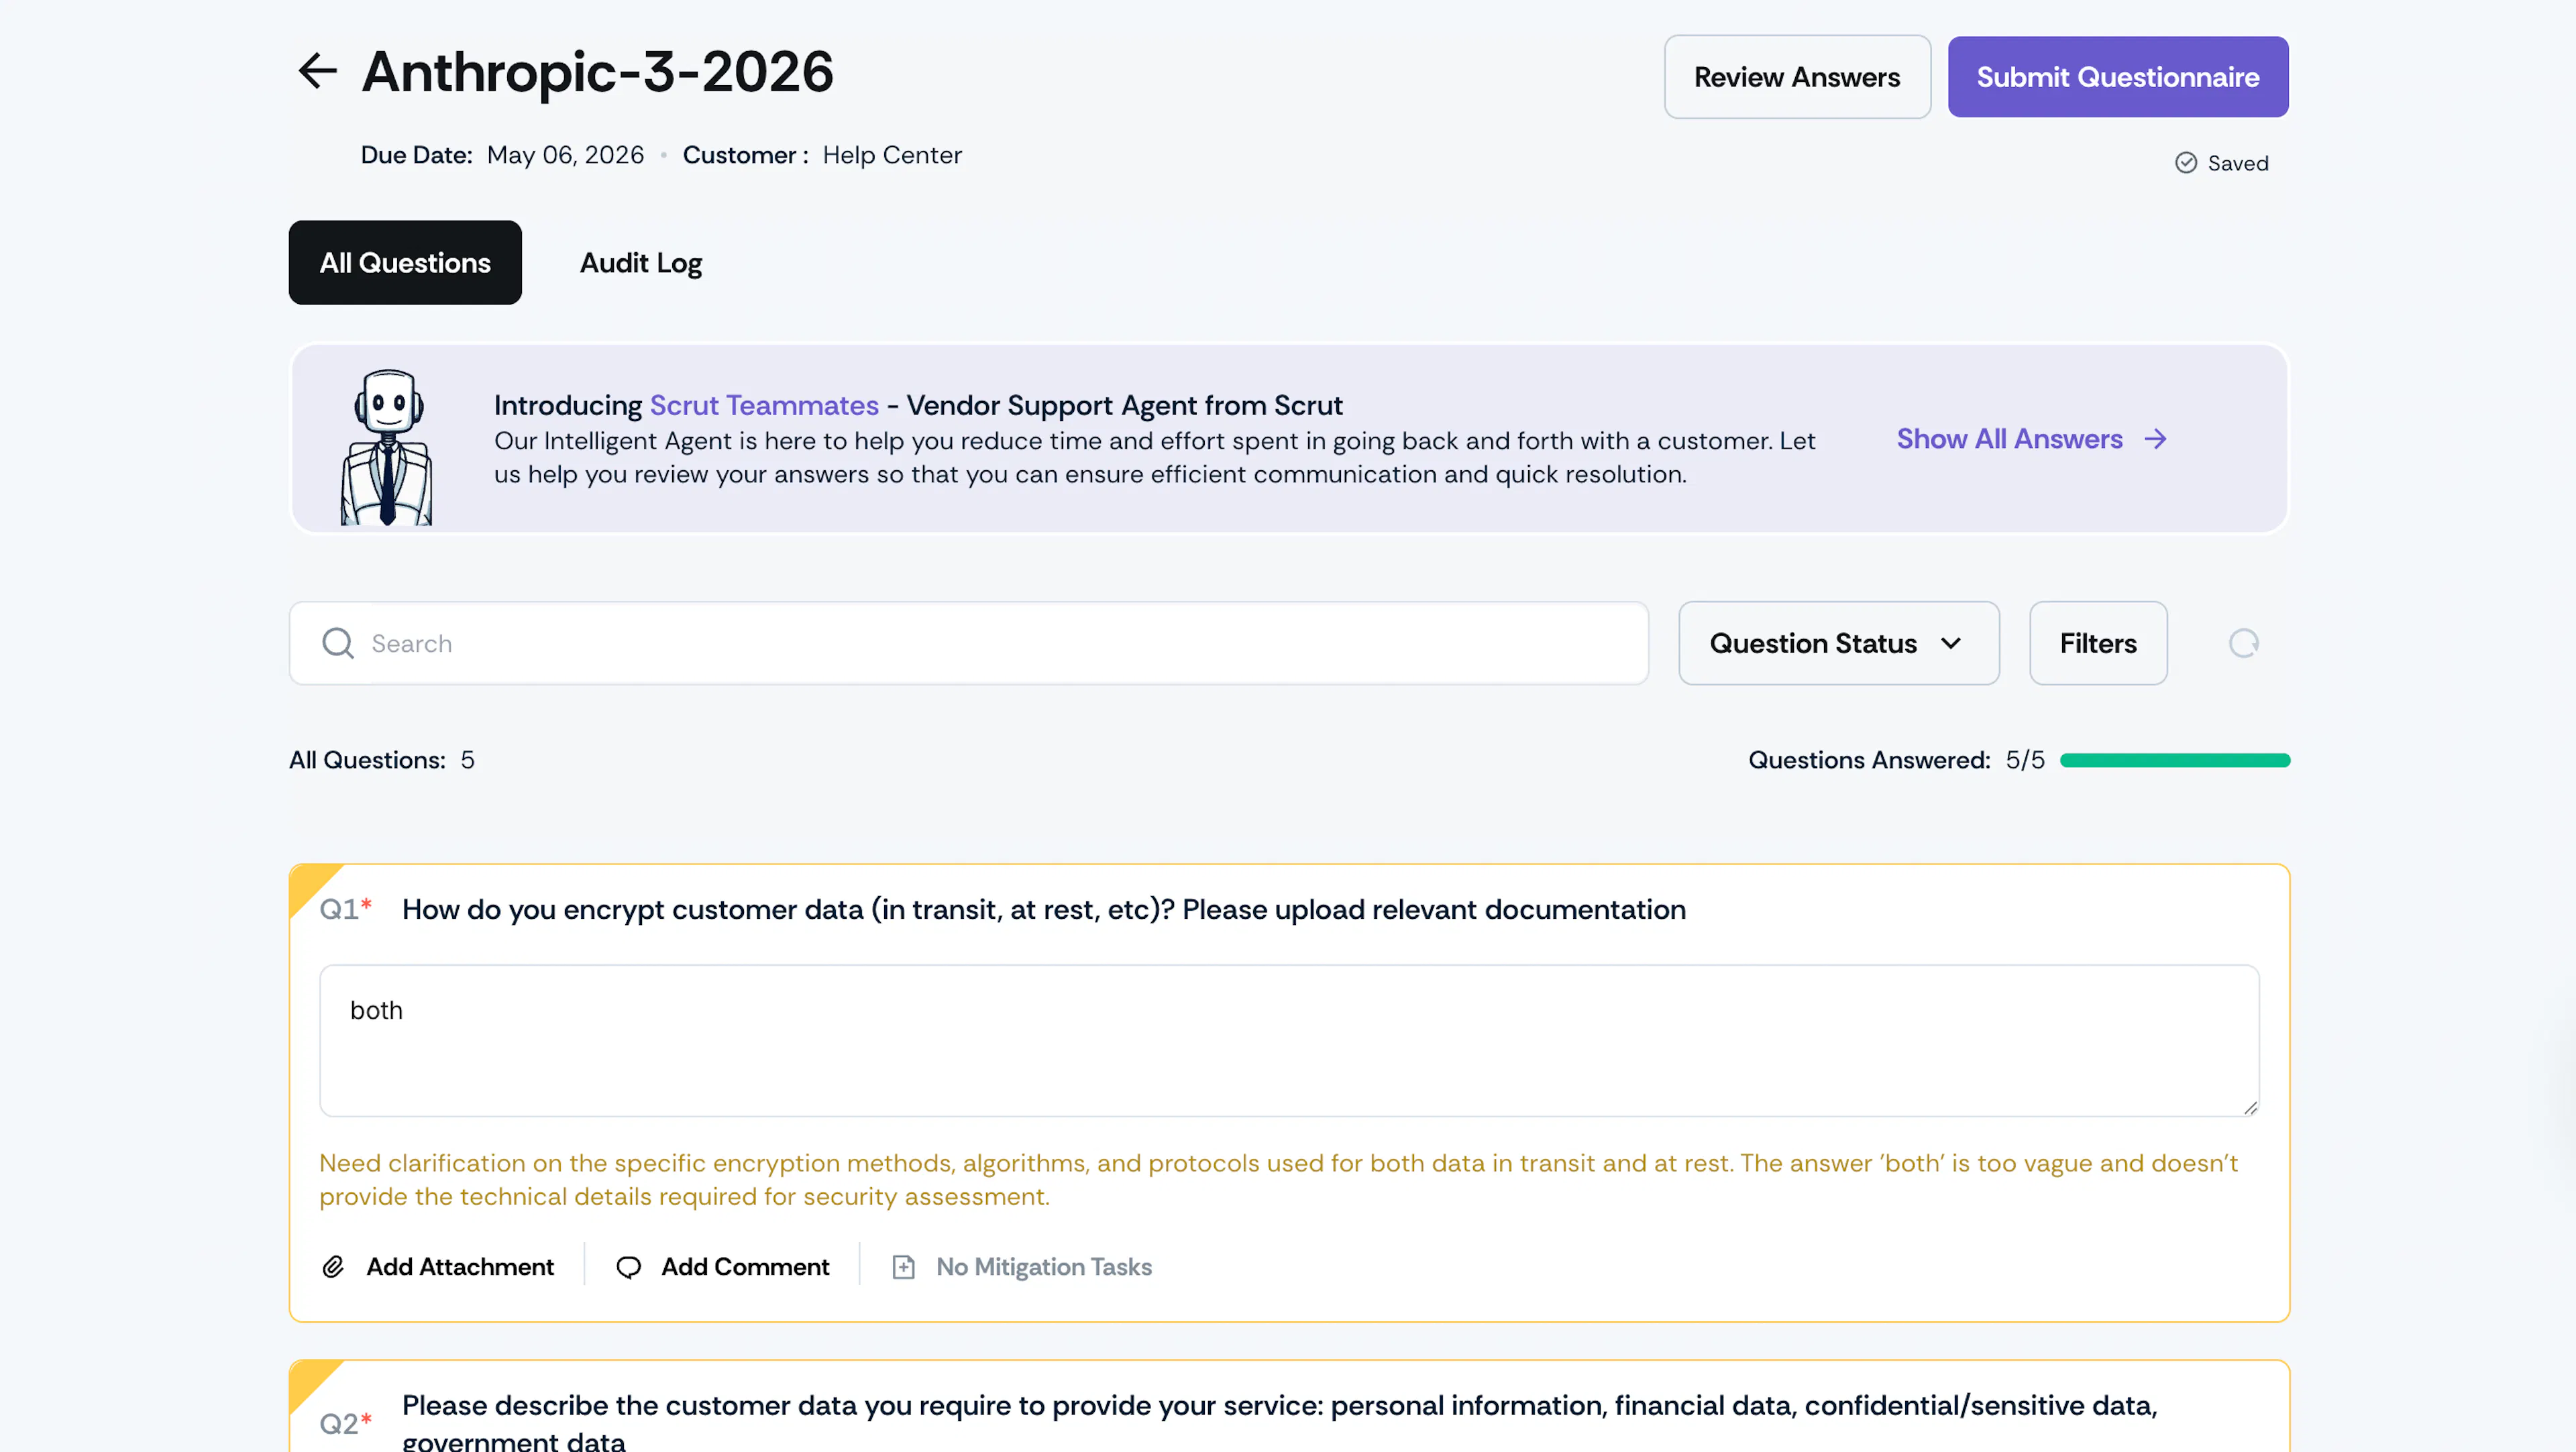
The vendor POC can edit their responses based on the AI feedback and then click Submit Questionnaire.
Step 7: Identify Risks from Submitted Responses
After the vendor submits the questionnaire, use Scrut Teammates to analyze responses and surface potential risks.
- Open the submitted questionnaire on the vendor's Questionnaires tab.
- Scrut Teammates scans all responses and flags questions where the answer is vague, insufficient, or potentially indicates a security or compliance risk.
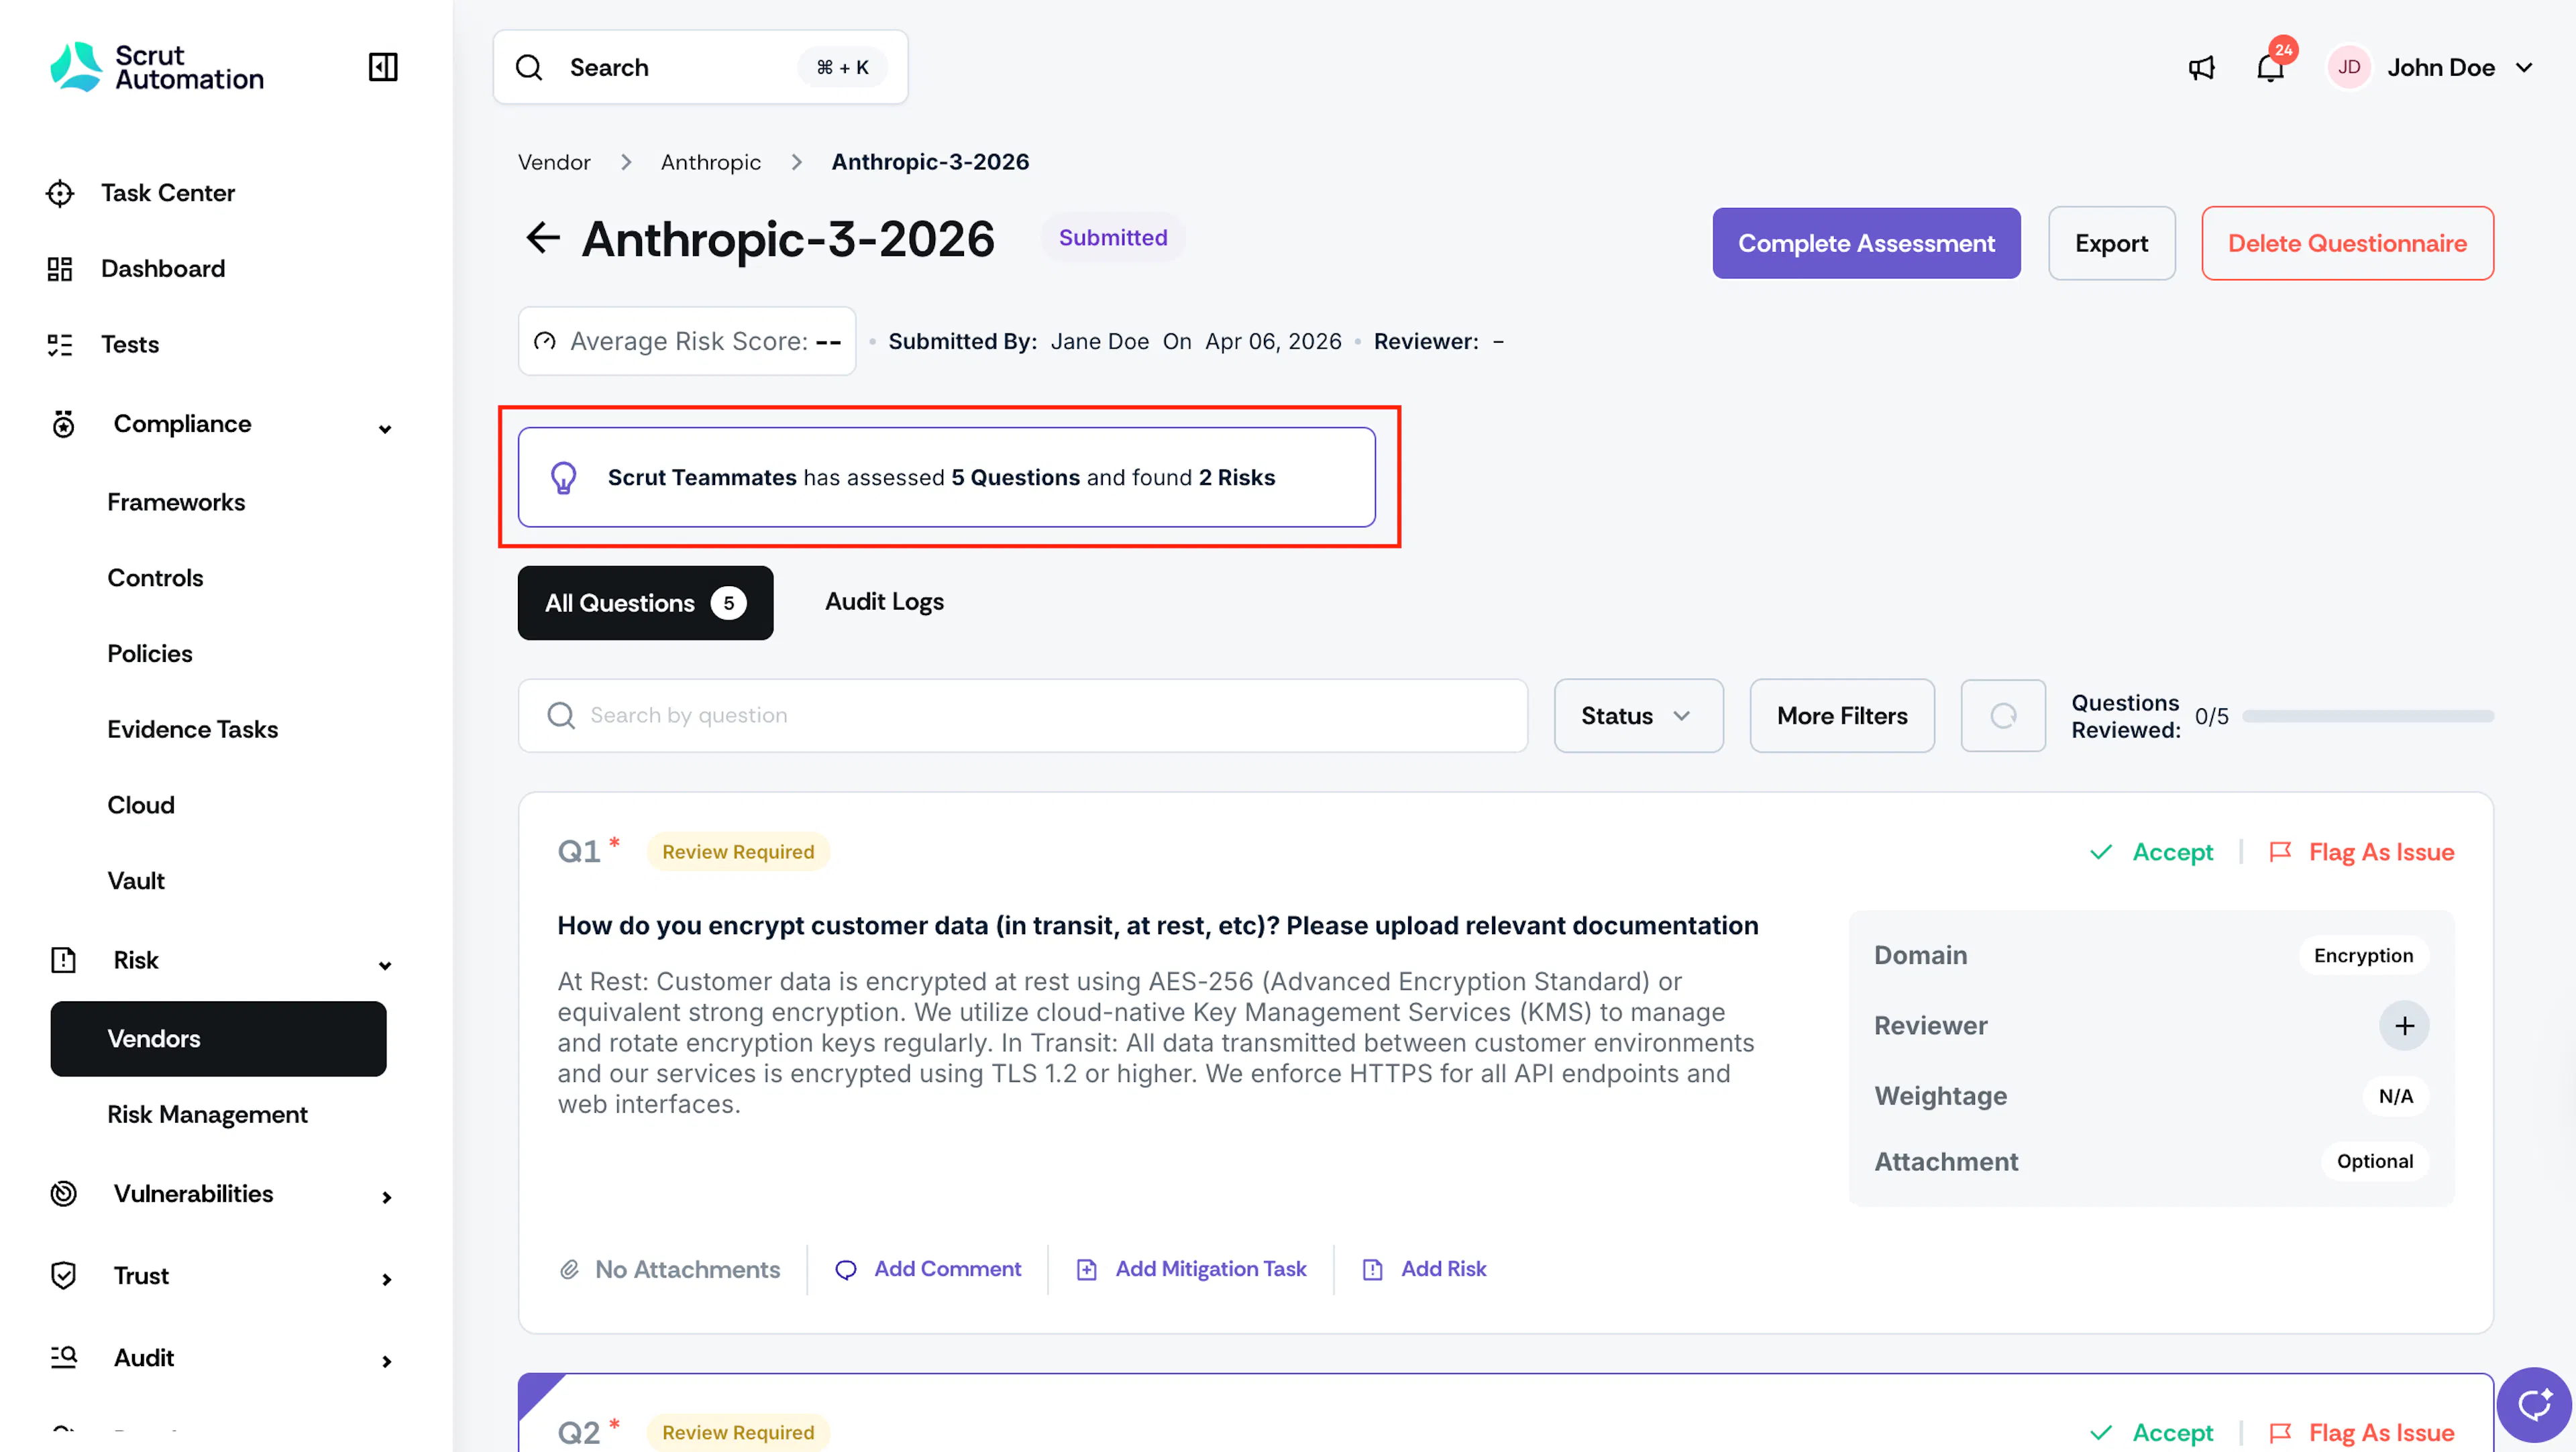
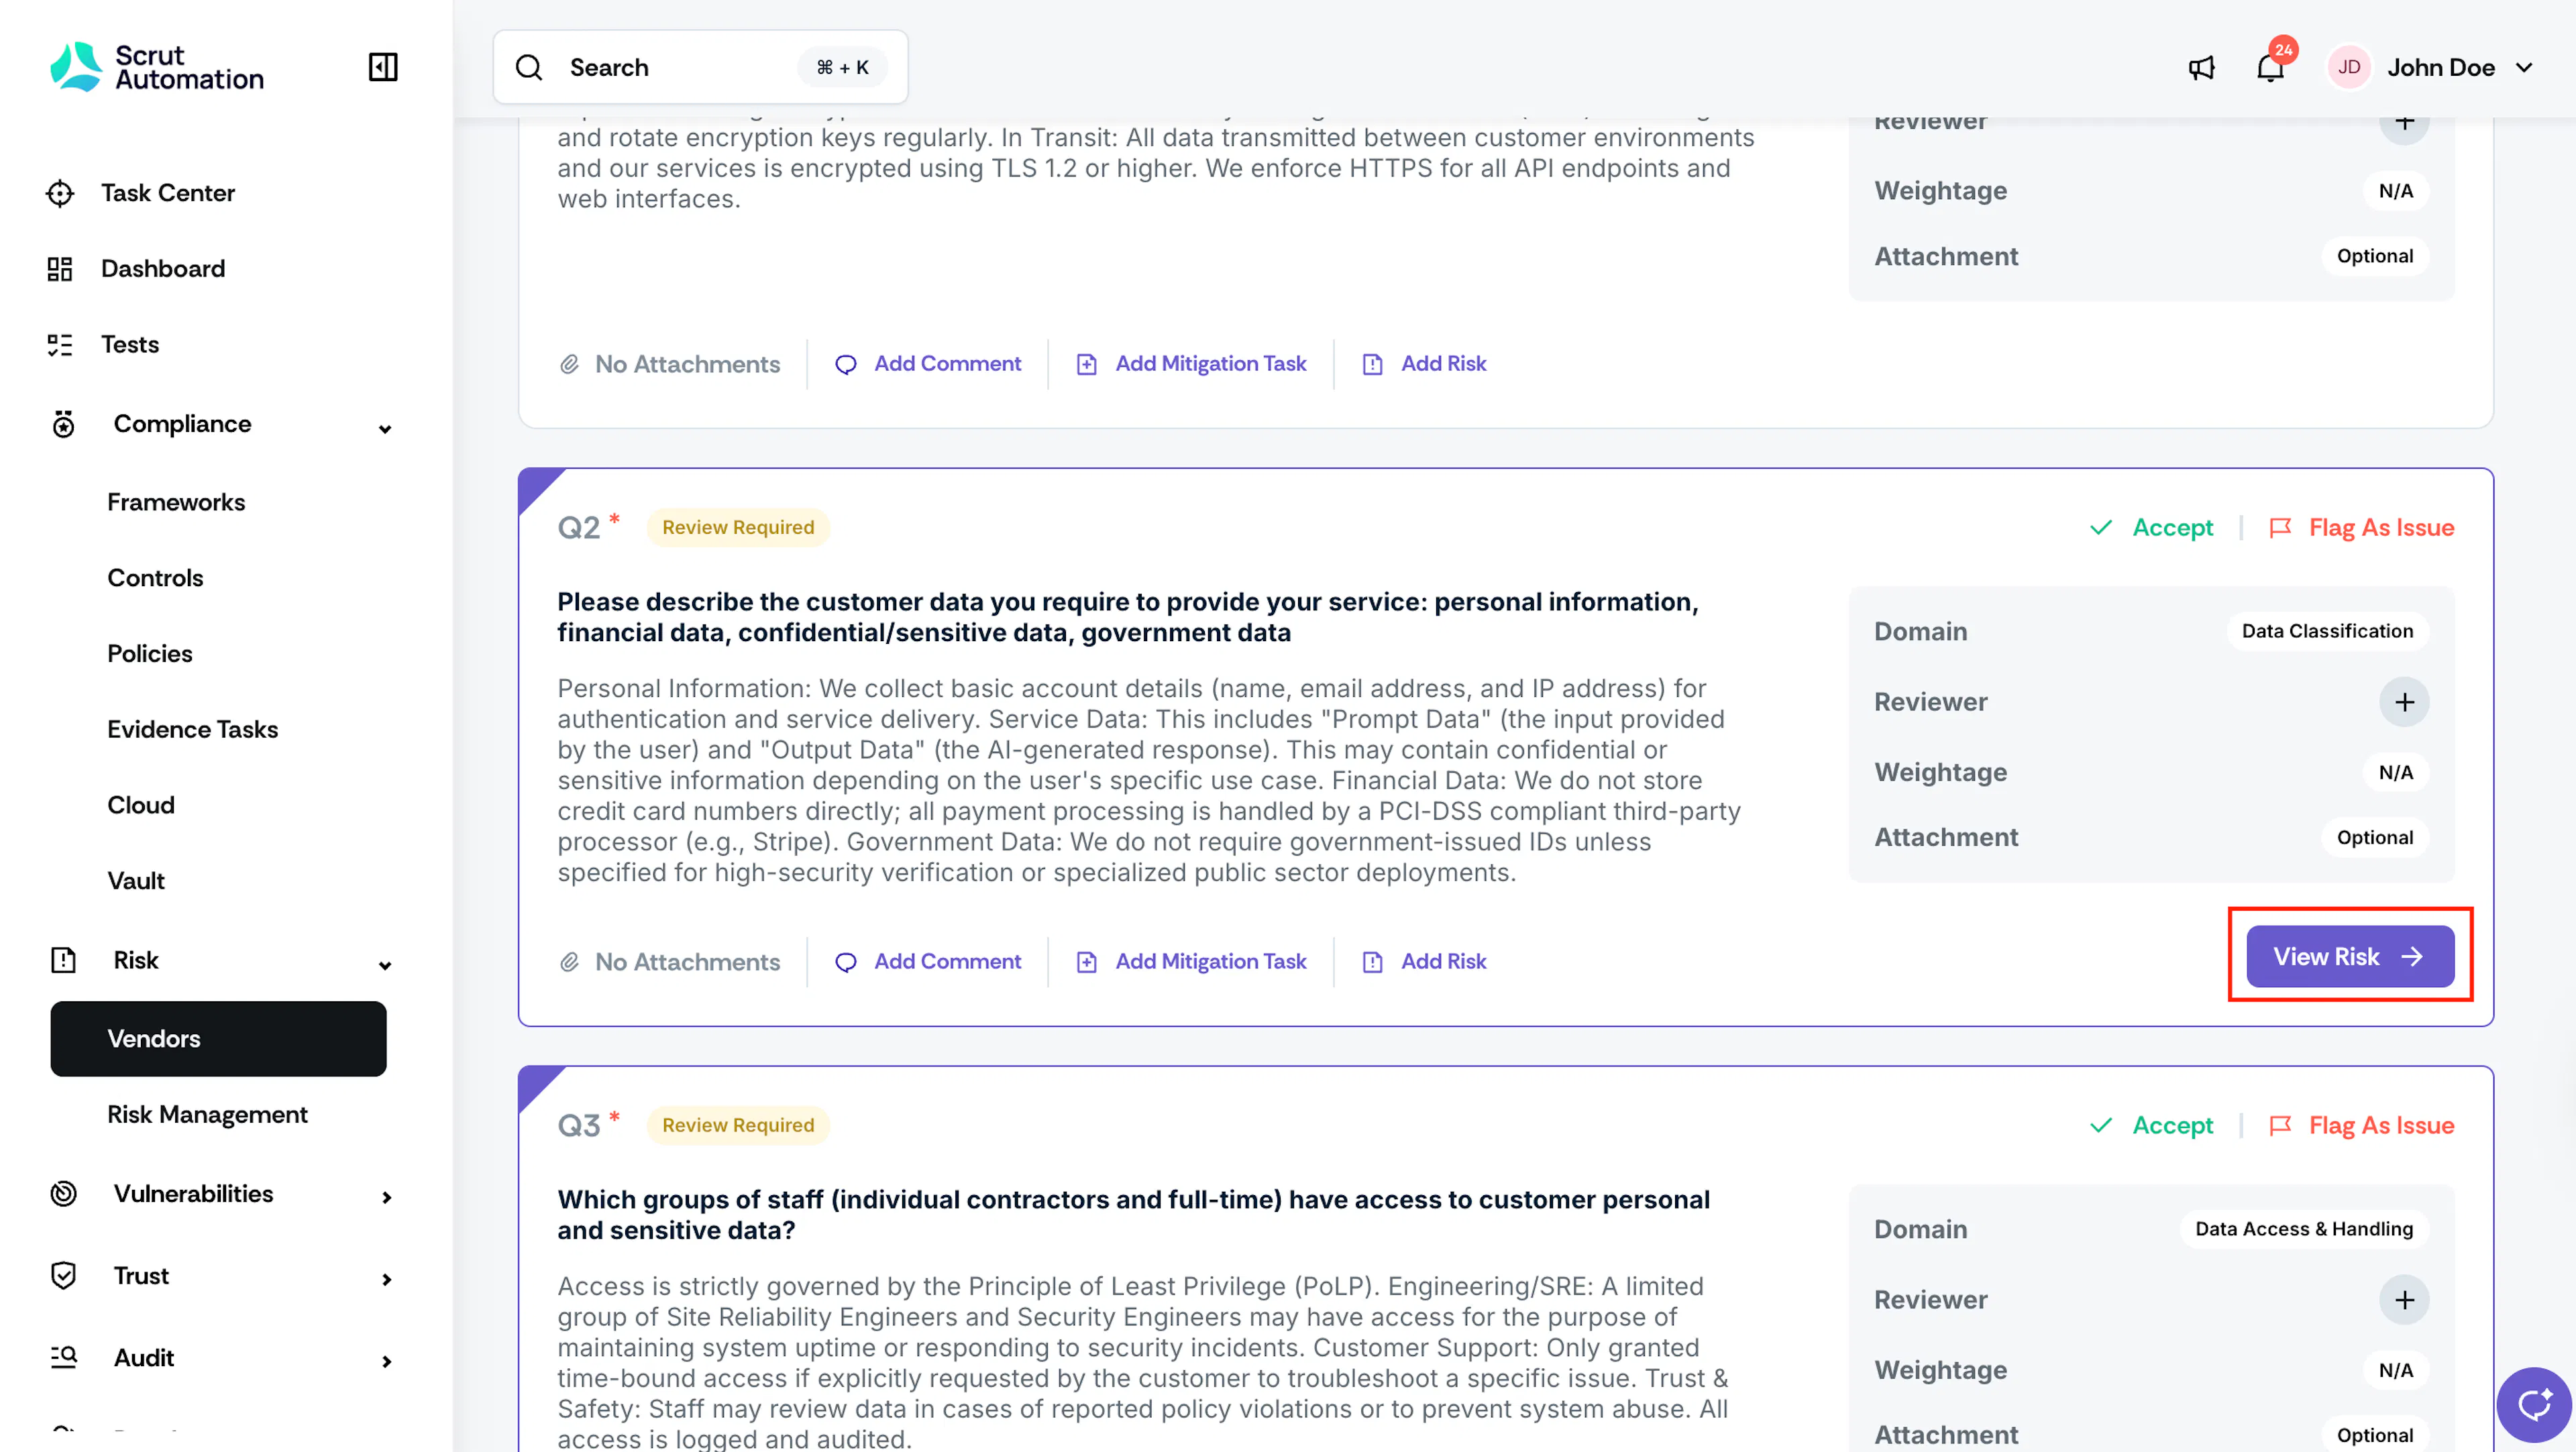
- Click View Risk next to a flagged question to read the identified risk and the AI's justification for flagging it.
- The panel shows the following for each flagged response:
- Risk: A description of the potential risk identified from the vendor's response.
- Justification: Scrut Teammates' reasoning for why the response is problematic, including specific concerns about how the vendor's answer could expose your organization.
- Source: A reference to the question and response that triggered the flag.
- Recommended mitigation task: A list of specific actions to address the identified risk.
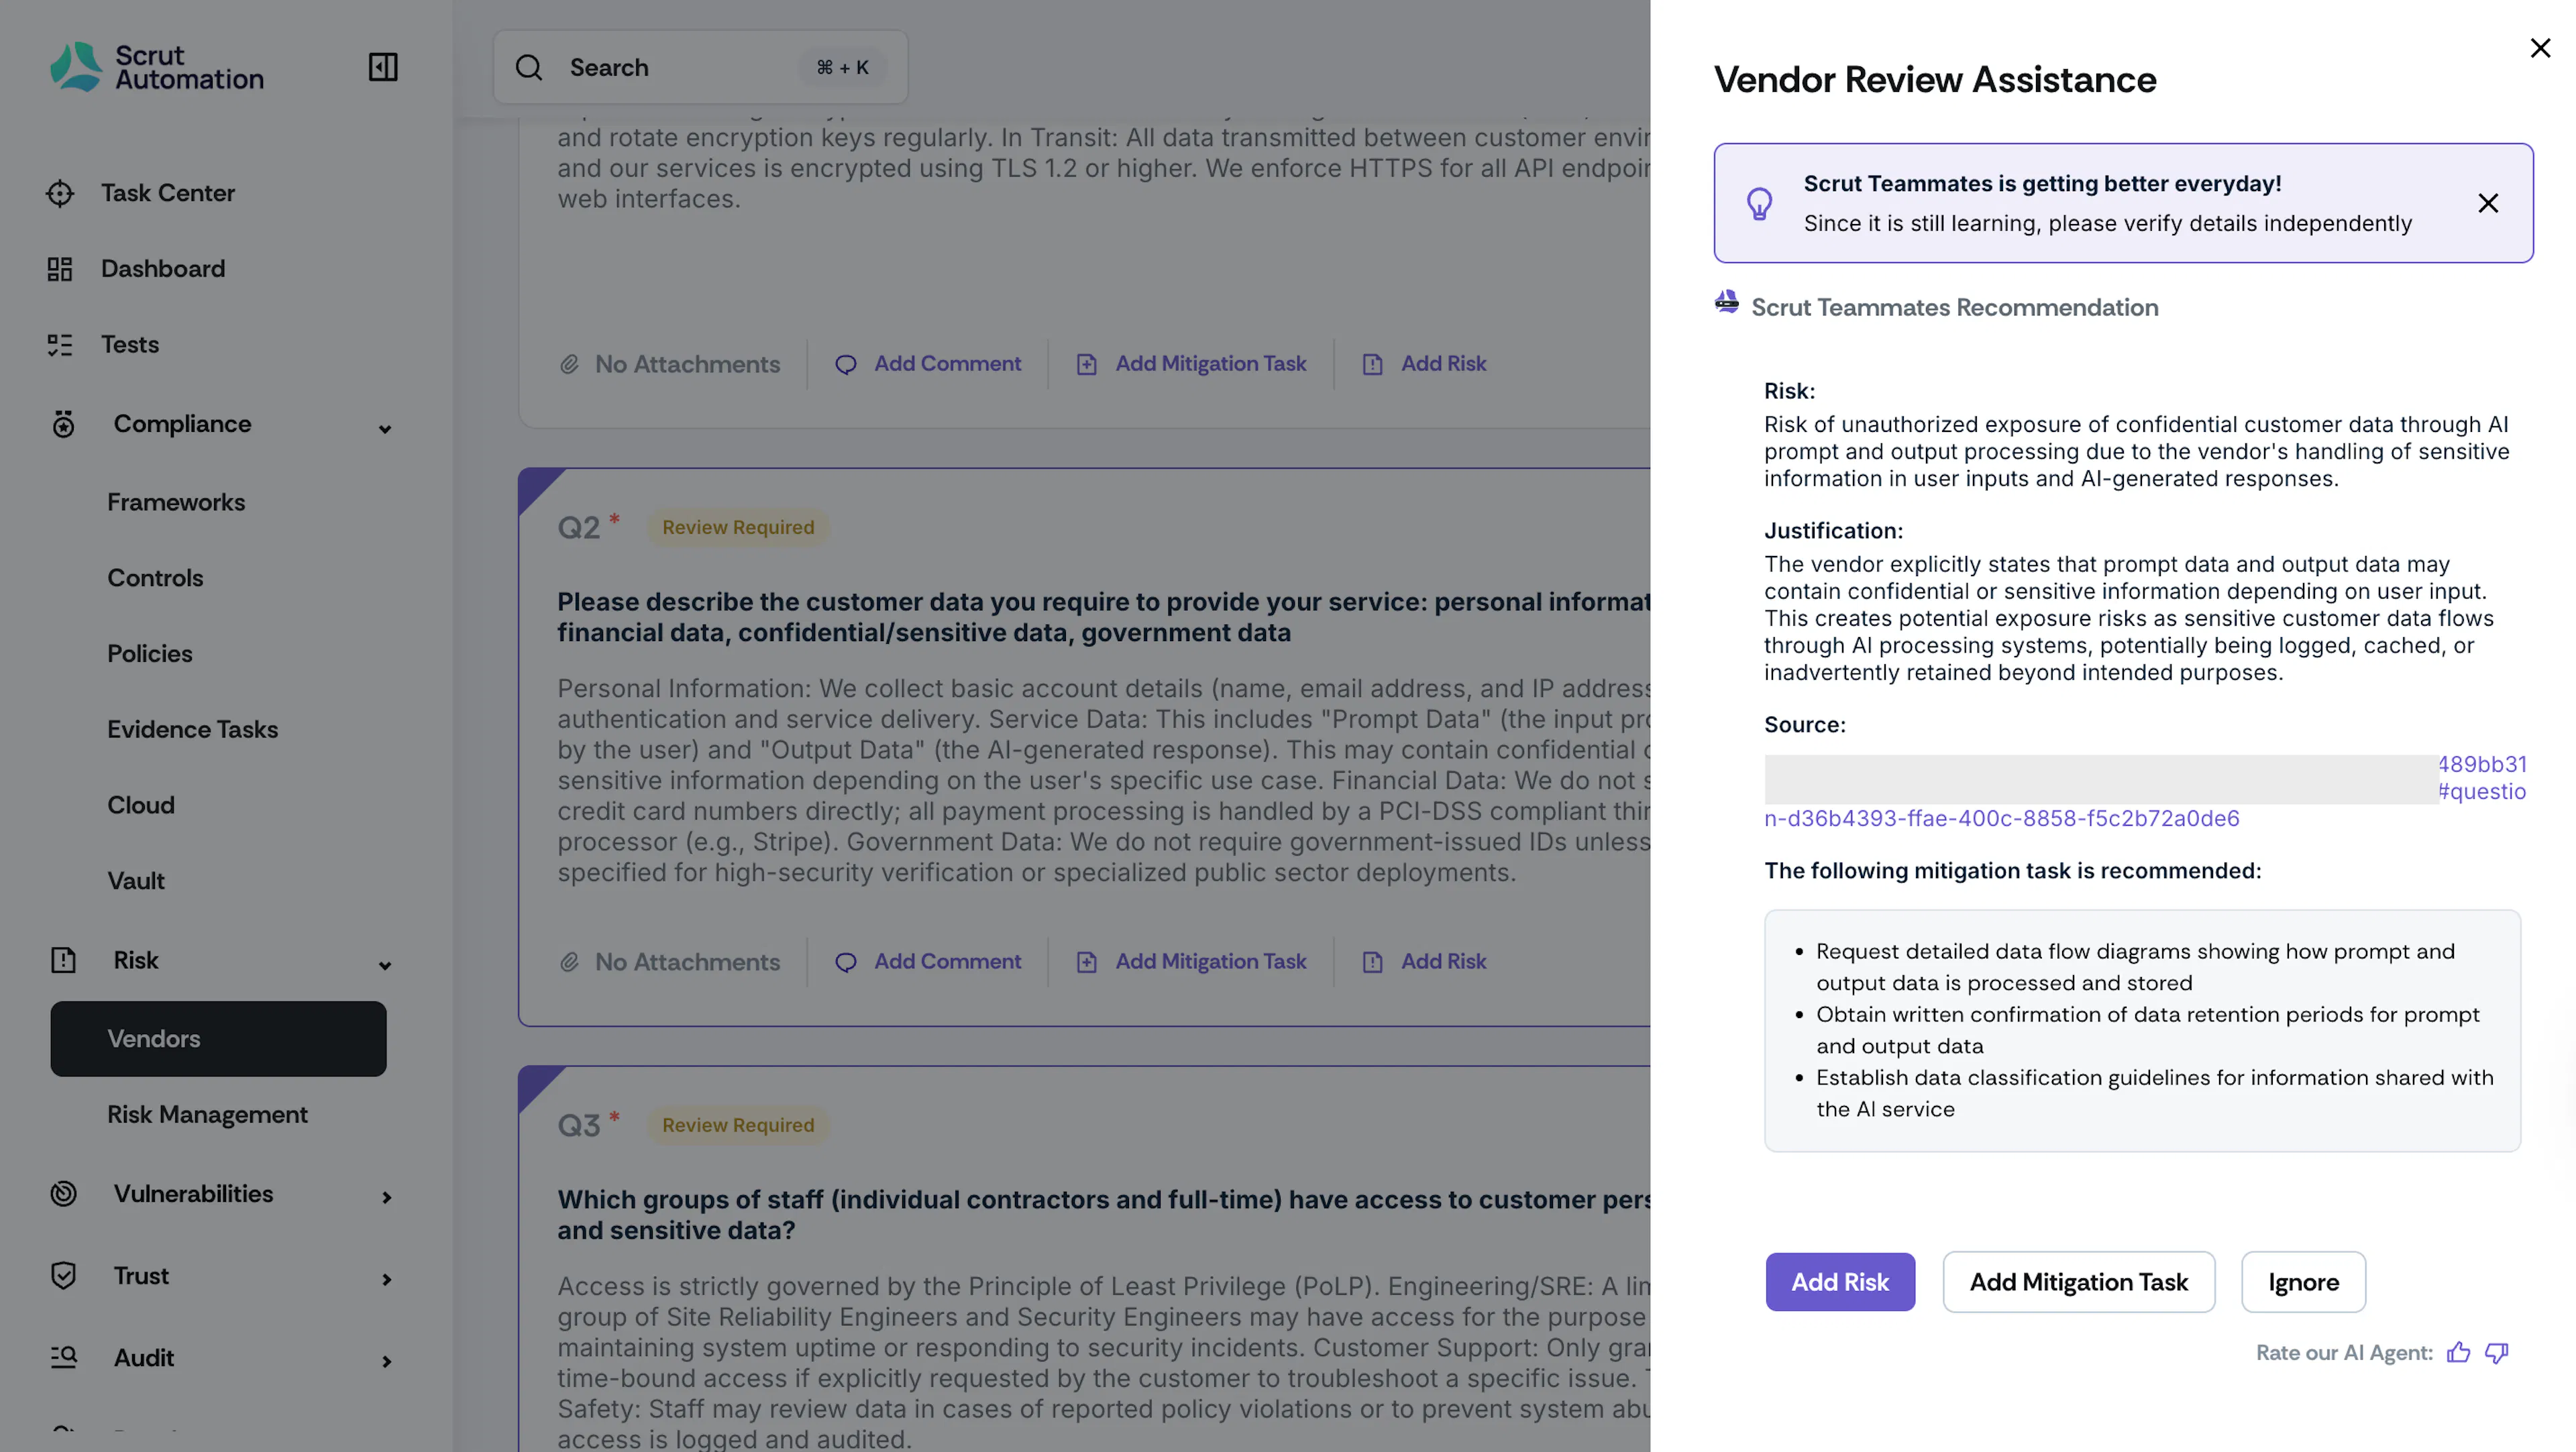
- Based on what you see in the panel, take one of the following actions:
- Click Add Risk to log the identified risk to your organization's risk register.
- Click Add Mitigation Task to create a trackable task in Scrut using the recommended actions.
- Click Ignore if you've reviewed the flag and determined no action is needed.
Note: Scrut Teammates notes that it is still learning and recommends verifying flagged details independently before acting on them.