

Integrate OpenAI
The Scrut-OpenAI integration fetches user access data, permissions, and role assignments from your OpenAI account and syncs them with the Access Review module. This integration enables your organization to maintain comprehensive visibility over user access rights and streamline periodic access reviews for compliance and security.
What This Integration Does in Scrut
This integration performs the following functions in Scrut:
- User Access Data: Fetches user details, roles, and permissions from OpenAI for Access Reviews.
- Automated Tests: Runs automated checks that continuously evaluate OpenAI for security misconfigurations and compliance checks against your applicable compliance frameworks.
Prerequisites
Before starting the integration, ensure you have the following credentials:
- You must be a Scrut Admin (or Contributor with access to the Integrations module)
- You must have permissions to generate an API key in OpenAI
Important:
You must have set up prepaid billing for your OpenAI account to use the API key. API keys generated without billing will fail.
Permissions and Access Requirements
For OpenAI
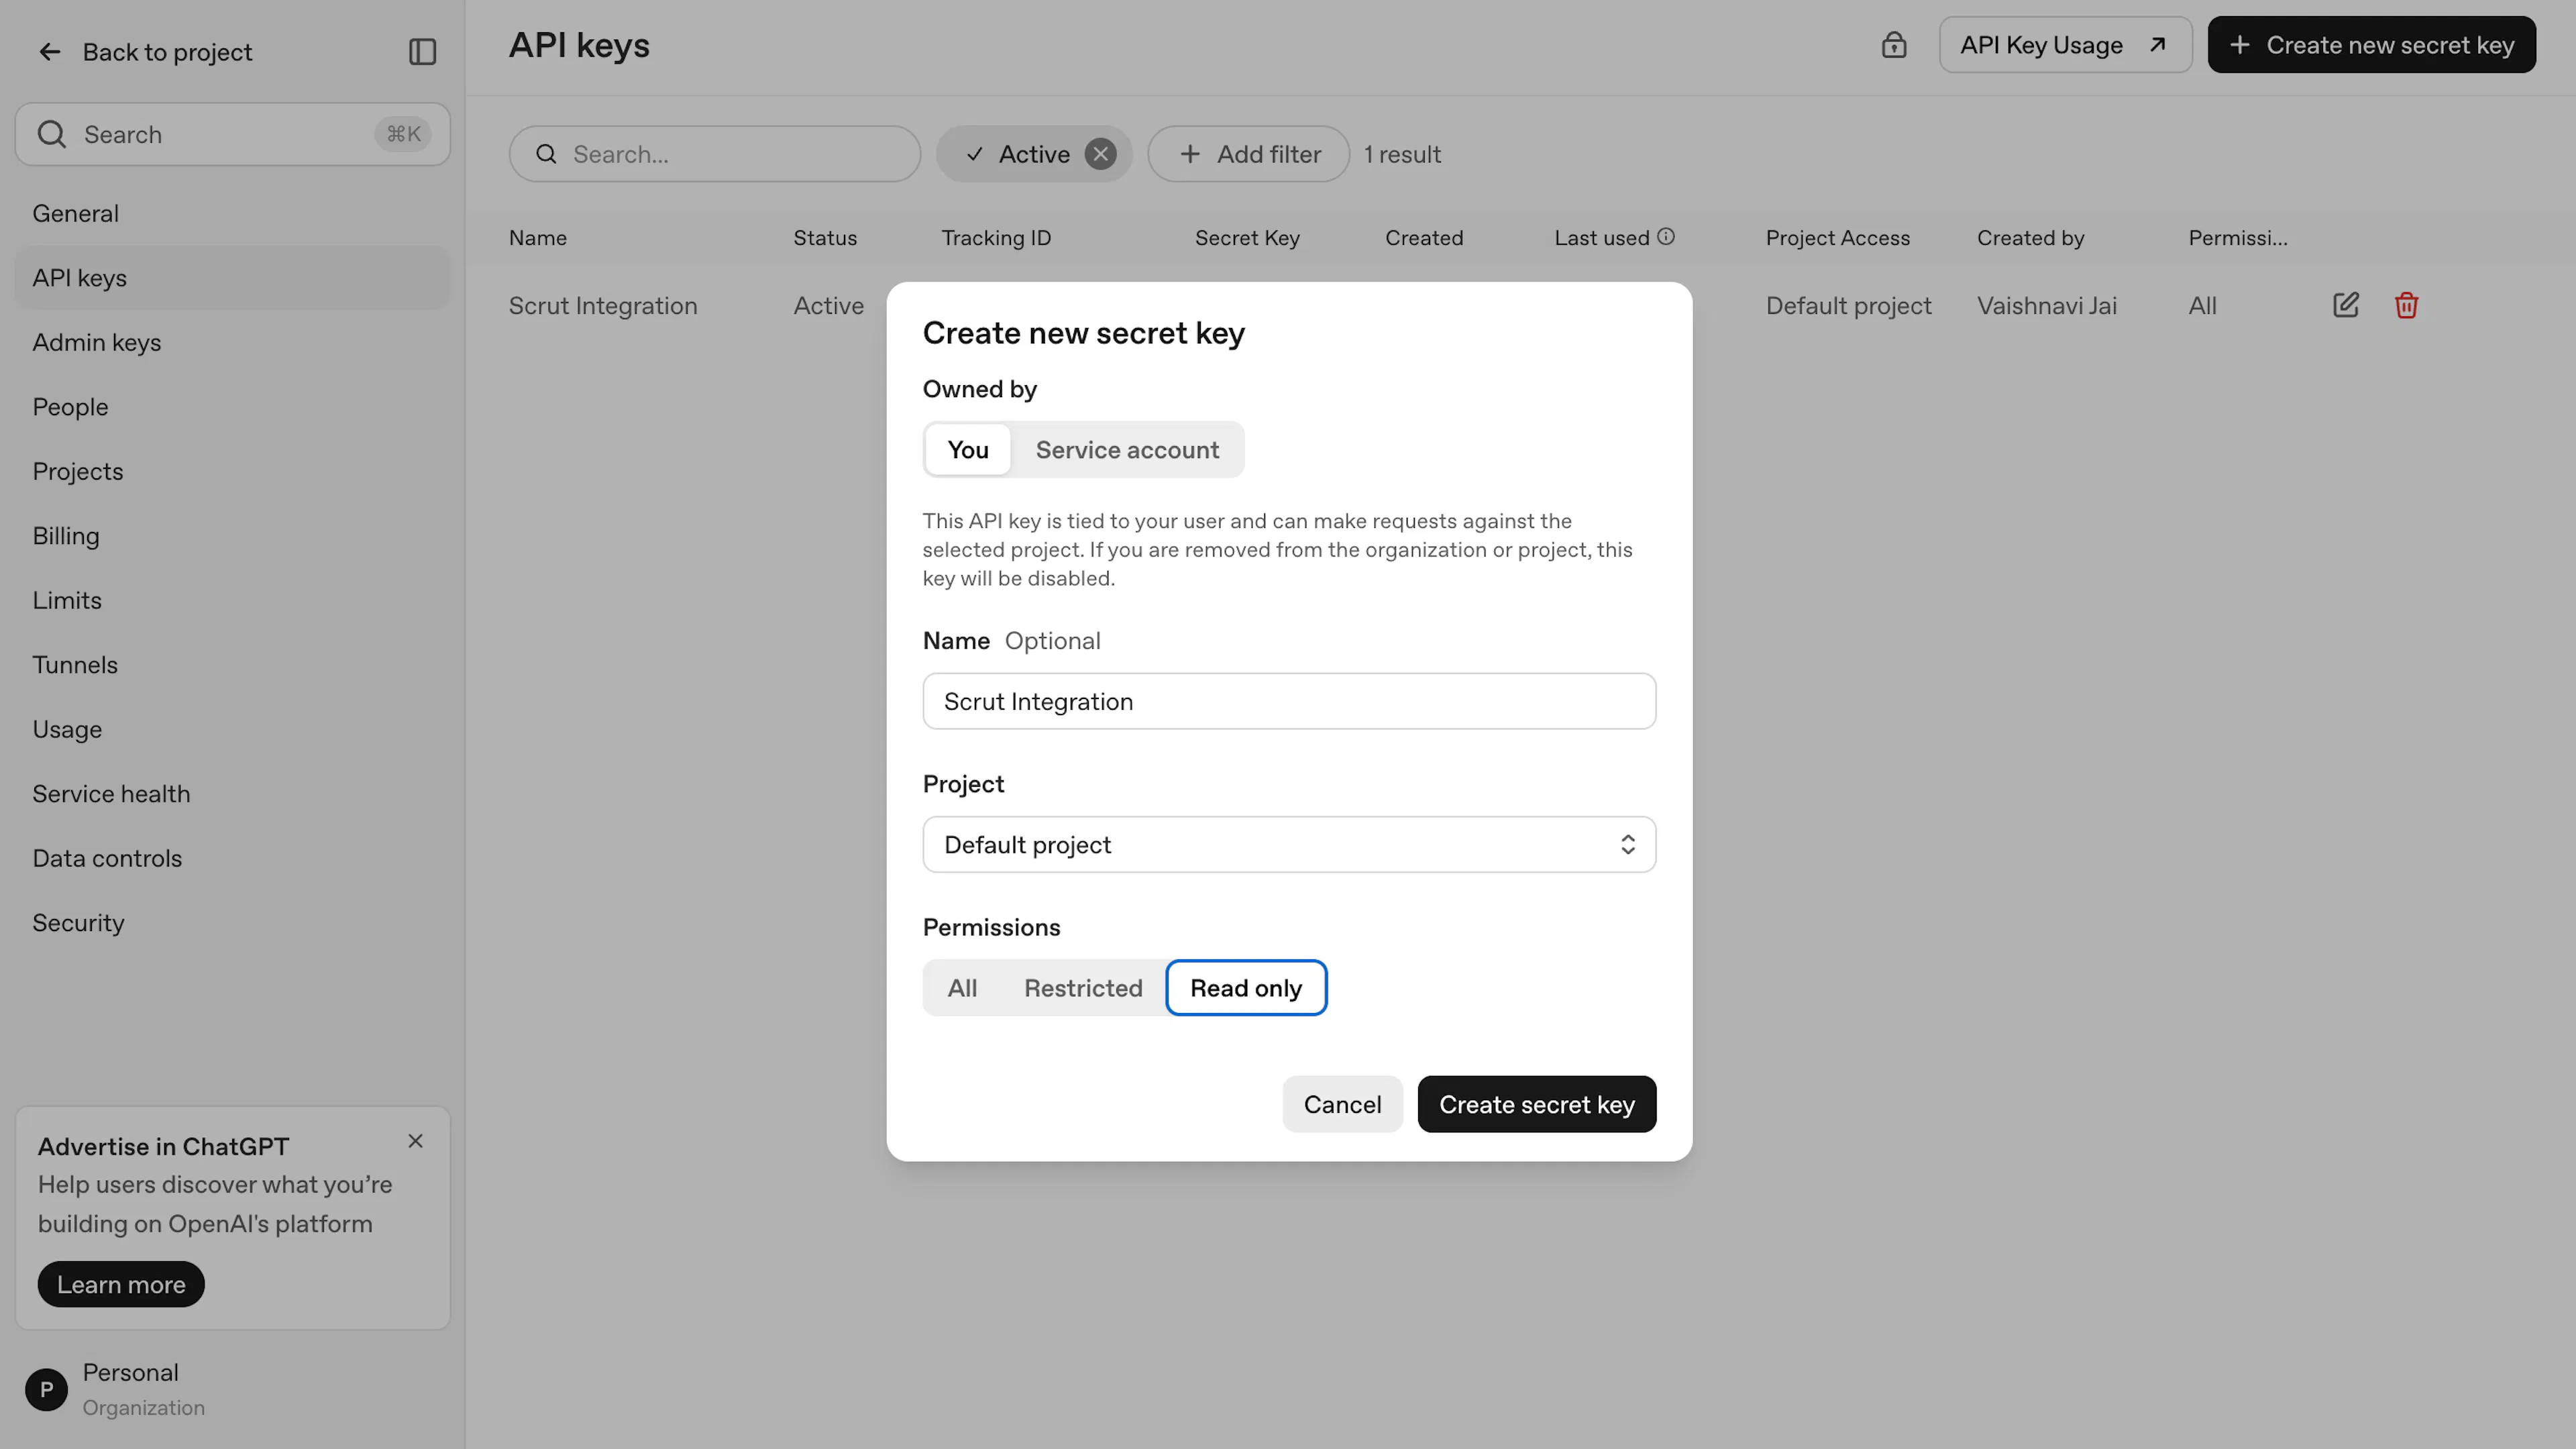
- When generating your API key, keep the Permissions set to Read only.
For Scrut
- Admin access to Scrut (or Contributor with access to the Integrations module)
Data Collected
- User Name: Full name of the OpenAI user
- User Email: Primary email address on the OpenAI account
- User Role: User's assigned role in OpenAI
Sync Frequency
Data is synced automatically once every 24 hours. You can also manually trigger a sync from the integration settings page.
How To Connect OpenAI With Scrut
Step 1: Fetch API Key from OpenAI
-
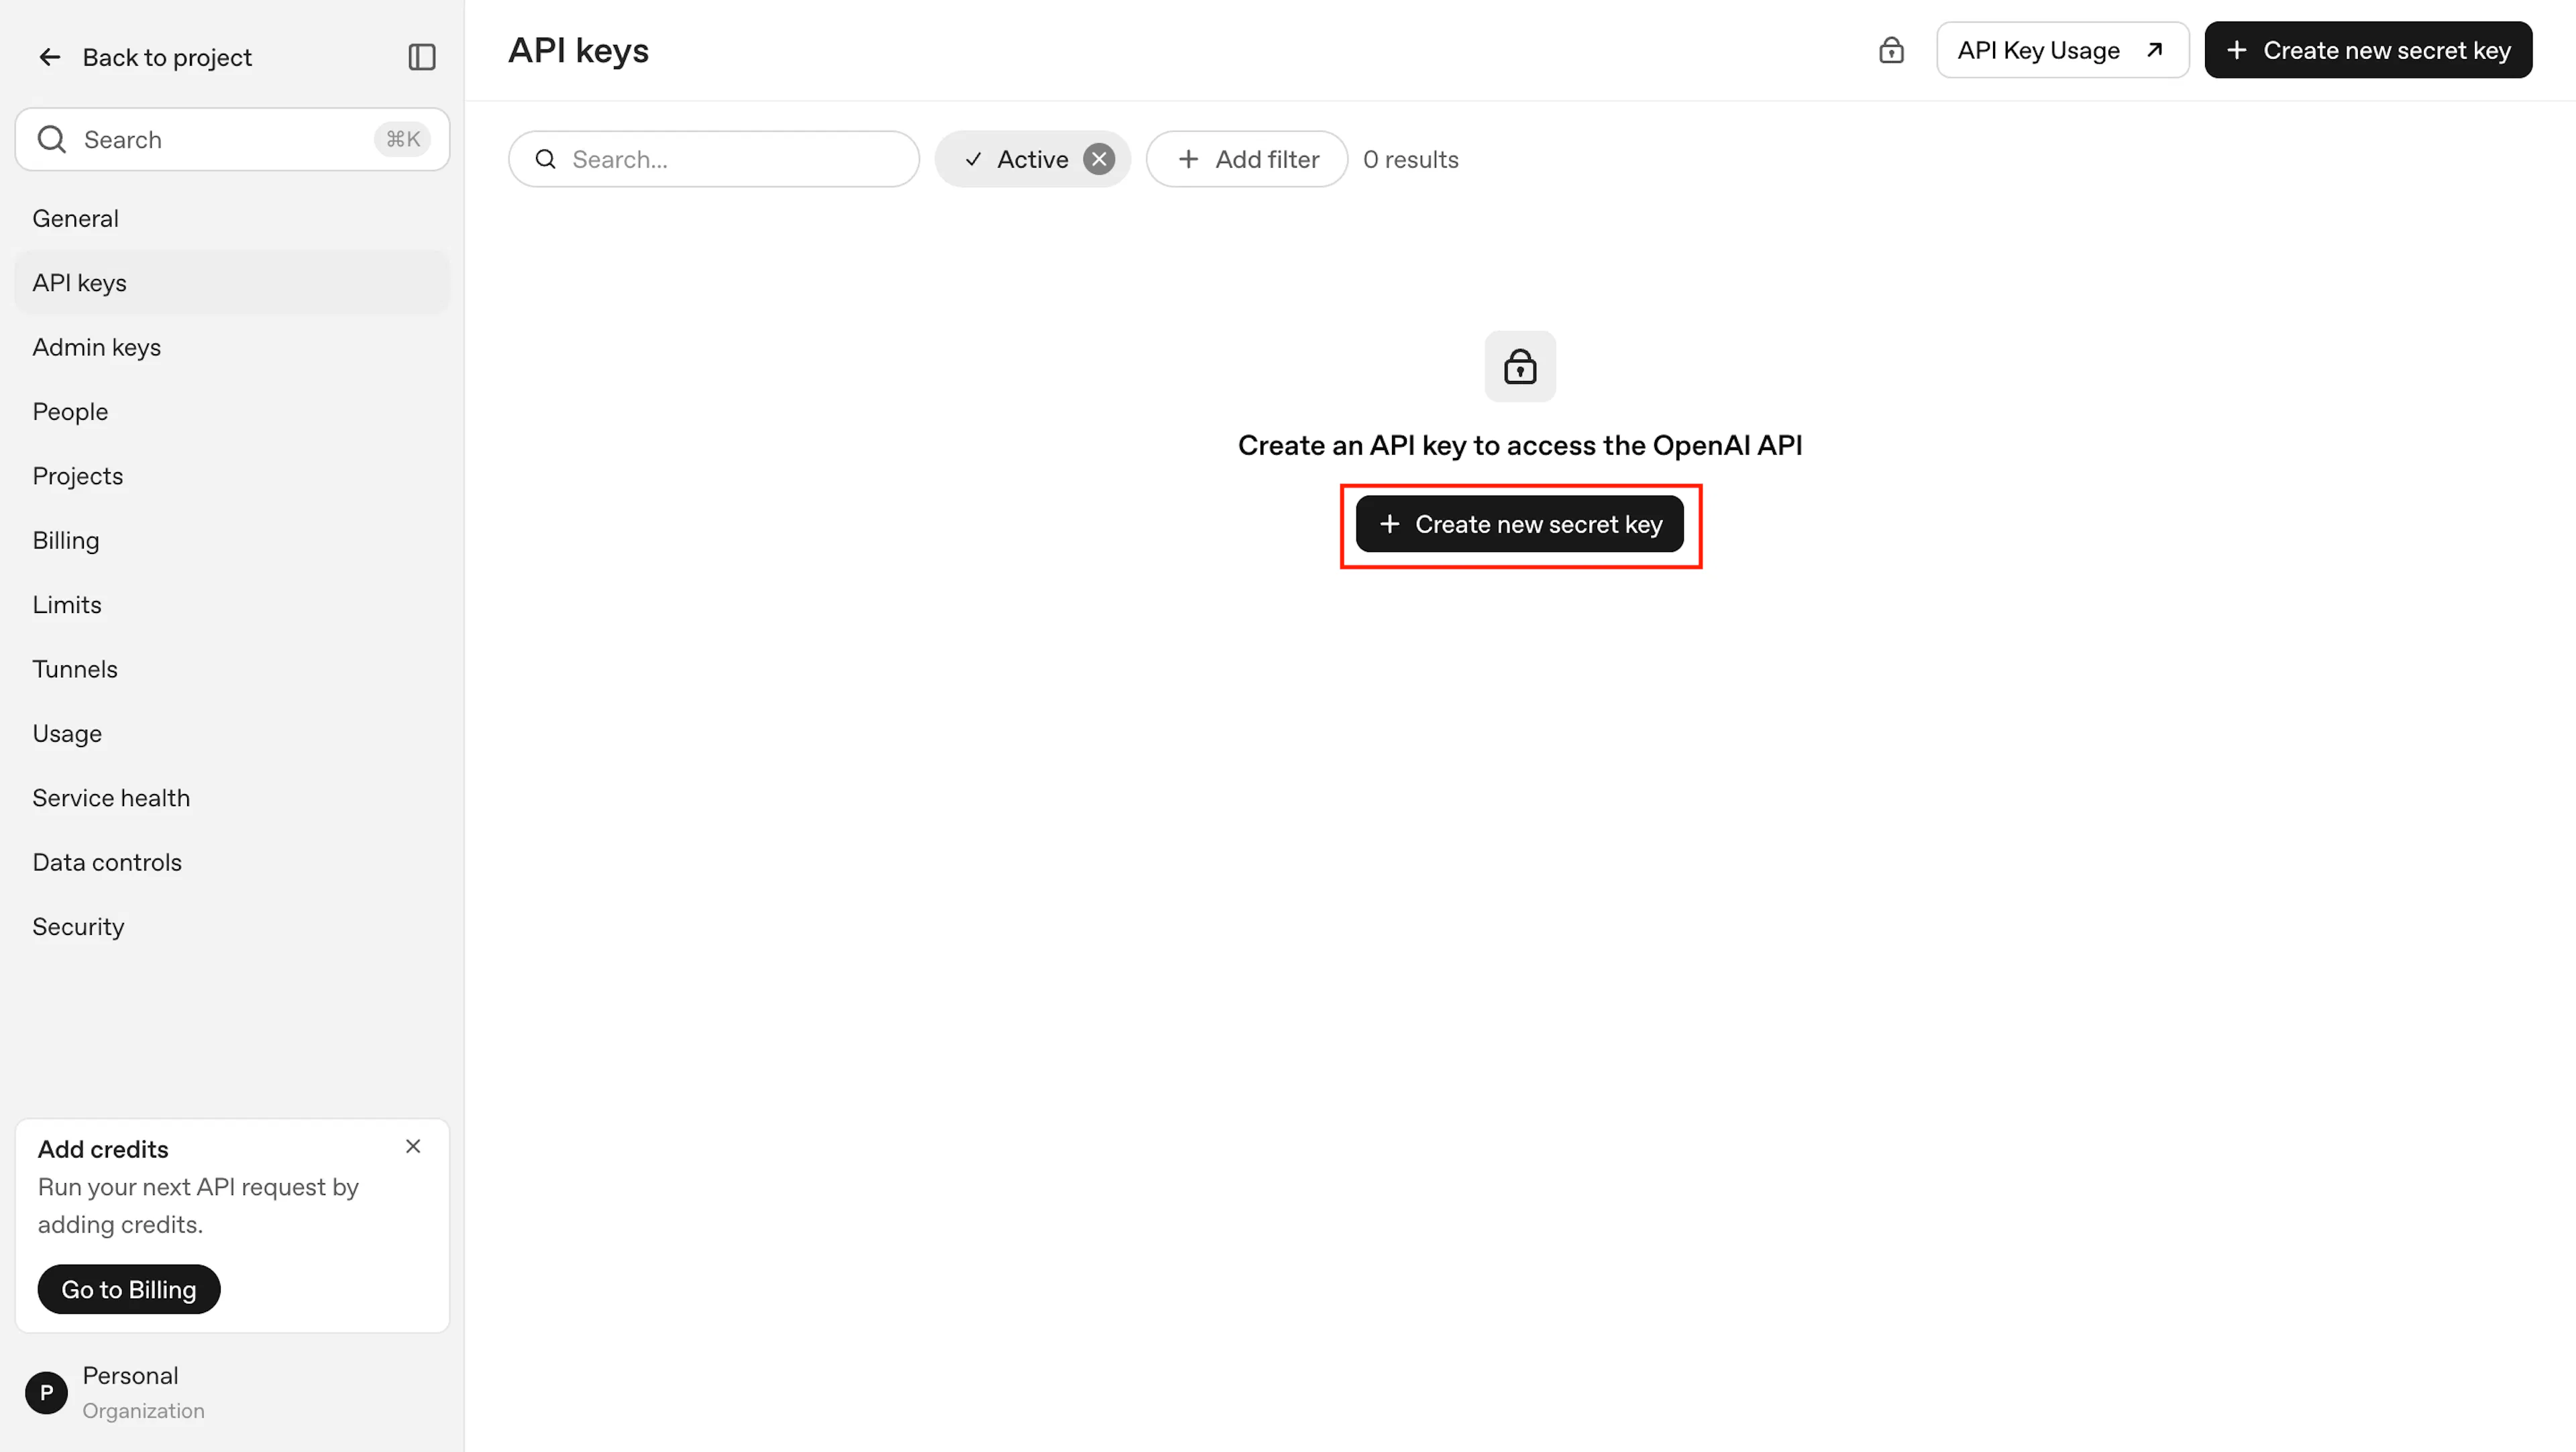
Sign in to your OpenAI account and go to the API keys page. (https://platform.openai.com/settings/organization/api-keys) .
-
Click on +Create new secret key.
-
Enter a name for the key, such as Scrut Integration and choose the Project.
-
Keep the Permissions set to Read only, then click Create secret key.
-
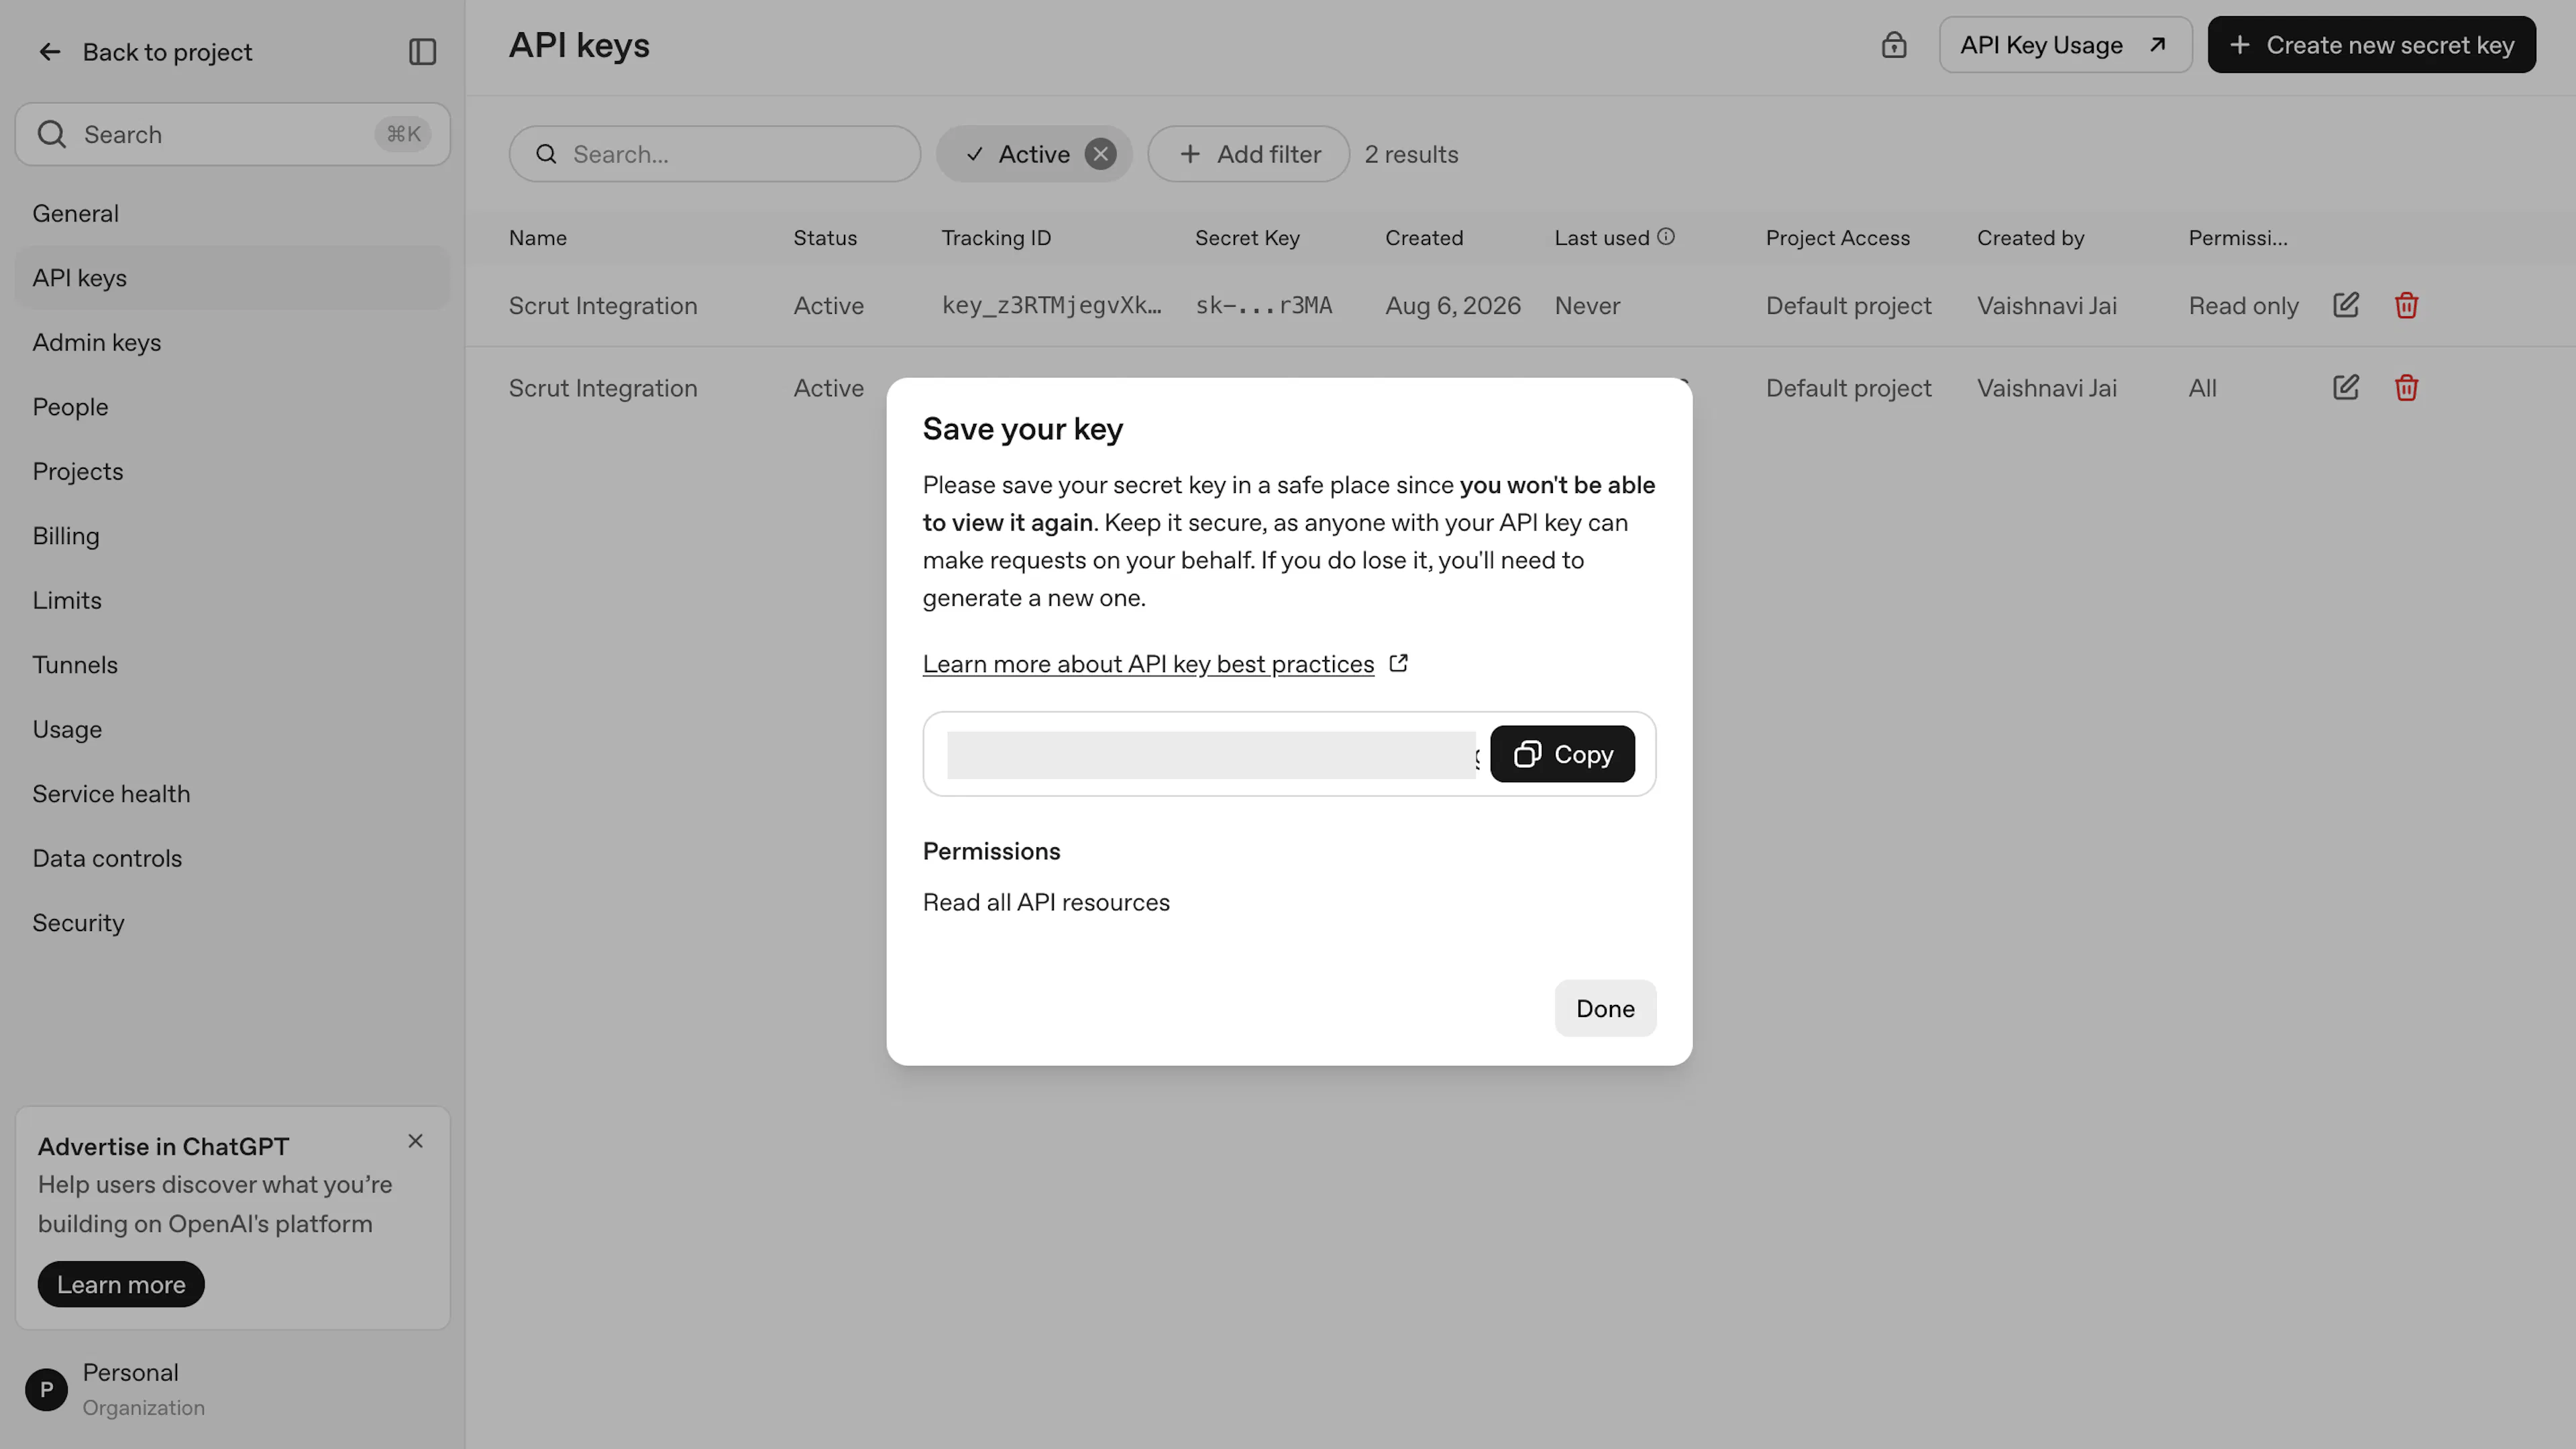
Copy the API key code, as you won’t be able to see this later. Save the code in a safe location, as you’ll need to enter it in Scrut in the next step.
Pro Tip!
Refer to this guide from OpenAI for more information on API key best practices.
Step 2: Go To Integrations in Scrut
-
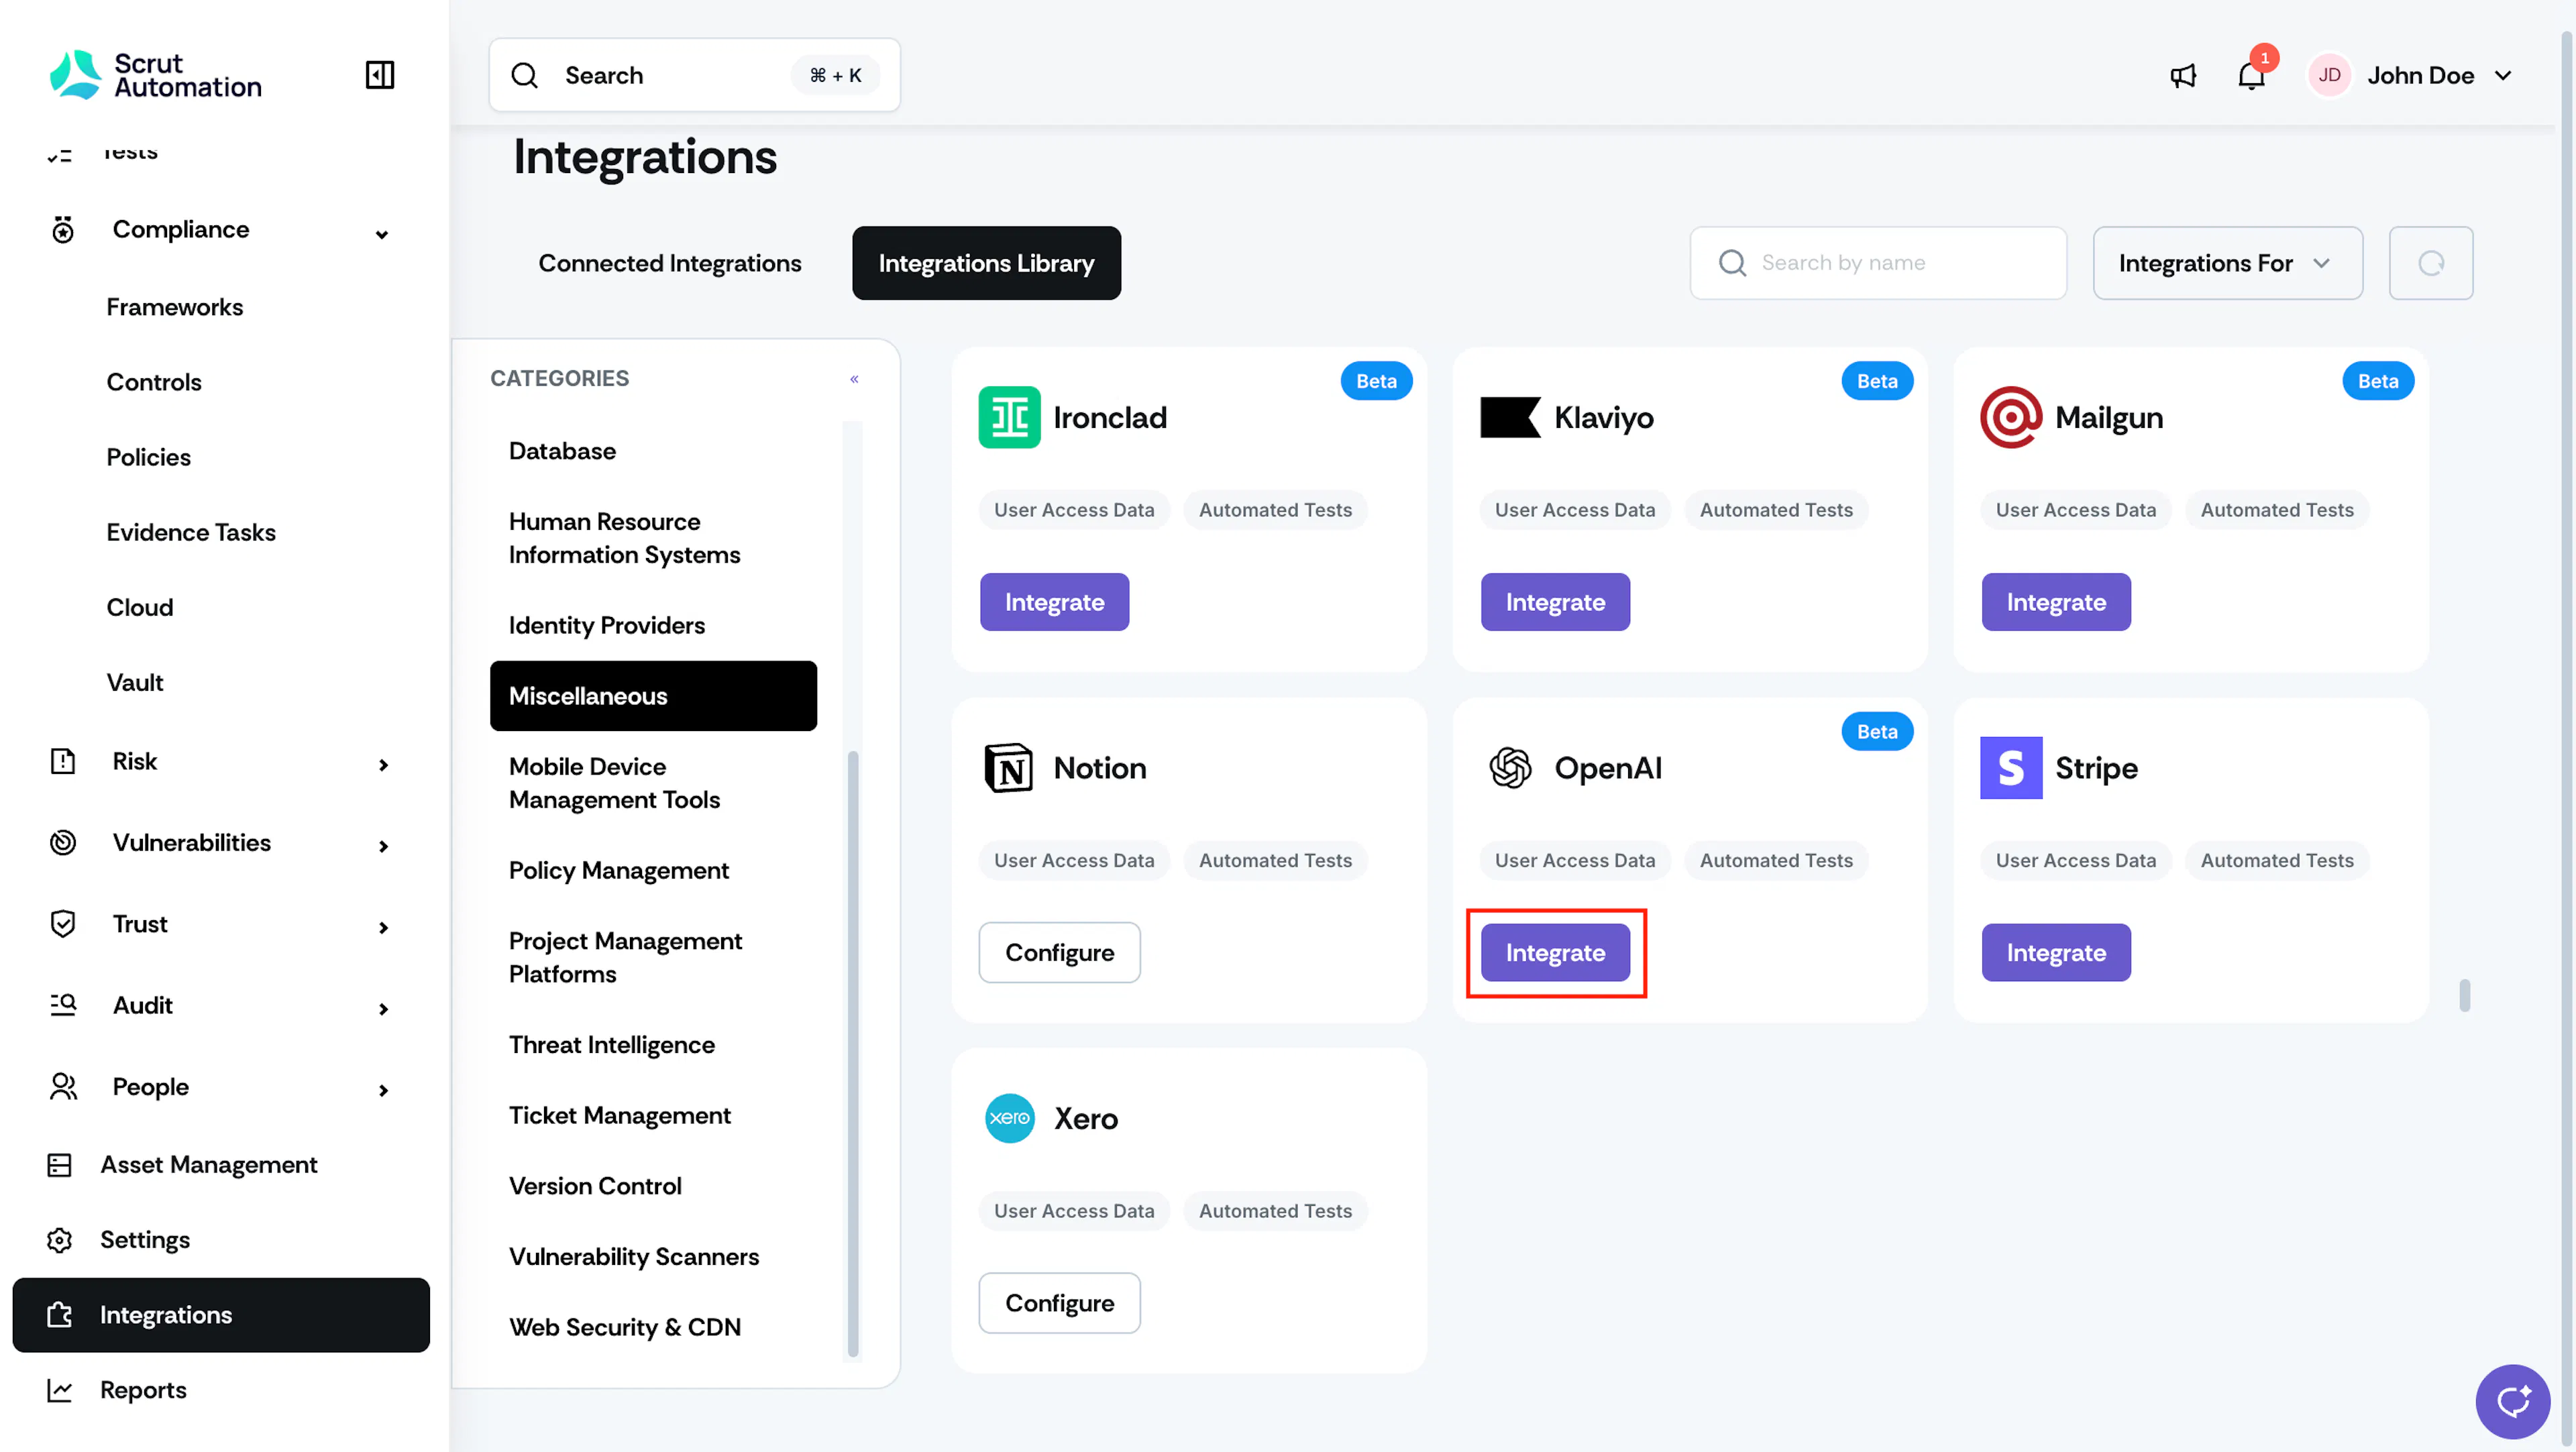
Sign in to Scrut and click Integrations on the left navigation panel.
-
Navigate to the Integrations Library tab, and choose Miscellaneous in the Categories section.
-
Scroll to the OpenAI tile and click Integrate.
-
On the integration page, paste the API key obtained in Step 1.
-
Click Submit.
-
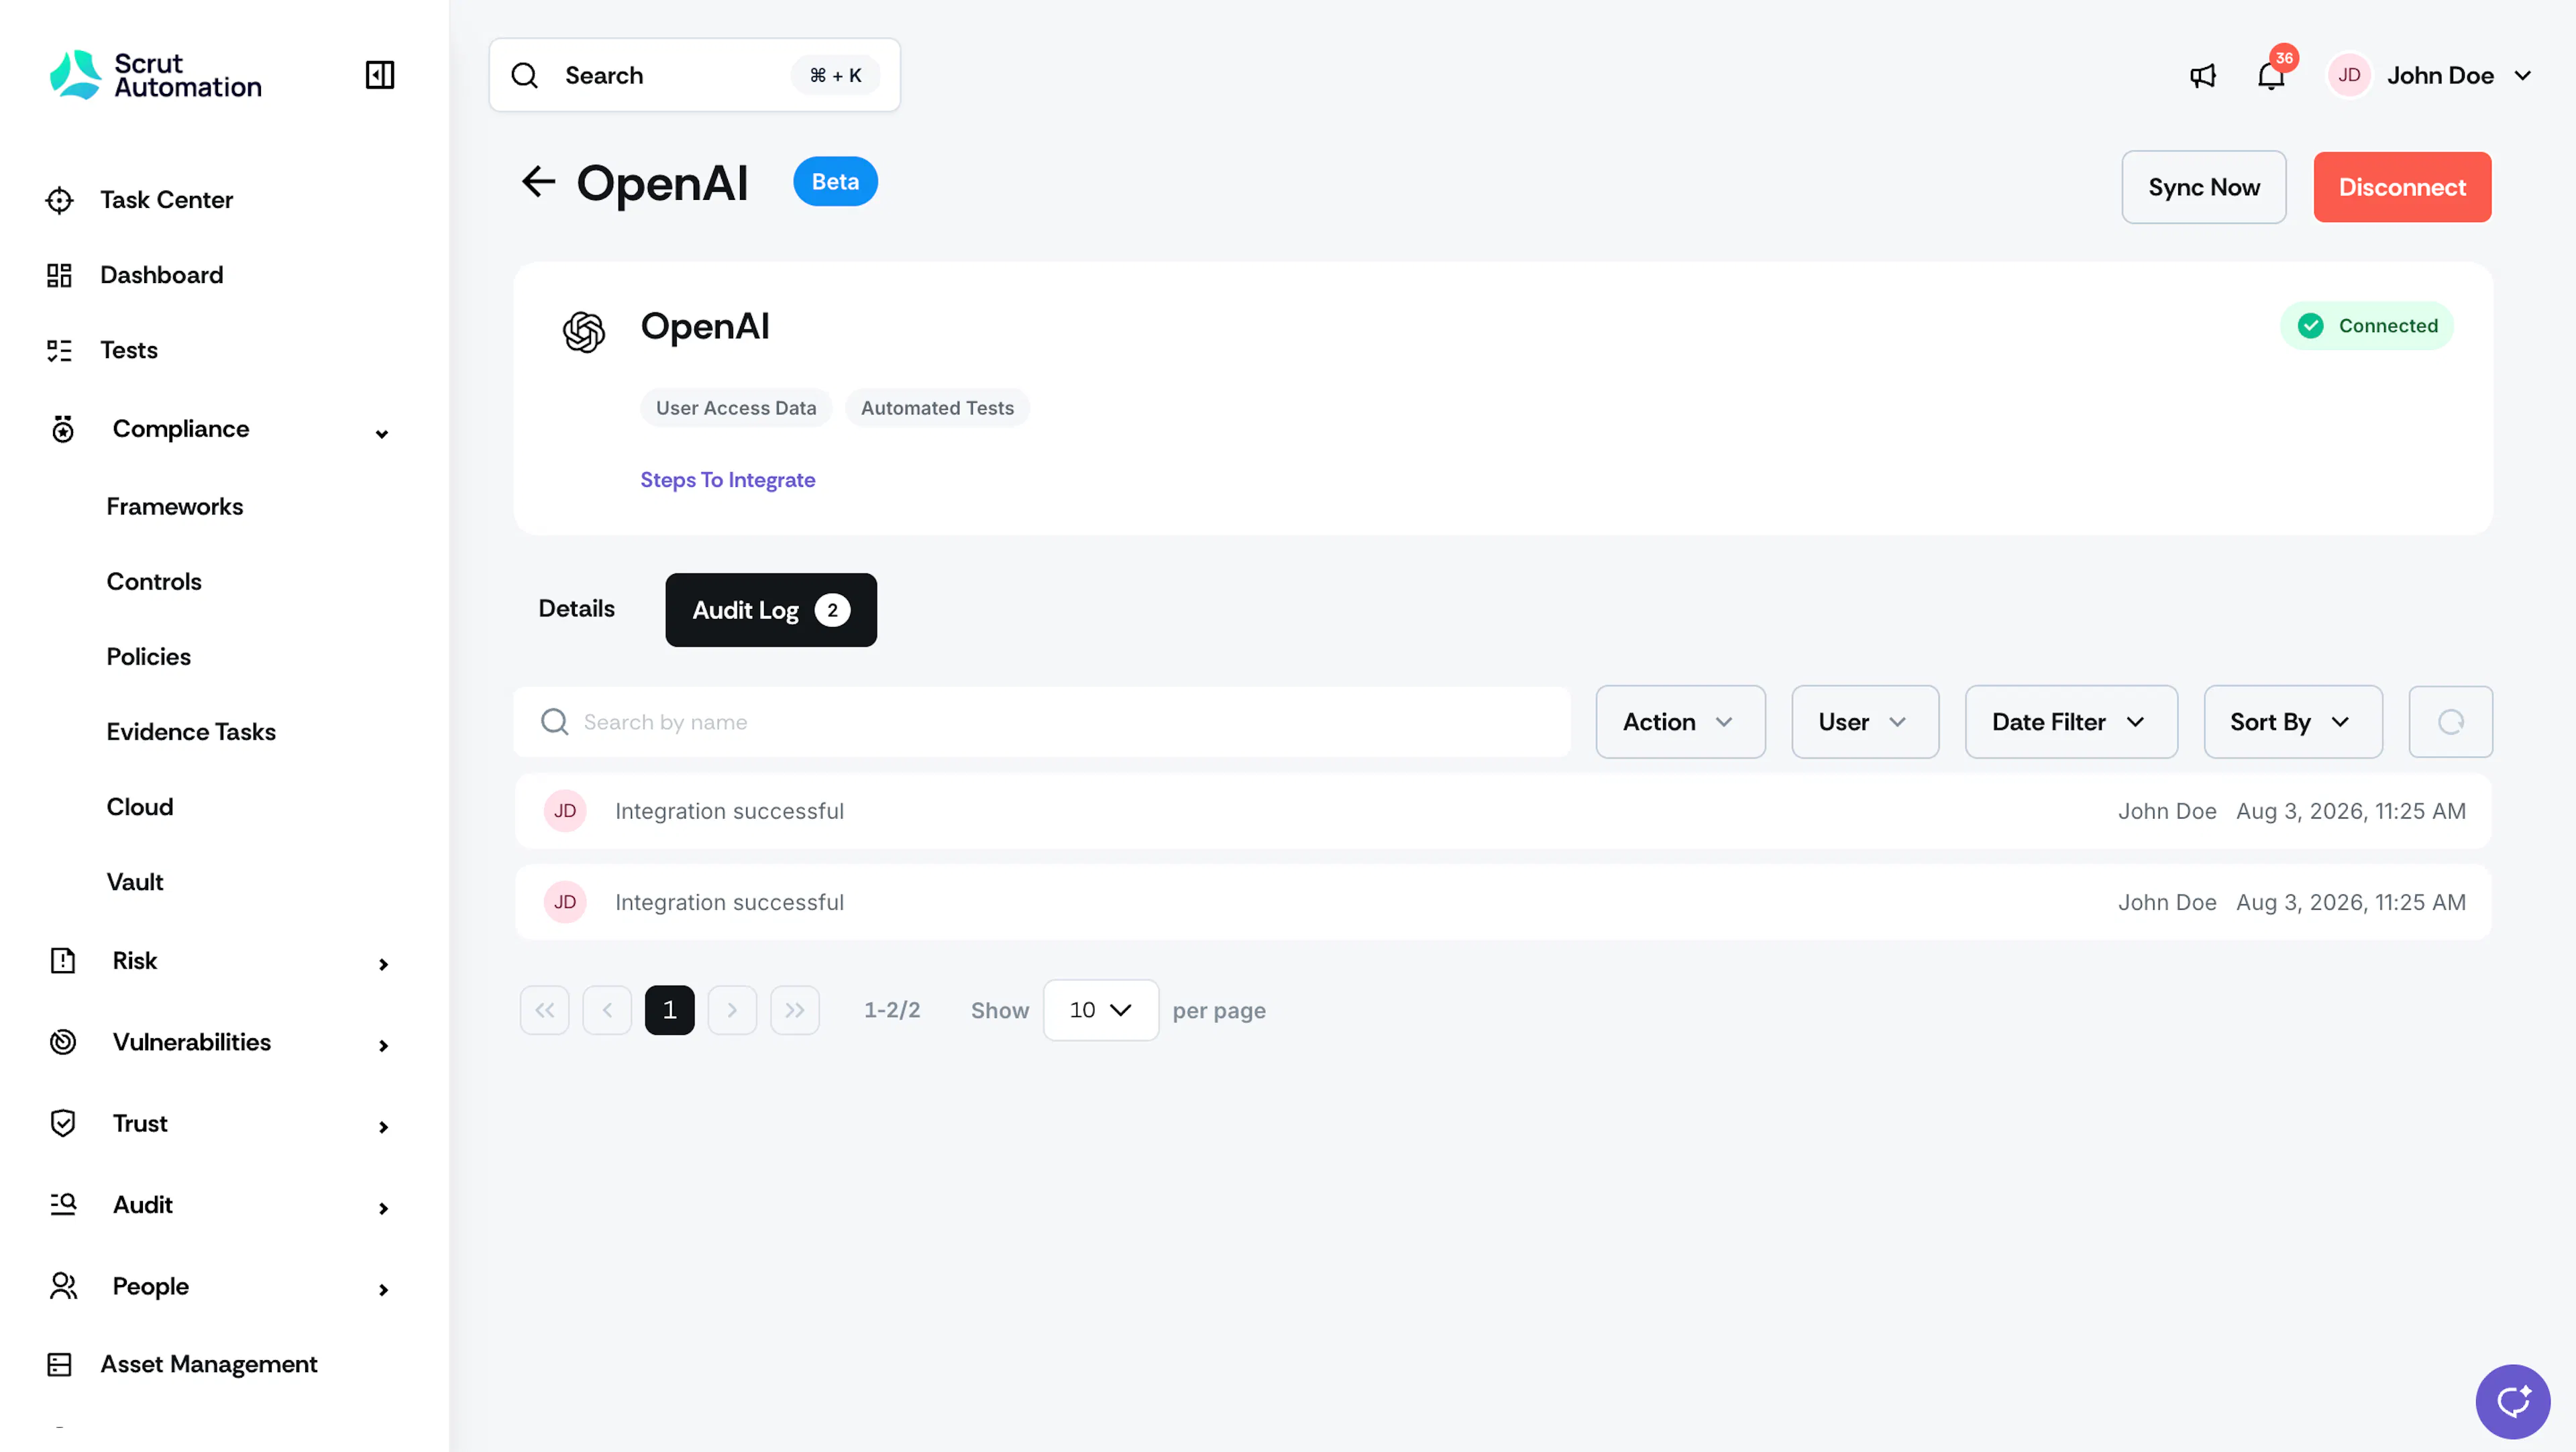
Once authorization is done, you’ll see the “Connected Successfully” message and the Connected status indicator.
What Happens Next?
Initial data sync
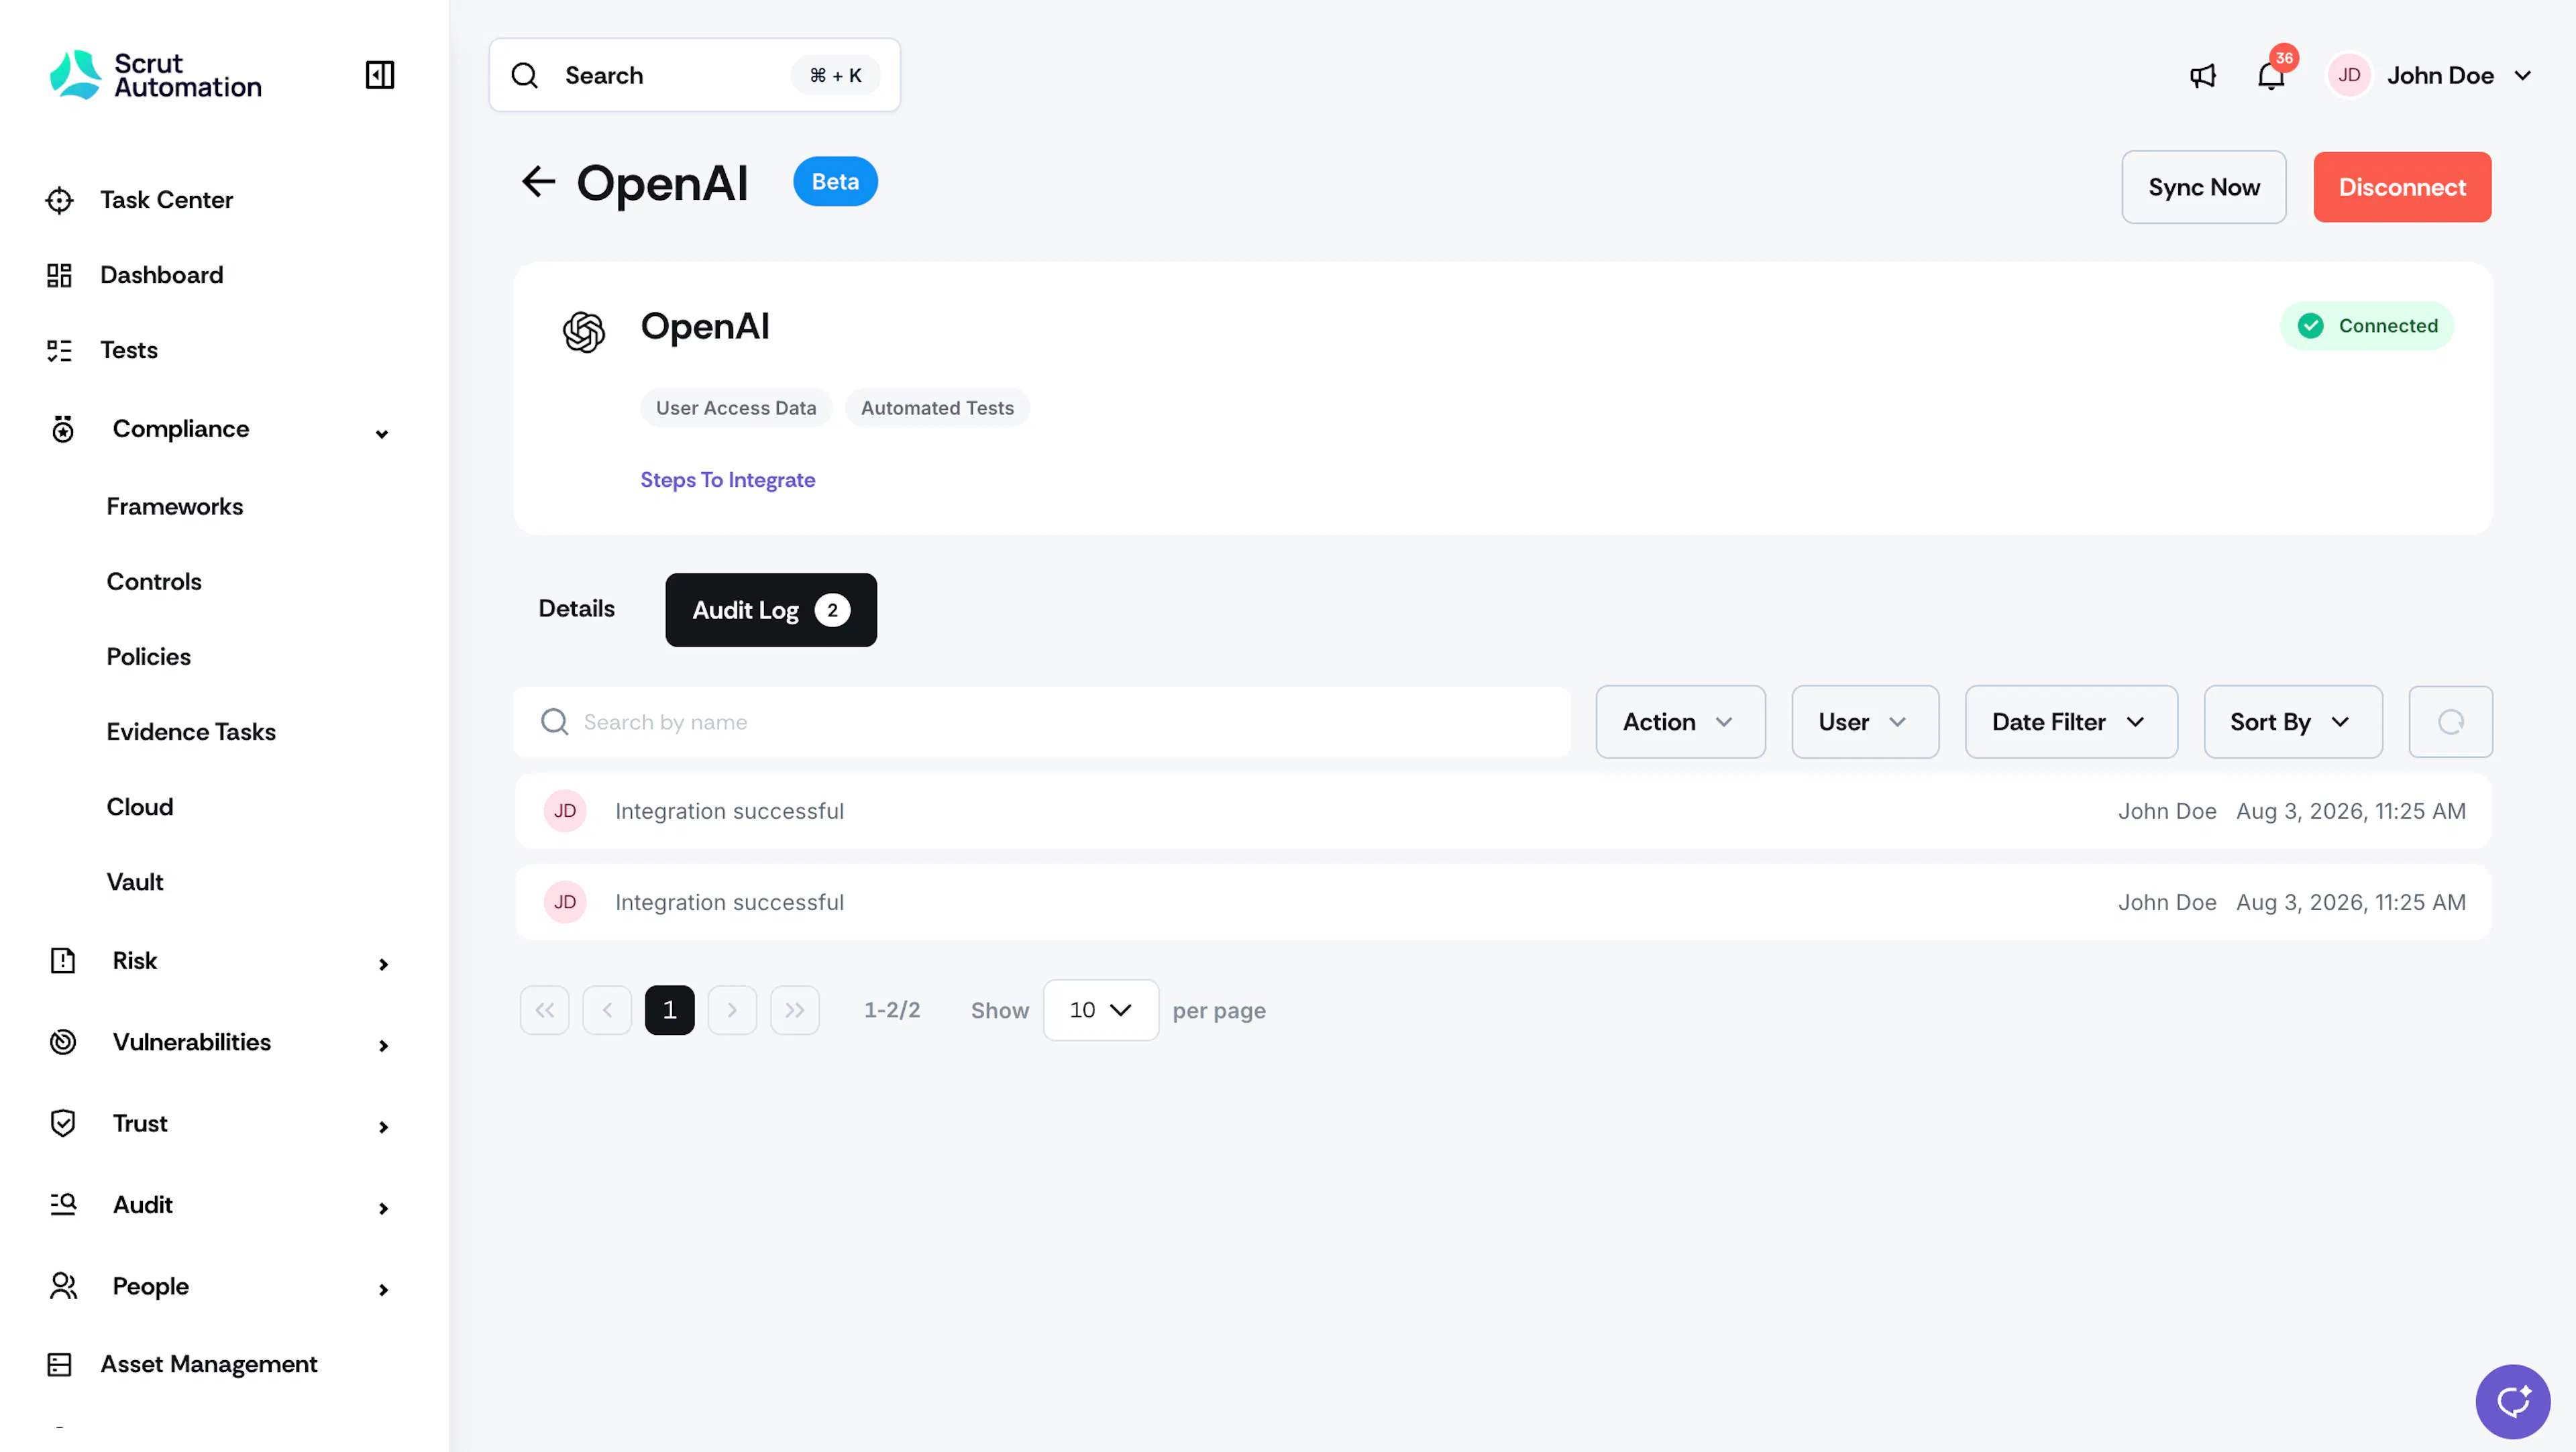
After the integration is connected, Scrut begins the initial data sync automatically. You can monitor sync activity by navigating to the OpenAI integration card in Integrations and checking the Audit Logs tab.
Review synced data
- Navigate to People → Access Reviews module in Scrut to view the user records fetched from OpenAI, including name, email address, and role.
- Navigate to Tests → Automated Tests to view the compliance checks that Scrut runs for OpenAI.
If you face any difficulties connecting OpenAI with Scrut, please contact the Scrut support team at support@scrut.io.