

Risk Approval Workflow
Who can use this feature
- Supported on Growth and Scale plans
Overview
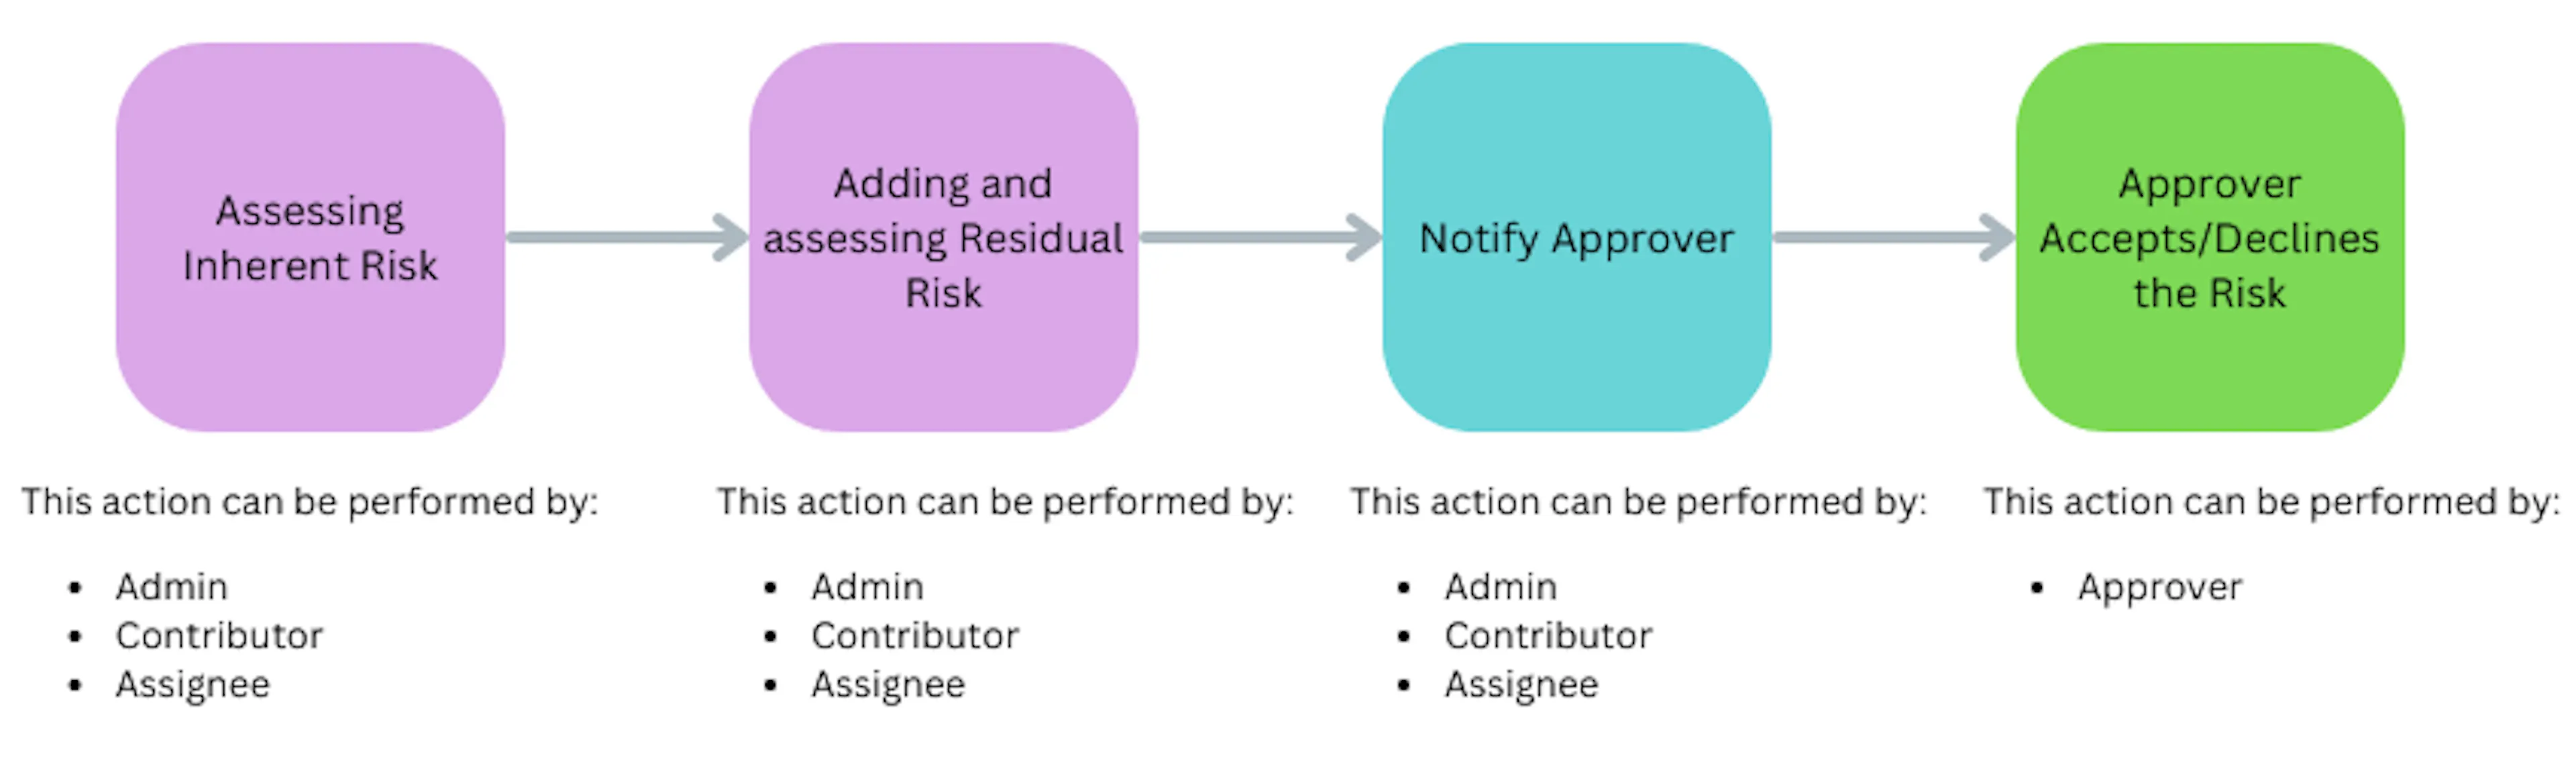
The Risk Approval Workflow adds a formal approval step to your risk management process. After the Assignee completes their assessment and treatment, the Approver reviews the risk and either approves or declines it before closing it. This ensures proper validation of risk treatments and strengthens governance within your organization.
When the approval workflow is toggled ON
When the risk approval flow is ON, an additional approval step for Risk is introduced. In this step, the assigned Approver reviews and approves the risk before it can be closed.
How to Enable the Risk Approval Workflow?
-
Sign in to Scrut and click Risk → Risk Management on the left navigation panel.
-
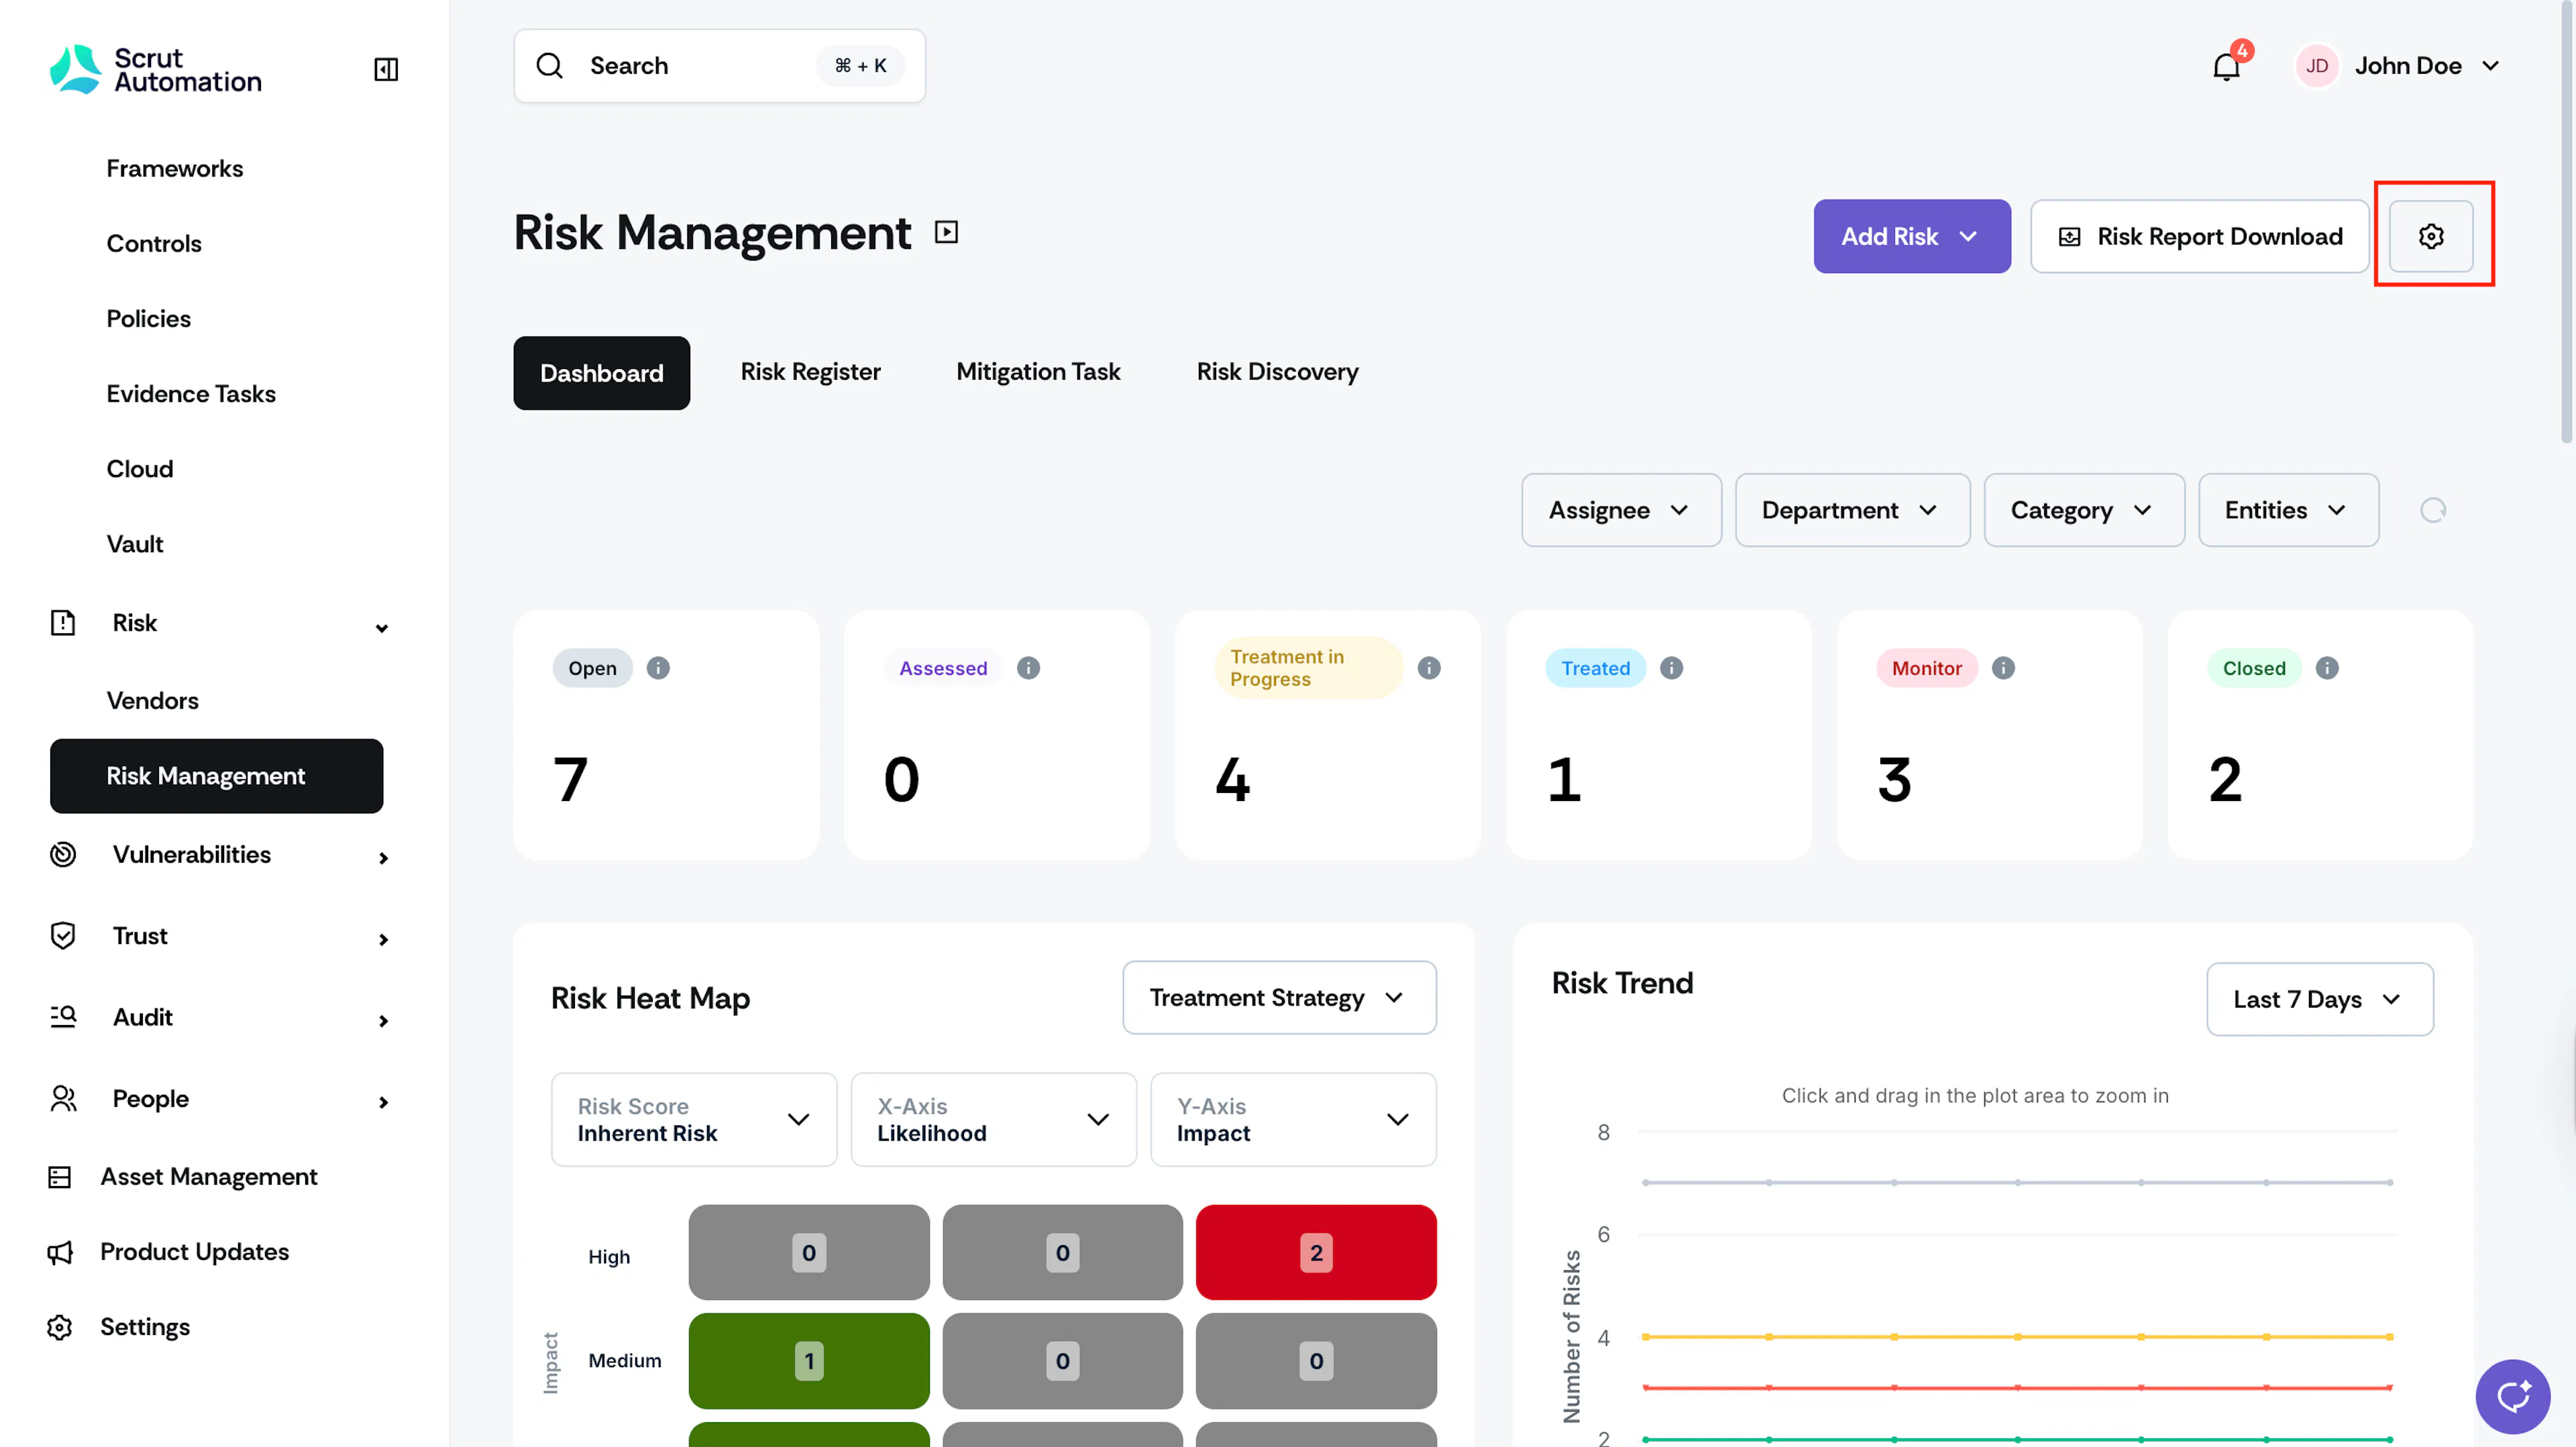
Click the Settings icon on the top right.

-
Navigate to the Configurations tab and turn on the Risk Approval Flow toggle.
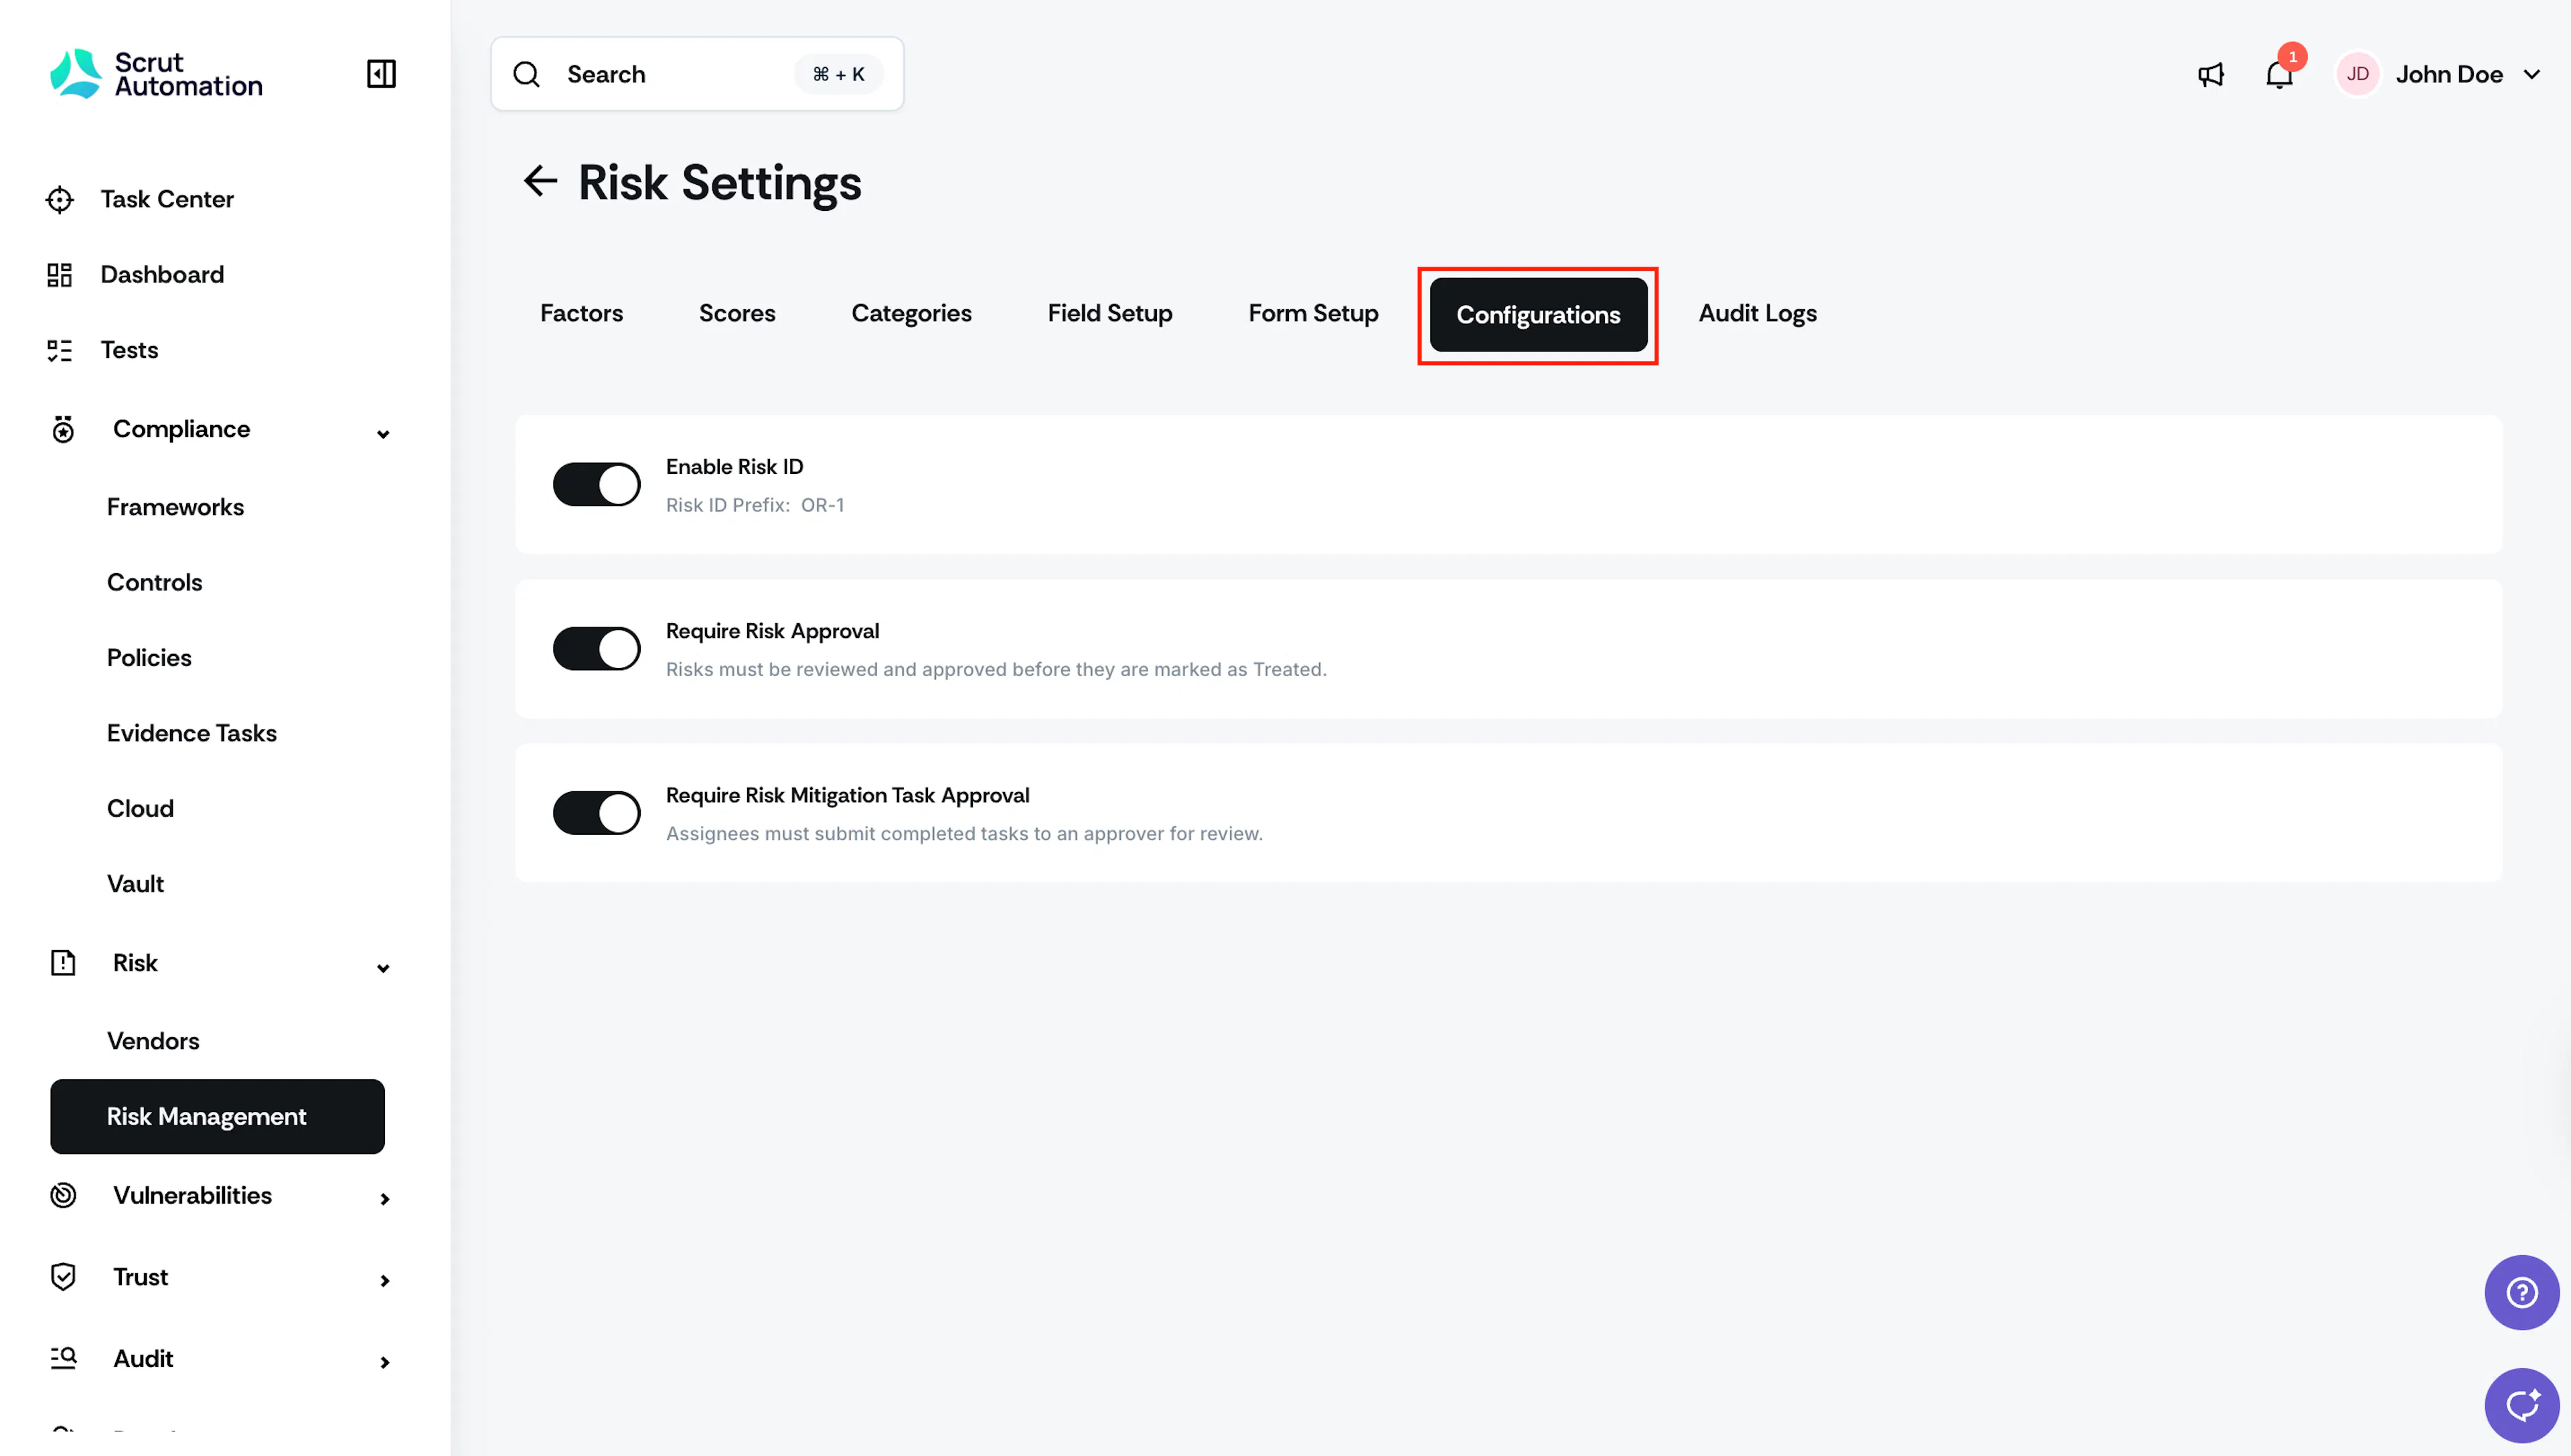
Once enabled, all risks will require approval before they can be closed.
How to Assign a Risk Approver
You can assign an Approver at any time during the risk lifecycle.
-
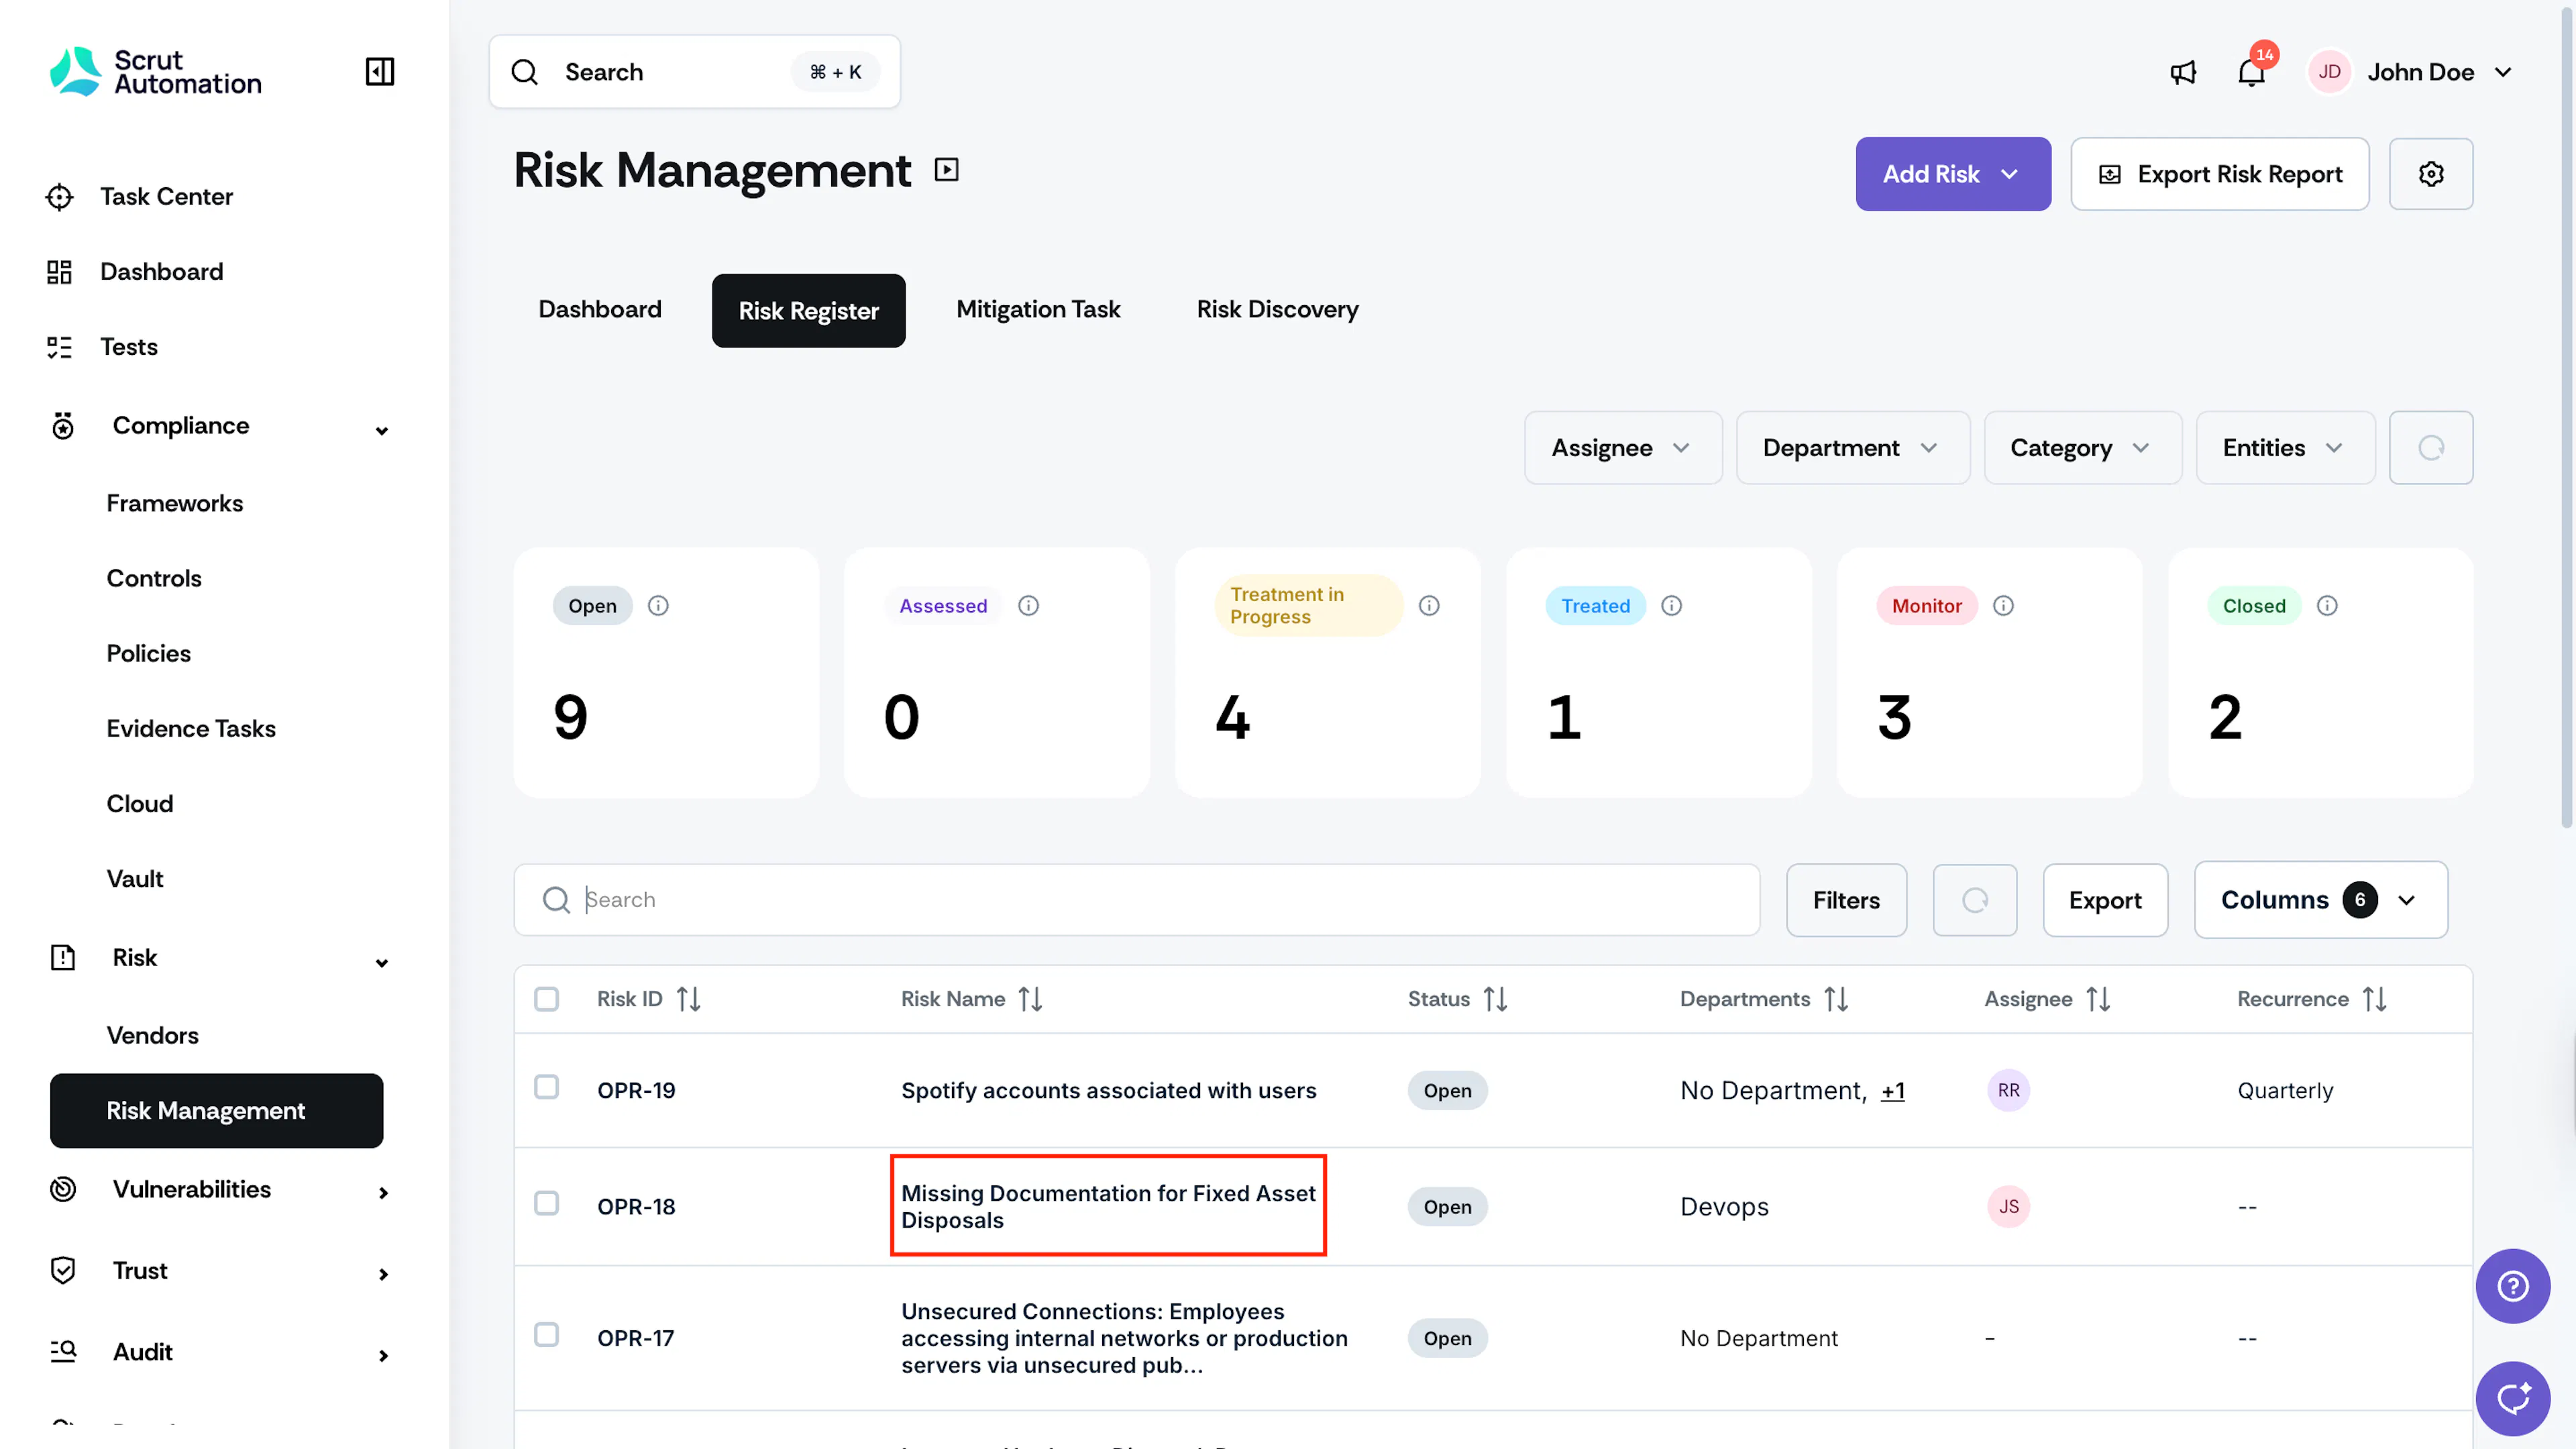
Navigate to Risk → Risk Management → Risk register.
-
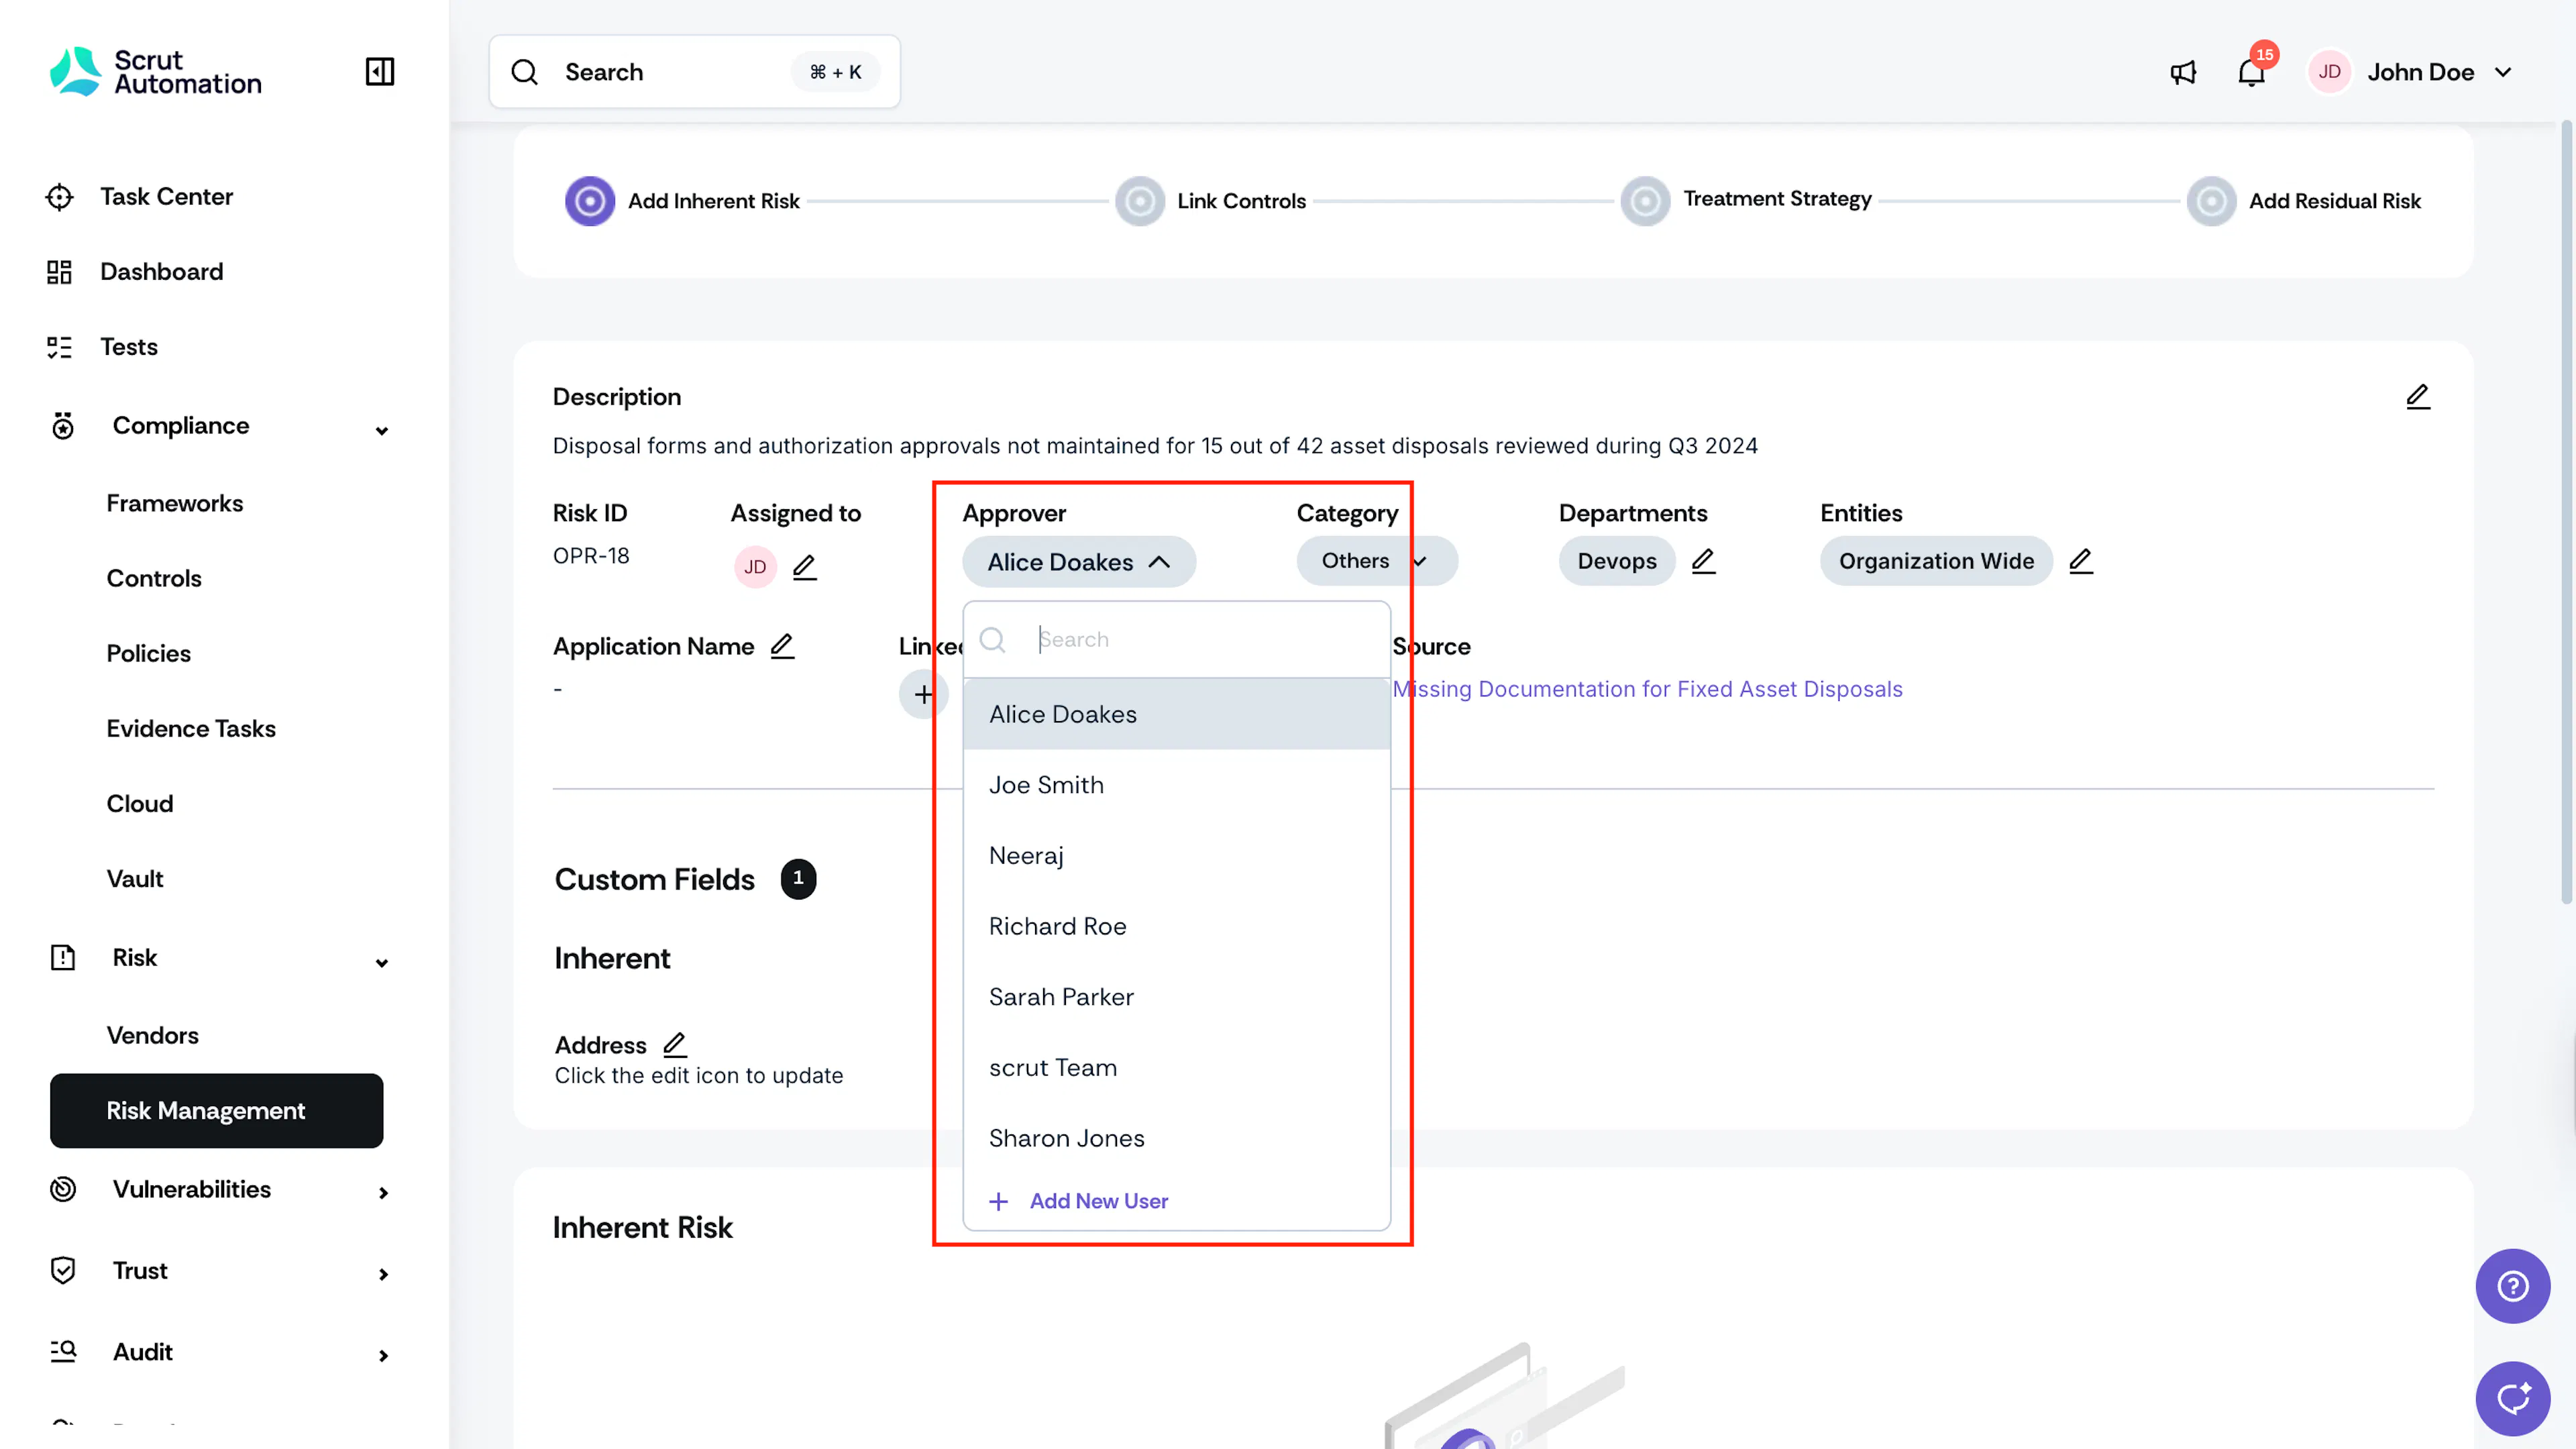
Click on the risk you want to assign an Approver to.
-
Select an Approver from the dropdown menu.
How to Send a Risk for Approval
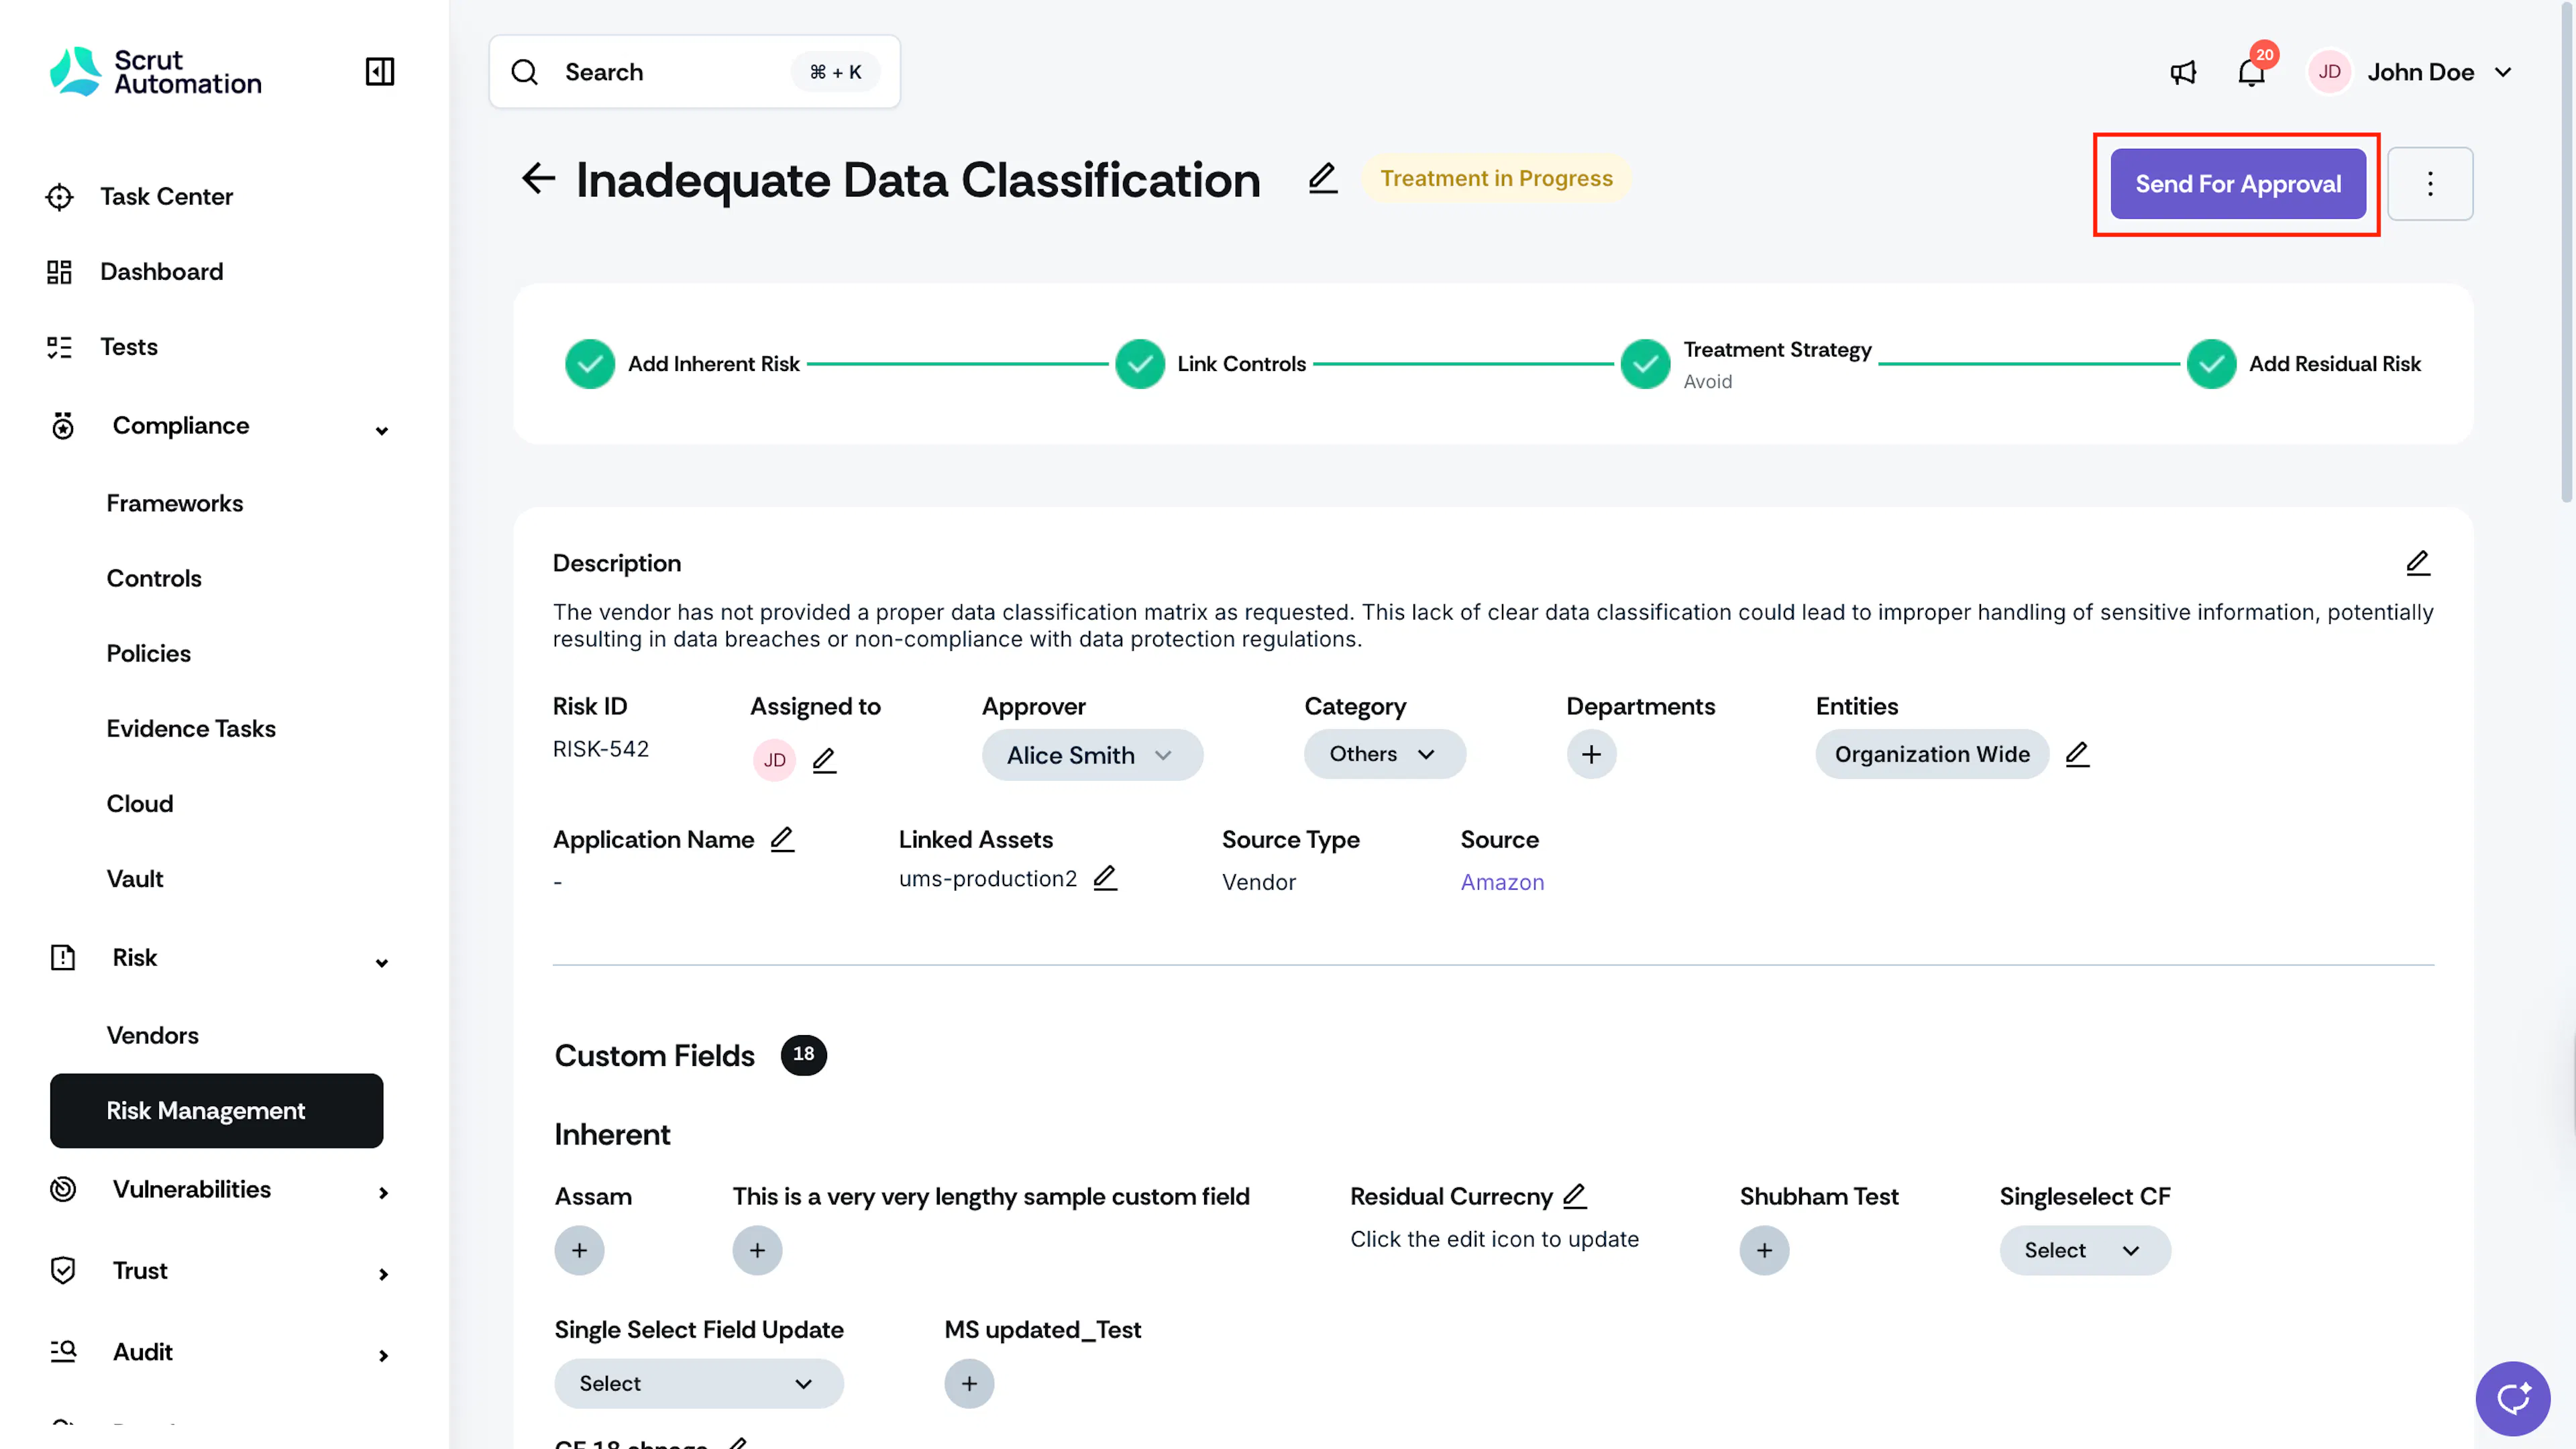
Once you complete the risk assessment and add the Residual Risk, you can send it for approval:
- Click the Send for Approval button.
- The Approver receives an email notification to review the risk.
Note:
The Send for Approval button is disabled for 24 hours after sending to prevent multiple notifications. Post the 24-hour mark, you can use the Notify Approver button to send a reminder notification to the Approver, if required.
For Approvers: Reviewing a Risk
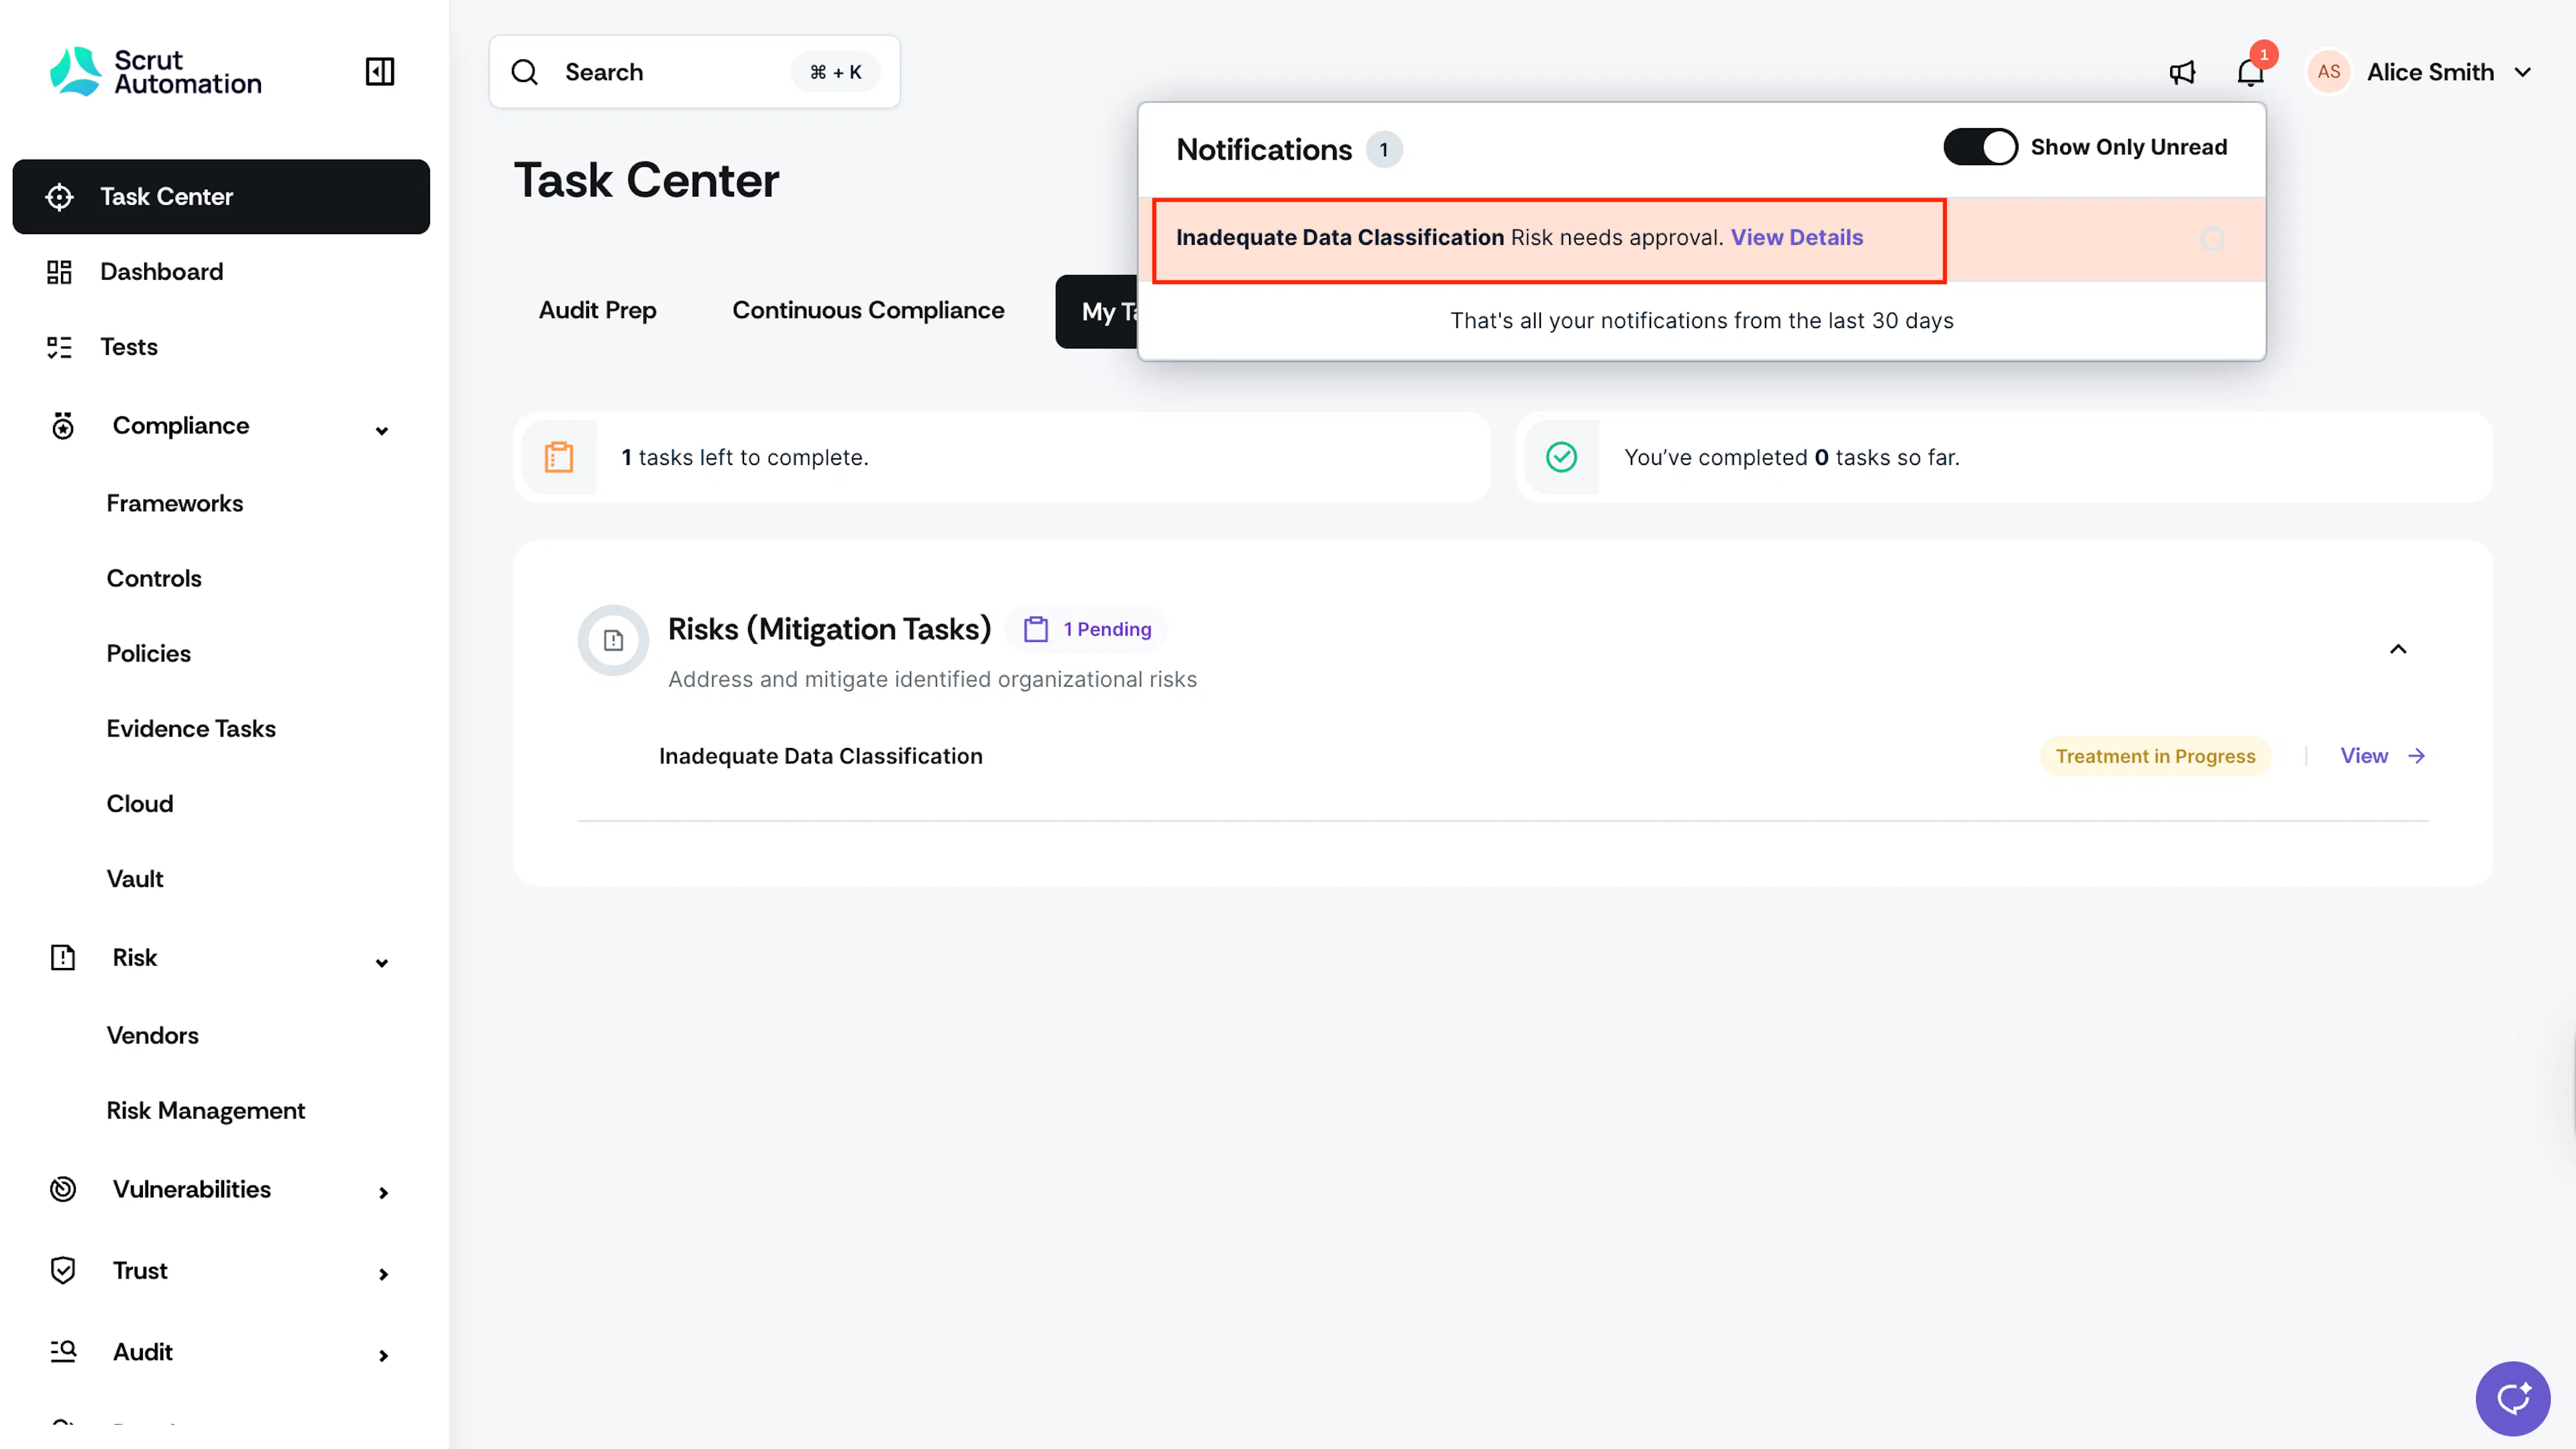
When you receive an approval notification:
-
Click View Details in the Notification Center to open the risk details page.
-
Review the risk assessment and treatment information.
-
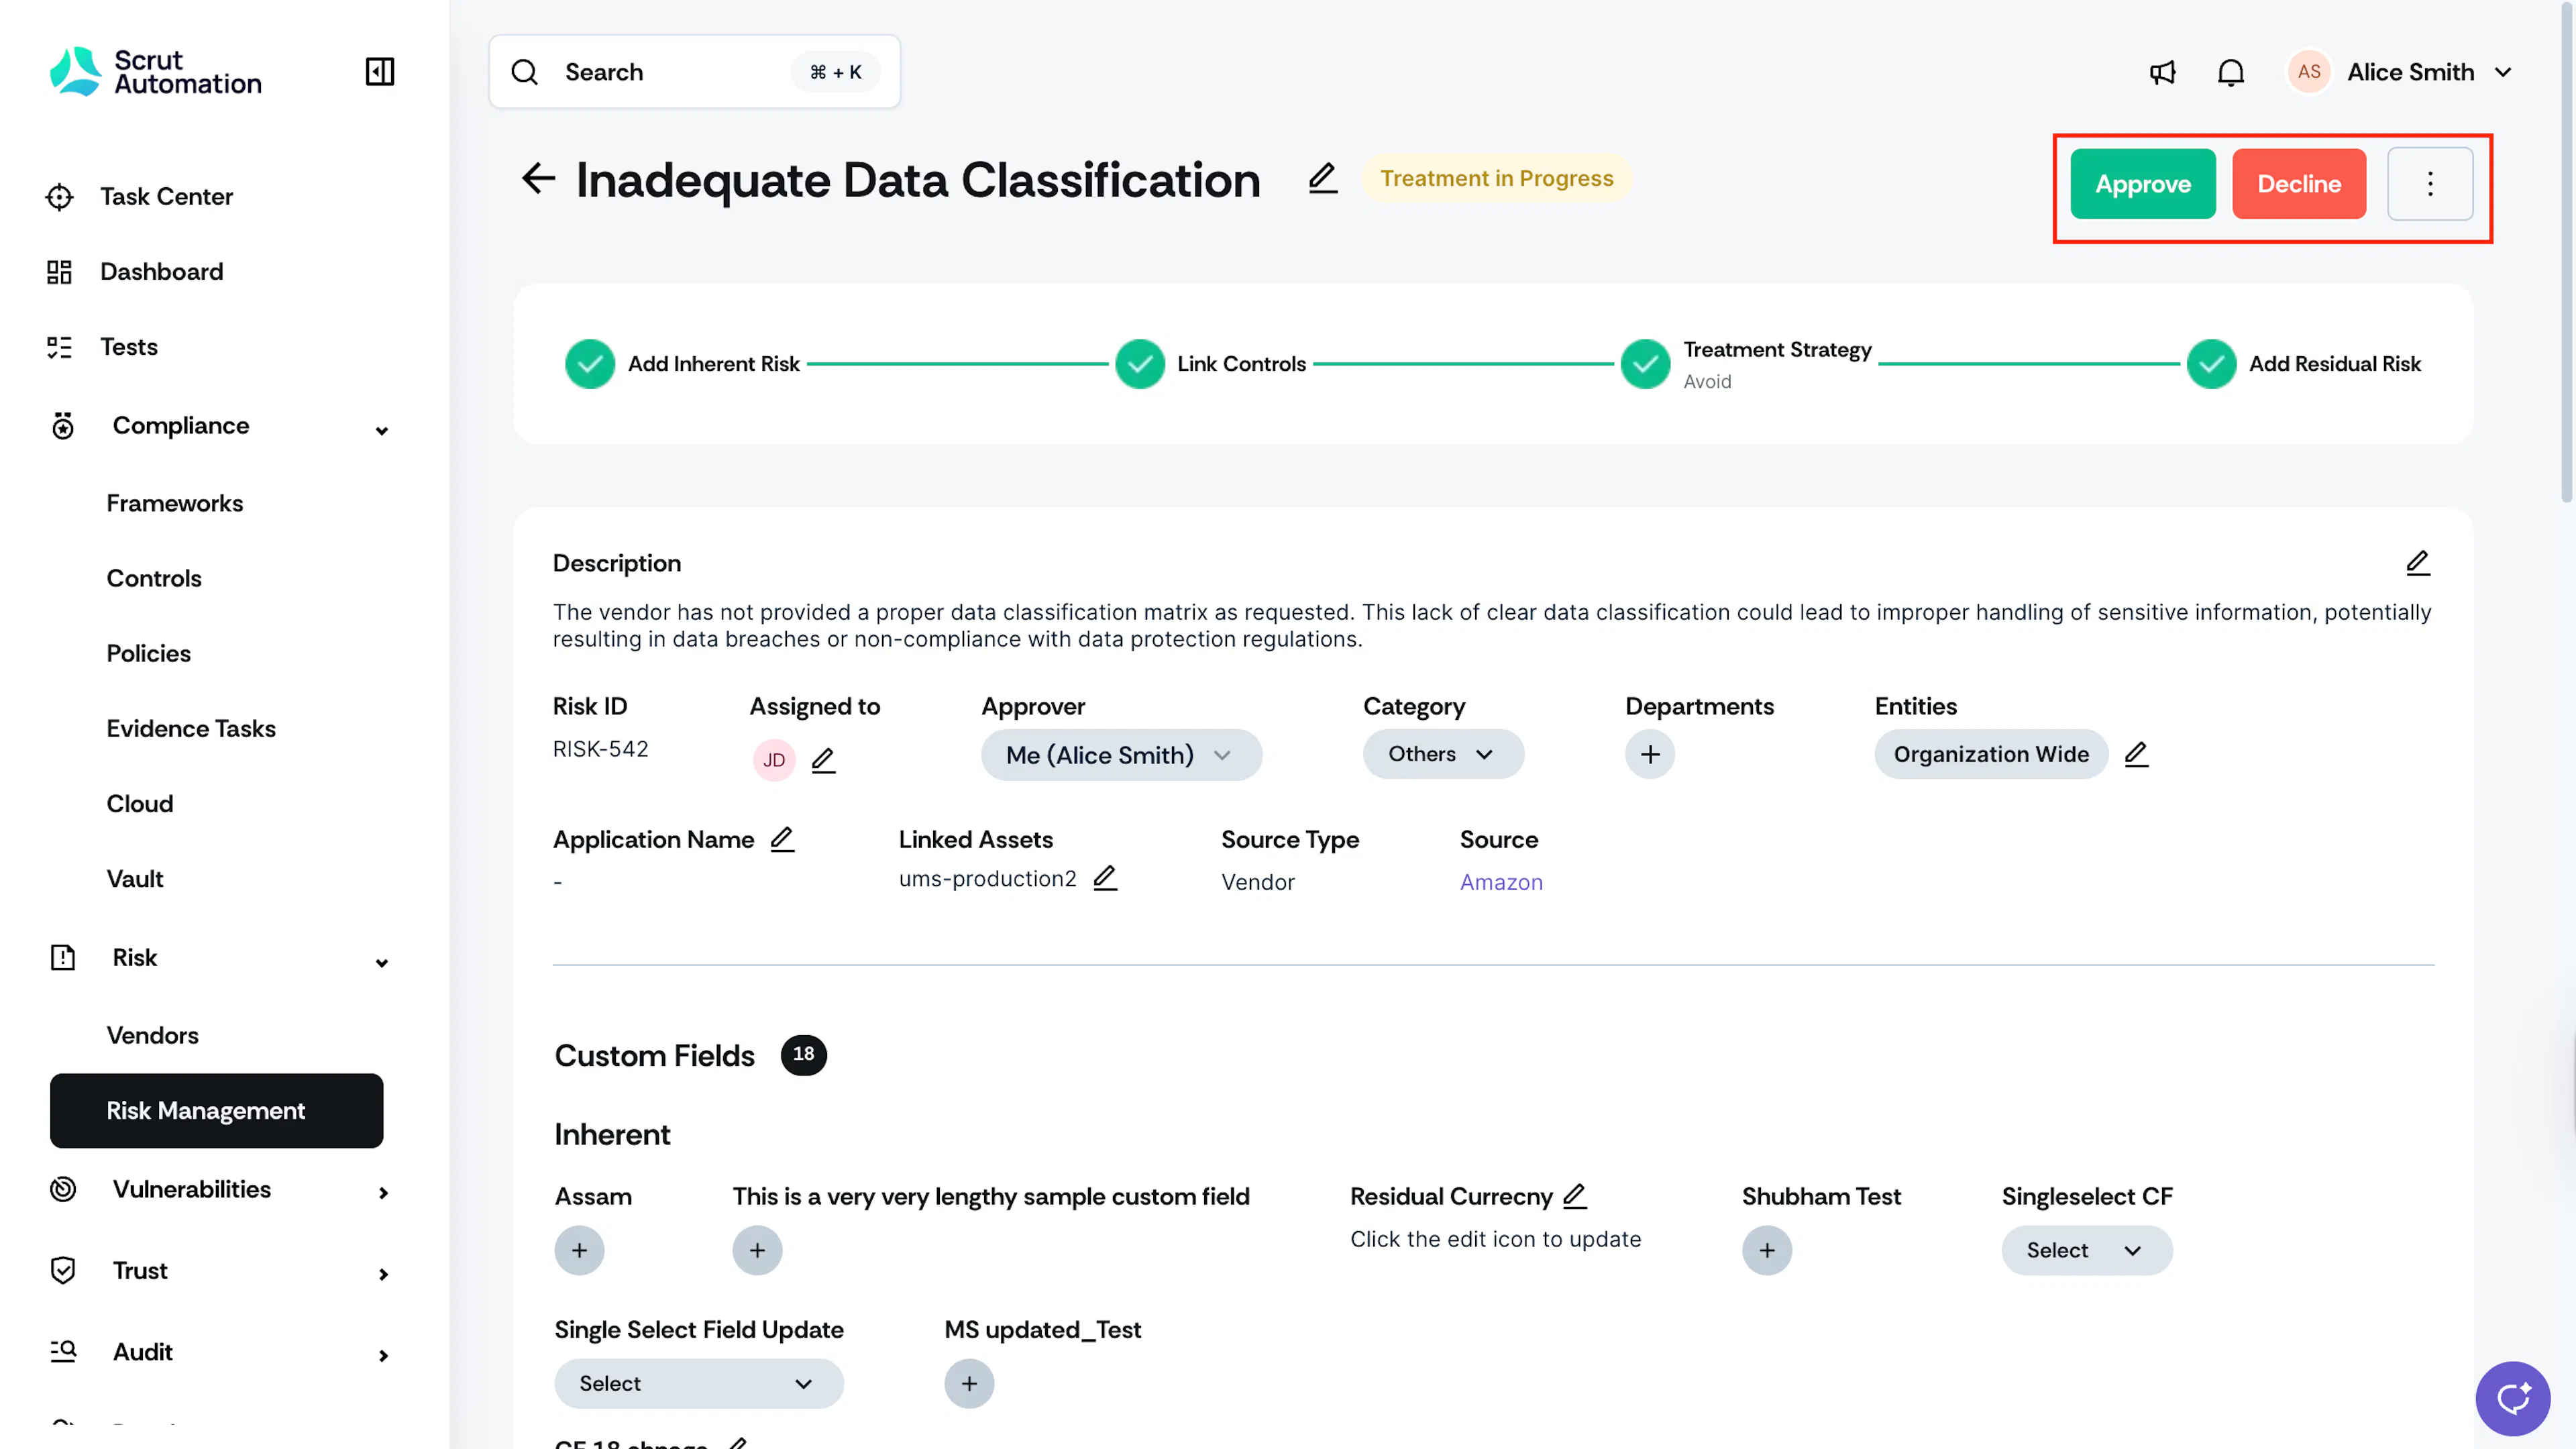
You can choose one of the following actions:
Approve & Close the Risk
-
If the risk assessment and treatment are satisfactory, click Approve to accept the risk.
-
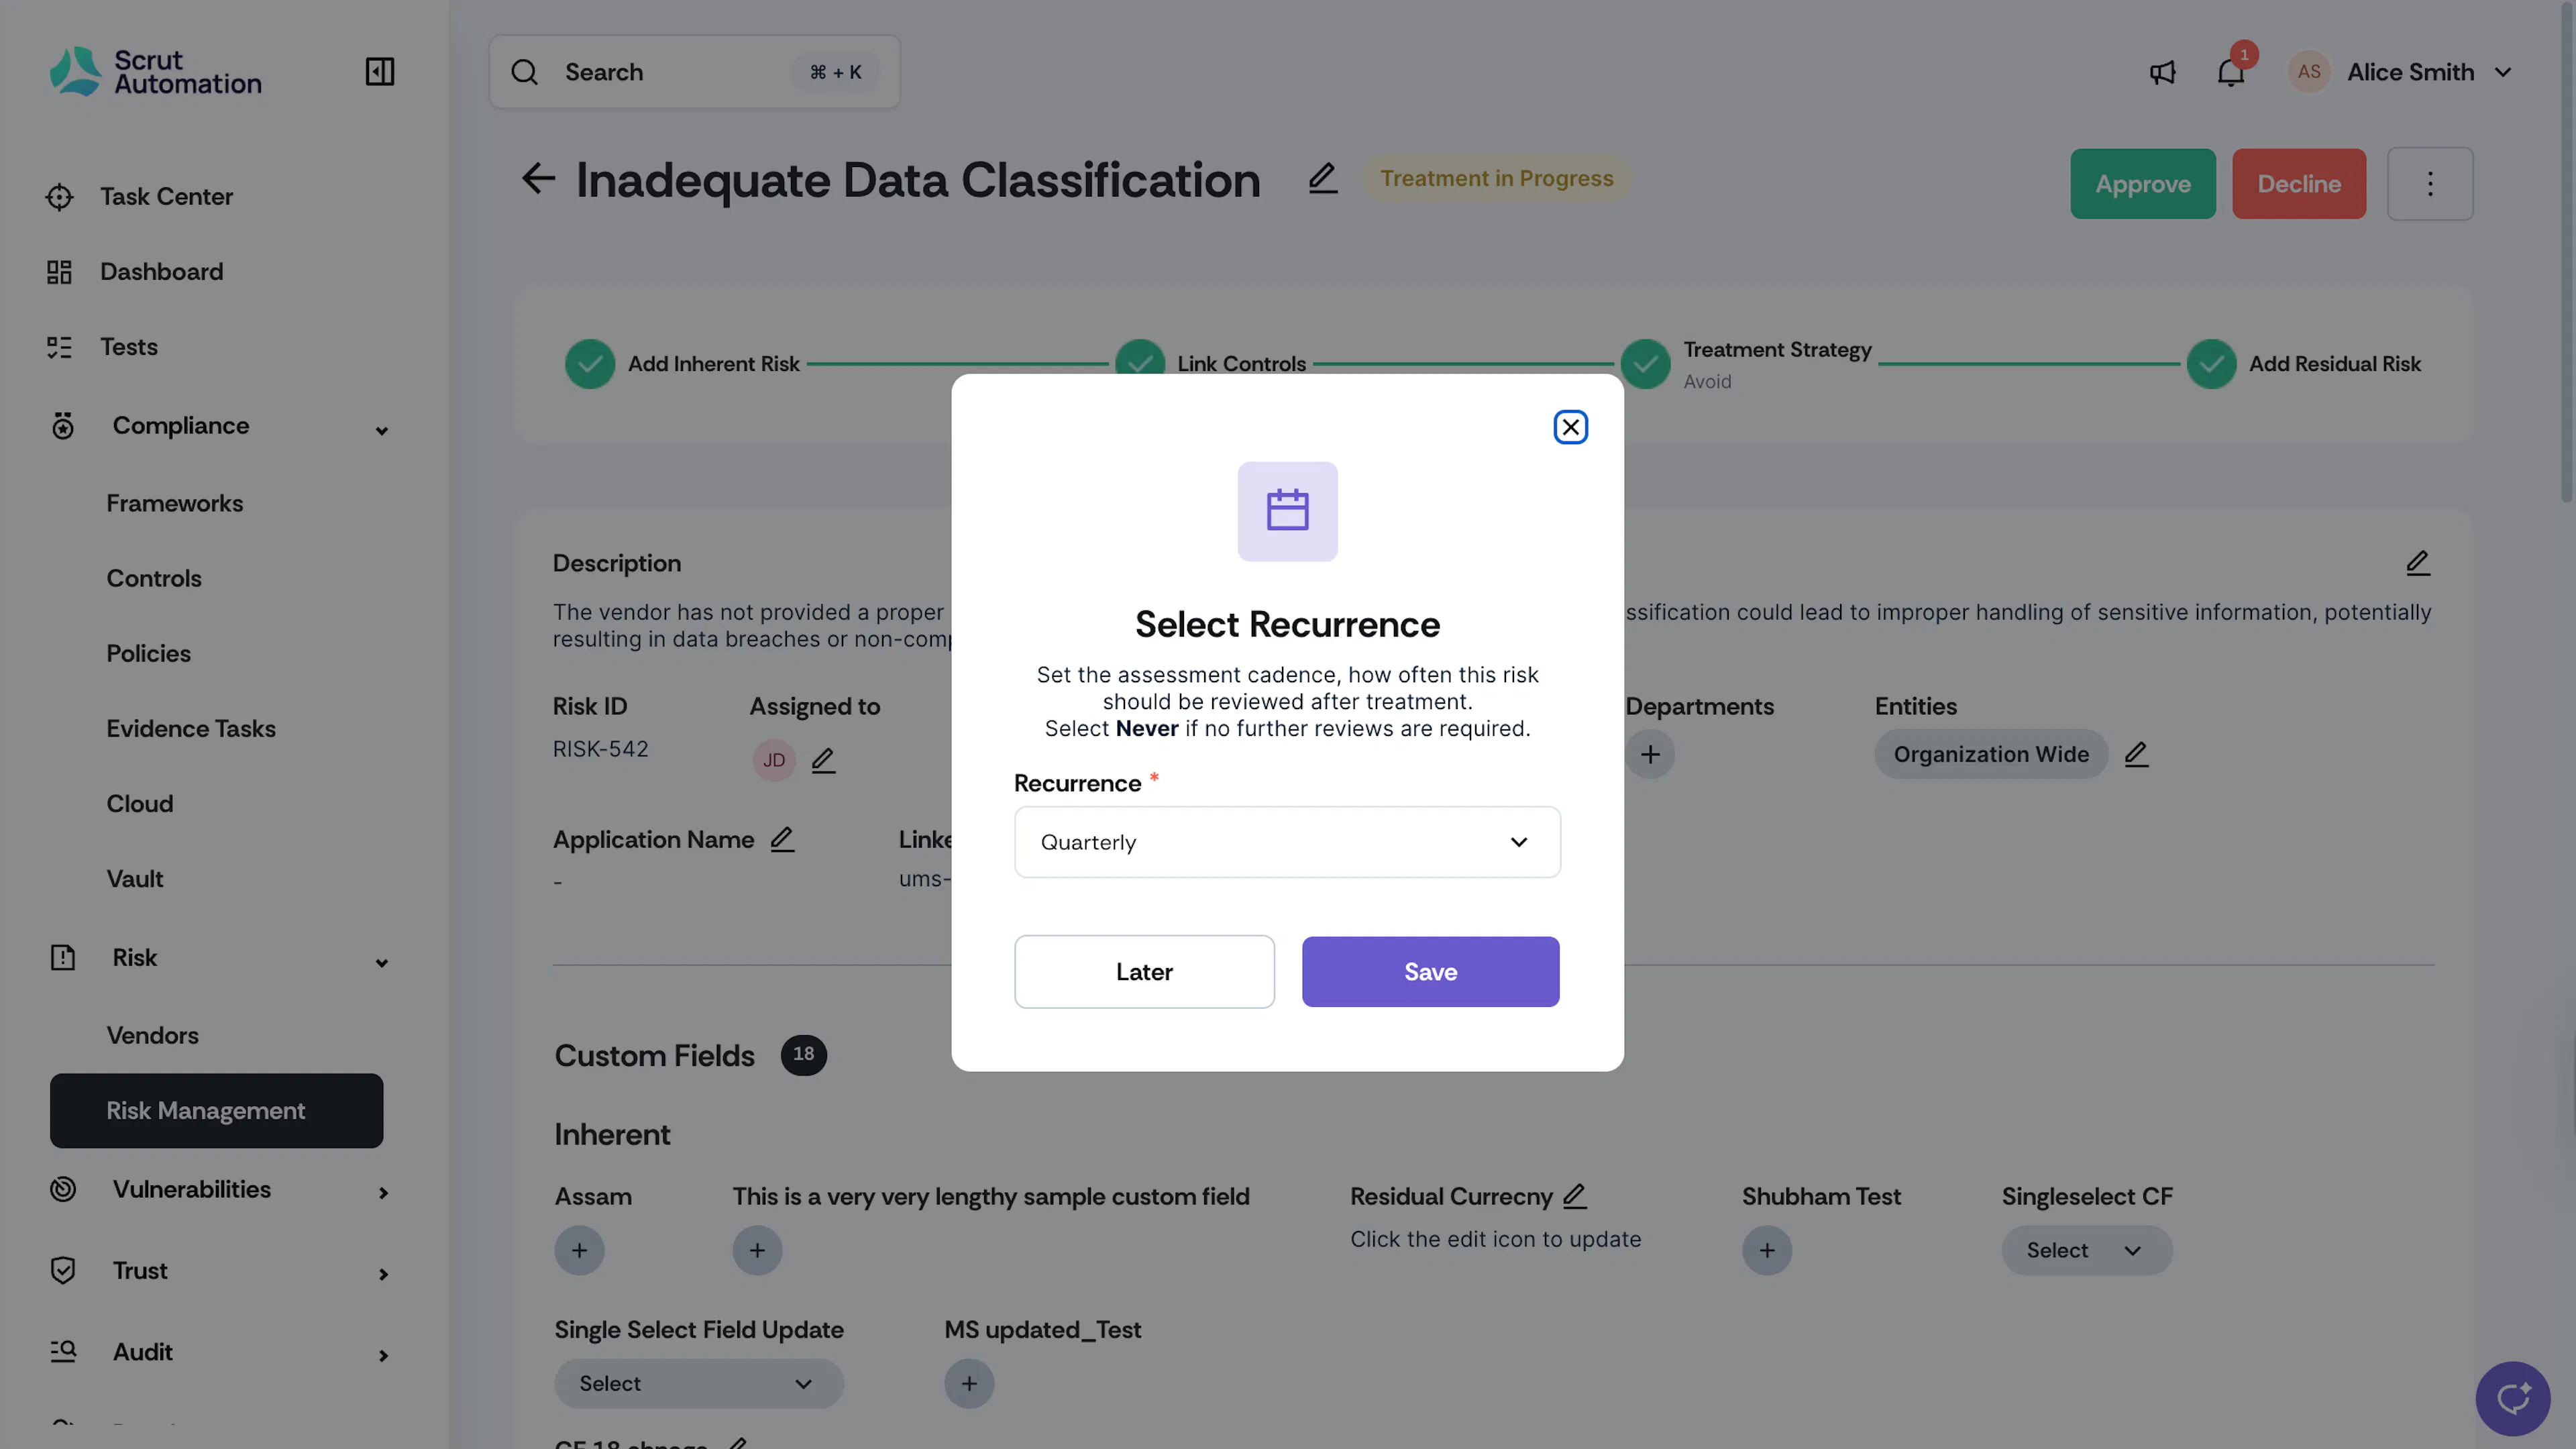
In the Select Recurrence modal that appears:
- Choose how often this risk should be reassessed (defaults to Quarterly)
- Click Save to confirm and approve the risk, or Later to close the modal without saving
- If you close the modal without selecting, the recurrence will automatically be set to Quarterly
-
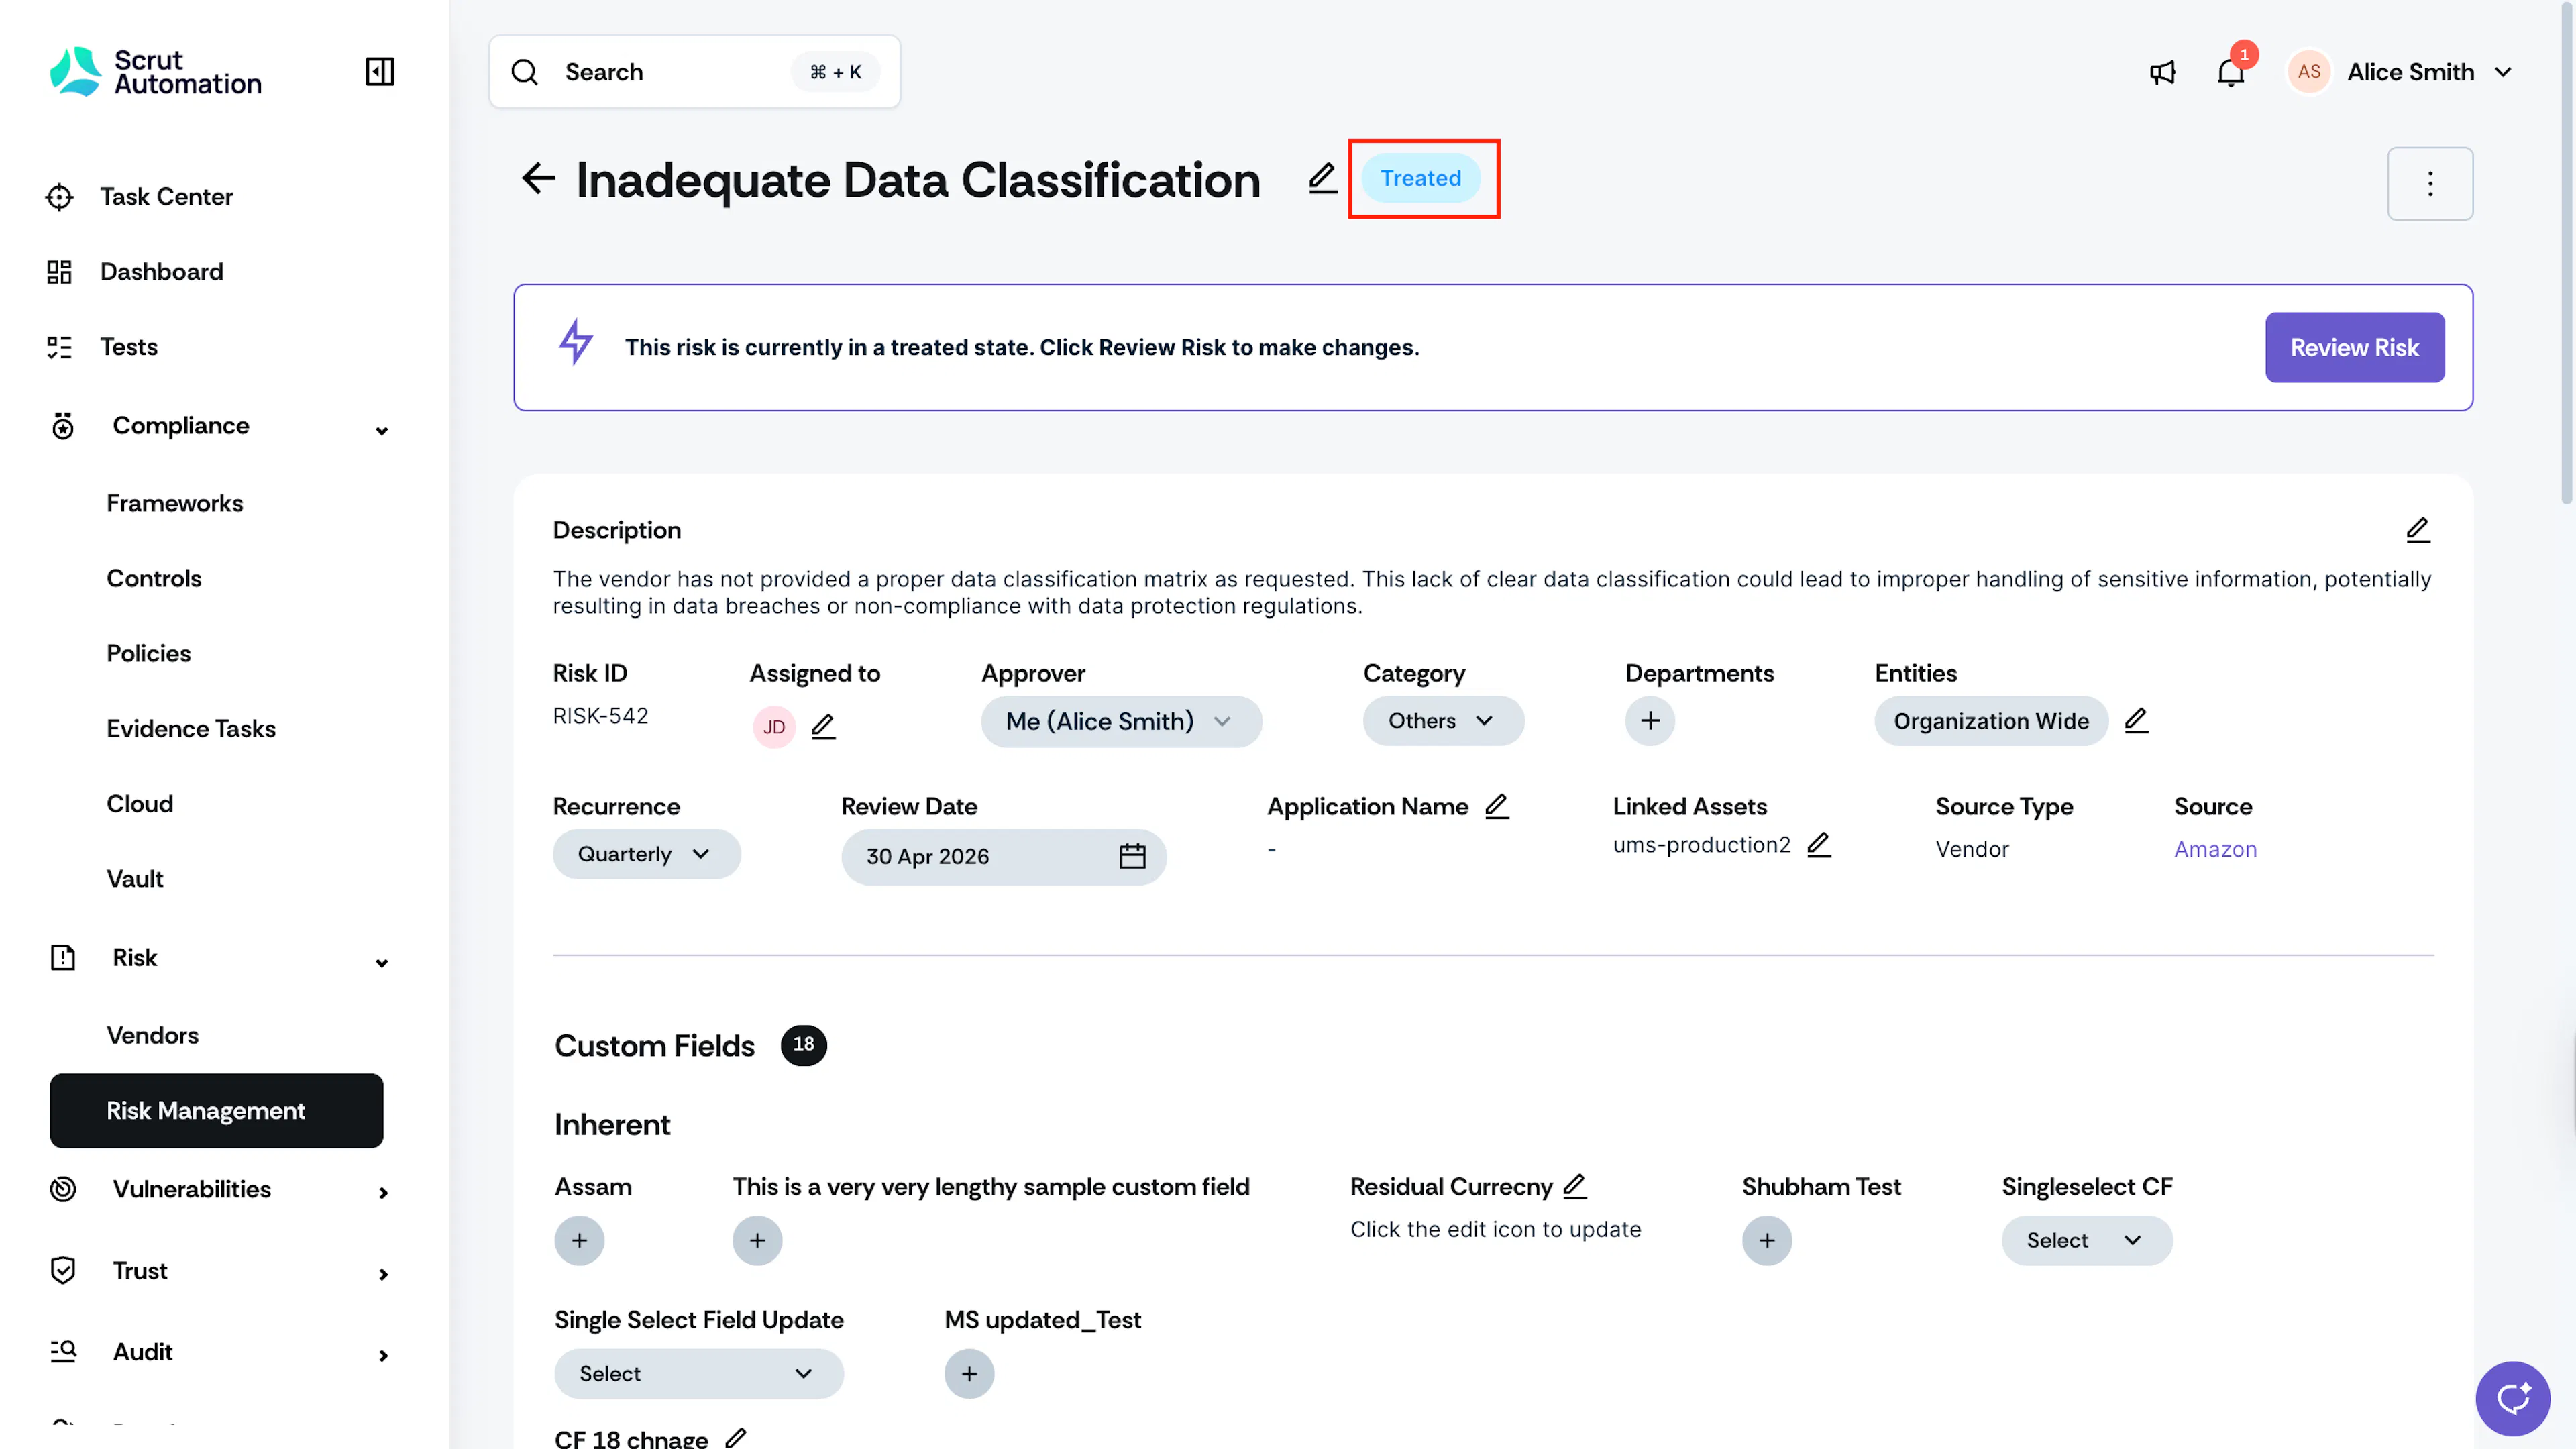
Once approved, the risk moves to the Treated state.
Decline & Request a Revision
-
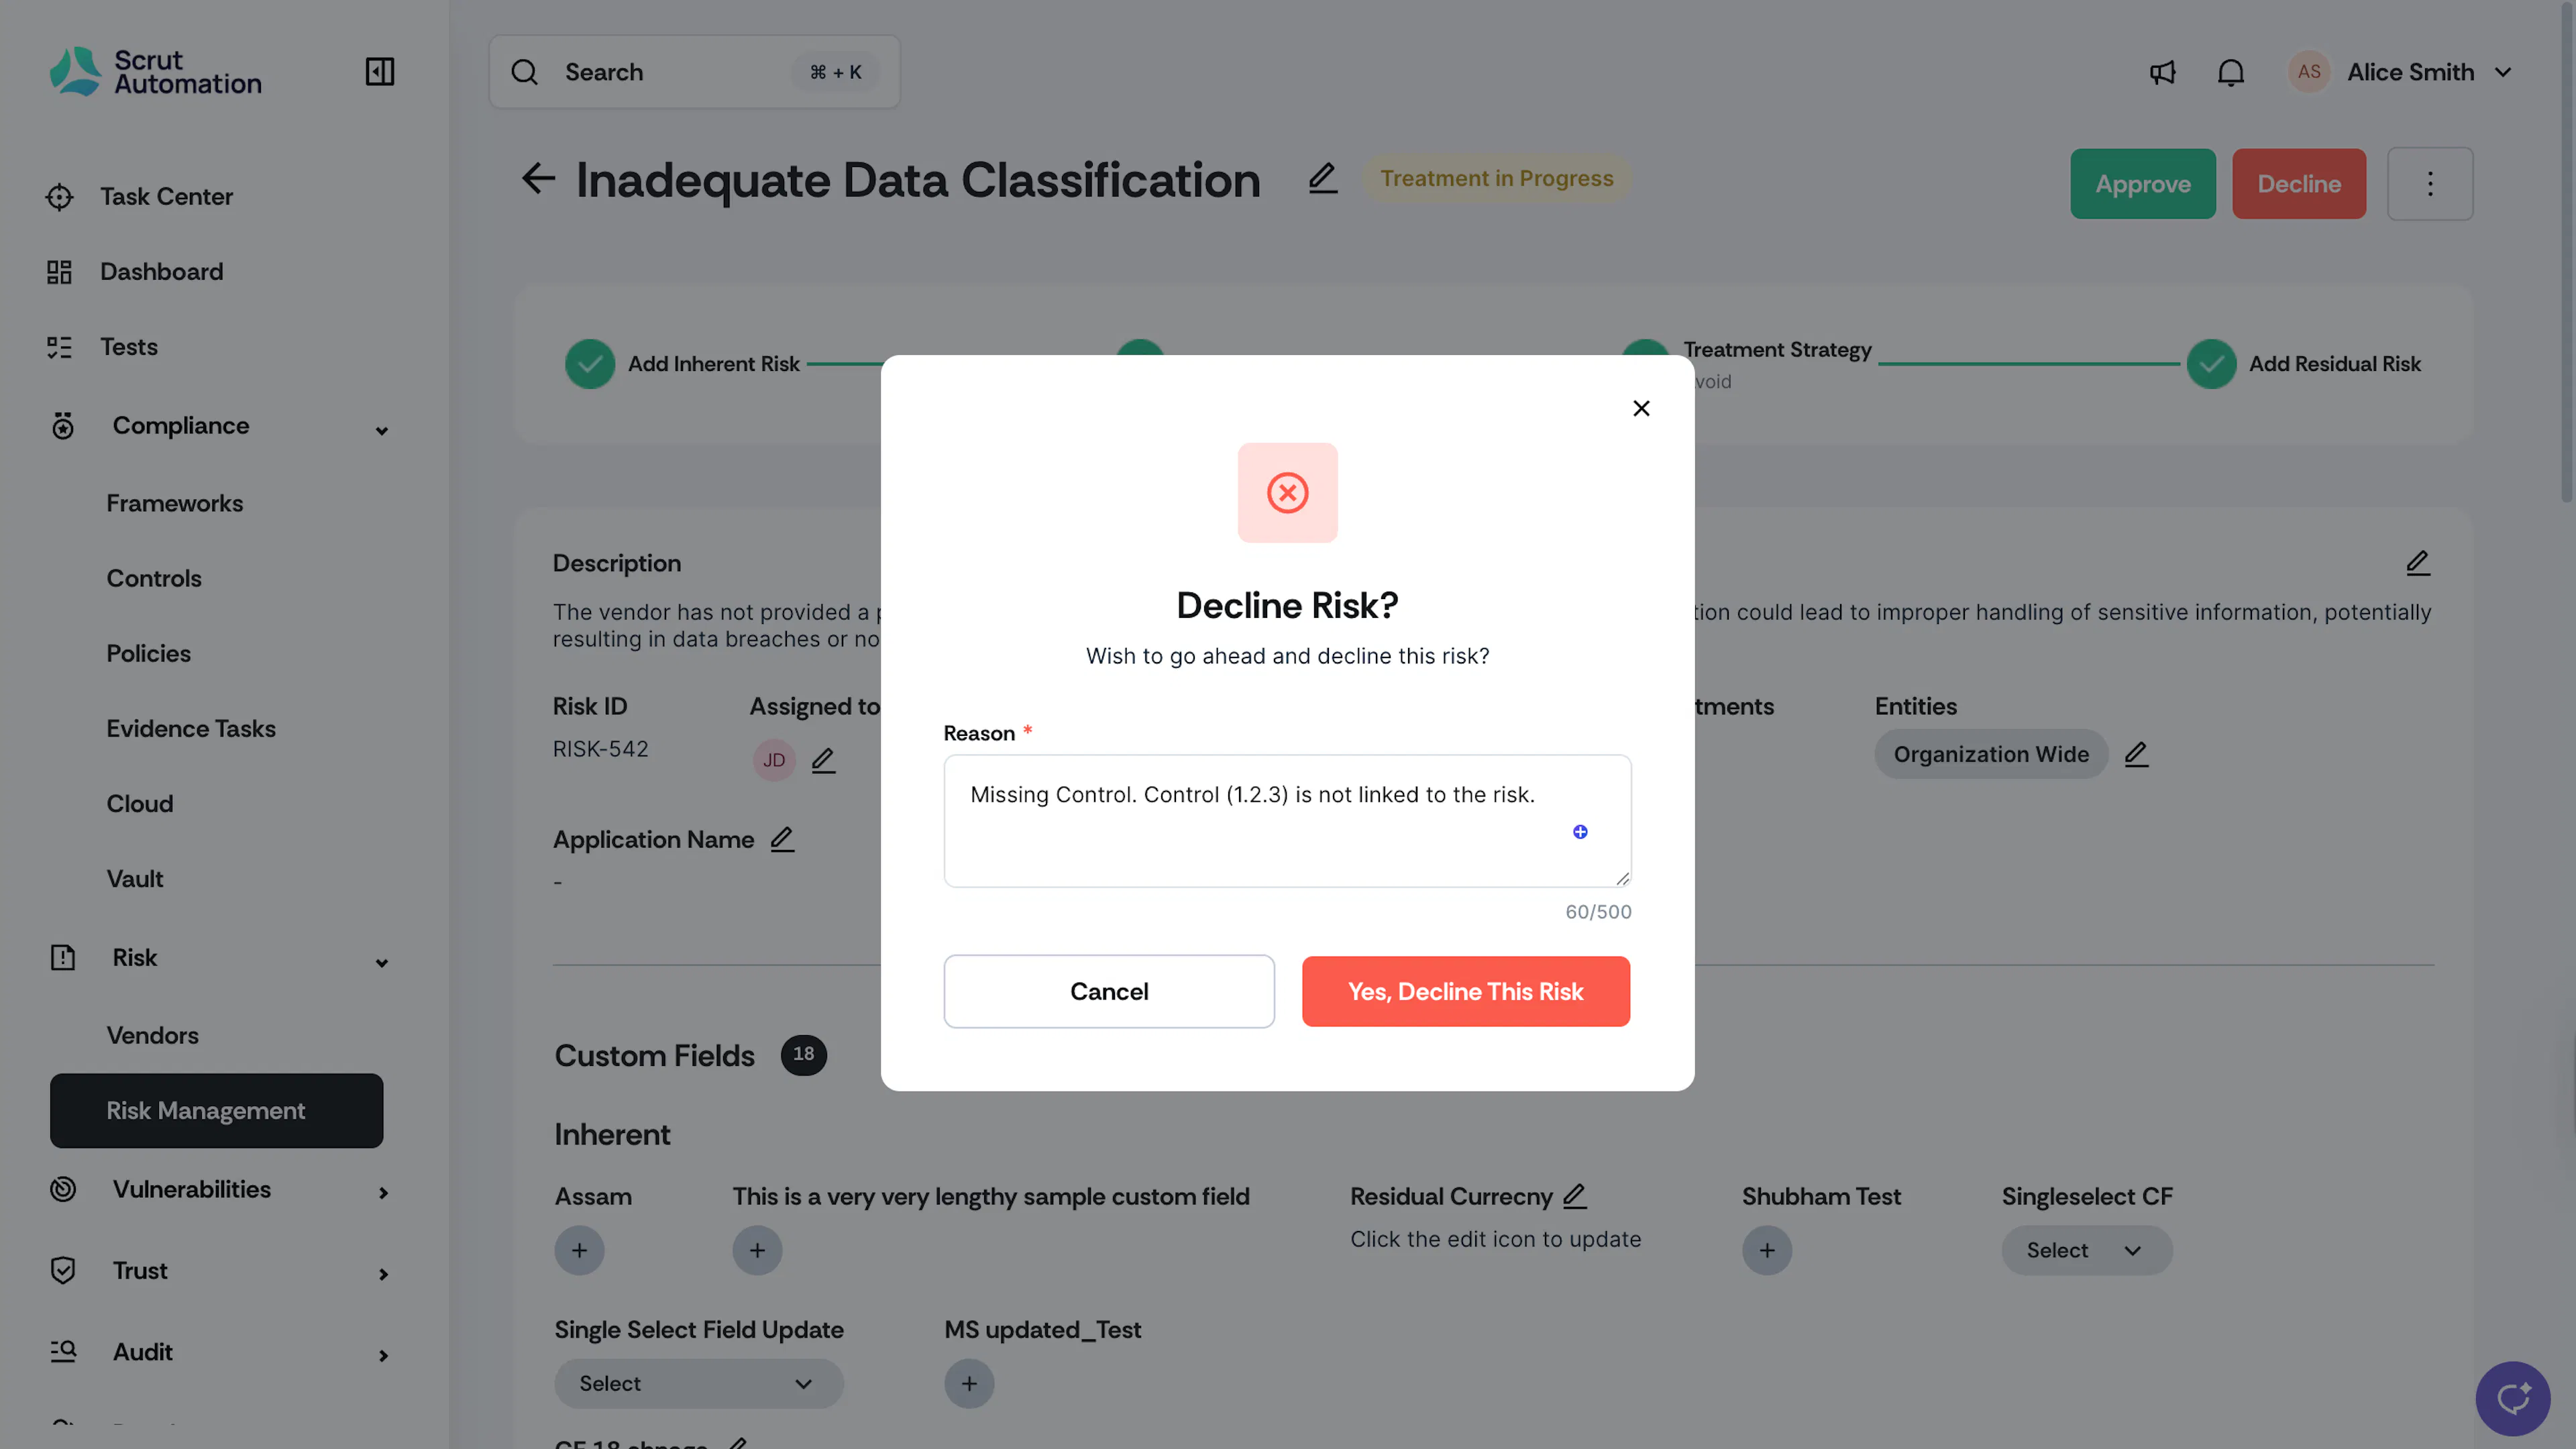
If the risk assessment needs revision, click Decline.
-
Enter a detailed reason for declining. Provide clear, actionable feedback when declining a risk. A good practice is to explain what’s missing and what needs to be done.
-
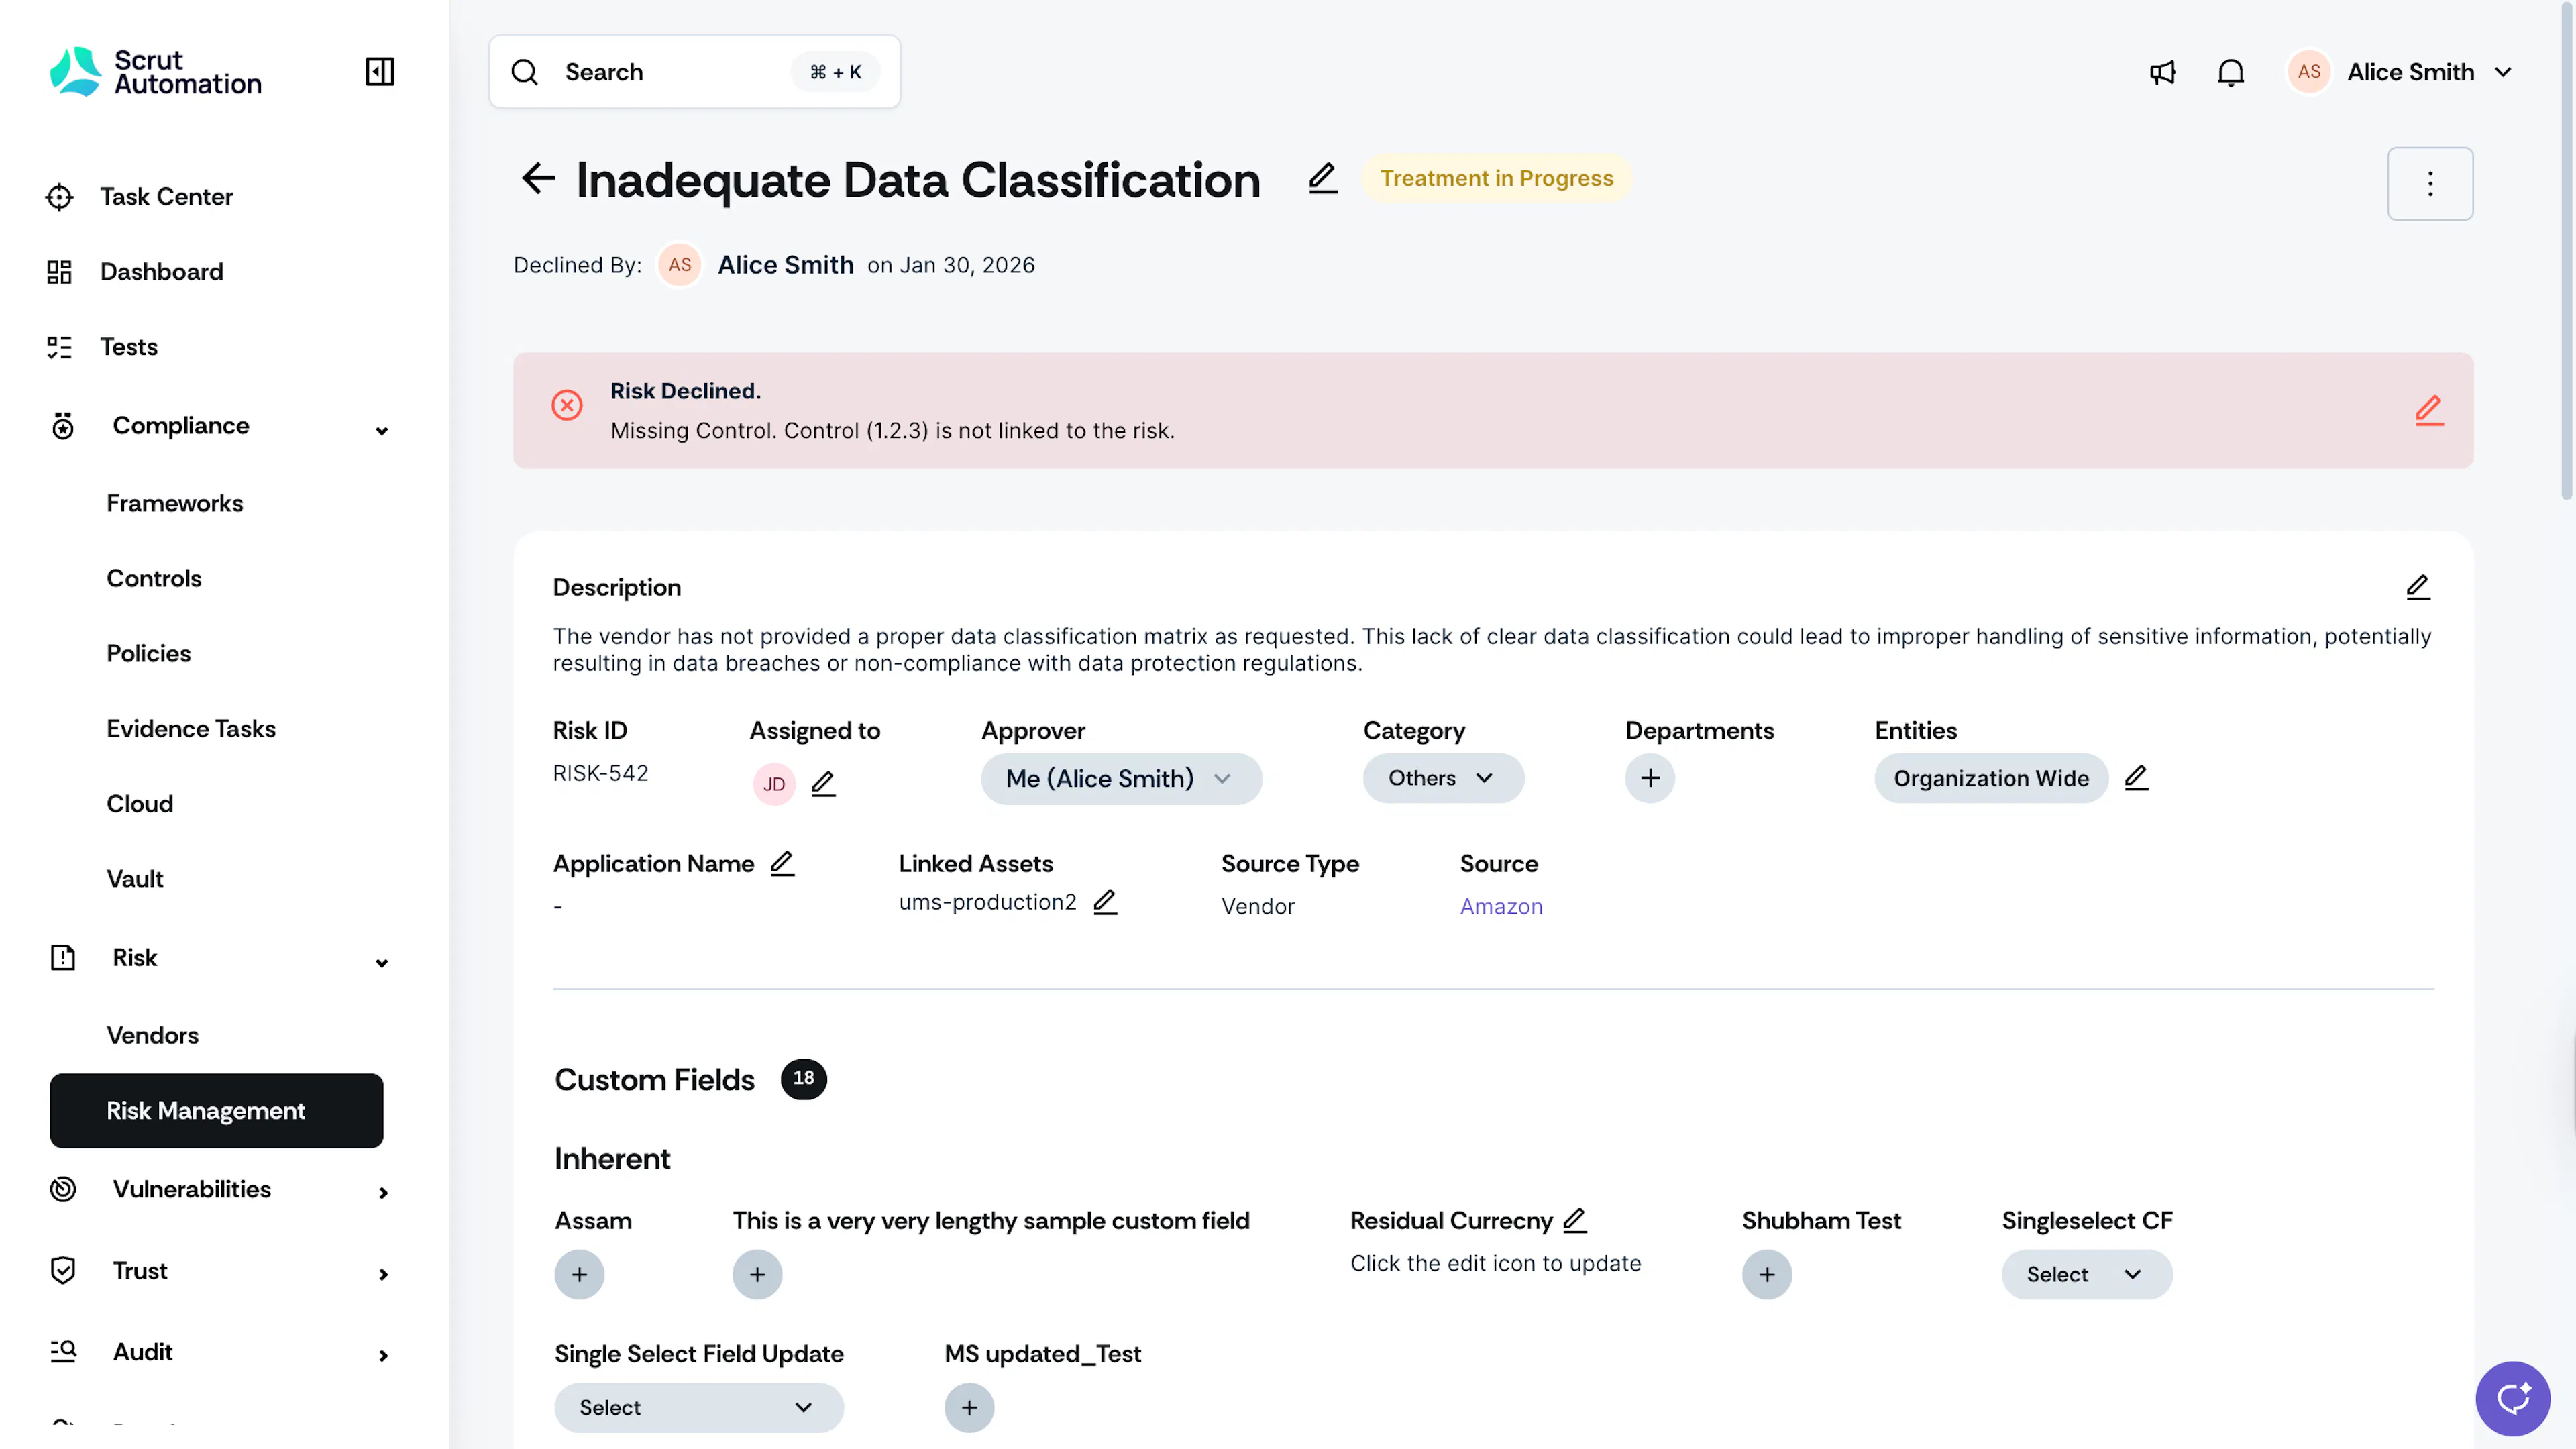
Once declined:
- The risk returns to the Treatment in Progress state, with the status displayed as declined.
- The assignee receives a notification to revisit the risk.
- The approver's action buttons are hidden until the risk is resubmitted.
What Happens Next?
The assignee makes the necessary changes and resubmits the risk for approval. This process can be repeated as many times as needed until you’re satisfied with the assessment and treatment.