

Quick Start Guide: Asset Management
Scrut automatically fetches and populates asset data from your connected integrations. This ensures your asset inventory remains up to date and comprehensive, eliminating the need for manual data entry. Additionally, you can manually import assets that are not part of your integrations.
Automatically Populated Asset Data From Integrations
Scrut automatically scans and retrieves asset information from your connected integrations, organizing the data into relevant categories within the Asset Management module. This process runs continuously, keeping your asset inventory up to date as changes occur in your connected systems.
Scrut automatically populates data for the following asset types based on your active integrations:
-
Cloud Infrastructure Assets: Data for the following asset types is fetched from your connected AWS, Azure, and GCP integrations:
- Compute Instances
- Container Platforms
- Storage & Databases
- Virtual Networks (VPC)
- Serverless Functions
- Monitoring & Logging
- Key Management
- Identity Users
- Identity Roles
- Identity Groups
-
Mobile Devices: Data for the mobile device asset type is retrieved from your connected MDM integrations. Currently, Scrut supports data reflection from the following MDM platforms:
- Fleet
- Jamf Pro
- JumpCloud
- Kandji
- Kolide
- KiteCyber
- MS Intune
- NinjaOne
- Rippling
- Sophos
- Scrut Agent
-
Code Repositories: Information regarding your code repositories is fetched from your connected GitHub and GitLab integrations, populating the Asset Management → Code Repo section.
For any other asset not covered by these automatic integrations, you can add it manually to ensure your complete asset inventory is reflected in Scrut.
How to Add Assets Manually
Add a Single Asset
Follow these steps to manually add an individual asset to your Scrut inventory.
-
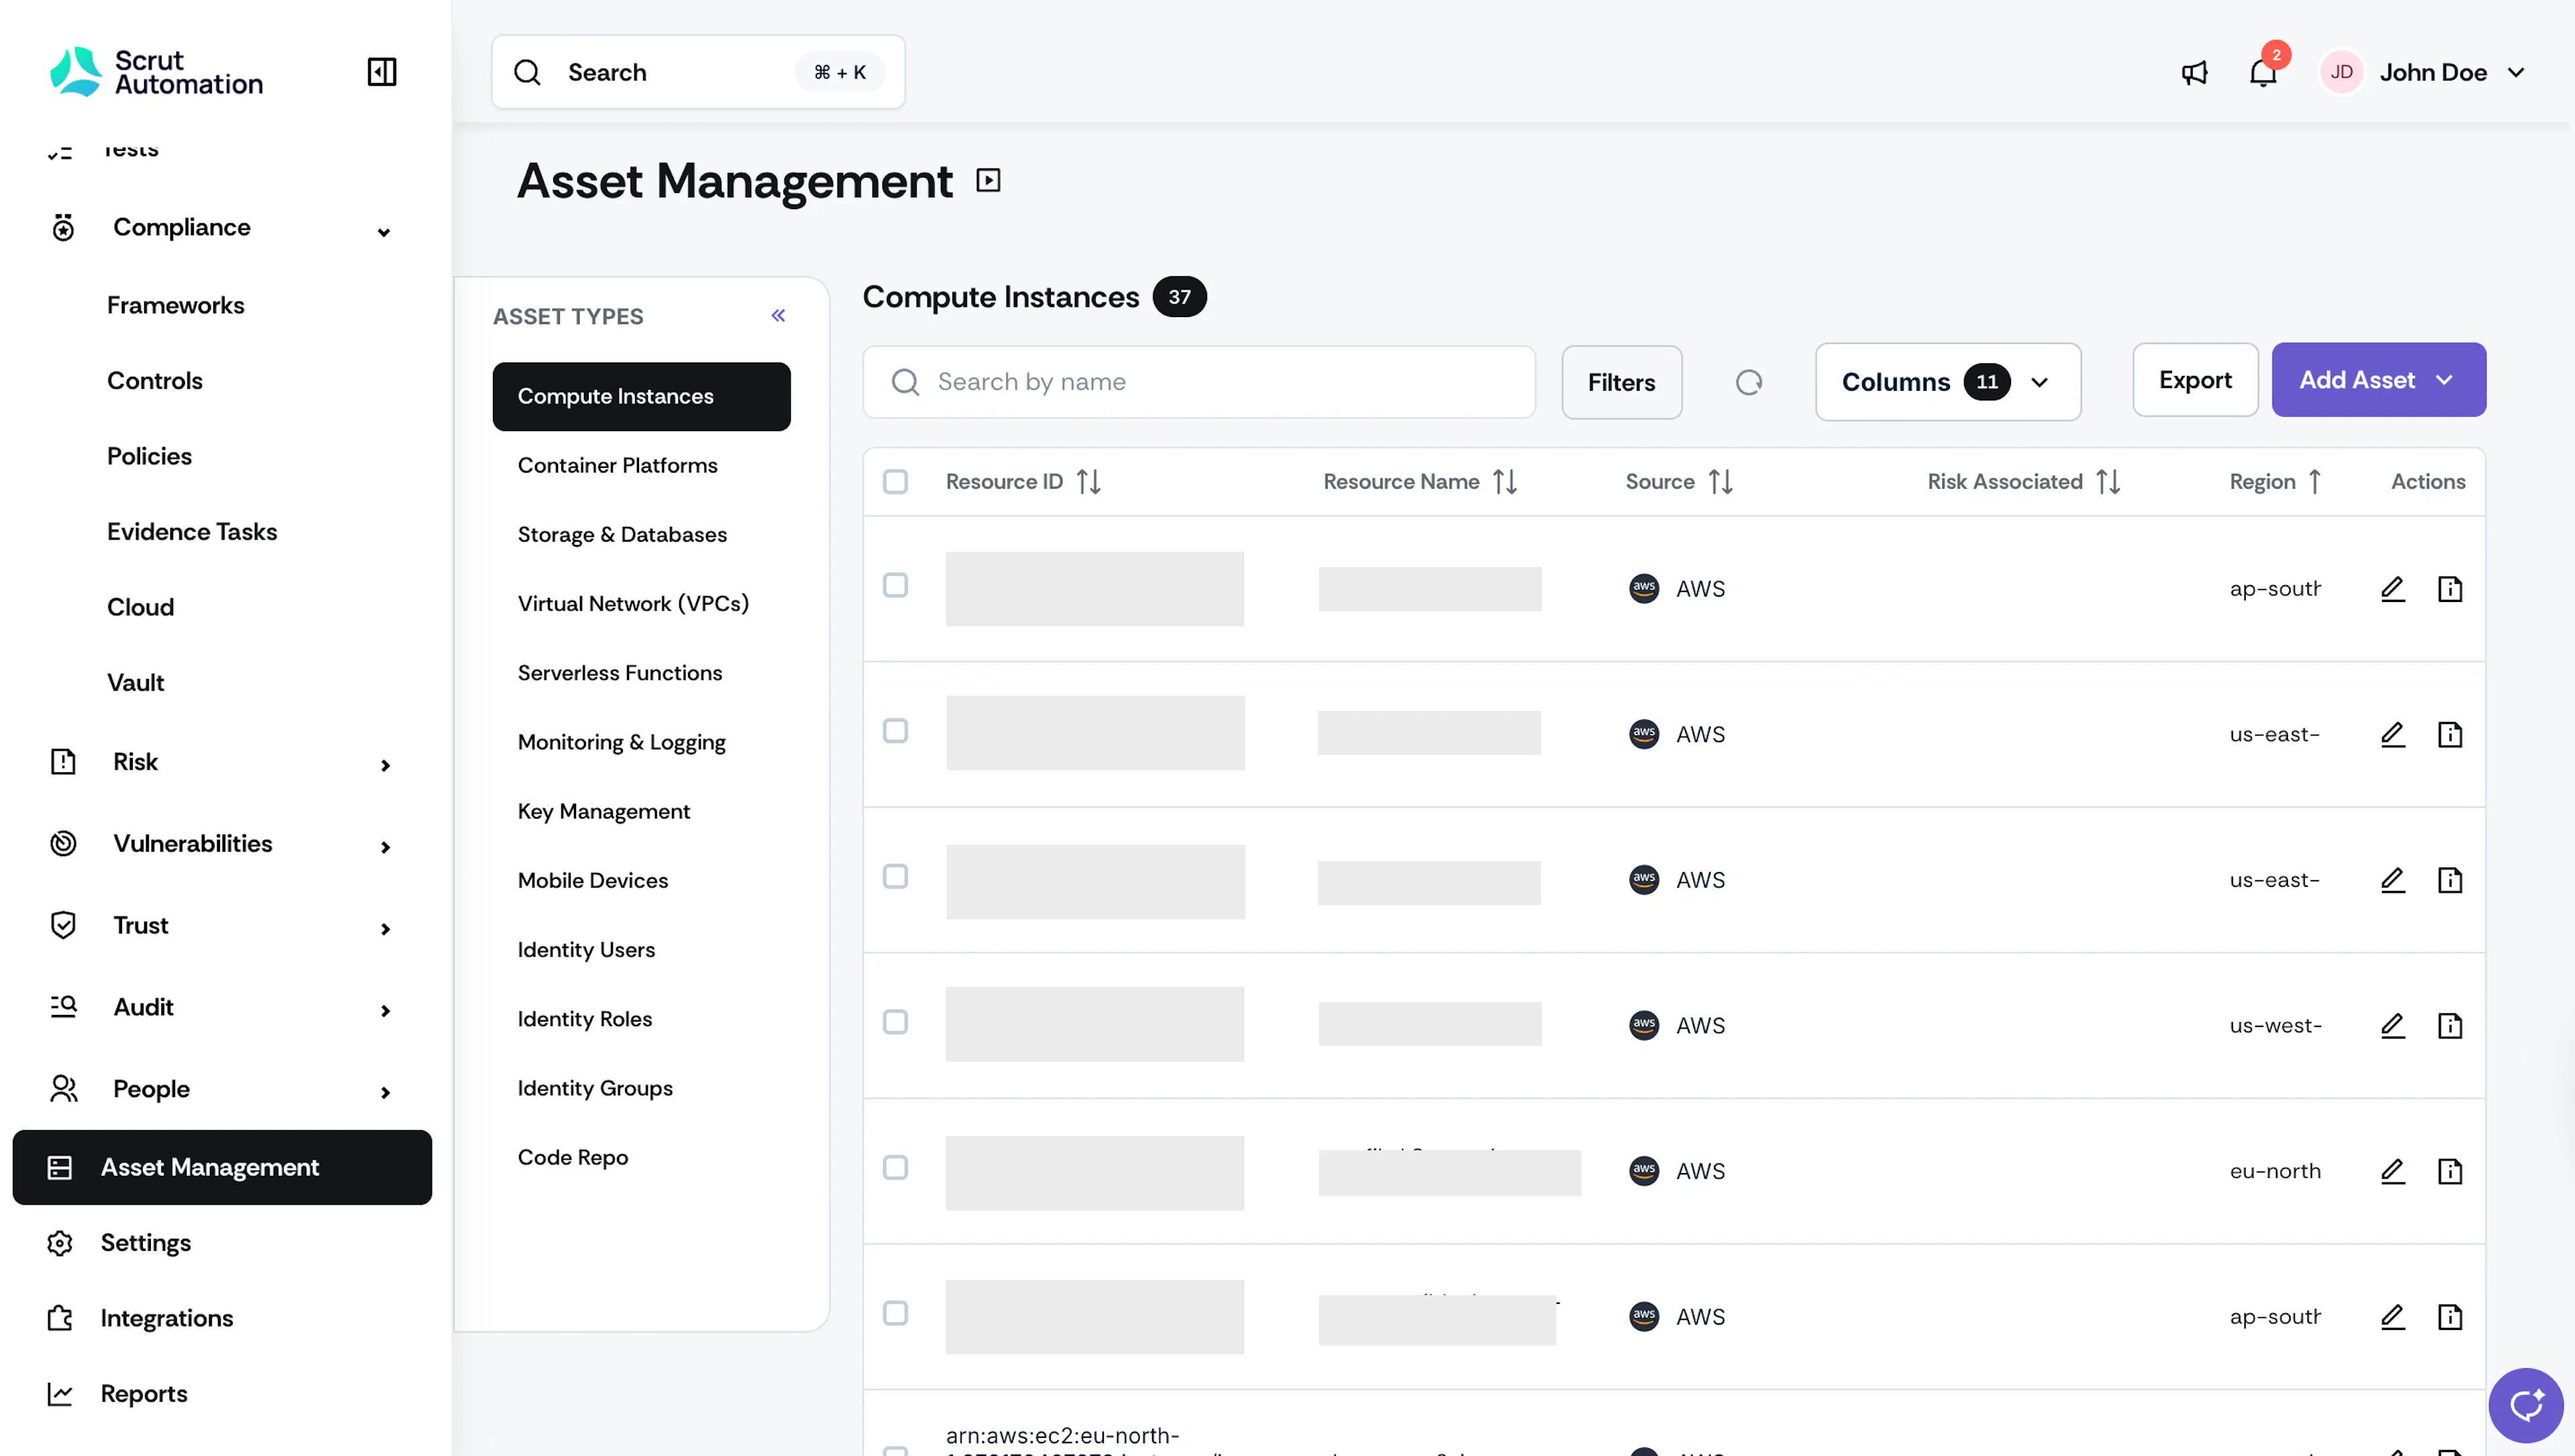
Sign in to Scrut and click Asset Management on the left navigation panel.
-
In the left panel under Asset Types, click the specific type of asset you want to add, such as Compute Instances, Container Platforms, Code Repos, Virtual Networks, etc.
-
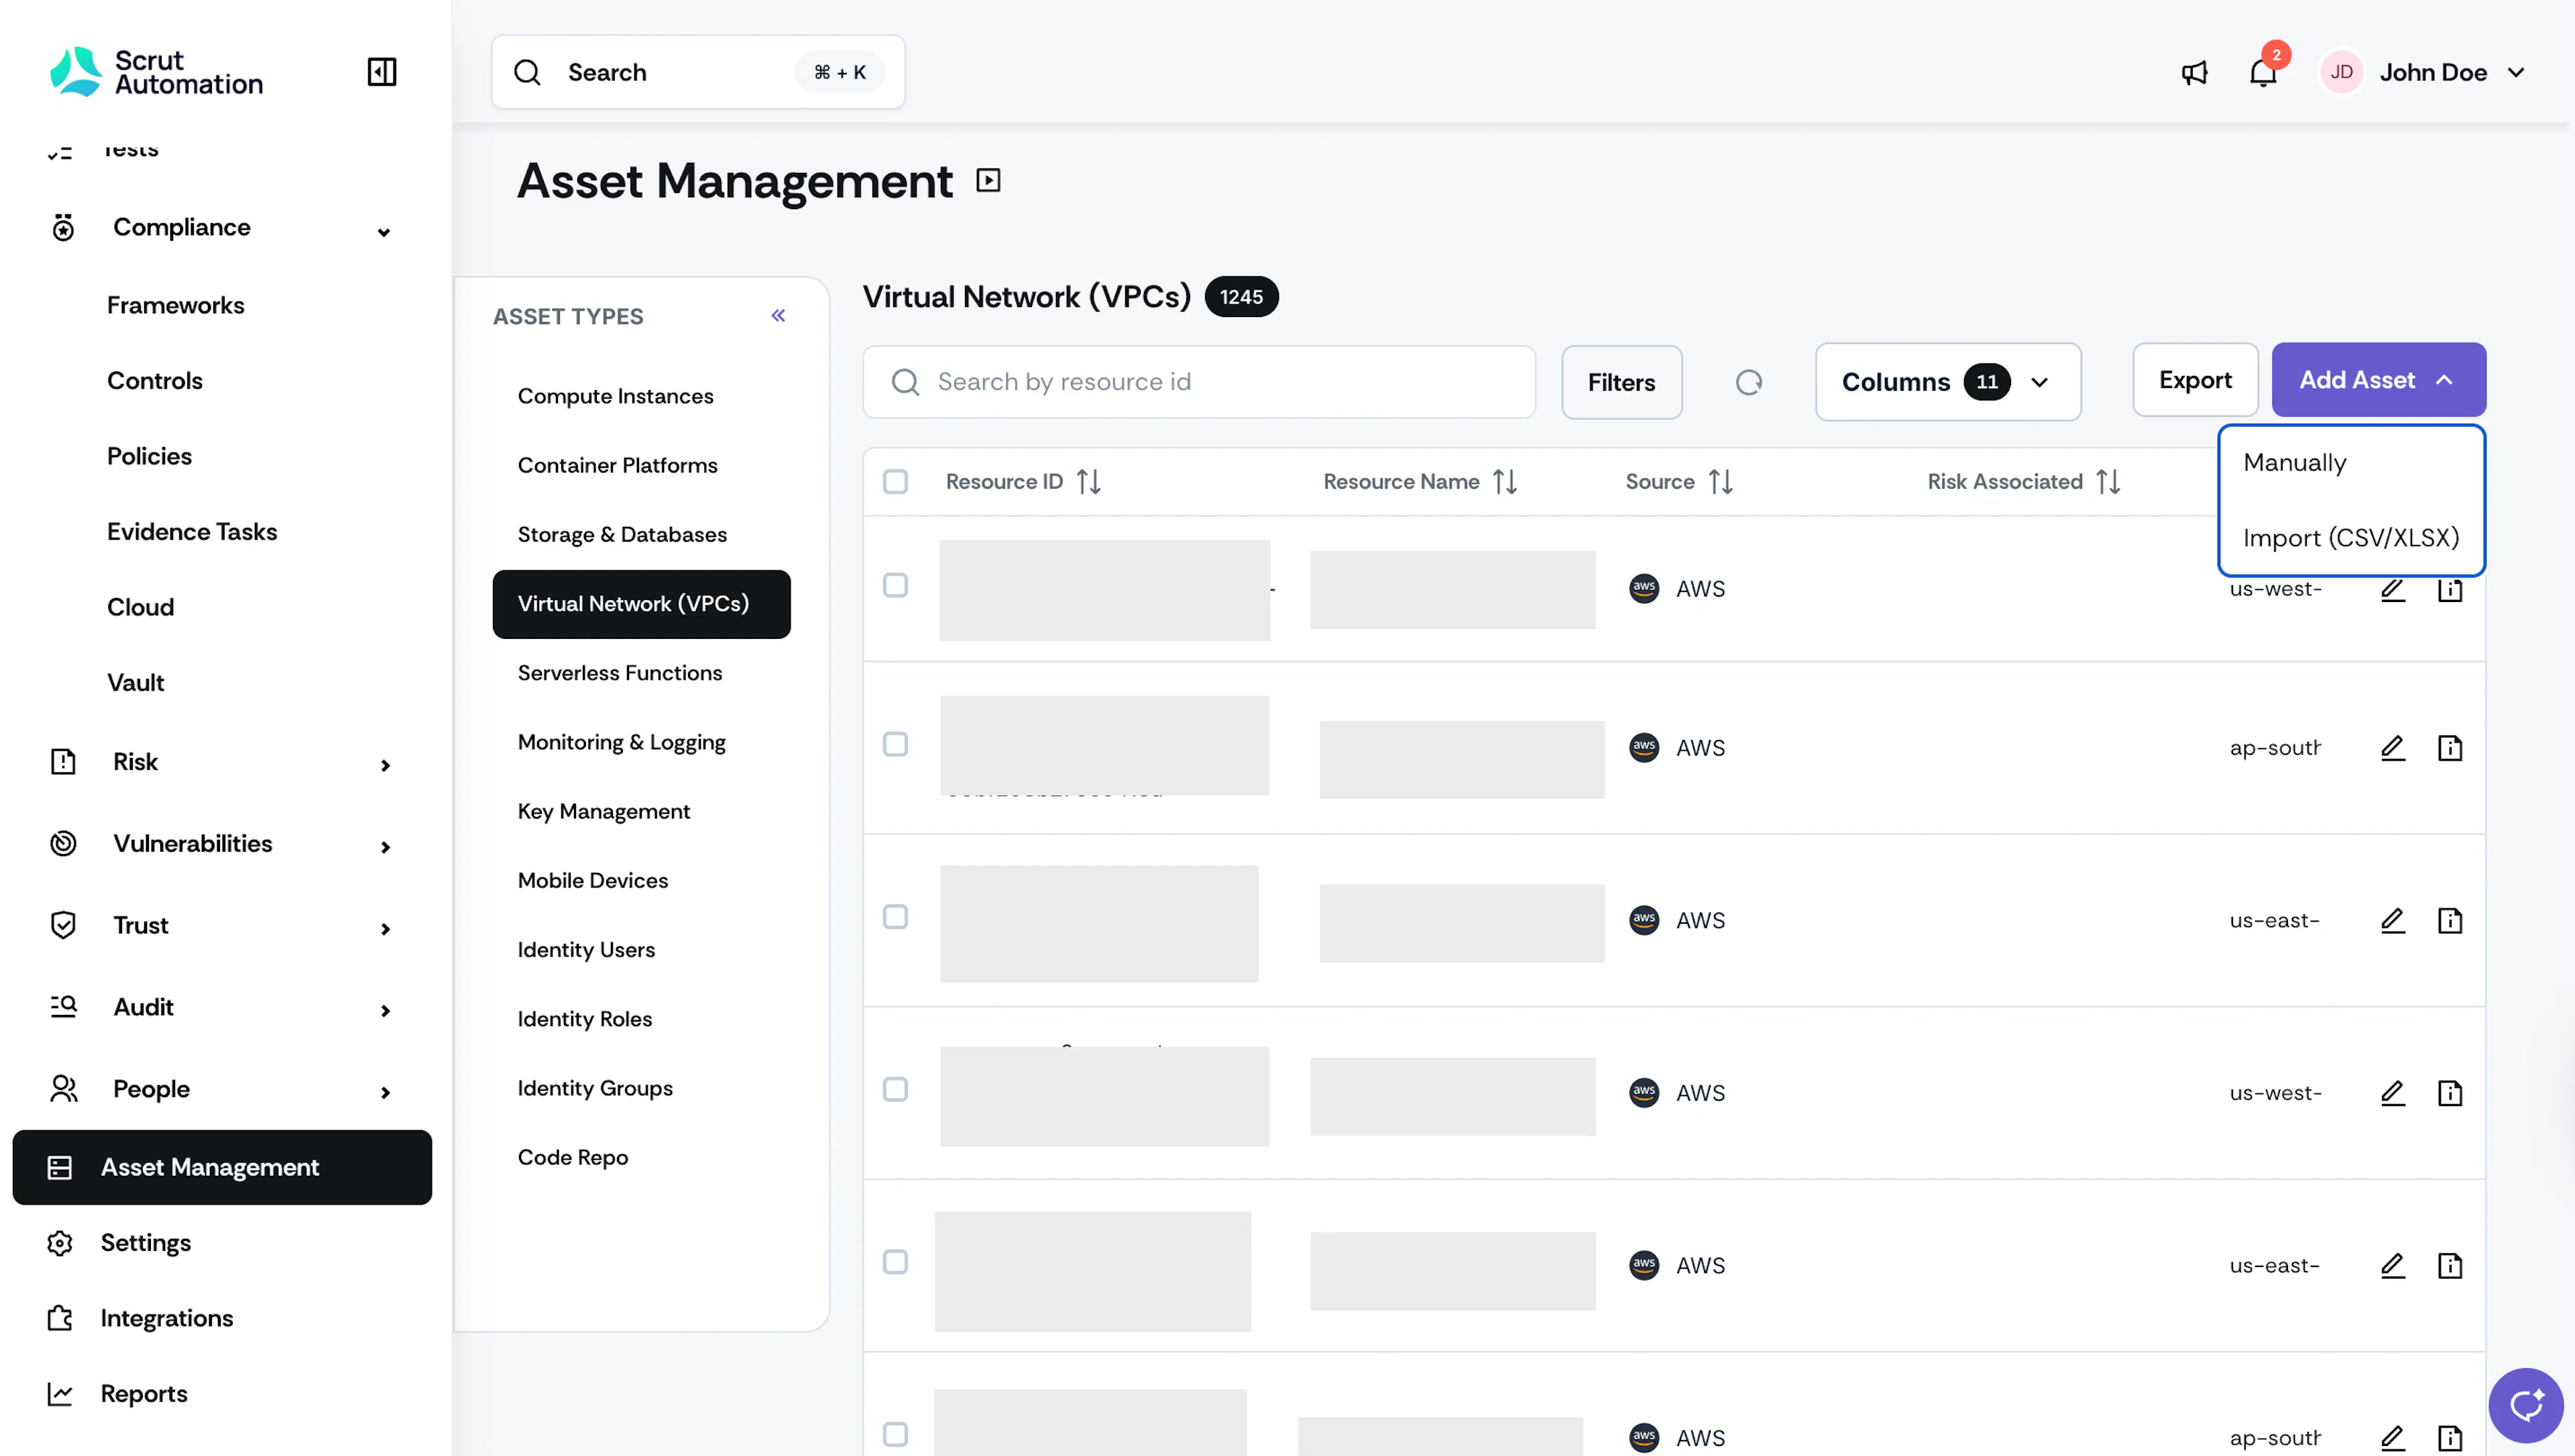
Click the Add Asset button, then select Manually from the dropdown menu.
-
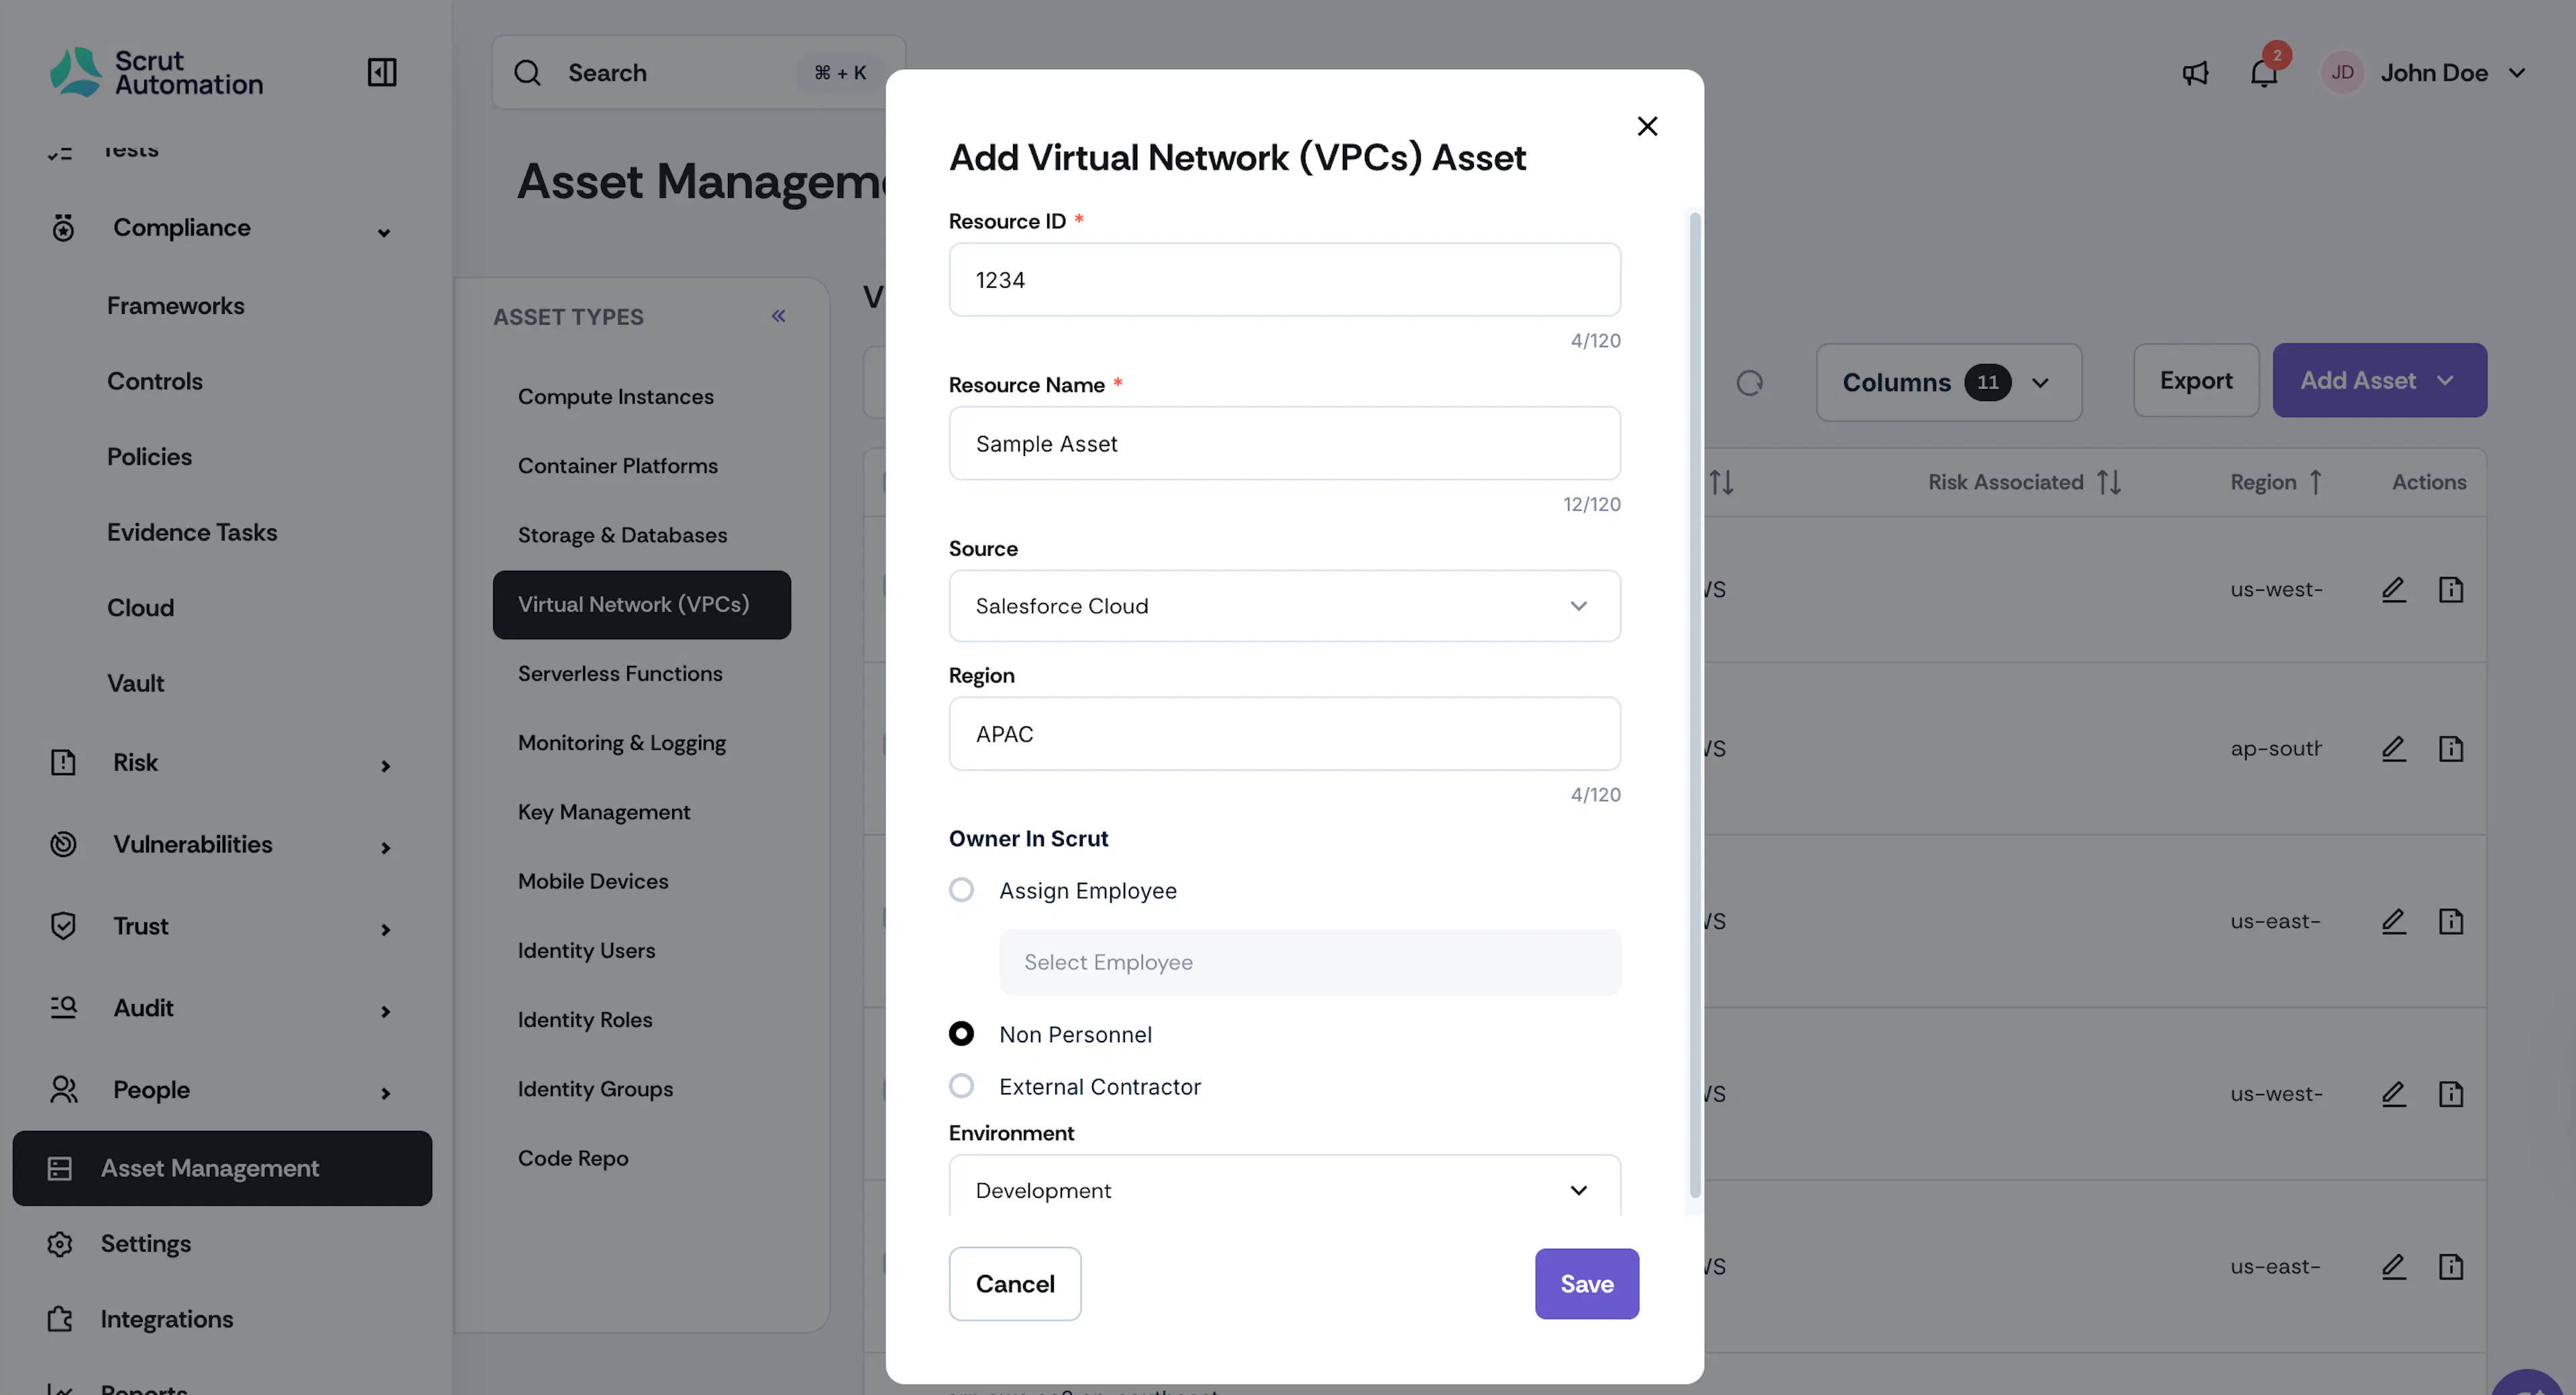
Enter the Asset information:
-
Required Fields
- Resource Name*: Enter a descriptive name for the asset
- Resource ID*: Enter a unique identifier for the asset
-
Optional Fields
-
Source: Select the application or system this asset originates from. Choose from existing sources in the dropdown or create a new source by clicking Add Source in the dropdown.
-
Region: Enter the geographical region where the asset is located or hosted.
-
Owner: Assign responsibility for this asset by selecting one of the following:
- Assign Employee: Choose a team member from the dropdown list
- Non-Personnel: Select if the asset belongs to a system account and is not managed by a specific employee
- External Contractor: Choose if the asset is managed by an external party
-
Environment: Specify the operational environment:
- Development: For assets in development/testing phases
- Test: For assets in quality assurance or staging
- Production: For live, customer-facing assets
-
-
-
Click Save to add the asset to your inventory.
Scrut will add the asset to the corresponding type in the asset management module.
Bulk Import Assets
Use the bulk import feature to add multiple assets at once by uploading a CSV or XLSX file. Upload your asset inventory and Scrut will automatically format your data and guide you through the field mapping process.
File Requirements
Your import file must include these required columns:
- Resource ID: A unique identifier for each asset
- Resource Name: A descriptive name for each asset
Optional columns can include: Source, Region, Owner, Environment, any other custom fields relevant to your asset type.
How To Bulk Import Assets
-
Sign in to Scrut and click Asset Management on the left navigation panel.
-
In the left panel under Asset Types, click the specific type of asset you want to add, such as Compute Instances, Container Platforms, Code Repos, Virtual Networks, etc.
-
Click the Add Asset button, then select Import (CSV/XLSX) from the dropdown menu.
-
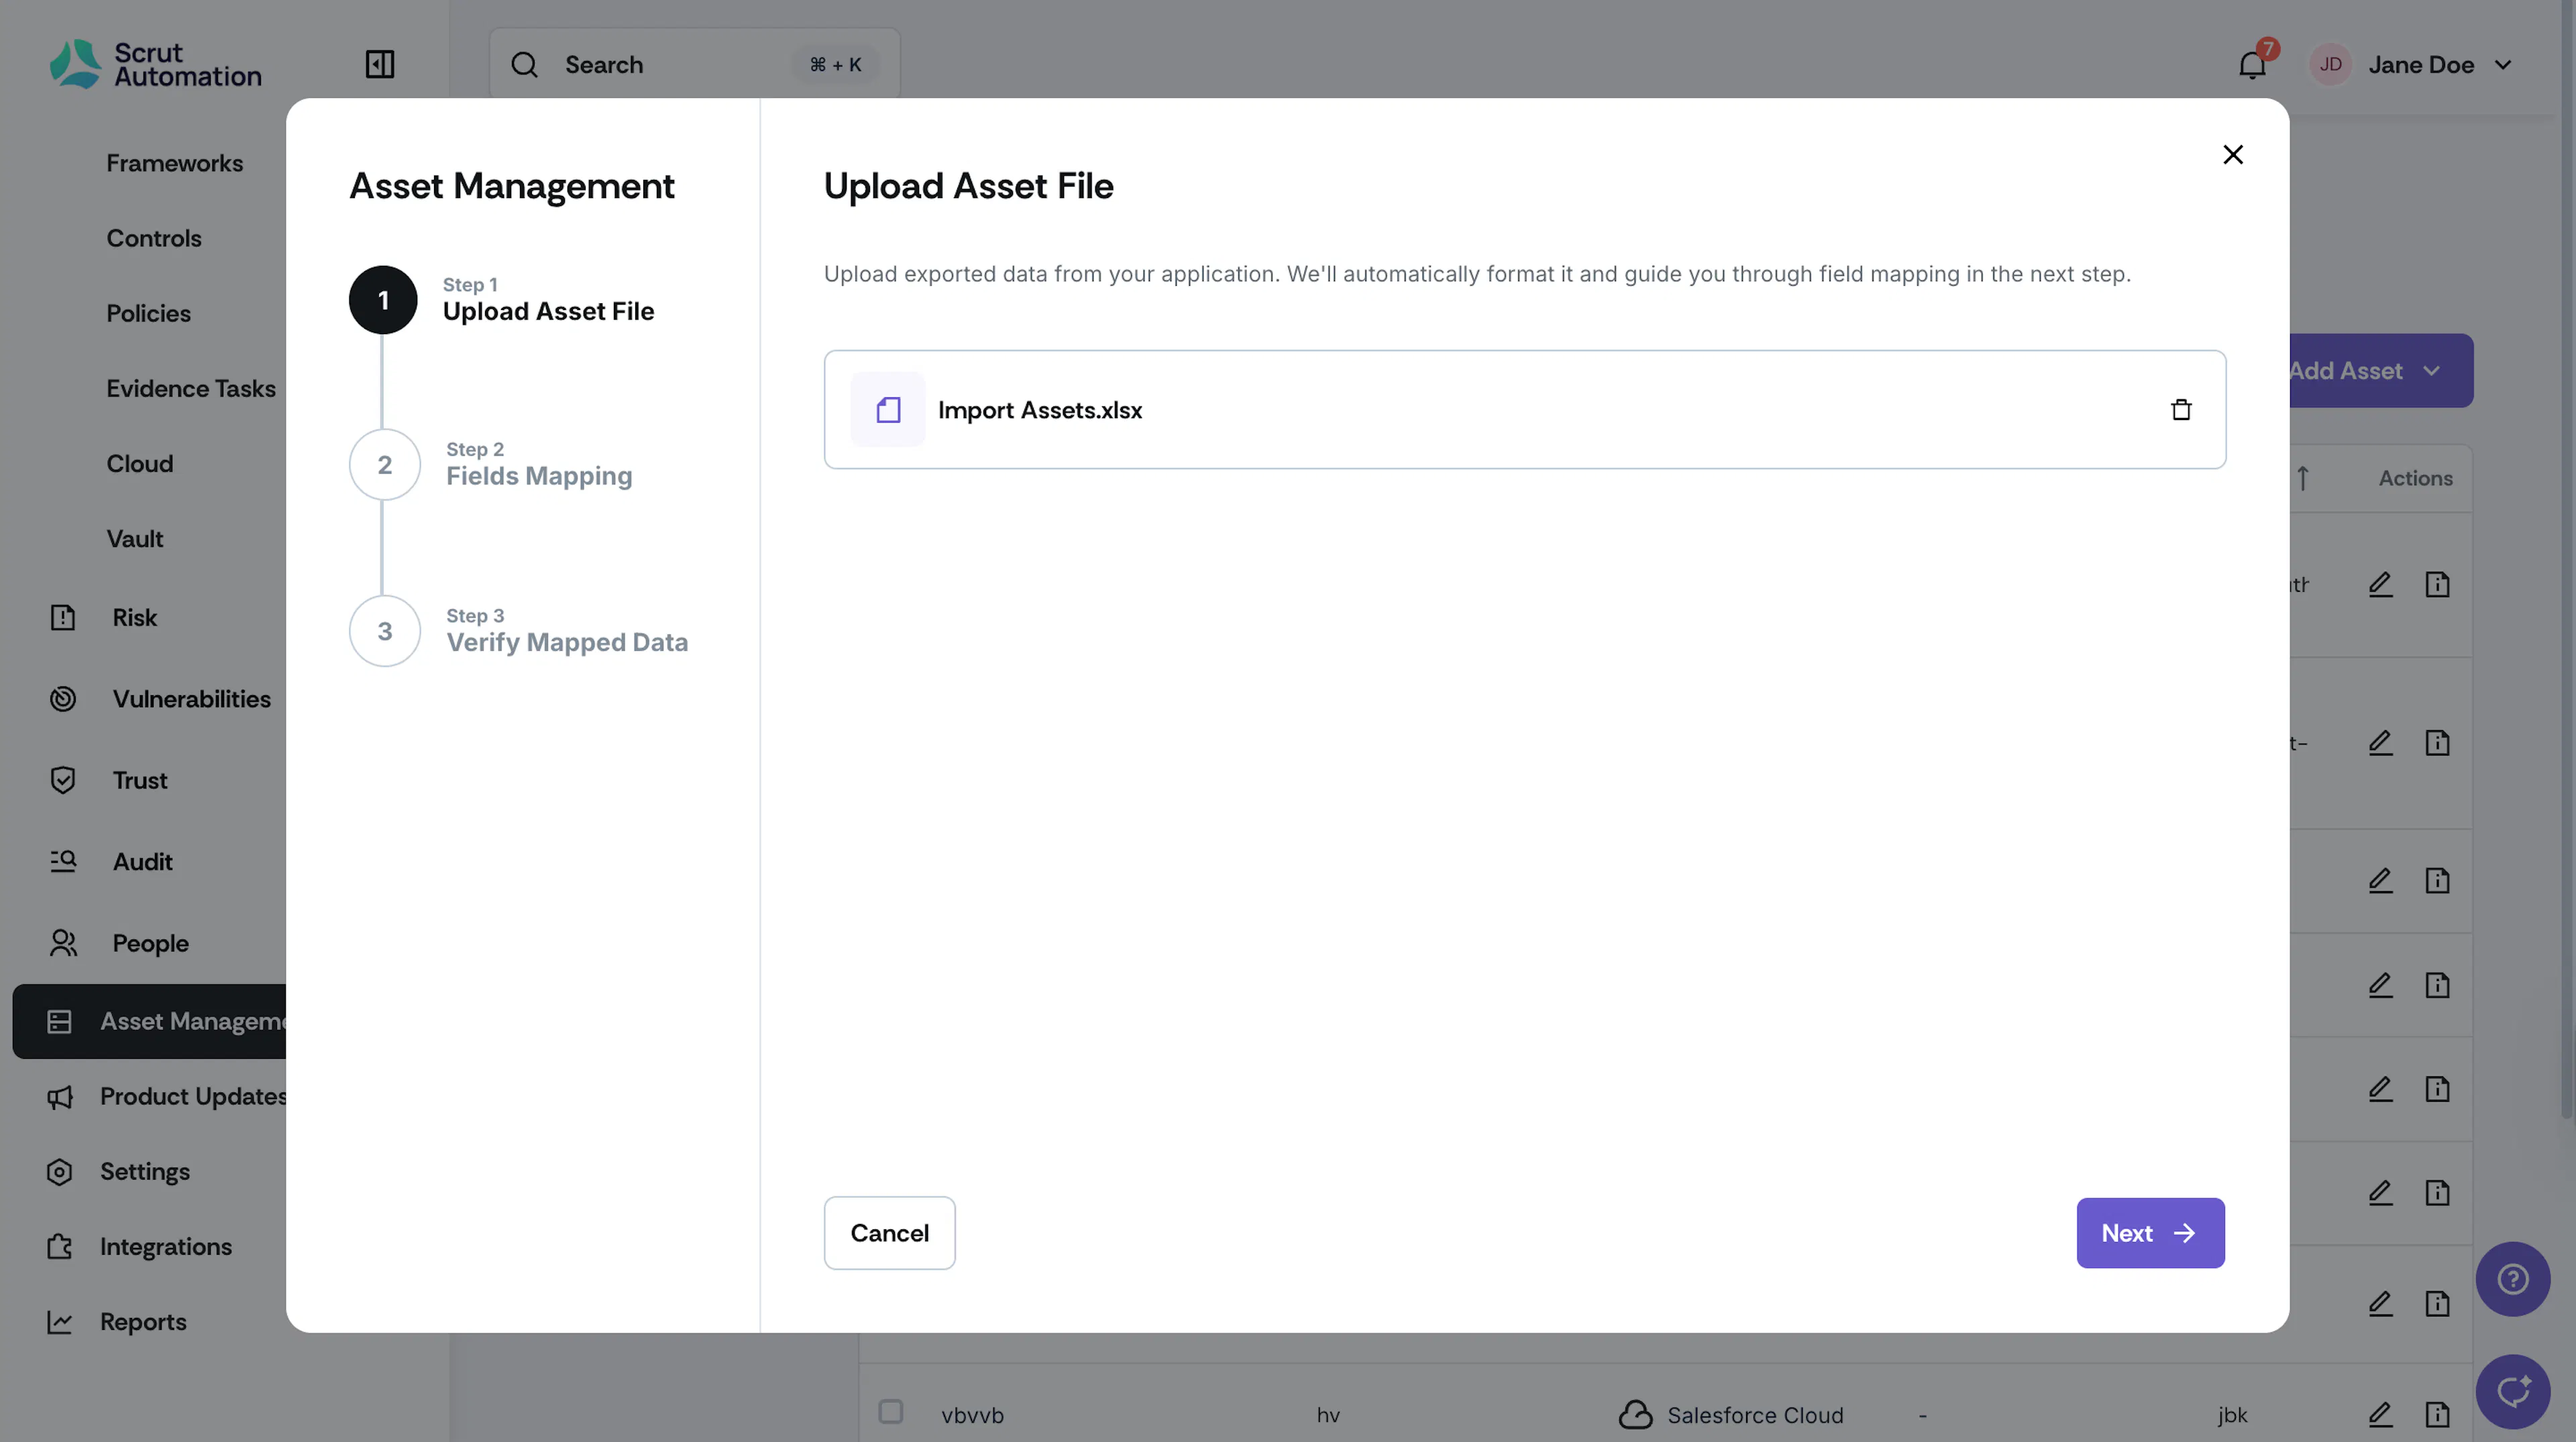
Upload the asset file in CSV or XLSX format. Make sure to include the required fields Resource ID and Resource Name.
-
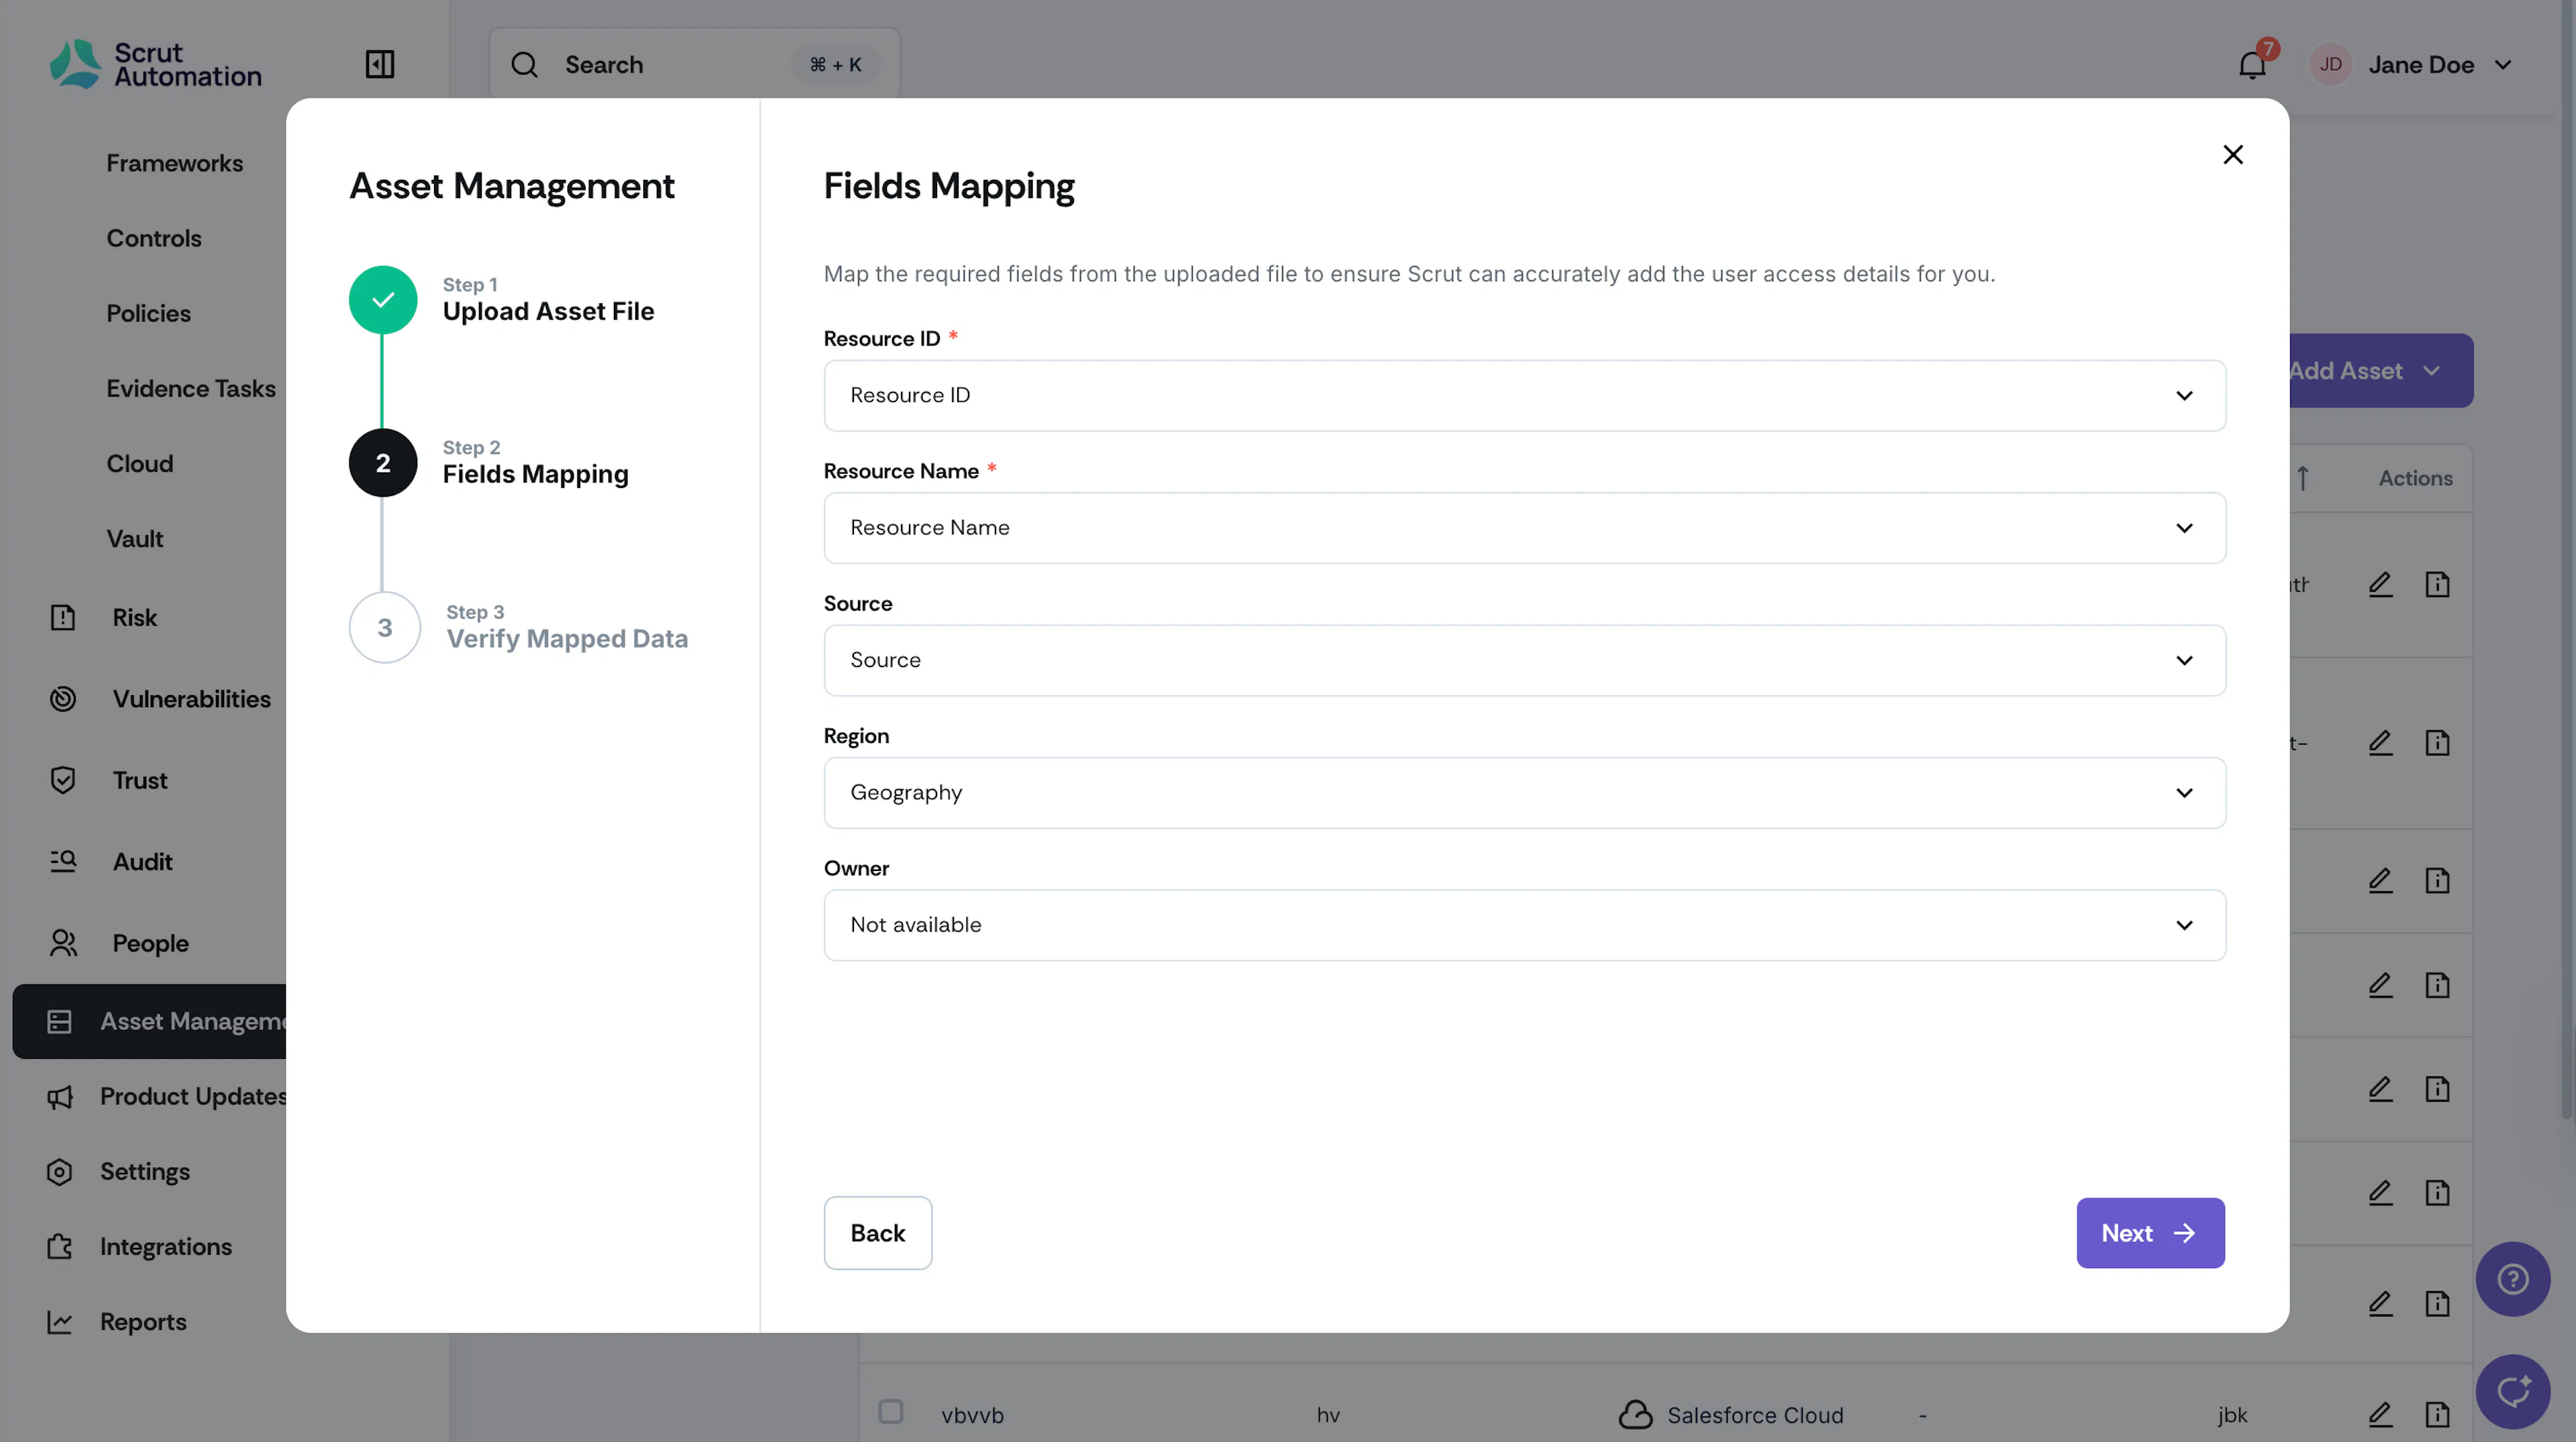
Map your fields: Scrut will display your file's columns and ask you to map them to Scrut's standard fields. For each column in your file:
-
Review the column name from your file (displayed on the left)
-
Select the corresponding Scrut field from the dropdown menu (displayed on the right)
-
If a field from your file doesn't match any Scrut field, select Not Available
-
-
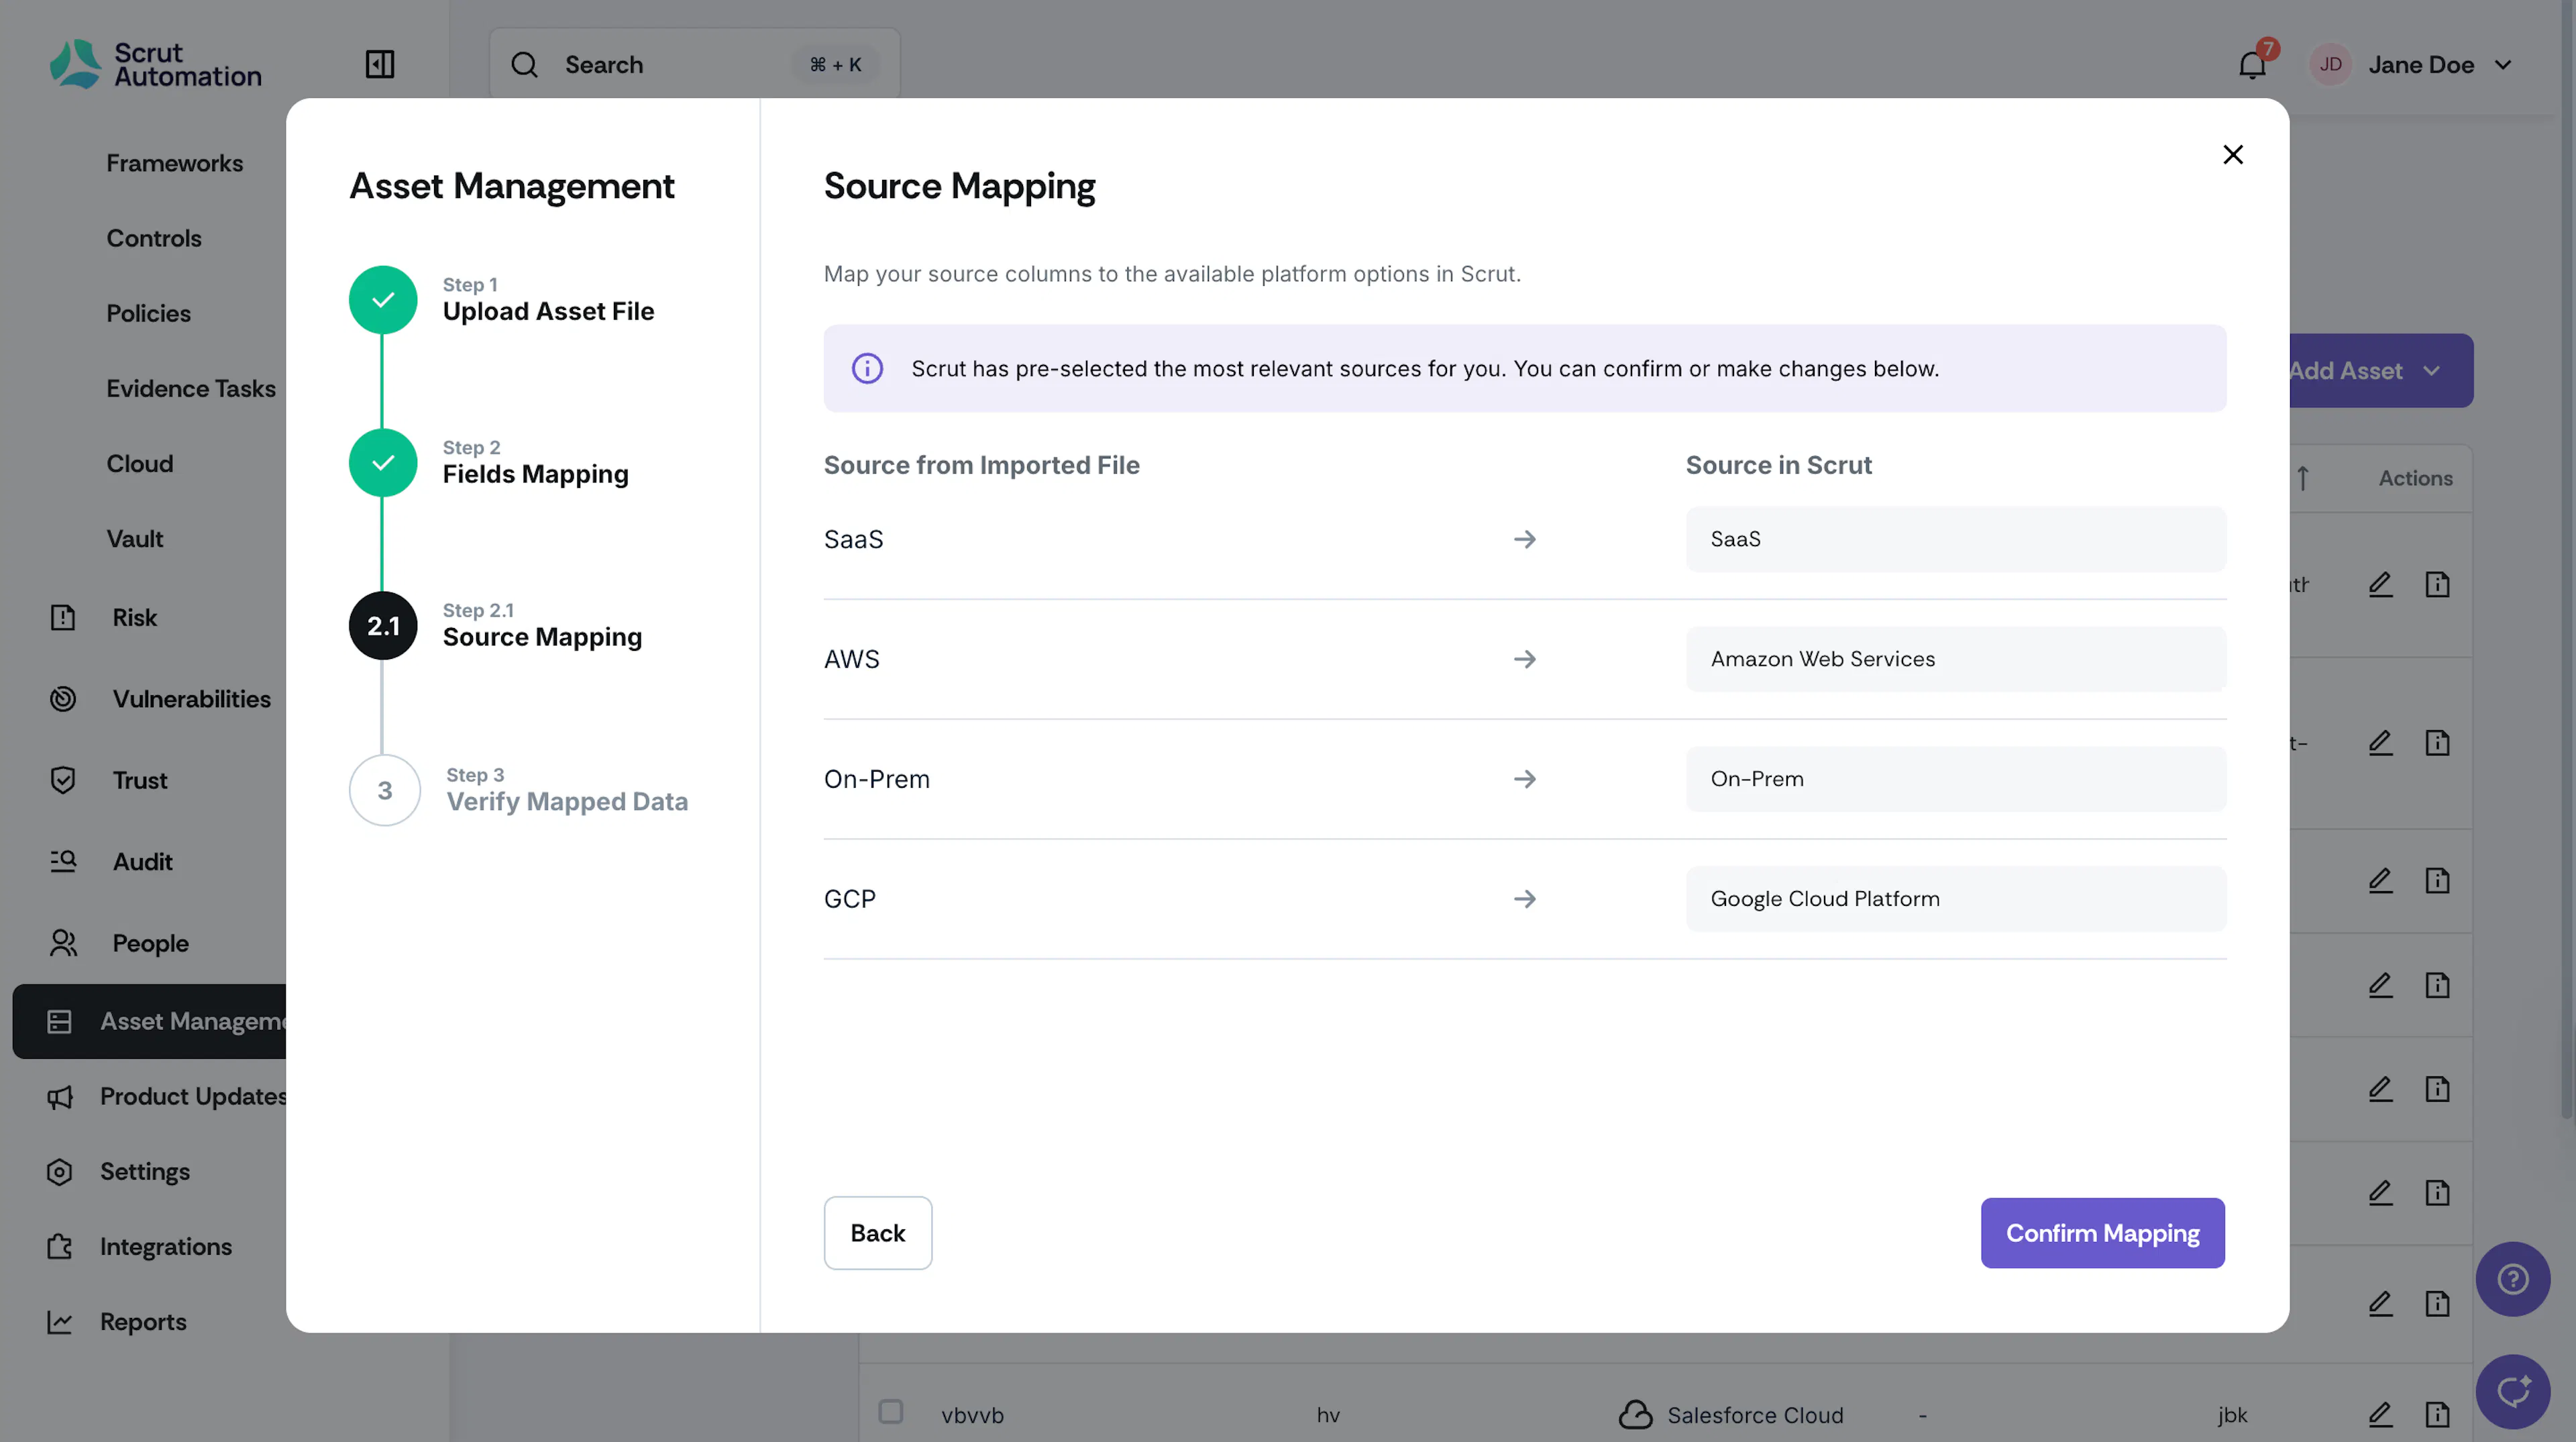
Map additional fields: Continue mapping all relevant fields.
-
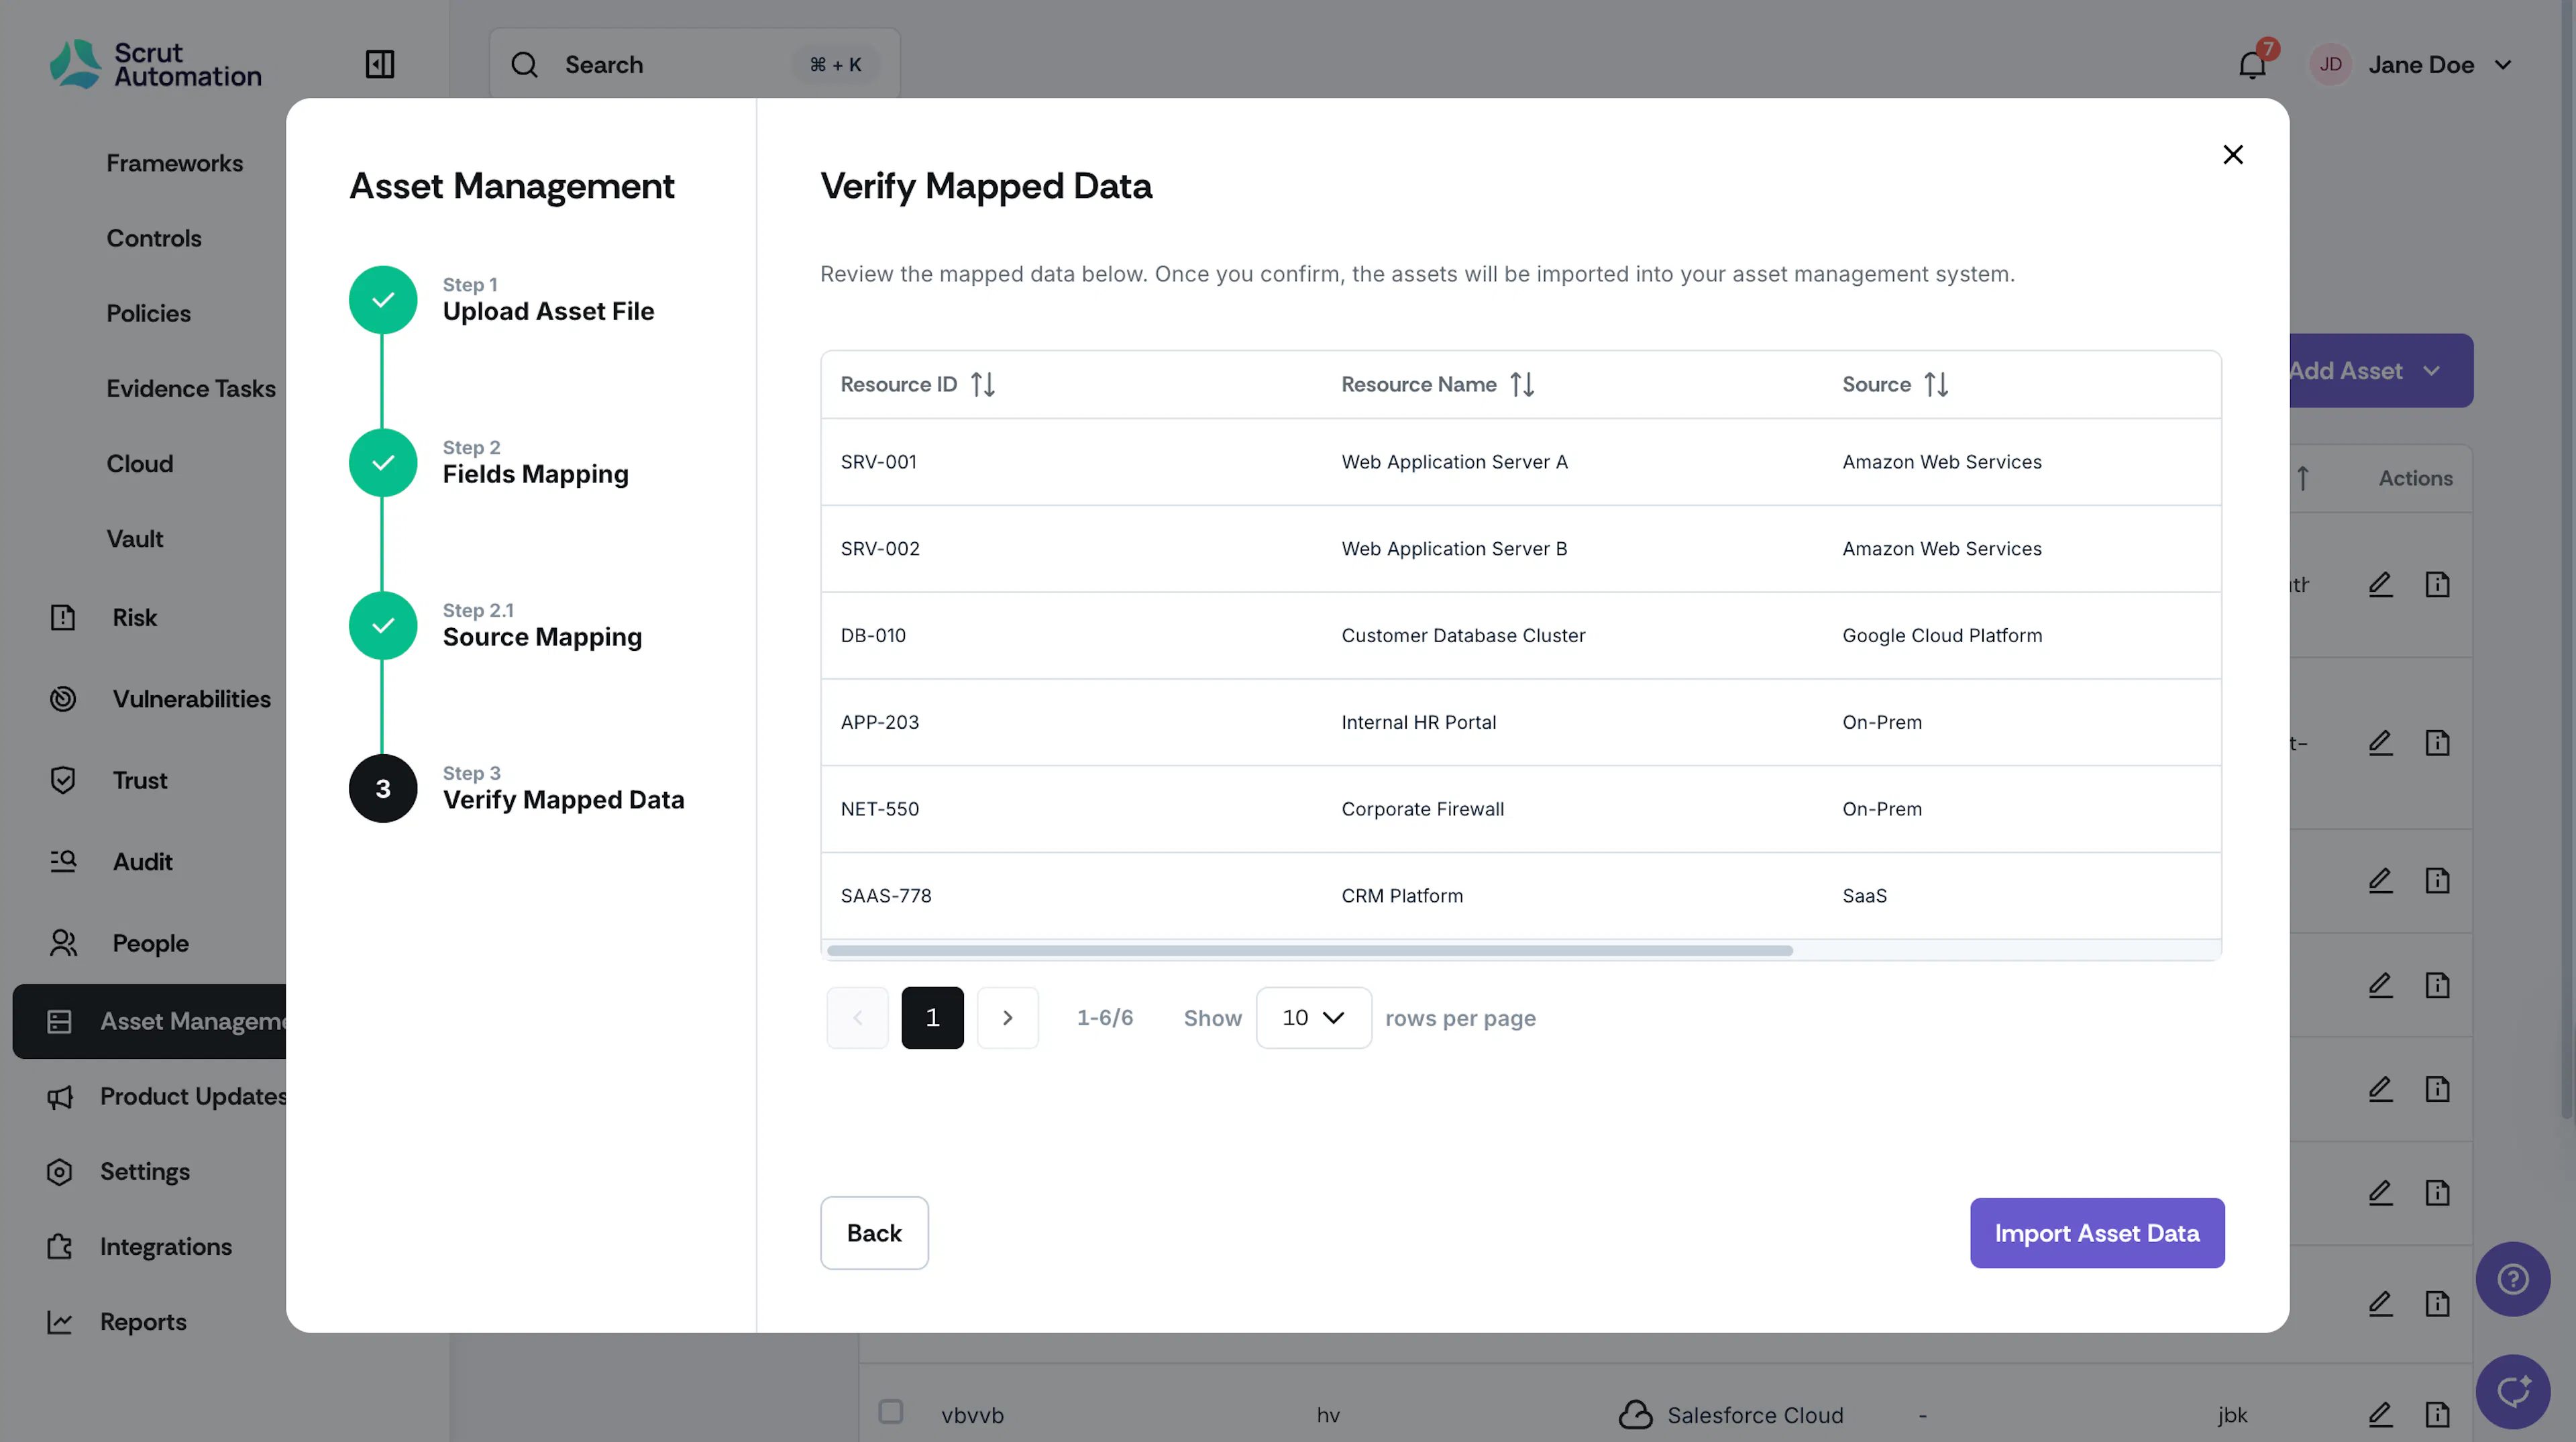
Review your mappings and click Import Asset to begin the import process.
-
Scrut will process your file and display a success or failure notification.
-
Download Error File to get a report of the issues. Review it to identify problems (e.g., missing required fields, invalid data formats, duplicate IDs, etc.)

-
Repeat from Step 3 after making the requisite changes.
What Next?
- All successfully imported assets or manually added assets appear in the corresponding asset type category
- Assets are available for compliance tracking and reporting
- You can edit individual assets and take actions on them as needed
Pro Tips!
This guide walks you through the different actions you can perform on assets in Scrut.