

Perform Actions on Assets
You can perform the following actions on assets added to the Asset Management module:
1: Assign an Owner
-
Go to Asset Management, and click on your preferred asset type.
-
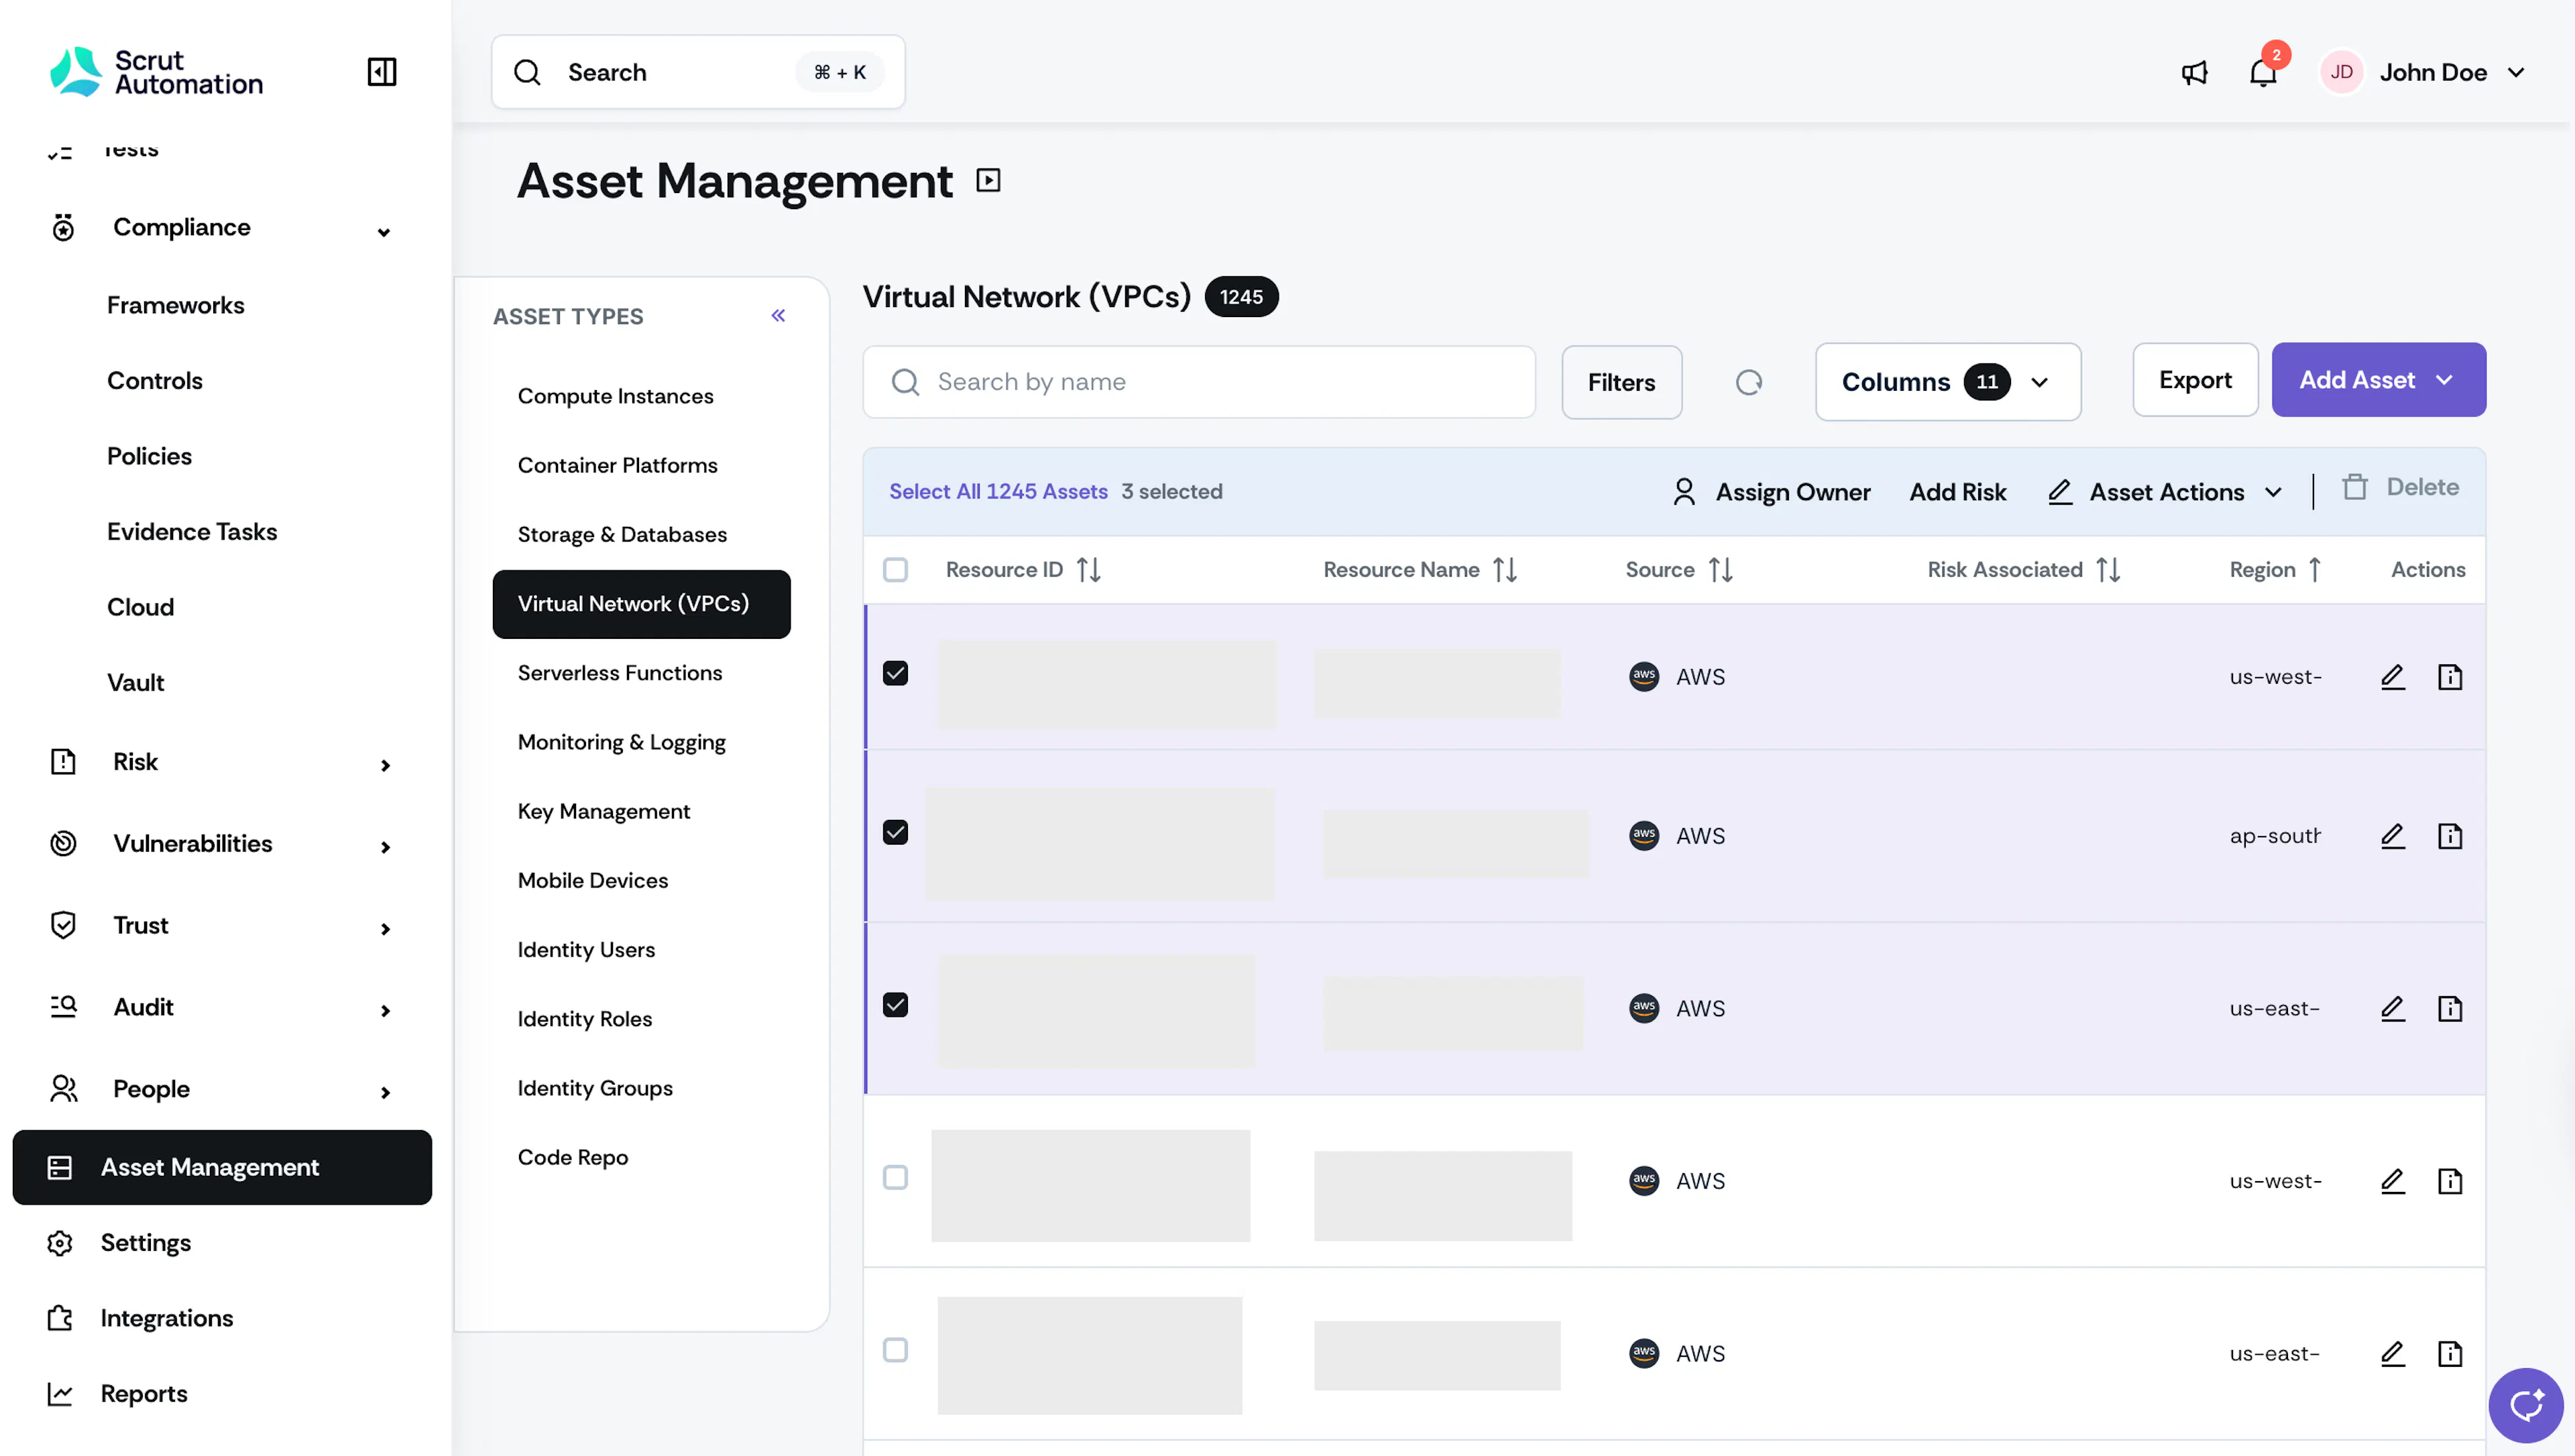
Select one or more assets for which you want to bulk assign an owner and click Assign Owner.
-
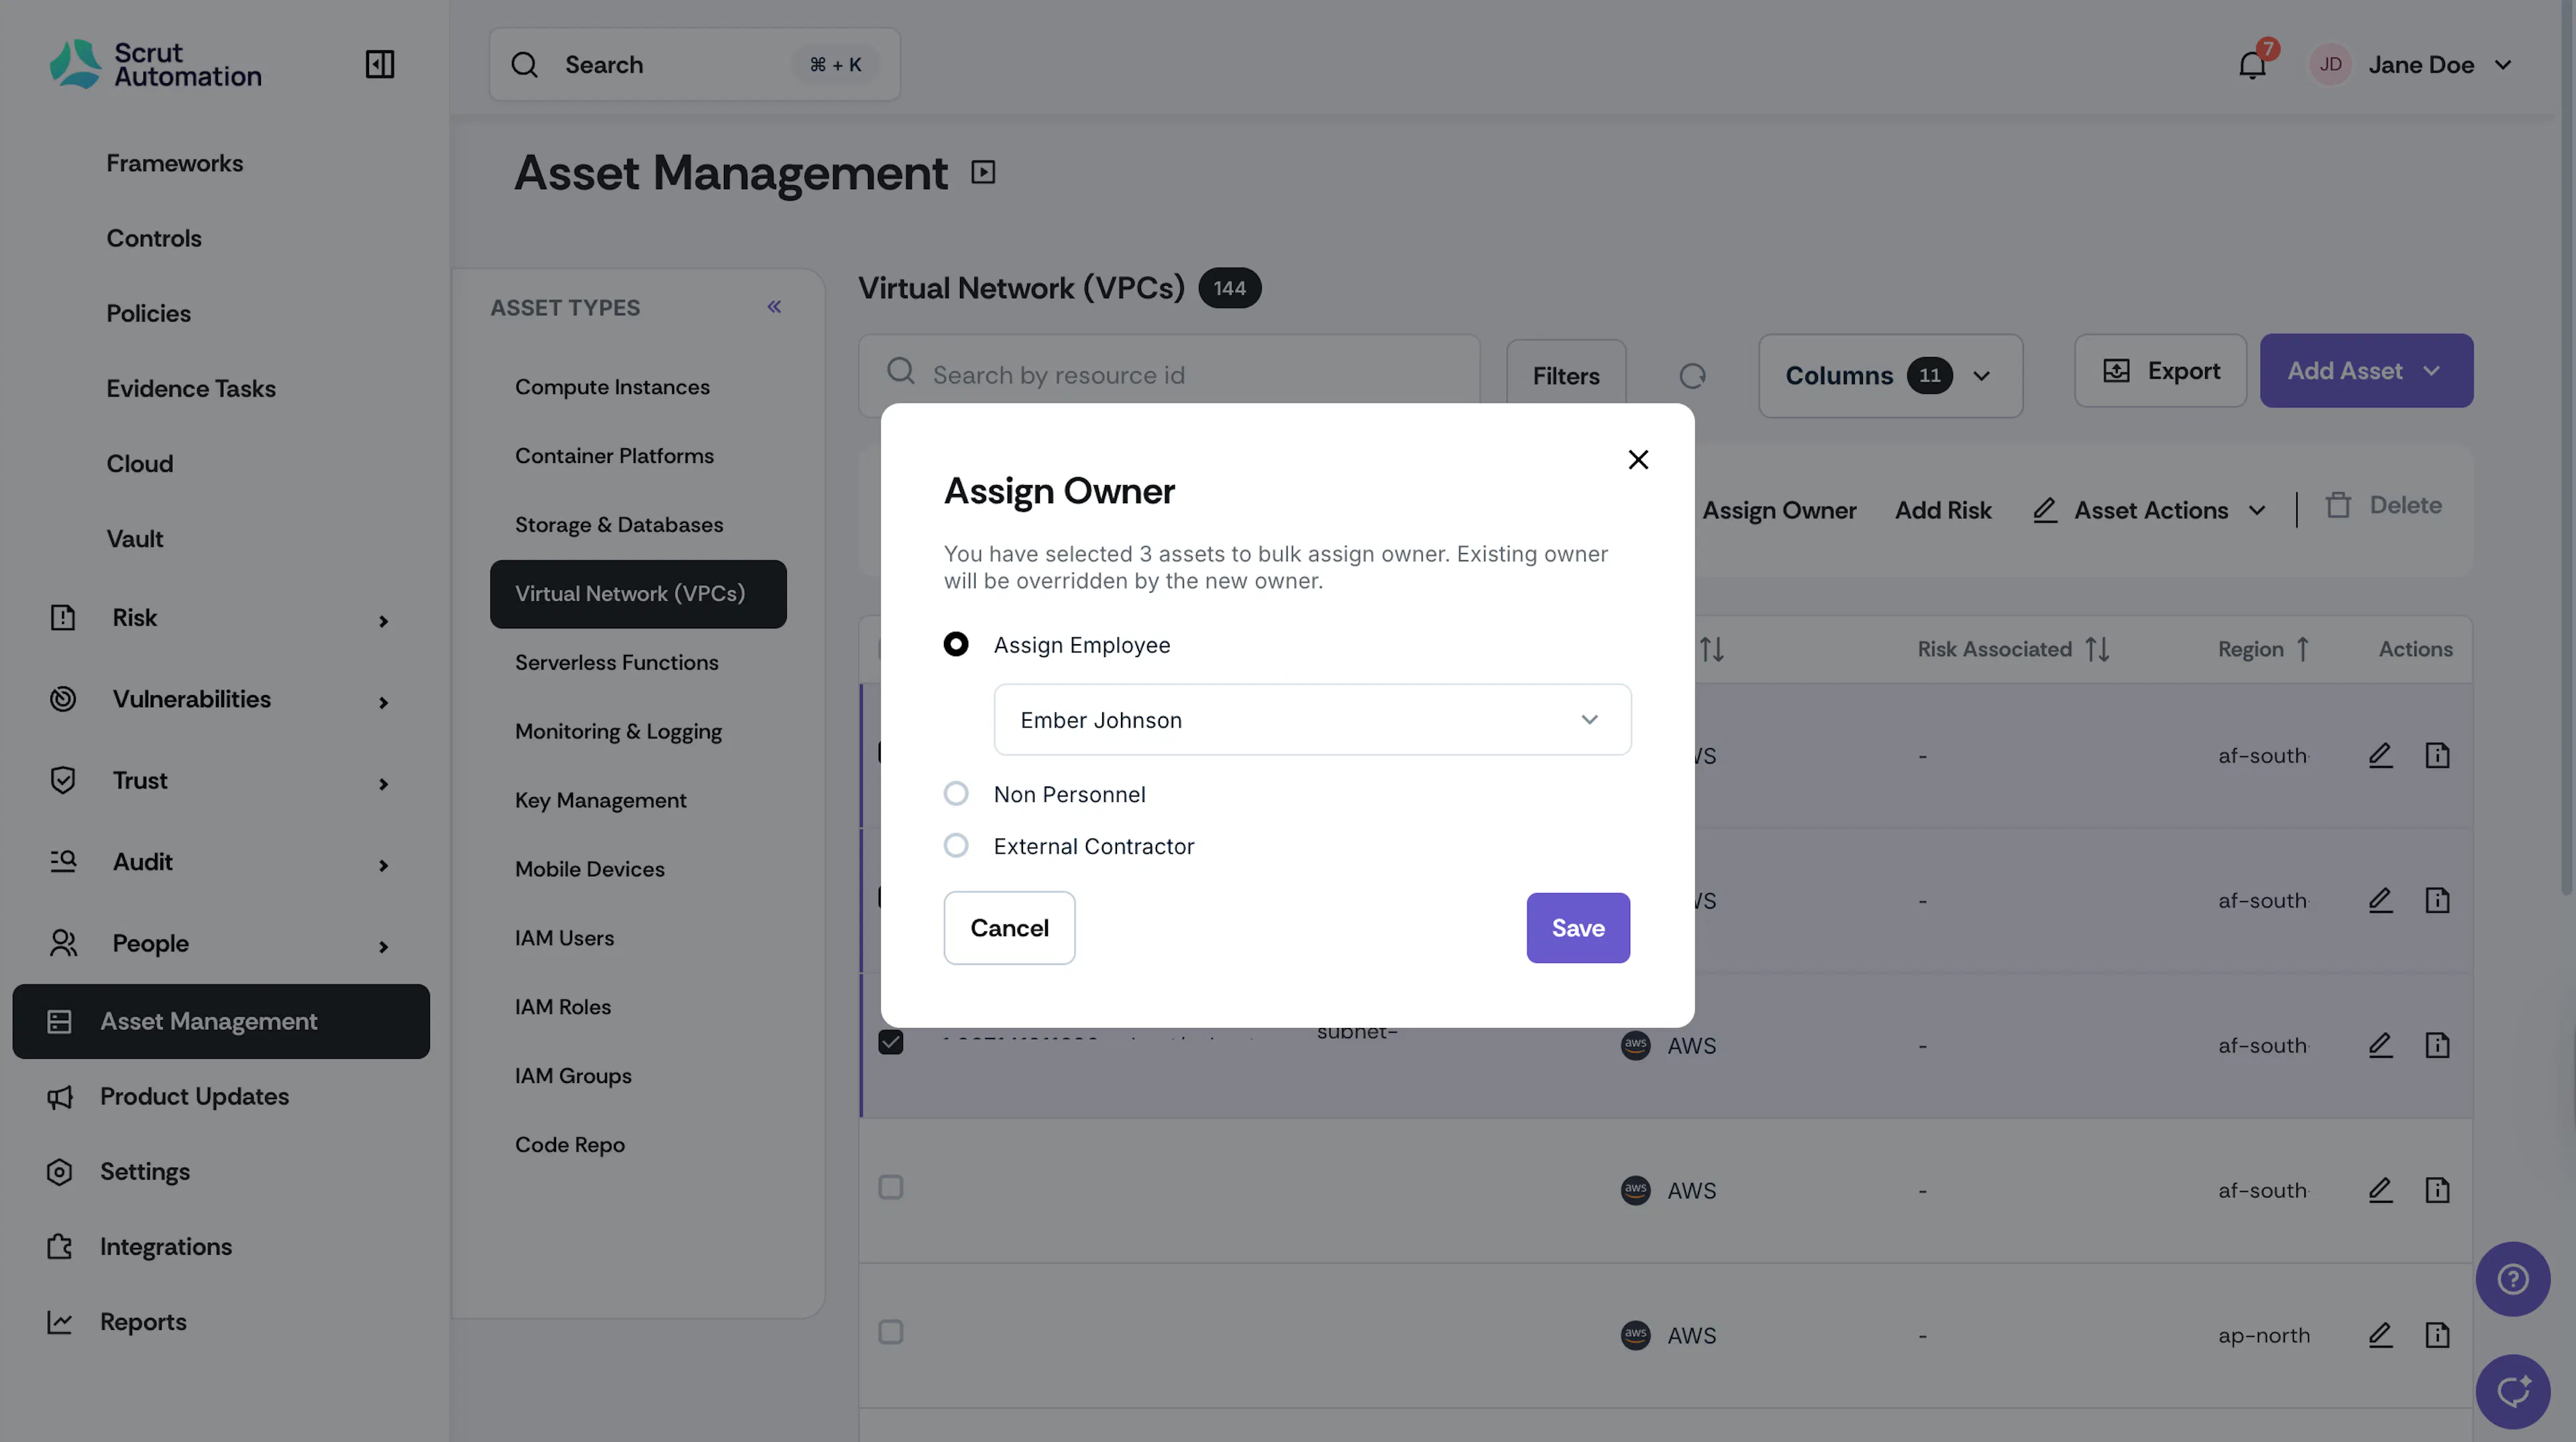
Choose your desired owner.
- Assign Employee: Choose a team member from the dropdown list
- Non-Personnel: Select if the asset belongs to a system account and is not managed by a specific employee
- External Contractor: Choose if the asset is managed by an external party
-
Click Save.
-
Scrut will override the existing owner and assign the new owner.
2: Ignore
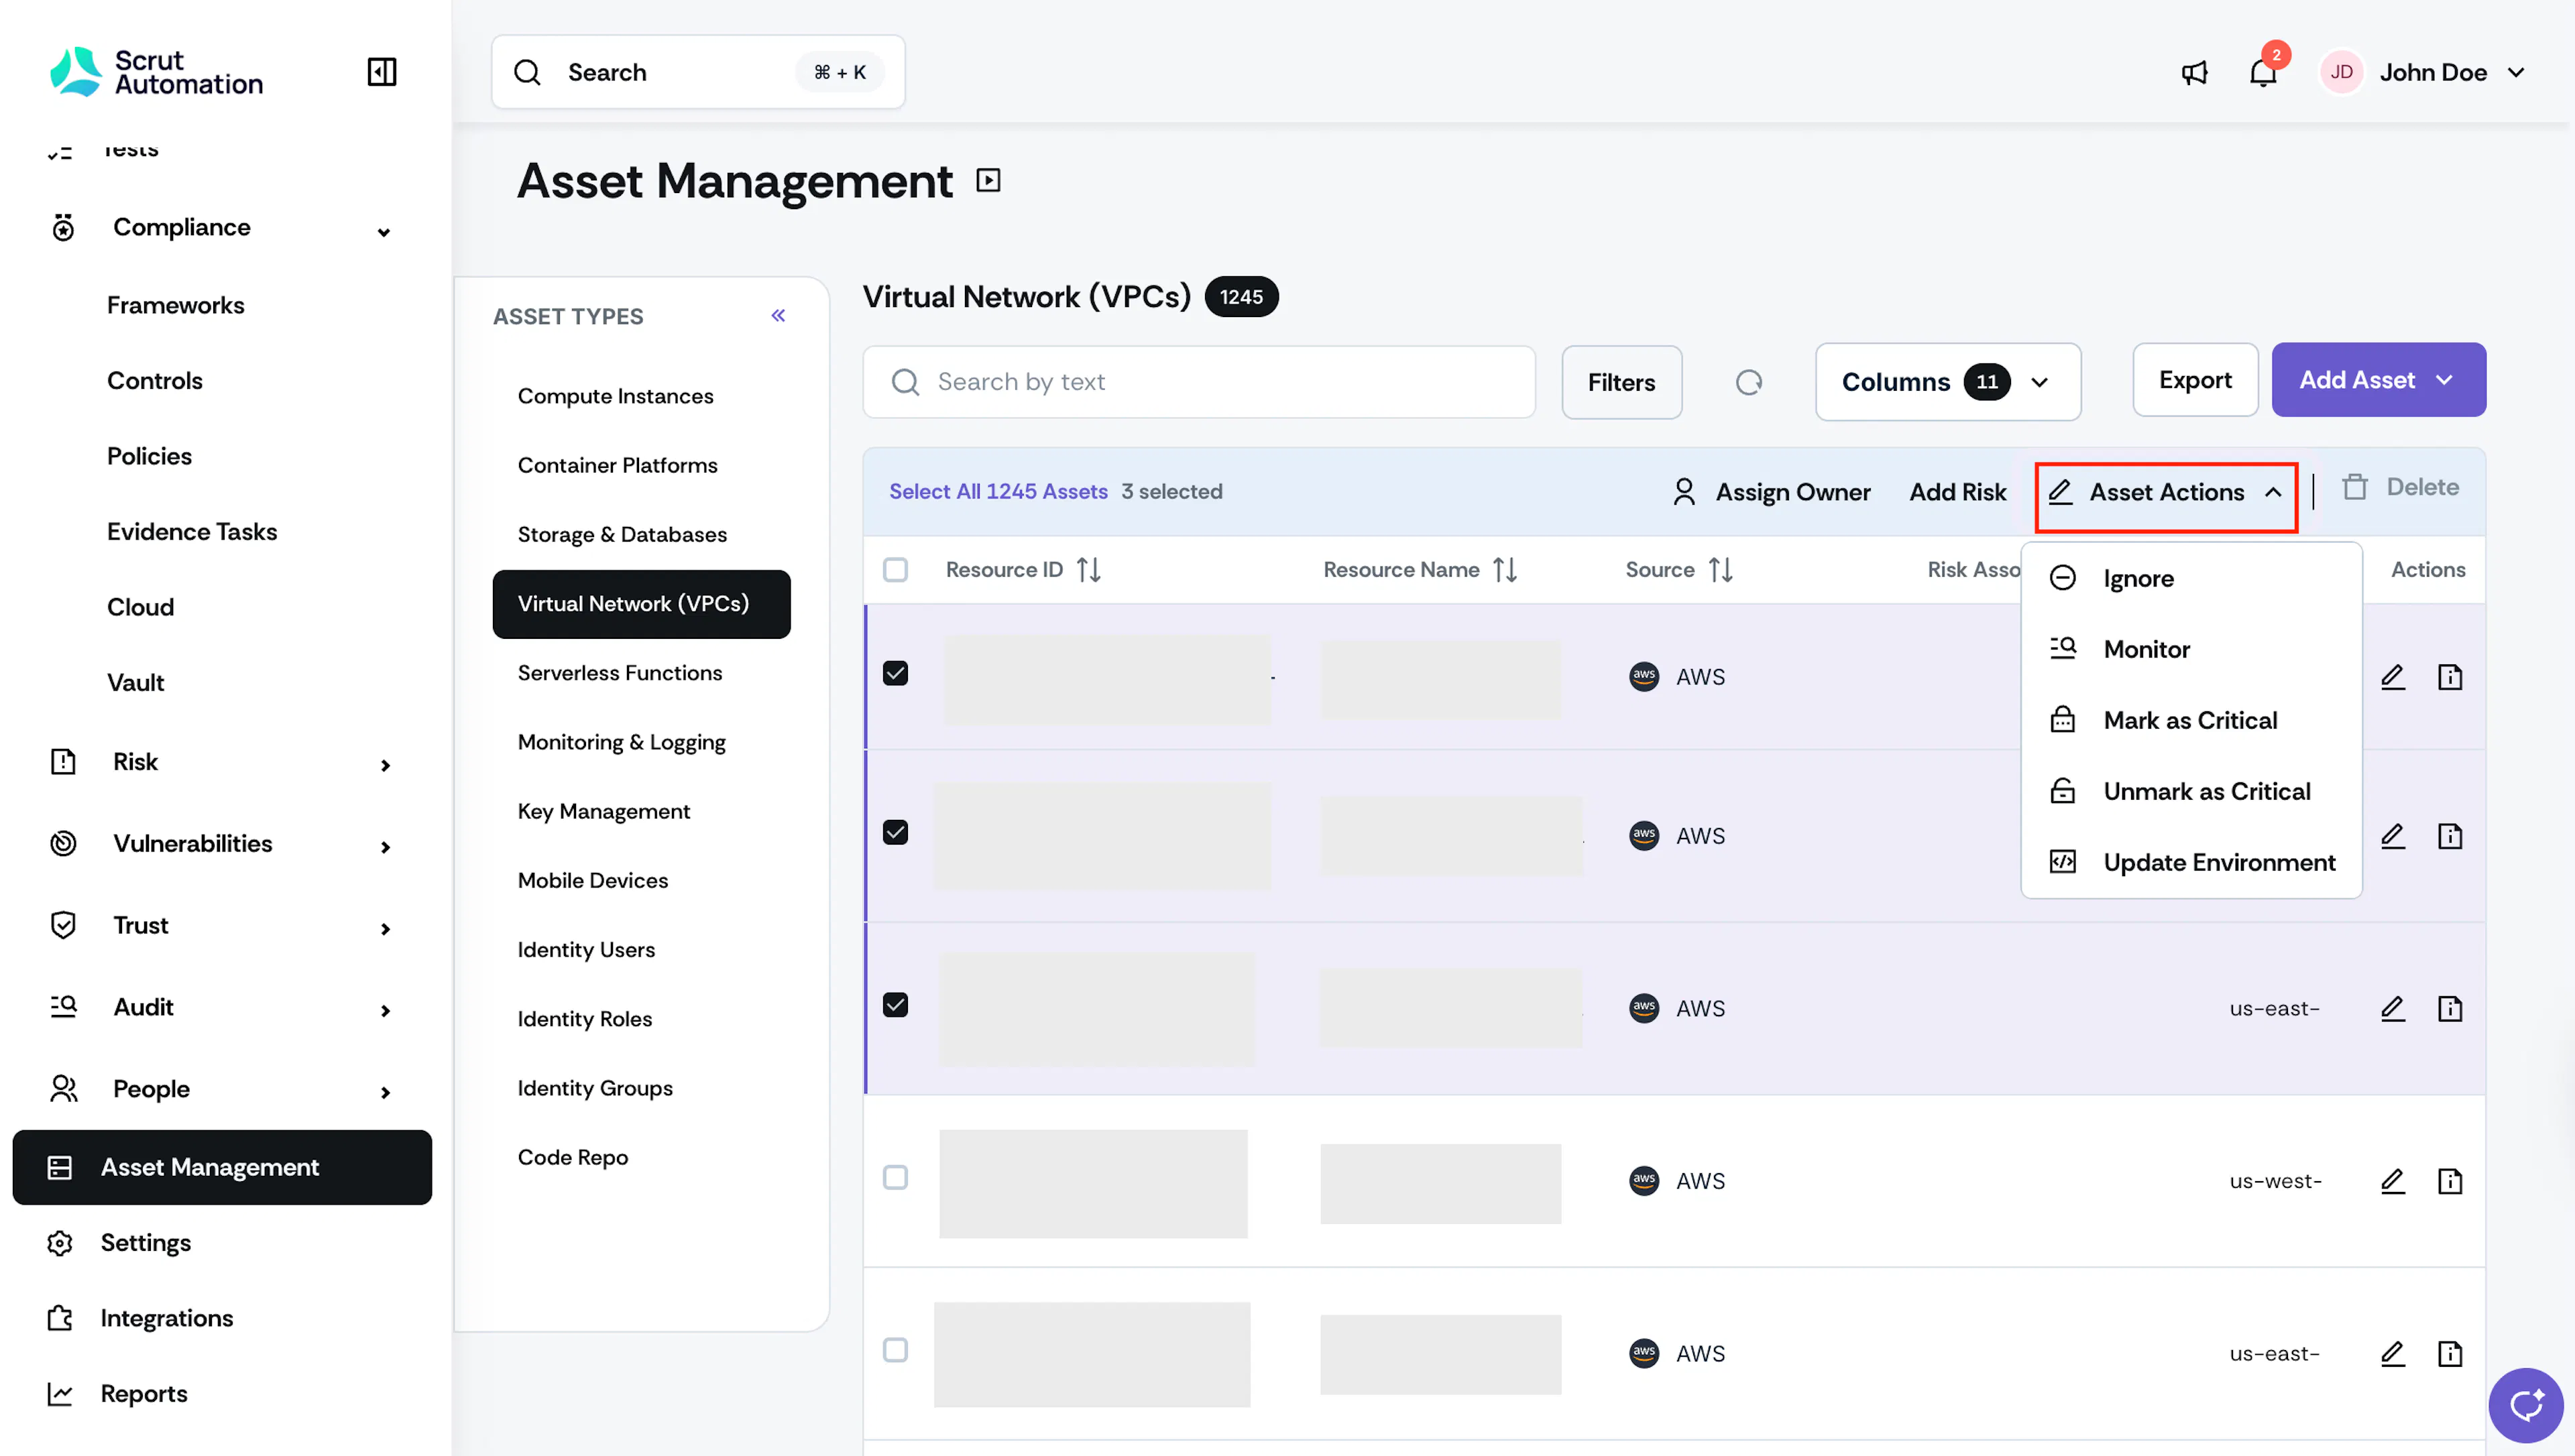
If you no longer want to include an asset in your compliance and security requirements, you can mark it as ignored. Go to Asset Management, and click on your preferred asset type. Select one or more assets, click Asset Actions, and choose Ignore. Provide a valid justification for ignoring the assets and click Save.
3: Monitor
Go to Asset Management, and click on your preferred asset type. Select one or more assets, click Asset Actions, and choose Monitor. Confirm your action. Scrut will mark the selected assets as monitored.
4: Mark as Critical
What are Critical Assets?
Critical assets are those that store or process sensitive data requiring enhanced security and compliance tracking. A few examples include:
- Personally Identifiable Information (PII): Customer names, addresses, social security numbers, etc.
- Financial records: Payment data, bank account information, credit card details
- Operational data: Systems essential to business operations, proprietary algorithms, trade secrets
- Protected health information (PHI): Medical records and health-related data
- Authentication credentials: Passwords, API keys, tokens, certificates
Why Mark Assets as Critical?
Marking assets as critical helps your organization:
- Meet compliance requirements that mandate tracking of sensitive data
- Pass compliance tests that verify proper asset classification
- Maintain audit trails for the handling of regulated information
How to Mark Assets as Critical
- Go to Asset Management and select your preferred asset type
- Select one or more assets from the list
- Click Asset Actions and choose Mark as Critical
- Confirm your action
Scrut will mark the selected assets as critical, enabling them to be tracked for compliance purposes.
5: Unmark as Critical
Go to Asset Management, and click on your preferred asset type. Select one or more assets, click Asset Actions, and choose Unmark as Critical. Confirm your action. Scrut will remove the critical status from the selected assets.
6: Update Environment
-
Go to Asset Management, and click on your preferred asset type.
-
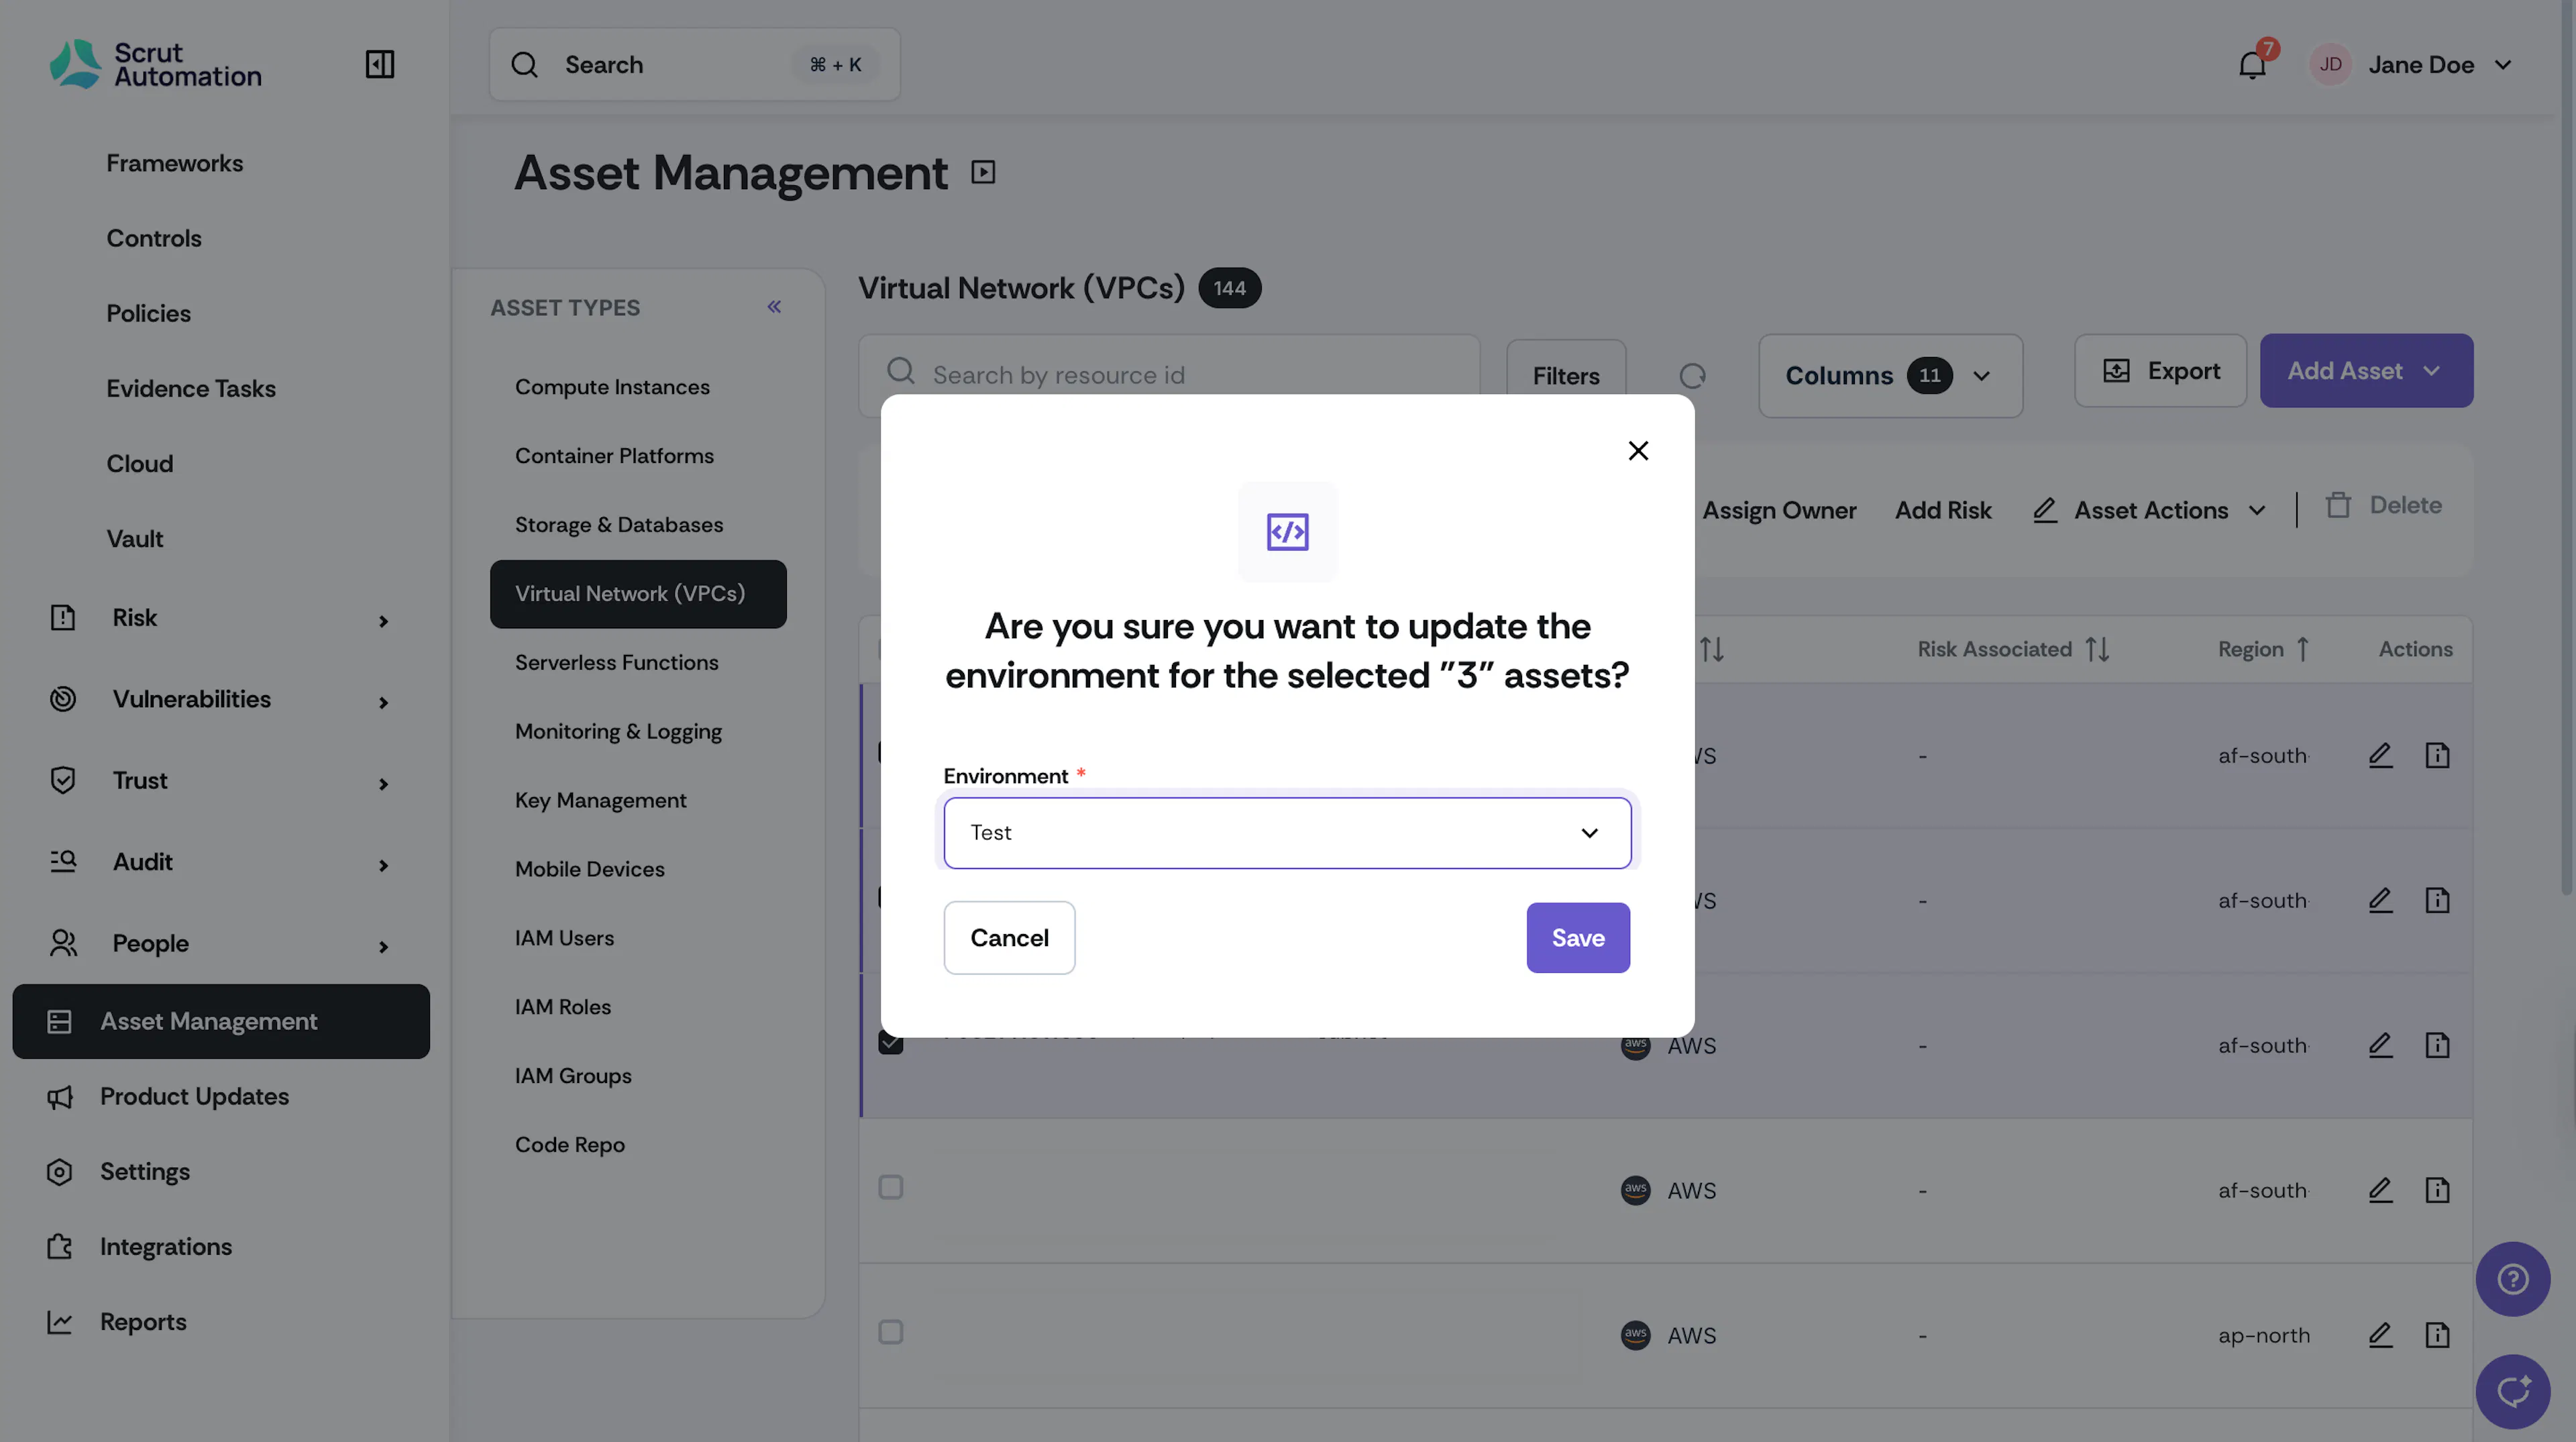
Select one or more assets for which you want to update the environment, and click Asset Actions → Update Environment.
-
Specify the operational environment:
- Development: For assets in development/testing phases
- Test: For assets in quality assurance or staging
- Production: For live, customer-facing assets
-
Click Save. Scrut will override the existing environment details and assign the new environment.
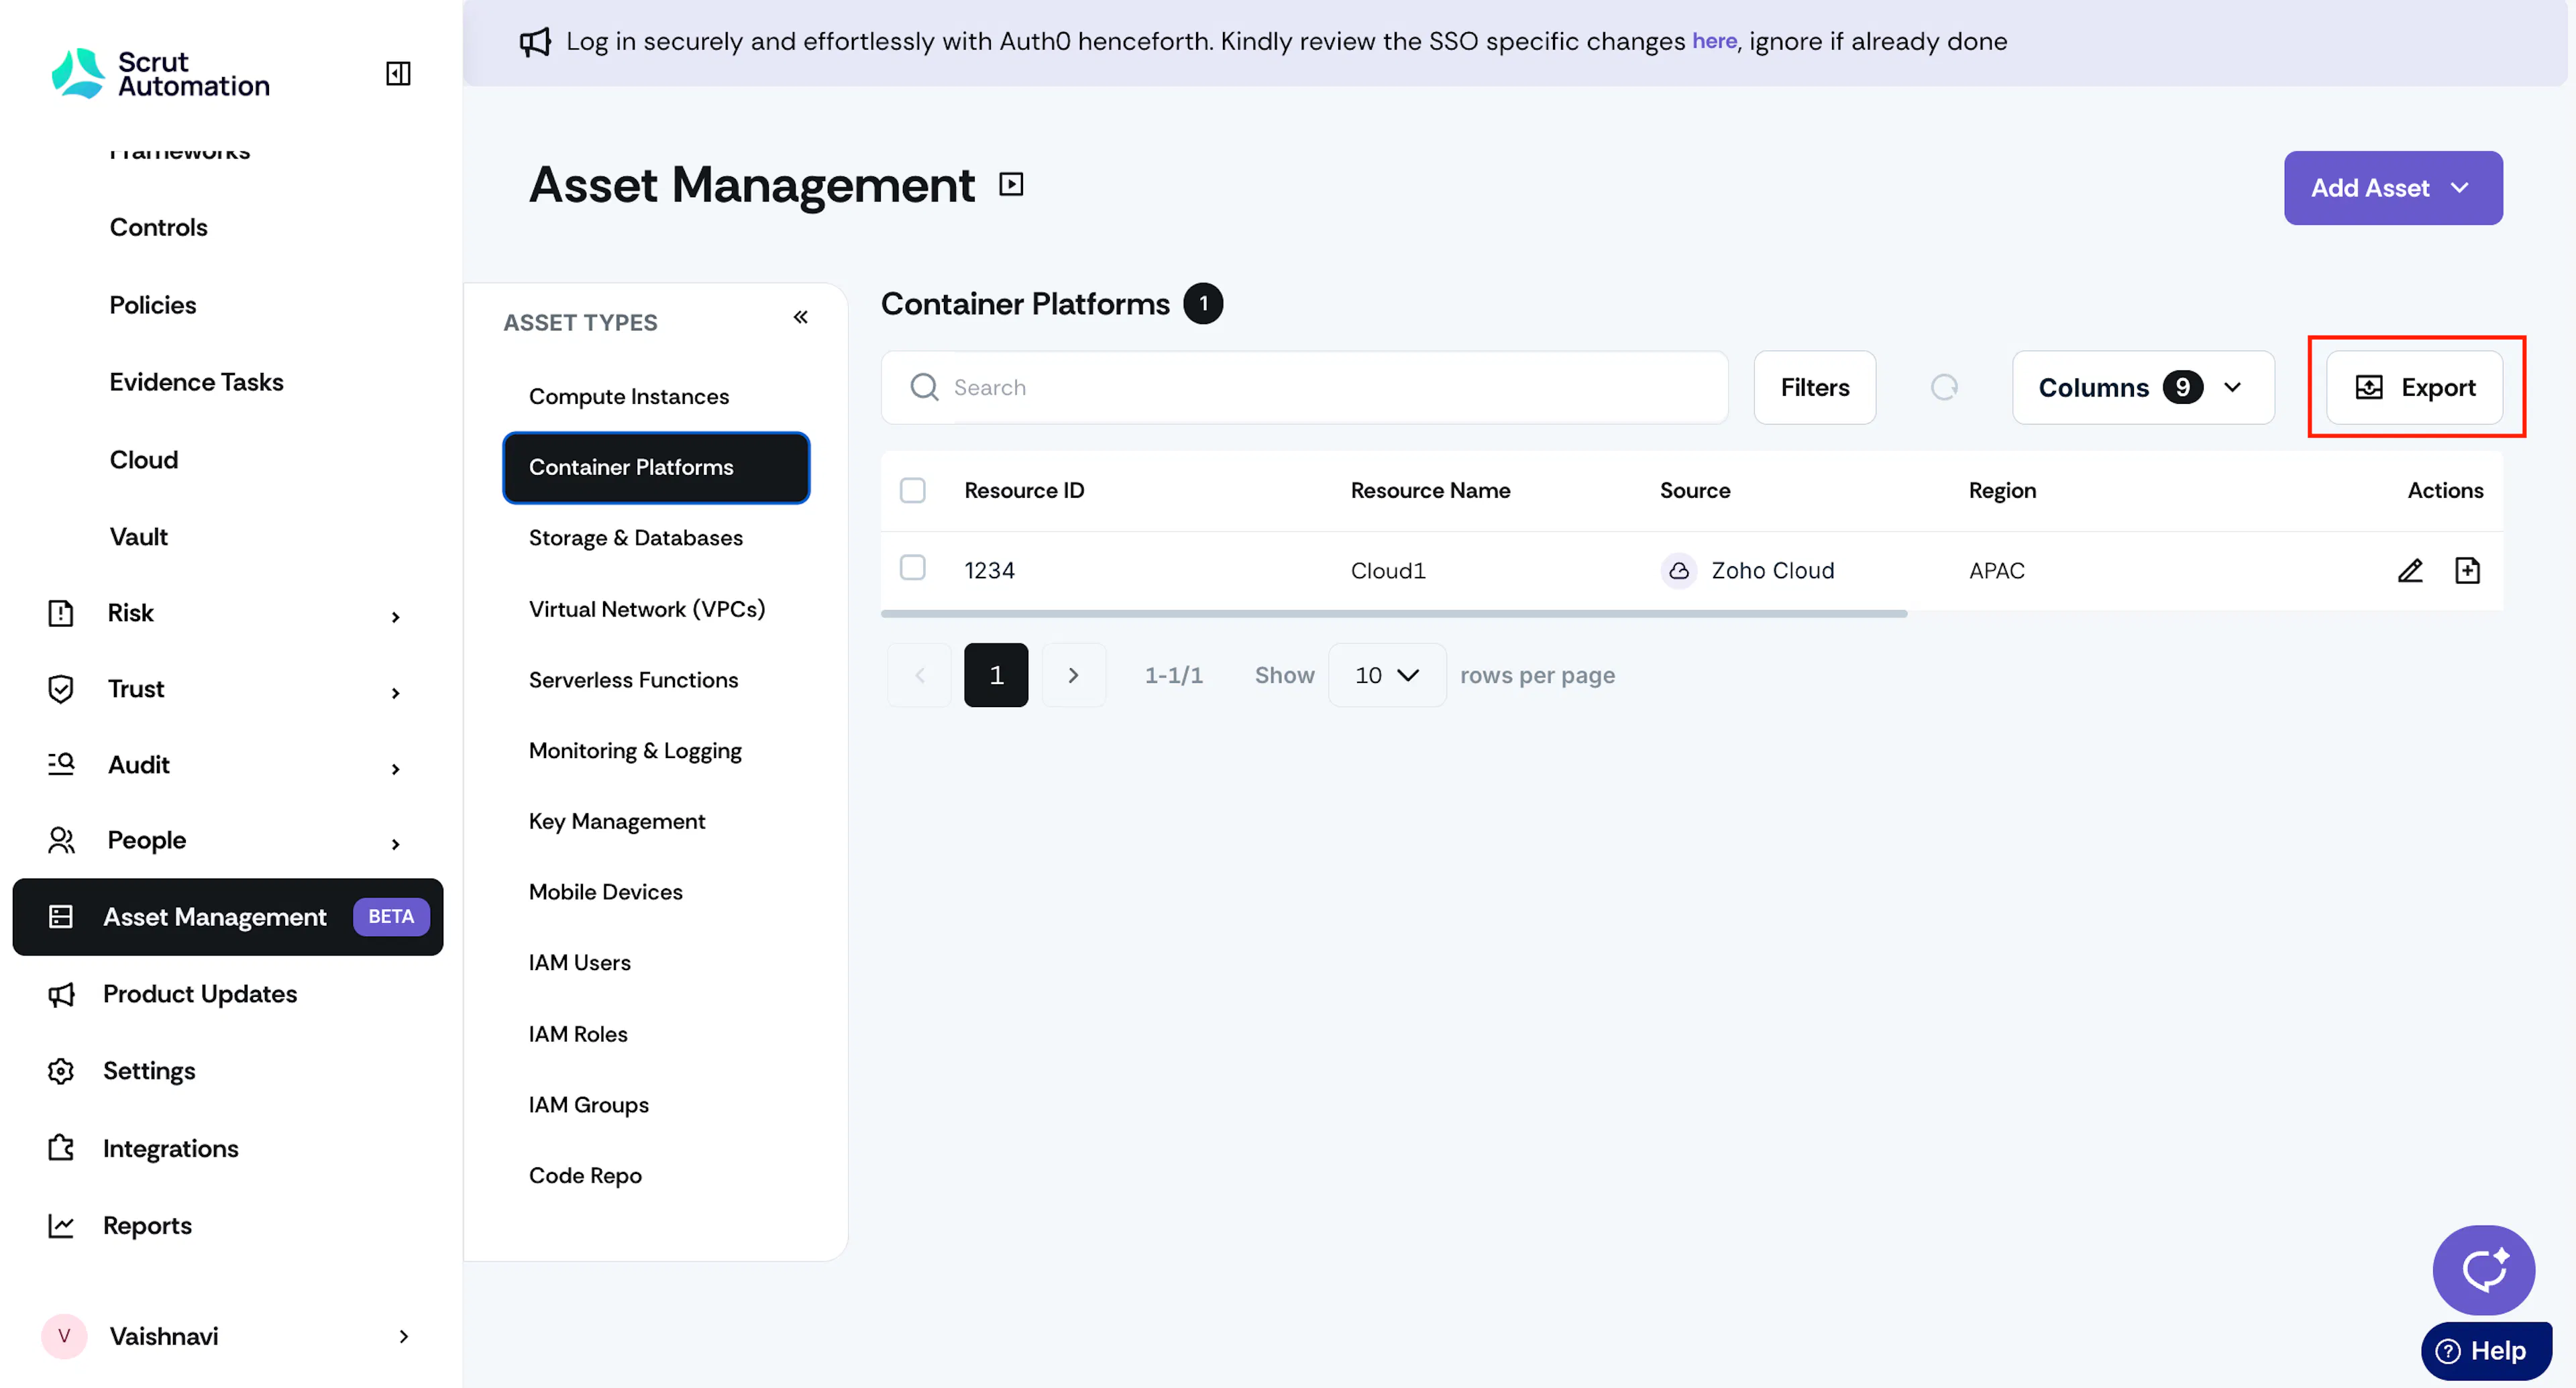
7: Export Asset Data
Go to Asset Management, and click on your preferred asset type. Click the Export button to download asset data as a CSV file.

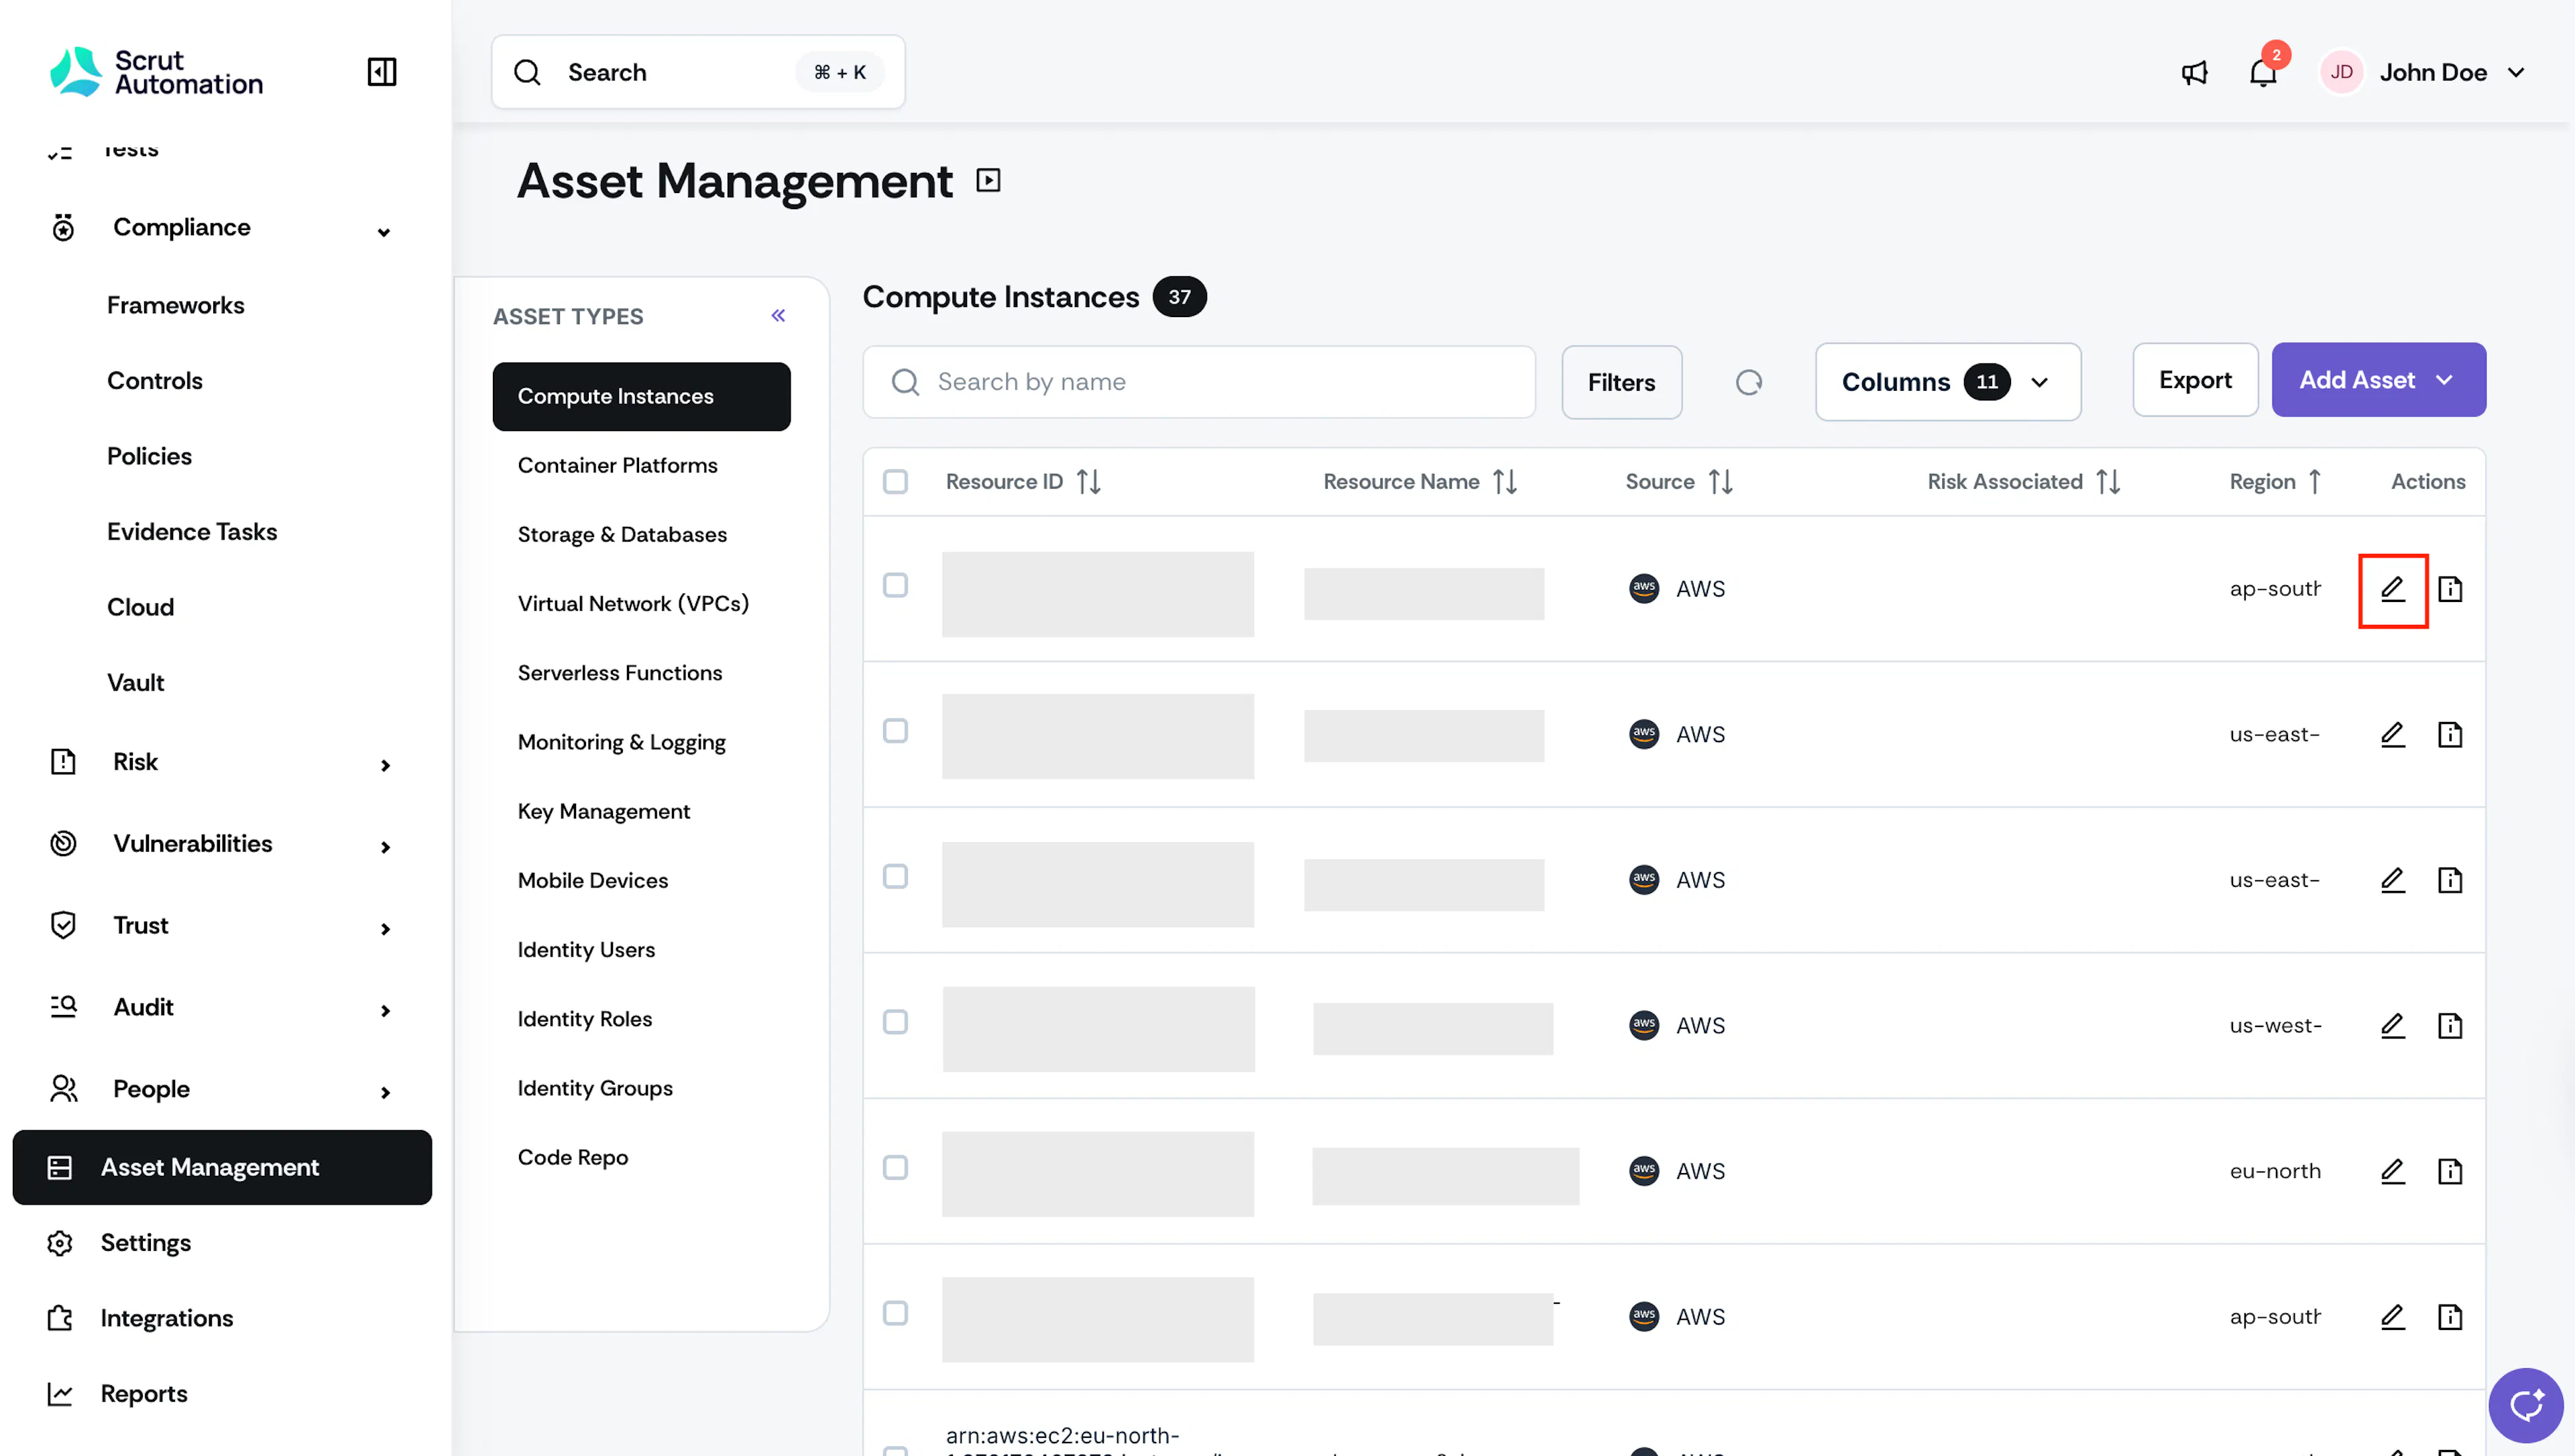
8: Editing an Asset
To edit an asset, click the pencil icon next to the asset.

Note:
Depending on the asset type, you cannot edit certain fields.
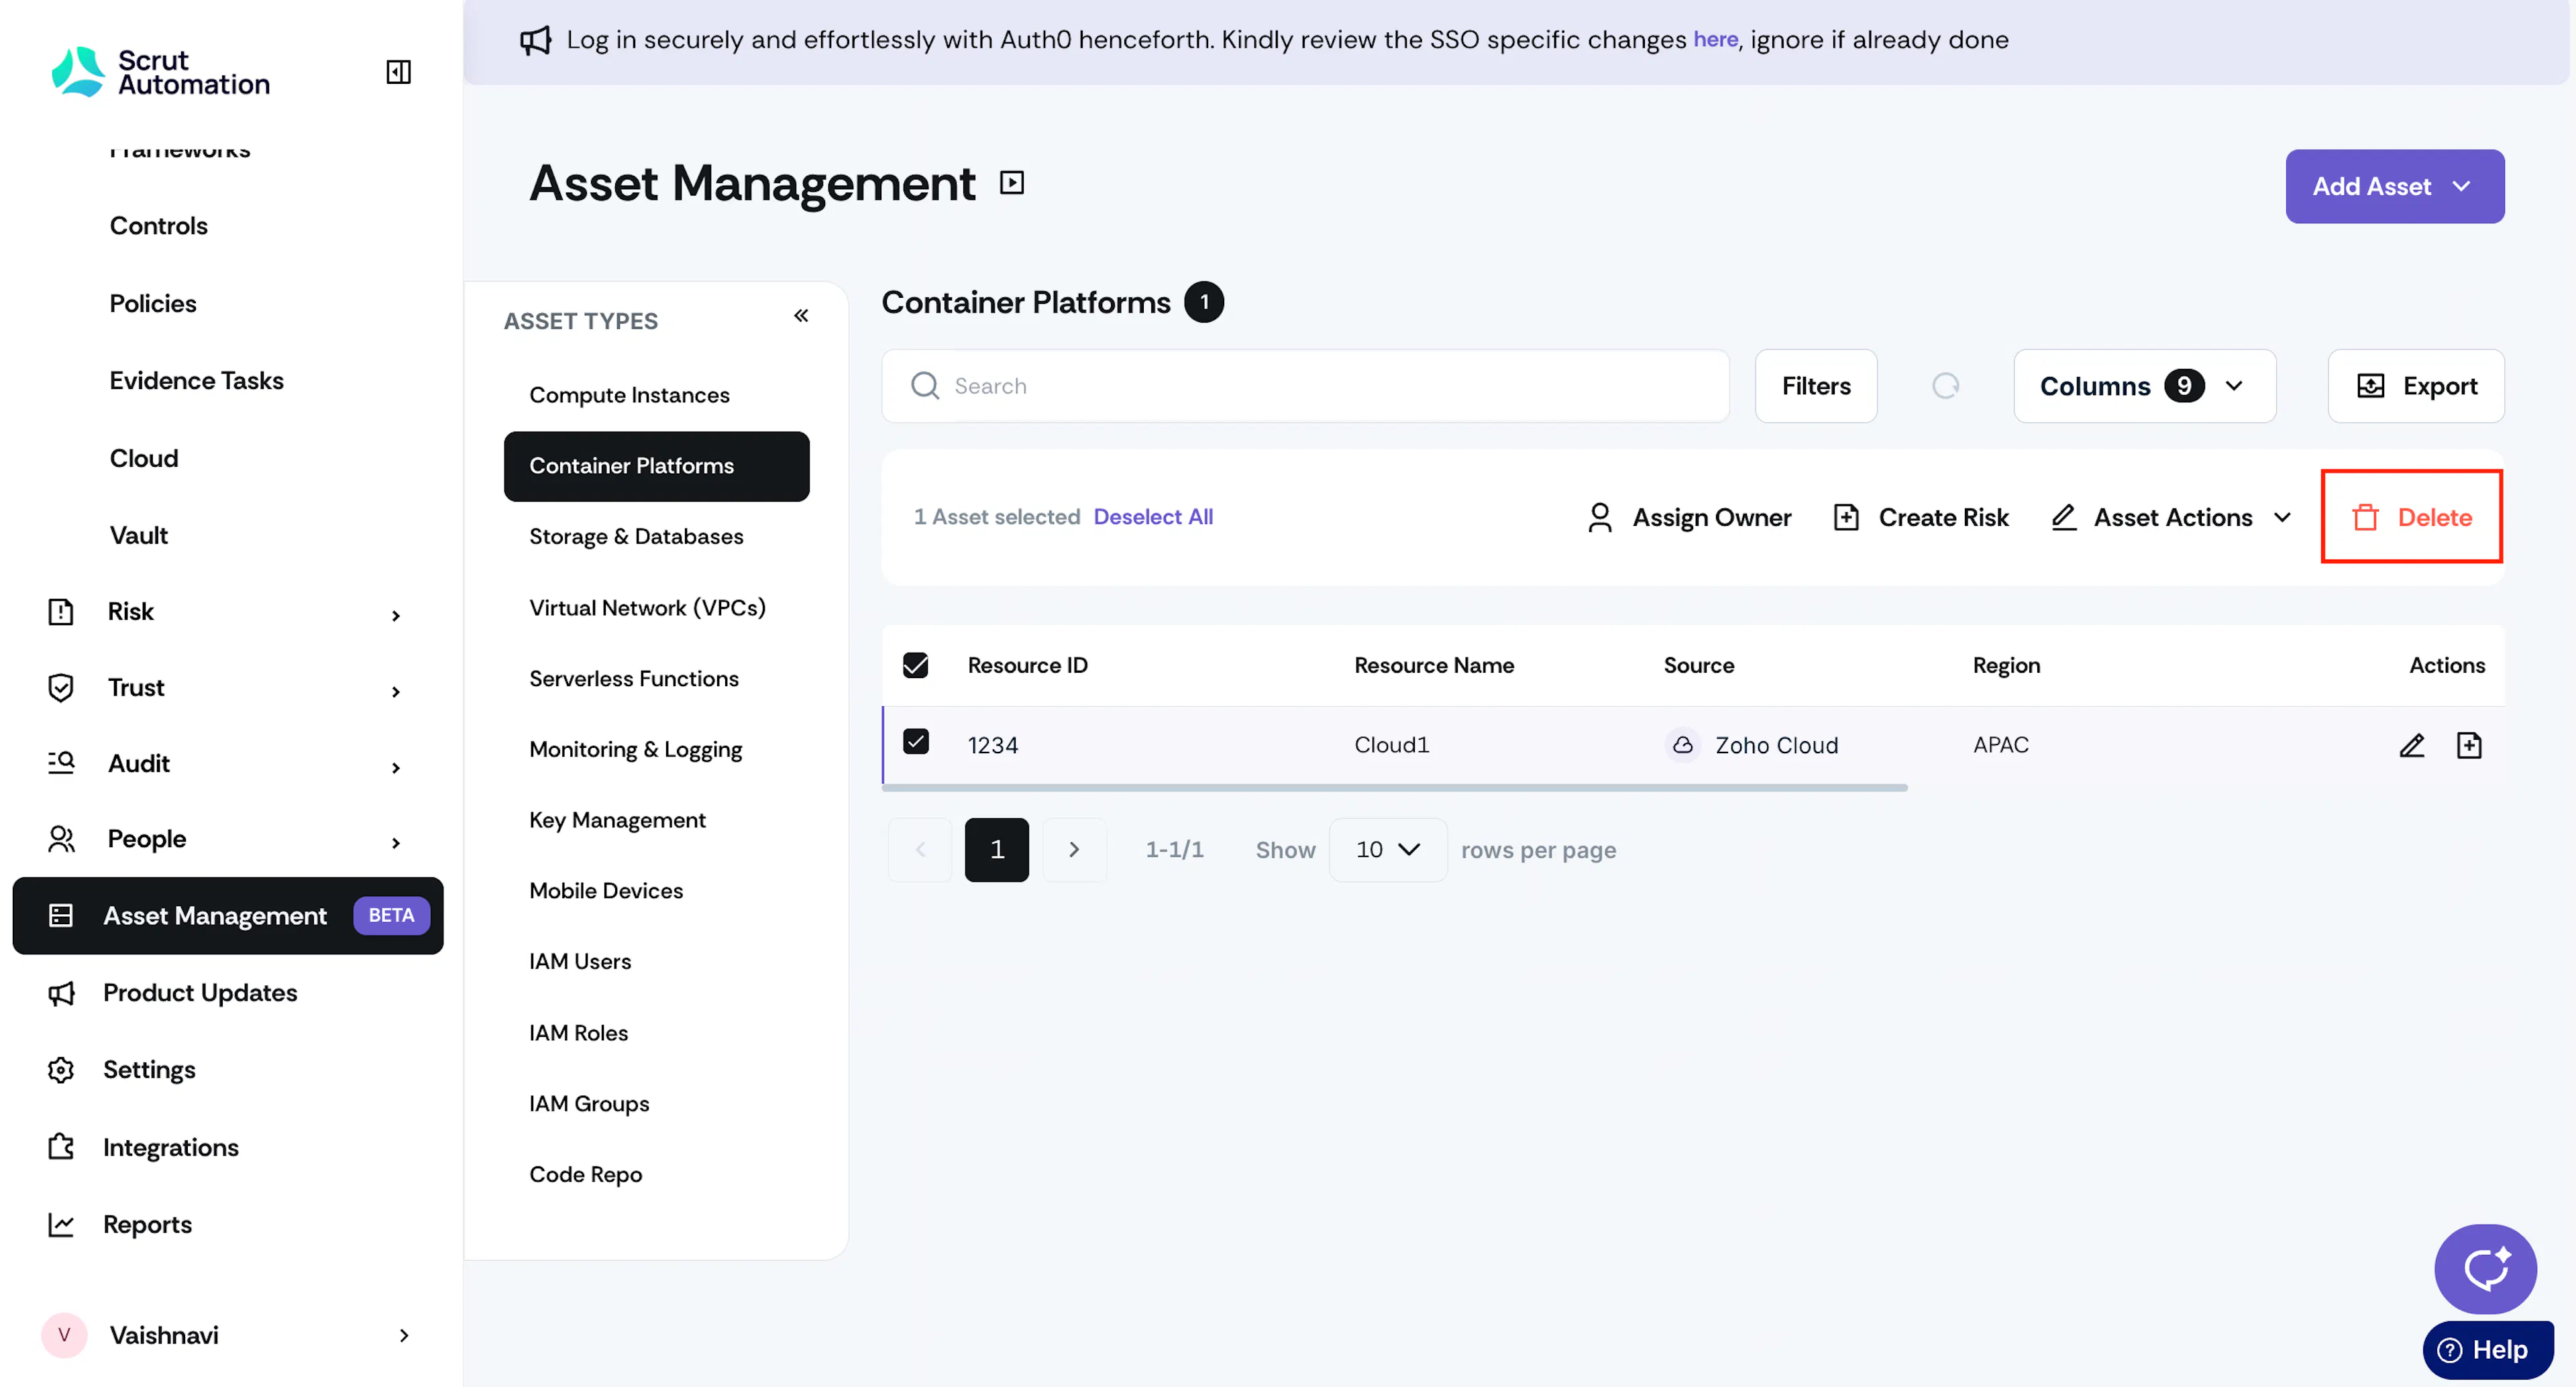
9: Deleting an Asset
Go to Asset Management, and click on your preferred asset type. Select one or more assets that you want to delete, and then click the Delete icon that appears at the top of the table.
Note: Deleting an asset is a permanent action and cannot be undone. So, proceed with caution.
Note:
You can delete only assets that you’ve added manually to Scrut. Scrut doesn’t allow you to delete assets that are automatically fetched from your integrations.