

Approve or Decline Access Requests
Who can use this feature
- Supported on Foundation, Growth, and Scale plans
While your Trust Portal is accessible via a public URL, you have complete control over who can access sensitive information. When a visitor tries to access gated content on your Trust Portal, they’ll be prompted to submit an access request. This extra layer of security guarantees that sensitive data is shared only with individuals you’ve vetted and approved. In this article, we'll guide you on how to review, approve, or deny access requests to your Trust Portal.
Approve Access
-
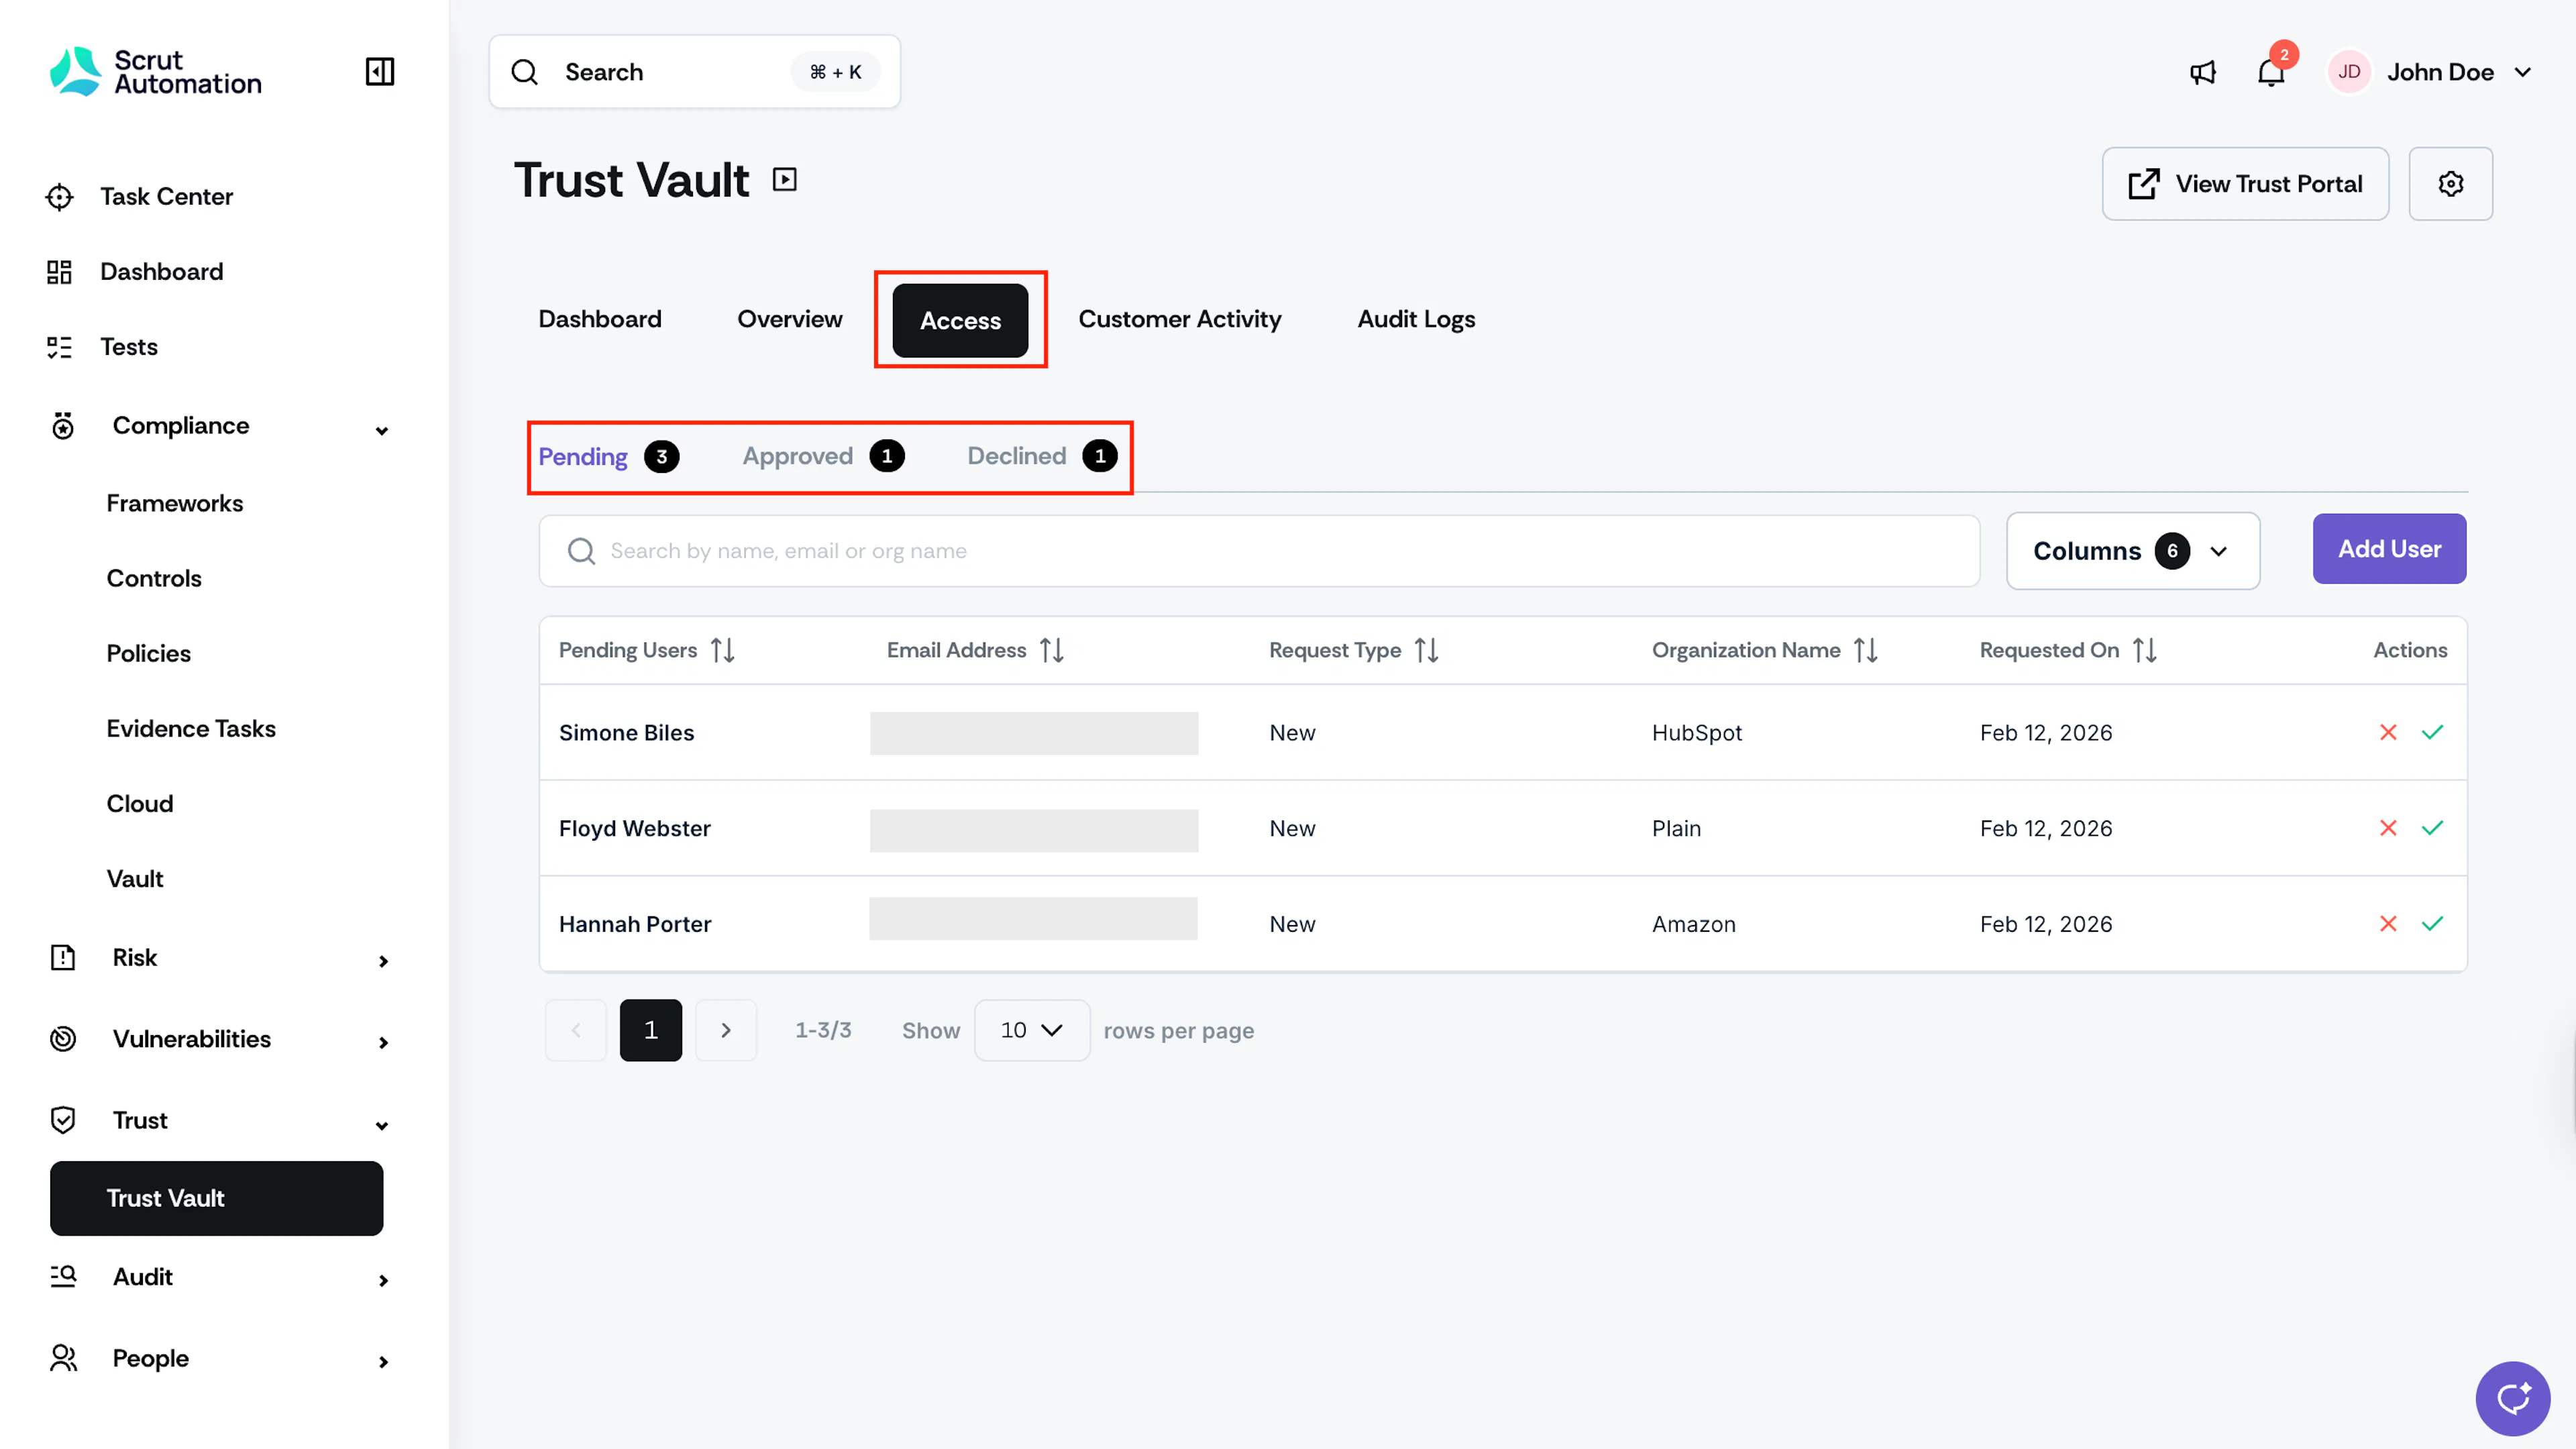
Click Trust → Trust Vault on the left navigation panel.
-
Go to the Access tab. Here, you'll see three sub-sections:
-
Pending: Access requests that you still need to review.
-
Approved: Access requests that you have approved.
-
Declined: Access requests that you have declined.
-
-
Navigate to the Pending tab, click the green checkmark icon in the Actions column to approve a request.
Pro Tip!
Need to approve someone quickly? Use the search bar to find a specific user (by name, email, or organization name) and approve their request.
-
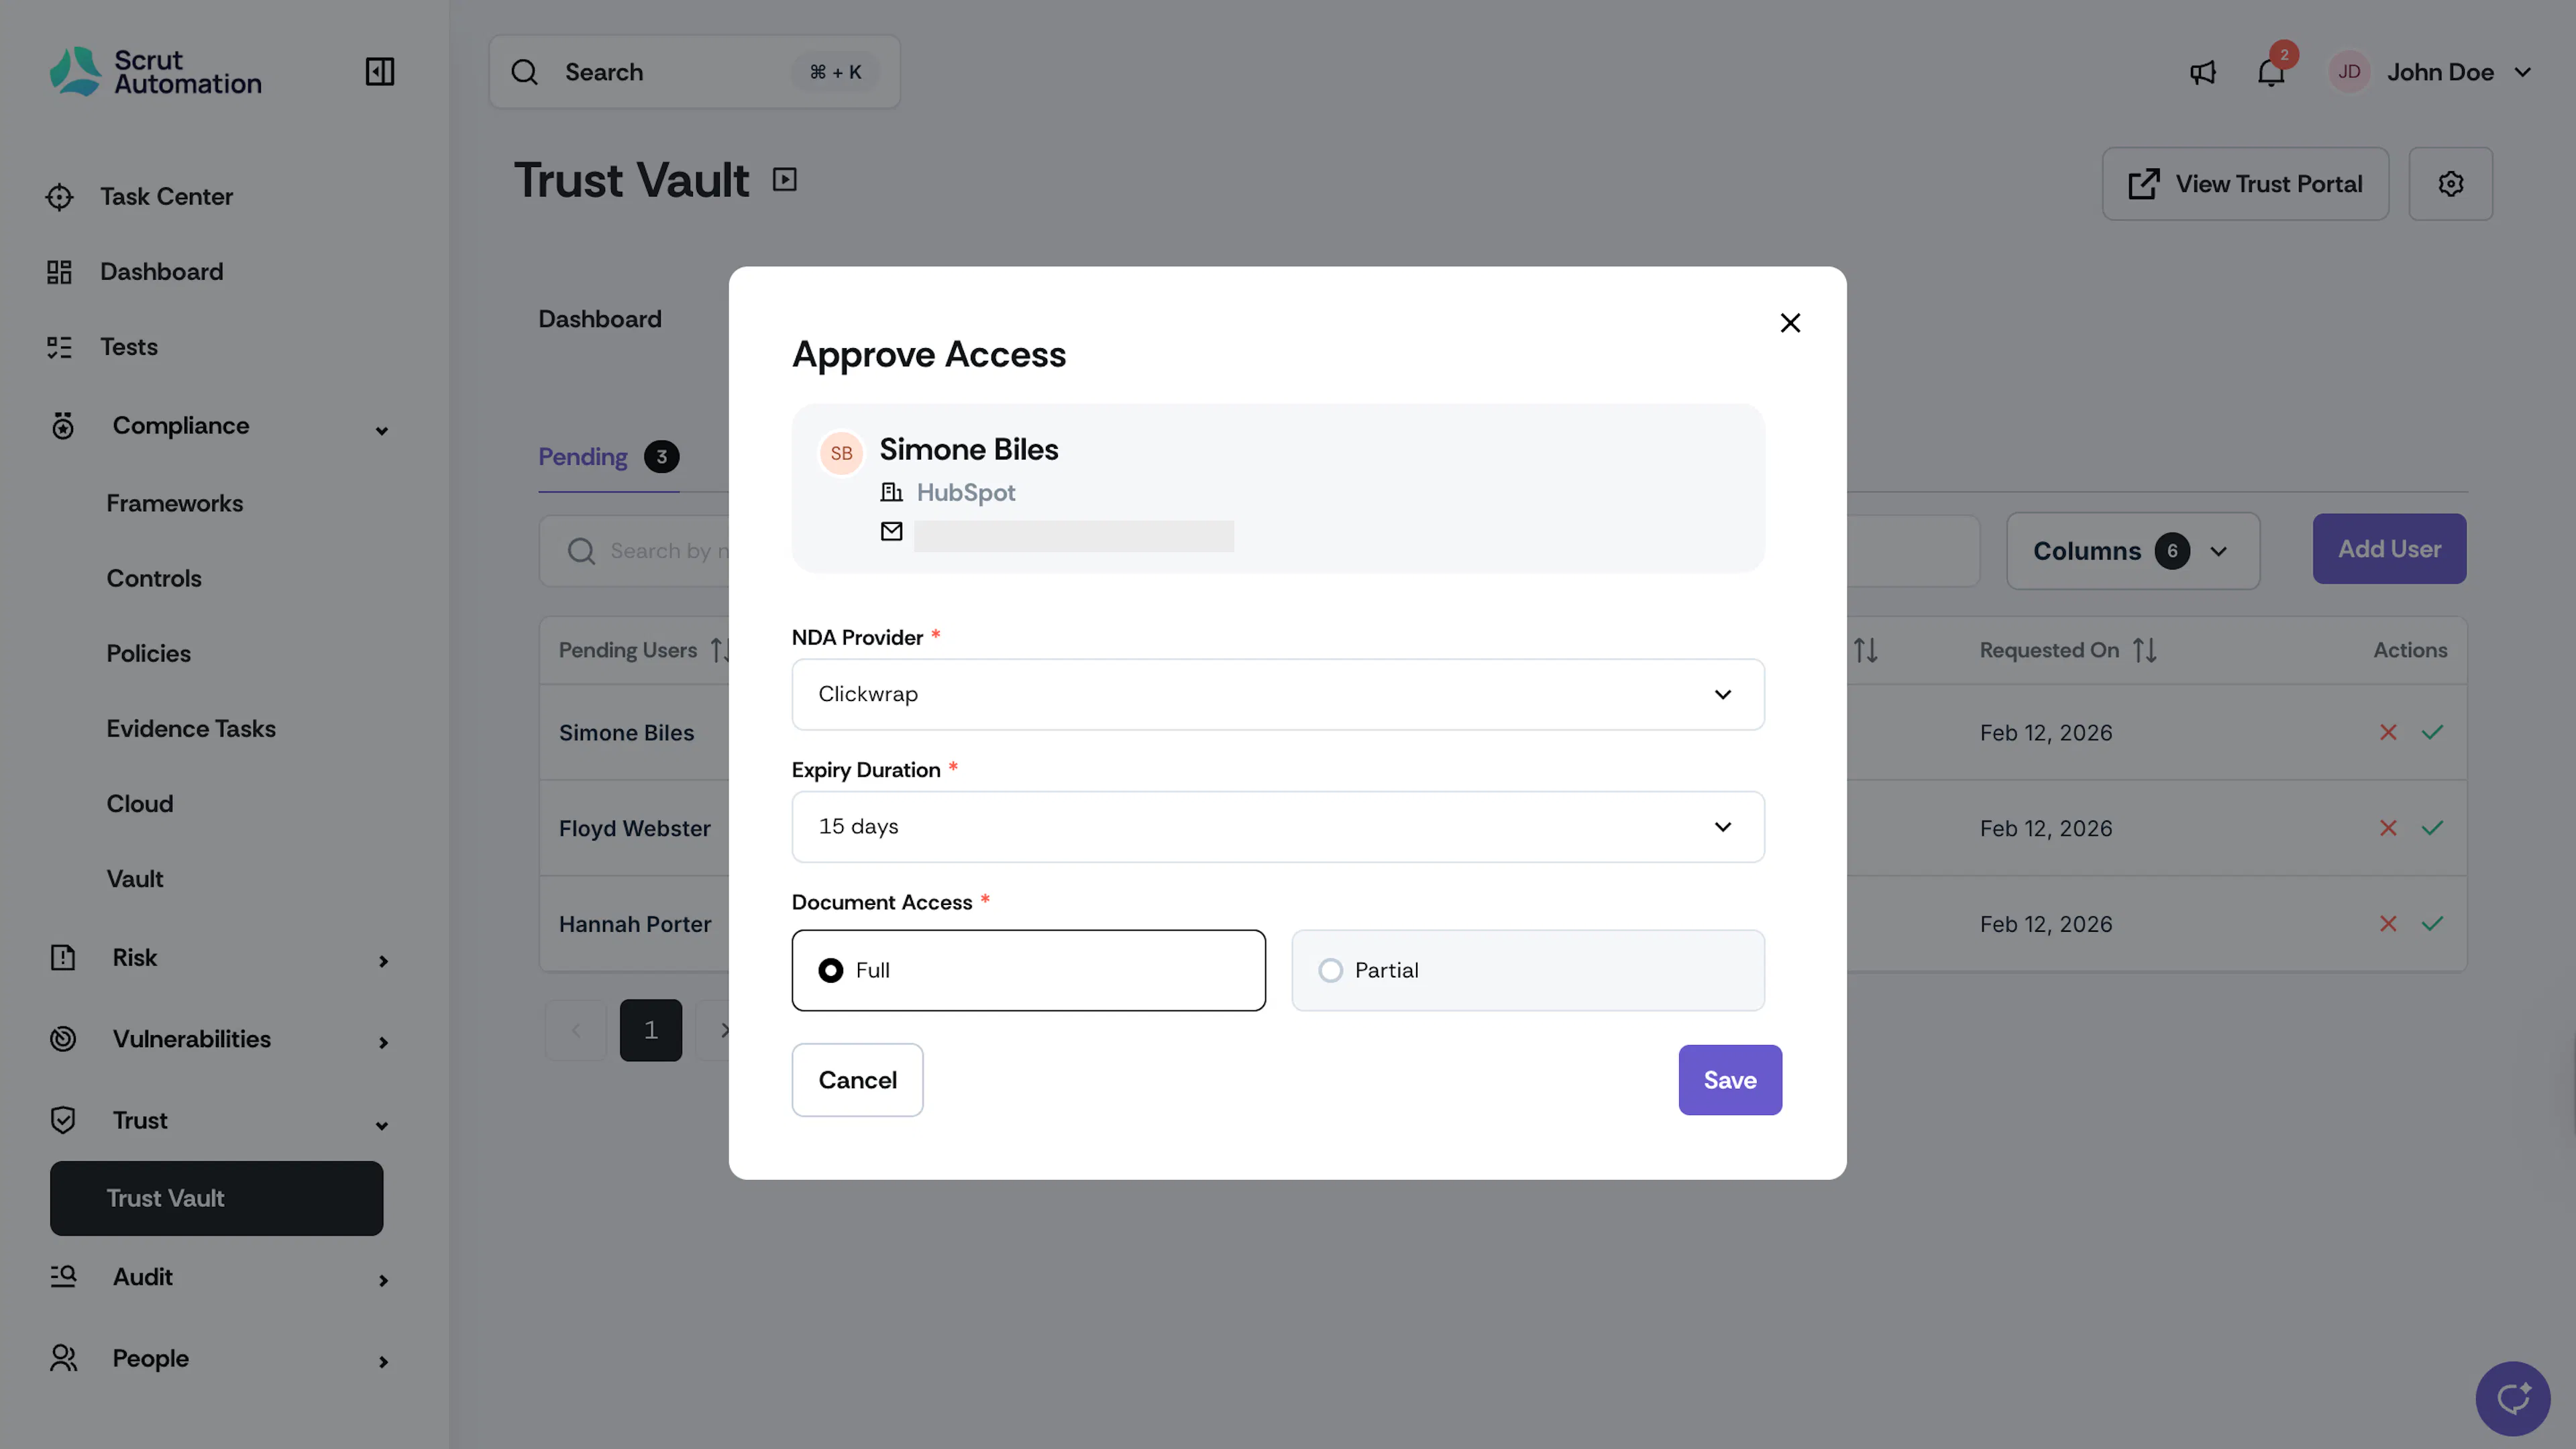
Once you click the green checkmark, the Approve Request window opens. Here, you can view the details the requester has shared, such as Name, Email, and Company Name.
-
In the NDA Provider dropdown menu, select whether you need an NDA.
- No NDA: Select this option if you don’t need an NDA.
- Clickwrap: Select this option if you want users to sign an NDA in Scrut before they can access the Trust Vault.
- Signed outside Scrut Automation: Select this option if the user has already signed an NDA outside Scrut.
Heads Up!
If you select Signed Outside Scrut Automation, you must upload the signed NDA copy.
-
In the Expiry Duration dropdown menu, choose how long to wait before Scrut revokes the trust vault access for the requester.
- 7 Days: Access expires 7 days after acceptance.
- 15 Days: Access expires 15 days after acceptance.
- 30 Days: Access expires 30 days after acceptance.
- Never: Access will not be revoked at any time.
- Custom: Select a date from the calendar to revoke access.
-
Use the Document Access radio button to choose the level of access you want to provide the requester.
- Full: Grants complete access to all documents in the Trust Vault.
- Partial: Select the documents you want to grant access to the requester.
-
Click Approve. The requester will receive an email notifying them that they have been granted access.
Deny Access
-
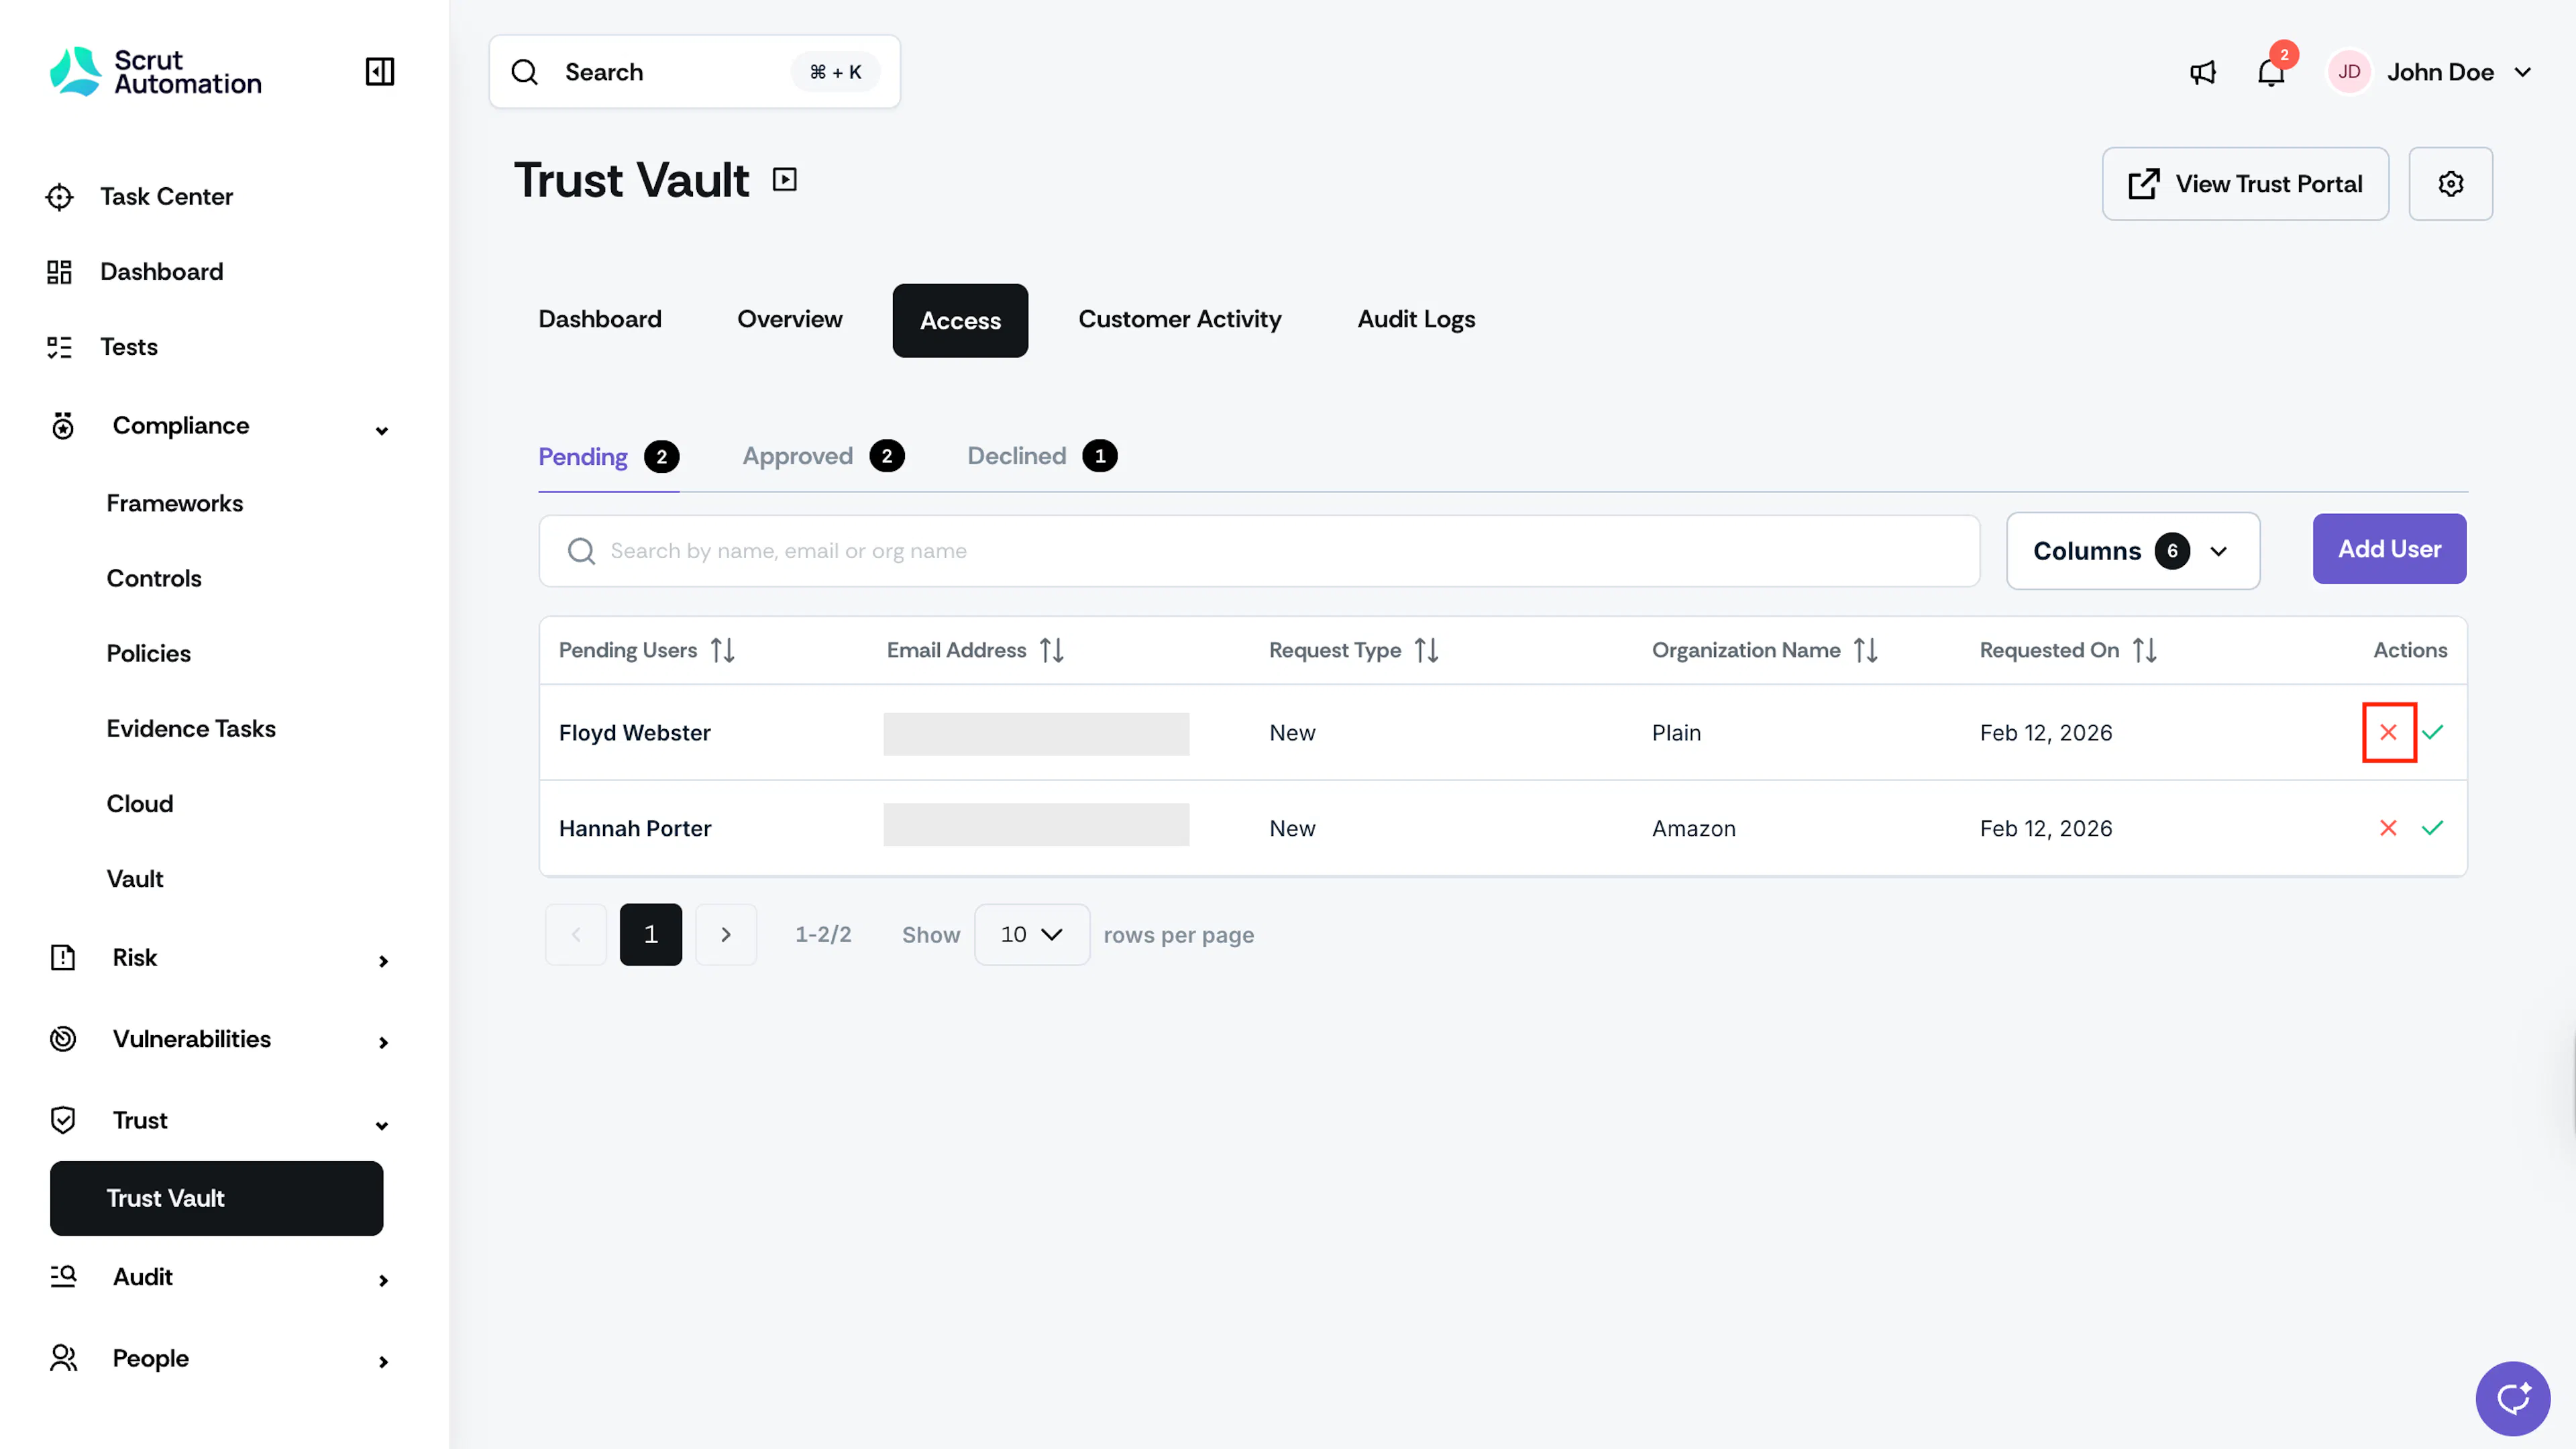
Click the red cross under Actions to deny the requester access.
-
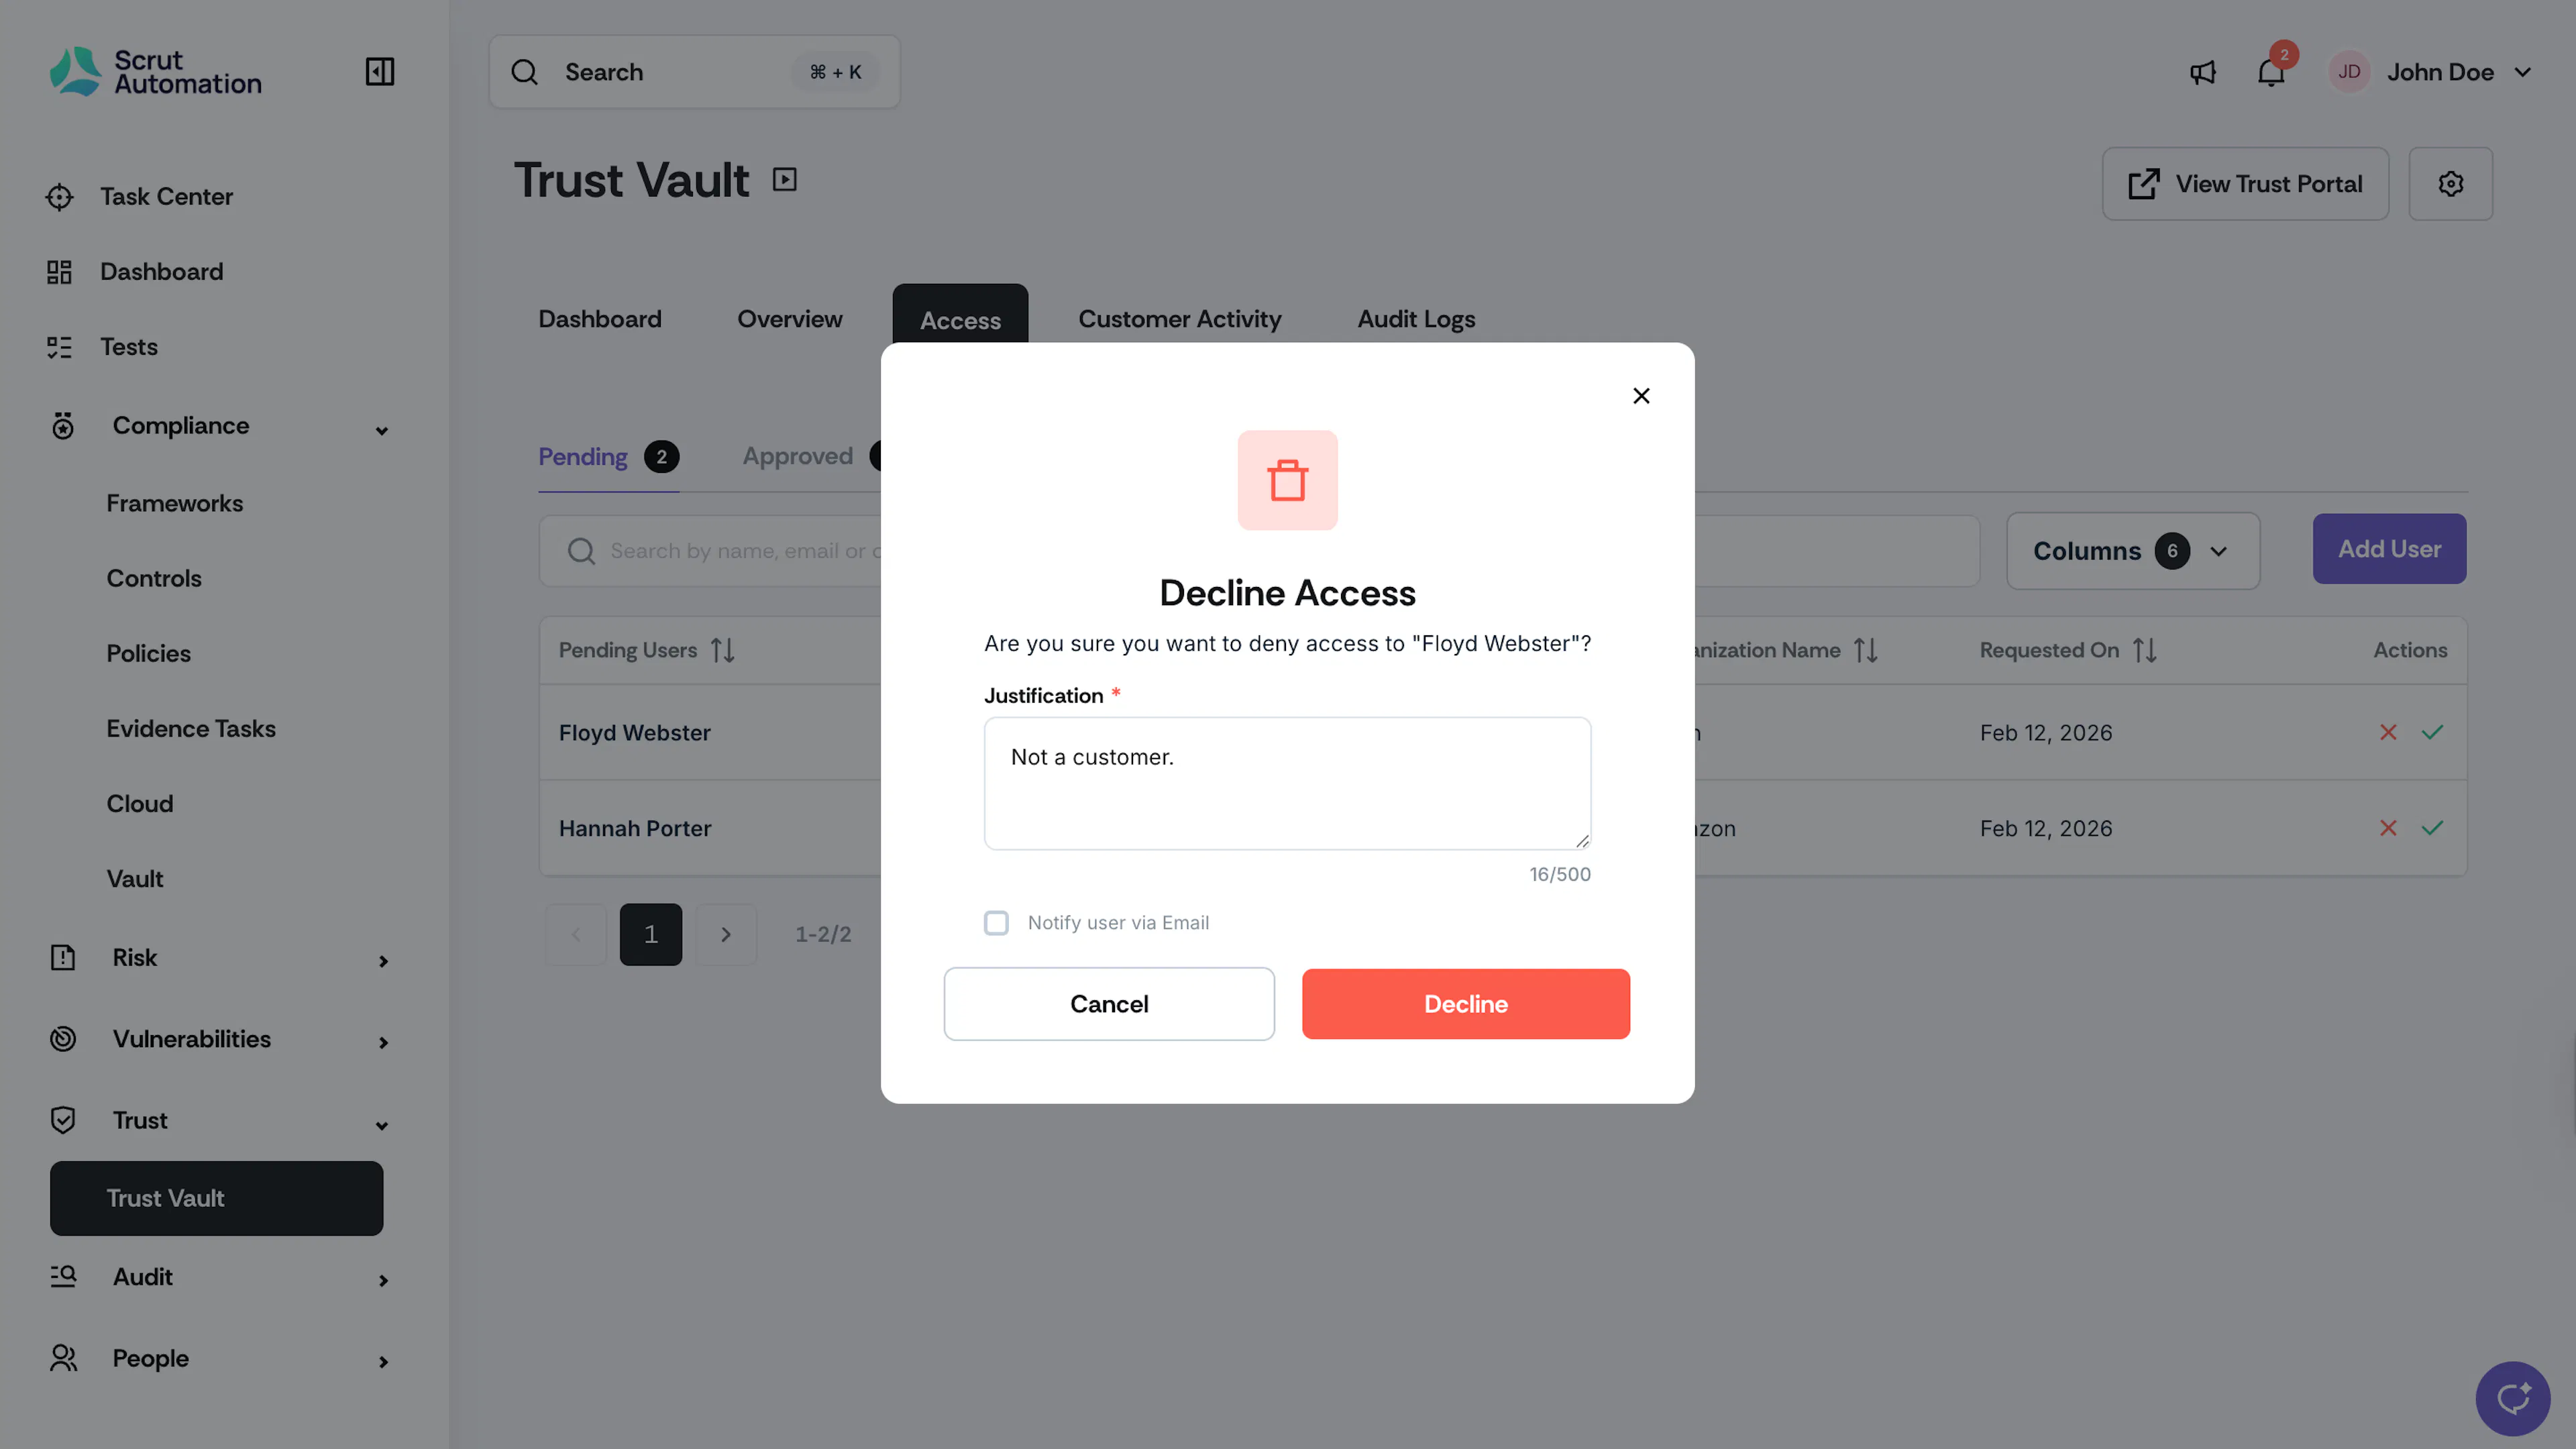
Enter a valid reason and click the Decline button.
-
Optionally, you can select the checkbox to Notify User via Email.
Actions on Approved Users
-
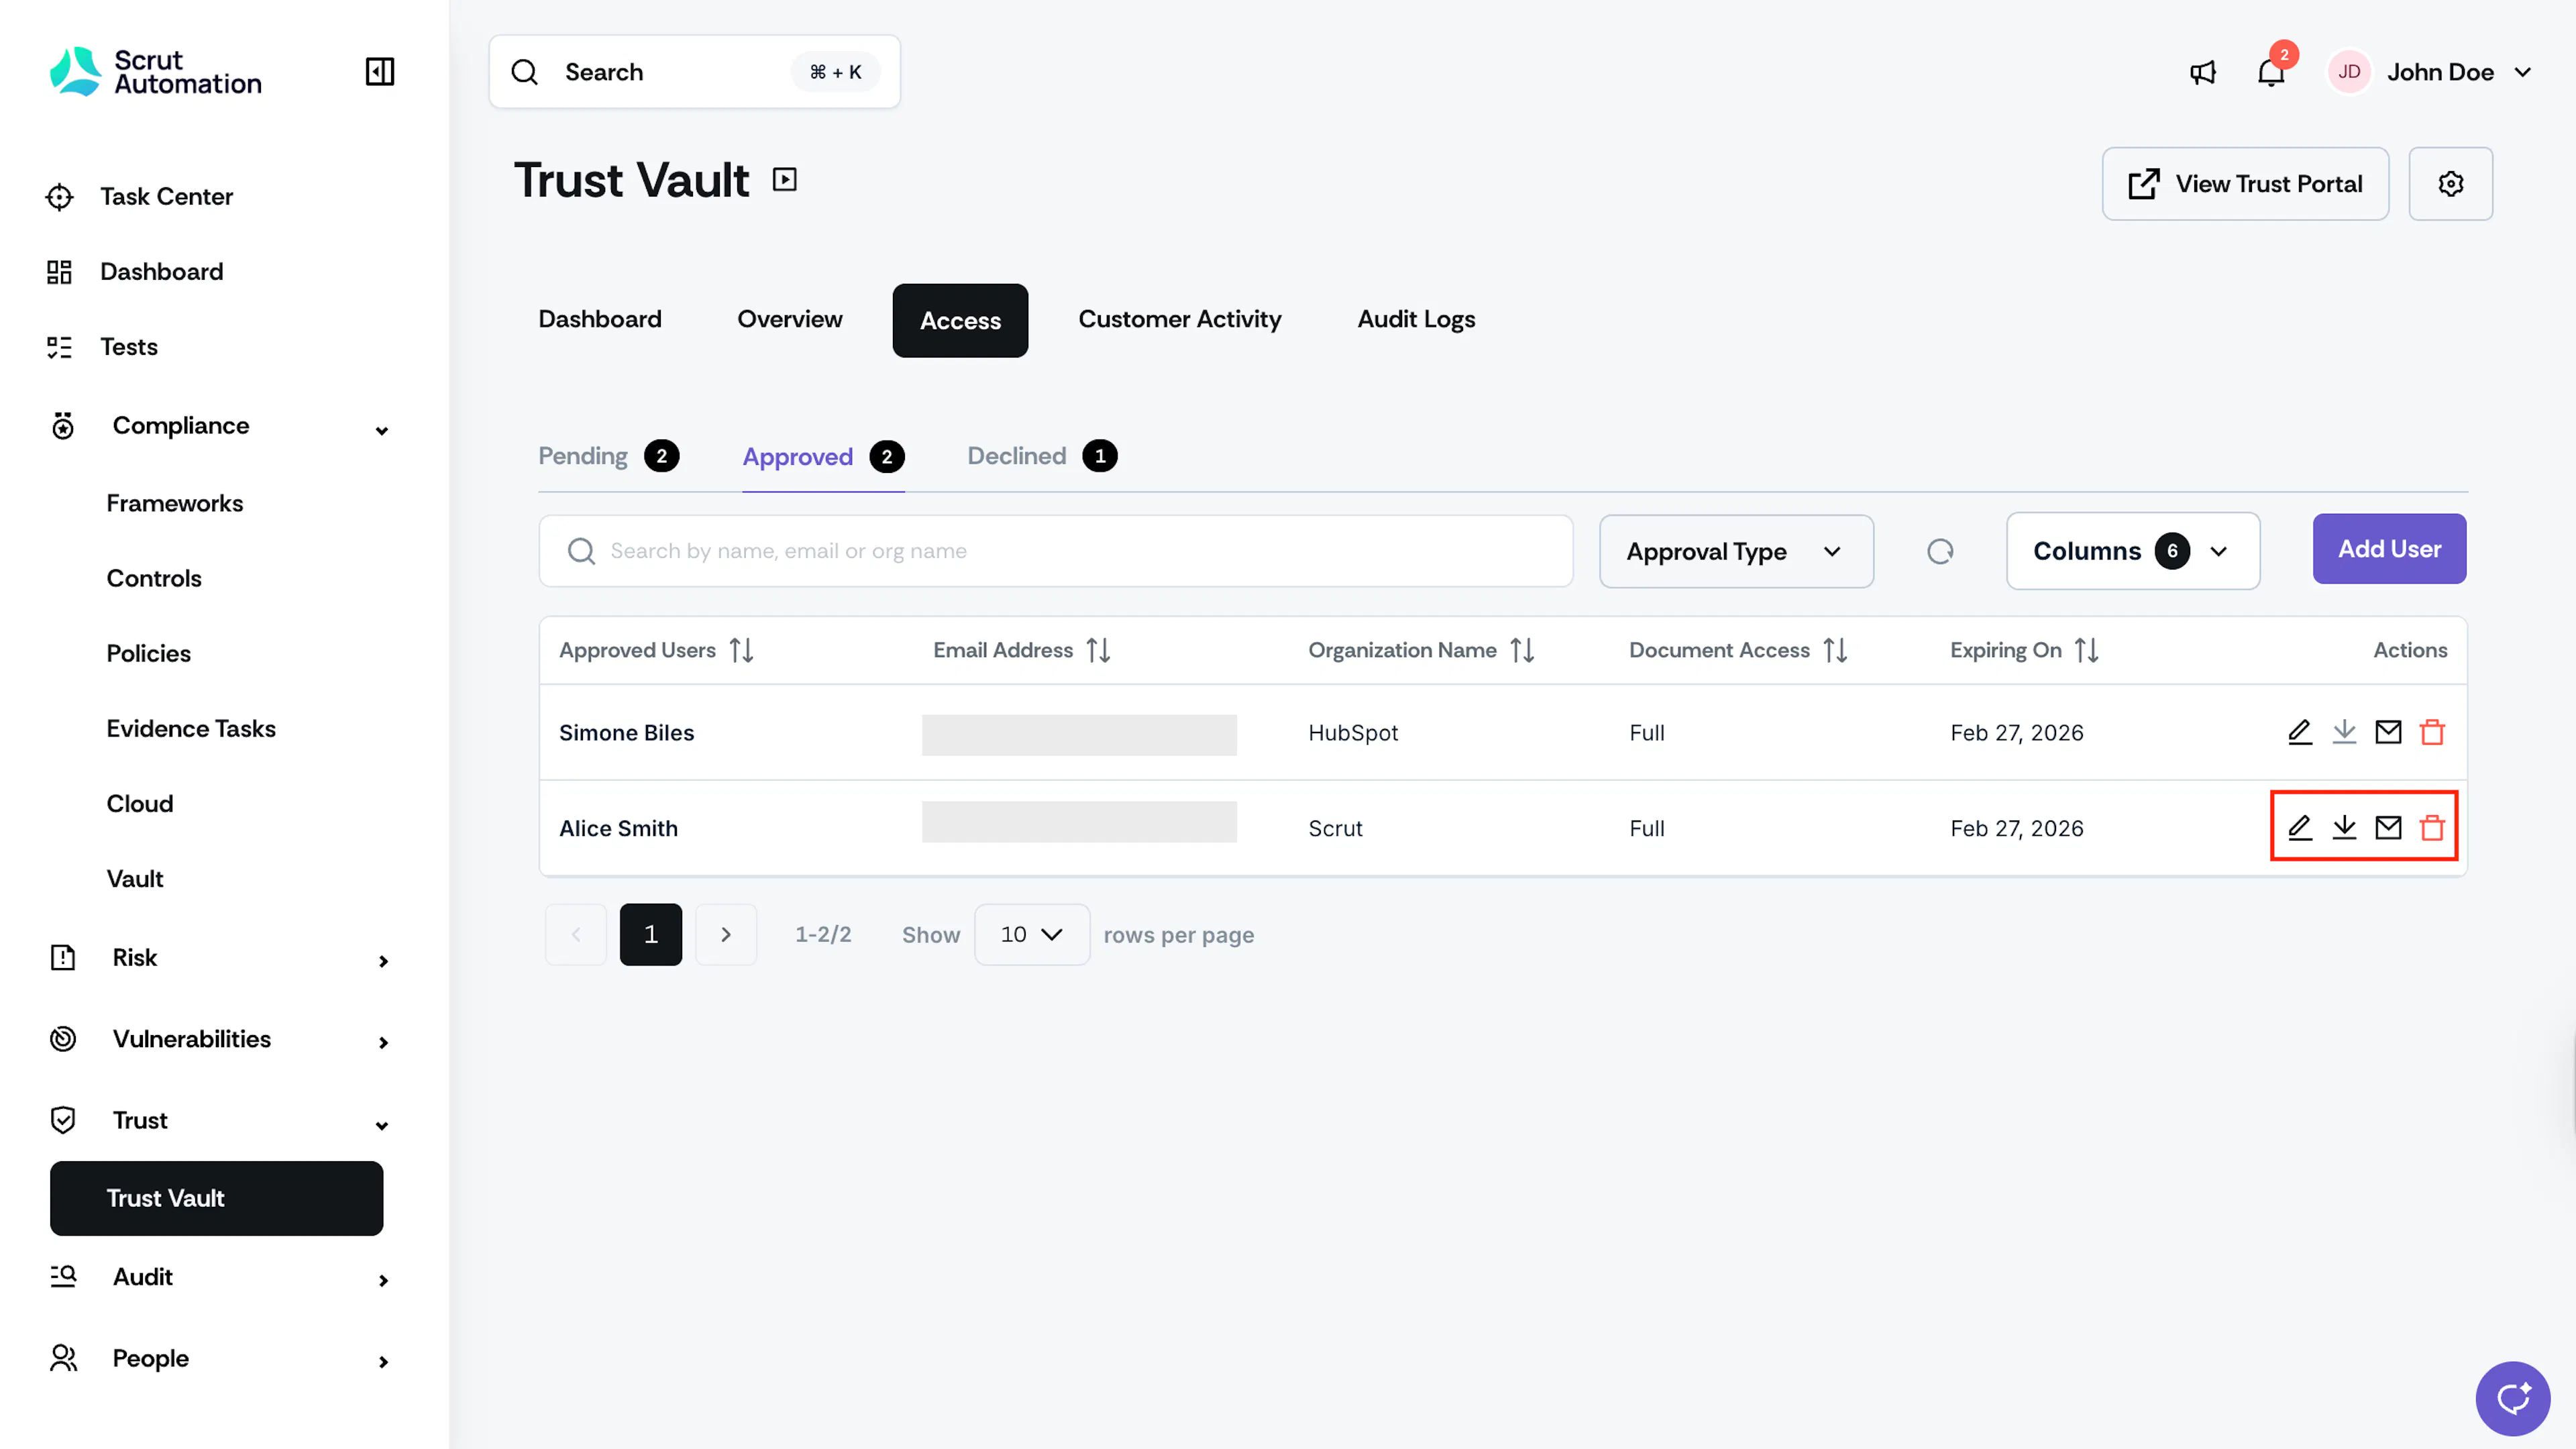
Go to the Approved tab to view details for approved users, including their name, email, organization, access expiry date, and access type.
-
Click the pencil icon under the Actions column to edit user details.
-
You can edit all details except the email address.
-
Click the download icon to download the customer NDA.
-
Click the envelope icon to resend the access invitation.
Note:
- The download icon will be enabled only when the NDA type is Clickwrap and the user has accepted it. The download button will be greyed out if you have chosen the options Signed Outside Scrut or No NDA.
- The envelope icon will be greyed out if the access duration has expired.
-
Click the trash can icon to revoke customer access. Click Delete in the confirmation pop-up to proceed.
Actions on Declined Users
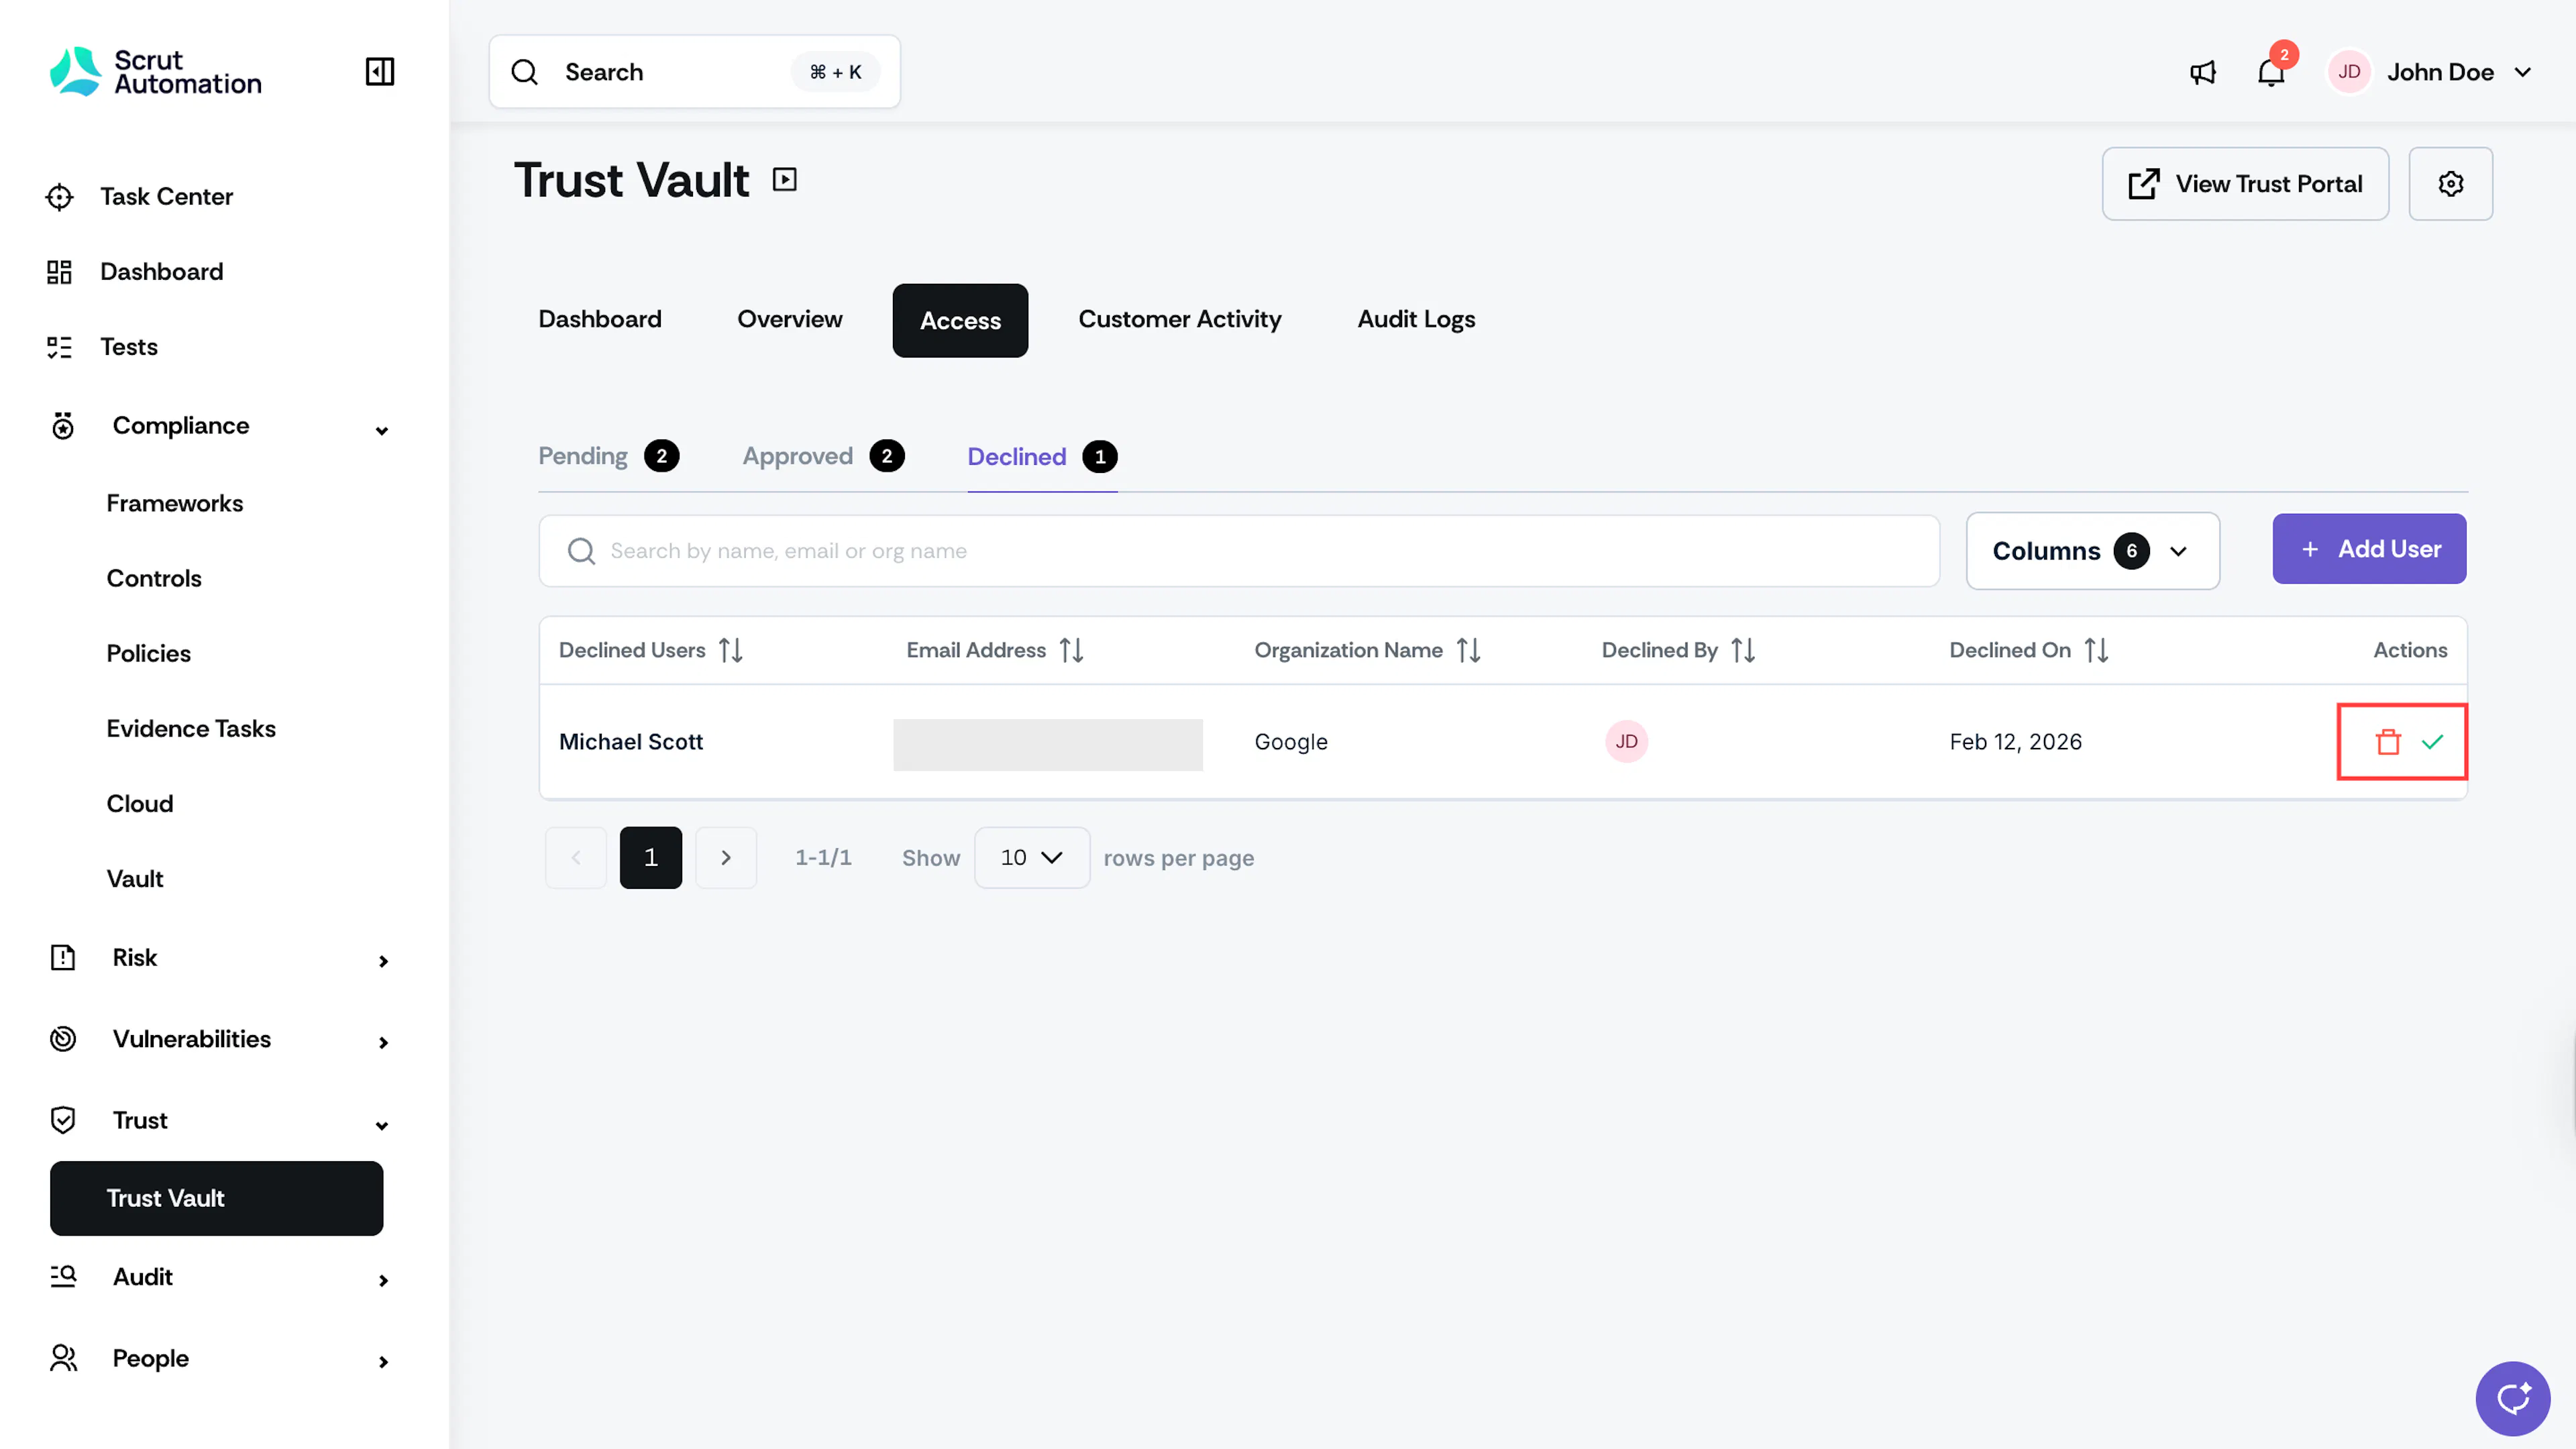
- Go to the Declined tab to view details of denied requests, including the requester's name, email, organization, the person who declined the access, and the access type.
- Click the green checkmark icon under the Actions column to approve a declined request.
- Click the trash can icon to remove the user details permanently from this page. Click Delete in the confirmation pop-up to proceed.
Add a User from the Access Tab
Follow these steps to grant access to a user to your Trust Portal:
-
Head to the Access tab in the Trust Vault dashboard.
-
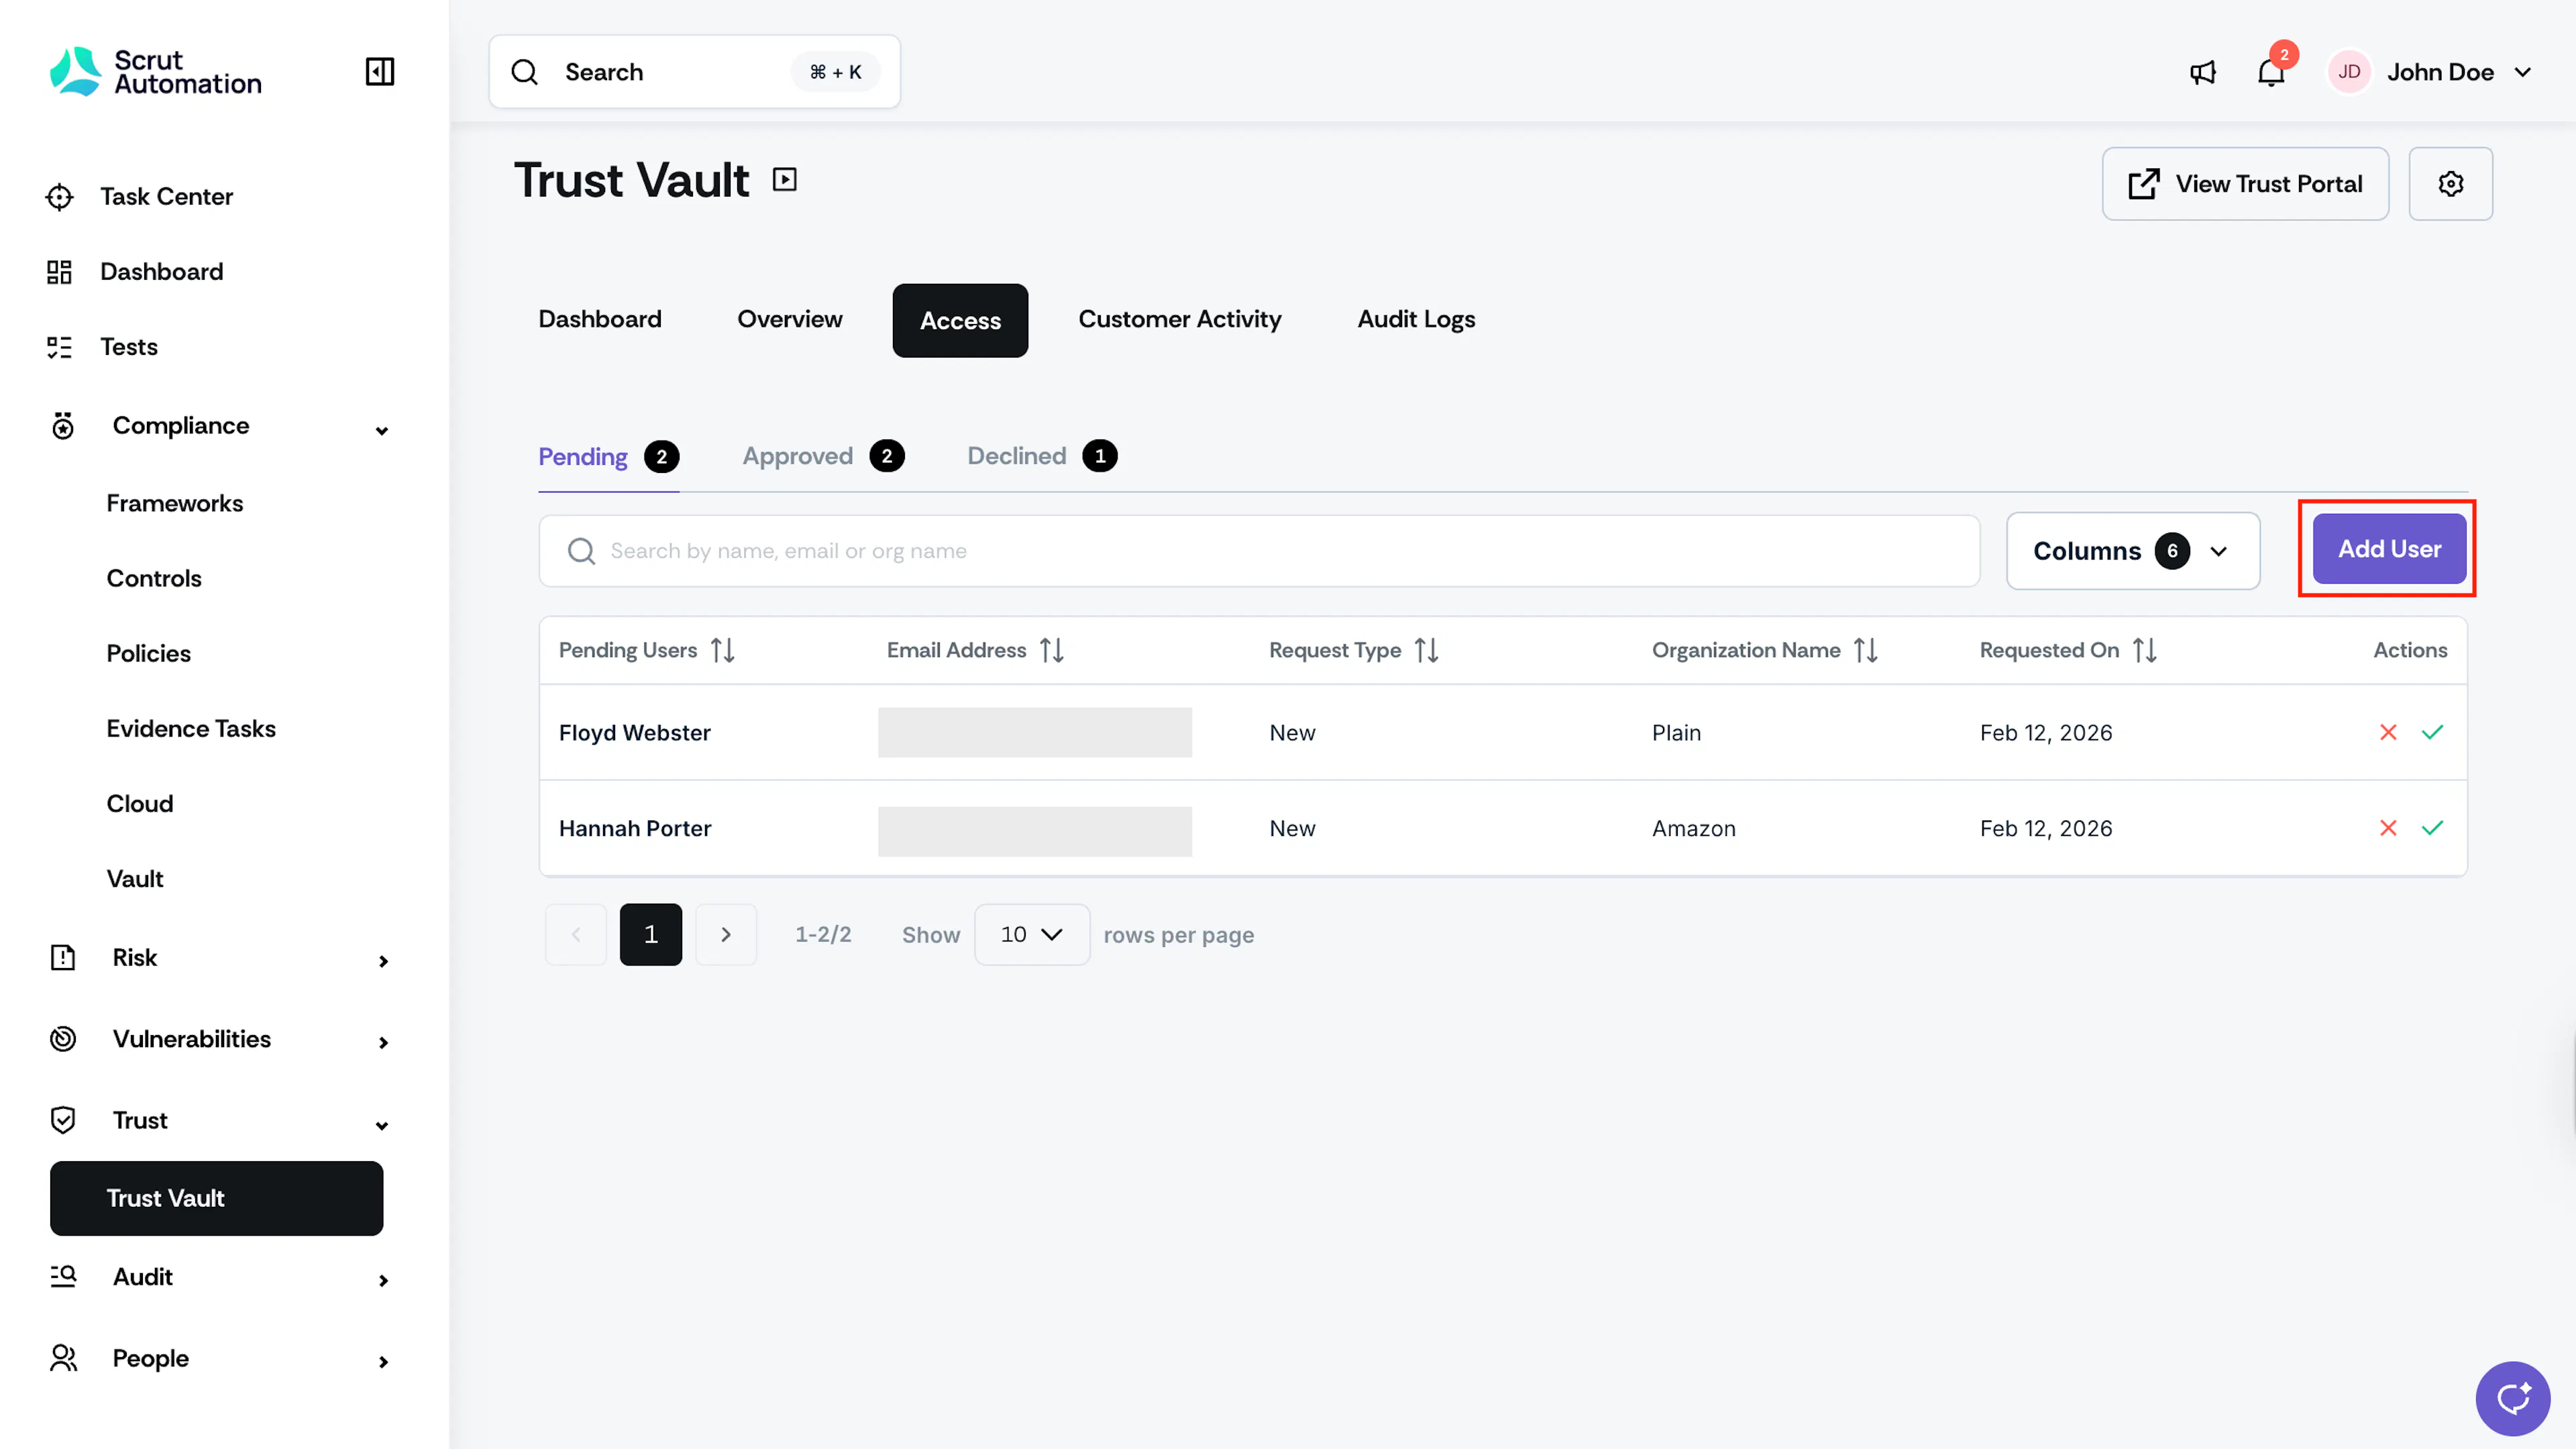
Click the Add User button at the top-right.
-
In the Add User drawer, enter the details of the user whom you want to grant access to:
- First Name
- Last Name
- Email Address
- Organization Name
- Organization Type: [Optional]
- Street Address: [Optional]
- Country
- State [Optional]
- NDA Provider: Select the NDA type
- Expiry Duration: Select the access duration
- Document Access: Select Full or Partial access
-
Click Save.
Scrut adds the user to the Approved tab and sends a notification email stating that they've been granted access to your Trust Portal.
FAQs
Note:
The audit logs capture all actions, including extending expiry dates, re-granting access, denying access, etc.