

Configure Auto Approval via Salesforce Integration
Who can use this feature
- Included in the Scale plan
- Available in the Trust Advanced Add-On for Foundation and Growth plans
By default, anyone who visits your Trust Vault must submit an access request to view sensitive information. However, there might be situations where you may want to auto-approve requests from specific users, such as those listed as contacts or prospects in your Salesforce account.
Follow these steps to enable auto-approval for specific users:
-
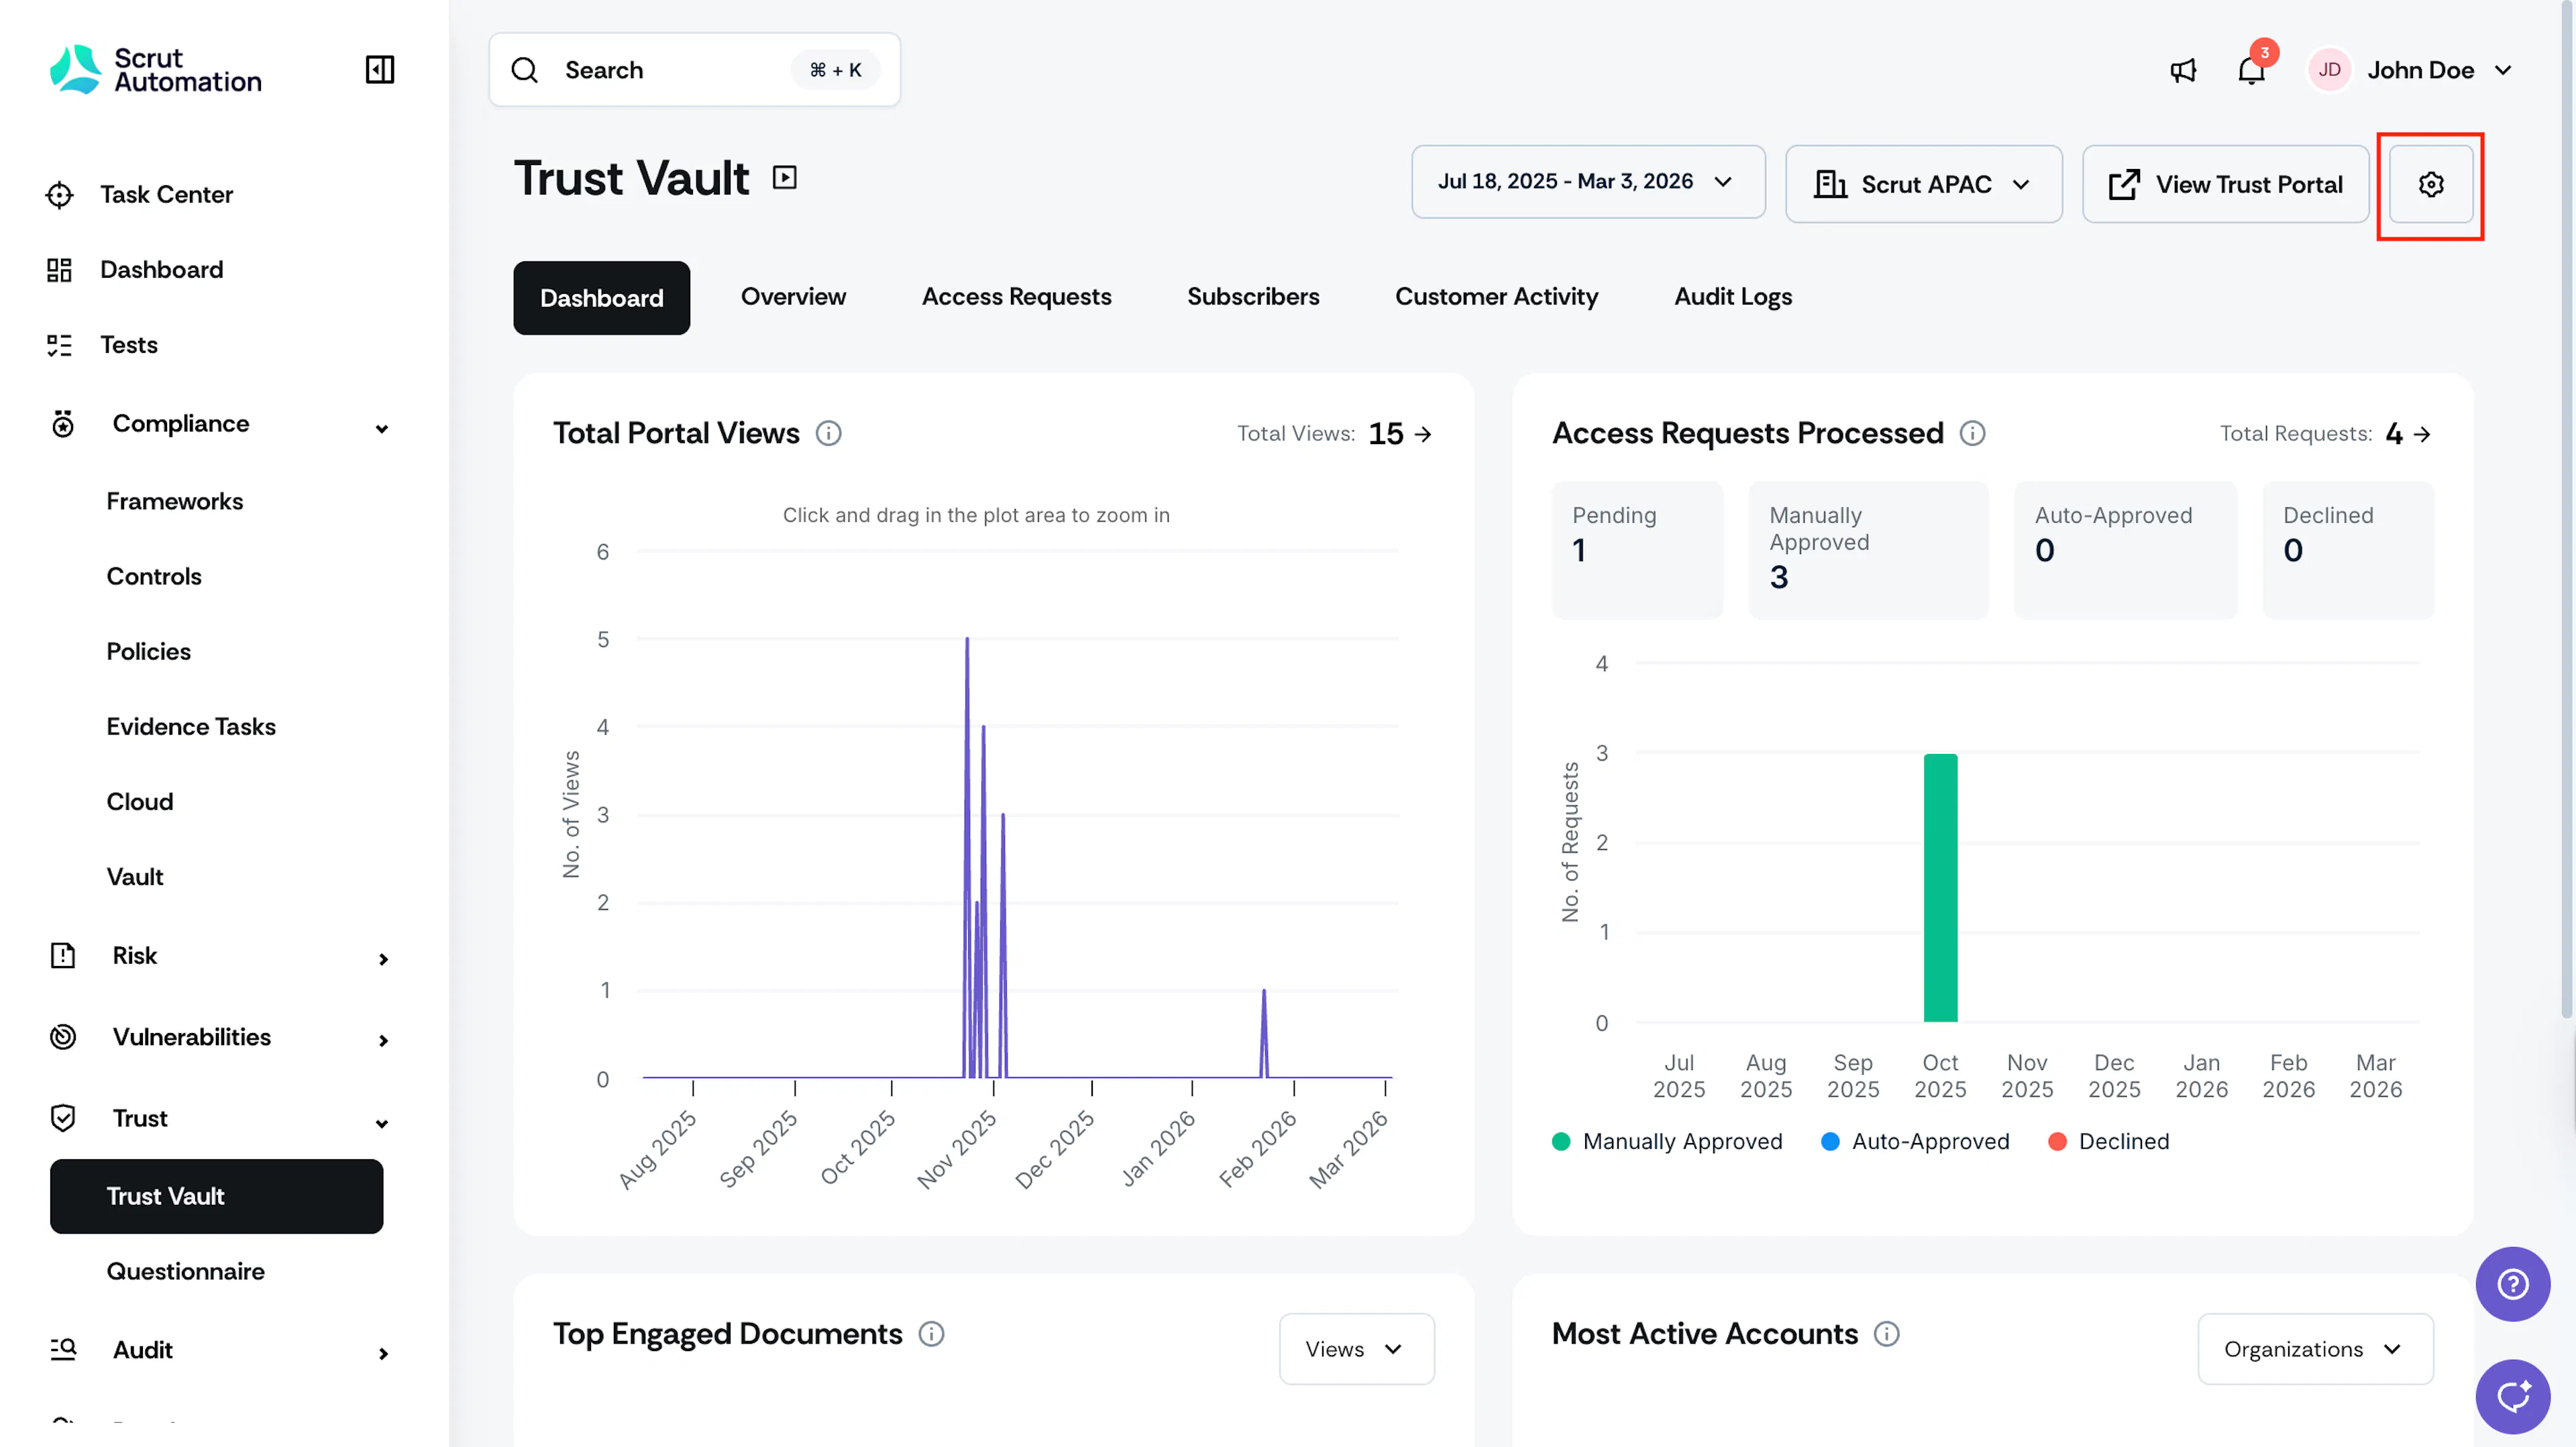
Click the settings icon on the top right of the Trust Vault → Overview page.
-
This opens the Trust Vault Settings page.
-
Go to the Auto Approve tab and select the Auto-Approve If radio button.
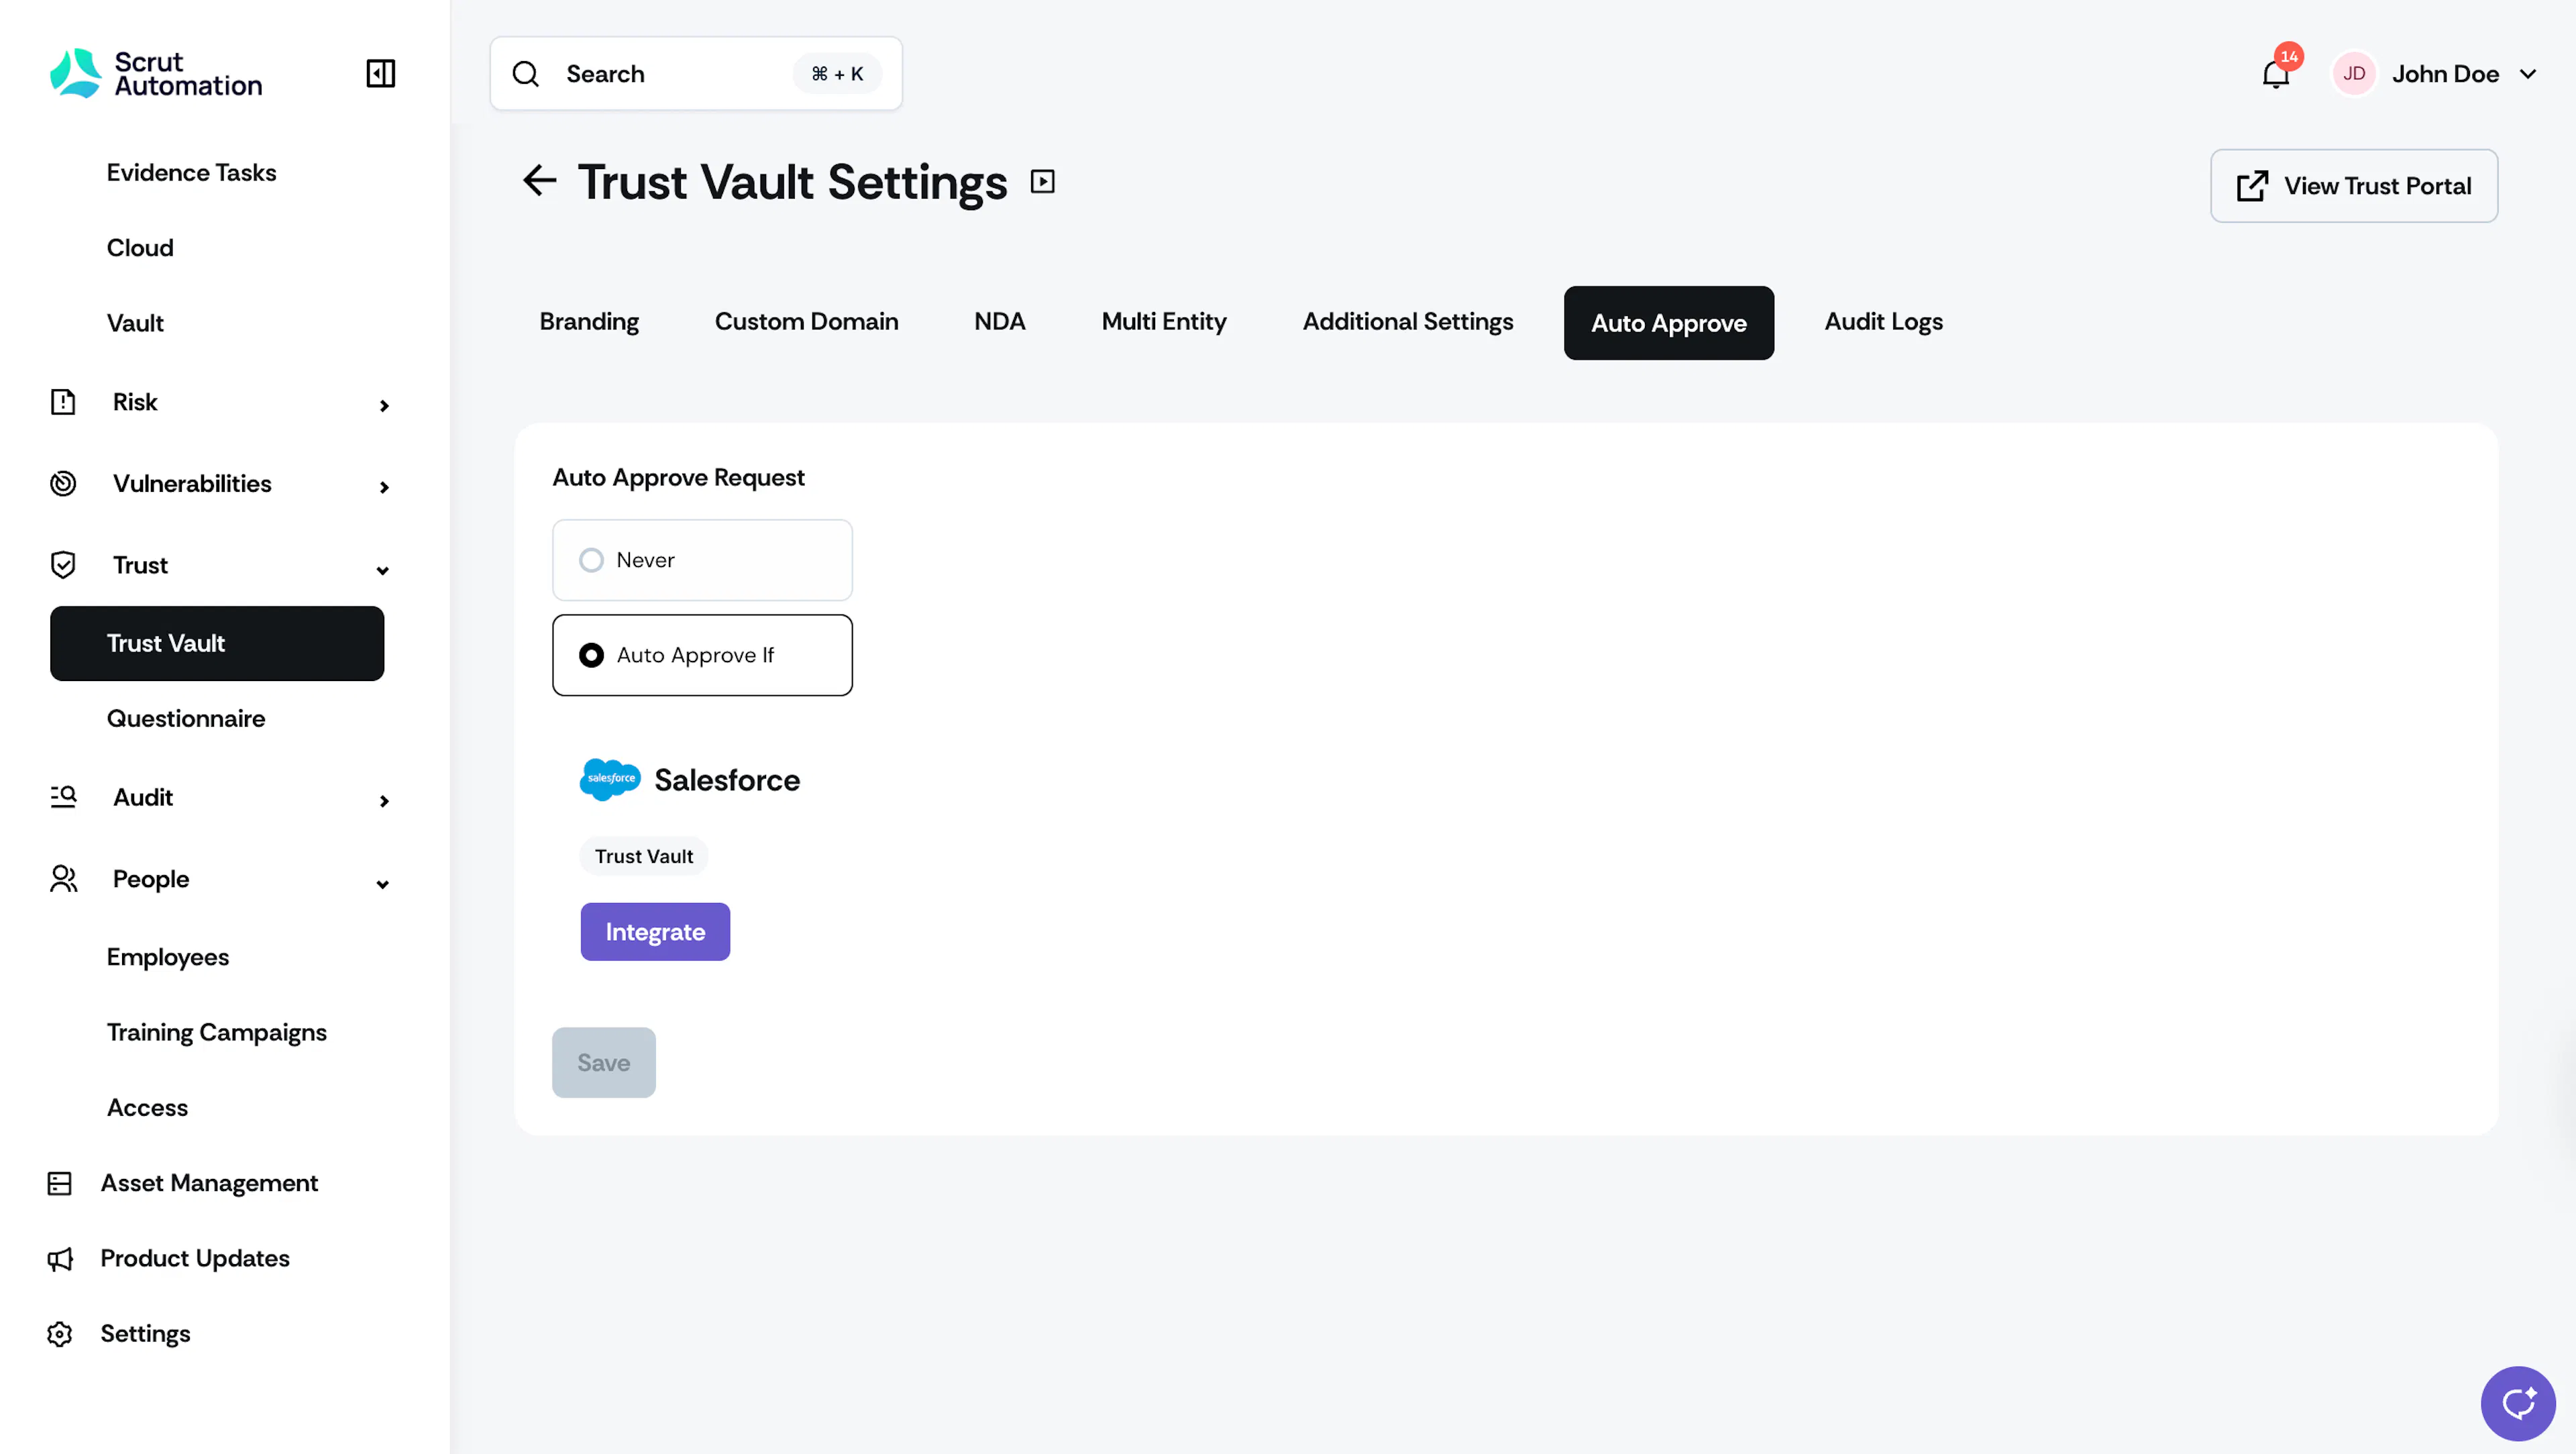
- Click the Integrate button for Salesforce.
- Follow the steps listed in the Integrating Salesforce guide to complete the integration.
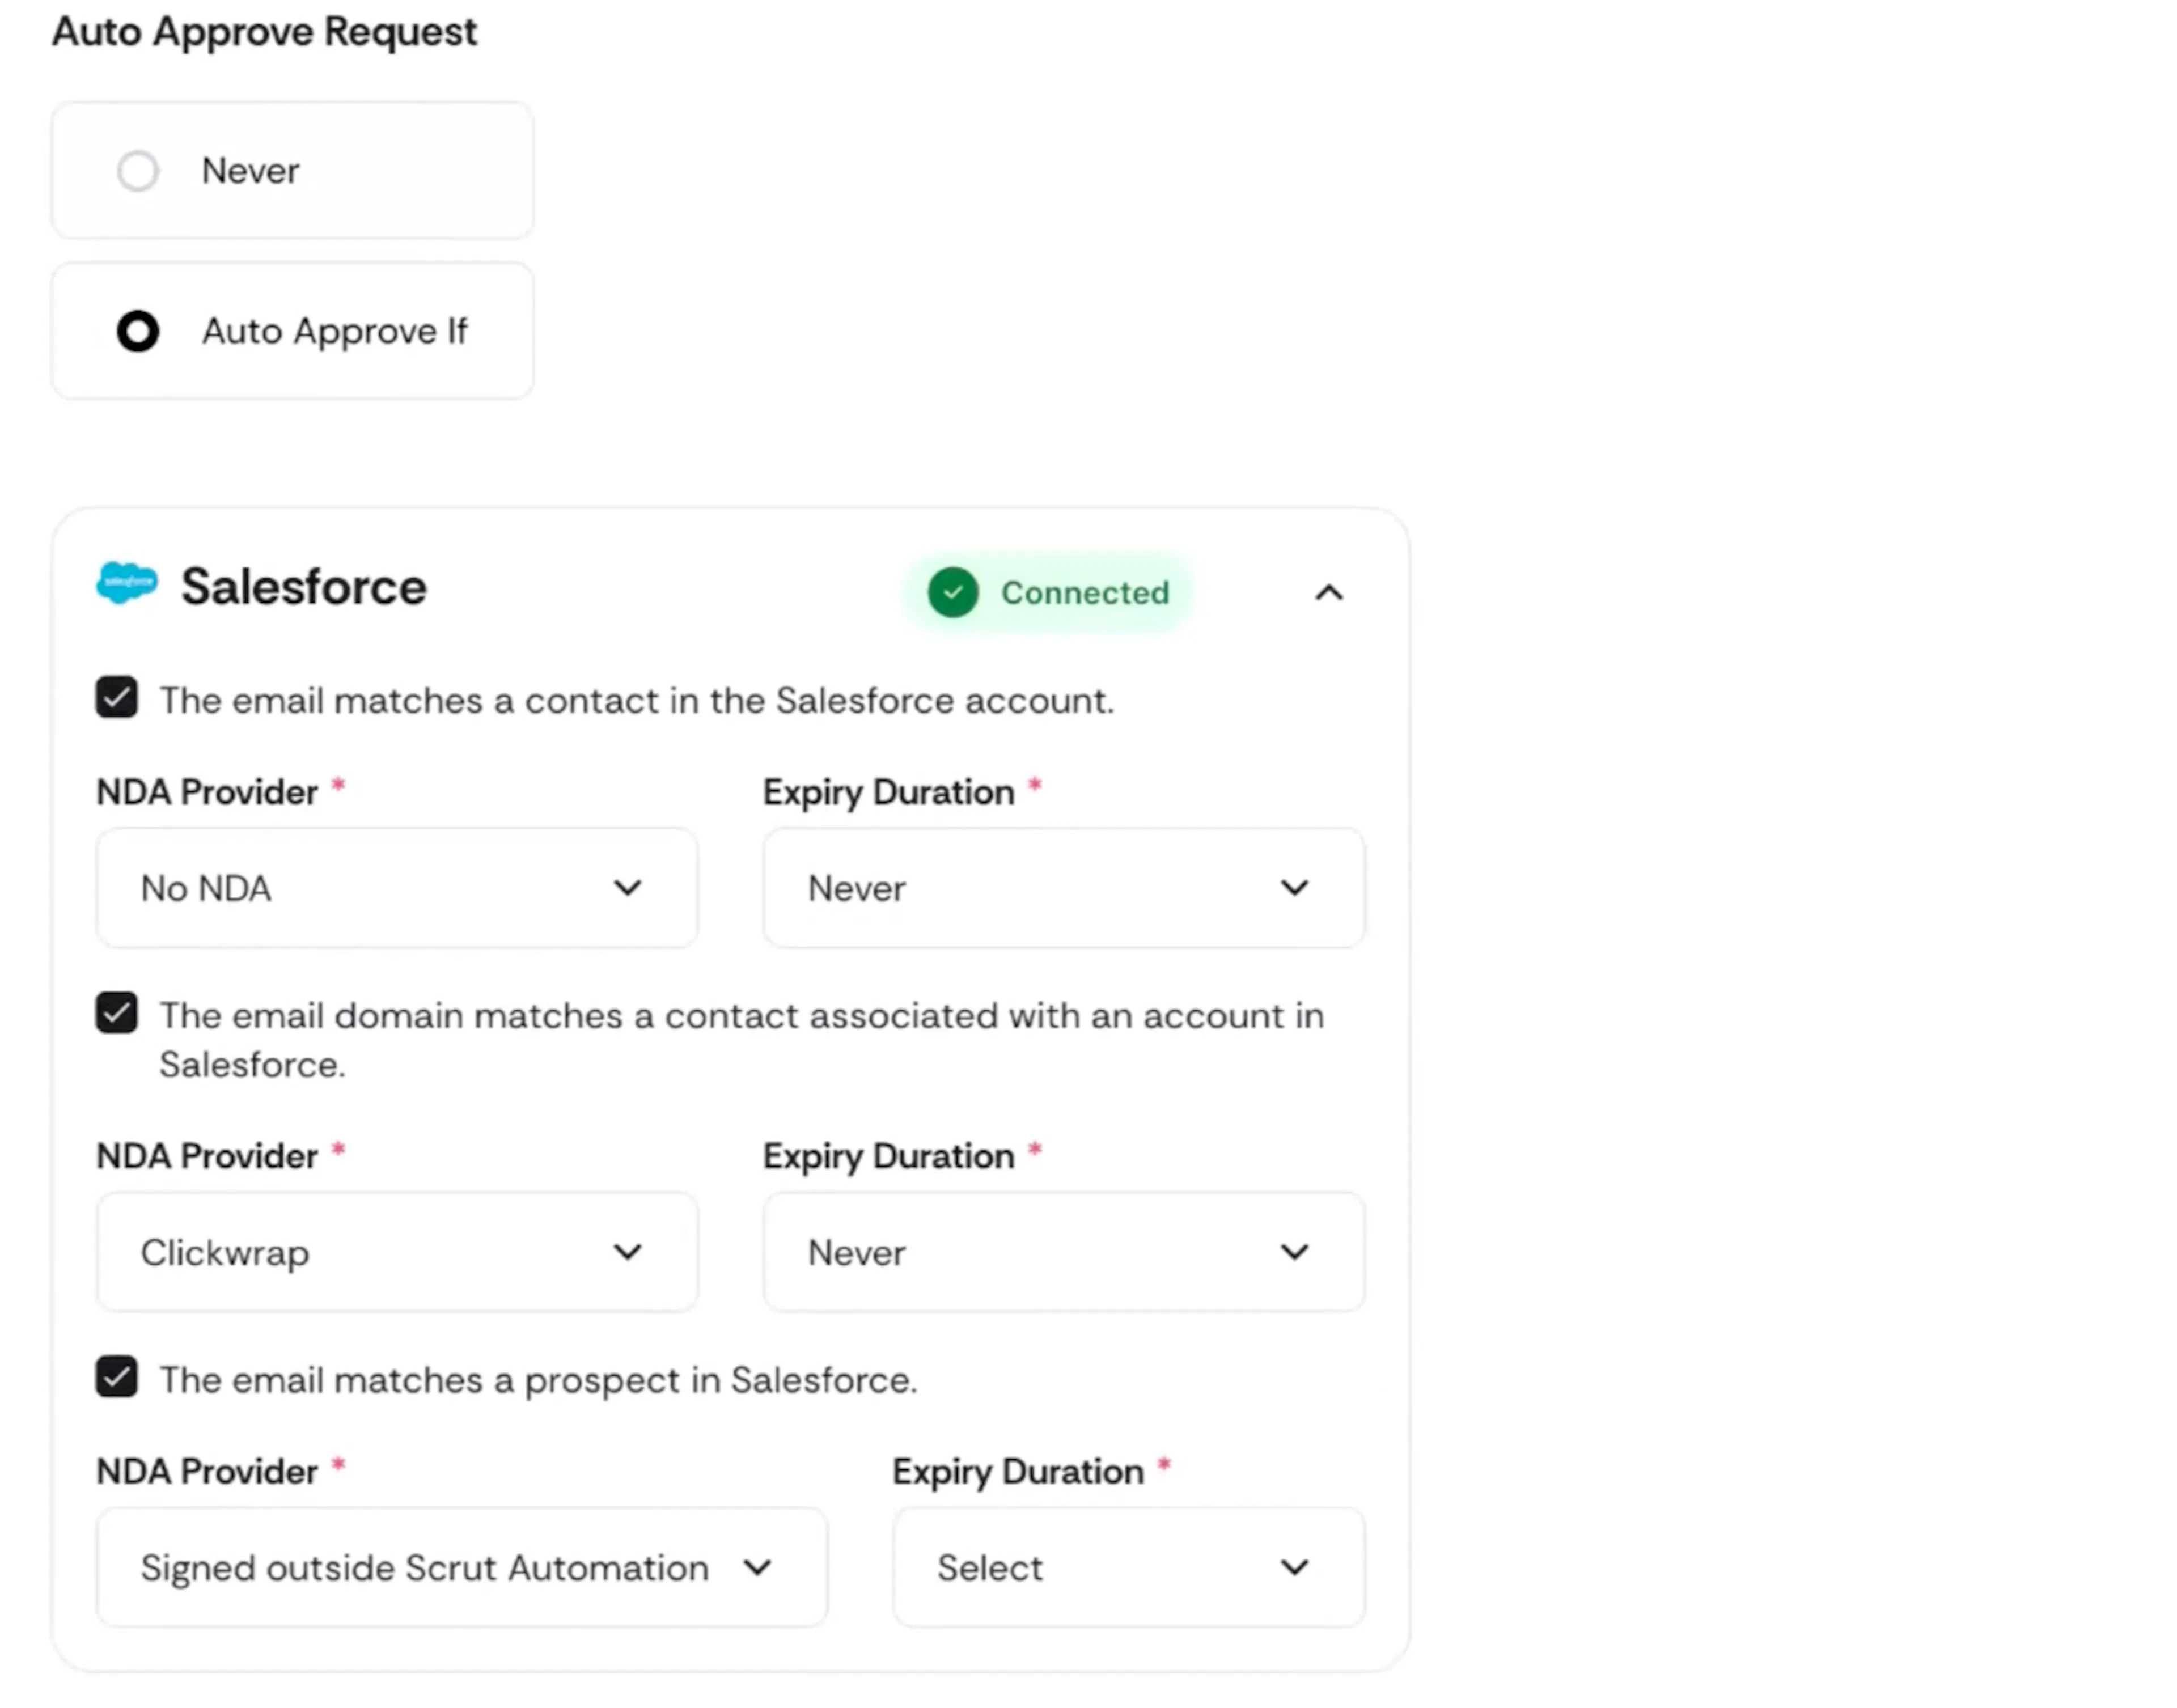
- Once the Salesforce integration is complete, configure the auto-approve rules, as required.
- Click Save.
What Happens Next?
Depending on the rules you’ve configured in the Auto Approve tab, whenever a customer/prospect requests access to your organization’s Trust Vault, the request will get auto-approved if the user’s:
- Email matches a contact in your Salesforce account
- Email domain matches a contact associated with an account in Salesforce
- Email matches a prospect in your Salesforce account
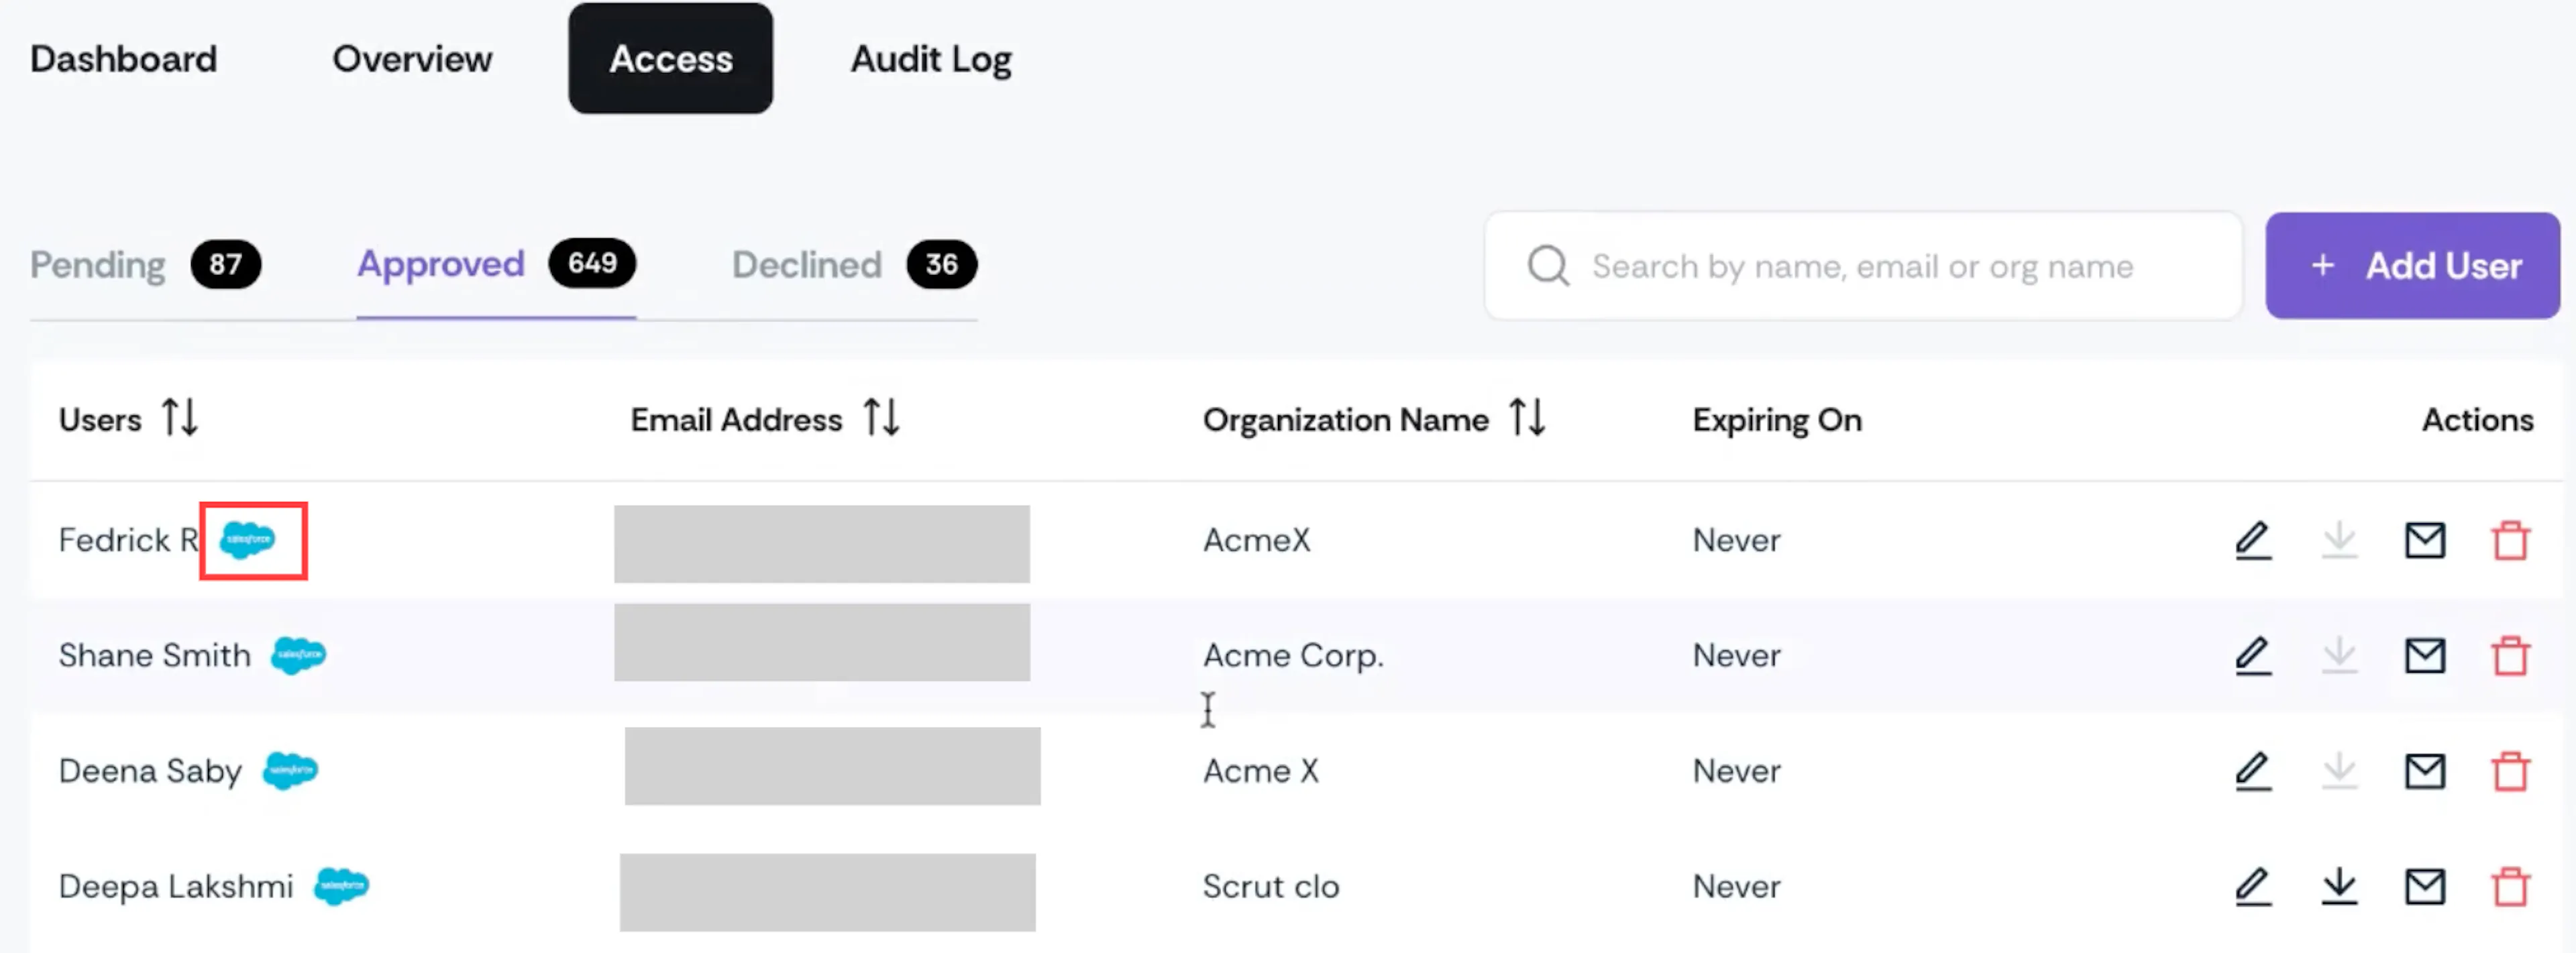
If there is a match, you don’t have to approve the access request. Scrut will automatically grant them access to all documents in your Trust Vault. Users who are auto-approved will have the Salesforce tag associated with them. You can check this in the Trust Vault → Access → Approved tab.
Note:
Users auto-approved via Salesforce will have the Salesforce tag associated with them.