

Integrate GCP (Multi-Project) [BETA]
Important
This feature is currently in beta and may require additional validation or implementation steps. If you would like to use this method for GCP integration, please contact your CSM to enable this workflow for your Scrut account.
When to use this method?
When connecting multiple GCP Projects (ideally, more than 10)
If you’re connecting multiple projects, the legacy approach of connecting GCP with Scrut might be time-consuming. You have to repeat the same steps for each integration (one integration equals one GCP account) to connect multiple GCP Projects, which can be highly time-consuming and manual.
To address this challenge, we’ve simplified the workflow. This method allows you to connect multiple GCP projects simultaneously. We’ve also limited the manual steps required, reducing the time and effort needed to set up the integration.
How to Integrate Your GCP Account With Scrut for Multi-Projects
Permissions
Before you begin the integration, make sure you have the following permissions for your GCP platform:
-
Project Details and Configurations: Access to view project metadata, resource settings, and configurations across your Google Cloud environment to ensure compliance with best practices.
-
Logs and Monitoring Data: Permission to retrieve logs and performance data via Stackdriver to track resource usage, detect unusual activity, and maintain operational security.
-
Service Account Tokens: Access to service account tokens and associated metadata to ensure secure authentication and proper access control within cloud services.
-
Cloud Resource Manager API is enabled for the project. (To learn more, refer to Cloud Resource Manager API | Google Cloud.)
-
IAM Service Account Credentials API is enabled for the project. (To learn more, refer to IAM Service Account Credentials API.)
-
The service account has the following permissions: Security Reviewer, Service Account Token Creator, and Viewer. (To know more, refer to IAM Basic and Predefined Roles.)
Pro Tip:
See here for a detailed overview of the permissions needed for this integration. To learn more about service account impersonation, refer to Google’s documentation on:
Step 1: Navigate to Integrations in Scrut
-
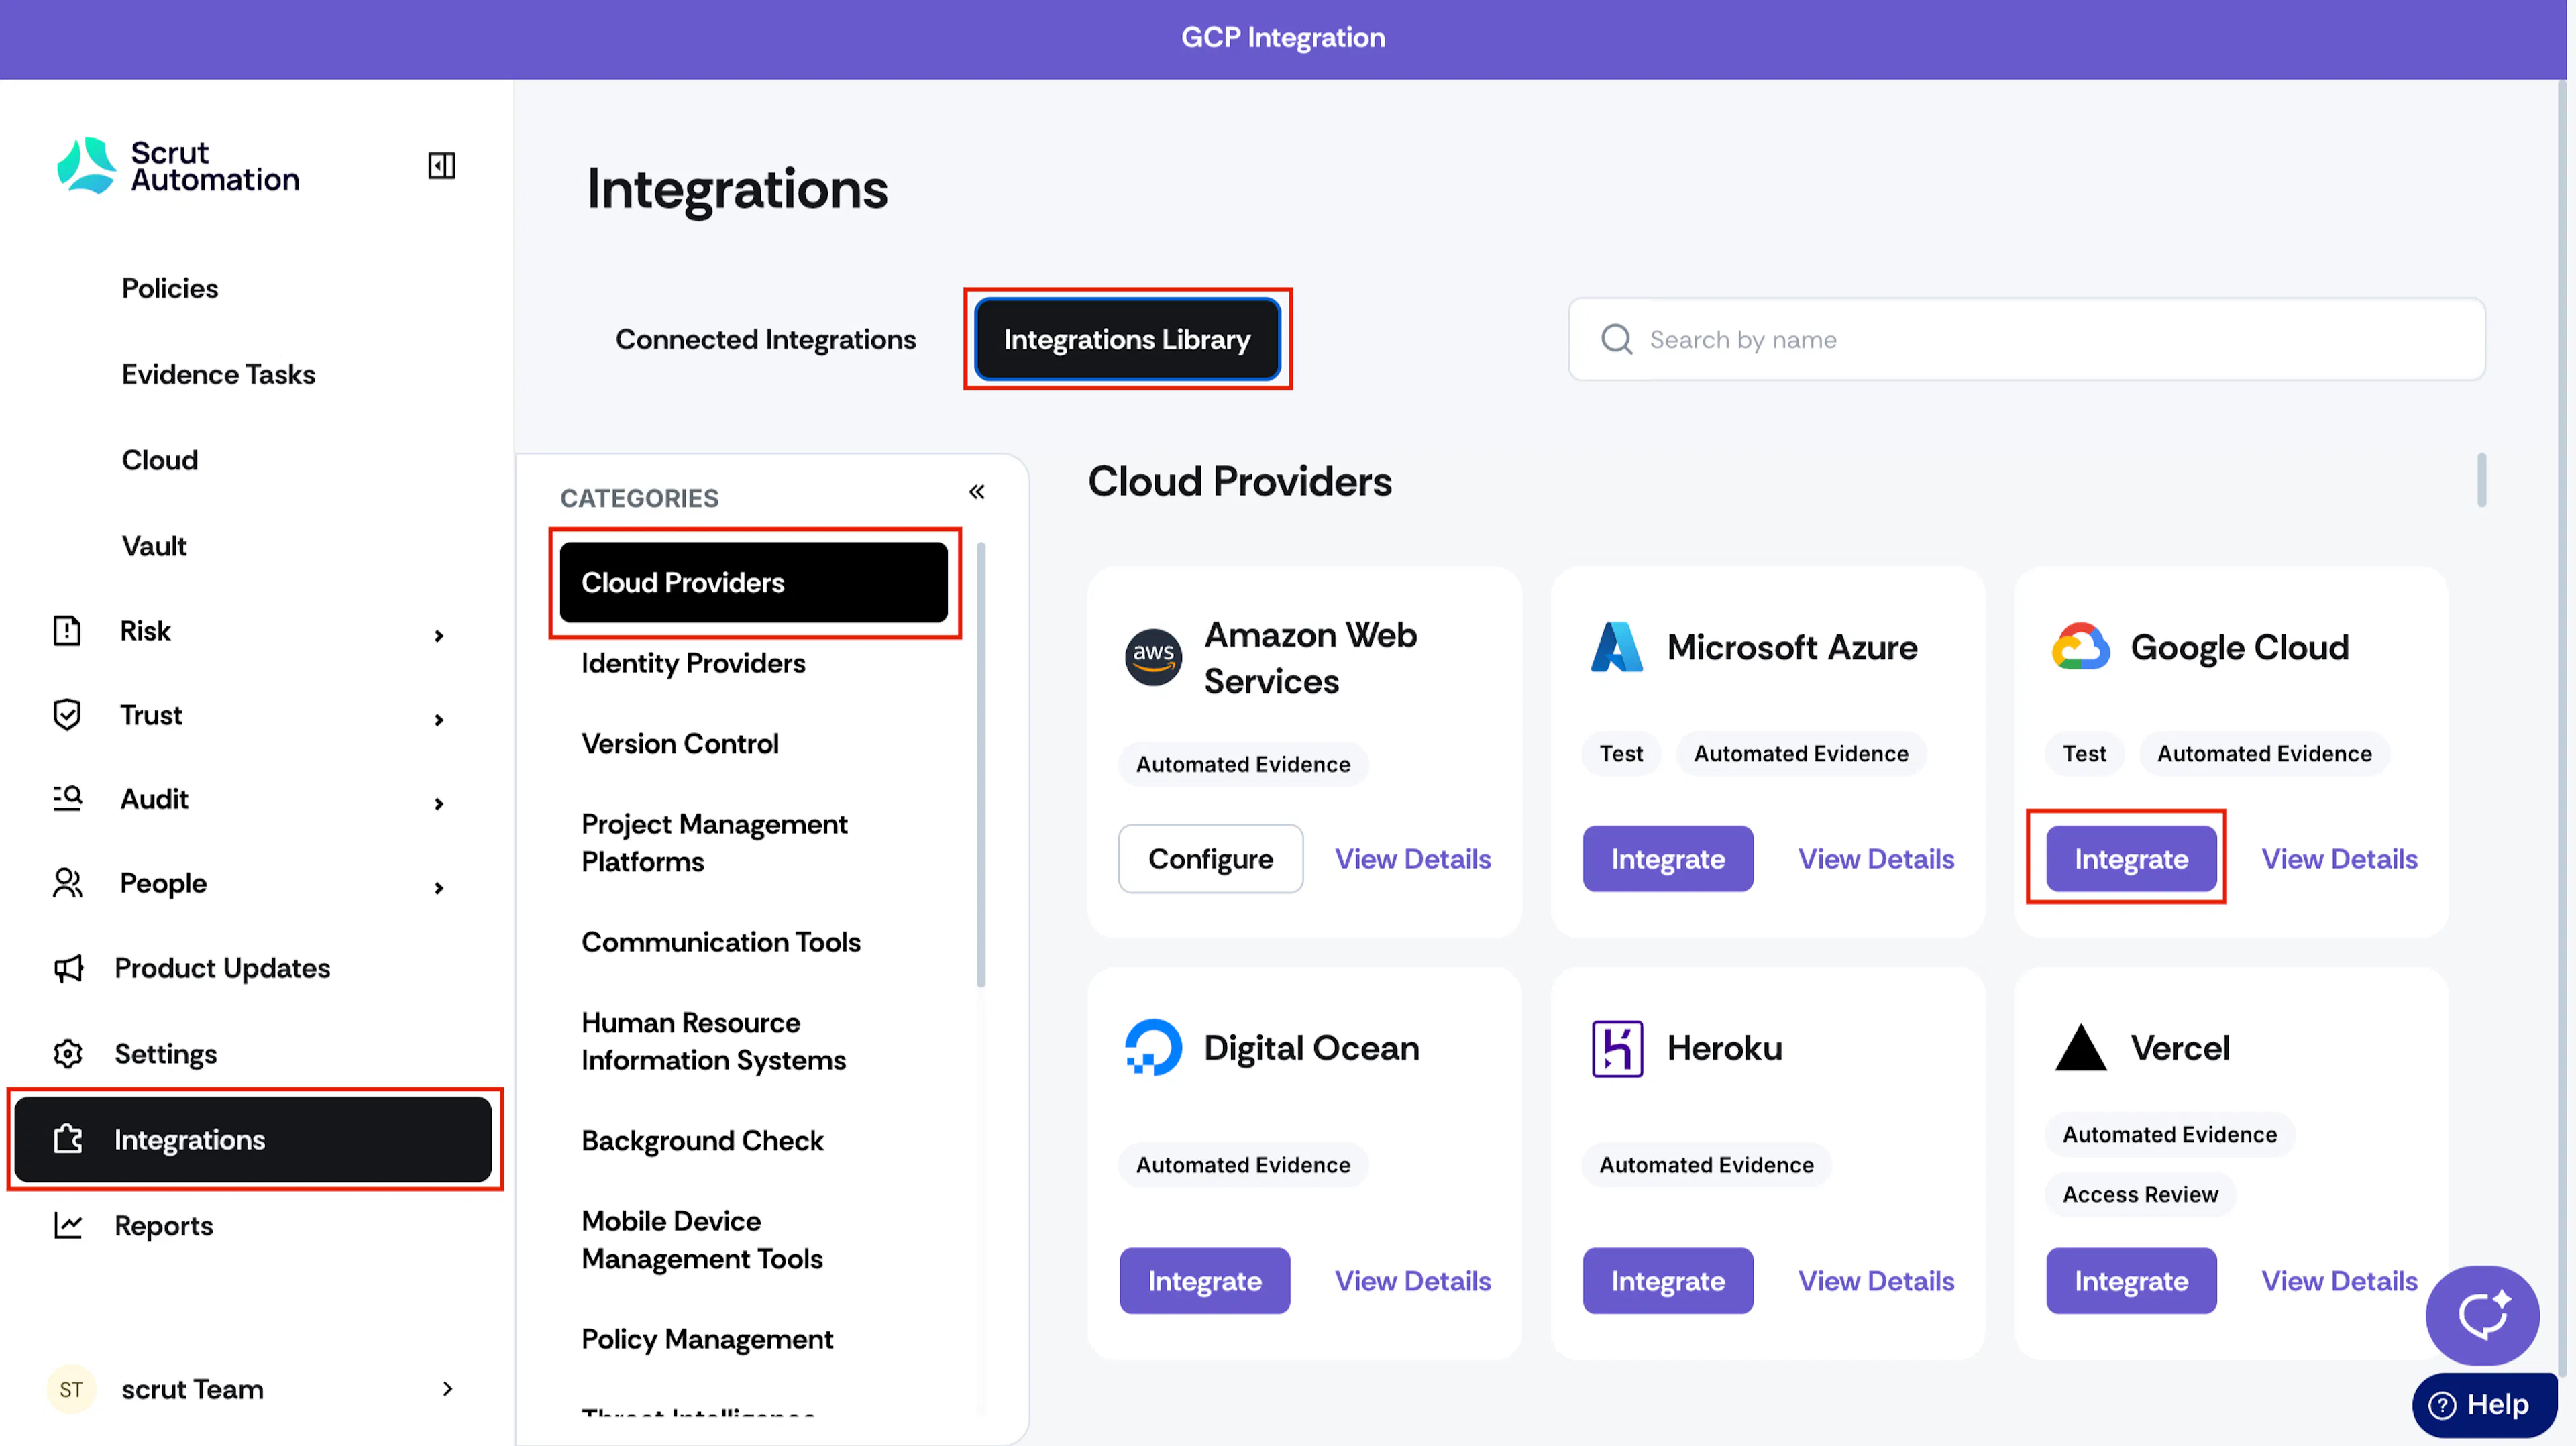
Log in to Scrut and click Integrations on the left navigation panel.
-
Click the Integrations Library tab at the top of the page.
-
In the Categories section, click Cloud Providers.
-
Click the Integrate button on the Google Cloud card.
-
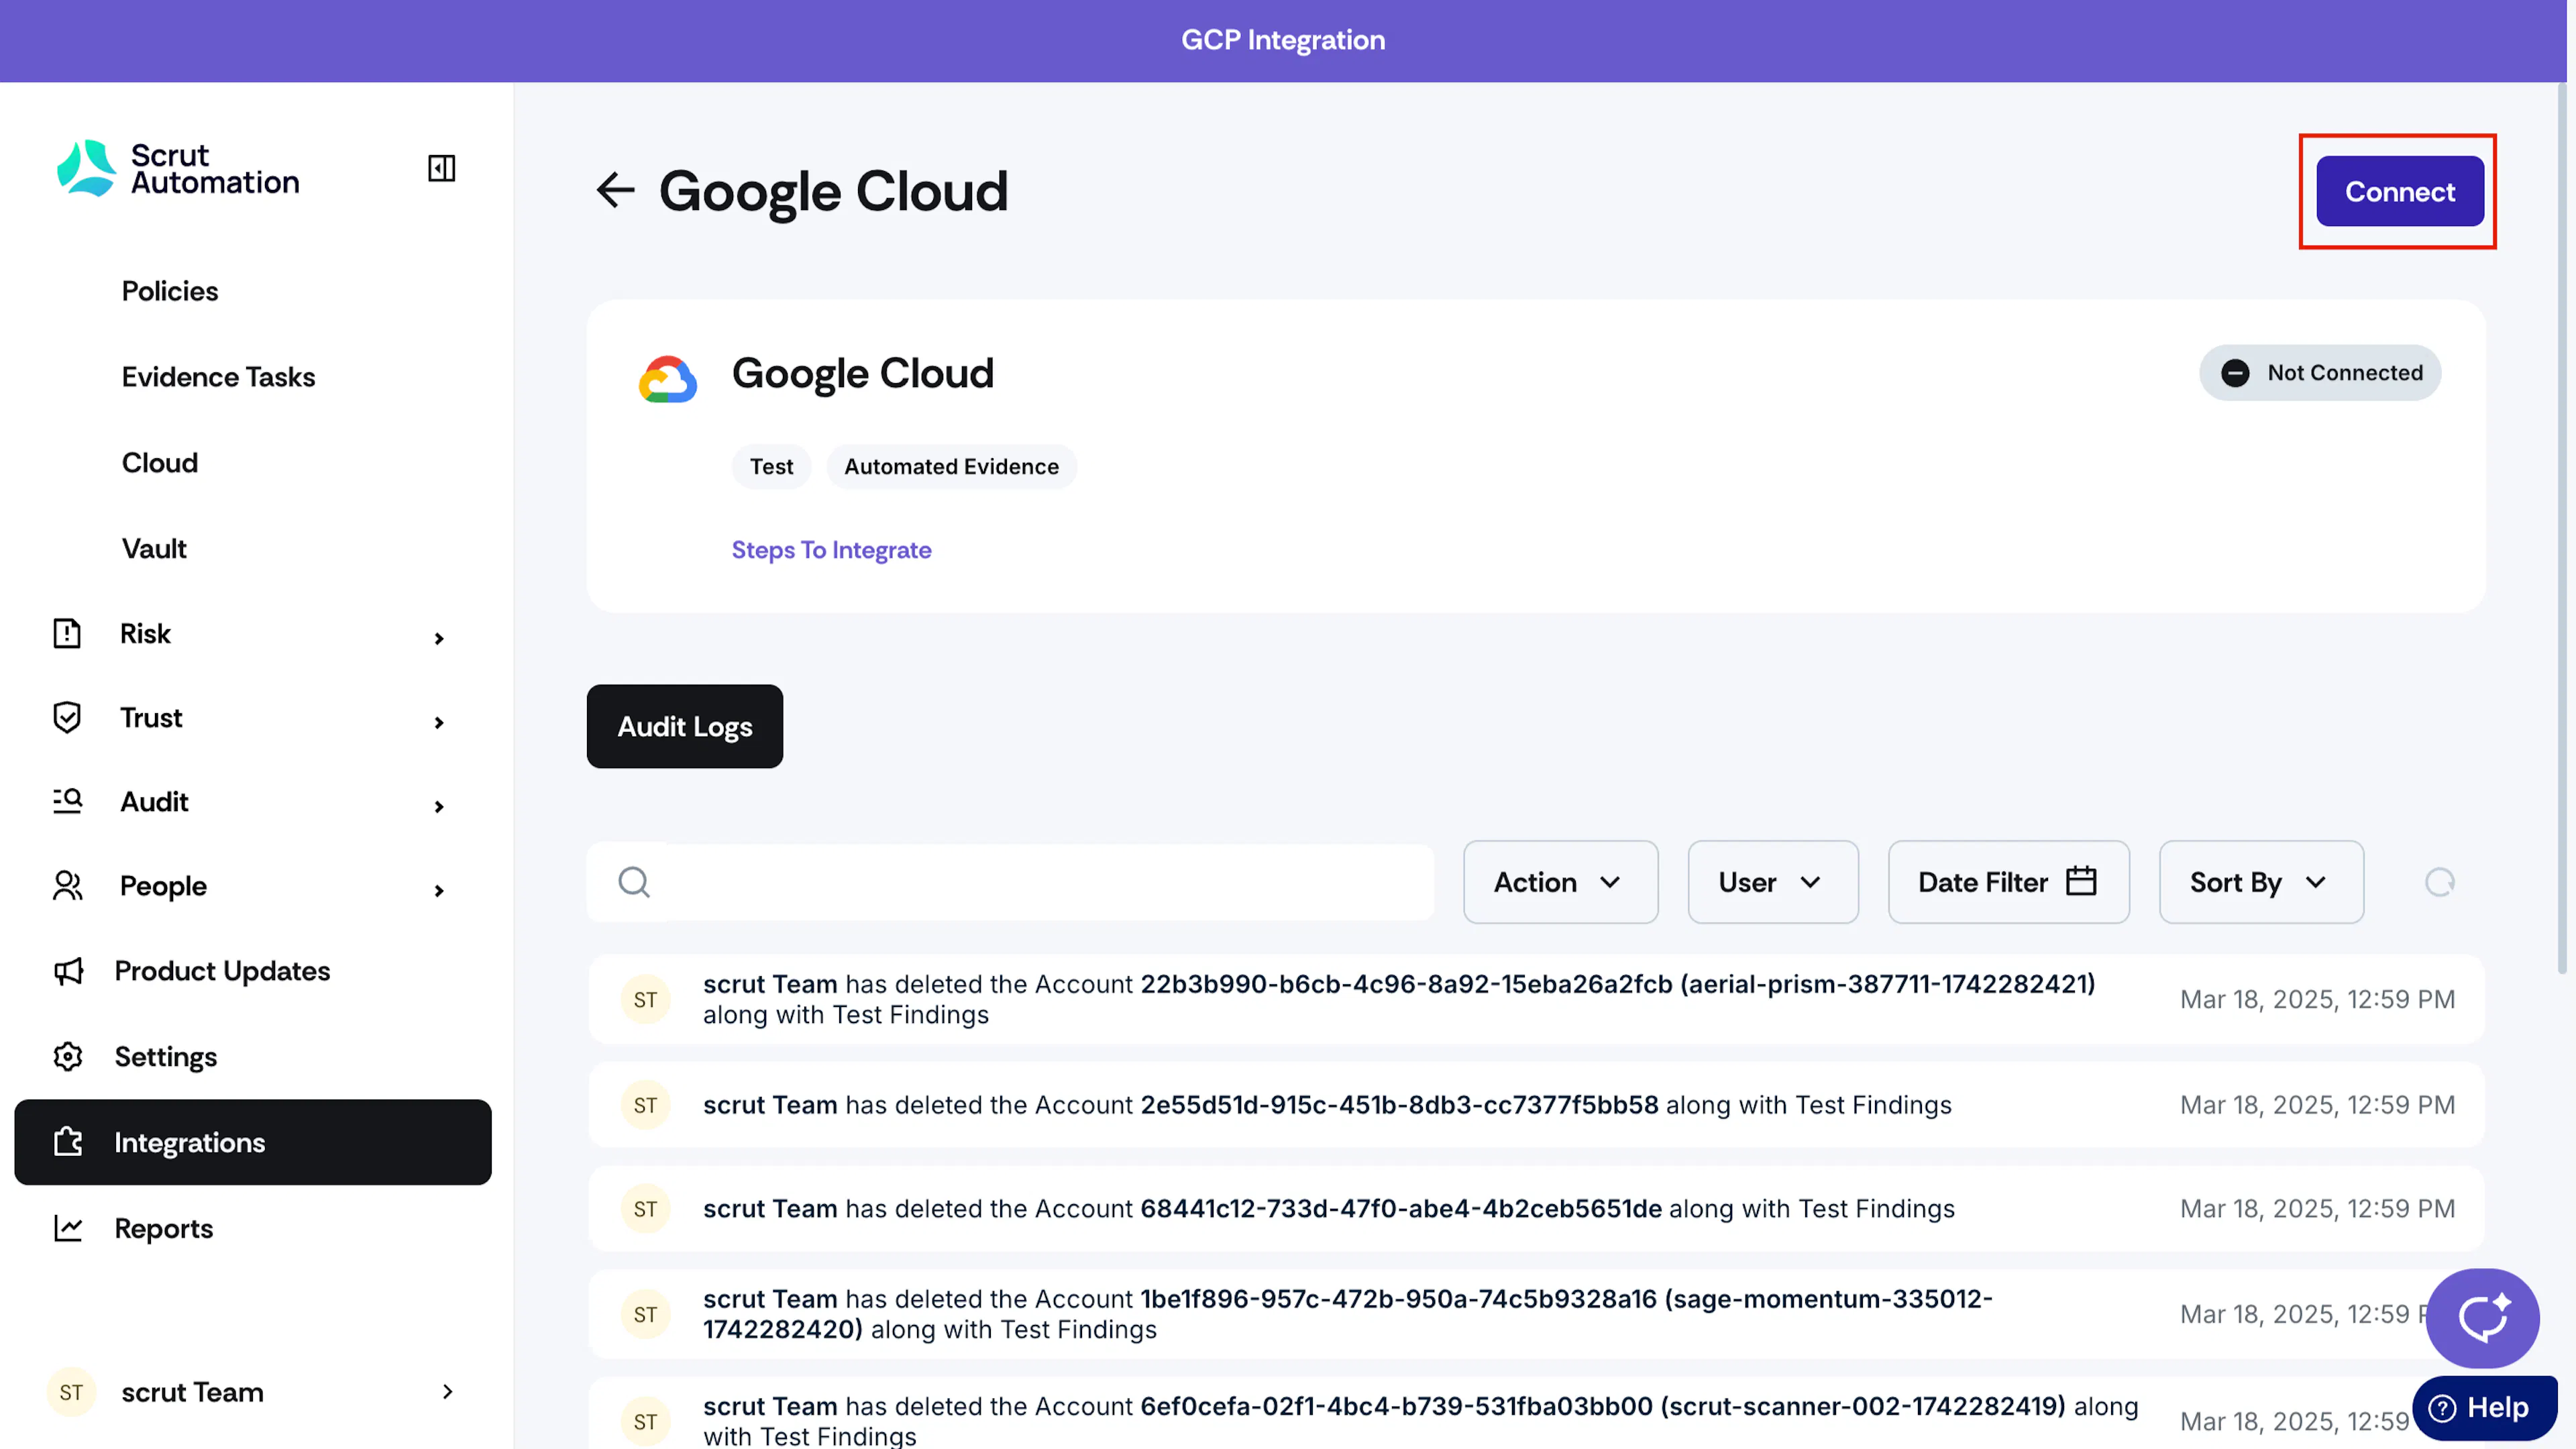
Click the Connect button on the GCP integration page.
Step 2: Execute Scrut’s Integration Script
Scrut runs a script on your GCP organization to extract the required metadata for the integration. Follow the instructions on the screen to generate and execute the script.
Prerequisites
Install the Google Cloud SDK if you haven’t done so already.
Step 2.1: Authenticate the CLI
Run these commands sequentially.
gcloud auth login

sudo apt-get install jq
Step 2.2: Download the Shell File
Download this file: scrut-gcp-setup-script.sh
Step 2.3: Upload the File to Cloud Shell
-
Open Google Cloud Shell.
-
Click Open Editor → More → Upload.

-
Upload the file you downloaded in the previous step to the same directory.
Step 2.4: Run the Script
chmod +x scrut_gcp_integration.sh

./scrut_gcp_integration.sh
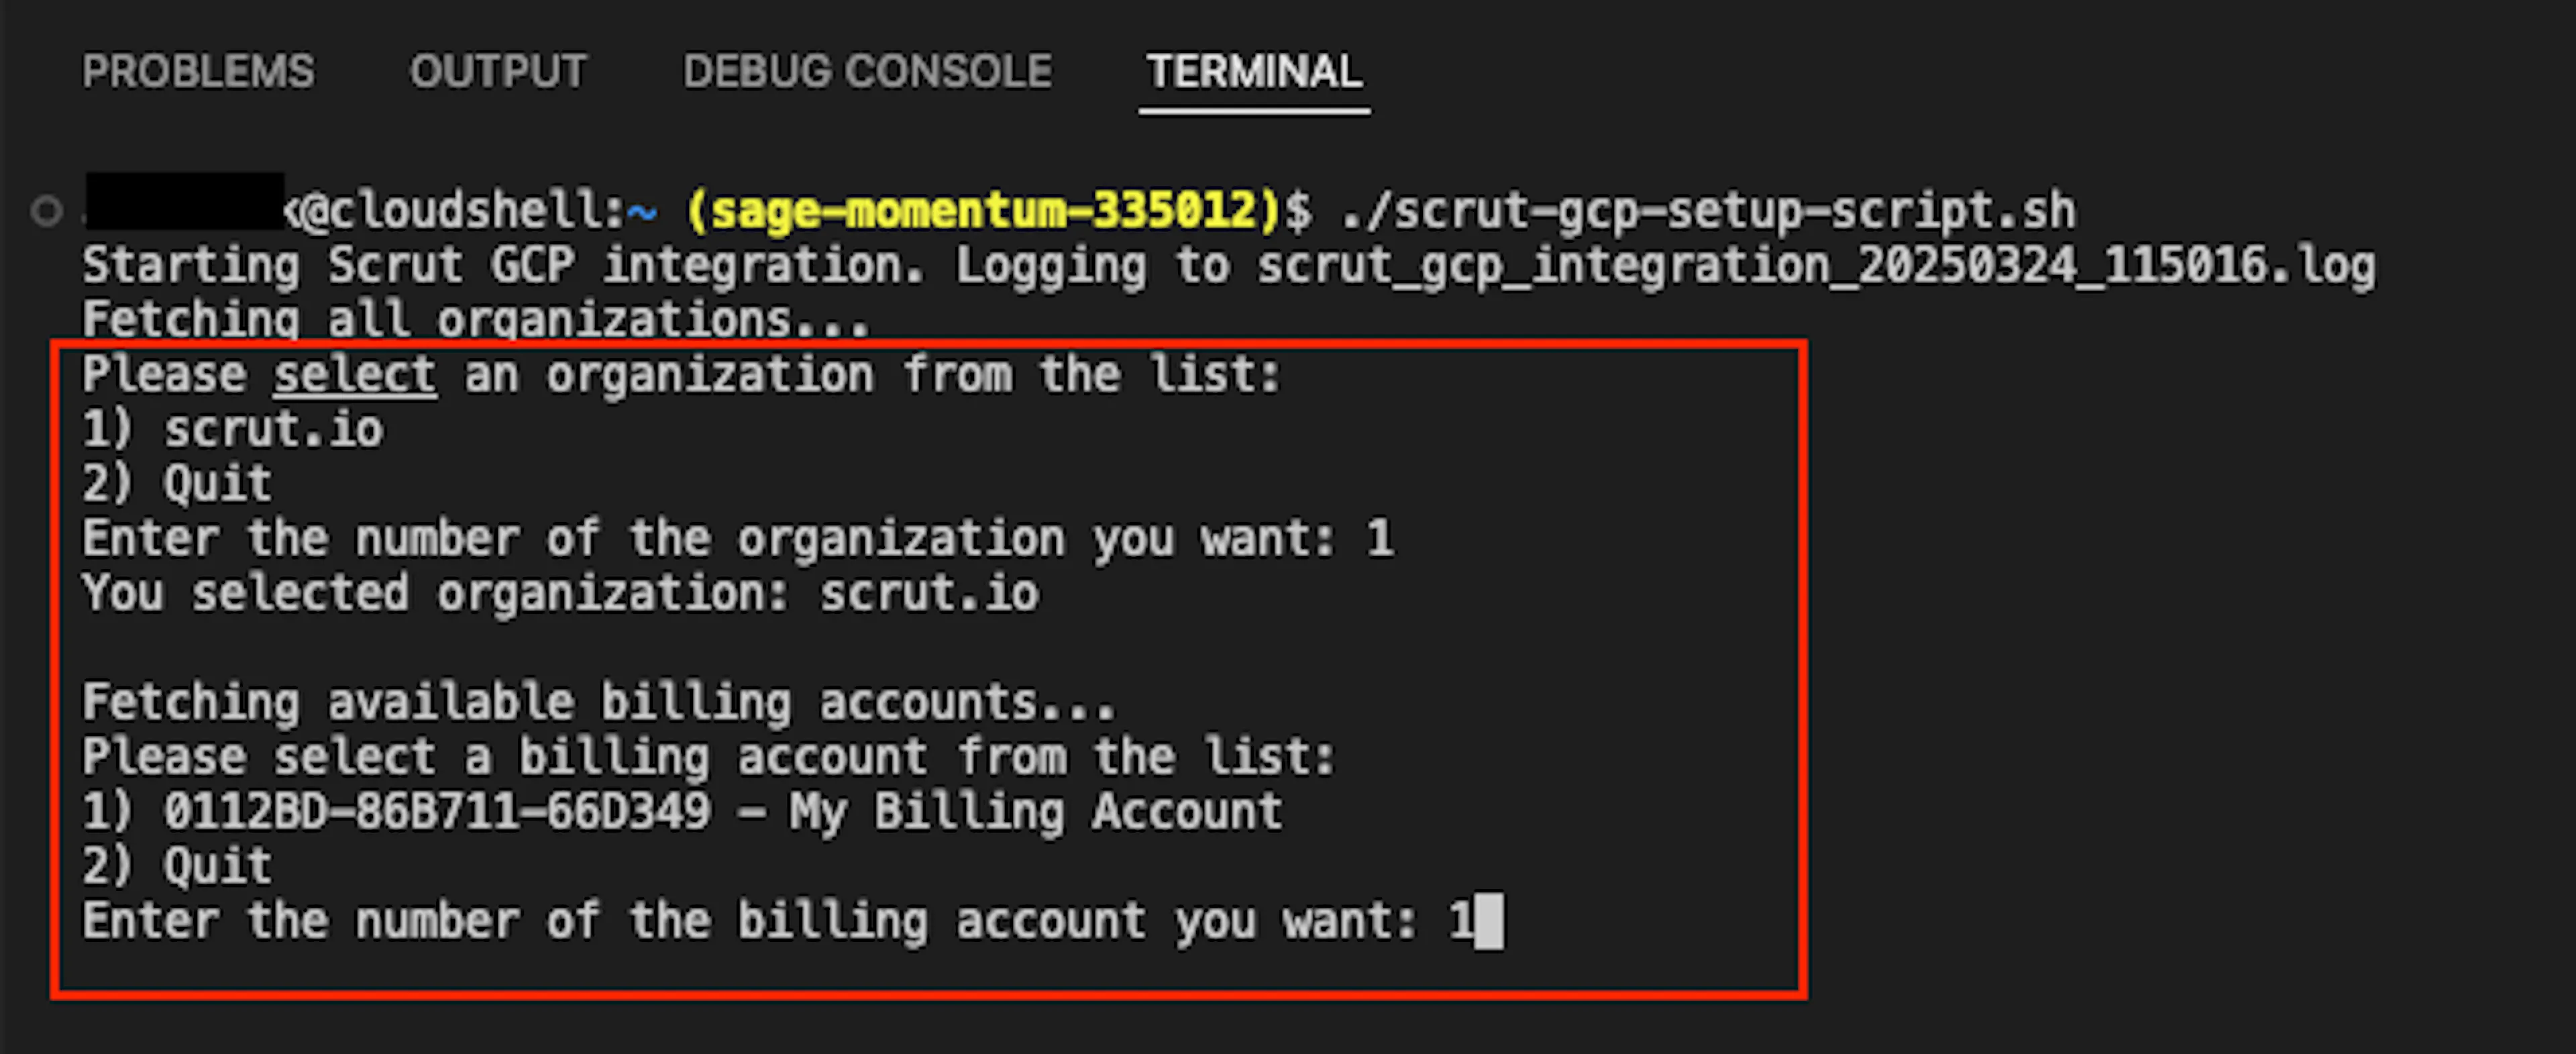
Scrut runs the script on your GCP organization to extract the required metadata for the integration. After you run the script, you’ll be prompted to:
-
Select the GCP organization and billing account you want to connect to Scrut.
-
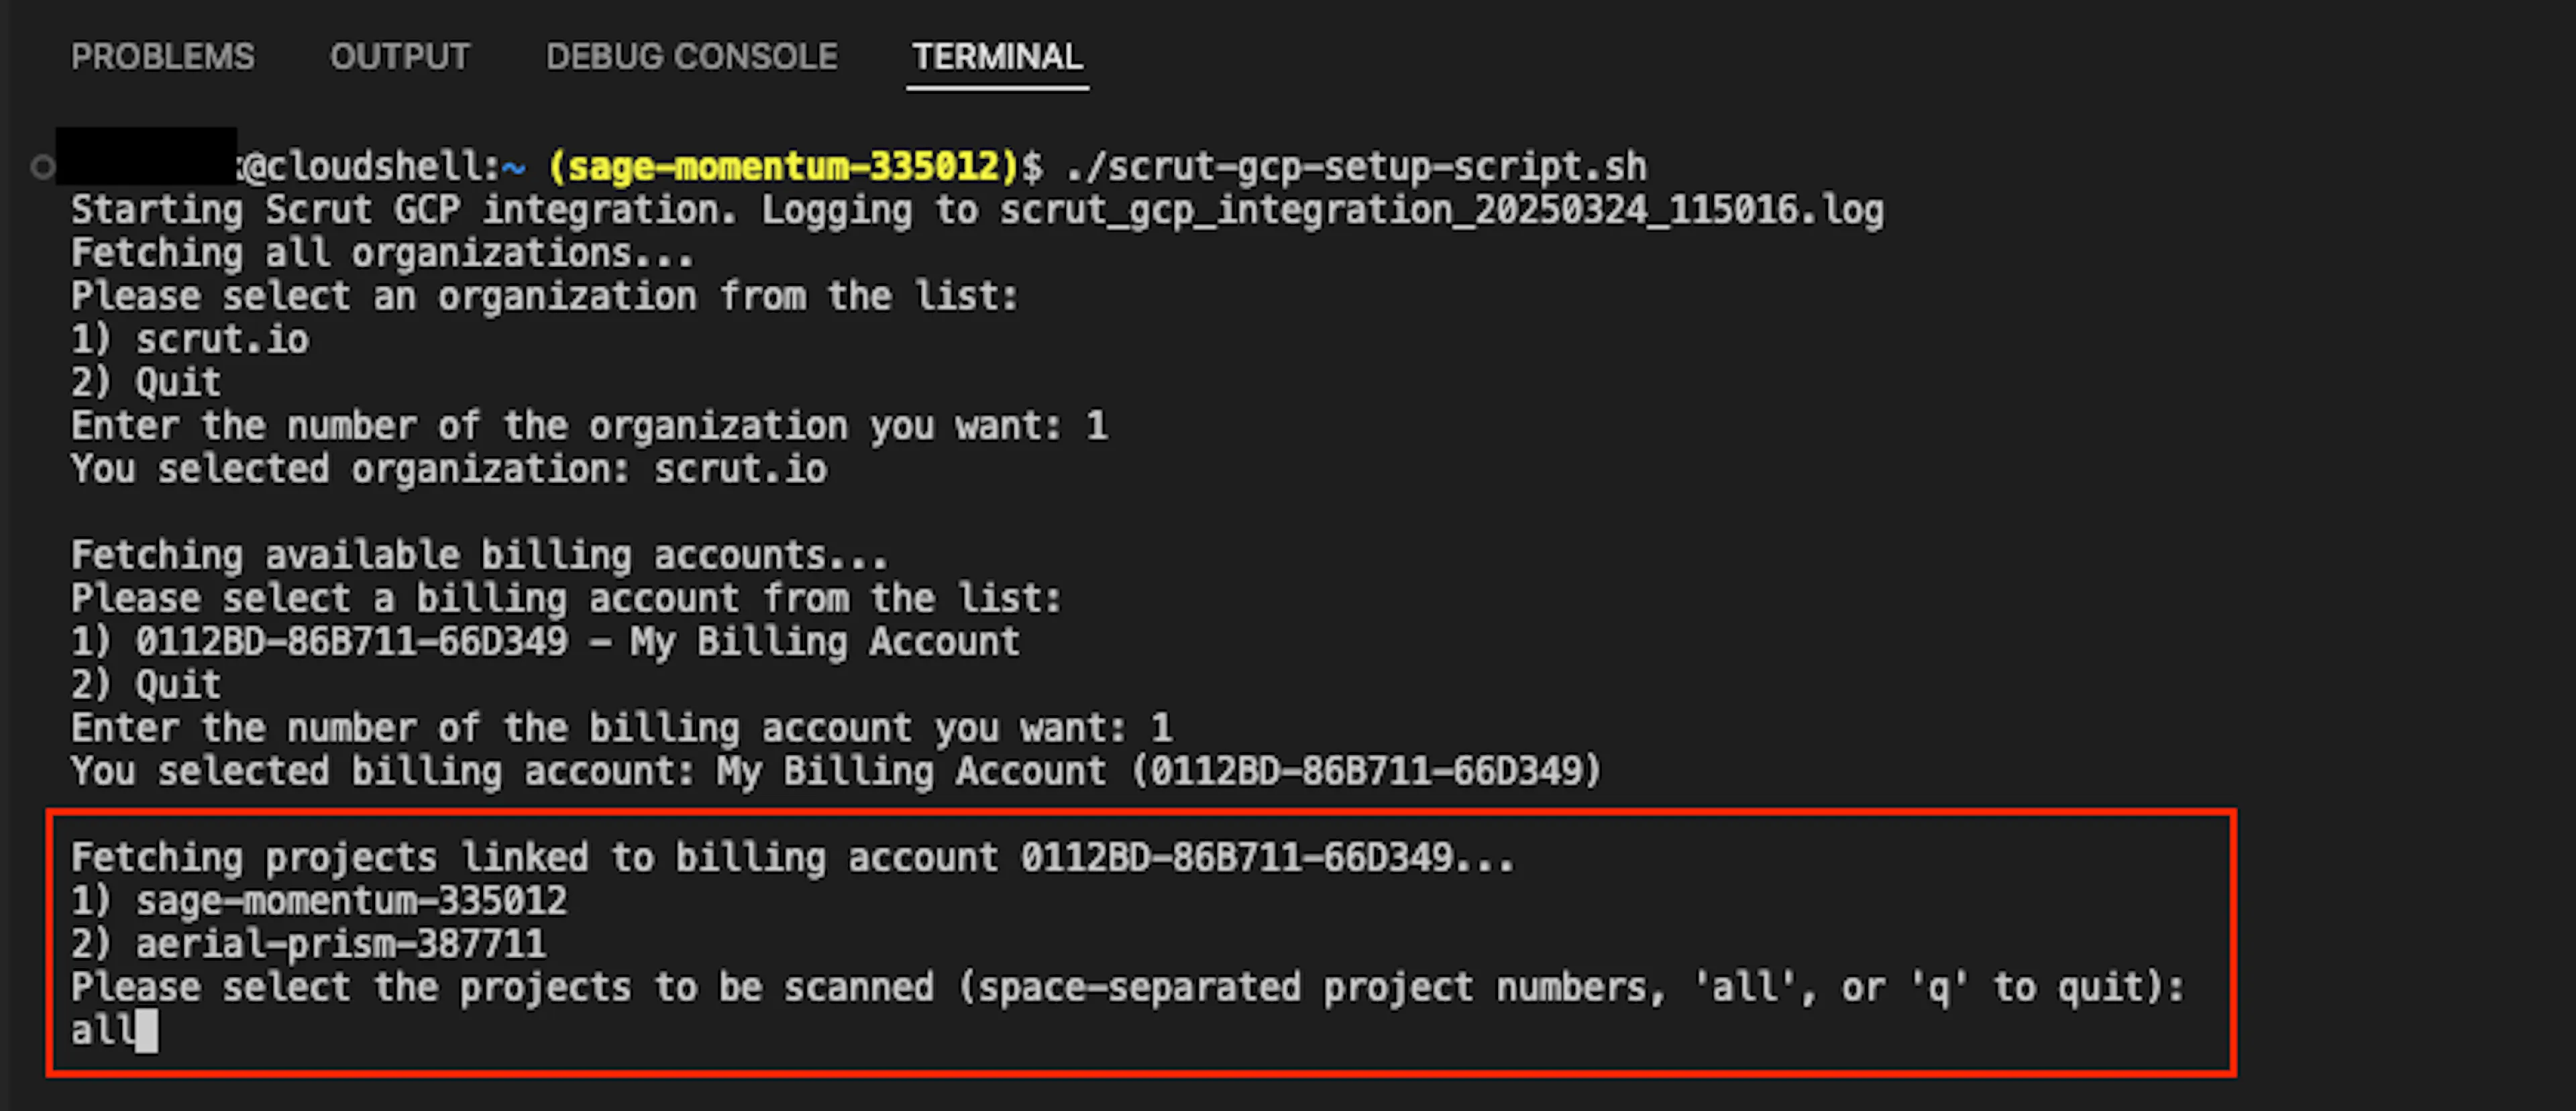
Select the projects to include in the integration. Enter the numbers corresponding to the projects you want to connect. Enter ALL to connect all your GCP projects to Scrut in a single step.
Once you provide the inputs, the script will create a service account and the necessary roles and permissions.
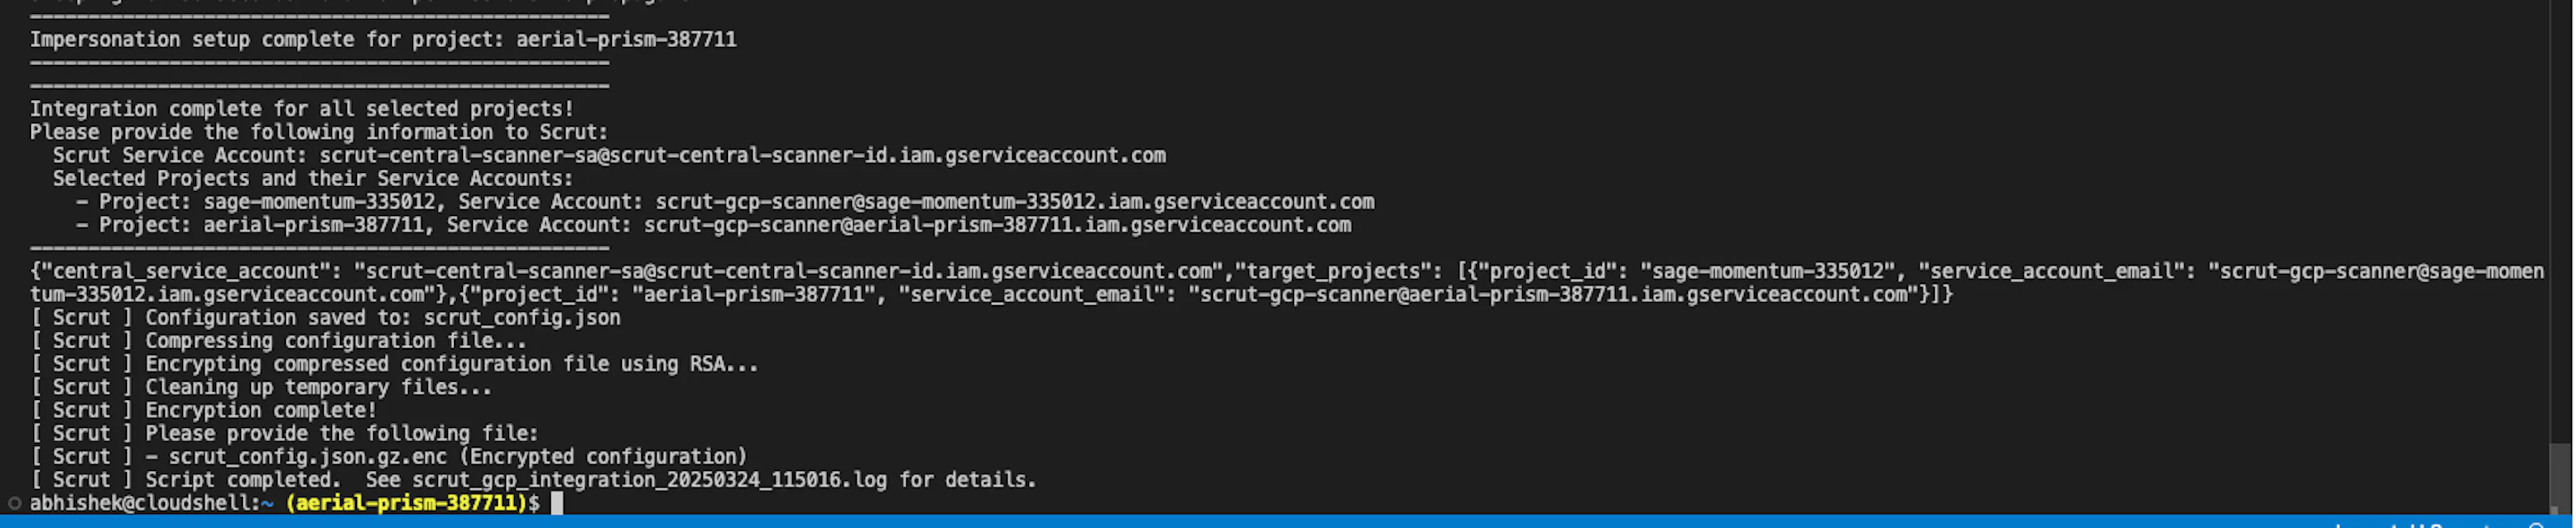
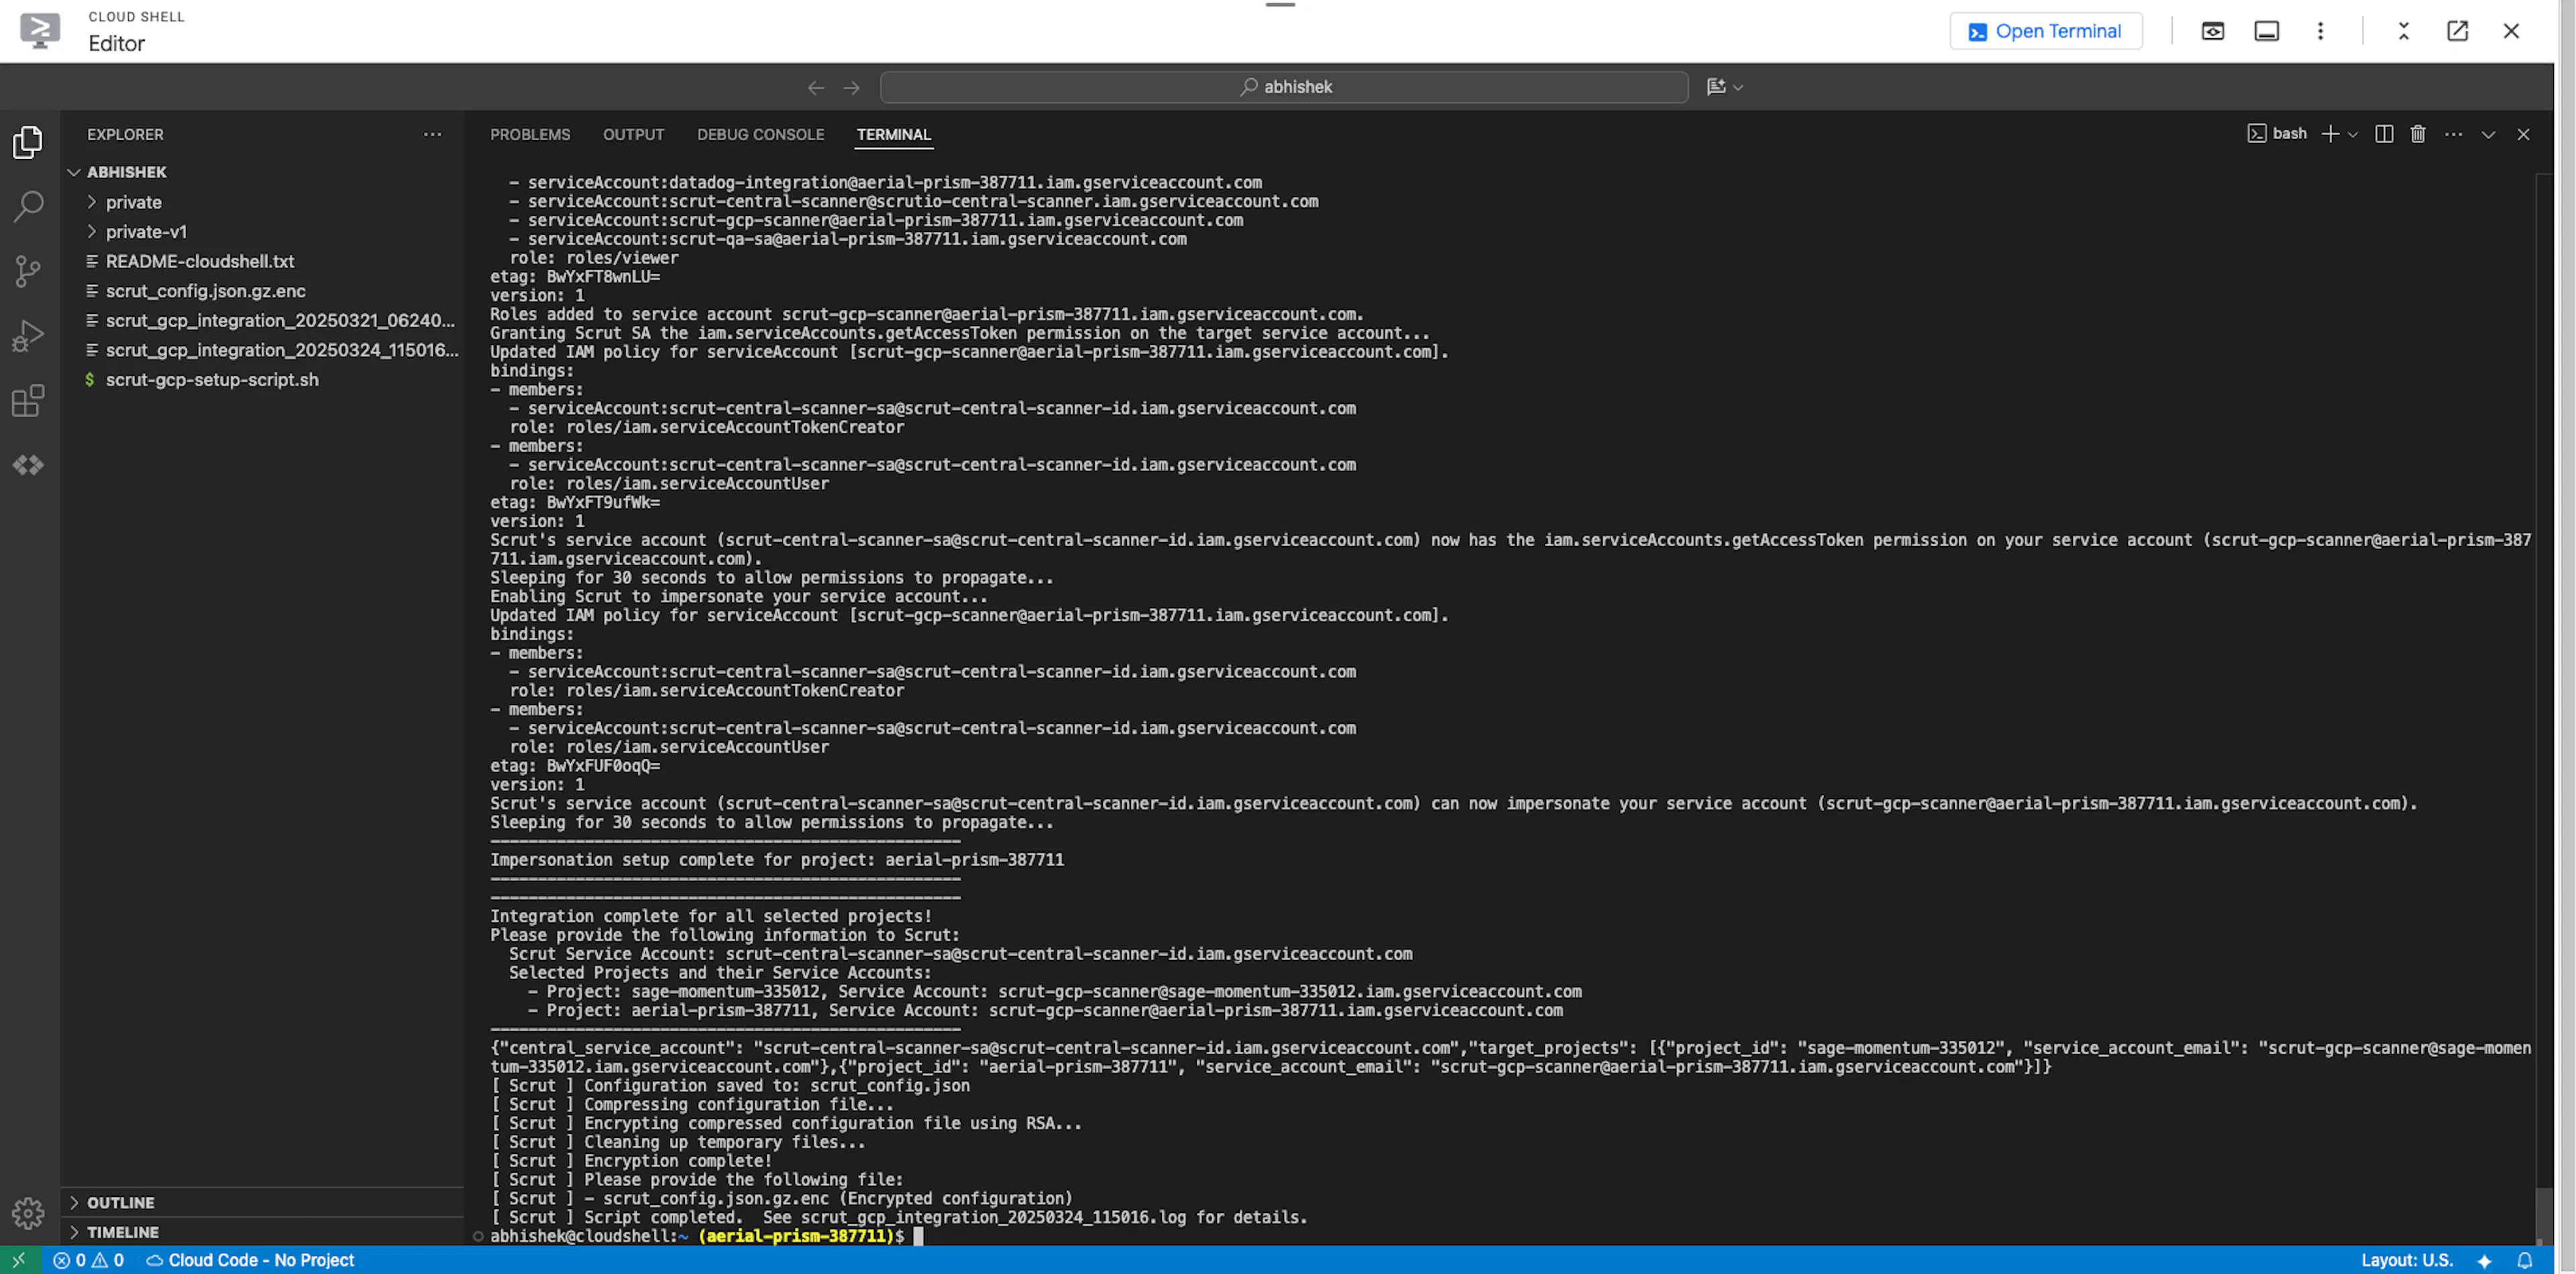
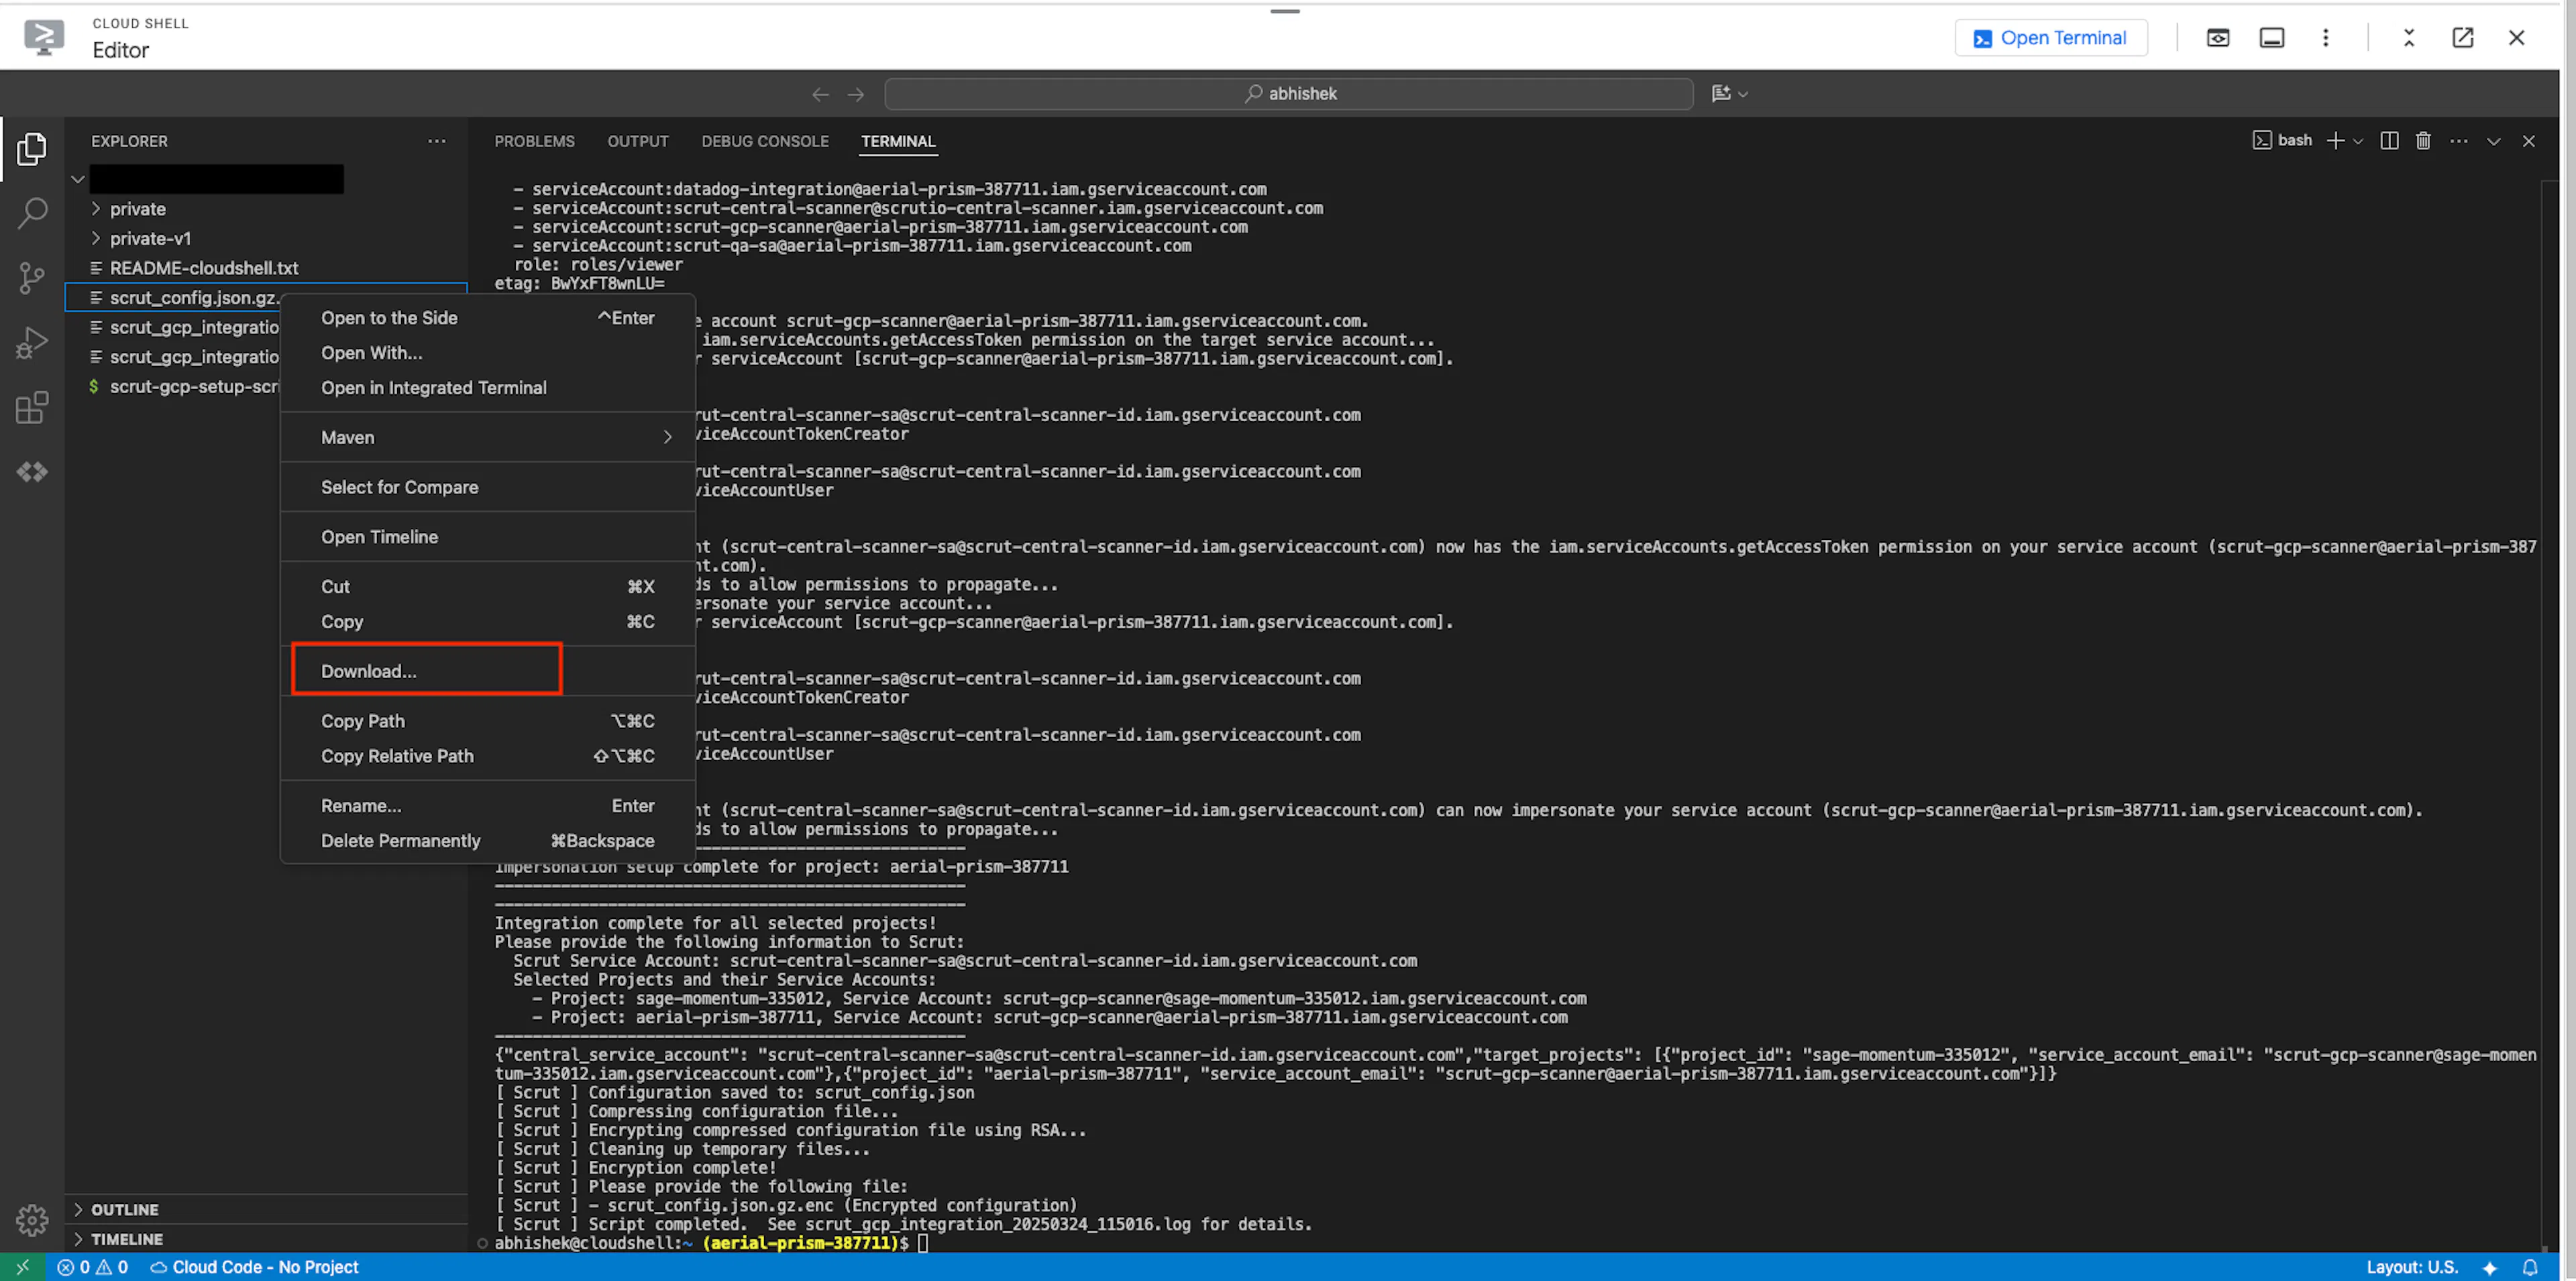
Once it finishes executing, it will create a file named scrut_config.json.gz.enc in the same folder as the script. Download the generated encrypted (scrut_config.json.gz.enc) file. You’ll need to upload it in the next step of the integration process in Scrut.
Note:
When connecting a huge number of GCP projects, the integration script may occasionally encounter issues during execution. If the script fails to complete, please contact our support team at support@scrut.io for assistance.
Step 3: Upload the encrypted file to Scrut
-
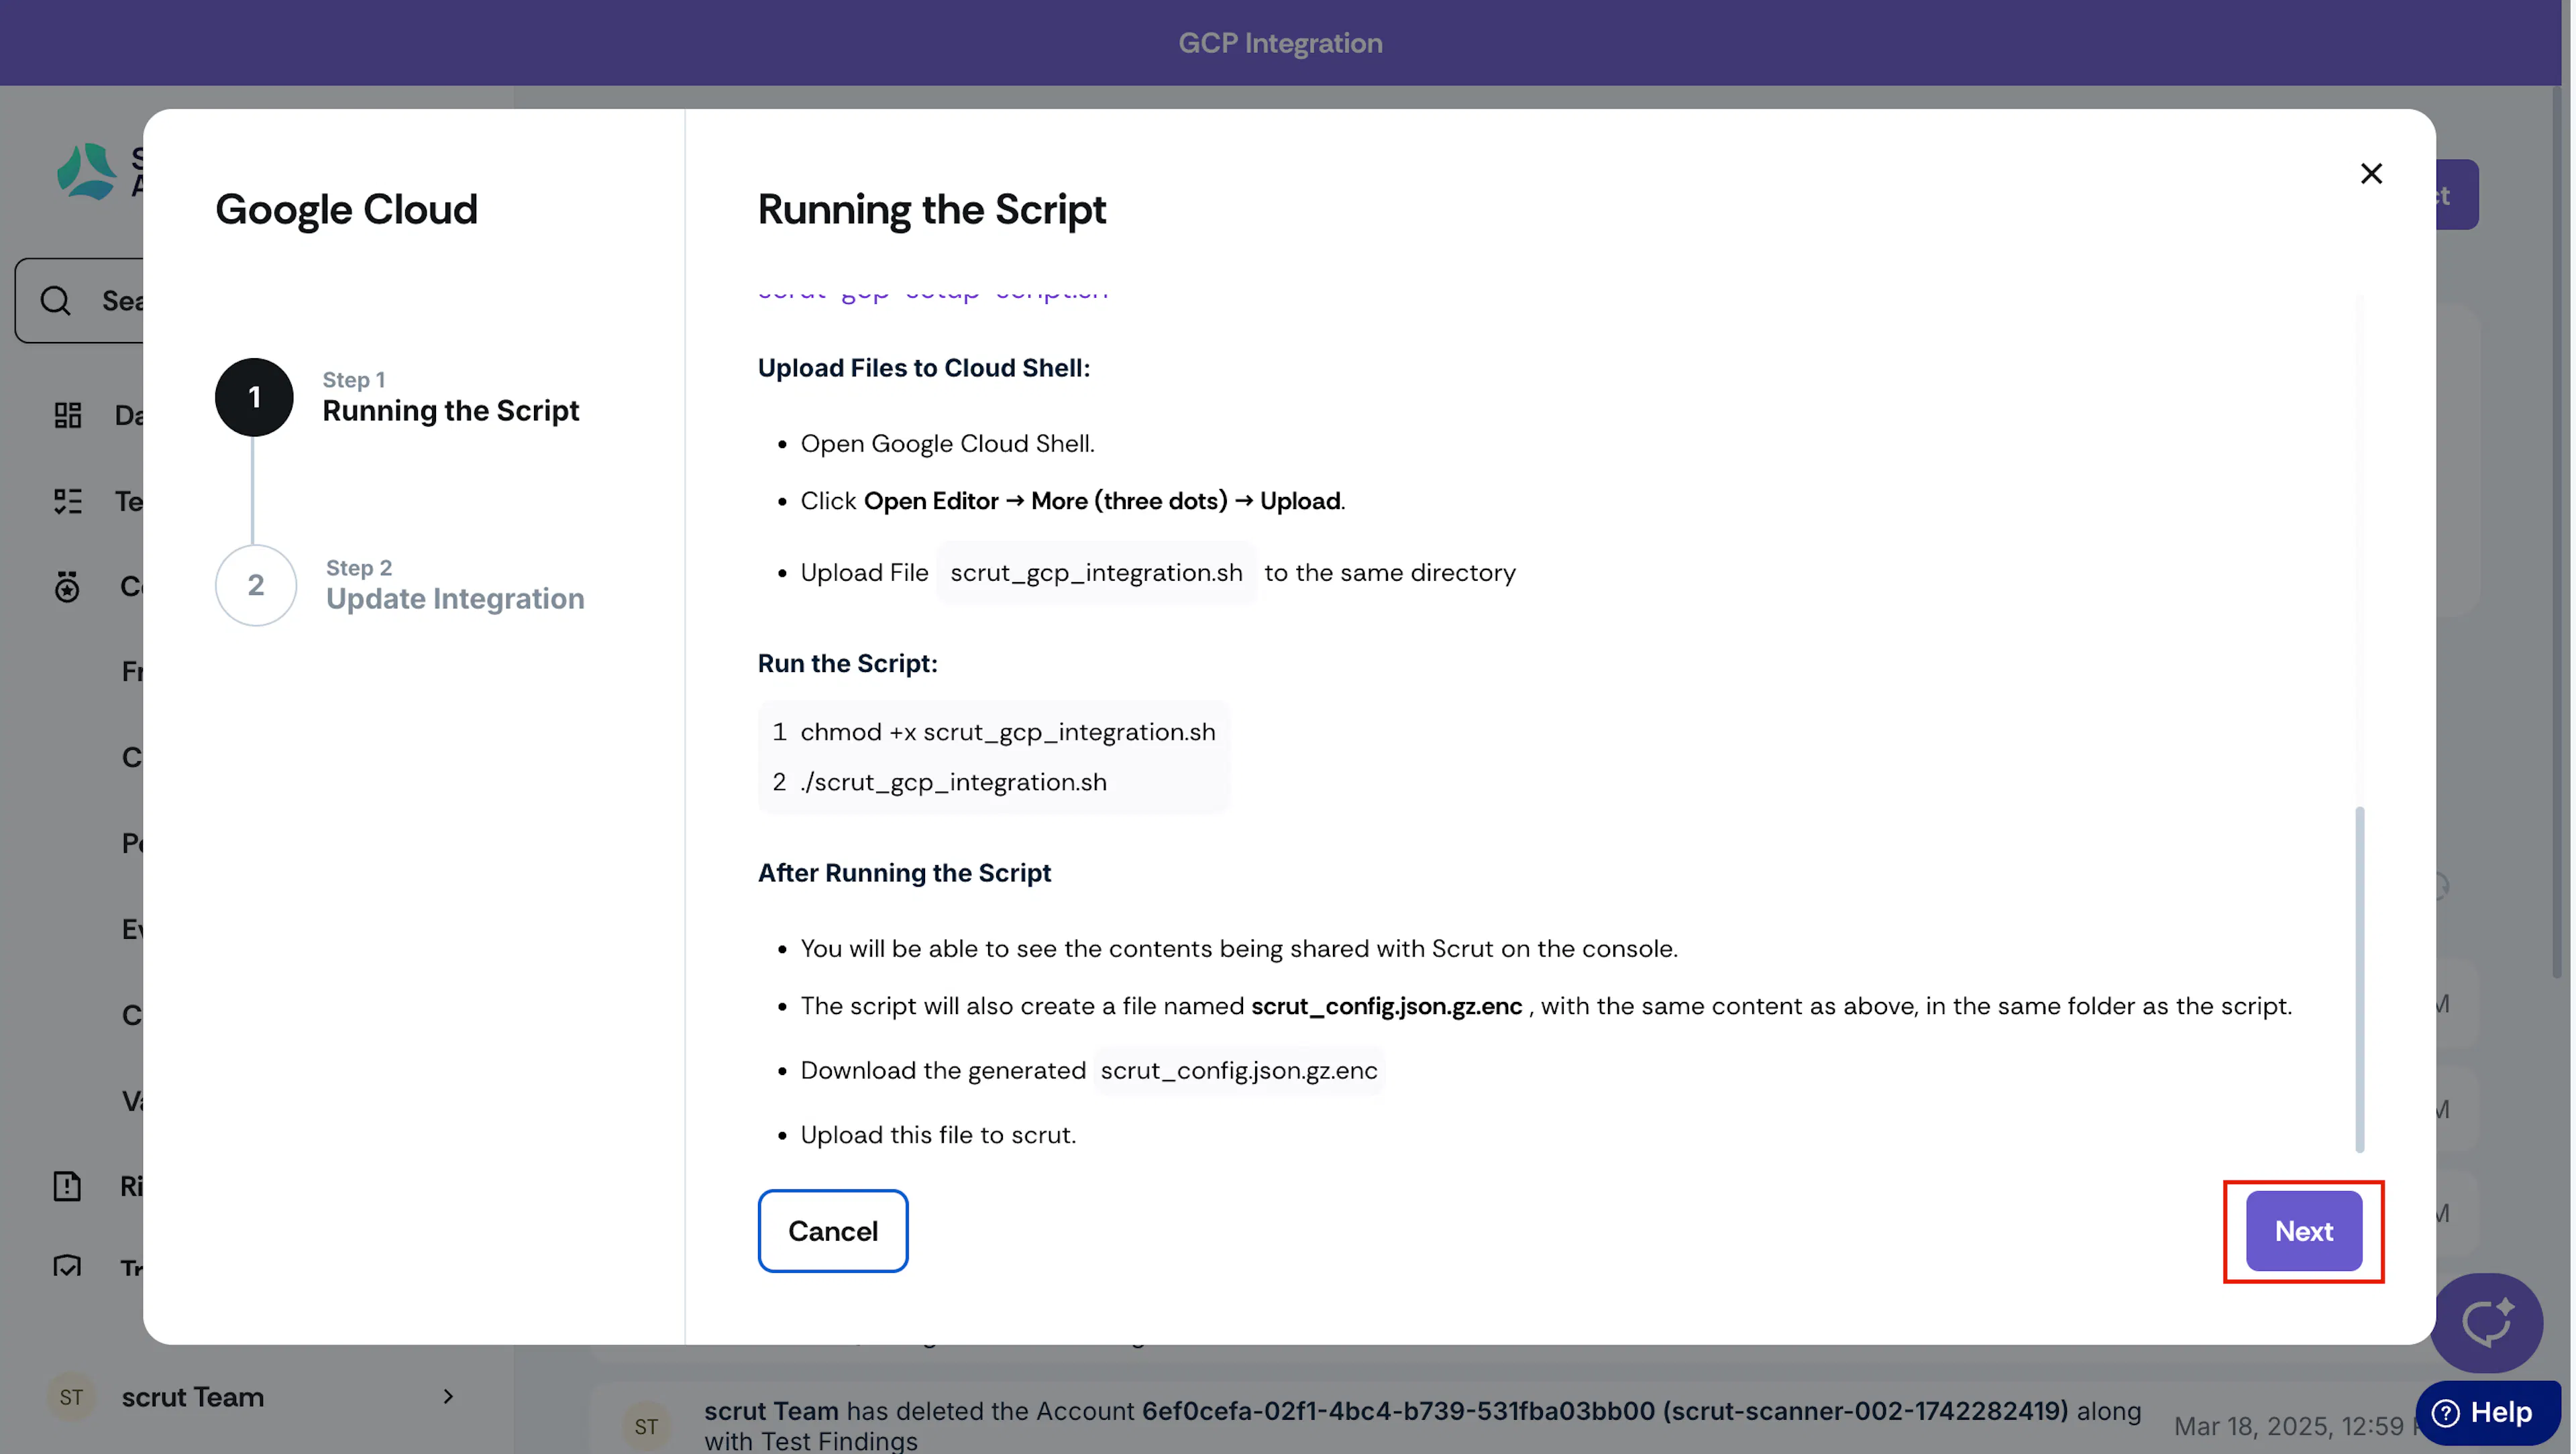
Navigate back to the Scrut platform and click Next.
-
Upload the downloaded file and click Finish.
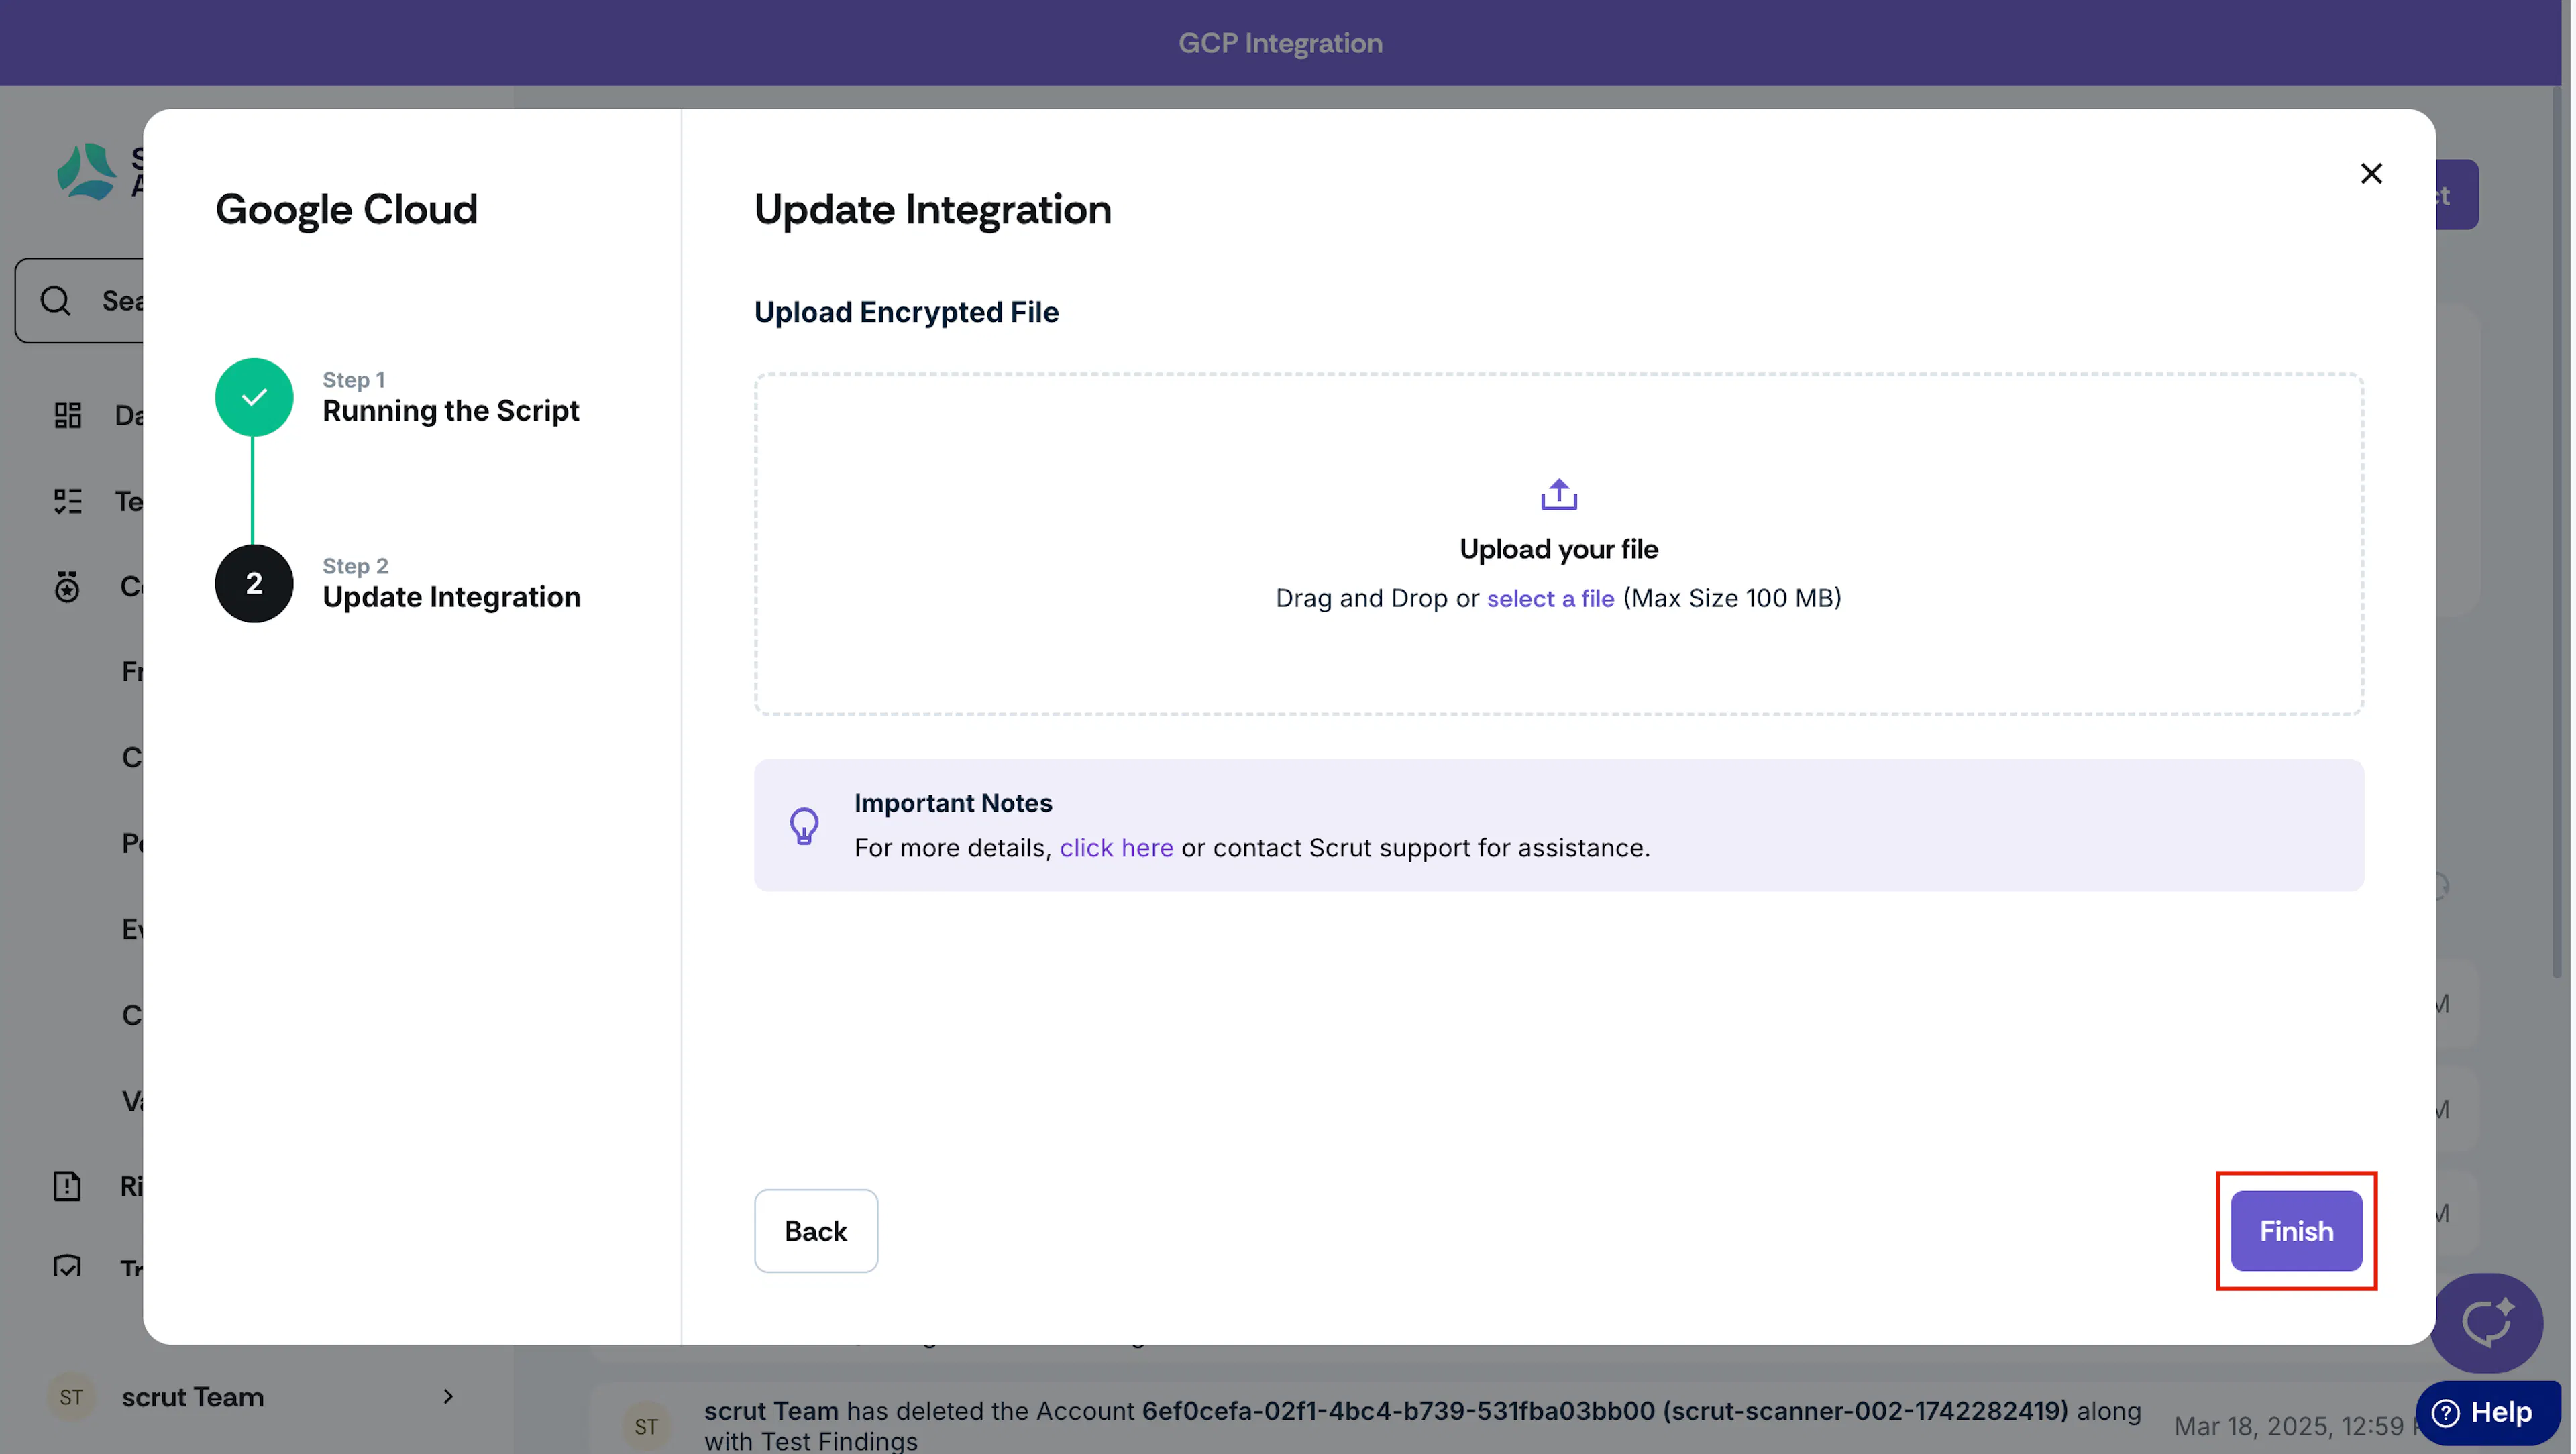
This completes your GCP integration with Scrut.