

Integrate Snowflake
Learn how to connect your organization's Snowflake account with Scrut.
What This Integration Does in Scrut
- User Access Data: Fetches user details, roles, and permissions from Snowflake for Access Reviews.
- Automated Tests: Runs automated checks that evaluate Snowflake against your applicable compliance frameworks.
Prerequisites
Before starting the integration, make sure the following are in place:
- An active Snowflake account and your Snowflake Account Identifier
- Access to the ACCOUNTADMIN role in Snowflake to register a public key or create a security integration
- OpenSSL installed on your machine, if you plan to use JWT Key-Pair
- Administrator access to your identity provider (for example, Okta), if you plan to use M2M OAuth
Permissions and Access Requirements
For Snowflake
- Read access to user accounts, roles, and permissions in Snowflake
- The ACCOUNTADMIN role to assign a public key to a user (JWT Key-Pair) or to create a security integration (M2M OAuth)
For Scrut
- Admin access to Scrut, or Contributor access with the Integrations module enabled
Limitations
- User Name and Password works for SQL actions only. It does not support Snowflake V3 REST actions, which require JWT Key-Pair or M2M OAuth.
- Snowflake has announced the deprecation of single-factor password authentication. User Name and Password may already be restricted in your account, depending on your organization's security policy.
- M2M OAuth does not support identity provider apps with DPoP enabled. Snowflake accepts standard Bearer tokens only.
- Scrut does not provide a passphrase field for JWT Key-Pair. Use an unencrypted private key when you connect using the individual fields.
Data Collected
- User Name: Snowflake user display name
- User Email: Snowflake user email address
- User Role: Snowflake role assigned to user
Sync Frequency
Data syncs automatically every 24 hours. You can also manually trigger a sync from the integration settings page using the Sync Now button.
Integration Setup
Before You Begin: Fetch Your Account Identifier
All three connection methods require your Account Identifier. To find it:
- Log in to Snowflake.
- Click your profile in the bottom left corner.
- Under Account, click Copy Account Identifier.
Alternatively, run the following SQL in any Snowflake worksheet: SELECT CURRENT_ORGANIZATION_NAME() || '-' || CURRENT_ACCOUNT_NAME();
Note: The preferred format is orgname-accountname (for example, mycompany-prod123). The legacy account locator format is still accepted, but is not recommended by Snowflake.
Choose a Connection Method
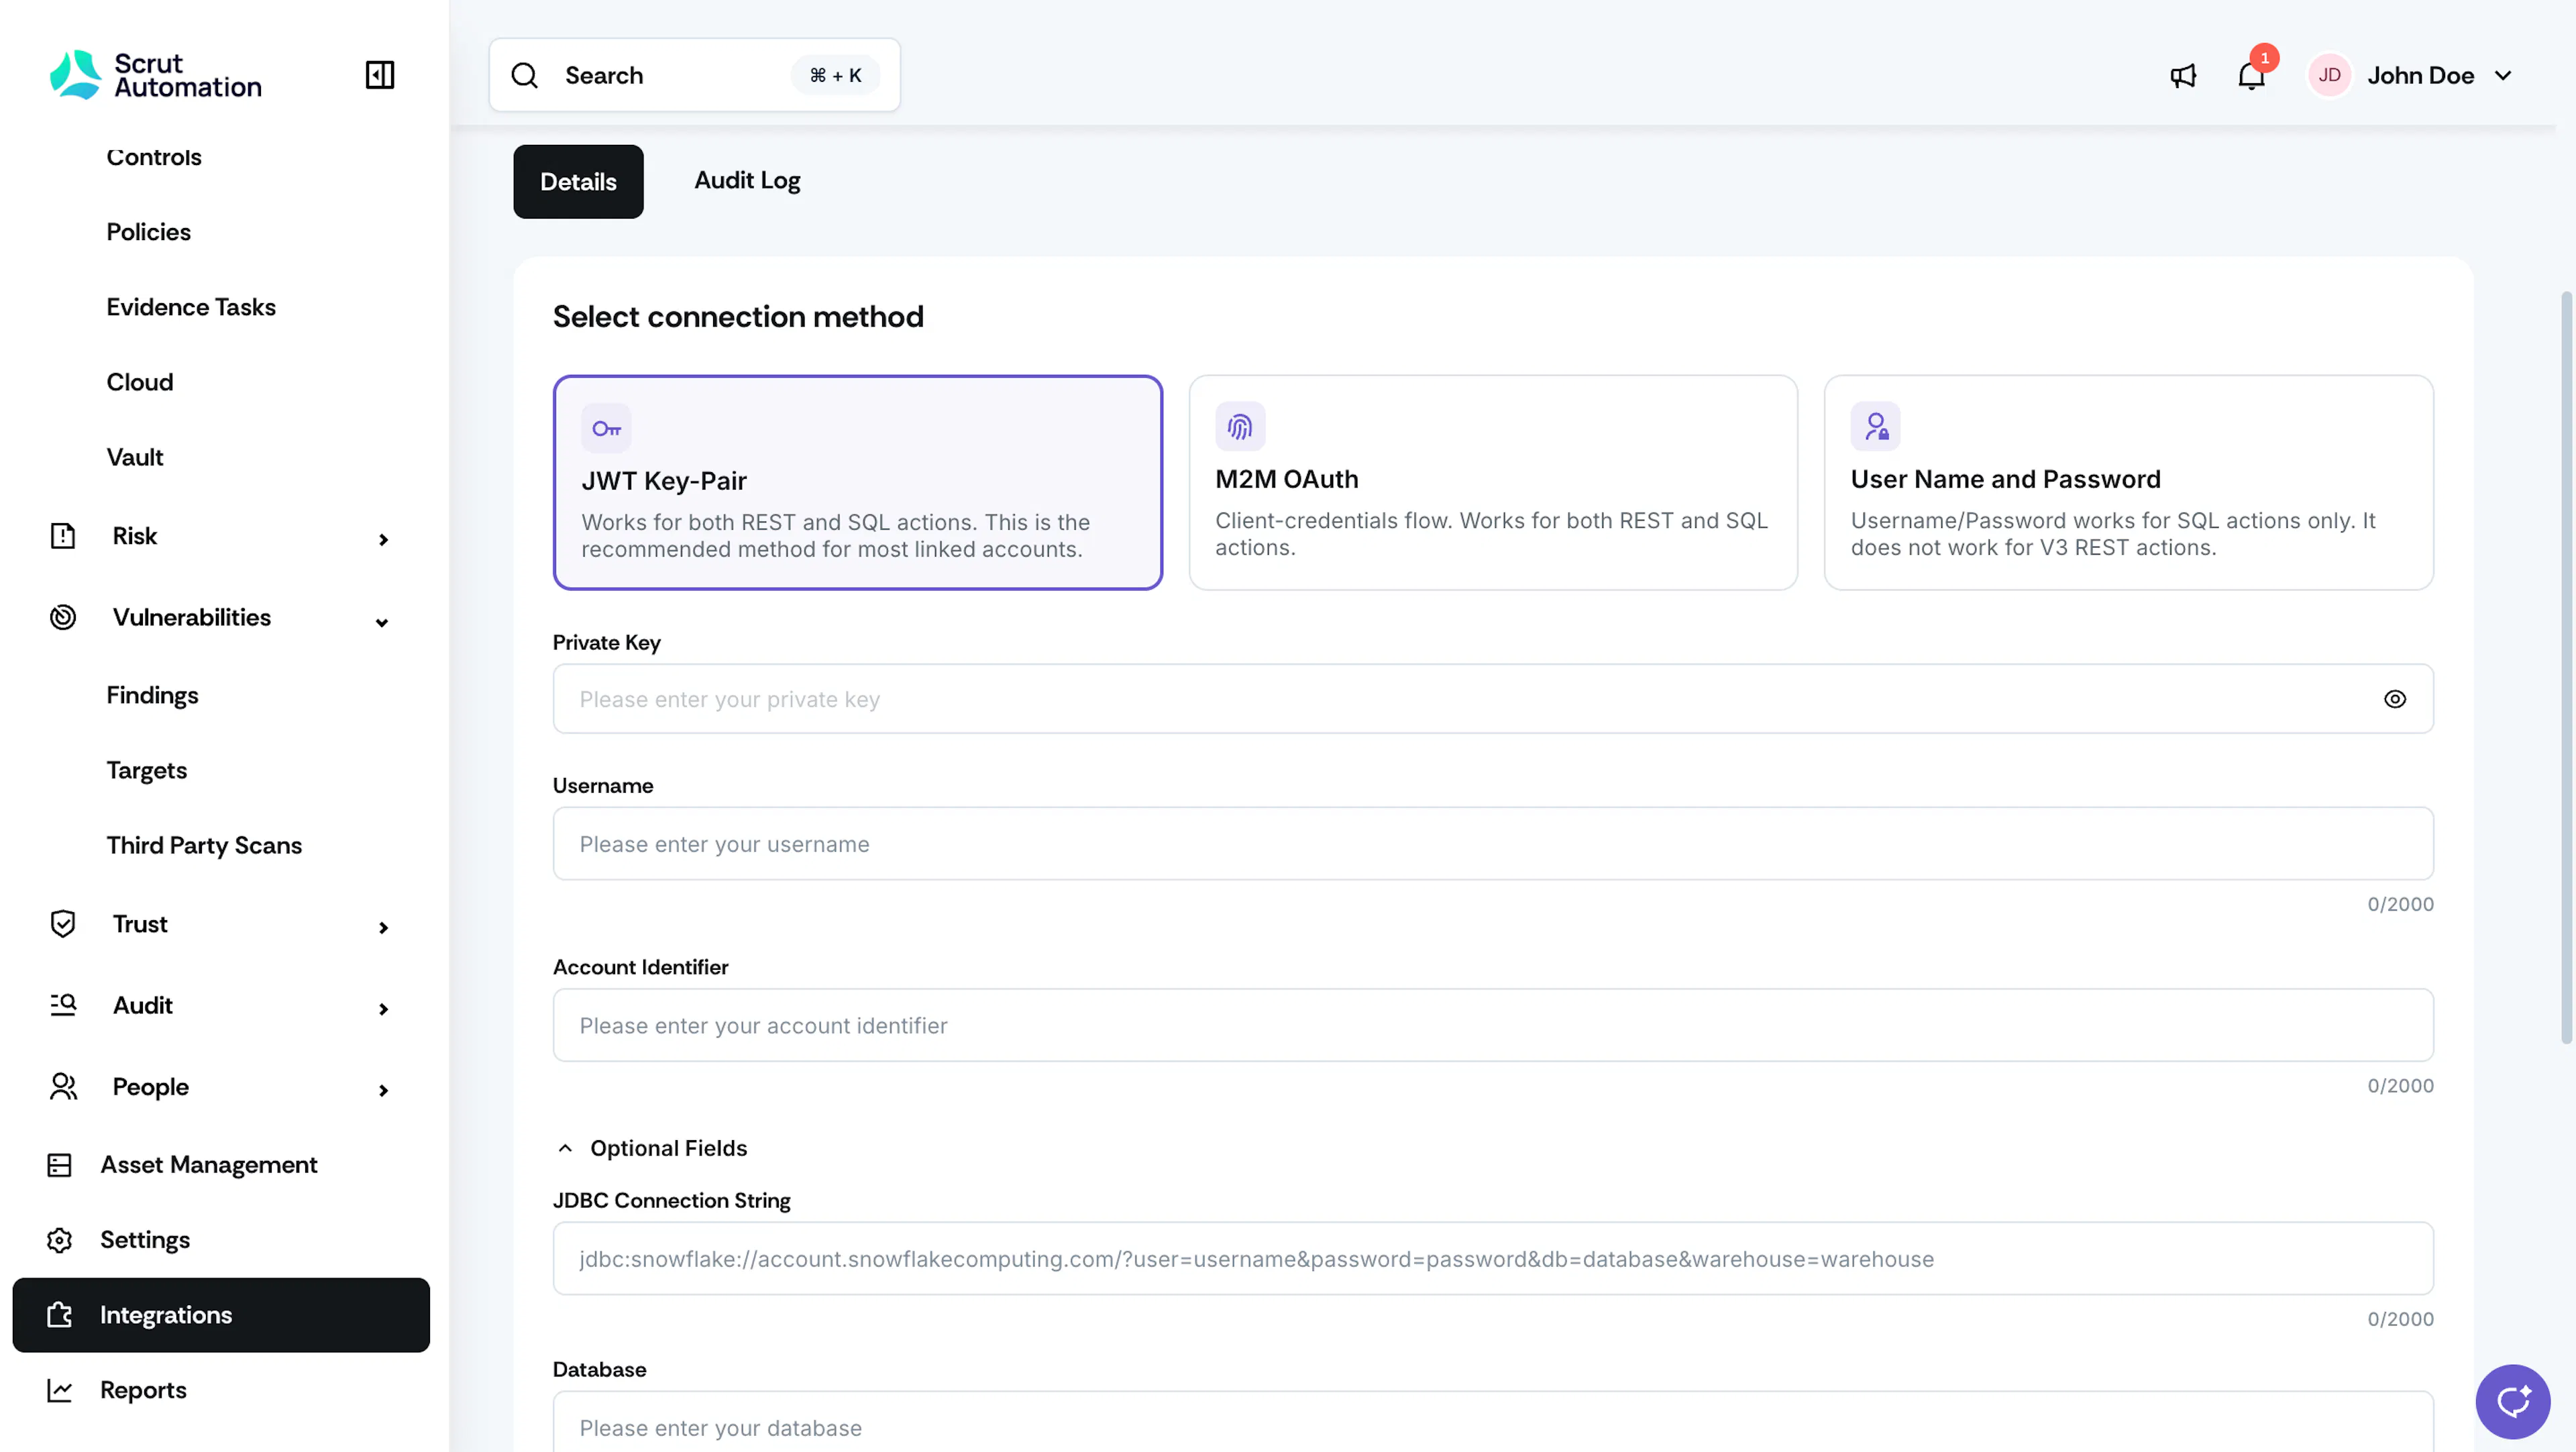
Scrut supports three connection methods. The methods are mutually exclusive.
Heads Up! Select one method and provide the complete set of fields for that method only.
| Method | Best for | Required fields in Scrut |
|---|---|---|
| JWT Key-Pair (recommended) | Works for both REST and SQL actions. This is the recommended method for most linked accounts. | Private Key, Username, Account Identifier |
| M2M OAuth | Client-credentials flow. Works for both REST and SQL actions. | Account Identifier, Client ID, Client Secret, Token URL |
| User Name and Password | Username/Password works for SQL actions only. It does not work for V3 REST actions. | Username, Password, Account Identifier |
Step 1: Prepare Your Snowflake Credentials
Complete the steps in the tab for the method you plan to use.
Works for both REST and SQL actions. This is the recommended method for most accounts.
Required Fields: Private Key, Username, and Account Identifier.
- Get your account identifier
Log in to your Snowflake account, click your profile in the bottom left, and under Account, click Copy Account Identifier. This is your account_id.
- Get your username
Click My Profile in the bottom left and copy the Username.
- Generate a private key
Open a terminal and run the command below. You’ll be prompted for an encryption password — this is your passphrase. Save it. This generates private_key.p8 in the current directory.
openssl genrsa 2048 | openssl pkcs8 -topk8 -inform PEM -out private_key.p8 -scrypt
To generate an unencrypted key (no passphrase), use -nocrypt instead of -scrypt.
- Copy your private key
Print the private key and copy its contents. This is your private_key.
cat private_key.p8
- Generate the public key
Generate the public key using the passphrase from step 3, then print and copy it.
openssl rsa -in private_key.p8 -pubout -out public_key.pem -passin pass:<your_passphrase>
cat public_key.pem
- Register the public key in Snowflake
In Snowflake, confirm your current role is ACCOUNTADMIN (switch role if needed), open a new Worksheet under Projects, and run the statement below, replacing the username and public key with your own.
ALTER USER <Username> SET RSA_PUBLIC_KEY="<Public_key>"
The ACCOUNTADMIN role is required to assign a public key to a user.
Paste only the key body. Exclude the -----BEGIN PUBLIC KEY----- and -----END PUBLIC KEY----- lines.
Run DESC USER <Username>; and confirm that the RSA_PUBLIC_KEY_FP property has a value. This confirms the key is assigned.
Important: Assign the public key to the Snowflake user before you connect in Scrut. The connection fails if you skip this step.
Uses the OAuth client credentials flow. Works for both REST and SQL actions. The steps below use Okta as the identity provider, but you can use any OAuth provider that supports client credentials.
Required fields: Account Identifier, Client ID, Client Secret, and Token URL. Scope is optional.
Prerequisites: Okta admin access, the Snowflake ACCOUNTADMIN role, and your Snowflake account URL (e.g. https://ORGNAME-ACCOUNT.snowflakecomputing.com).
1. Create an Okta API Services application
In the Okta Admin Console, go to Applications → Applications → Create App Integration, select API Services, name it (e.g. snowflake-client-app), and save. Note the Client ID and Client Secret.
- Create an authorization server
Go to Security → API → Authorization Servers → Add Authorization Server. Set the Audience to your exact Snowflake account URL (e.g. https://ORGNAME-ACCOUNT.snowflakecomputing.com).
- Create a scope
Inside the authorization server, go to Scopes → Add Scope and create session:role:SYSADMIN (replace SYSADMIN with the role you want to grant). This scope tells Snowflake which role the OAuth client will use.
- Create an access policy and rule
Go to Access Policies → Add Policy and assign it to your OAuth application. Add a rule that enables only the Client Credentials grant type and sets the allowed scope to session:role:SYSADMIN.
- Get the metadata URLs
Open the Metadata URI on your authorization server and note the Issuer, token_endpoint (.../v1/token), and jwks_uri (.../v1/keys).
- Configure the Snowflake security integration
Run the following in Snowflake, substituting the values from the previous step:
CREATE OR REPLACE SECURITY INTEGRATION okta_oauth
  TYPE = EXTERNAL_OAUTH
  ENABLED = TRUE
  EXTERNAL_OAUTH_TYPE = OKTA
  EXTERNAL_OAUTH_ISSUER = '<issuer>'
  EXTERNAL_OAUTH_JWS_KEYS_URL = '<jwks_uri>'
  EXTERNAL_OAUTH_AUDIENCE_LIST = ('<your Snowflake account URL>')
  EXTERNAL_OAUTH_TOKEN_USER_MAPPING_CLAIM = 'sub'
  EXTERNAL_OAUTH_SNOWFLAKE_USER_MAPPING_ATTRIBUTE = 'LOGIN_NAME';
- Create a Snowflake user mapped to the OAuth client
In the client-credentials flow, the JWT sub claim is the Okta Client ID, and Snowflake maps sub → LOGIN_NAME. Create a Snowflake user whose LOGIN_NAME equals your Okta Client ID, otherwise Snowflake returns 390100: Incorrect username or password even with a valid token.
CREATE USER IF NOT EXISTS okta_oauth_user
  LOGIN_NAME = '<your Okta Client ID>'
  DISPLAY_NAME = 'Okta OAuth Client'
  DEFAULT_ROLE = SYSADMIN
  DEFAULT_WAREHOUSE = COMPUTE_WH;
GRANT ROLE SYSADMIN TO USER okta_oauth_user;
- Provide the credentials when connecting
Enter account_id, client_id, client_secret, token_url (the token endpoint), and optionally scope in Scrut.
Note: DPoP-enabled OAuth apps will not work, as Snowflake expects standard Bearer tokens. If your IdP app has DPoP enabled, you’ll get invalid_dpop_proof errors. Disable DPoP or recreate the app without it.
Works for SQL actions only. It does not work for V3 REST actions.
Required fields: Account Identifier, Username, and Password.
- In Snowflake, click your profile in the bottom-left corner and select My Profile. Copy the Username. Admins can also find usernames under Admin → Users & Roles → Users.
- Use the password associated with that Snowflake user.
Important: Snowflake is deprecating single-factor password authentication. If this method fails with an authentication error, switch to JWT Key-Pair or M2M OAuth.
Optional Fields
You can also enter the values for these optional fields while connecting the integration in Scrut.
| Field | Description |
|---|---|
| JDBC Connection String | An alternative to entering the individual connection fields. See the format below. |
| Database | The database to use for SQL actions. Run SHOW DATABASES; to list options. |
| Warehouse | The warehouse to use for SQL actions. Run SHOW WAREHOUSES; to list options. |
| Role | The role to use for SQL actions. Run SHOW ROLES; to list options. |
| Schema | The schema to use for SQL actions. Defaults to PUBLIC. Run SHOW SCHEMAS IN DATABASE <database_name>; to list options. |
| Scope | This scope tells Snowflake which role the OAuth client will use. |
Database, Warehouse, Role, and Schema apply to SQL actions only and are ignored by REST actions.
Use a JDBC connection string
The connection string must start with jdbc:snowflake://. The credentials you include depend on your connection method.
For User Name and Password, include user and password:
jdbc:snowflake://<ACCOUNT_IDENTIFIER>.snowflakecomputing.com/?user=<USERNAME>&password=<PASSWORD>&warehouse=<WAREHOUSE>&db=<DATABASE>&schema=<SCHEMA>
For JWT Key-Pair, include user and private_key. If your private key is encrypted, also include private_key_passphrase:
jdbc:snowflake://<ACCOUNT_IDENTIFIER>.snowflakecomputing.com/?user=<USERNAME>&private_key=<URL_ENCODED_KEY>&private_key_passphrase=<PASSPHRASE>&warehouse=<WAREHOUSE>&db=<DATABASE>&schema=<SCHEMA>
When you include a private key in the connection string, URL-encode it. Replace every + with %2B and every / with %2F. Unencoded characters corrupt the string and cause the connection to fail.
Step 2: Connect Snowflake in Scrut
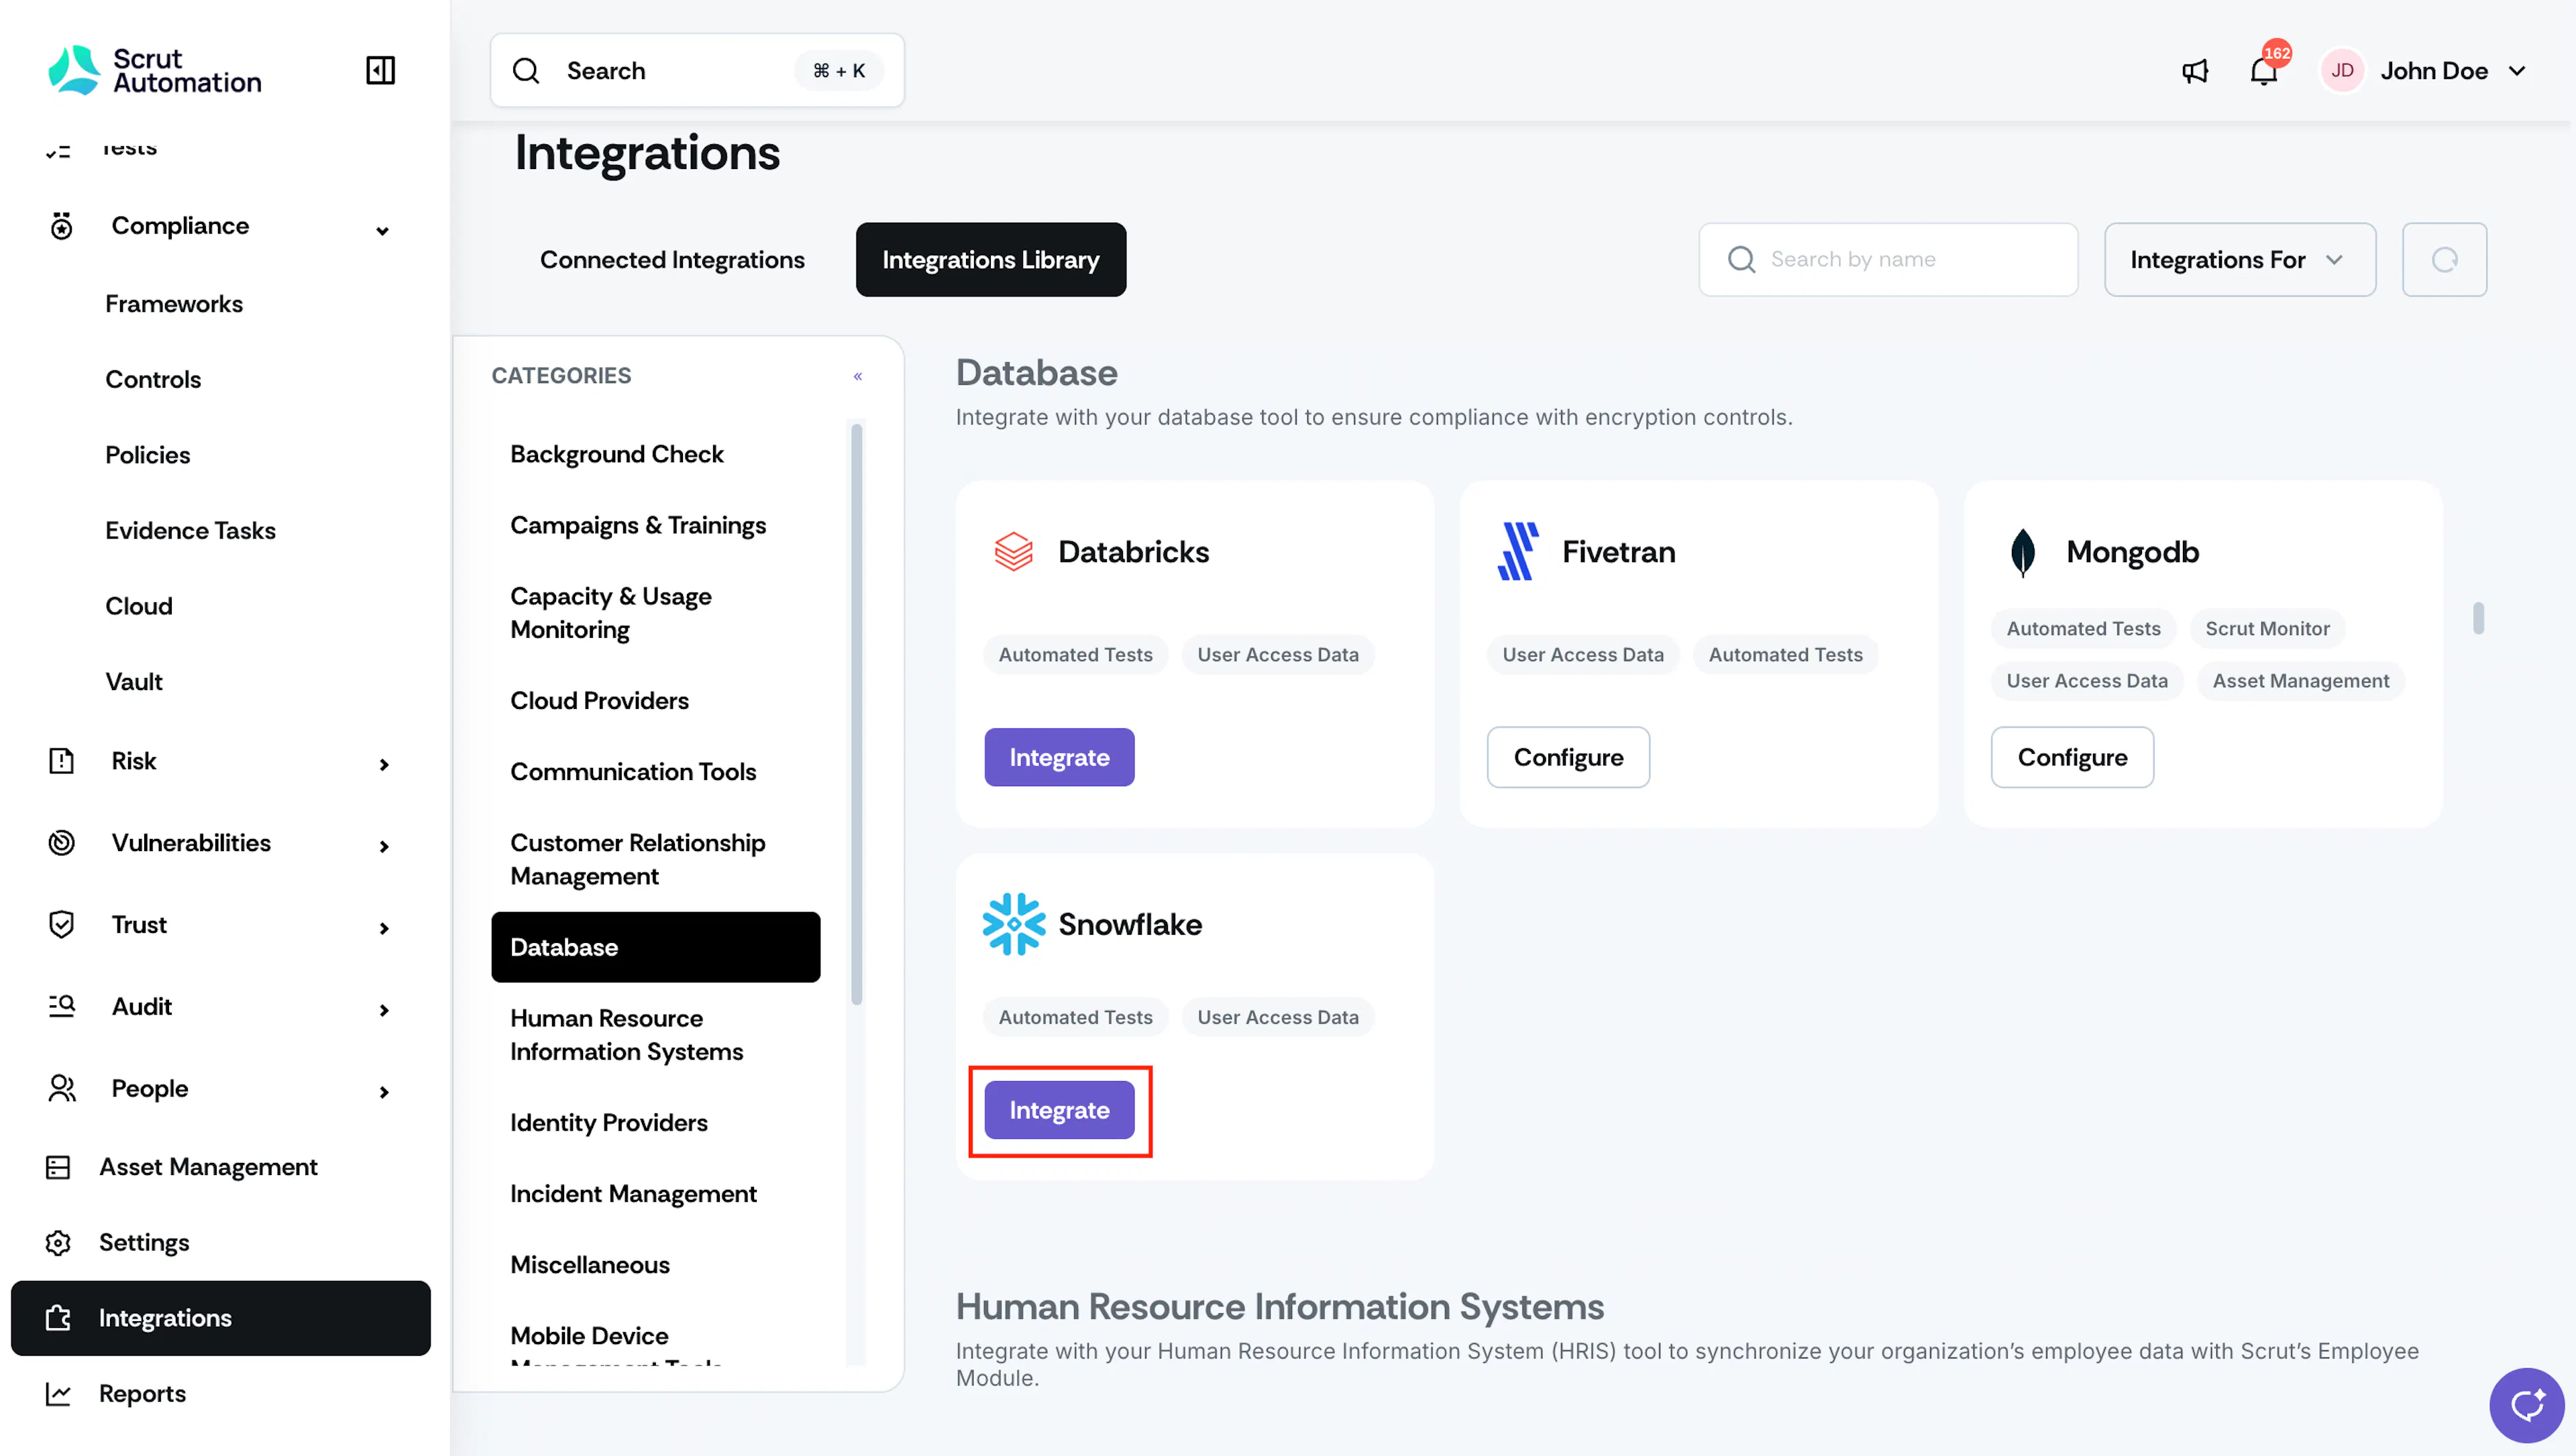
- Sign in to Scrut and click Integrations in the left navigation panel.
- Go to the Integrations Library tab and select Database from the Categories section.
- Scroll to the Snowflake tile and click Integrate.
- Choose your preferred connection method and enter the required values.
- (Optional) Click Optional Fields to expand the section, and enter any values you need.
- Click Submit and Connect.
When the connection succeeds, you will see the Integration Successful message and the Connected status on the integration page.
What Happens Next?
Initial Data Sync
After the integration connects, Scrut automatically begins syncing user data from Snowflake. The initial sync may take a few hours. To monitor progress, go to the Audit Log tab on the Snowflake integration page in Scrut.
Review Synced Data
Once the sync is complete, review the data at the following locations:
- Navigate to People → Access Reviews → Applications to view Snowflake user details, including names, emails, and roles.
- Navigate to Automated Tests to view compliance tests that Scrut runs against your Snowflake data.
Common Errors and Troubleshooting
FAQs
Contact support@scrut.io or your CSM for further assistance.