

Corrective Action Workflow
Who can use this feature
- Supported on Foundation, Growth, and Scale plans
Heads Up!
You cannot close an audit finding/request until all associated corrective actions are closed.
This guide walks you through the complete workflow for corrective actions, from creation to closure. The workflow ensures proper documentation, review, and approval of remediation efforts.
Step 1: Create a Corrective Action
You can create a corrective action in three ways:
Step 2: Add Corrective Action Details
Pro Tip!
While not mandatory, completing all fields is highly recommended. Auditors review these details during audits to verify your security and compliance practices.
-
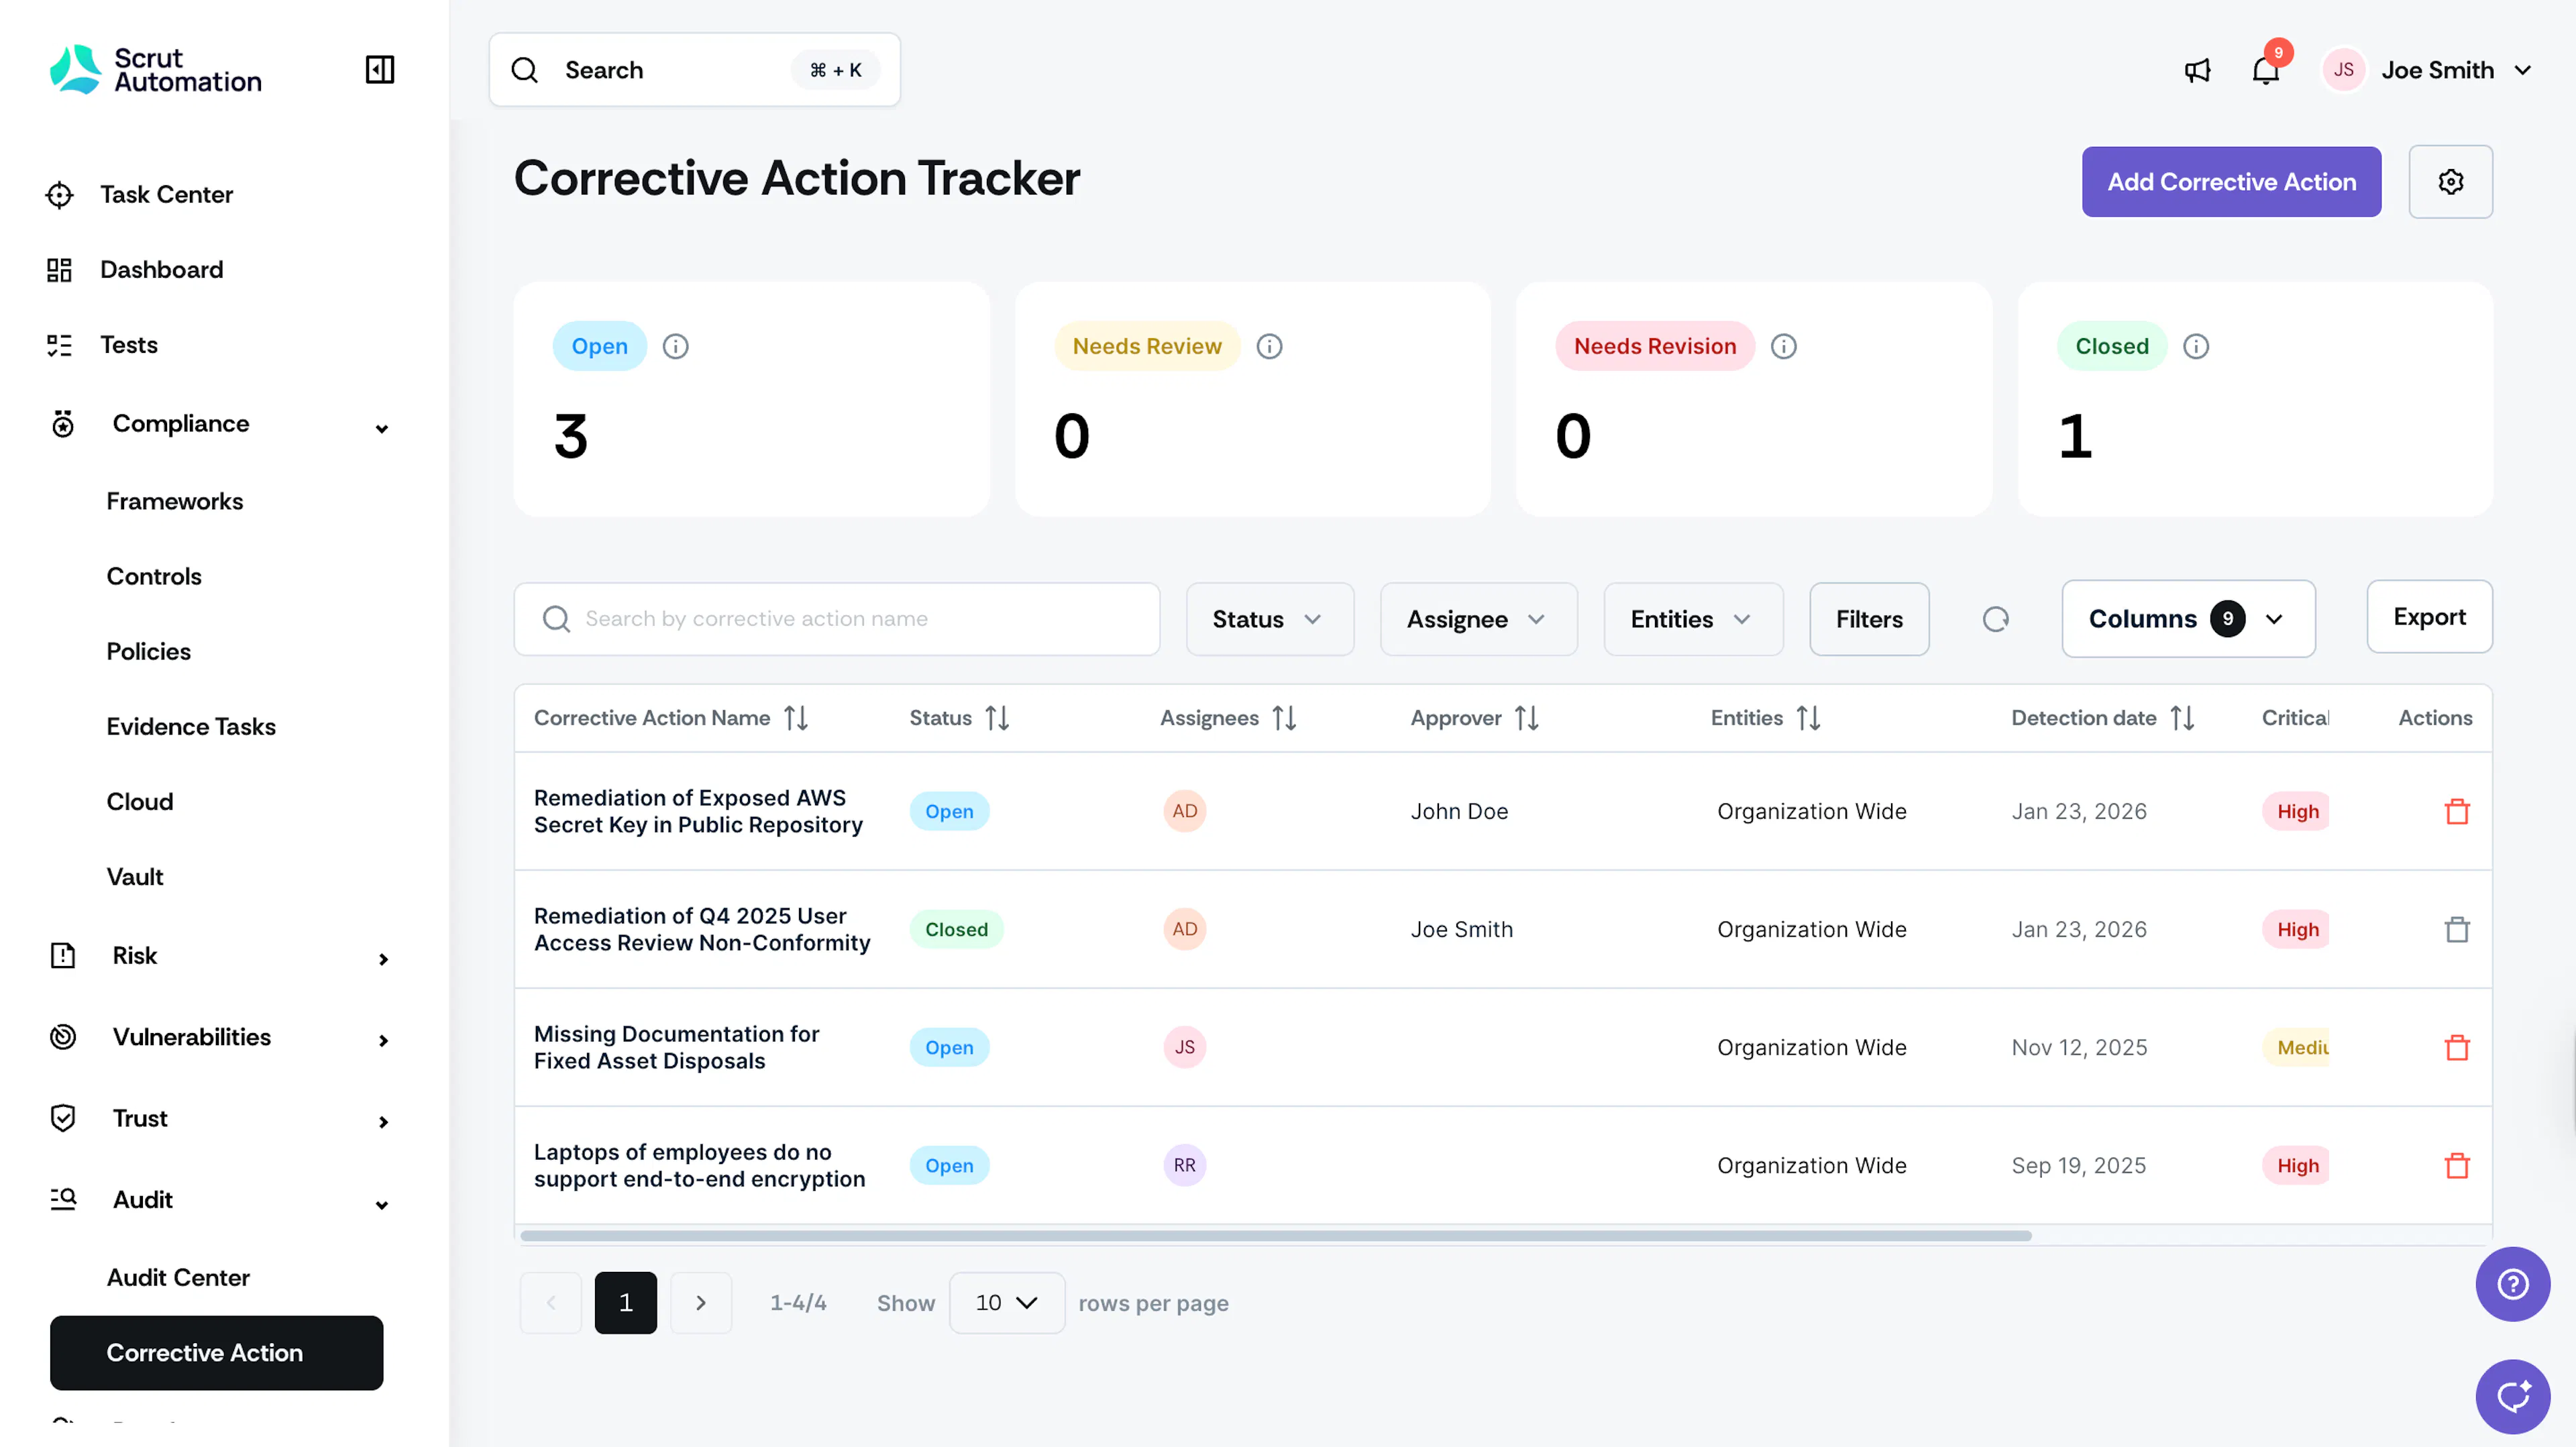
Navigate to Audits → Corrective Action to open a specific action.
-
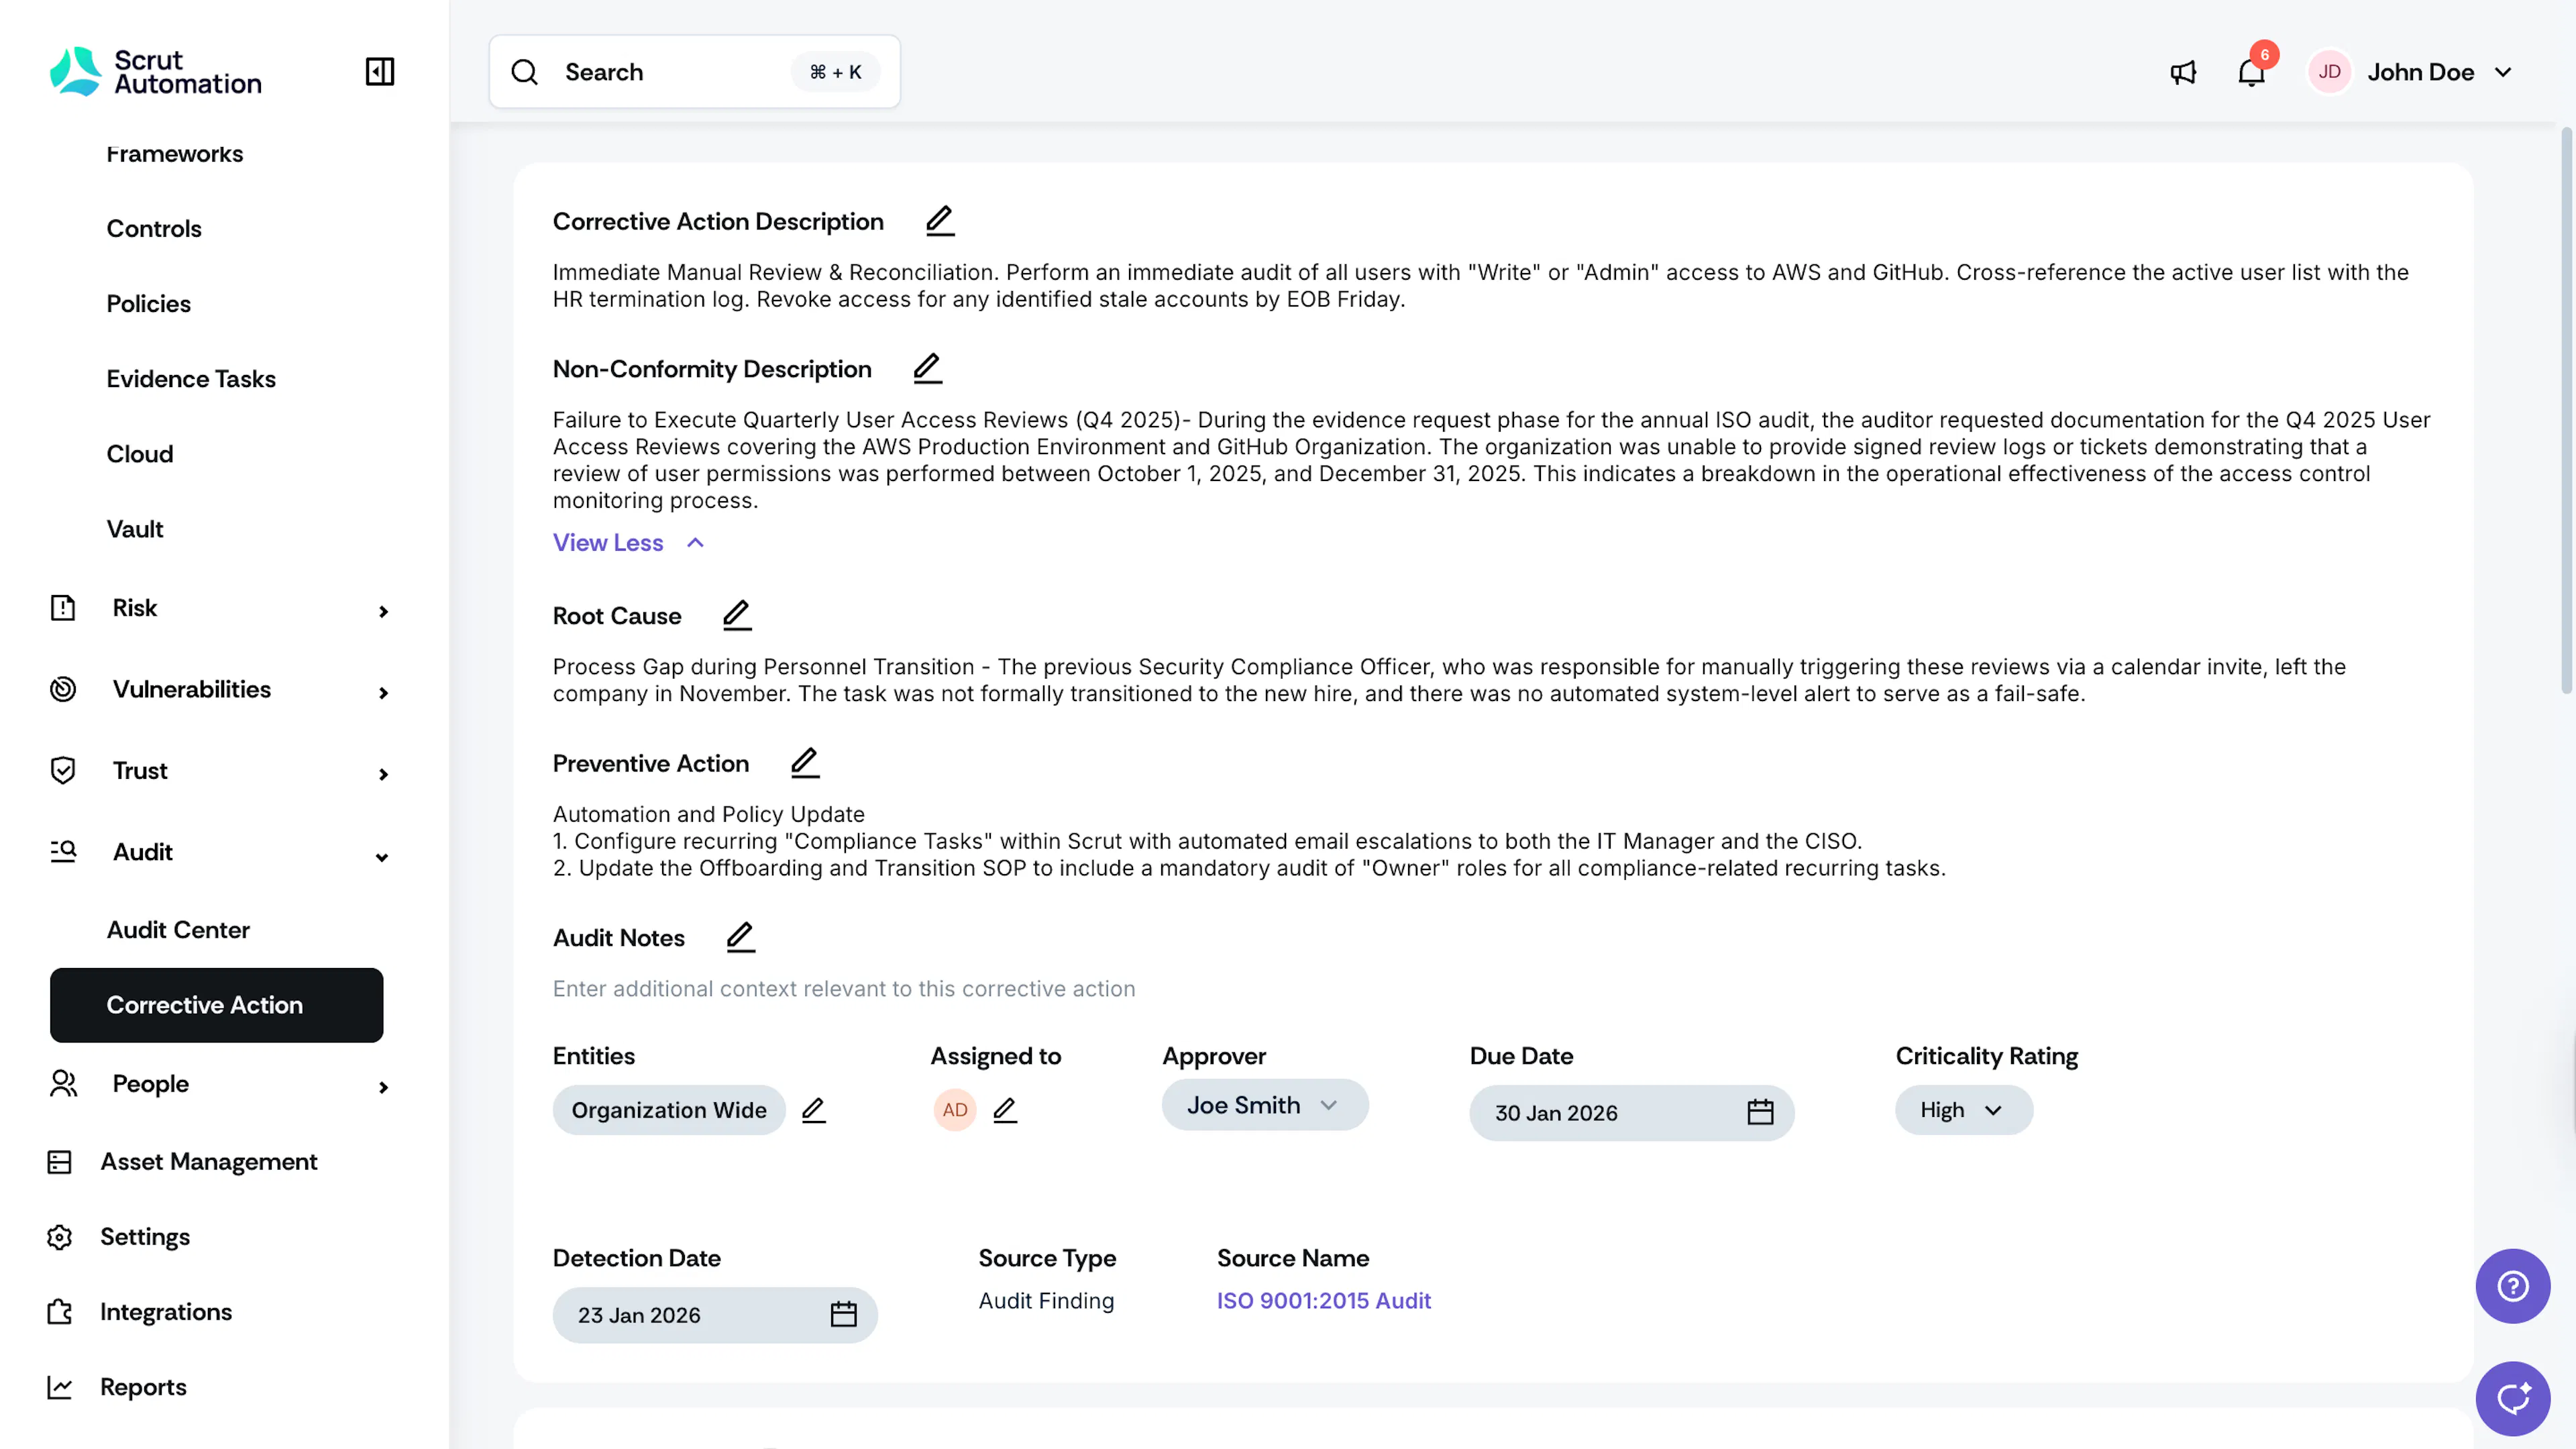
Add the required details to the corrective action. These details can be filled while creating the corrective action, but if they weren't completed, you can add them now:
-
Corrective Action Description: Briefly describe the short-term fix to address the non-conformity. This should outline the immediate steps taken to rectify the issue and ensure compliance.
-
Non-Conformity Description: Scrut auto-fills this field with the finding/request name and description when you create a corrective action from an audit finding/request. This provides context for the issue being addressed. You can edit it to add more details, if needed.
-
Root Cause: Explain the underlying cause of the non-conformity. Explain the factors that led to the issue, which can help in determining effective preventive measures.
-
Preventive Action: Describe the long-term preventive measures to address the root cause and prevent recurrence. This should include strategies or changes to be implemented to ensure the non-conformity does not occur again.
-
Detection Date: Select the date the non-conformity was detected.
-
Assignees: Choose the users responsible for taking corrective action.
-
Approver: Select the user responsible for reviewing and approving the corrective action.
Note: Scrut recommends that the assignee and approver be different to ensure an independent review.
-
Due Date: Set the deadline for completing the corrective action.
-
Criticality Rating: Assign a rating based on the severity of the non-conformity. You can choose from: Low, Medium, or High.
-
Step 3: Upload Evidence
Once you've implemented the corrective action, upload supporting evidence or documentation:
-
Navigate to Audit → Corrective Action on the left navigation panel and click on the corrective action you're working on.
-
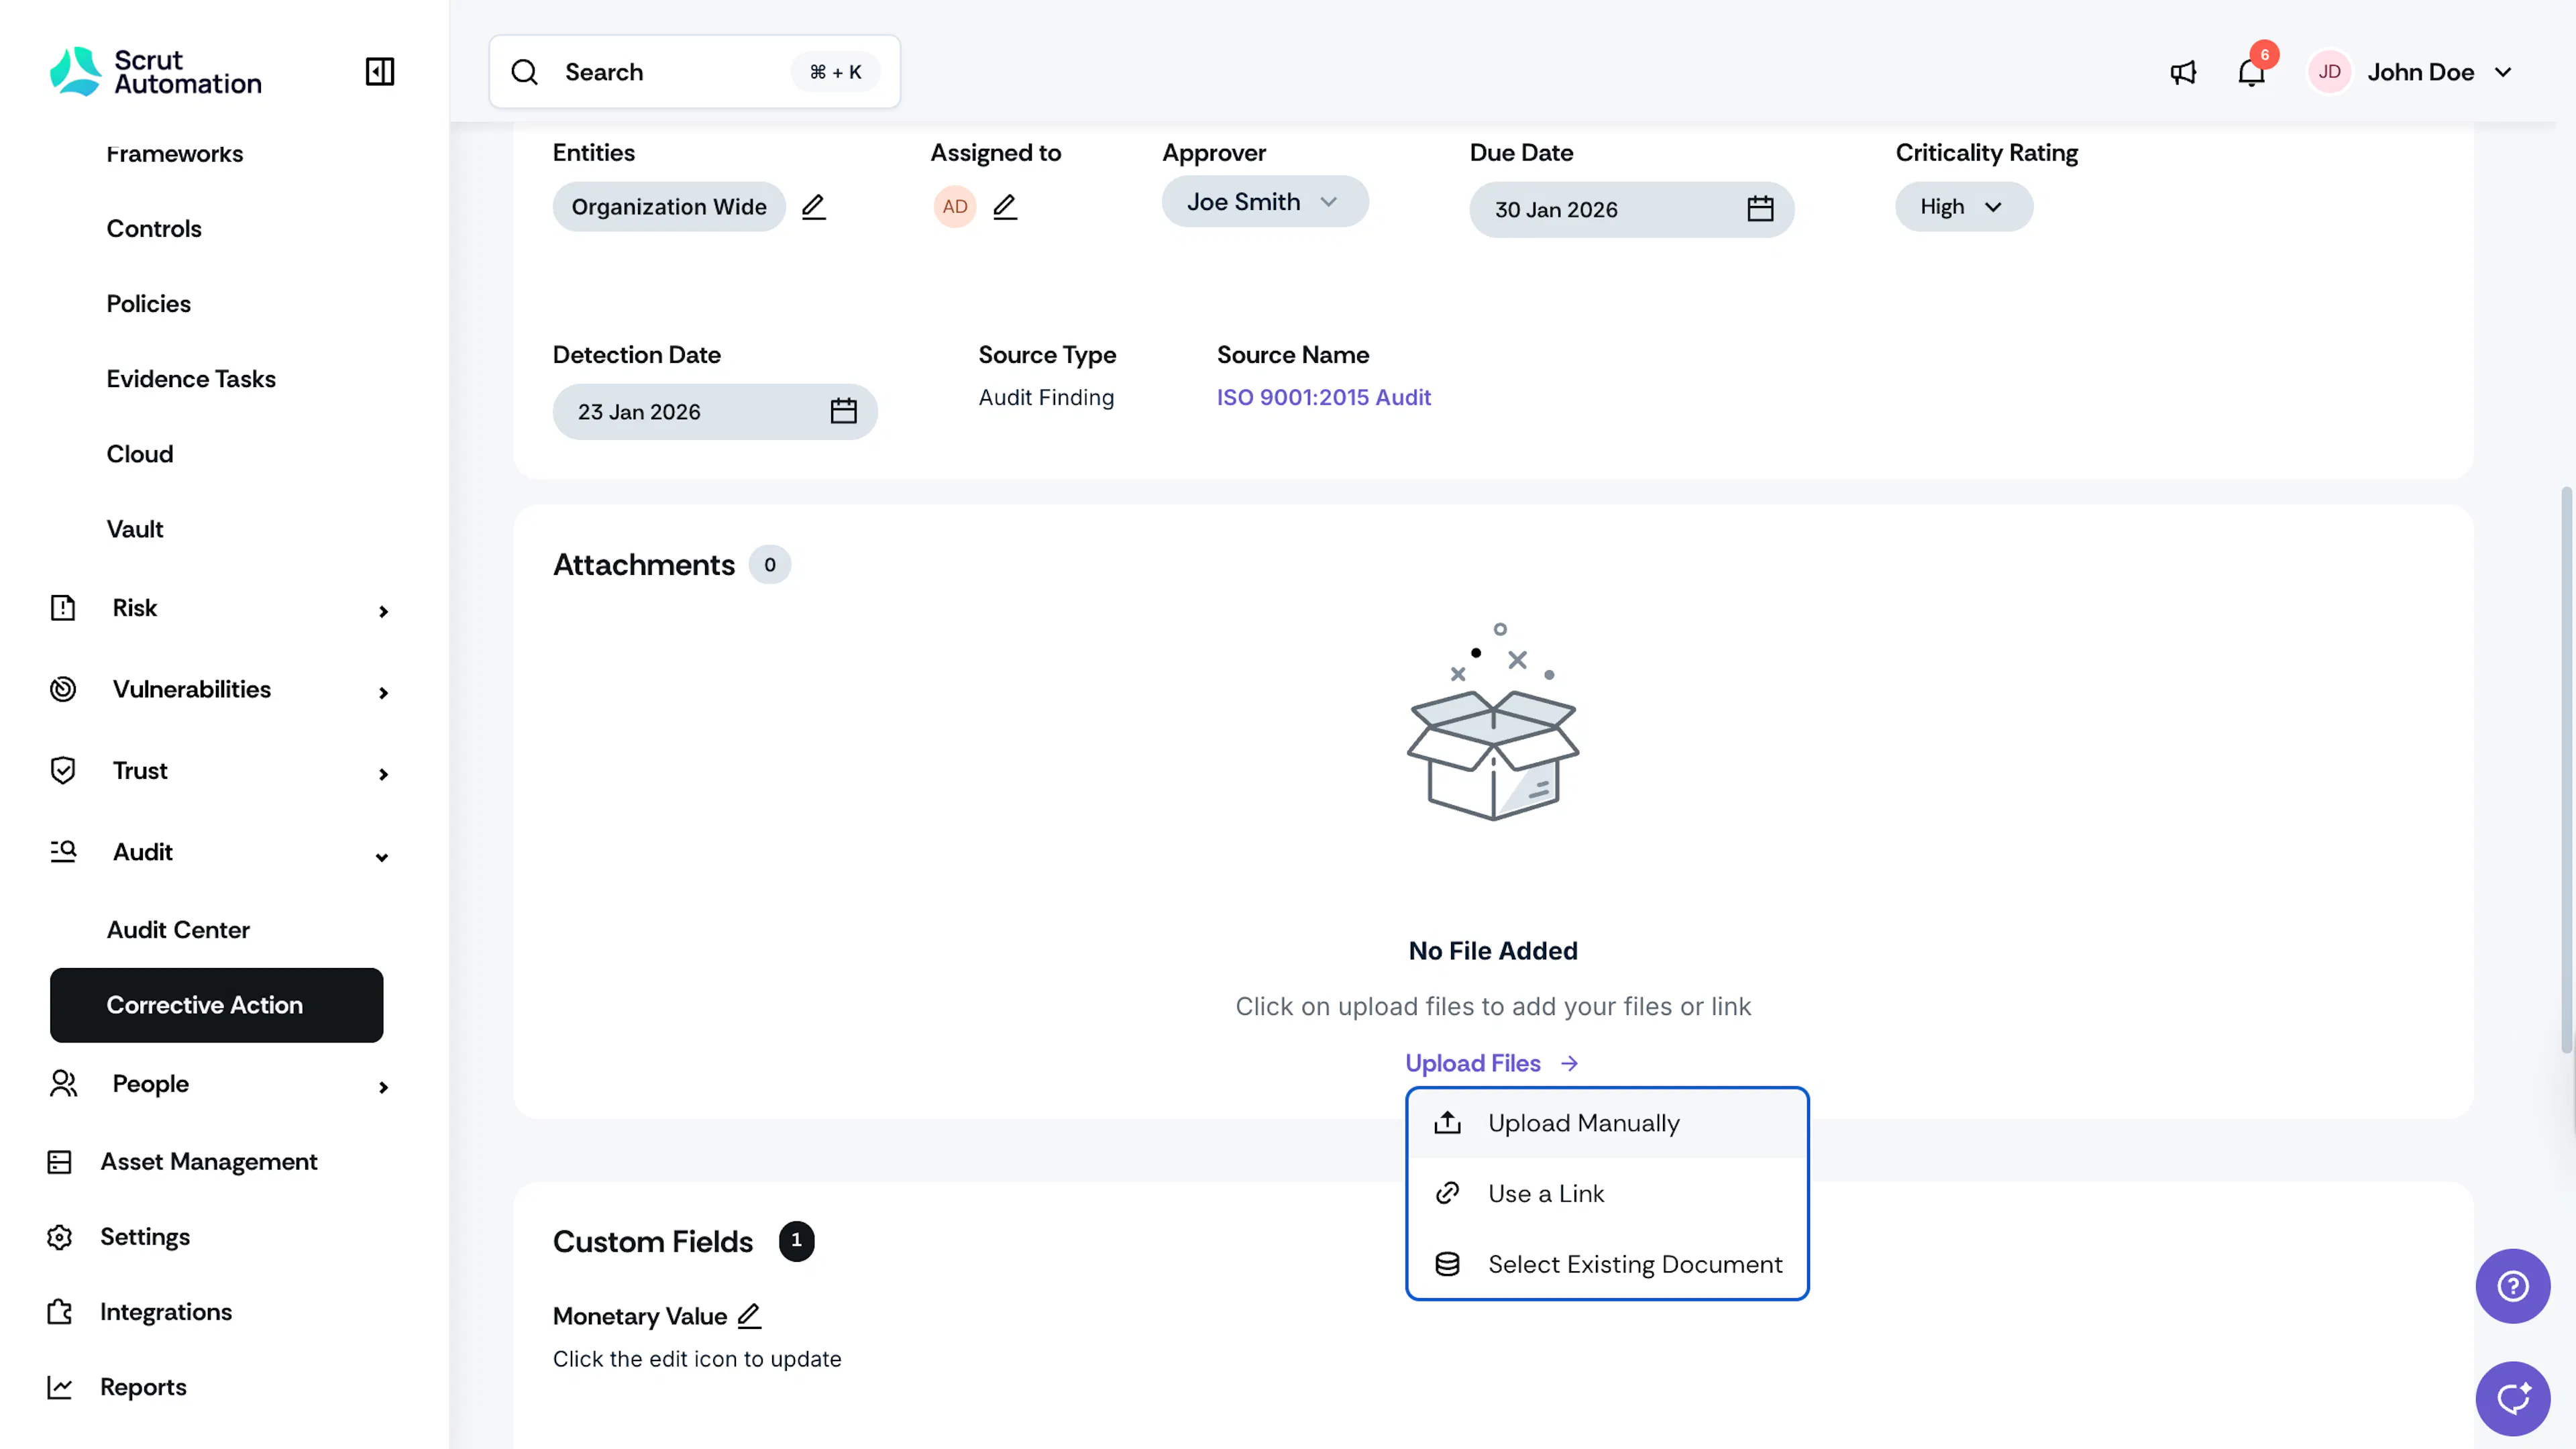
In the Attachments section, click Upload Files and choose one of the following methods:
-
Upload Manually: Upload files directly from your computer. Click this option, select the file(s) you want to upload, and confirm.
-
Use a Link: Add a link to external evidence such as documents stored in cloud services, screenshots, or other online resources. Paste the URL and save.
-
Select Existing Document: Choose documents that have already been uploaded to Scrut. You can select from:
- Policies: Stored in the Policies module
- Vault: Files stored within the Vault module
This allows you to reuse evidence from other corrective actions or audits without uploading duplicates. Simply browse through the available documents, select the ones you need, and click Save.
-
Step 4: Submit for Review
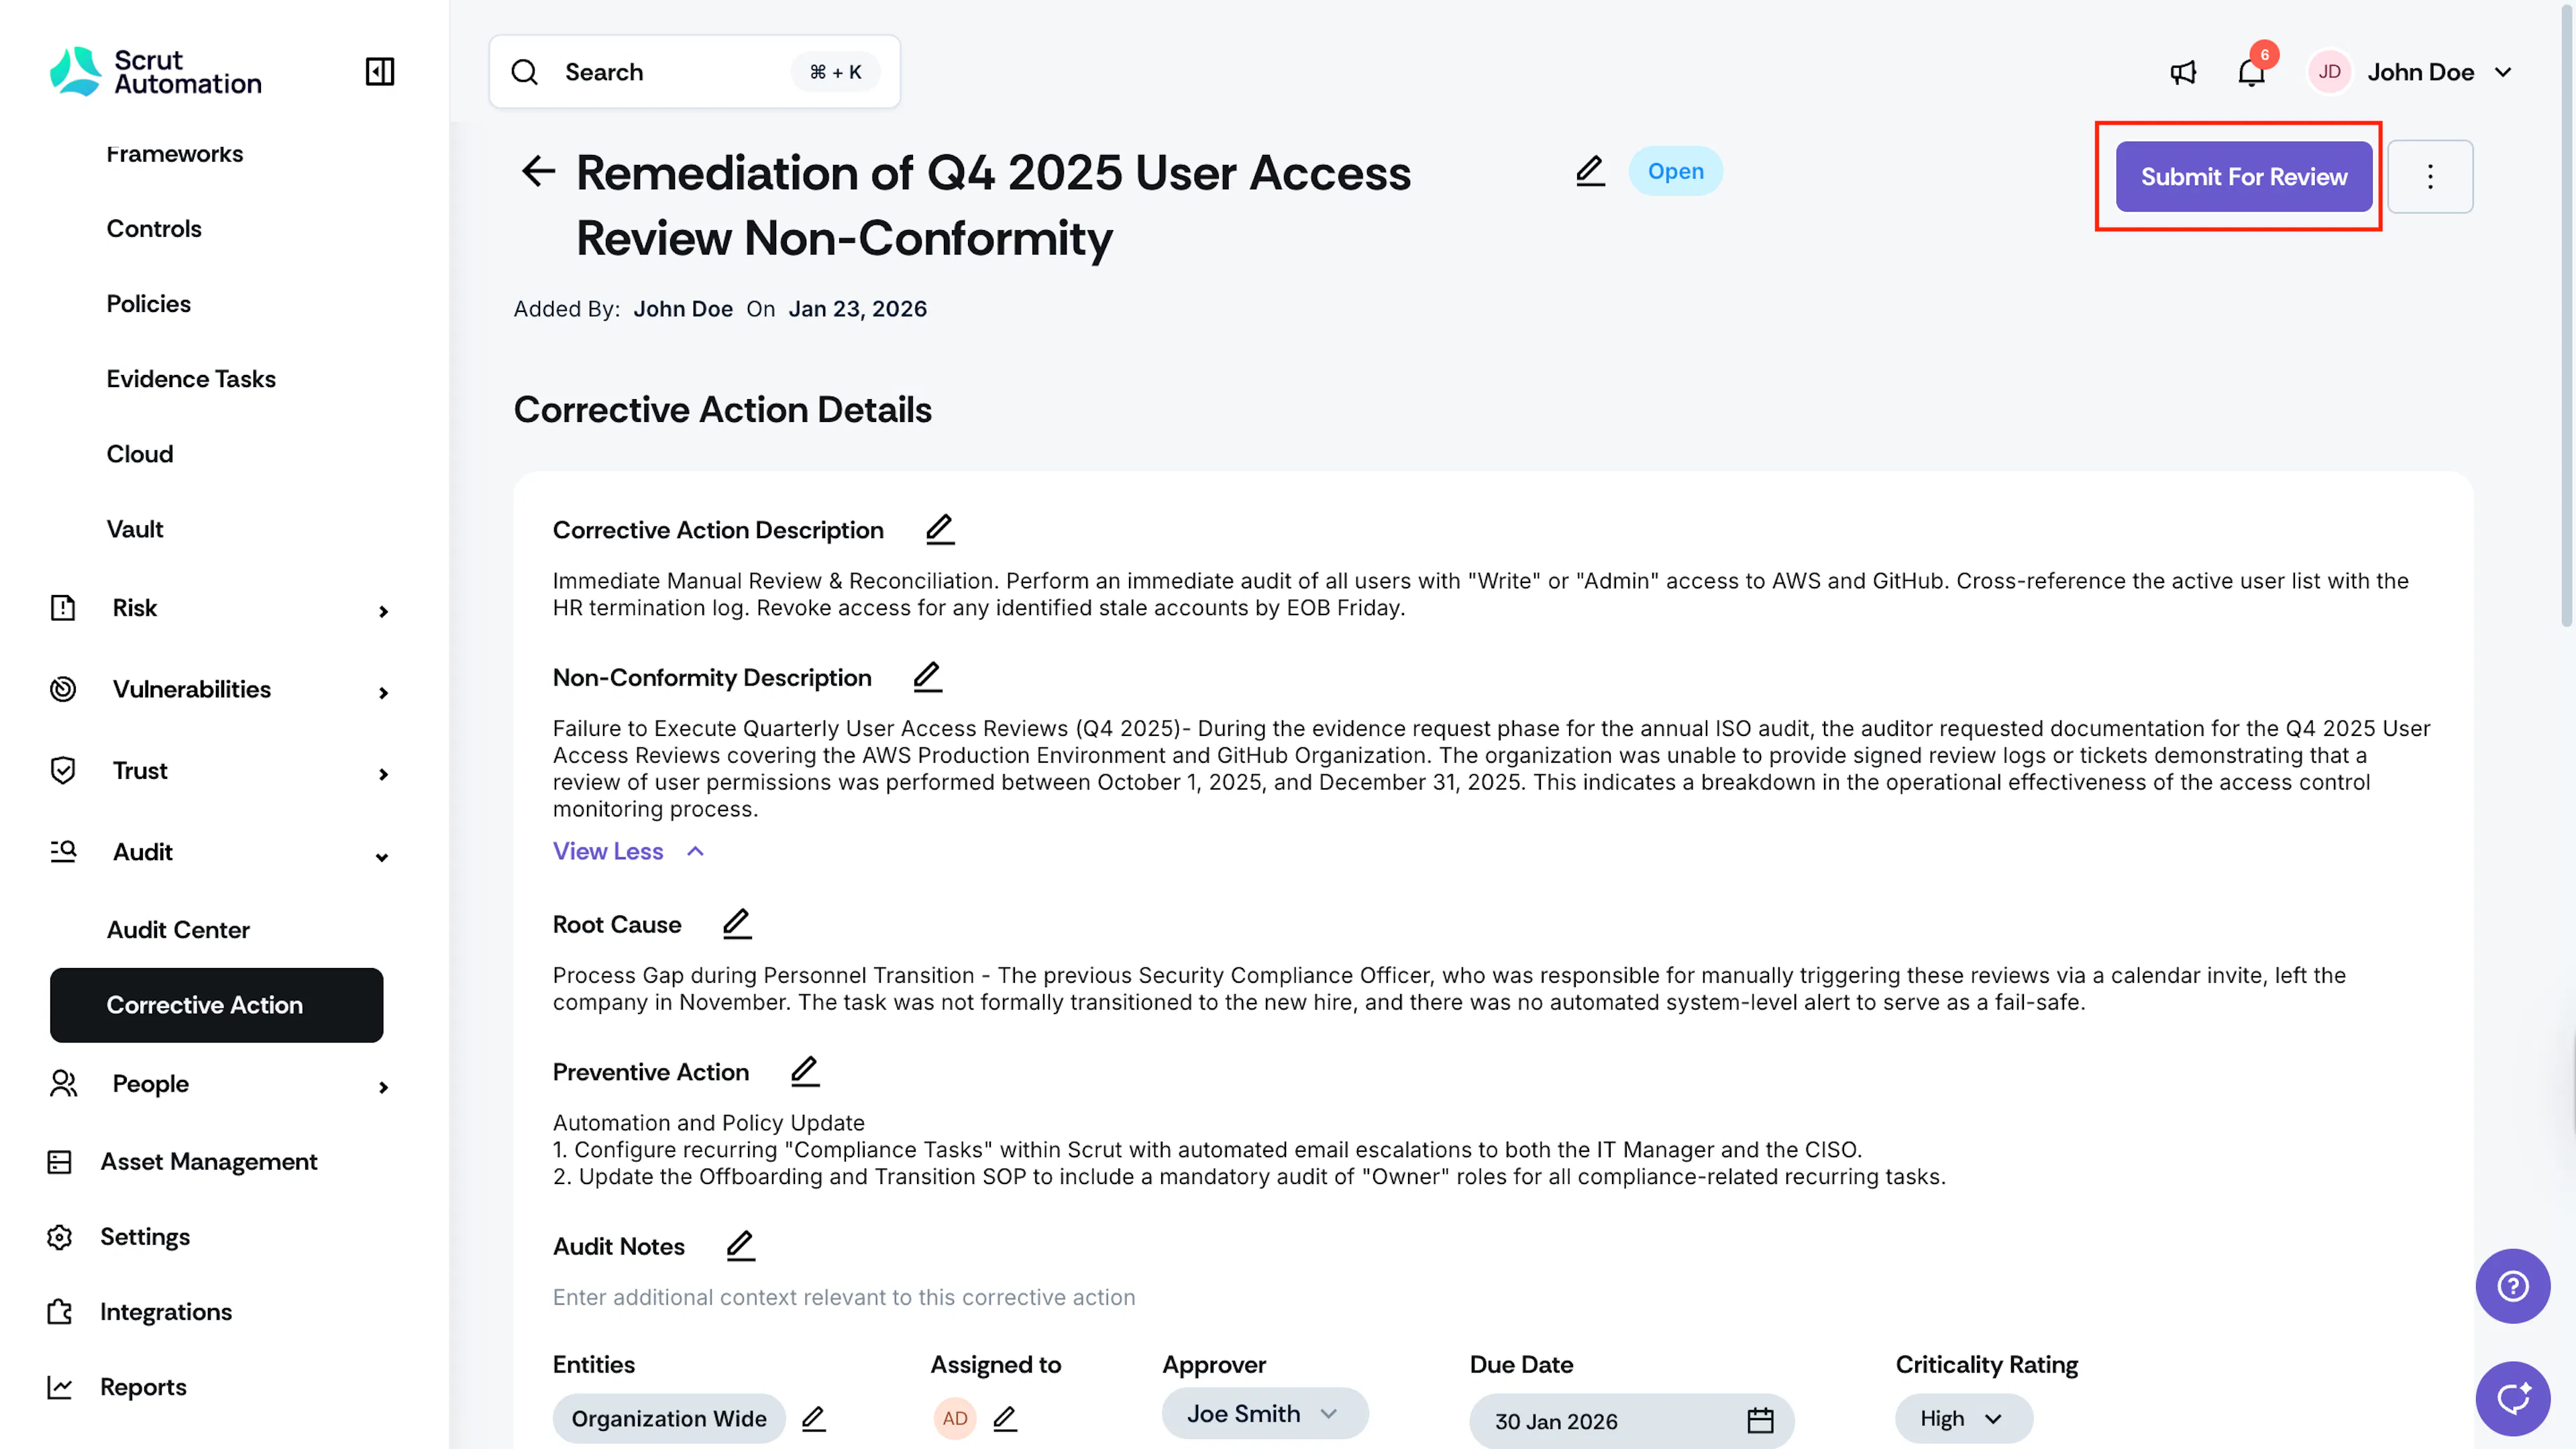
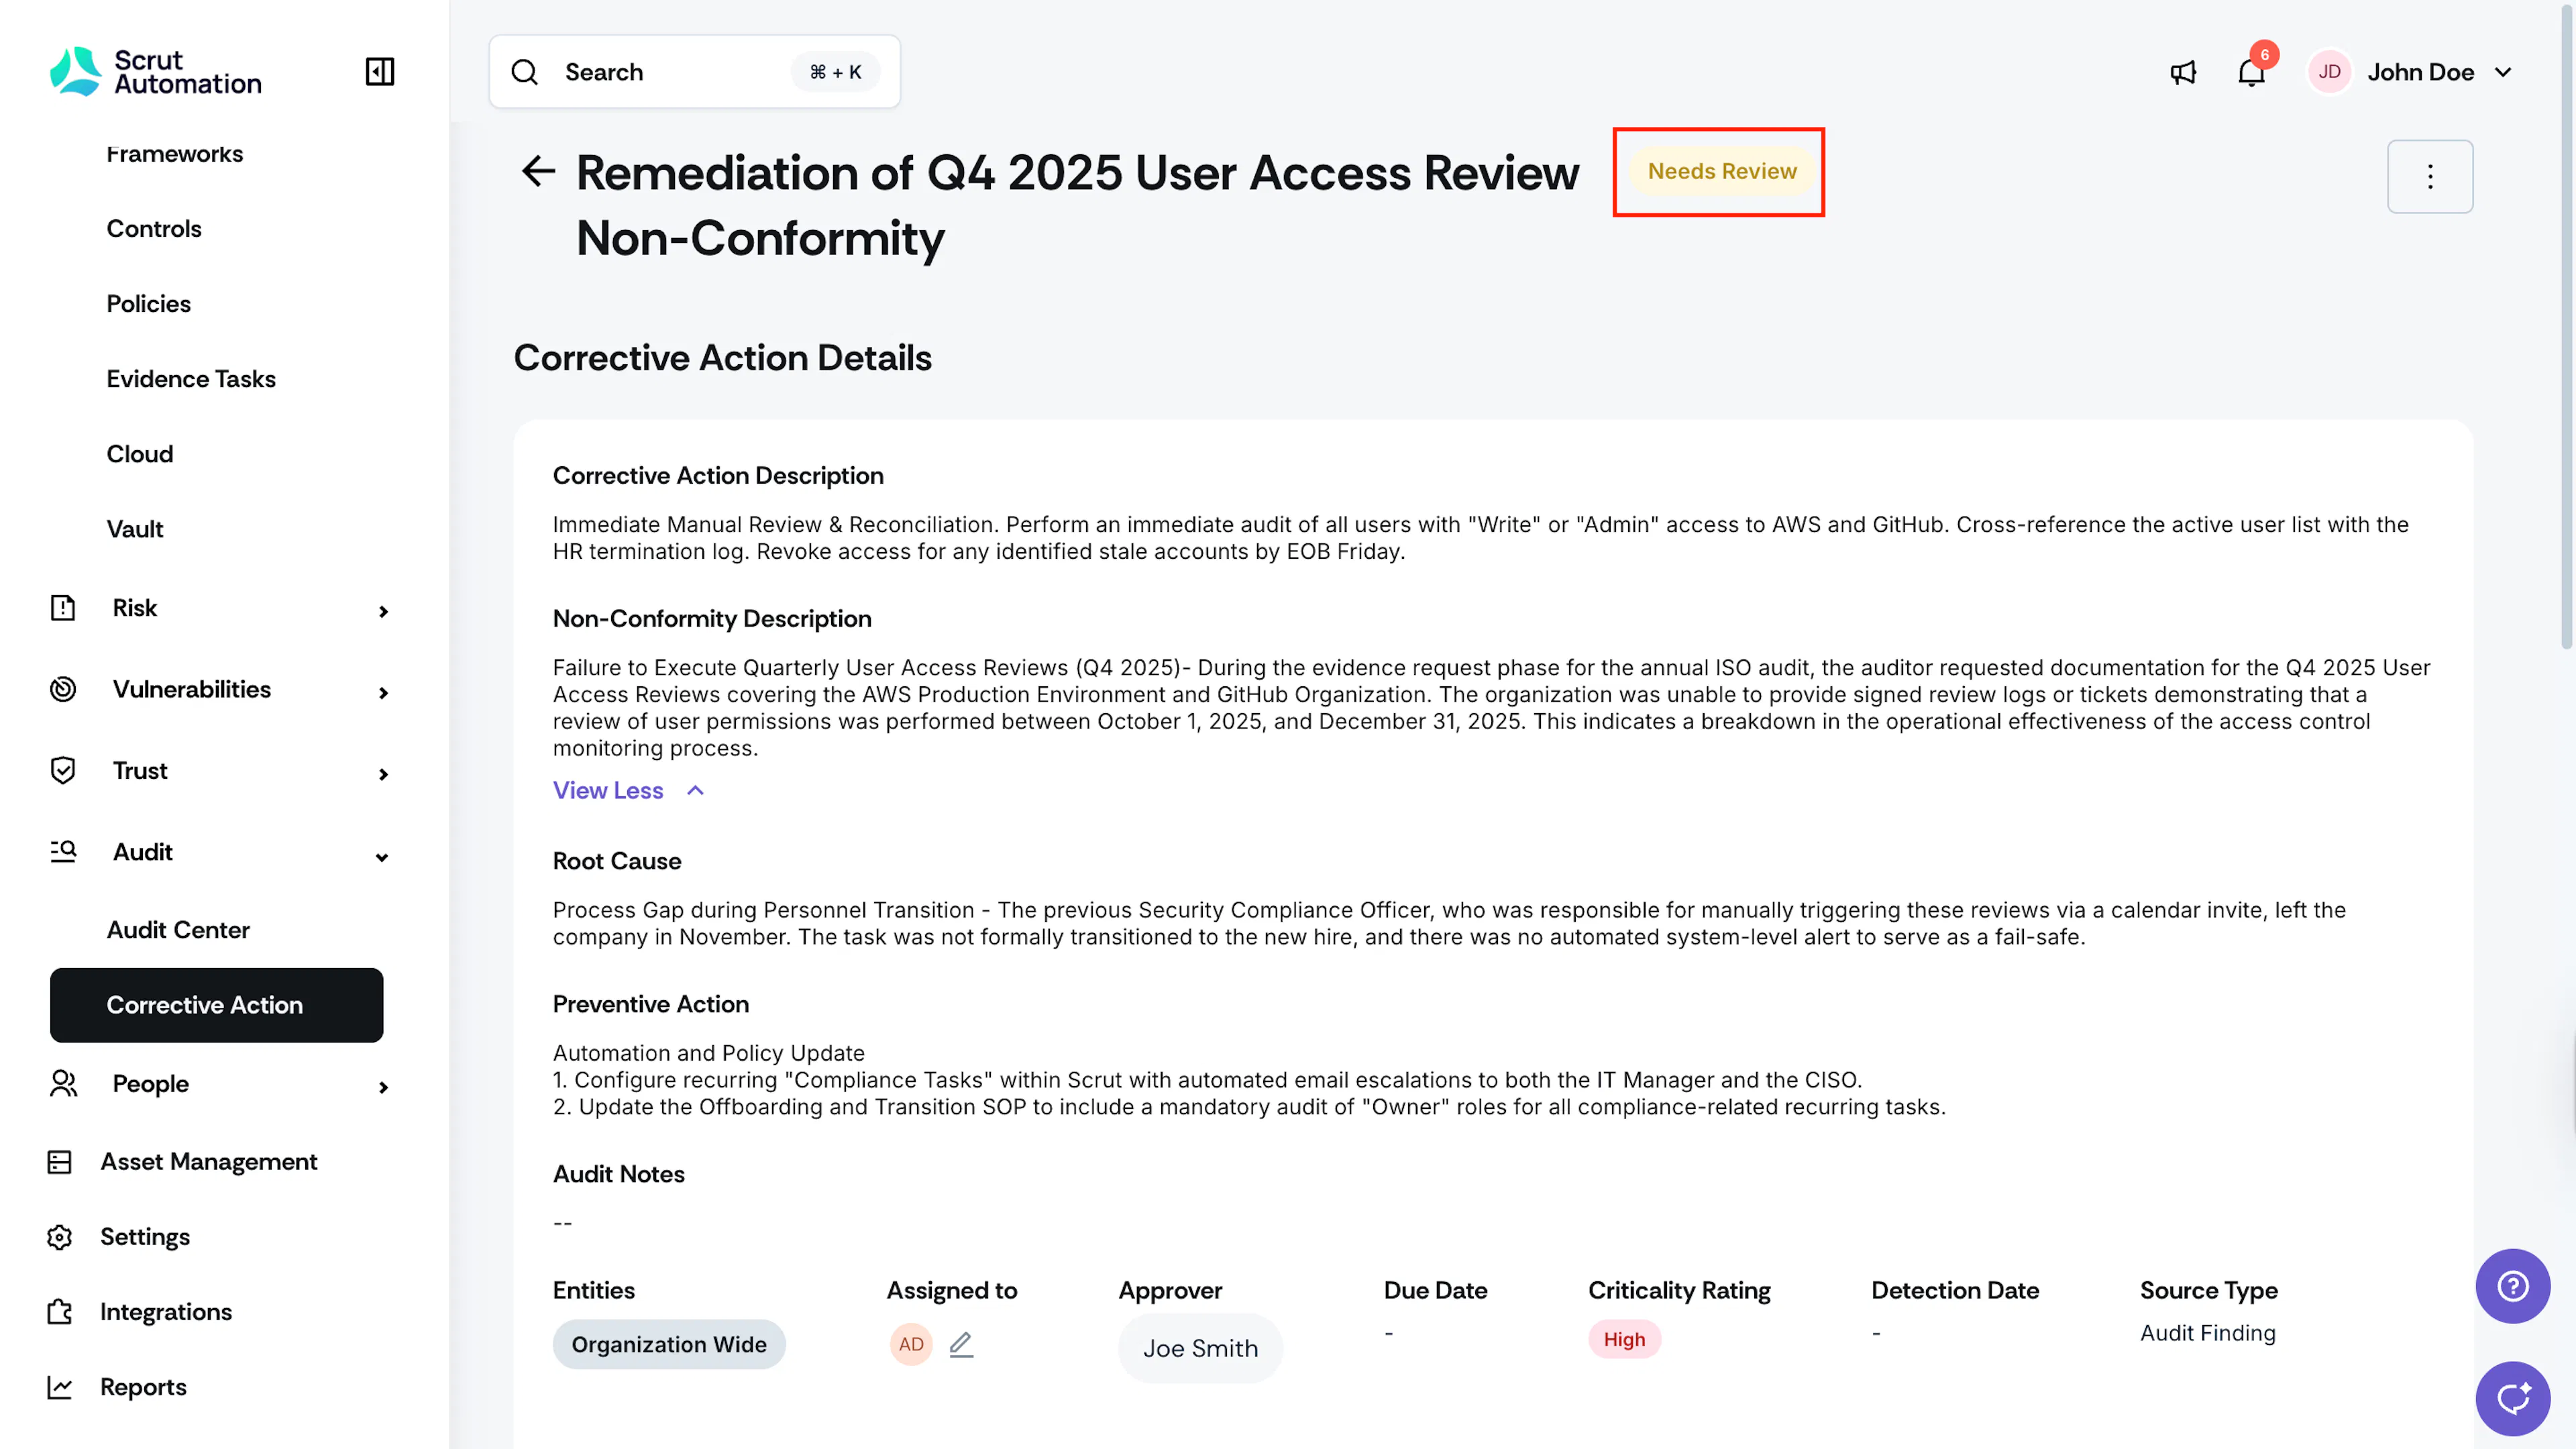
After uploading all required evidence, click the Submit for Review button.
Note:
The Submit for Review button is only enabled when you've added at least one attachment or link to the corrective action.
- The corrective action status changes to Needs Review
- The designated approver receives a notification to review your submission
Step 5: Review the Submission (Approver)
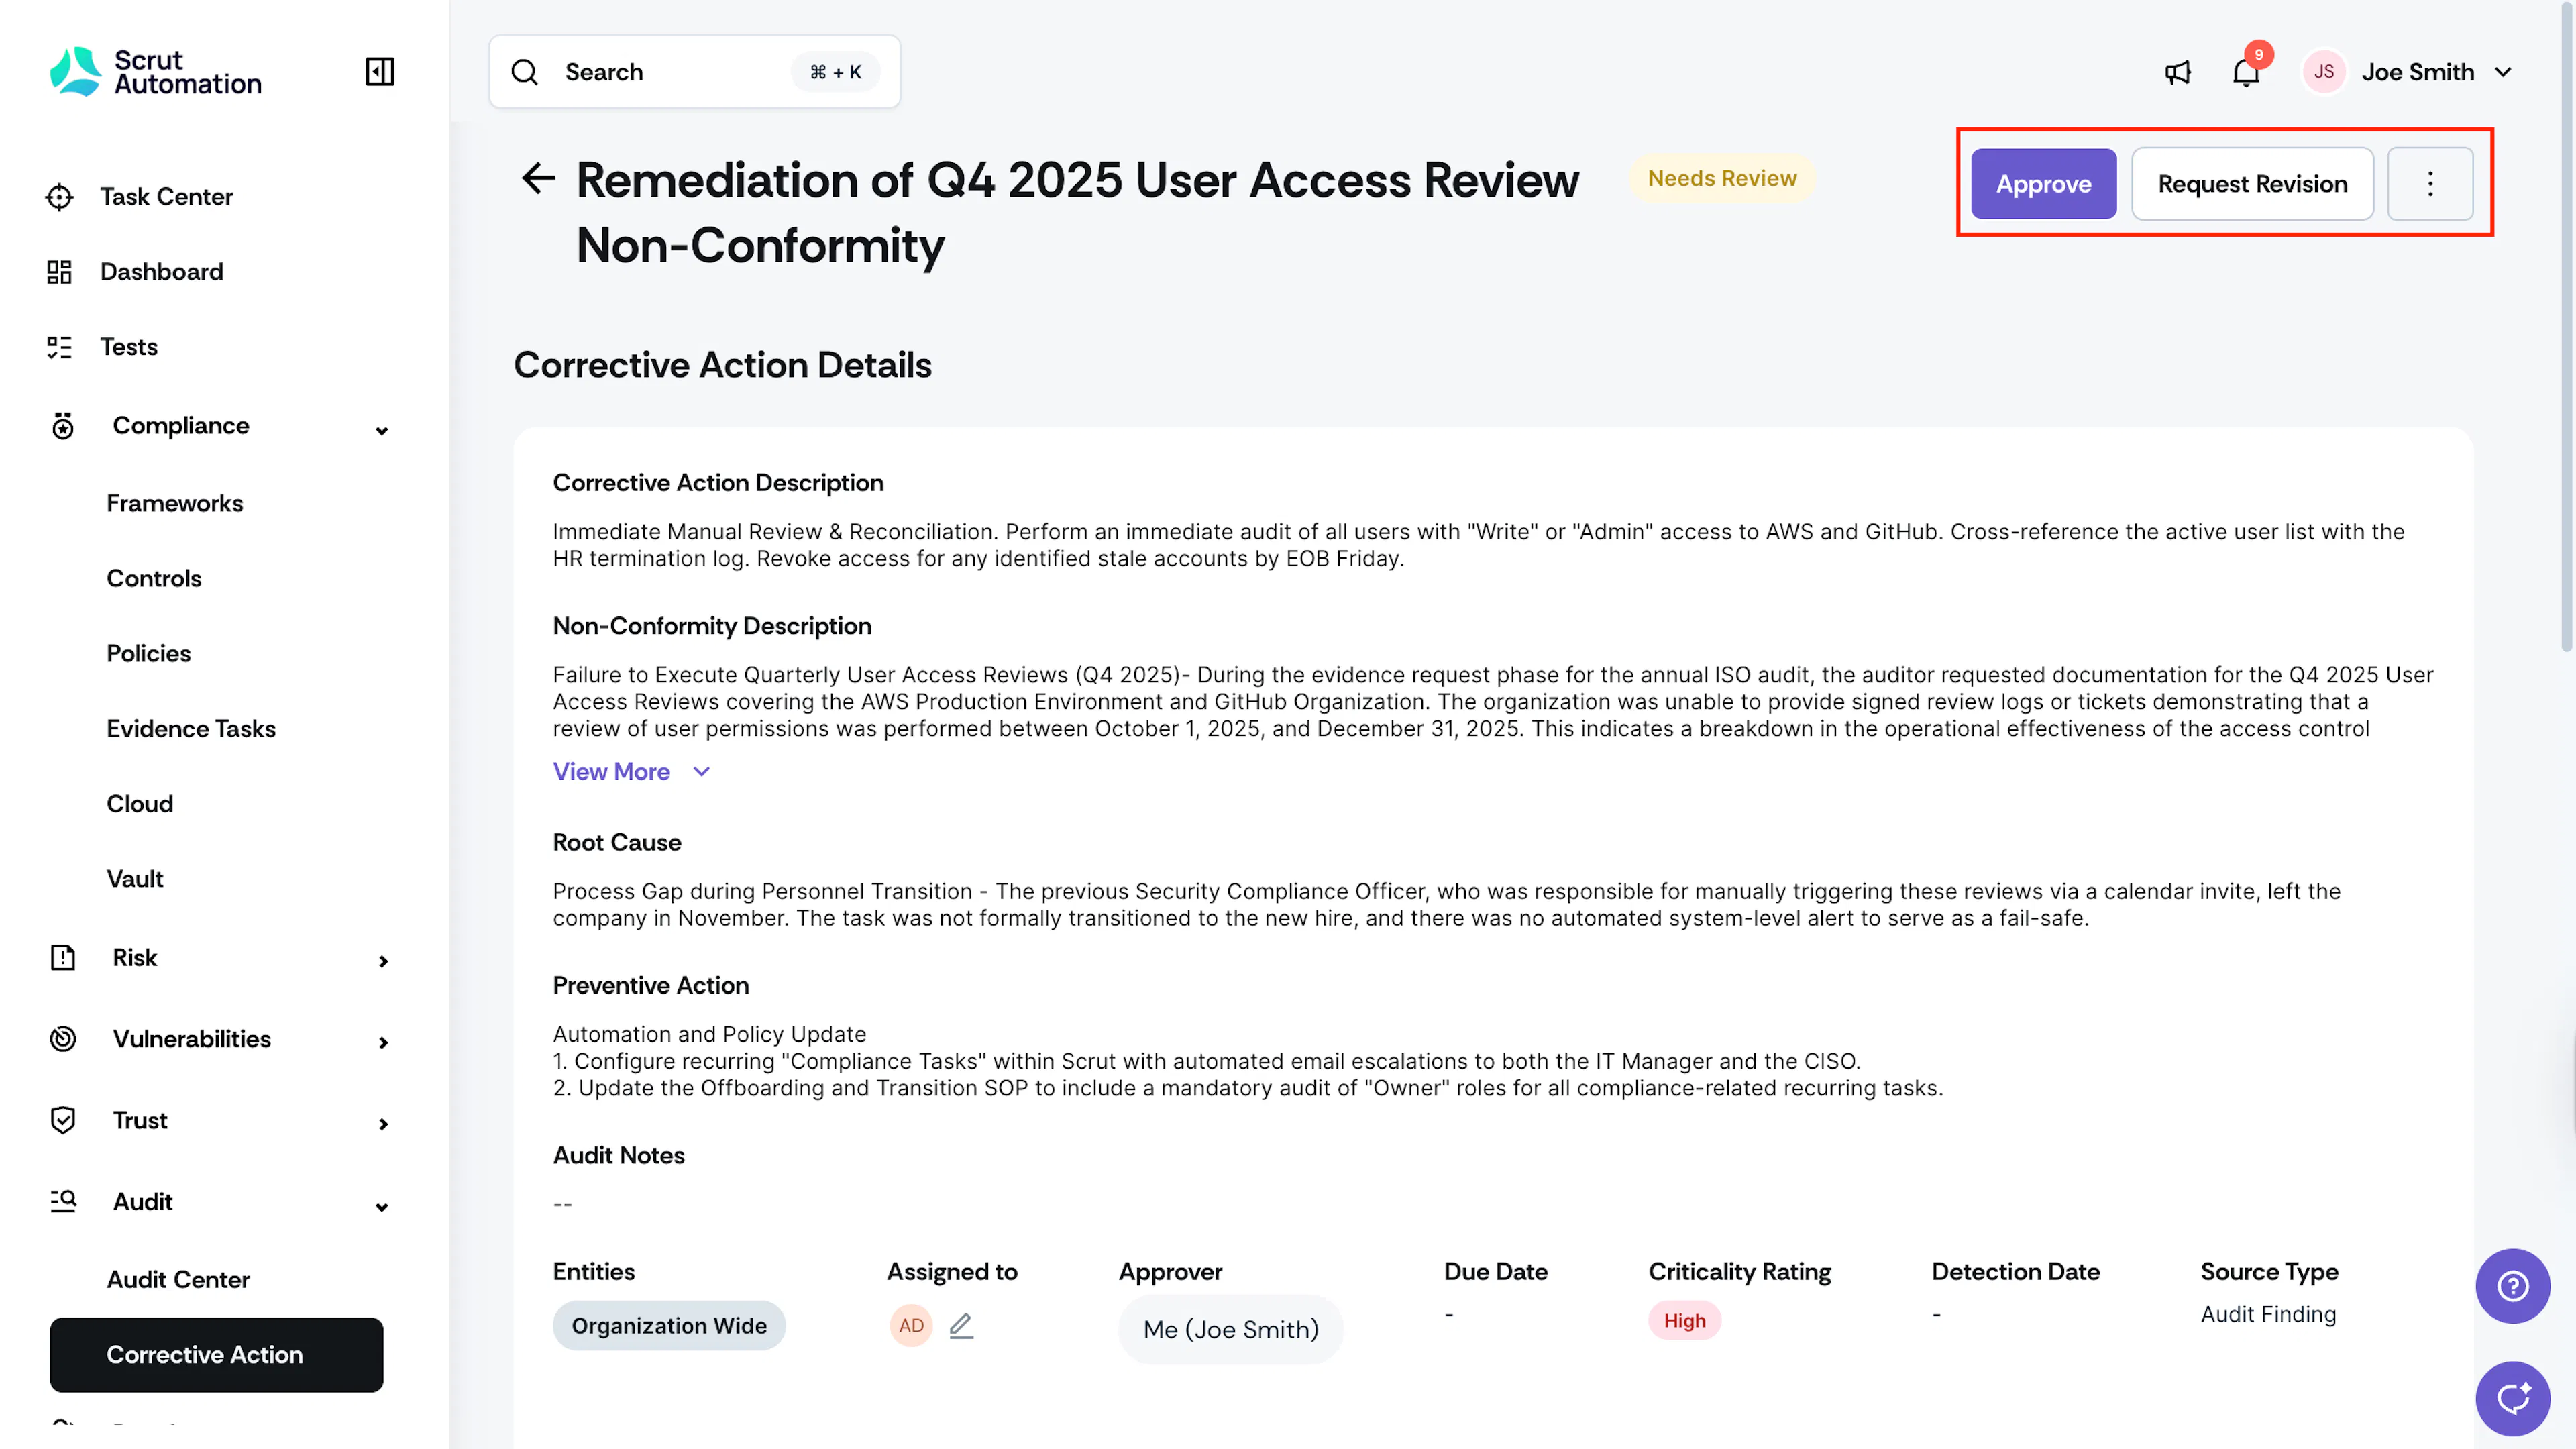
When you receive a notification that a corrective action is ready for review:
- Navigate to Audit → Corrective Action and open the corrective action.
- Review the uploaded evidence and documentation.
- You can choose one of the following actions:
Approve & Close Finding
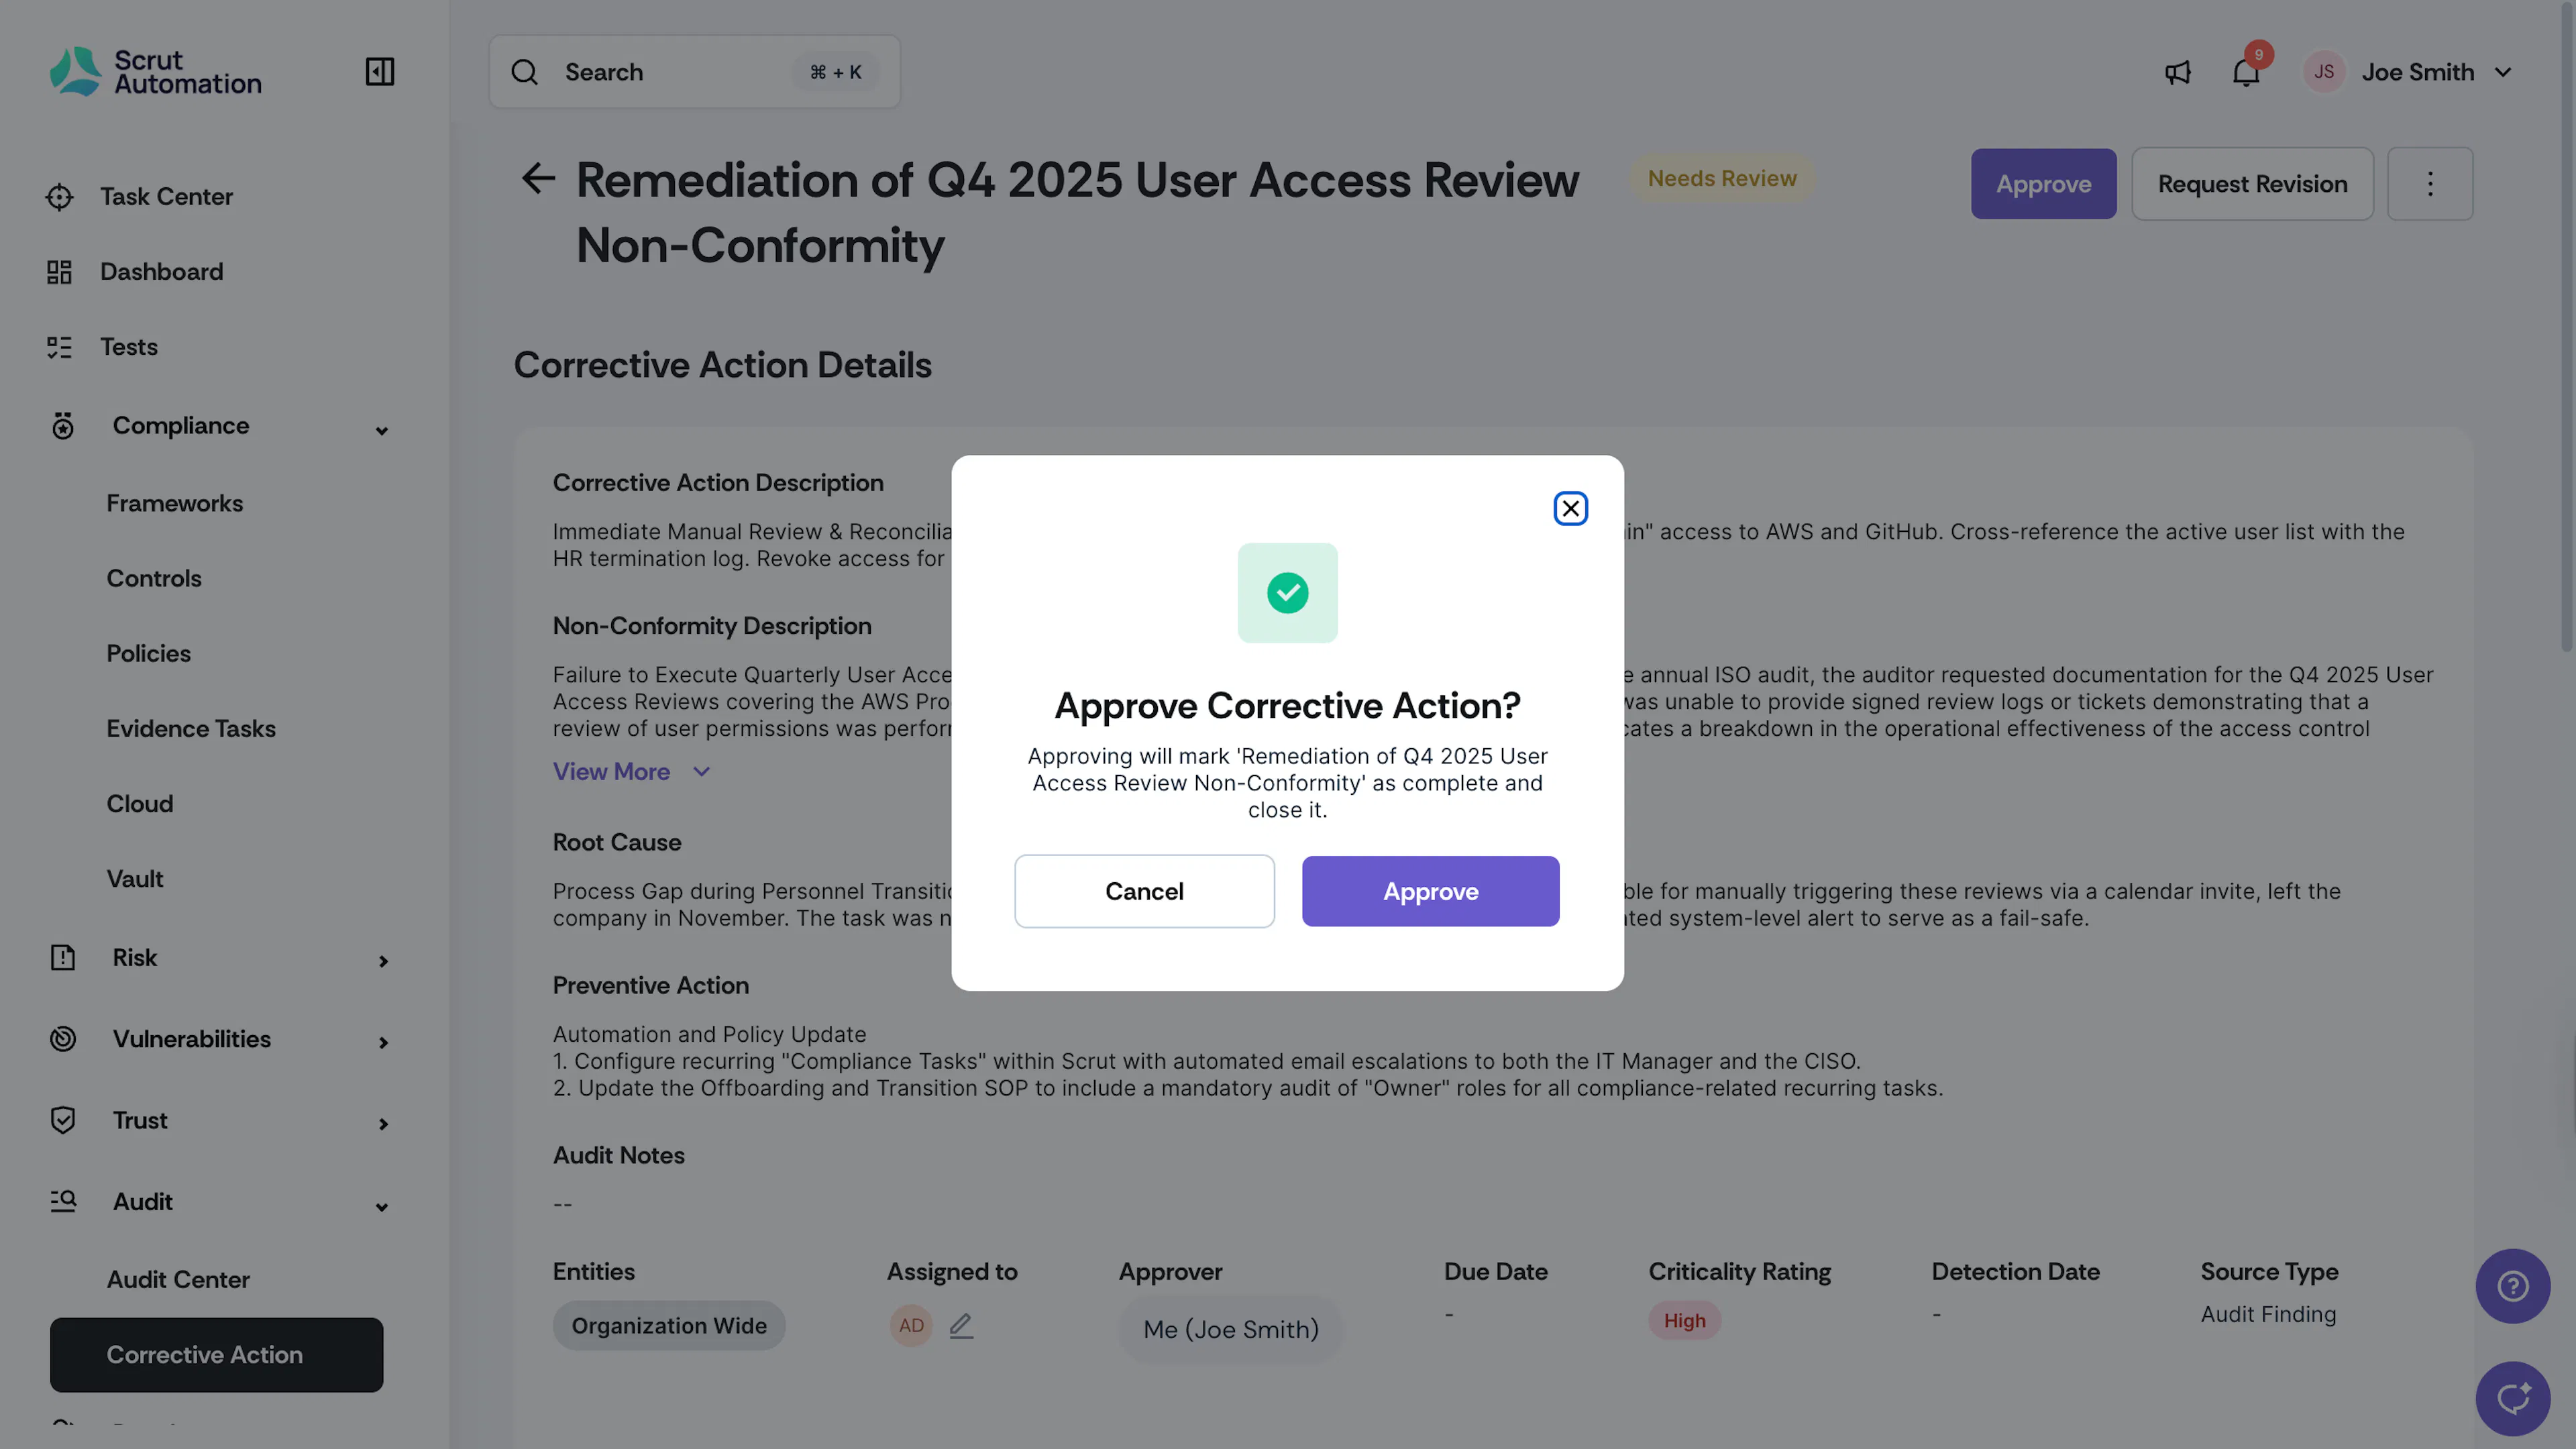
If the evidence is satisfactory and the corrective action is complete:
- Click Approve.
- The corrective action status changes to Closed.
- The assignee receives a notification that the corrective action has been closed.
Request Revision
If the evidence is insufficient or changes are needed:
- Click Request Revision.
- Enter a detailed reason for the revision request in the comment field (required, 500-character limit).
- Click to confirm.
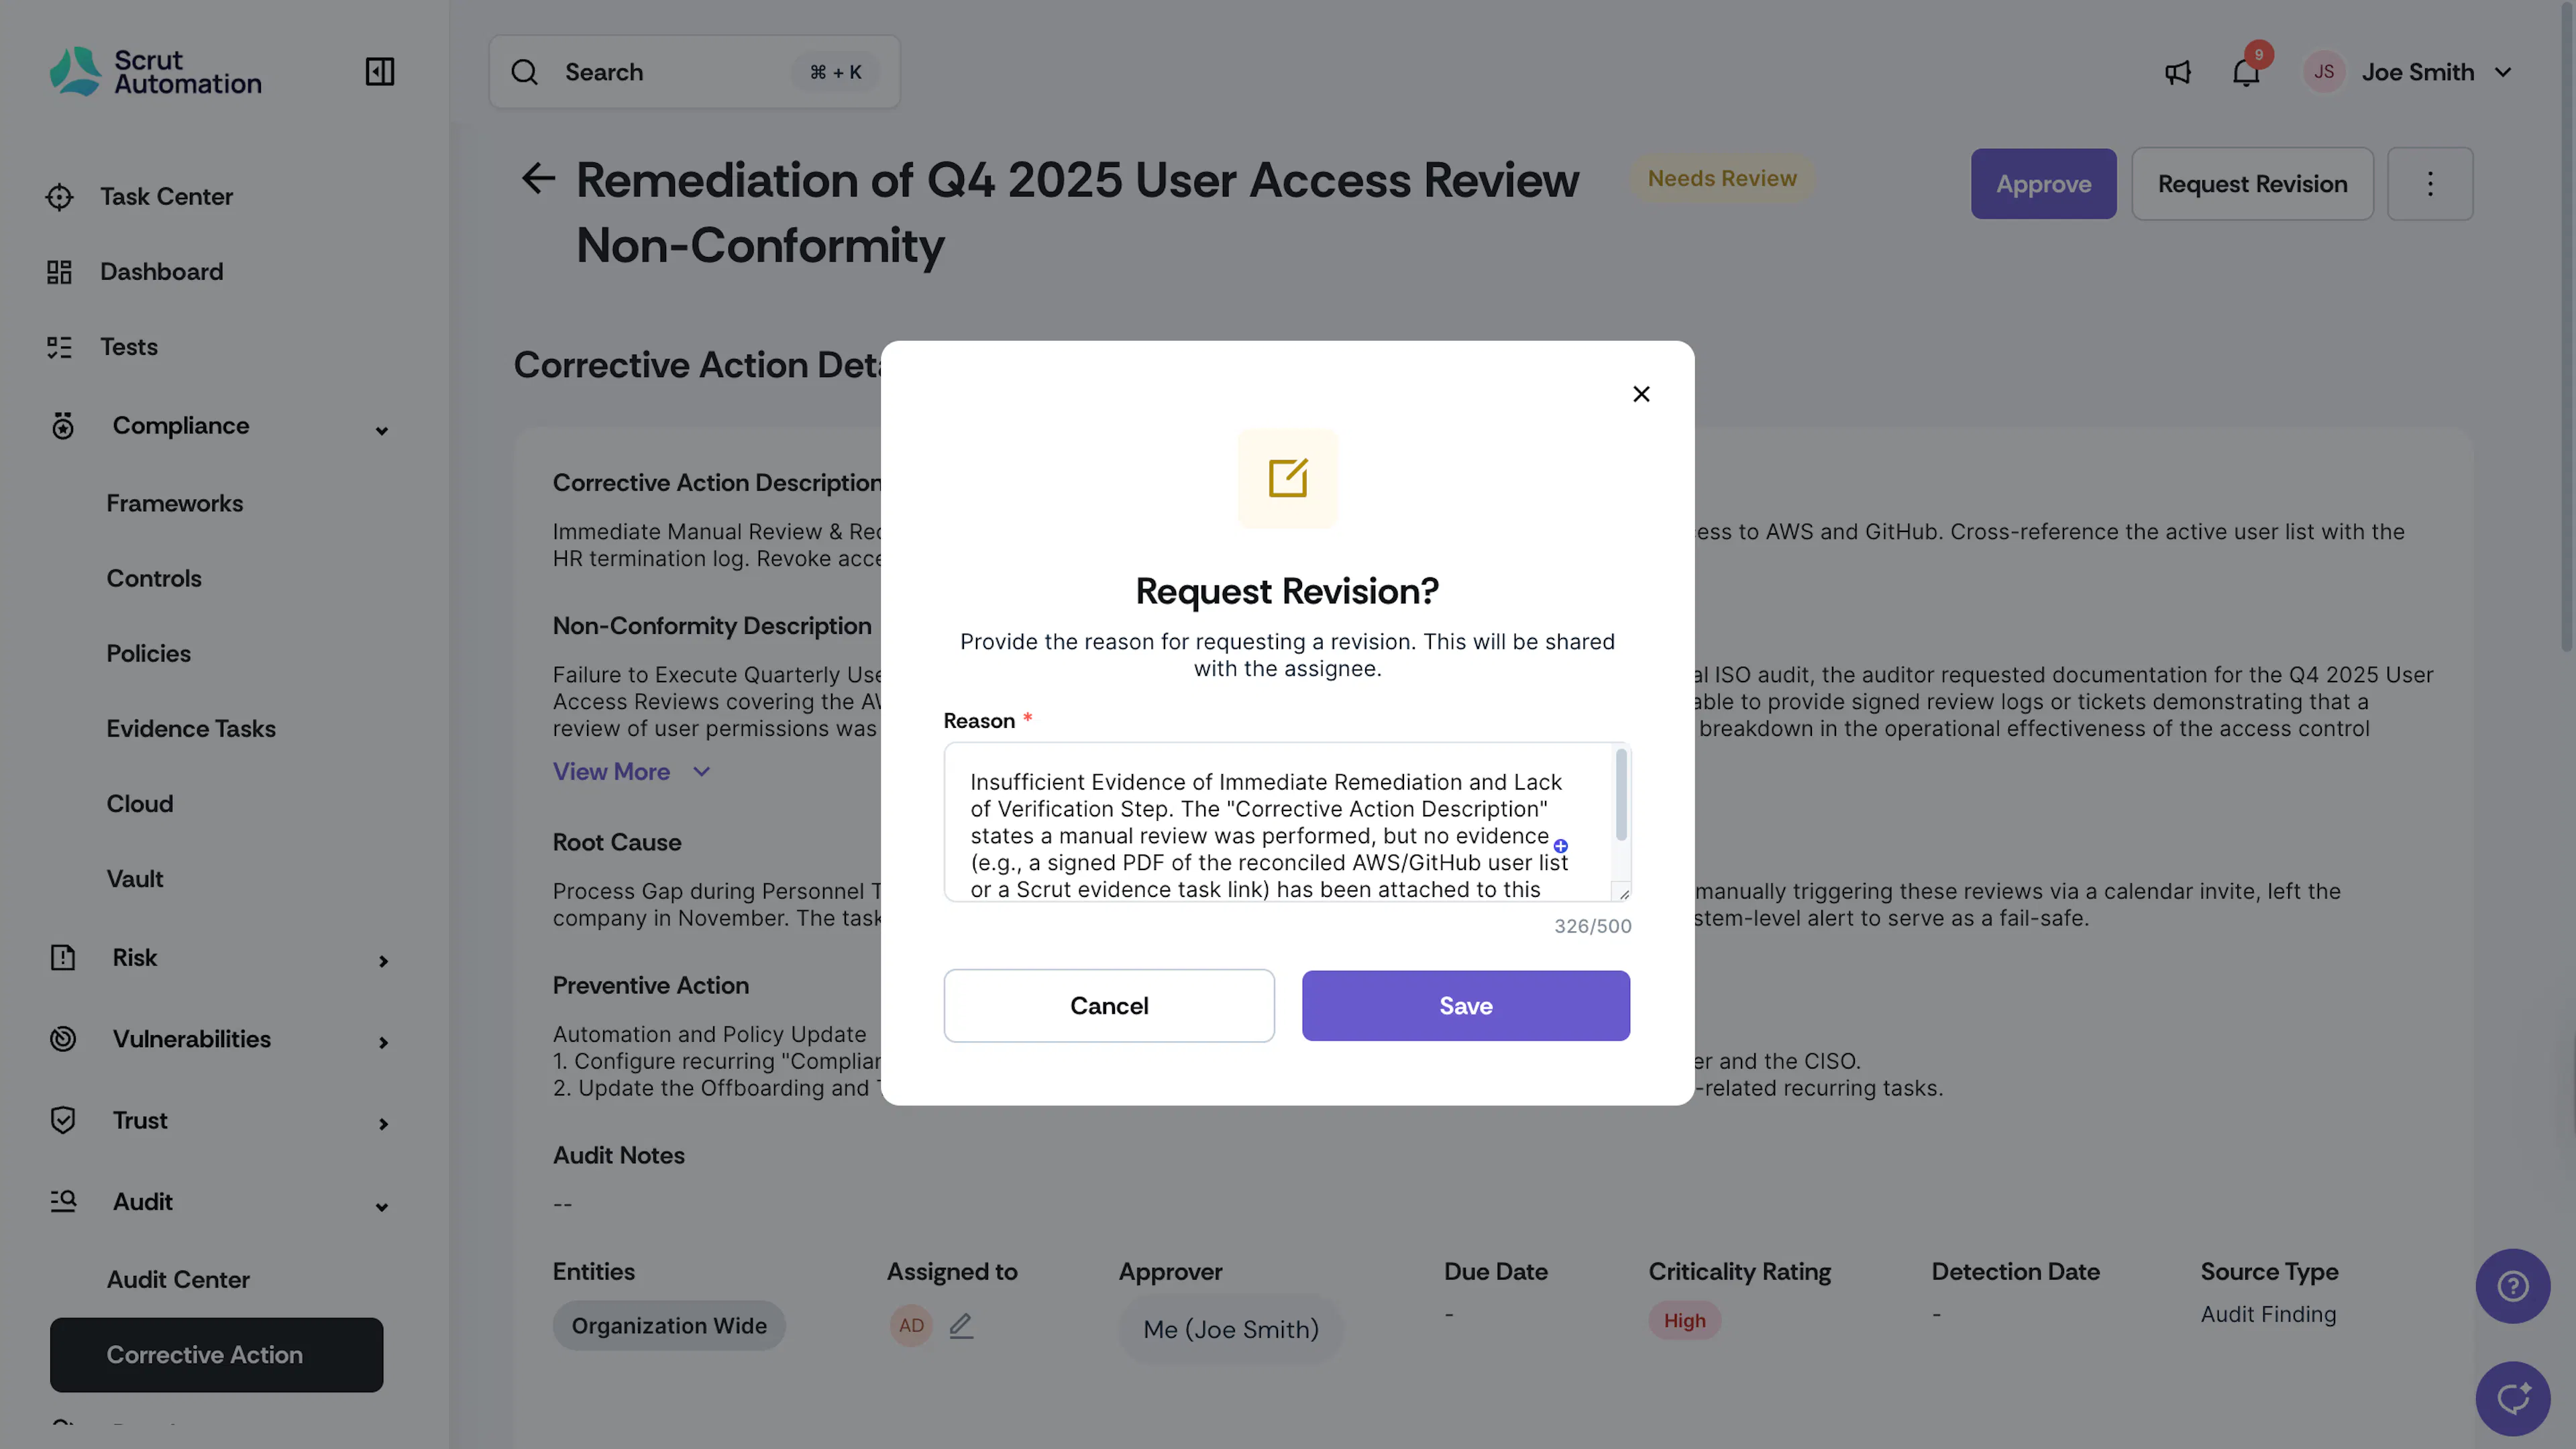
- The corrective action status changes to Needs Revision.
- The assignee receives a notification with your comment explaining what needs to be addressed.
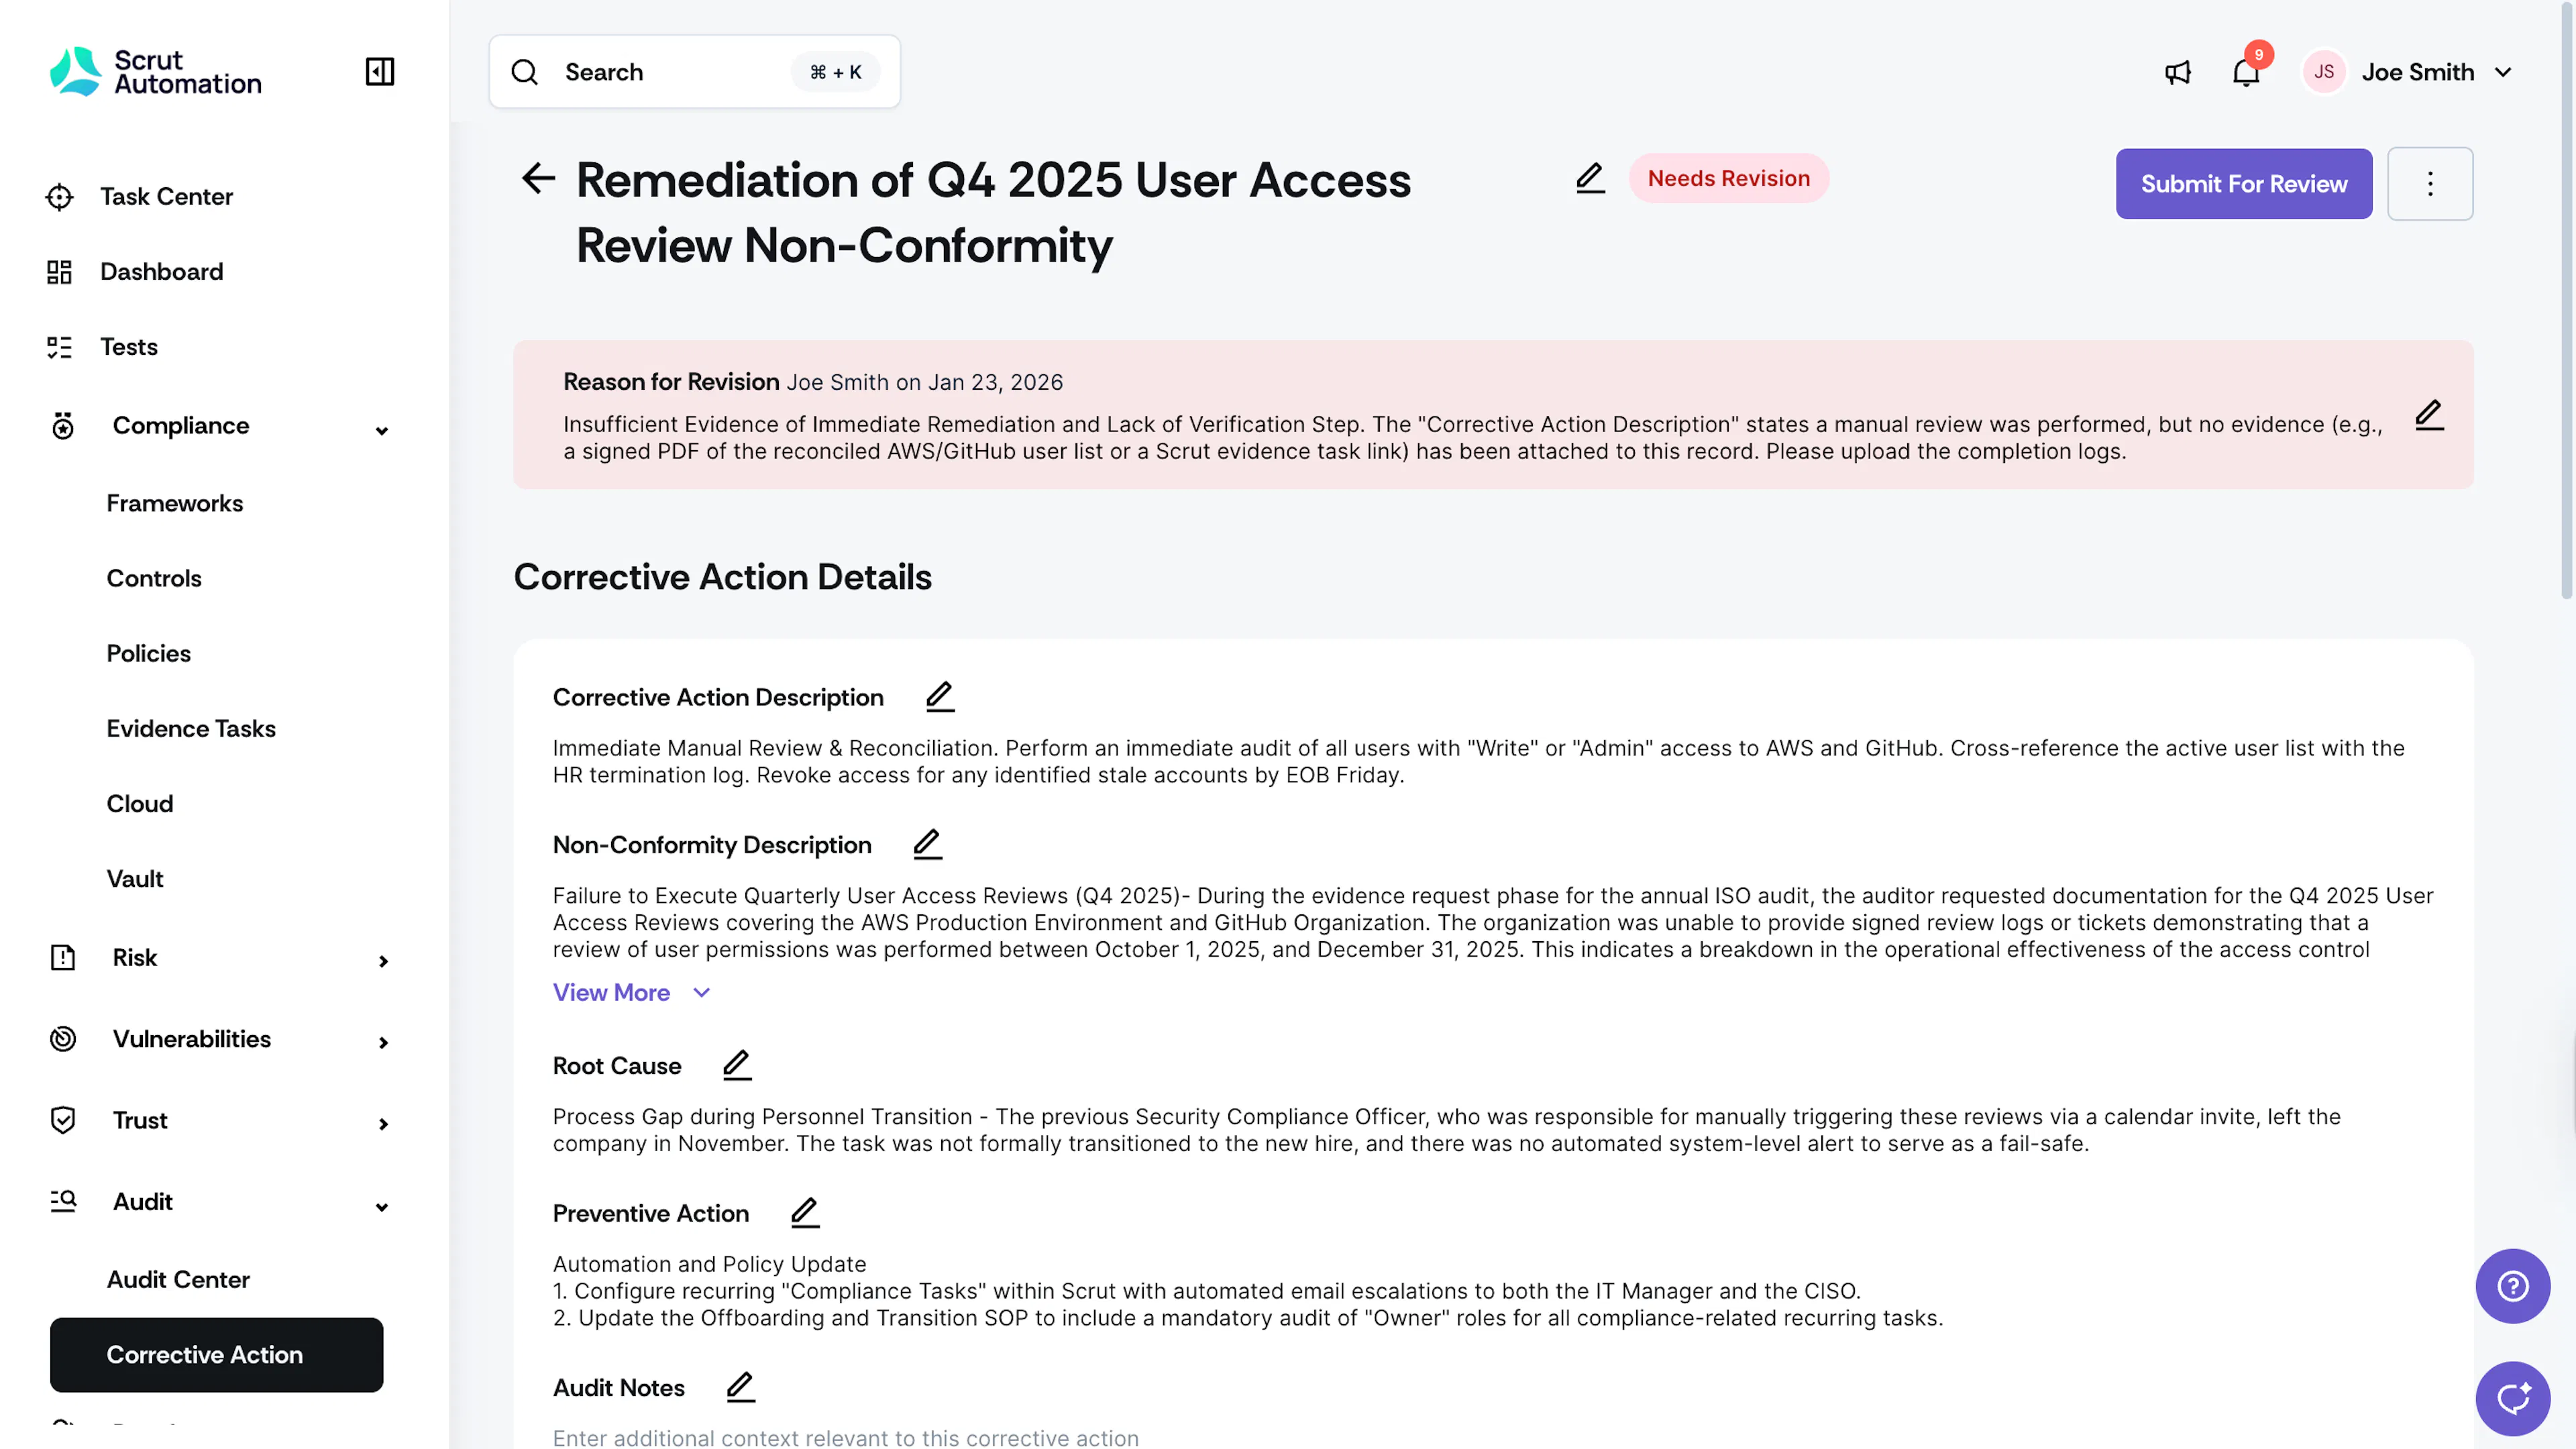
Step 6: Address Revision Requests (Assignee / Corrective Action Creator)
If your submission was sent back for revision:
- Review the approver's comments to understand what changes are needed.
- Make the necessary corrections or improvements.
- Upload revised or additional evidence.
- Click Submit for Review again.
The corrective action returns to Needs Review status, and the approver is notified to review your resubmission.
Step 7: Final Approval and Closure (Approver)
Once the revised evidence meets requirements:
- Review the updated submission.
- Click Approve and close the corrective action.
- The corrective action status changes to Closed.
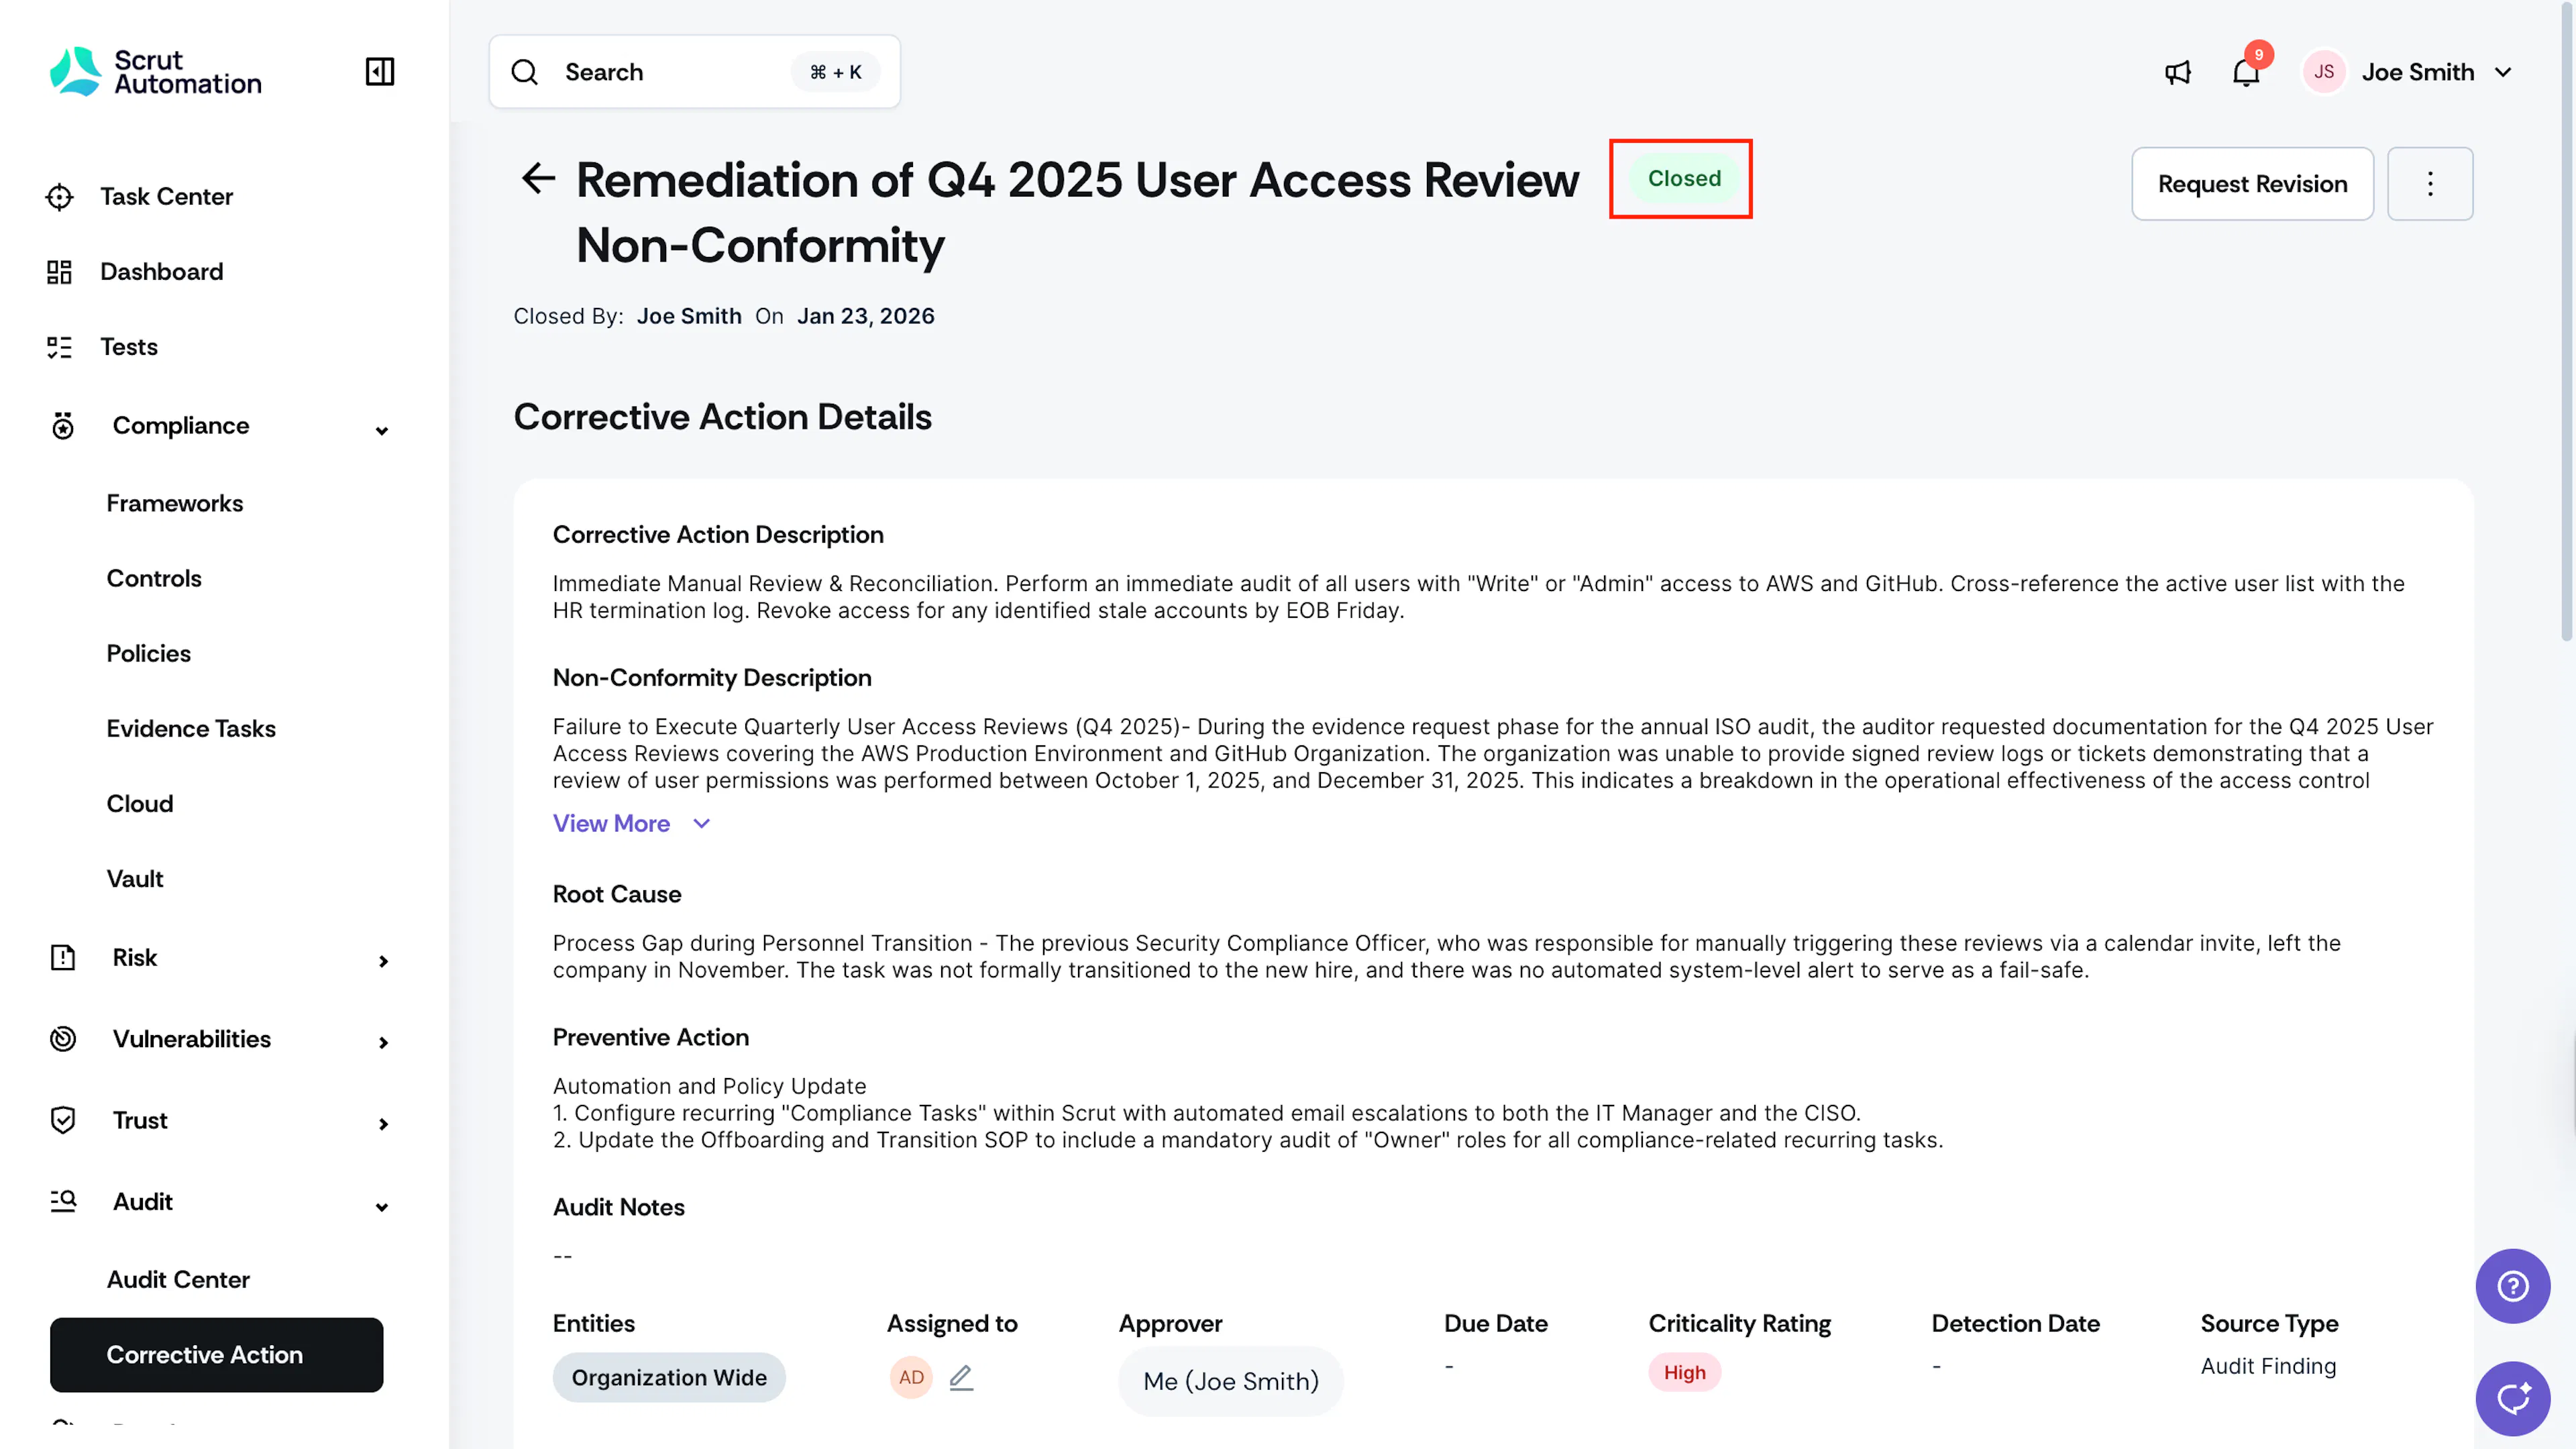
Note:
You can also request a revision even after closing a corrective action if additional concerns arise.
FAQs
Best Practices
For Scrut Admins
- Assignee and approver should be different people to ensure an independent review.
For Corrective Action Assignees
- Upload comprehensive evidence before submitting for review to avoid an unnecessary revision cycle.
- Respond promptly to revision requests to keep audit workflows moving efficiently.
- Complete all required fields in Step 2 to provide approvers and the audit team with full context.
For Approvers
- Provide detailed comments when requesting revisions to help the assignee understand the required changes.