Add and Manage Documents and Folders
In this article, we’ll explain how to upload documents, create and manage folders in the Vault.
Managing Folders
You can create folders and sub-folders in the Vault to organize your documents.
Create a Folder
- Log in to your Scrut account, expand the Compliance tab on the left navigation panel, and click Vault.
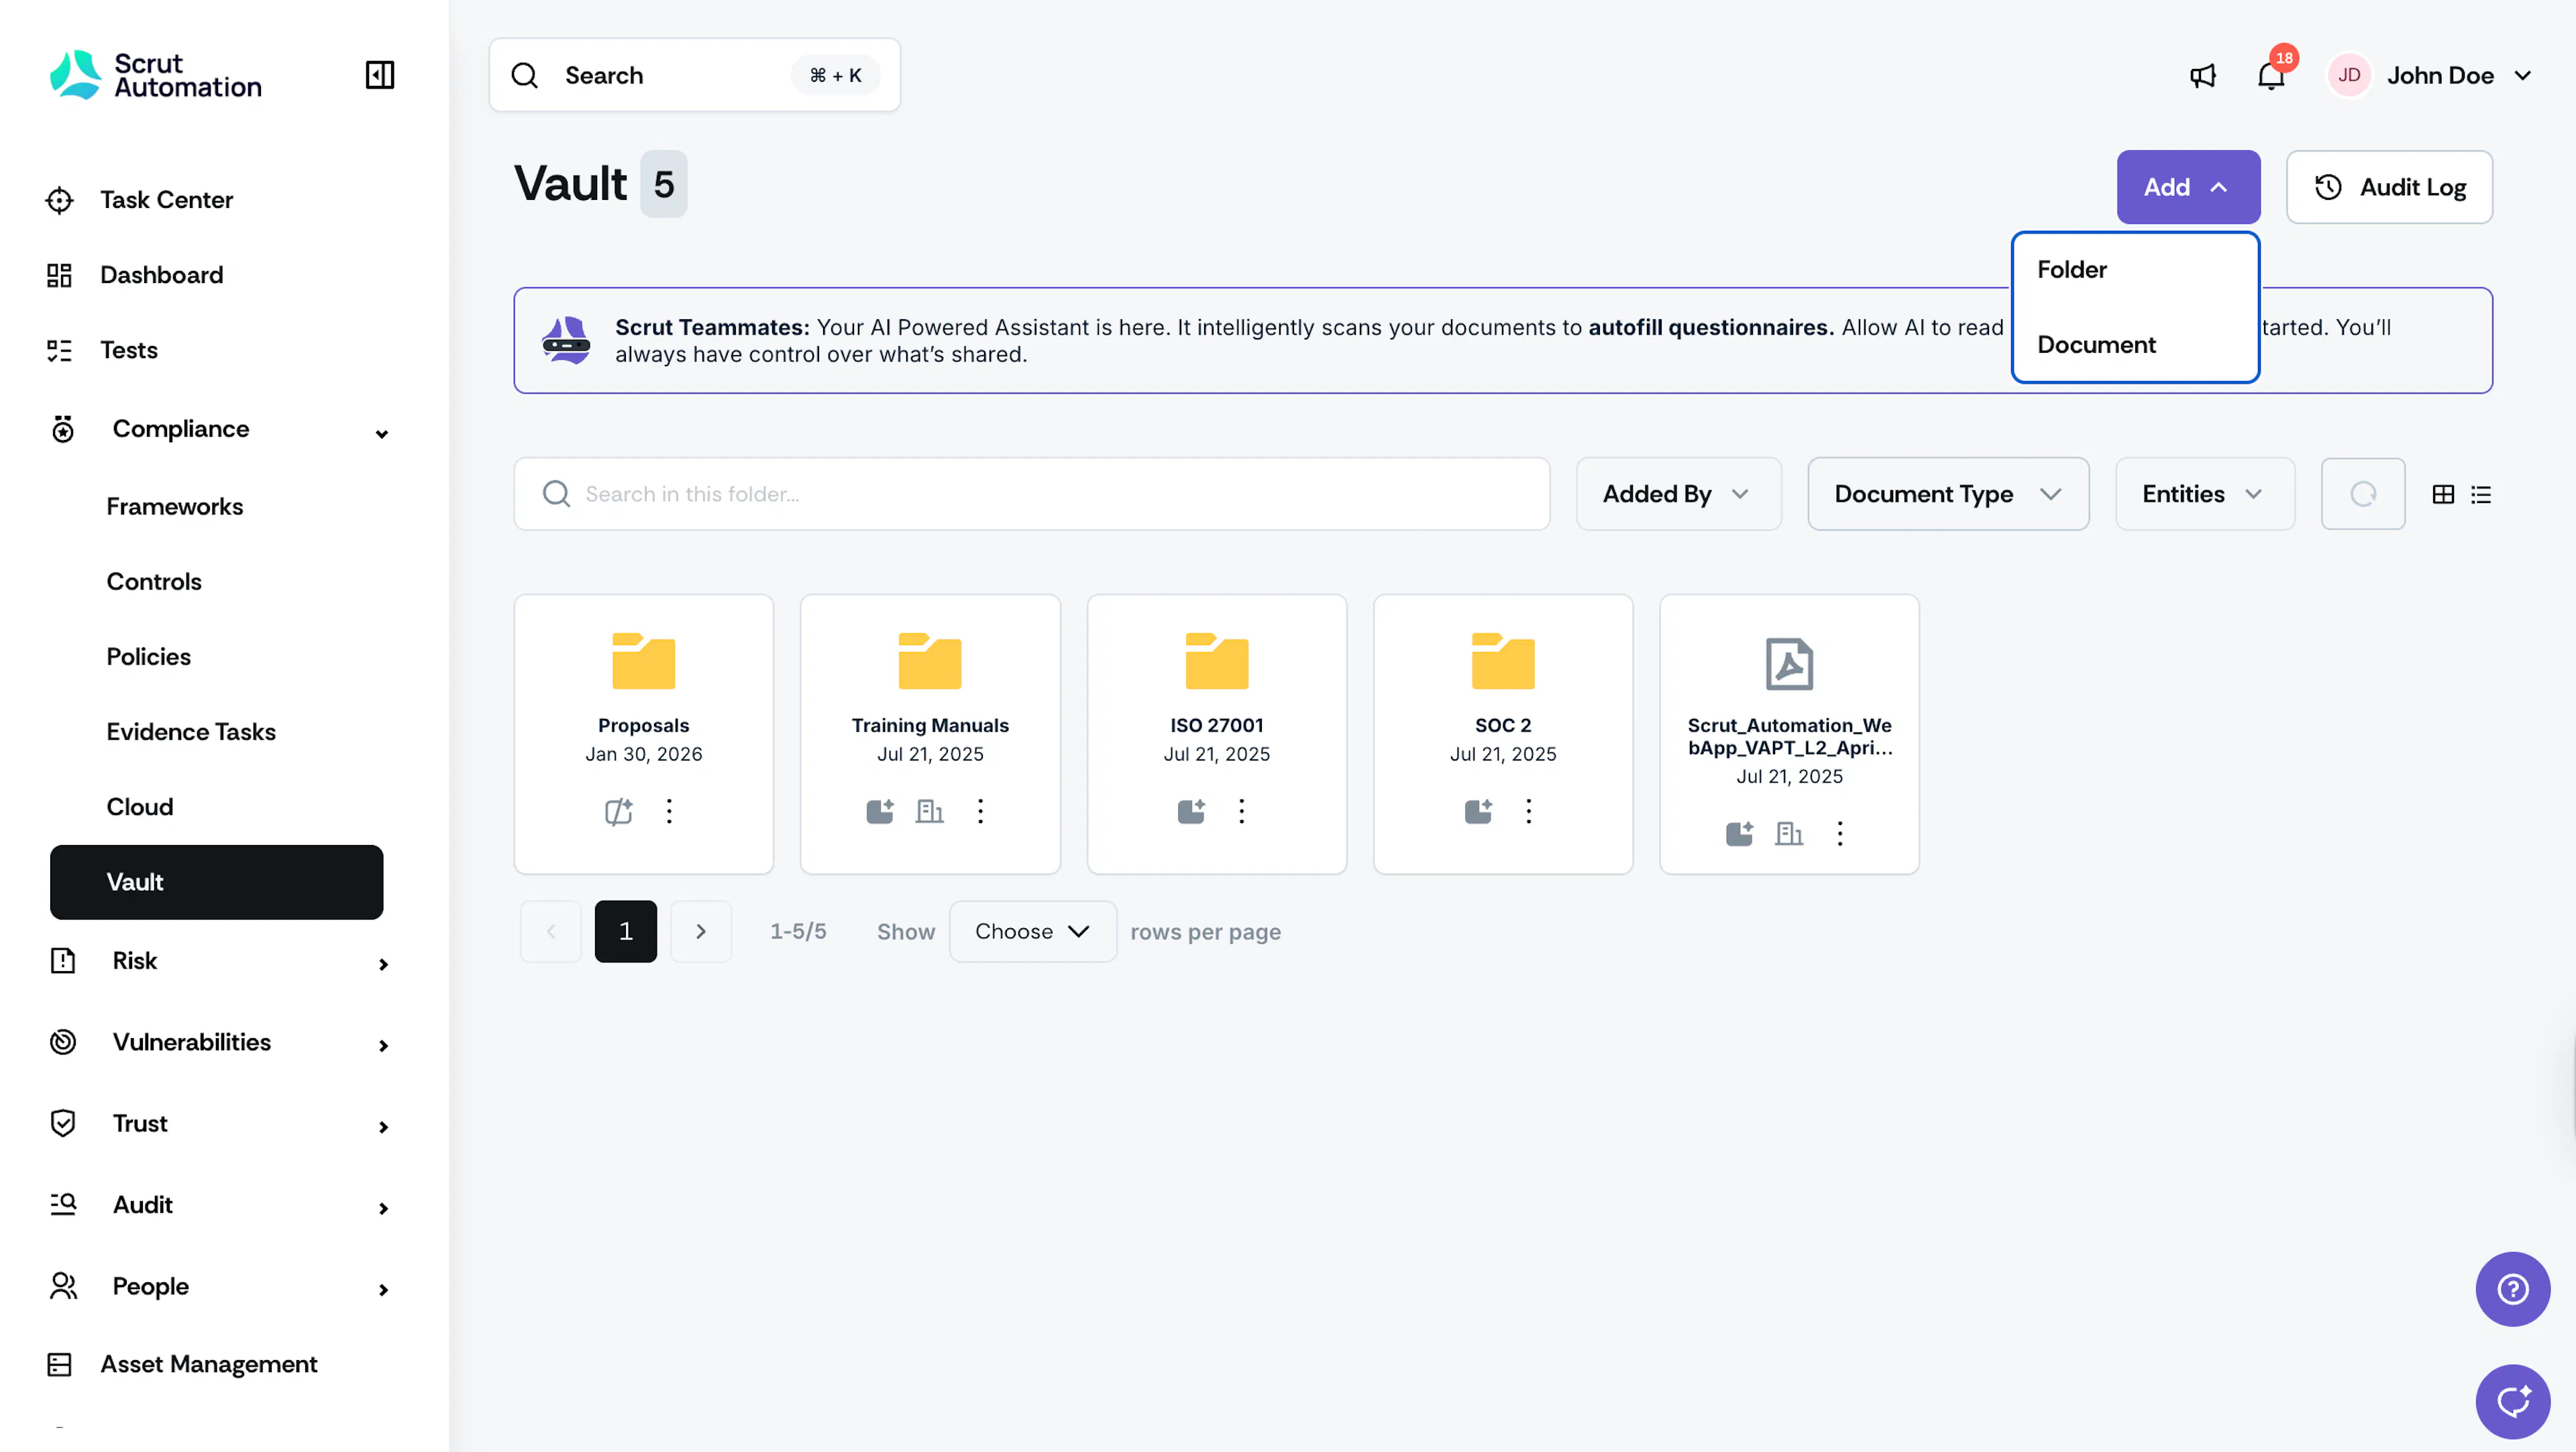
- Click the Add button and select Folder.
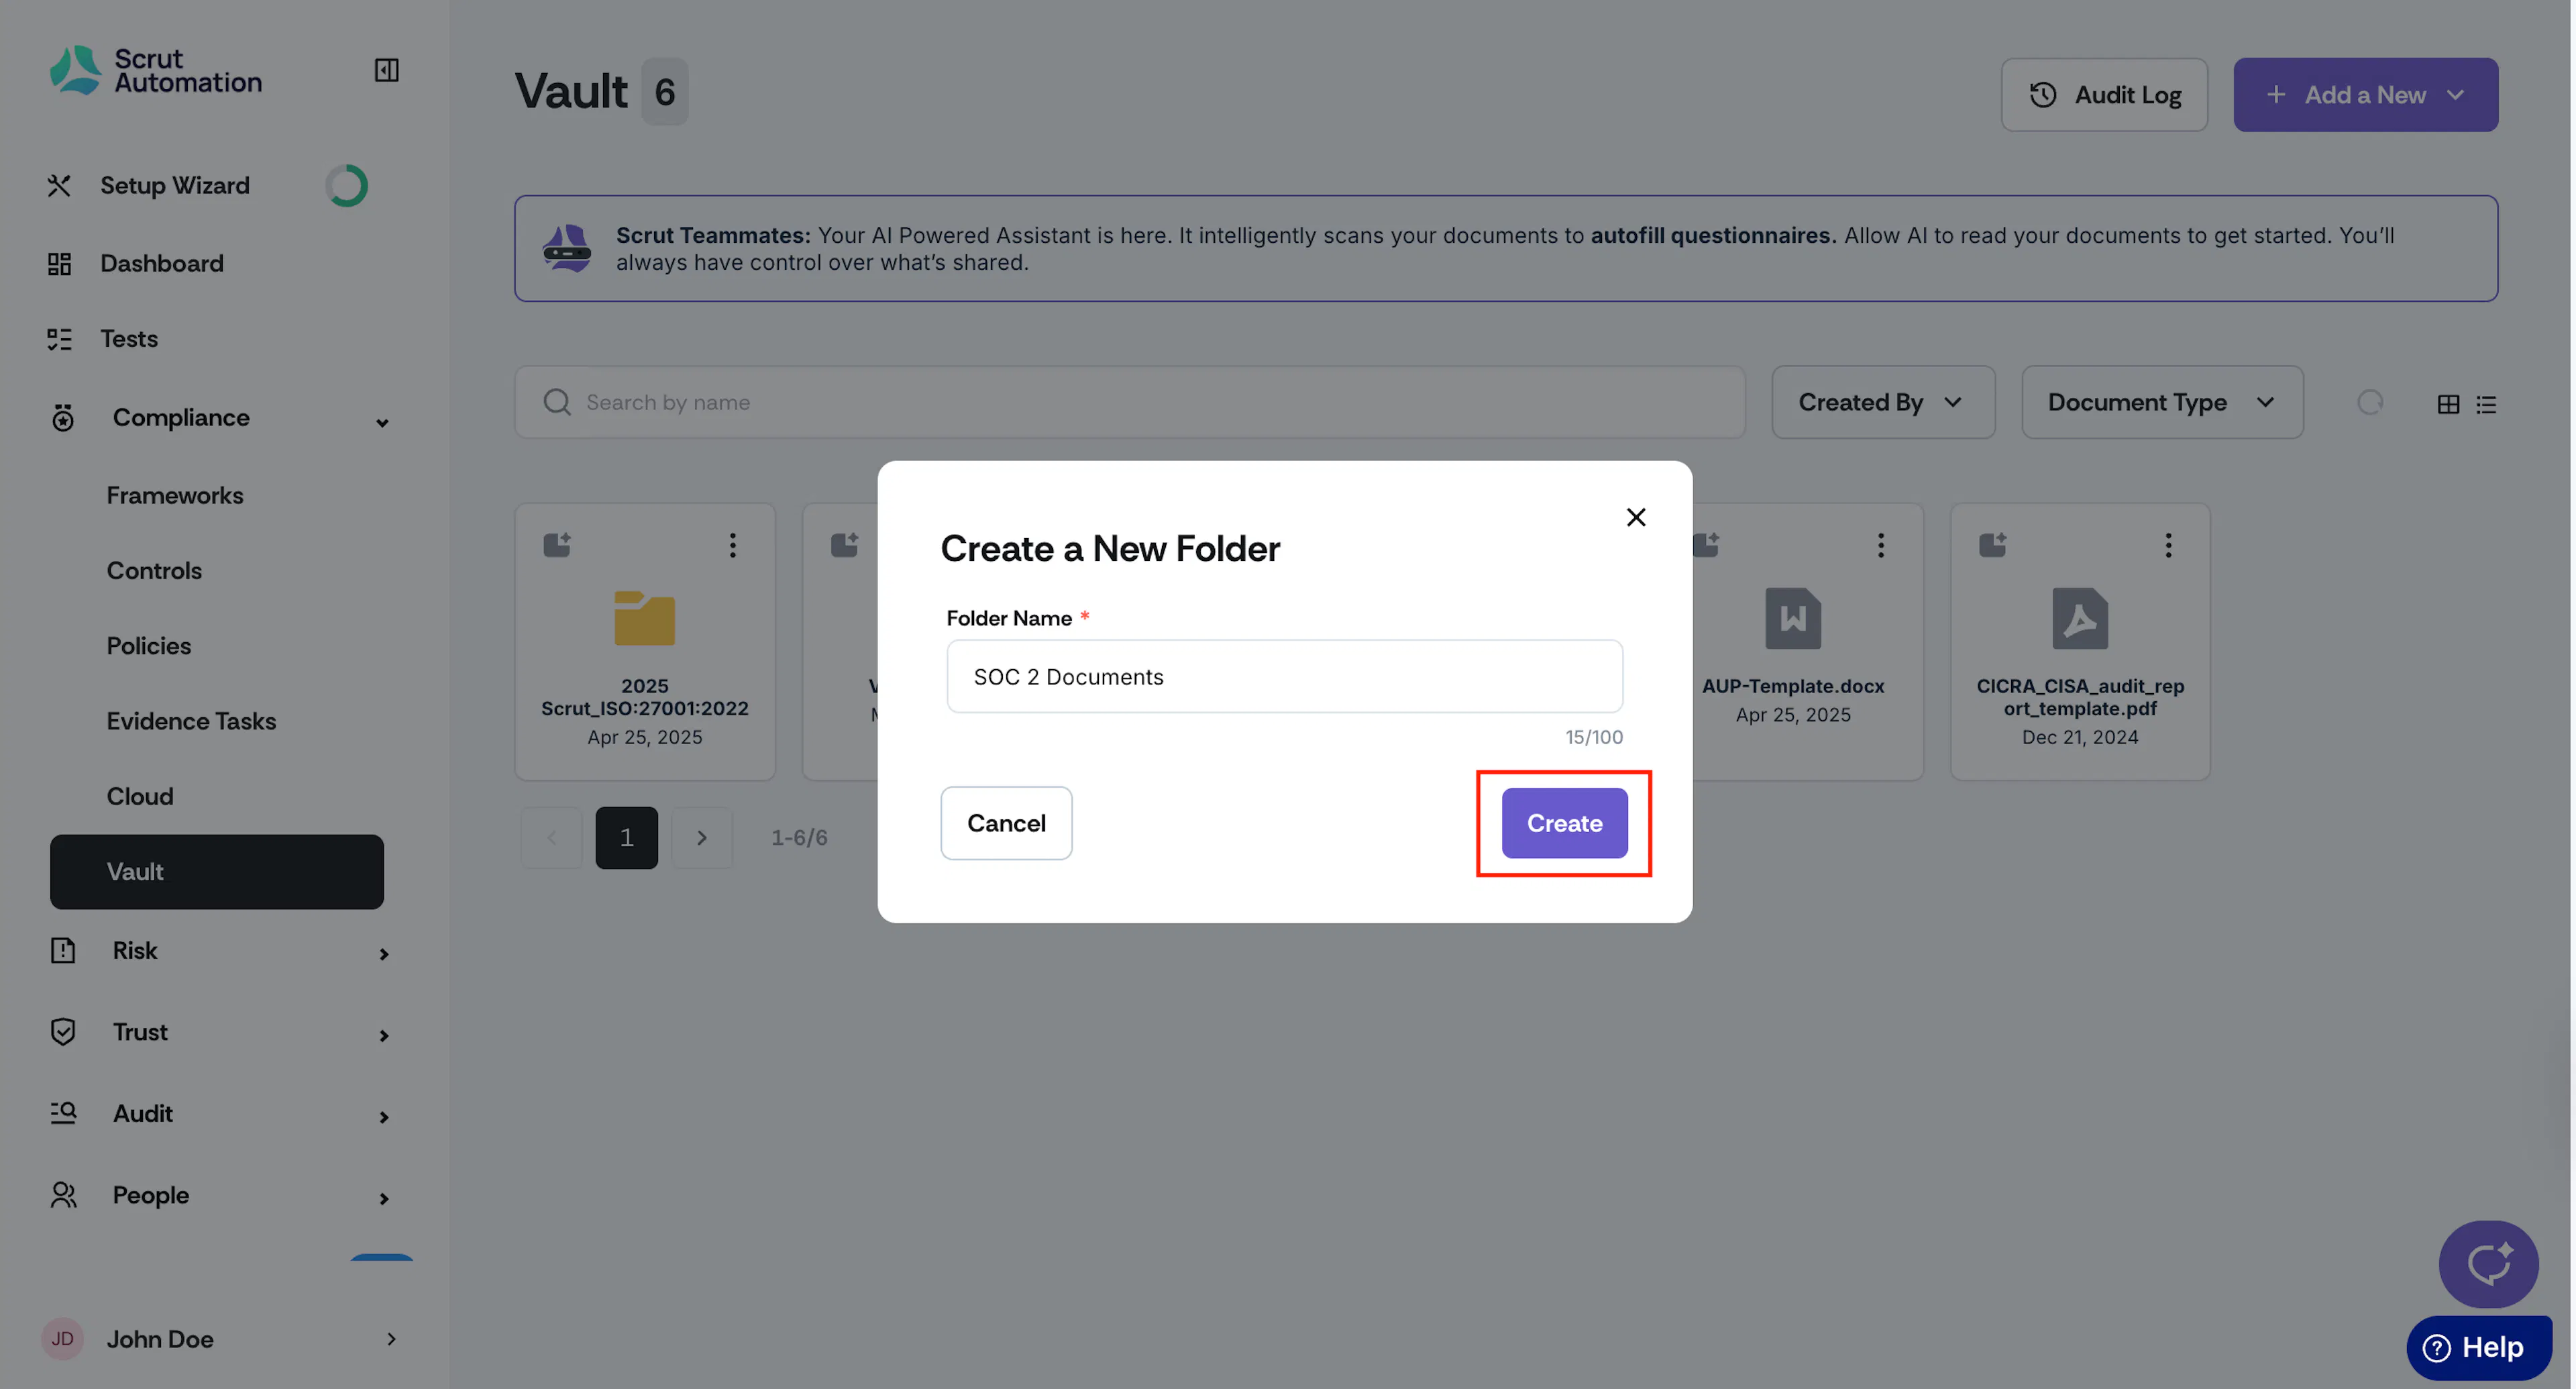
- Give the folder a name and click Create.
Create a Nested (Sub) Folder
Scrut also allows you to create multiple layers of sub-folders in the Vault for enhanced document organization. To create a nested folder:
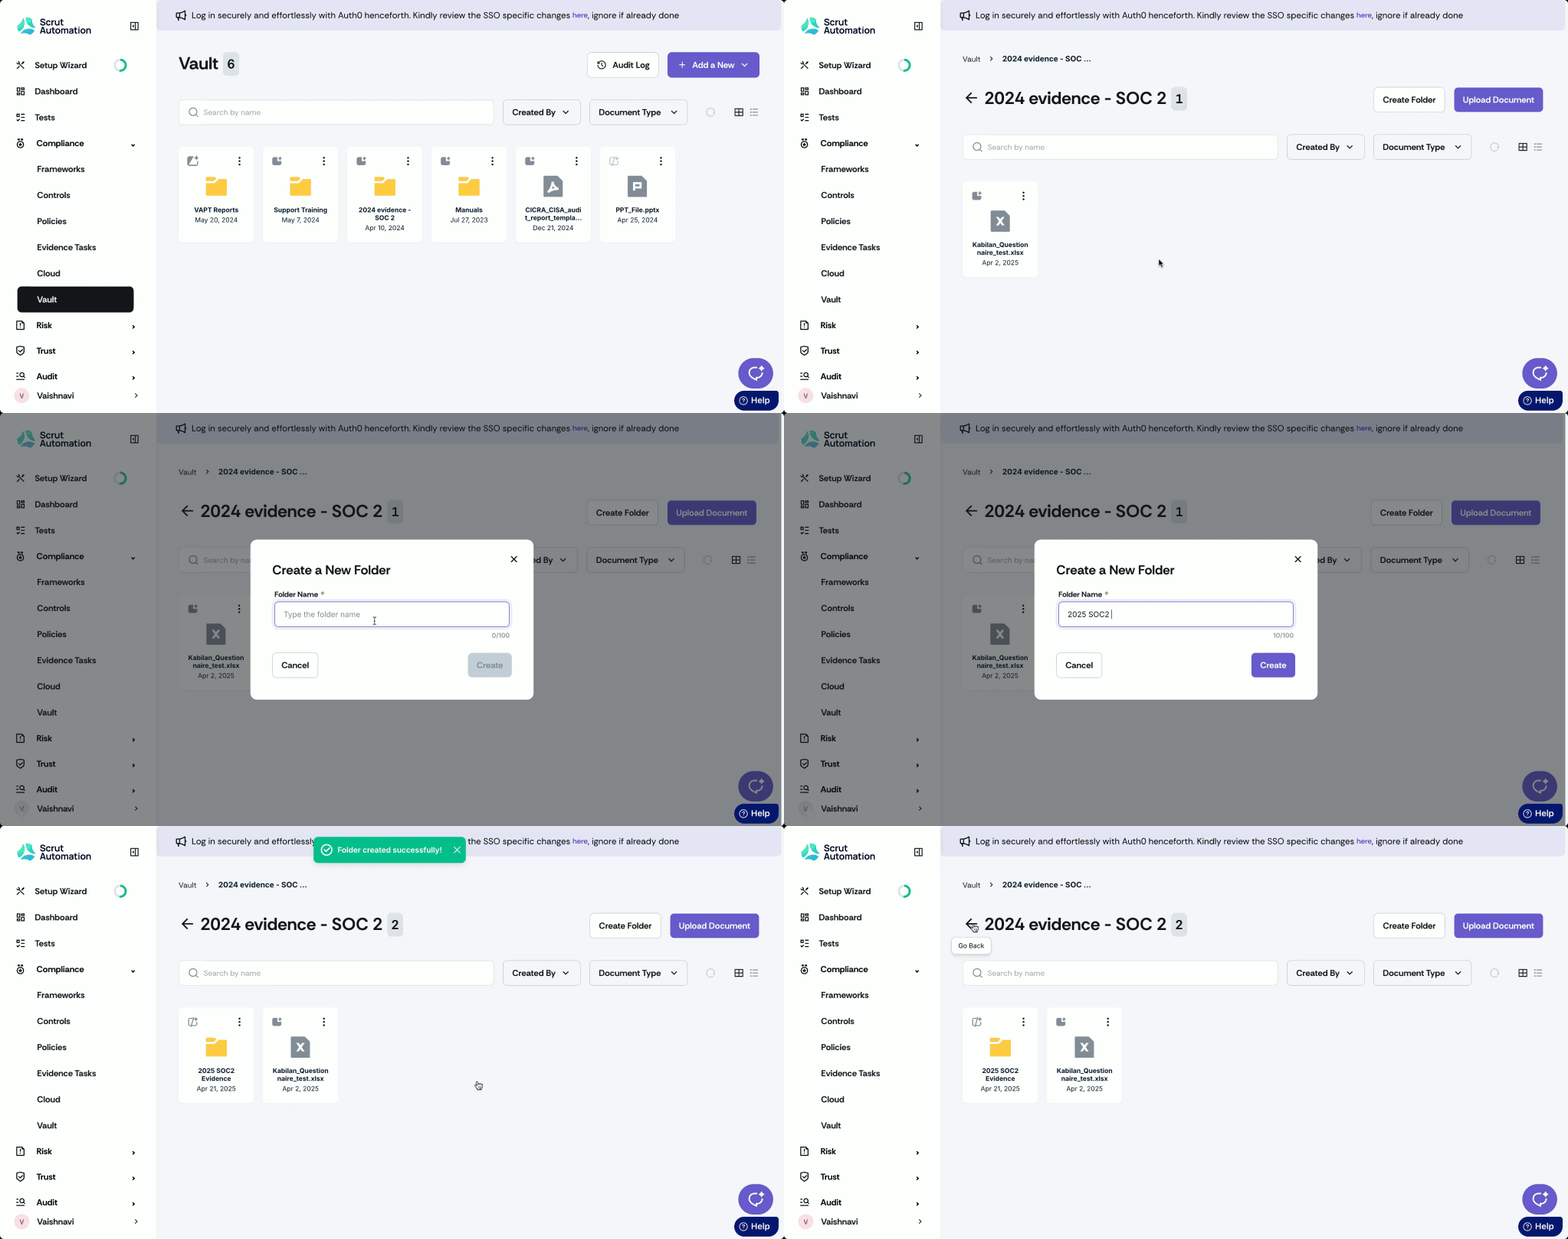
- Navigate to the Vault module and open your preferred folder.
- Click the Create Folder button.
- Enter the name of the sub-folder and click Create.
Rename a Folder
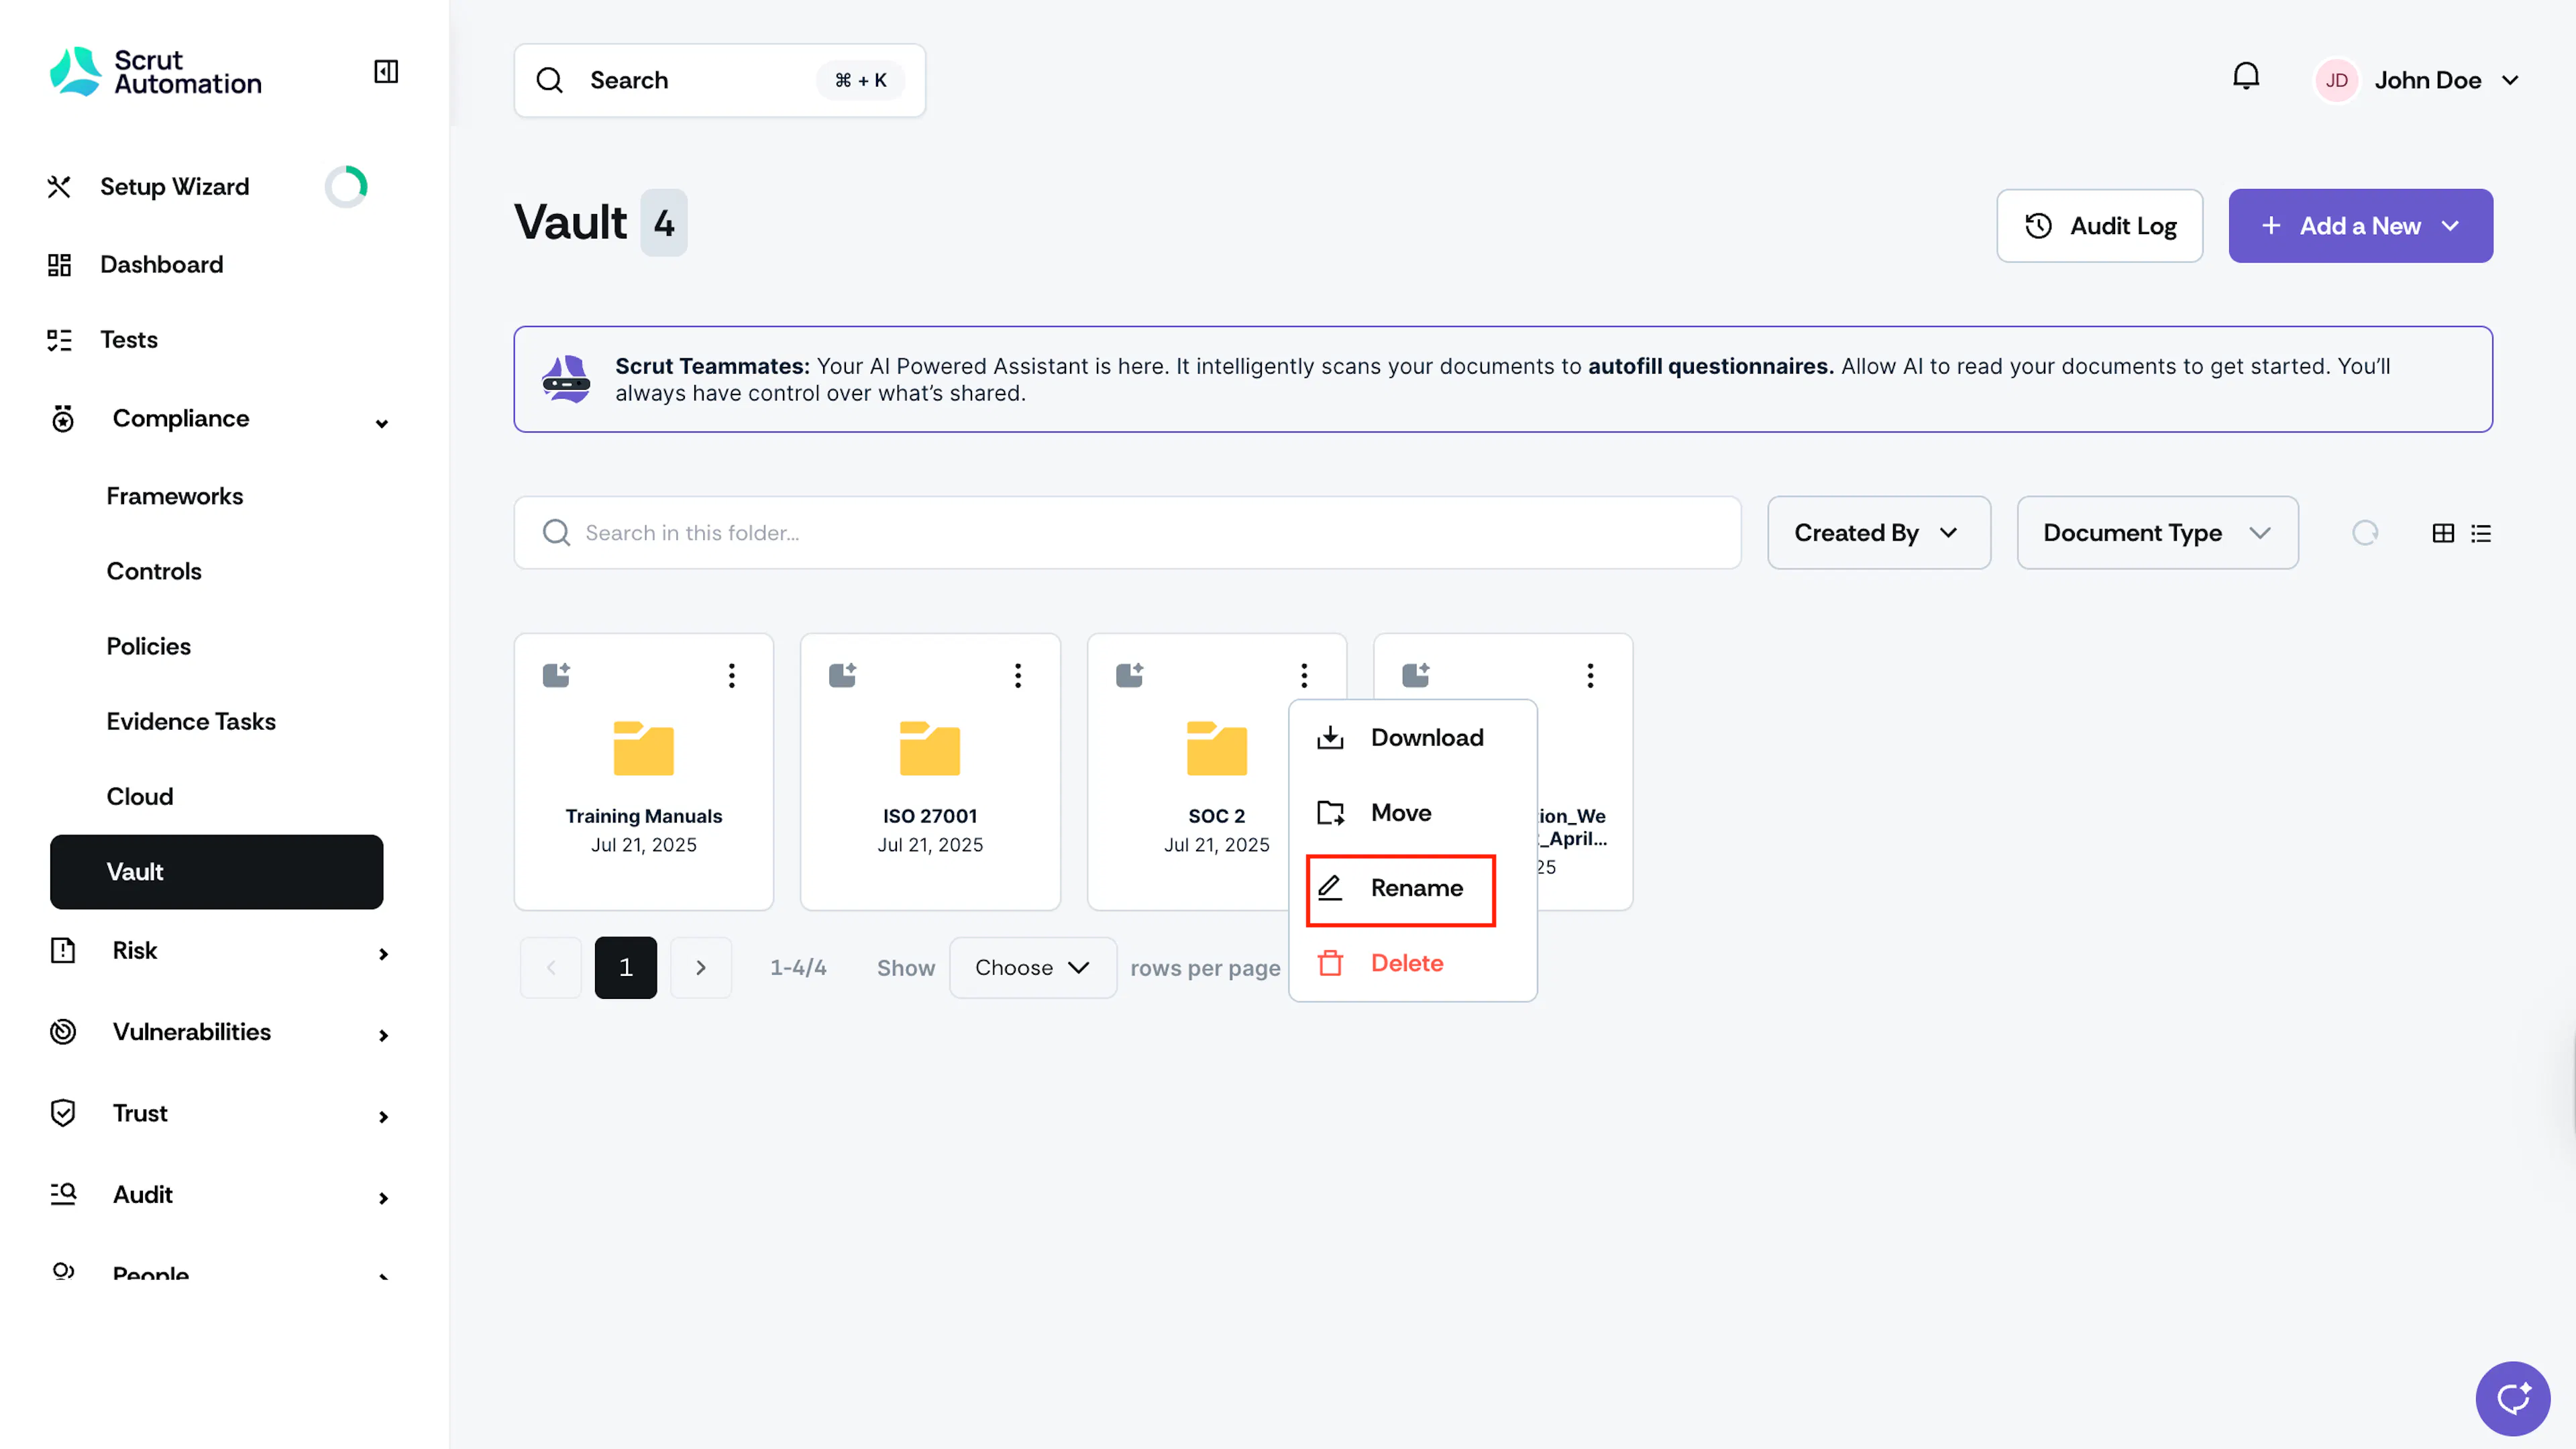
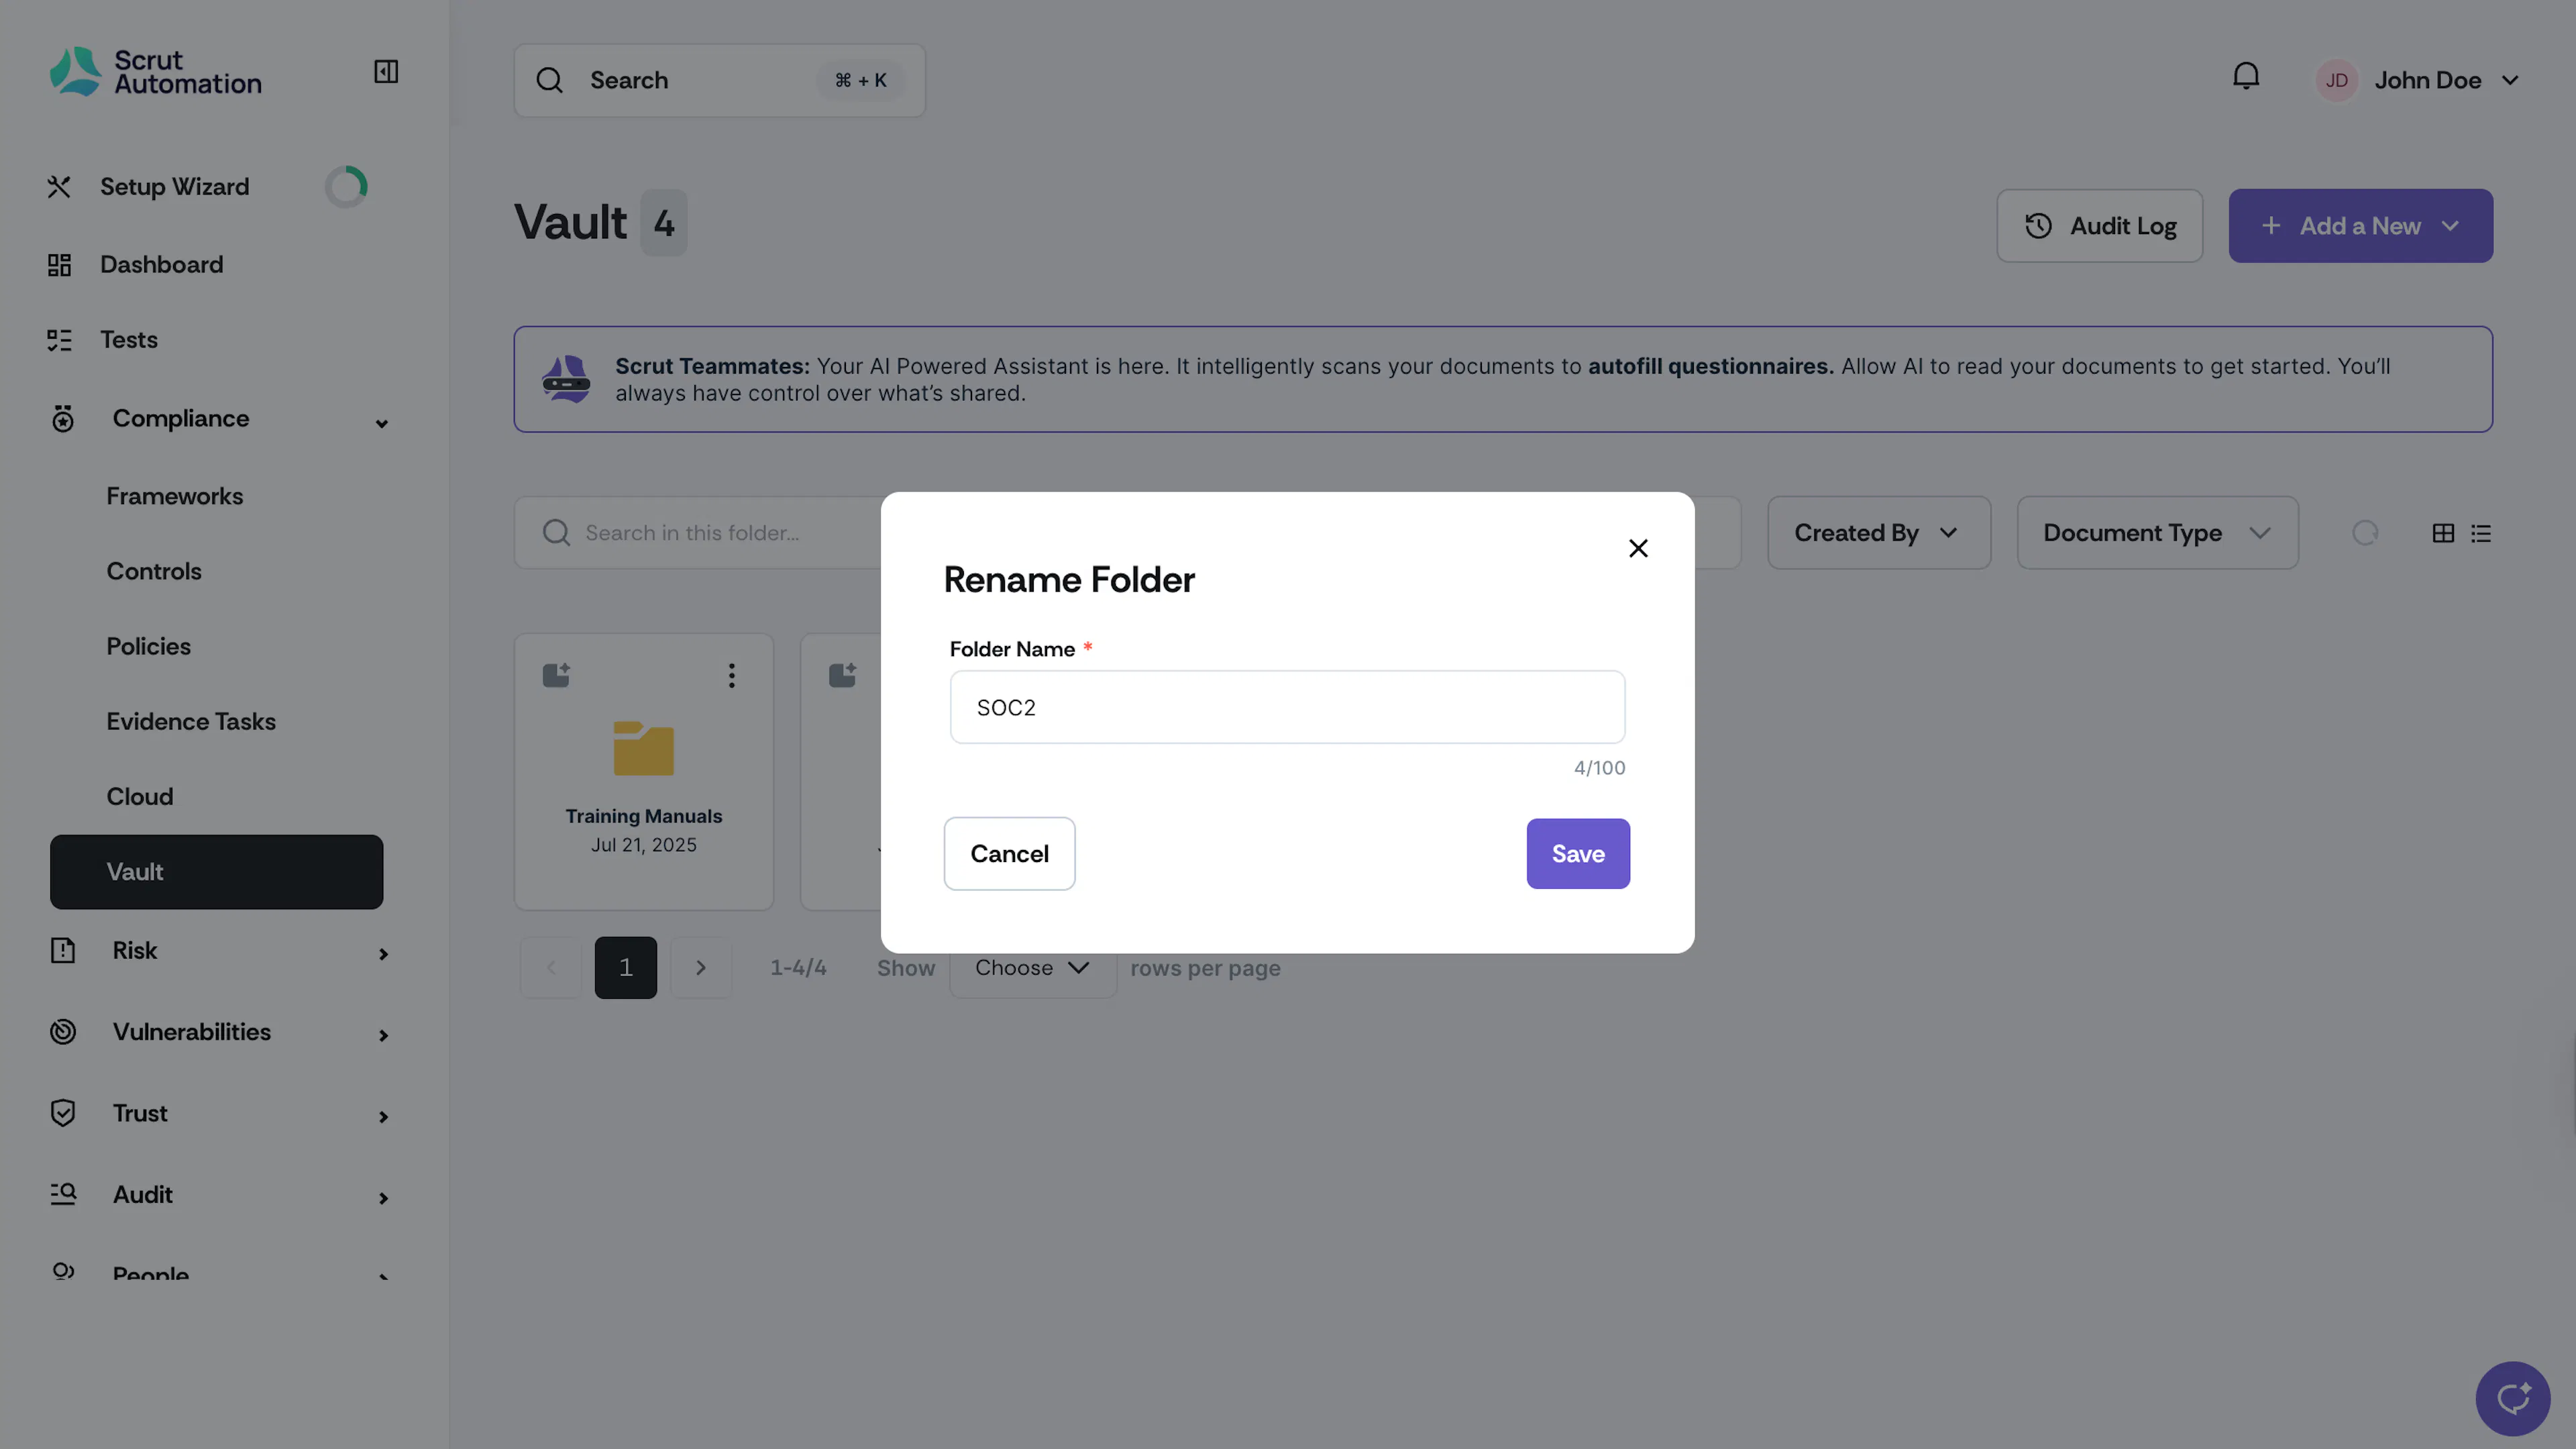
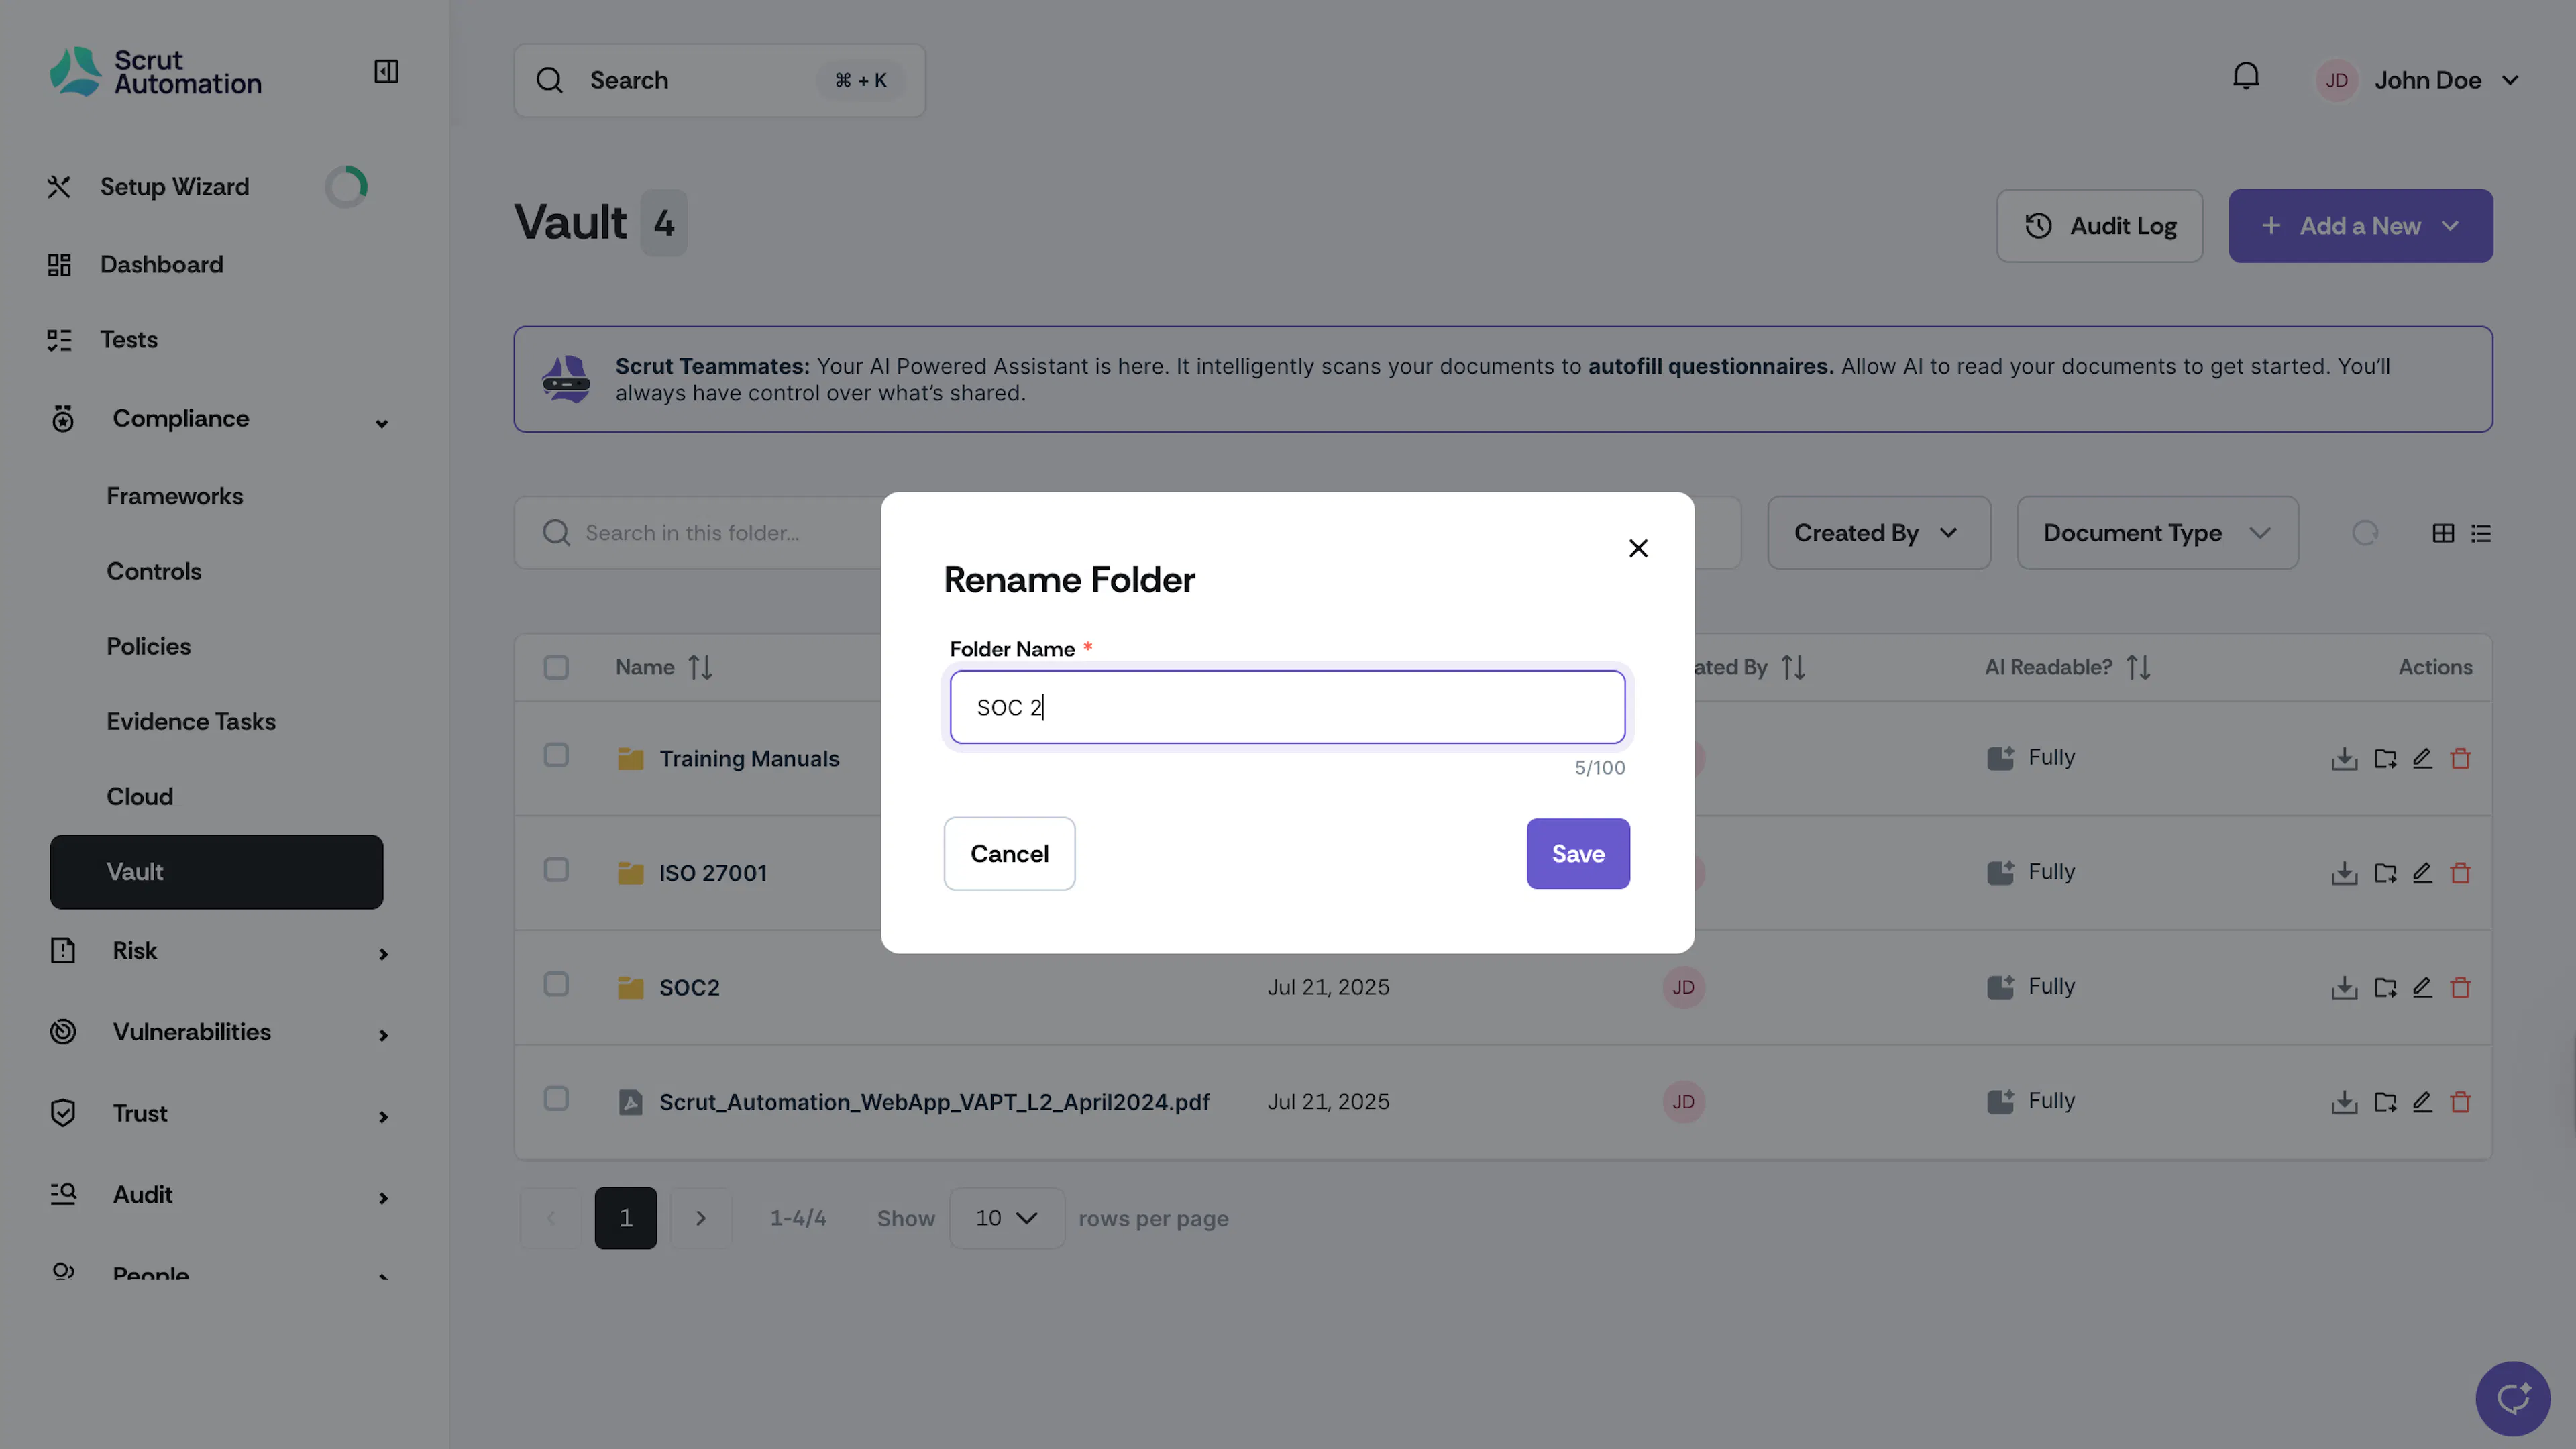
Click the three-dots icon on the folder and select Rename. Enter the new name for the folder and click Save.
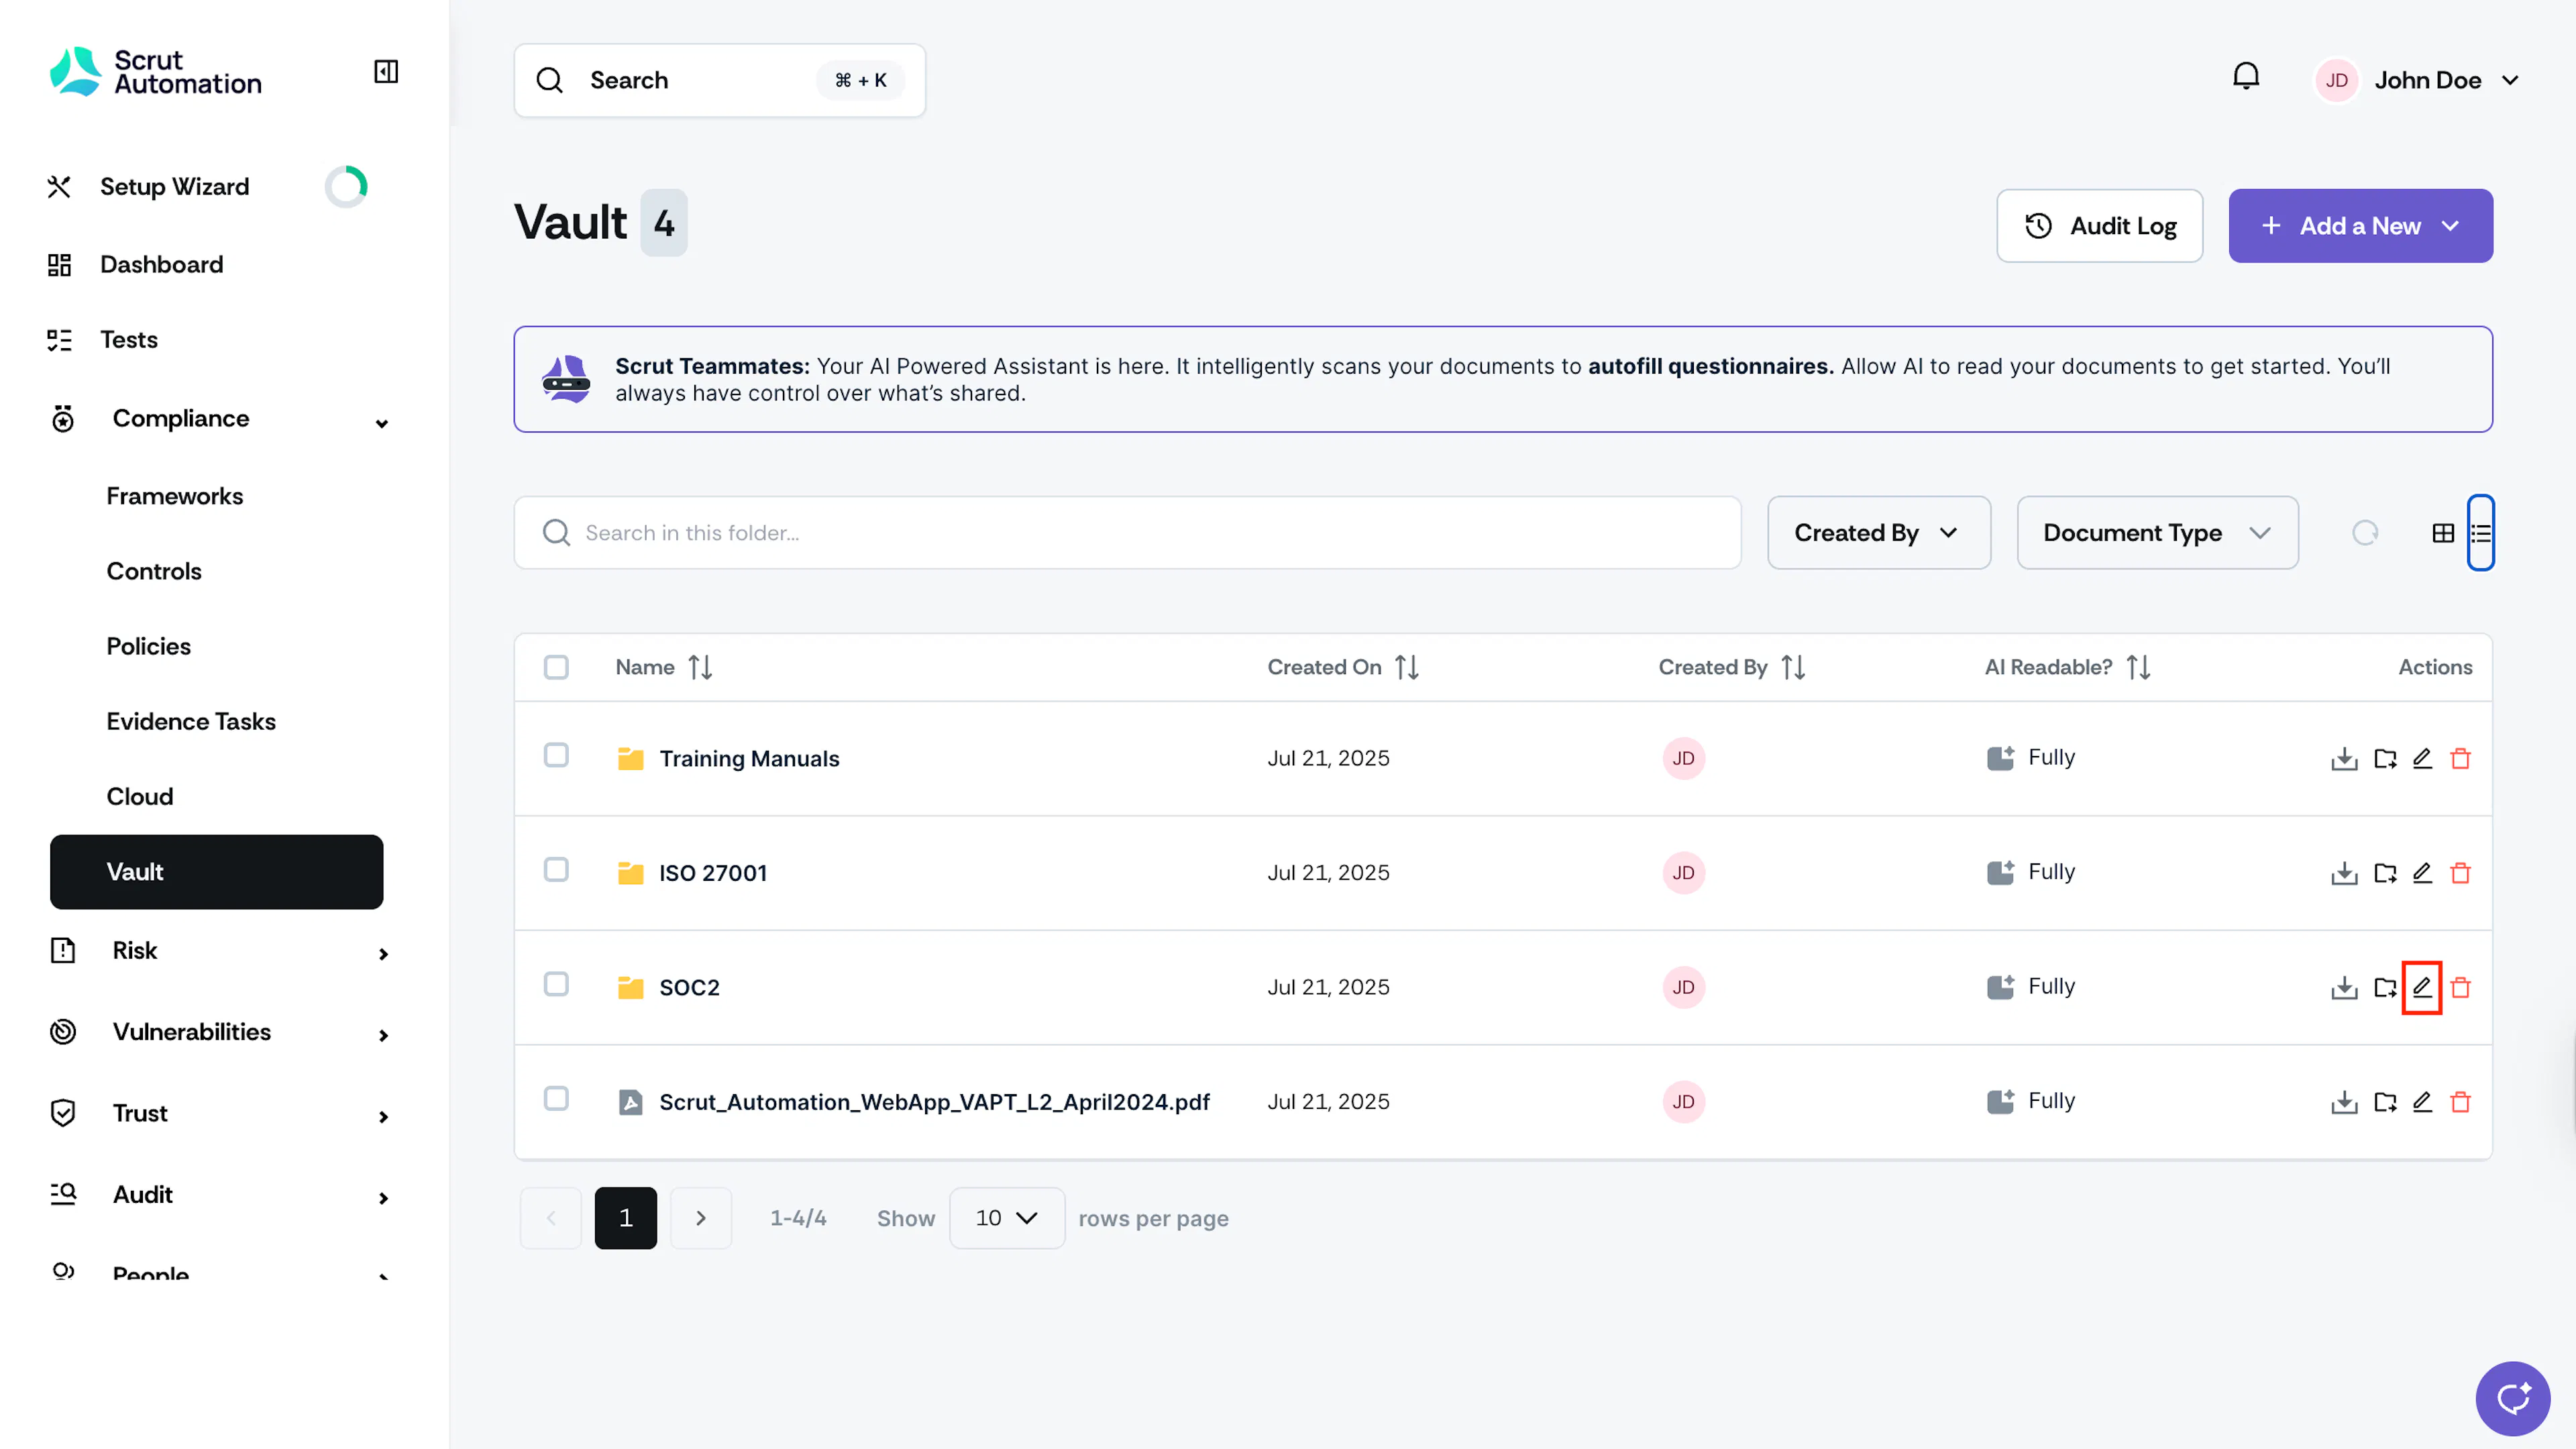
Click the edit icon next to the folder. Enter the new name for the folder and click Save.

Move a Folder
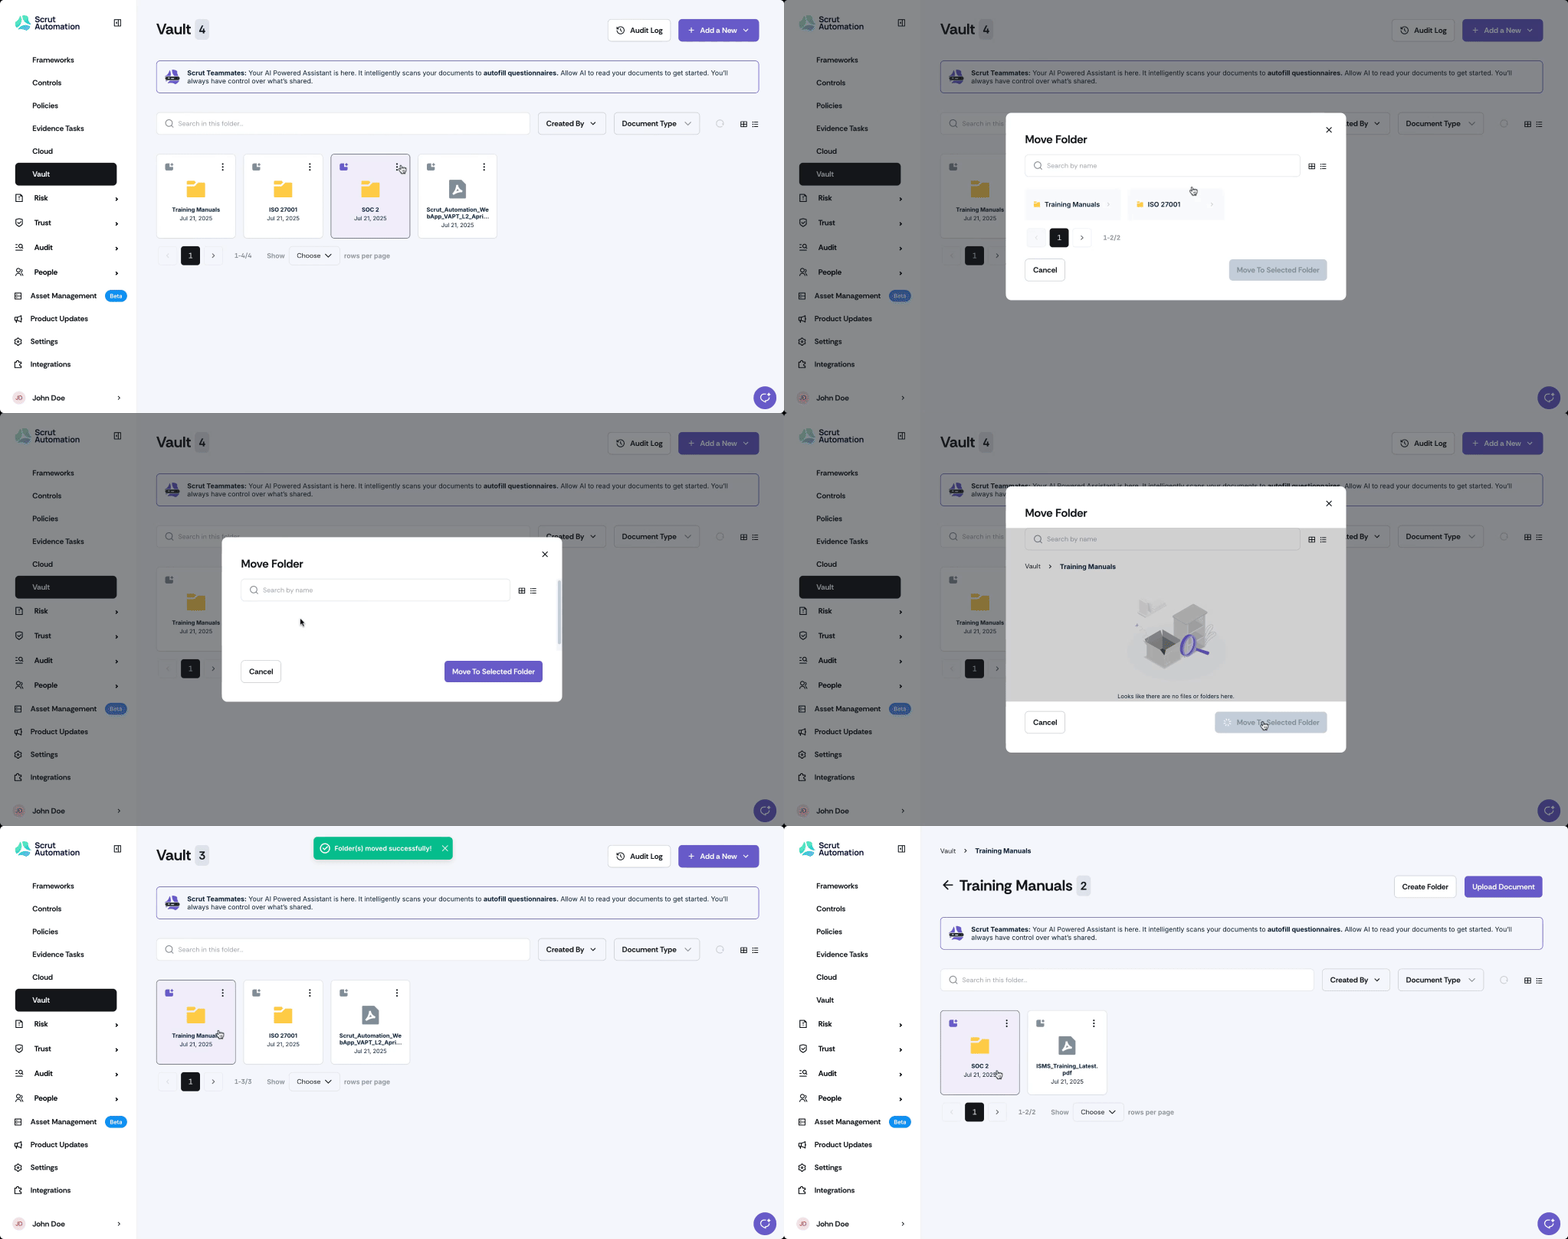
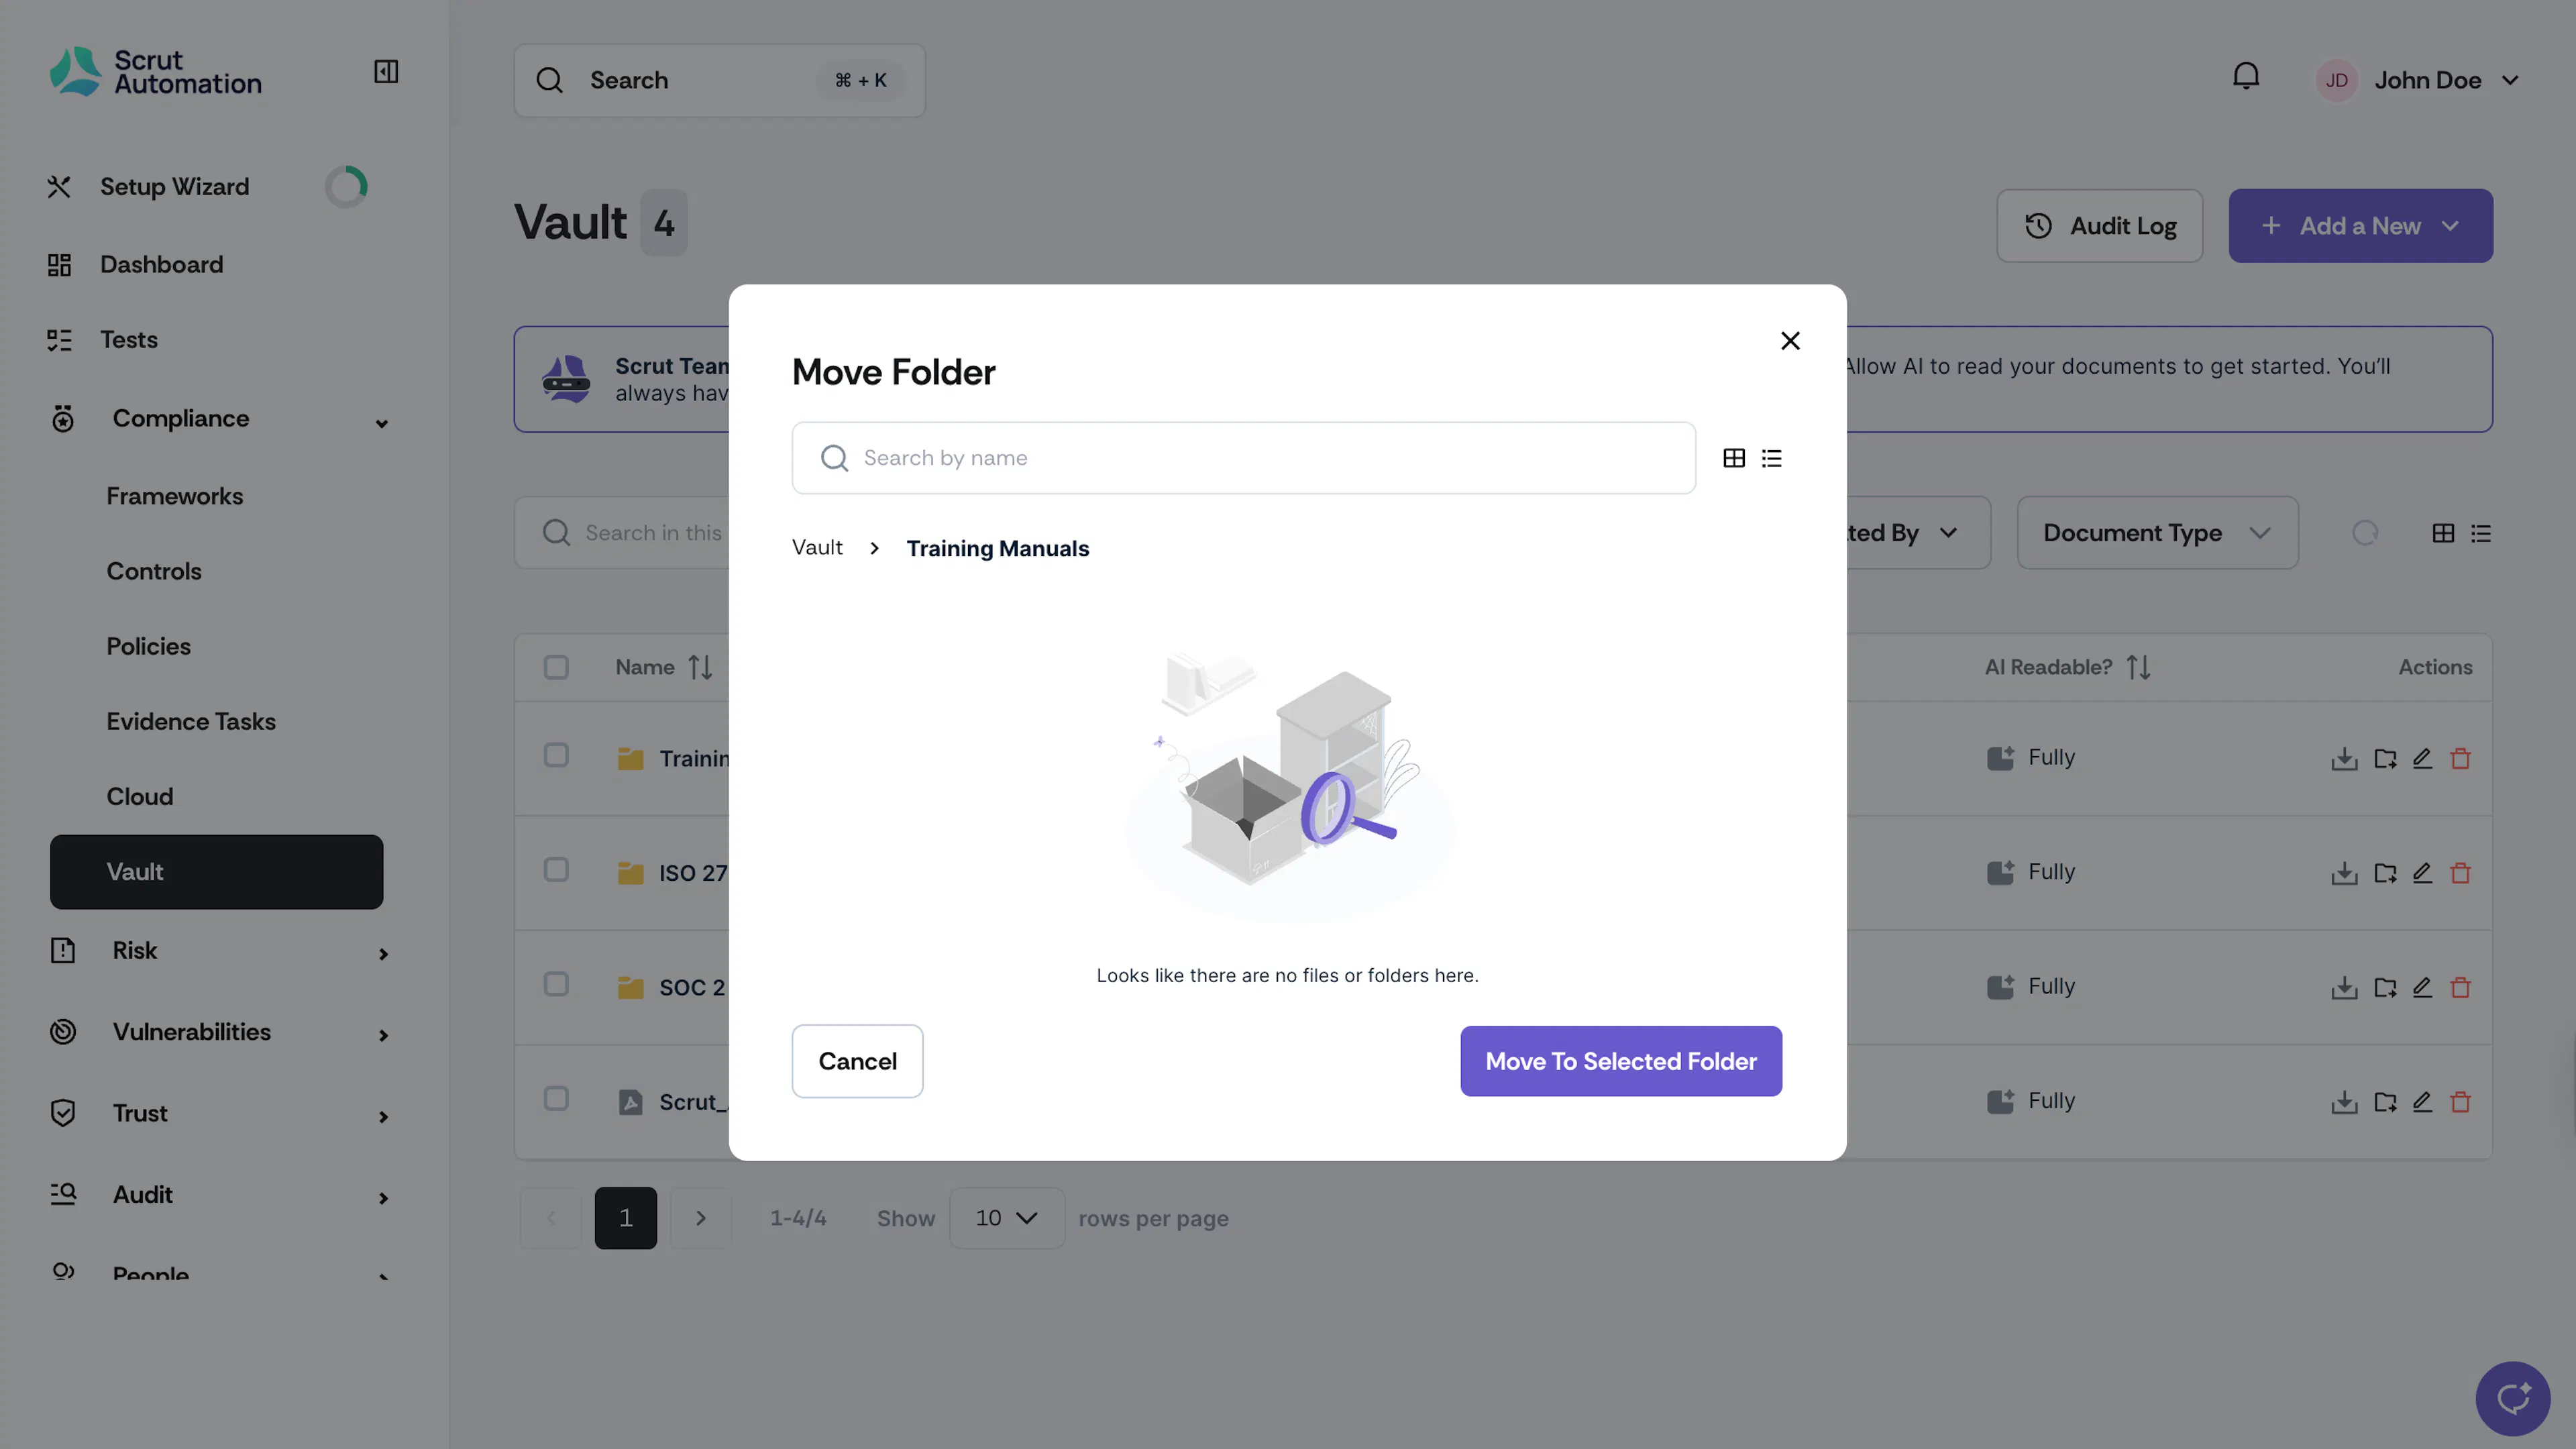
Select the folder to move, click the three-dots icon, and choose Move. Then, select the destination folder and click Move to Selected Folder.
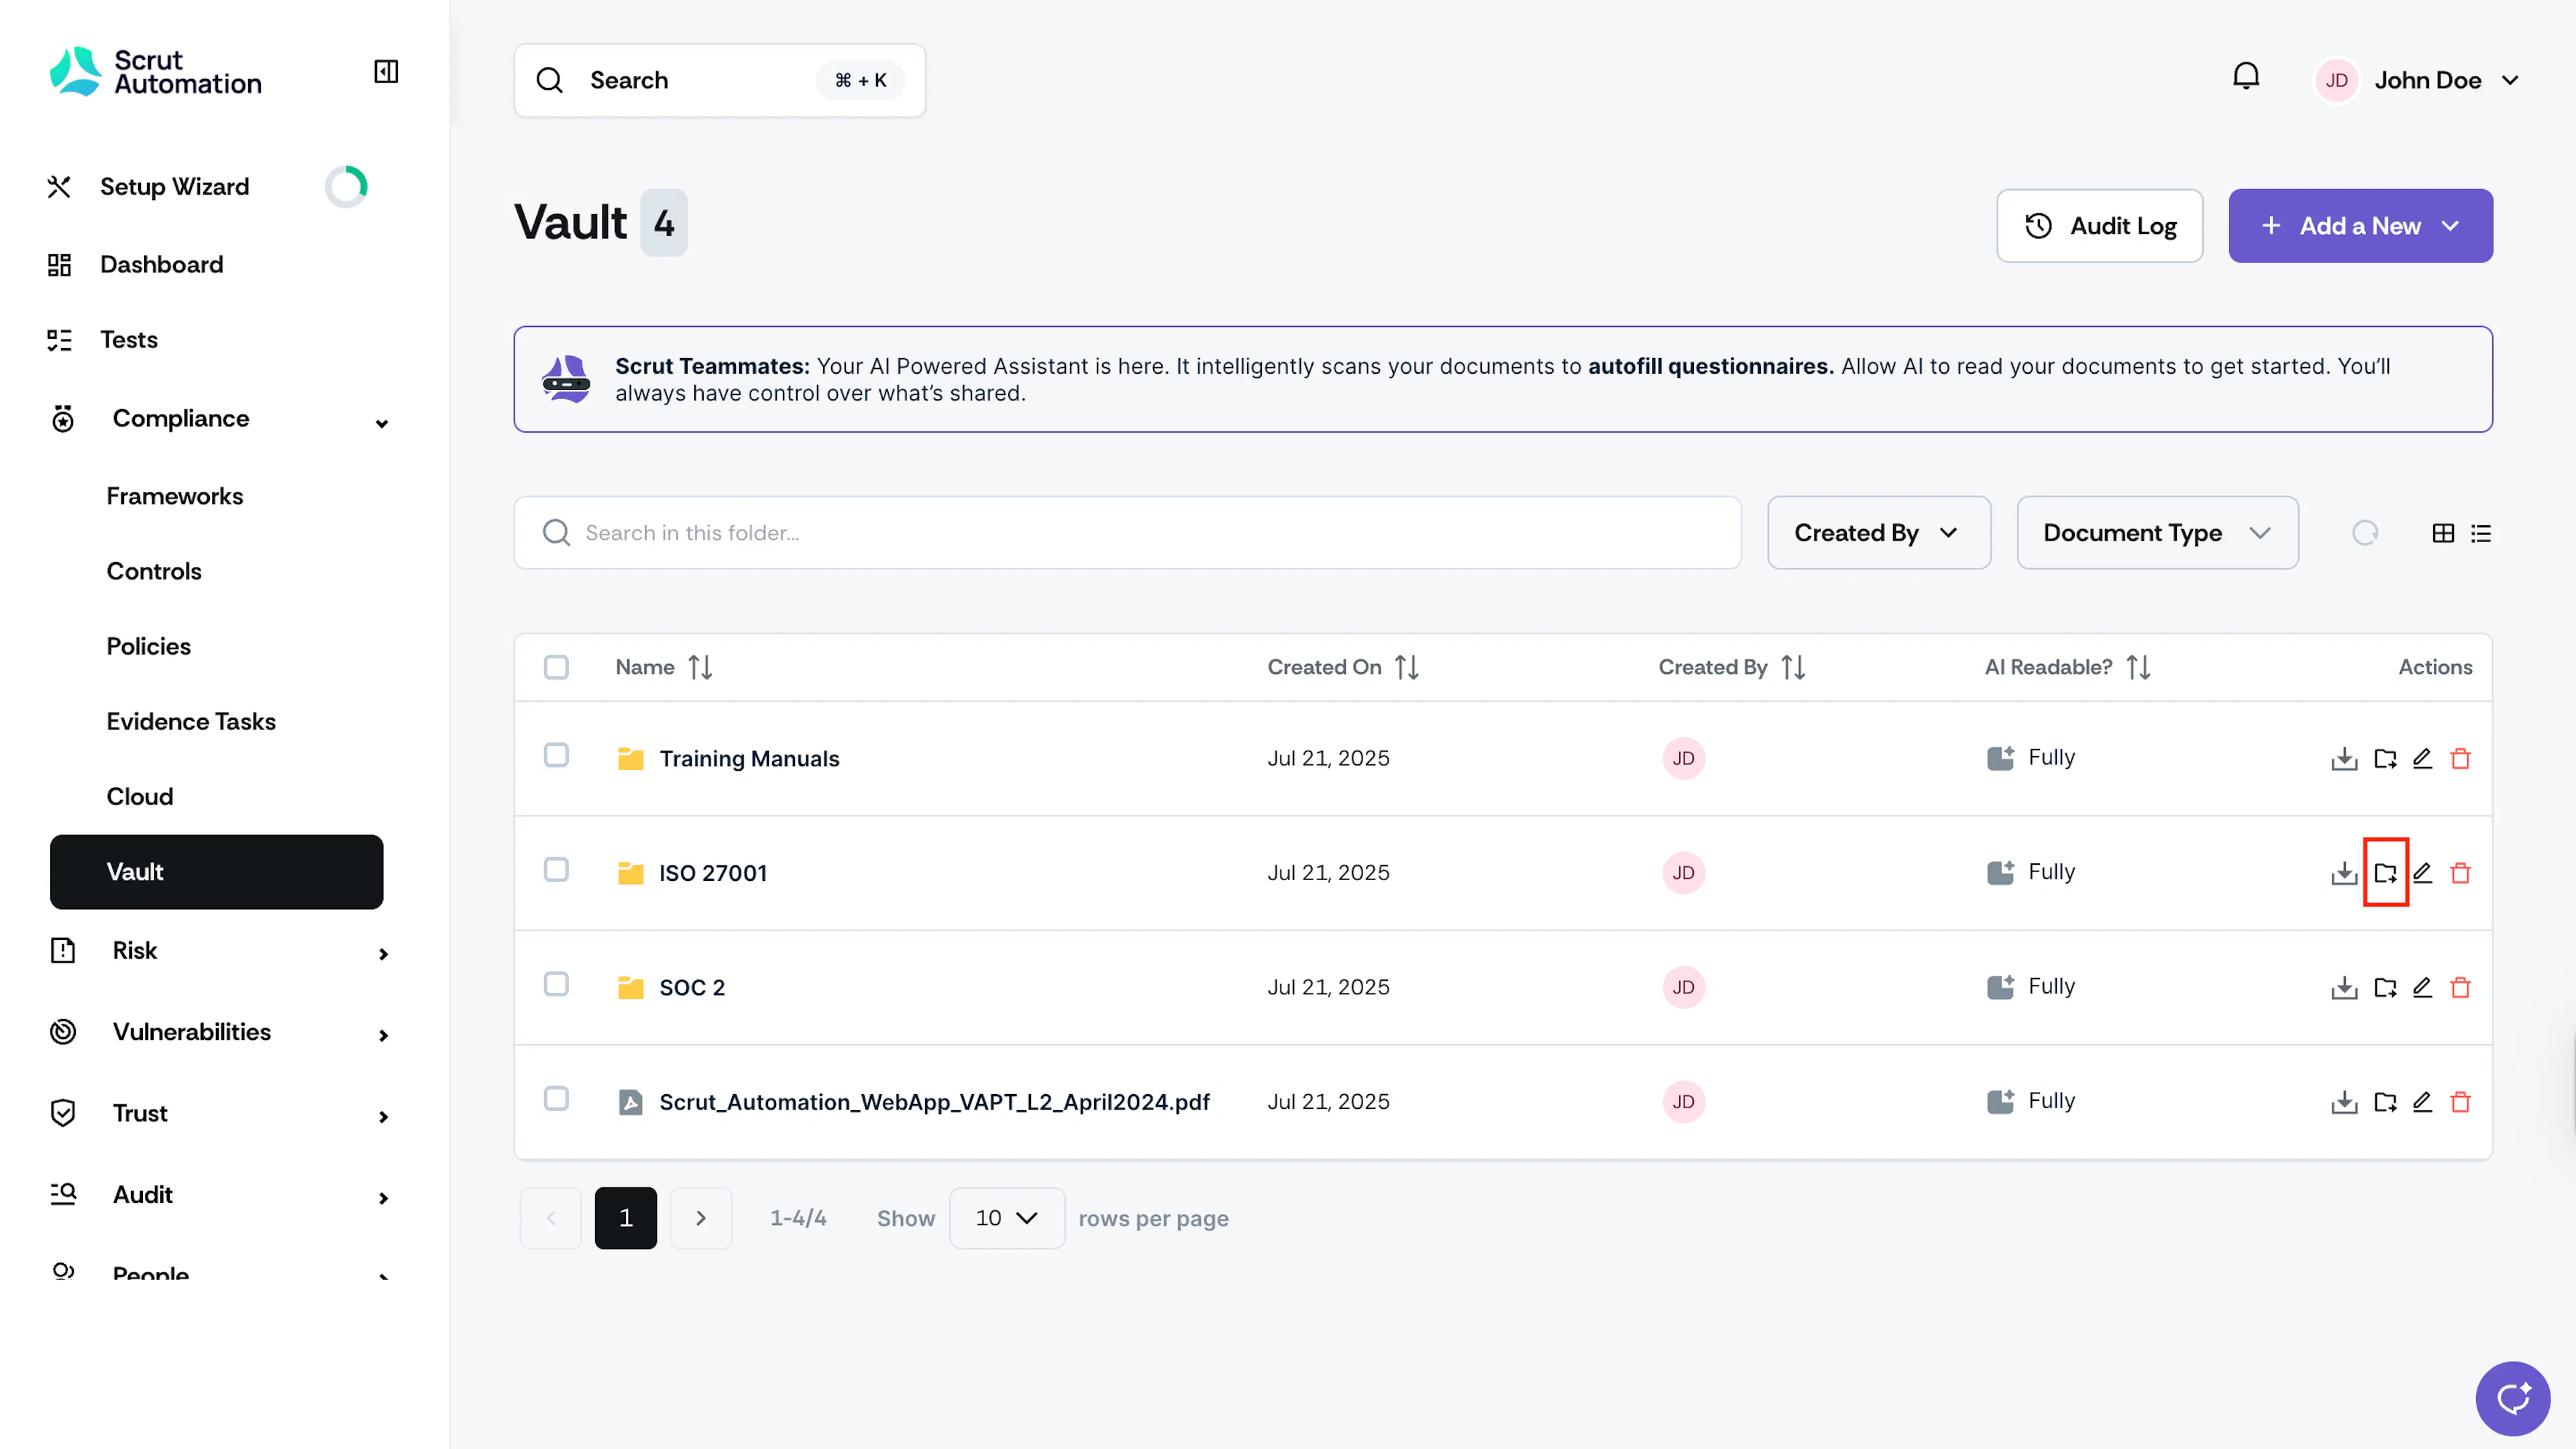
Click the Move icon next to your desired folder. Select the destination folder and click Move to Selected Folder.
Move Multiple Folders and Files
You can also move multiple folders and files at once.
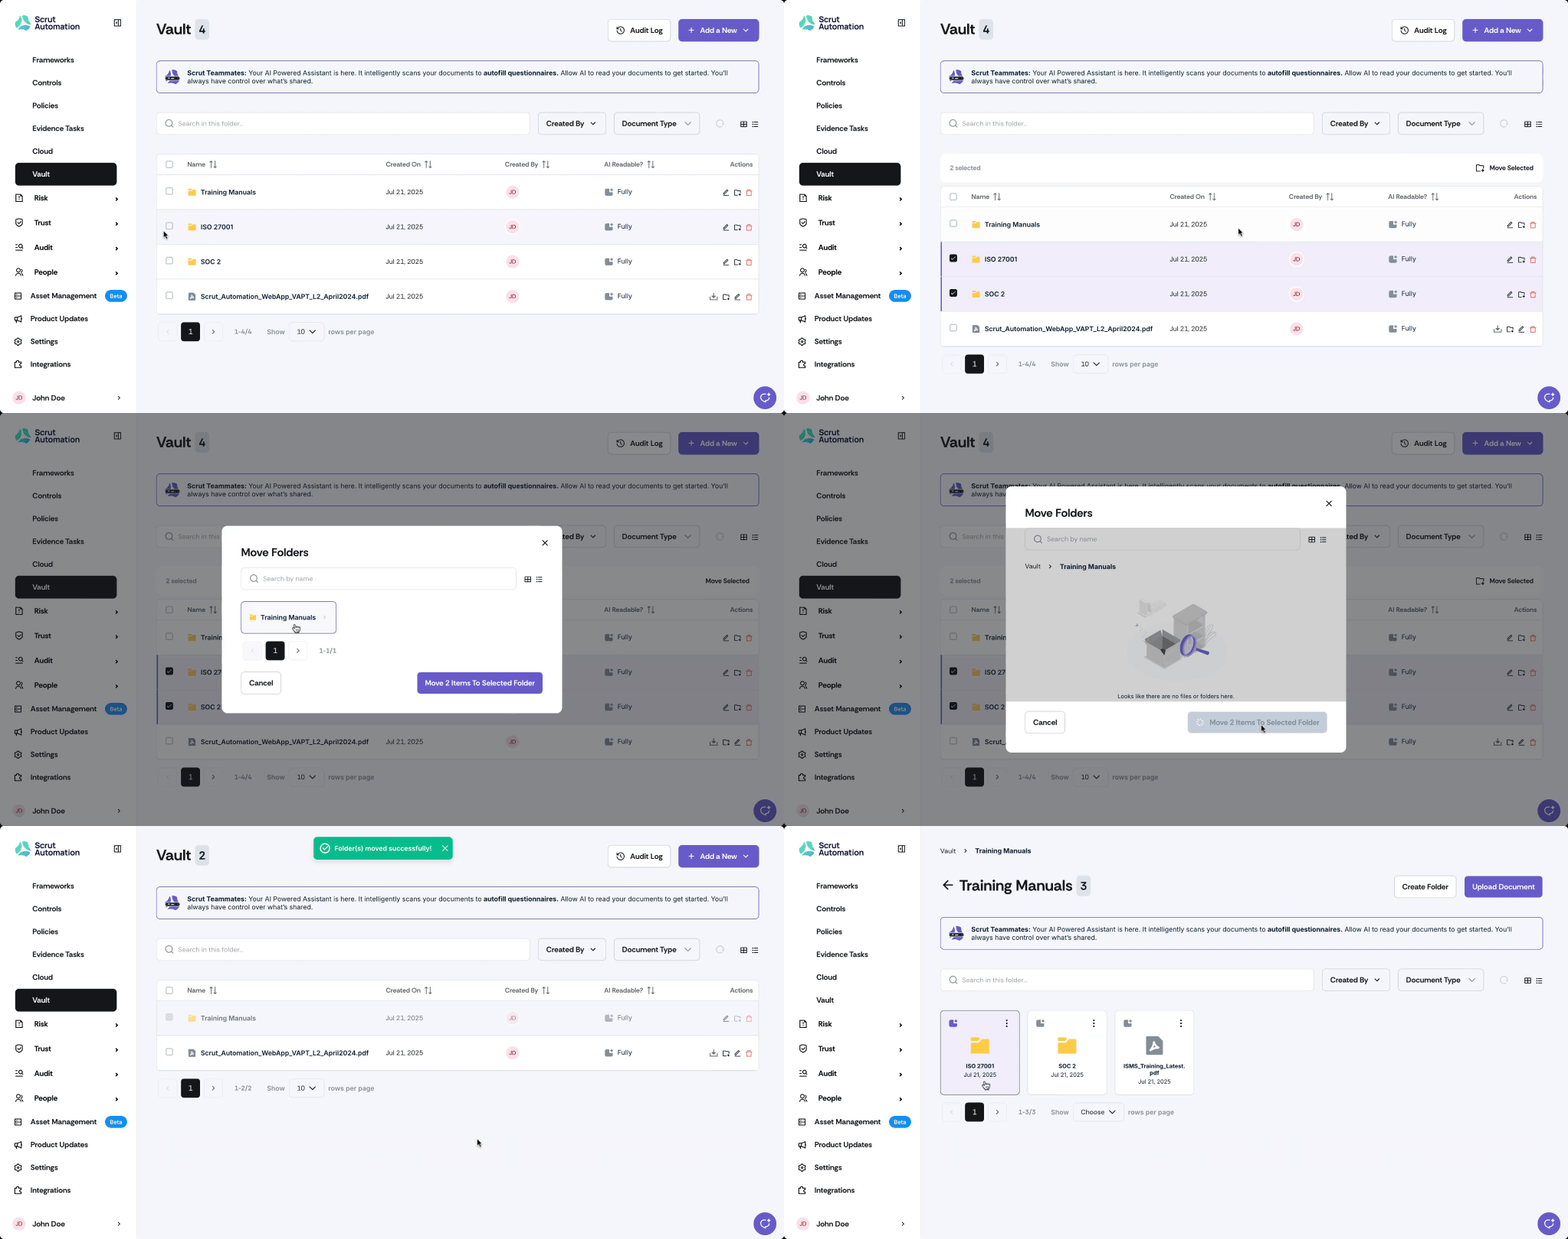
To move multiple folders and files, follow these steps:
- To select a range (contiguous selection)
- Click the first item, then hold the Shift key and click the last item.
- All files and folders in between will be selected.
- To select separate items (non-contiguous selection)
- Click the first item, hold the Ctrl key (Windows) or Command key (macOS), and click each additional item you want to select.
- Only the items you click will be selected.
- Click the consolidated Move Selected button at the top, select the destination folder and confirm your action.
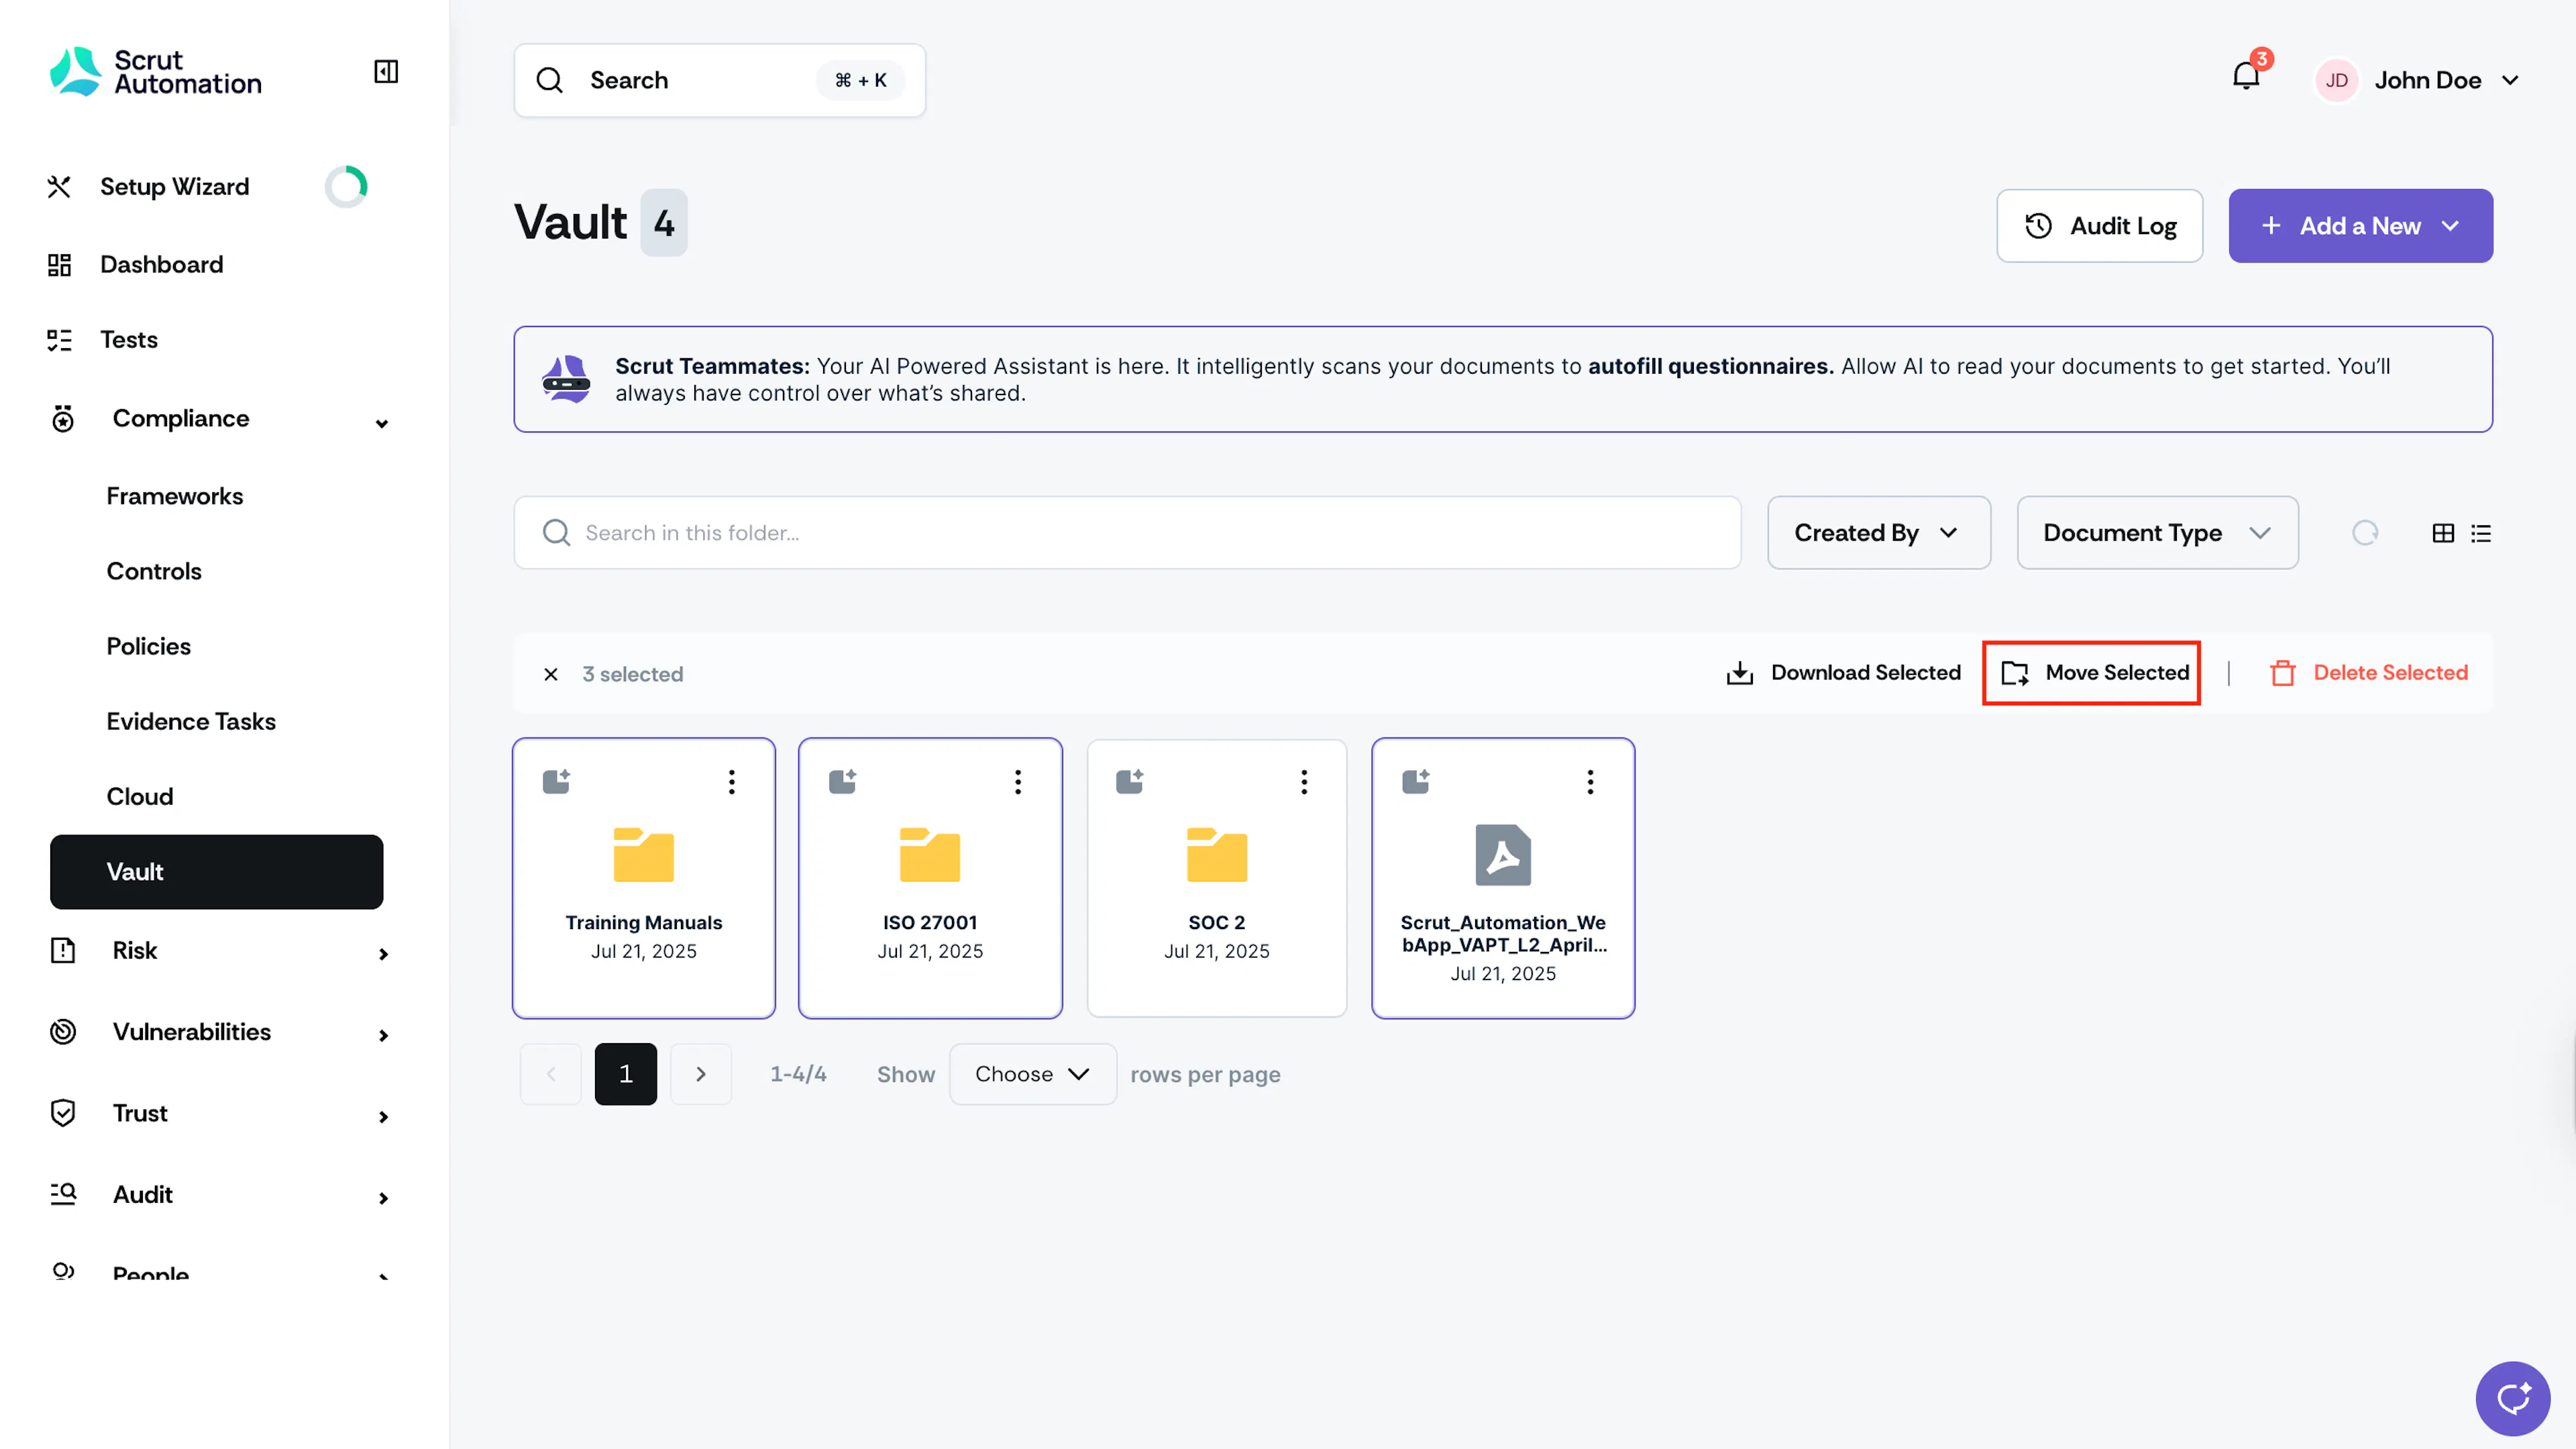
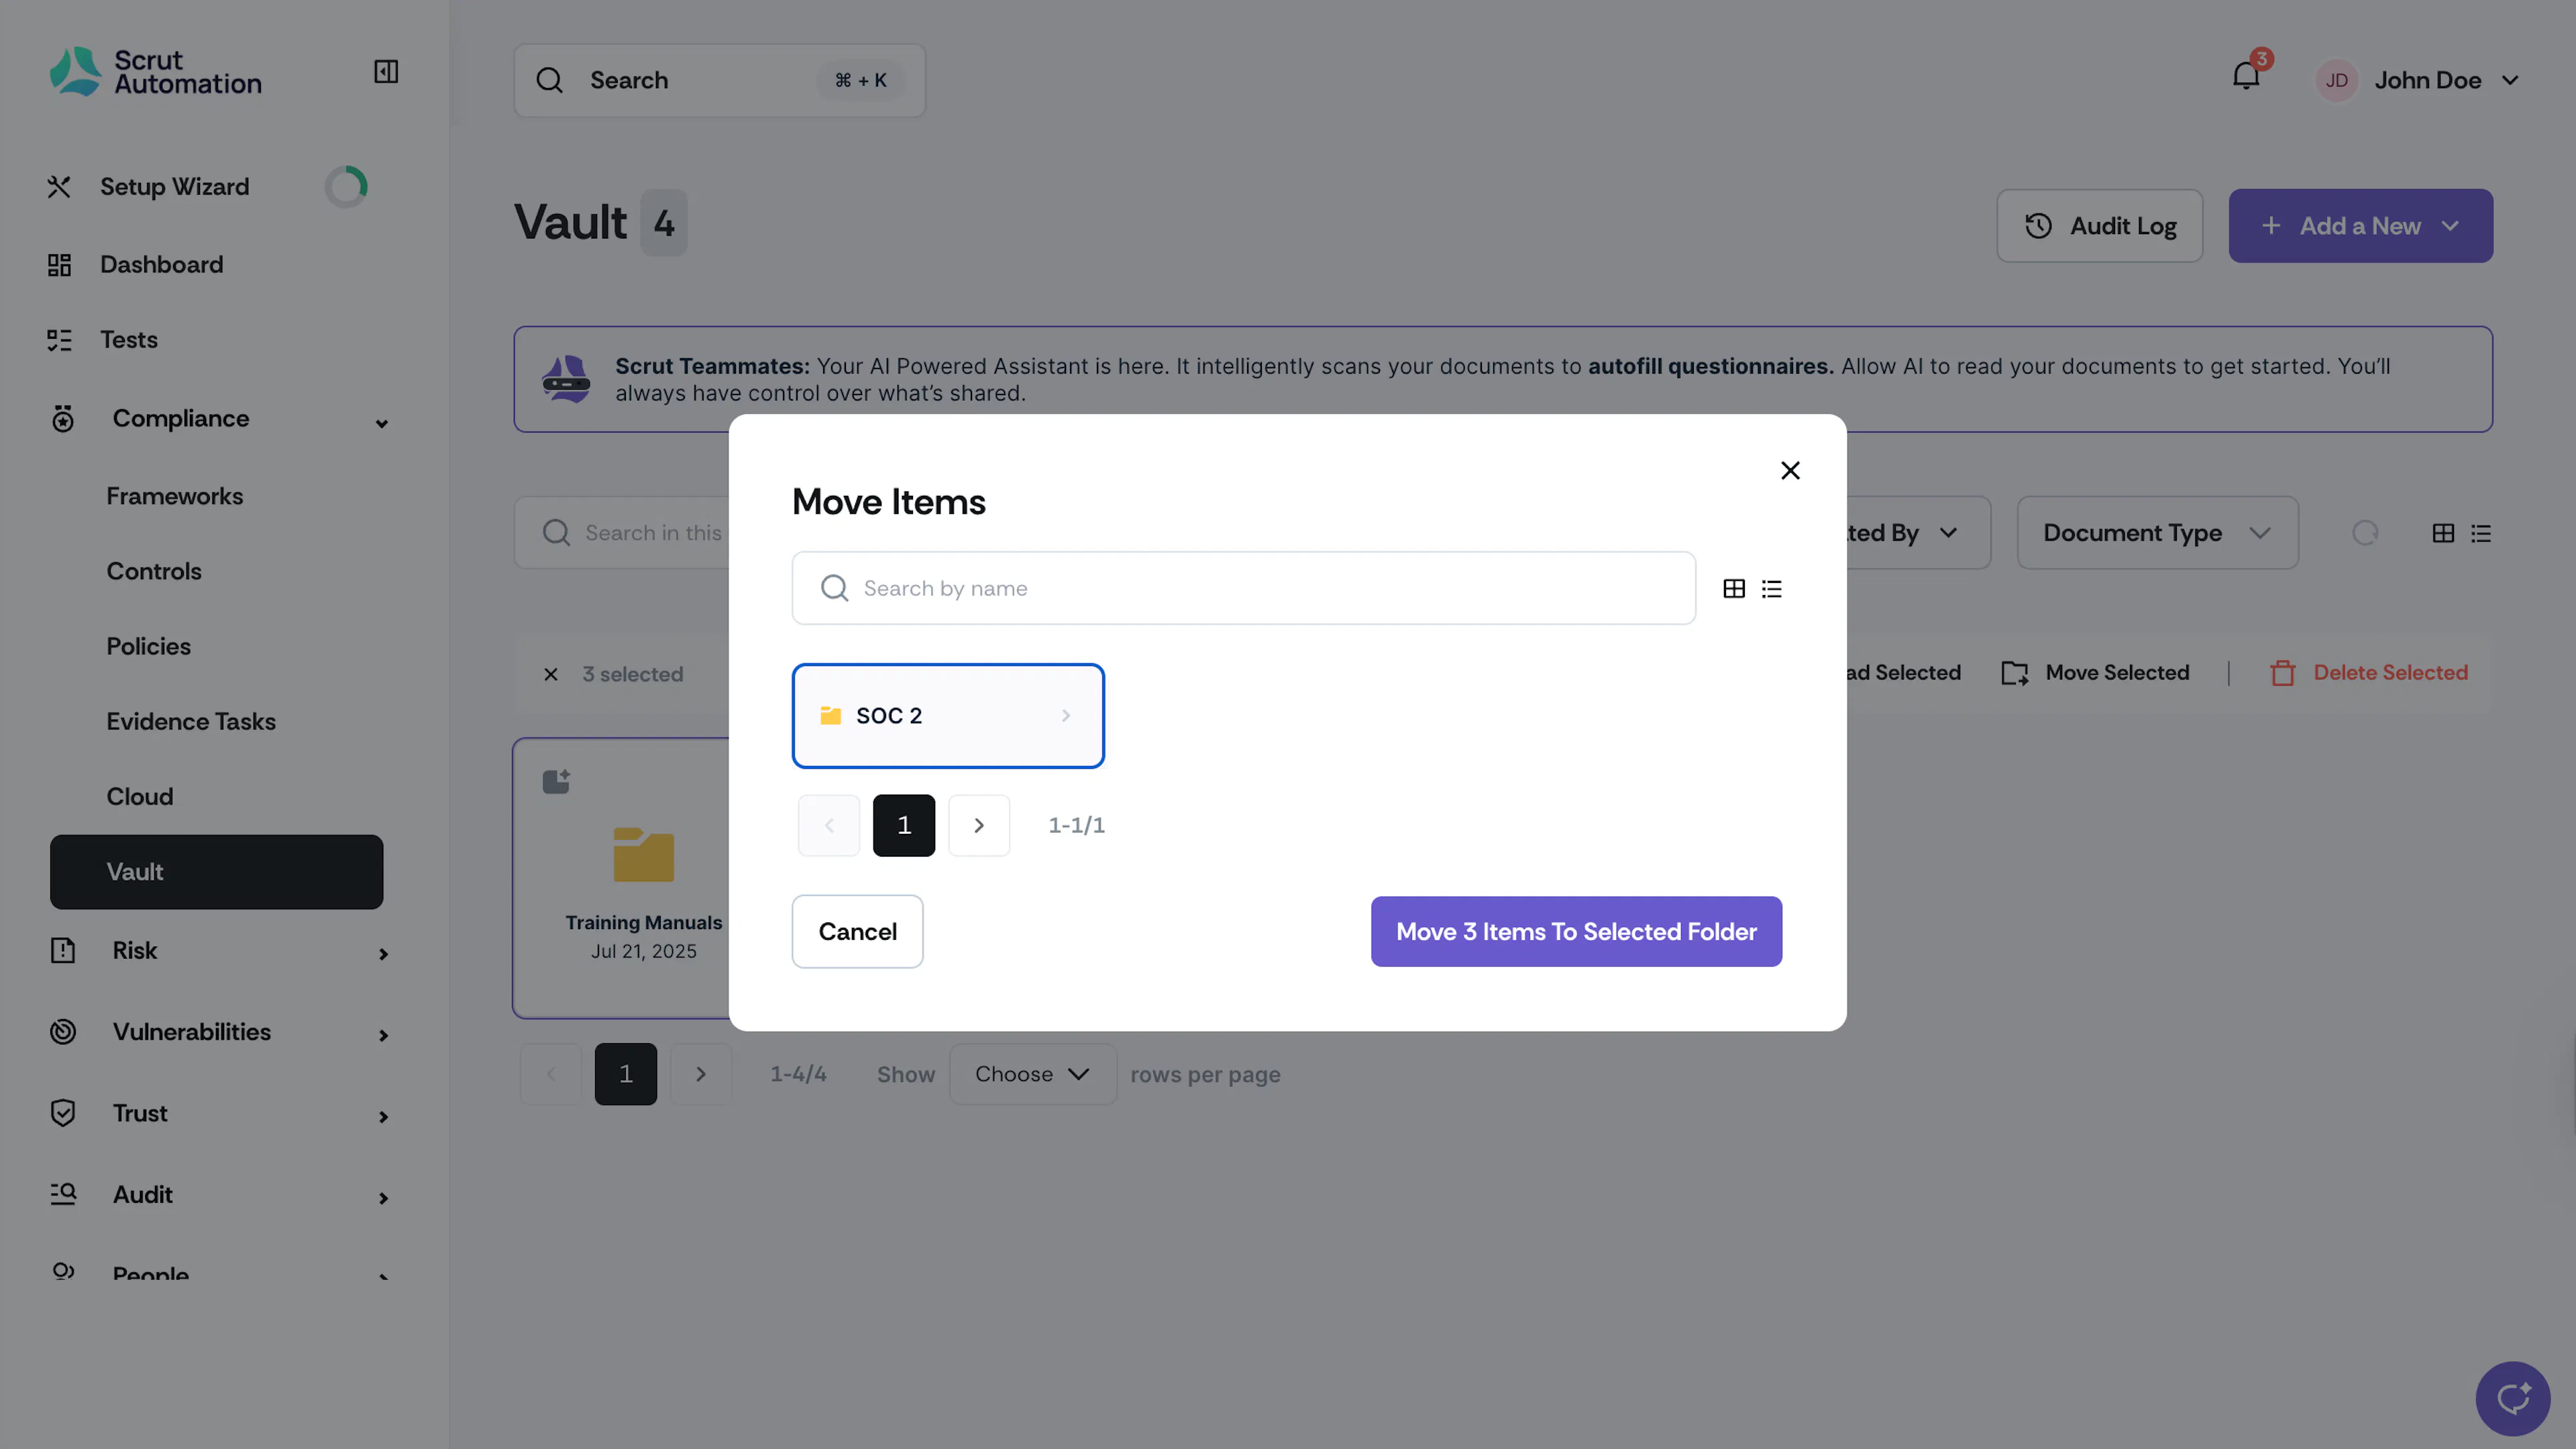
To move multiple folders and files, select the checkboxes next to the folders and files you want to move. Click the consolidated Move Selected button at the top and select the destination folder.
Download a Folder
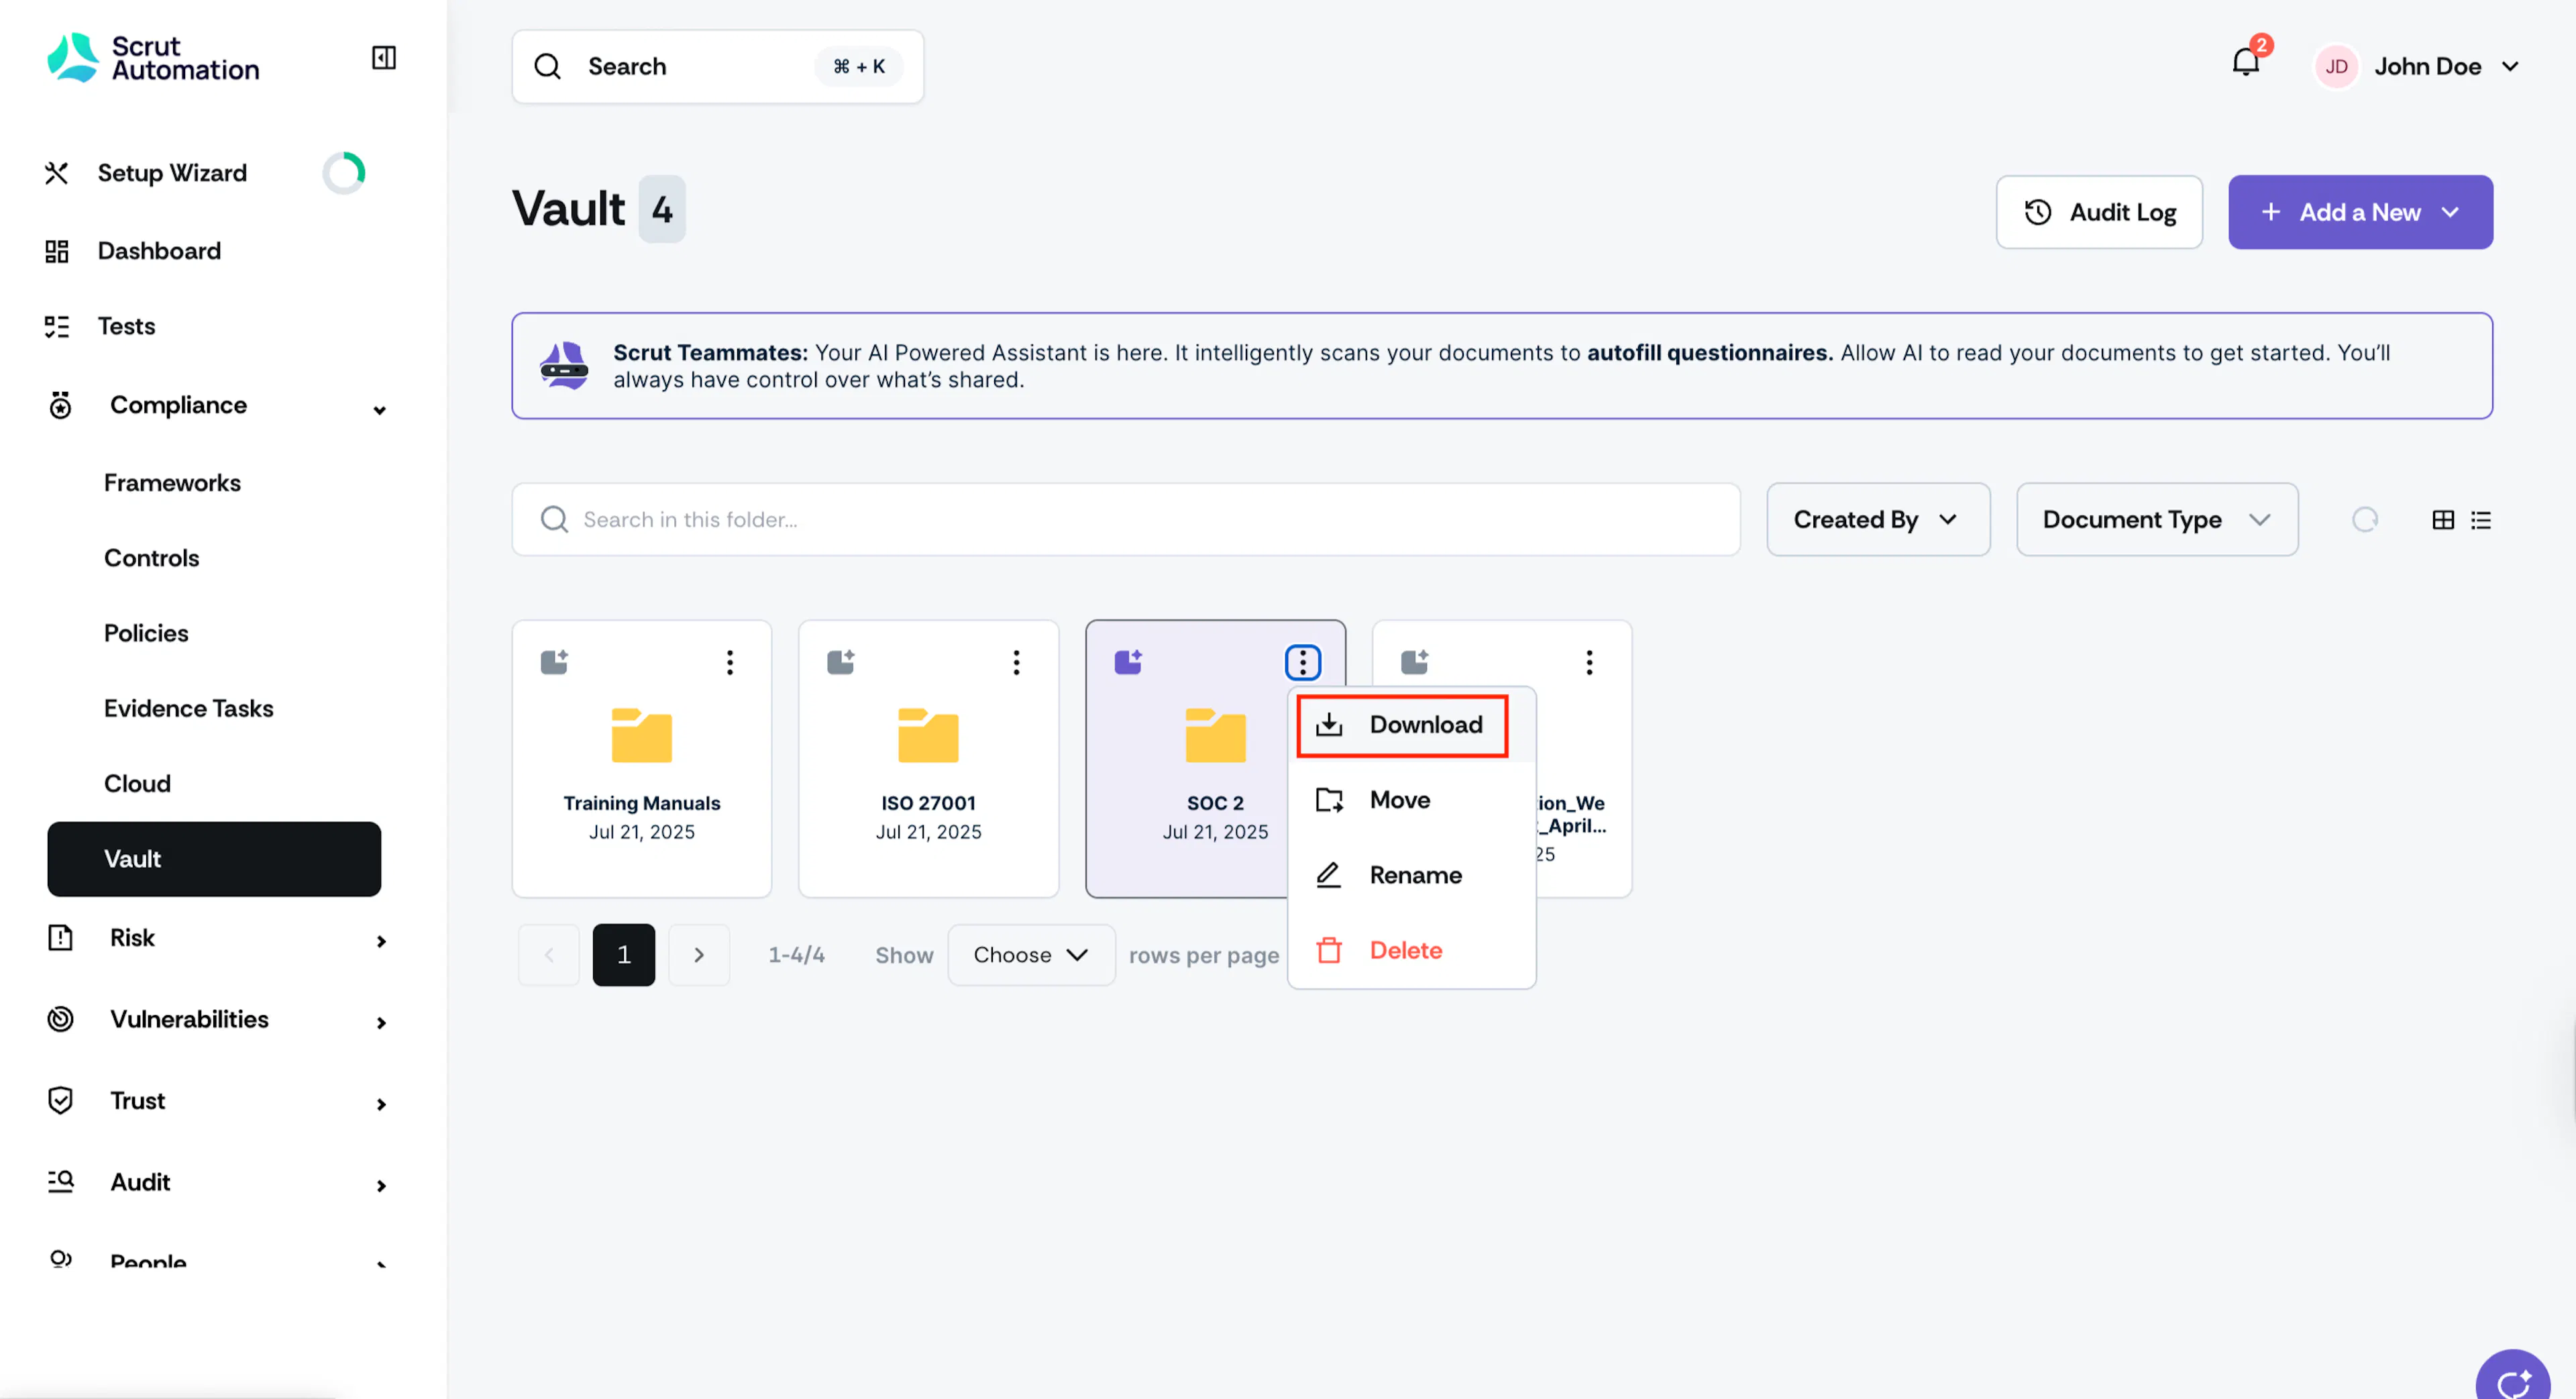
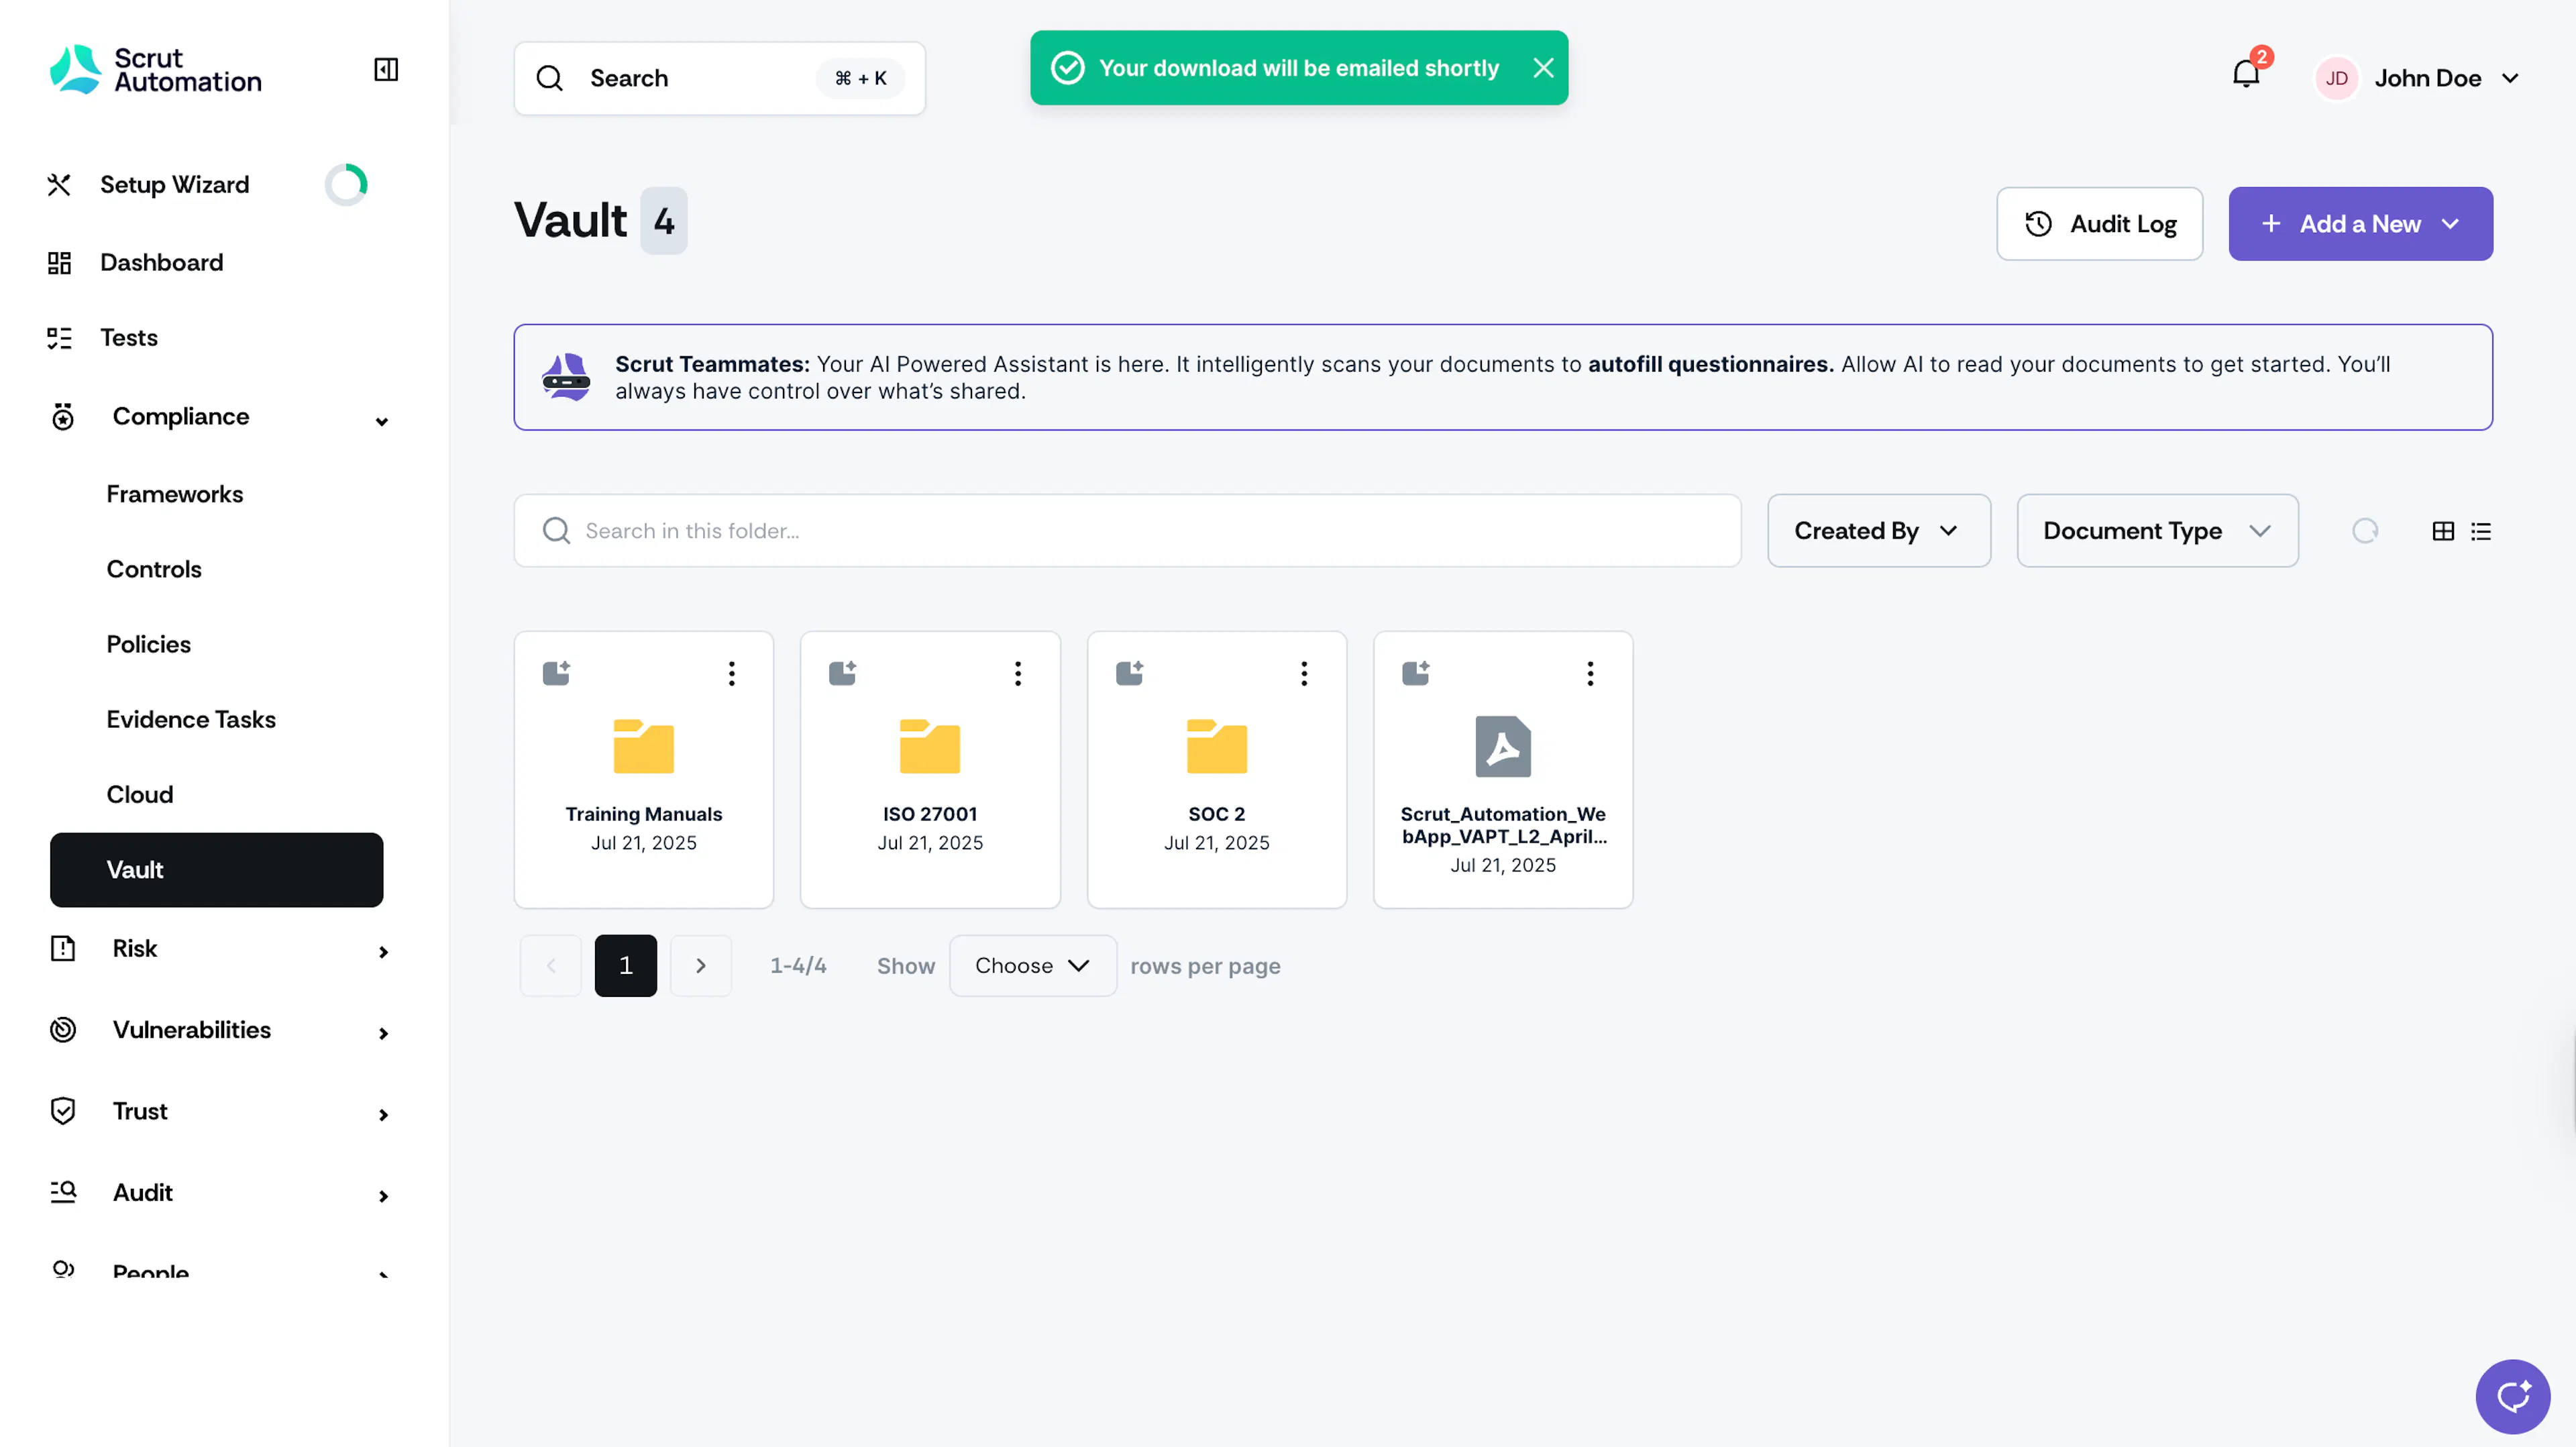
Click the three-dots icon on your desired folder and click the Download icon. Scrut will email the folder and its contents to you.
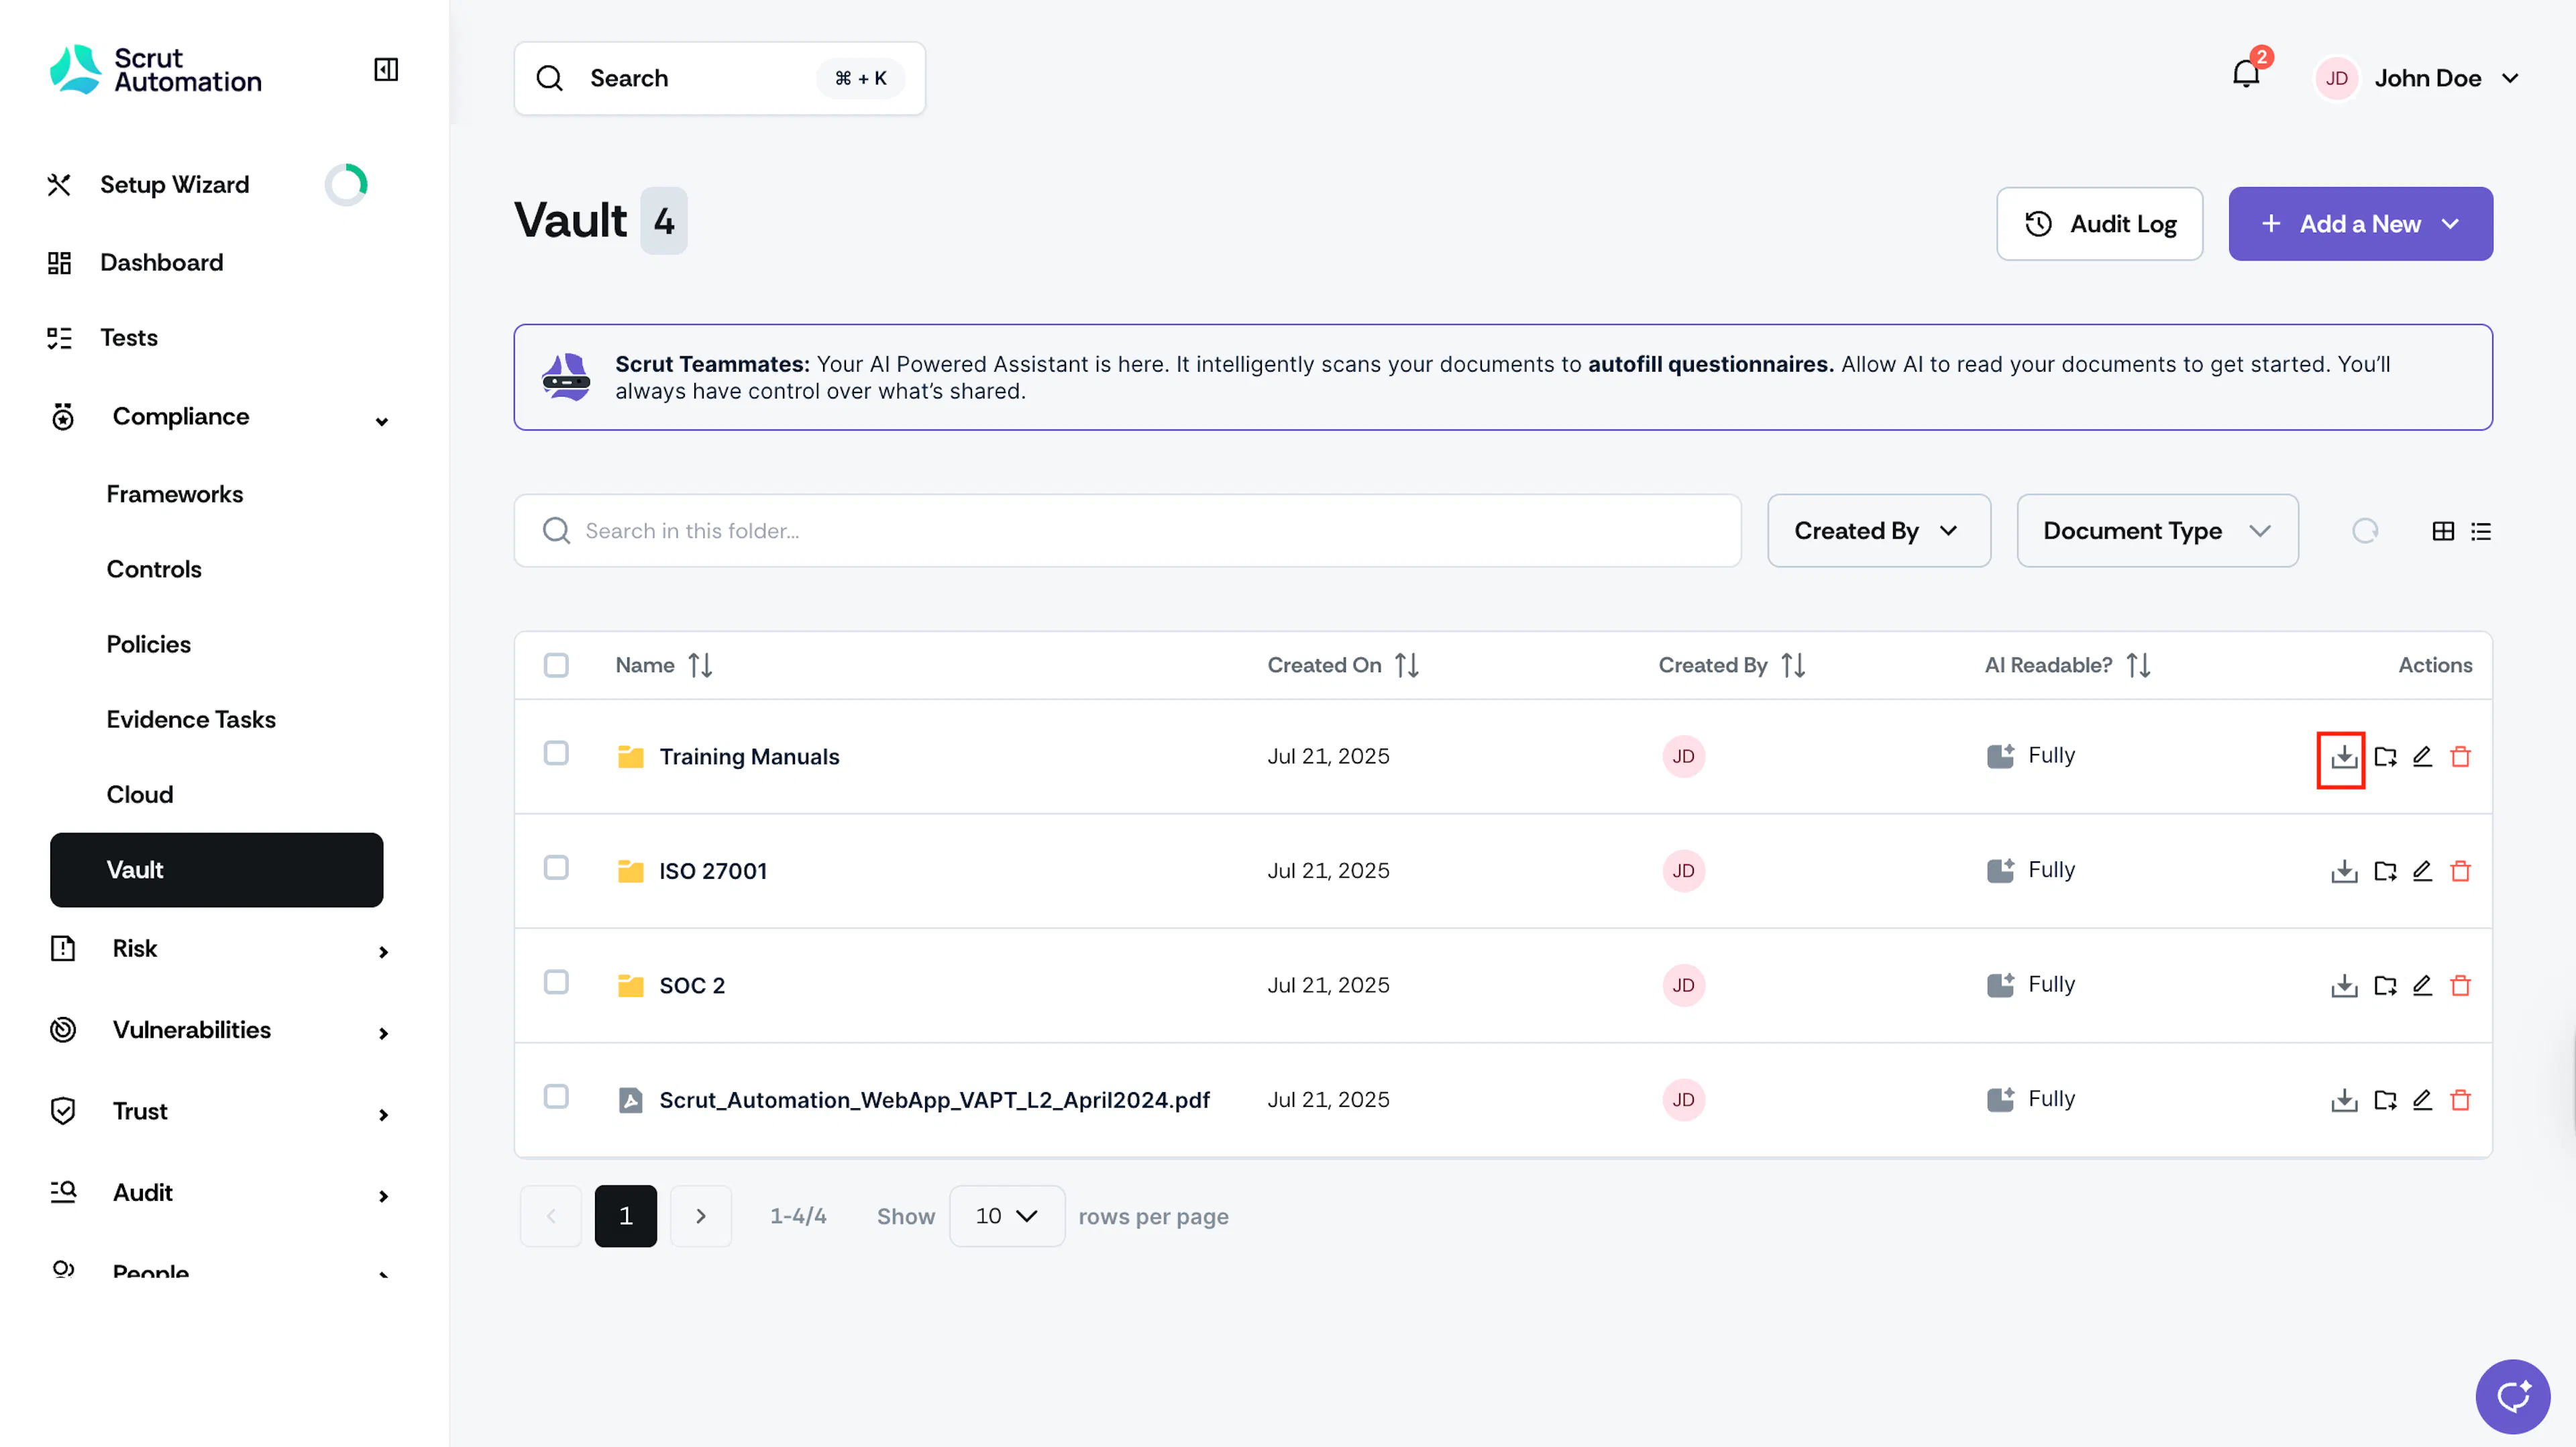
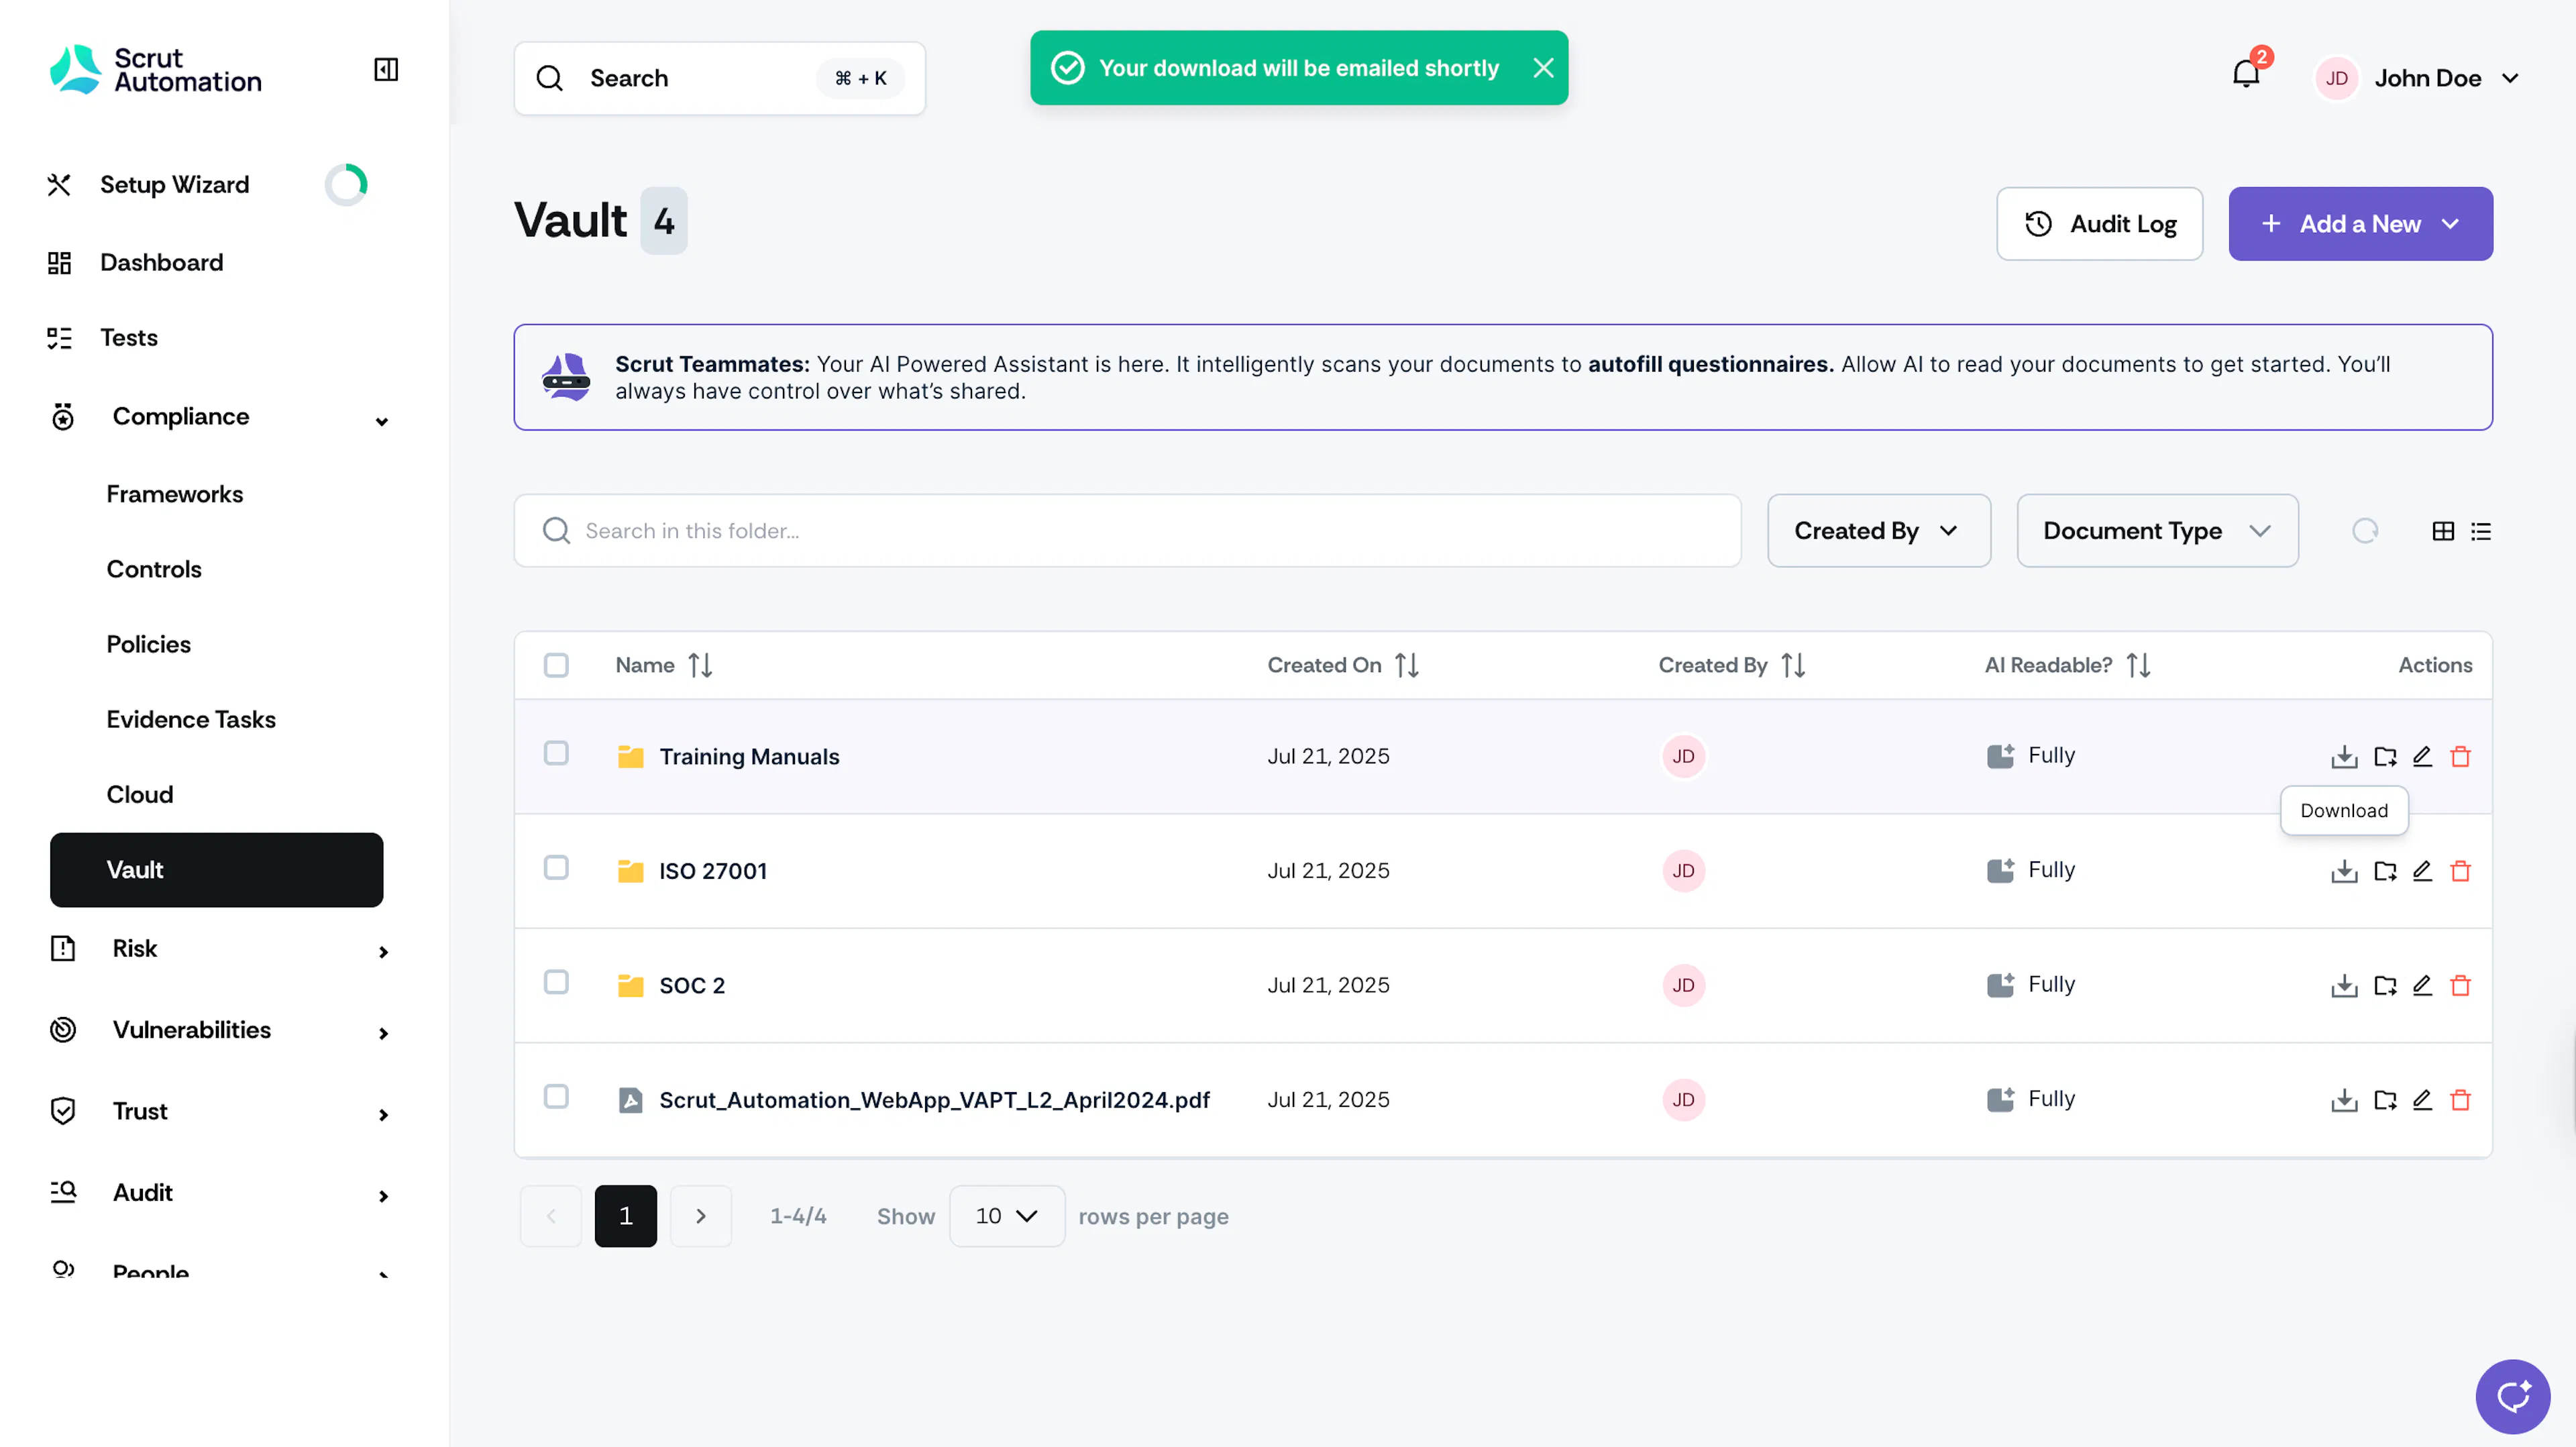
Click the Download icon next to your desired folder. Scrut will email the folder and its contents to you.

Download Multiple Folders and Files
To download multiple folders and files, follow these steps:
- To select a range (contiguous selection)
- Click the first item, then hold the Shift key and click the last item.
- All files and folders in between will be selected.
- To select separate items (non-contiguous selection)
- Click the first item, hold the Ctrl key (Windows) or Command key (macOS), and click each additional item you want to select.
- Only the items you click will be selected.
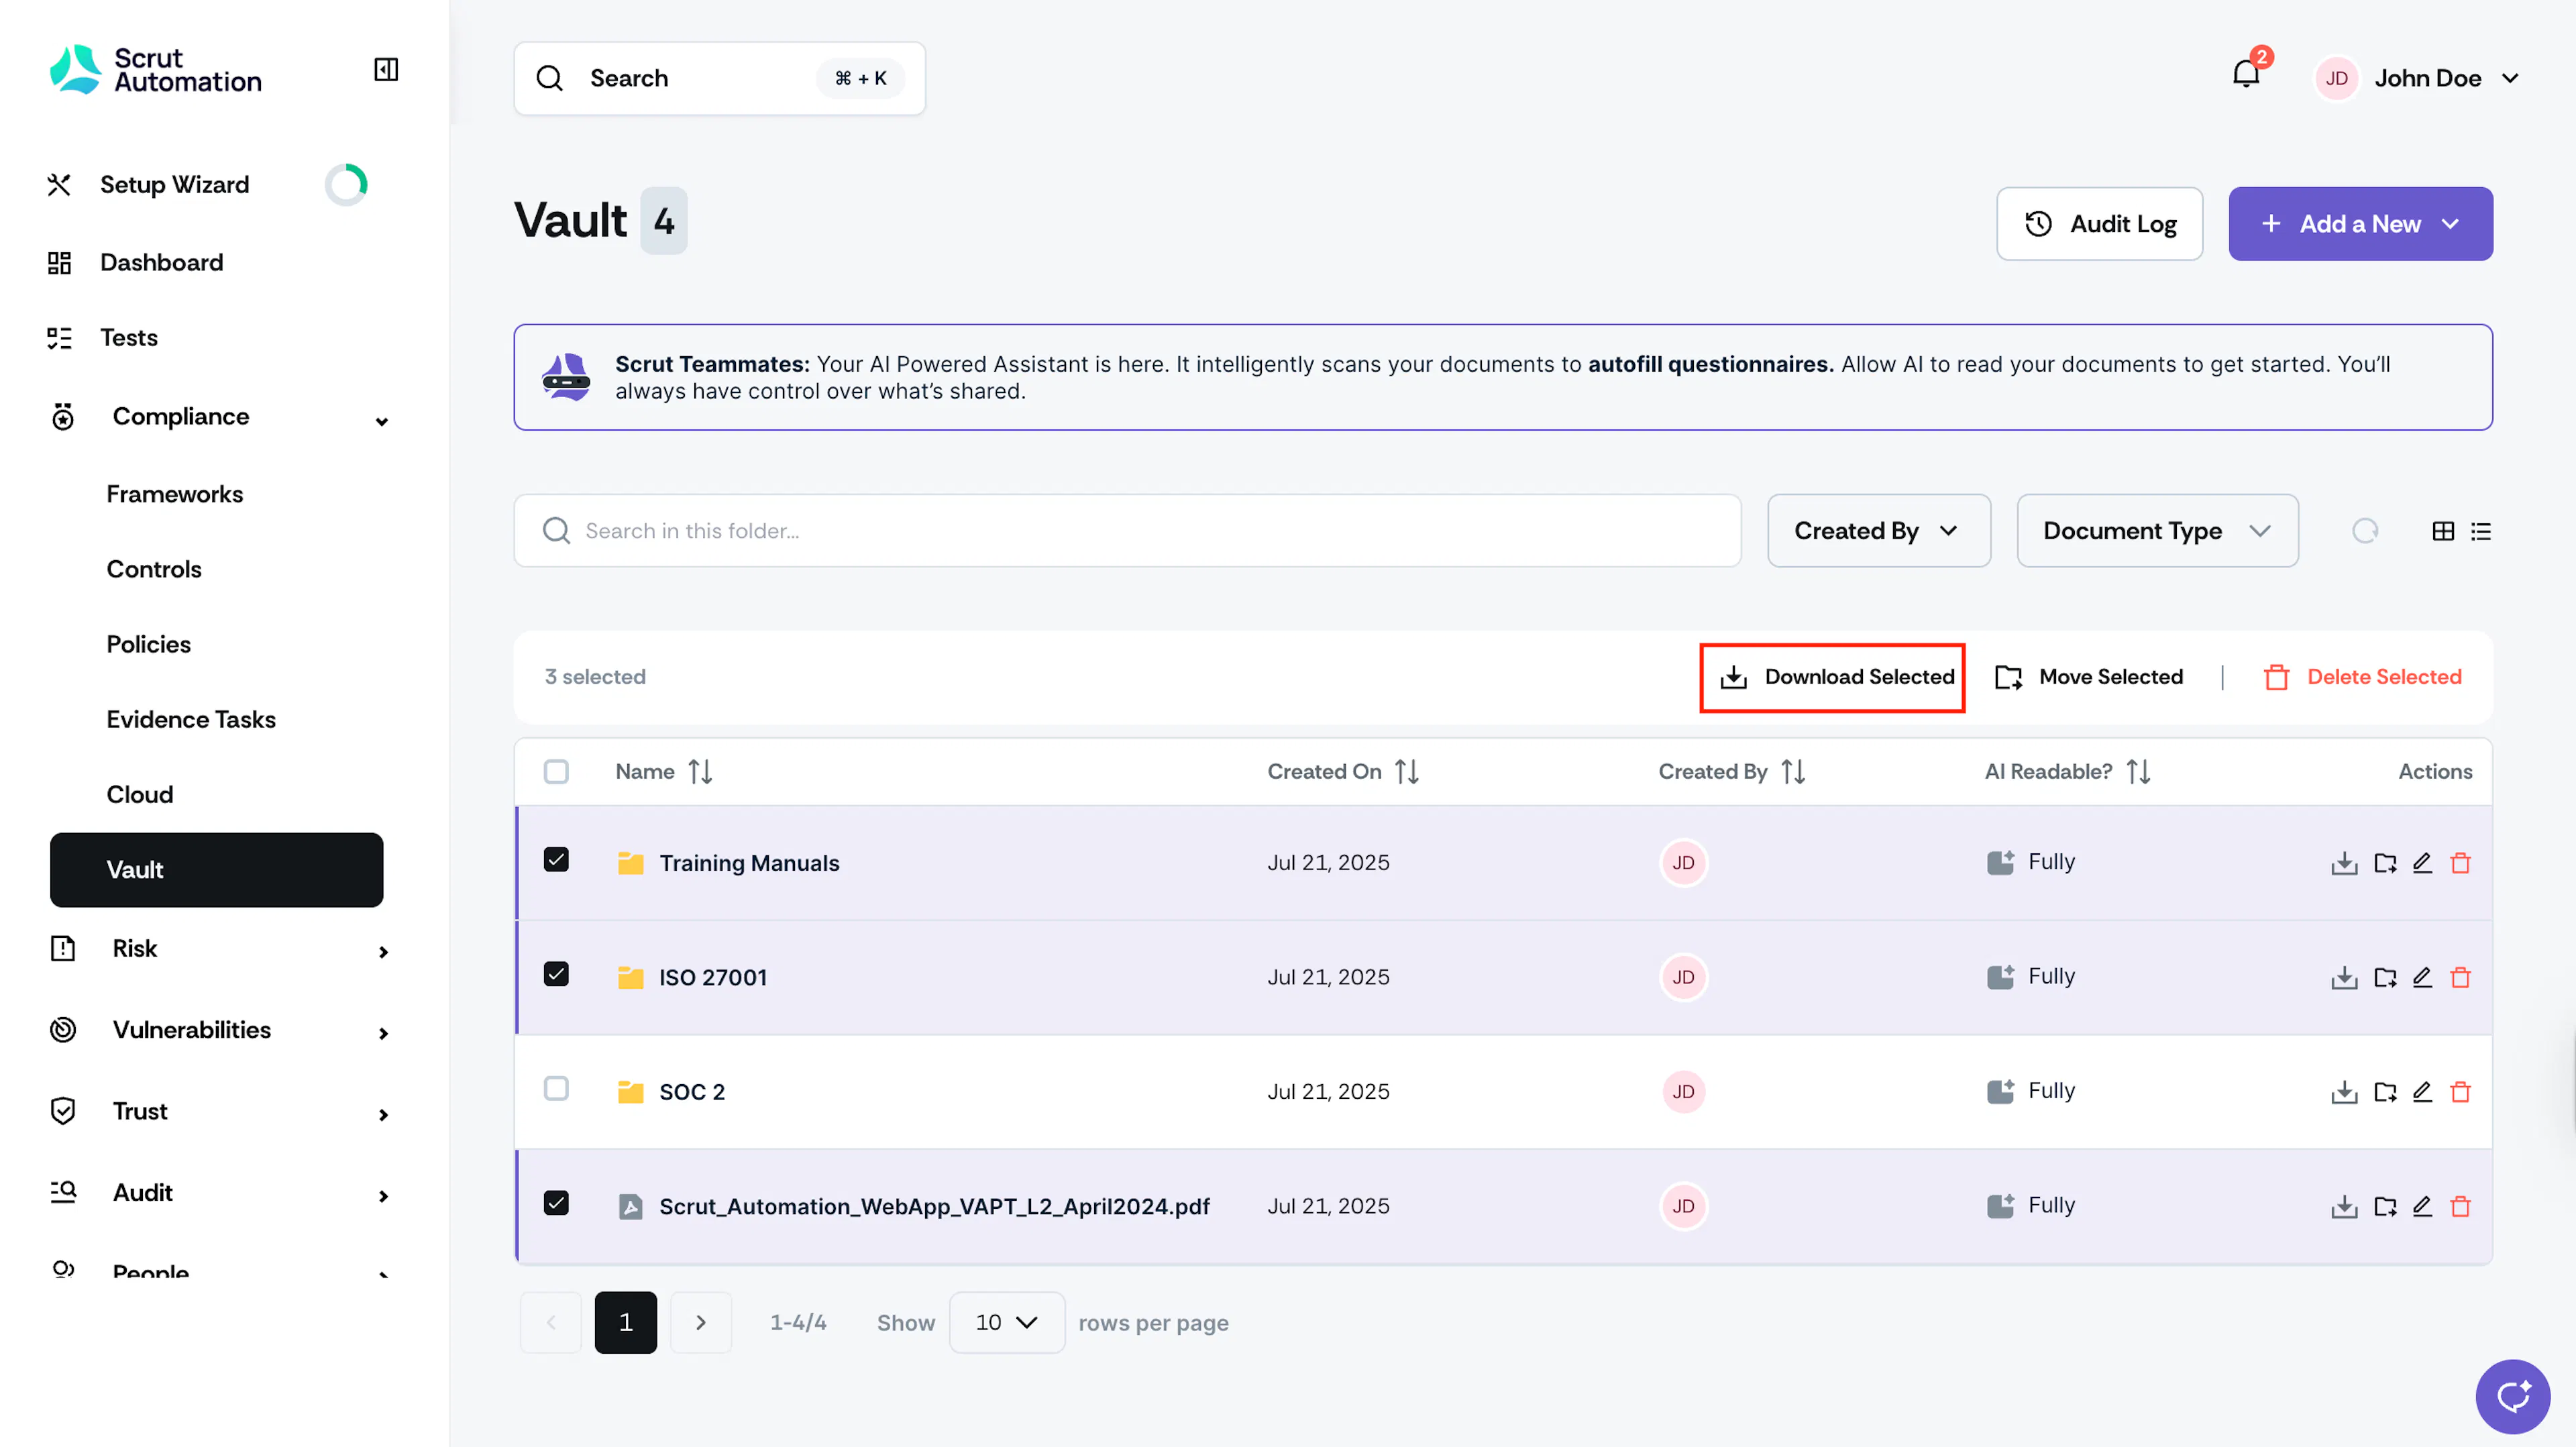
- Click the consolidated Download Selected button at the top. Scrut will email you the selected items.
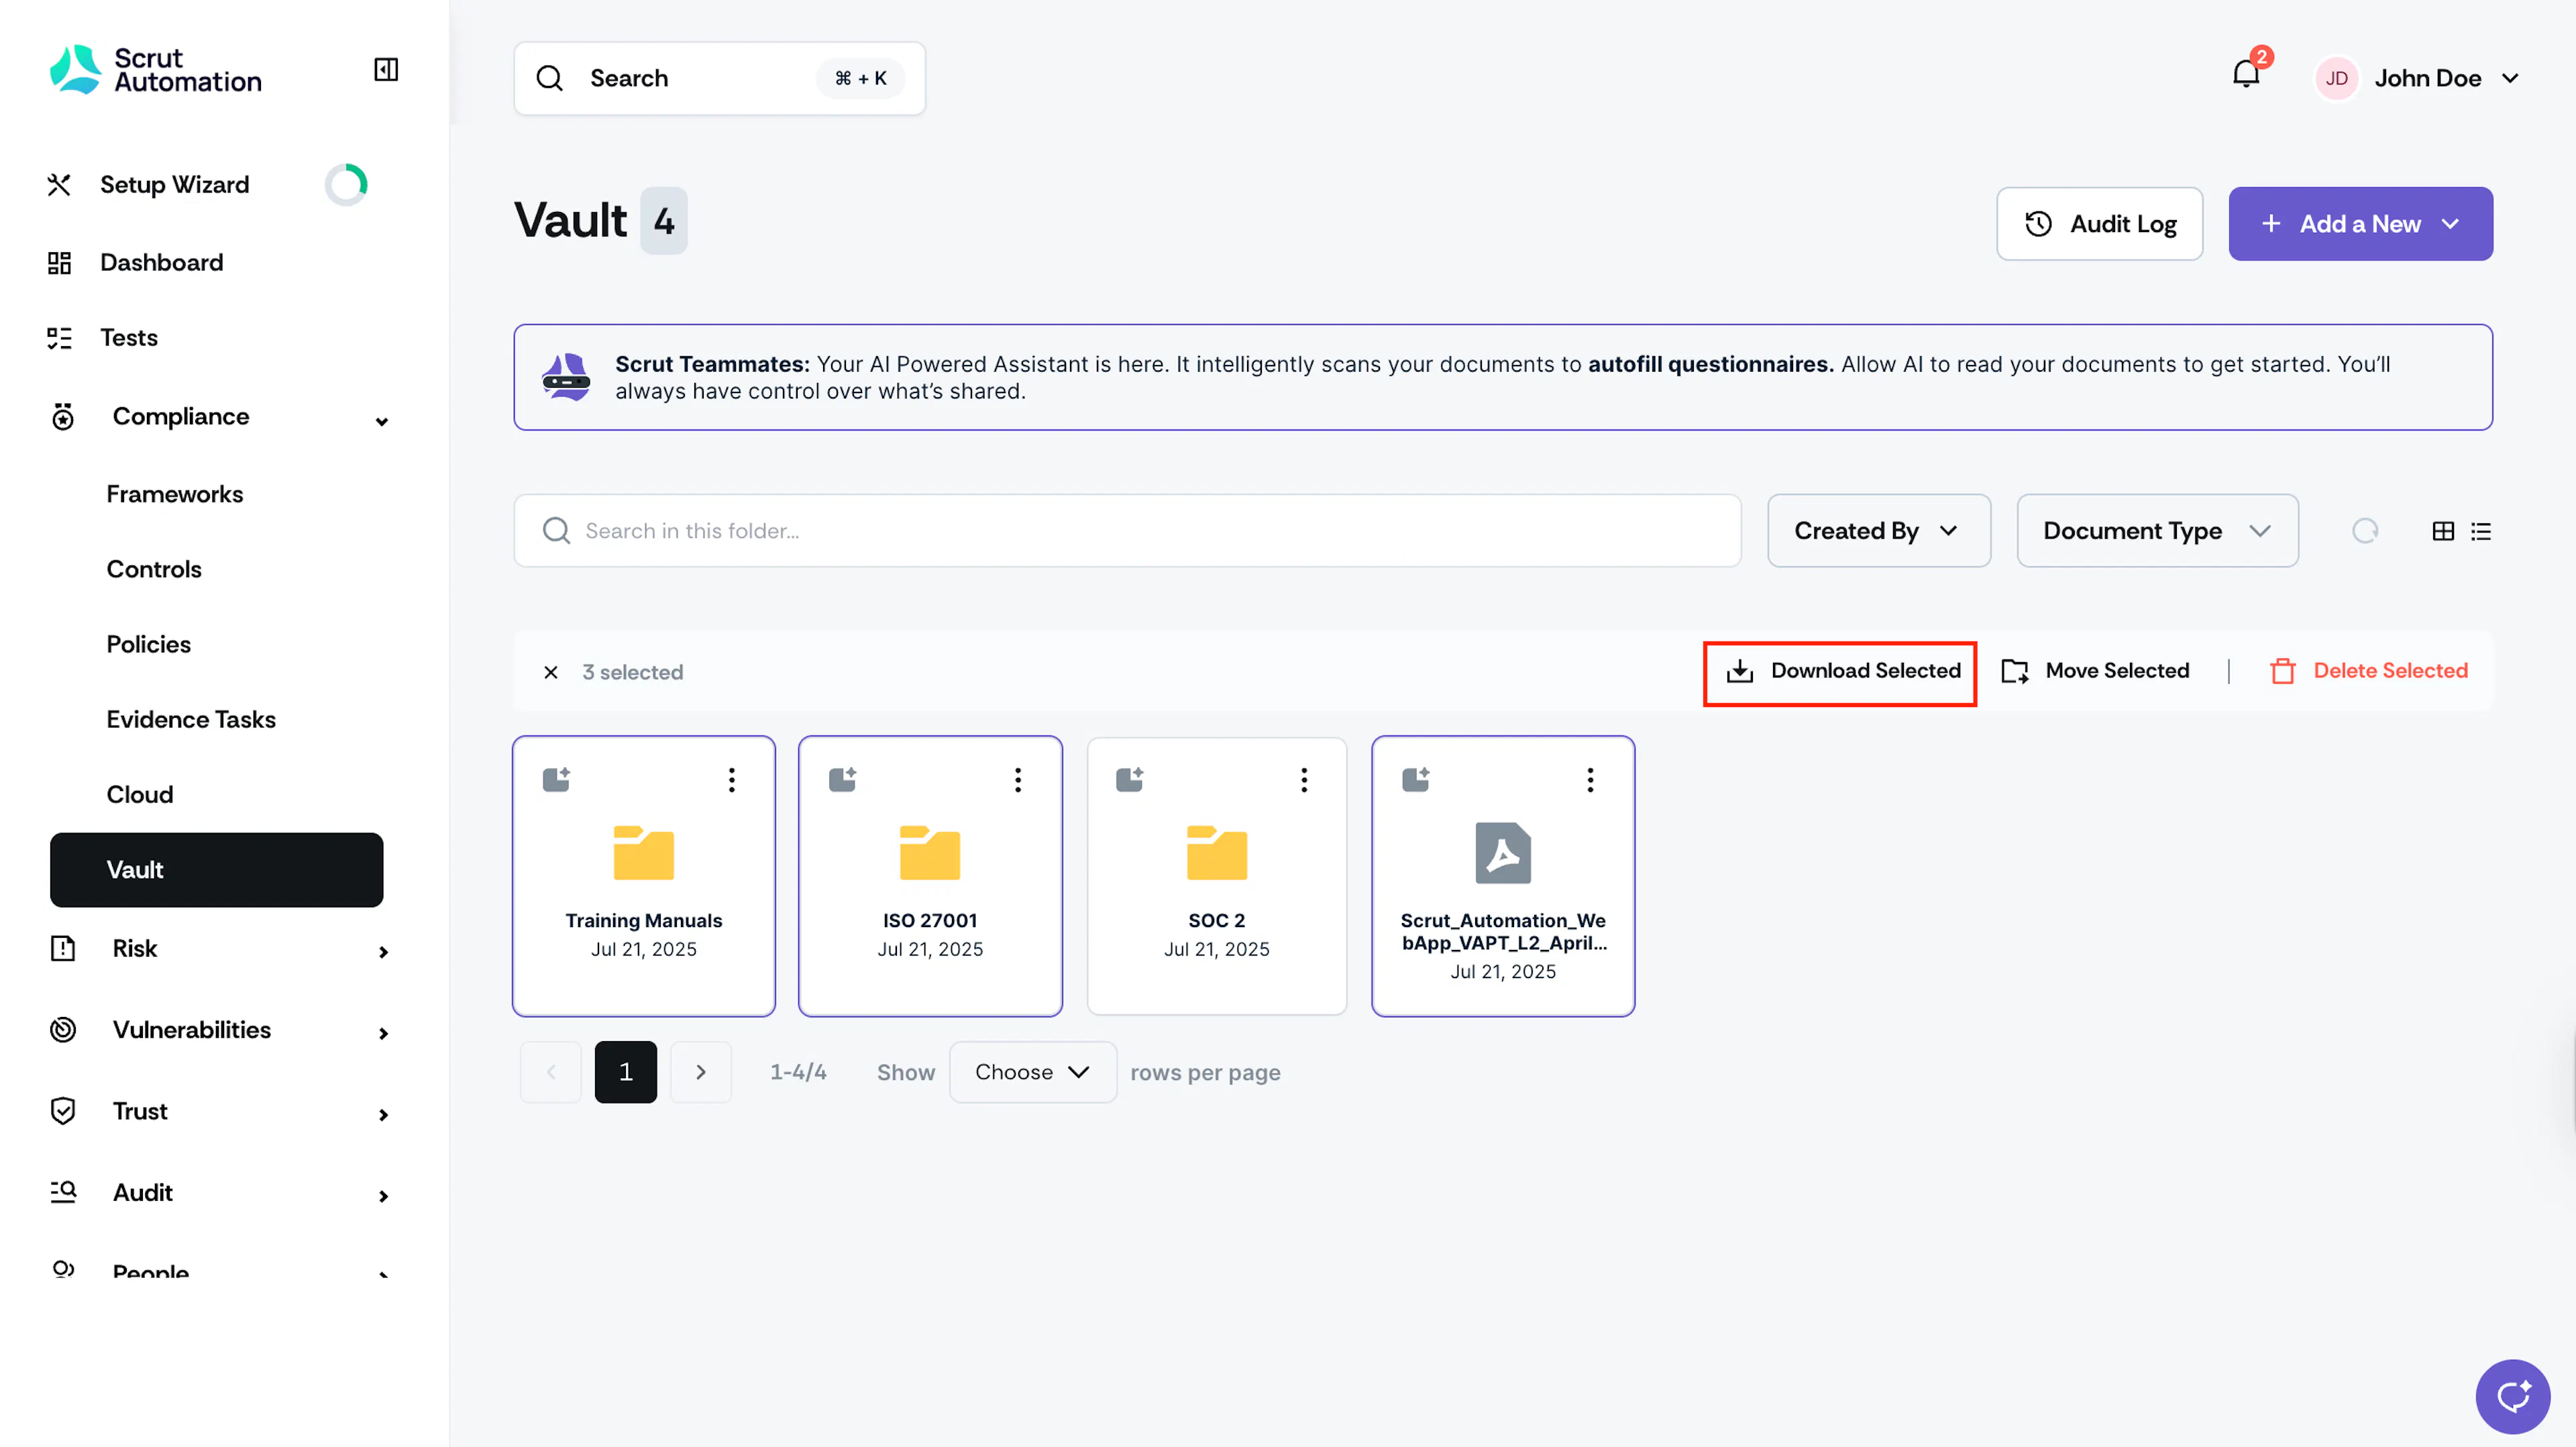
To download multiple folders and files, select the checkboxes next to the folders and files you want to download. Click the consolidated Download Selected button at the top. Scrut will email you the selected files and folders.
Delete a Folder
Heads Up!
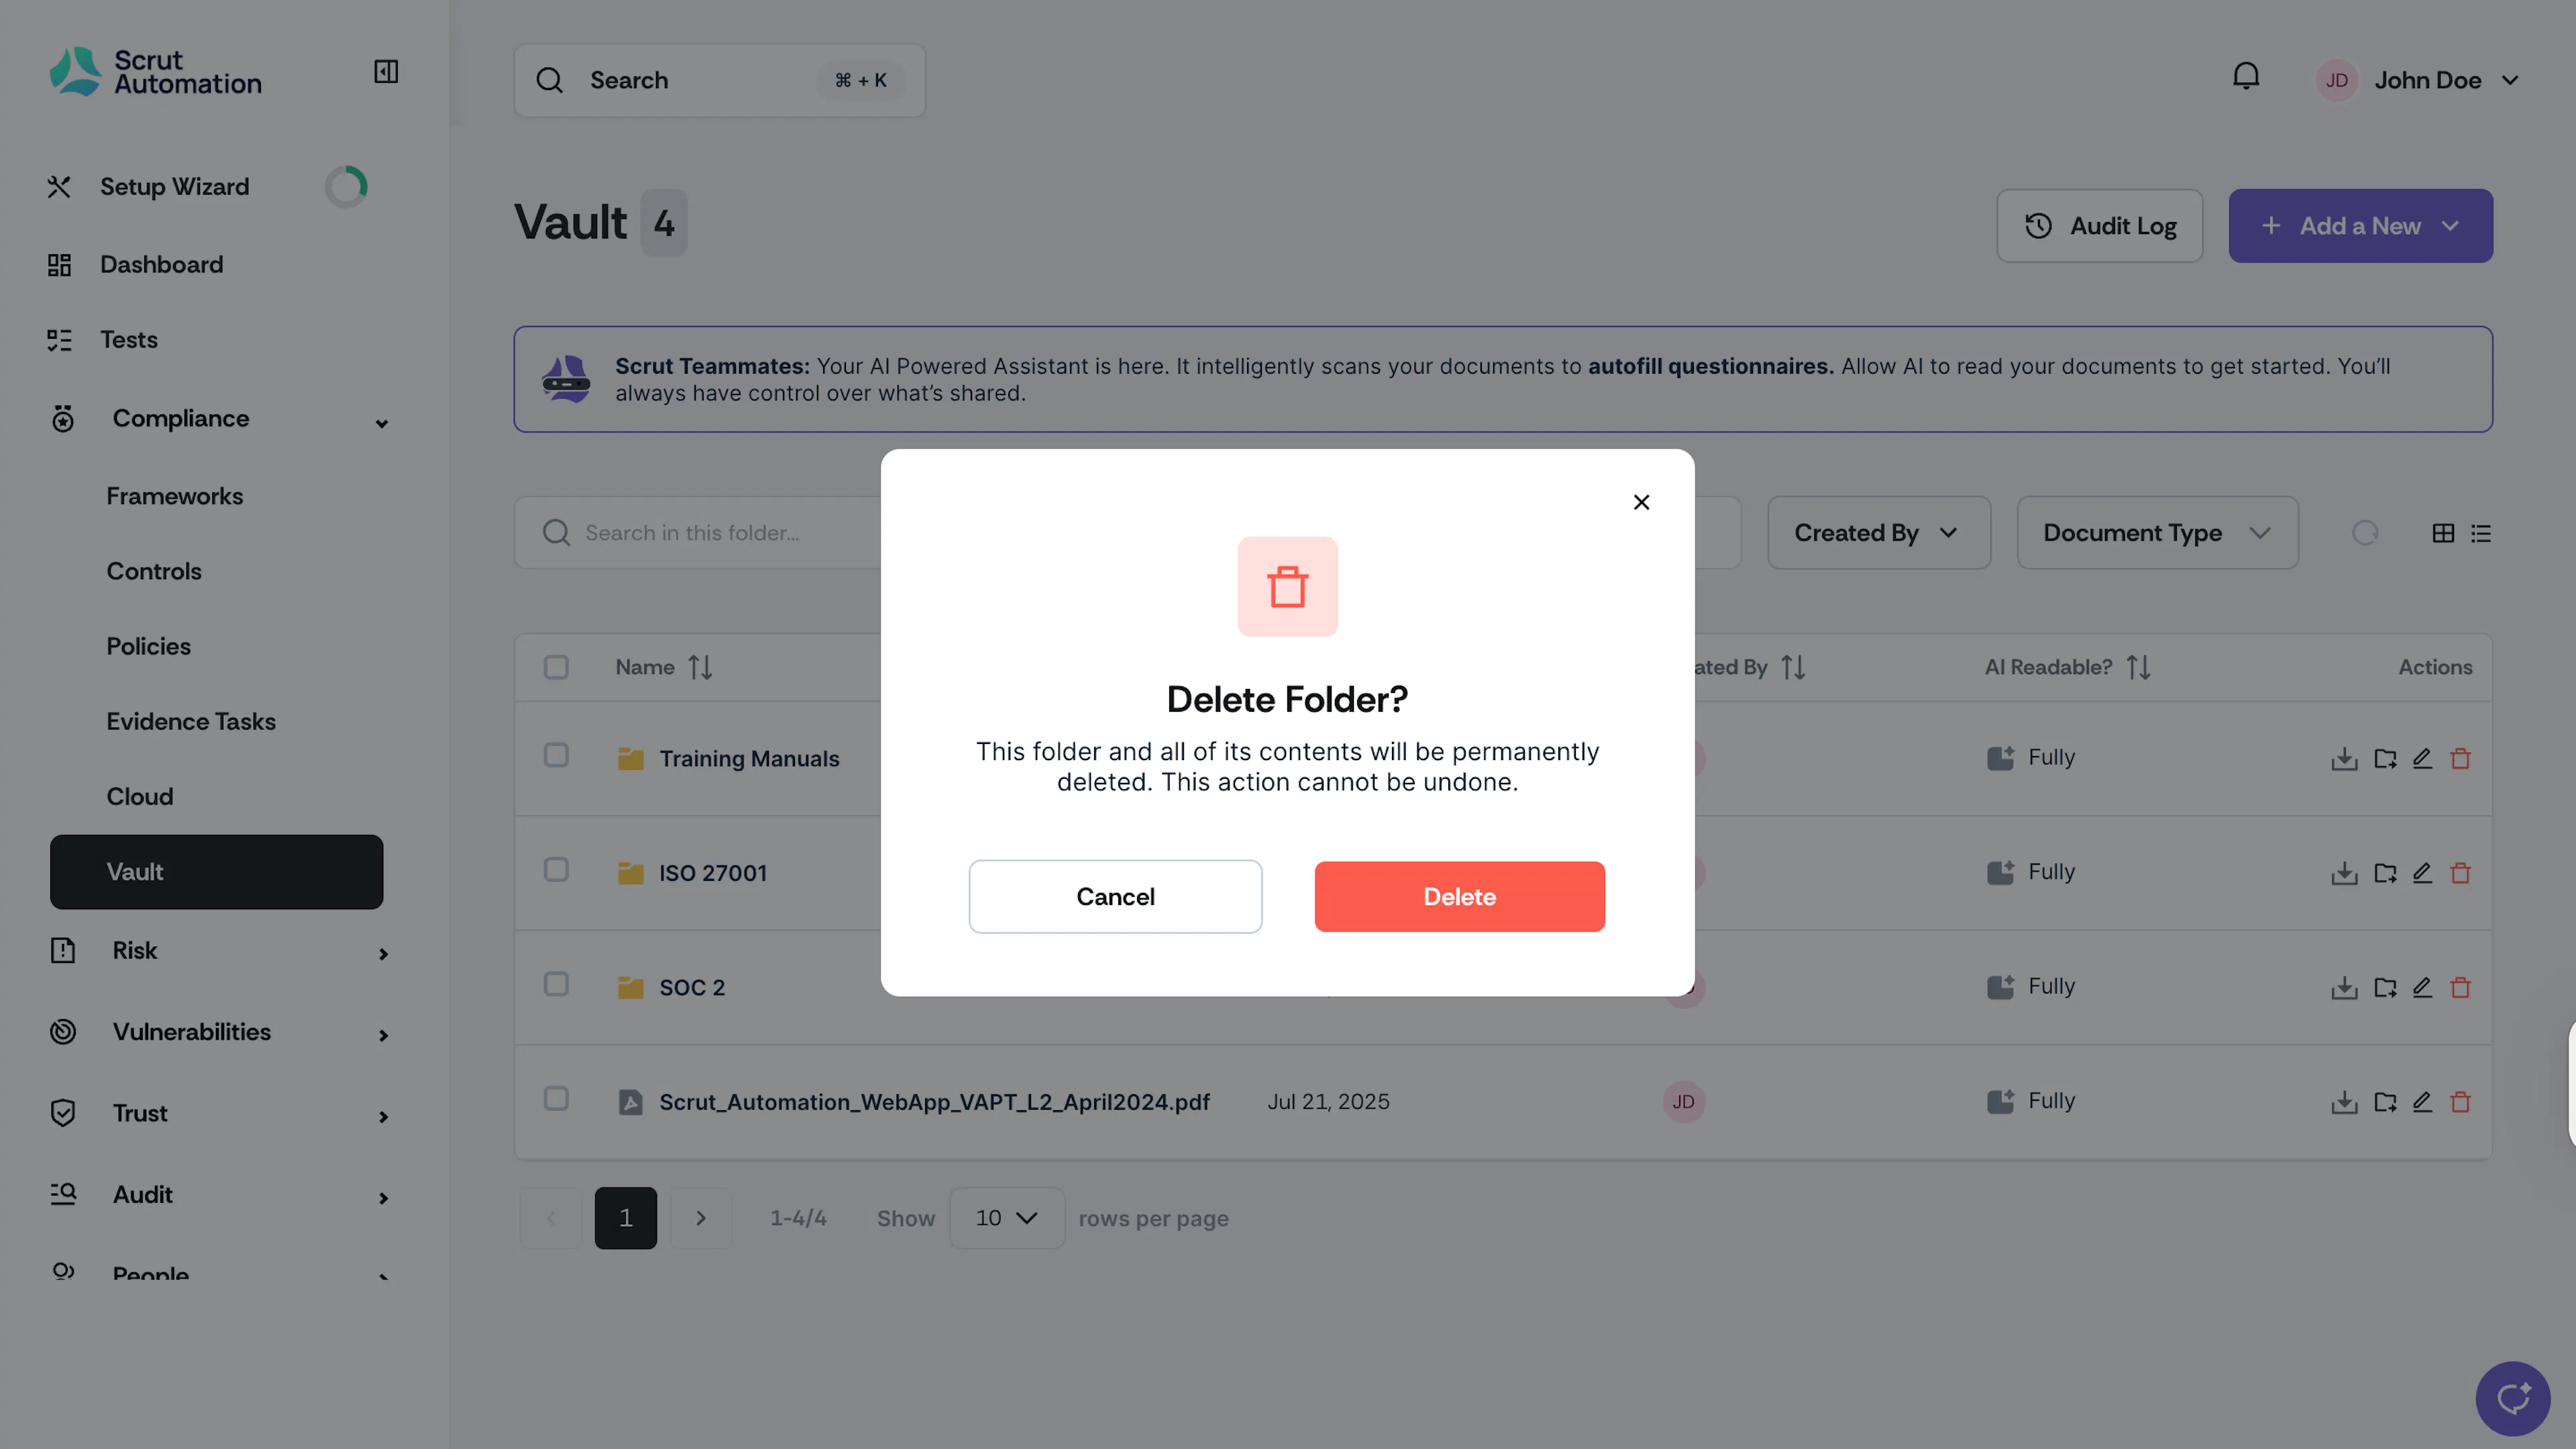
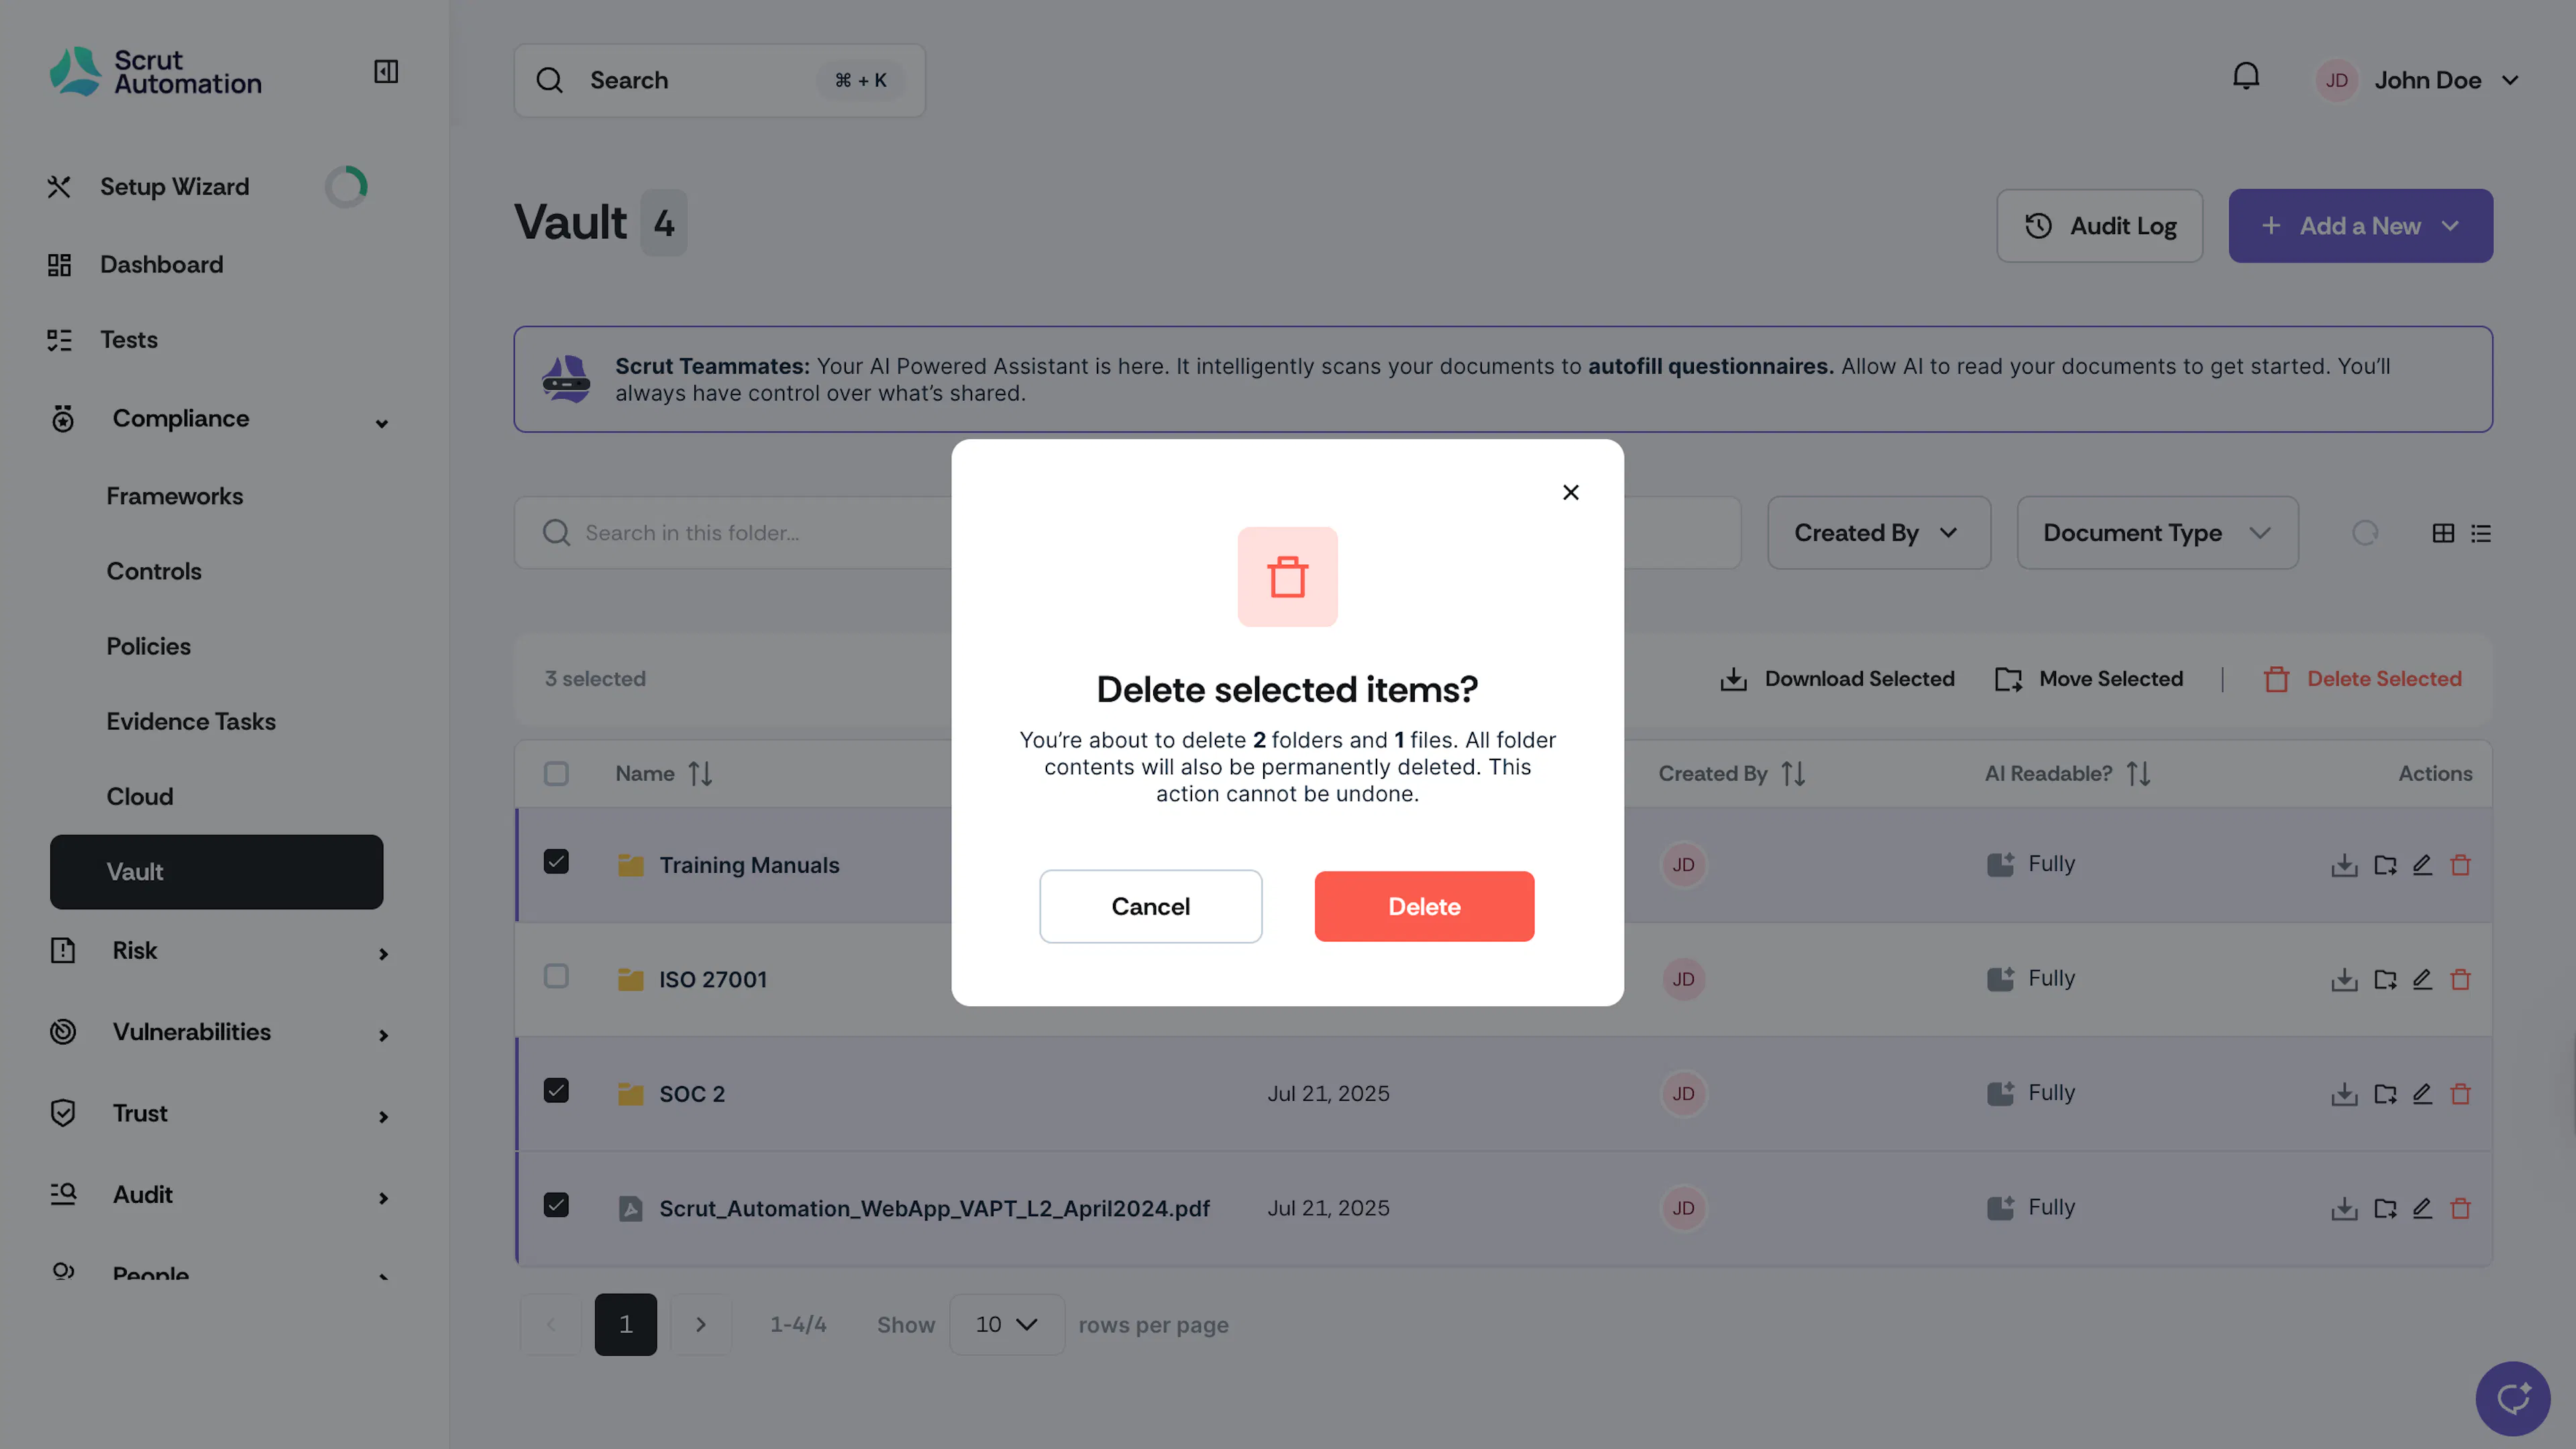
Deleting a folder will also delete sub-folders and documents within it. This action is permanent and cannot be undone. So, proceed with caution.
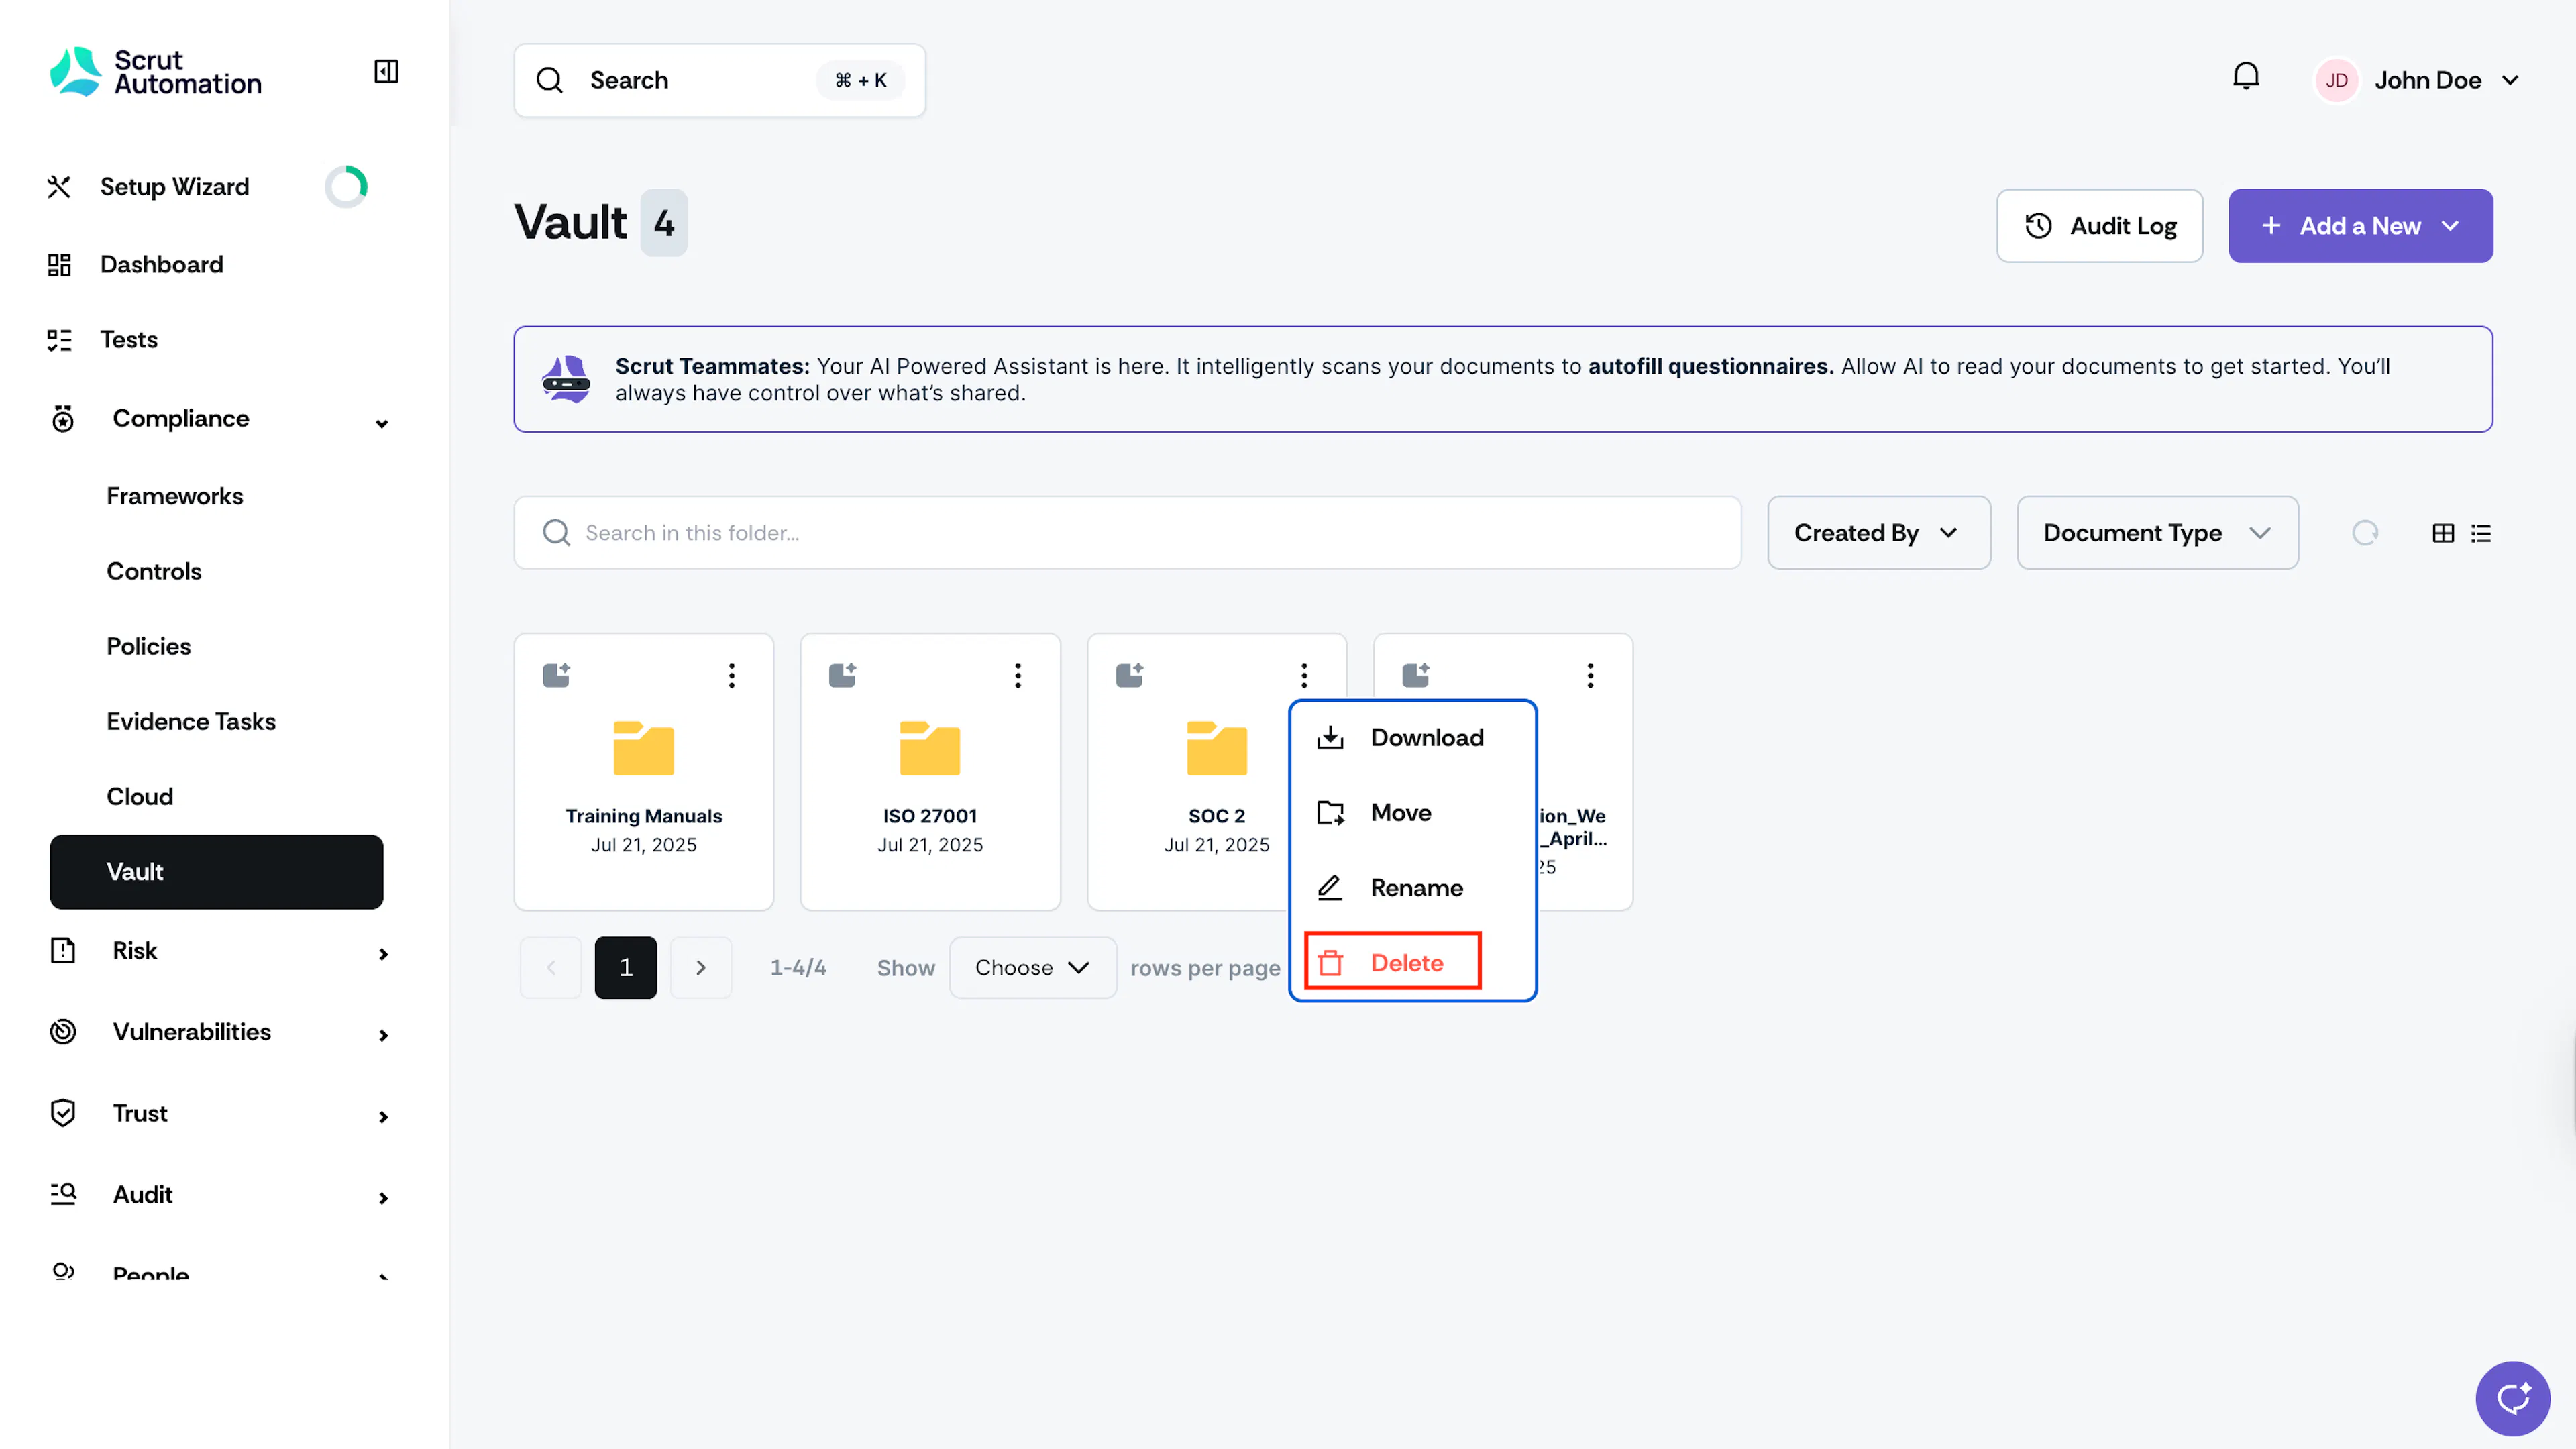
Click the three-dots icon on the folder and select Delete. Click Delete to confirm.
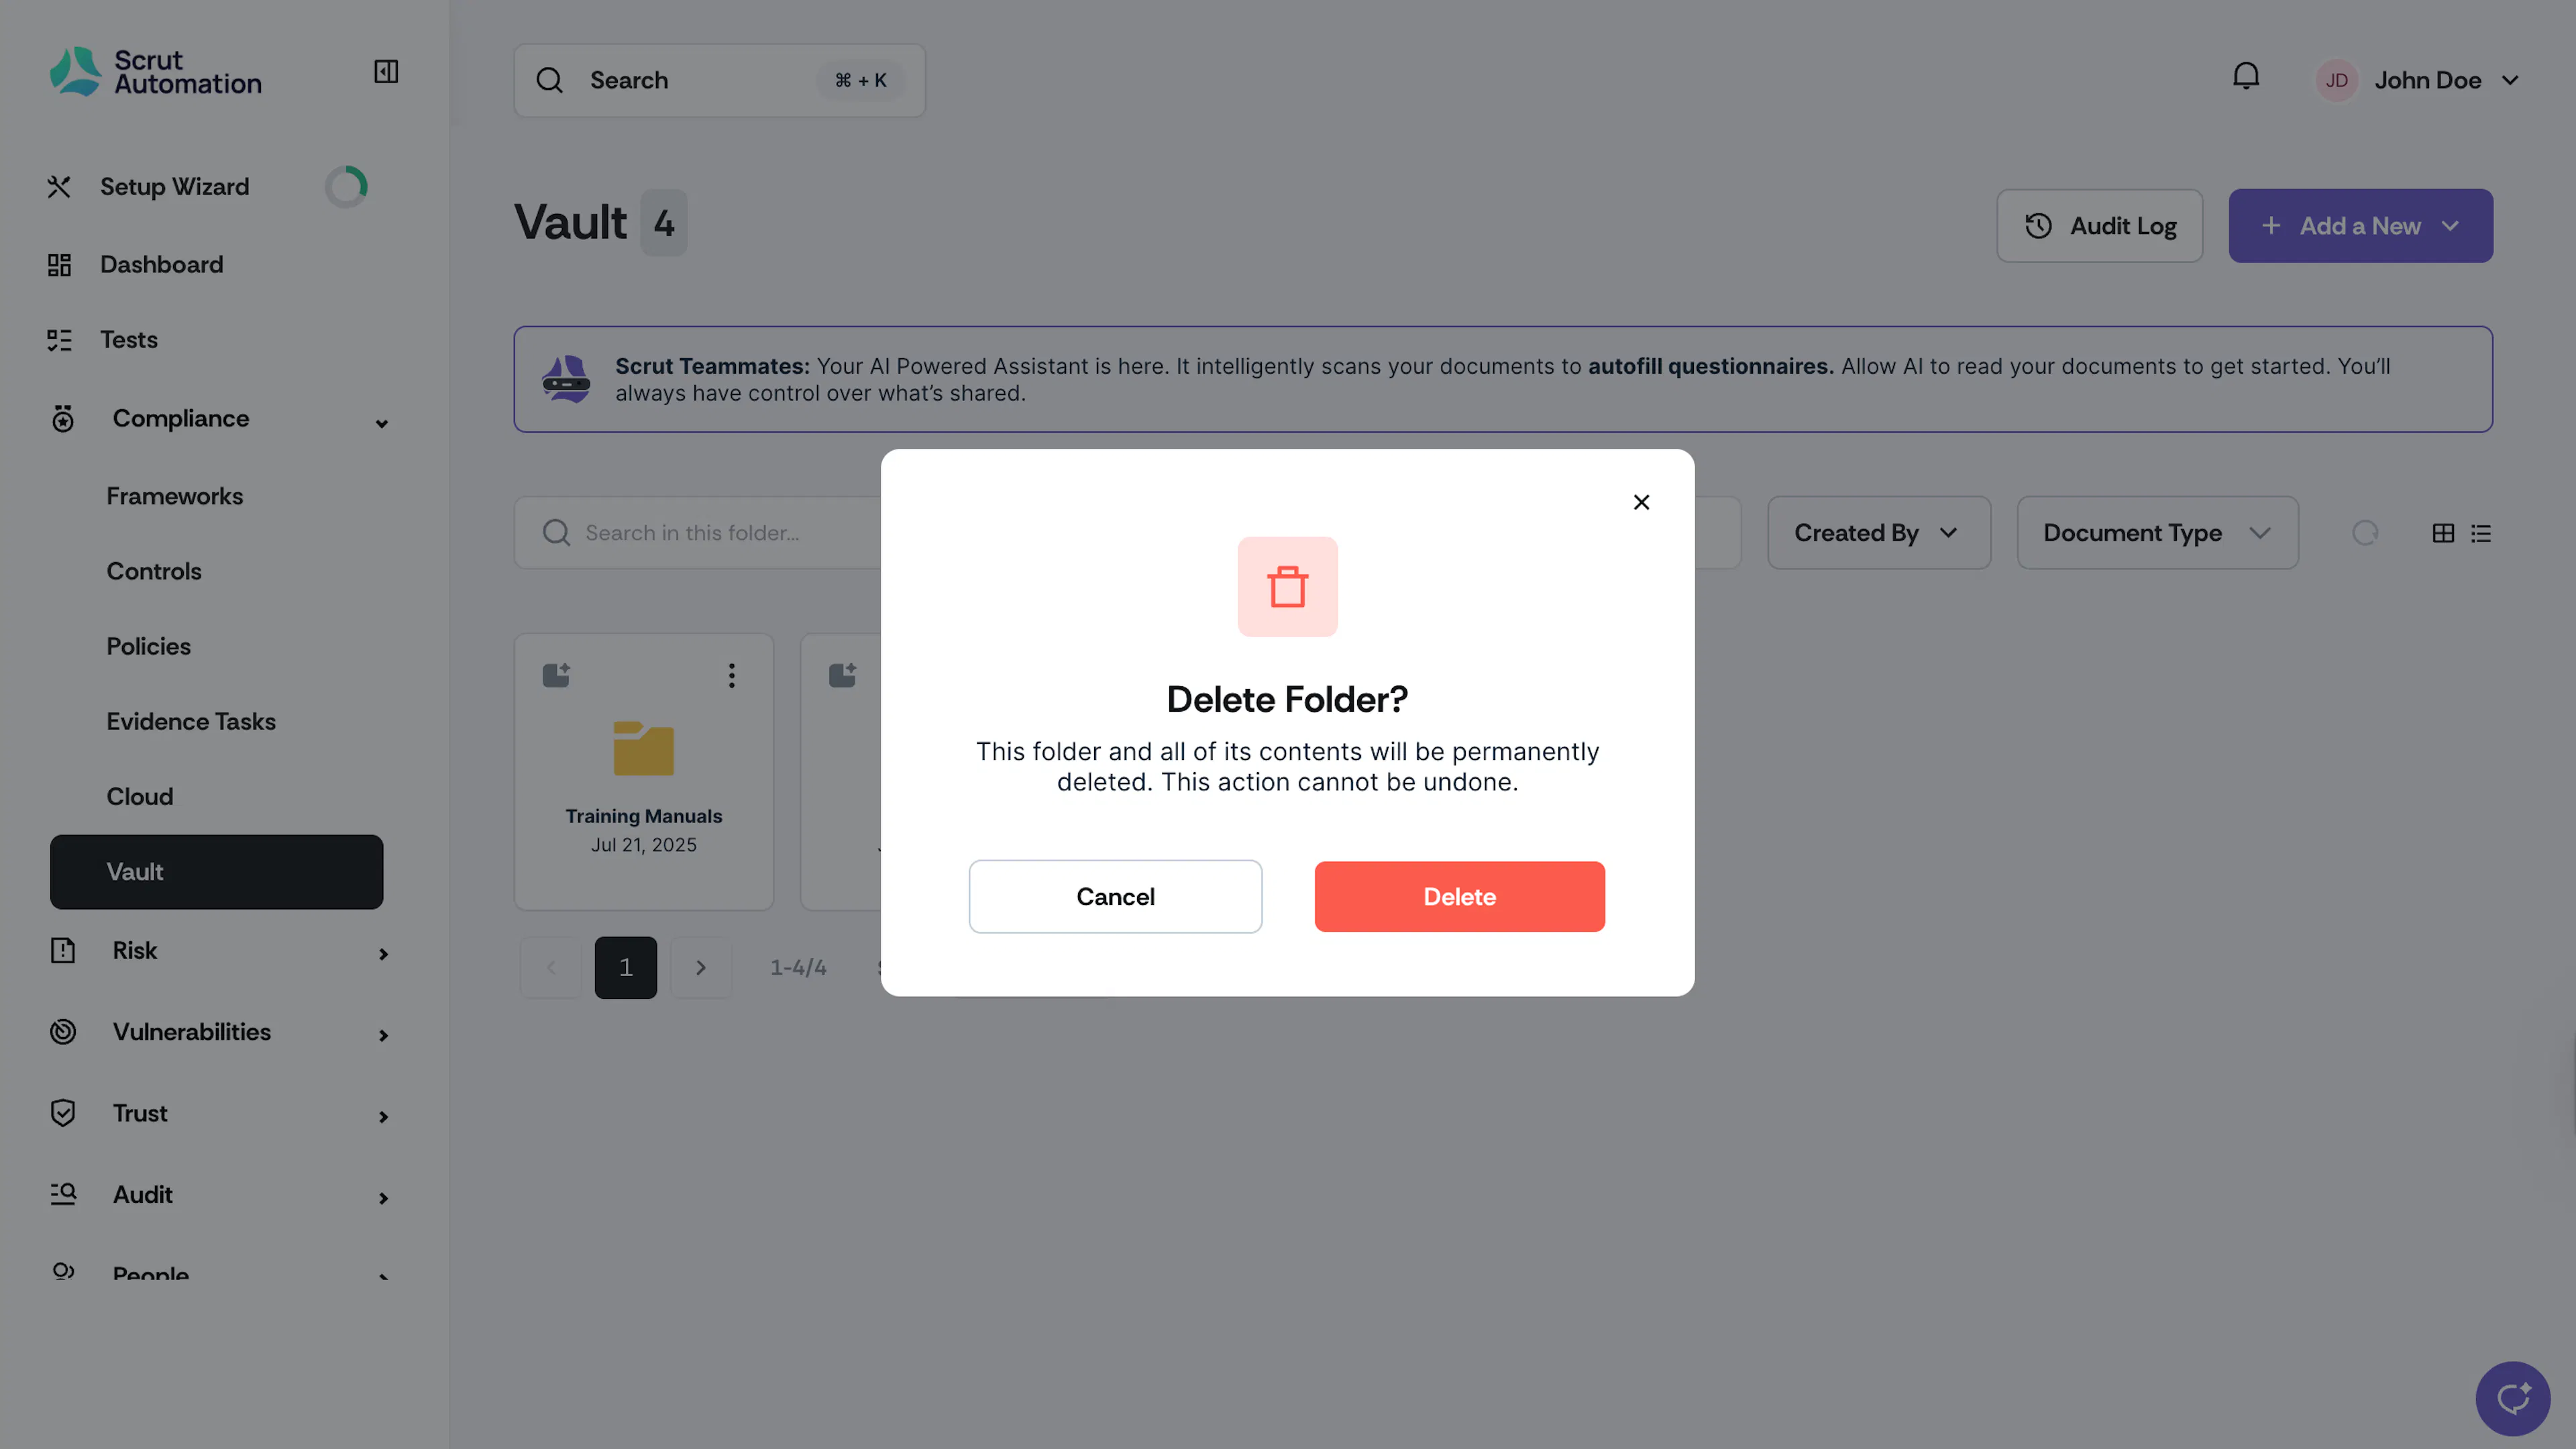
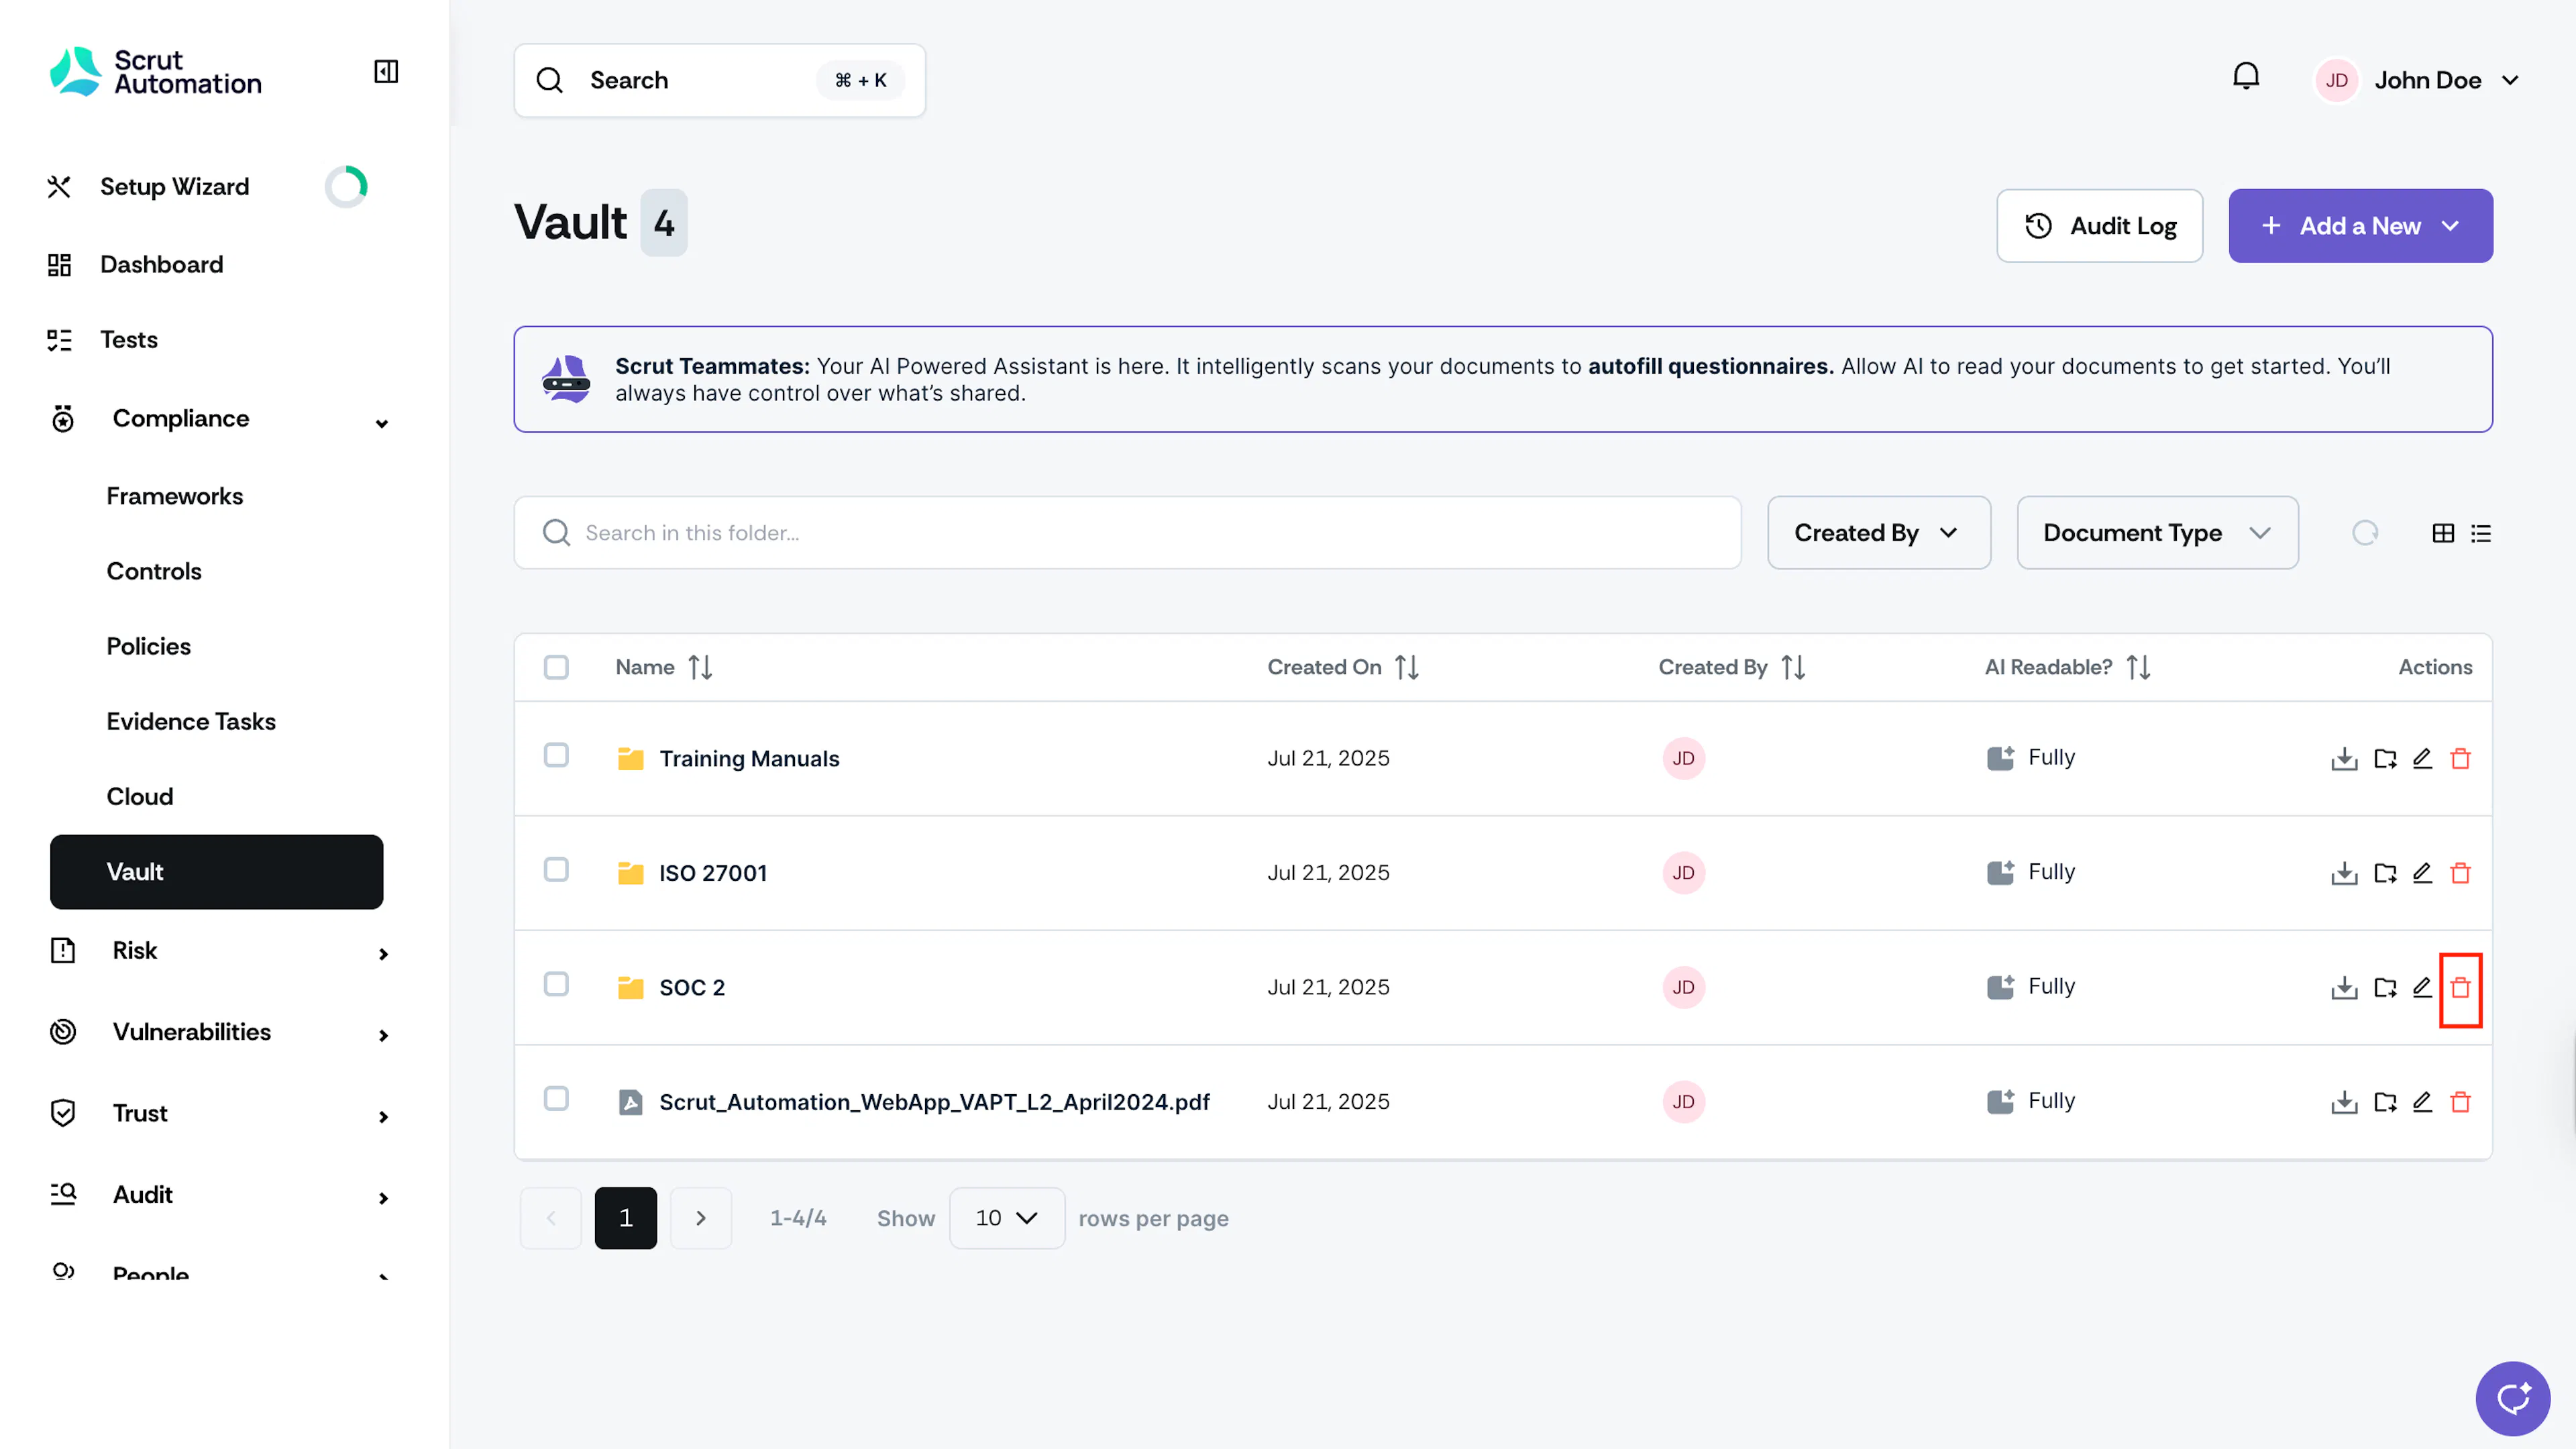
Click the trash icon next to the folder you want to delete. Click Delete to confirm.

Delete Multiple Folders & Files
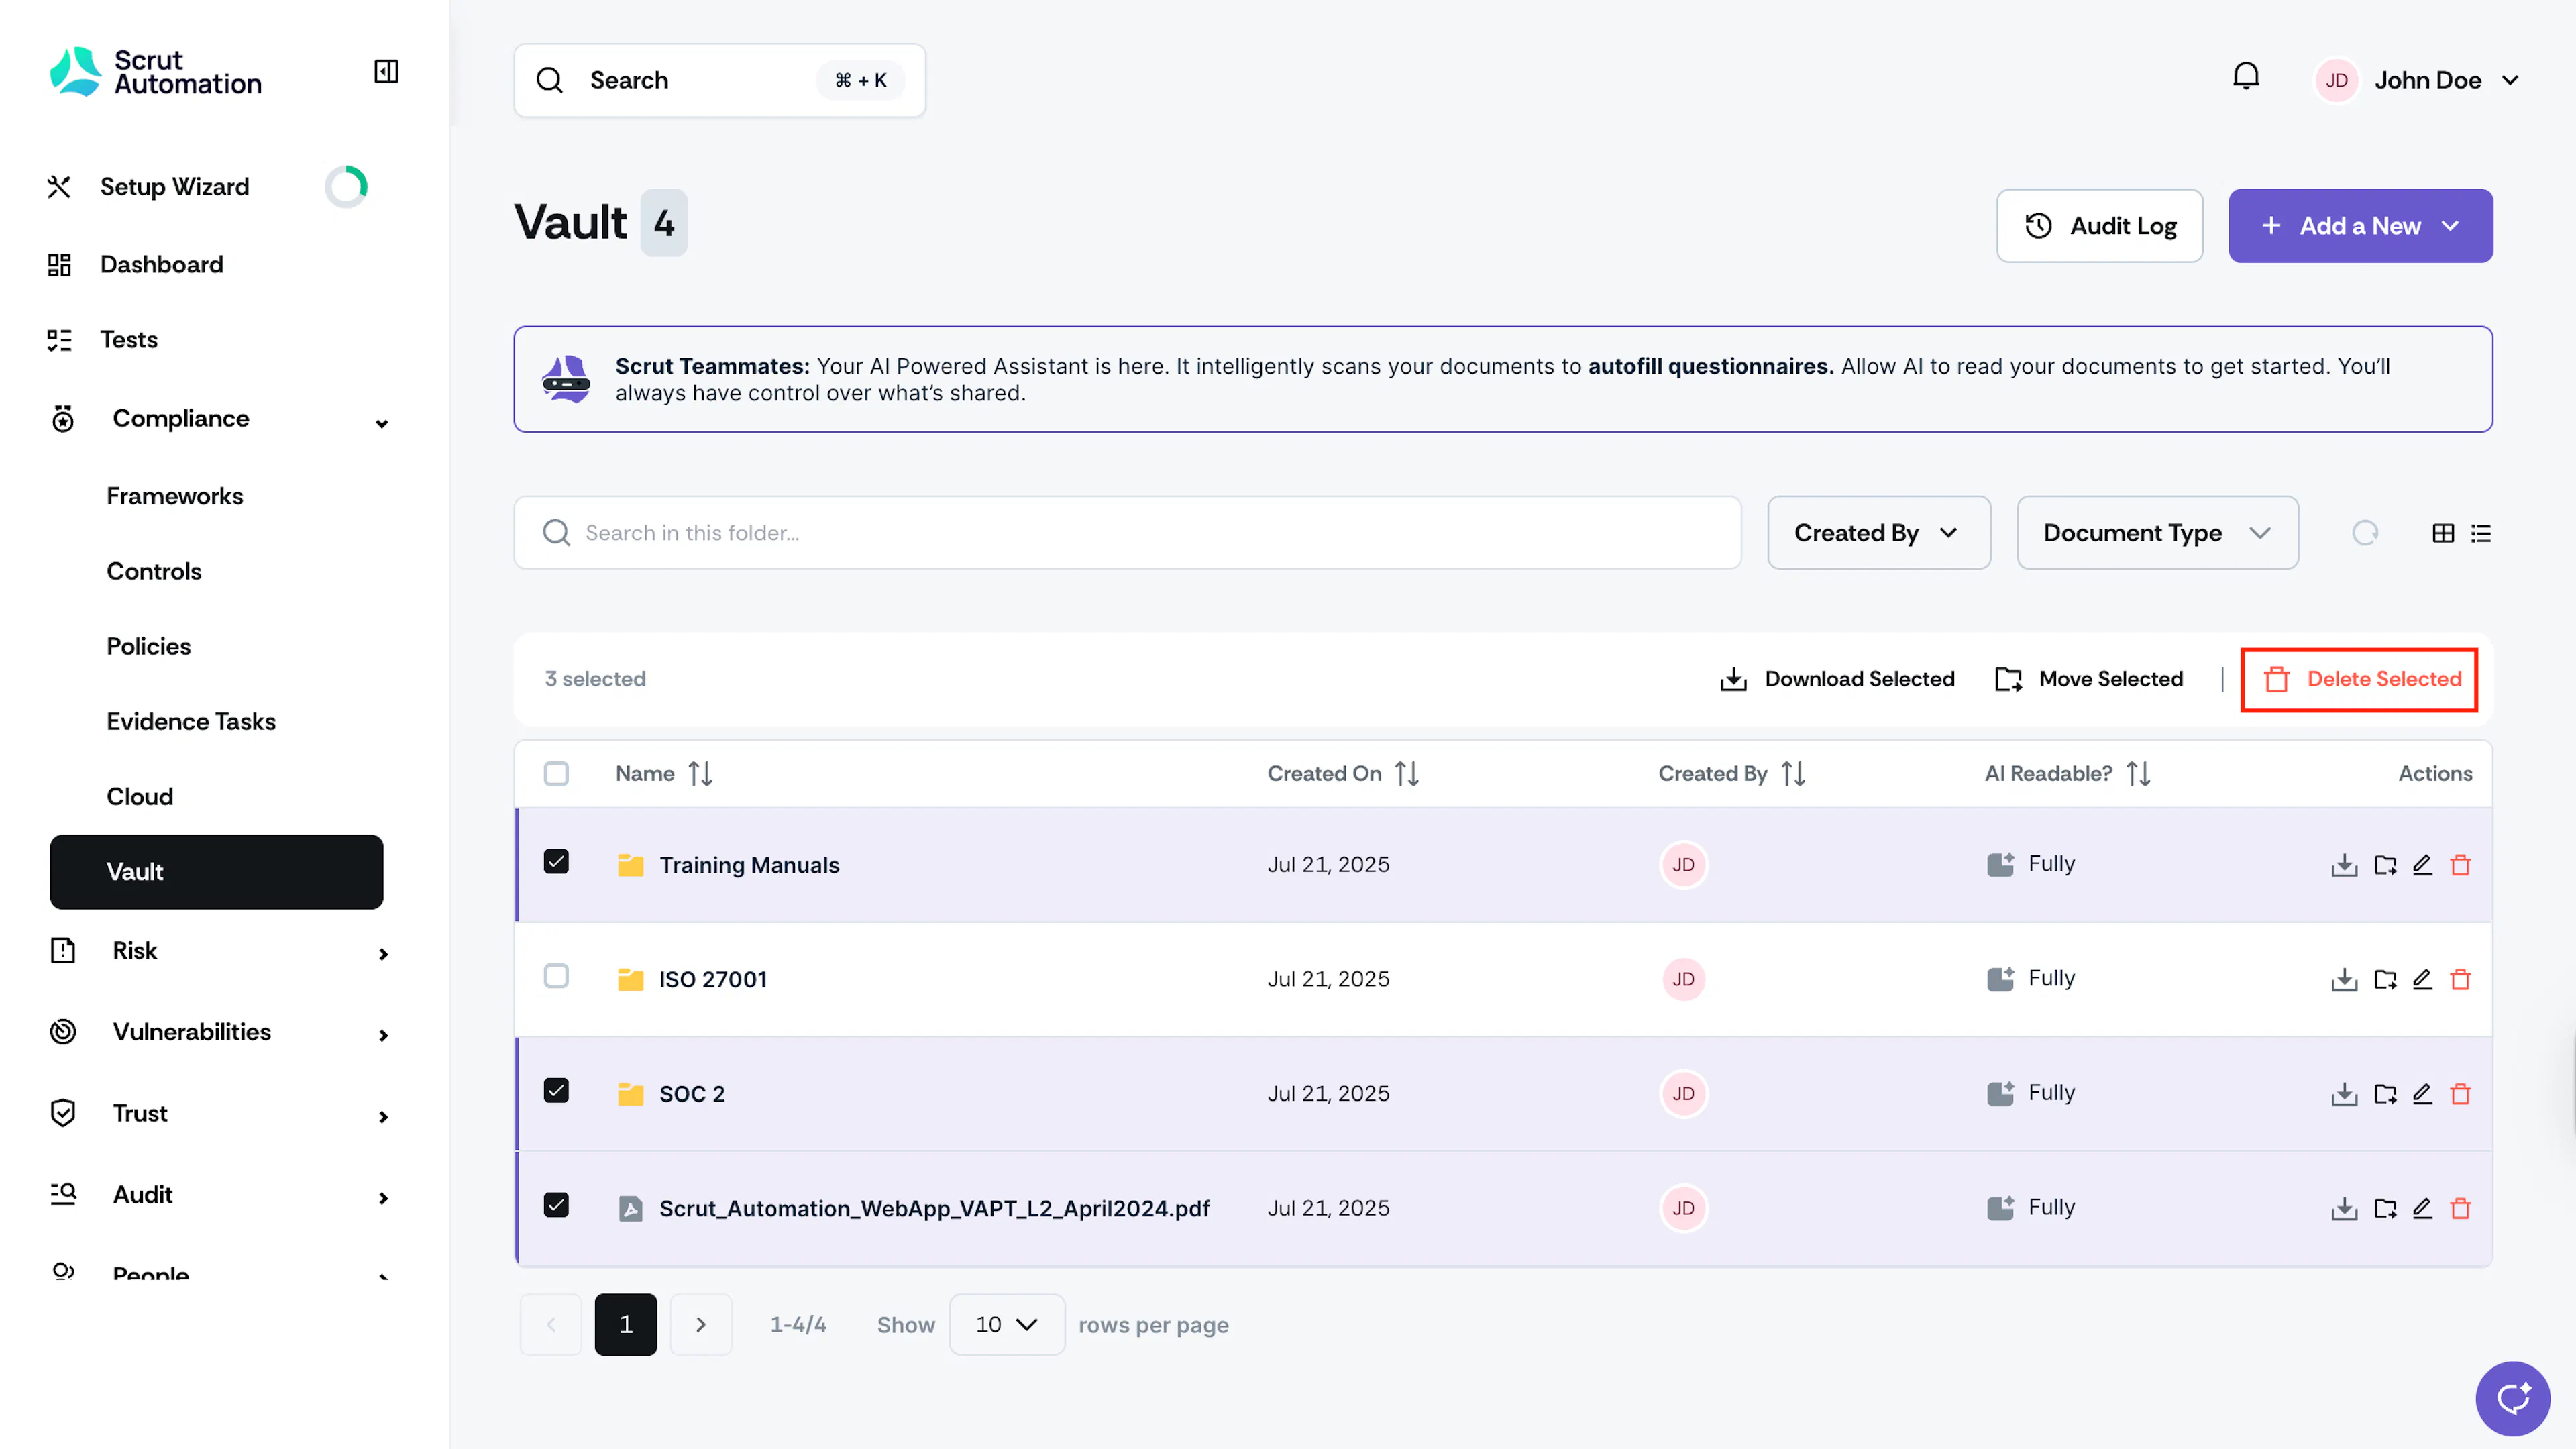
To delete multiple folders and files, follow these steps:
- To select a range (contiguous selection)
- Click the first item, then hold the Shift key and click the last item.
- All files and folders in between will be selected.
- To select separate items (non-contiguous selection)
- Click the first item, hold the Ctrl key (Windows) or Command key (macOS), and click each additional item you want to select.
- Only the items you click will be selected.
- Click the consolidated Delete Selected button at the top and confirm by clicking "Delete."
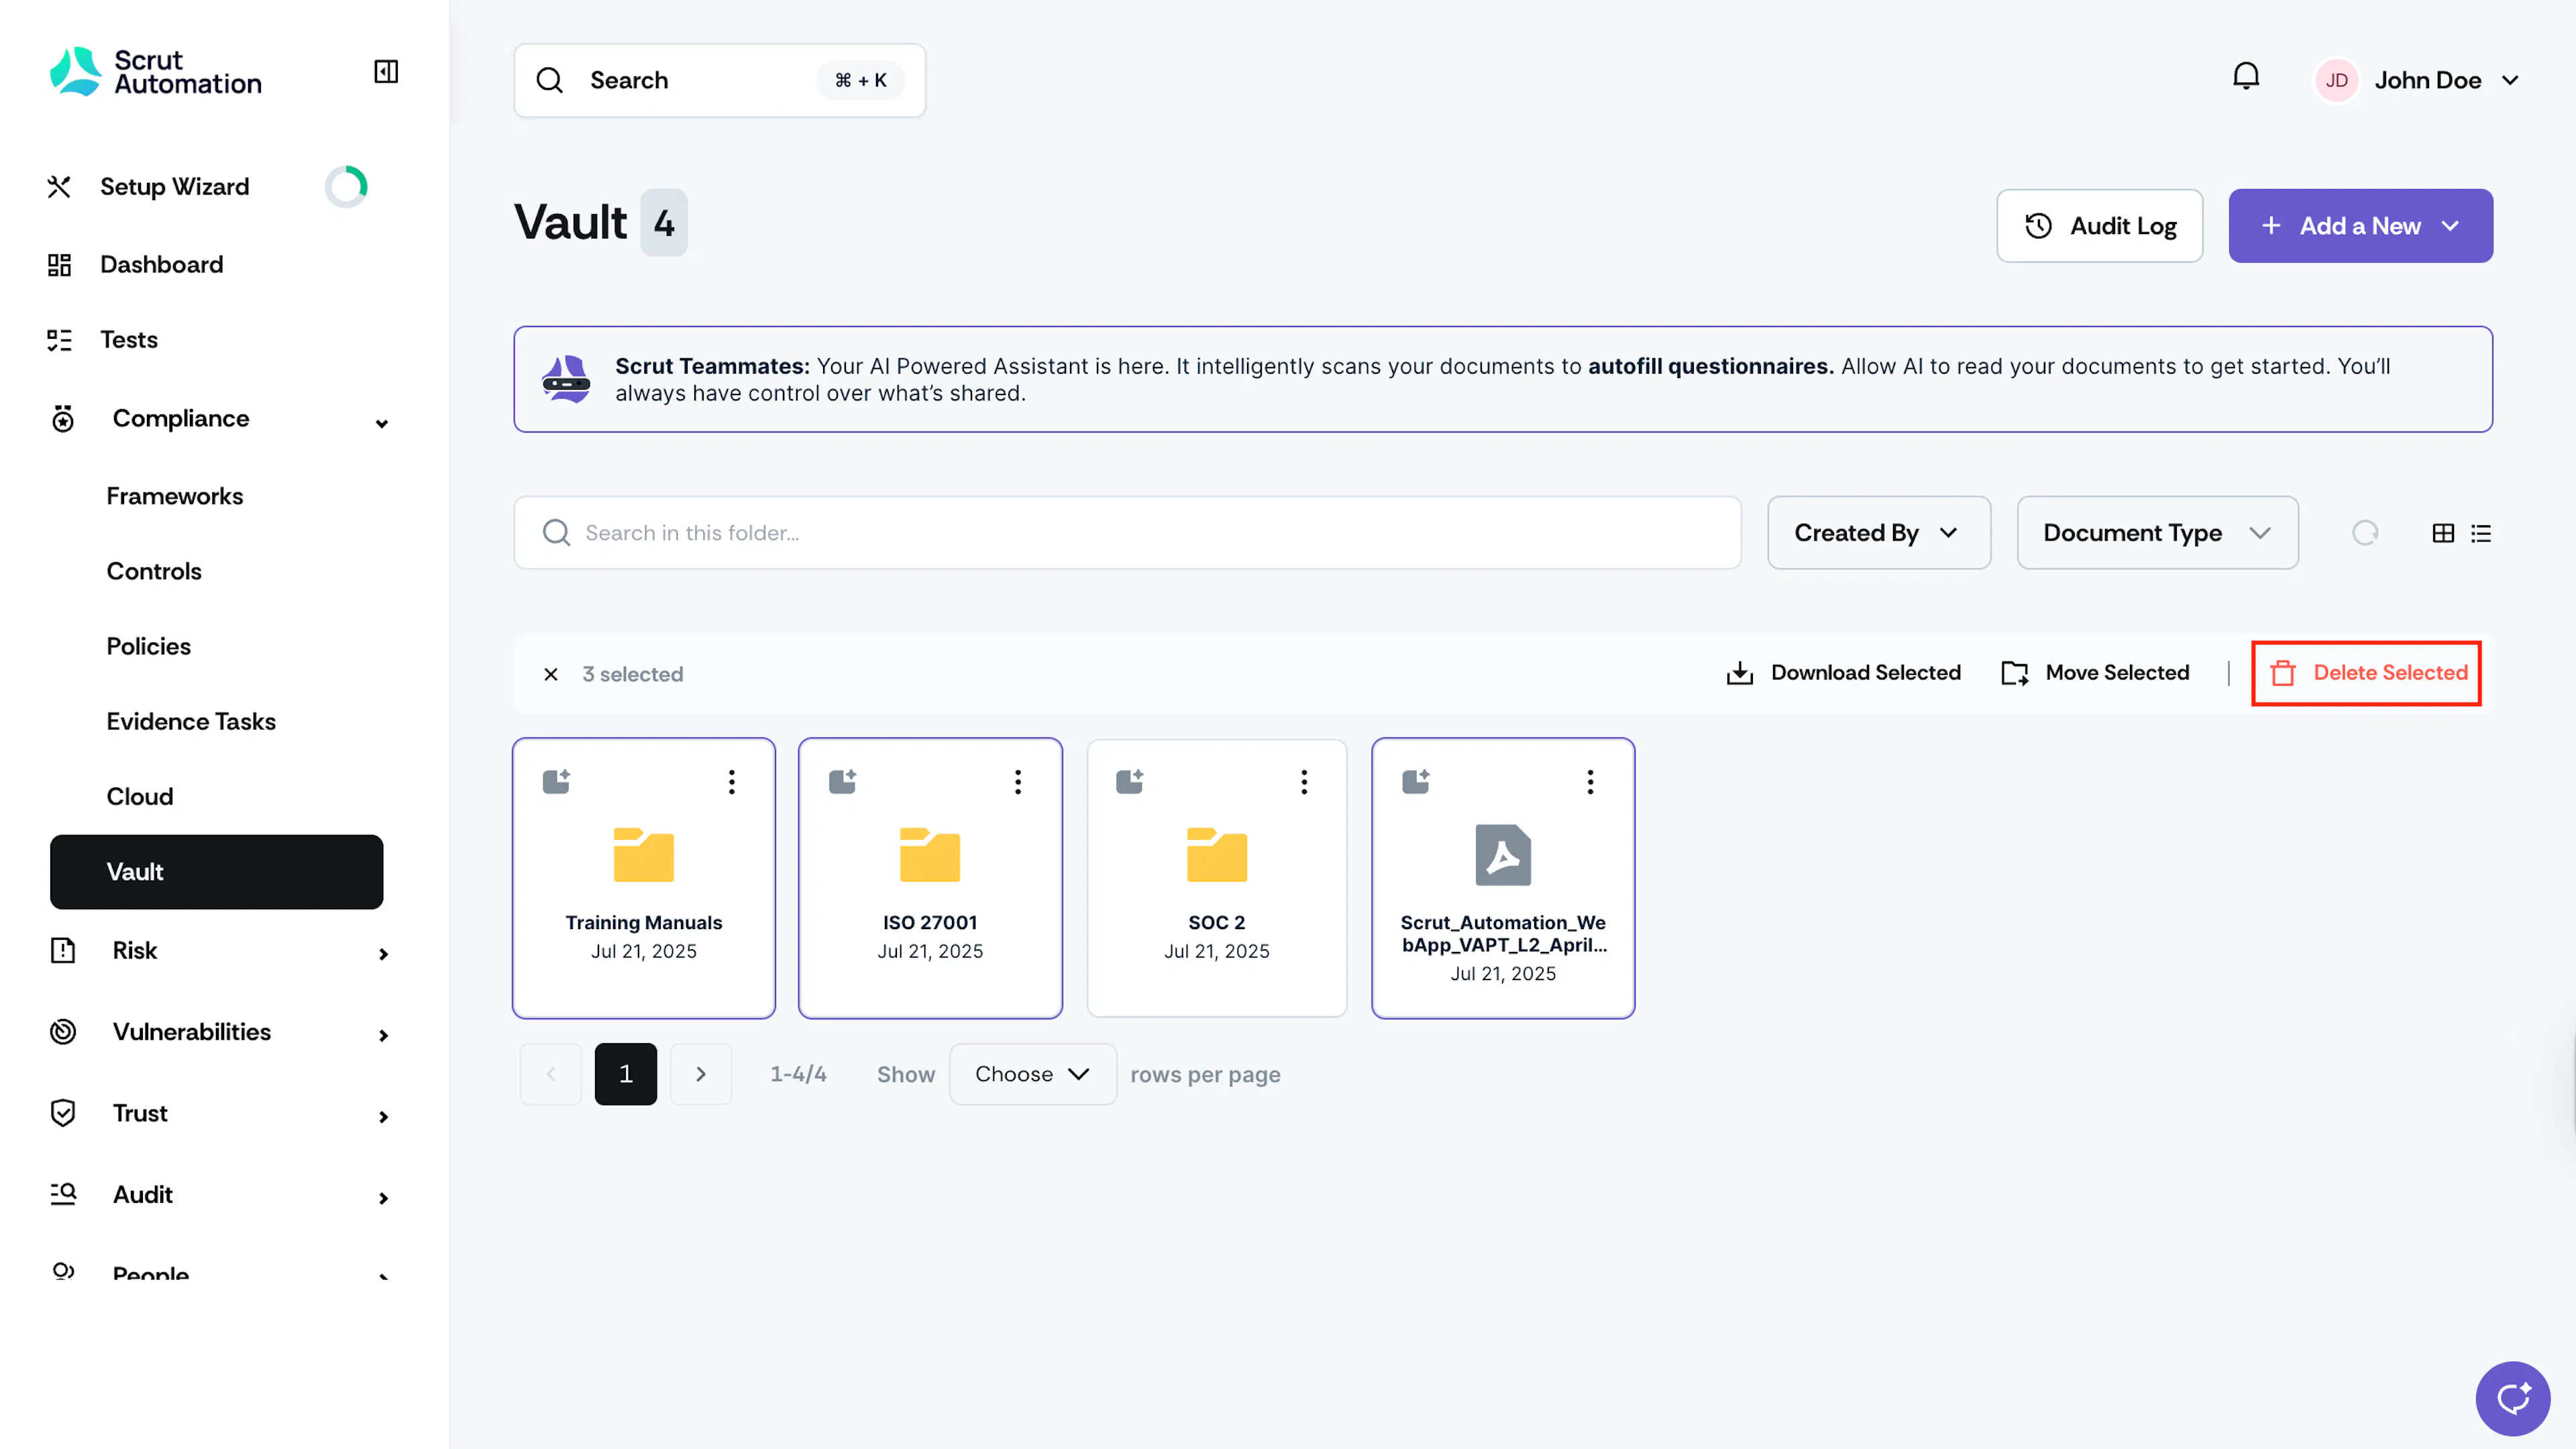
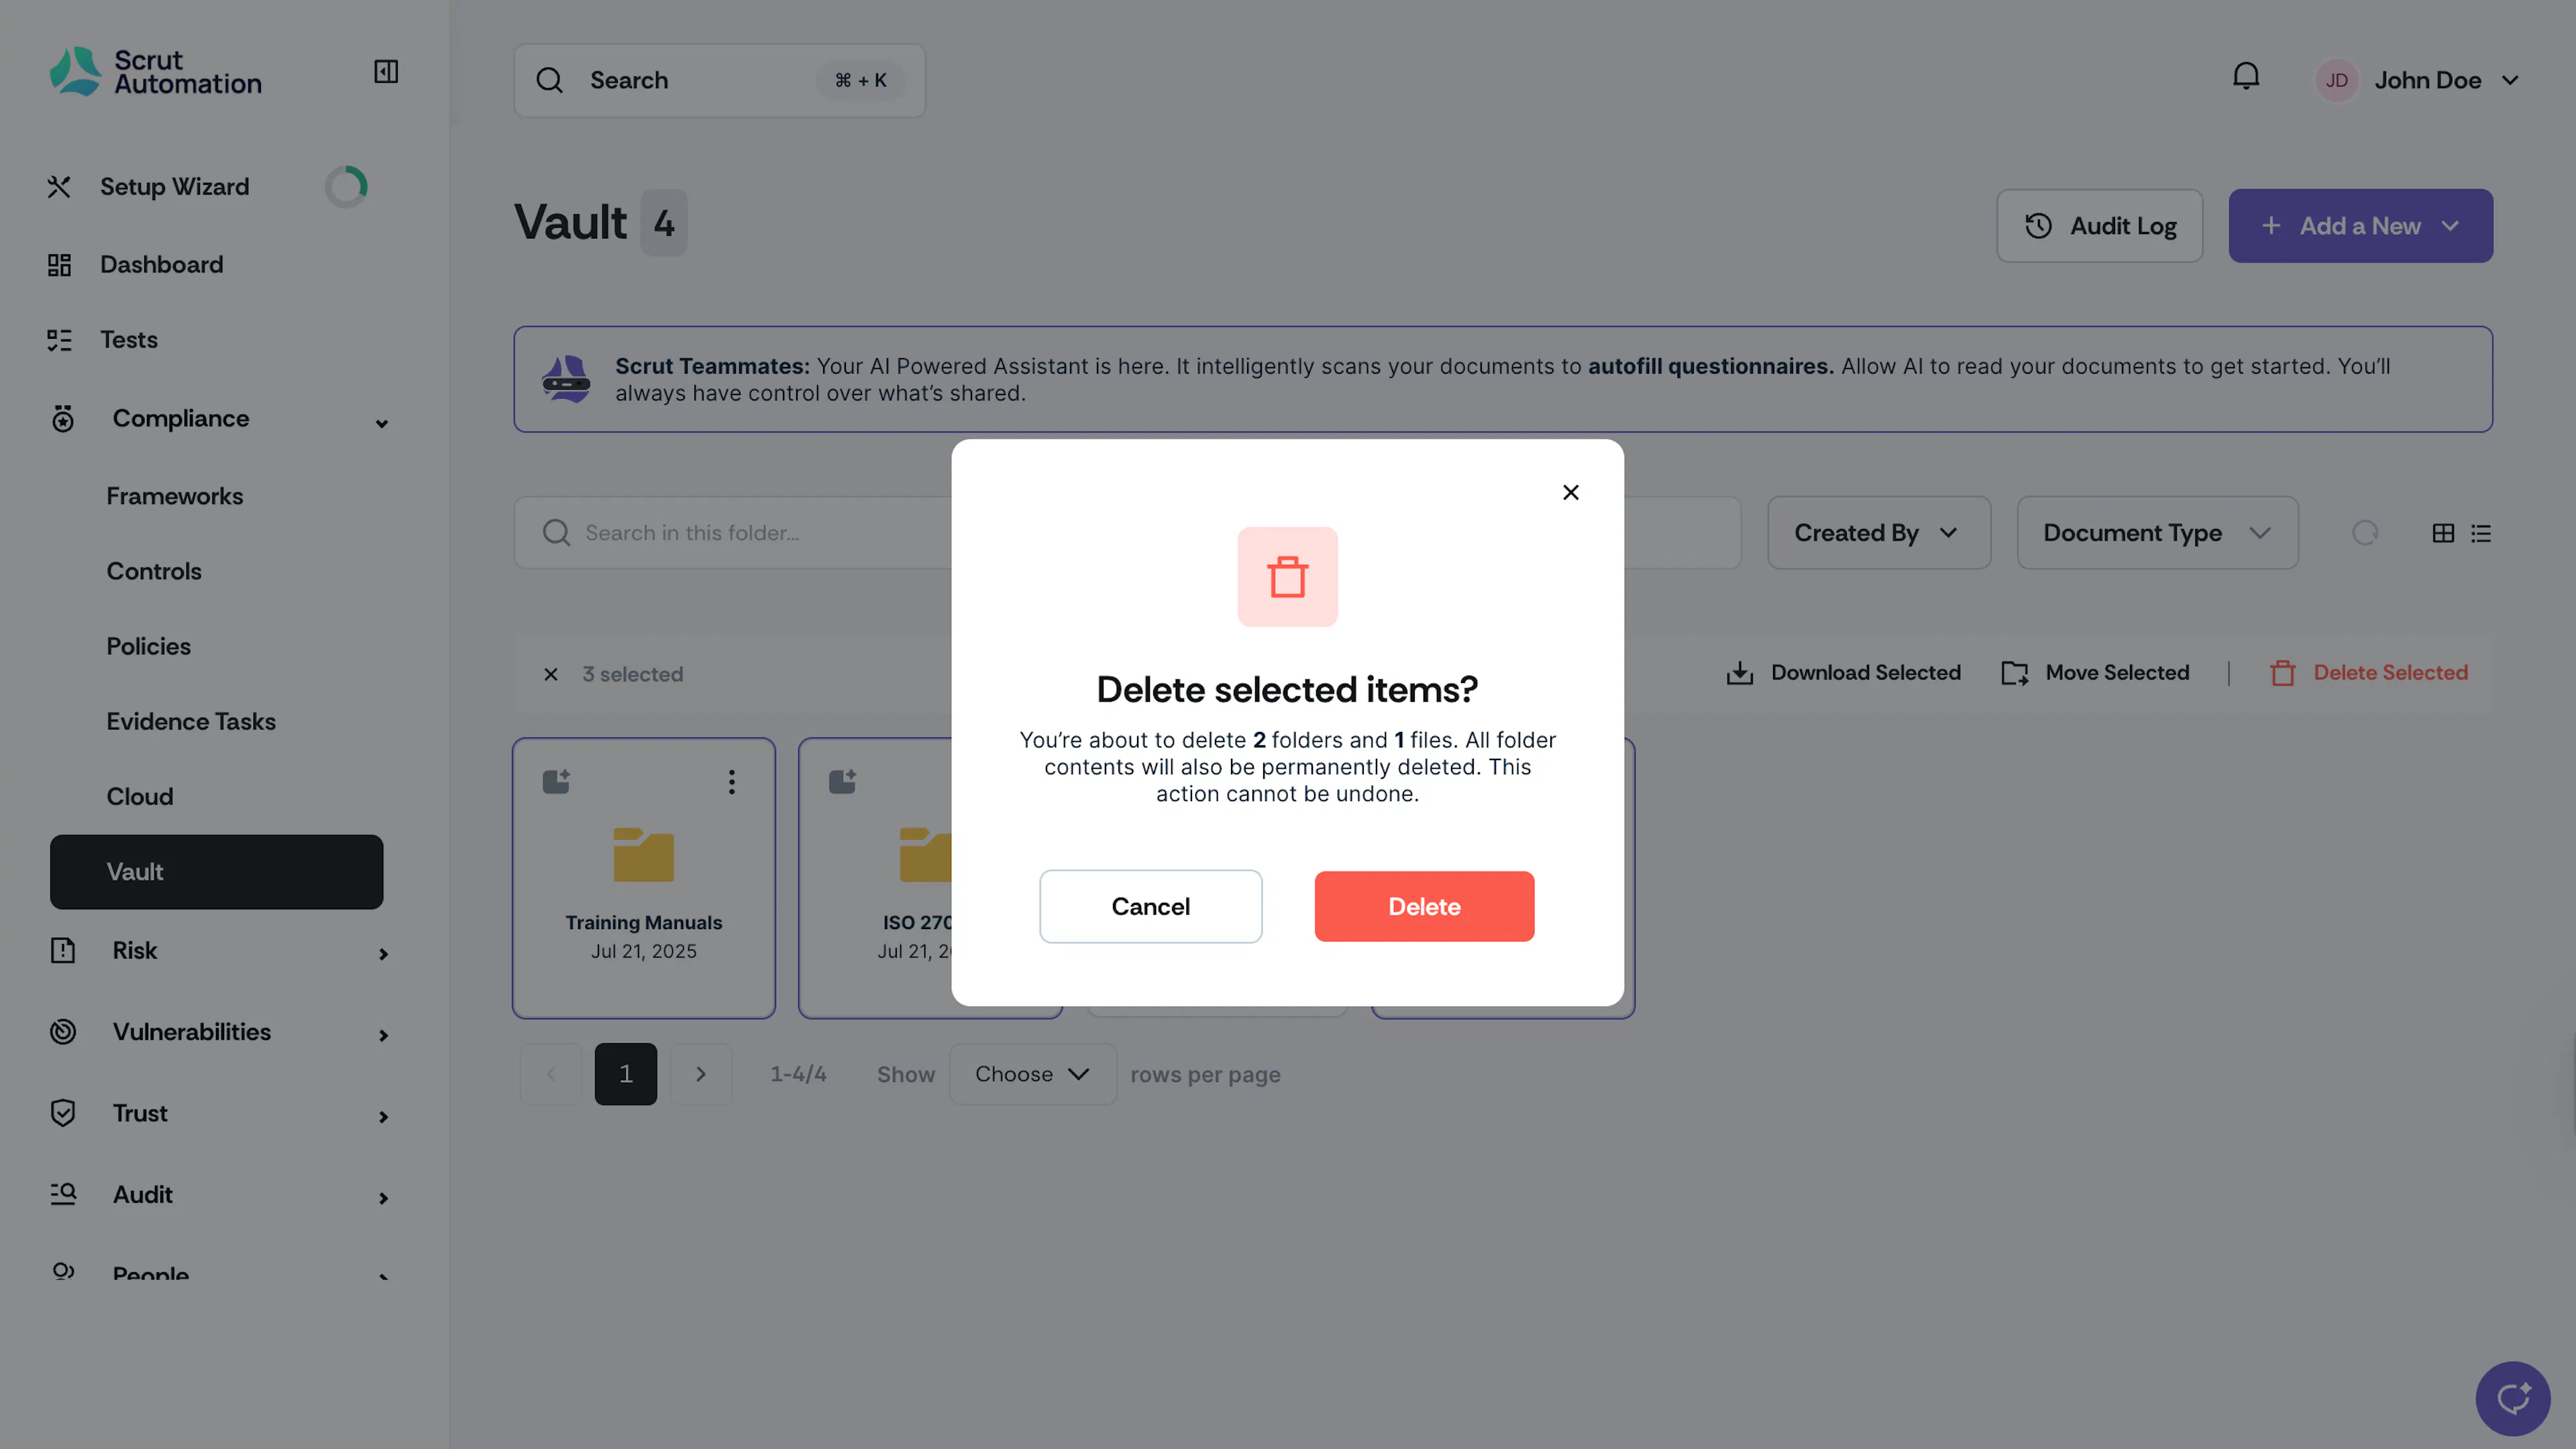
To delete multiple folders, select the checkboxes next to the folders and files you want to delete. Click the consolidated Delete Selected button at the top. Click Delete to confirm your action.
Managing Documents
You can upload documents to the following locations:
Upload Directly to the Vault (Root Folder)
- Navigate to the Vault module, click the Add button and select Document.
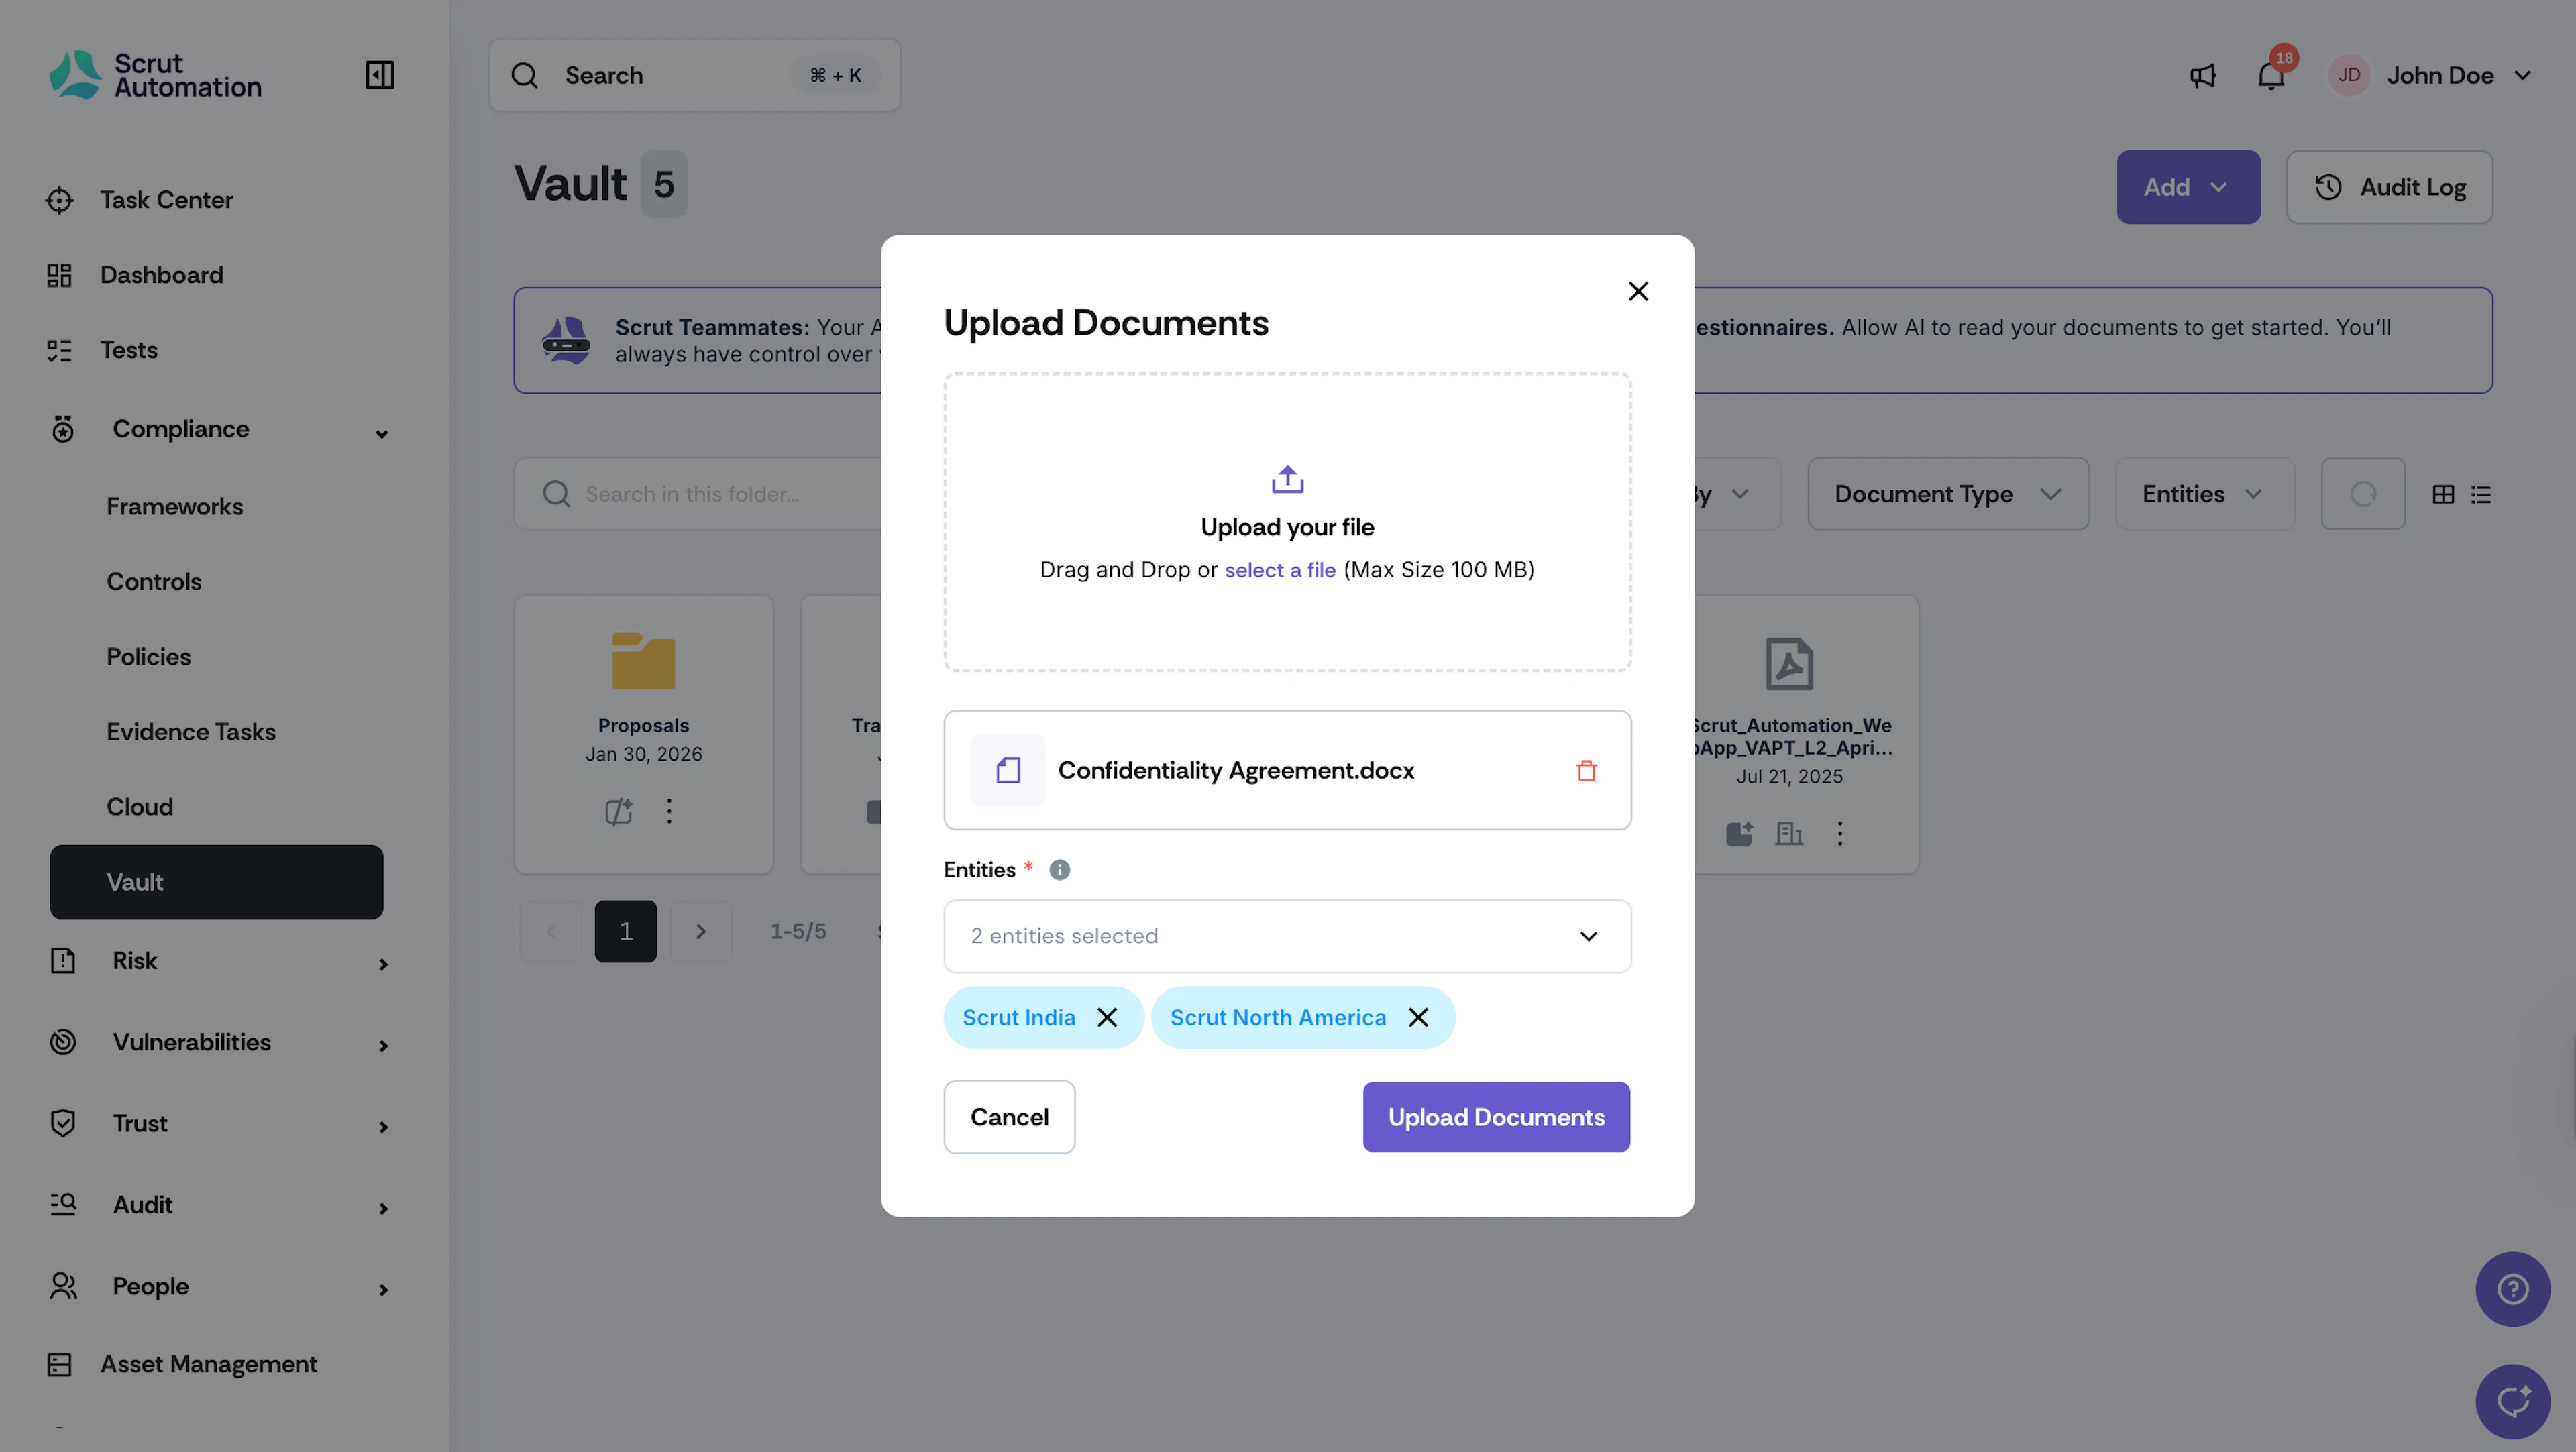
- Select and upload your desired file. (Maximum size: 100 MB). Supported file types include PDF, Word, Excel, images, text files, Markdown (.md), and YAML (.yaml, .yml) files. If you upload an unsupported file type, Scrut shows an error explaining why it rejected the file.
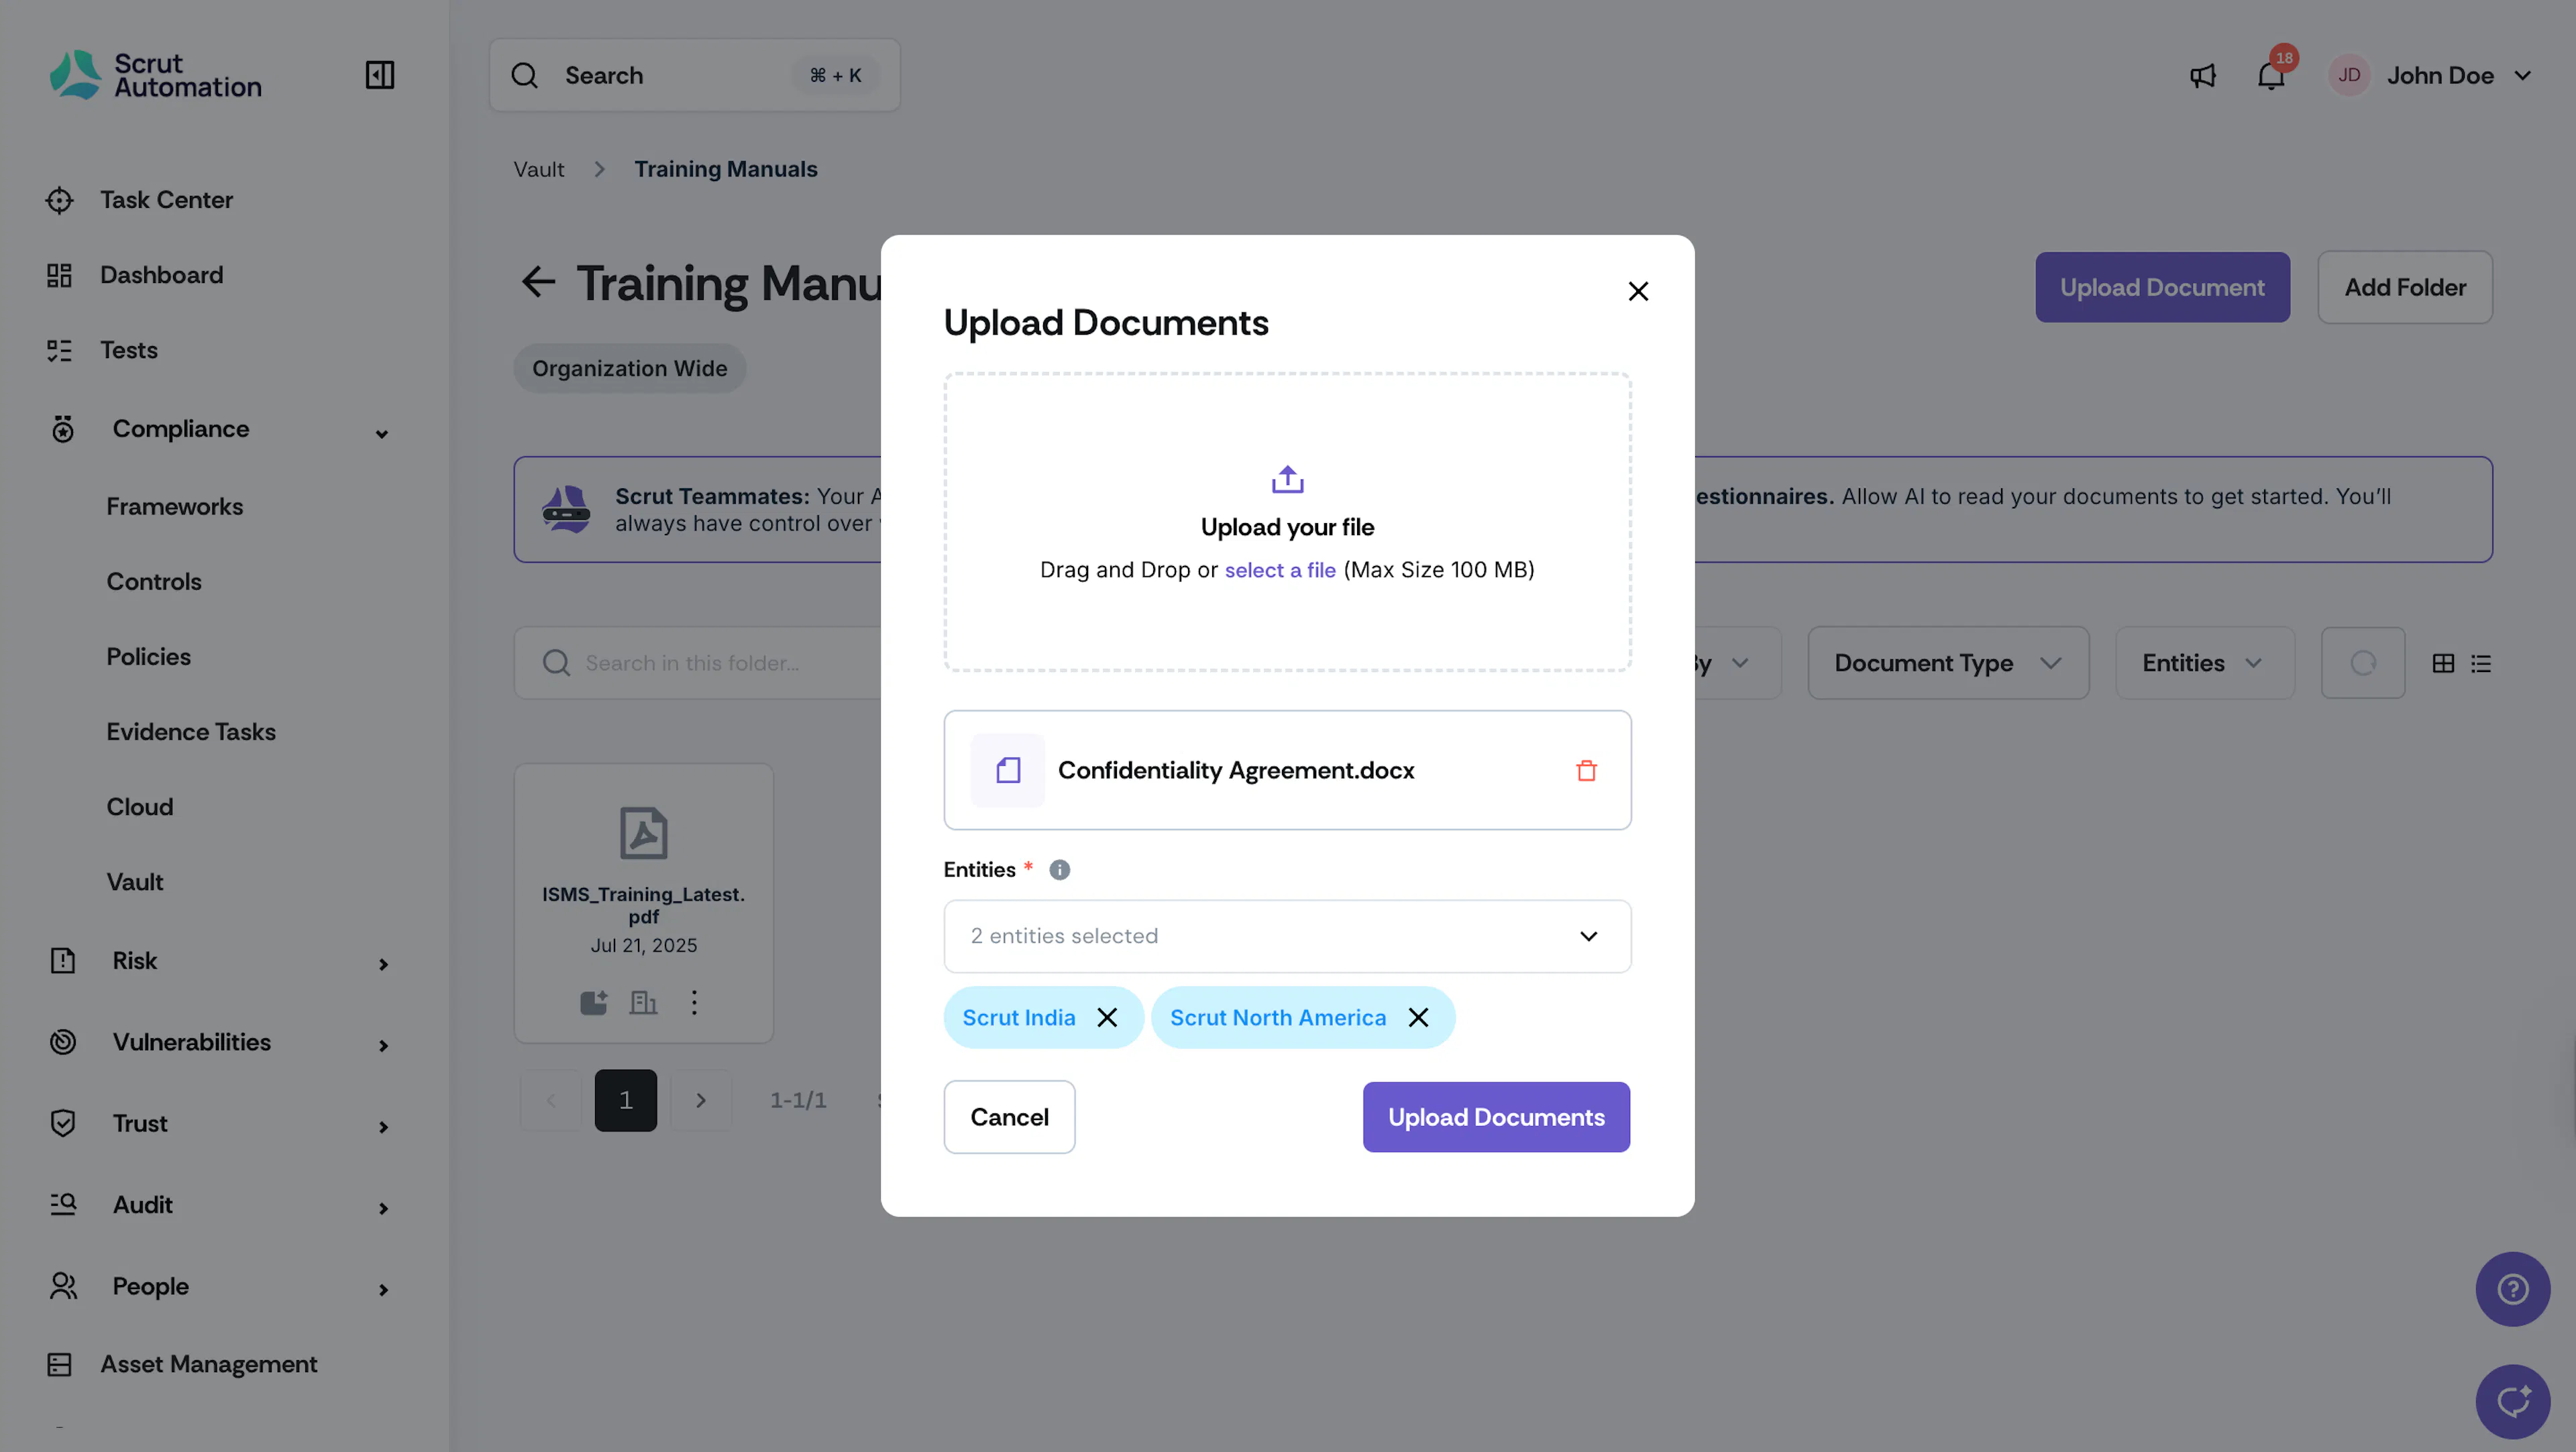
- Choose the entities for which you want to make this document accessible. By default, organization wide is pre-selected and the document will be accessible by all entities.
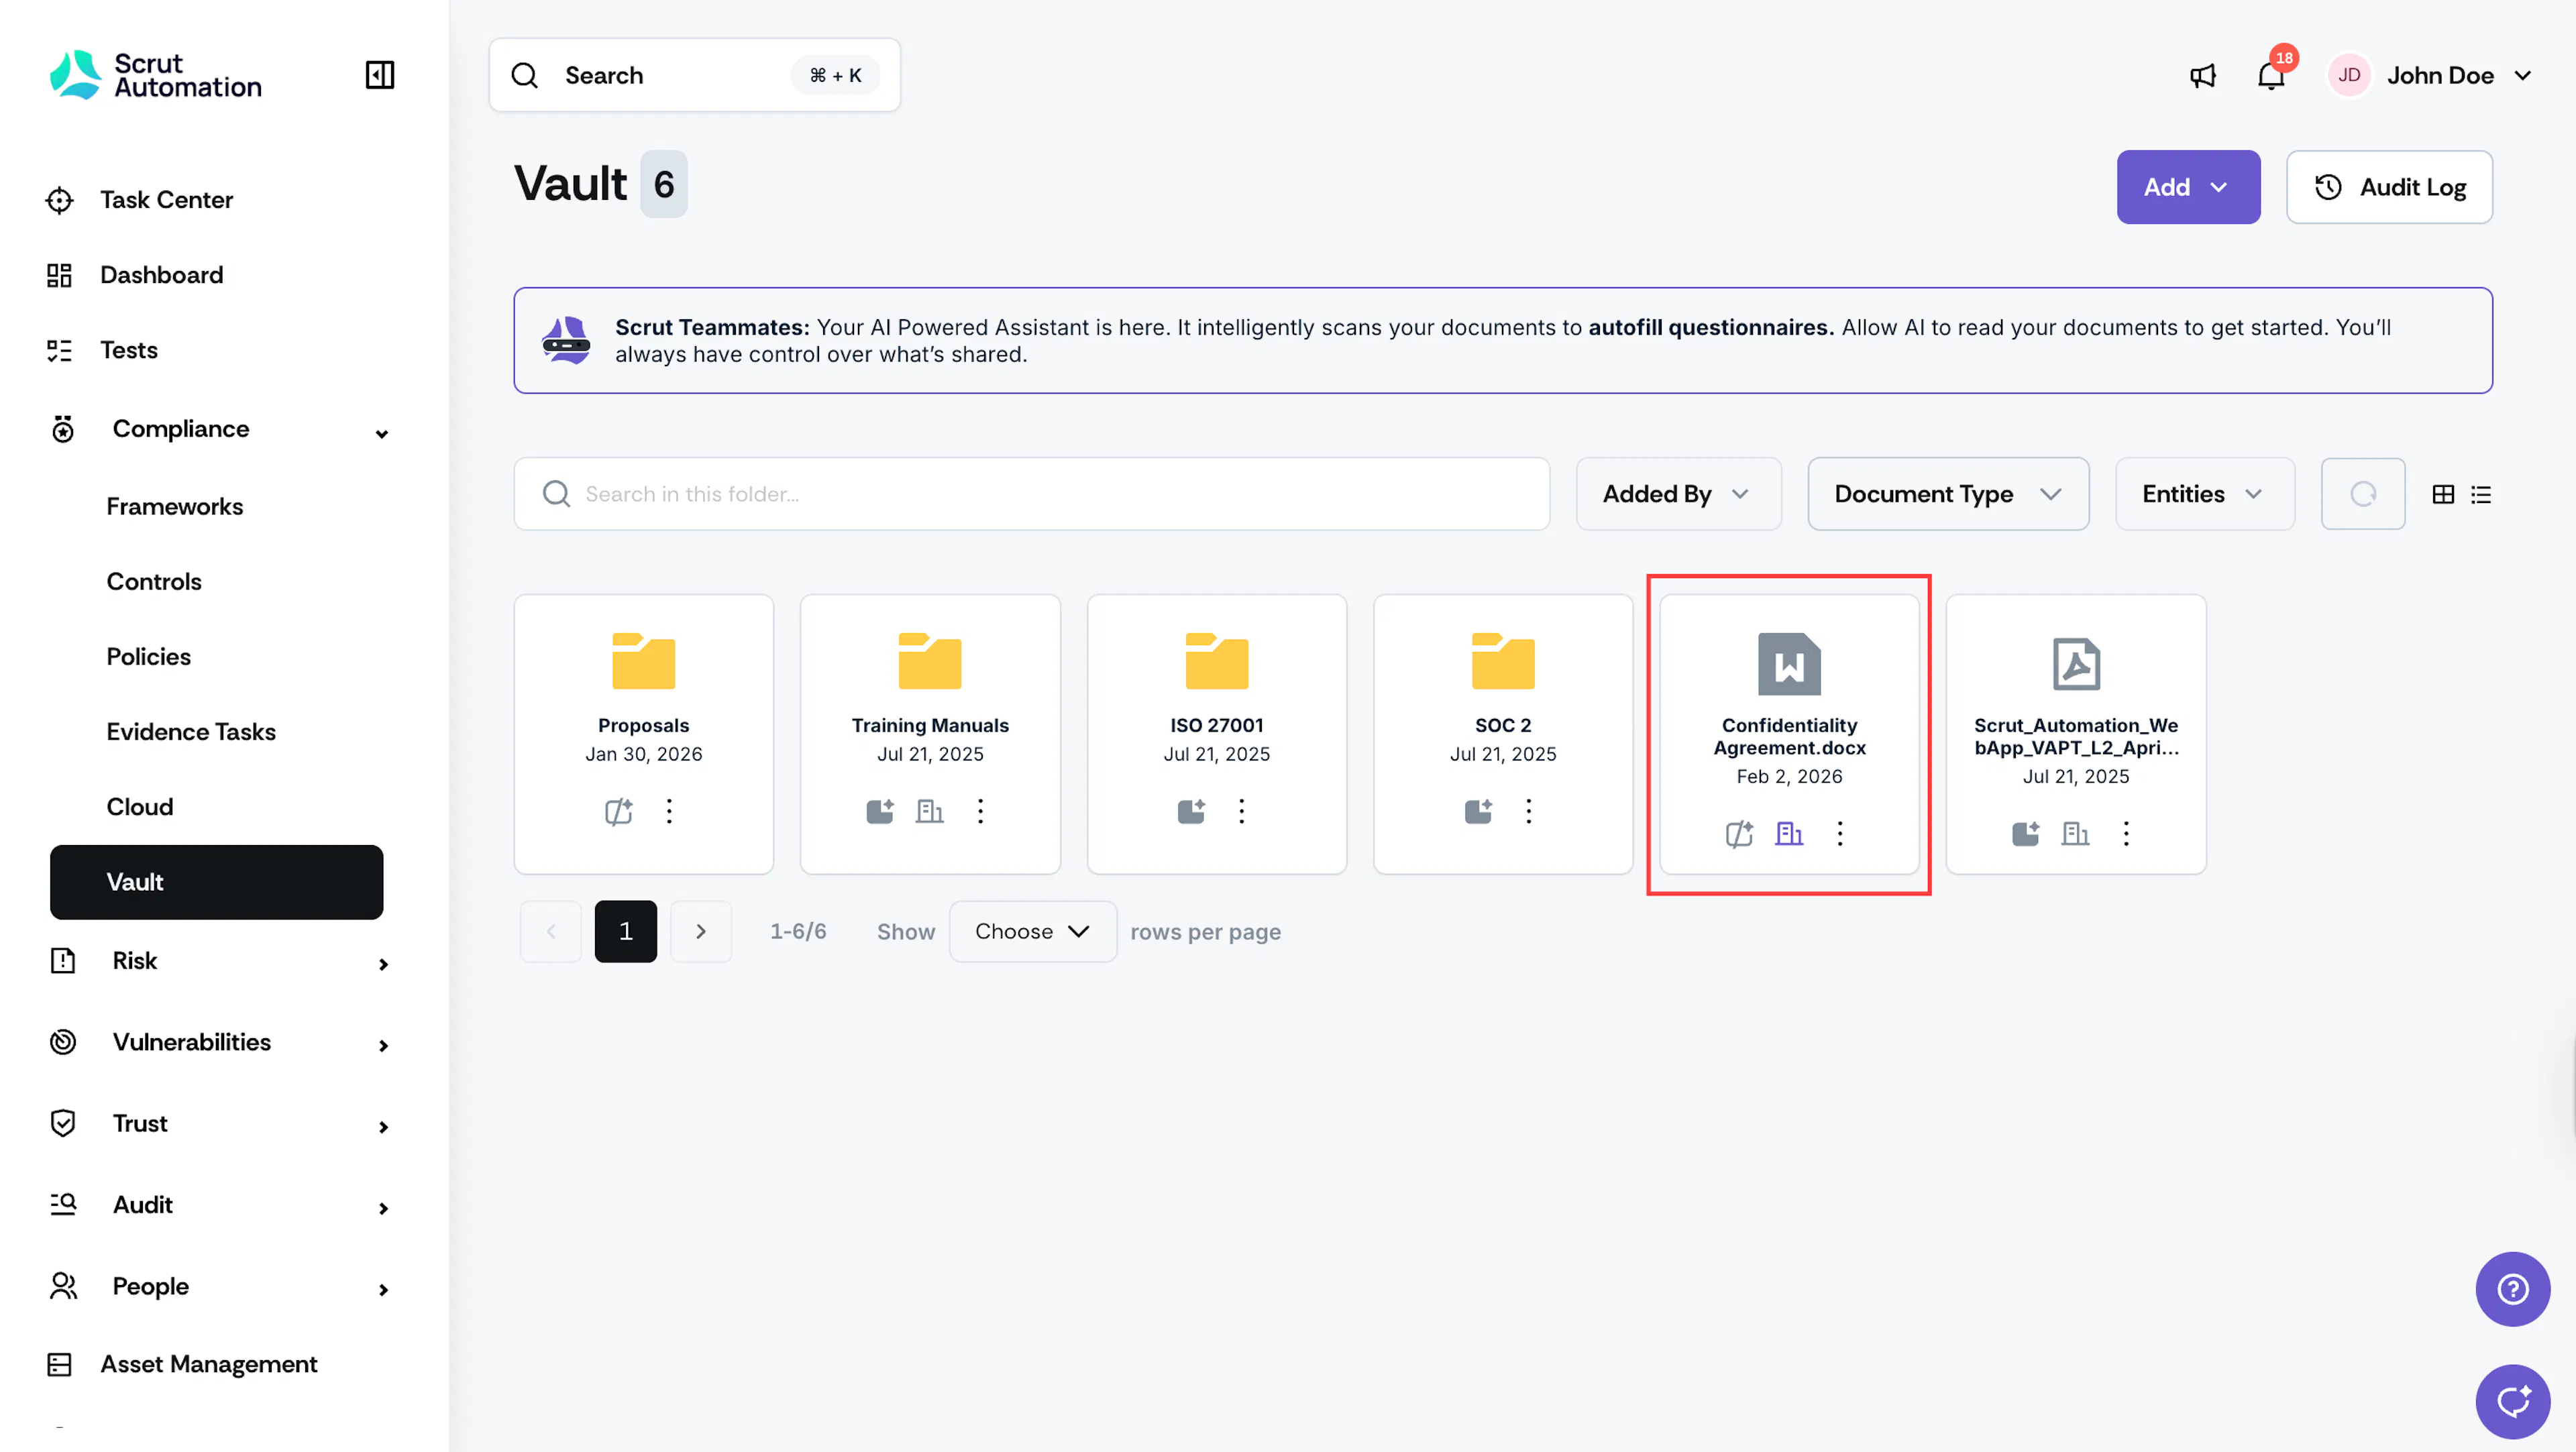
- This adds the document directly to the vault's root folder.
Upload to a Folder or Sub-folder
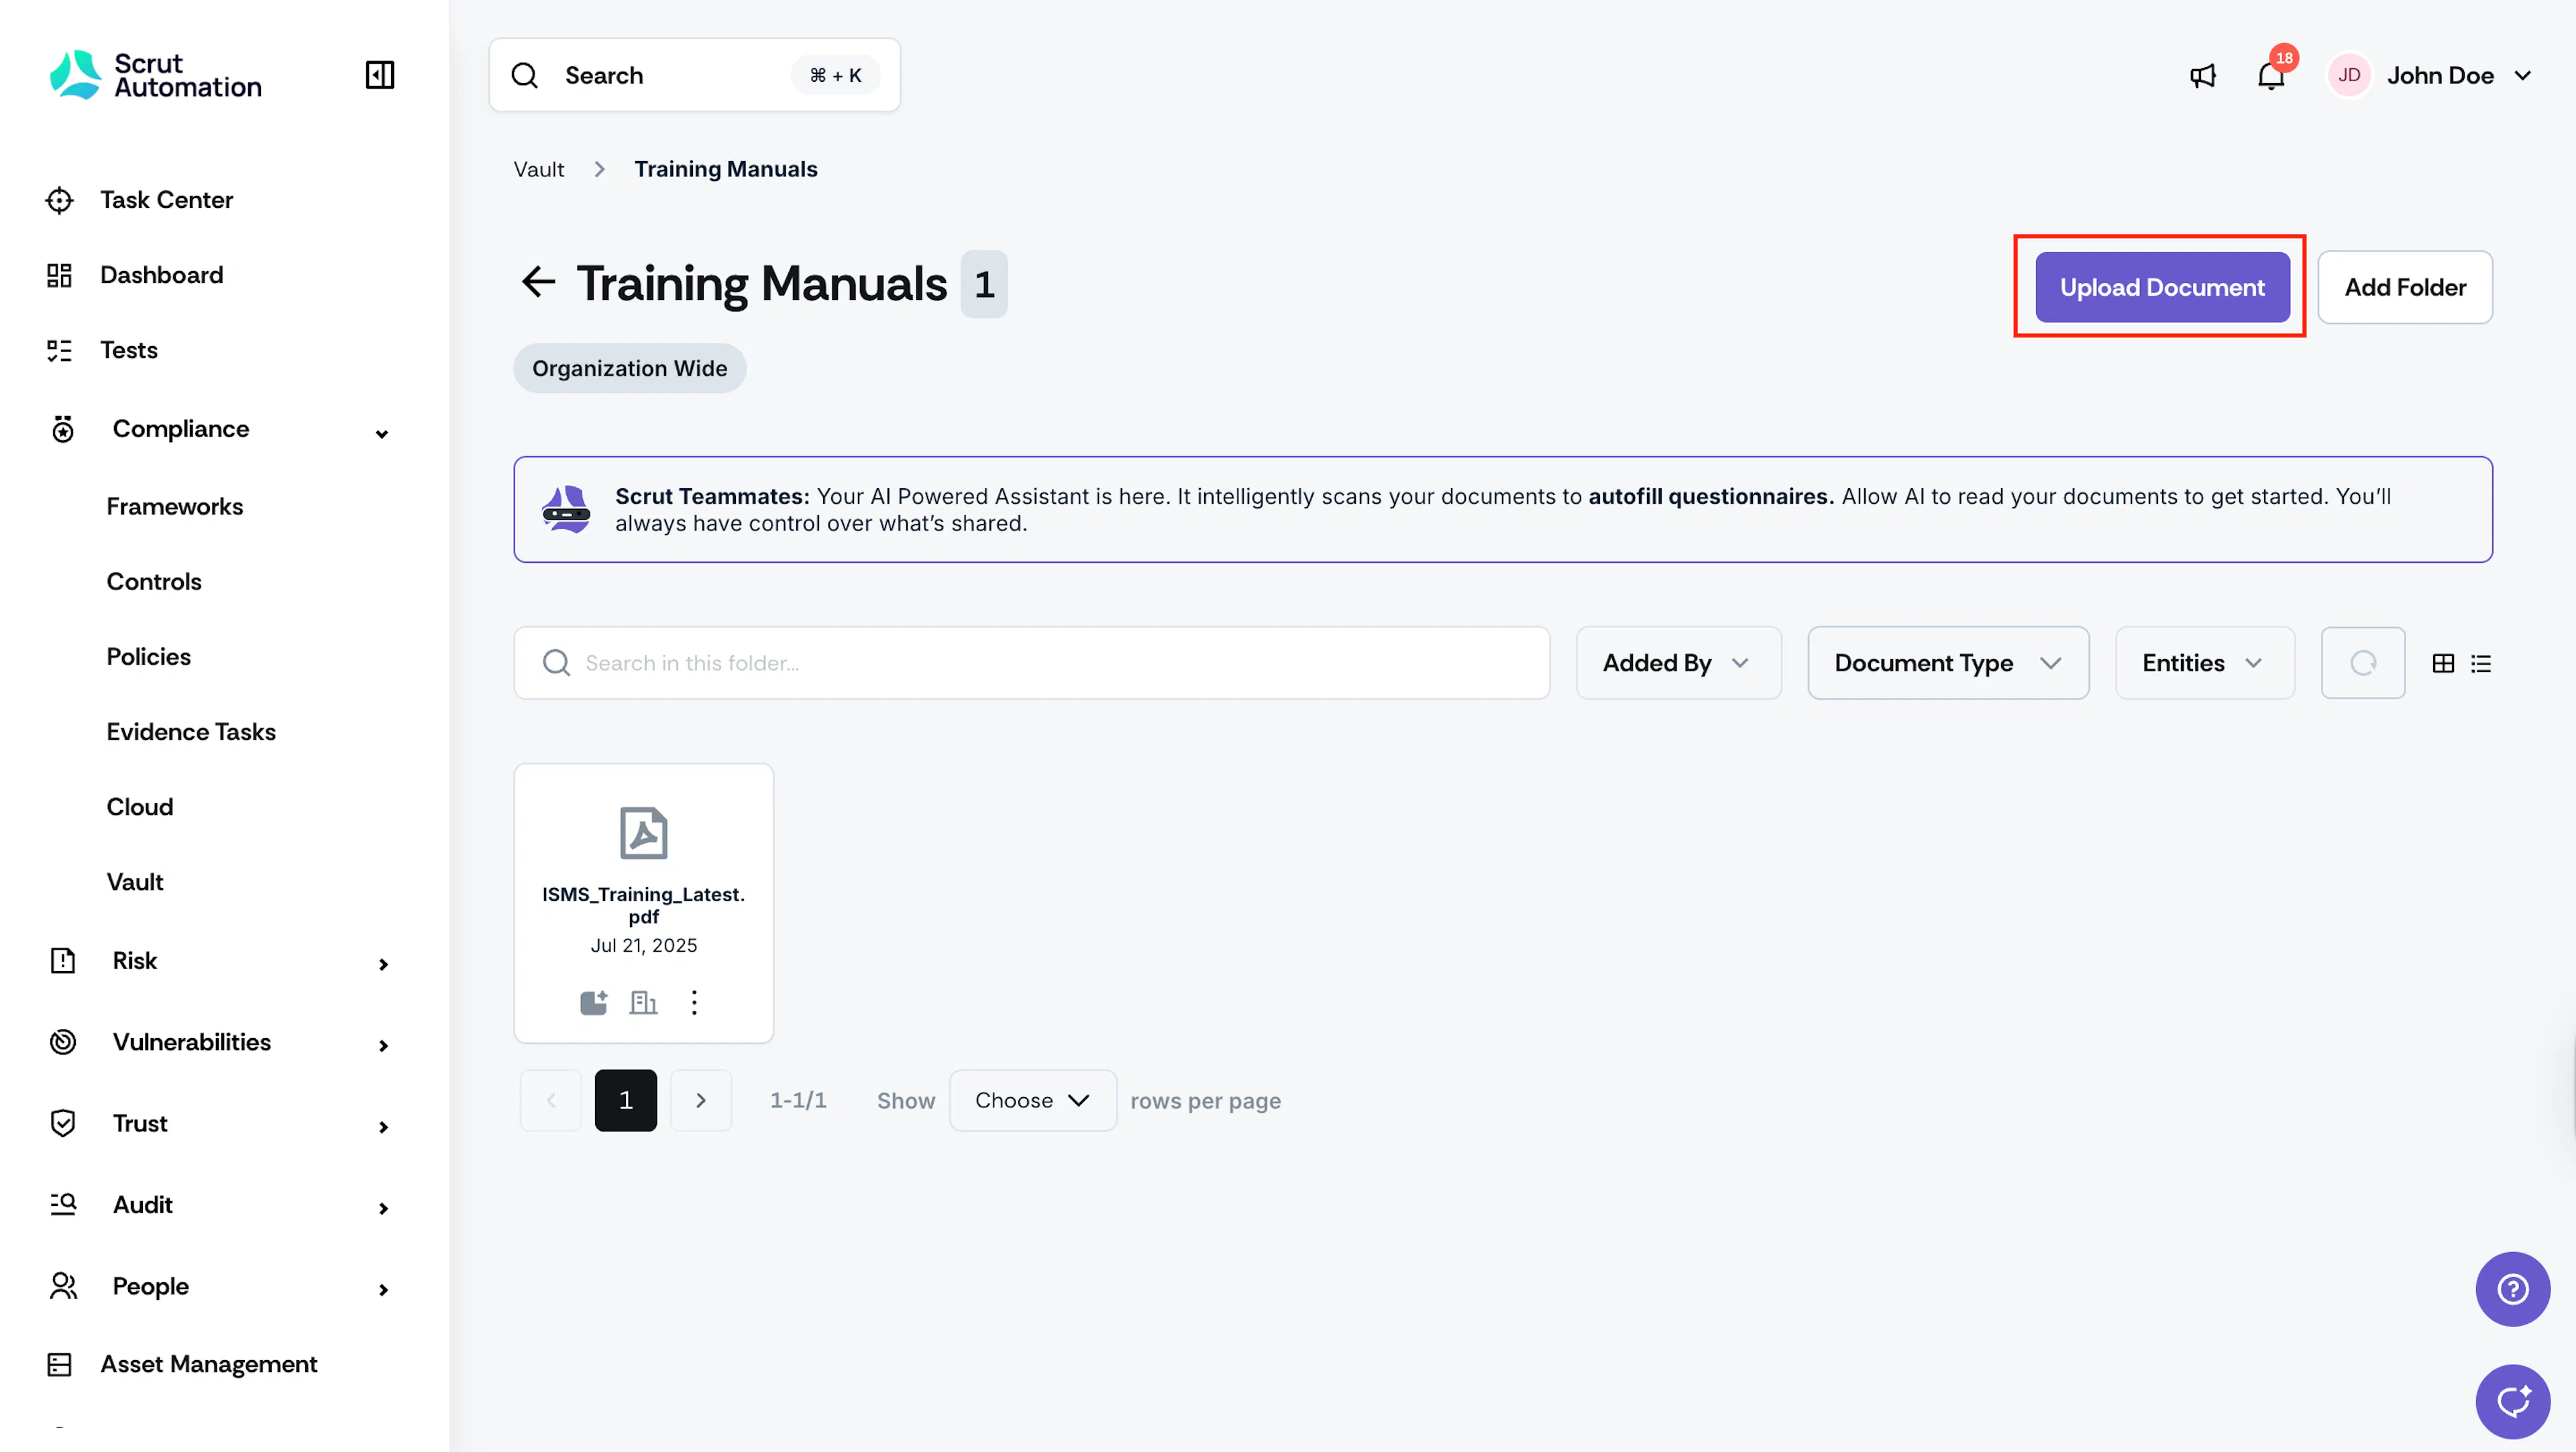
- Navigate to the Vault module and open your desired folder.
- Click the Upload Document button.
- Select and upload your desired file. (Maximum size: 100 MB). Supported file types include PDF, Word, Excel, images, text files, Markdown (.md), and YAML (.yaml, .yml) files. If you upload an unsupported file type, Scrut shows an error explaining why it rejected the file.
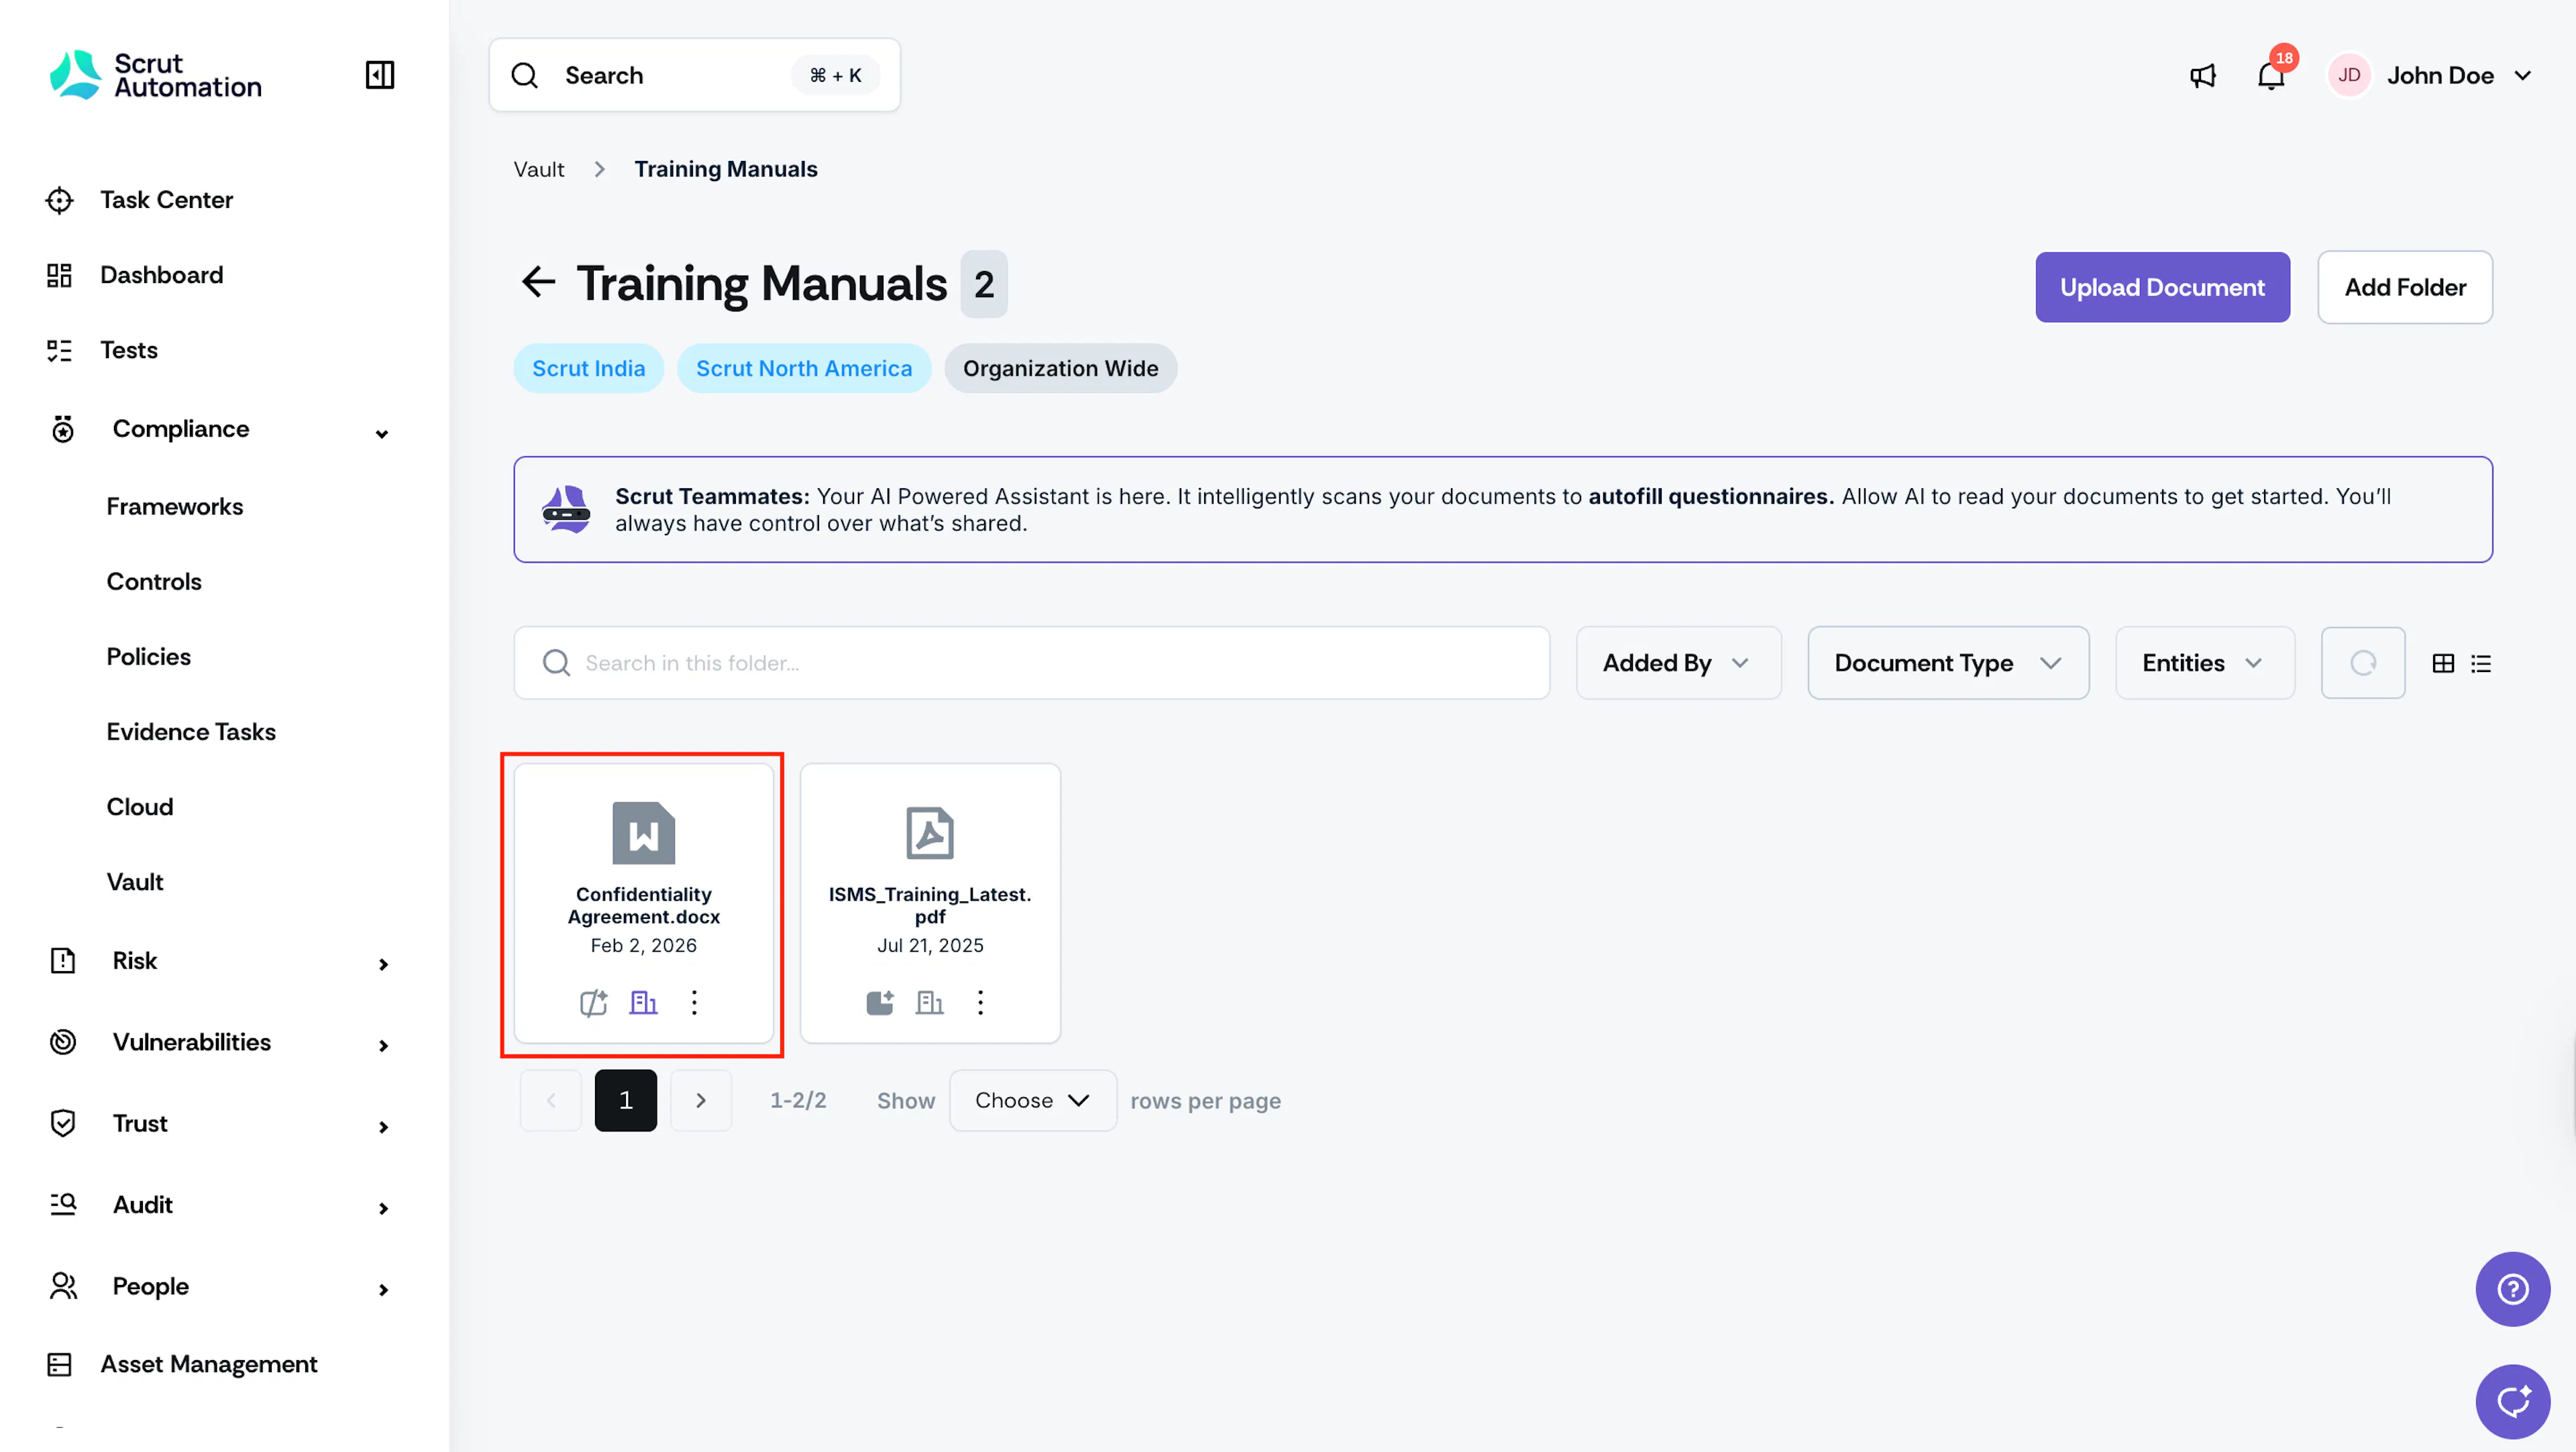
- This adds the document to the specific folder.
Document Actions
Click the three-dots icon on your desired document.
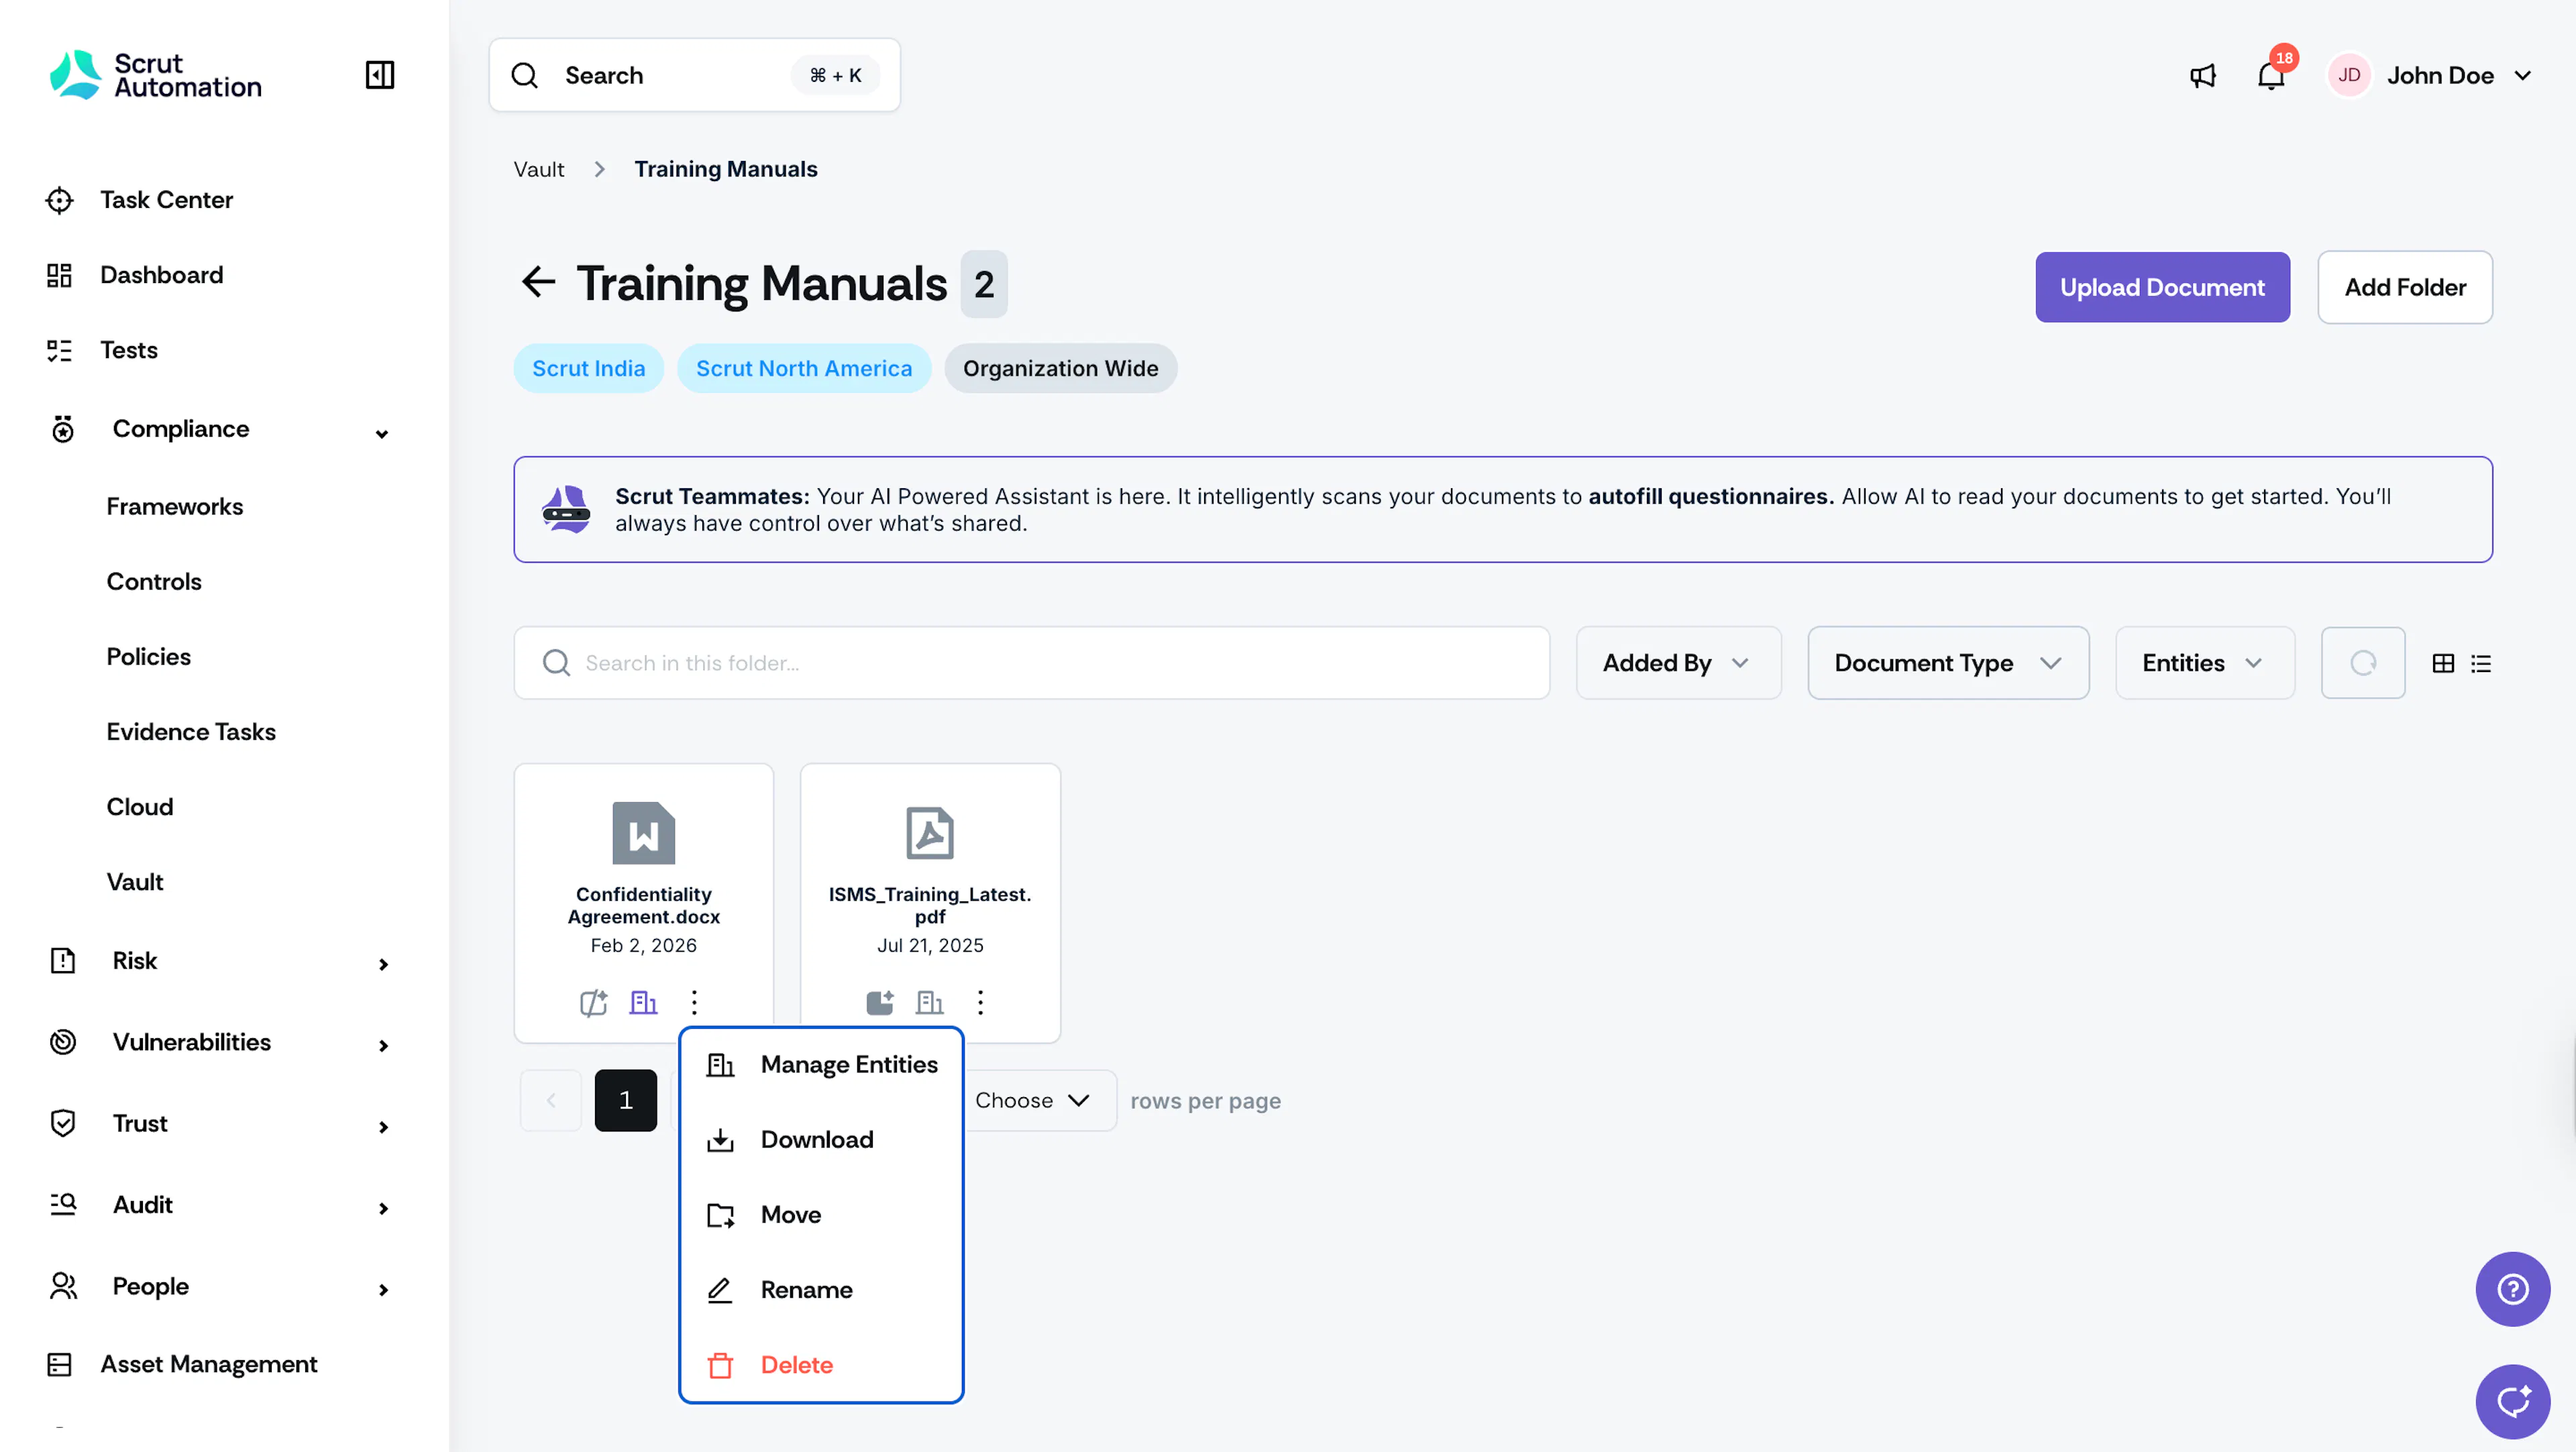
You can perform the following actions on documents in the vault:
- Manage Entities: Set which entities the document is accessible to.
- Download: Click the Download icon next to the file, choose your target location and click Save.
- Move: To organize documents in the Vault, you can move them to your desired folder. Click the three-dot icon on the file, select Move , and choose your destination folder.
- Rename: Click the three-dot icon, select Rename , enter a new name, and click Save.
- Delete: Click the three-dot icon, select Delete , and confirm by clicking Delete again.
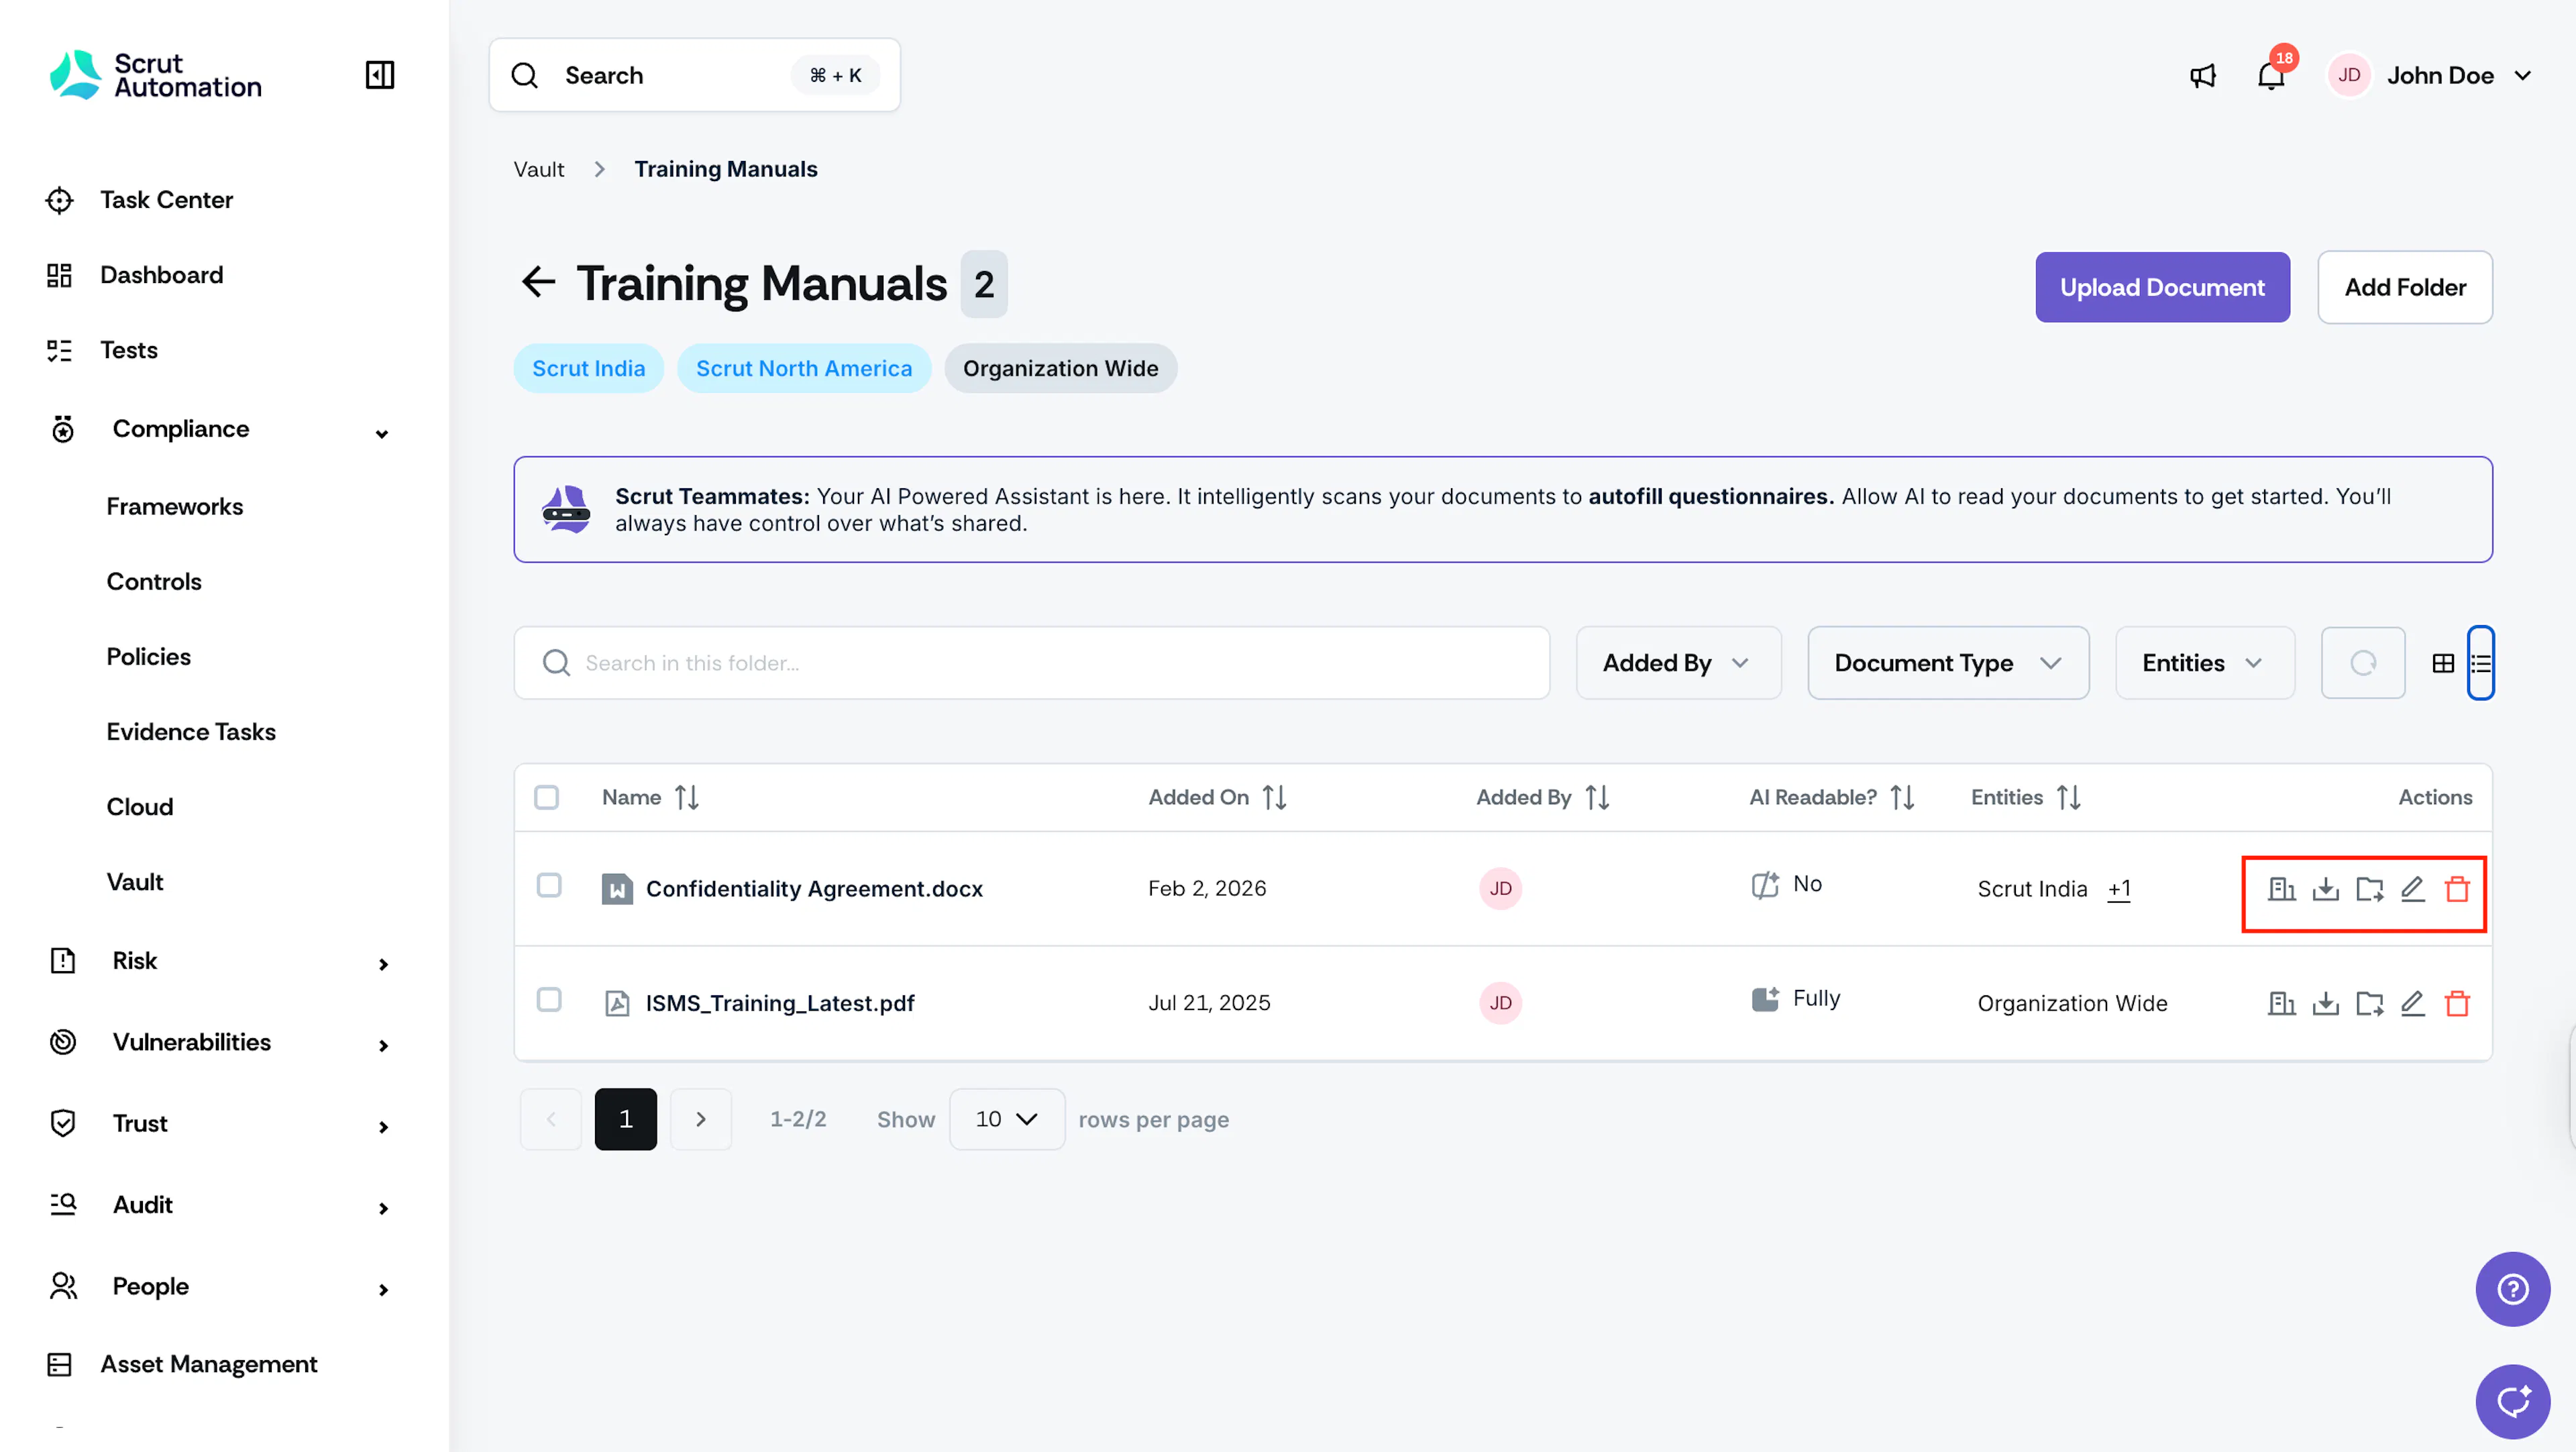
Click the icons next to your desired file.
- Manage Entities: Set which entities the document is accessible to.
- Download: Click the Download icon next to the file, choose your target location and click Save.
- Move: To organize documents in the Vault, you can move them to your desired folder. Click the three-dot icon on the file, select Move , and choose your destination folder.
- Rename: Click the three-dot icon, select Rename , enter a new name, and click Save.
- Delete: Click the three-dot icon, select Delete , and confirm by clicking Delete again.
Audit Log
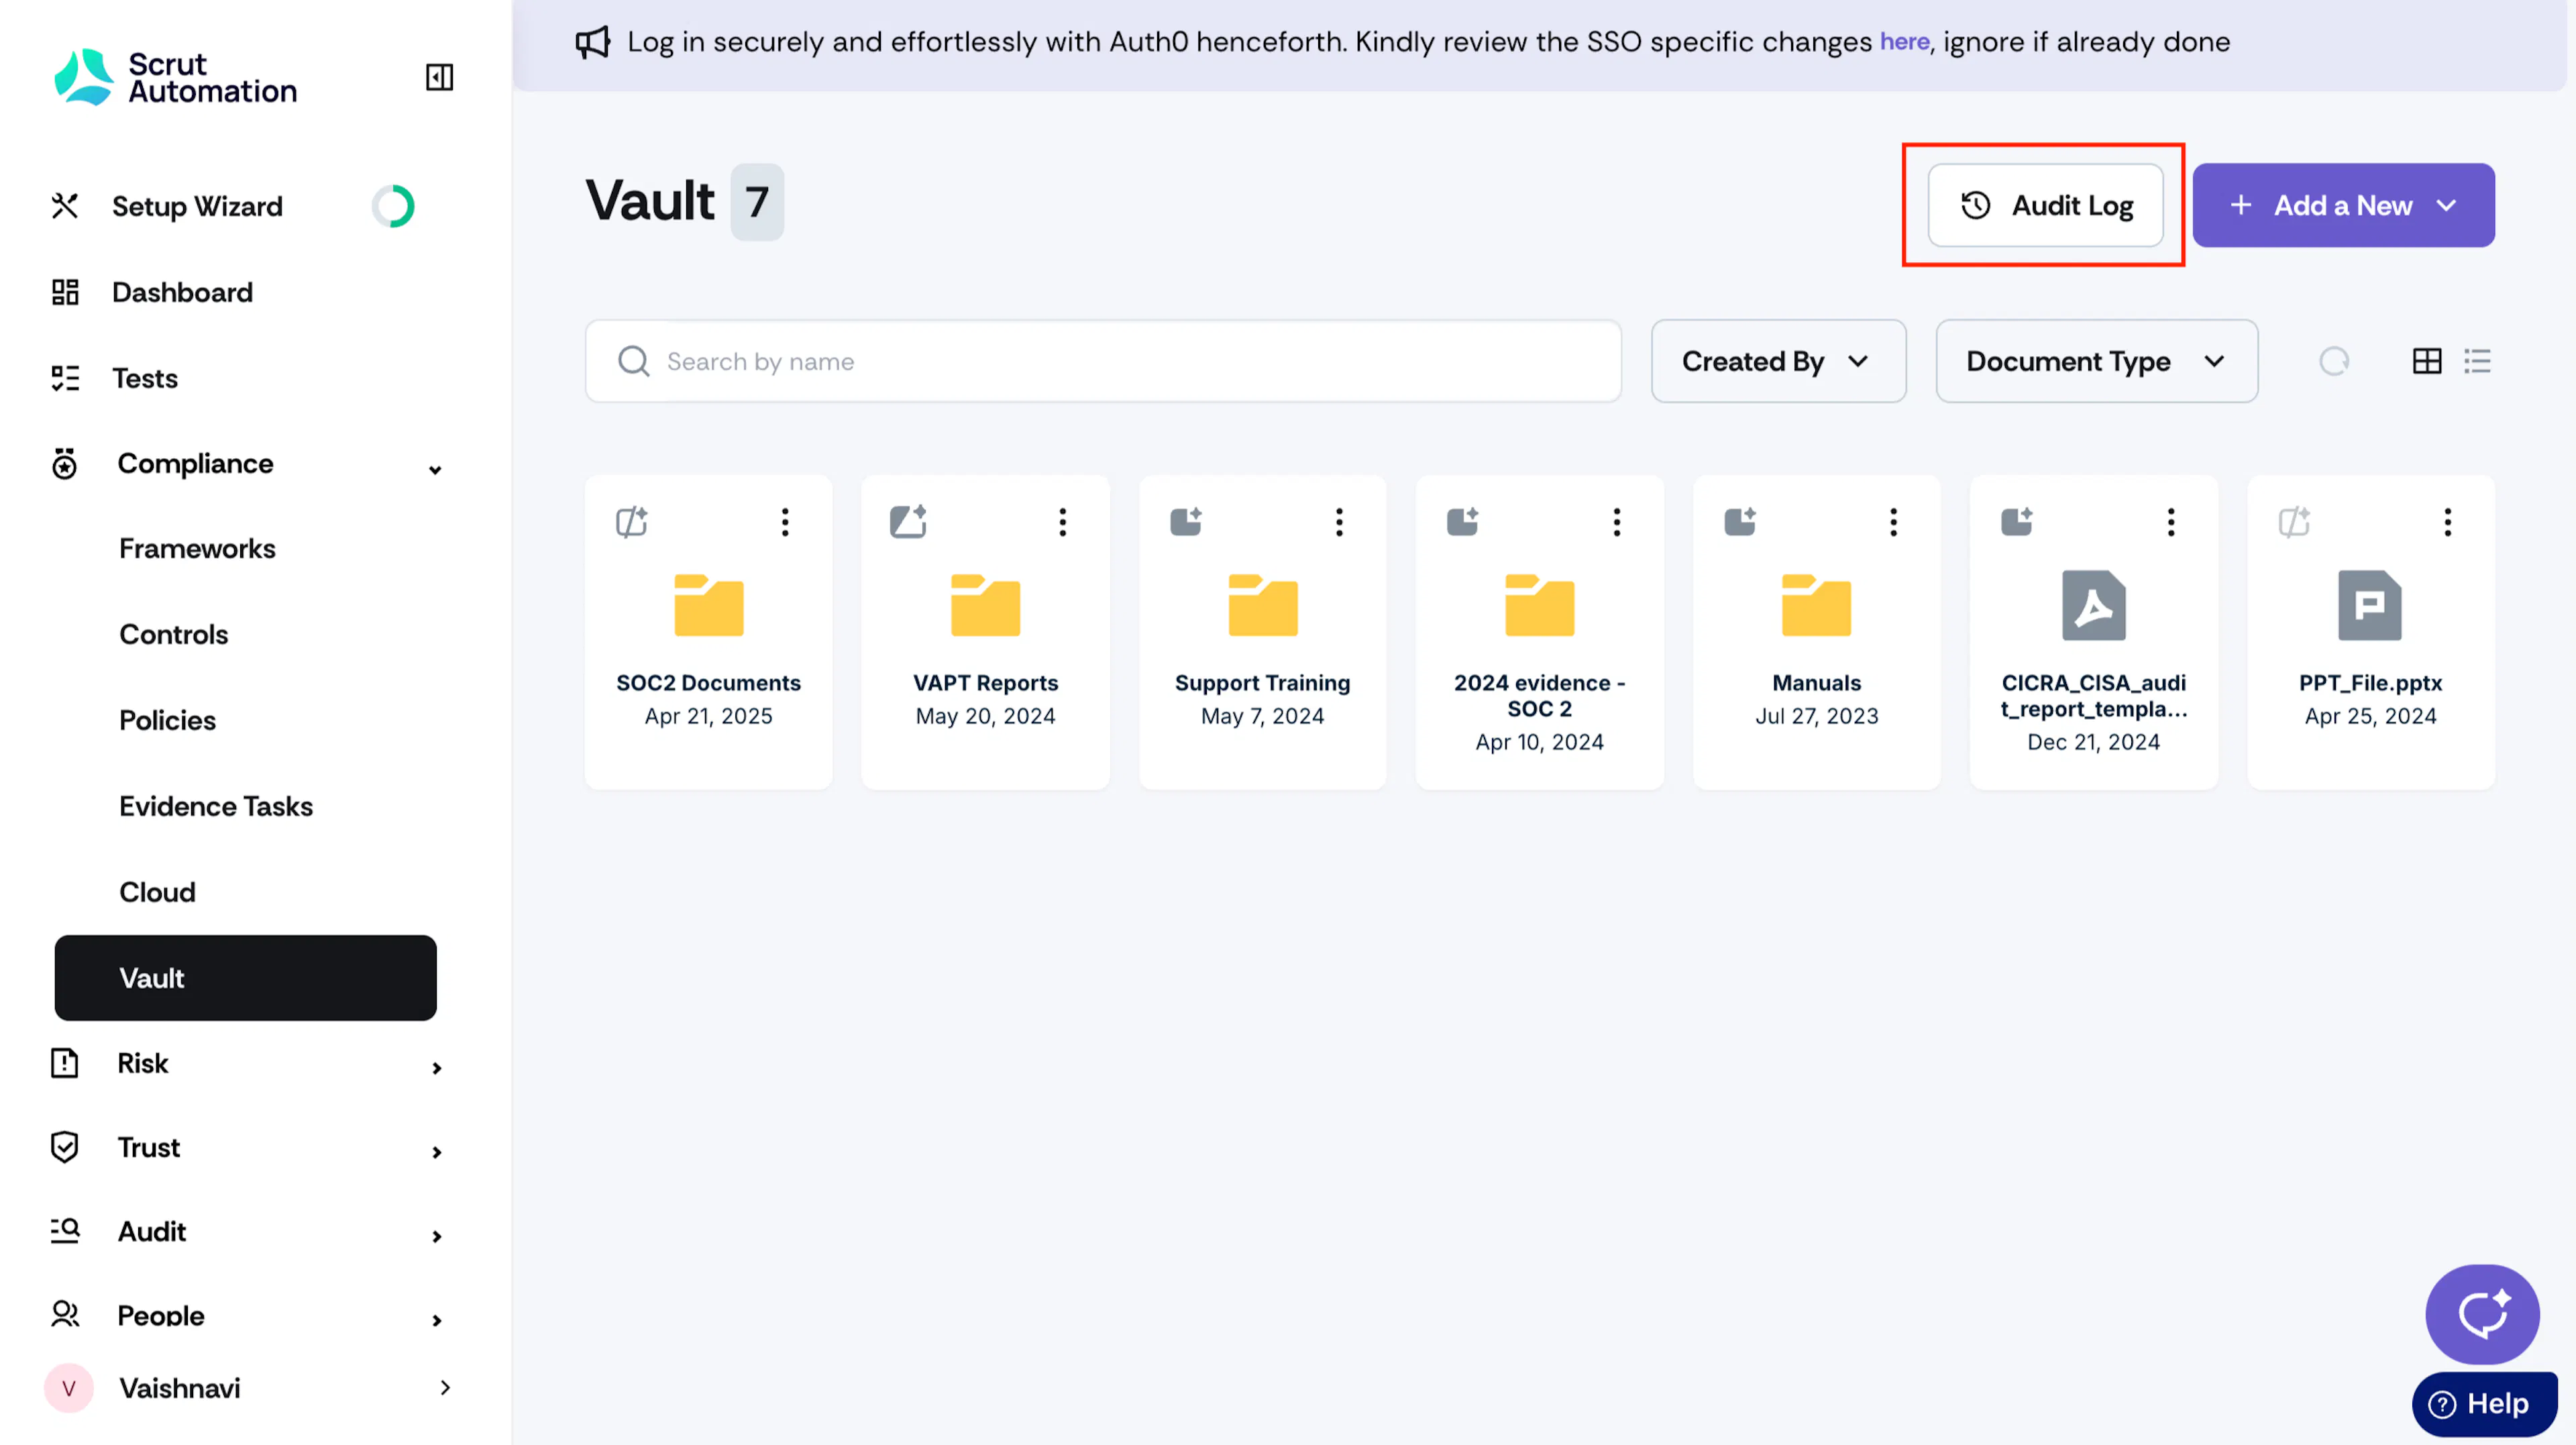
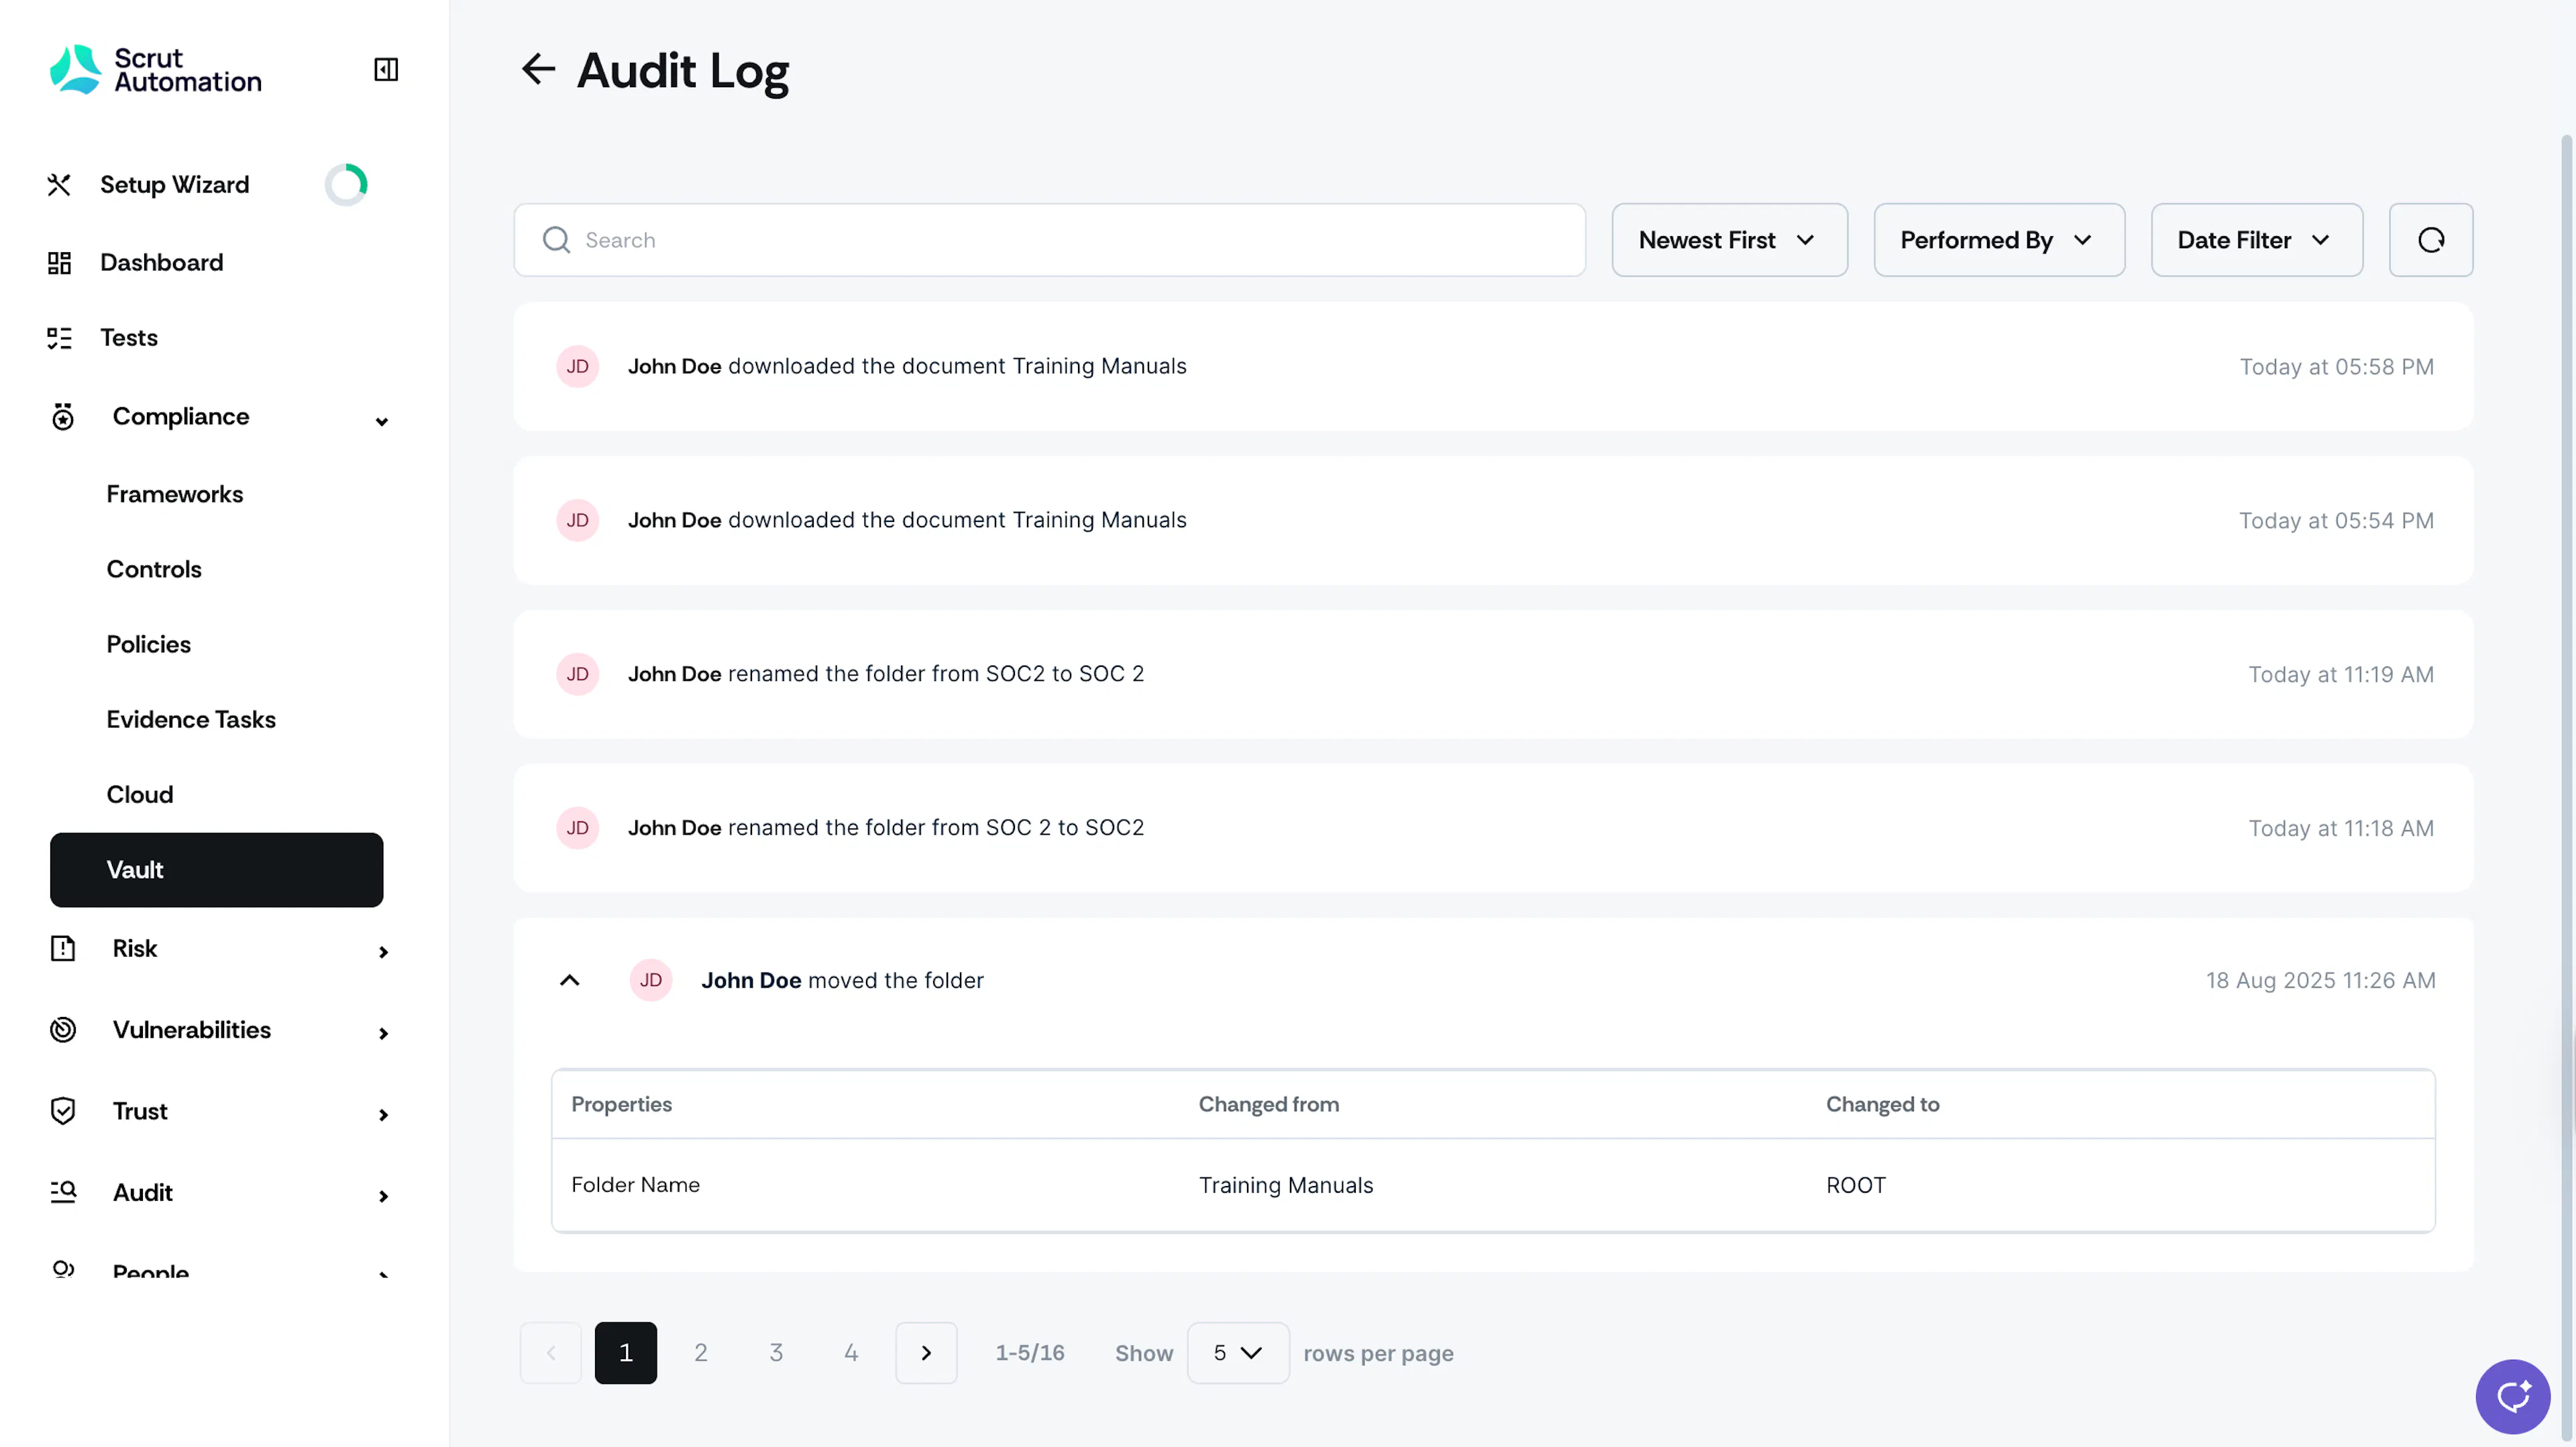
The audit log provides visibility into all actions performed by you or your teammates within the Vault module. Click the Audit Log button on the top right to view the various actions, along with their timestamps.