

Manage Tags in the Vault
Who can use this feature
- Supported on Foundation, Growth, and Scale plans
Learn how to add tags to Vault content so that you can control which documents and folders Scrut Teammates refers to when autofilling questionnaires.
How Do Tags Work In the Vault?
Tags let you label files and folders in the Vault, so each questionnaire refers only to the documents that are relevant to it. Instead of letting Questionnaire Automation scan your entire Vault, you can scope it to the exact content, such as product documentation for a product security questionnaire and SOC 2 reports for a compliance questionnaire.
Before You Begin
- Tags are visible and manageable by Admins only.
- Contributors and Auditors do not see the Tags feature anywhere in the product.
Limitations
- A workspace supports a maximum of 10 tags.
- Each tag name can be up to 15 characters, using letters, numbers, spaces, hyphens, and underscores only.
- Tag names must be unique within a workspace. Names are case-insensitive, so "soc2" and "SOC2" are treated as the same tag.
Step 1: Create Your Tags
Start by creating your tag library in Vault Settings. You can create up to 10 tags per workspace.
-
Navigate to Compliance → Vault.
-
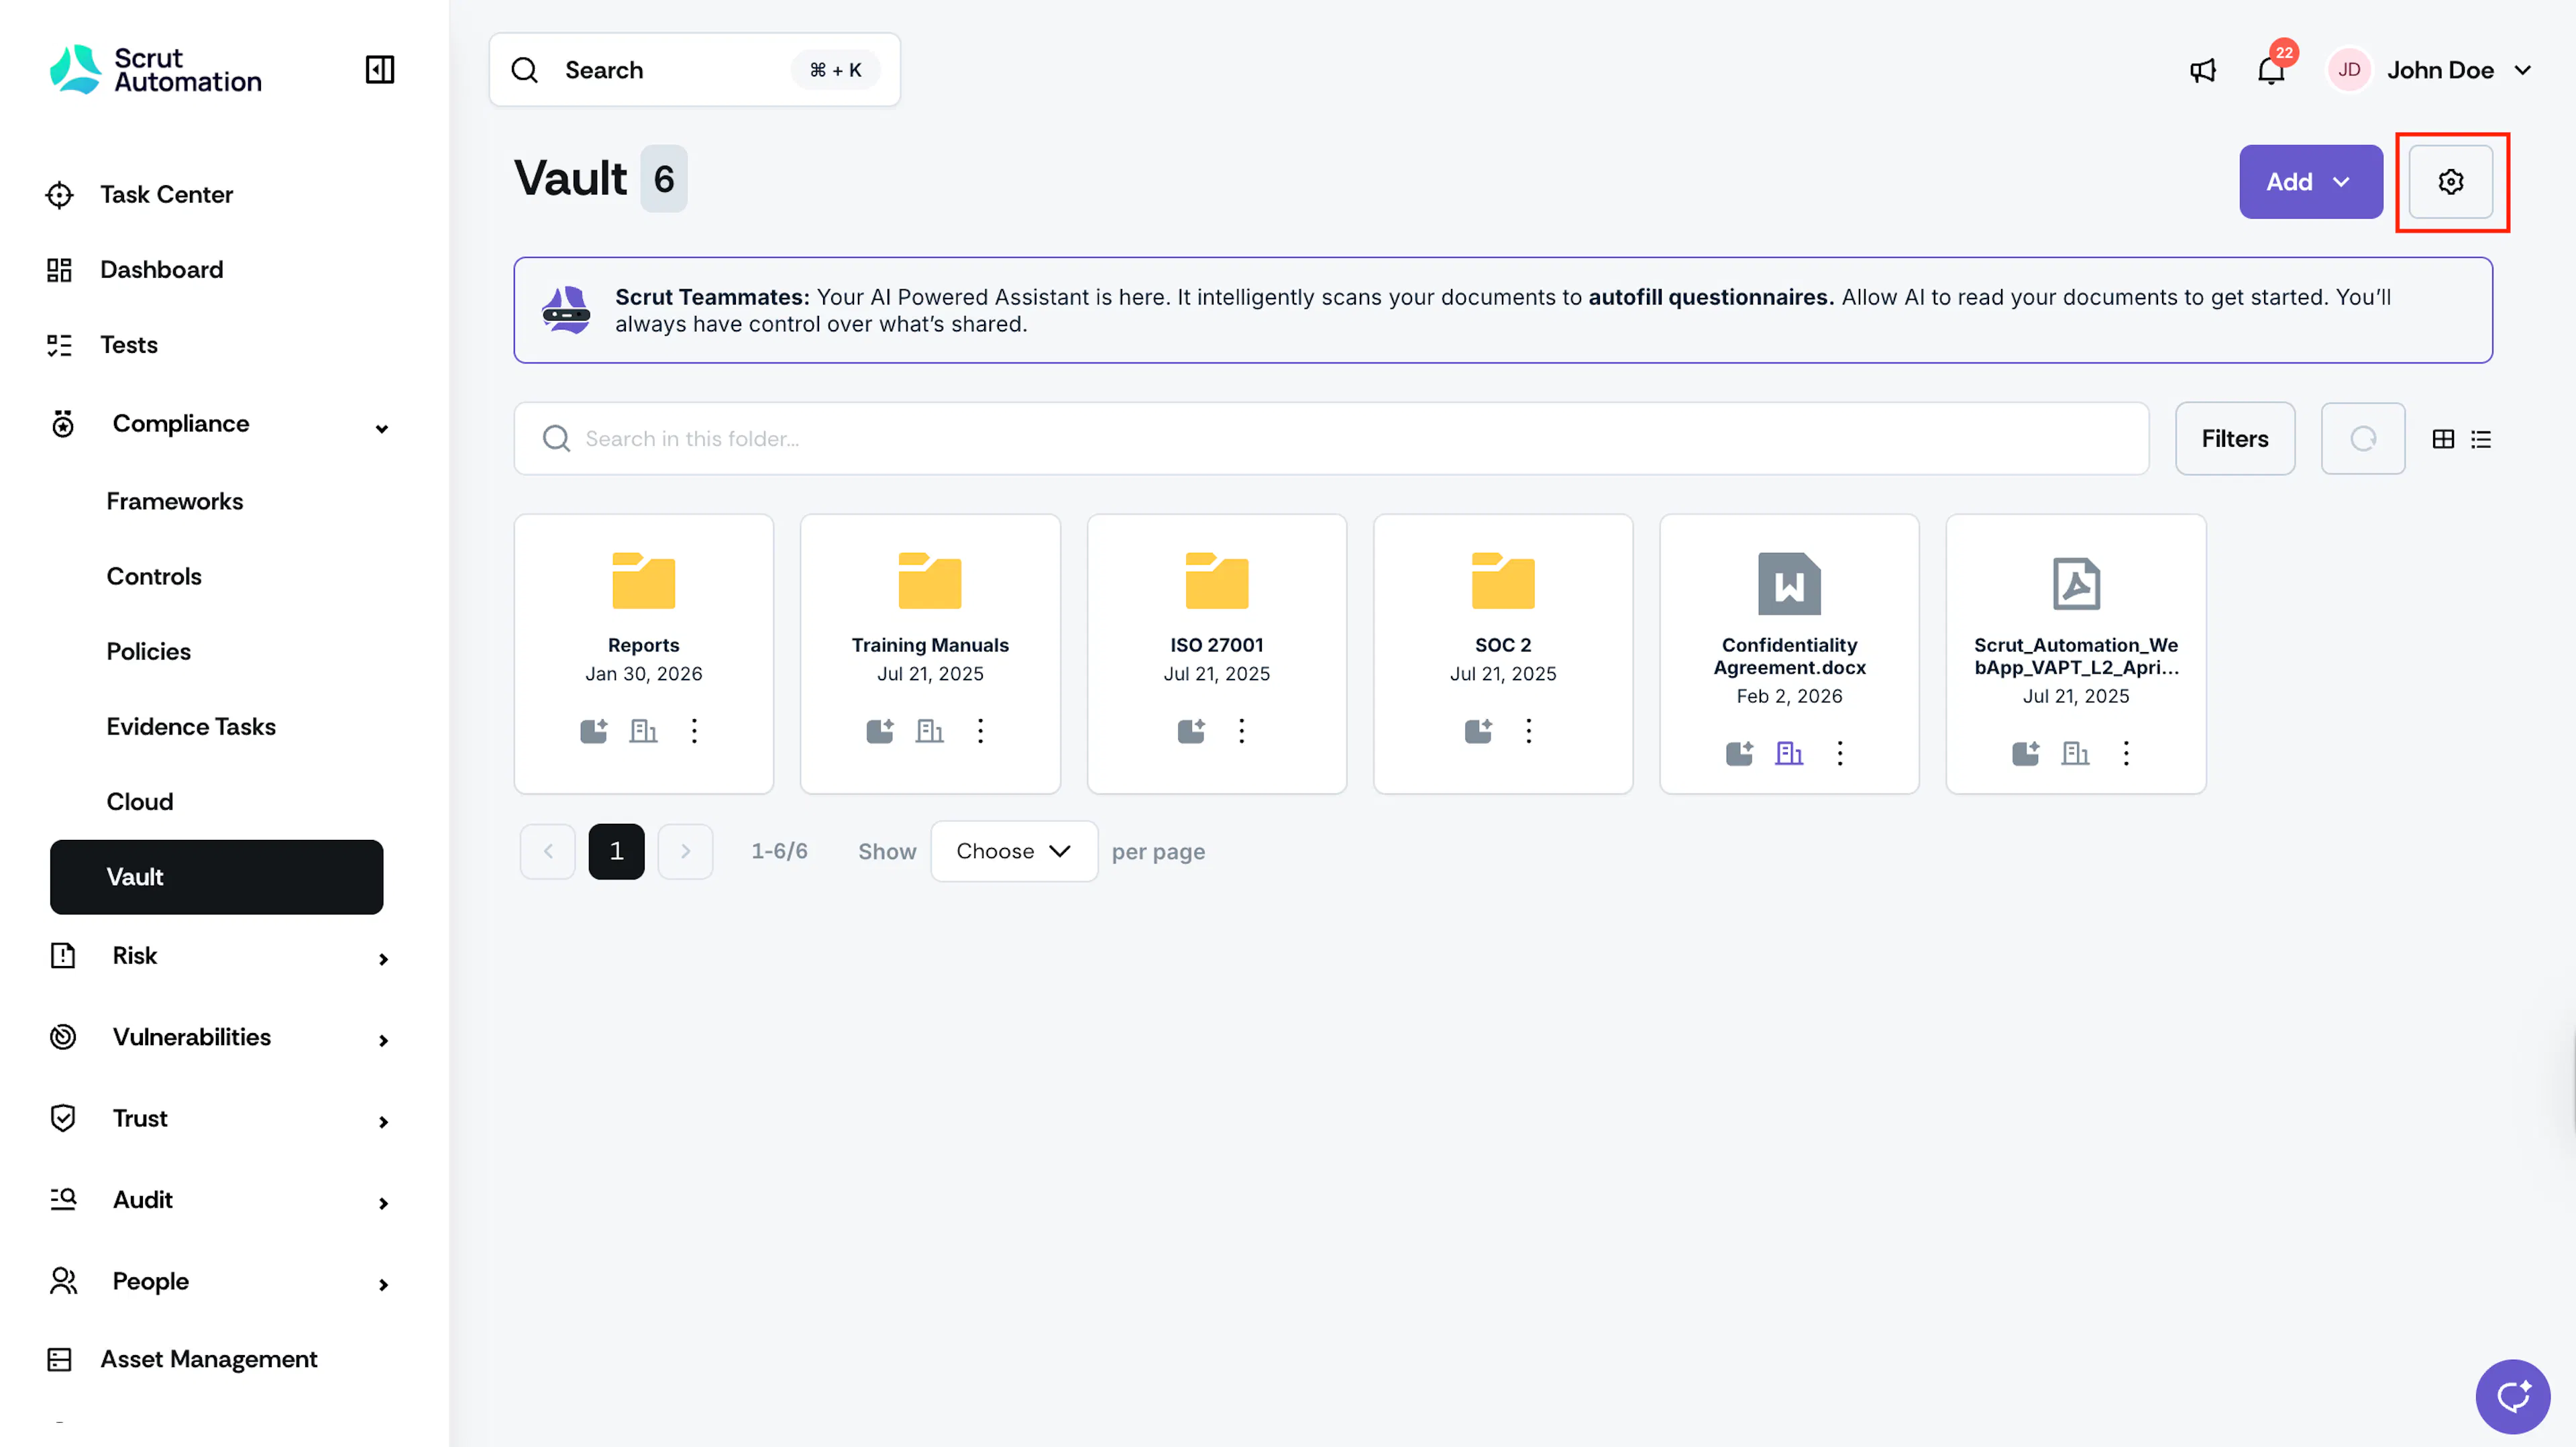
Click Settings in the top right corner.
-
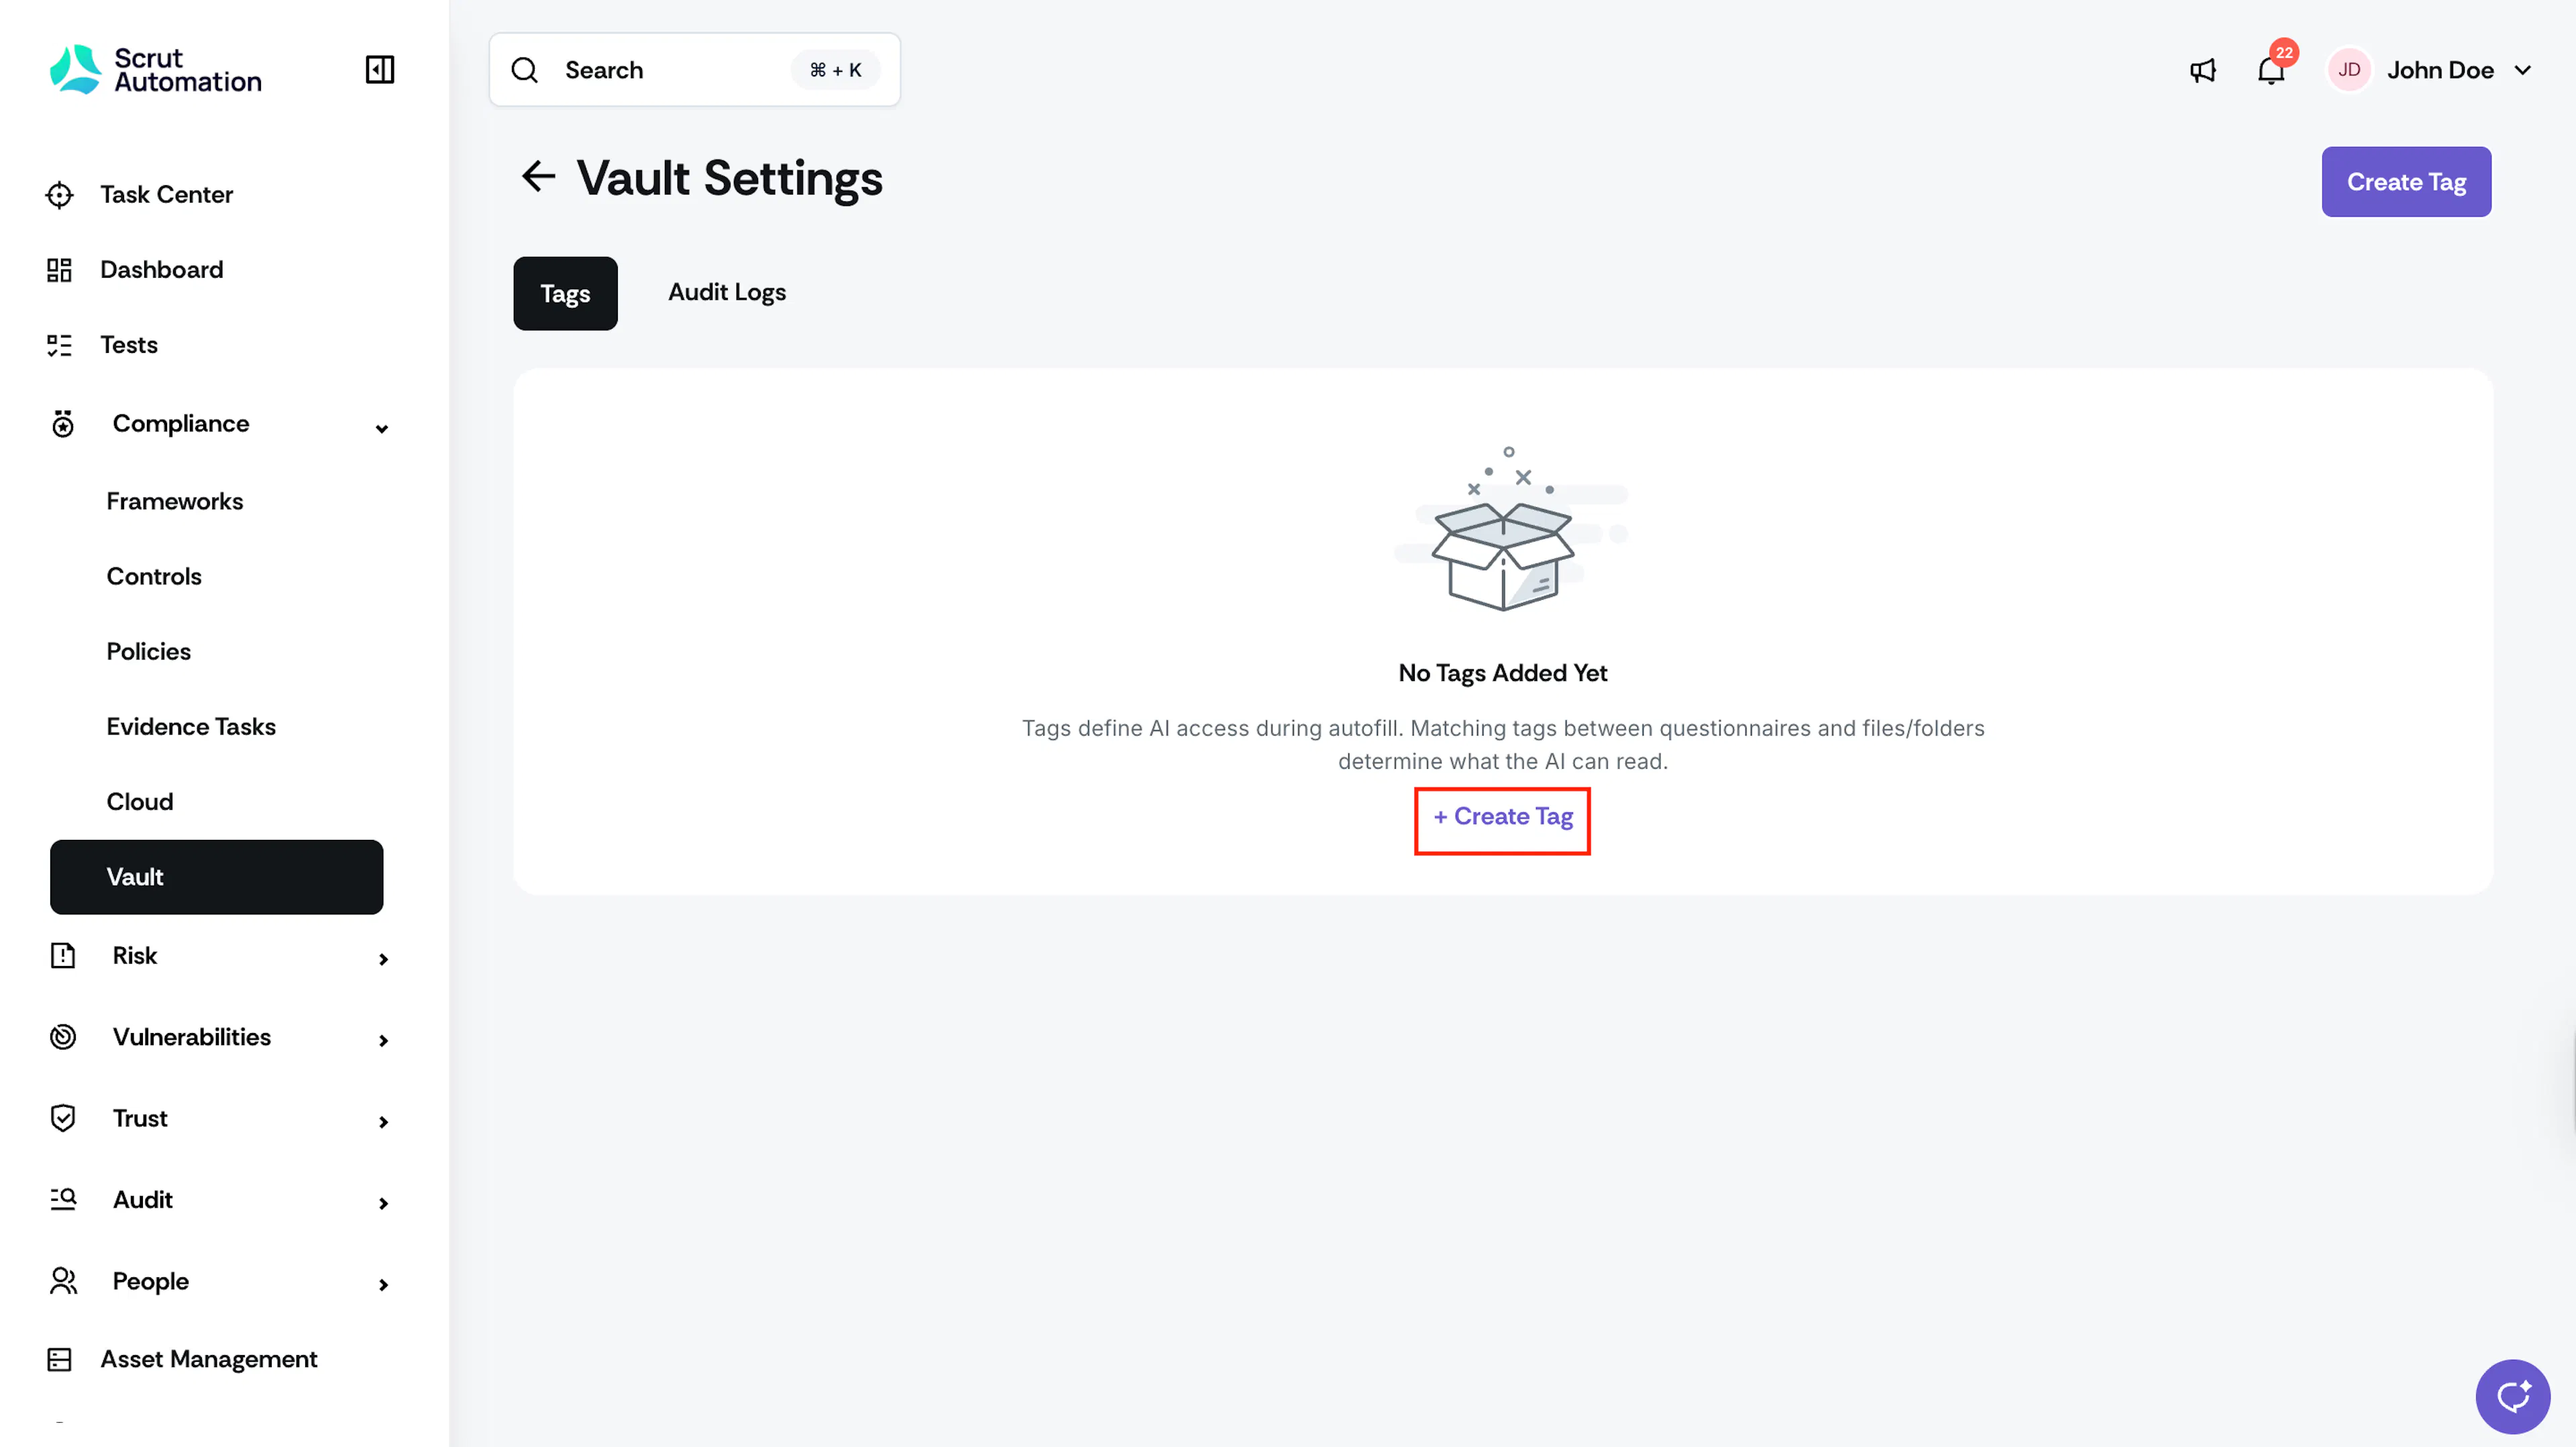
Select the Tags tab. The Tags table shows all existing tags, along with who created them, when they were created, and how many items are using each tag.
-
Click Create Tag.
-
Enter a name for the tag. Use letters, numbers, spaces, hyphens, or underscores only.
-
Click Save.
The new tag appears in the table with a count of 0 items. Repeat these steps until you have created all the tags you need.
Pro Tip!
Plan your tag names before you start. Because you can only have 10 tags per workspace, short, descriptive names work best. For example: "SOC2", "Product Docs", "HR Policy", "Pen Test".
Step 2: Assign Tags to Folders
Tagging a folder is the most efficient way to tag your content at scale. When you tag a folder, every file inside it inherits that tag for automation purposes, regardless of whether the individual files are tagged.
-
Navigate to Compliance → Vault.
-
Locate the folder you want to tag.
-
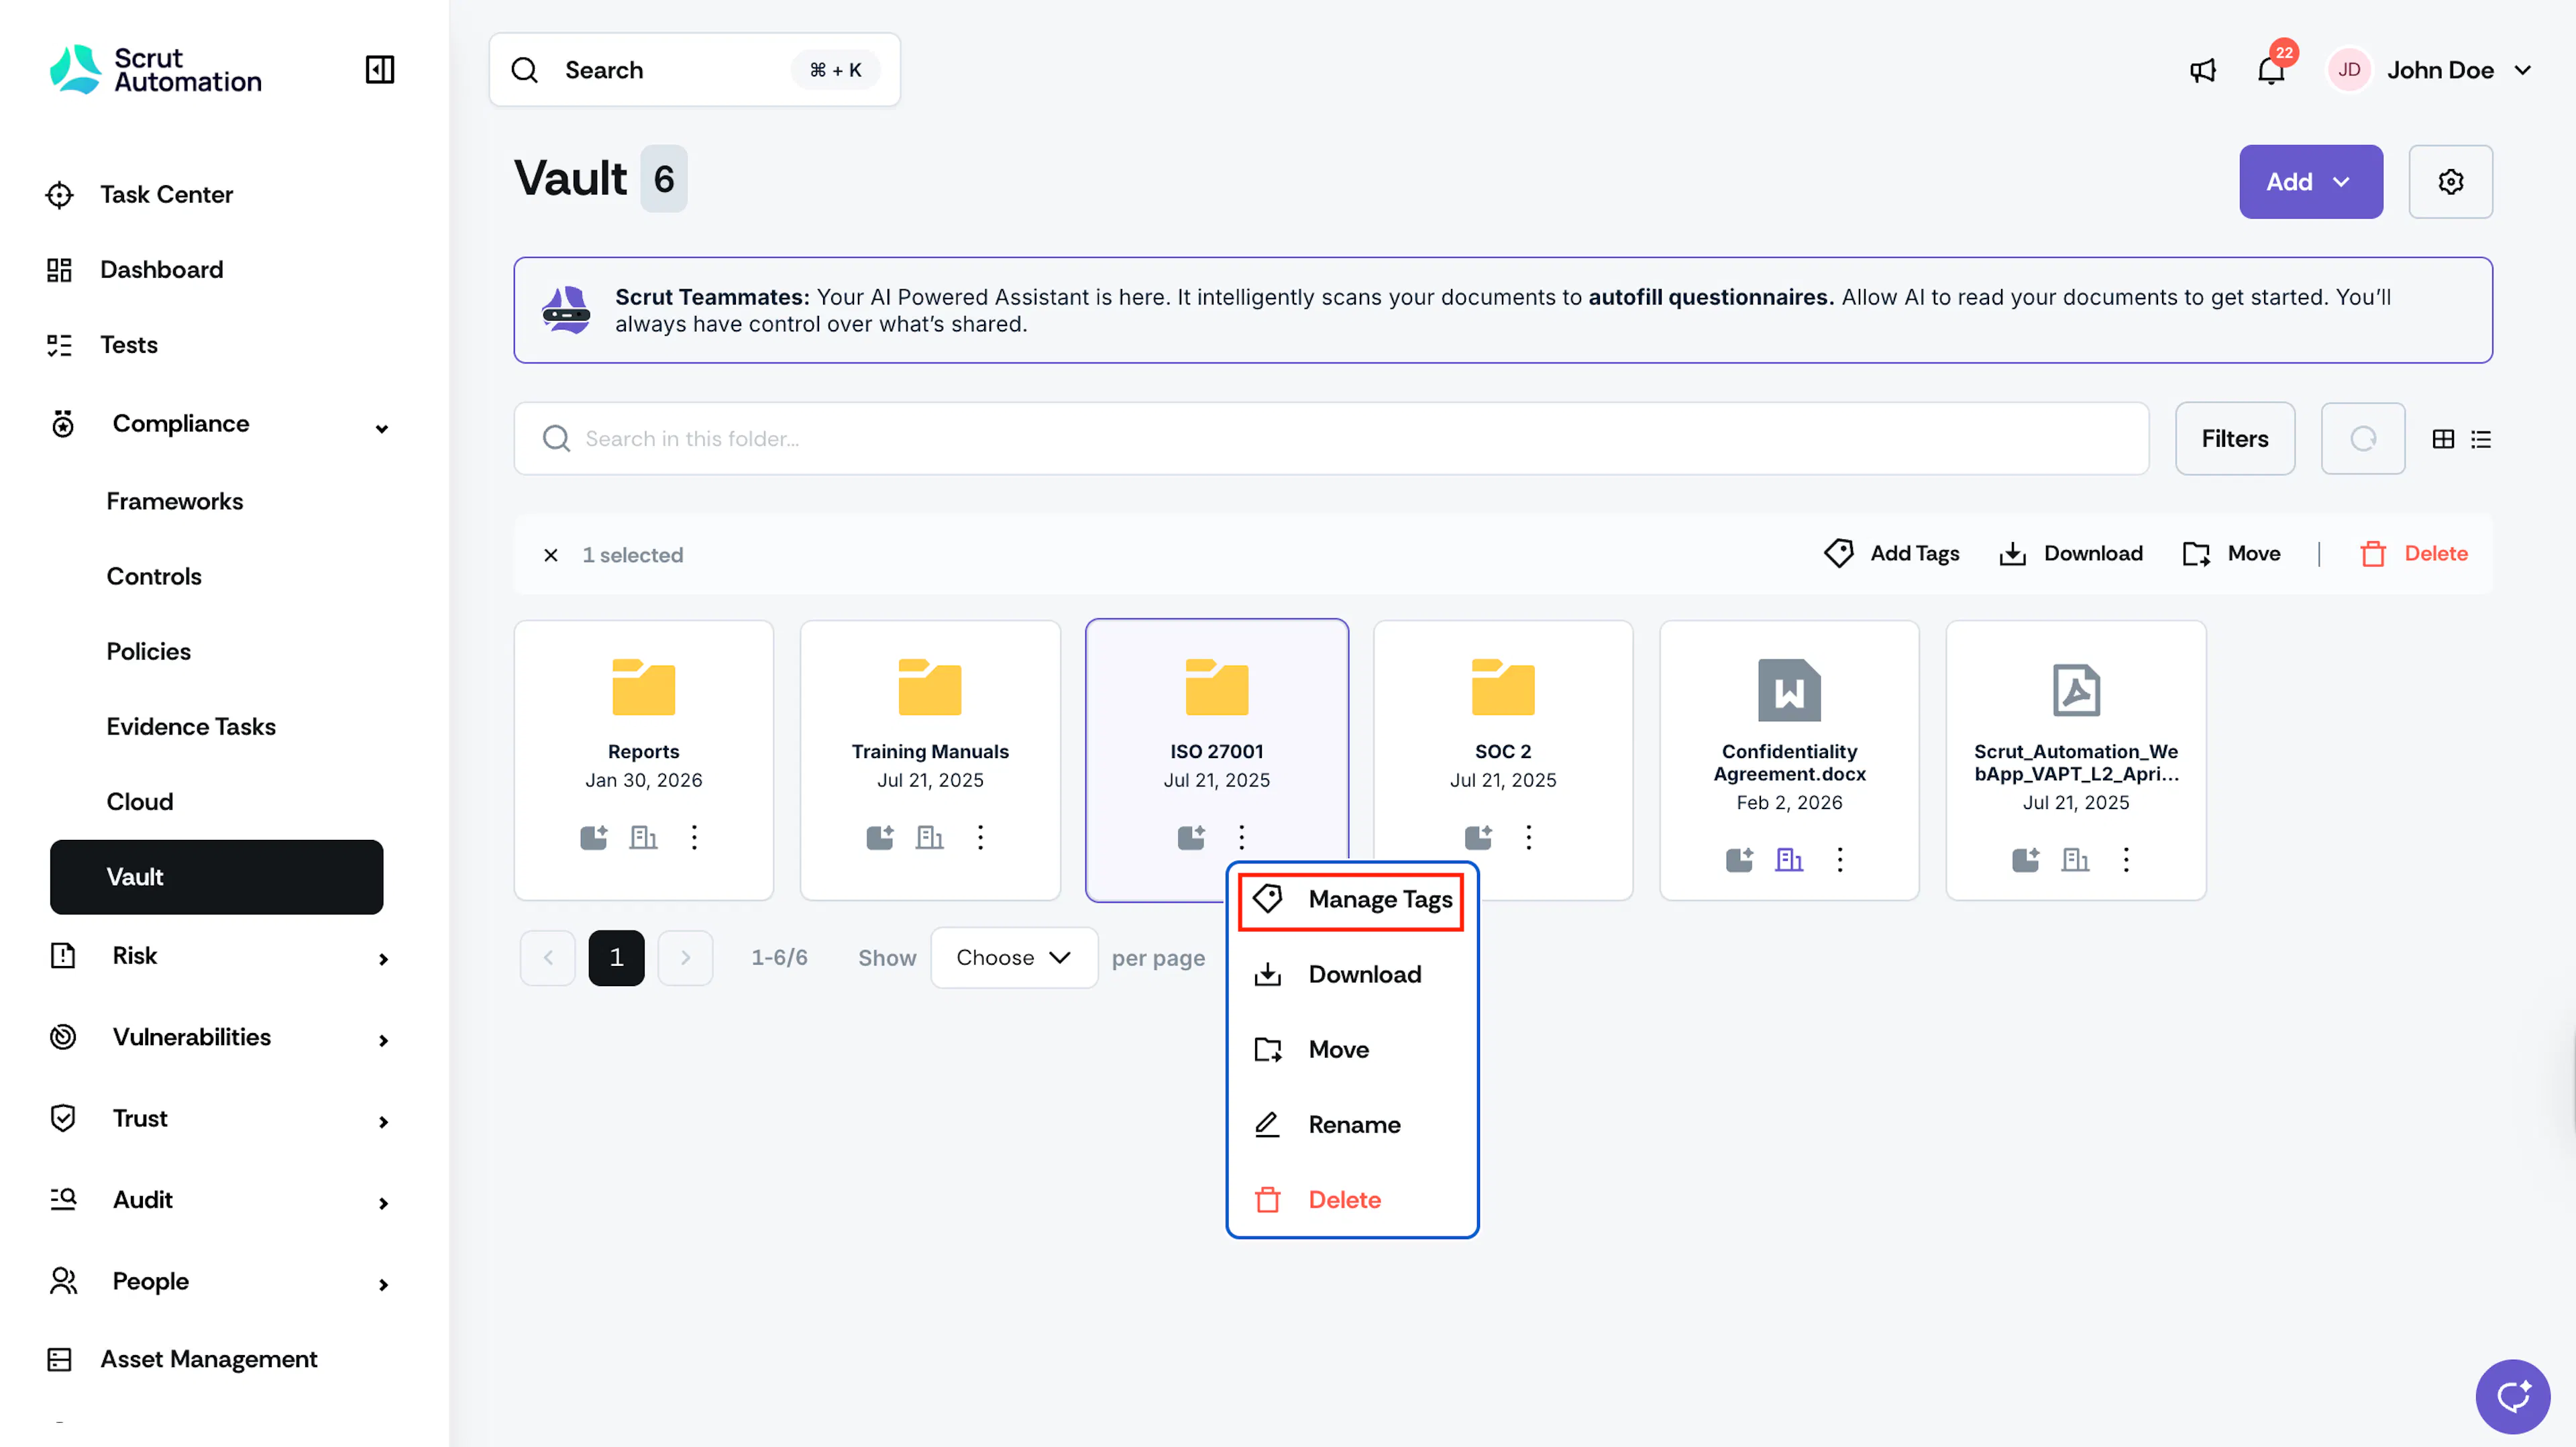
Click the three-dot icon on the folder card and select Manage Tags.
-
Select the tags you want to assign to this folder. Already-assigned tags appear pre-checked.
-
Click Save.
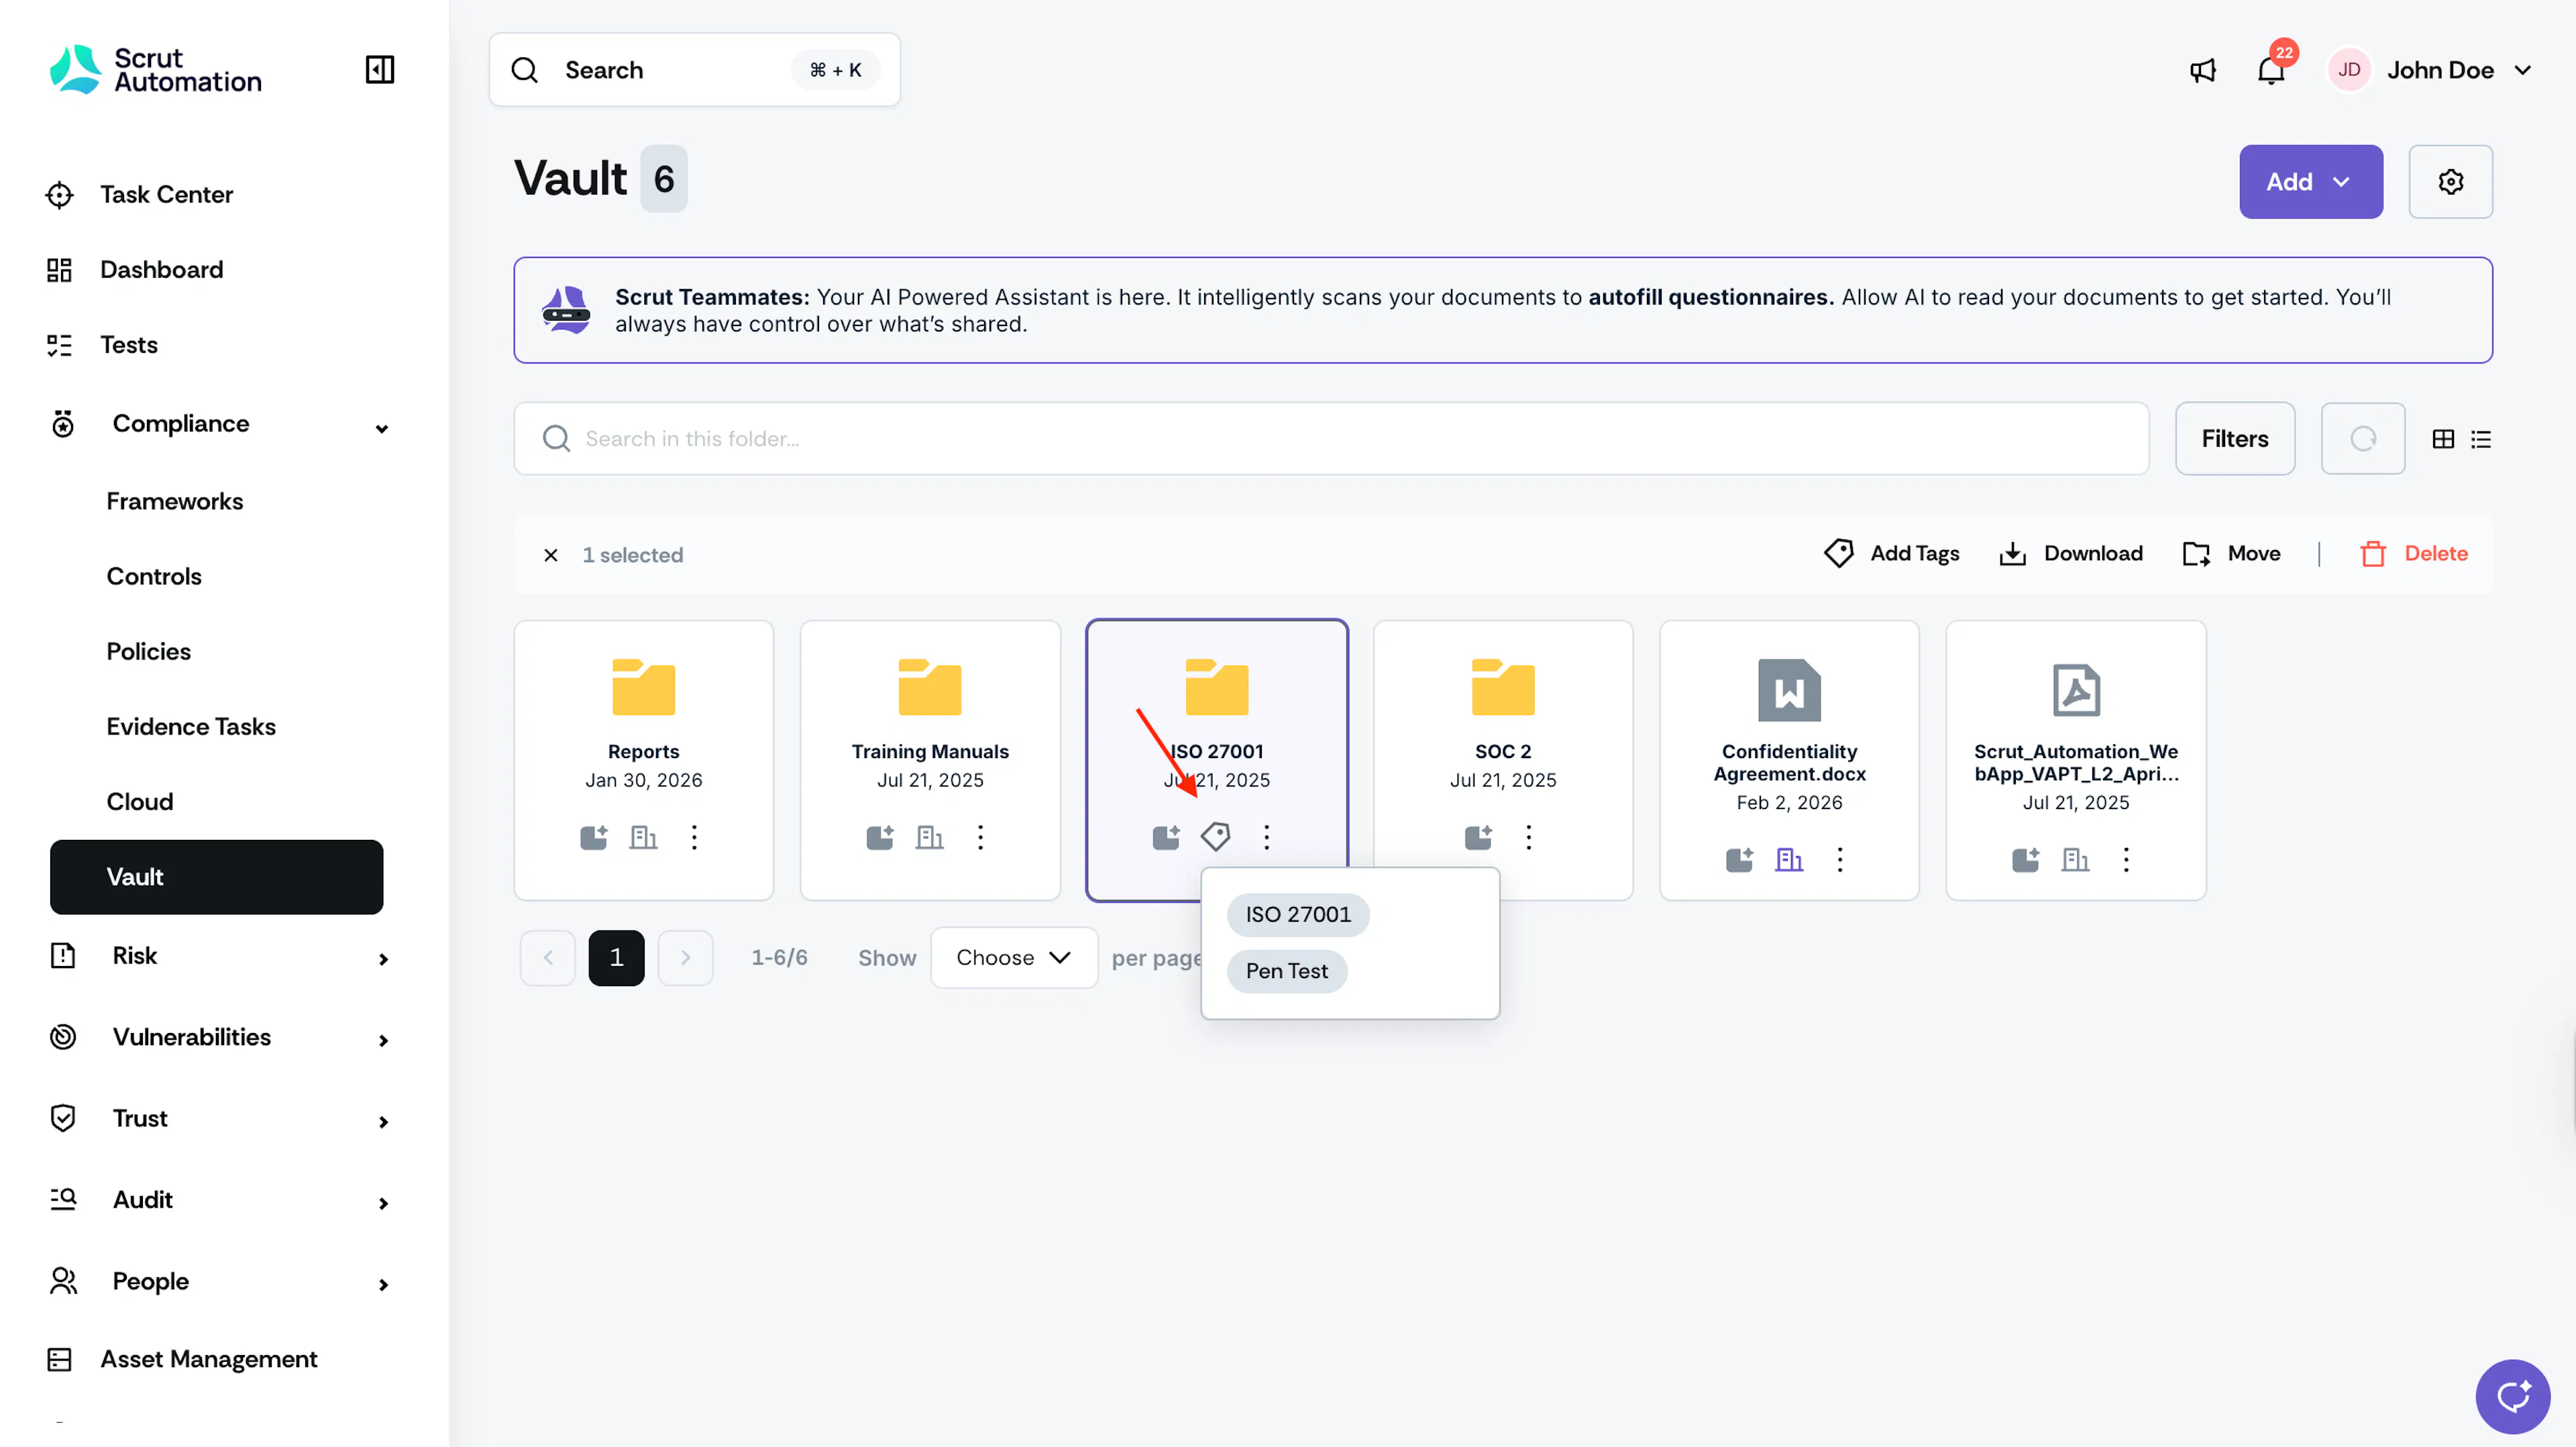
Tag badges now appear on the folder card. All files inside the folder are treated as carrying these tags for Questionnaire Automation, even if the individual files have no tags of their own.
Important:
Folder tags apply to all files inside. Files keep their own tags, but they'll also inherit the folder's tags.
If a folder has Tag A and a file inside it has Tag B, Scrut Teammates treats the file as having both Tags A and B.
Step 3: Assign Tags to Individual Files
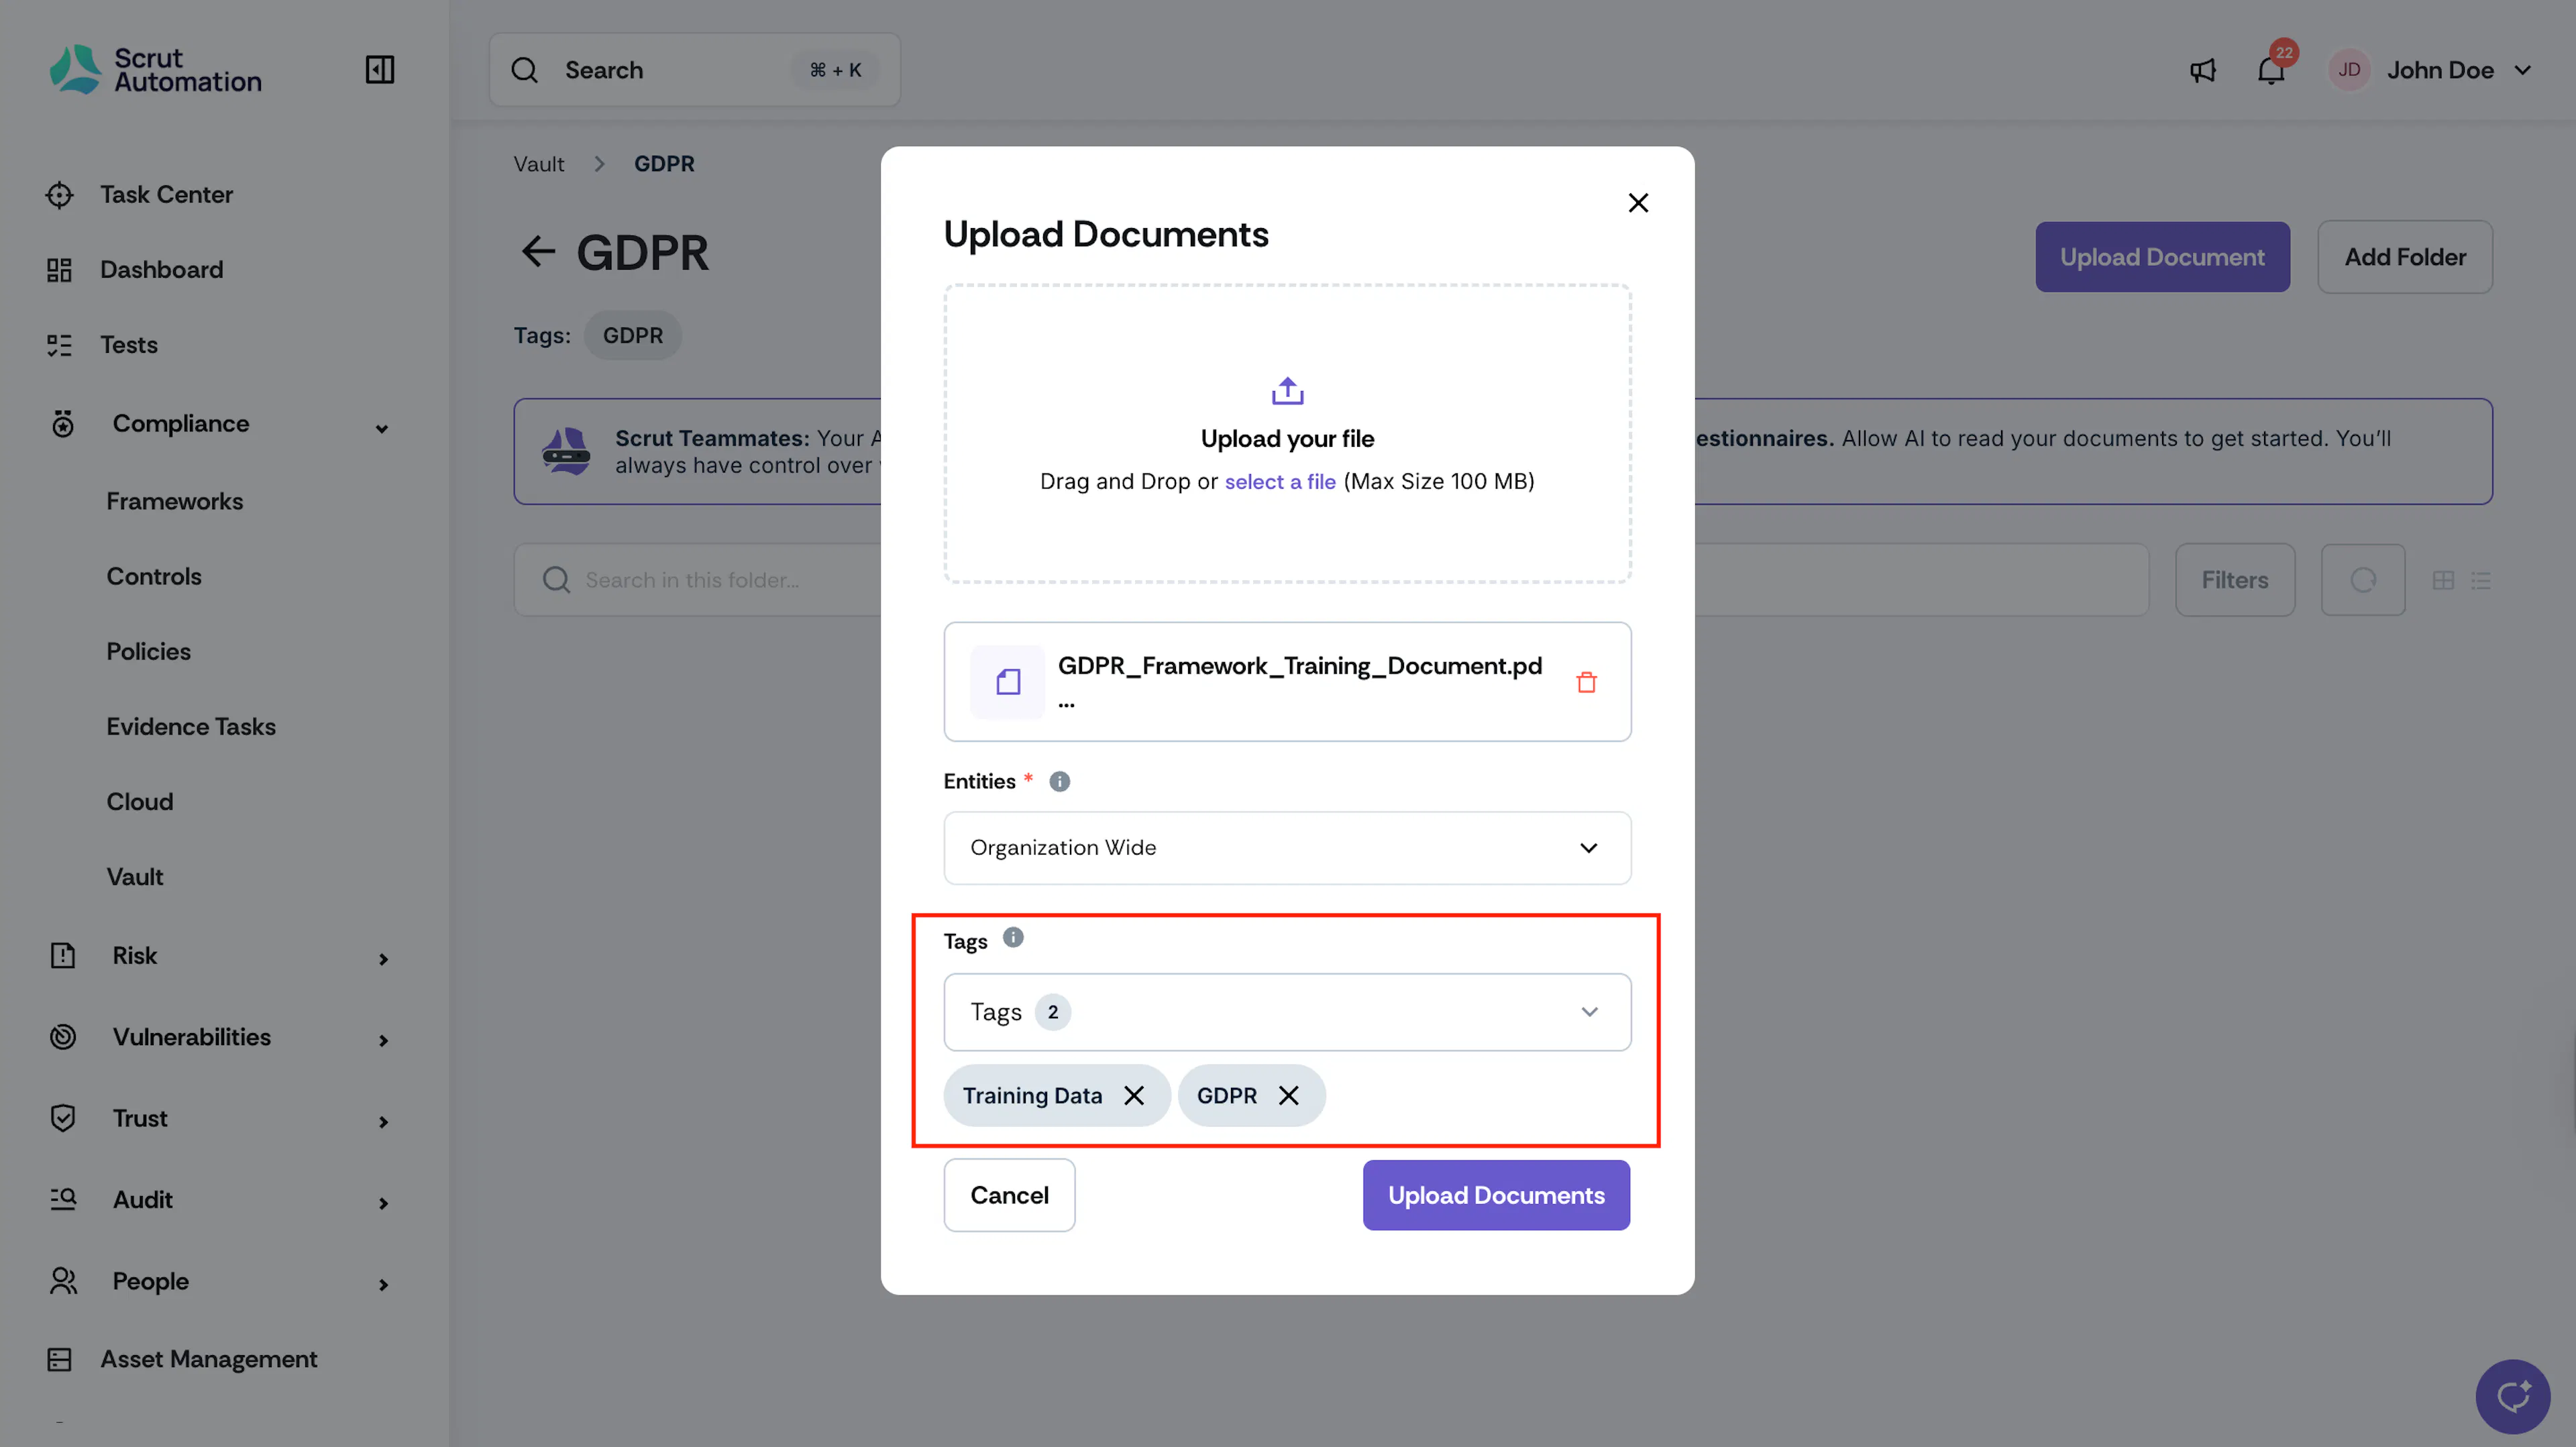
You can also tag files directly, either when uploading or at any time after upload.
When Uploading a New File
- Navigate to the folder where you want to upload the file.
- Click Upload Document.
- Select your file.
- In the Tags field, select the tags that apply to this file.
- Click Upload.
For an Existing File
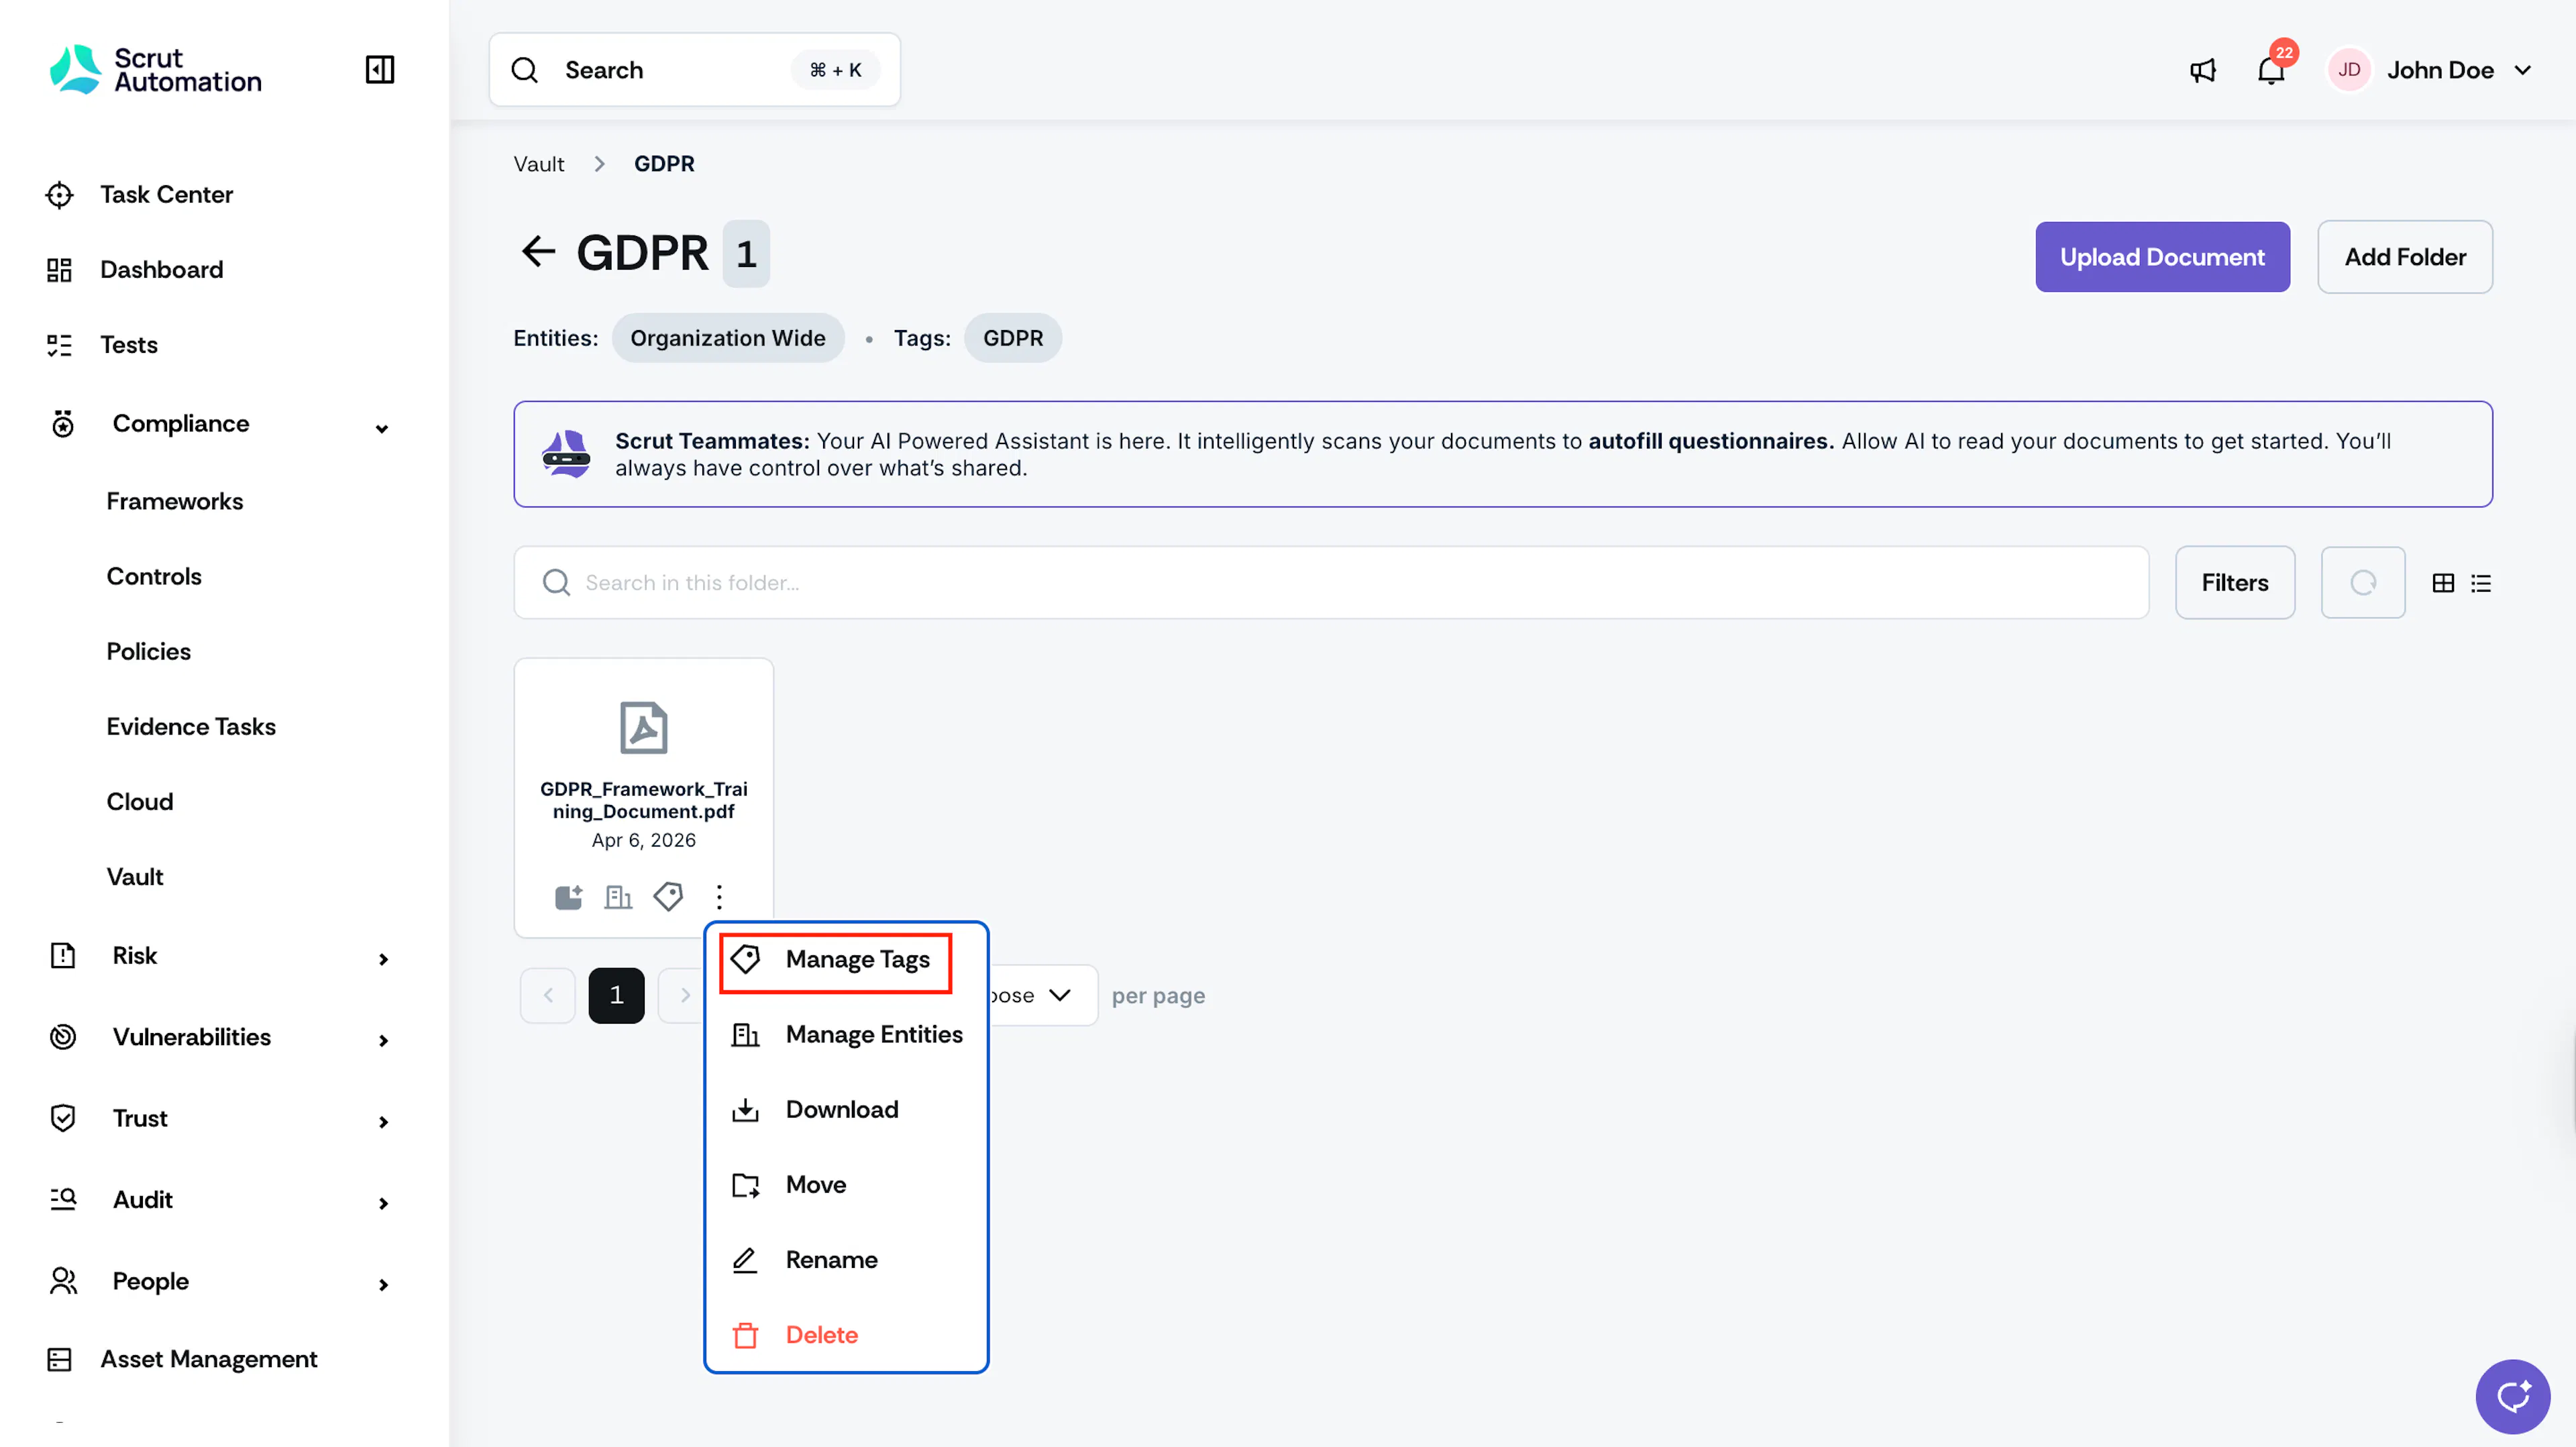
- Navigate to Compliance → Vault and open the folder containing the file.
- Click the three-dot icon next to the file and select Manage Tags.
- Select or deselect tags as needed.
- Click Save.
Step 4: Bulk Tag Multiple Files and Folders
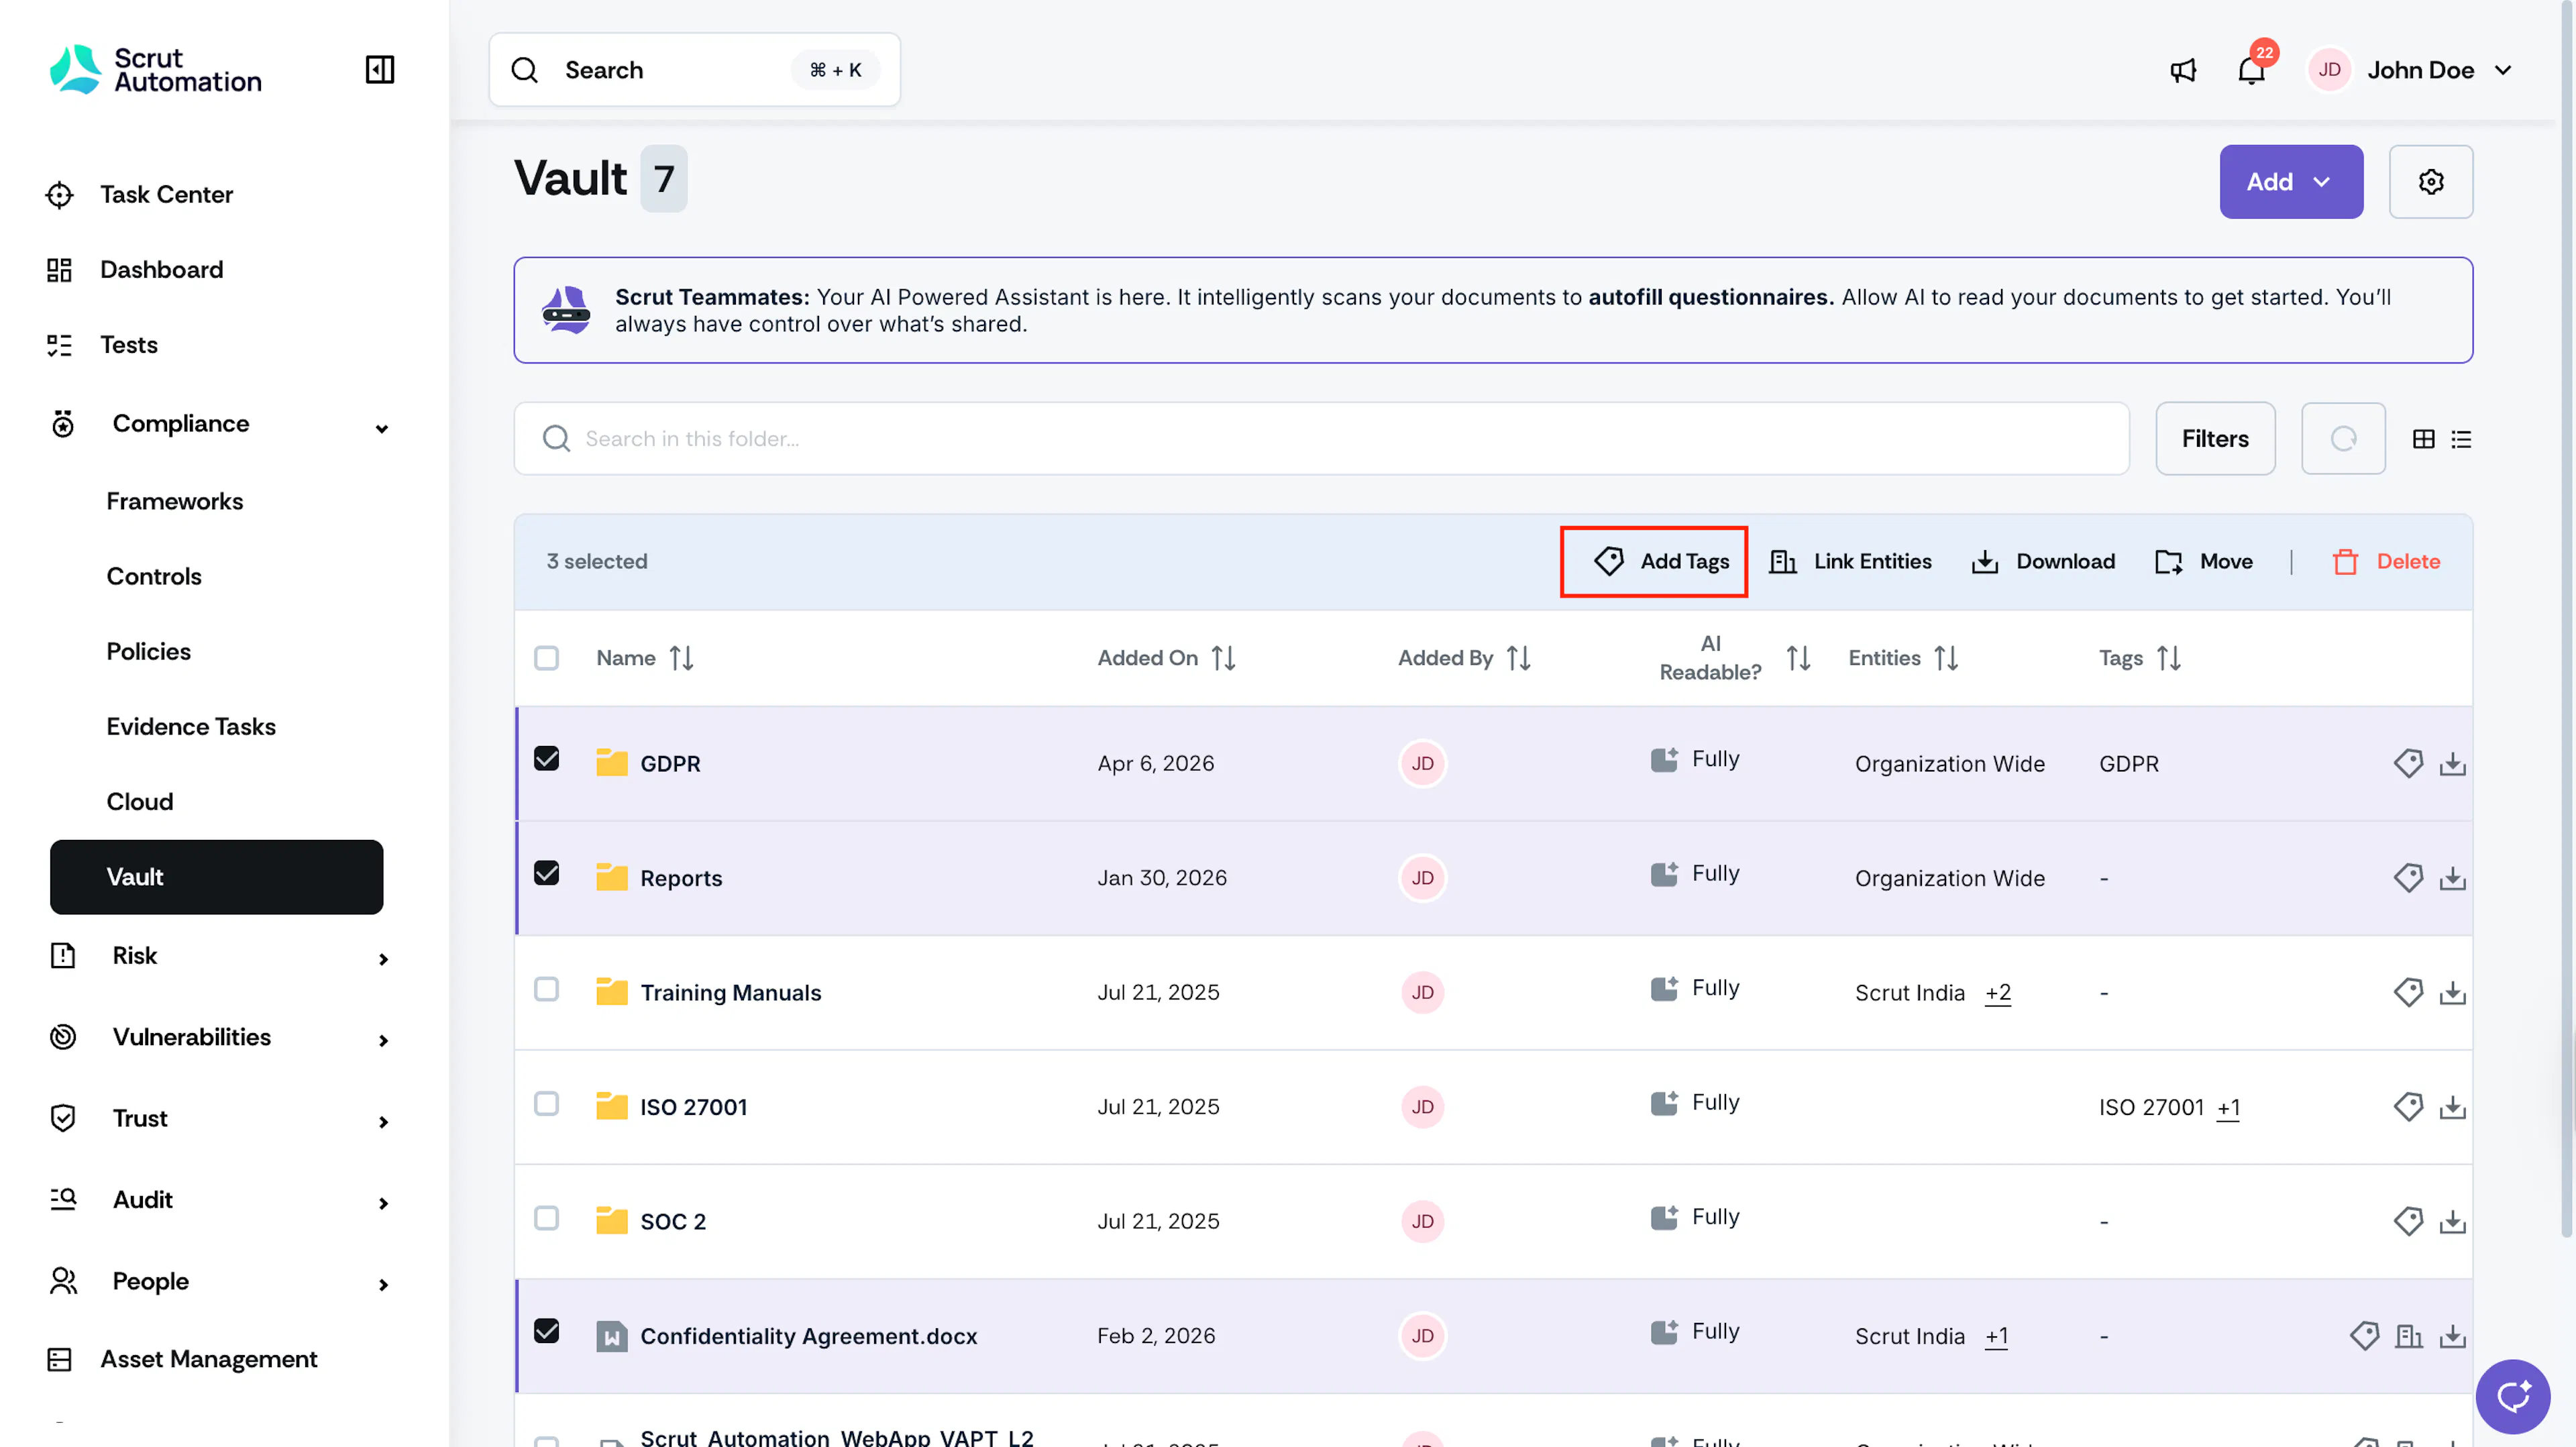
If you have several items to tag at once, use the bulk action bar to tag them all at once. Bulk tagging adds the selected tags to each item's existing tags without replacing any already assigned tags.
- Navigate to Compliance → Vault.
- Select the checkboxes next to the files and folders you want to tag.
- Click Add Tags in the bulk action bar that appears at the top.
- Select the tags you want to apply. You can also create a new tag from this dropdown if needed.
- Click Apply.
Step 5: [Optional] Filter Vault Contents by Tag
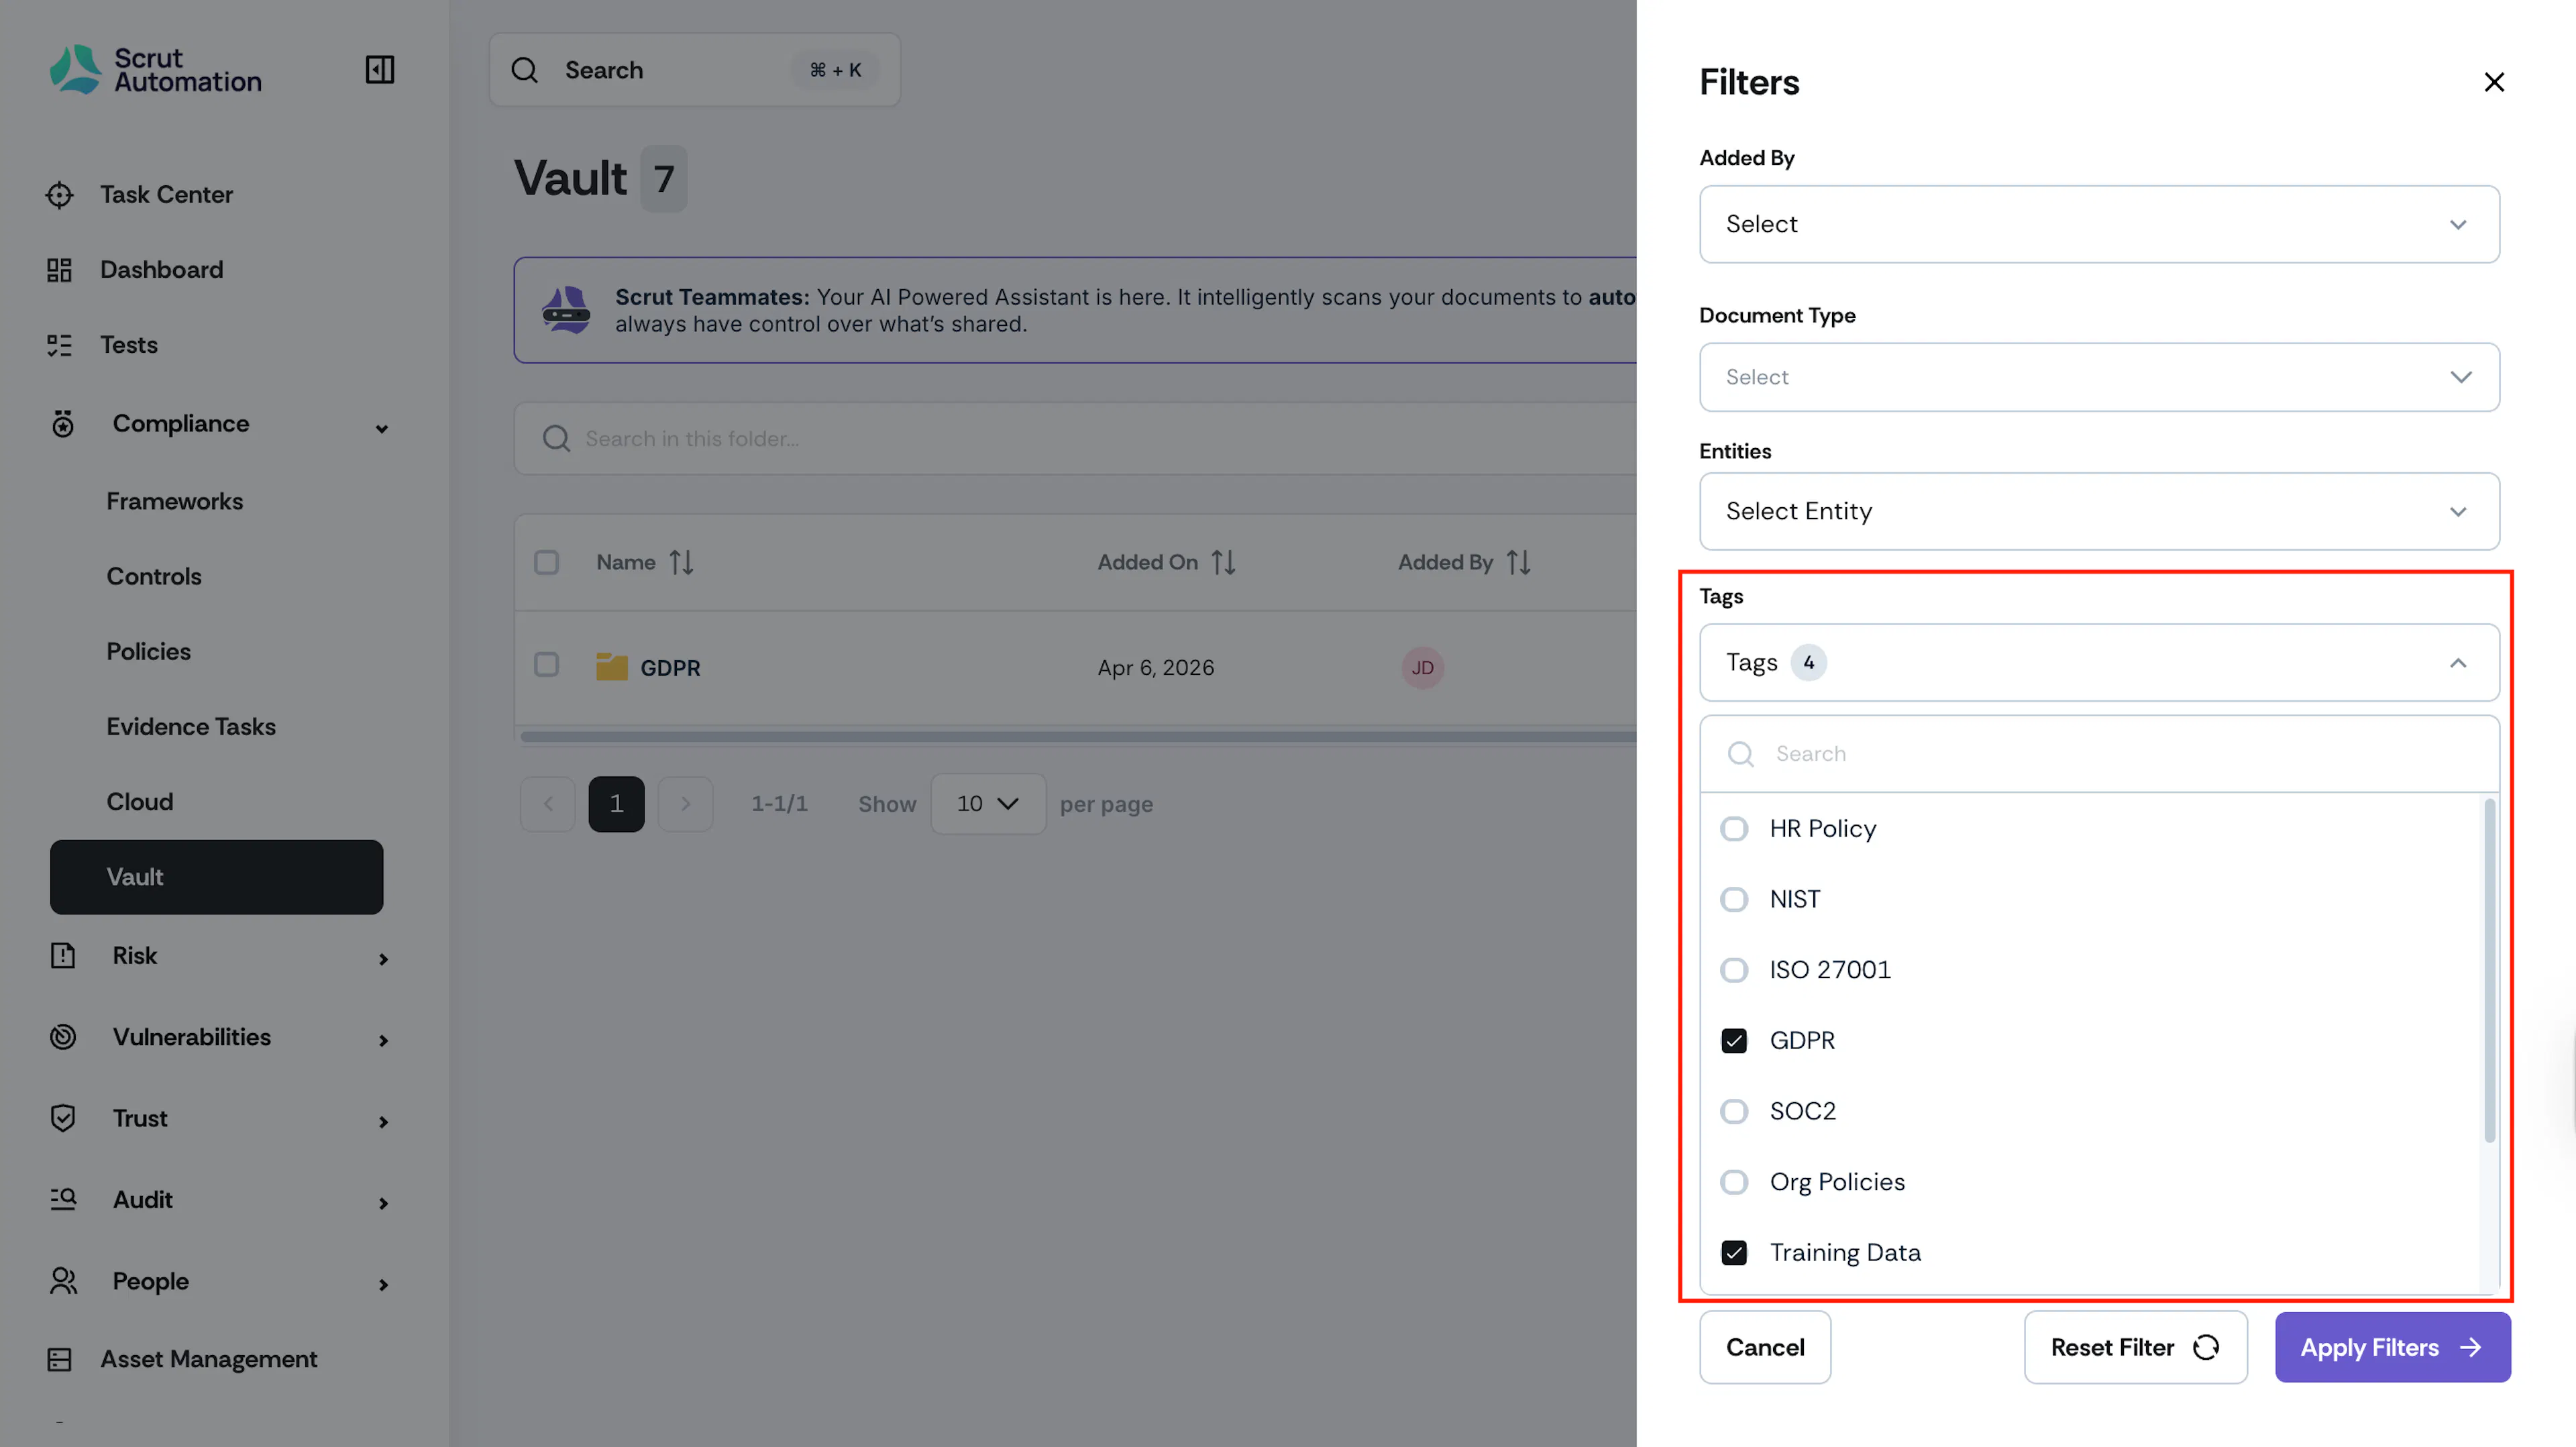
Once your files and folders are tagged, you can filter the Vault to see only items with a specific tag.
- Navigate to Compliance → Vault.
- Click the Filters bar.
- Select Tags and choose the tags you want to filter by.
The Vault view updates to show only files and folders with those tags directly assigned.
Step 6: Use Tags on a Questionnaire
With your tags set up and assigned, you can now scope which Vault content Questionnaire Automation references when generating answers.
-
Navigate to Trust → Questionnaire.
-
Click Add Questionnaire and select Create in Scrut.
-
Fill in the questionnaire details.
-
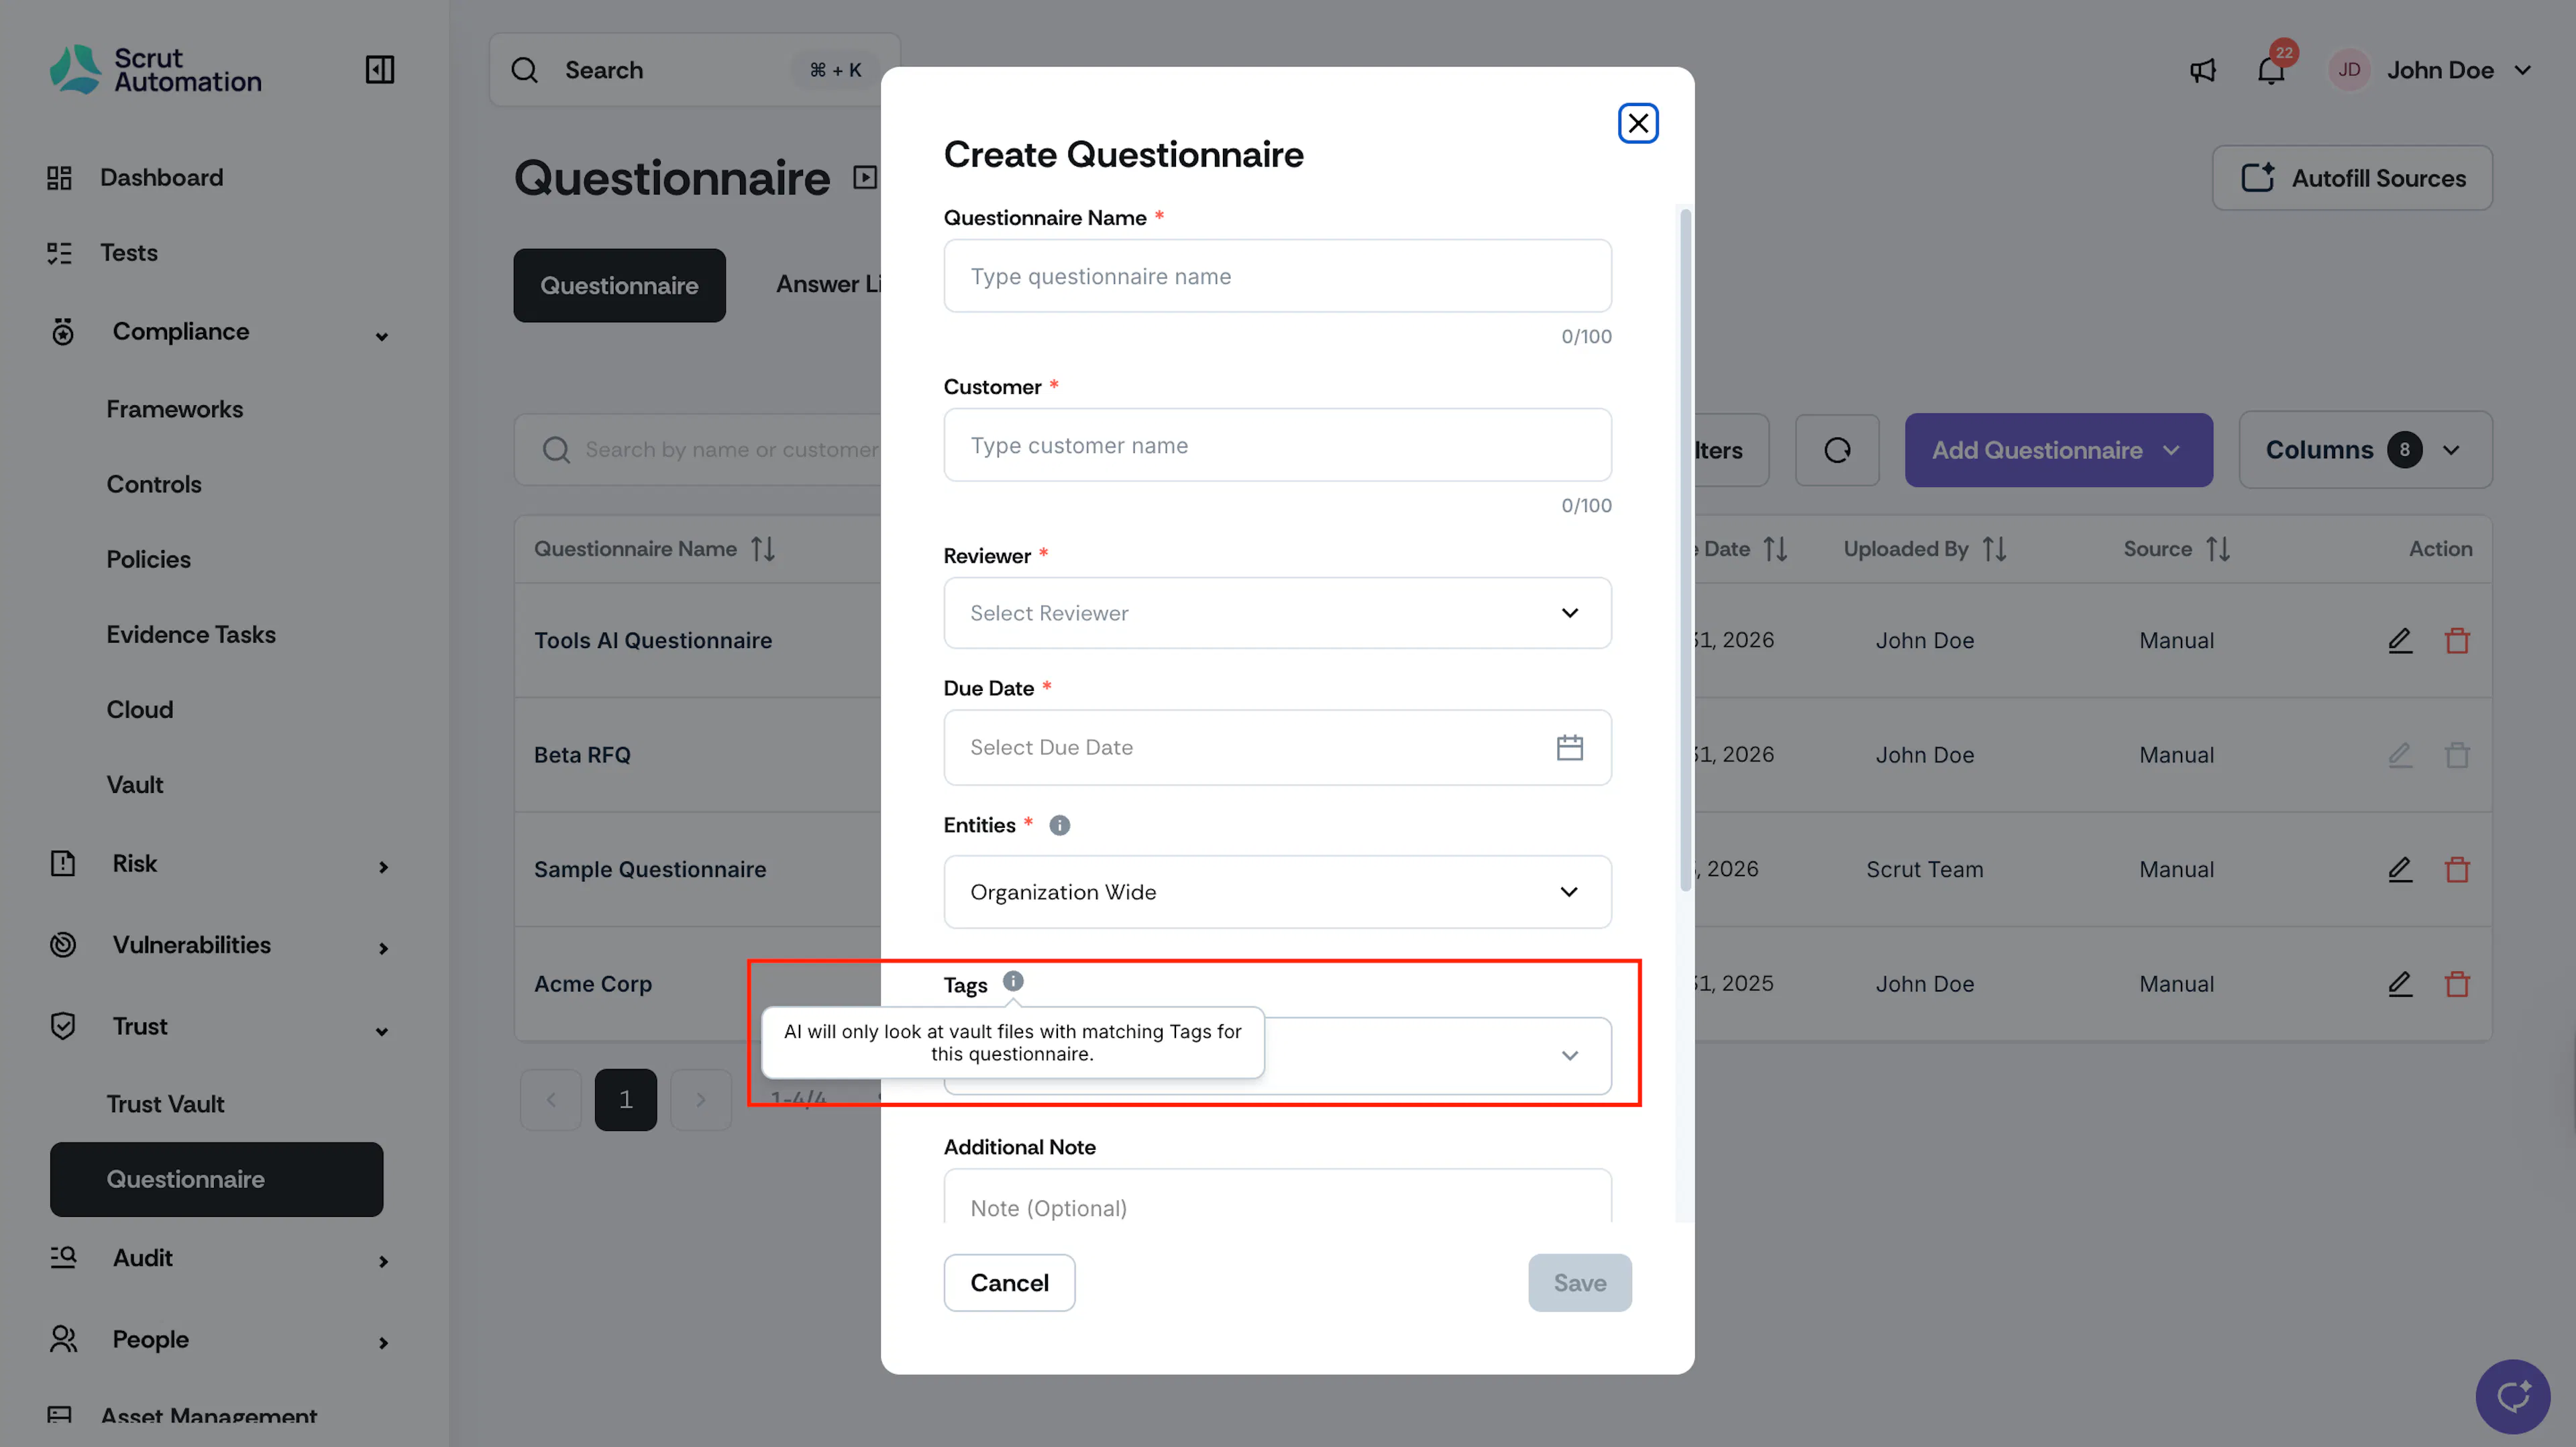
In the Tags selector, choose the tags that define which Vault content should feed this questionnaire. This field is optional.
Note: If you leave it empty, Scrut Teammates considers all Vault content when autofilling the questionnaire.
-
If you also select an Entity, Scrut Teammates applies AND logic between tags and entities: only files that match at least one selected tag AND belong to at least one selected entity are considered.
-
Click Save.
When Questionnaire Automation runs, it pulls context only from Vault files that carry at least one of the tags you selected. If no matching files exist for the combination of tags and entities you chose, Scrut Teammates shows a "No matching files found" empty state.
Note: You can edit the tags on a questionnaire after creation. Changing tags does not re-trigger autofill for questions that are already answered. Only new and unanswered questions will use the updated tag filtering.
Managing Existing Tags
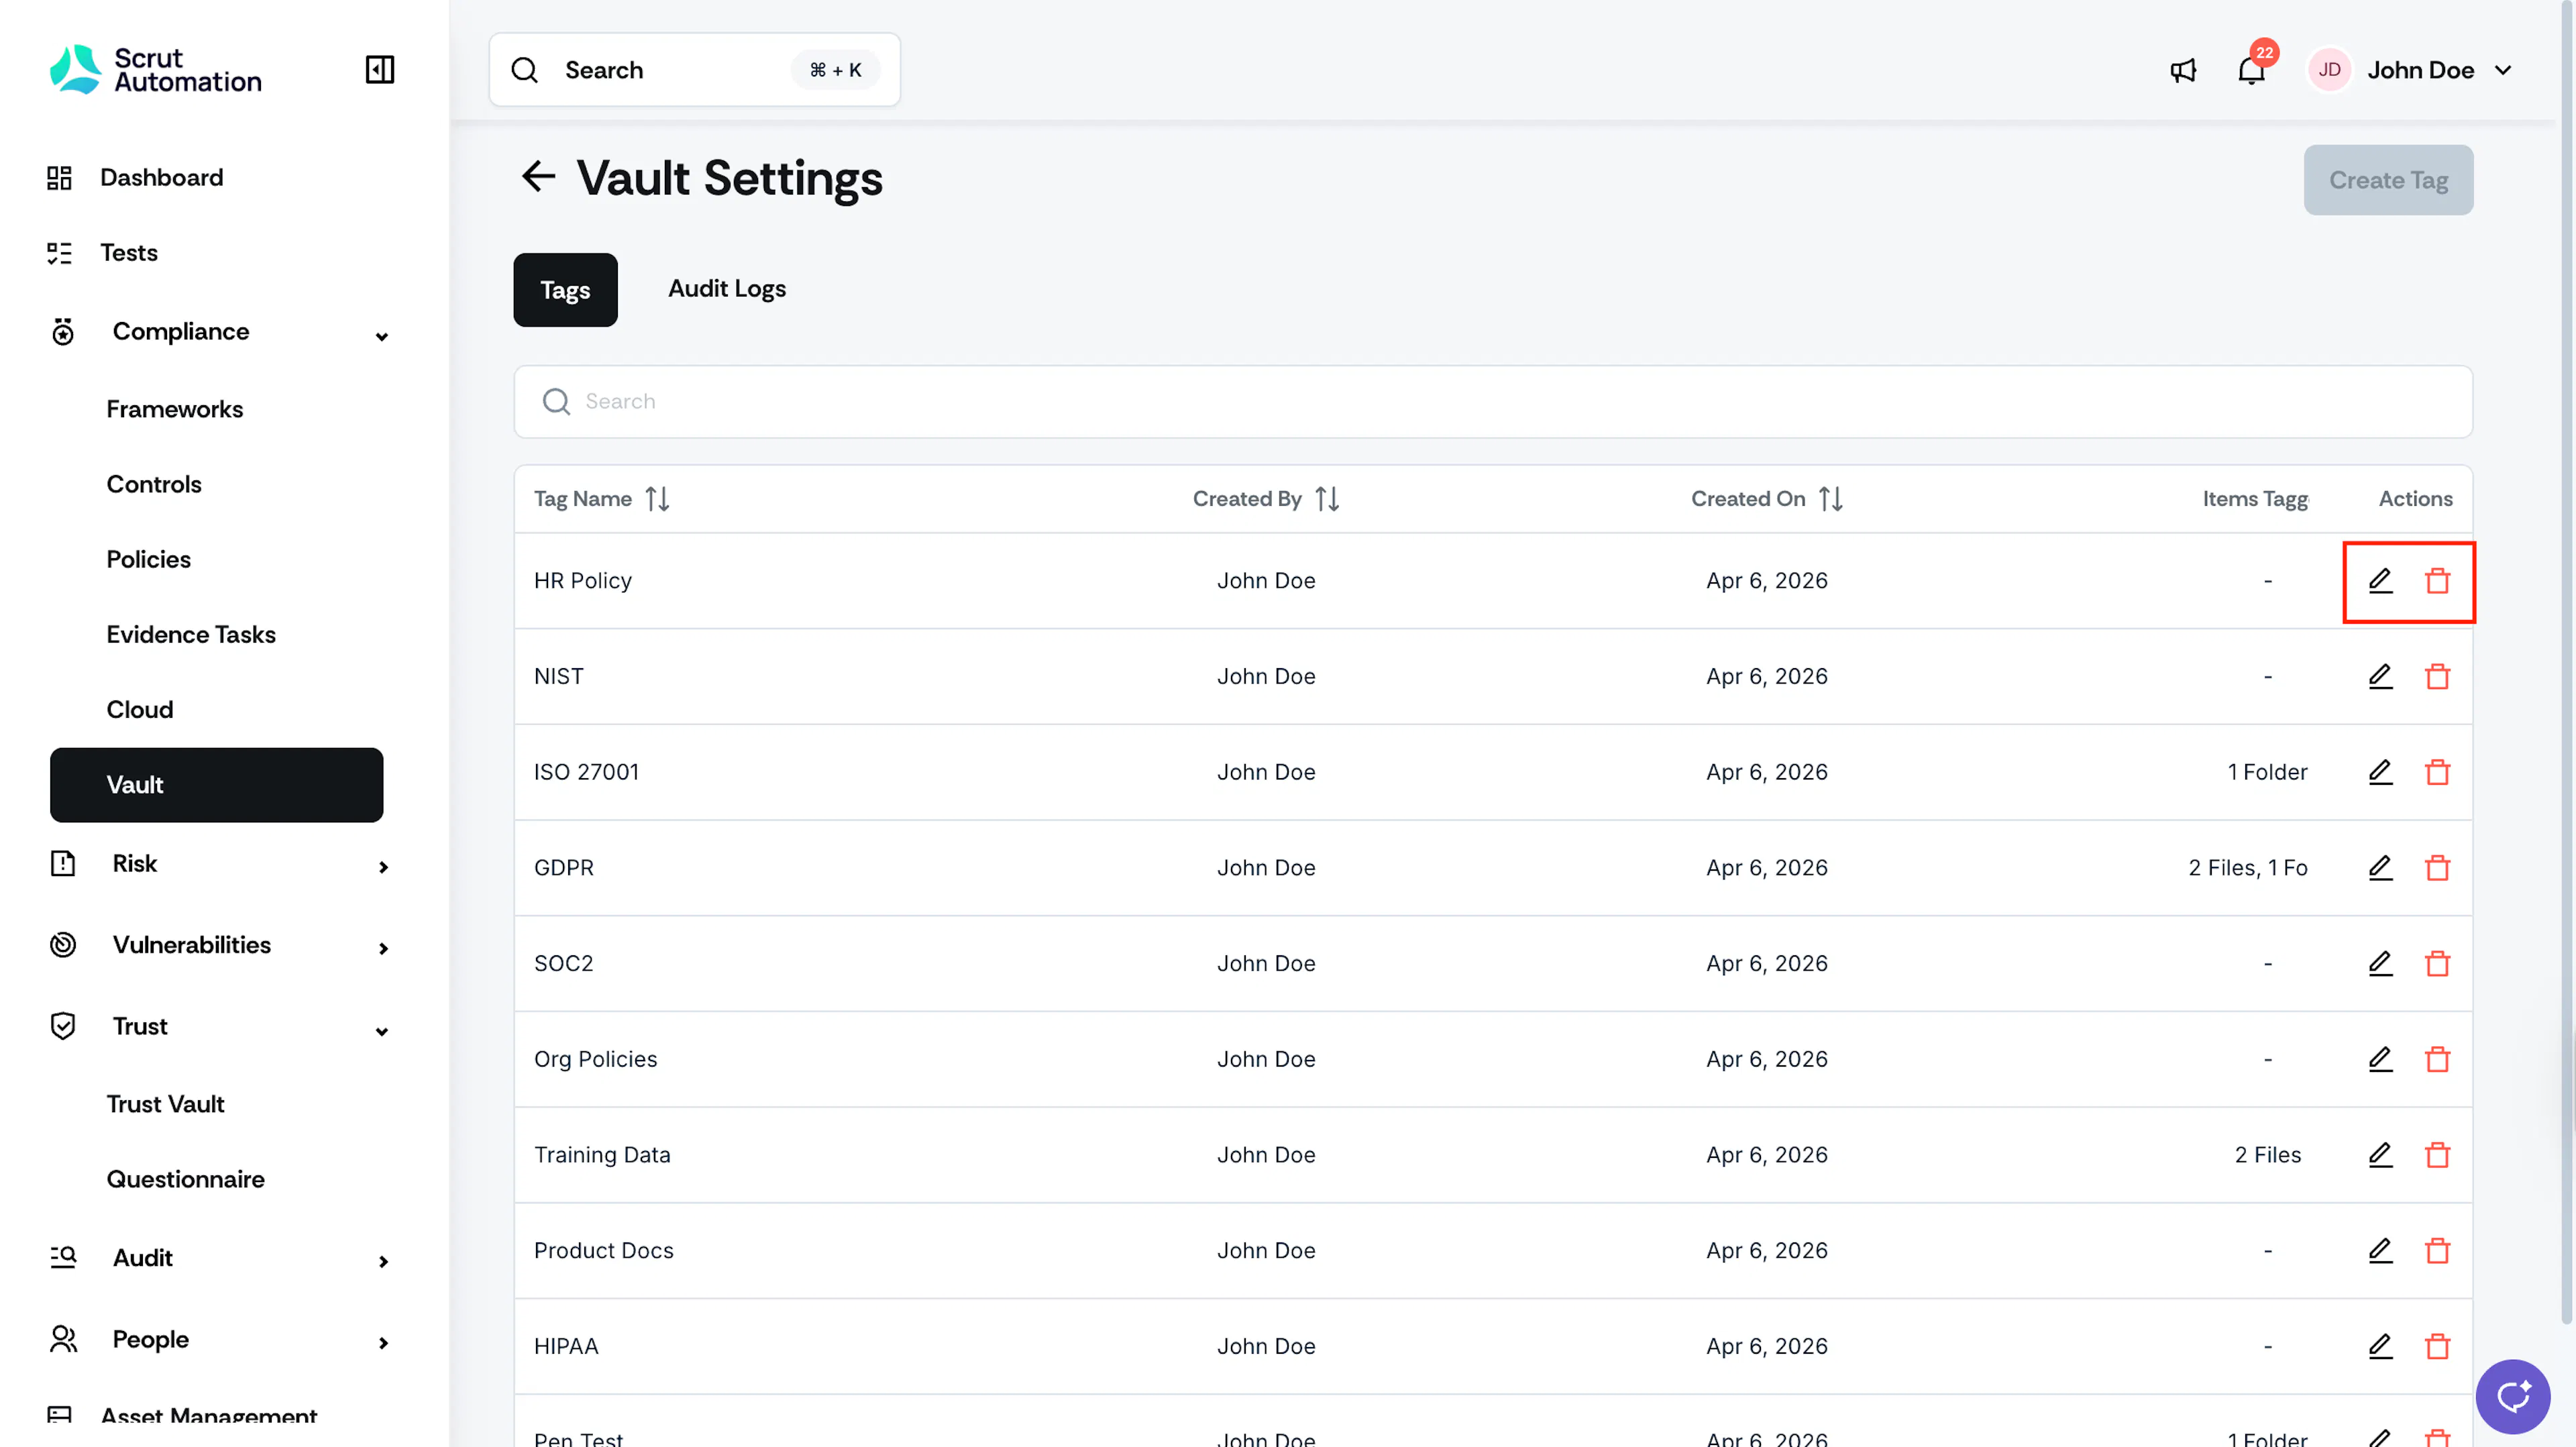
Edit a Tag Name
- Navigate to Compliance → Vault → Settings → Tags.
- Click the edit icon next to the tag you want to rename.
- Enter the new name and click Save.
The updated name propagates to all files, folders, and questionnaires referencing this tag.
Delete a Tag
- Navigate to Compliance → Vault → Settings → Tags.
- Click the delete icon next to the tag.
- Review the impact summary in the confirmation modal. It shows how many items and questionnaires reference this tag.
- Click Delete to confirm.
The tag is removed from all assigned files, folders, and questionnaires. Questionnaires with only this tag revert to no-tag filtering and will consider all Vault content on the next autofill run.
Heads Up!
Tag deletion and renaming are blocked if any questionnaire referencing the tag has an active autofill running. Wait for autofill to complete before making changes to the tag.