Who can use this feature
Supported on Foundation, Growth, and Scale plans
The Policy Editor is an in-platform tool that helps you create, edit, and format policies and enhance team collaboration. It helps you:
Save Time: Quickly draft policies using built-in templates and pre-defined sections.
Collaborate Effectively: Use comments to request feedback and clarification from team members.
Ensure Consistency: Leverage formatting tools to maintain a unified structure and style across all policies.
Step 1: Open the Policy Editor
Log in to Scrut and click Compliance → Policies in the left panel.
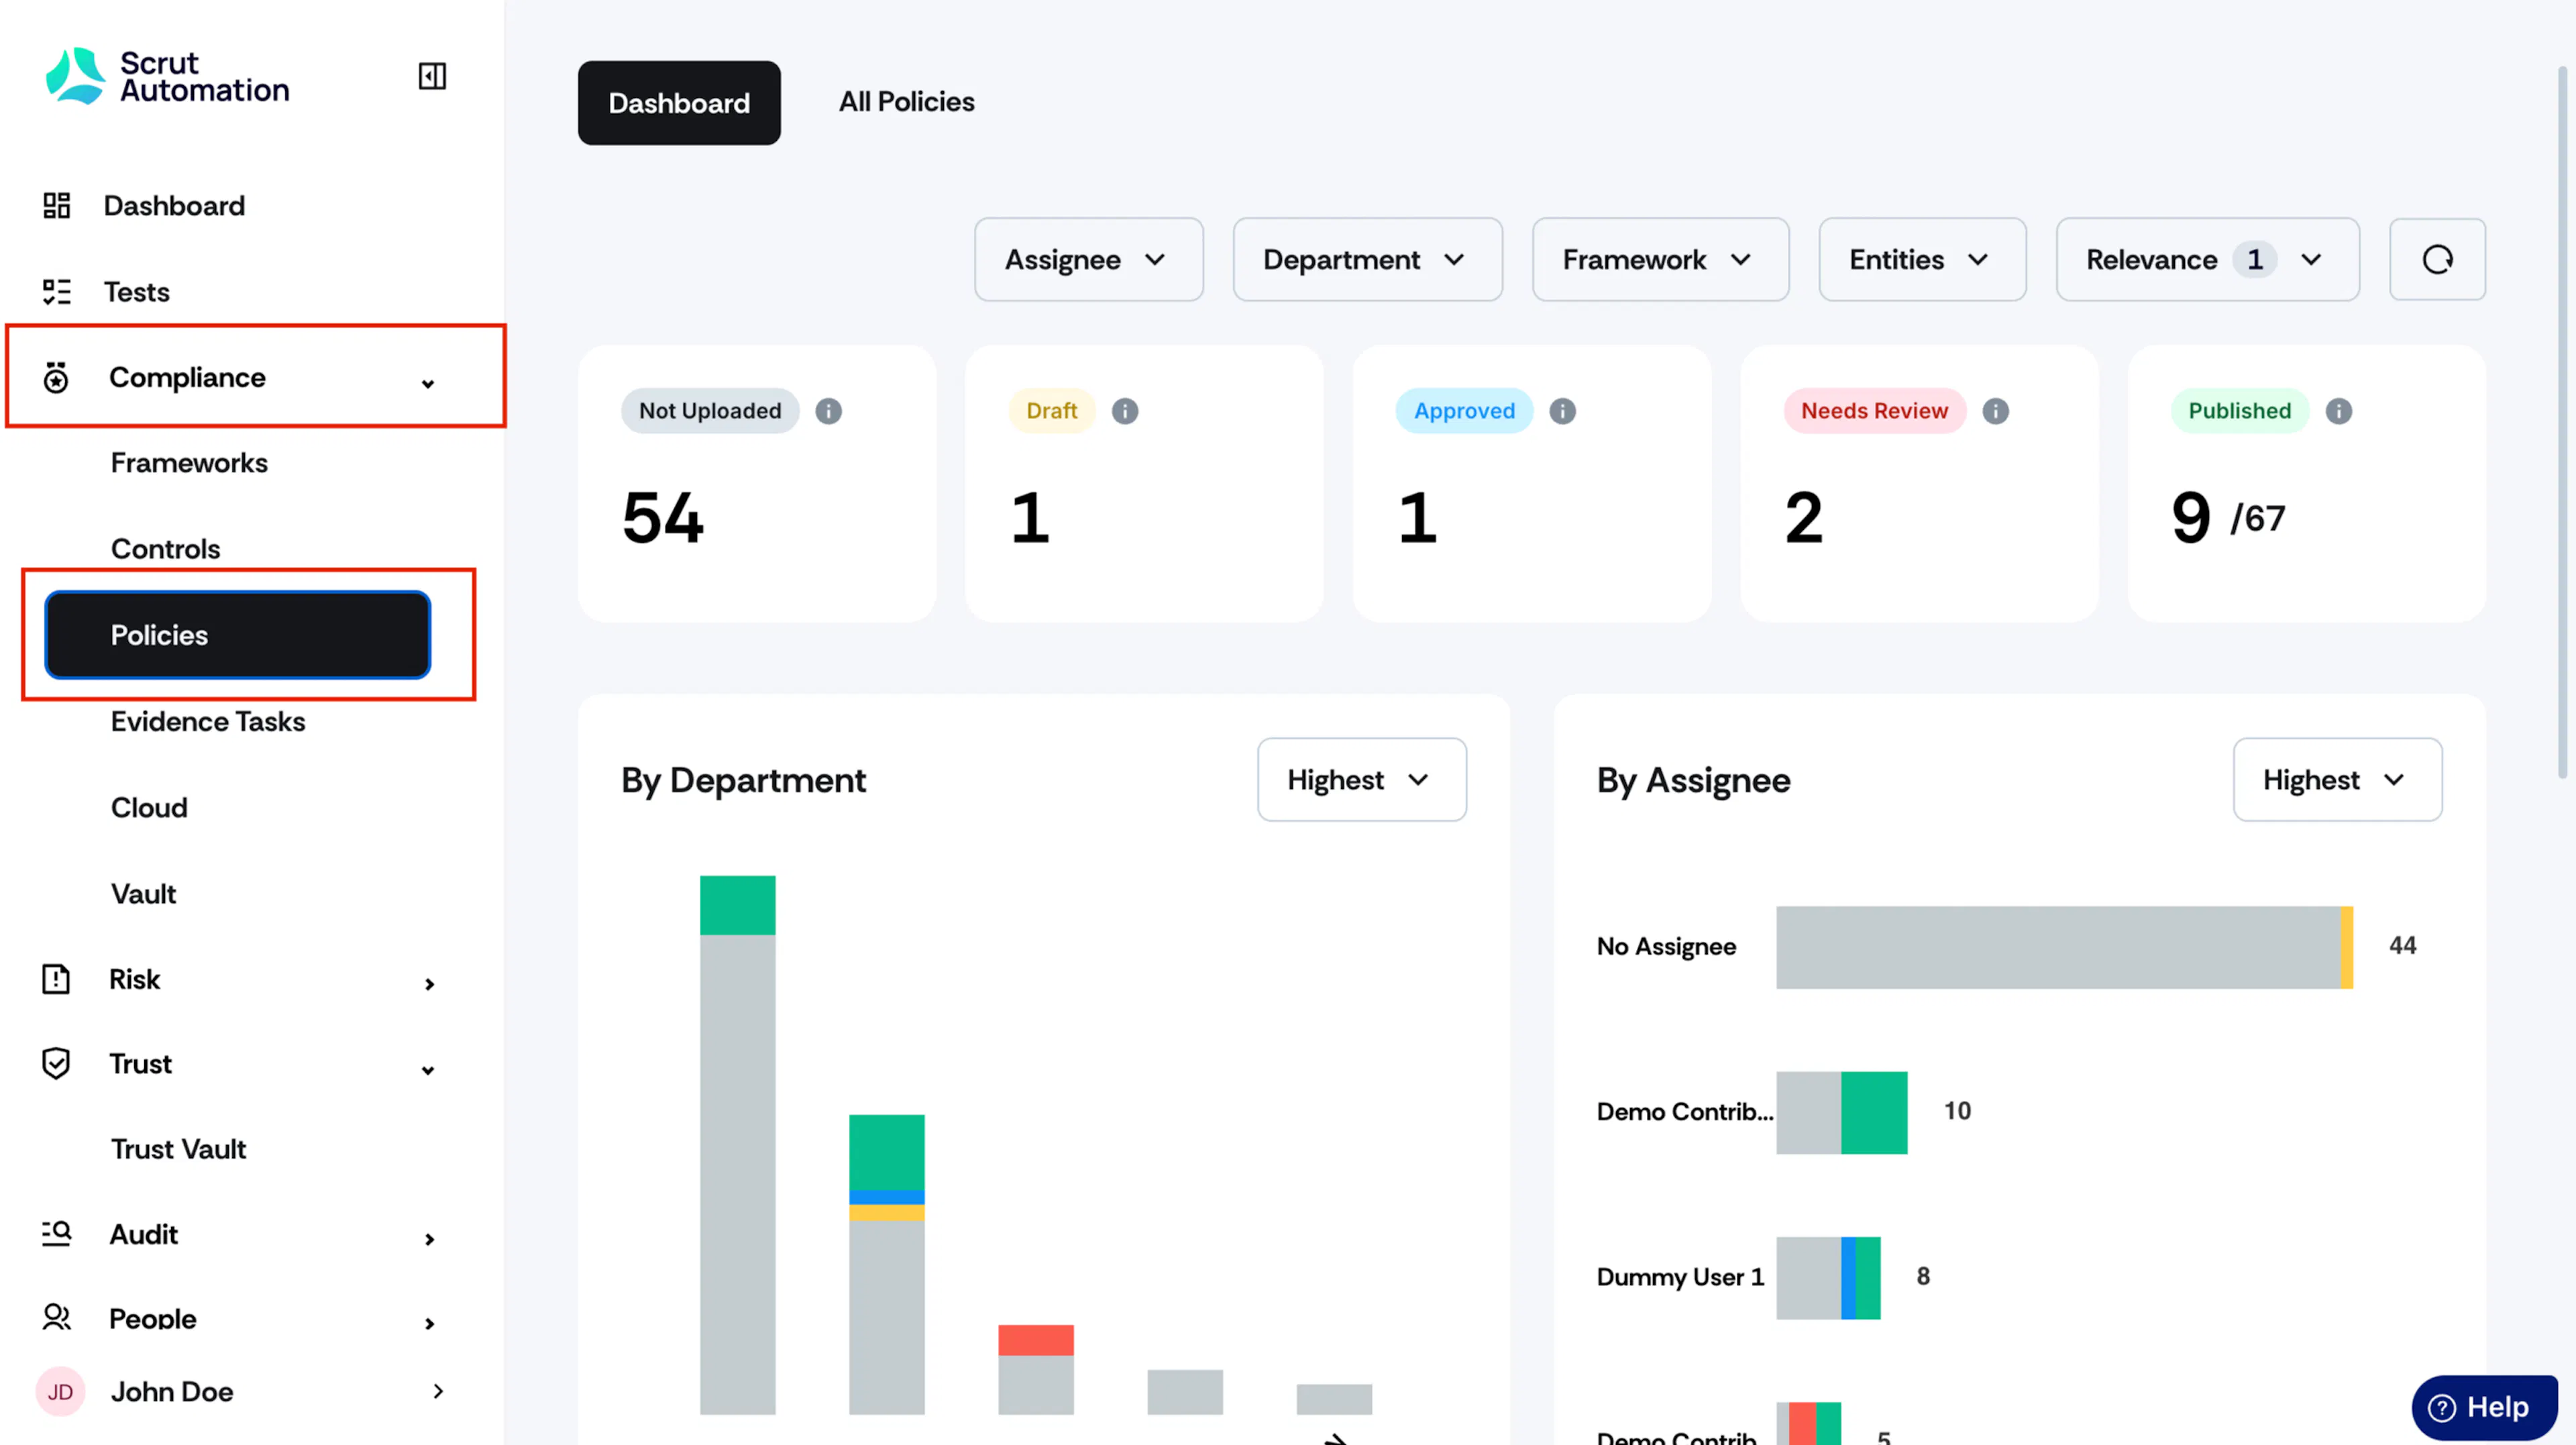
Navigate to the All Policies tab and create a new policy or open an existing one.
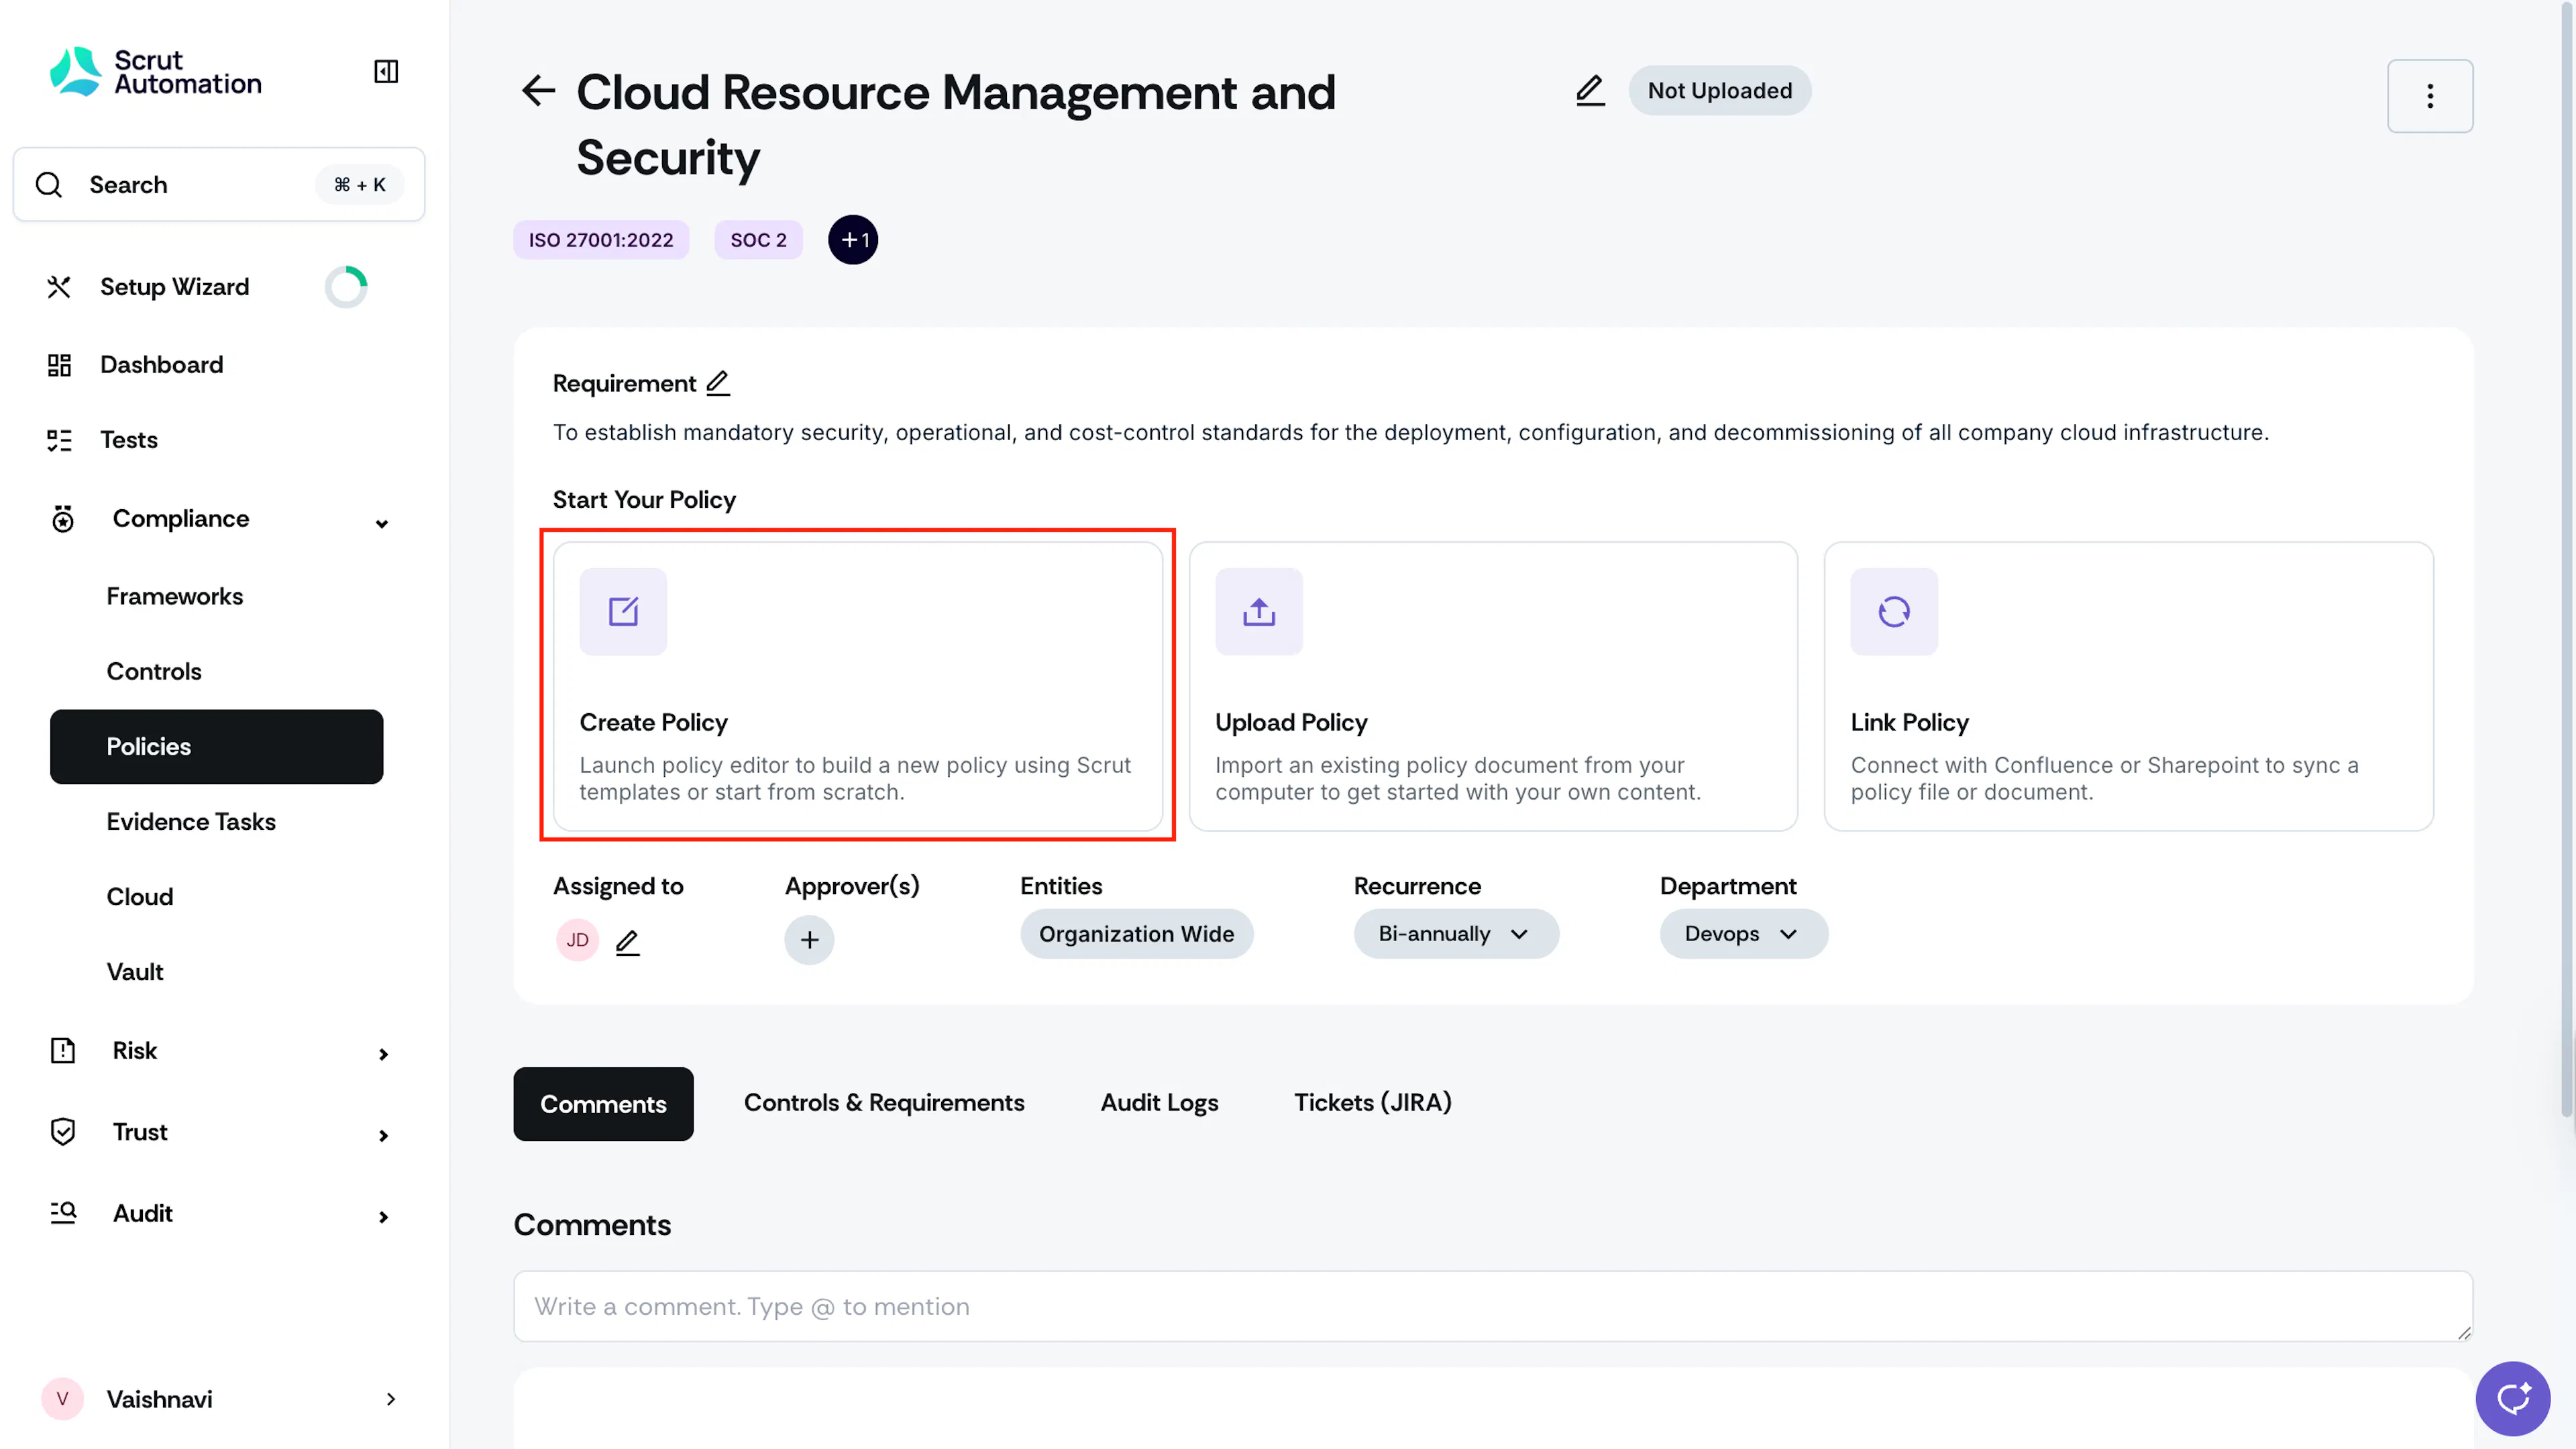
On the Policy Details page, scroll to the Attachments section and click Create Policy.
Heads Up!
Scrut pre-populates the editor with a sample policy template, that you can edit and modify, as per your requirements. However, note that the sample template is not available for custom policies.
Step 2: Edit and Format Content
You can edit and format the content using the tools available on the toolbar at the top.
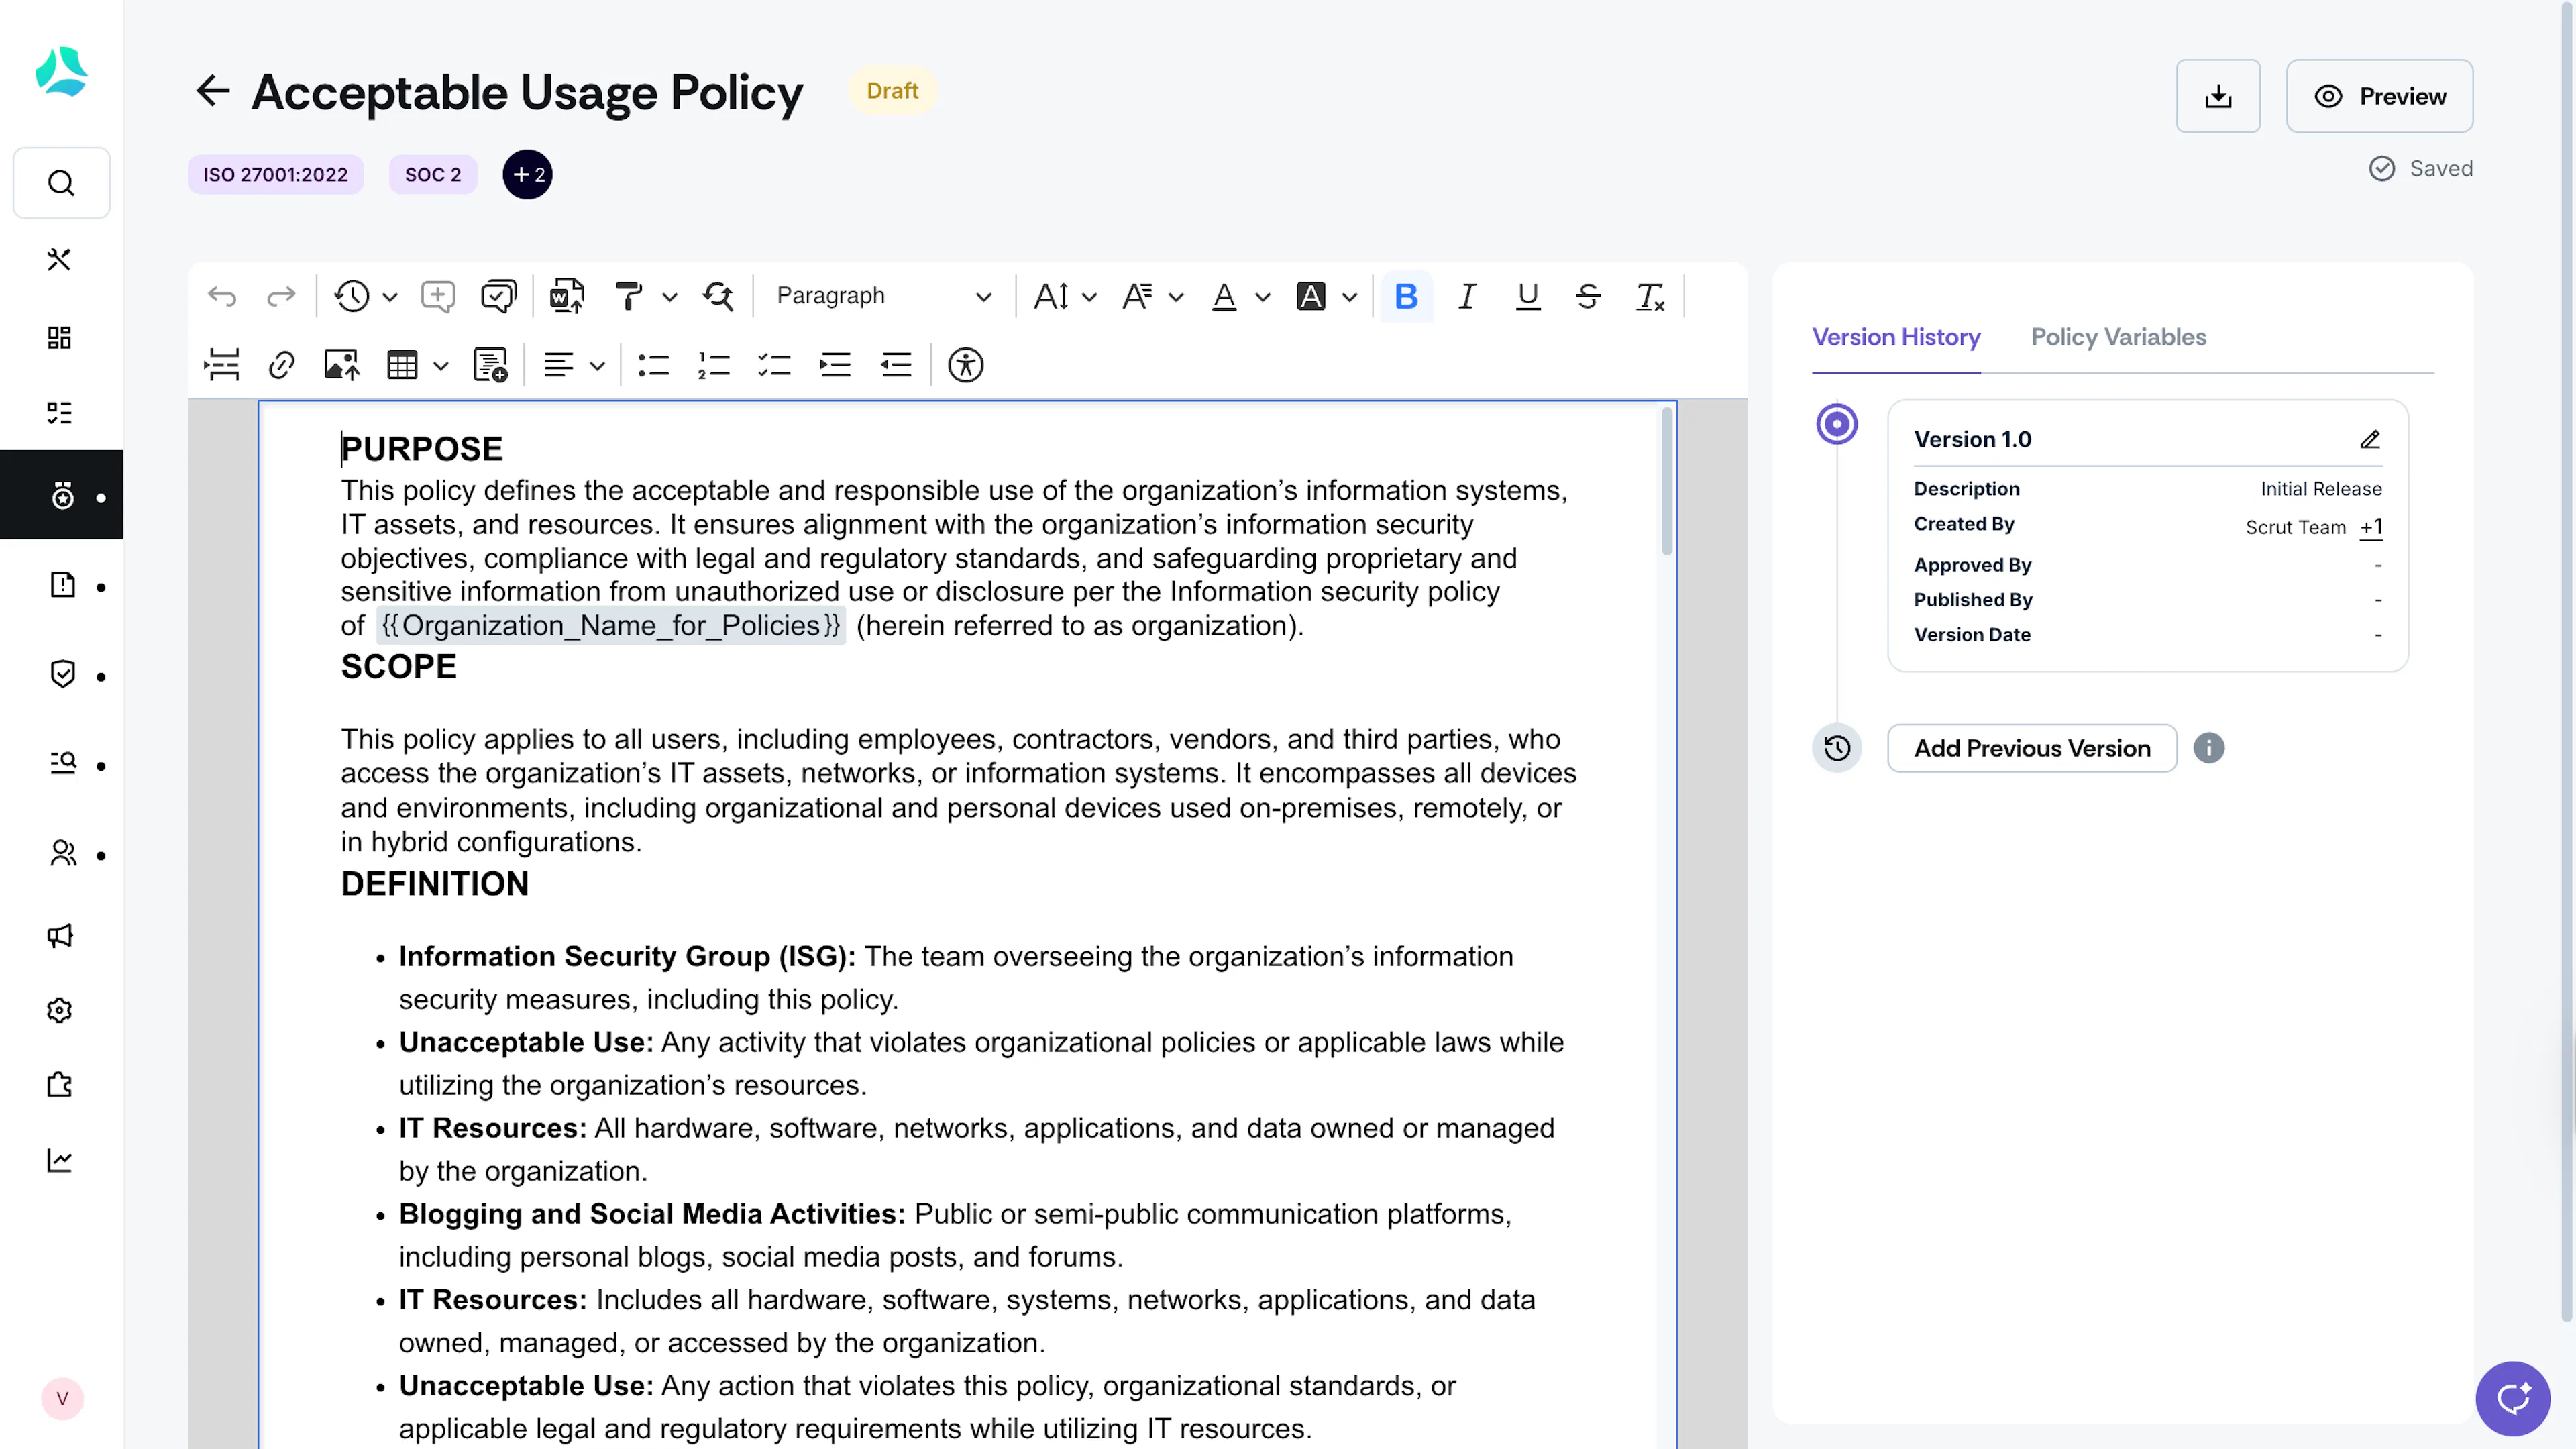
Use the icons in the toolbar at the top to add and edit text, format paragraphs and spacing, include a table of contents, etc. Here’s a cheat sheet to help you get familiar with the various icons on the toolbar.
Text Formatting
Icon | Tool | Usage |
| Heading Levels | Create a logical hierarchy in your text using appropriate heading levels. For regular text, choose Paragraph. |
| Font Size | Change the font size. The default font size is 16 pts. Choose from options: 10, 12, 14, 16 (Default), 18, 20, and 22 pts. |
| Font Family | Choose your preferred font style from Arial, Courier New, Georgia, Lucida Sans Unicode, Tahoma, Times New Roman, Trebuchet MS, and Verdana. |
| Font Color | Open the color palette and select the desired font color. |
| Font Background Color | Open the color palette and choose the background font color. |
| Bold | Emphasize important information. |
| Italic | Highlight special items or definitions. |
| Underline | Underline text to highlight key information. |
| Strikethrough | Strikethrough for marking outdated content. |
| Remove Format | Clear all formatting (such as bold, italics, underline, superscript, subscript, and color) and return your text to the default style. |
| Text Alignment | Align text to Left, Right, Center, or Justify. |
| Bulleted List | Create a bulleted list. |
| Numbered List | Create a numbered list. |
| To-do List | Create a to-do list. |
| Increase Indent | Increase the indent level of the selected text or paragraph. |
| Decrease Indent | Decrease the indent level of the selected text or paragraph. |
| Paint Formatting | Quickly apply consistent formatting across different sections. |
Structuring and Navigation
Icon | Tool | Usage |
|---|---|---|
| Undo | Undo the last action. |
| Redo | Redo the last undone action. |
| Find and Replace |
|
| Import from Word | Upload content from an existing MS Word document. |
| Page Break | Include a page break at the specified location in the policy document. |
| Link | Add hyperlinks to external sources. Turn on the Downloadable toggle if you want the hyperlinked resource to be available for download to policy viewers. |
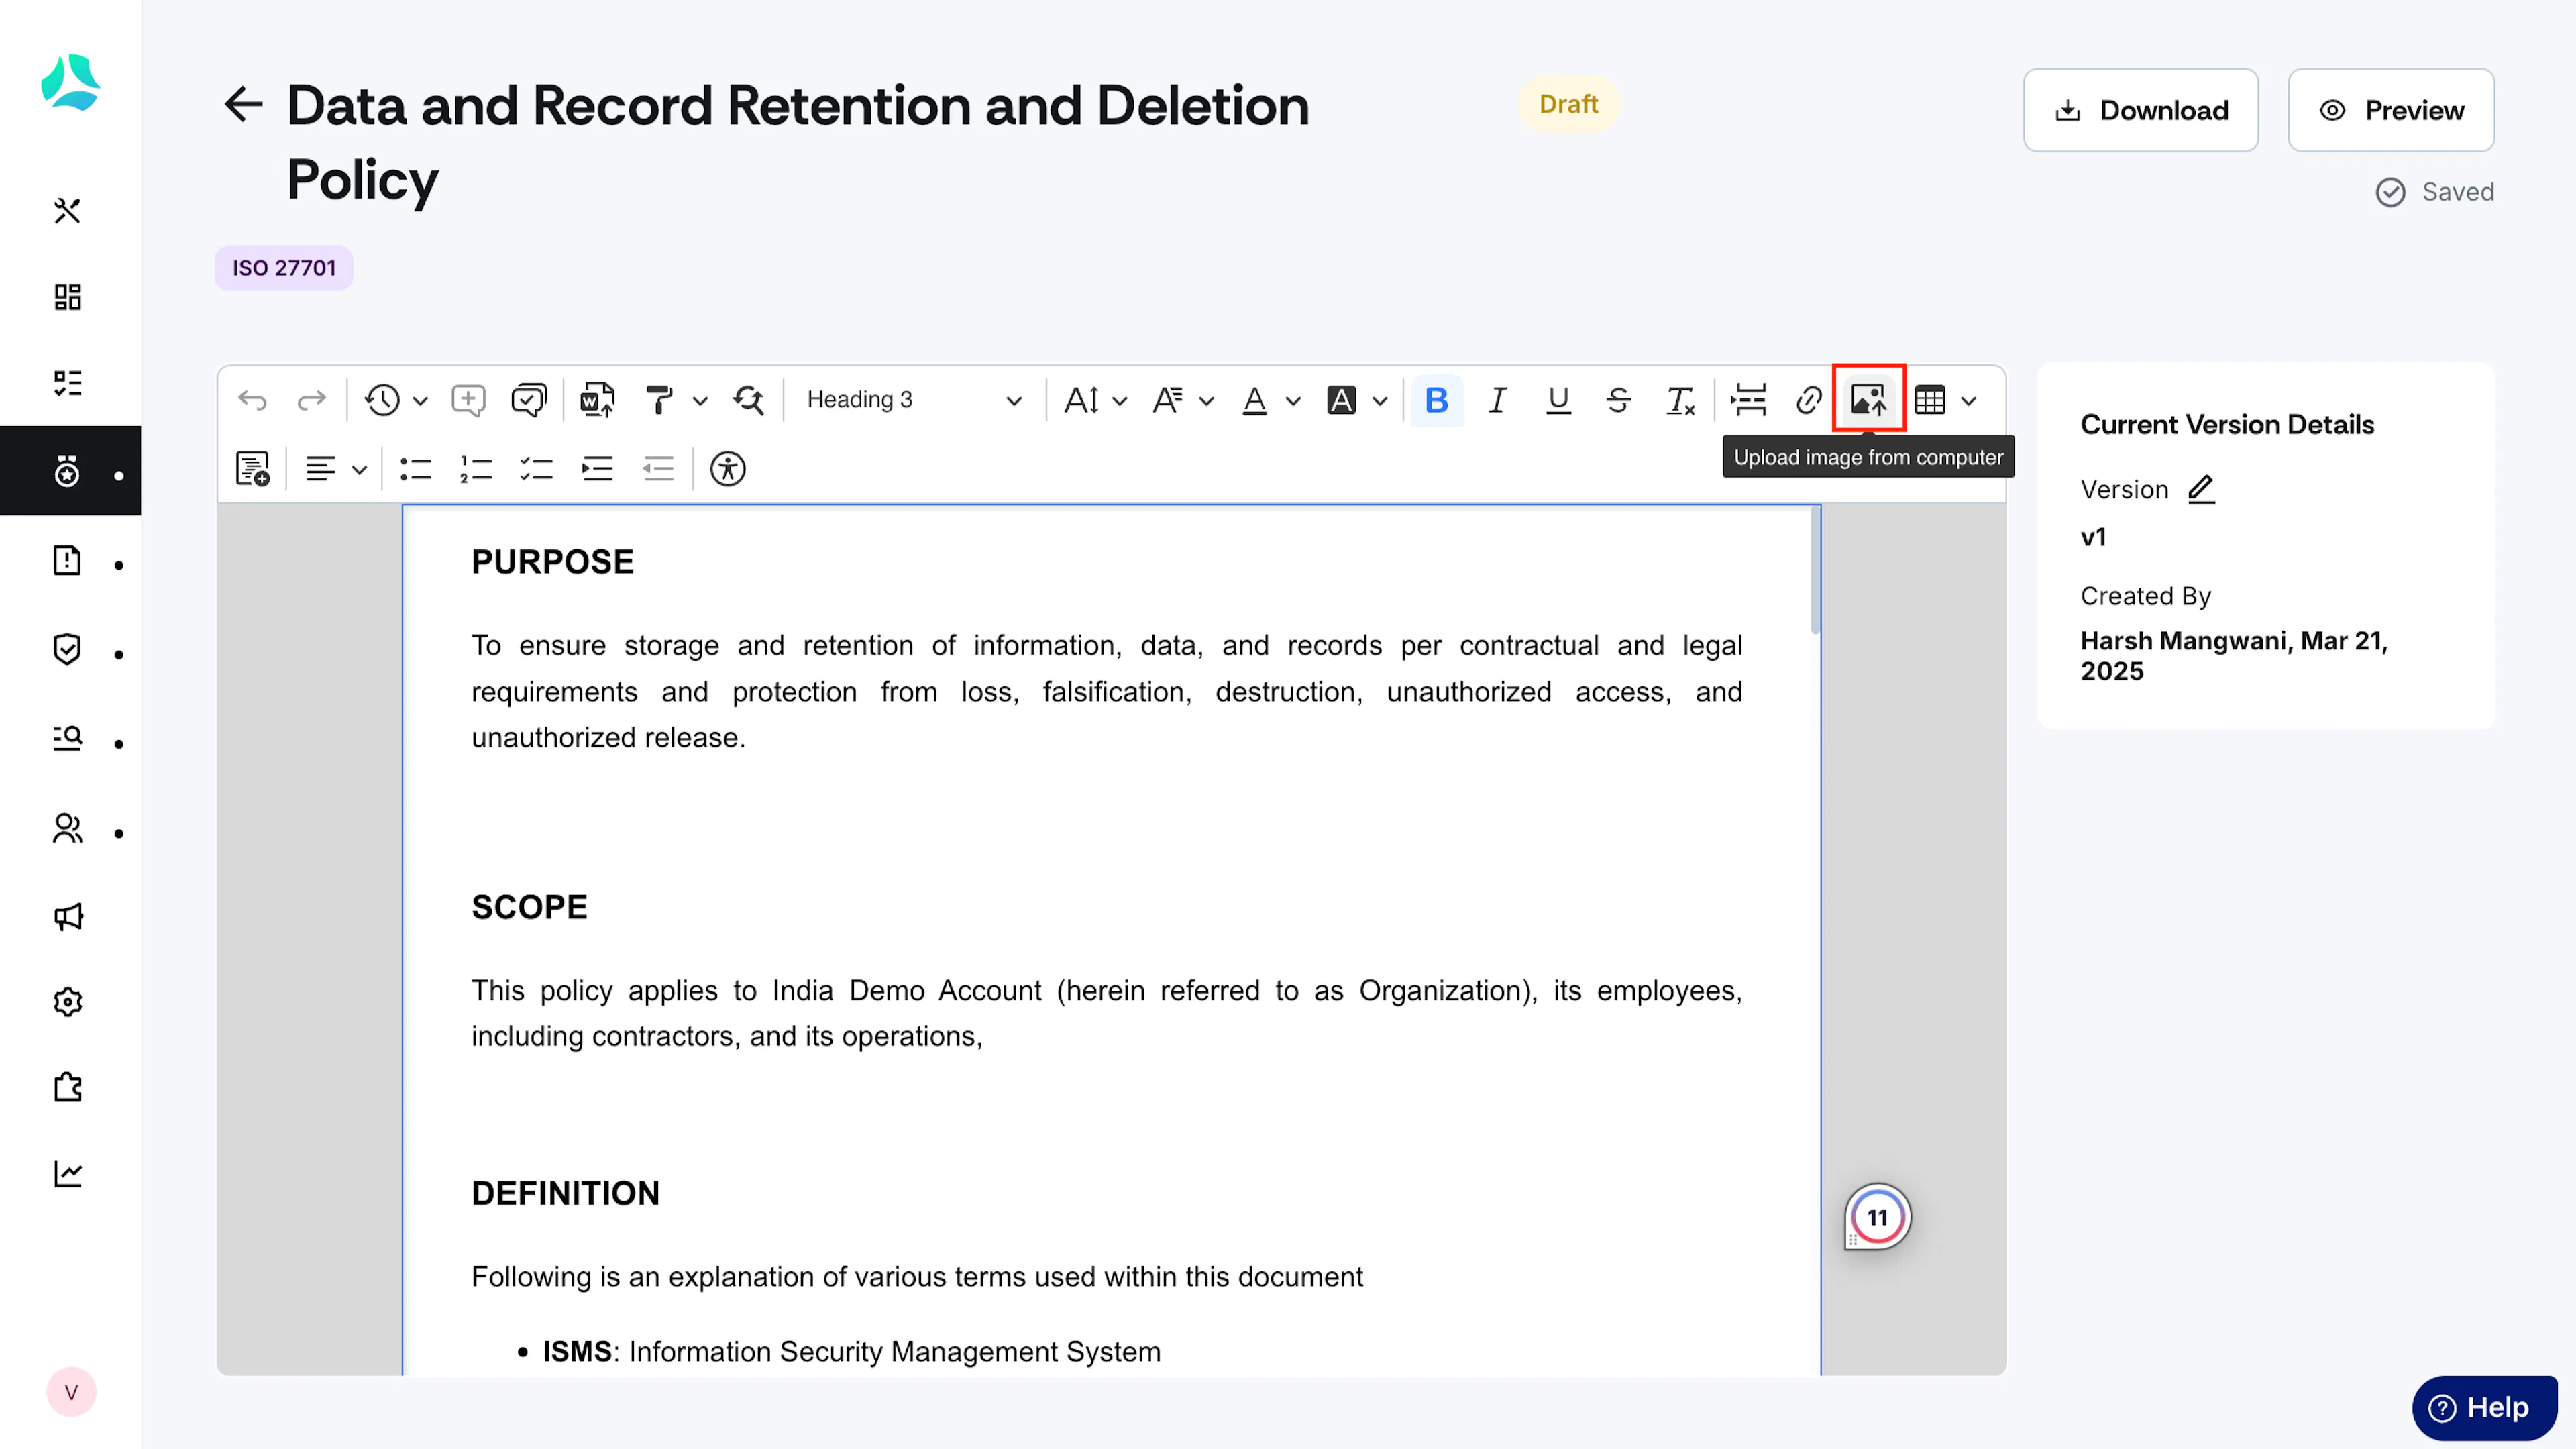
| Upload Image | Include an image from your computer. |
| Table | Add a table to organize data into rows and columns. |
| Table of Contents | Add a table of contents to the policy document. |
Working with Tables
How to Insert and Work with Tables
The policy editor includes a built-in table tool that lets you insert and customize tables directly in your policy content.
To Insert a Table
Place your cursor where you want the table to appear.
Click the Table icon in the editor toolbar.
Drag across the grid to select the number of rows and columns you need, then click to insert.

Manage Columns
Click inside any column, then click the Column dropdown in the table toolbar. You can:

Turn on Header column to style the first column as a header.
Click Insert column left or Insert column right to add a column.
Click Delete column to remove the selected column.
Click Select column to highlight the entire column for bulk formatting.
Manage Rows

Click inside any row, then use the Row dropdown in the table toolbar to insert rows above or below, delete a row, or toggle a header row.
Merge Cells

Select the cells you want to merge by clicking and dragging across them.
Click Merge cells in the table toolbar.
To split a previously merged cell, select it and click Split cell.
Set Table Properties
Click anywhere inside the table.
Click the Table properties icon in the table toolbar.

In the Table properties dialog, configure the following:
Border: Set the style (for example, Double), color, and width.
Background: Set a background color for the entire table.
Dimensions: Enter a fixed width and height.
Alignment: Align the table to the left, center, or right of the content area.
Click Save to apply, or Cancel to discard changes.

Set Cell Properties
Cell-level properties such as background color, padding, and border can be set separately by right-clicking a cell and selecting Cell properties.

Collaboration
Icon | Tool | Usage |
|---|---|---|
| Revision History | View a timeline of all changes made to the policy document. You can:
|
| Add a Comment | Add a comment and tag a team member for feedback or clarification. You can:
|
| Comments Archive | View all open and resolved comments. You can:
|
Help
Icon | Tool | Usage |
|---|---|---|
| Accessibility | Get a list of keyboard shortcuts that you can use in the editor. |
Step 3: Download and Preview

After you finish editing:
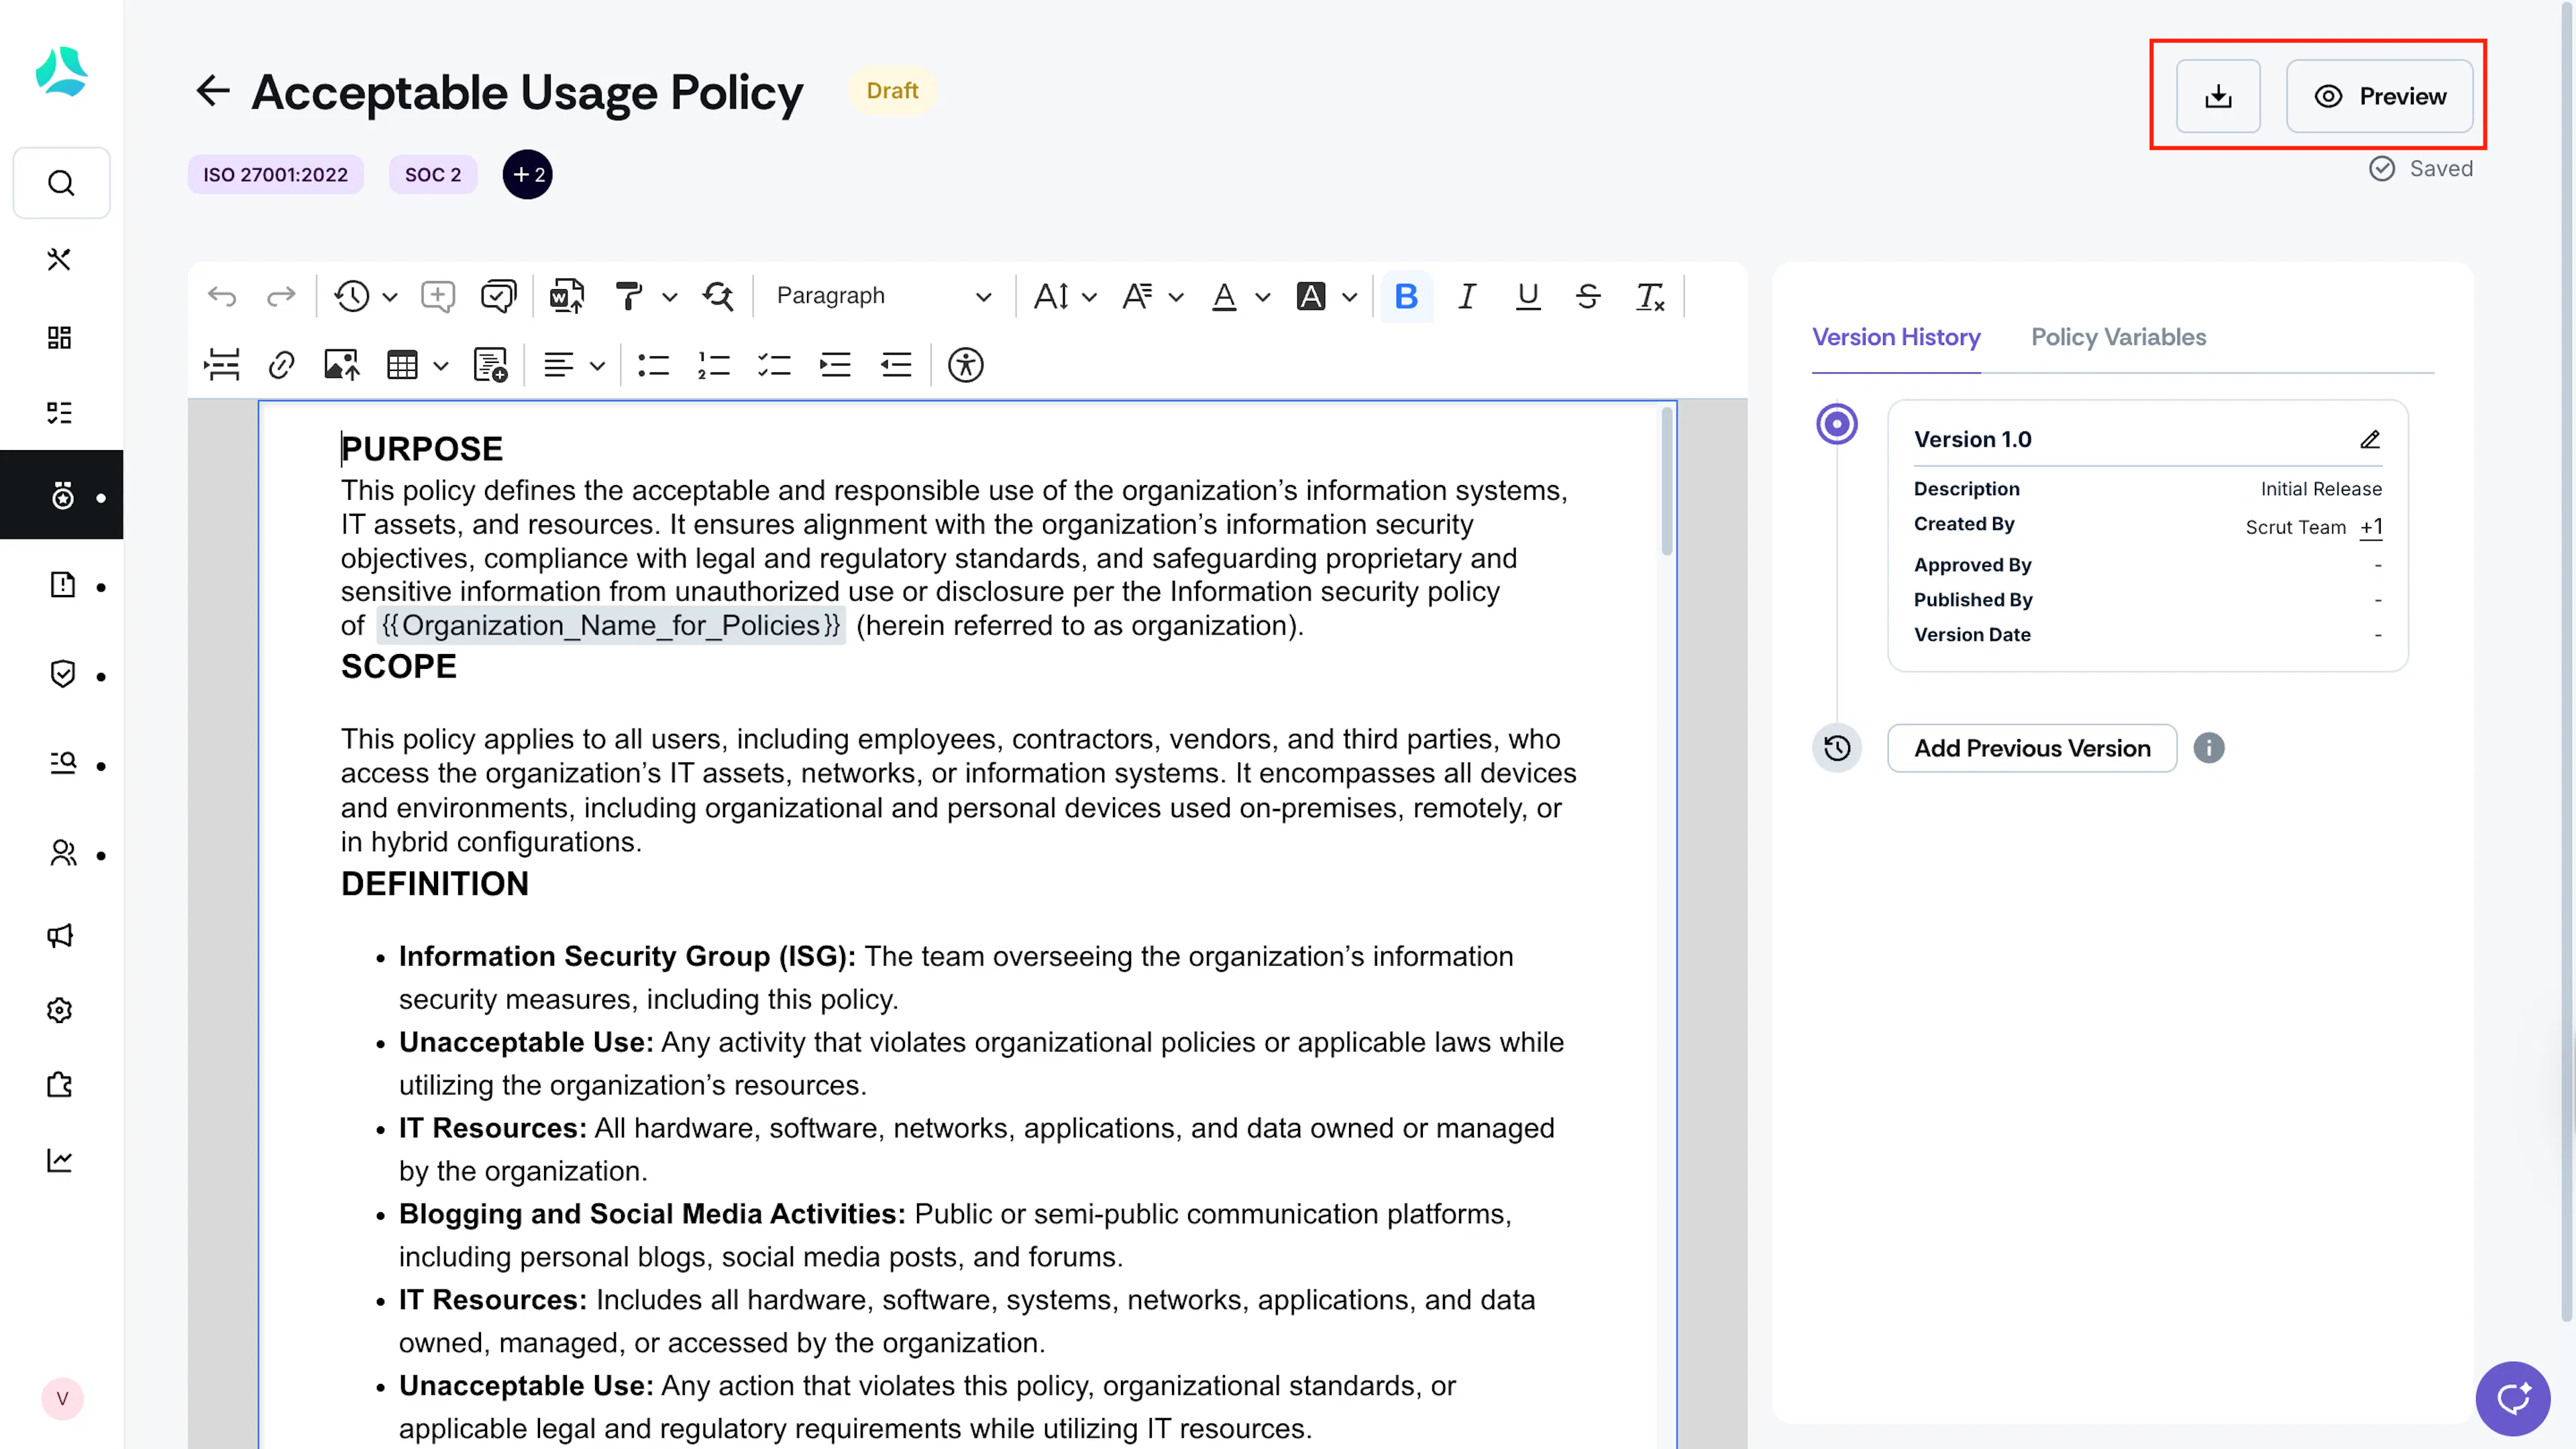
Click the Preview button on the top right to view the current output.
Click the Download button to save a PDF copy of the policy document to your computer.
Note:
The Policy Editor autosaves your work, so you can click back anytime without losing your changes.
Resolving Formatting Issues
When you copy-paste content from external documents such as Word files or Google Docs, formatting inconsistencies can appear in the Policy Editor. To ensure consistent formatting throughout the policy, clean up the content before editing further.
To resolve formatting issues:
Launch the Policy Editor.
Use the shortcuts Ctrl + A (For Windows) or Cmd + A (For Mac) to Select All.
Change the text style to Paragraph
Change the font family to Default
Change the font size to Default
Remove extra line breaks or spacing.
Reset the indentation and reapply bullets or numbering, as required.
Best Practices
#1: Add a Cover Page With Your Organization’s Logo
When creating a policy with the policy editor, Scrut will automatically generate a cover page featuring your organization's logo, account name, and policy name.
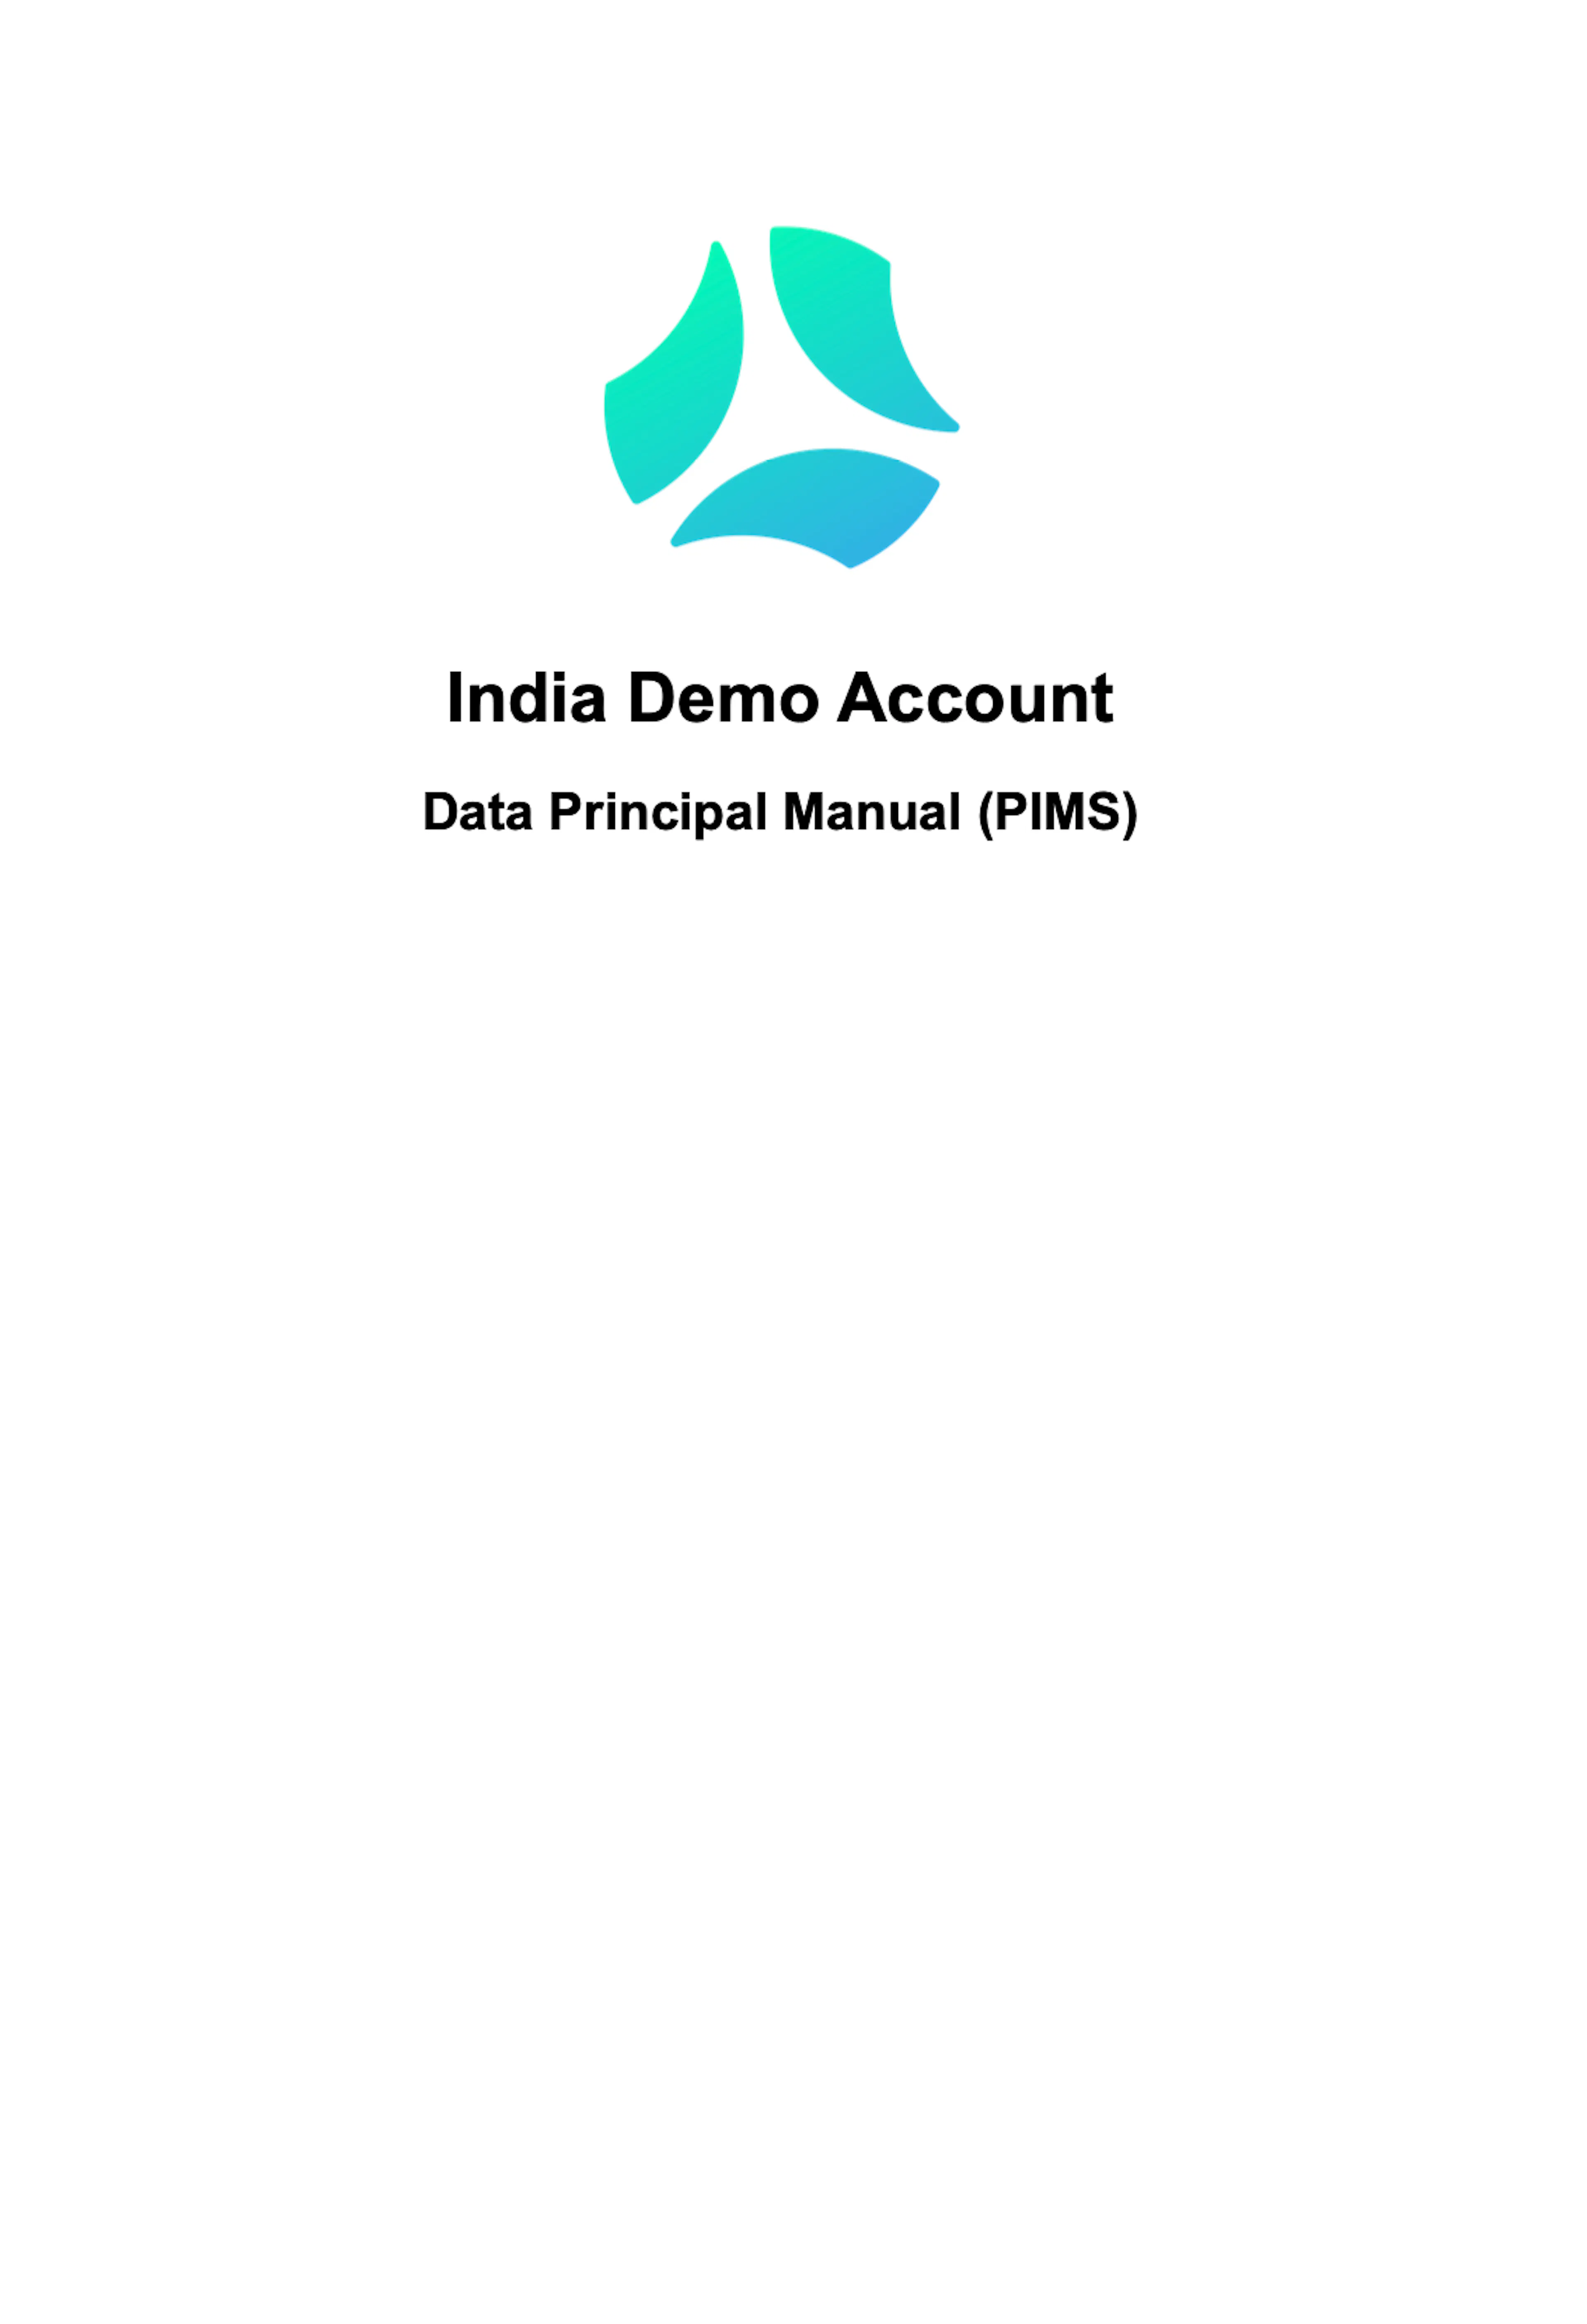
Sample Policy Cover Page
Please note that the cover page won't be visible while you're editing, but you can preview it by downloading the policy.
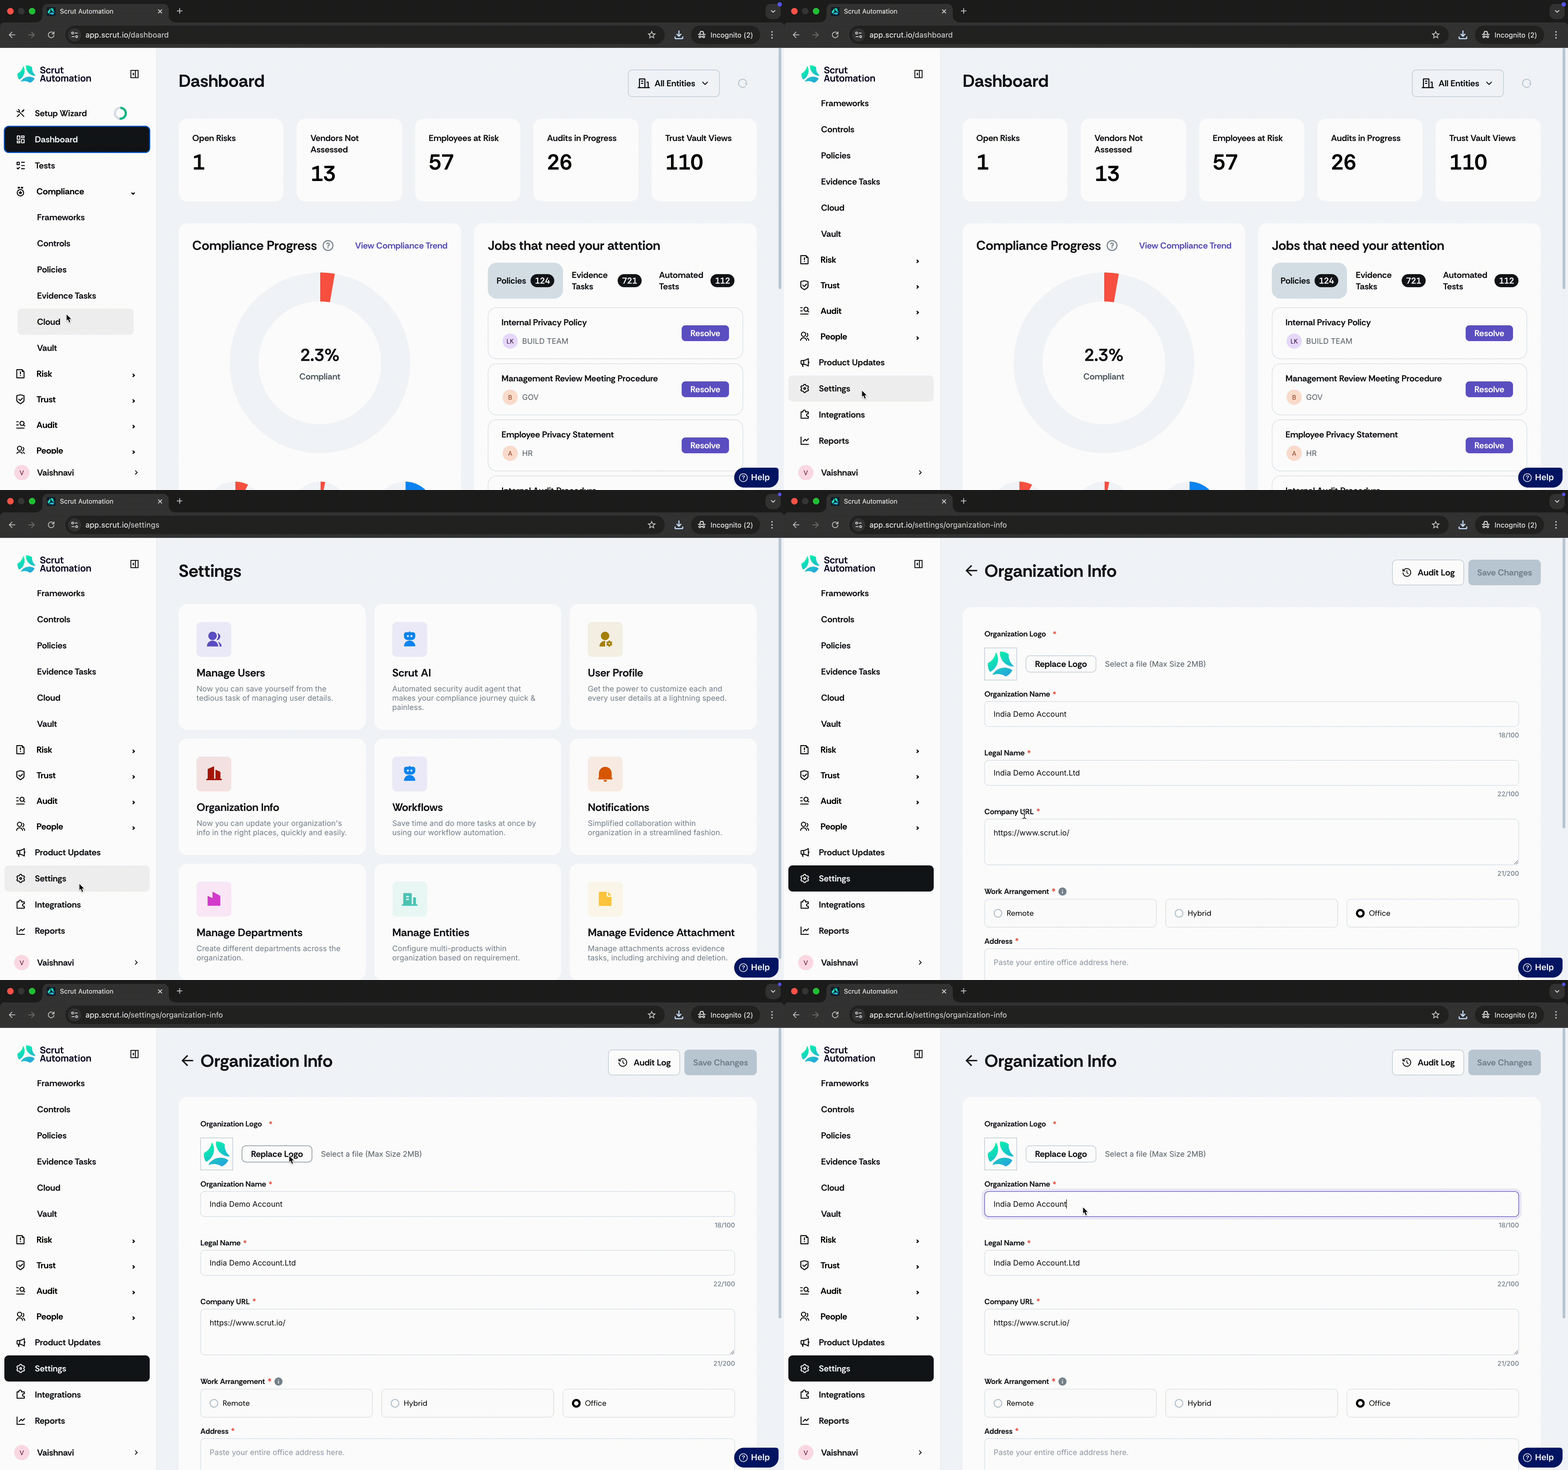
Scrut gathers the details for the cover page, including the logo and organization name, from the information you've provided in Settings → Organization Info. To update the information displayed on the cover page, make the necessary changes in Settings → Organization Info.
Alternatively, if you want to add a custom logo for the policy, use the Upload Image button on the toolbar to add your preferred logo.
#2: Include Policy Version Details
Like the cover page, Scrut will automatically include a Policy Version Details table for a policy created using the policy editor. This table is attached to the end of the policy and provides essential information such as the version name, created by, date of creation, etc.
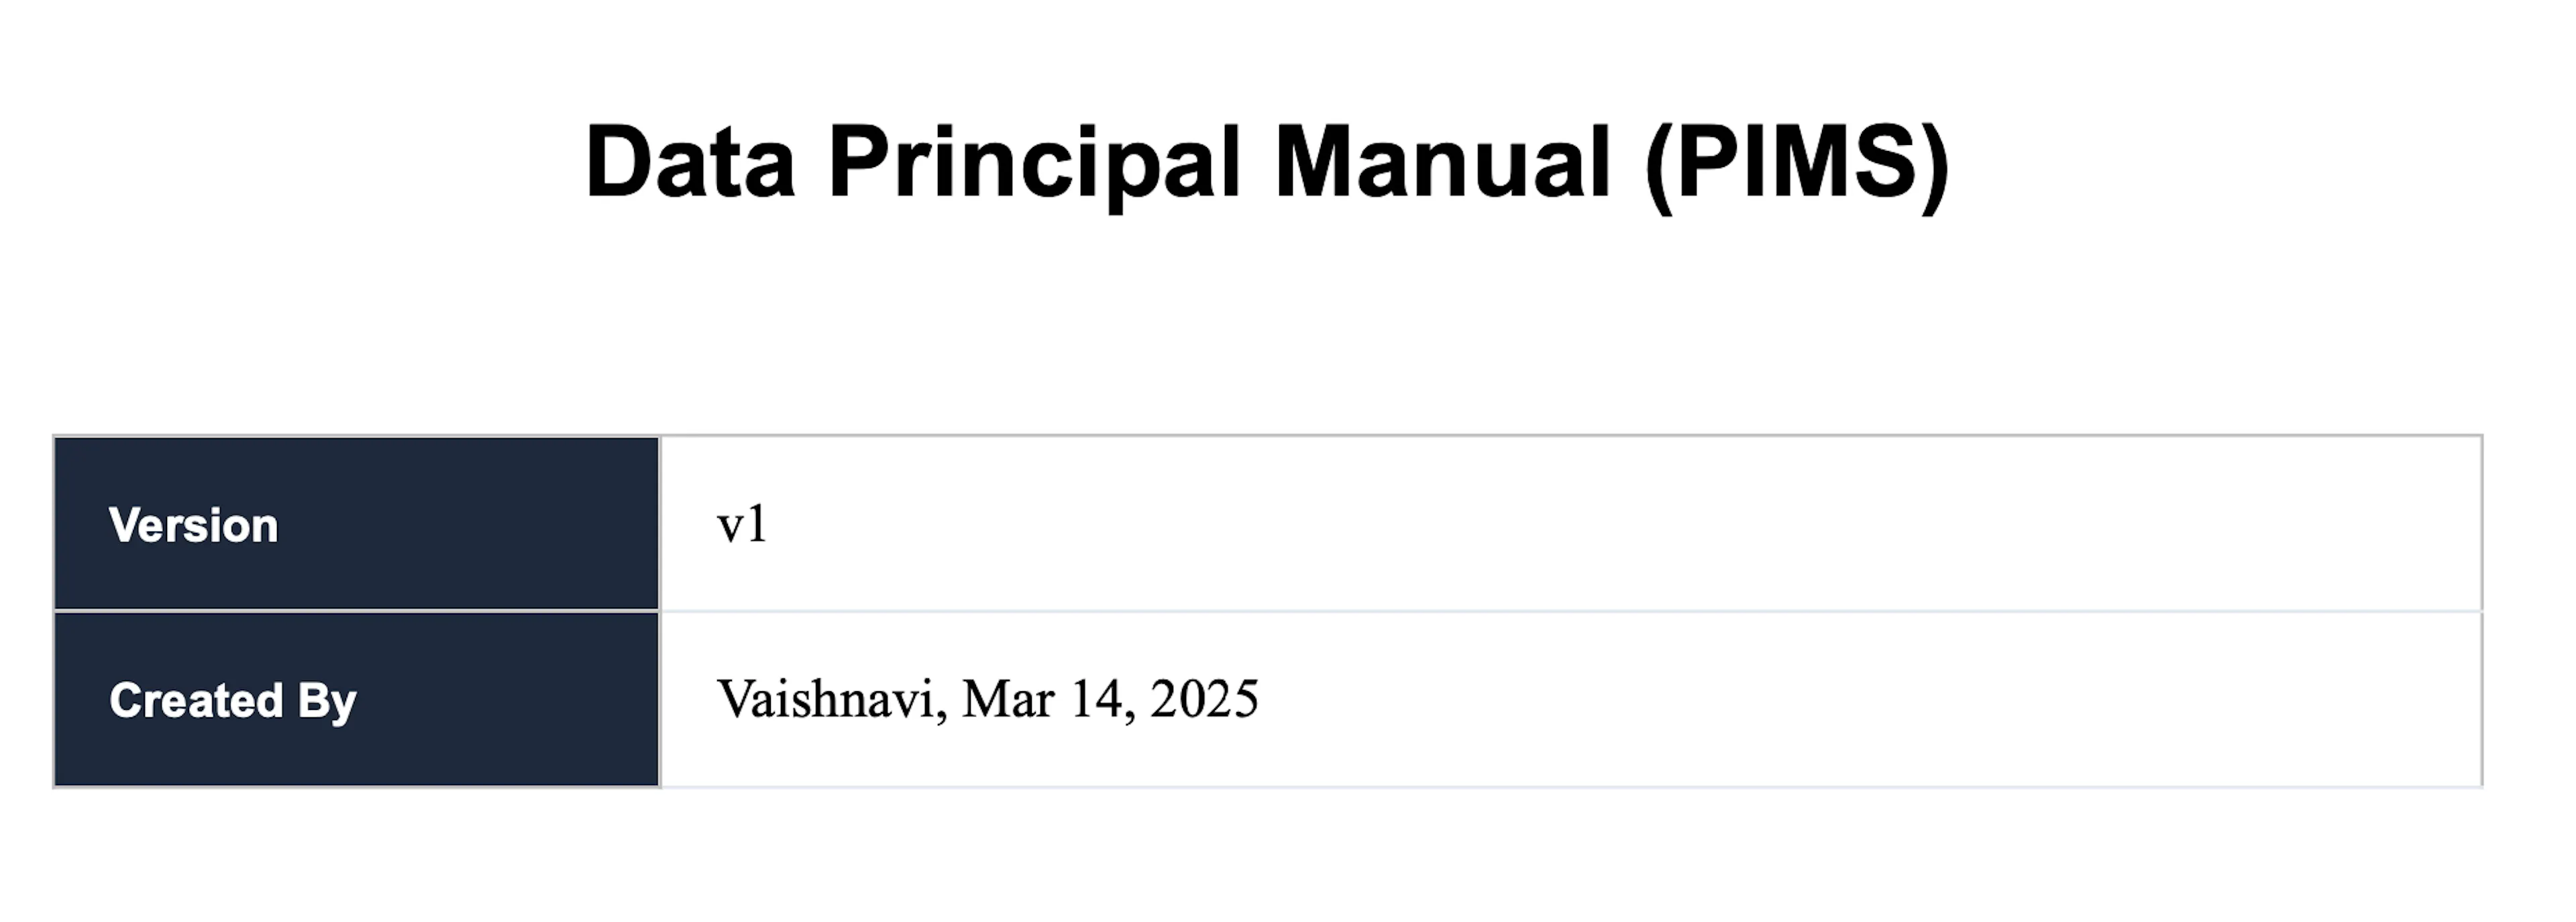
Sample Policy Version Table
To include this table in all policies, navigate to the Settings icon on the Policy page and turn on the Enable Policy Version Details toggle.
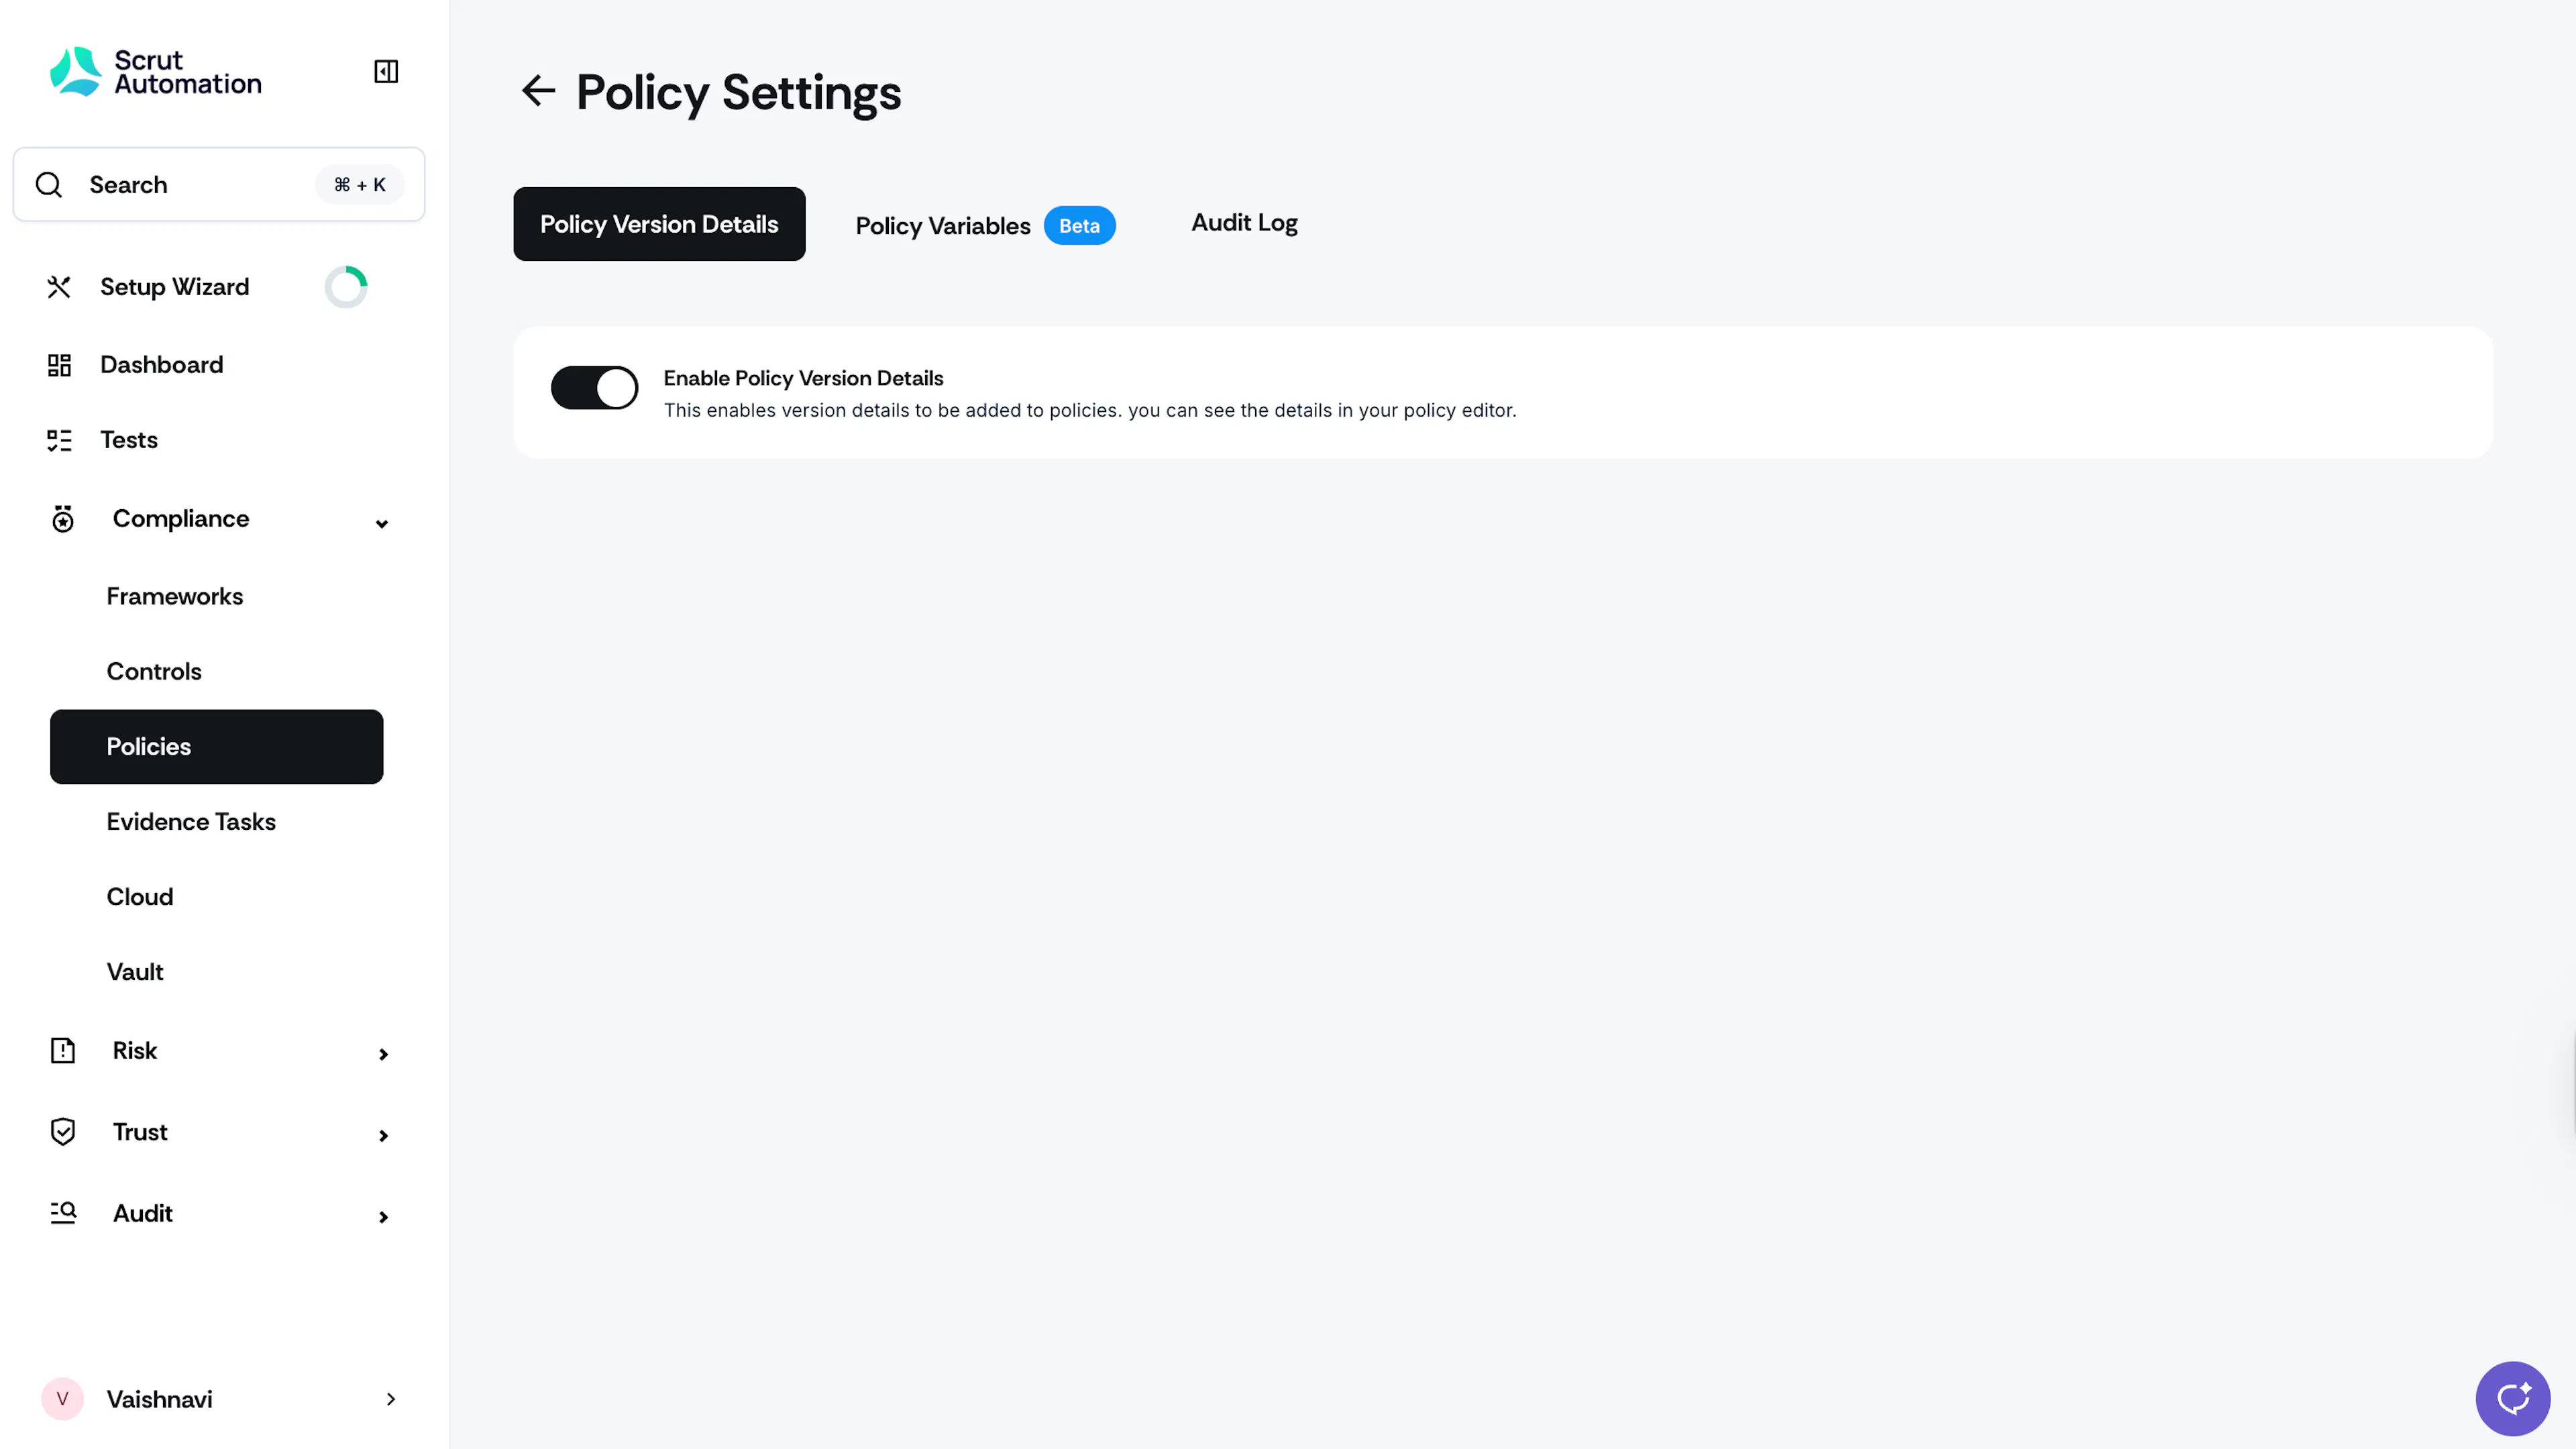
Heads up!
The policy version table is not visible in the policy editor. However, you can view it by downloading the policy.
FAQs & Troubleshooting
1: How do I rename the current version?
Click the pencil icon
in the policy details card on the right panel. To know more about policy versioning, see here.

2: Does the Grammarly extension work with the policy editor?
Yes. The Grammarly Chrome extension is compatible with Scrut’s Policy Editor.
3: Can I edit existing policy documents created outside Scrut using the policy editor?
Yes. Click the Import from Word icon to import an existing Word document into the policy editor and edit it.

Heads Up!
If you Upload an Existing File to the Policy Page directly, it will not be available for editing in the Policy Editor.
4: What happens if multiple users try to edit the same policy simultaneously?
When a user edits a policy, it gets locked for others. If someone else tries to access the editor, they'll see a message saying, "Another user is editing." If the current editor goes offline or is idle, the lock will release automatically after a timeout, allowing others to edit.
5: How to manually save the policy?
Scrut automatically saves your changes while you edit. If autosave fails for any reason, you can use the "Save Now" button in the top right to save any unsaved changes.

6: Can I edit the policy while offline?
Yes, any edits made offline are saved locally. When your internet connection returns, Scrut will automatically save them or prompt you to click the "Save Now" button.
7: Why isn’t the policy editor pre-populating with a sample template?
The sample template is not available for custom policies. If you’re working on a custom policy, initially, the policy editor will be blank, and you have to build the policy from scratch.