

Integrate Sentry
Connect your Sentry account with Scrut to sync user access data and run automated compliance checks against your applicable frameworks.
What This Integration Does in Scrut
- User Access Data: Fetches user details, roles, and permissions from Sentry for Access Reviews.
- Automated Tests: Runs automated checks that continuously evaluate Sentry for security misconfigurations and compliance checks against your applicable compliance frameworks.
Prerequisites
Before starting the integration, make sure you have the following in place:
- An active Sentry account with permission to create Custom Integrations
Permissions and Access Requirements
For Sentry
Scrut requires read-only access to the following scopes in Sentry:
- Project: Read access to Projects, Tags, Debug Files, and Feedback
- Member: Read access to Members within Teams
For Scrut
- Admin access to Scrut, or Contributor access with the Integrations module enabled
Data Collected
- User Name: Full name as listed in Sentry Email
- User Email: Primary email address on the Sentry account
- User Role: Organization-level role assigned in Sentry
Sync Frequency
Data is synced automatically once every 24 hours. You can also manually trigger a sync from the integration settings page in Scrut.
Integration Setup
Step 1: Generate a Custom Integration Token in Sentry
-
Log in to your Sentry account.
-
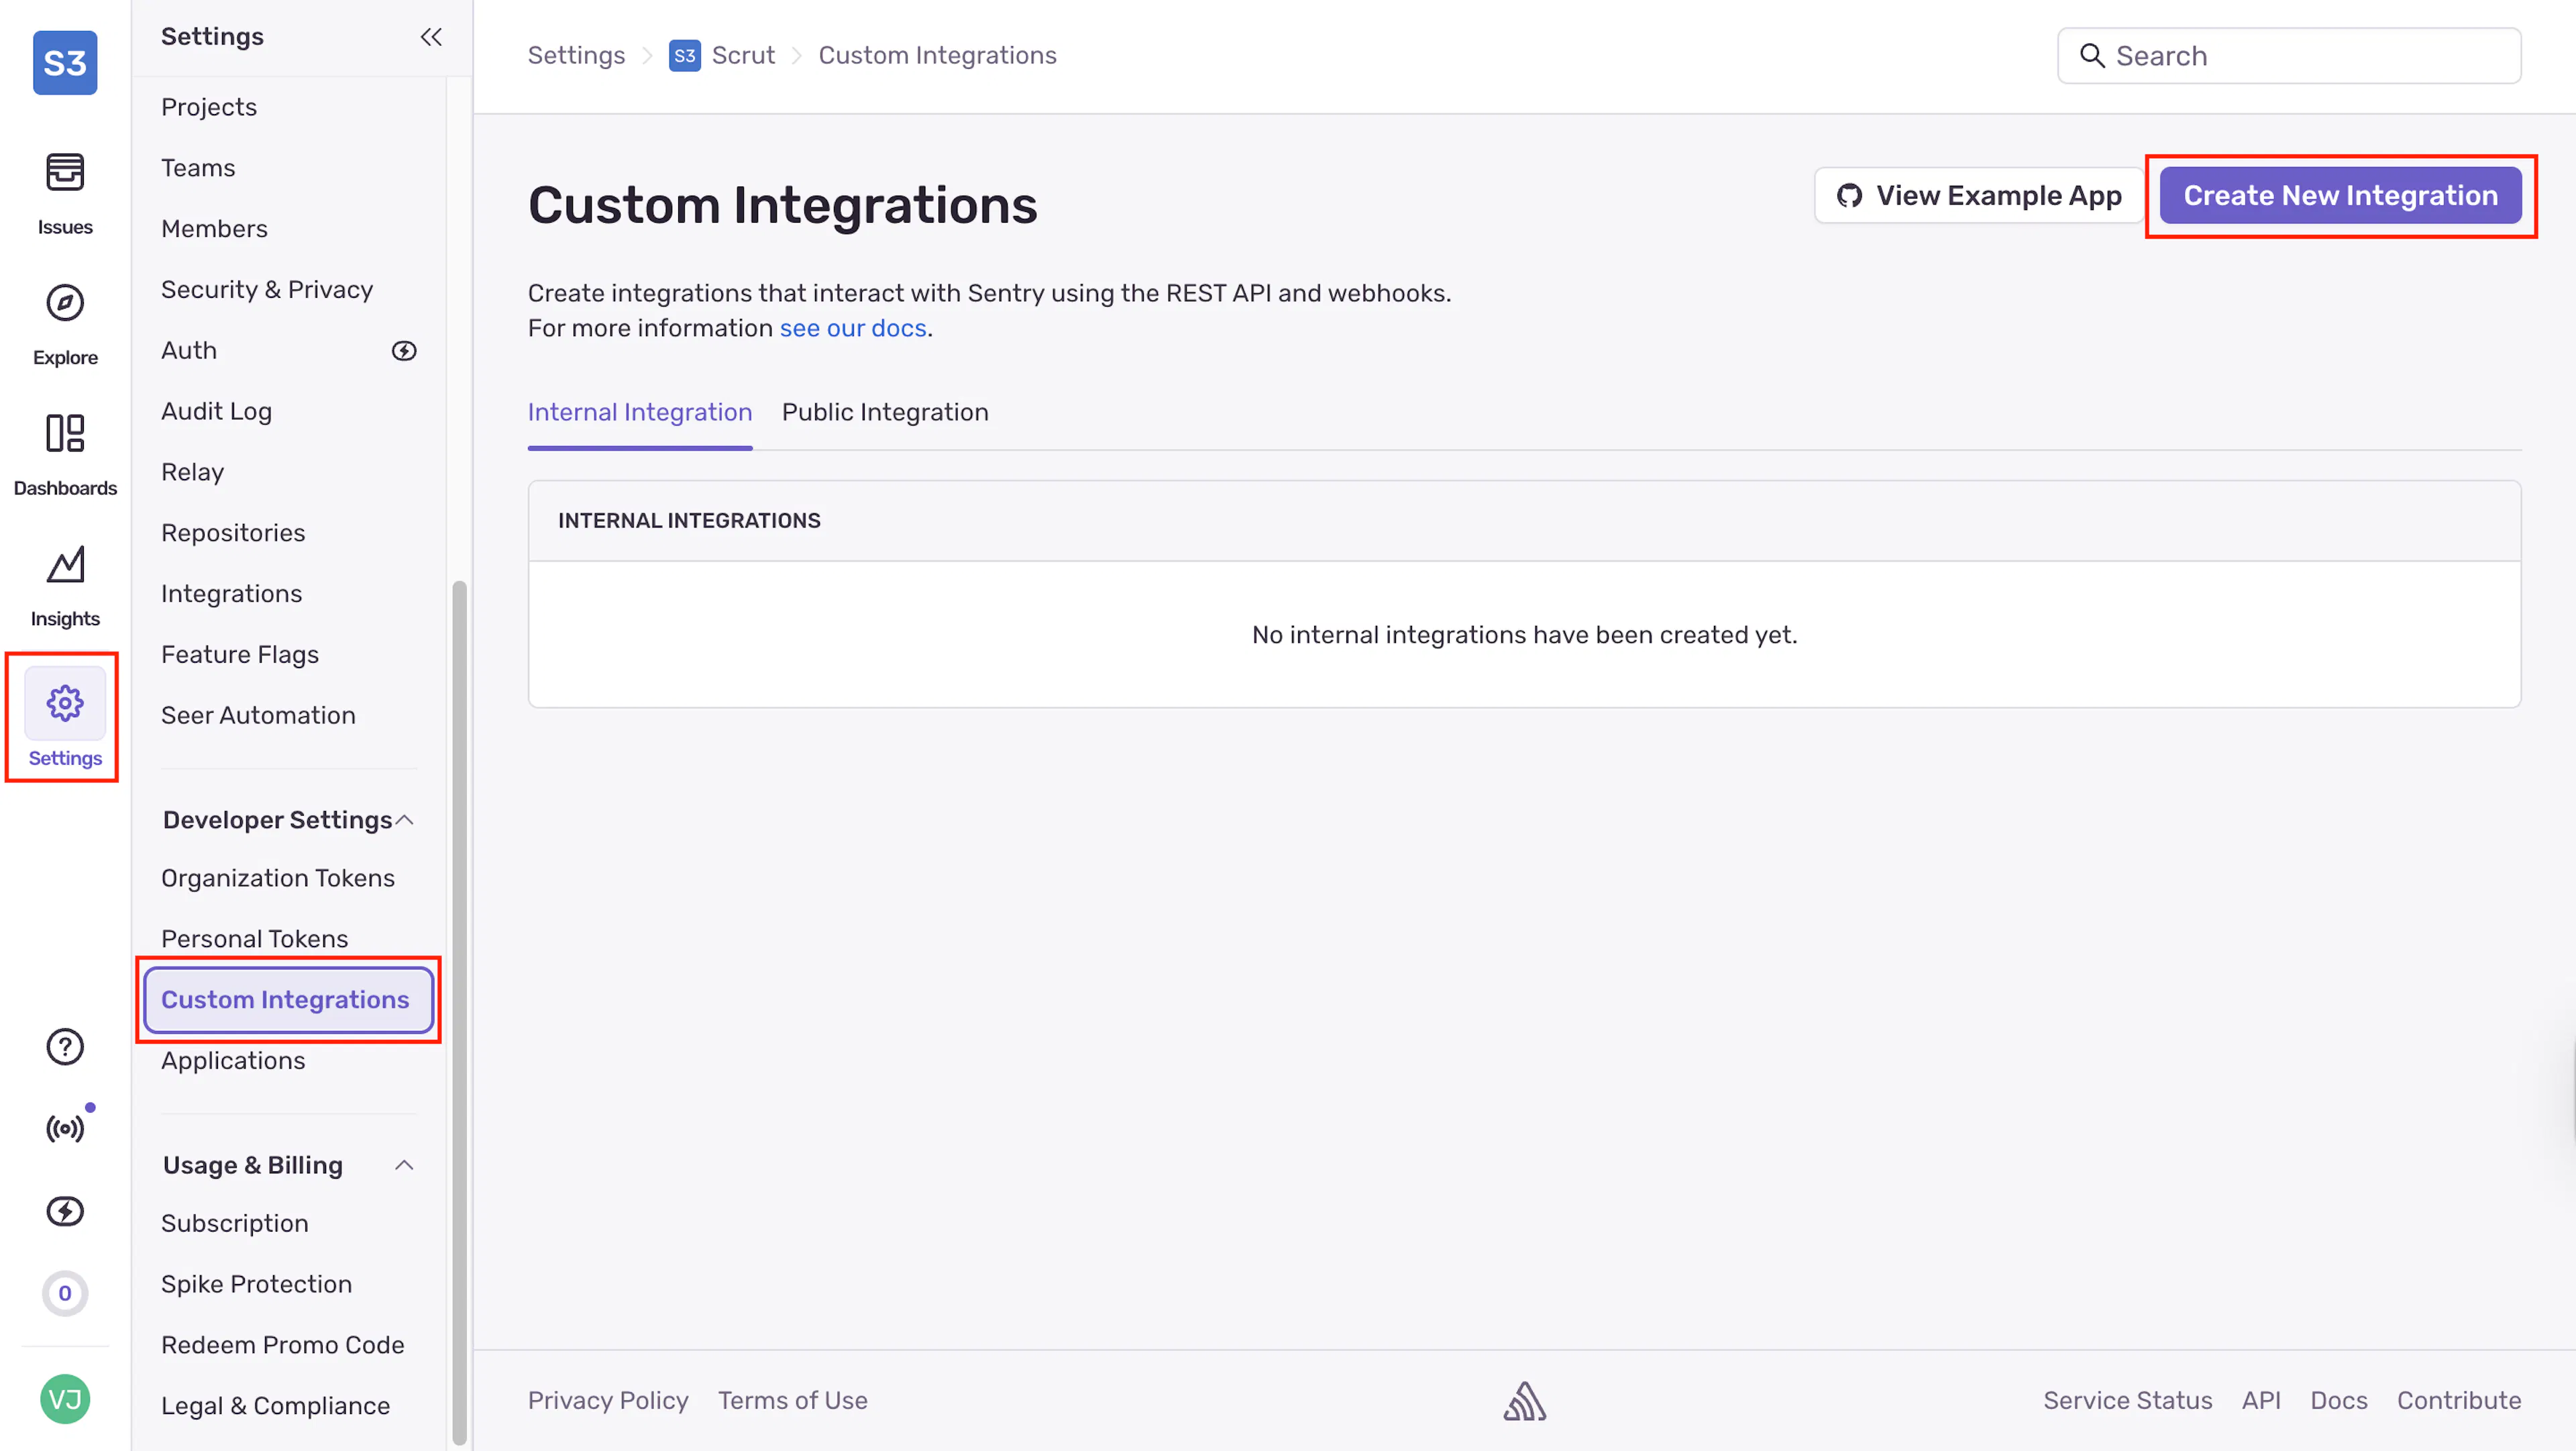
Go to Settings and select Custom Integrations from the left navigation panel under Developer Settings.
-
Click Create New Integration.
-
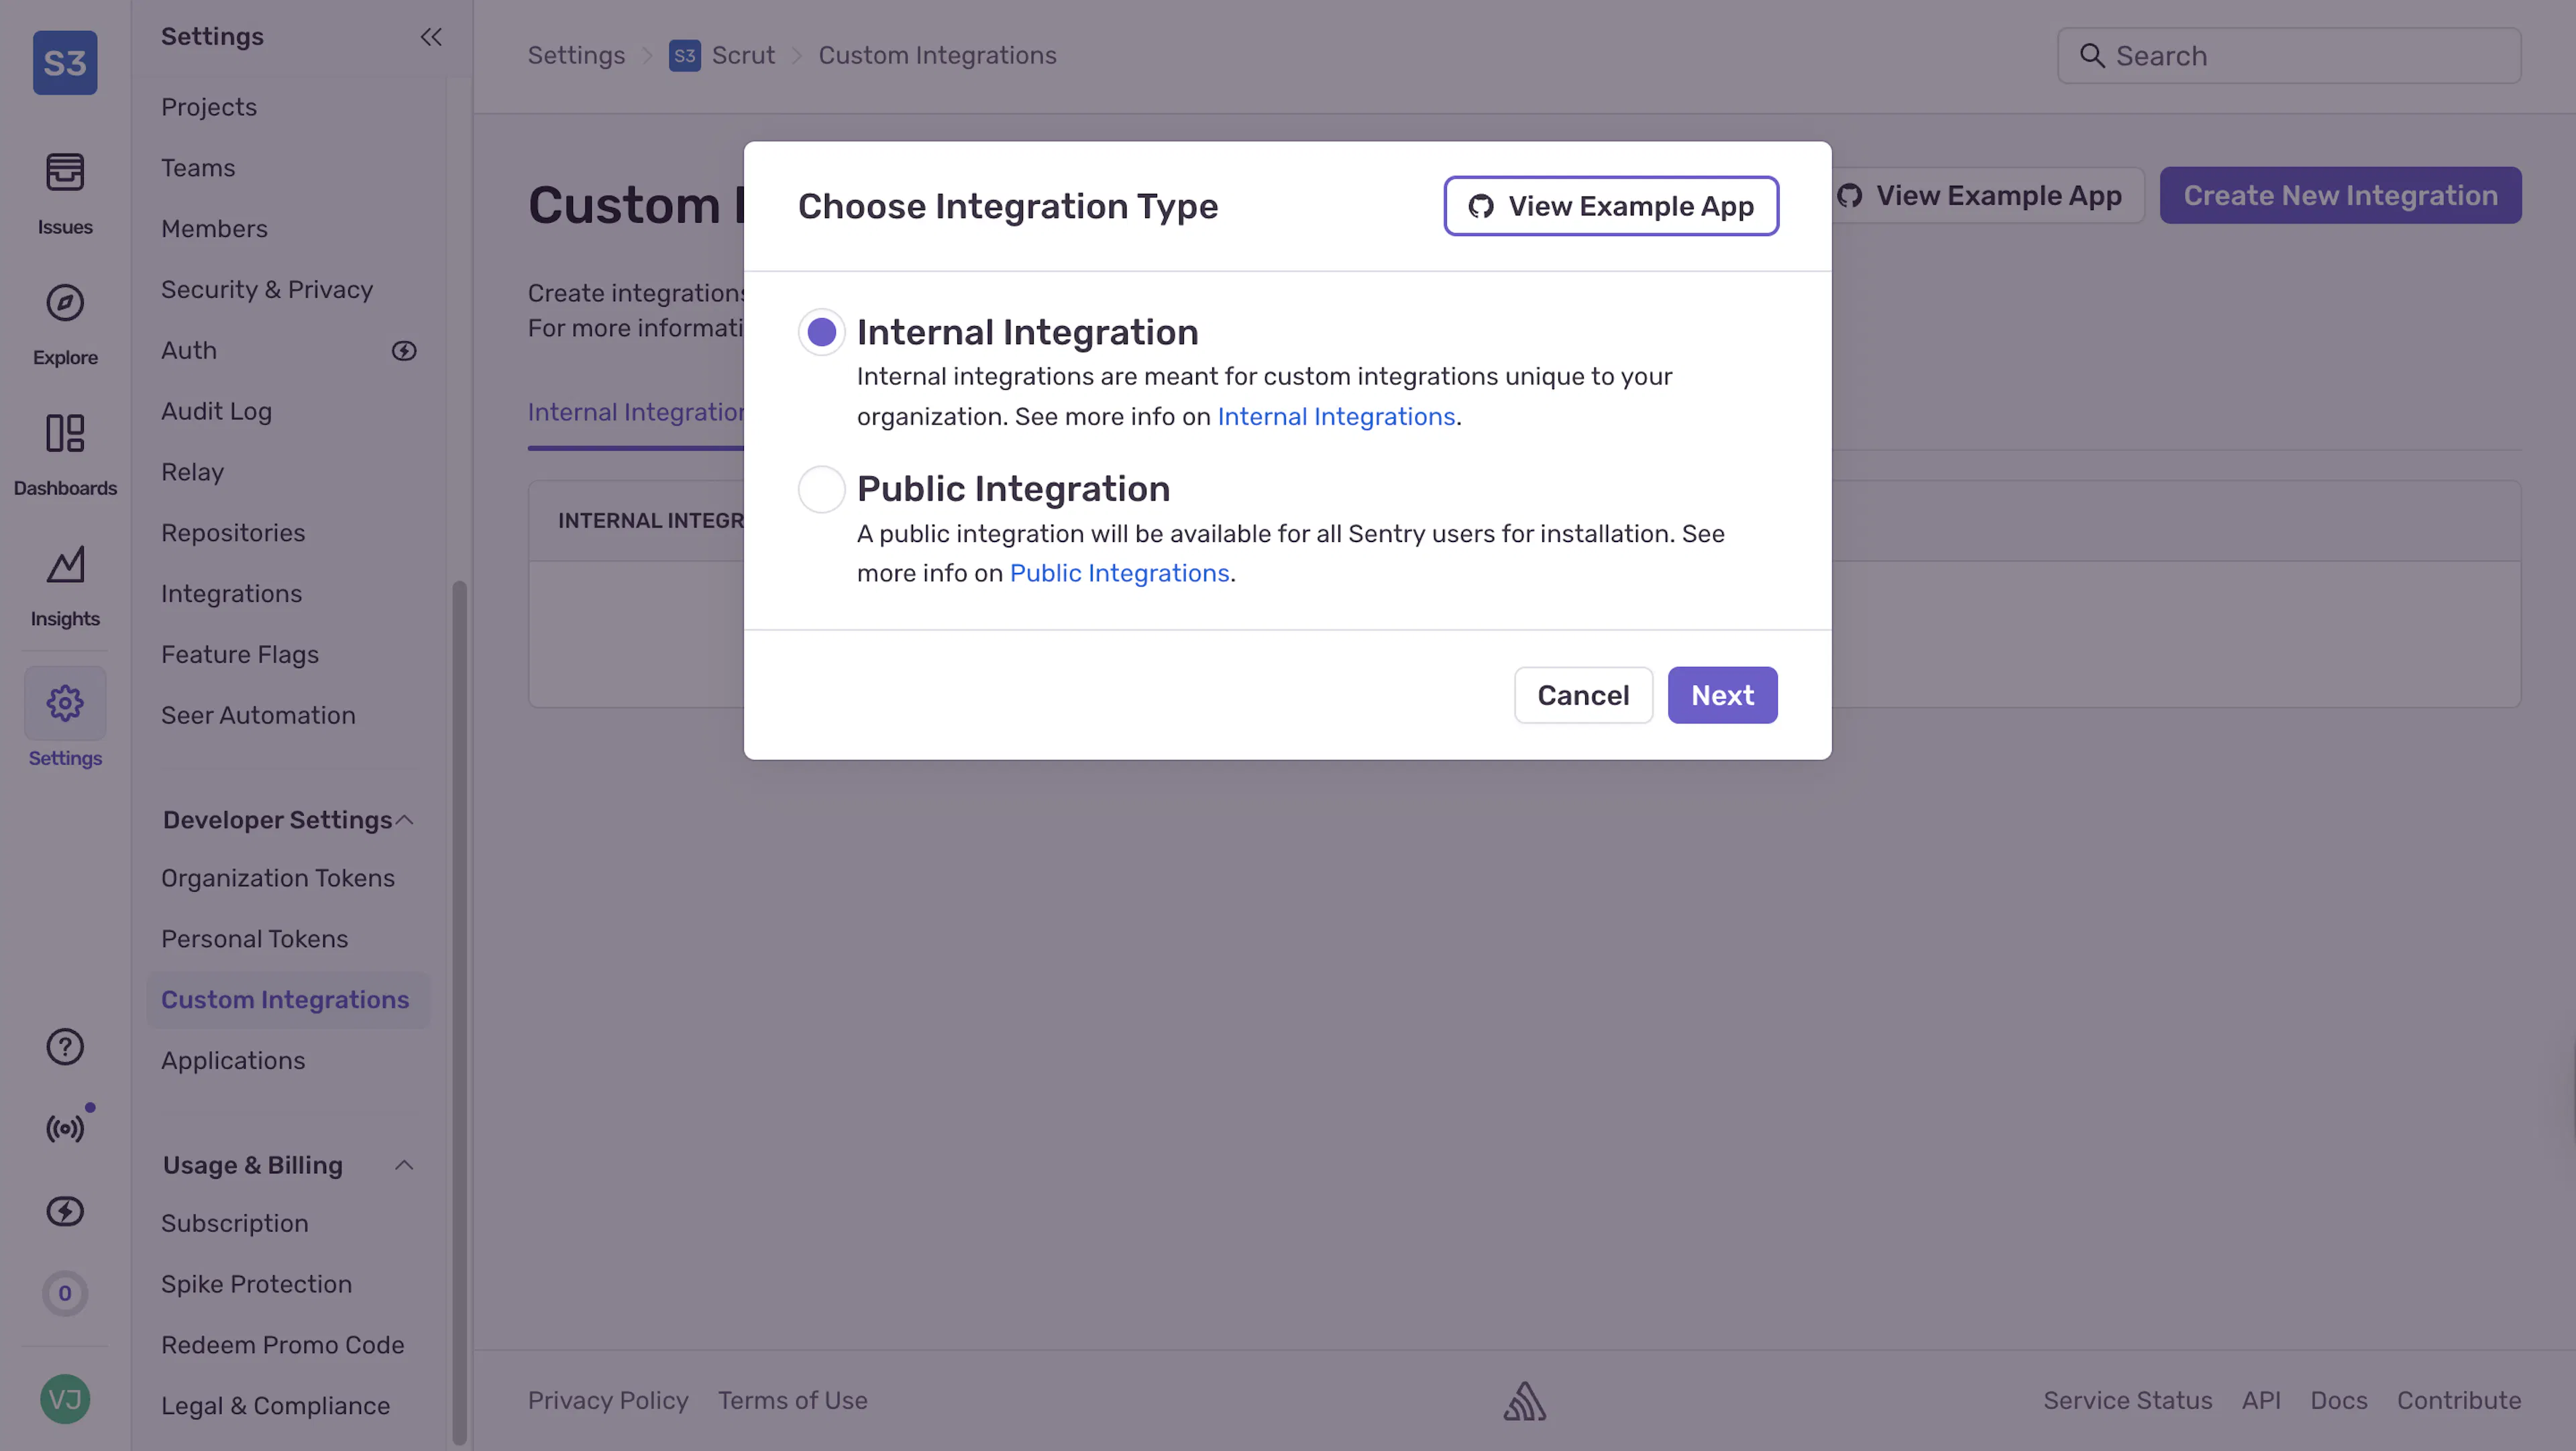
When prompted to choose an integration type, select Internal Integration and click Next.
-
Enter a name for the integration, such as Scrut.
-
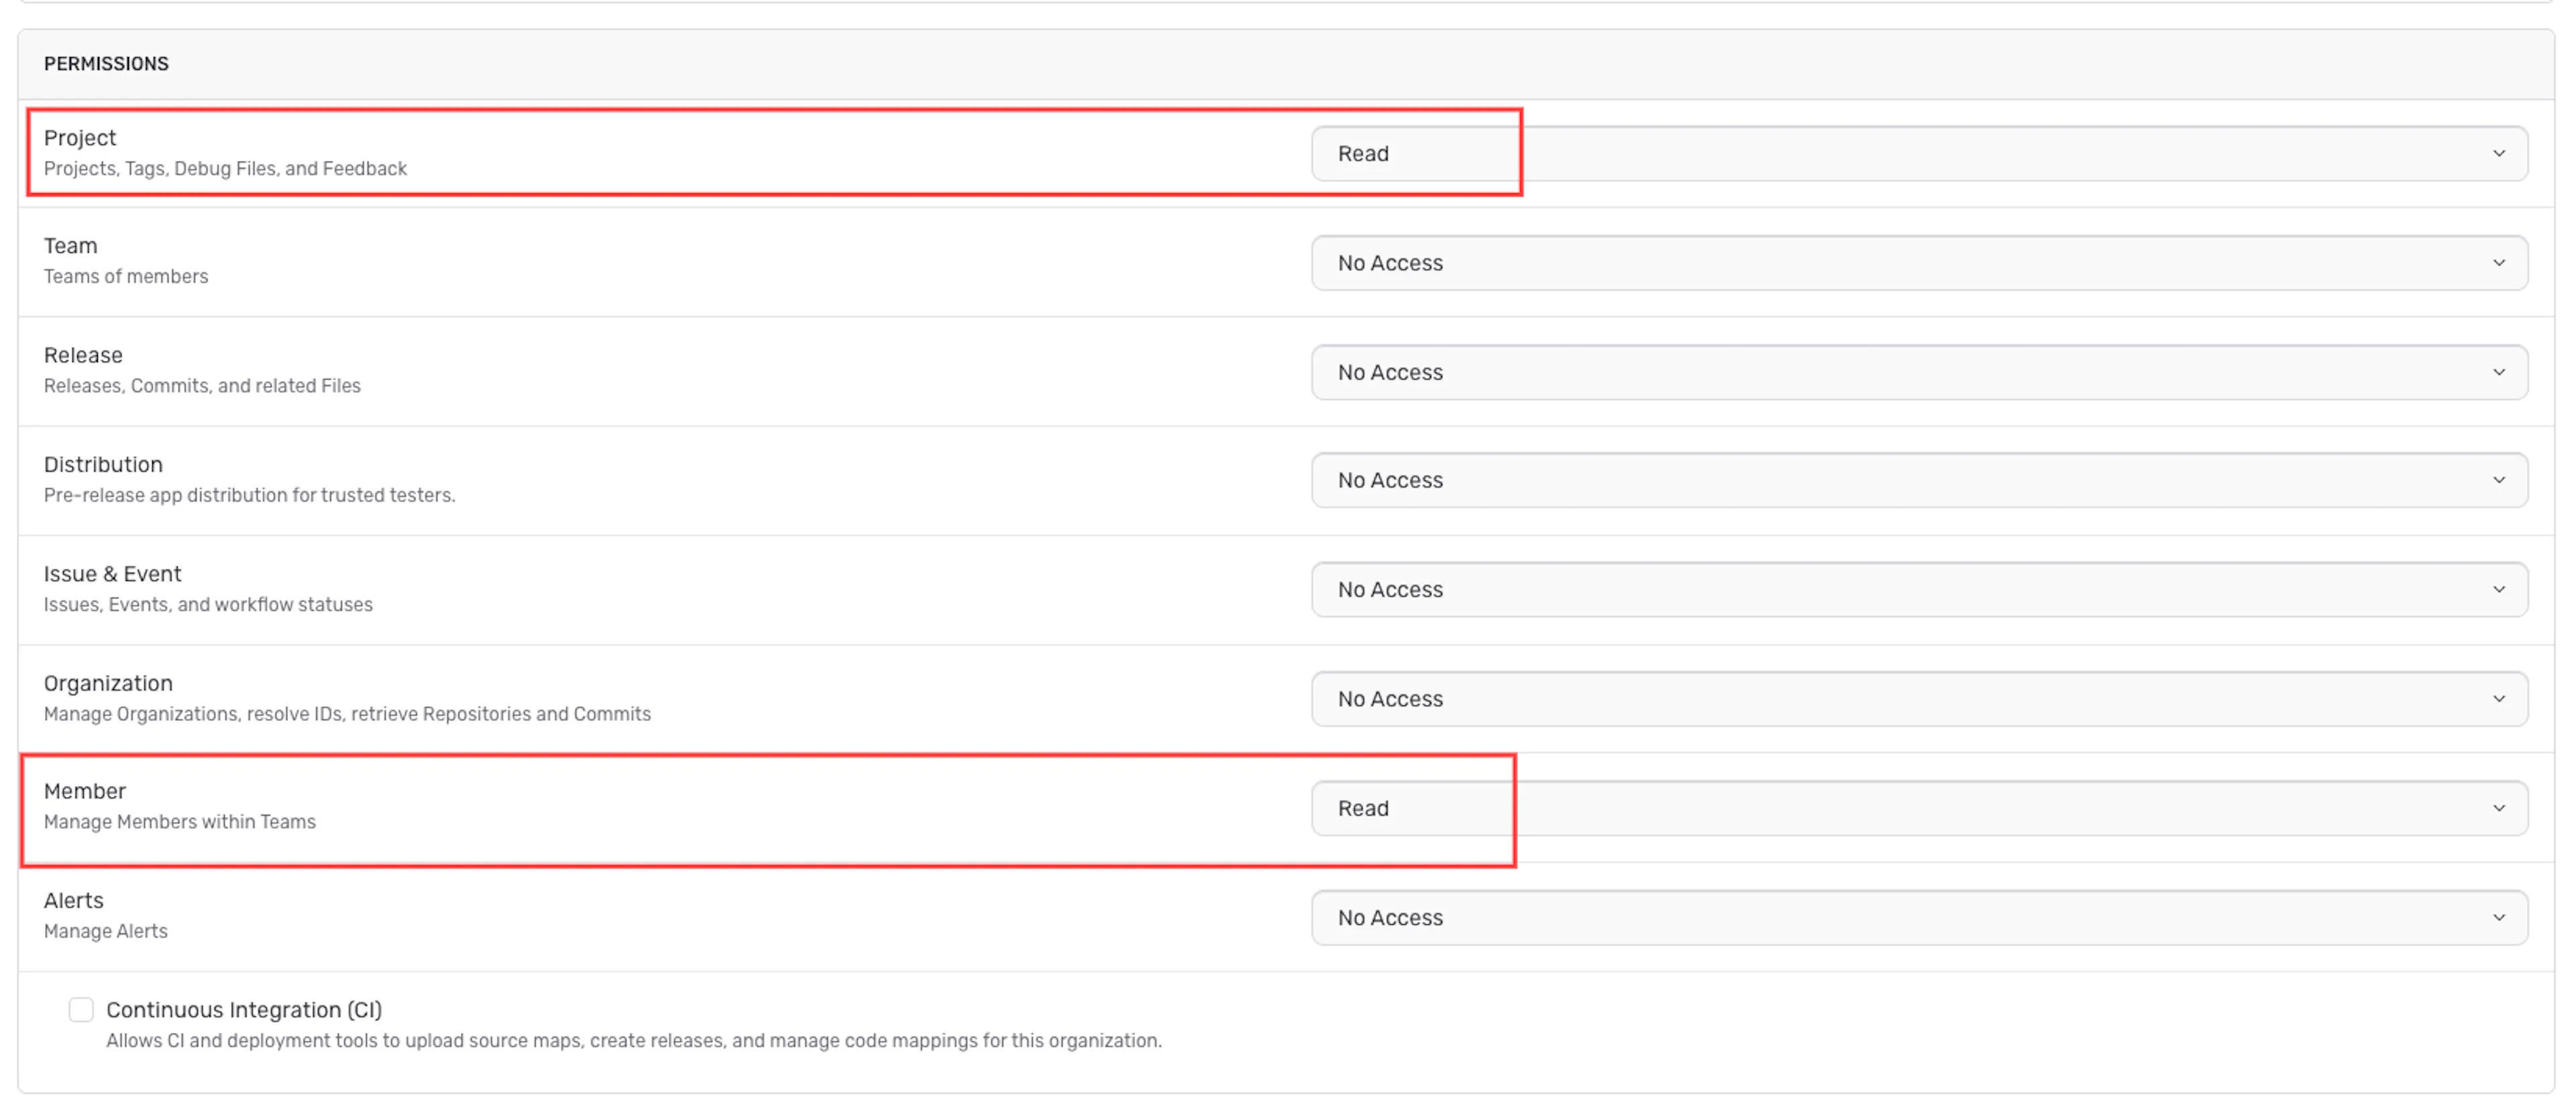
Under Permissions, set the following access levels:
- Project: Read
- Member: Read
- Leave all other permissions set to No Access.
-
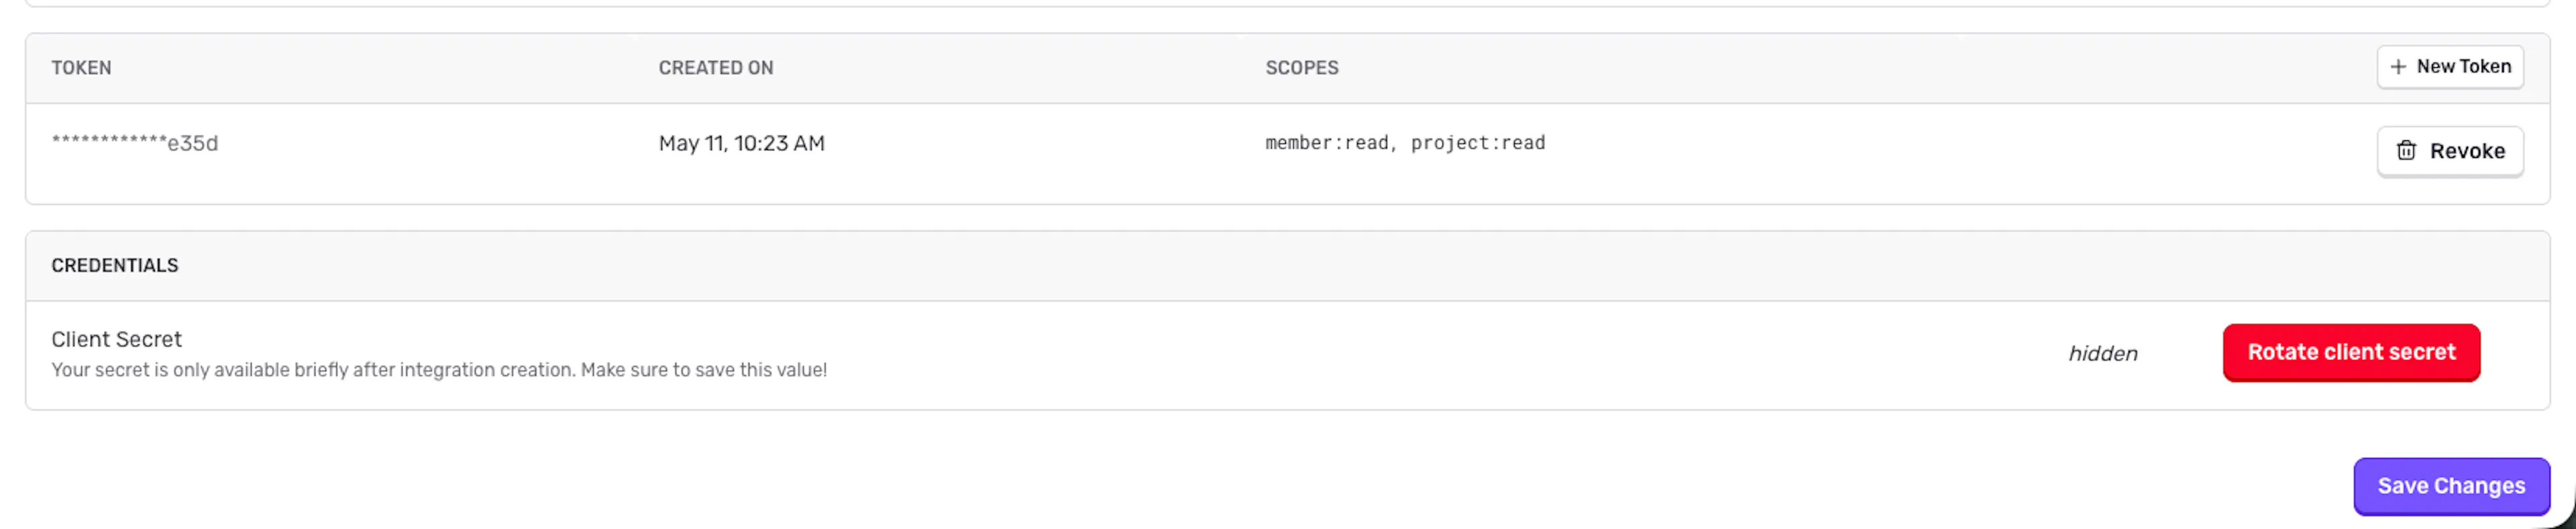
Click Save Changes.
-
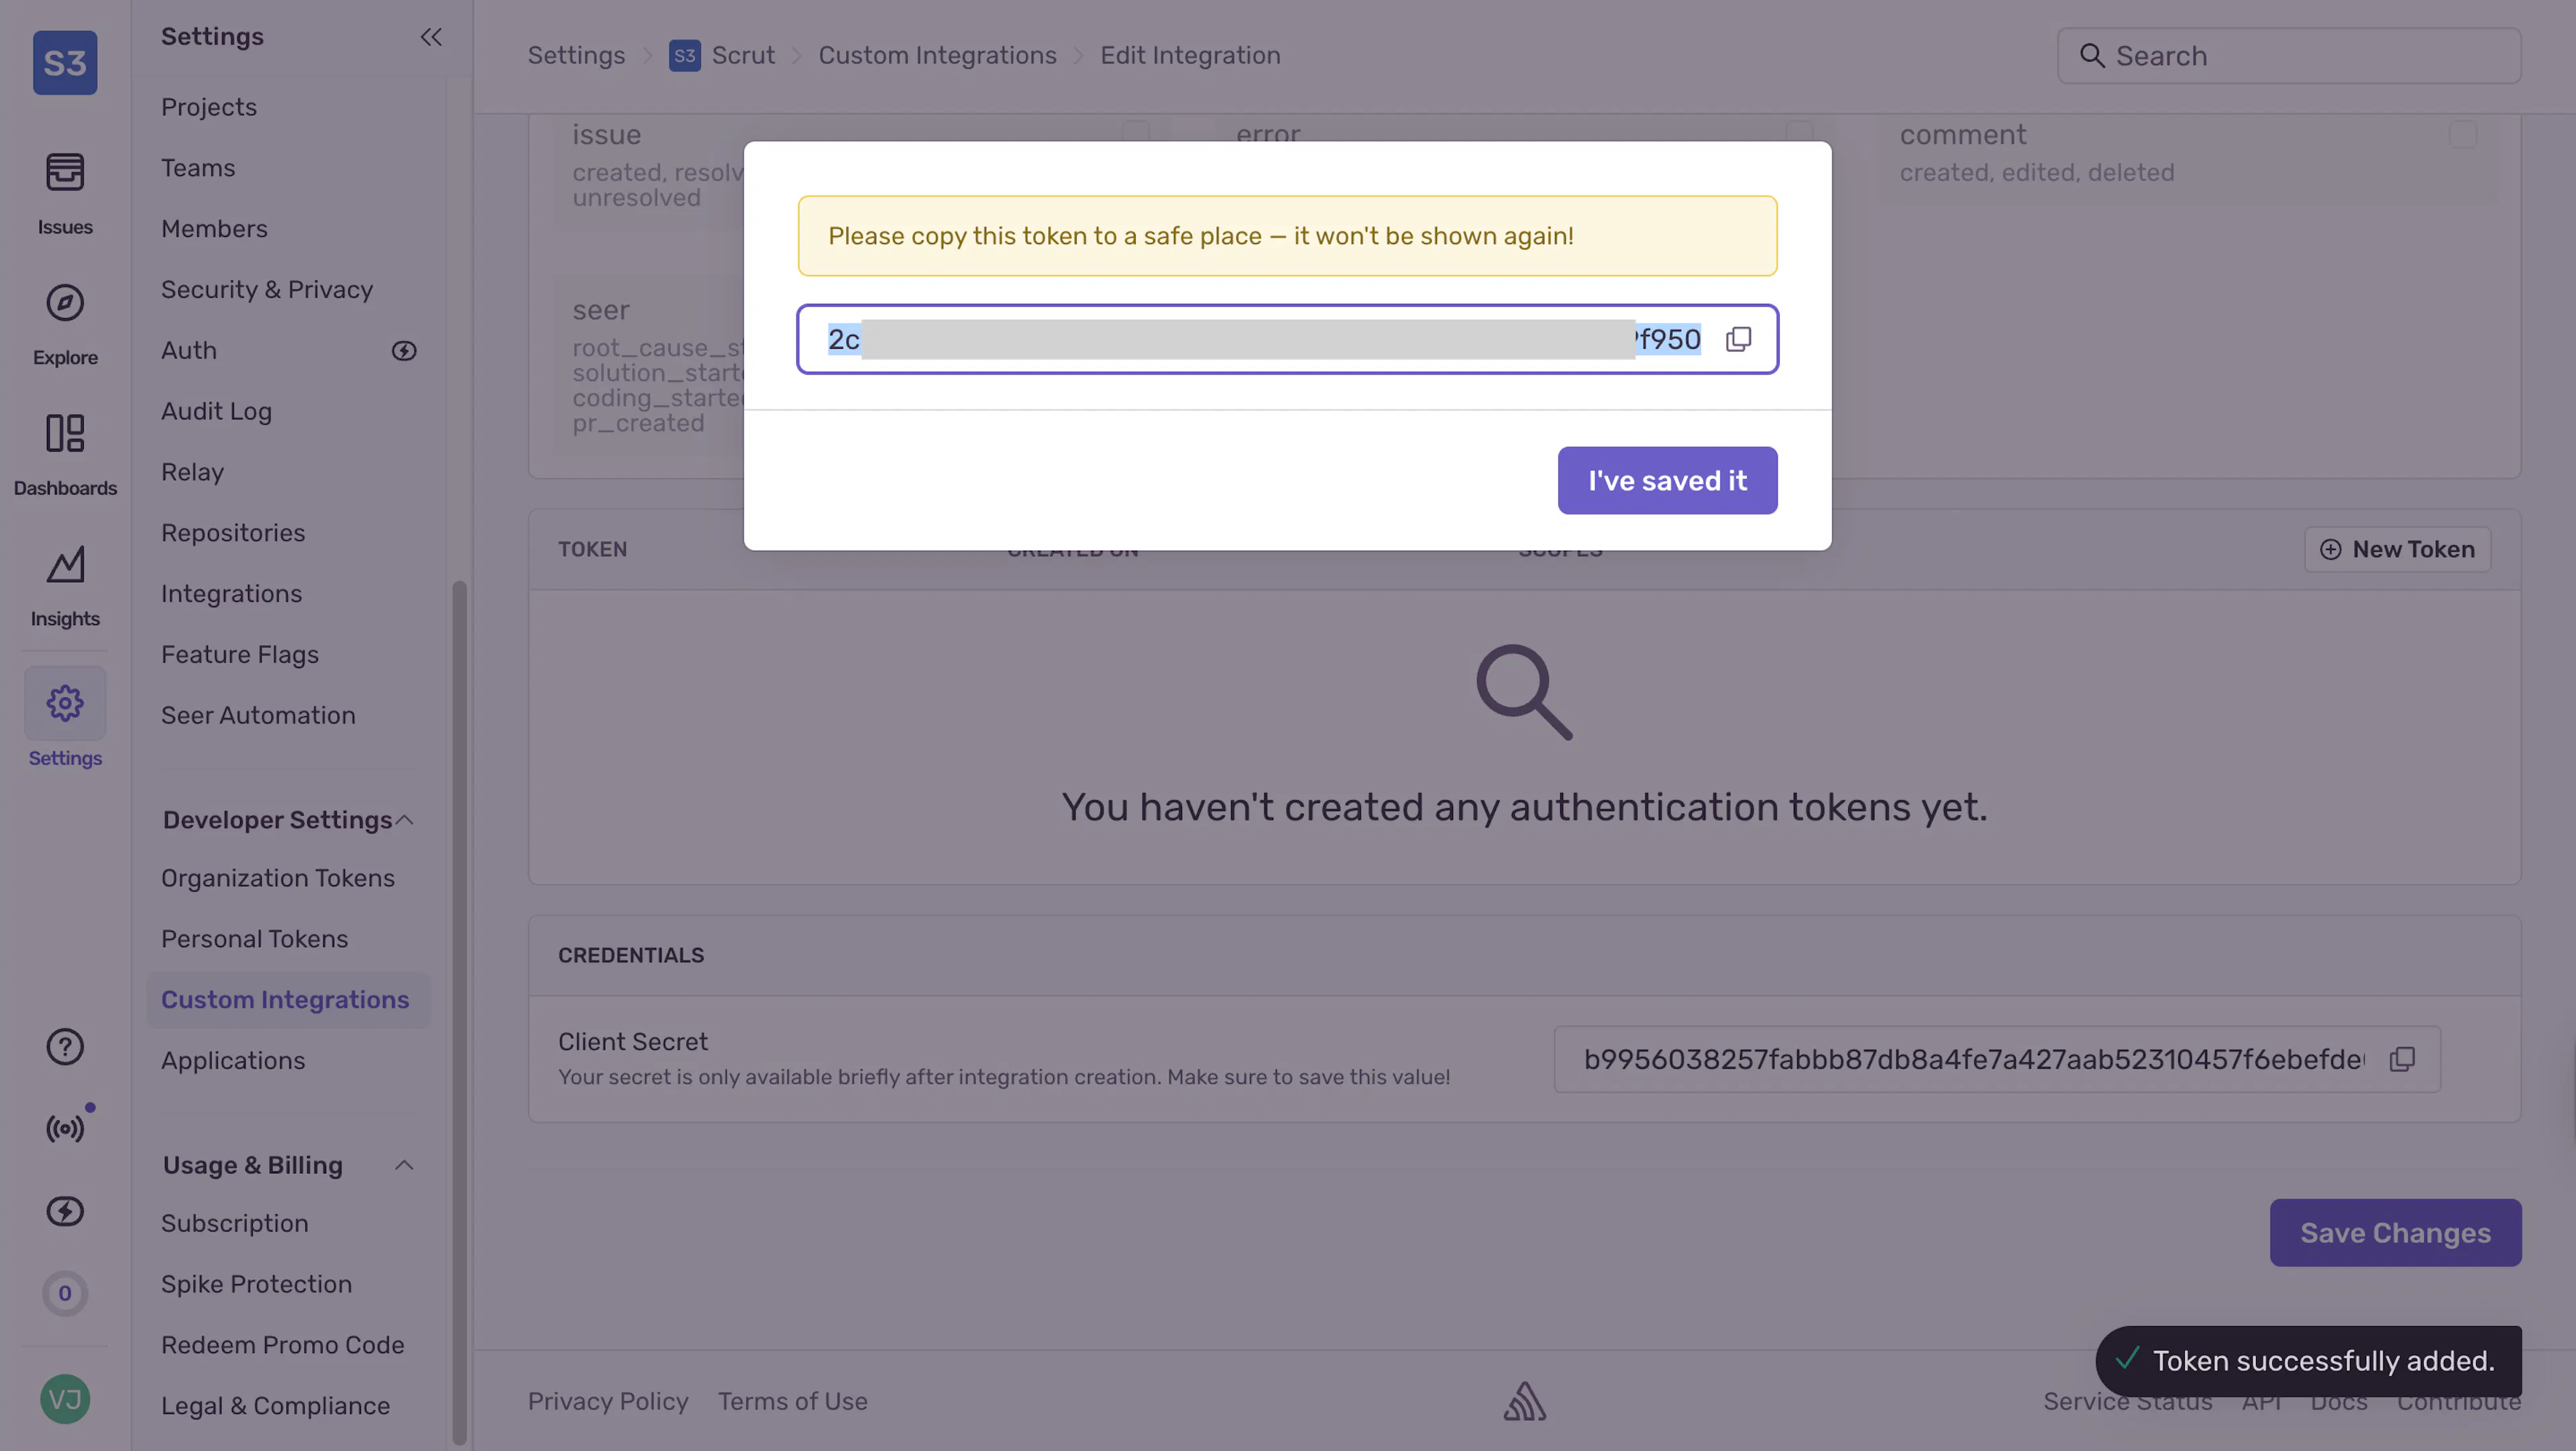
Scroll down to the Token section and click + New Token.
Important: Copy the token immediately and store it in a secure location. Sentry will not display this token again after you leave the page.
-
Click Save Changes to confirm.
Note: Refer to this guide from Sentry for more information on how to generate an Auth token and what it does.
Step 2: Connect Sentry in Scrut
-
Sign in to Scrut and click Integrations in the left navigation panel.
-
Go to the Integrations Library tab.
-
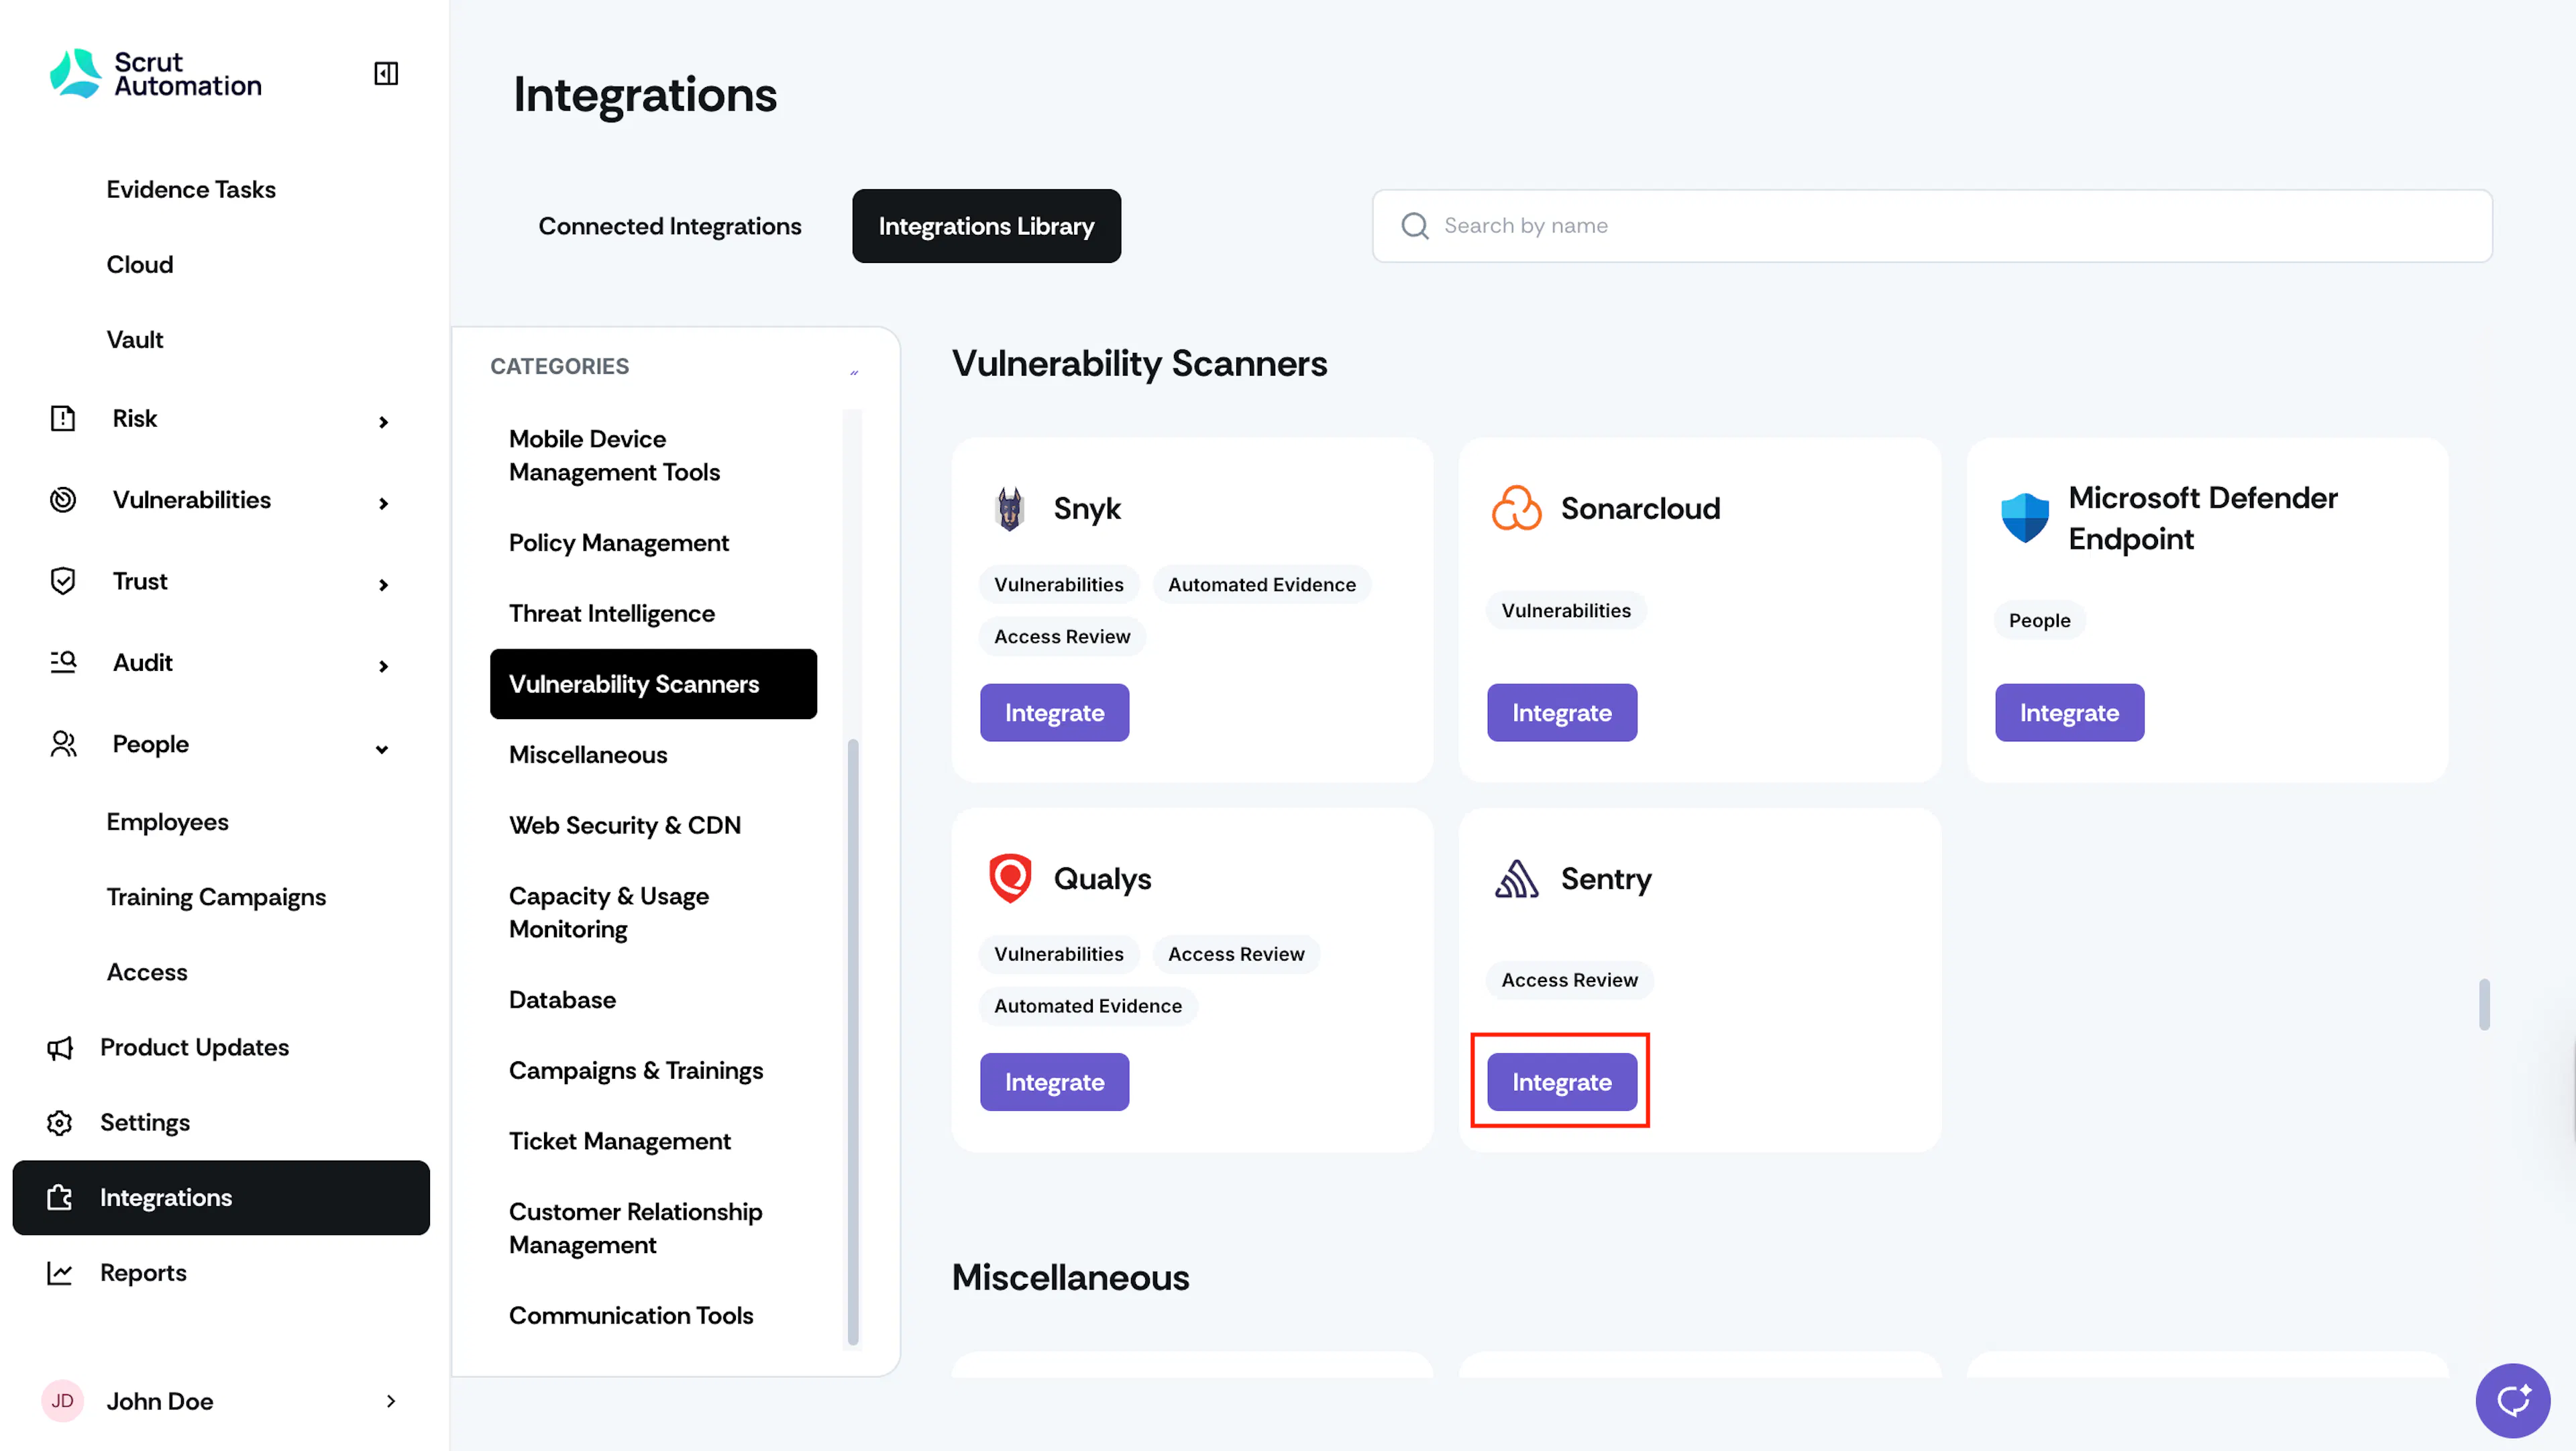
In the Categories panel on the left, select Vulnerability Scanners.
-
Locate the Sentry tile and click Integrate.
-
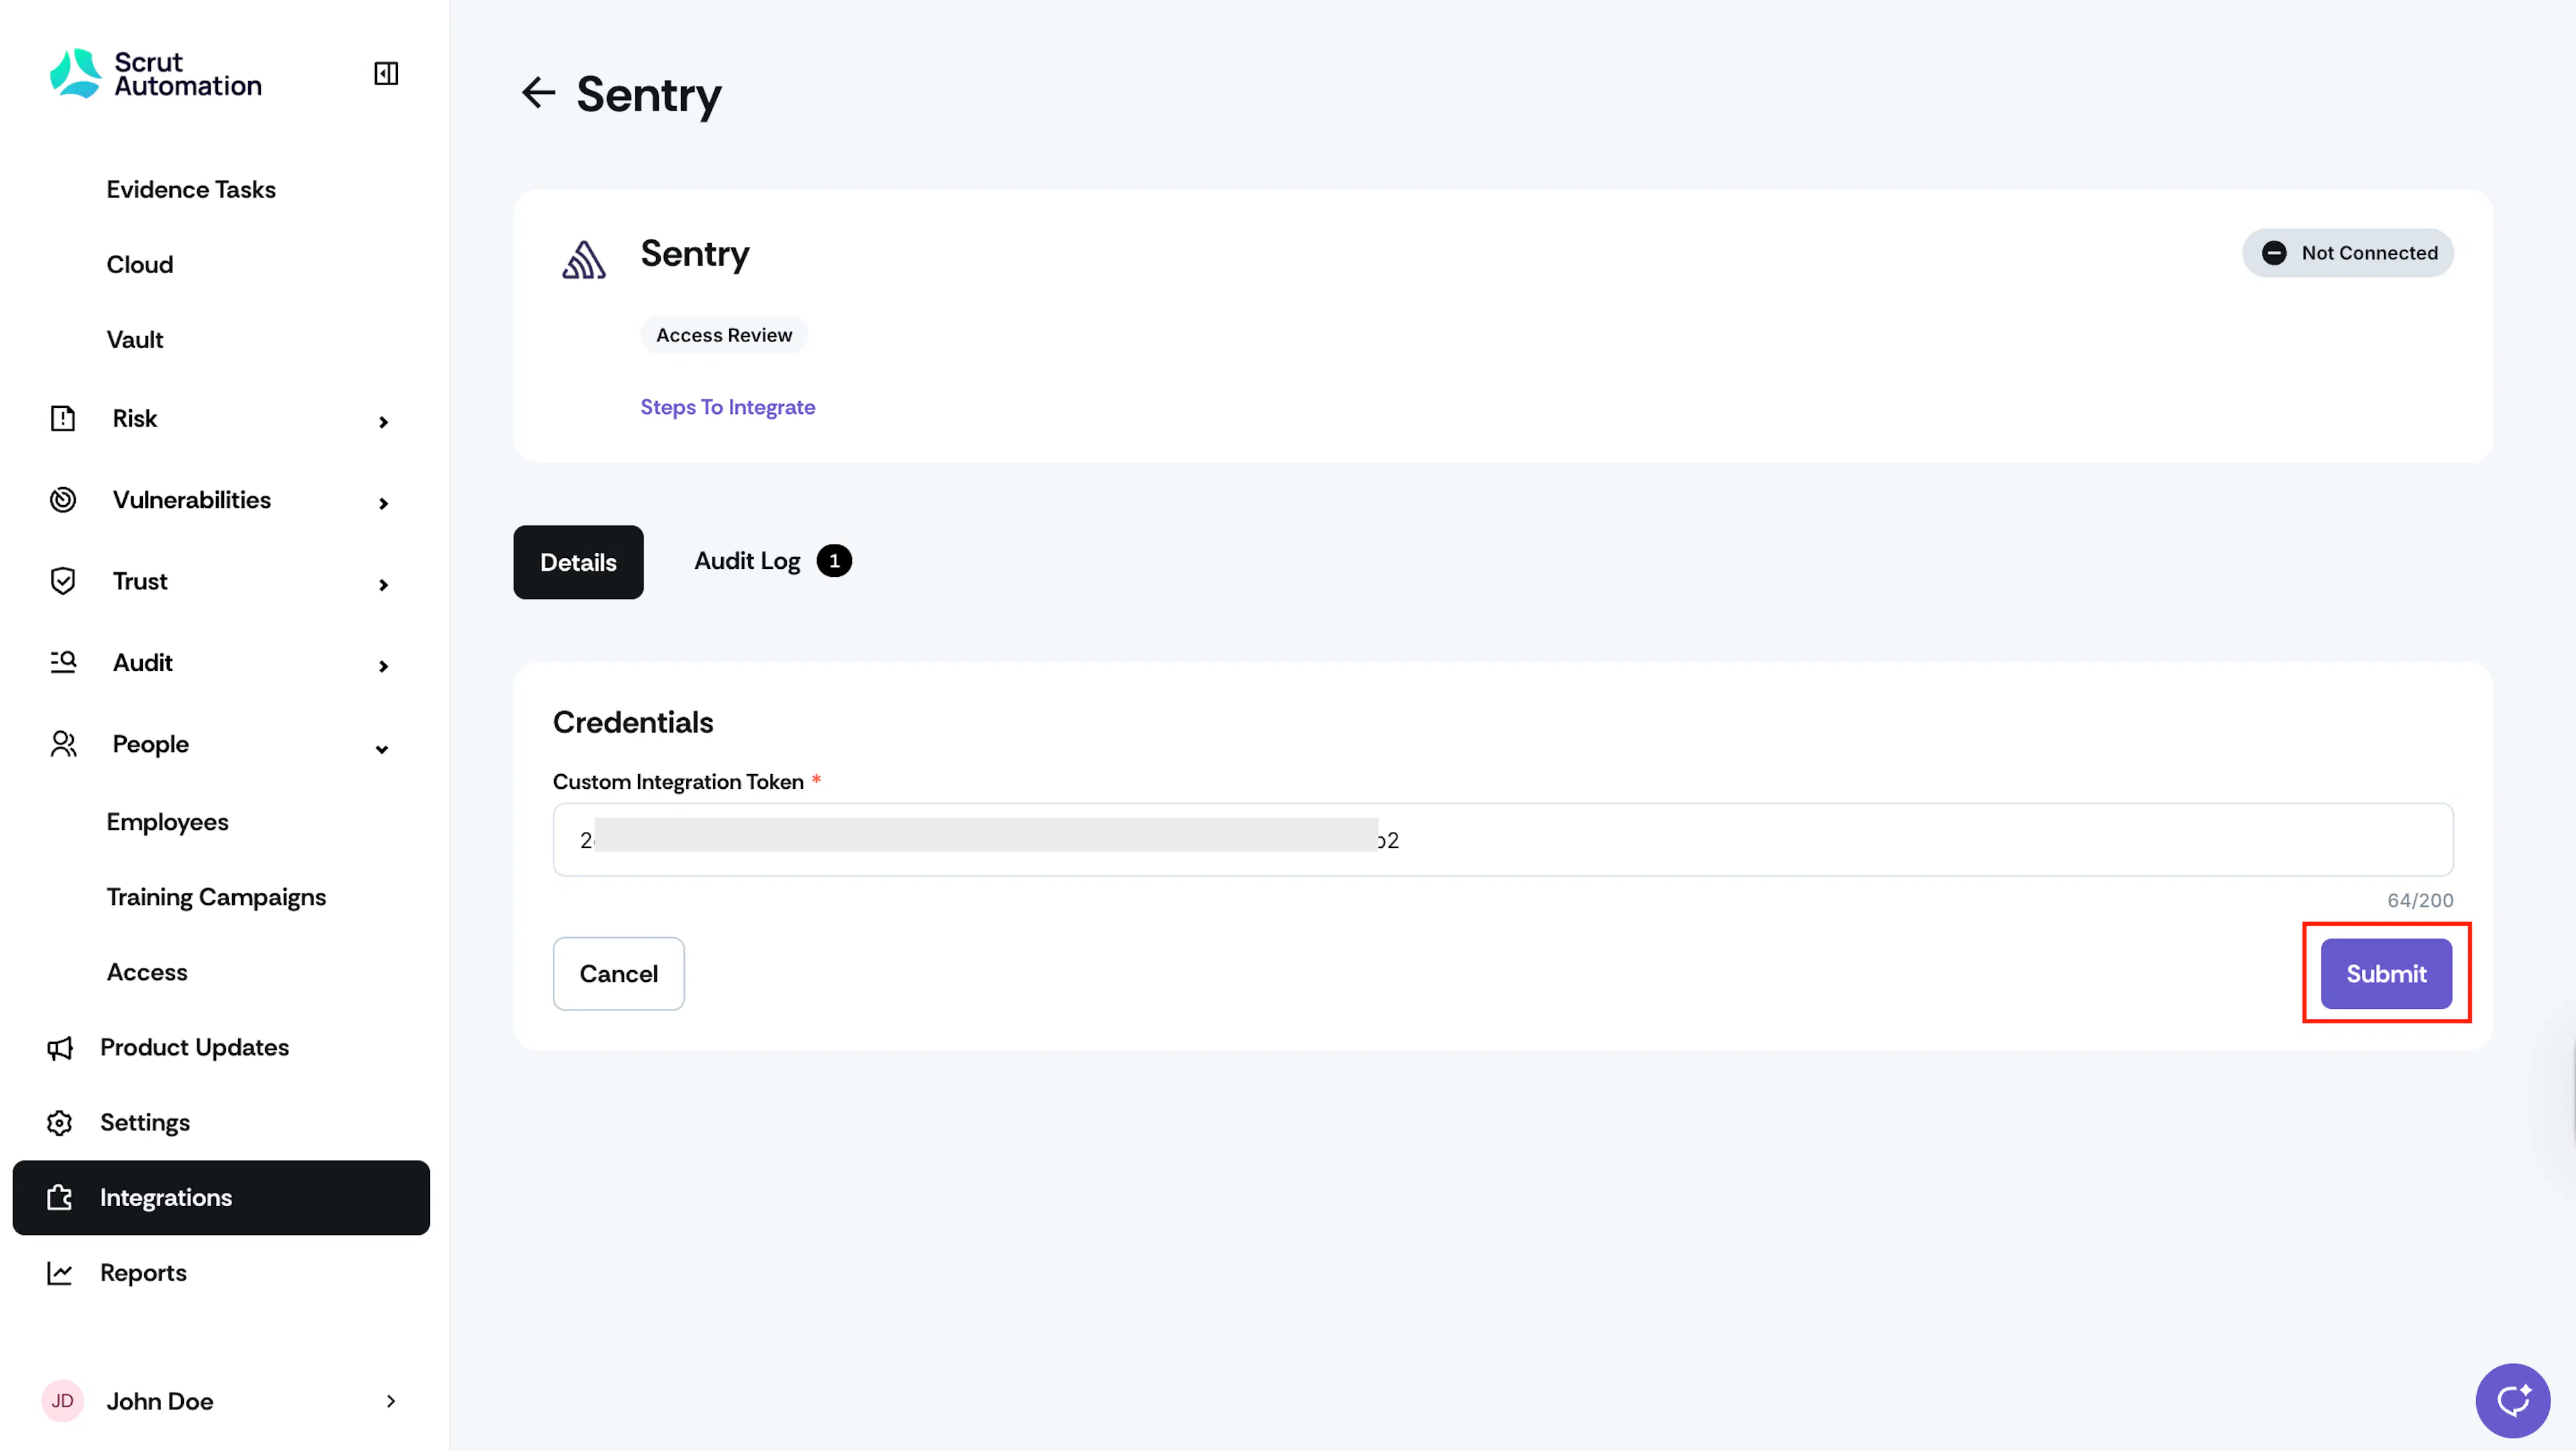
On the integration page, paste the Custom Integration Token you copied in Step 1 into the Custom Integration Token field.
-
Click Submit.
-
Once the connection is verified, you'll see a success toast, and the status indicator will update to Connected.
What Happens Next?
Initial data sync
After the integration is connected, Scrut begins syncing user data from Sentry automatically. The initial sync typically takes a few hours. To monitor the status, go to the Sentry integration page in Scrut and click the Audit Log tab.
Review synced data
Once synced, check whether Sentry user data is synced in the following modules:
- Navigate to Tests and filter tests by Application → Sentry to view only automated tests for the Sentry integration.
- Navigate to People → Access Reviews and create a new Access Review, or open an existing one. In Step 2 of the Access Review setup, search for and add Sentry under Applications in Scope. Select a Reviewer and Approver, review the details, and click Save Review. From the Access Review page, click Sentry to view user name, email, and role data pulled from your Sentry account.
To trigger a sync at any time, go to the Sentry integration page in Scrut and click Sync Now.
Common Errors and Troubleshooting
Integration fails, or the token is not accepted
Possible solutions:
- Confirm that the token was copied in full, without any extra spaces.
- Check that the integration type in Sentry is set to Internal Integration. Tokens generated from Public Integrations are not supported.
- Verify that the Project and Member permissions are both set to Read before saving.
- If the token was generated but then the permissions were changed, generate a new token and resubmit.
Data is not appearing in Access Reviews
Possible solutions:
- Check the Audit Log on the Sentry integration page in Scrut to confirm the sync completed successfully.
- If the initial sync is still in progress, wait a few hours and check again.
- Confirm that Sentry is added as an application in scope in the Access Review you're checking.
- Click Sync Now on the integration page to trigger a manual refresh.
User records are missing or incomplete
Possible solutions:
- Verify that the affected users exist and are active in your Sentry organization.
- Confirm that the integration token has Member: Read permission. Without this scope, user data will not be fetched.
FAQs
Reach out to support@scrut.io or contact your CSM for further assistance.