

Integrate Workday
The Scrut-Workday integration seamlessly syncs employee data from your Workday account with Scrut. This article provides a step-by-step guide for integrating your Workday account with Scrut.
Prerequisites
Before you begin the integration, make sure to have the following permissions for your Workday account:
-
Account Information: Login credentials
-
Access Level: Admin access to your company’s Workday account
-
Permissions: Scrut requires read access to the following data:
- Read: user_profile
- Read: employment_info
- Read: manager_info (wherever applicable)
- Read: leave_data
Pro Tip!
We recommend logging into your Workday account with your admin credentials before beginning the integration to avoid doing so later.
How to Connect Workday With Scrut
Step 1: Fetch the Required Details from Workday
As part of the integration, you’ll need to copy-paste the following parameters from Workday in Scrut.
1: Workday URL
To find your Workday Web Services URL, follow these steps:
-
Log in to your Workday account.
-
In the search bar, search for and click Public Web Services.
-
At the top of the page, click the more options icon beside Public Web Services.

-
Hover over Web Service and click View WSDL.
-
An XML document opens in a new tab. Locate the
hostattribute. -
Copy the URL found in the
locationattribute of thesoapbind:addresselement until the/service. For example, if the XML contains the URL,soap:address location="https://example.workday.com/ccx/service/tenant/service/version"the Web Services URL ishttps://example.workday.com/ccx.
2: Workday Integration System Username and Password
To create an Integration System User (ISU) in Workday, follow these steps:
-
In your Workday portal, log in to the Workday tenant.
-
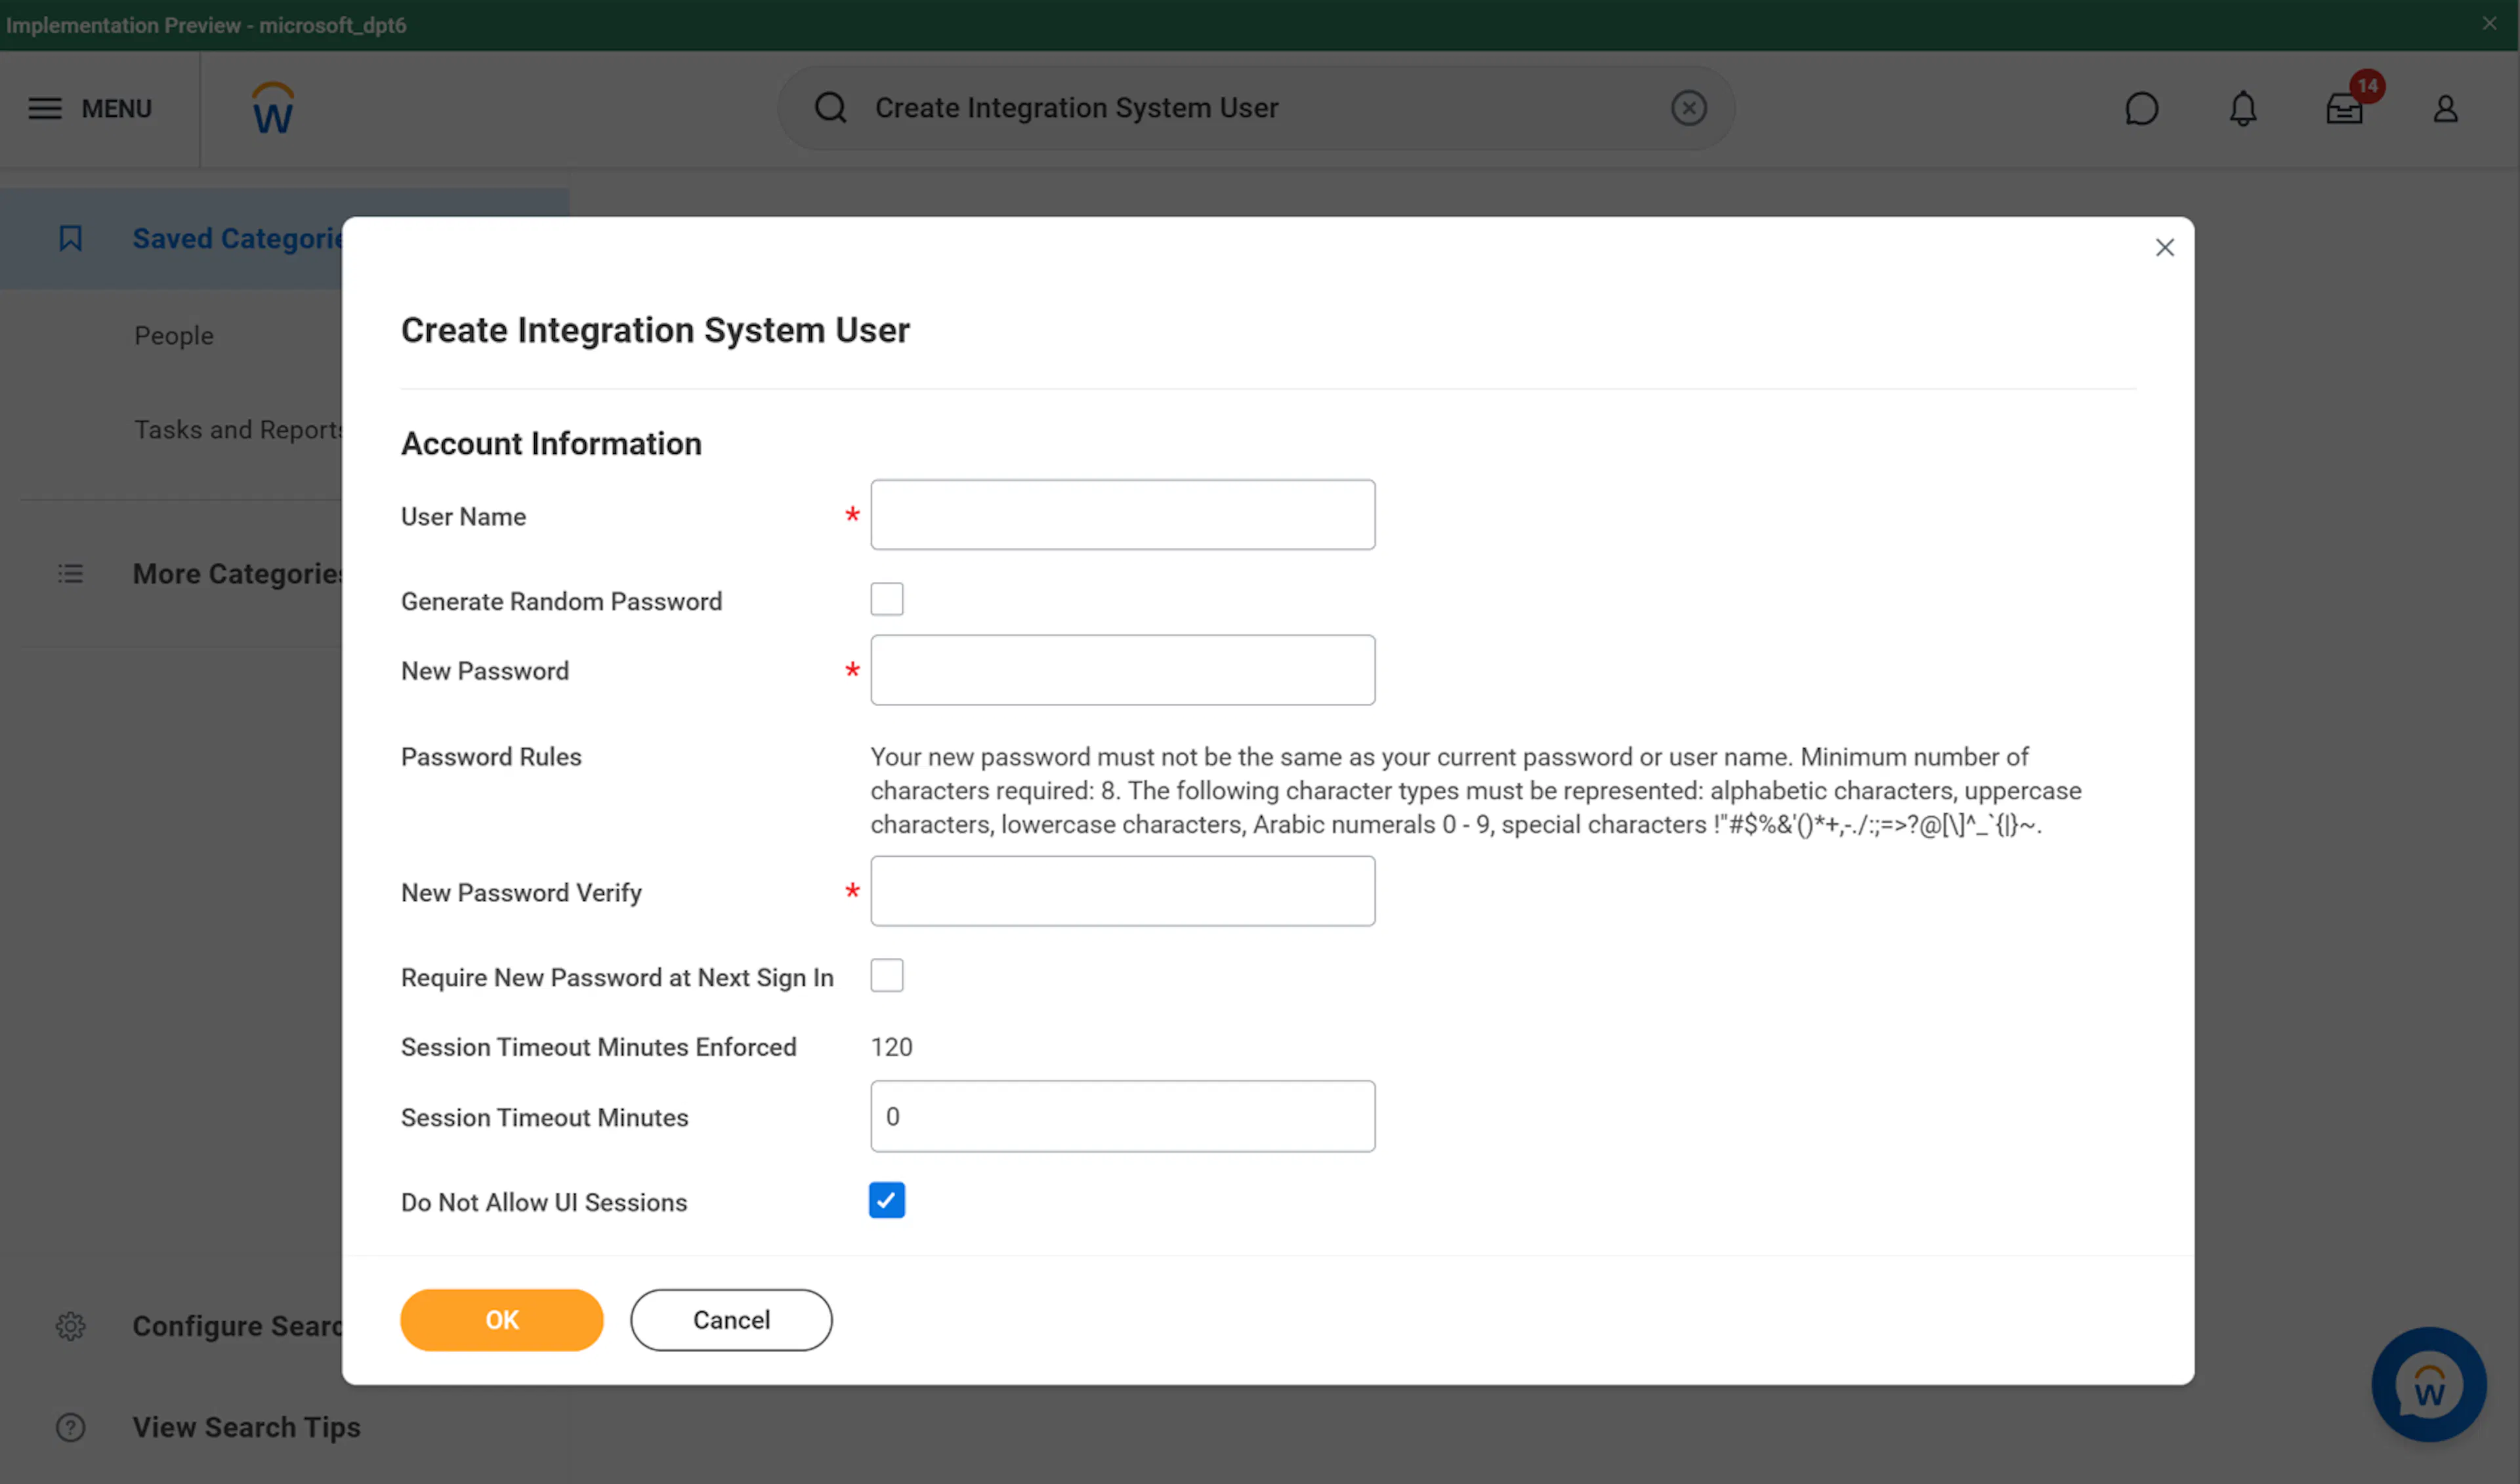
In the Search field, type Create Integration System User.
-
Select the Create Integration System User task.
-
Enter a username, such as Scrut Automation.
-
Enter a password and click OK.
-
Workday automatically sets the value of Session Timeout Minutes to zero, preventing the ISU from expiring. Expired sessions can cause the integration to stop before it completes.
-
Do Not Allow UI Sessions: We recommend selecting this option, as there is no need for the integration system user to log in to the Workday UI as a regular user.
Note: Add this user to the list of System Users to prevent the password from expiring.
Ensure that you complete these instructions before proceeding to the next step.
Create a Security Group and Assign an Integration System User
-
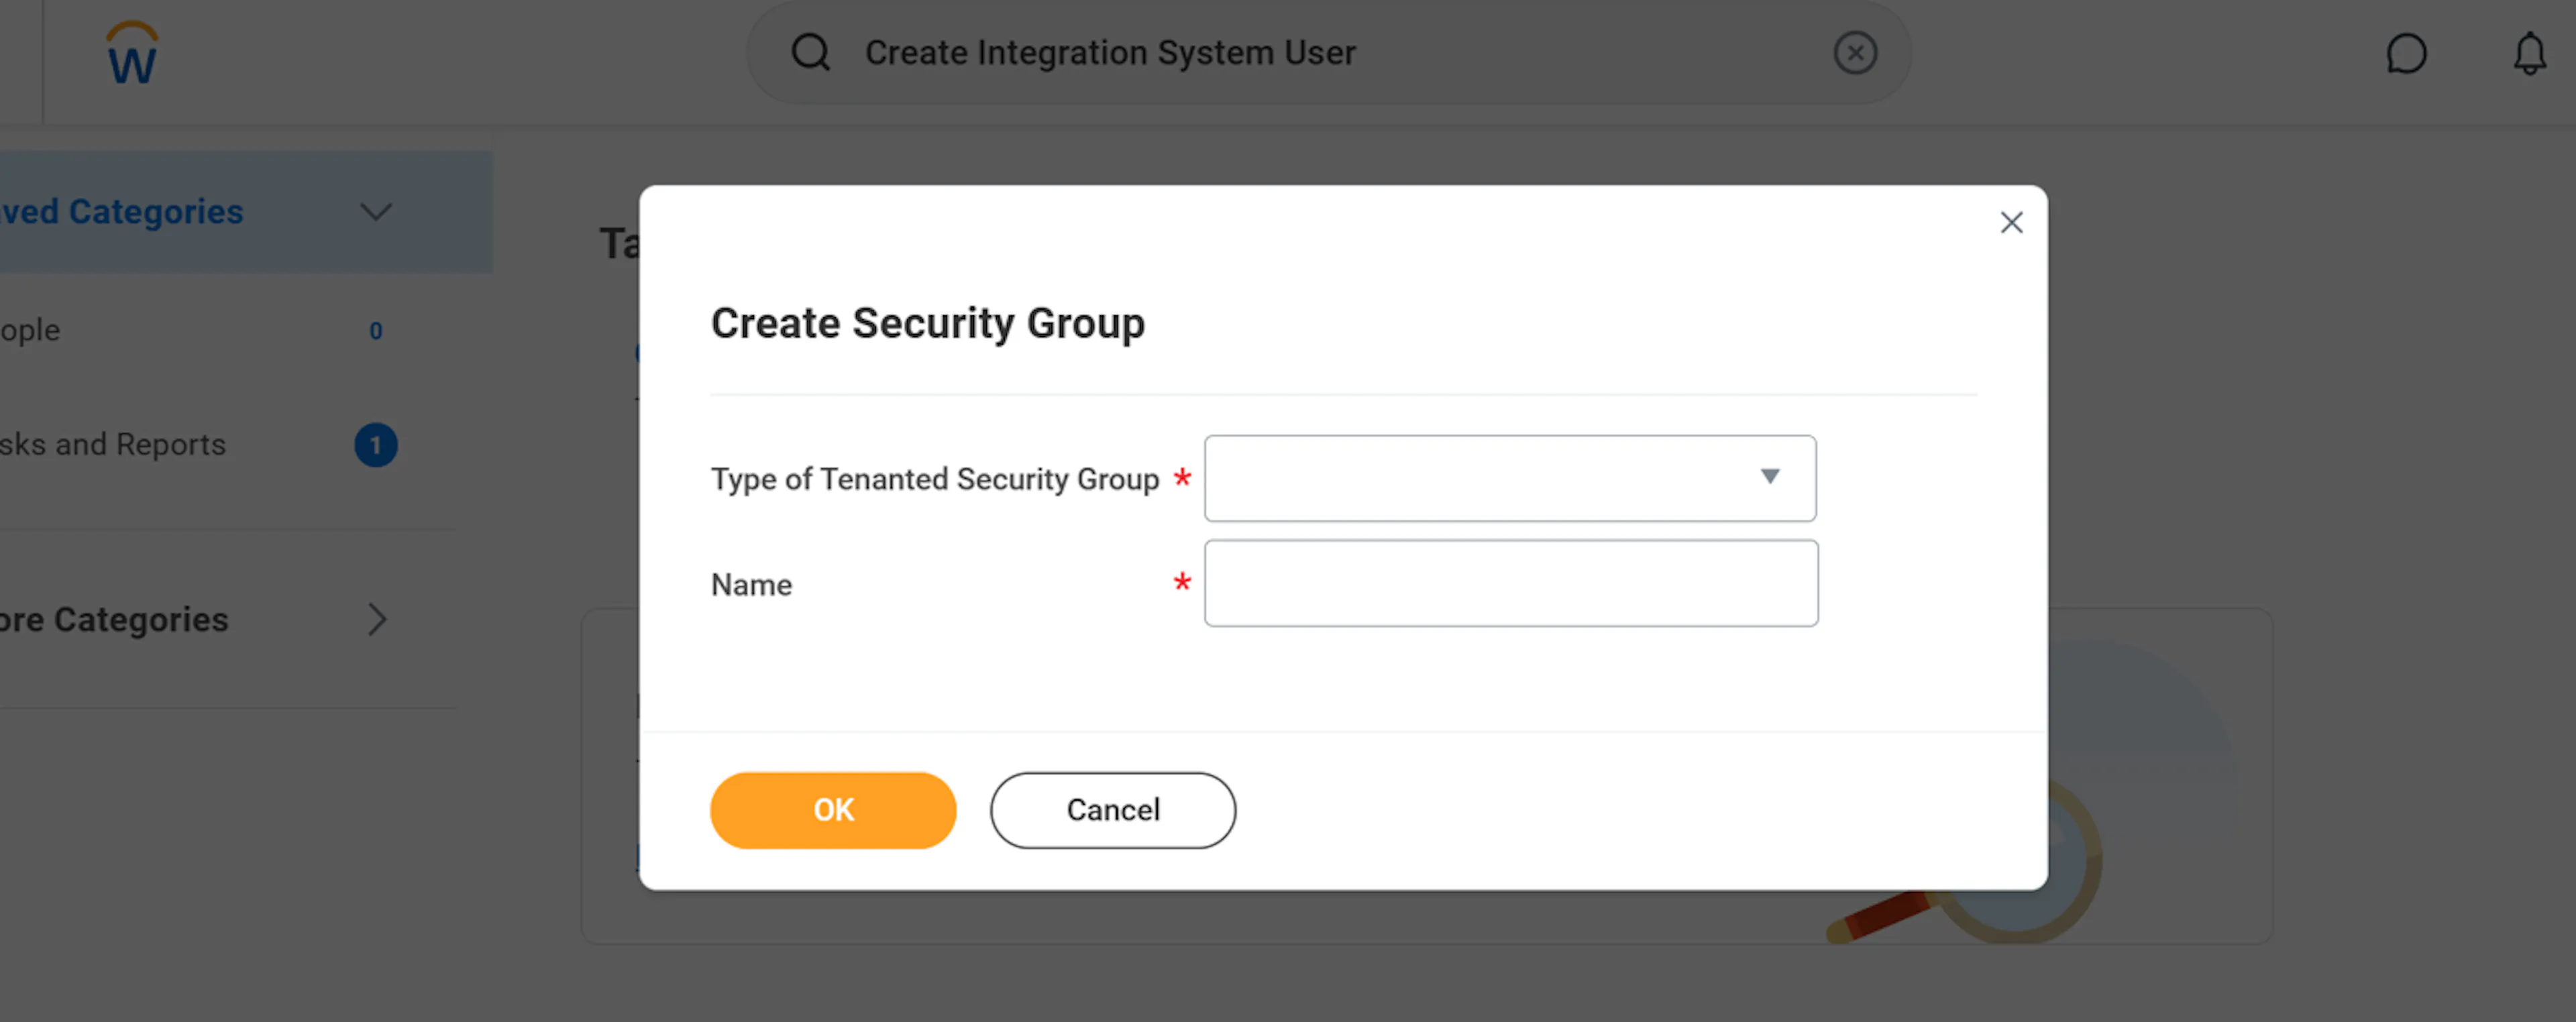
On the Workday home page, type "Create Security Group" into the search bar.
-
Click the Create Security Group task in the dropdown.
-
In the dialog, enter the following:
- Type of Tenanted Security Group: Select Integration System Security Group (Unconstrained).
- Name: Enter a name for the security group.
-
Click Ok.
-
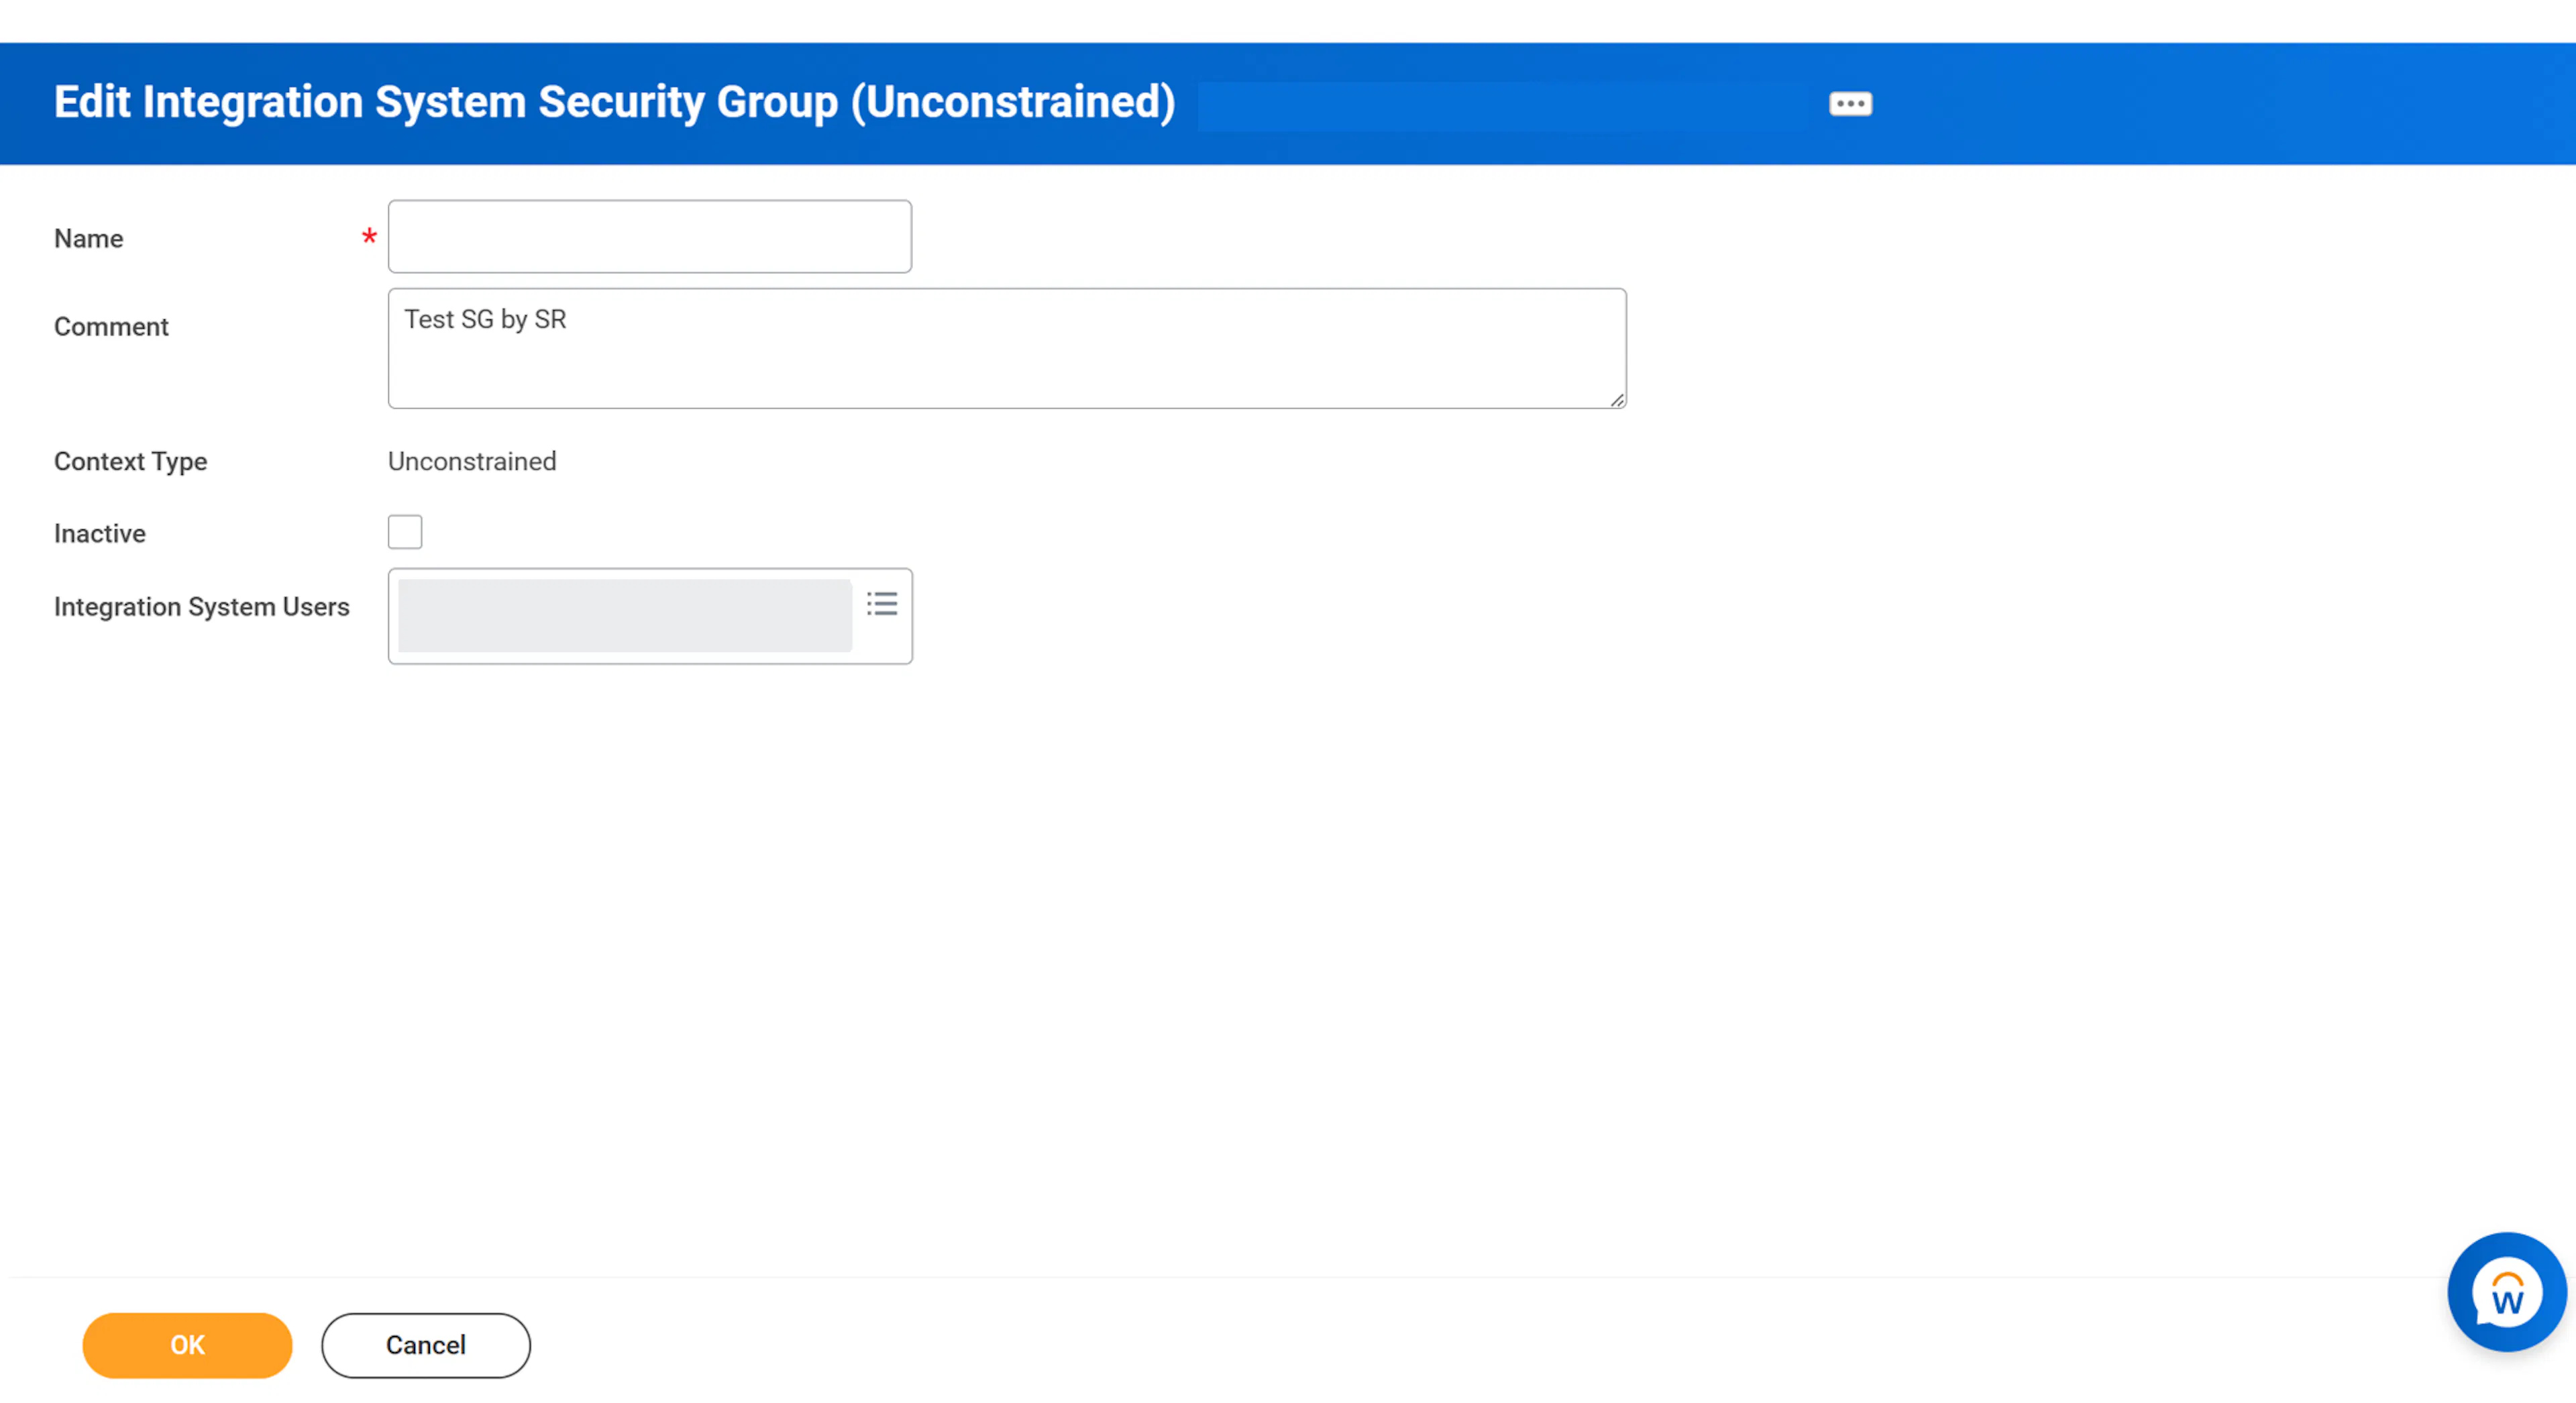
In the Edit Integration System Security Group (Unconstrained) dialog, enter the following:
- Integration System Users: Enter the name of the integration system user you created above (such as Scrut Automation).
-
Click Ok.
Configure Domain Security Policy Permissions
For the Security Group, you will need to edit the Domain Security Policy Permissions and add the following GET operations:
| Parent Domains Required for HRIS | Parent Domains Required for ATS |
|---|---|
| Job Requisition Data • Person Data: Name • Person Data: Personal Data • Person Data: Home Contact Information • Person Data: Work Contact Information • Worker Data: Workers • Worker Data: All Positions • Worker Data: Current Staffing Information • Worker Data: Public Worker Reports • Worker Data: Employment Data • Worker Data: Organization Information | Candidate Data: Job Application • Candidate Data: Personal Information • Candidate Data: Other Information • Pre-Hire Process Data: Name and Contact Information • Job Requisition Data • Person Data: Personal Data • Person Data: Home Contact Information • Person Data: Work Contact Information • Manage: Location • Worker Data: Public Worker Reports |
Activate Security Policy Changes
- On the Workday home page, type "Activate Pending Security Policy Changes" into the search bar.
- This provides a summary of the pending security policy changes awaiting approval.
- Review the policies and approve the pending security policy changes to activate them.
3: Workday Tenant Name
Finding your Workday Tenant Name is easy. For example, if you sign in athttps://example.workday.com/acme, your tenant name is "acme."
Important
Workday REST credentials (#4 Client ID and Client Secret, #5) are optional. You need them only to sync Leave APIs and Bank Account Details.
4: Workday REST Client ID and Client Secret
-
Log in to Workday and search for and click on "Register API Client."
-
In the Client Name field, enter the name of the client.
-
In the Client Grant Type field, select Authorization Code Grant.
-
Select Access Token as Bearer.
-
Select the following scope values from the Workday REST API:
- Scope (Functional Areas)
- Benefits
- Candidate Engagement
- Core Compensation
- Organizations and Roles
- Performance Enablement
- Pre-Hire Process
- Recruiting
- Staffing
- Time Off and Leave
- Time Tracking
- Worker Profile and Skills
-
Click OK to generate the Client ID and Client Secret.
-
Copy and save them in a safe location, as you’ll need to enter these values in Scrut in the next step.
5: Workday Refresh Token
- Log in to Workday, search for and then click on "View API Client."
- On the View API Clients page, click the API Clients for Integrations tab.
- Click the API Client that you created in the previous step and navigate to Manage Refresh Tokens for Integrations.
- On the Manage Refresh Tokens for Integrations page, in the Workday Account field, enter the Workday account of an admin.
- Click OK and return to the Workday home page.
- In the Search field, type "Register API Client for Integration".
- On the Delete or Regenerate Refresh Token page, select the Generate New Refresh Token option.
- Set Non-Expiring Refresh Token to Yes.
- Click OK.
- On the Successfully Regenerated Refresh Token Page, copy the Refresh Token.
Step 2: Connect Your Workday Account in Scrut
-
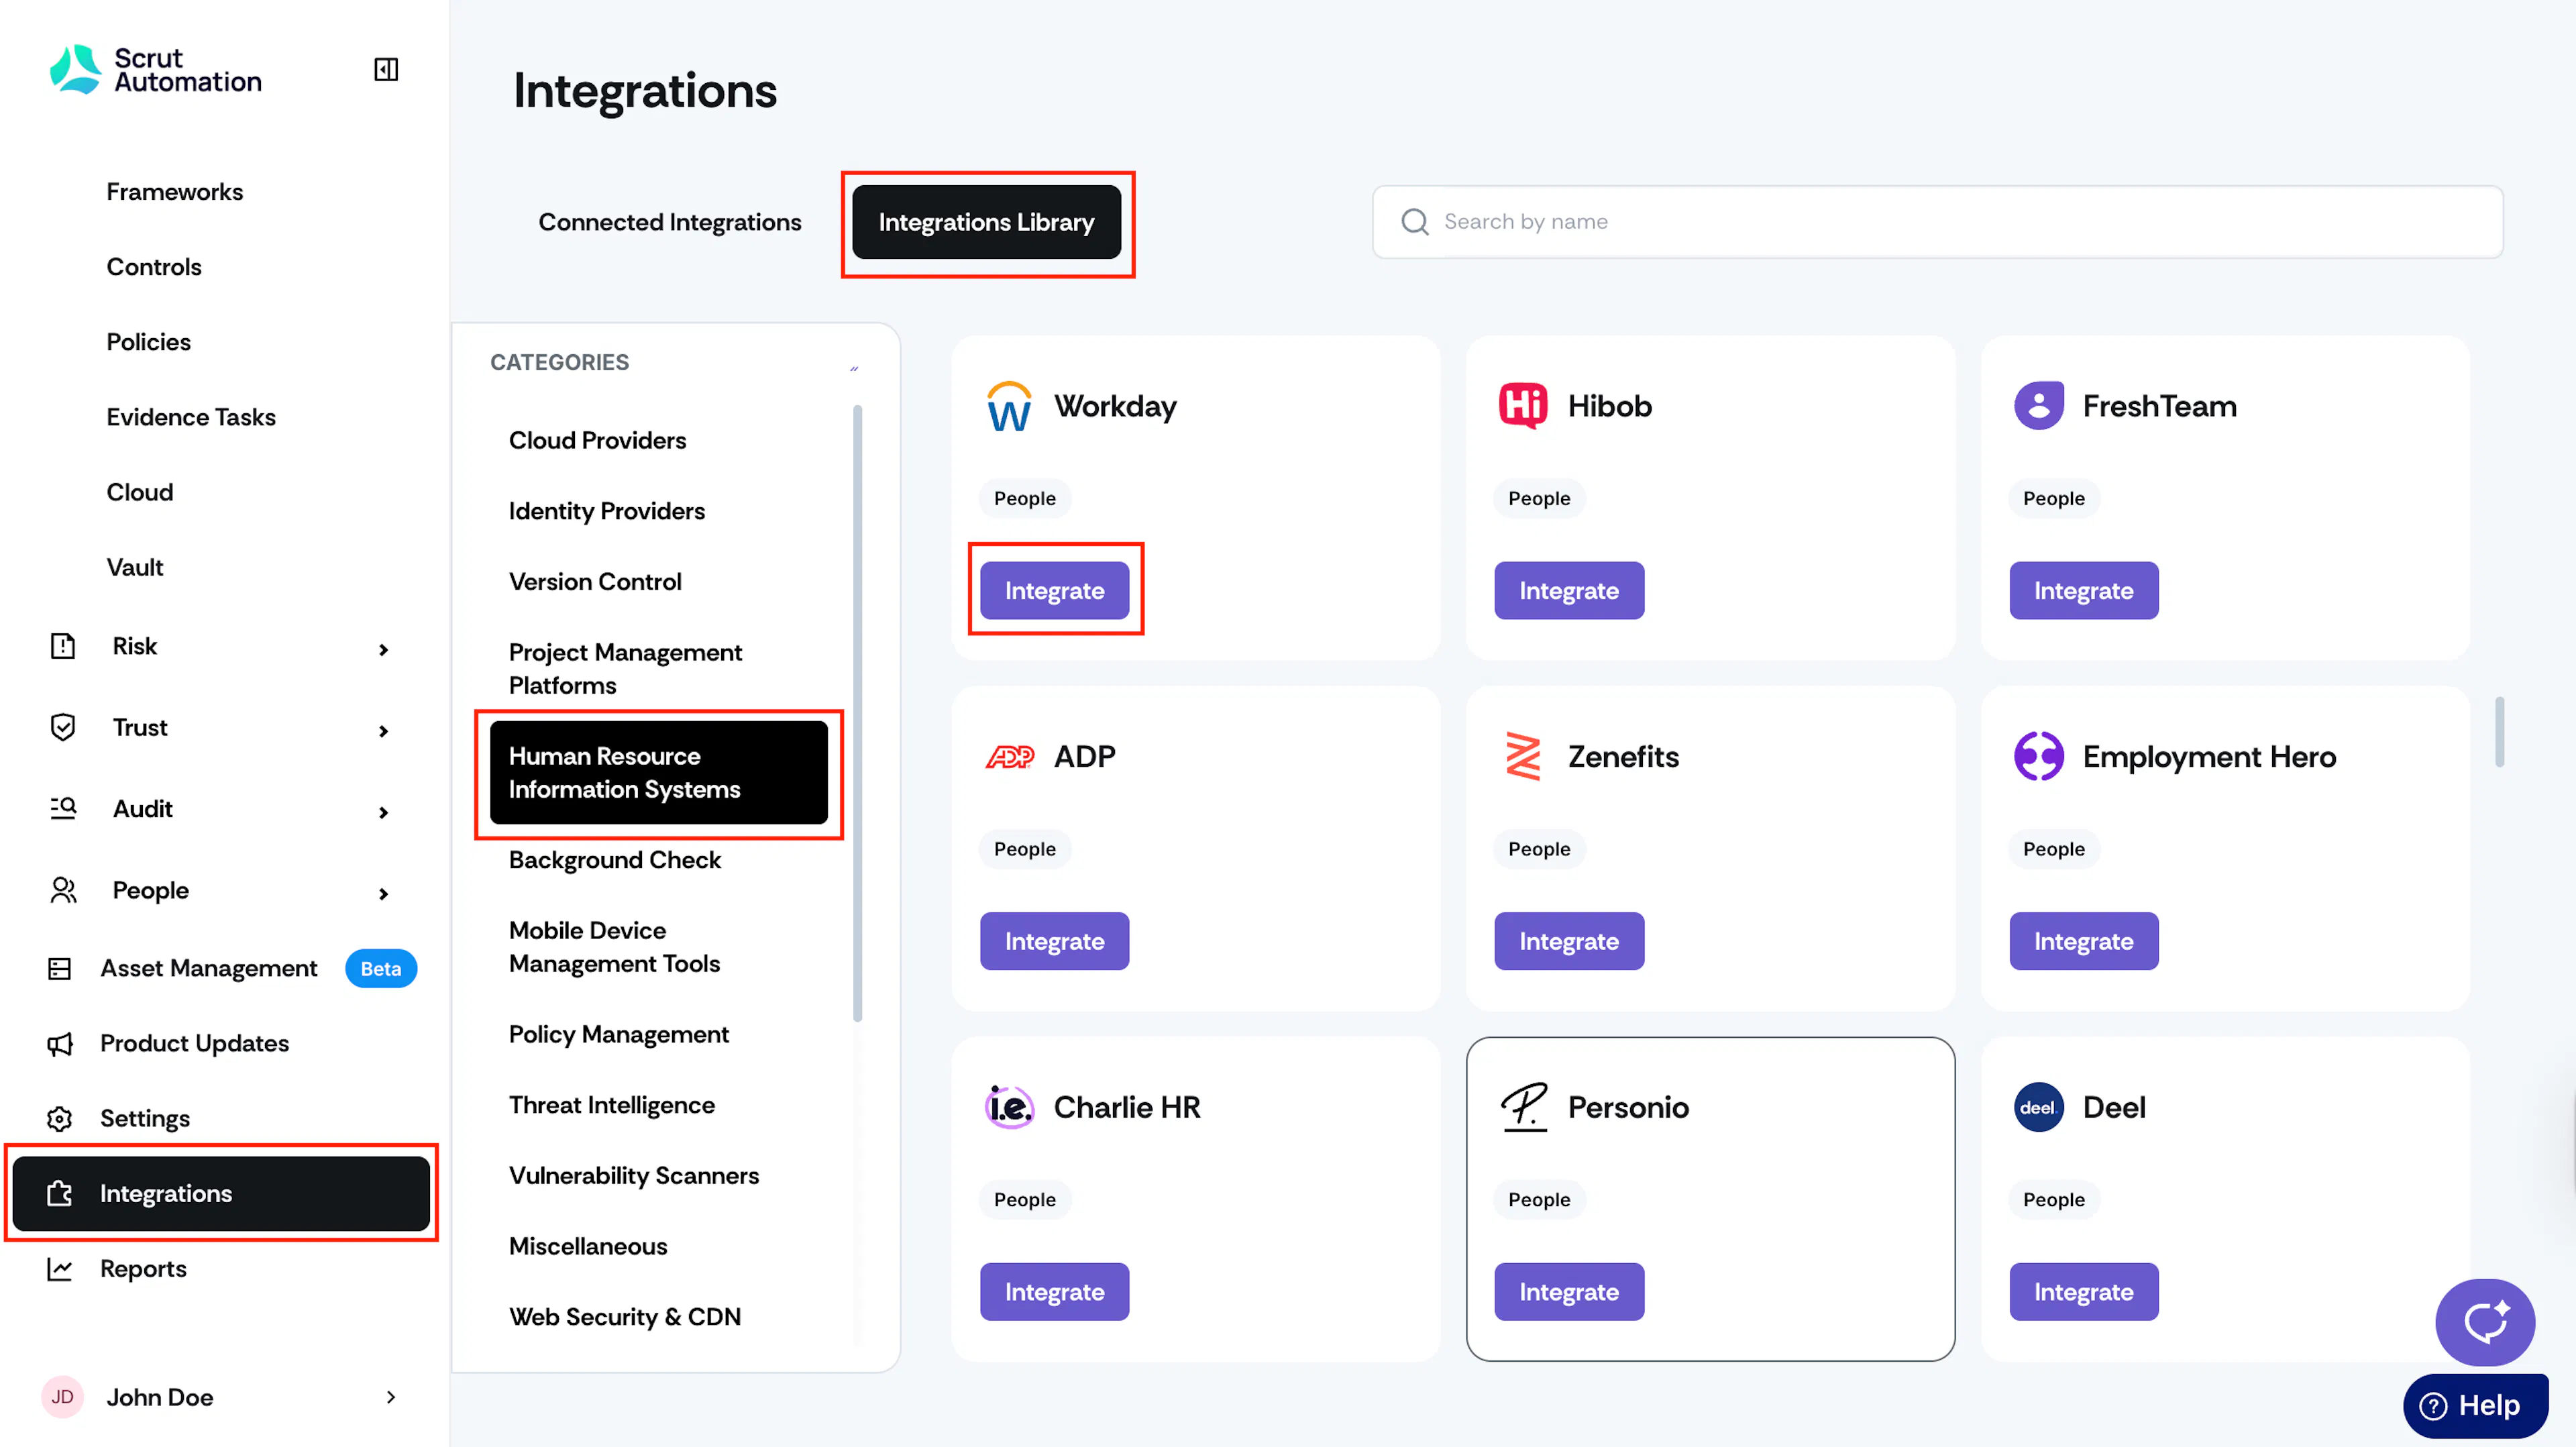
Log in to Scrut and click Integrations on the left panel.
-
Click the Integrations Library tab at the top, and in the Categories section, click Human Resources Information Systems.
-
Locate the Workday card, or use the search bar at the top of the page to find it, and click the Integrate button.
-
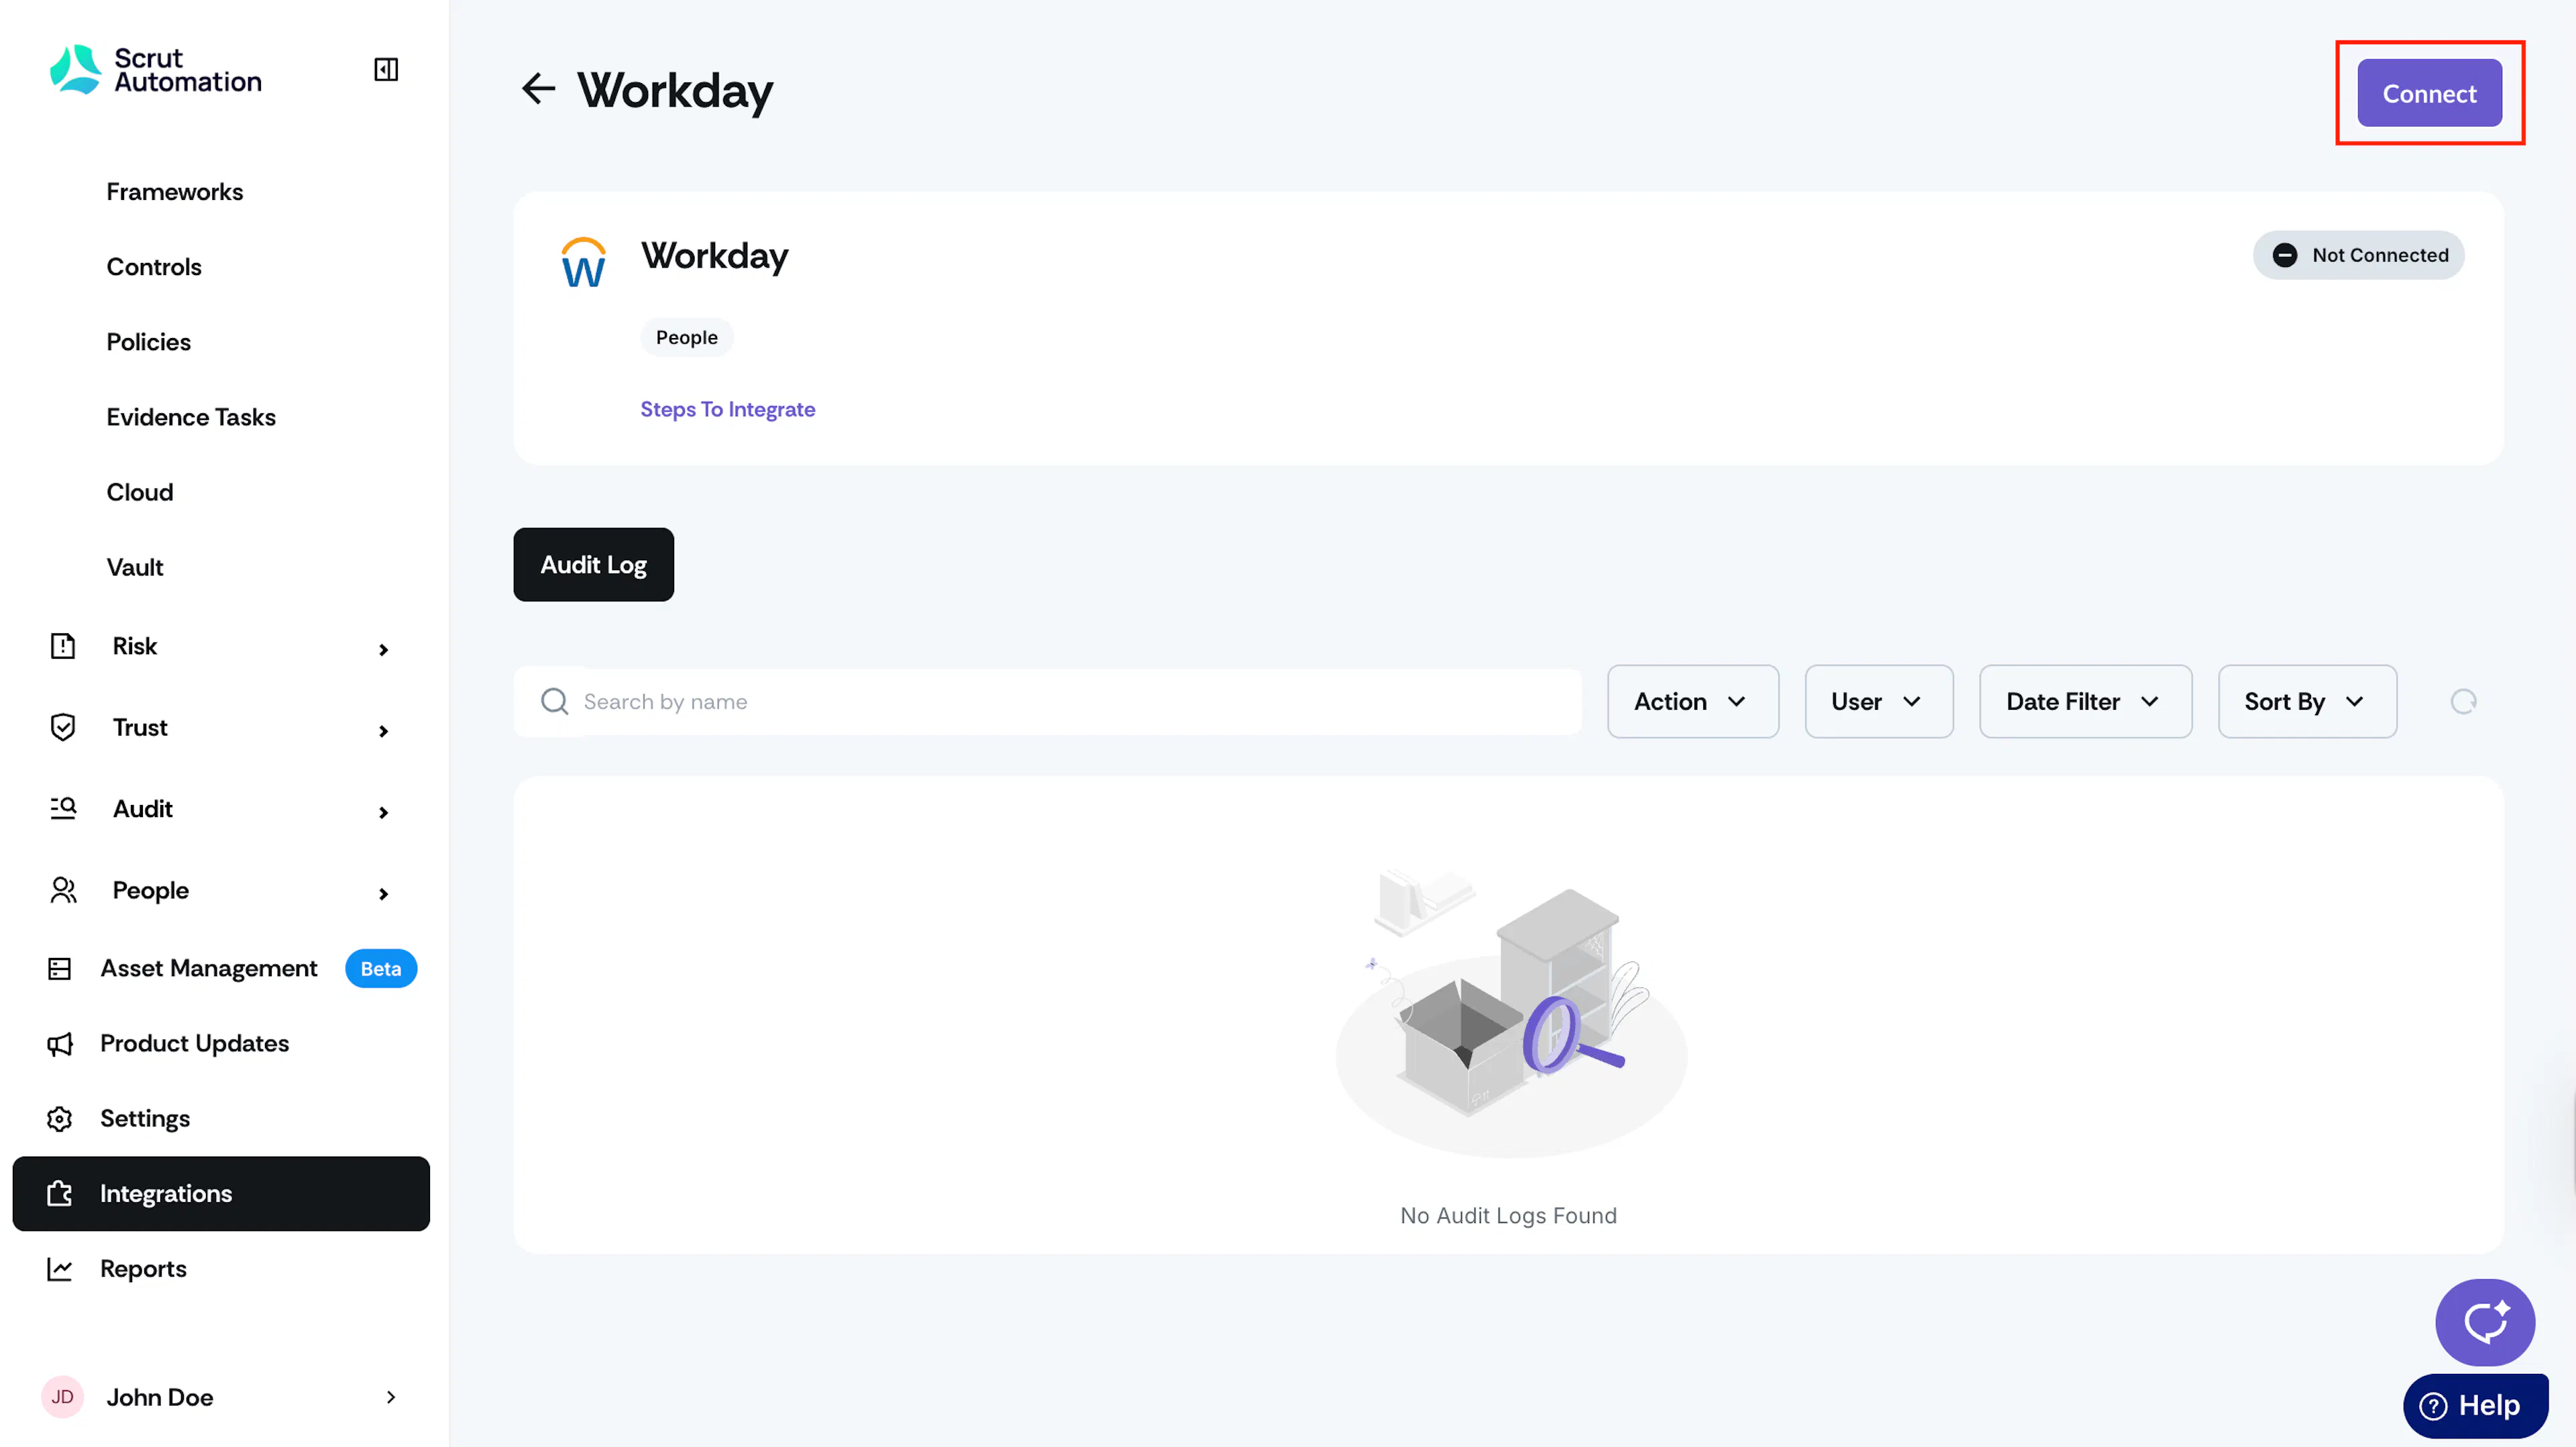
On the Workday integration page, click the Connect button at the top right.
-
Enter the details you fetched in Step 1: Workday URL, Integration System Username, Integration System User Password, and Tenant Name. Optionally, paste the REST Client ID, Client Secret, and Refresh Token, if required.
-
Click Submit.
That’s it. Once your Workday account is successfully integrated with Scrut, you will see a connected flag on the page.
Synchronization Details
- Initial Sync: Upon completing the integration, Scrut will immediately sync employee data from your Workday account.
- Recurring Sync: After this, Scrut performs the sync every 24 hours to fetch incremental data.
- Manual Sync: You can also initiate a manual sync by clicking the Sync Now button on the Workday integrations page.
Data Fetched From Workday
Scrut fetches the following employee details from Workday:
-
Contact Information
- Employee Name (First and Last Name)
- Email Address
-
Role Information
- Employment Start Date
- Date of Exit (if applicable)
- Department (if available)
- Reporting Manager Name and Email (if available)
-
Leave Data
- Start and End Dates of Employee Leaves
- Status of Employee Leaves
Viewing Workday Data in Scrut
To view Workday data in Scrut:
- Go to People → Employees → All Employees.
- Click on any employee to view their details, including name, email, joining date, reporting manager, and more.
If you encounter any difficulties connecting your Workday account with Scrut, please contact our support team at support@scrut.io for assistance.