Configure Risk Scores & Factors
Who can use this feature
- Supported on Growth and Scale plans
Configuring custom risk scoring formulas in Scrut's Risk Register is a pivotal step in aligning your risk assessment model with your organization's unique needs. This process involves defining two key components: Factors and the Score (or risk score formula). Let's delve into each of these configurations:
Scrut allows you to define custom risk score formulas that align with your organization’s specific needs. This process involves defining two critical components:
This article provides an in-depth explanation of these two elements.
Factors
Factors are the input parameters for a risk score formula. They represent the various elements or attributes that you need to consider when assessing risks. For example, it could include:
- Likelihood of Occurrence: How probable it is that a particular risk will happen.
- Impact: The potential consequences or damage that could result from the risk materializing.
- Control Effectiveness: An evaluation of how well existing controls or mitigation tasks work on reducing the risk.
For example, if you’re configuring a CIA (Confidentiality, Integrity, Availability) formula, the factors for it would be: Confidentiality (C), Integrity (I), and Availability (A). By identifying and defining specific factors for your organization, you can tailor risk assessment to address the unique requirements of your environment, operations, and potential risks.
How To Configure Risk Factors
-
Sign in to Scrut and go to Risk → Risk Management using the left side panel.
-
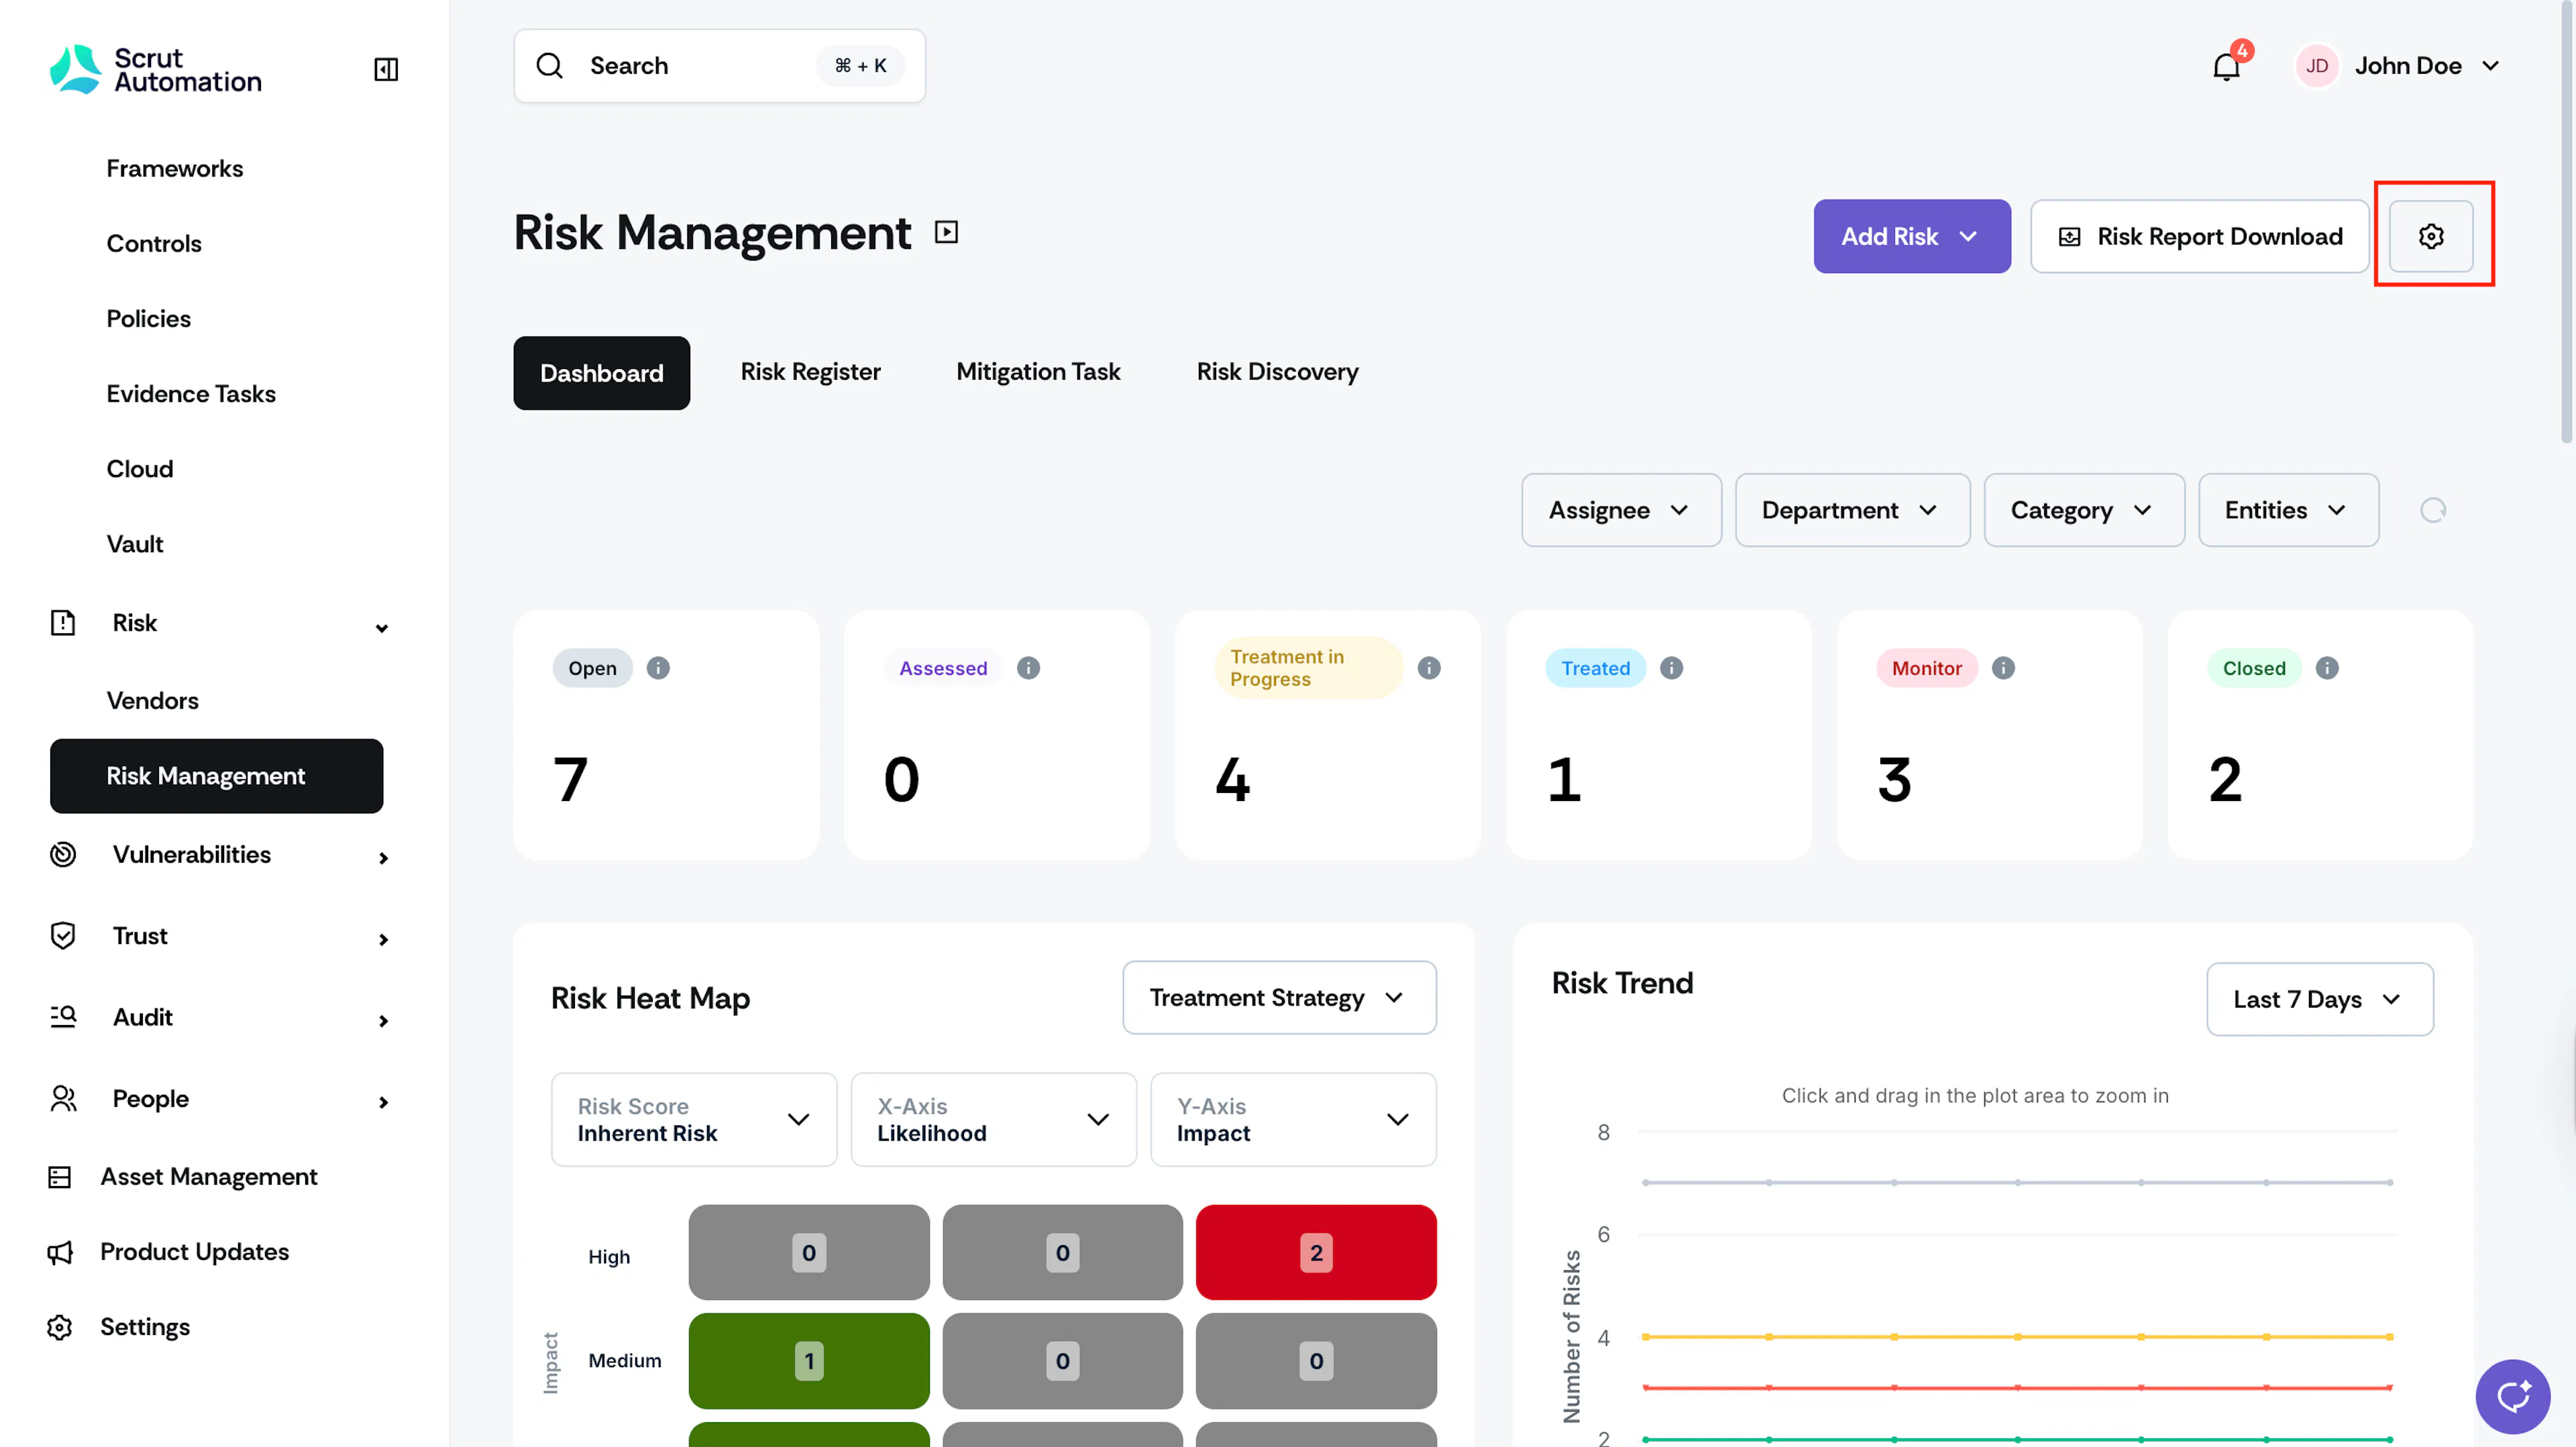
Click the Settings icon in the top-right corner of the Risk Management page.
-
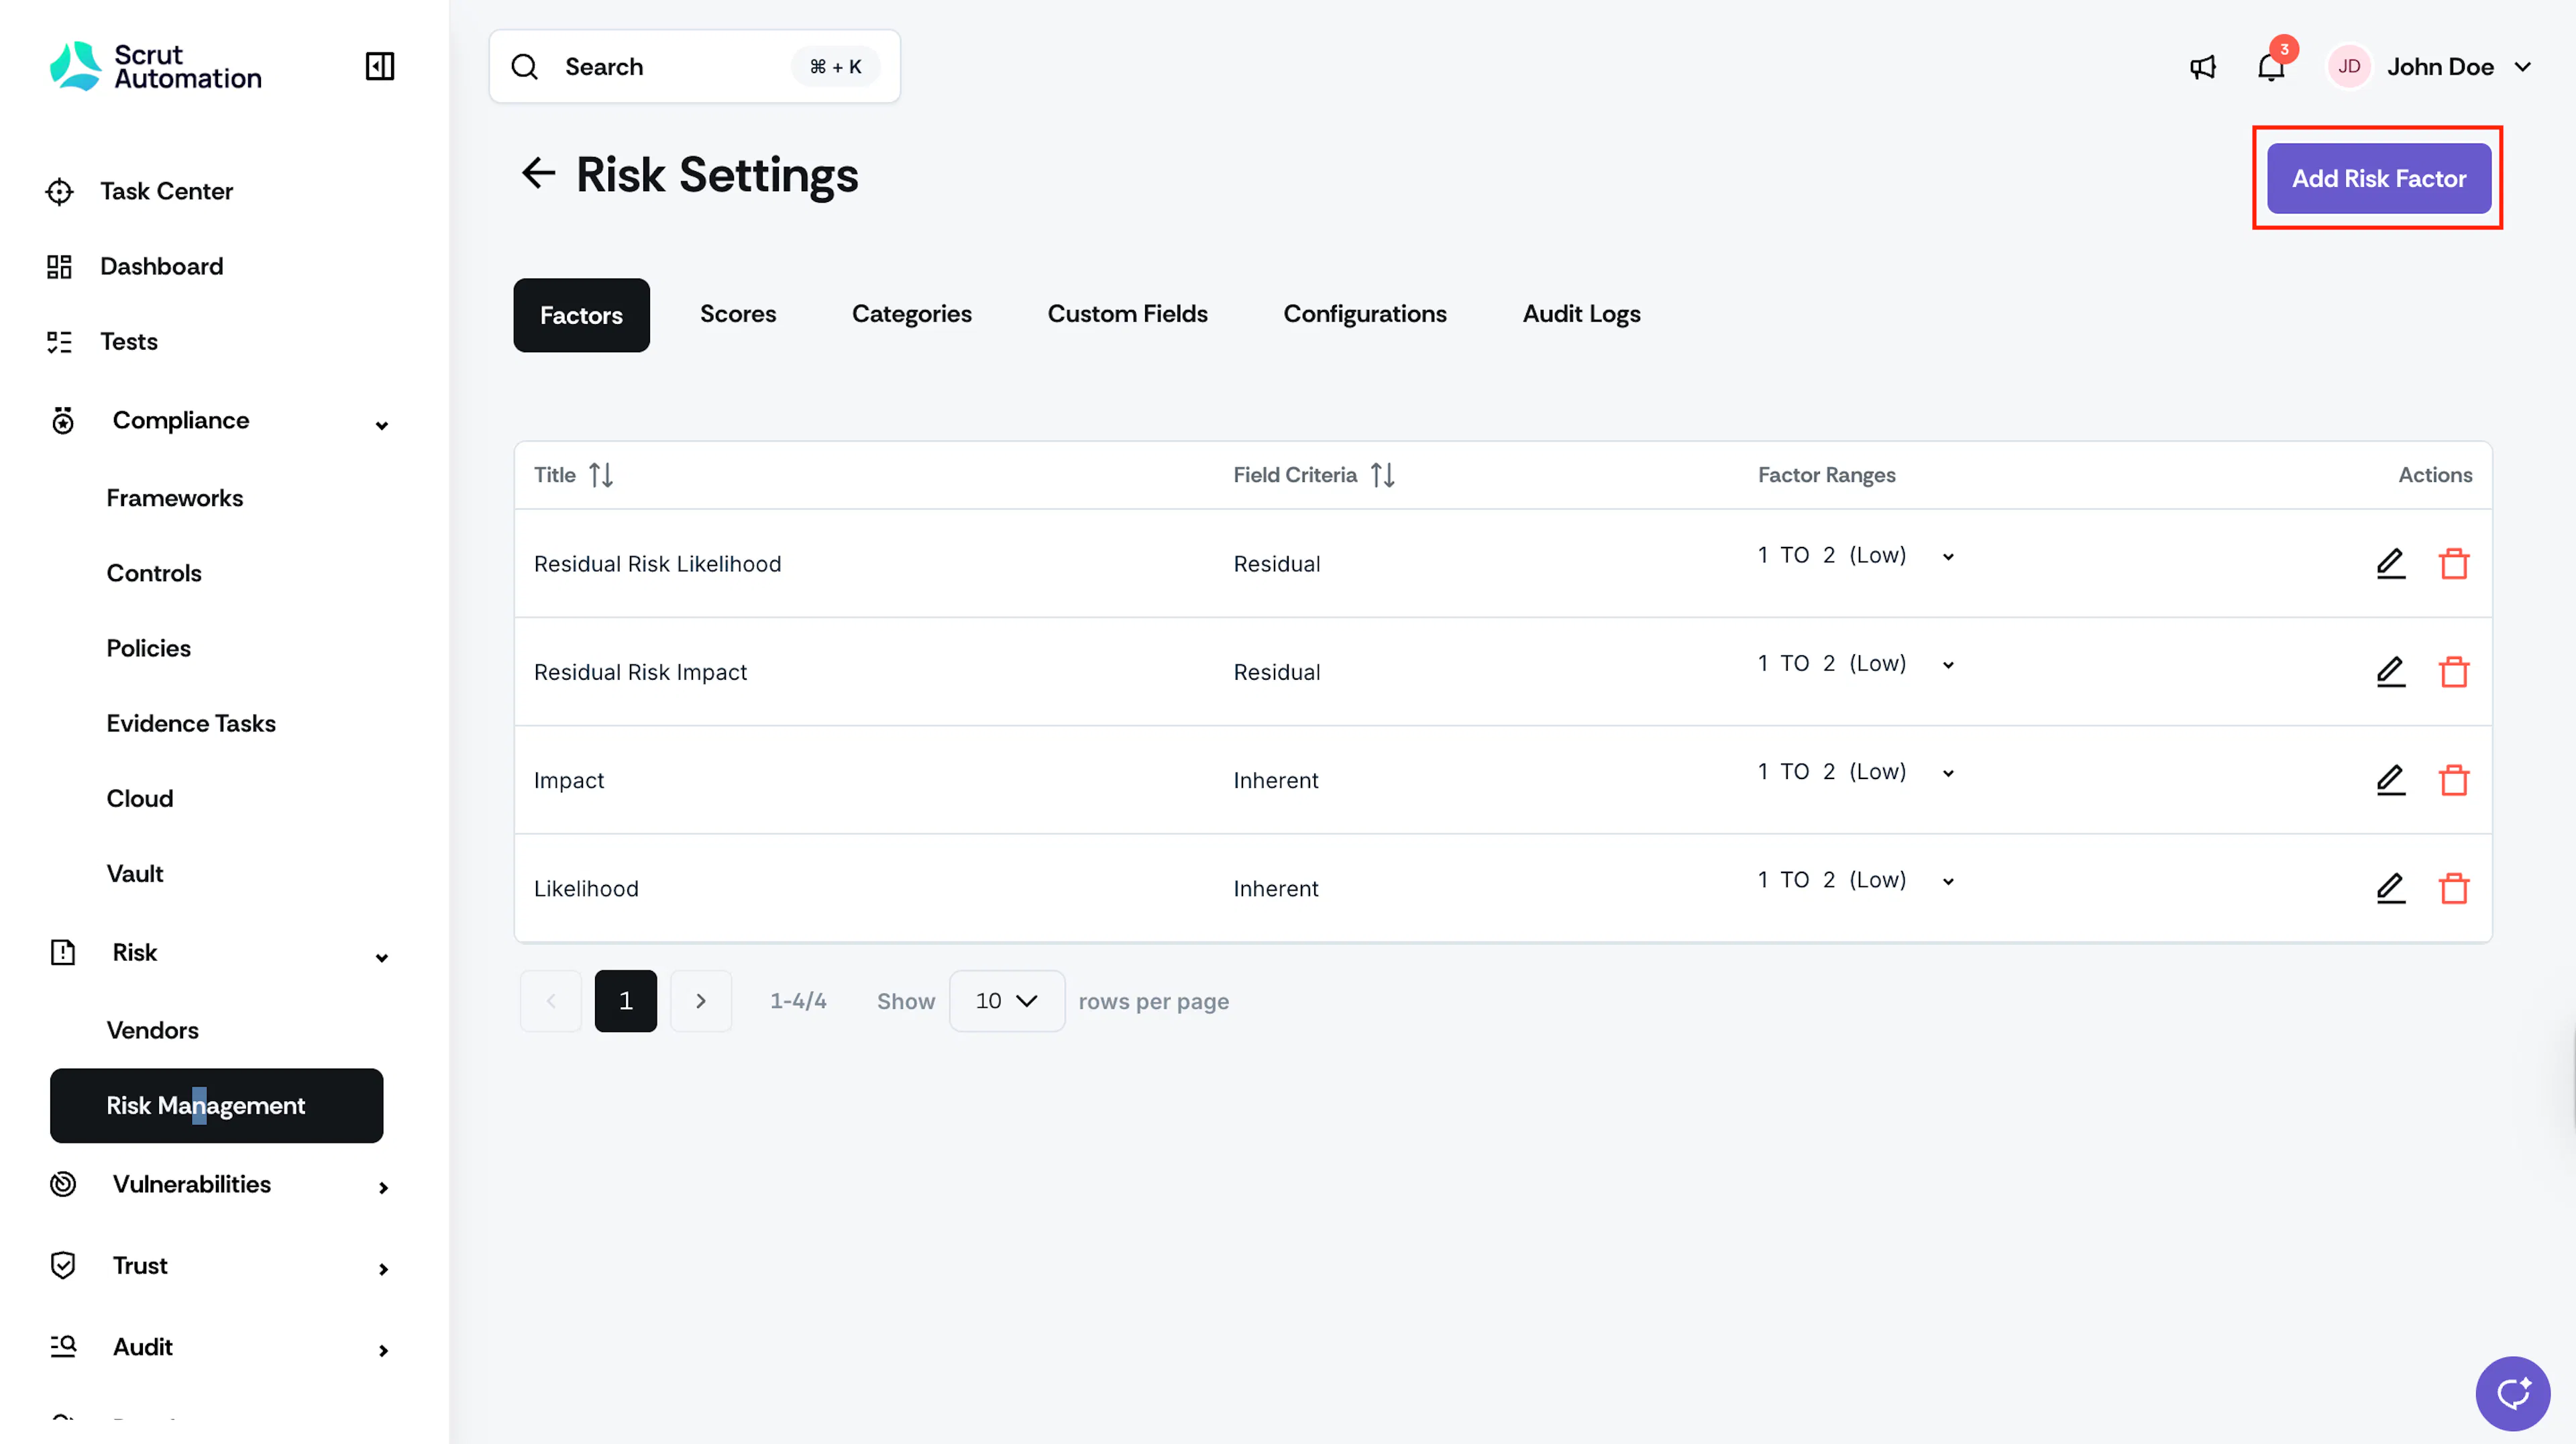
Click the Add Risk Factor button at the top right of the Factors tab.
-
By default, Scrut includes certain preset factors. If you don’t want to use these preset factors, you can either disregard or delete them, as needed.
-
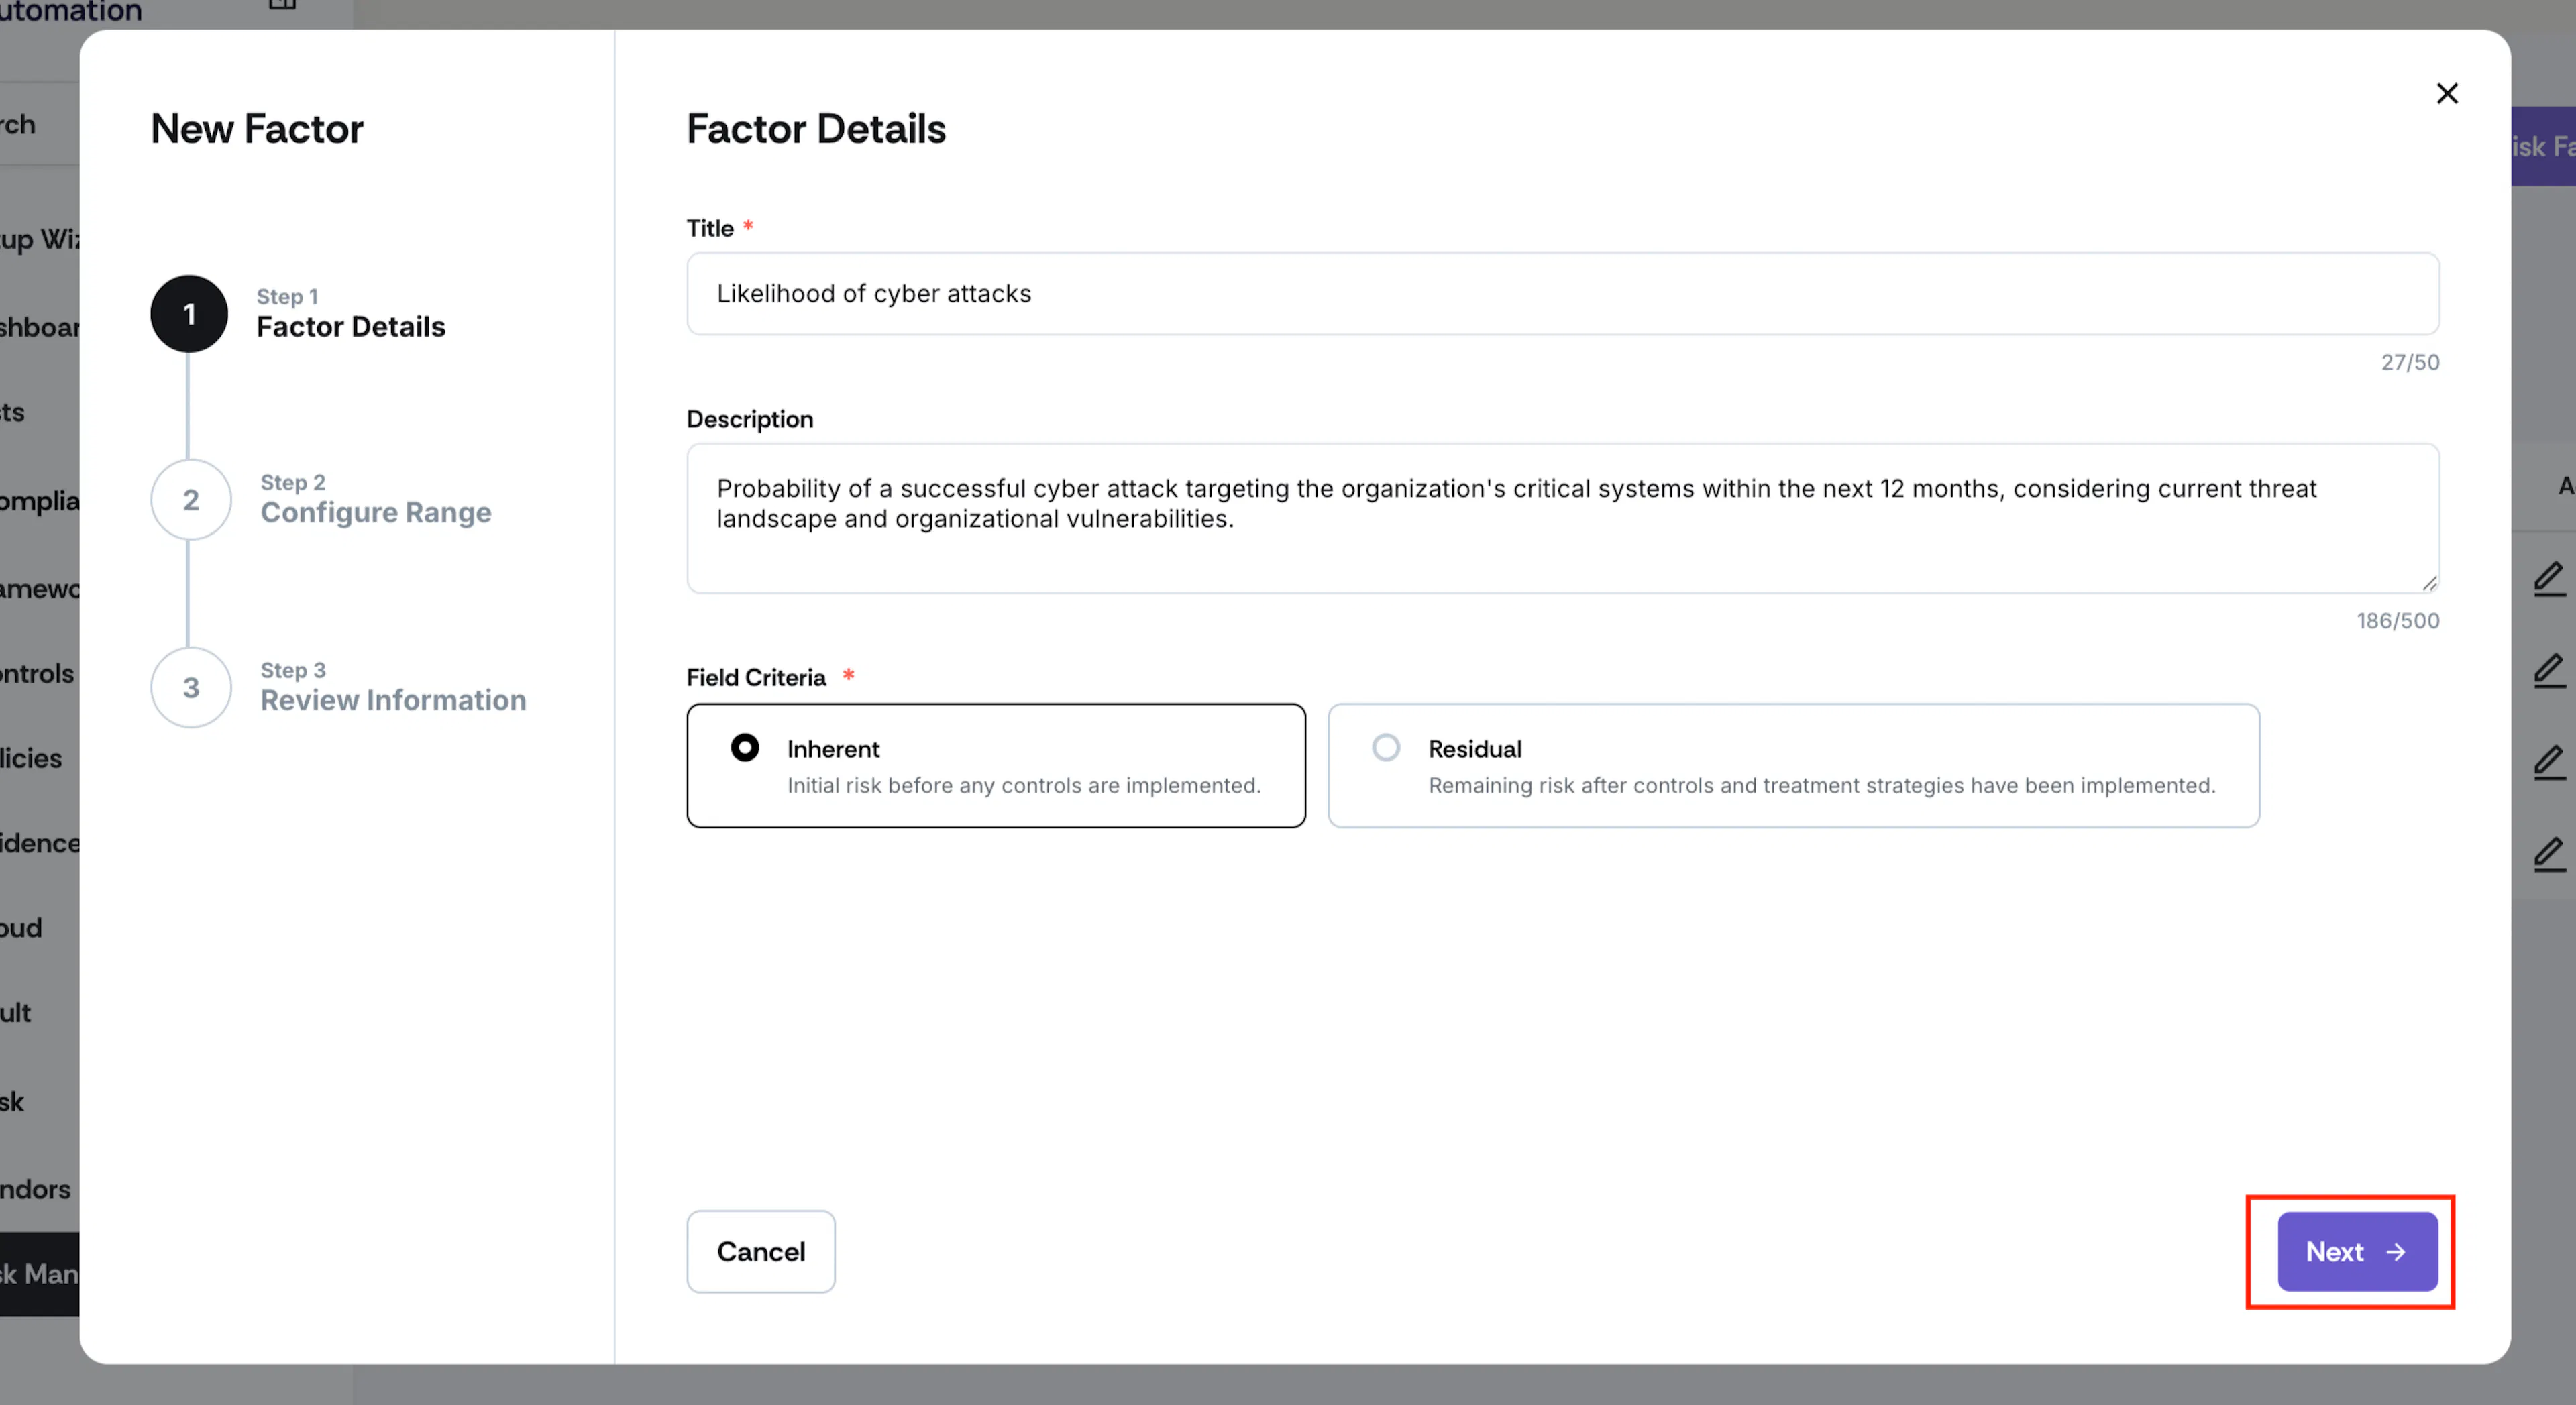
Enter factor details:
-
Title: Provide a clear and concise name for the factor you are defining. This should give a quick understanding of what the factor represents.
-
Description: Optionally, include a brief description that elaborates on the factor. This can help other users understand its significance and context.
-
Field Criteria: Select either Inherent or Residual.
- Inherent: Initial risk before any controls are implemented.
- Residual: Remaining risk after controls and treatment strategies have been implemented.
-
-
Click Next.
-
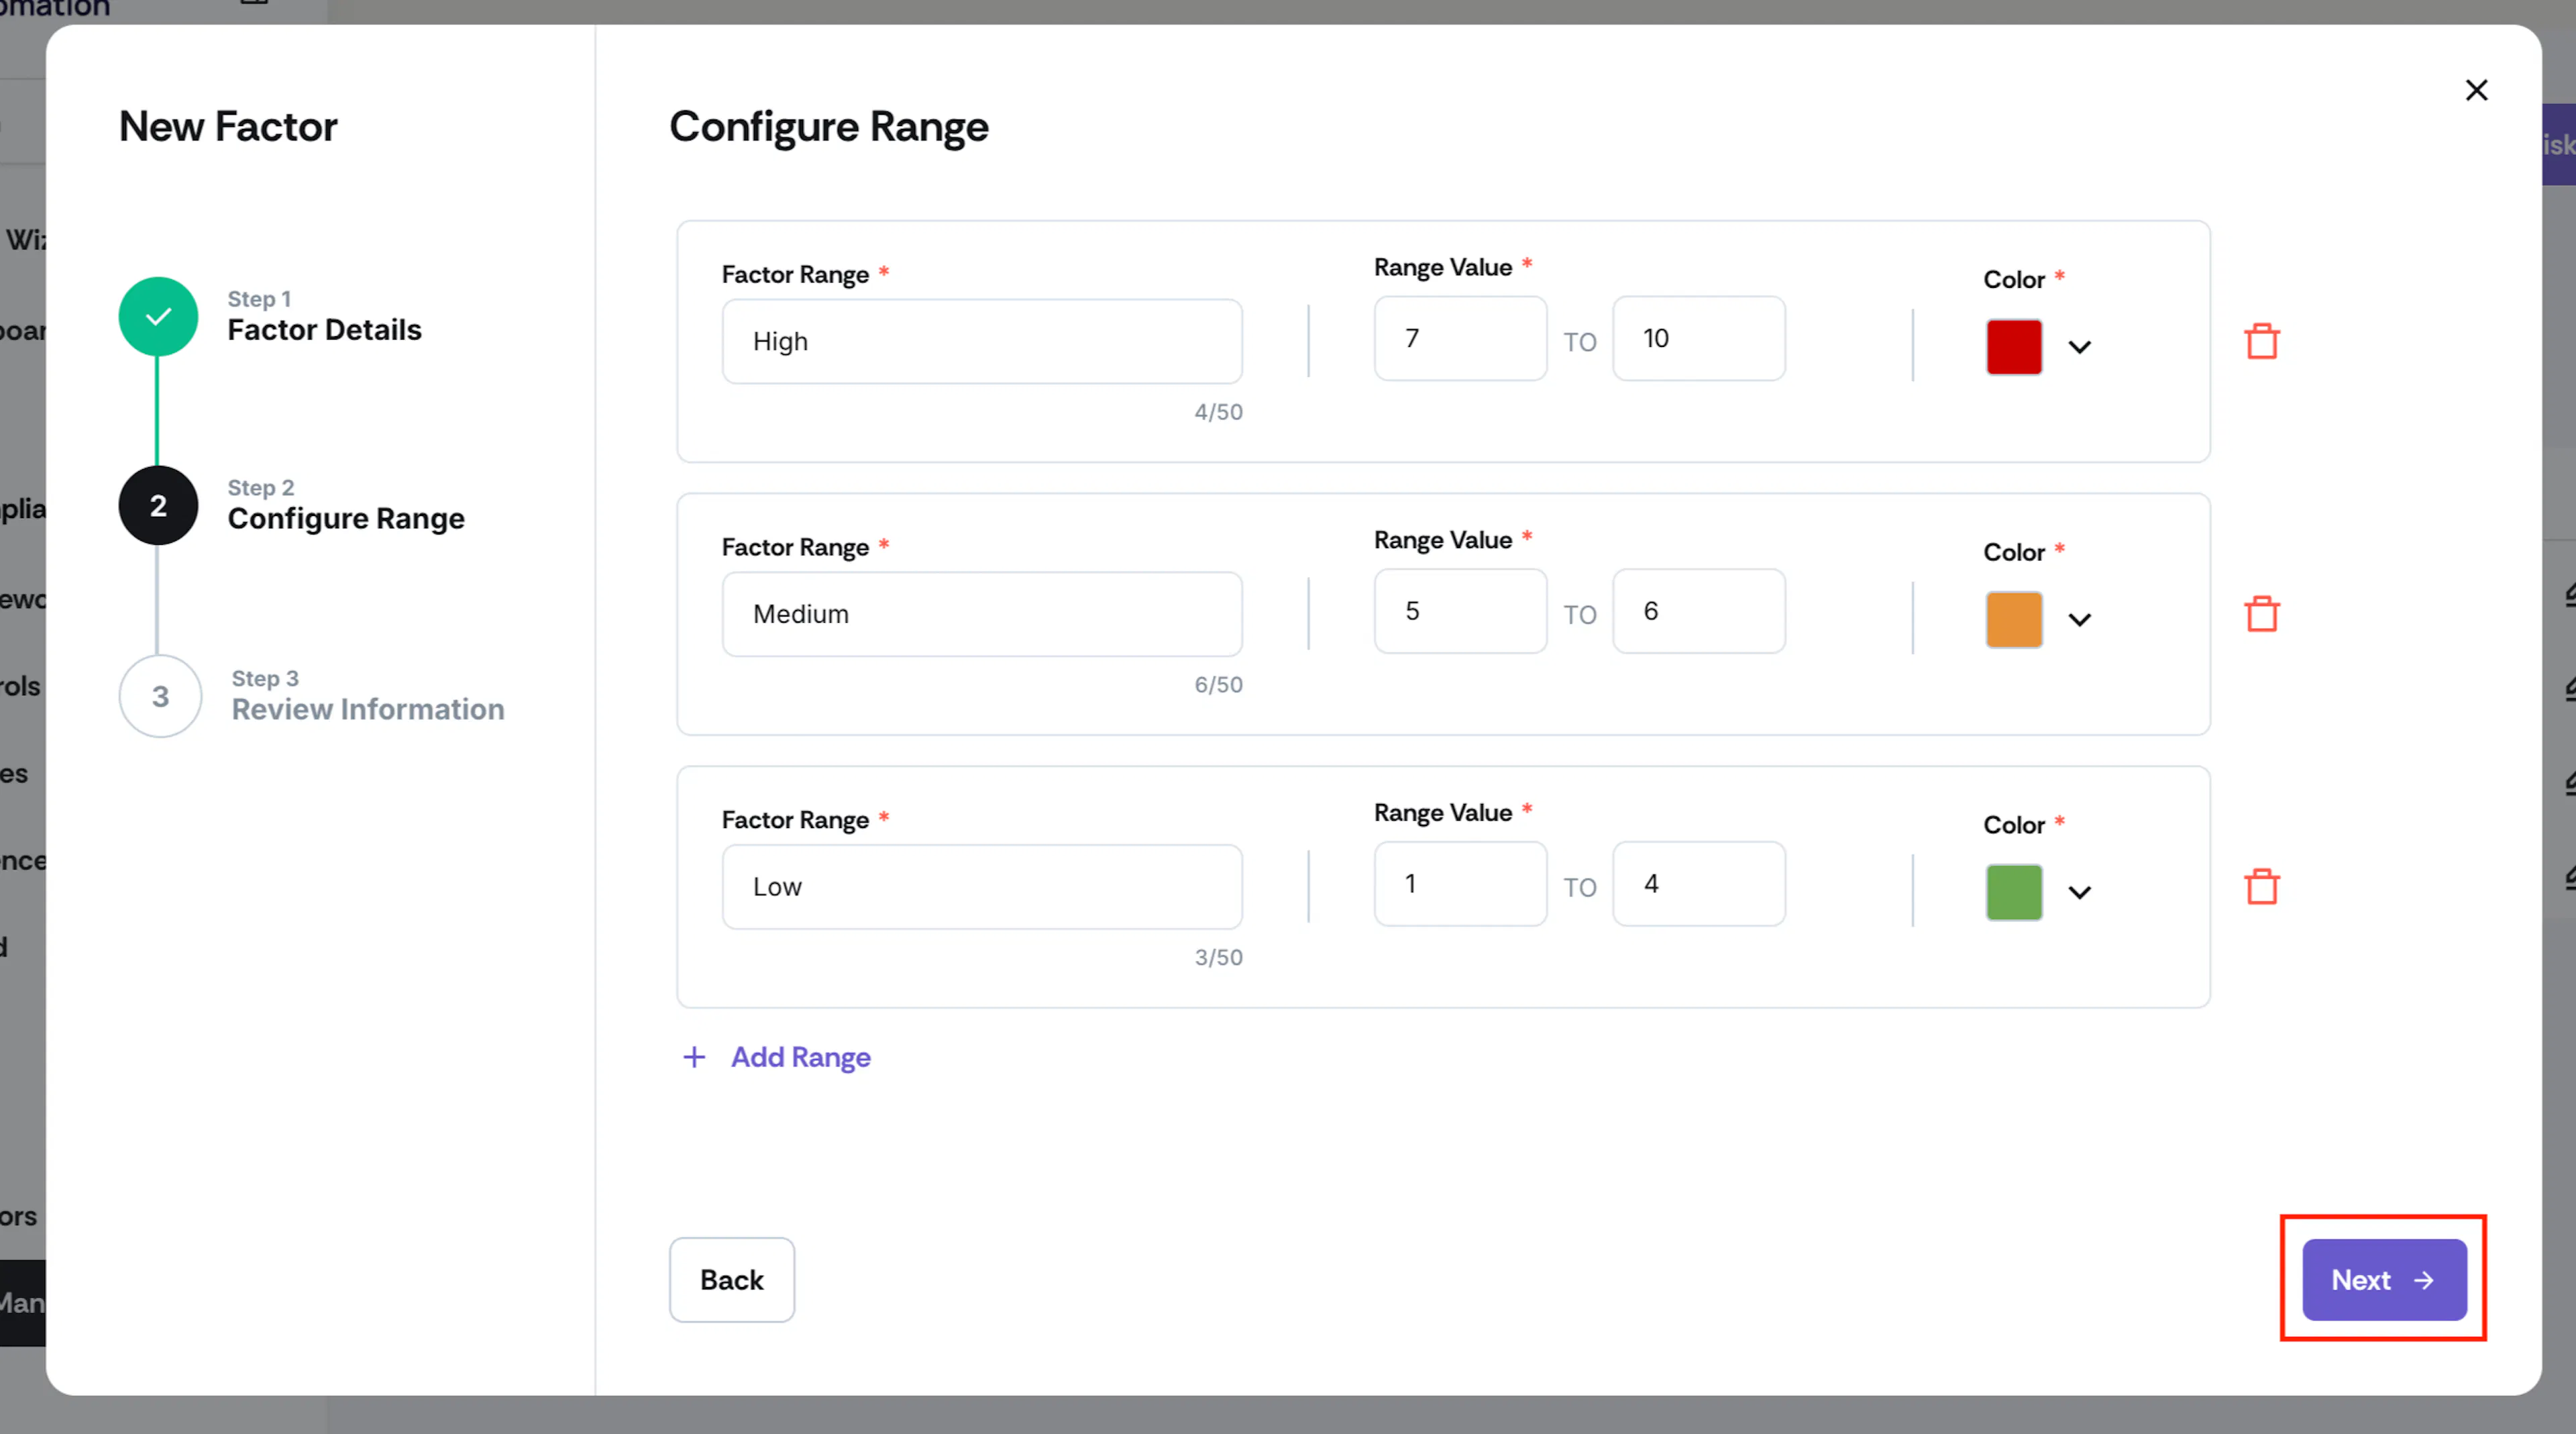
Configure the factor range.
- Range Name: Enter a descriptive label that defines a particular range.
- Range Values: Enter the numeric boundaries that define the limits of each range.
- Color Code: Assign a distinct color to each factor range to visually distinguish it in risk charts.
Factor Range Example
For a factor related to risk severity, such as Impact, the factor range can be:
| Factor Range | Range Value | Color |
|---|---|---|
| Very High | 9 to 10 | Dark Red |
| High | 7 to 8 | Light Red |
| Medium | 5 to 6 | Orange |
| Low | 3 to 4 | Light Green |
| Very Low | 1 to 2 | Dark Green |
-
Click Add Range to add more ranges.
-
Click Next.
Heads Up!
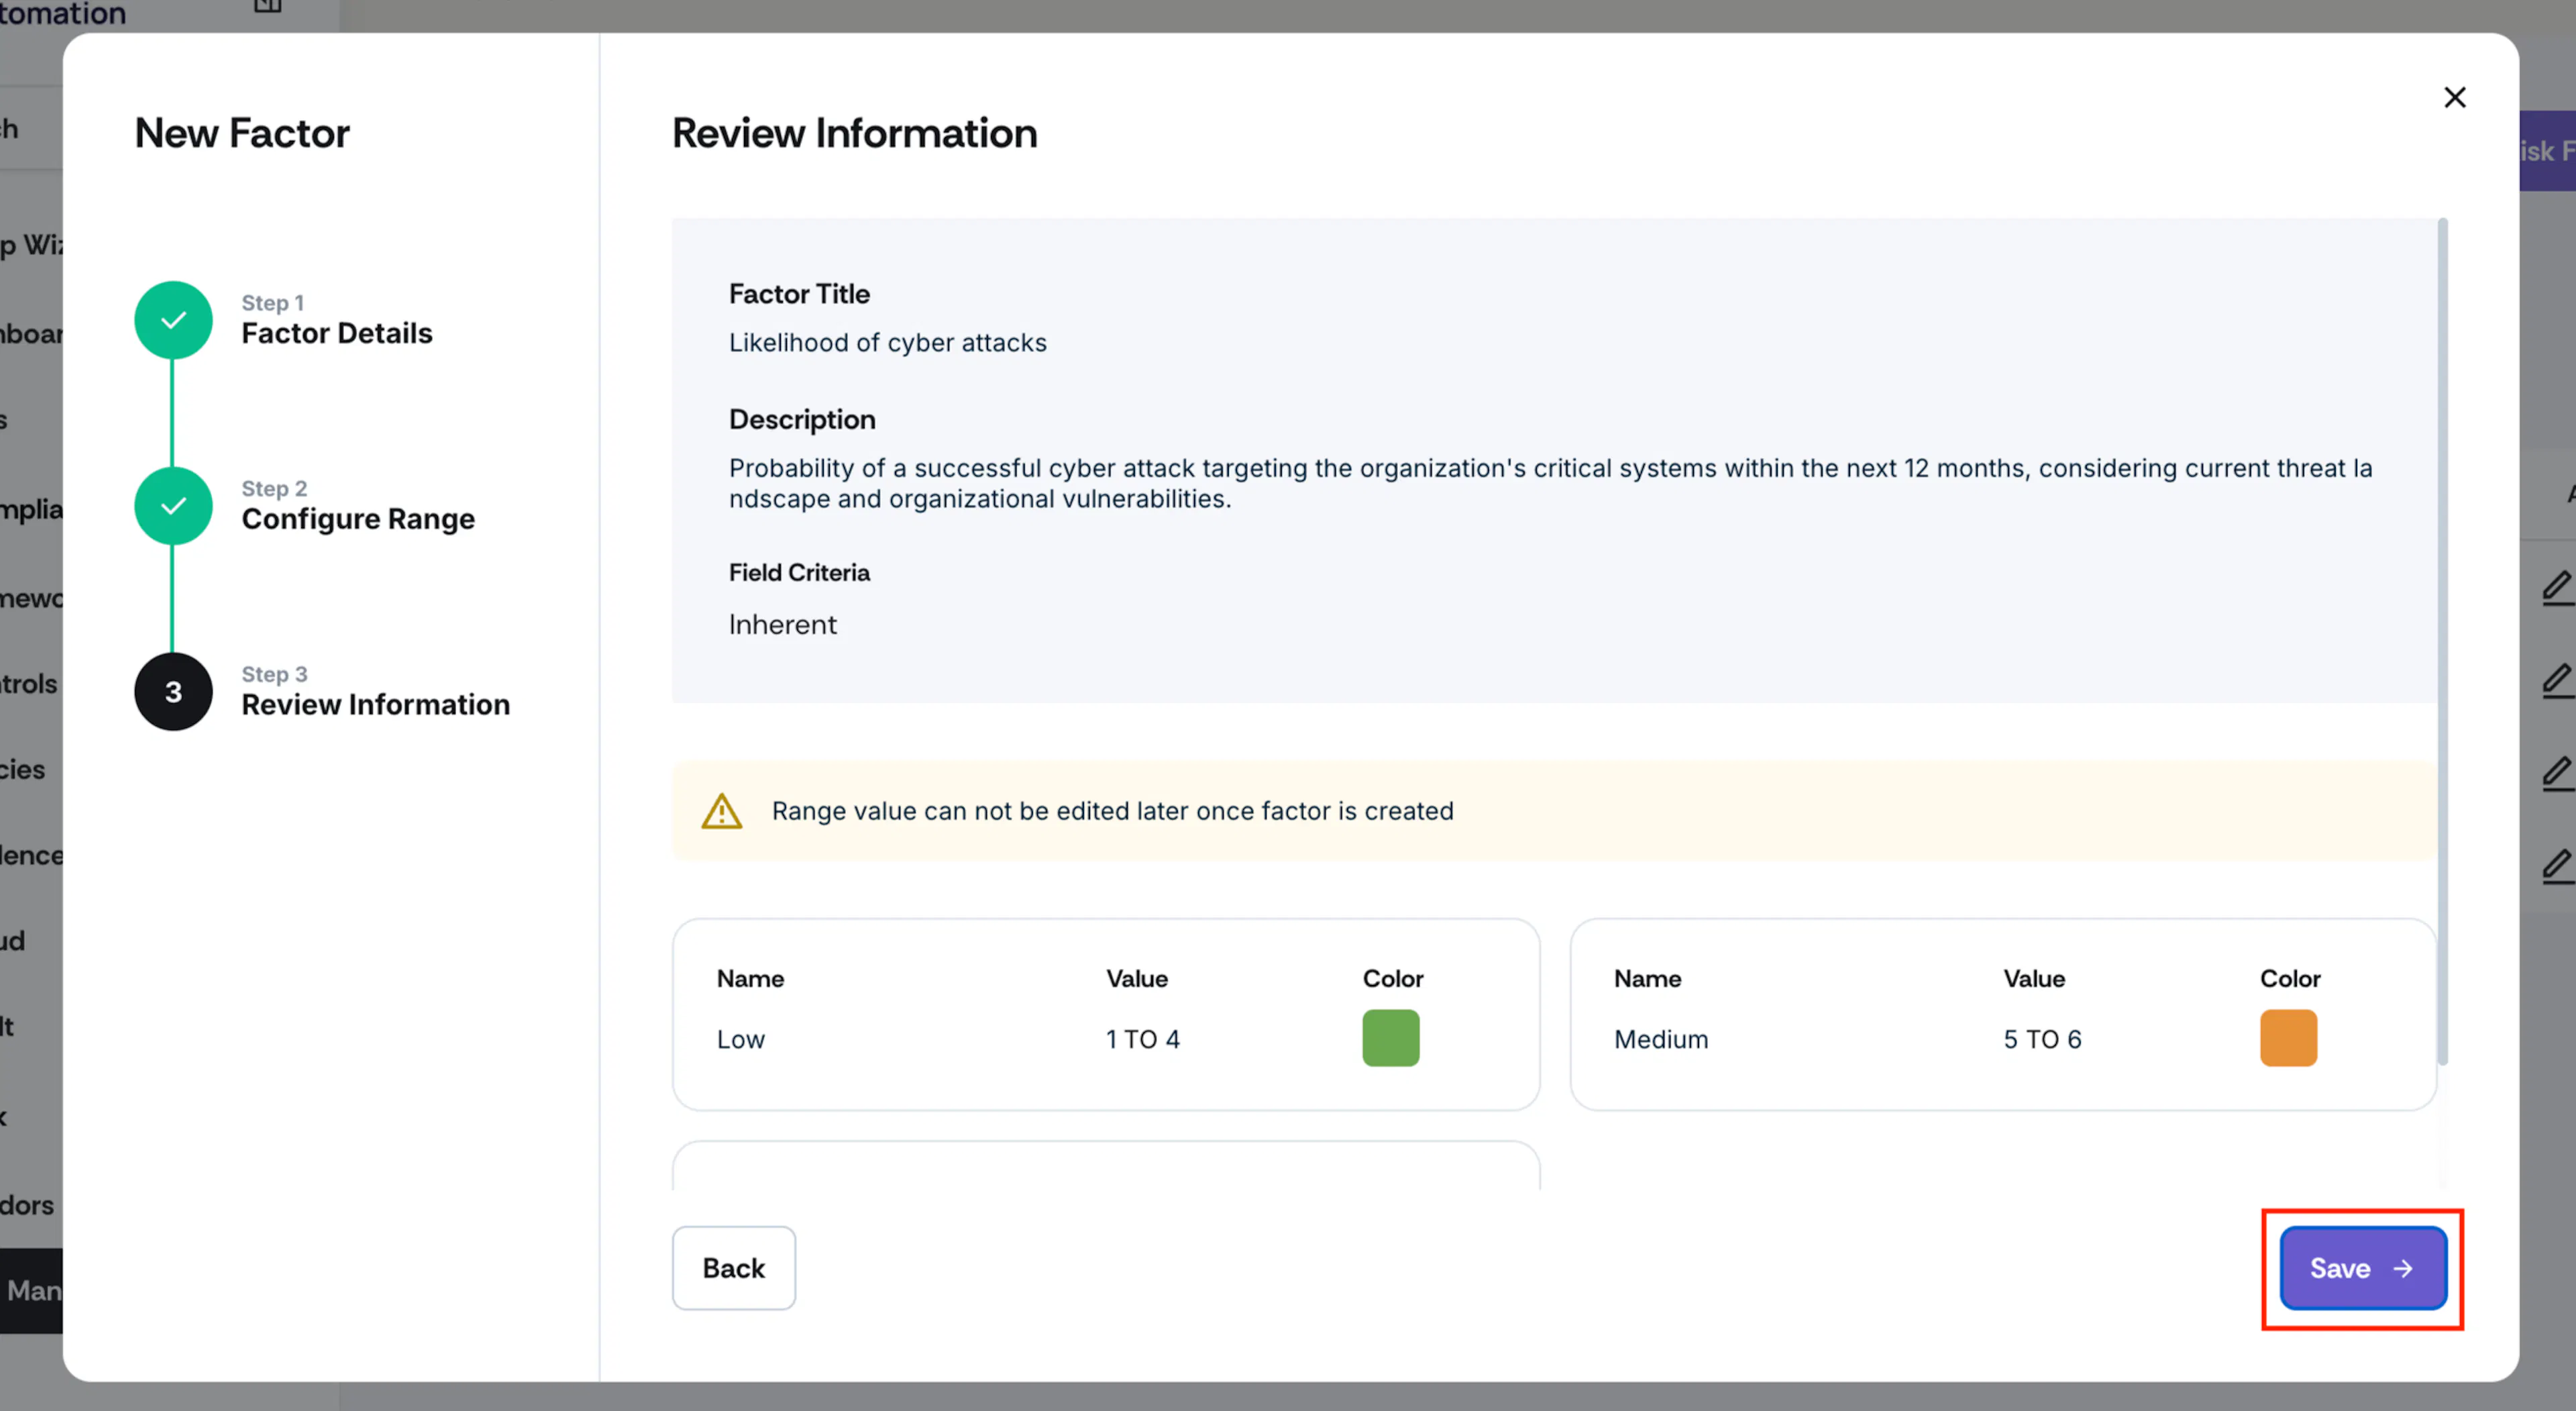
You cannot edit the range values once created, so please double-check your entries before finalizing.
-
Review the information you entered in steps 1 and 2 and click Save.
-
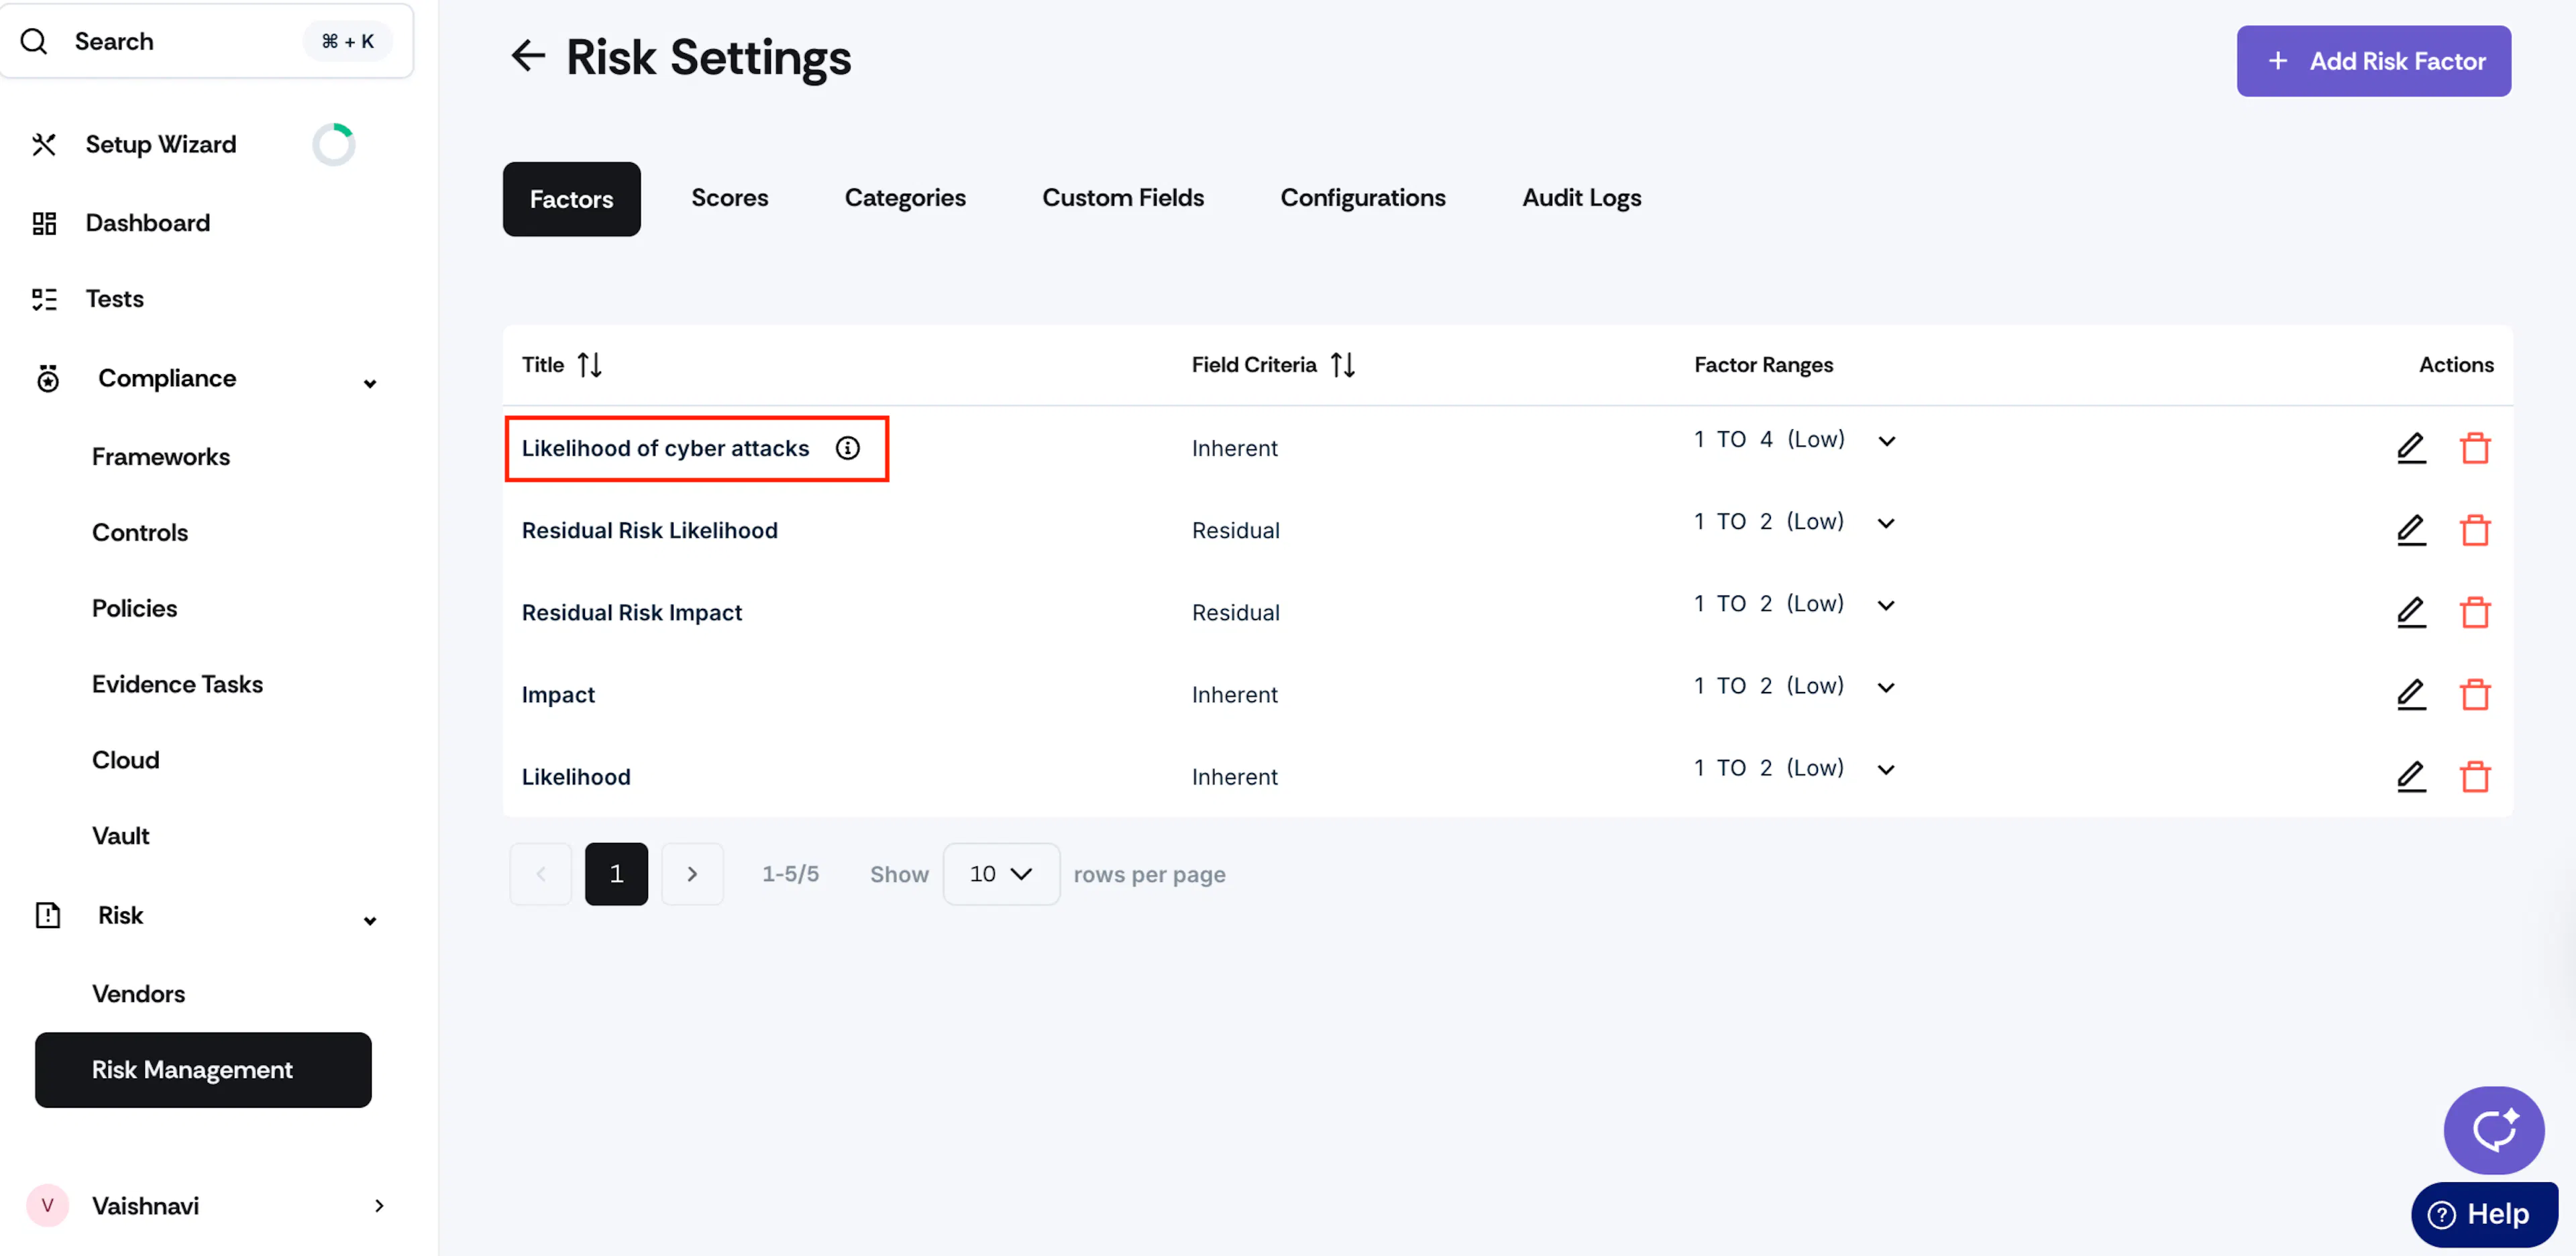
Scrut adds the newly created factor to the Factors table.
Scores
Once you have defined the risk factors, the next step is to configure the Risk Score. Risk scores are a critical part of your risk management program, providing a standardized, numerical way to understand and prioritize potential risks to your organization. The Risk Score is a formula that quantifies the risk based on the input factors.
Score Calculation Methods
Scrut supports four score calculation methods, such as:
1: Maximum
Assigns the highest value of all selected risk factors.
Example: If you select factors with values [3, 7, 2, 9], the result will be 9.
2: Minimum
Assigns the lowest value of all selected risk factors.
Example: If you select factors with values [3, 7, 2, 9], the result will be 2.
3: Conditional
Uses IF-ELSE conditional rules to calculate the risk score.
Supported input parameters: Risk factors and previously calculated risk scores.
Limitations: Only numeric fields. String comparisons are not supported.
Supported operators
| Category | Operators |
|---|---|
| Comparison | =, !=, >, <, >=, <= |
| Logical | AND, OR, NOT |
| Mathematical | +, -, *, / |
| Grouping | ( ) |
Examples:
- IF x < y, THEN 1
- IF x < y, THEN x
- IF (x + y) < 1, THEN x - z
- IF (x + y) < z, THEN 1
- IF risk_score_1 > 5 AND factor_1 < 2, THEN 10
- IF (risk_score_1 + factor_1) > 10, THEN risk_score_2 * 2
4: Custom
Defines a formula with factors, scores, constants, and simple math operators.
Supported Operators:
- Addition:
+ - Subtraction:
- - Division:
/ - Multiplication:
* - Exponentiation:
^ - Parentheses:
()for grouping
Examples:
- (risk_factor_1 + risk_factor_2) * 2
- risk_score_1 ^ 2 - risk_factor_3
- (risk_score_1 * 3) / (risk_factor_1 + 5)
Rounding Options
You can choose one of the following rounding methods for custom formulas:
- Standard Rounding: Rounds risk scores to the nearest whole number. For example, 7.5 rounds up to 8, while 7.4 rounds down to 7.
- Round Up: Rounds risk scores to the next whole number. For example, 7.1 and 7.9 both become 8.
- Round Down: Rounds risk scores down to the previous whole number. For example, 7.1 and 7.9 also becomes 7.
Note:
- Maximum and Minimum score calculations do not support rounding.
- Standard rounding is applied by default for Conditional formulas.
How To Configure Risk Scores
-
Sign in to Scrut and go to Risk → Risk Management using the left side panel.
-
Click the Settings icon on the top right of the Risk Management page.
-
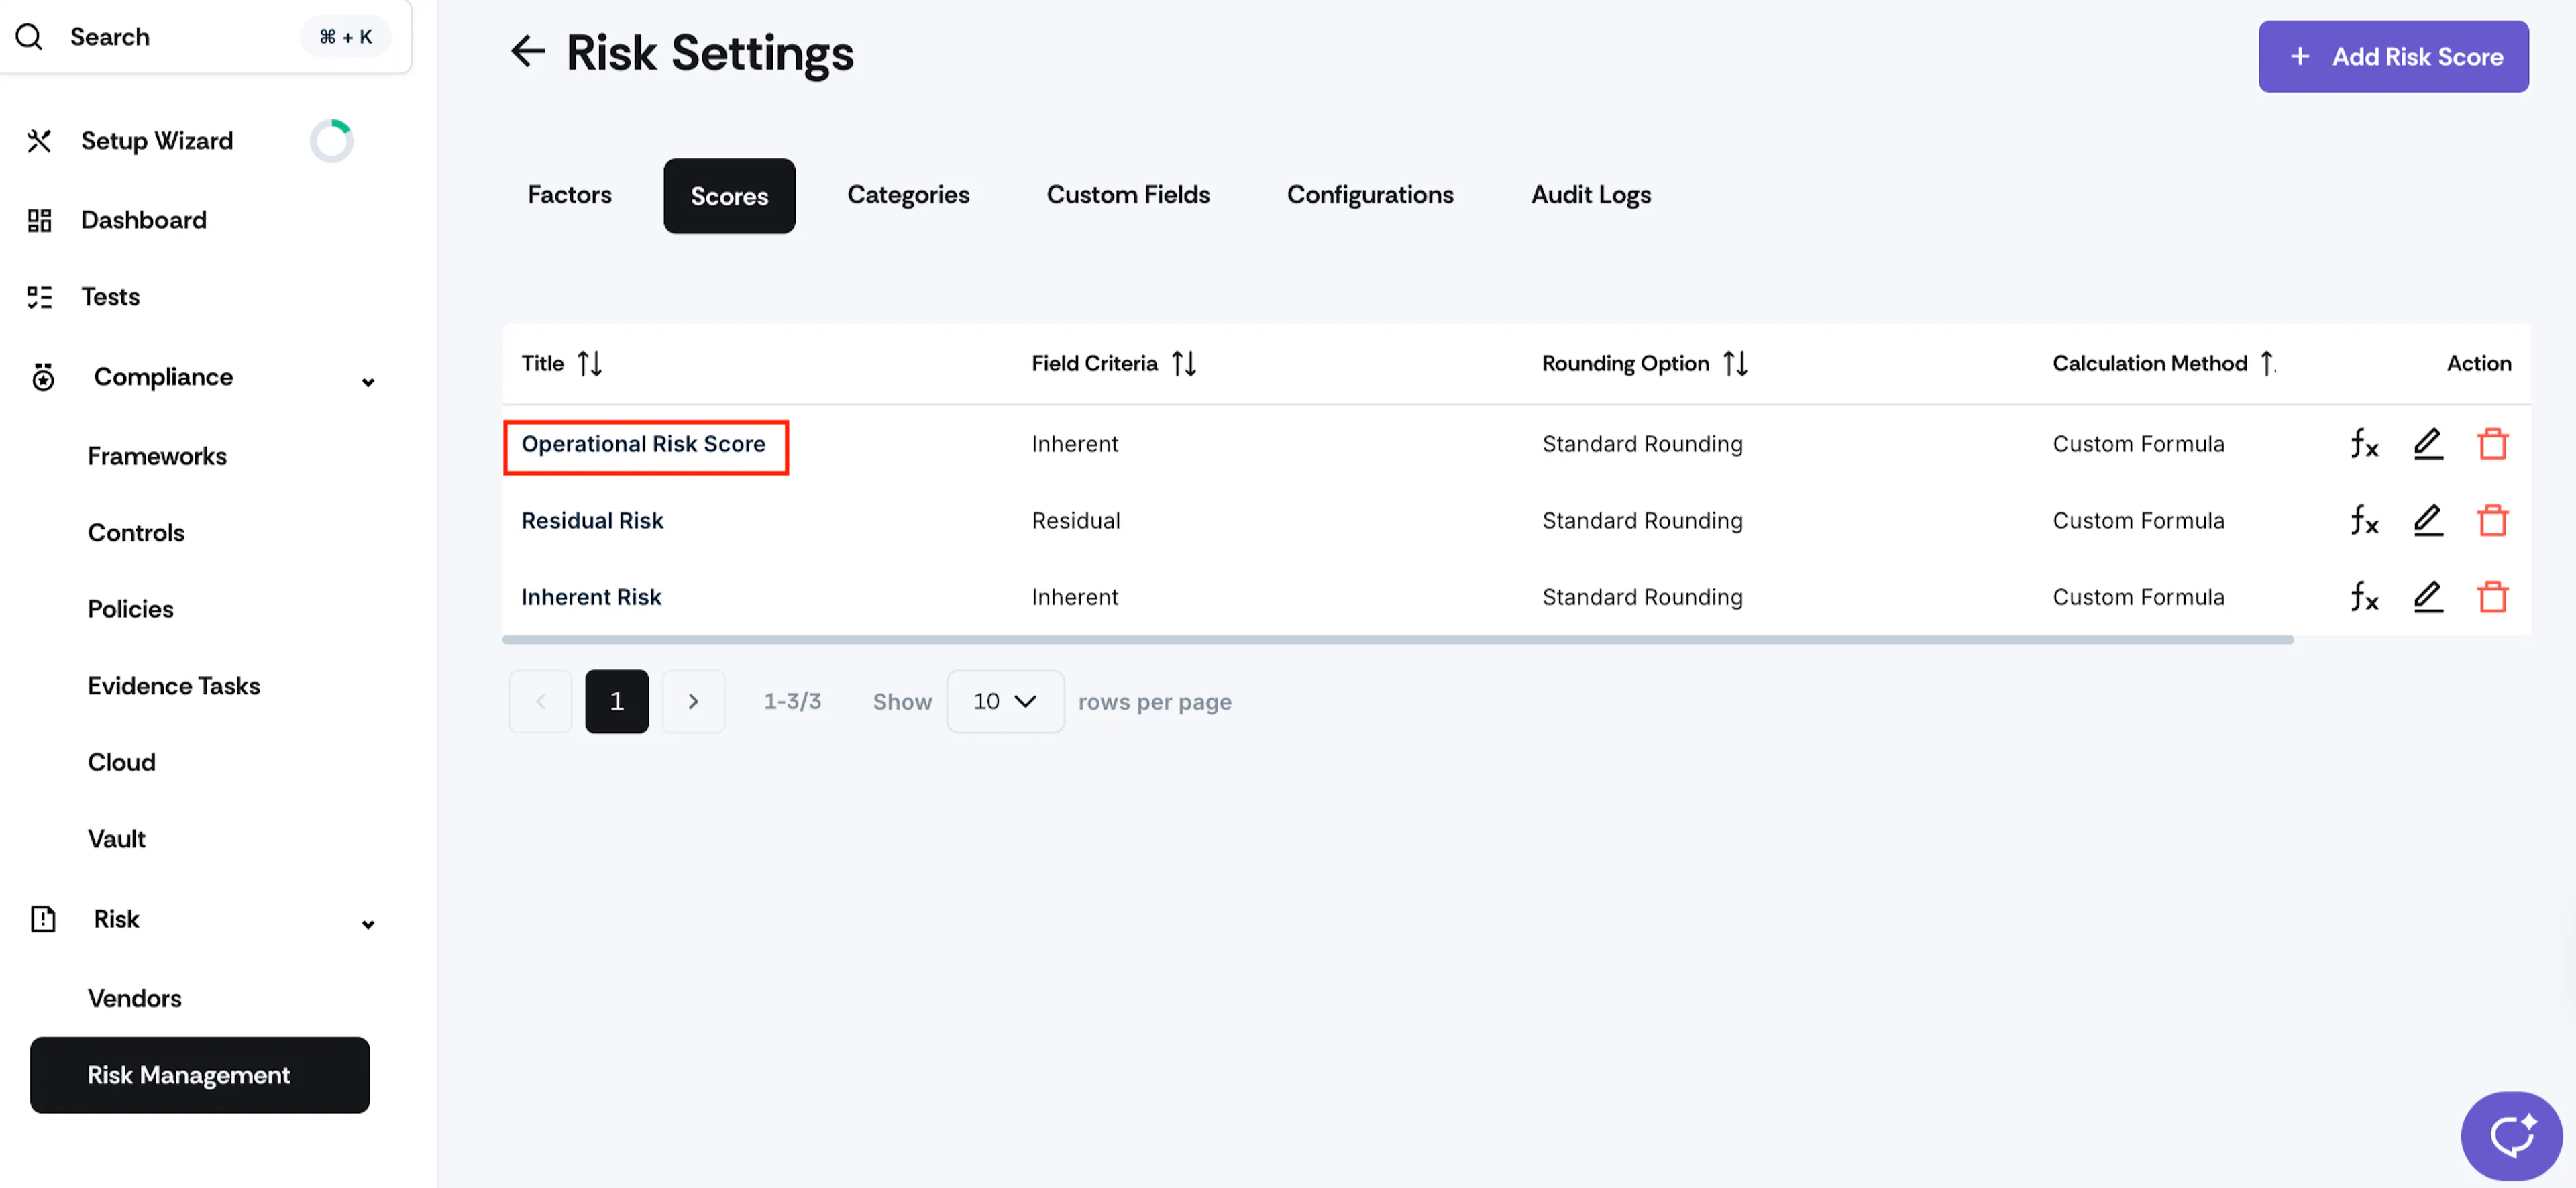
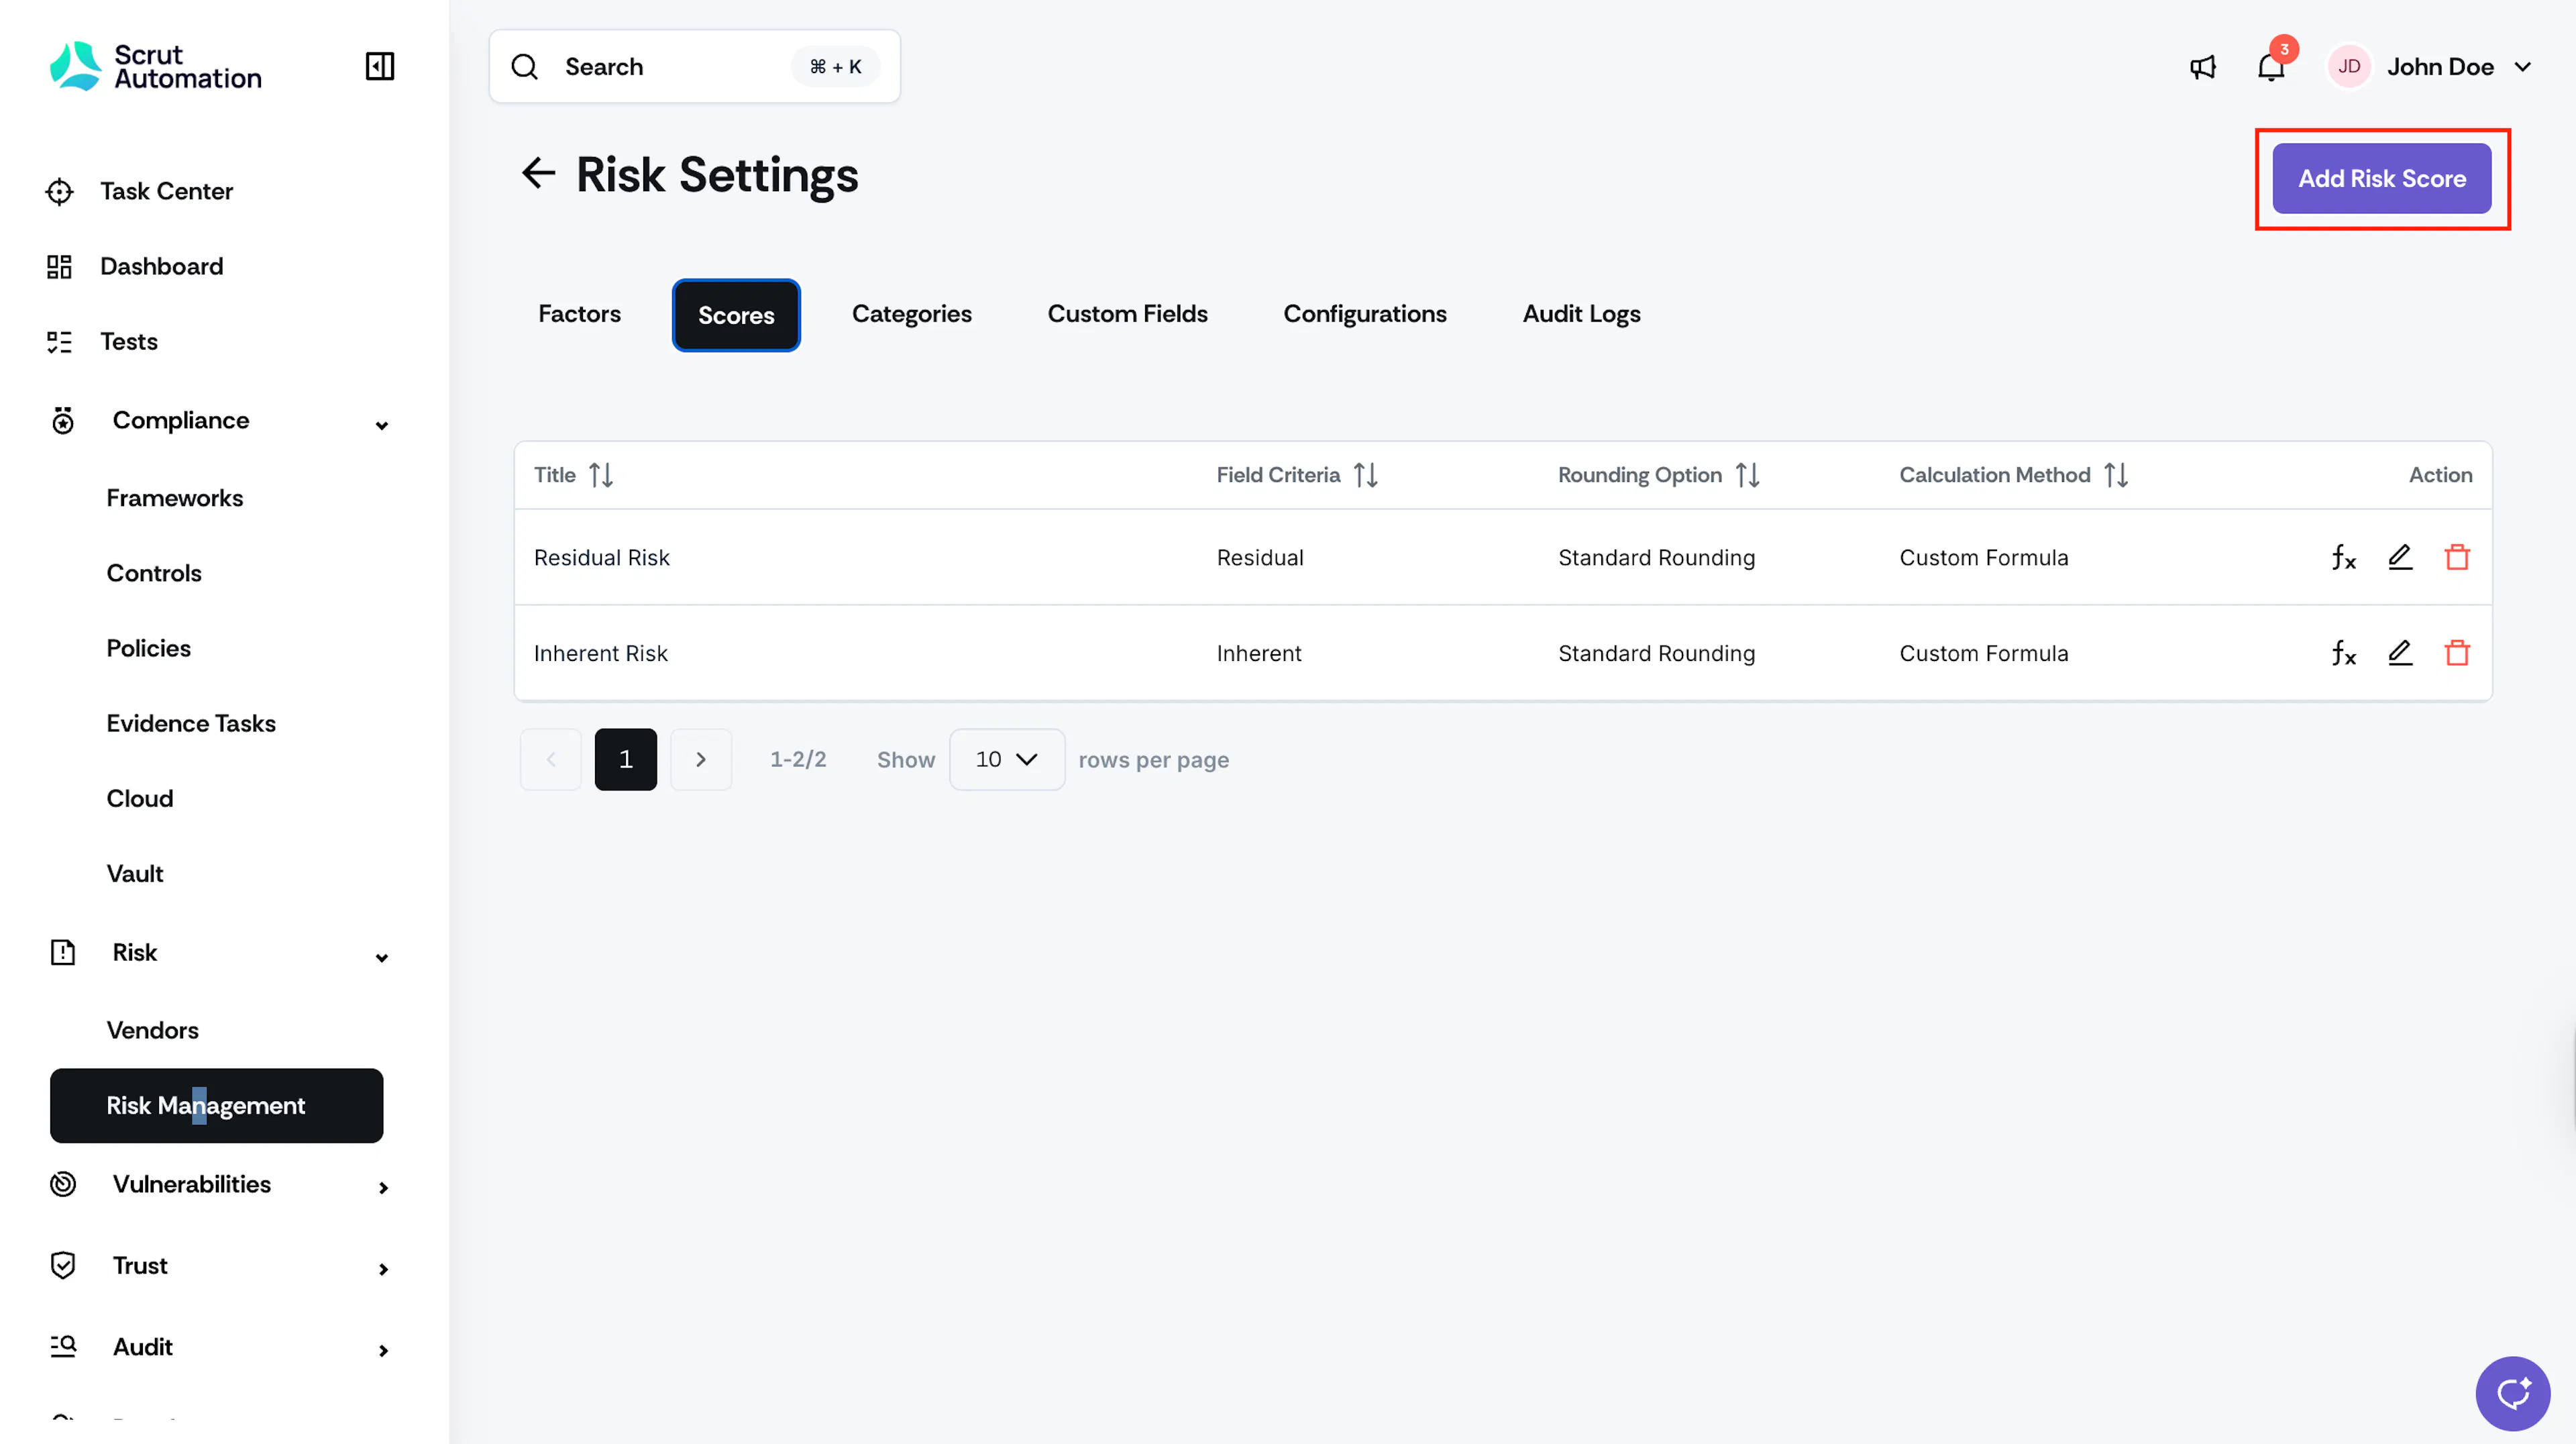
Go to the Scores tab and click the +Add Risk Score button at the top right.
-
By default, Scrut includes certain predefined scores. If you don’t want to use these preset scores, you can either disregard or delete them, as needed.
-
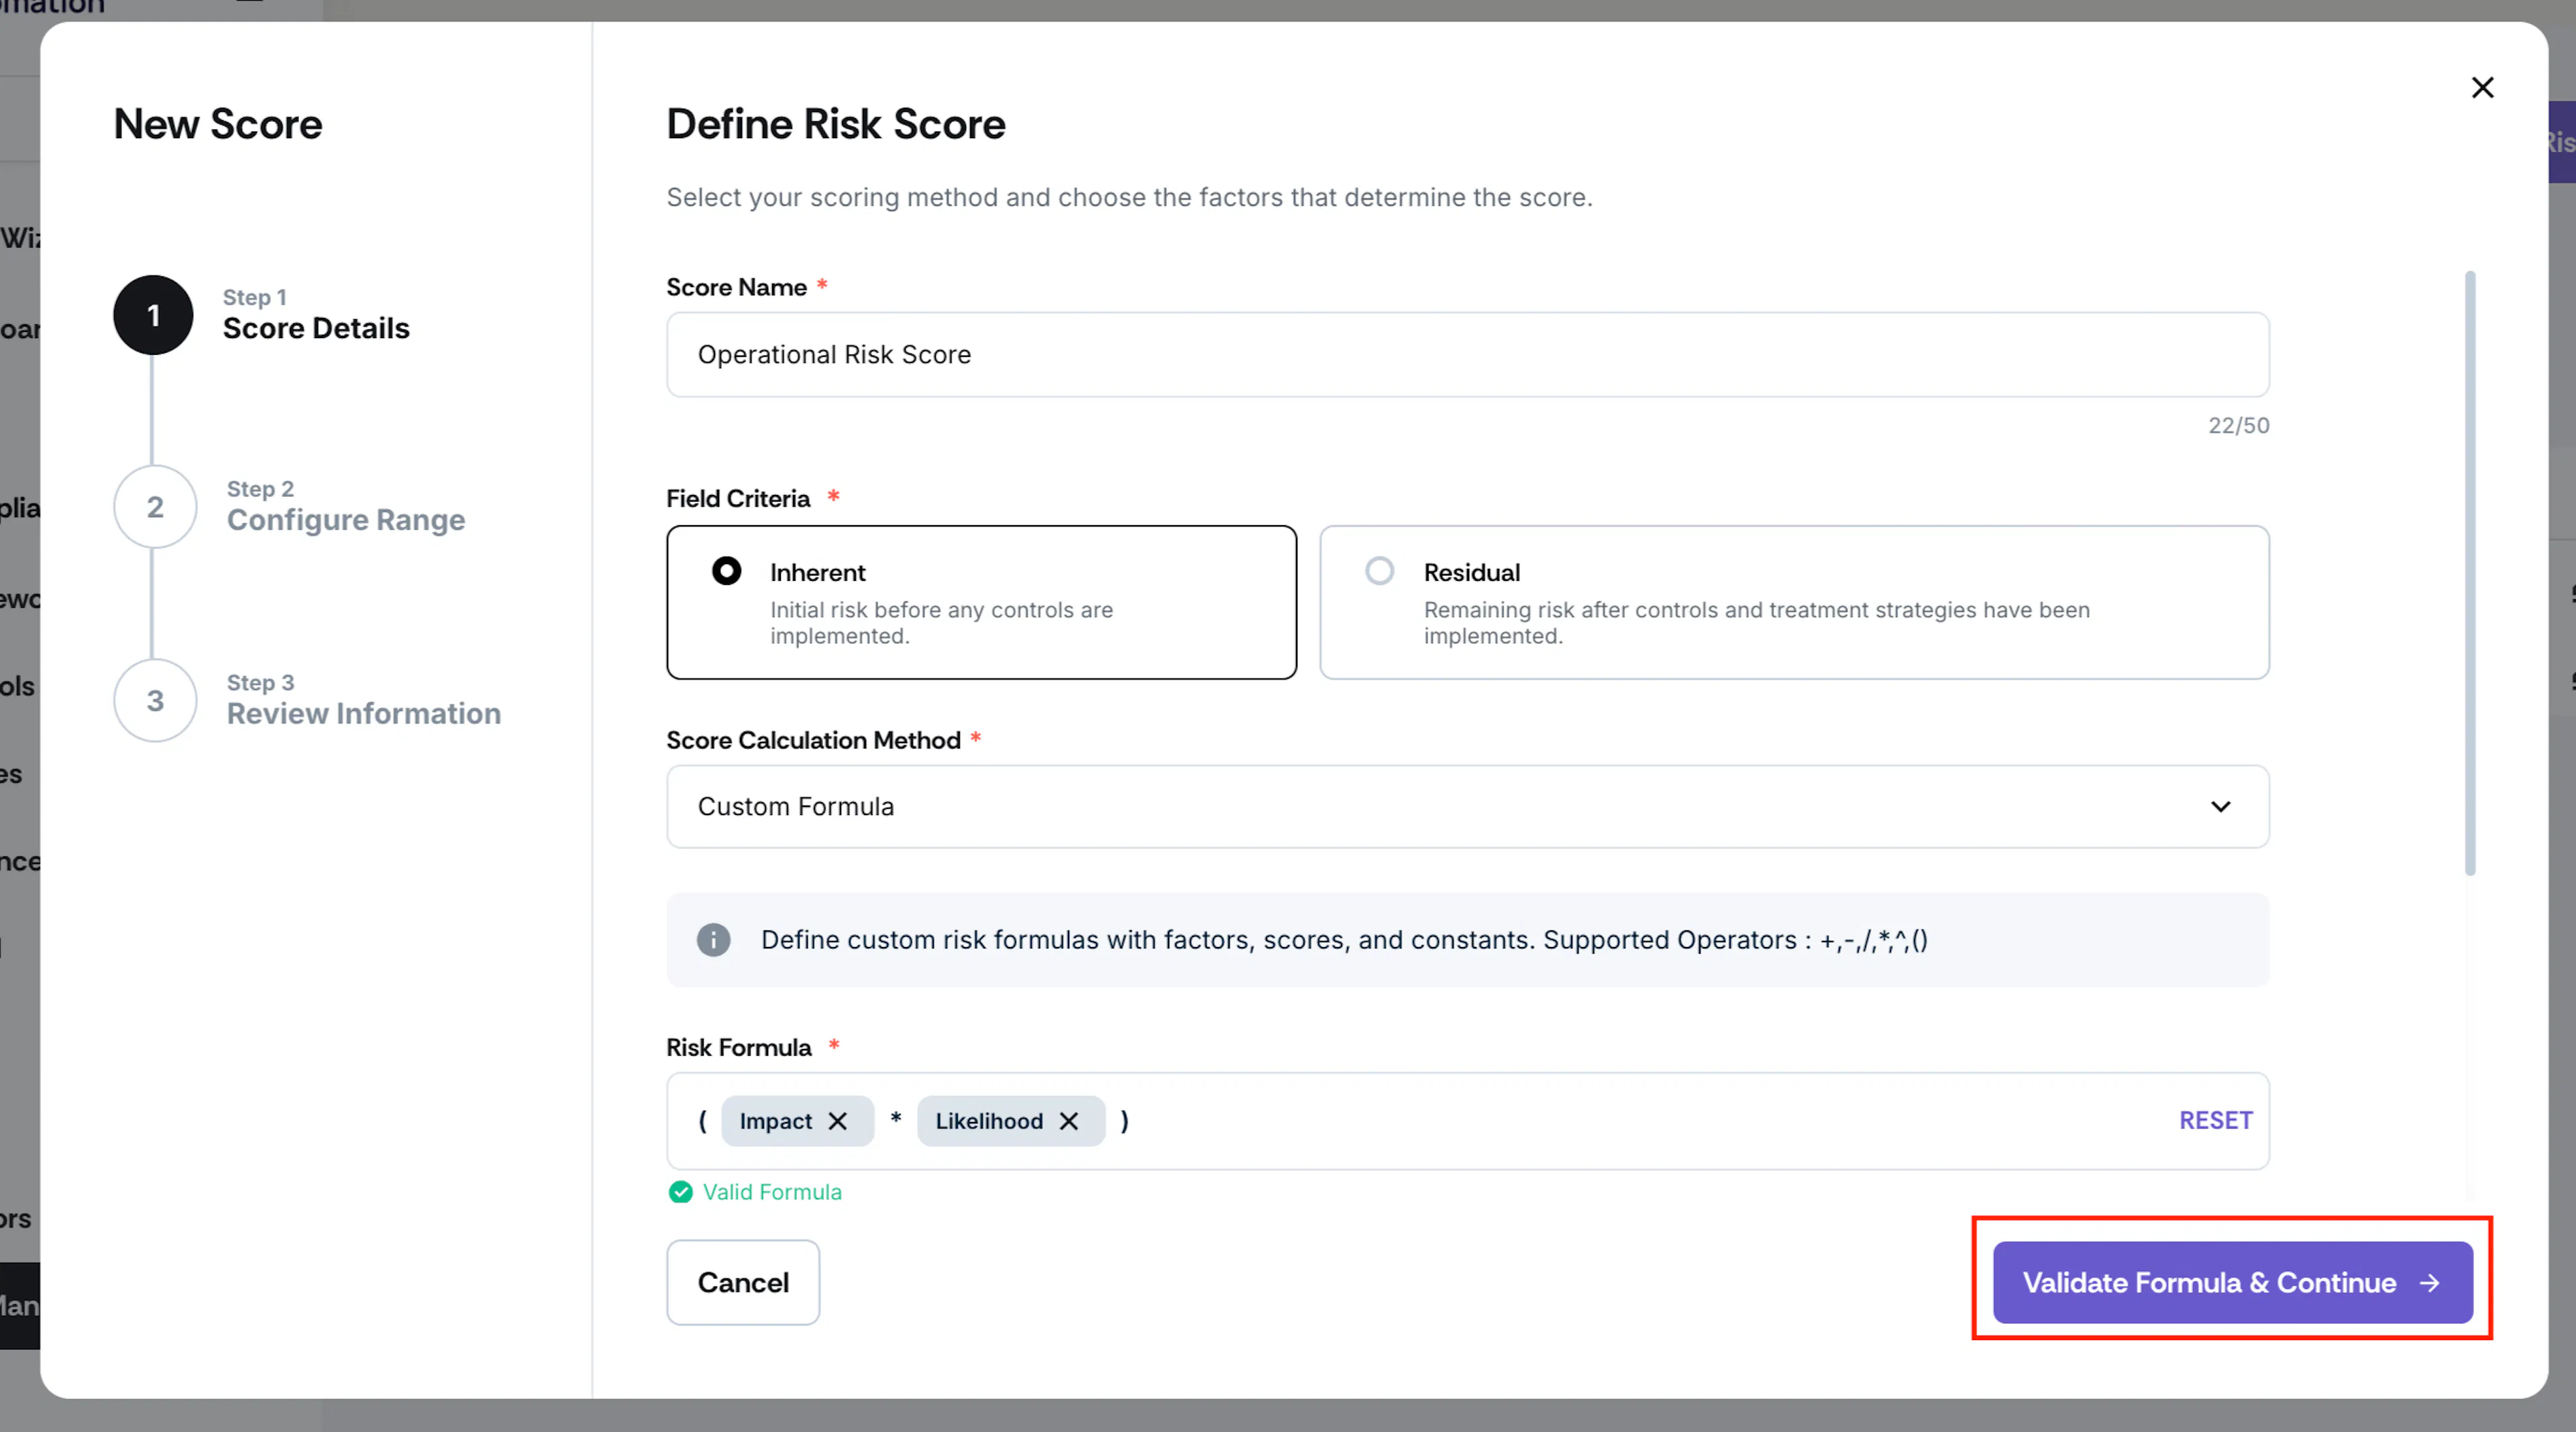
In the first step, you’ll need to select the scoring method and choose the factors that determine the score.
-
Enter the Score Name. Provide a clear and concise name for the score you are defining. This should give a quick understanding of what the score represents.
-
For Field Criteria, select either Inherent or Residual.
- Inherent: Initial risk before any controls are implemented.
- Residual: Remaining risk after controls and treatment strategies have been implemented.
-
Select the Score Calculation Method. You can choose from: Maximum, Minimum, Conditional, or Custom. To know more about these methods, see this section.
-
Choose the Rounding Method: Standard, Round Up, or Round Down.
-
Click Validate Formula & Continue.
-
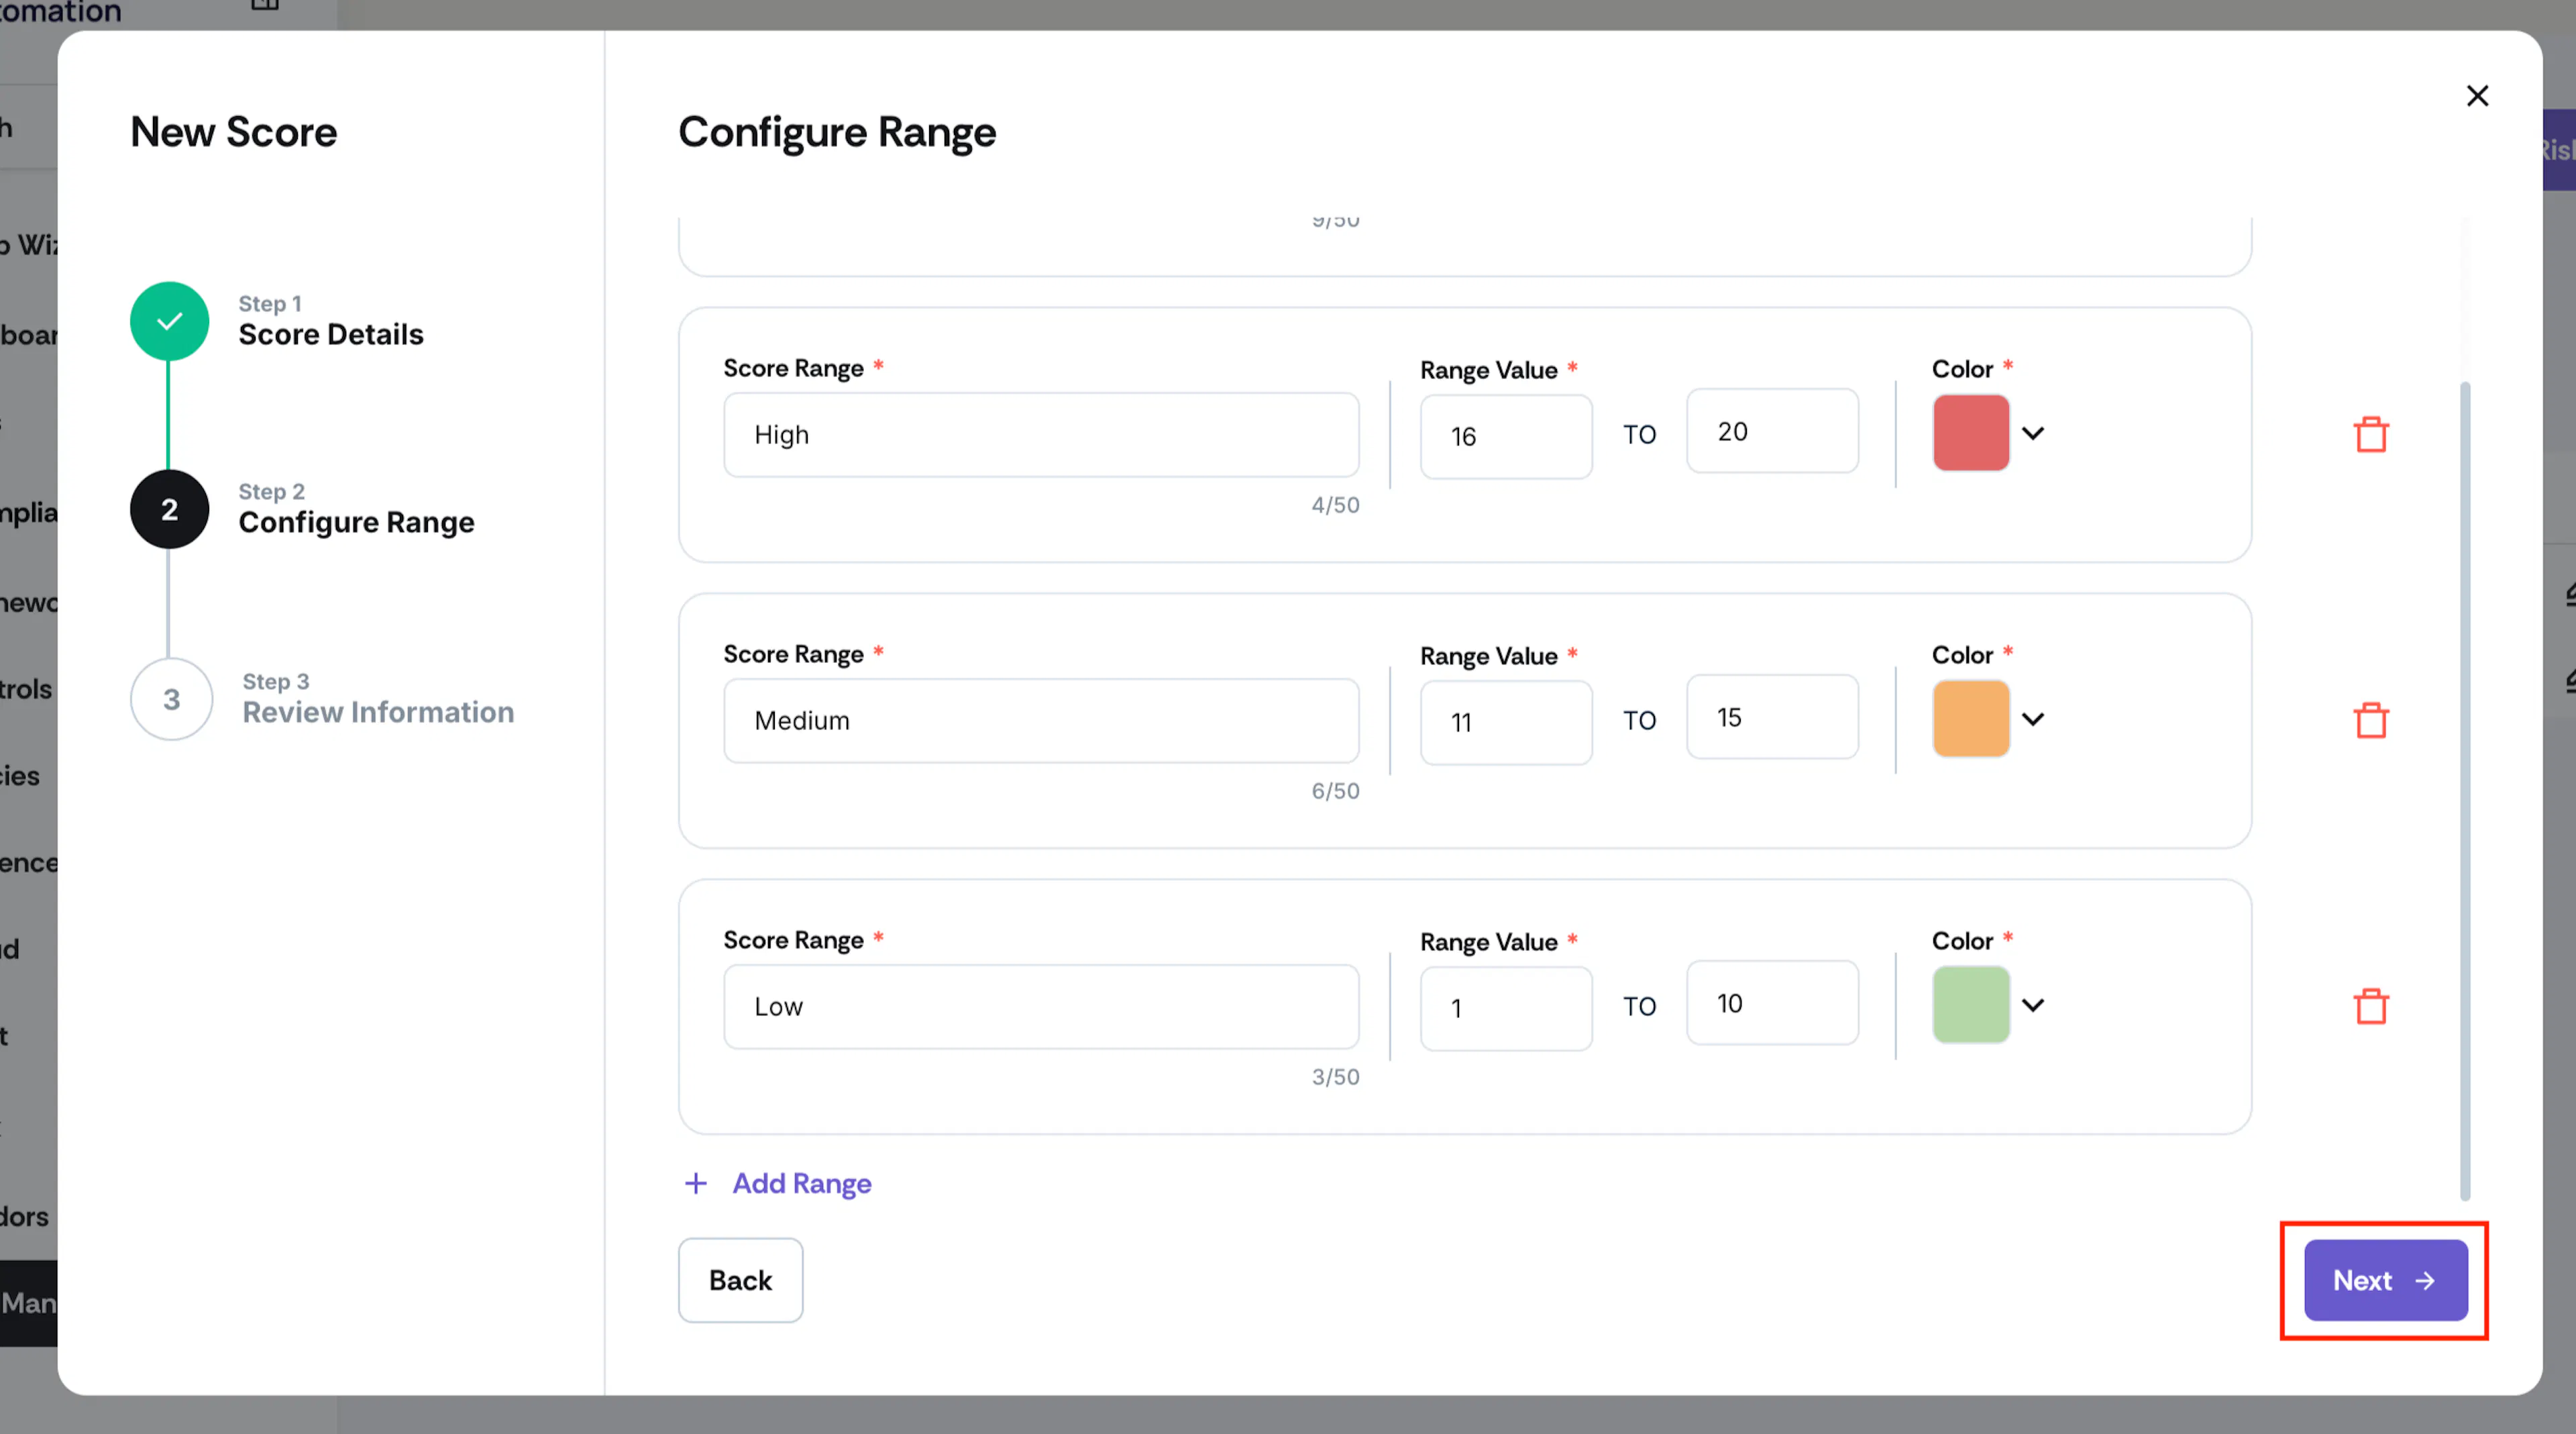
Configure the score range.
- Range Name: Enter a descriptive label that defines a particular range.
- Range Values: Enter the numeric boundaries that define the limits of each range.
- Color Code: Assign a distinct color to each factor range to make it visually distinguishable in risk charts.
Score Range Example
| Score Range | Range Value | Color |
|---|---|---|
| Very High | 21 to 25 | Dark Red |
| High | 16 to 20 | Light Red |
| Medium | 11 to 15 | Orange |
| Low | 6 to 10 | Light Green |
| Very Low | 1 to 5 | Dark Green |
-
Click Add Range to add more ranges.
-
Click Next.
Heads Up!
You cannot edit the range values once created, so please double-check your entries before finalizing.
-
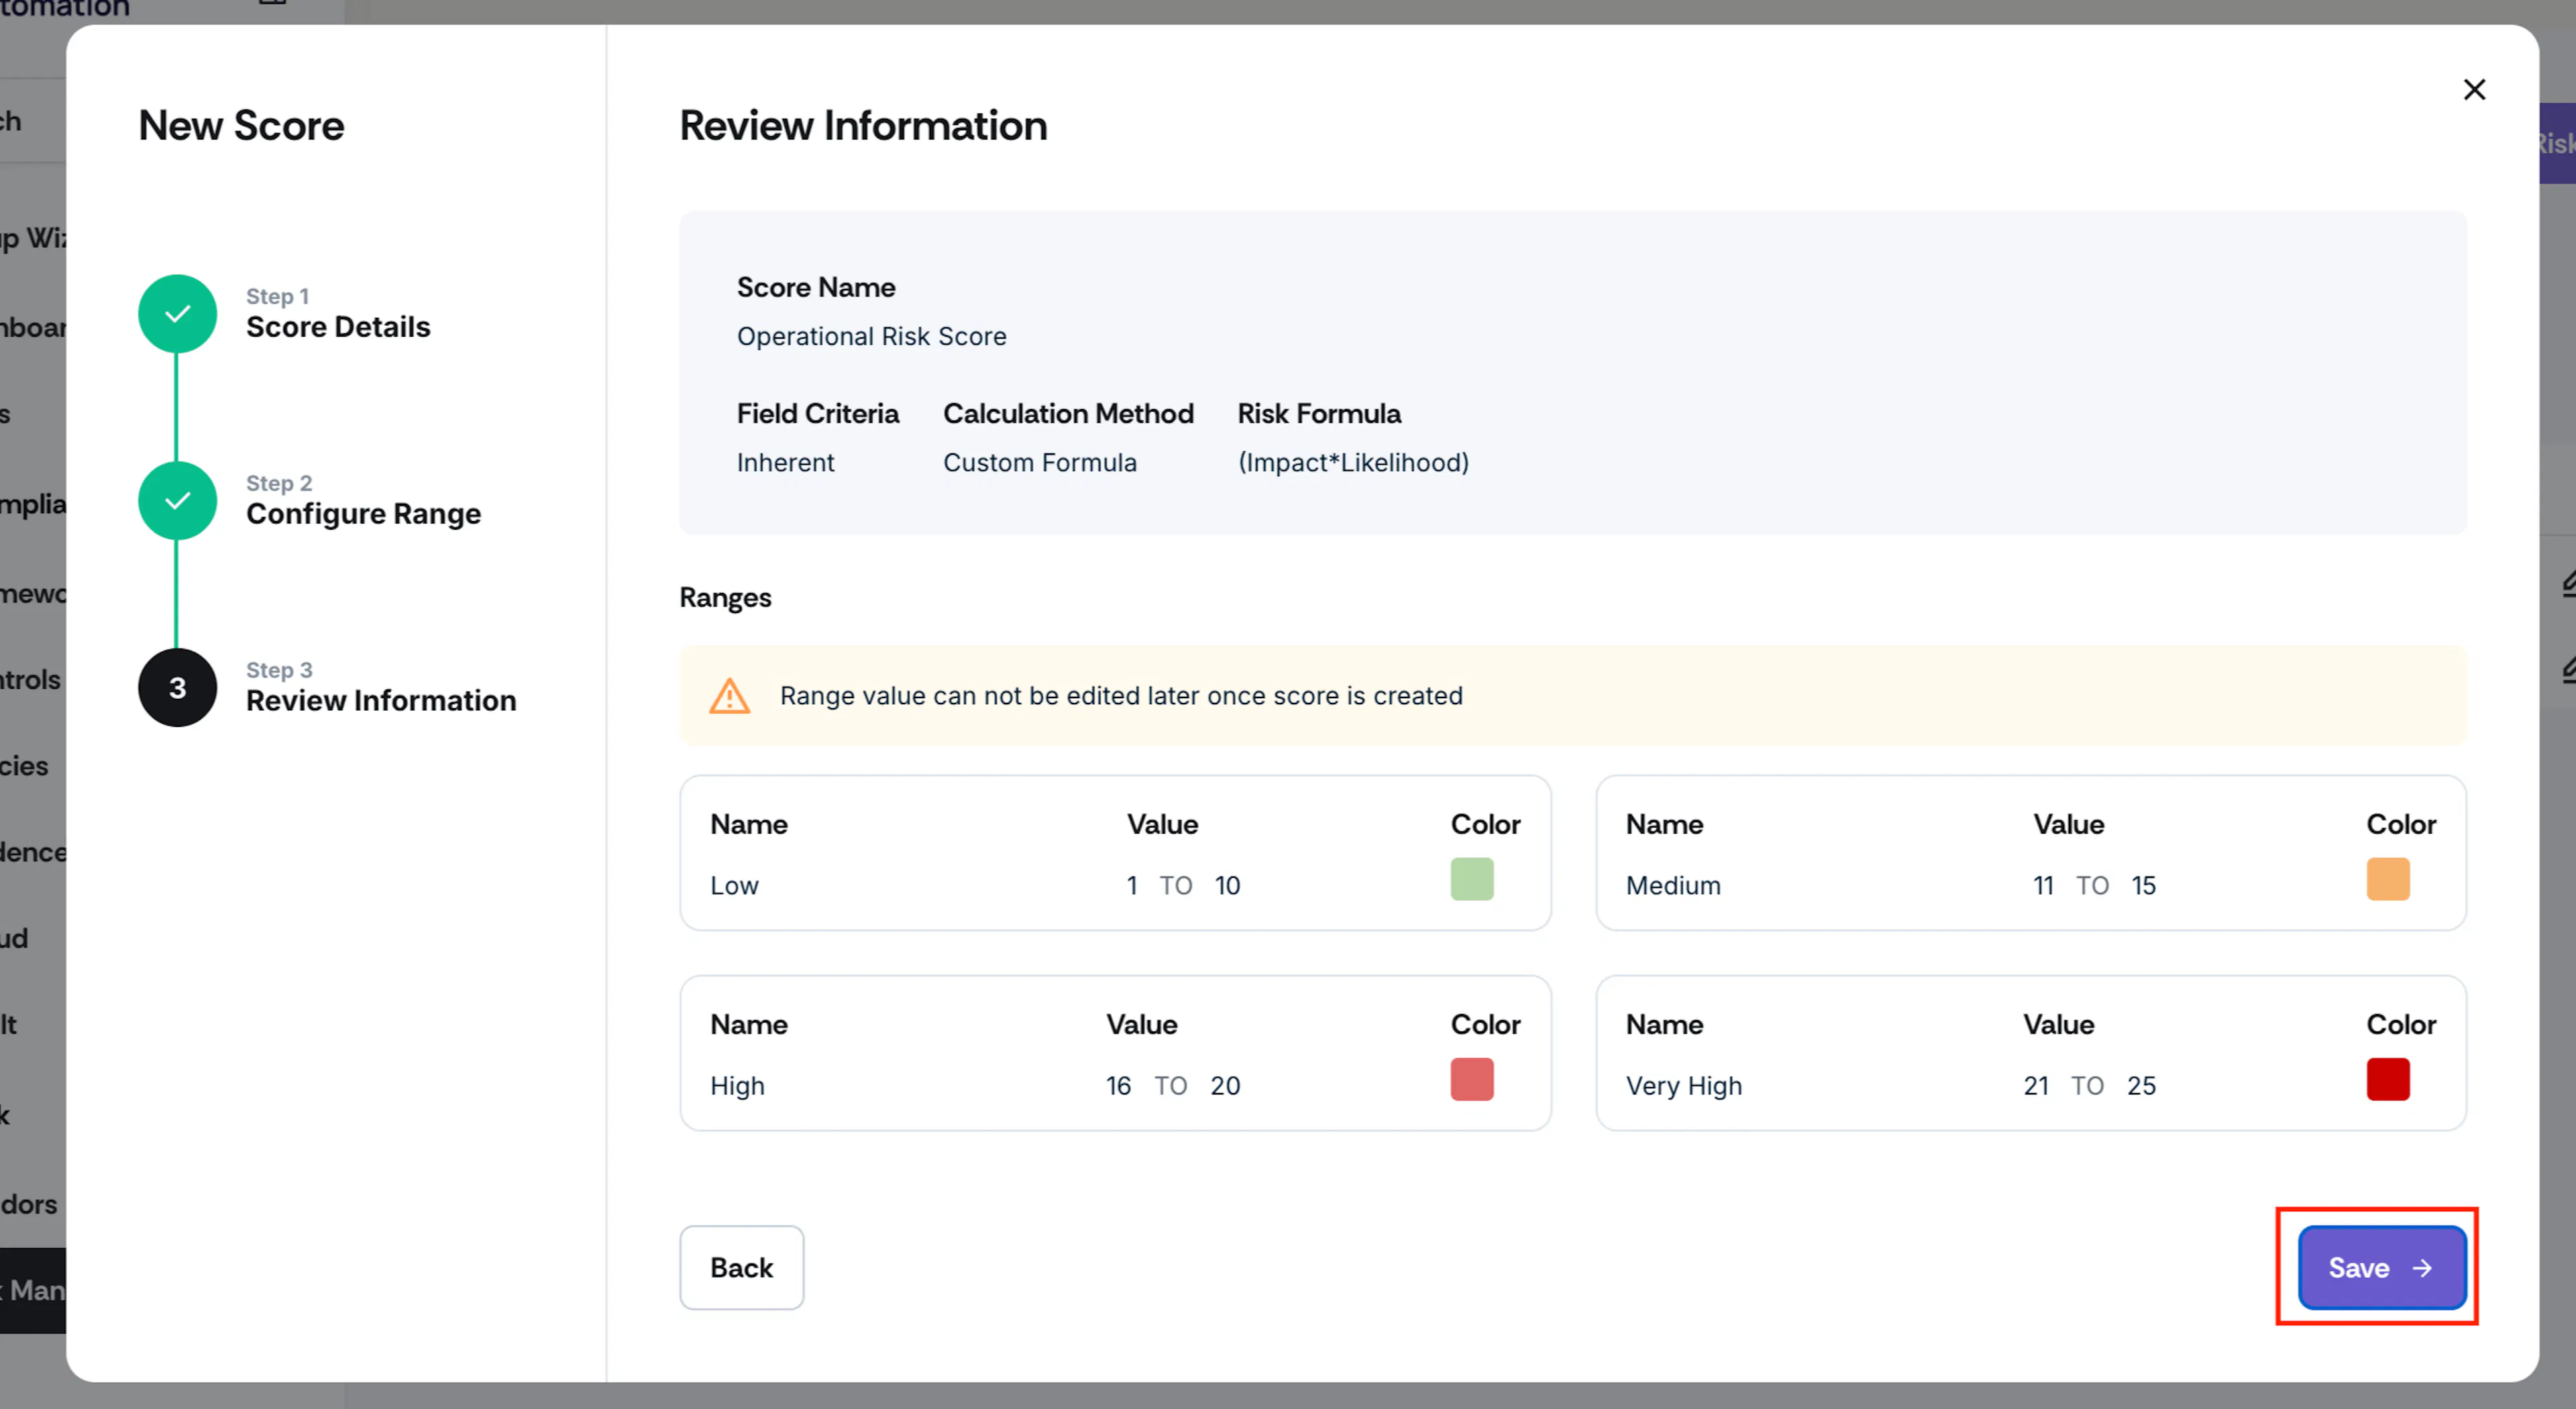
Review the information you entered in steps 1 and 2 and click Save.
-
Scrut adds the newly created score to the Scores table.