Vendors: Walkthrough
Scrut's vendor management solution empowers organizations to track, assess, and mitigate vendor risks efficiently. In this article, learn how to navigate the vendor module and understand its core functionalities.
How To Access the Vendor Management Module
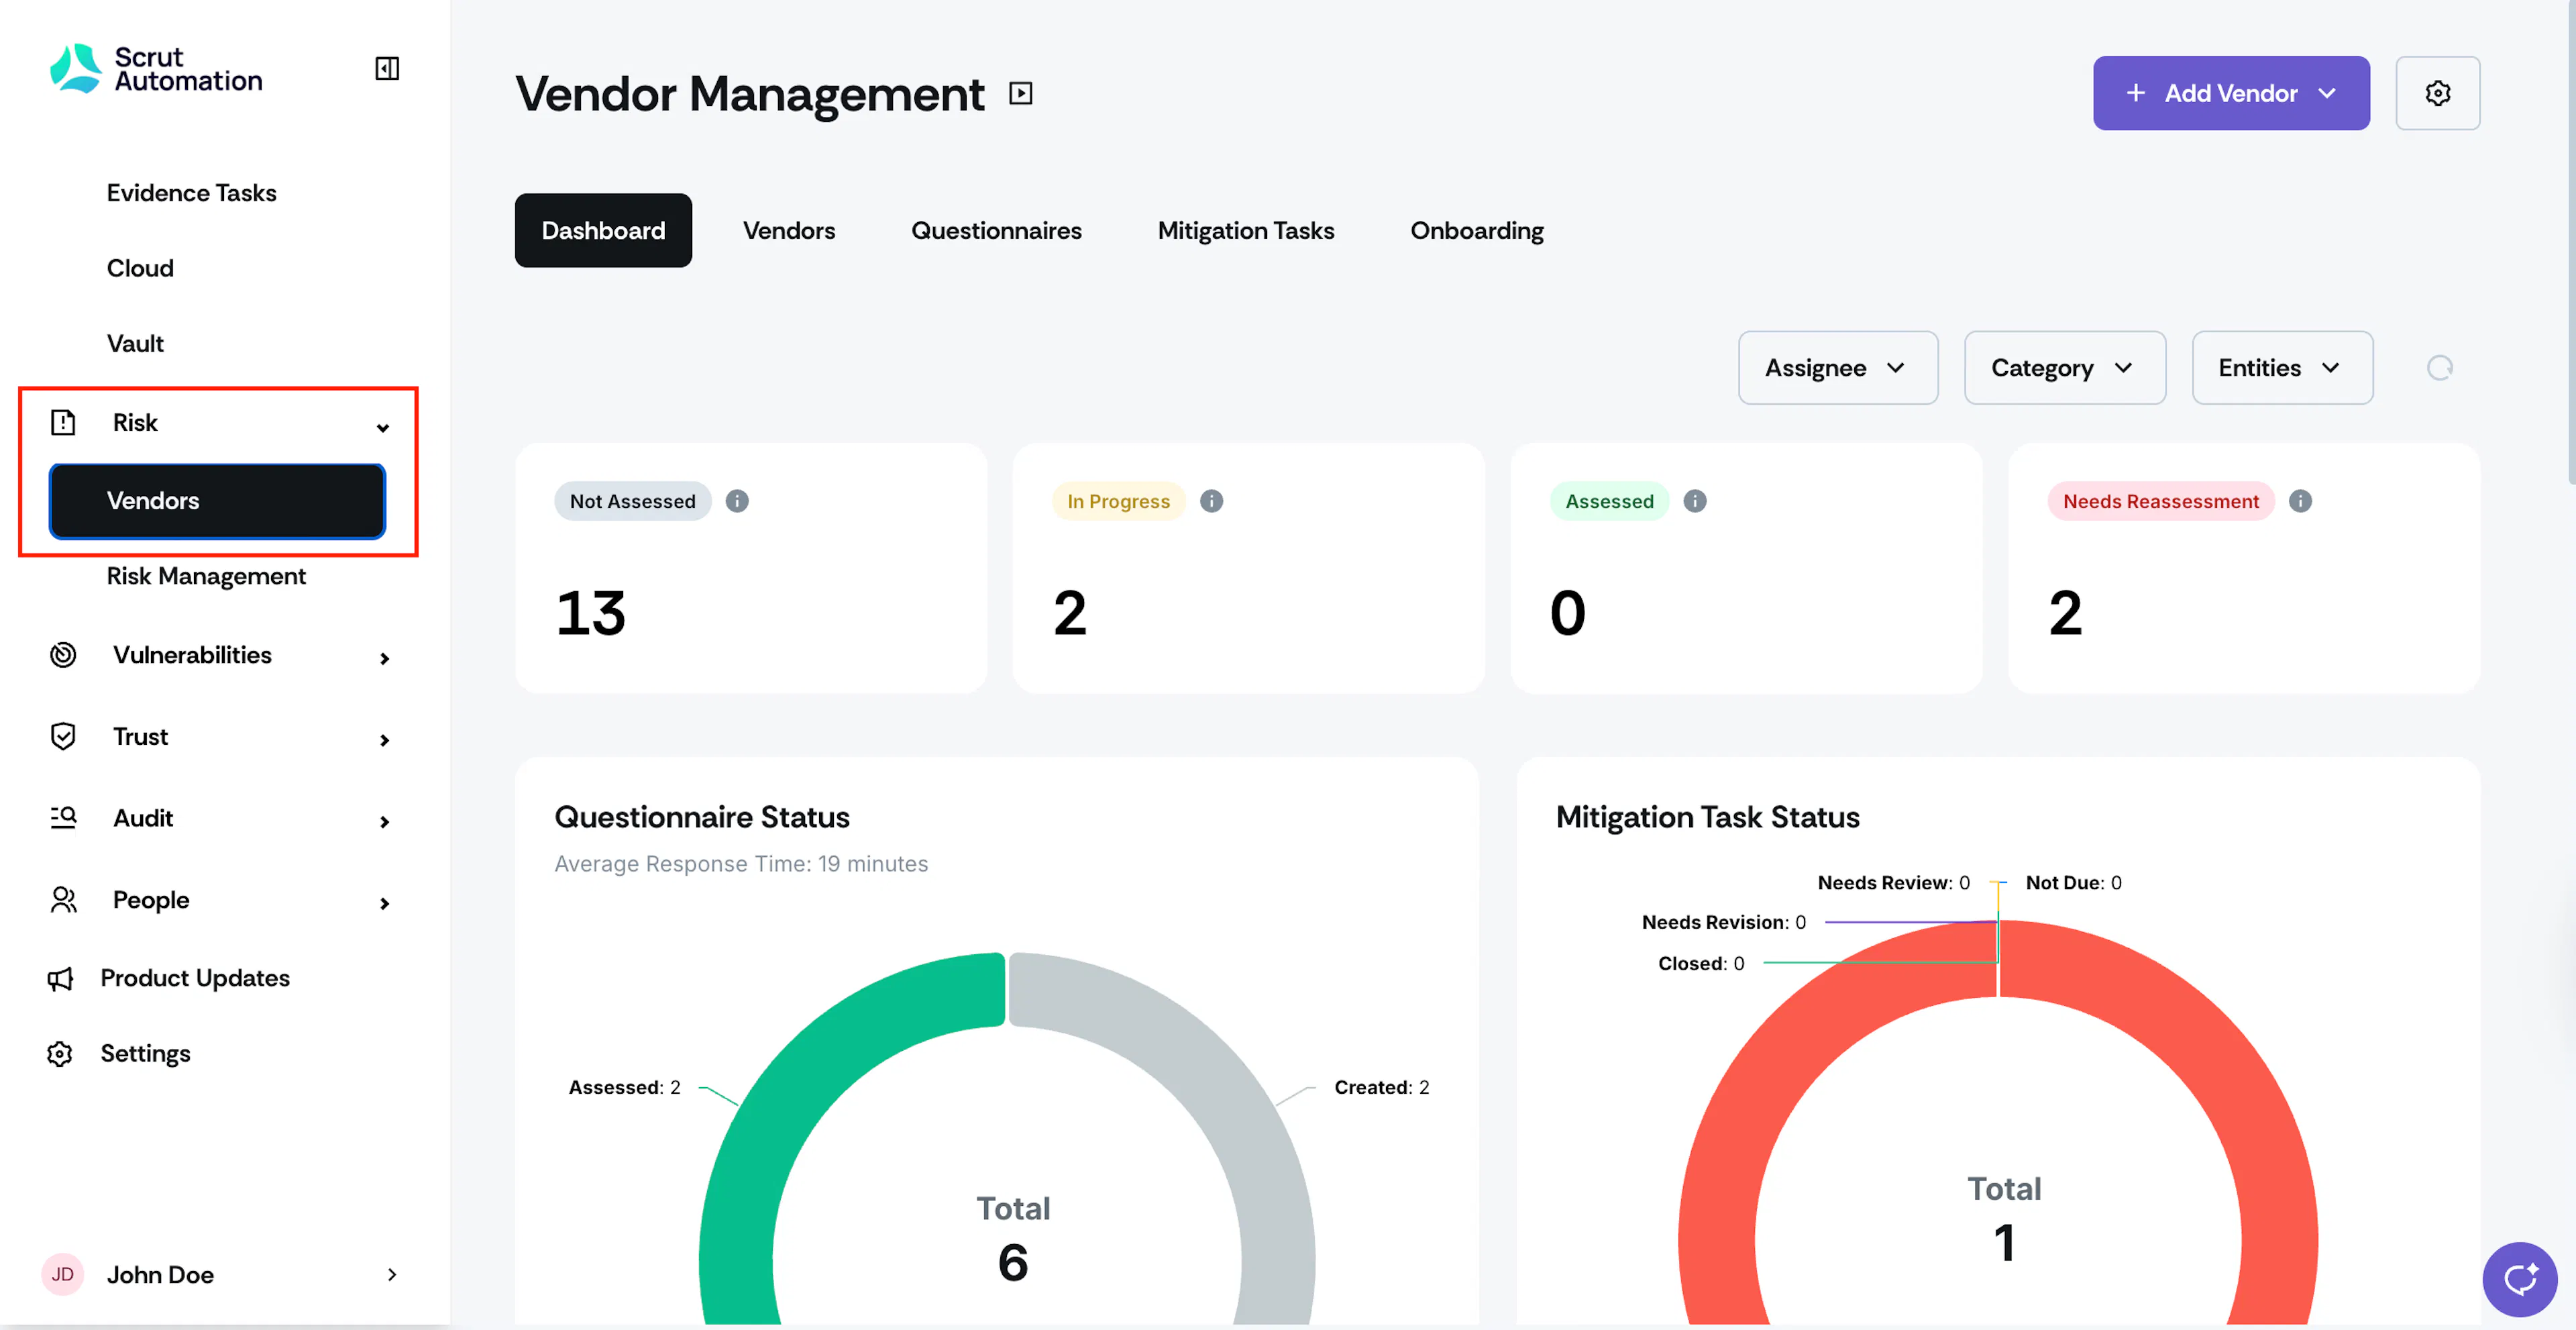
- Log in to your Scrut account and click Risk → Vendors using the left navigation panel.
- This opens the Vendor Dashboard.
Tabs
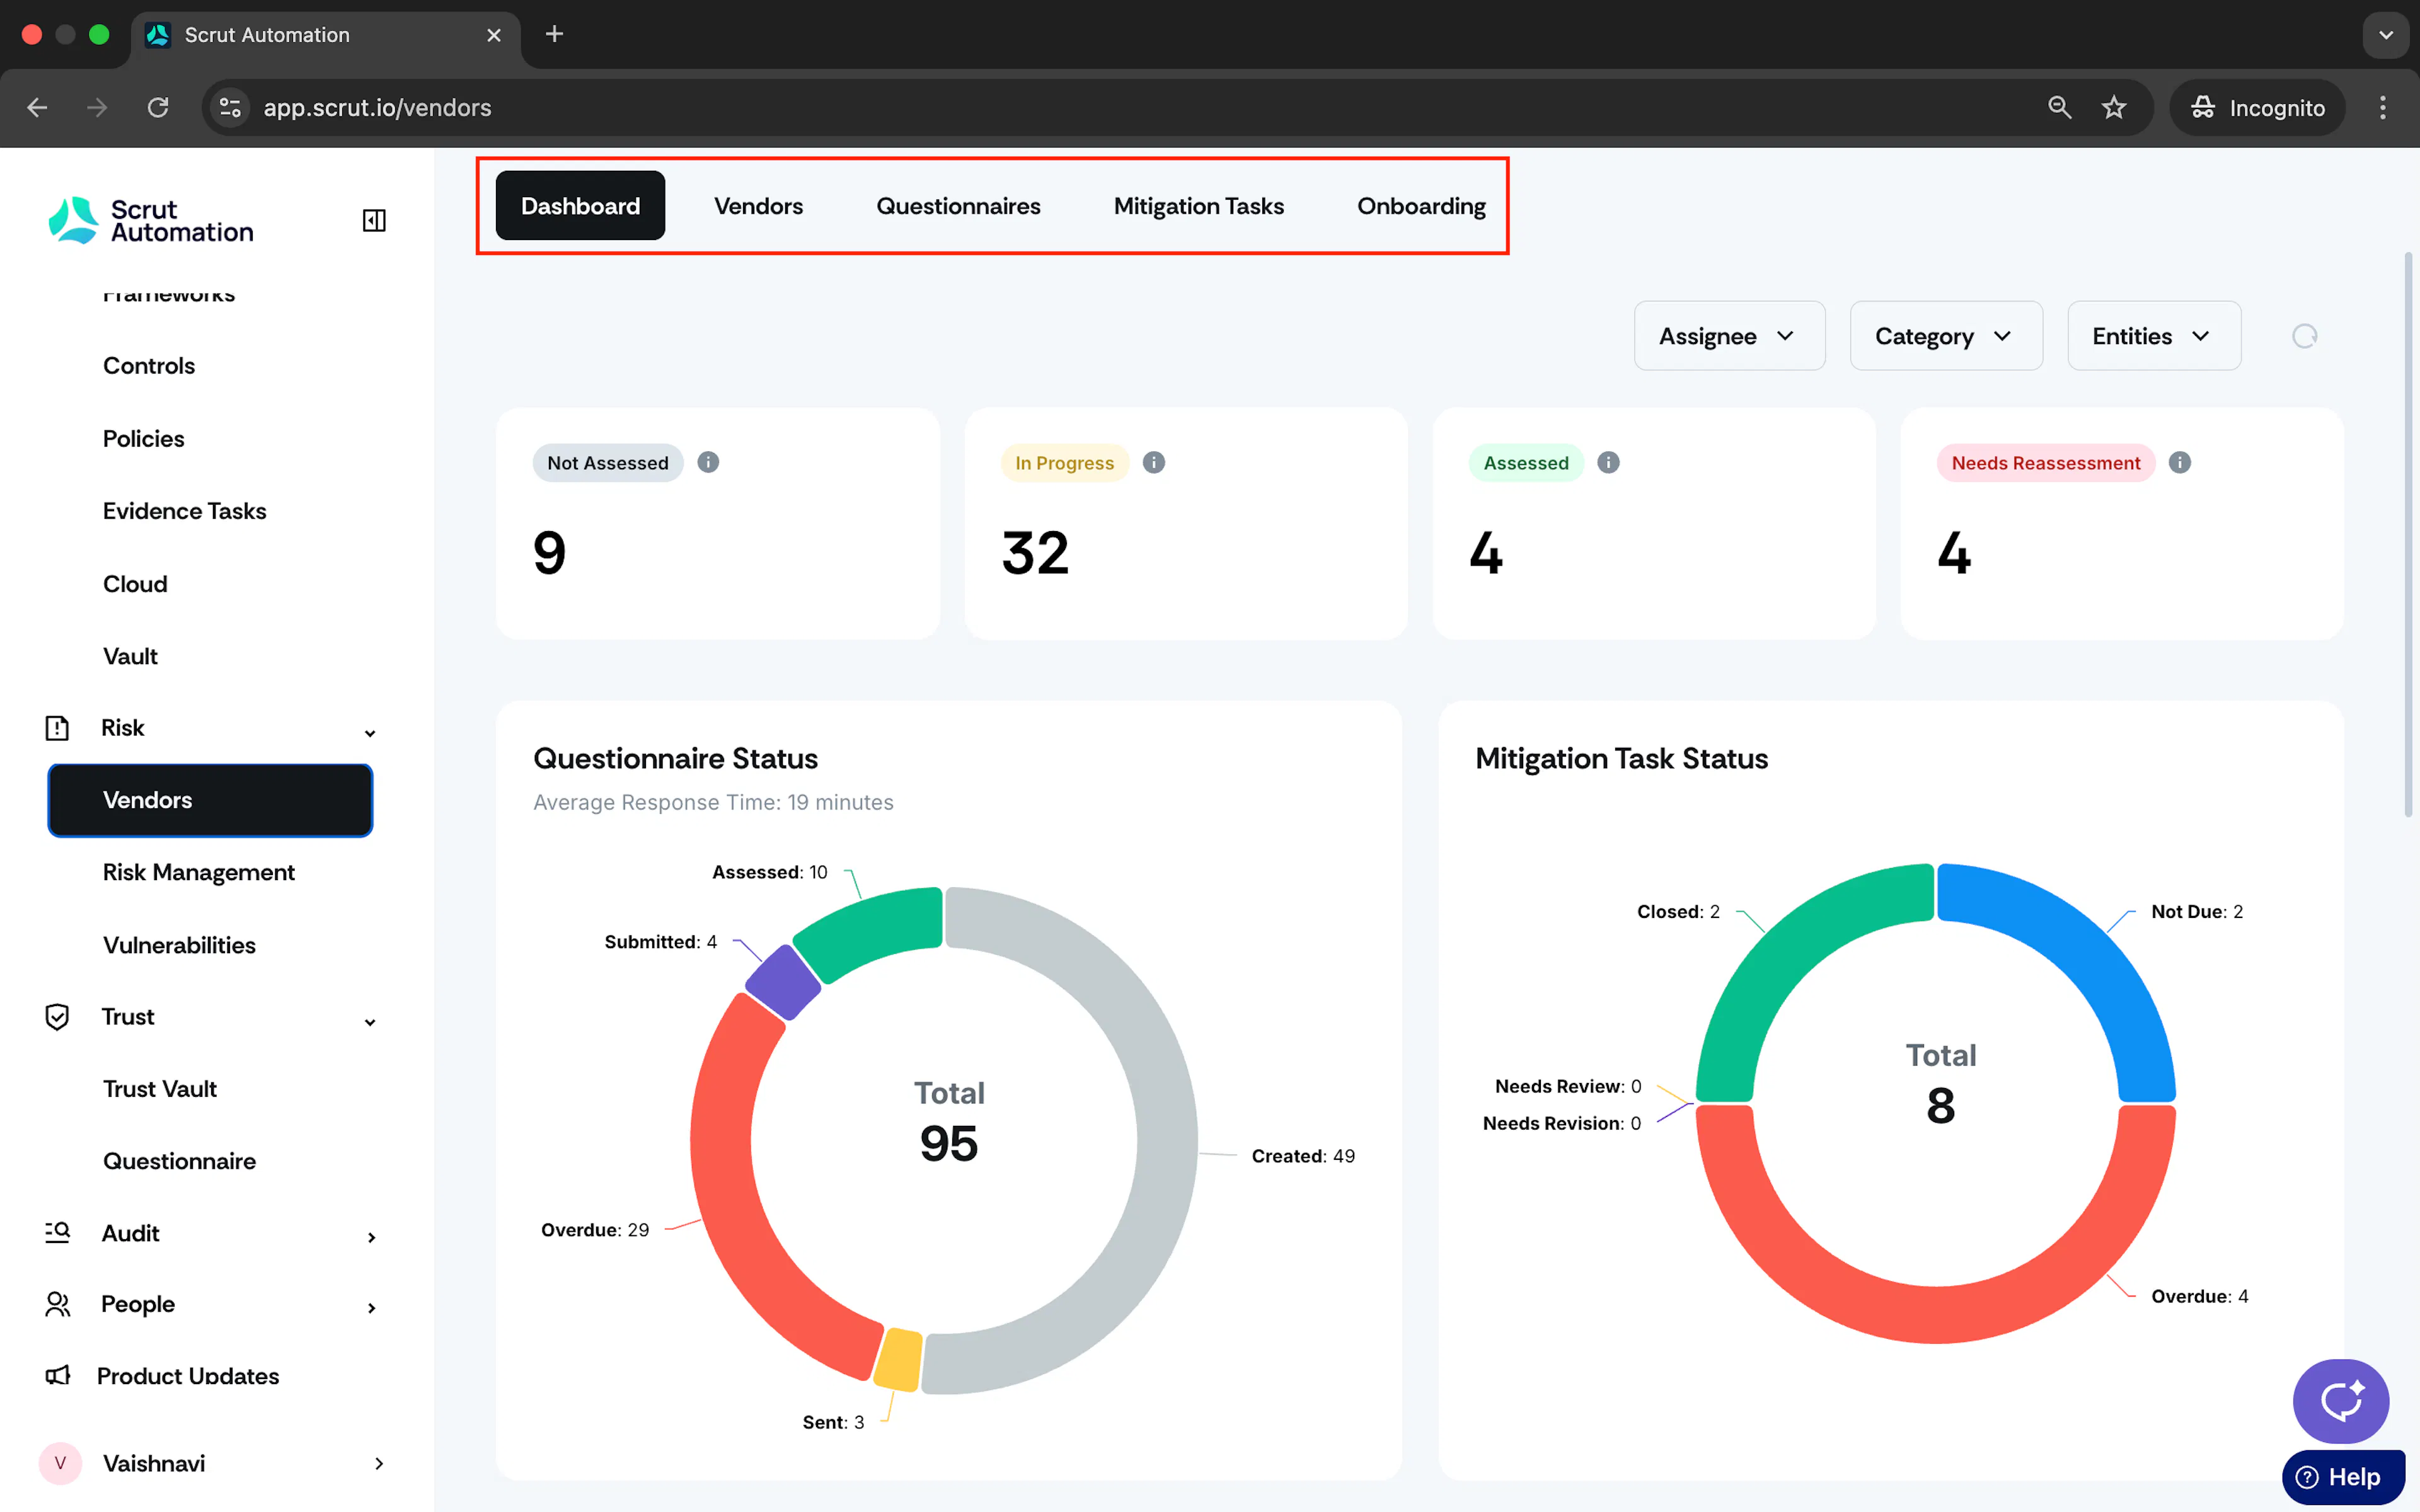
The Vendor Management module includes the following key sections:
- Dashboard: The dashboard displays key vendor metrics, including their assessment status and other relevant details, helping you make informed decisions. For an in-depth understanding, explore the dashboard here.
- Vendors: The Vendors tab streamlines the process of importing vendors into Scrut and presents a clear view of your current vendors. To learn more, refer to Adding a Vendor.
- Questionnaires: This tab allows you to monitor all questionnaires sent to vendors and their current statuses. Check out this step-by-step guide to conduct an AI-Powered Vendor Assessment.
- Mitigation Tasks: This tab shows all assigned mitigation tasks and their statuses, making it easy to manage vendor mitigation tasks from a single location. Check out this guide to understand the Vendor Mitigation Task Workflow.
- Onboarding: The Vendor Onboarding tab serves as a central hub for effectively onboarding vendors. It allows employees to fill out customized forms with vendor information, accelerating the vendor assessment process. For a deeper dive, refer to Vendor Onboarding.
Key Components
In this section, we explain the key components of this module that help you understand your vendor information better.
Filters
The vendor management module offers three primary filters to customize the data displayed.
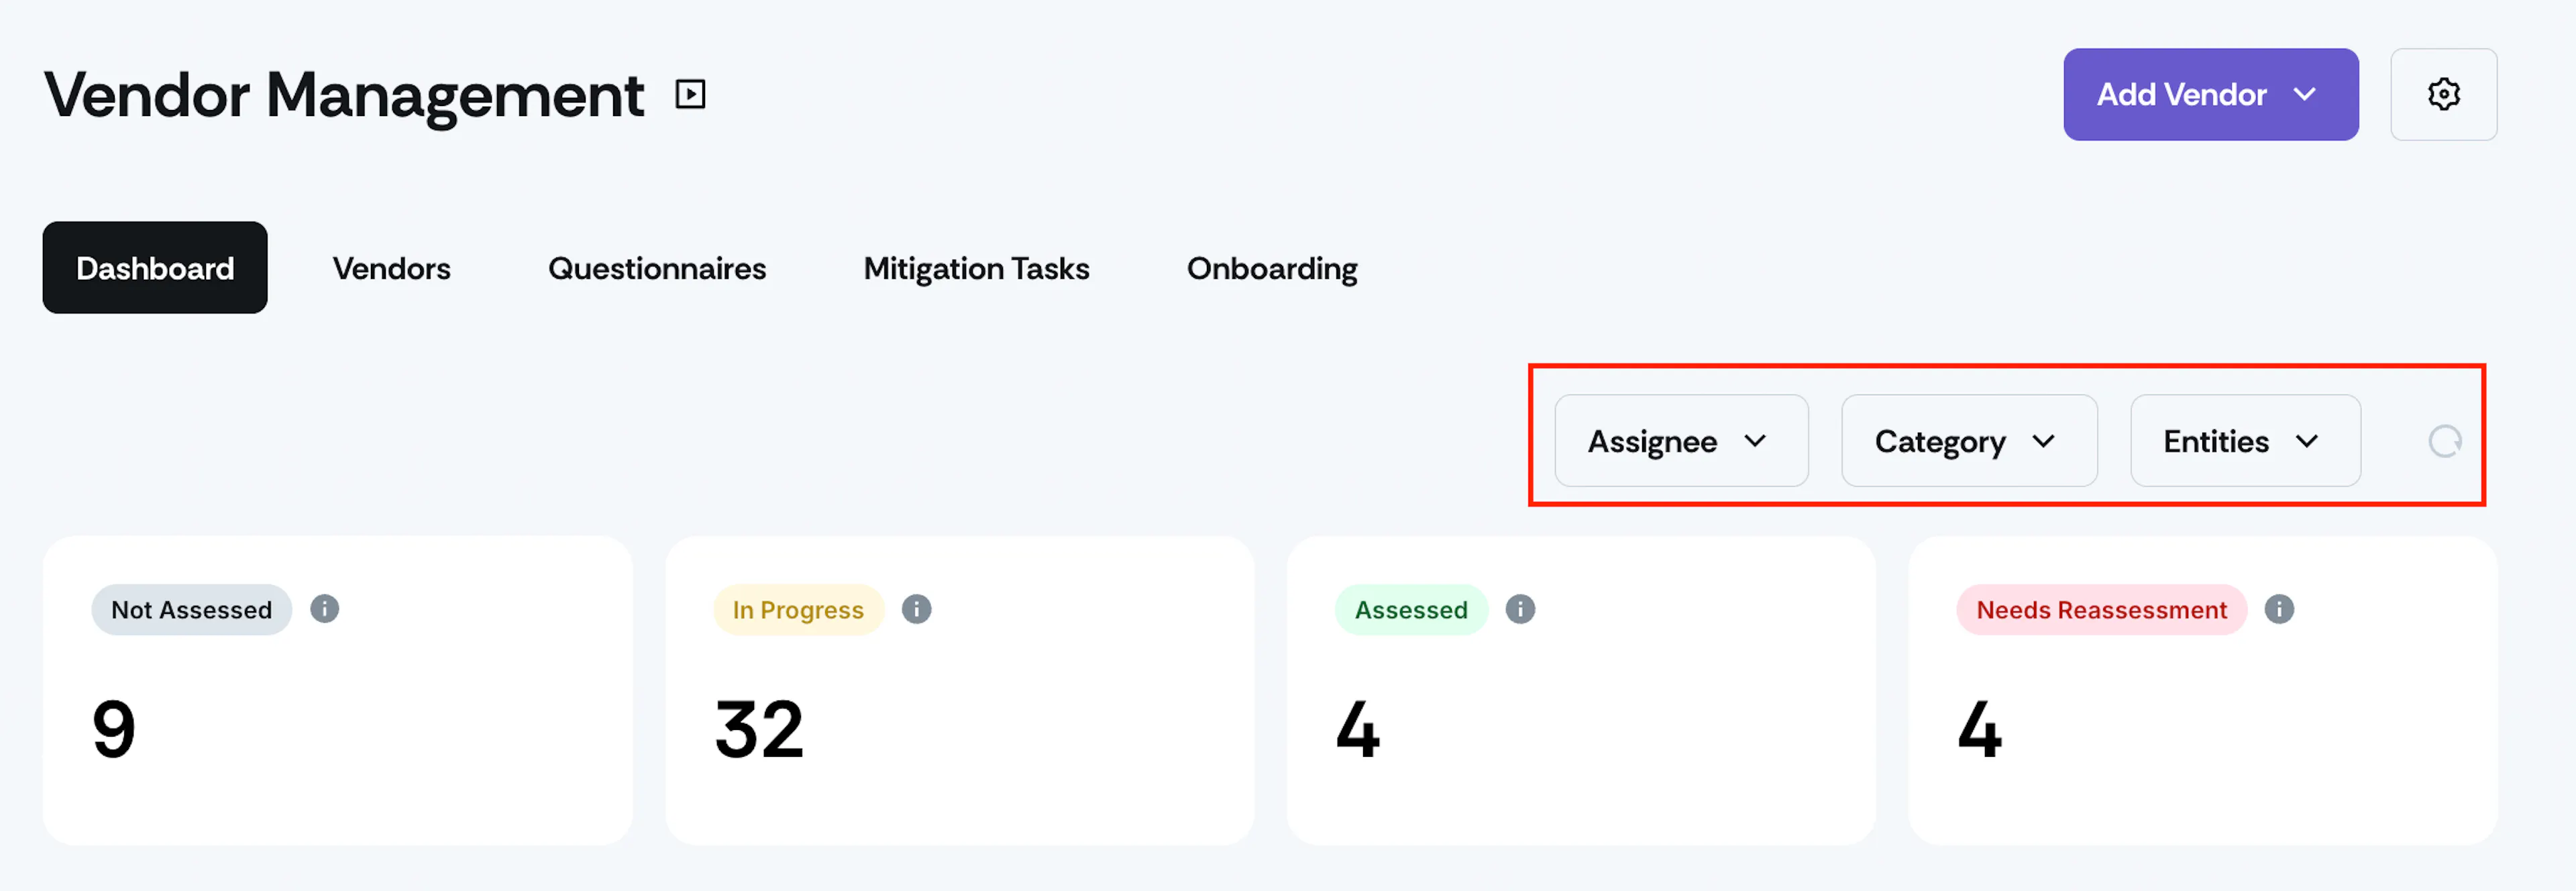
- Assignee: Use this filter to narrow down vendor data by specific assignees or display data without any assignee. You can also use it to quickly view the data of vendors assigned to you.
- Category: Use this filter to narrow the data by specific vendor categories, making it easier to focus on relevant information.
- Entities: Use this filter to narrow the data by specific entities or view organization-wide data.
Pro Tip!
Click on the circular undo icon to reset the applied filters.
Metrics
The metrics cards at the top of the page display vendor counts based on their assessment status.
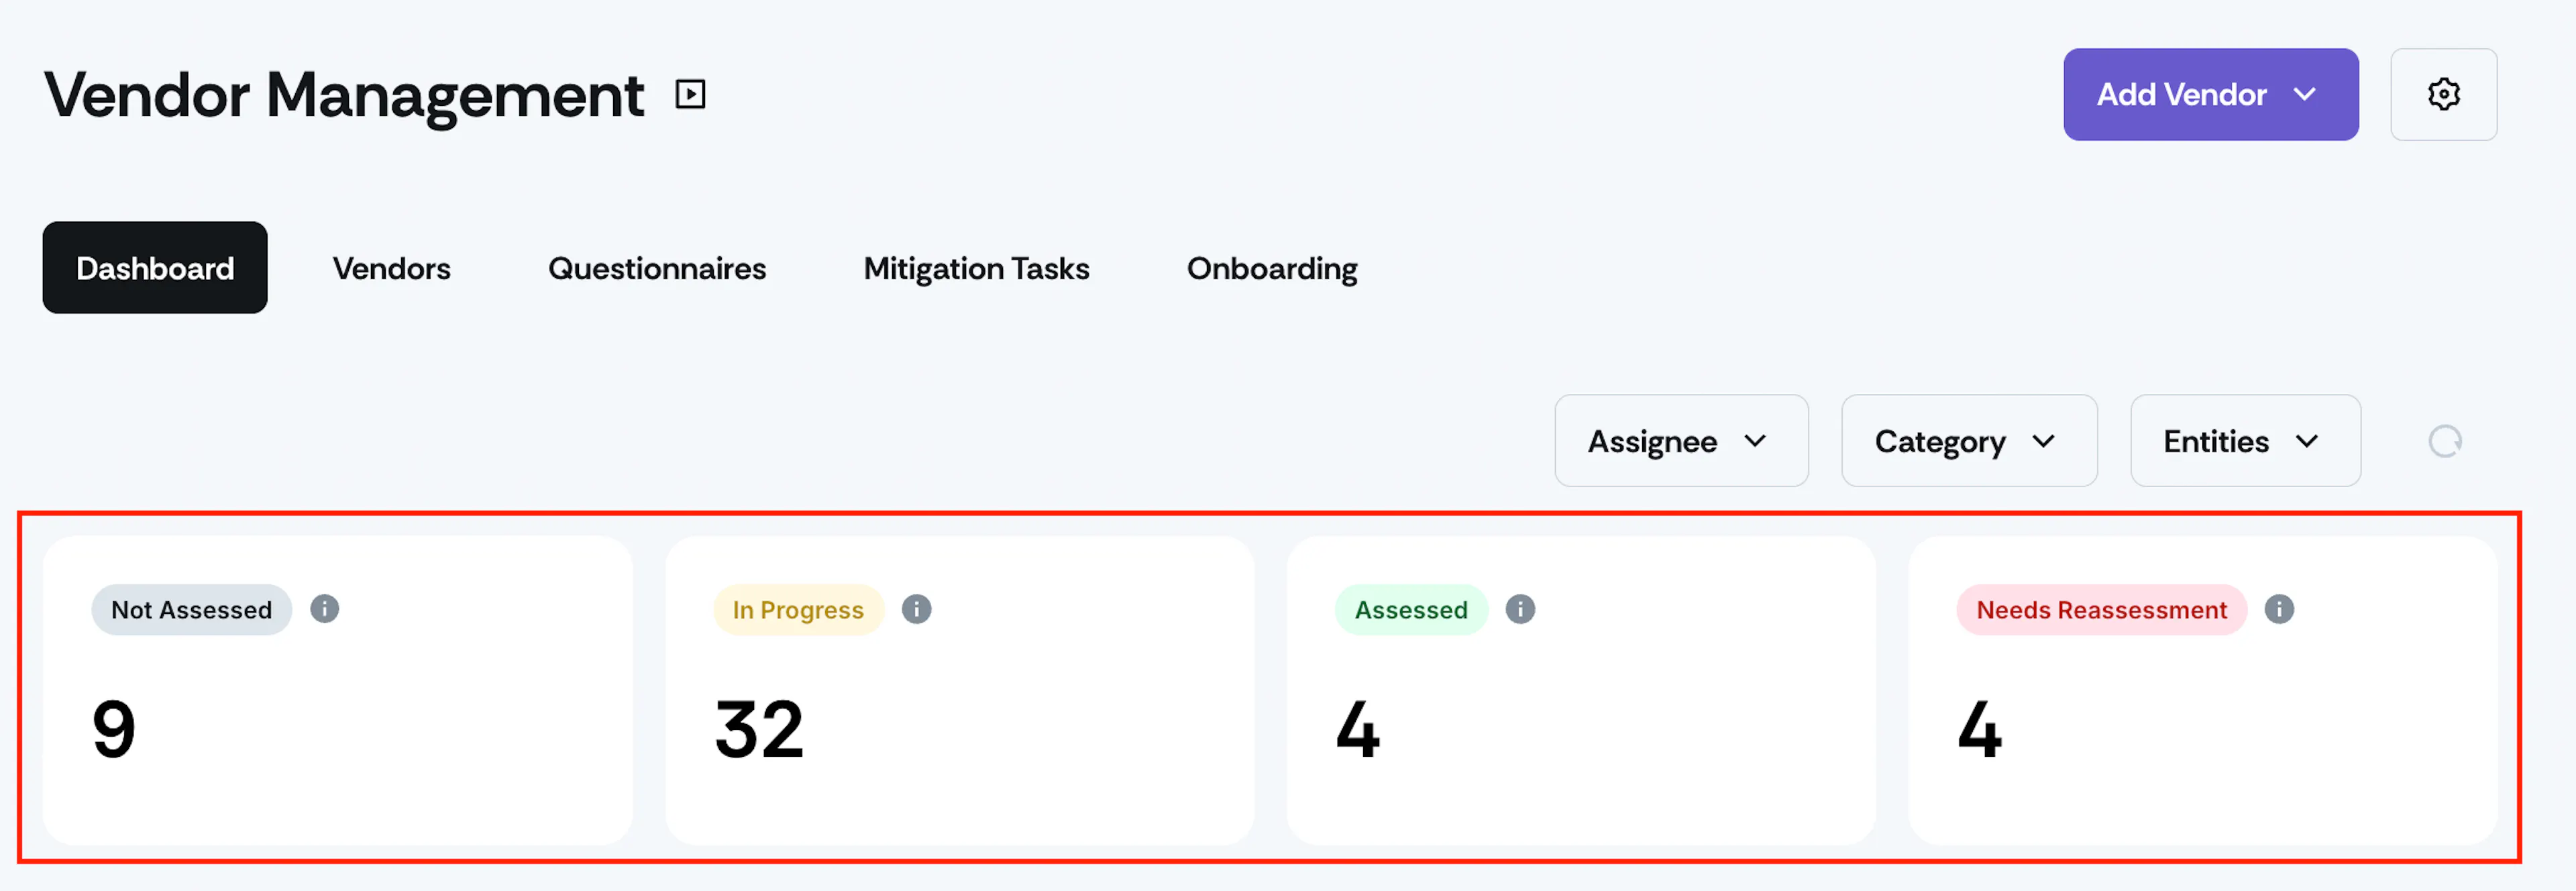
- Not Assessed: Number of vendors pending assessment. No questionnaires have been sent to these vendors.
- In Progress: Number of vendors currently undergoing assessment. At least one questionnaire has been sent to these vendors, but either the vendor has not yet submitted the questionnaire or the questionnaire is yet to be evaluated by the vendor risk assessment team.
- Assessed: Number of vendors with completed assessment (either in Scrut or off Scrut). All relevant questionnaires have been sent, submitted by the vendor, and evaluated by the vendor risk assessment team.
- Needs reassessment: Number of vendors overdue for assessment, based on the recurrence schedule.
Vendor Table
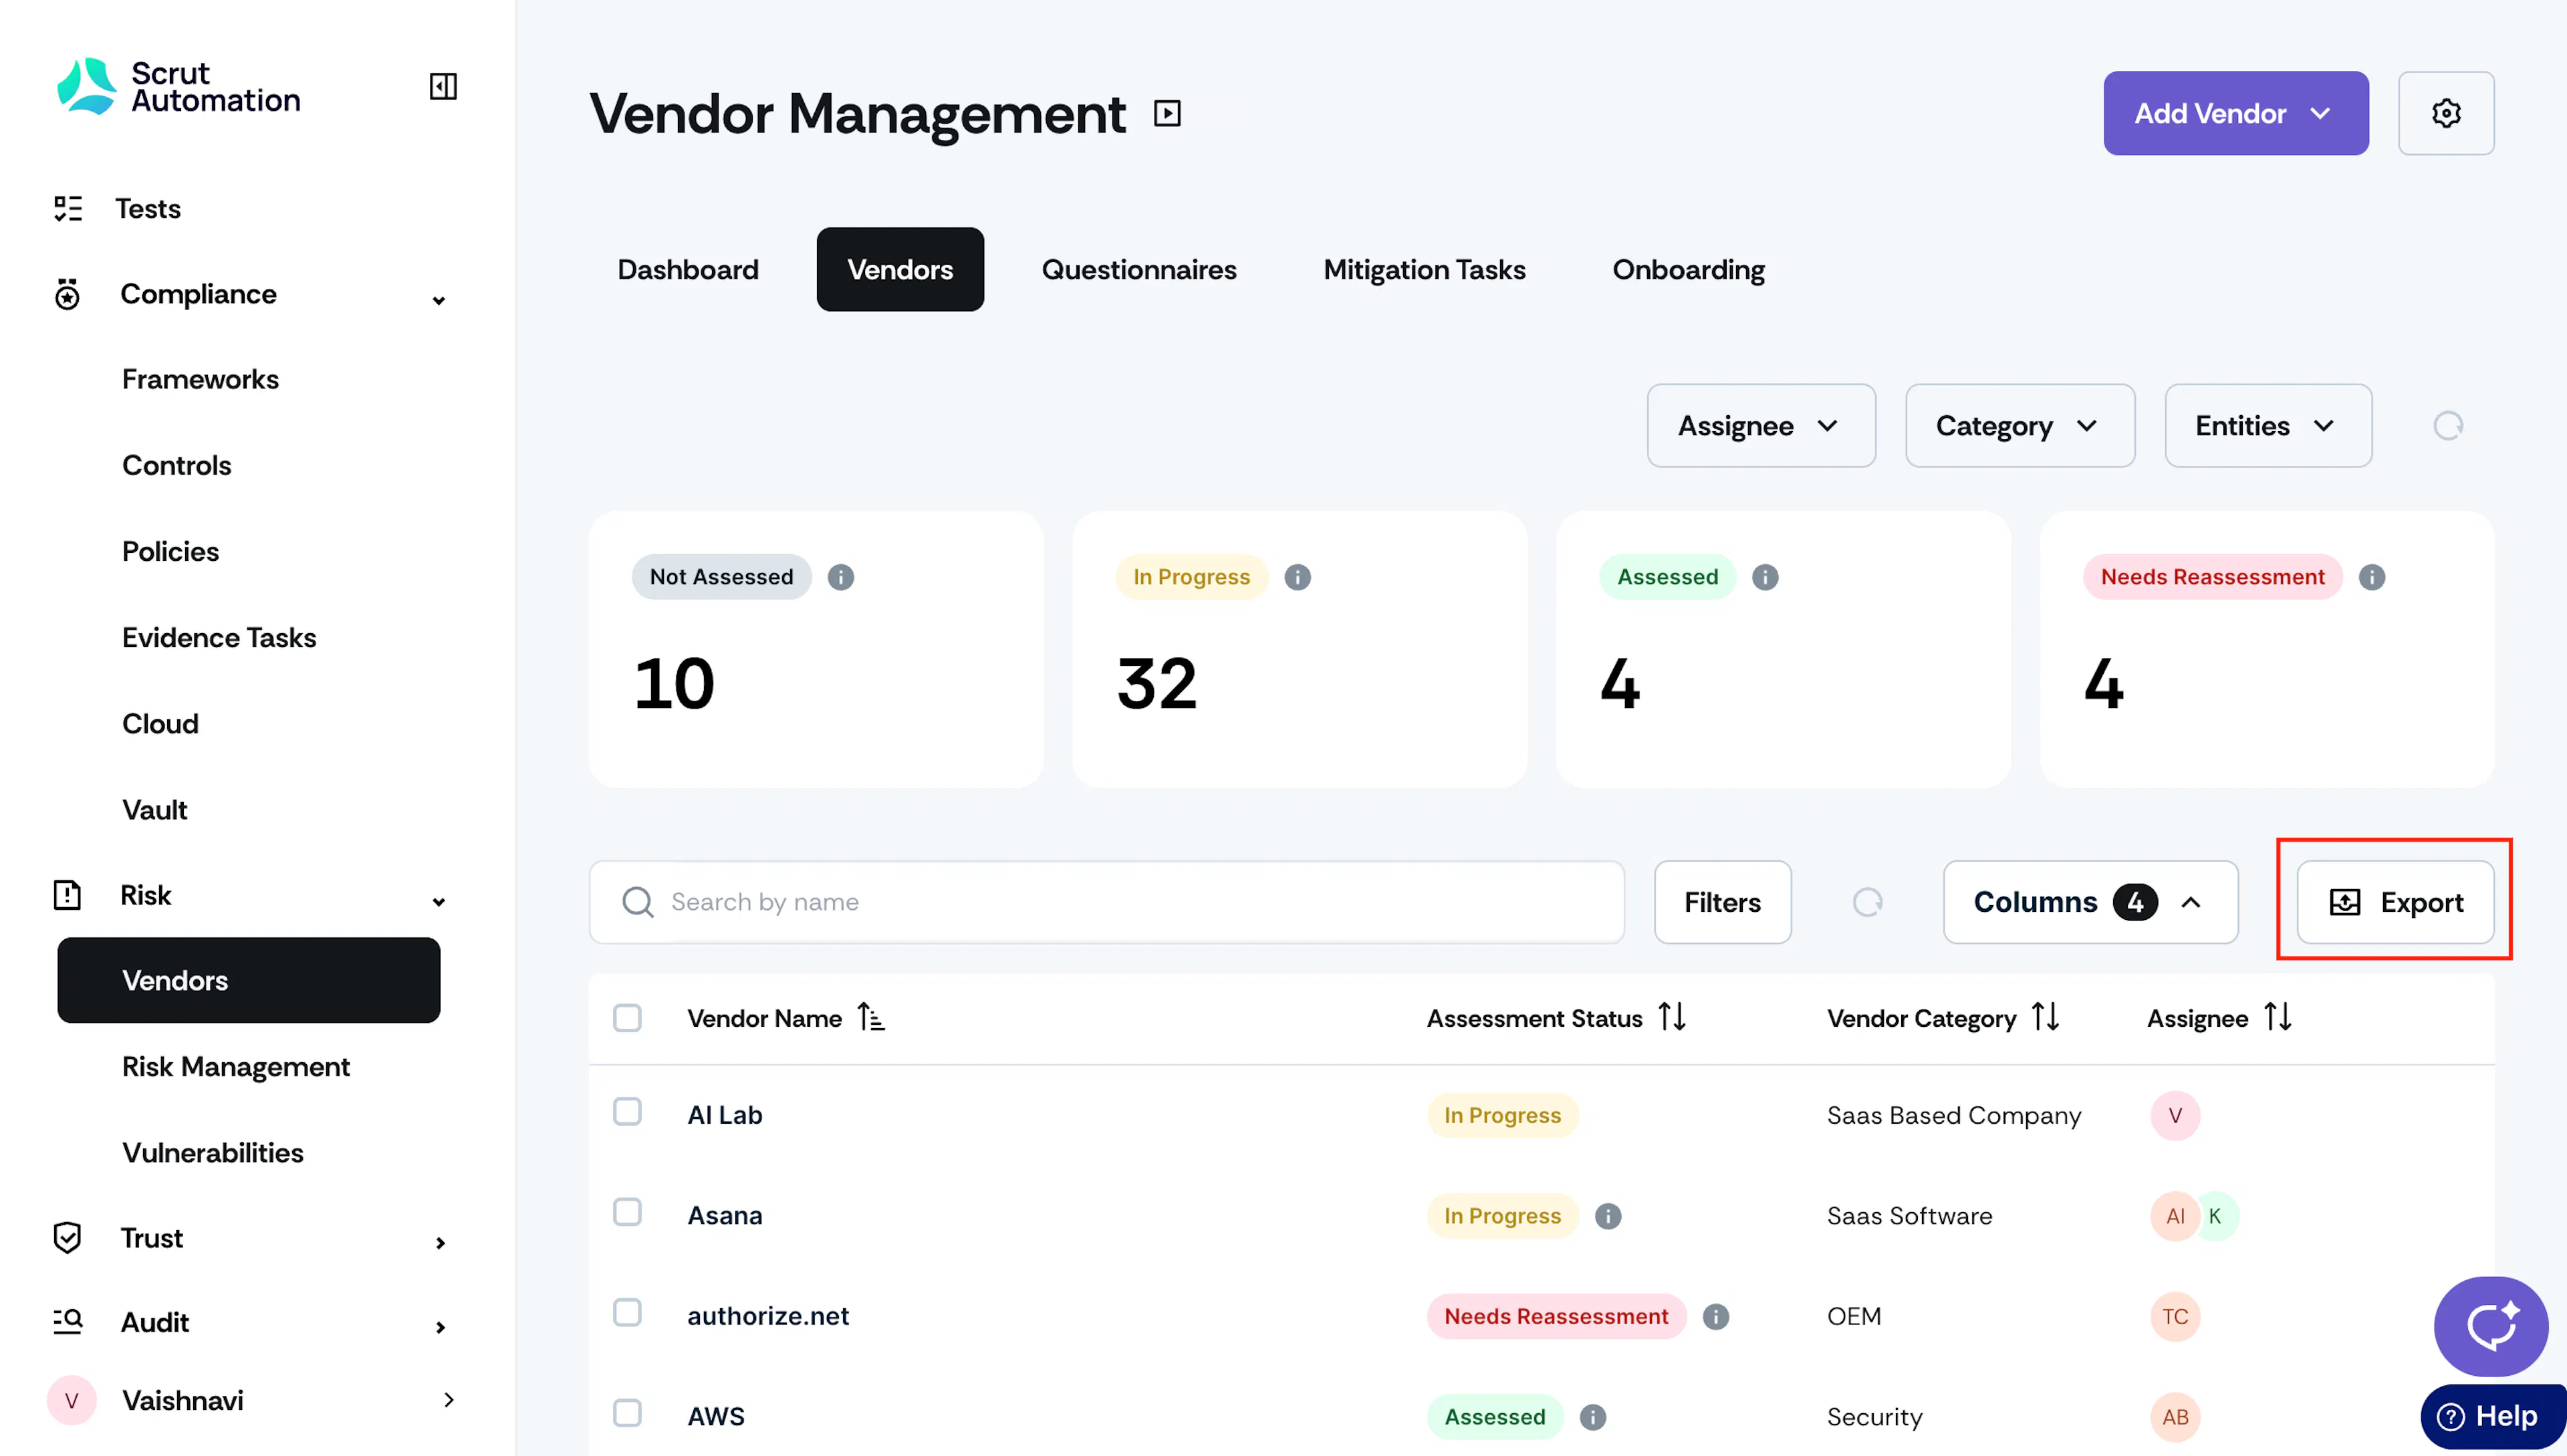
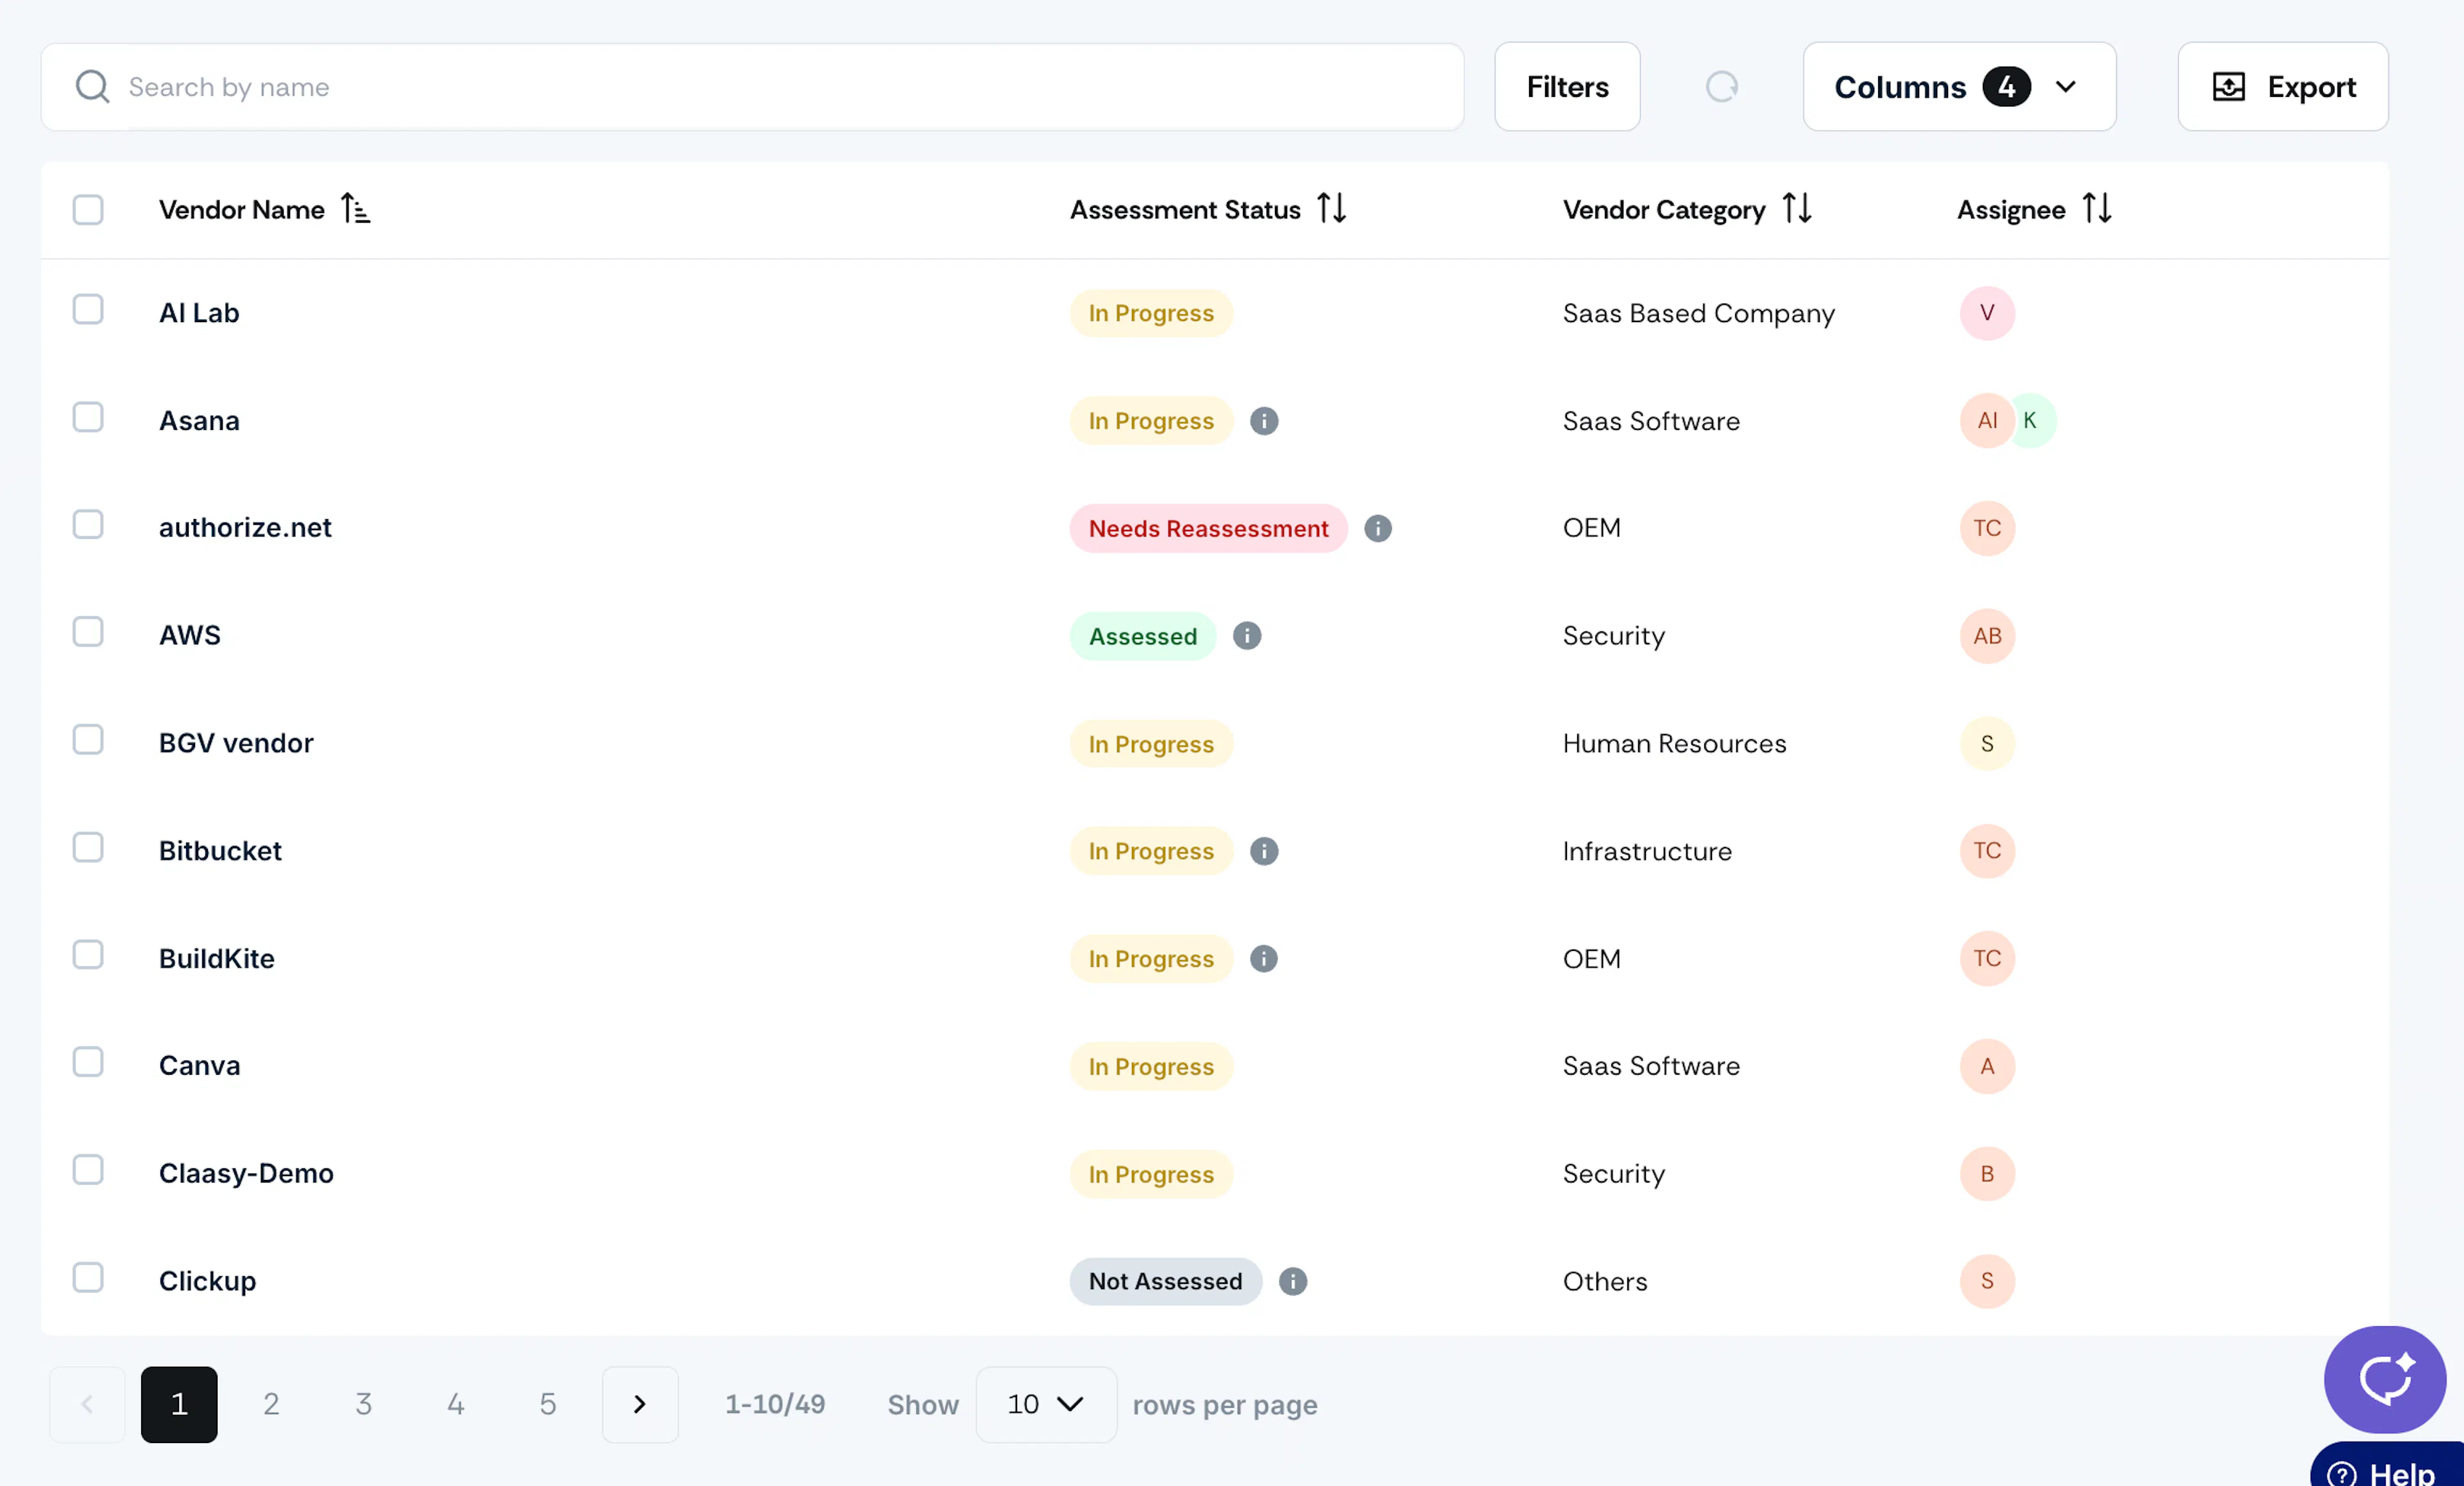
The core component of the Vendors tab is the Vendor Table. It displays a comprehensive list of all your vendors, providing a quick snapshot of the vendor name, assessment status, category, assignee, and other details.
Sort By
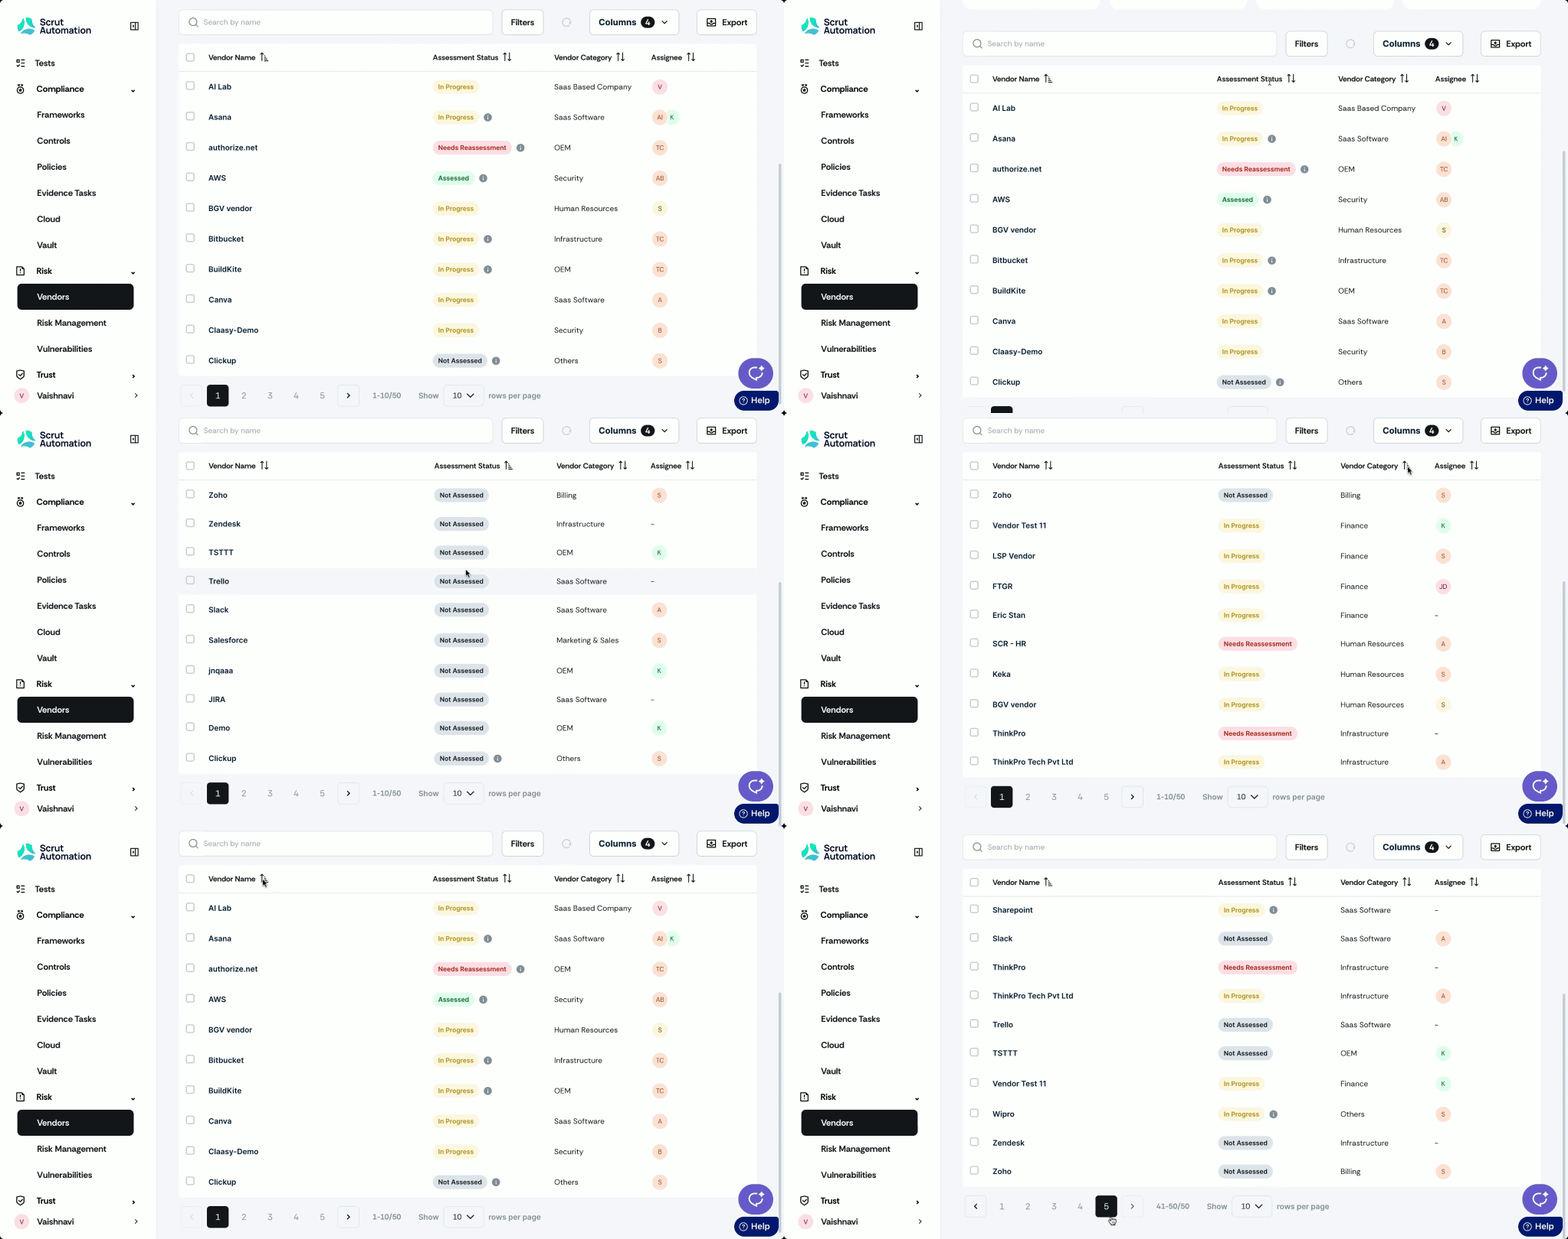
Use the Sort By icons at the top of each column to apply ascending/descending sorting.
Filters
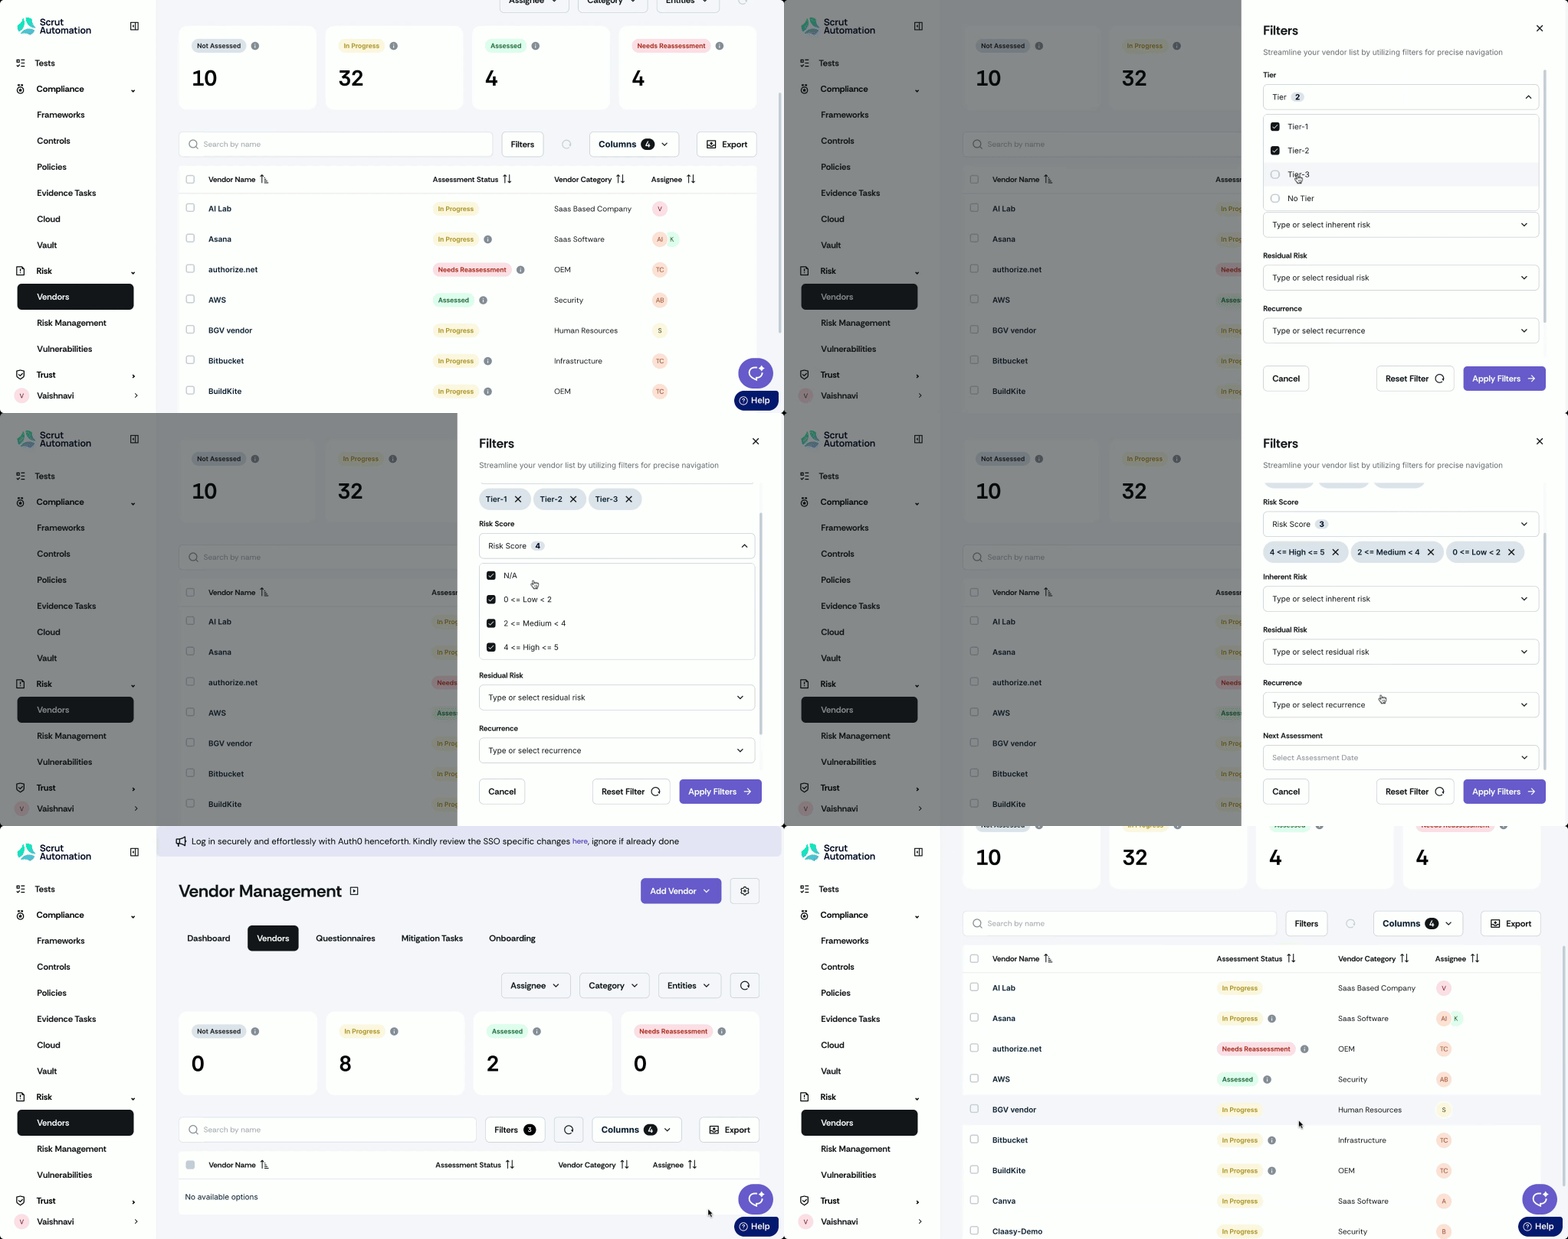
Click the Filters button to narrow the table data by vendor categories like Tier, Risk Score, Inherent Risk, Residual Risk, Recurrence, or Next Assessment Date.
Pro Tip!
Click the reset filter icon to remove all applied filters.
Search
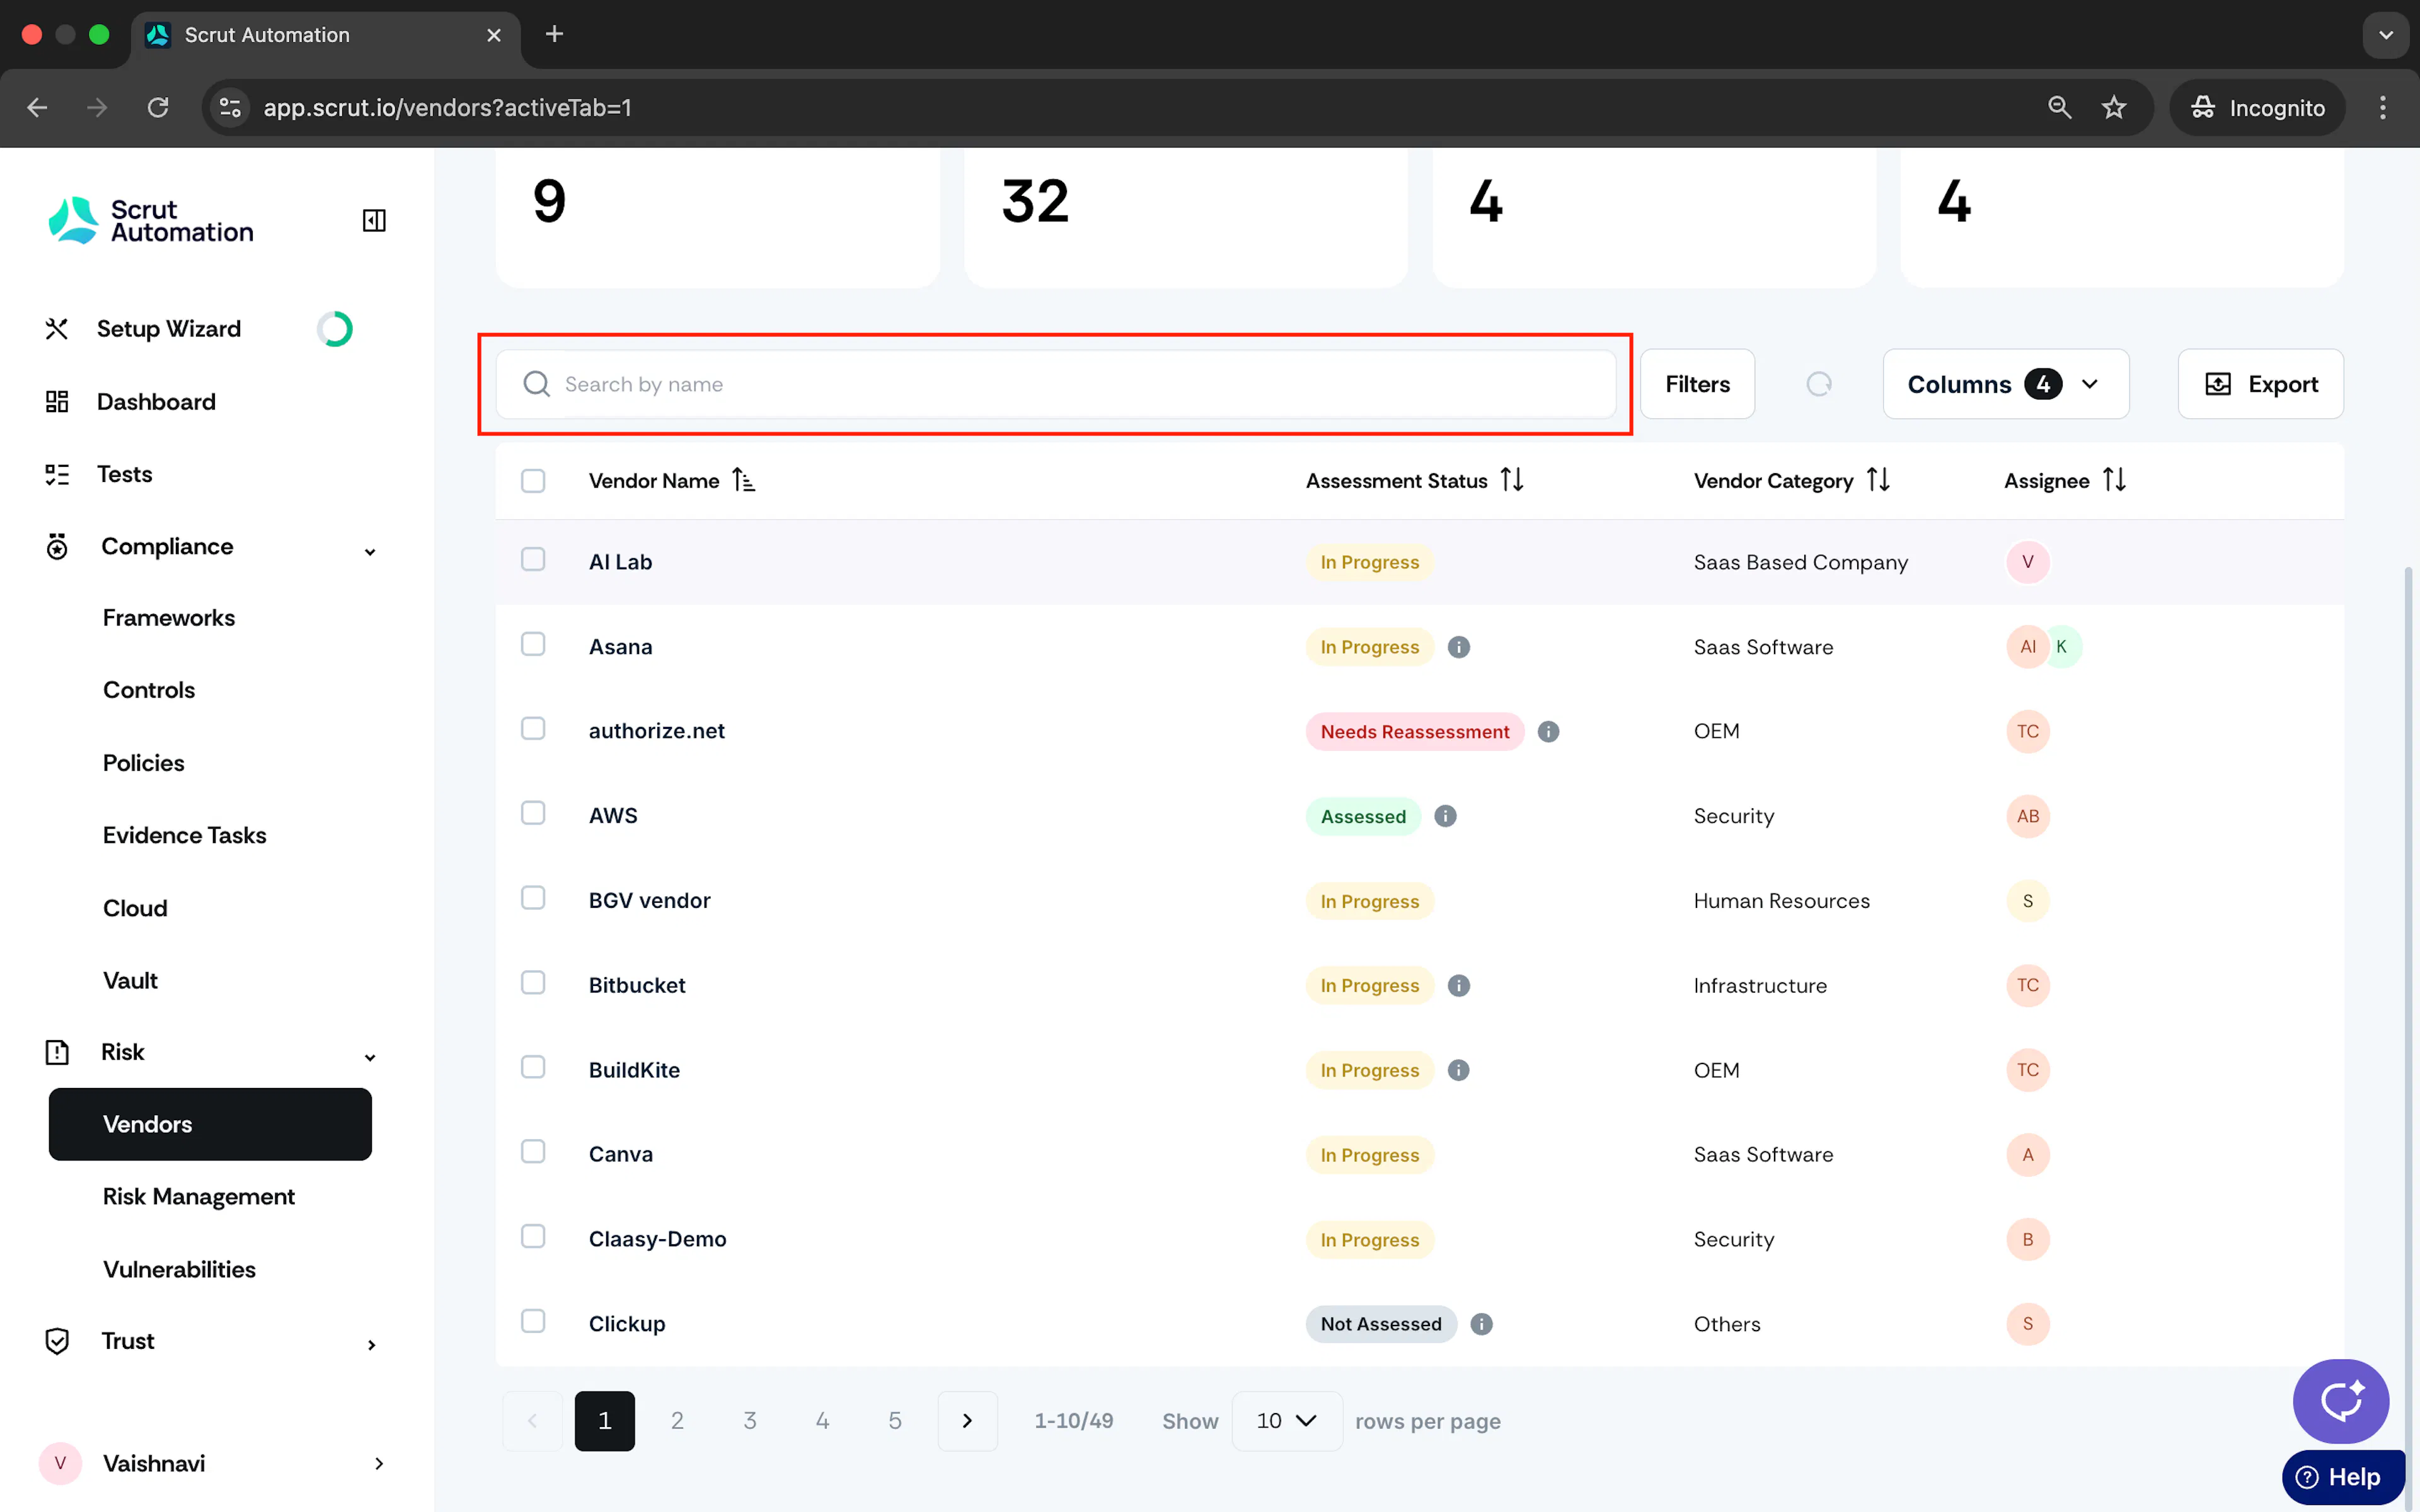
Use the search bar at the top of the table to locate a specific vendor quickly.
Column Selector
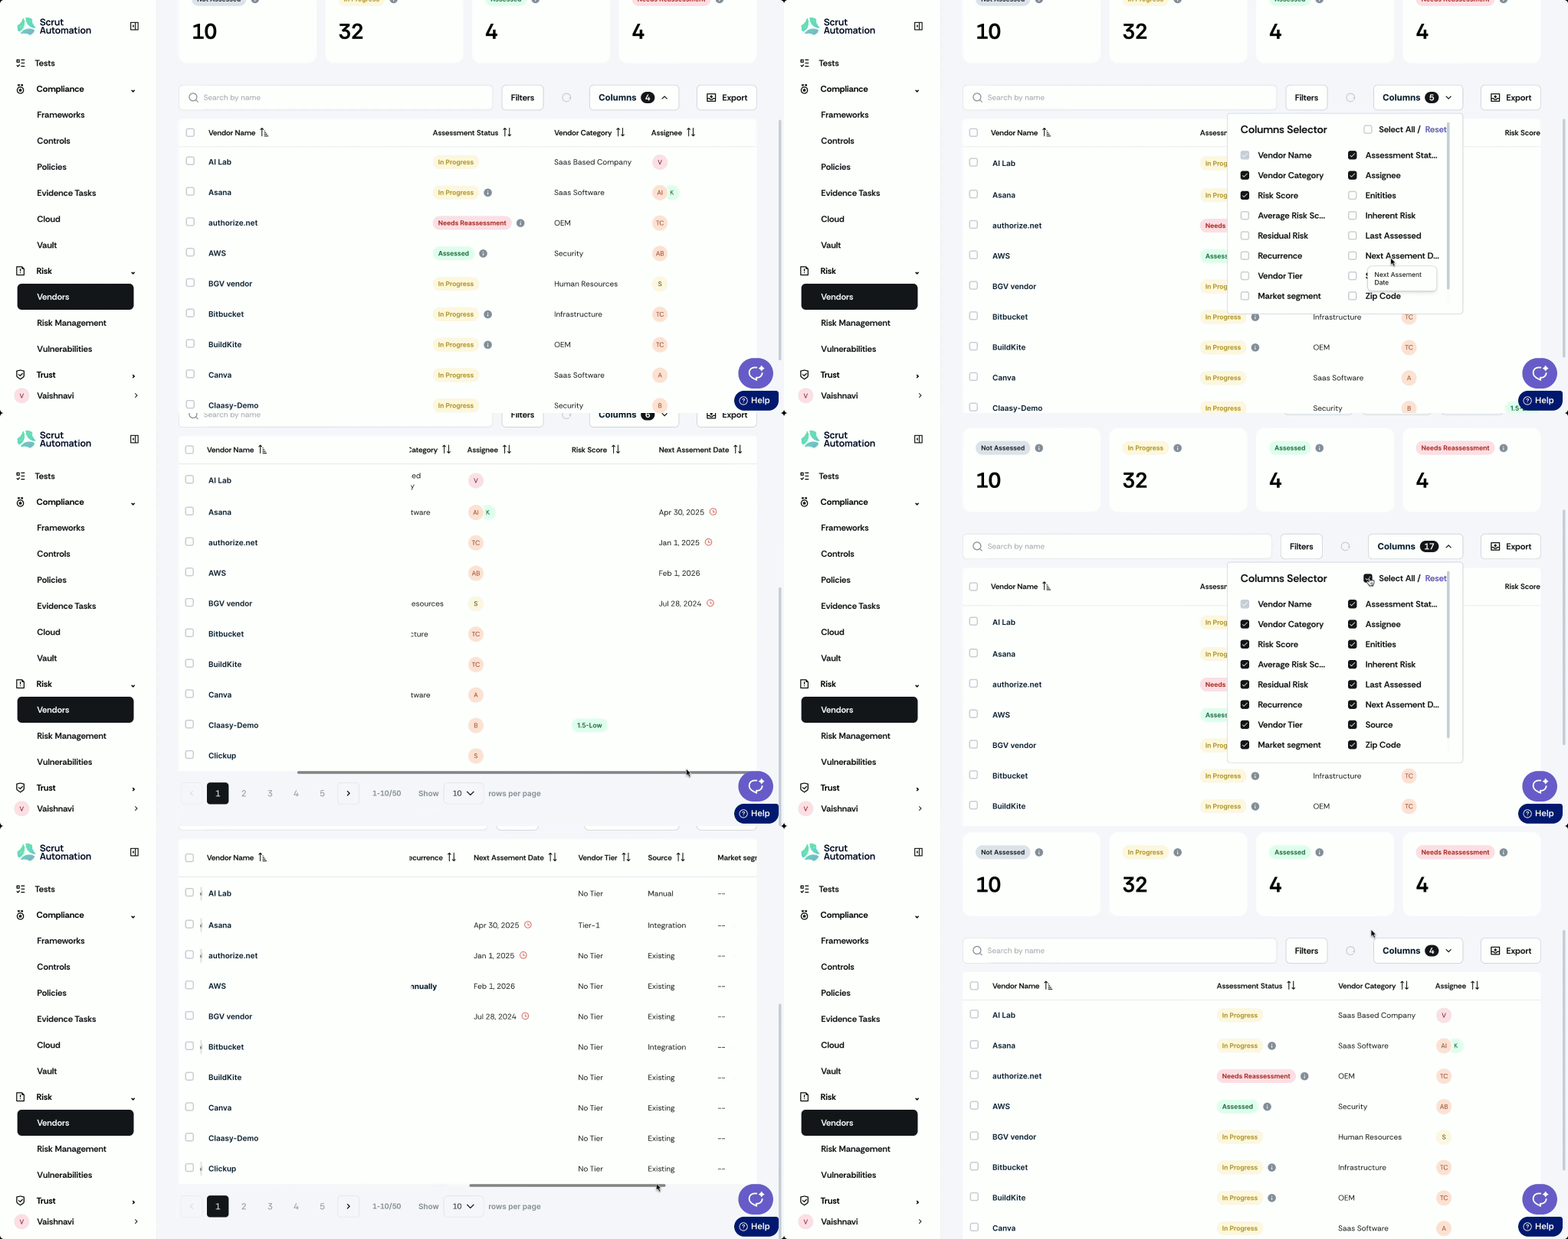
You can customize the data displayed on the vendor table by choosing columns according to your requirements. Click the Columns button to select the columns you want to view here.
Export
Click the Export button to download the vendor table as a CSV file.
Note: Ensure you select the desired columns using the column selector before downloading if you want more information.