

Add Vendors Manually
Who can use this feature
- Supported on Foundation, Growth, and Scale plans
In Scrut, you can add a vendor manually in two ways:
This article guides you through both methods.
Add a Single Vendor
-
Sign in to Scrut and go to Risk → Vendors using the left navigation panel.
-
Go to the Vendors tab, click the Add Vendor button and choose Manually.
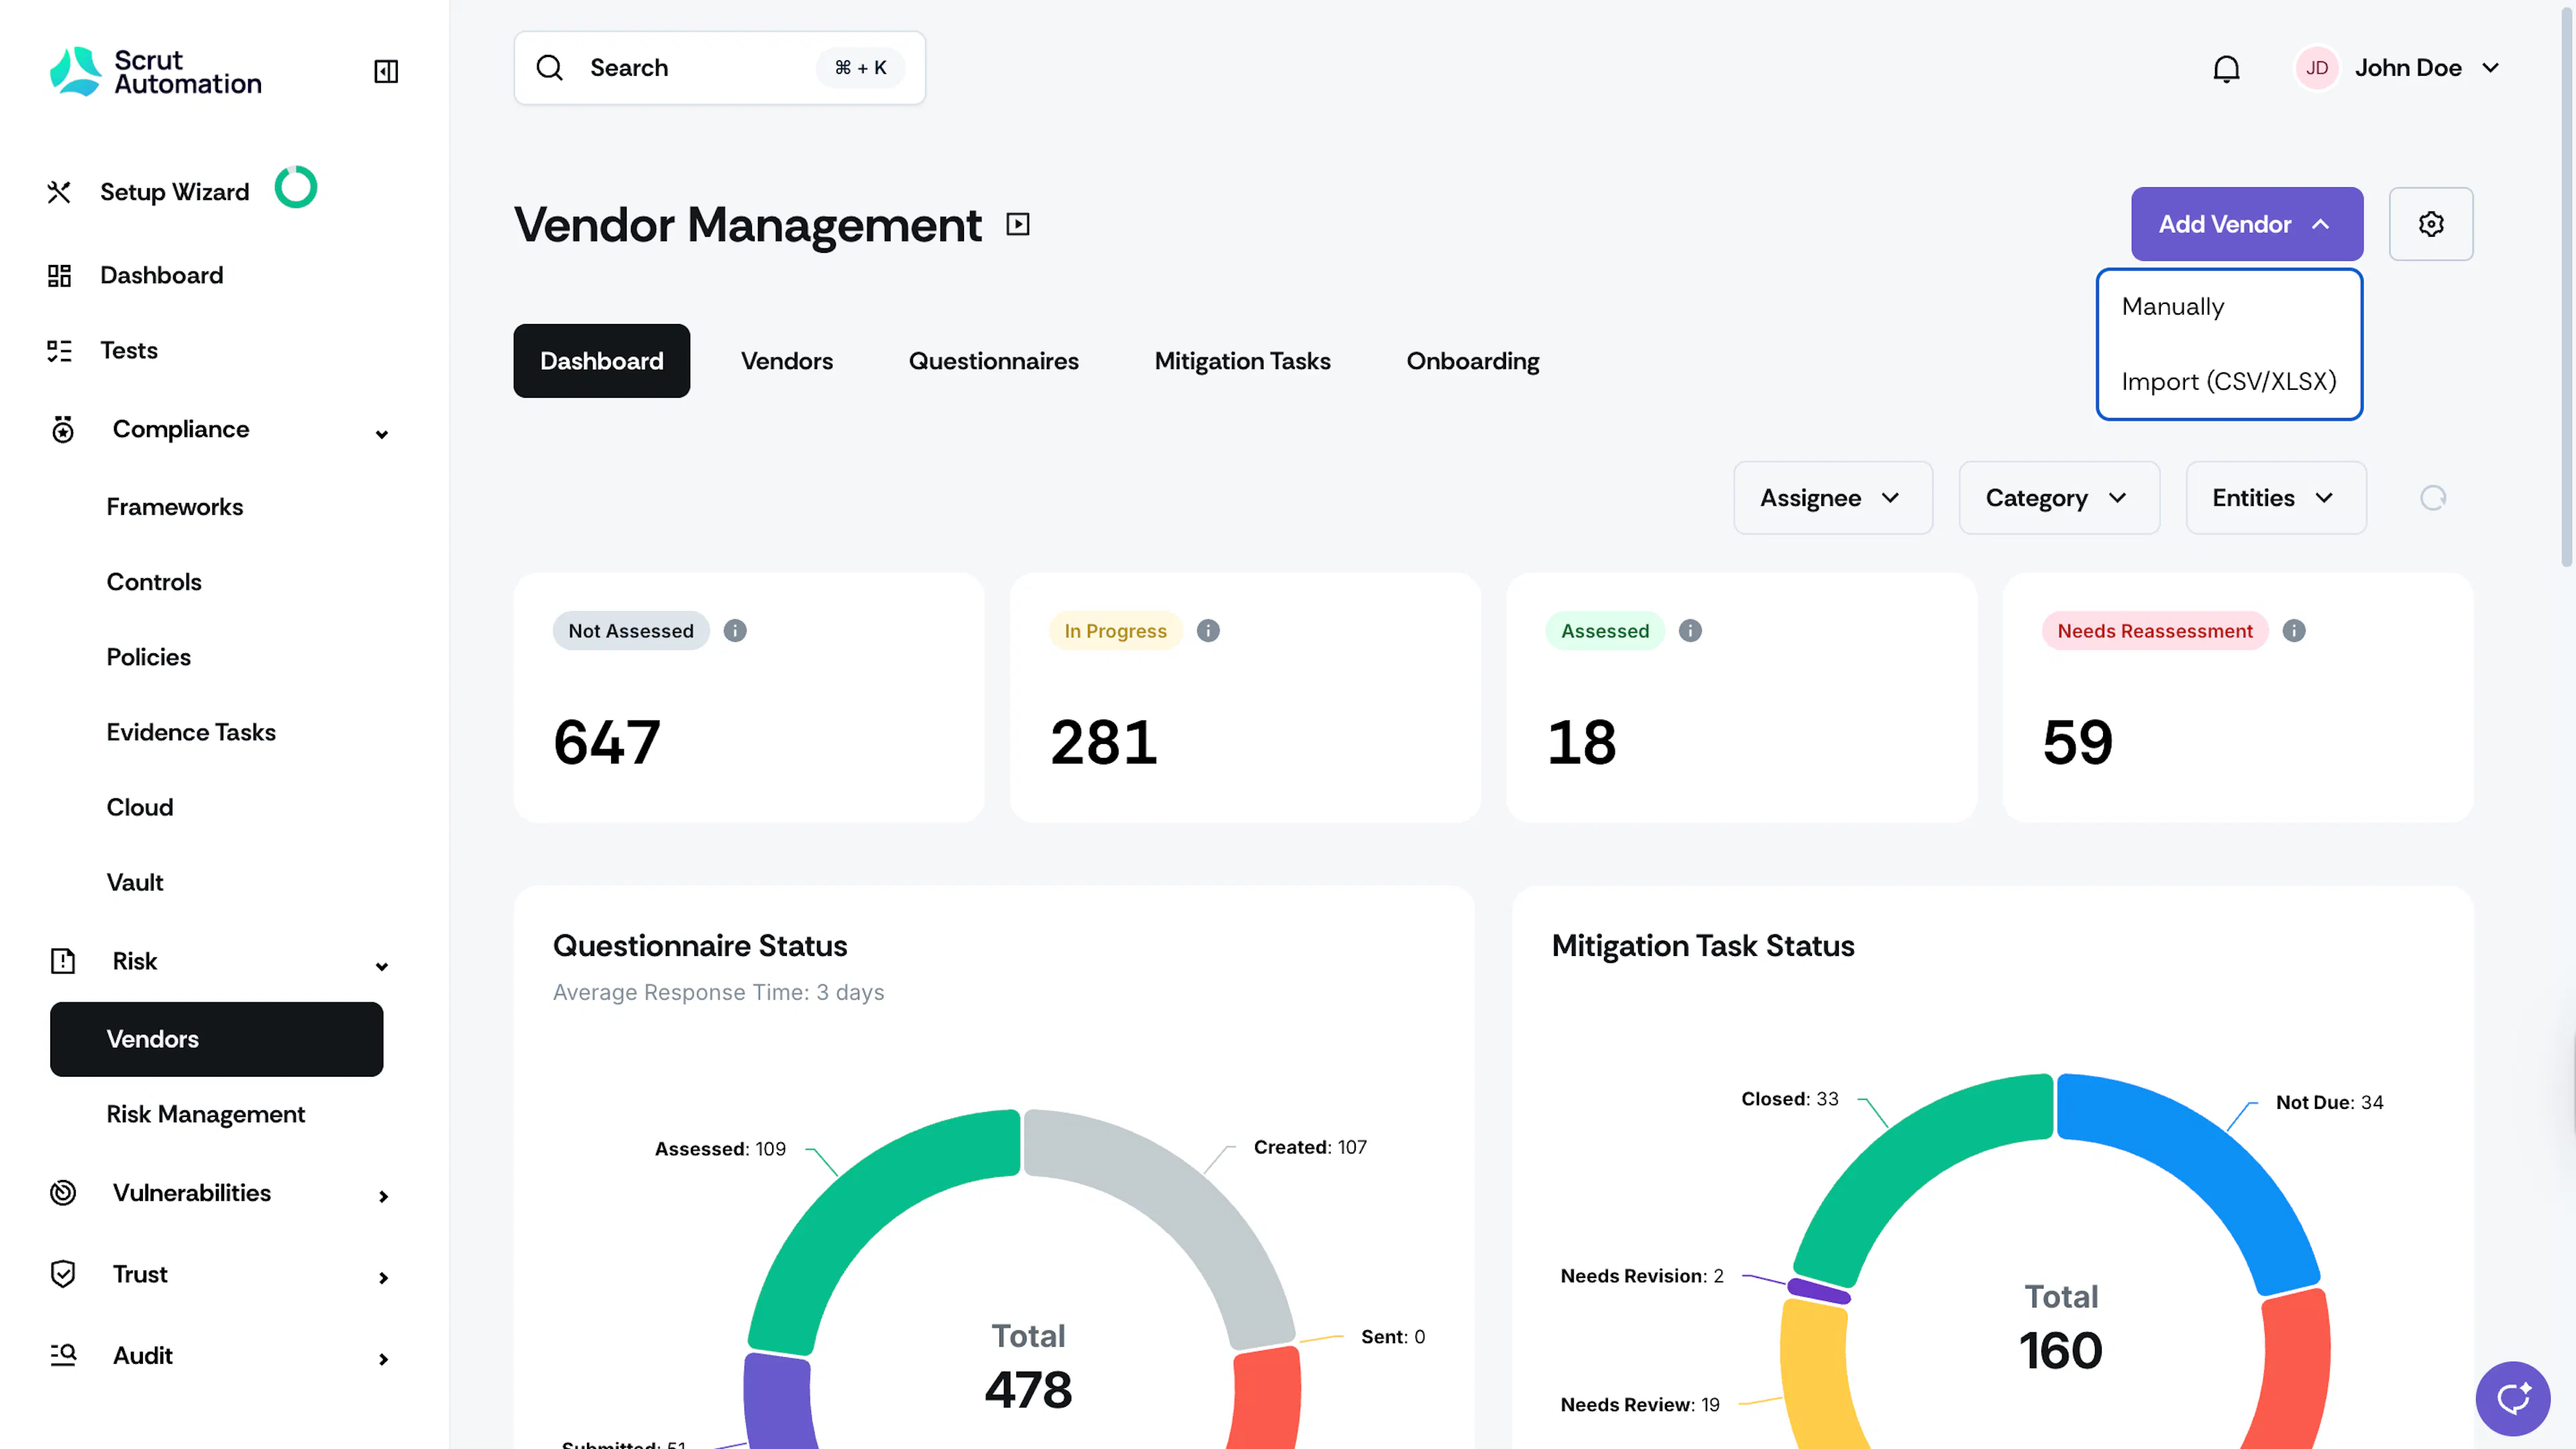
-
The Add Vendor modal opens.
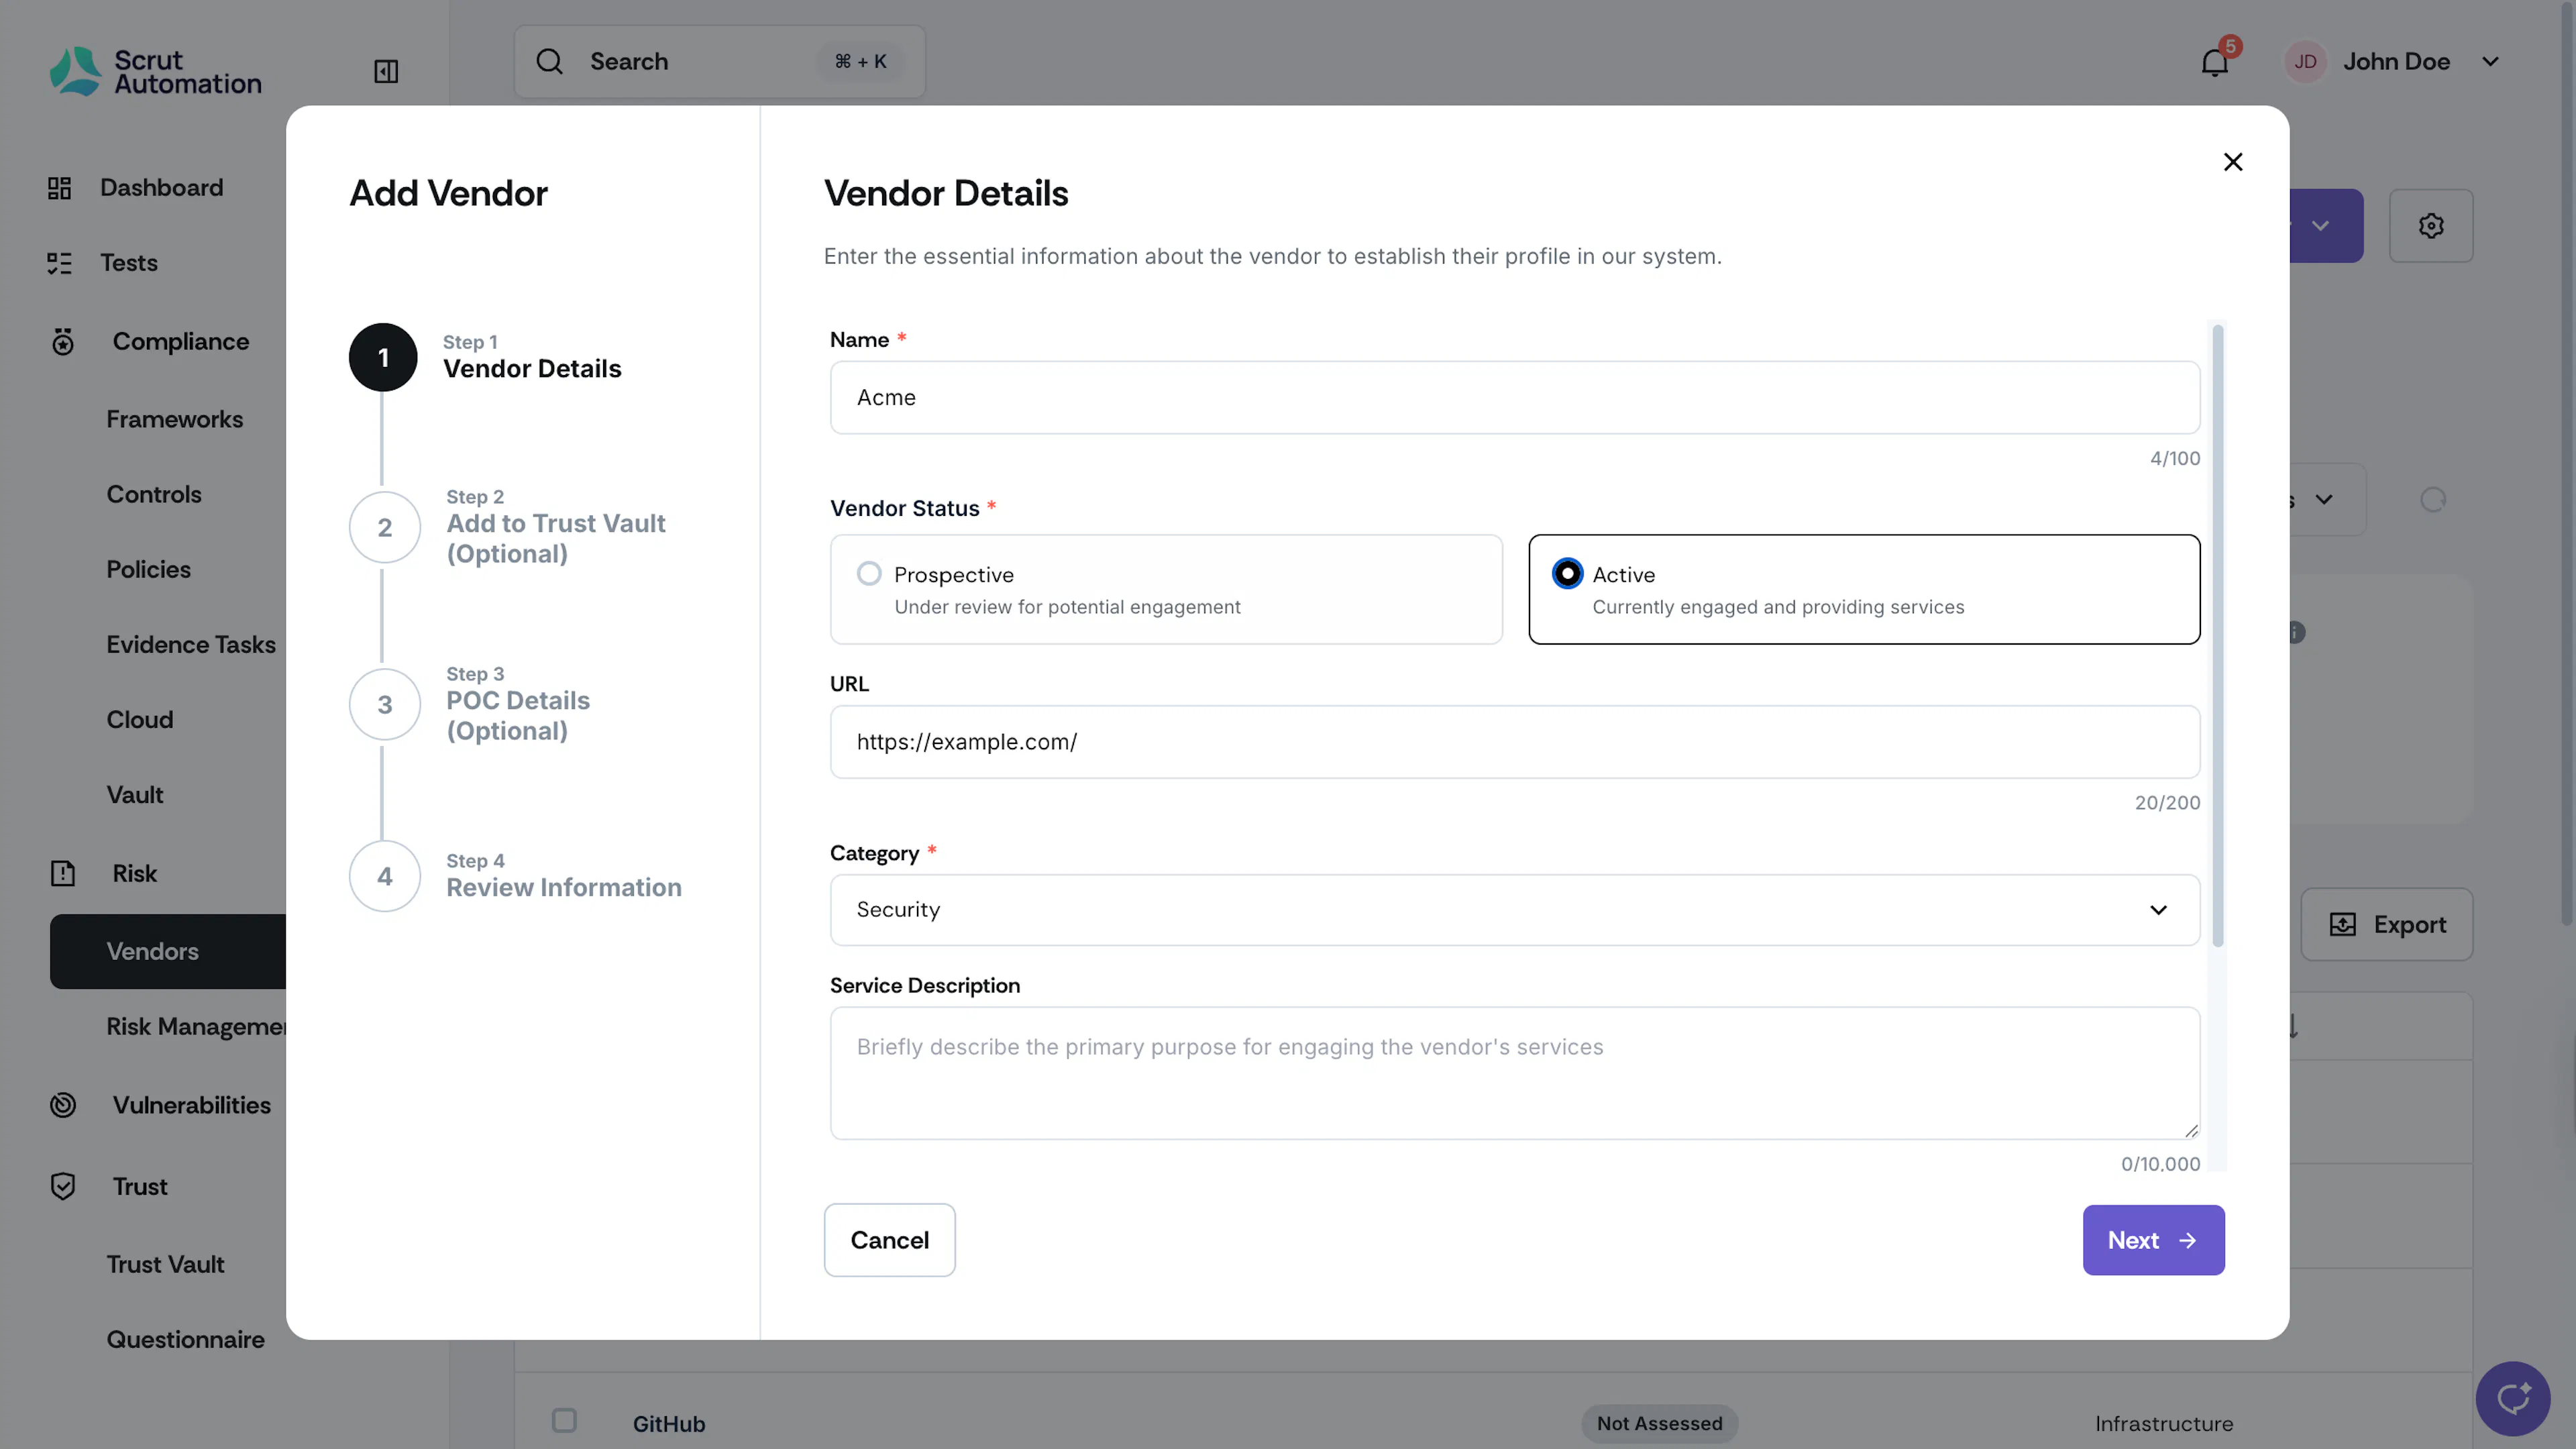
Step 1: Enter Vendor Details
Enter key details about your vendor to create the vendor profile in Scrut.
Vendor Name
Enter the official (or legal) name of the vendor organization.
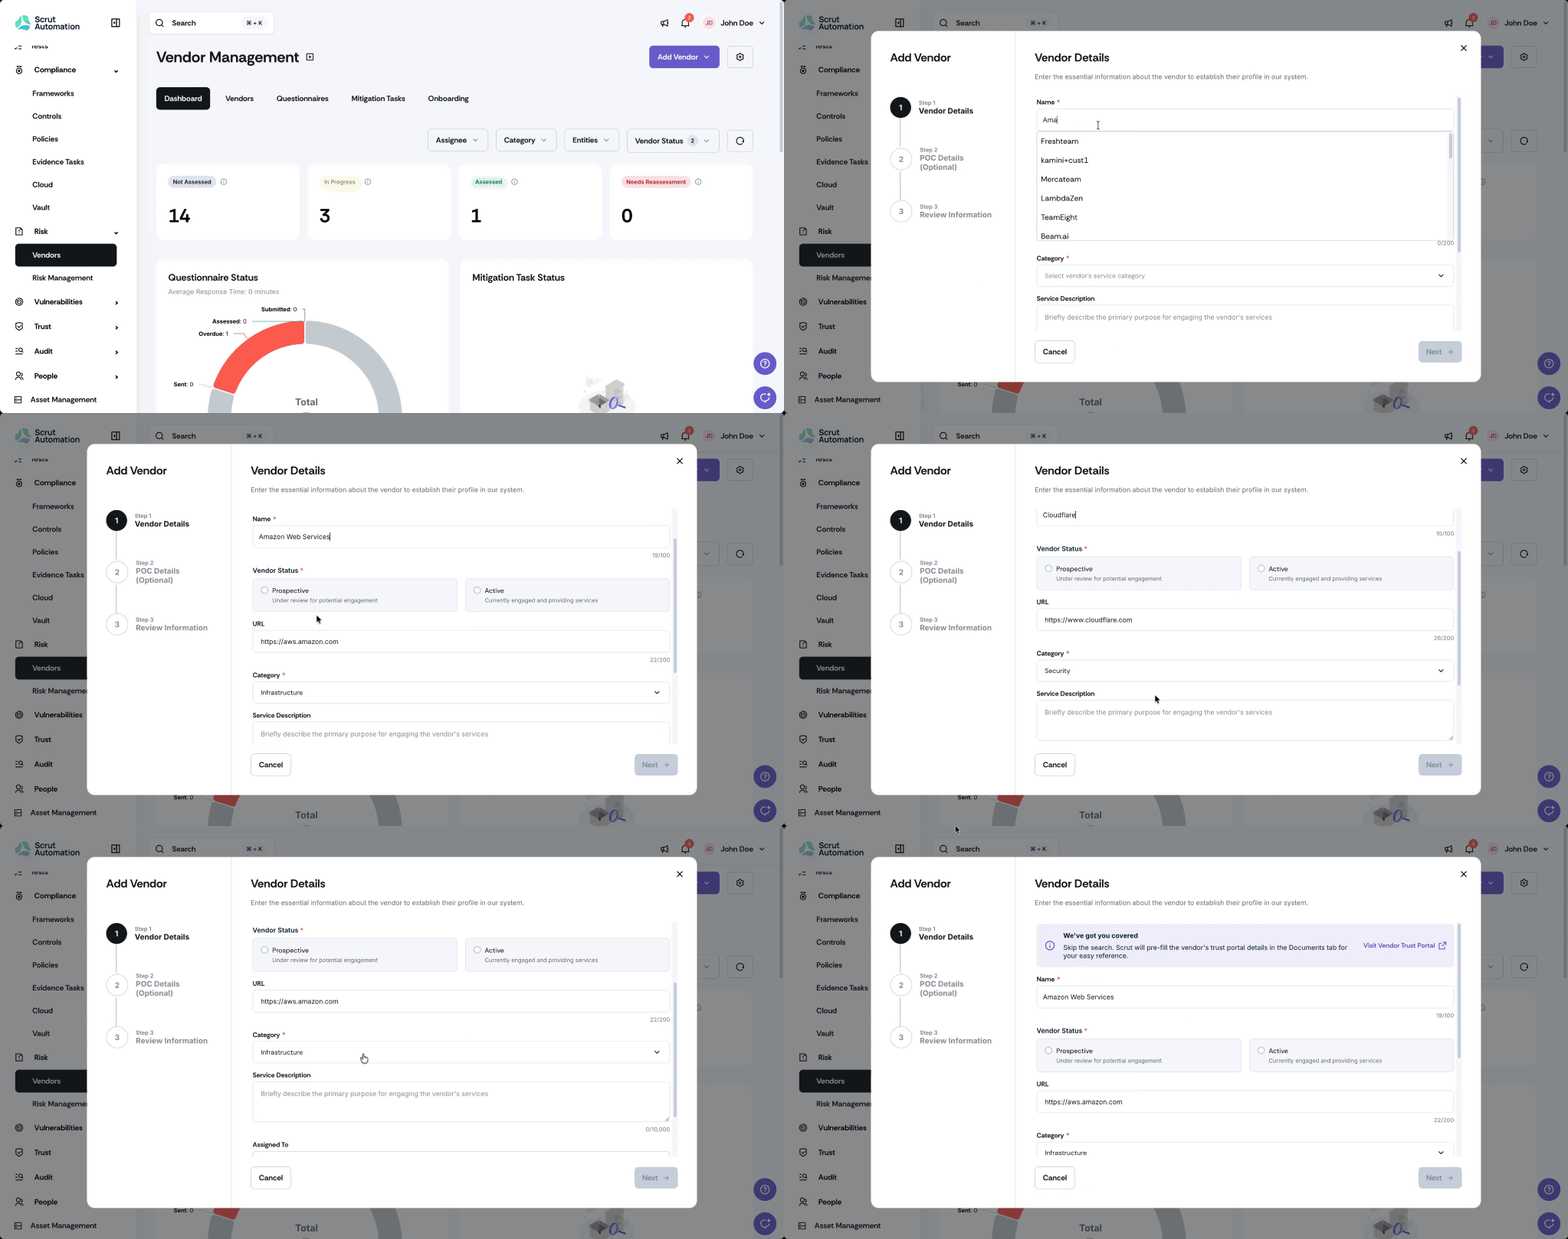
Pro Tip!
When adding a vendor, start typing the vendor name in the Name field. If the vendor is in Scrut's pre-defined list of known vendors, a dropdown will appear with matching suggestions. Selecting a vendor from the dropdown automatically fills in details if available, so you don't have to look them up manually.
Vendor Status
Choose the vendor’s current status:
- Prospective: If you’re currently reviewing the vendor for potential engagement
- Active: If the vendor is currently engaged and providing services
Heads Up!
If you choose the vendor status as “Prospective”, the step to add the vendor to your Trust Vault will not be shown here. However, you can add the vendor as a sub-processor in your Trust Portal later once you move them to the active status.
Vendor URL
Enter the vendor's official website link.
Vendor Category
Select the most appropriate category that accurately represents the vendor's services or products. If the vendor already exists in Scrut’s database, this field will be prefilled.
Service Description
Briefly describe the primary purpose for engaging the vendor’s services.
Assigned To
Select one or more team members responsible for managing this vendor relationship.
Entities
Select the specific entity or business unit within your organization that should be linked to this vendor. Click Next.
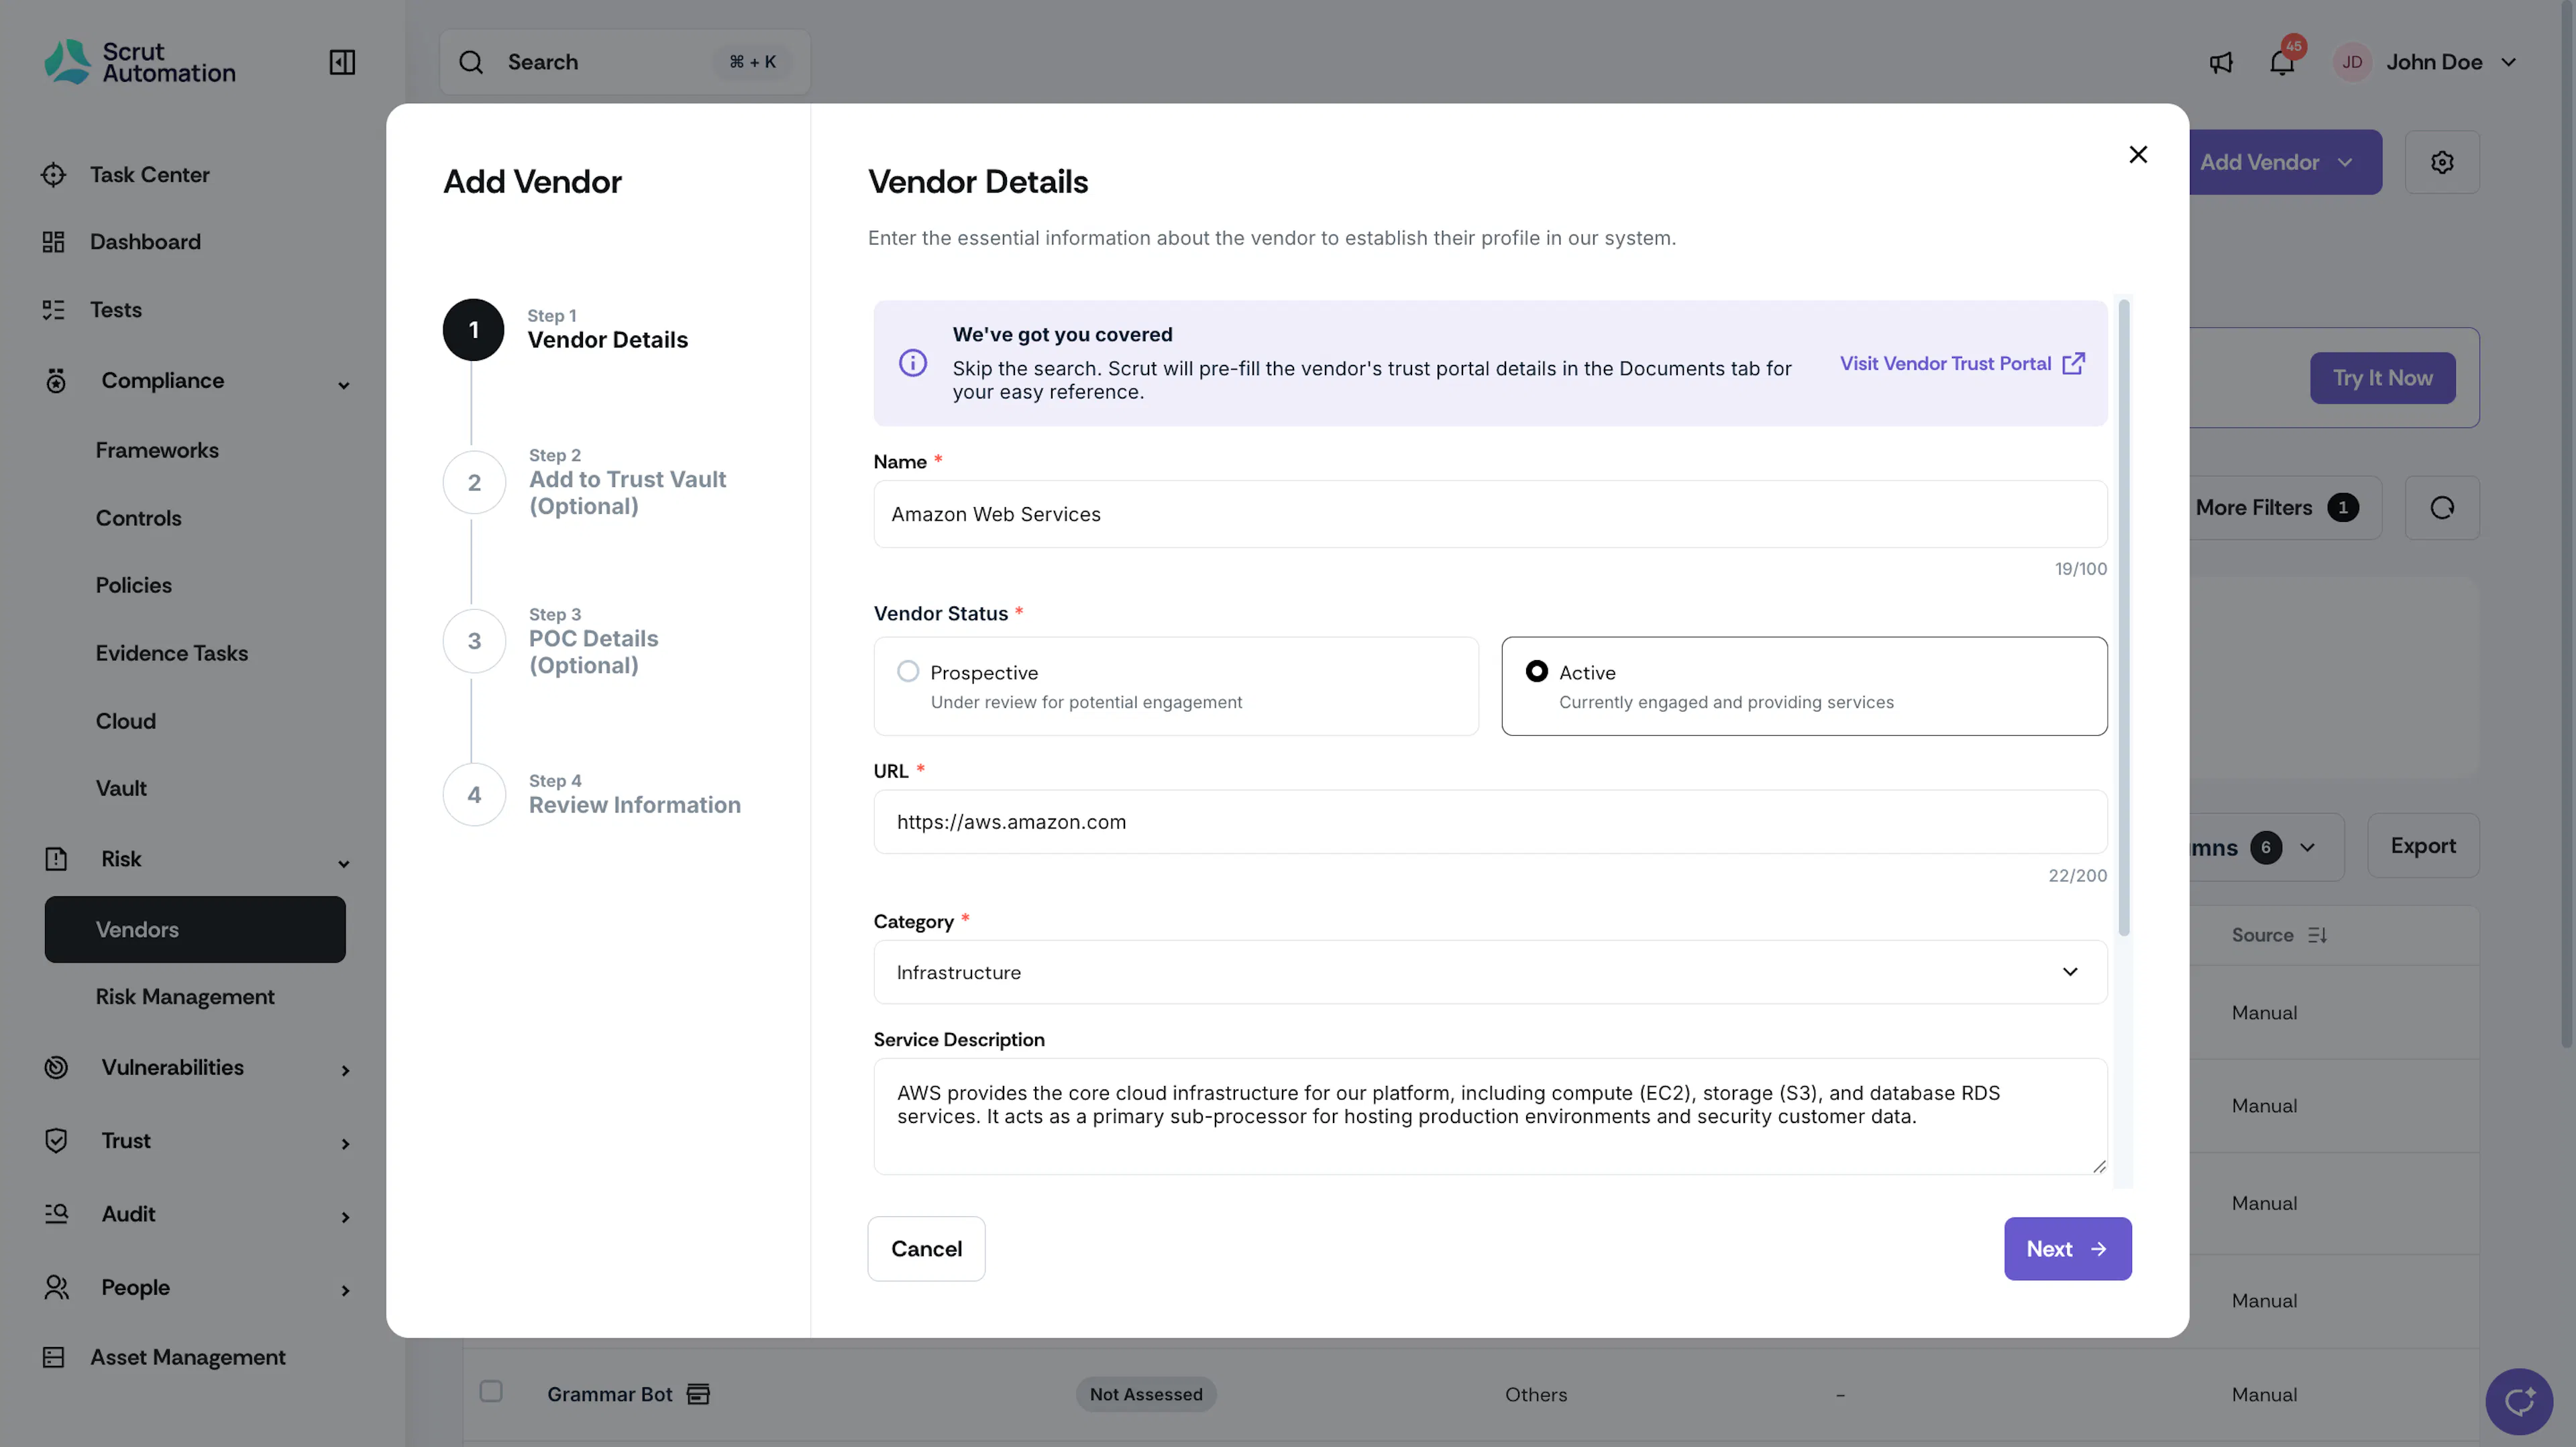
Step 2: Add to Trust Vault (Optional)
This step is optional. If you'd like to showcase the vendor as a sub-processor in the Trust Vault, fill in the relevant details here. However, if you prefer not to include the vendor in the Trust Vault, you can skip this step.
Pro Tip!
Scrut recommends adding vendors to the Trust Vault if they handle sensitive customer data or provide critical services.
- Sub-Processor Name: This name is displayed only in the Trust Vault and doesn’t affect the Vendor Name.
- Sub-Processor Website: Enter the official URL of the sub-processor.
- Location: Specify the sub-processor's location. This is important for compliance with regional data protection regulations.
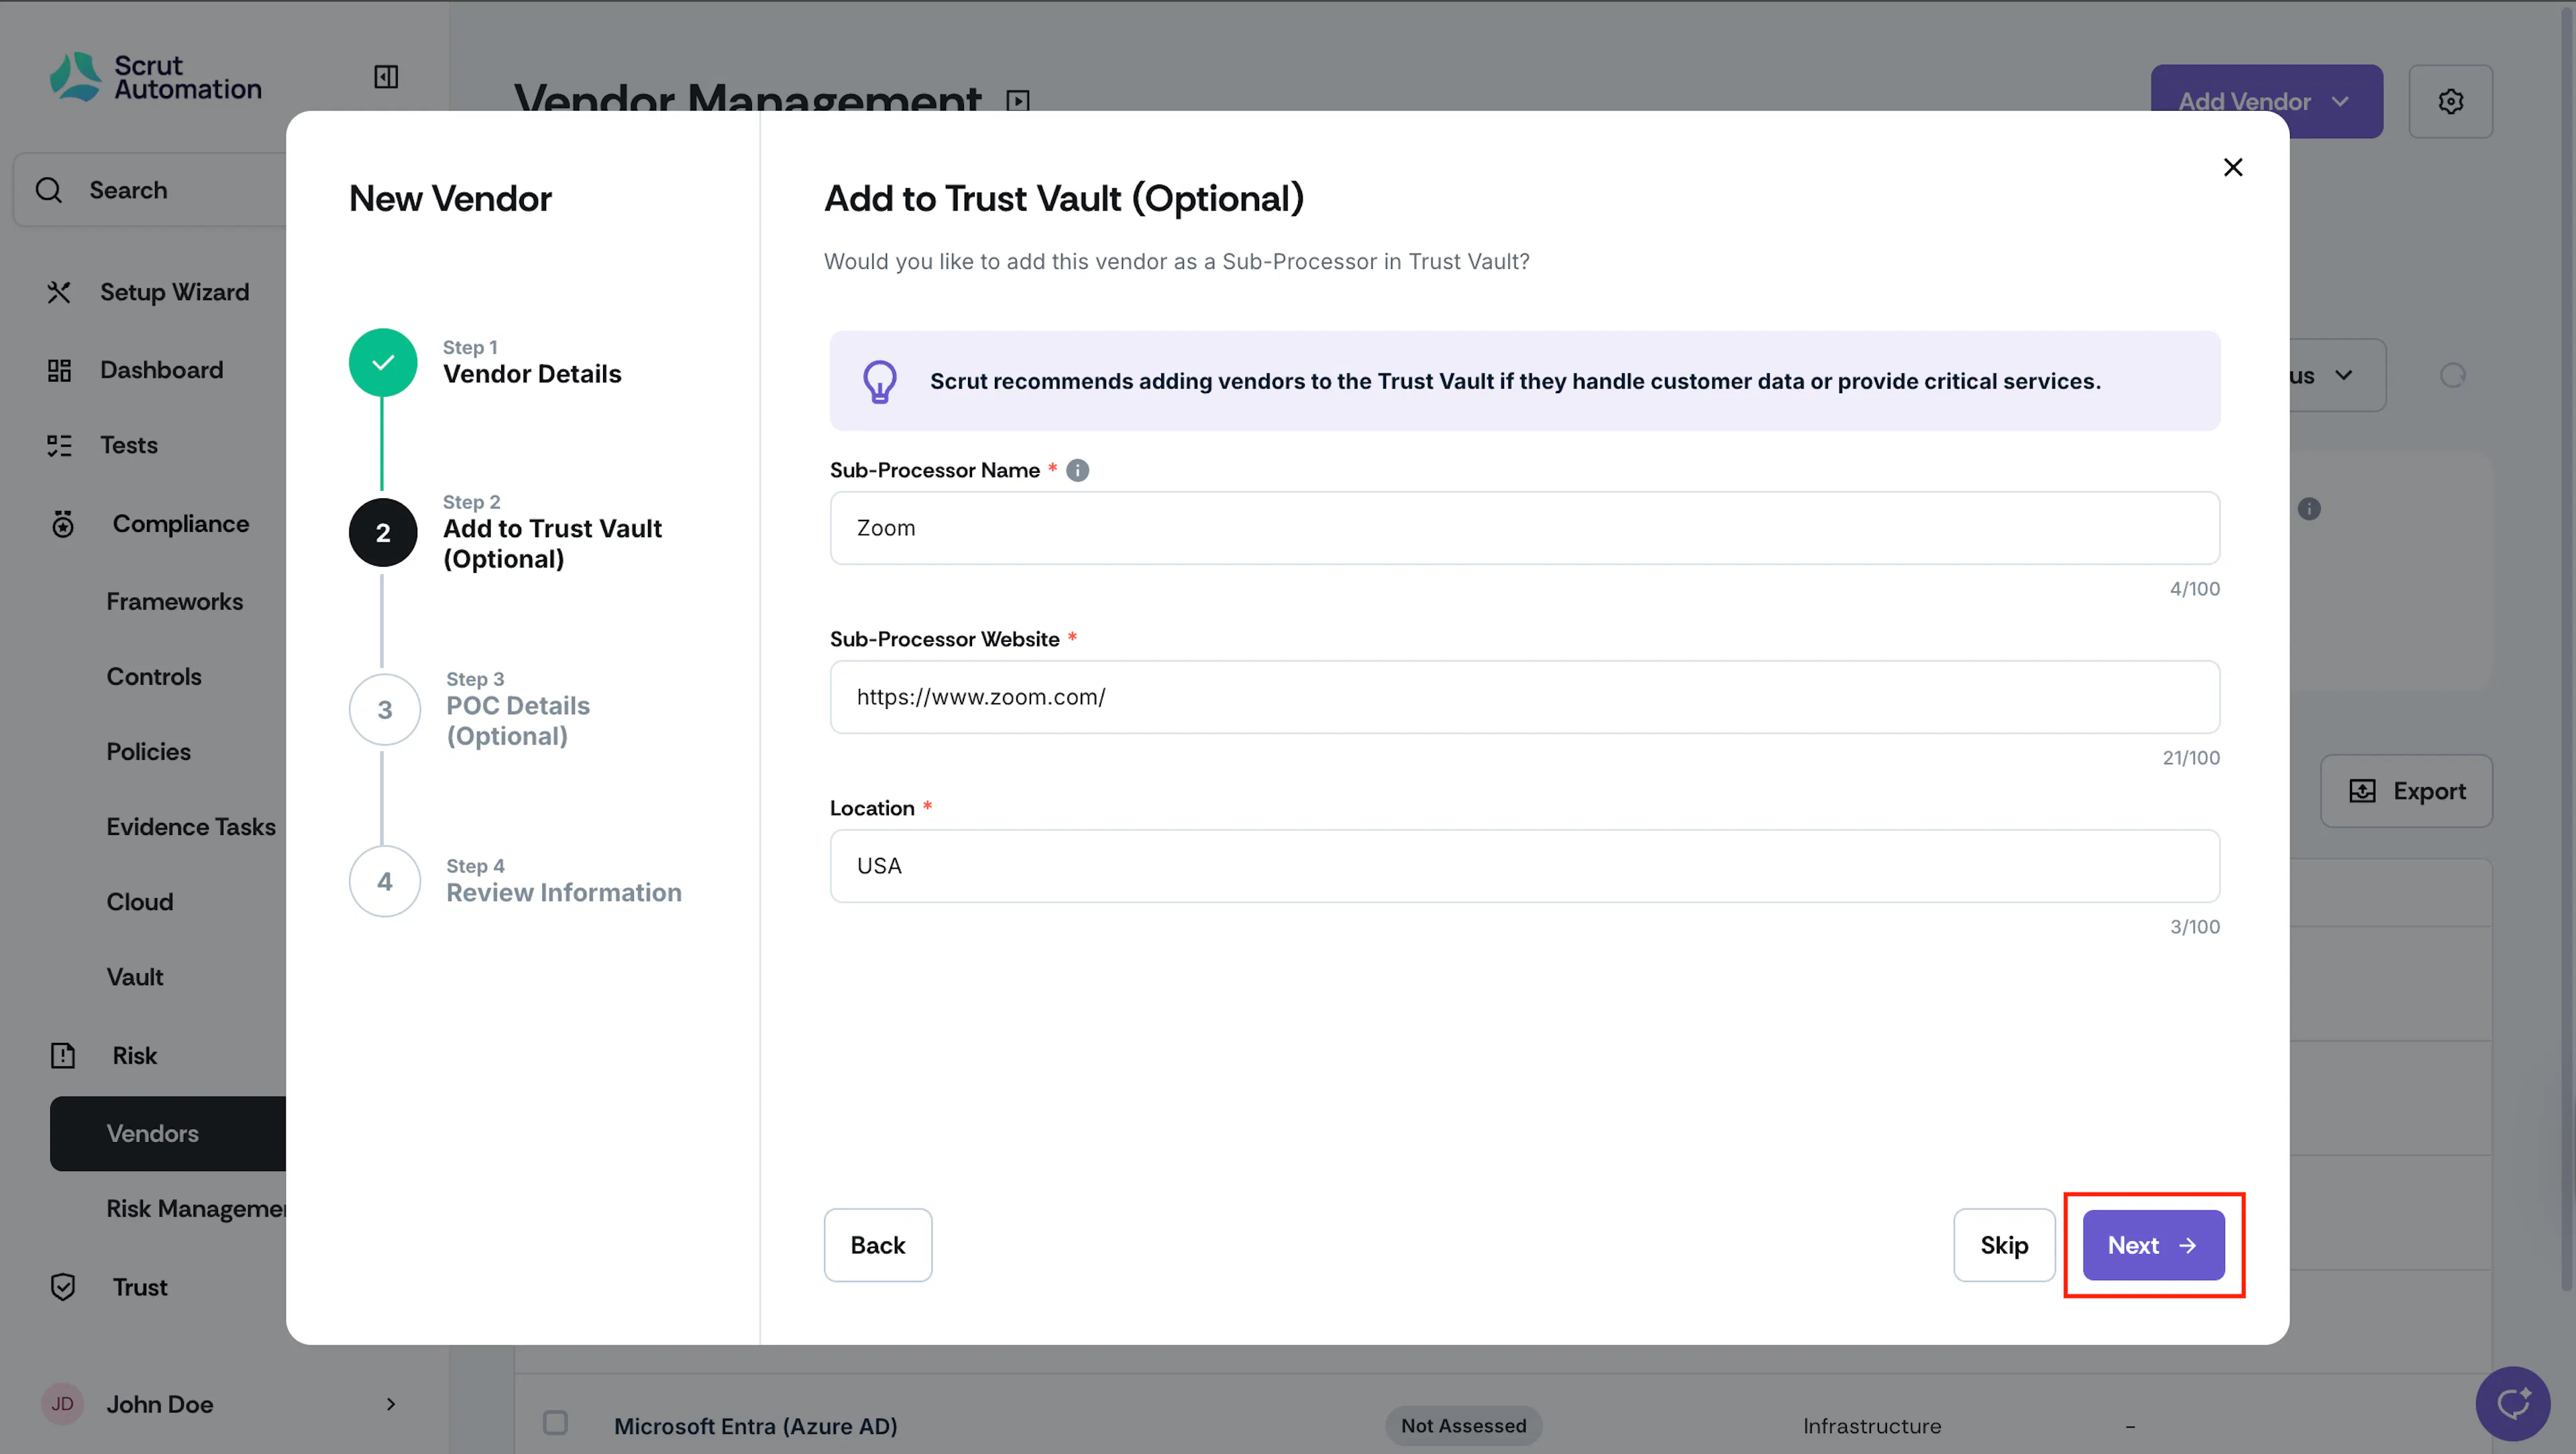
Note:
Adding the sub-processor details here will automatically make the sub-processor visible on your Trust Vault. Head to the Trust Vault page to modify the sub-processor description and logo.
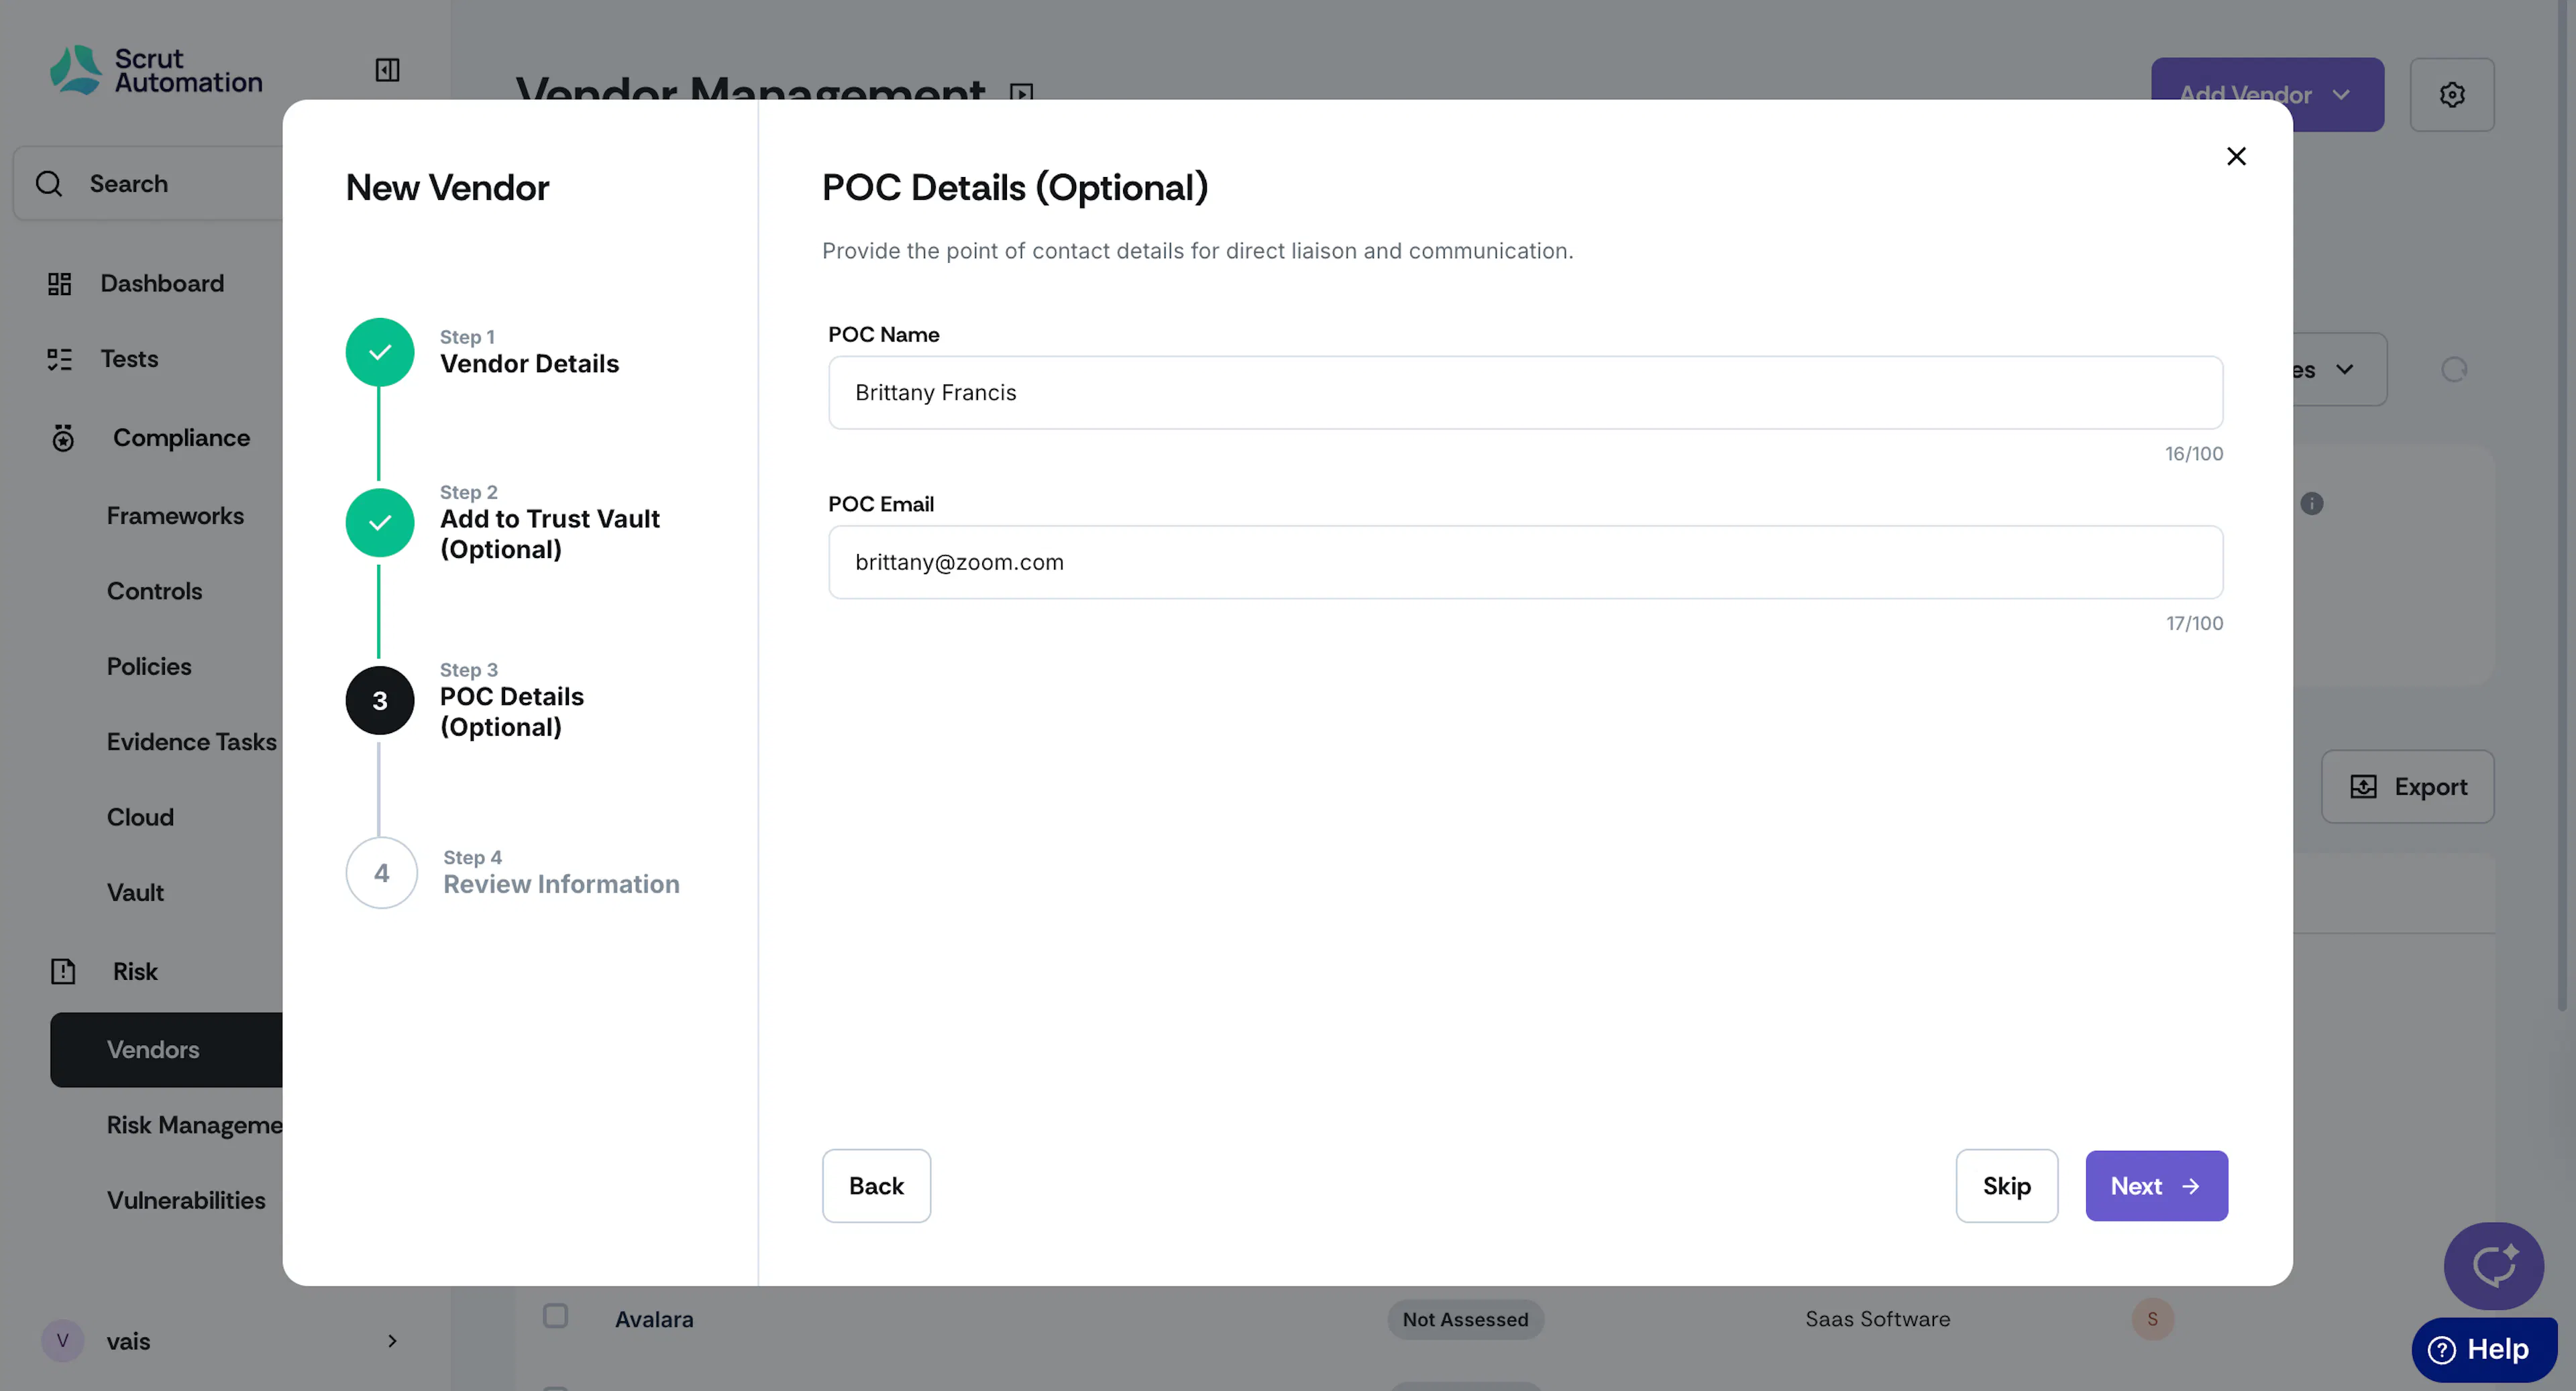
Step 3: Enter POC Details
In this step, provide the vendor's contact details. Ideally, the Vendor POC is the person on the vendor’s team to whom you send the vendor questionnaire. This part is optional. If you don’t have the contact information, you can skip it and add it later.
- POC Name: Enter the first and last name of the contact.
- POC Email: Enter the work email of the contact.
Click Next.
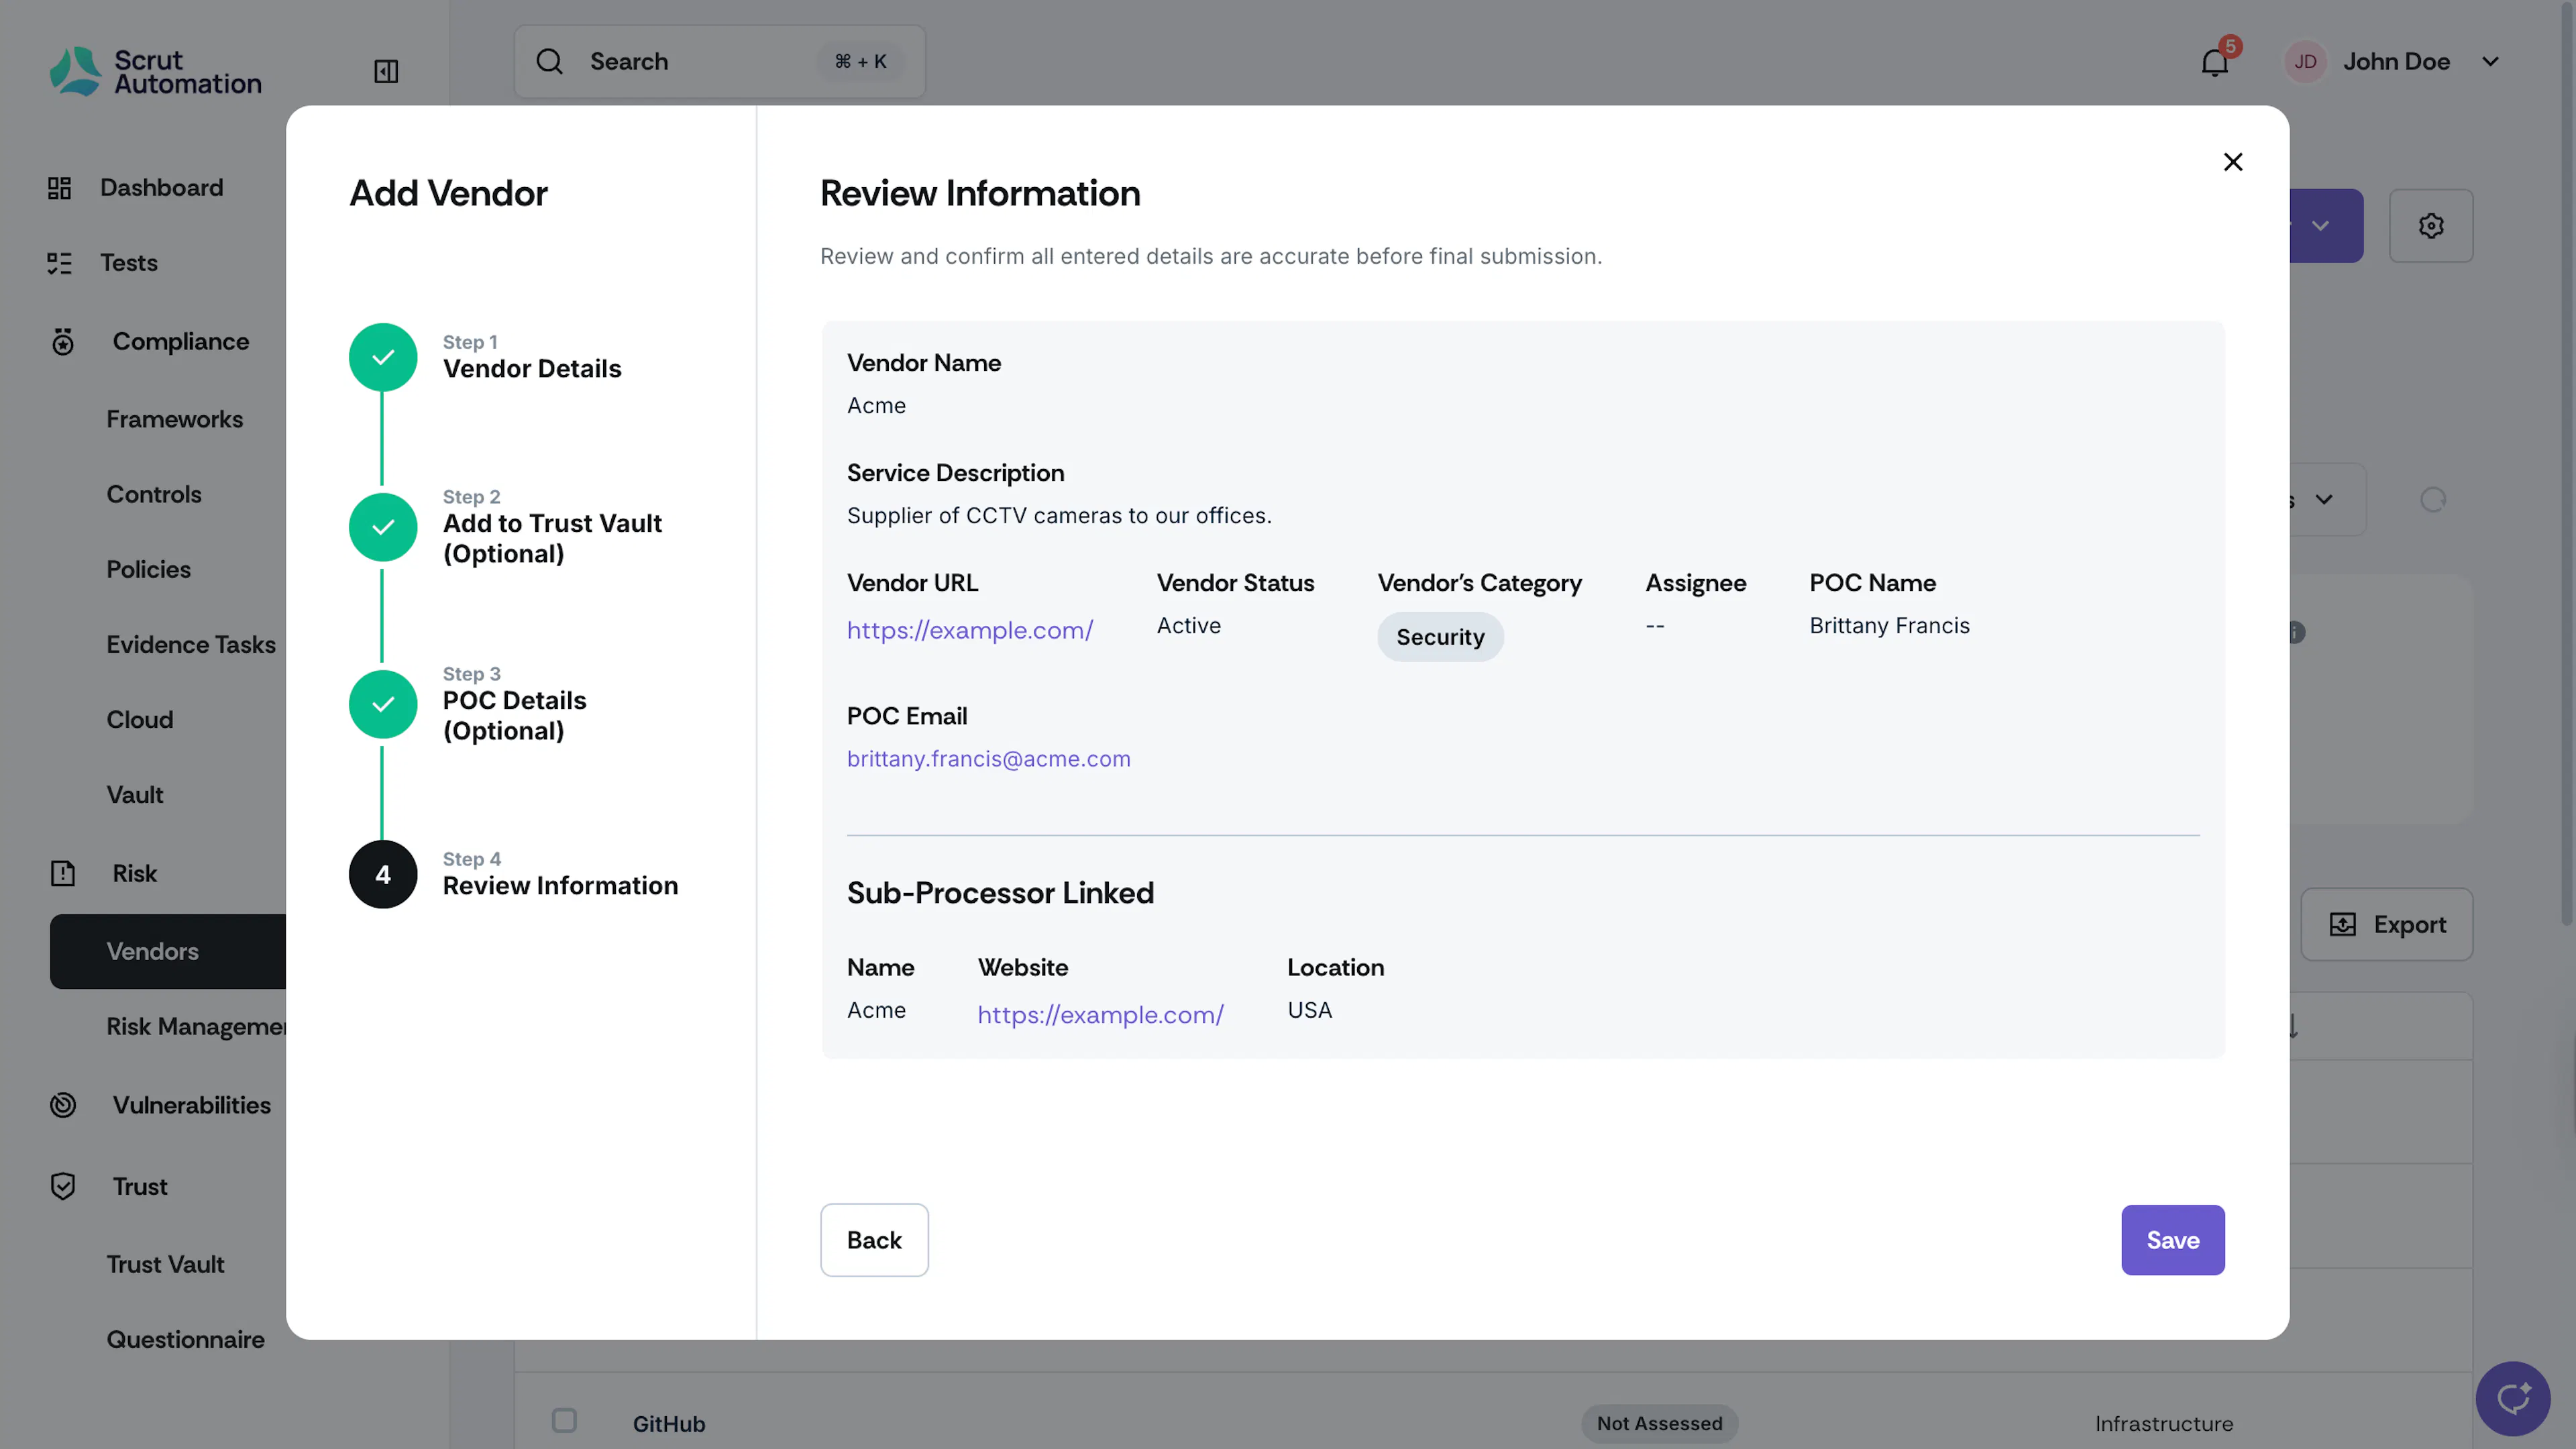
Step 4: Review Information
The final step is to review the information you entered in the previous steps. If you want to make any changes, click Back to return to the relevant step. Click Save to finish creating the vendor.
Bulk Import Multiple Vendors
Scrut also allows you to bulk import multiple vendors via a CSV or XLSX file.
-
Sign in to Scrut, and go to Risk → Vendors using the left navigation panel.
-
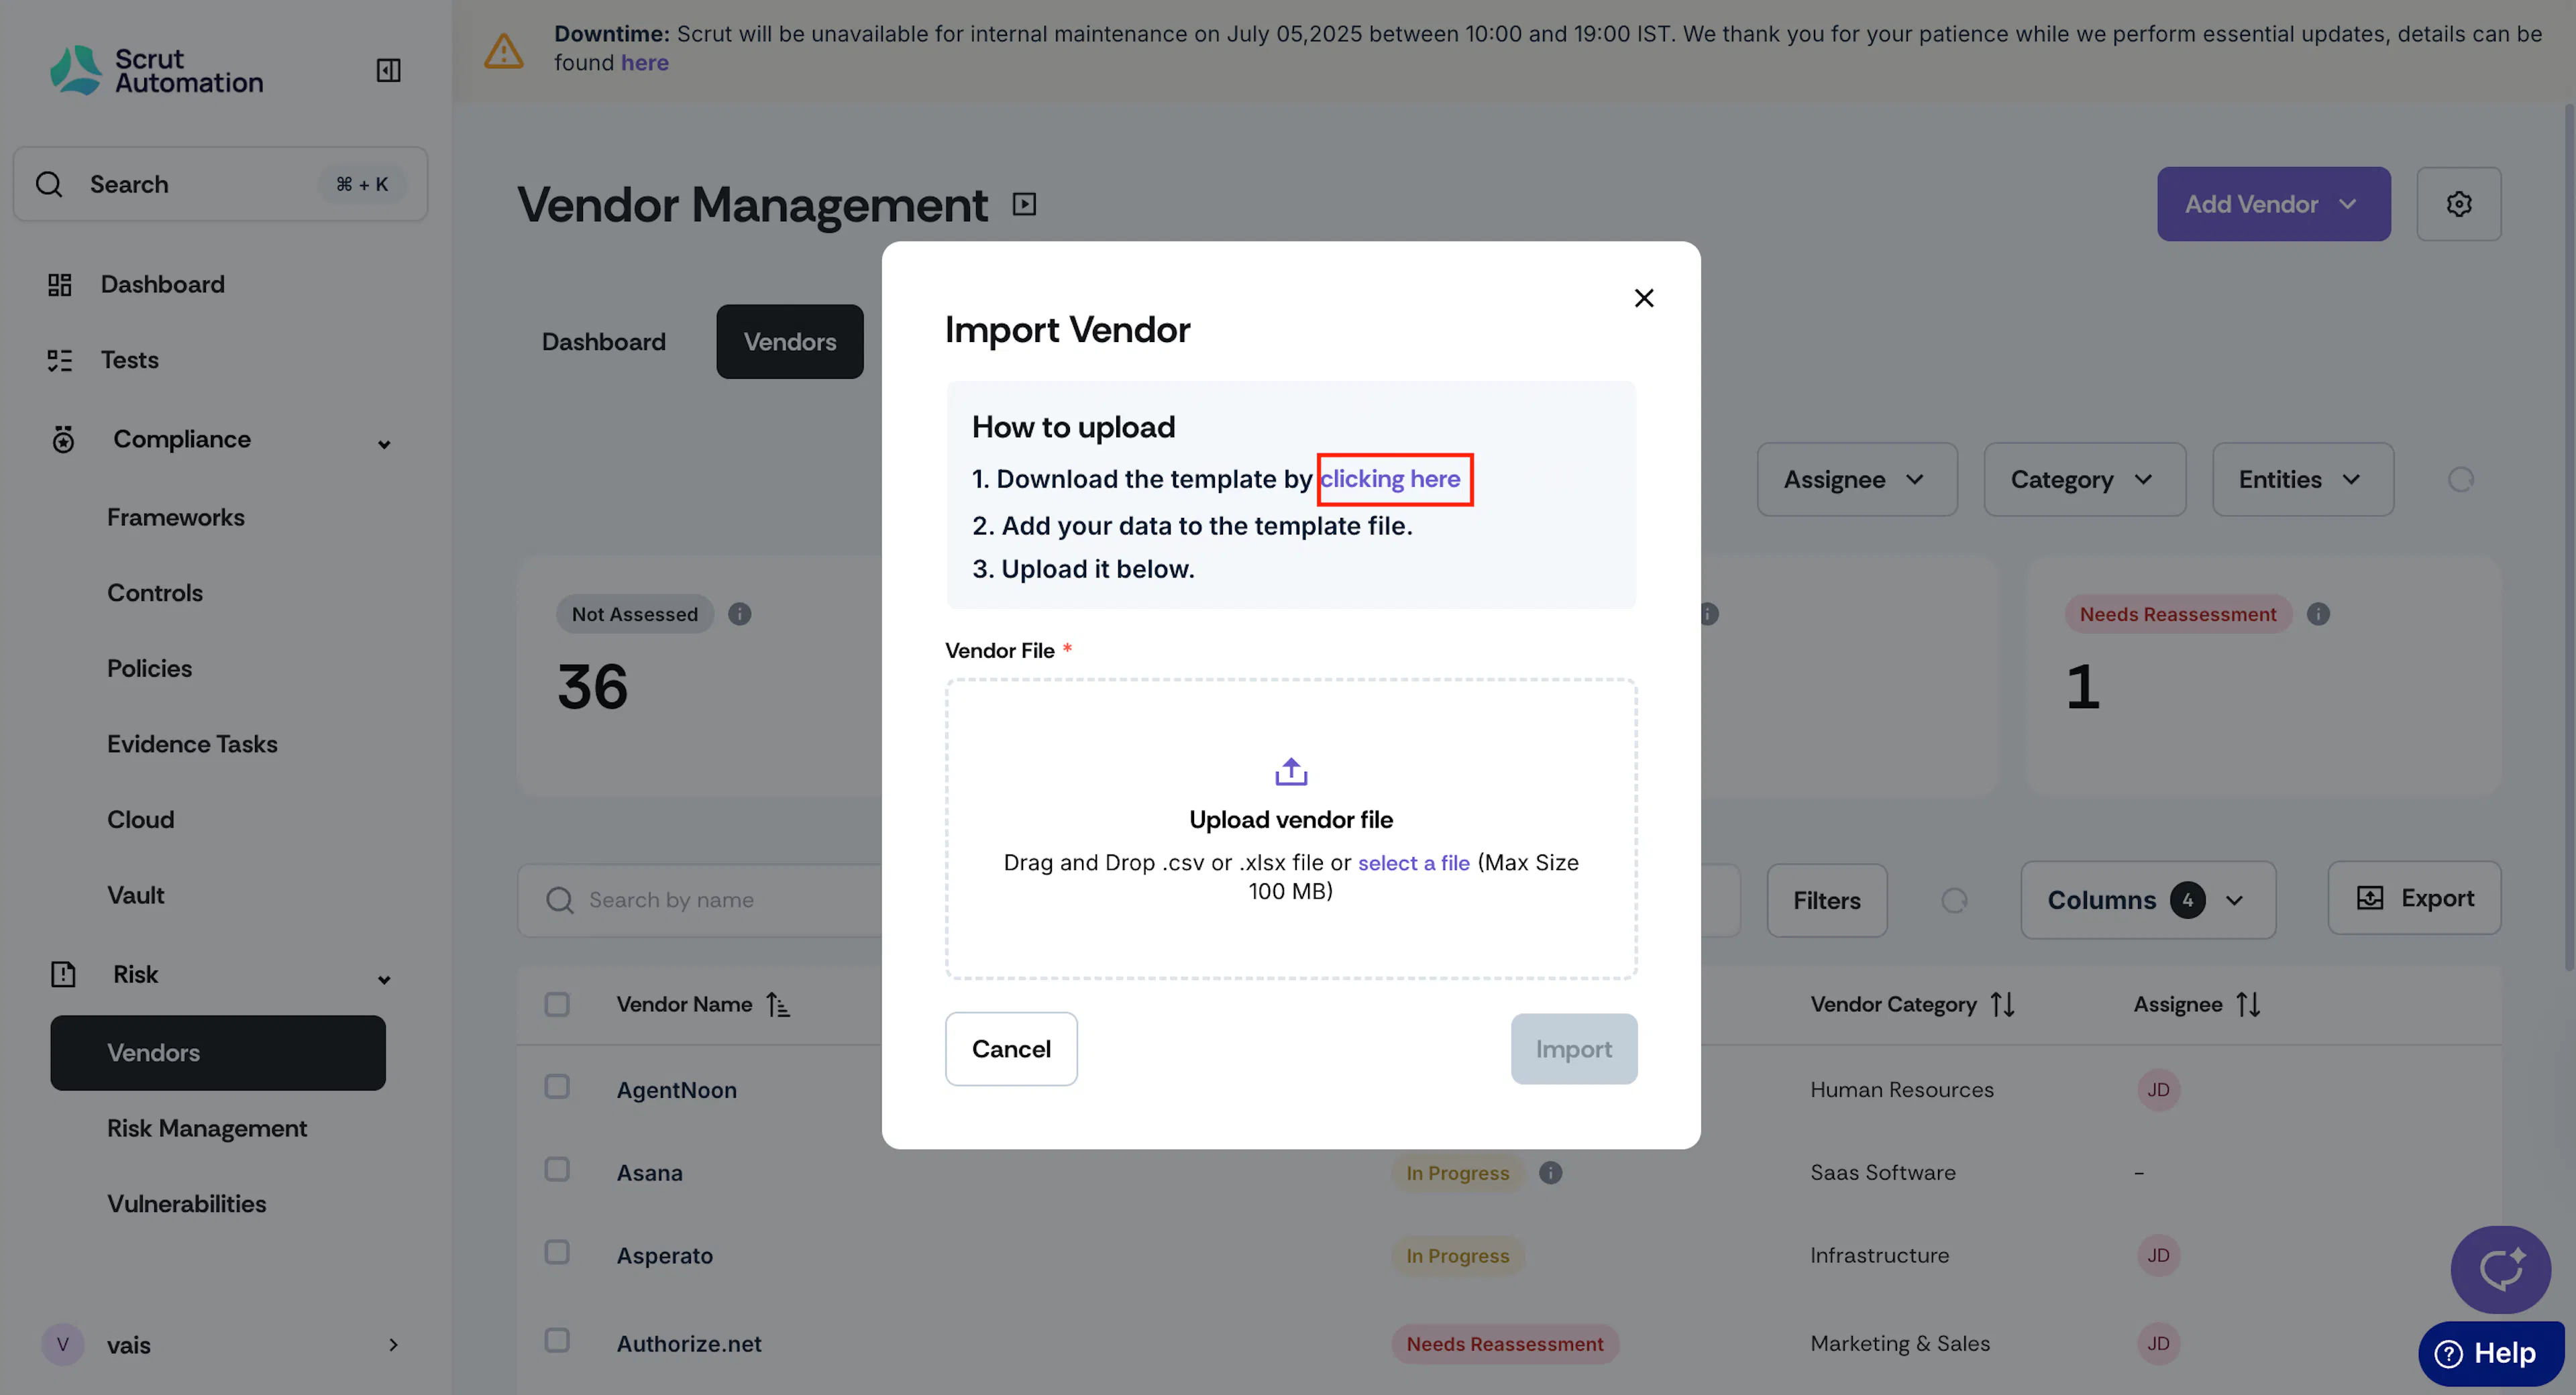
Go to the Vendors tab, click the Add Vendor button, and select Import (CSV/XLSX).
-
Download the template from the Import Vendor window.
-
Replace the contents of the template file with details of your vendors.
Pro Tip!
Refer to this section for detailed instructions on how to use the Import Vendor template.
-
Drag and drop the template file into the File field, or click to upload it manually.
-
Click Import.
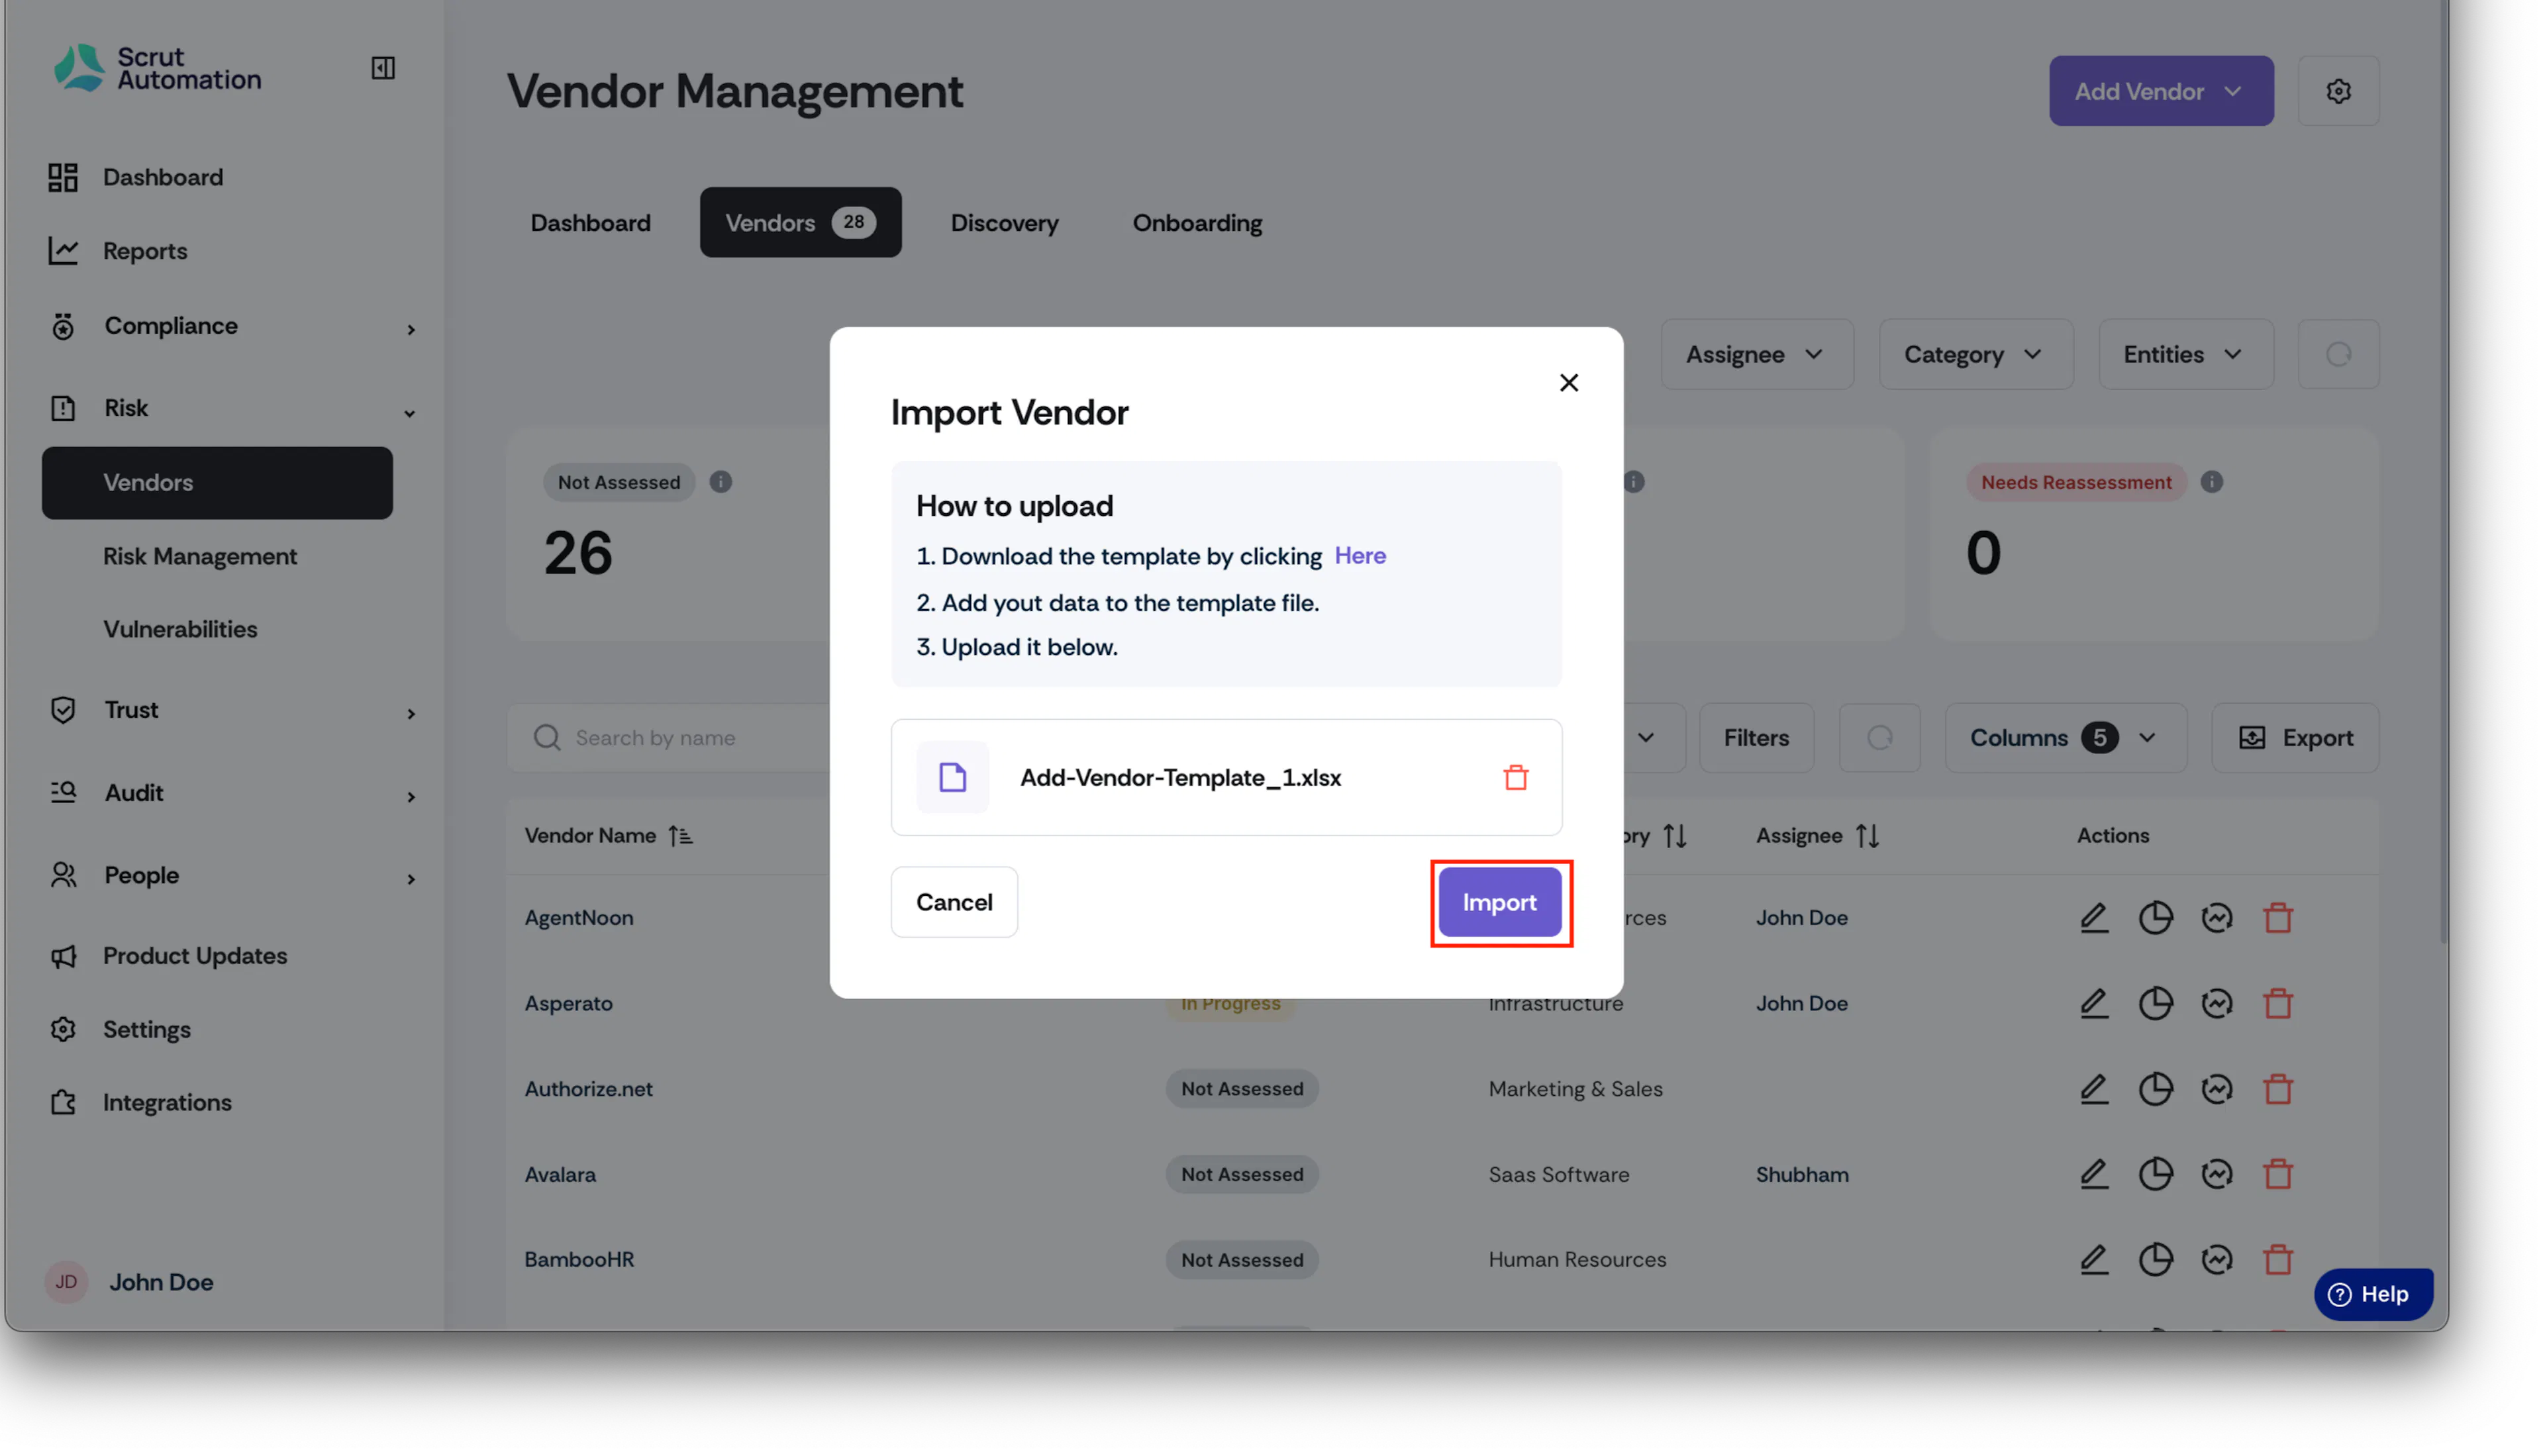
Scrut processes the file and imports your vendors.
Note:
- The import succeeds only when all entries are valid. If any error exists, the import will fail with an error message.
- Rectify the template and retry.
- If errors persist, reach out to support@scrut.io for assistance.
Tips for Using the Import Vendor Template
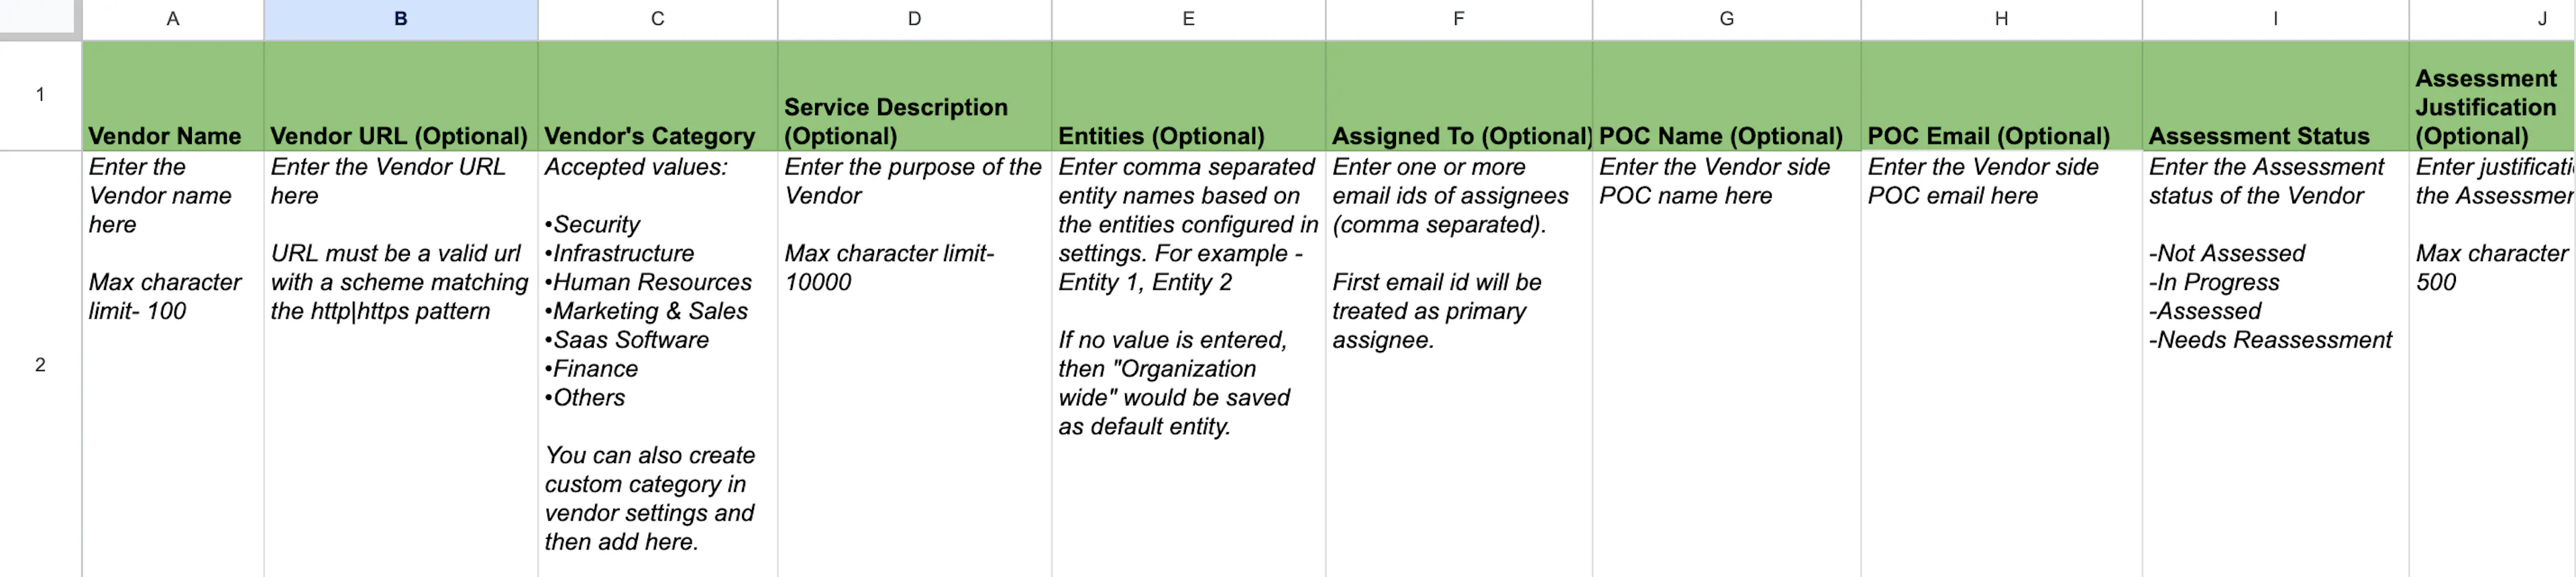
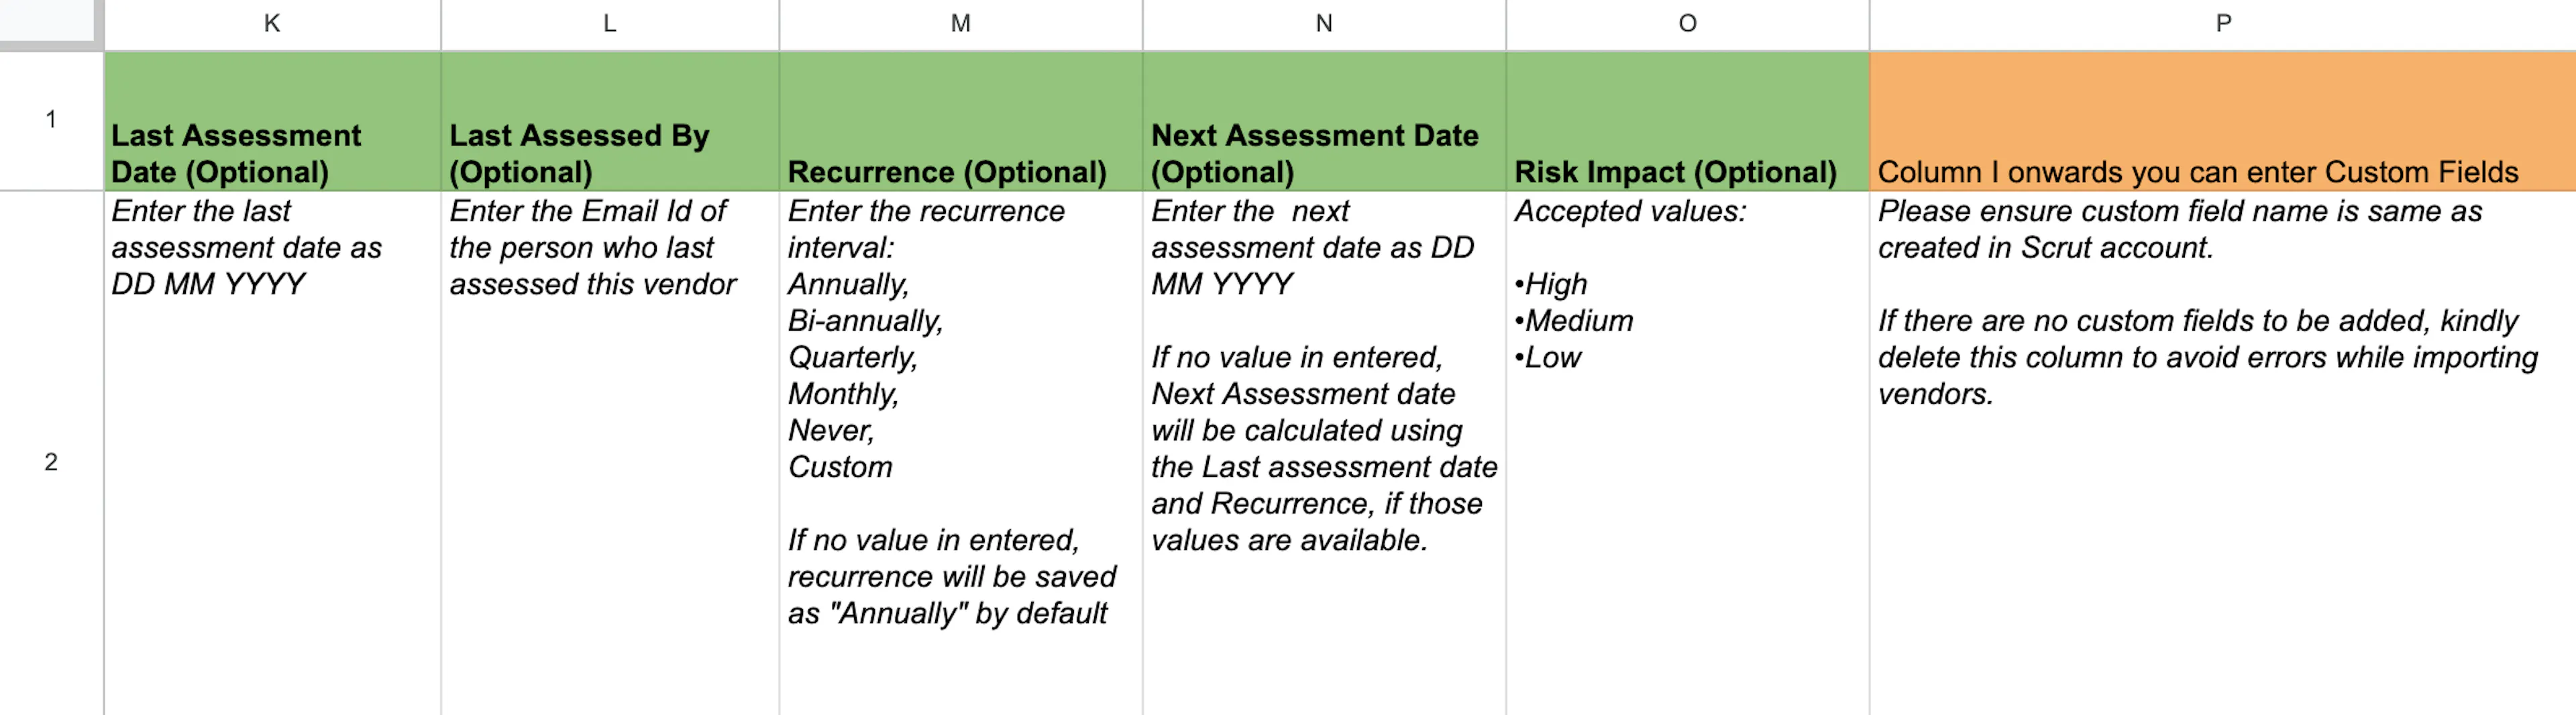
- Do NOT remove the first row, as it contains column headers. Scrut requires this information to import vendors accurately.
- Refer to the descriptive content in the second row to know the data format and accepted values for each column.
- Include each vendor in a separate row.
- Vendor Name (Column A), Vendor’s Category (Column C) and Assessment Status (Column I) are mandatory; all other fields are optional.
- Avoid using extra formatting, such as background colors, when entering vendor details in the template.
- Once you’ve finished entering all vendor details, delete the second row.