Edit, Delete or Mark a Control Out of Scope
Who can use this feature
- Supported on Foundation, Growth, and Scale plans
Scrut makes editing, deleting, or marking a control out of scope easy with our intuitive Controls dashboard. In this article, learn how to:
- Edit a Single Control
- Edit Multiple Controls
- Delete a Single Control
- Delete Multiple Controls
- Mark a Control as “Out of Scope”
- Mark a Control as “In Scope”
Edit a Control
-
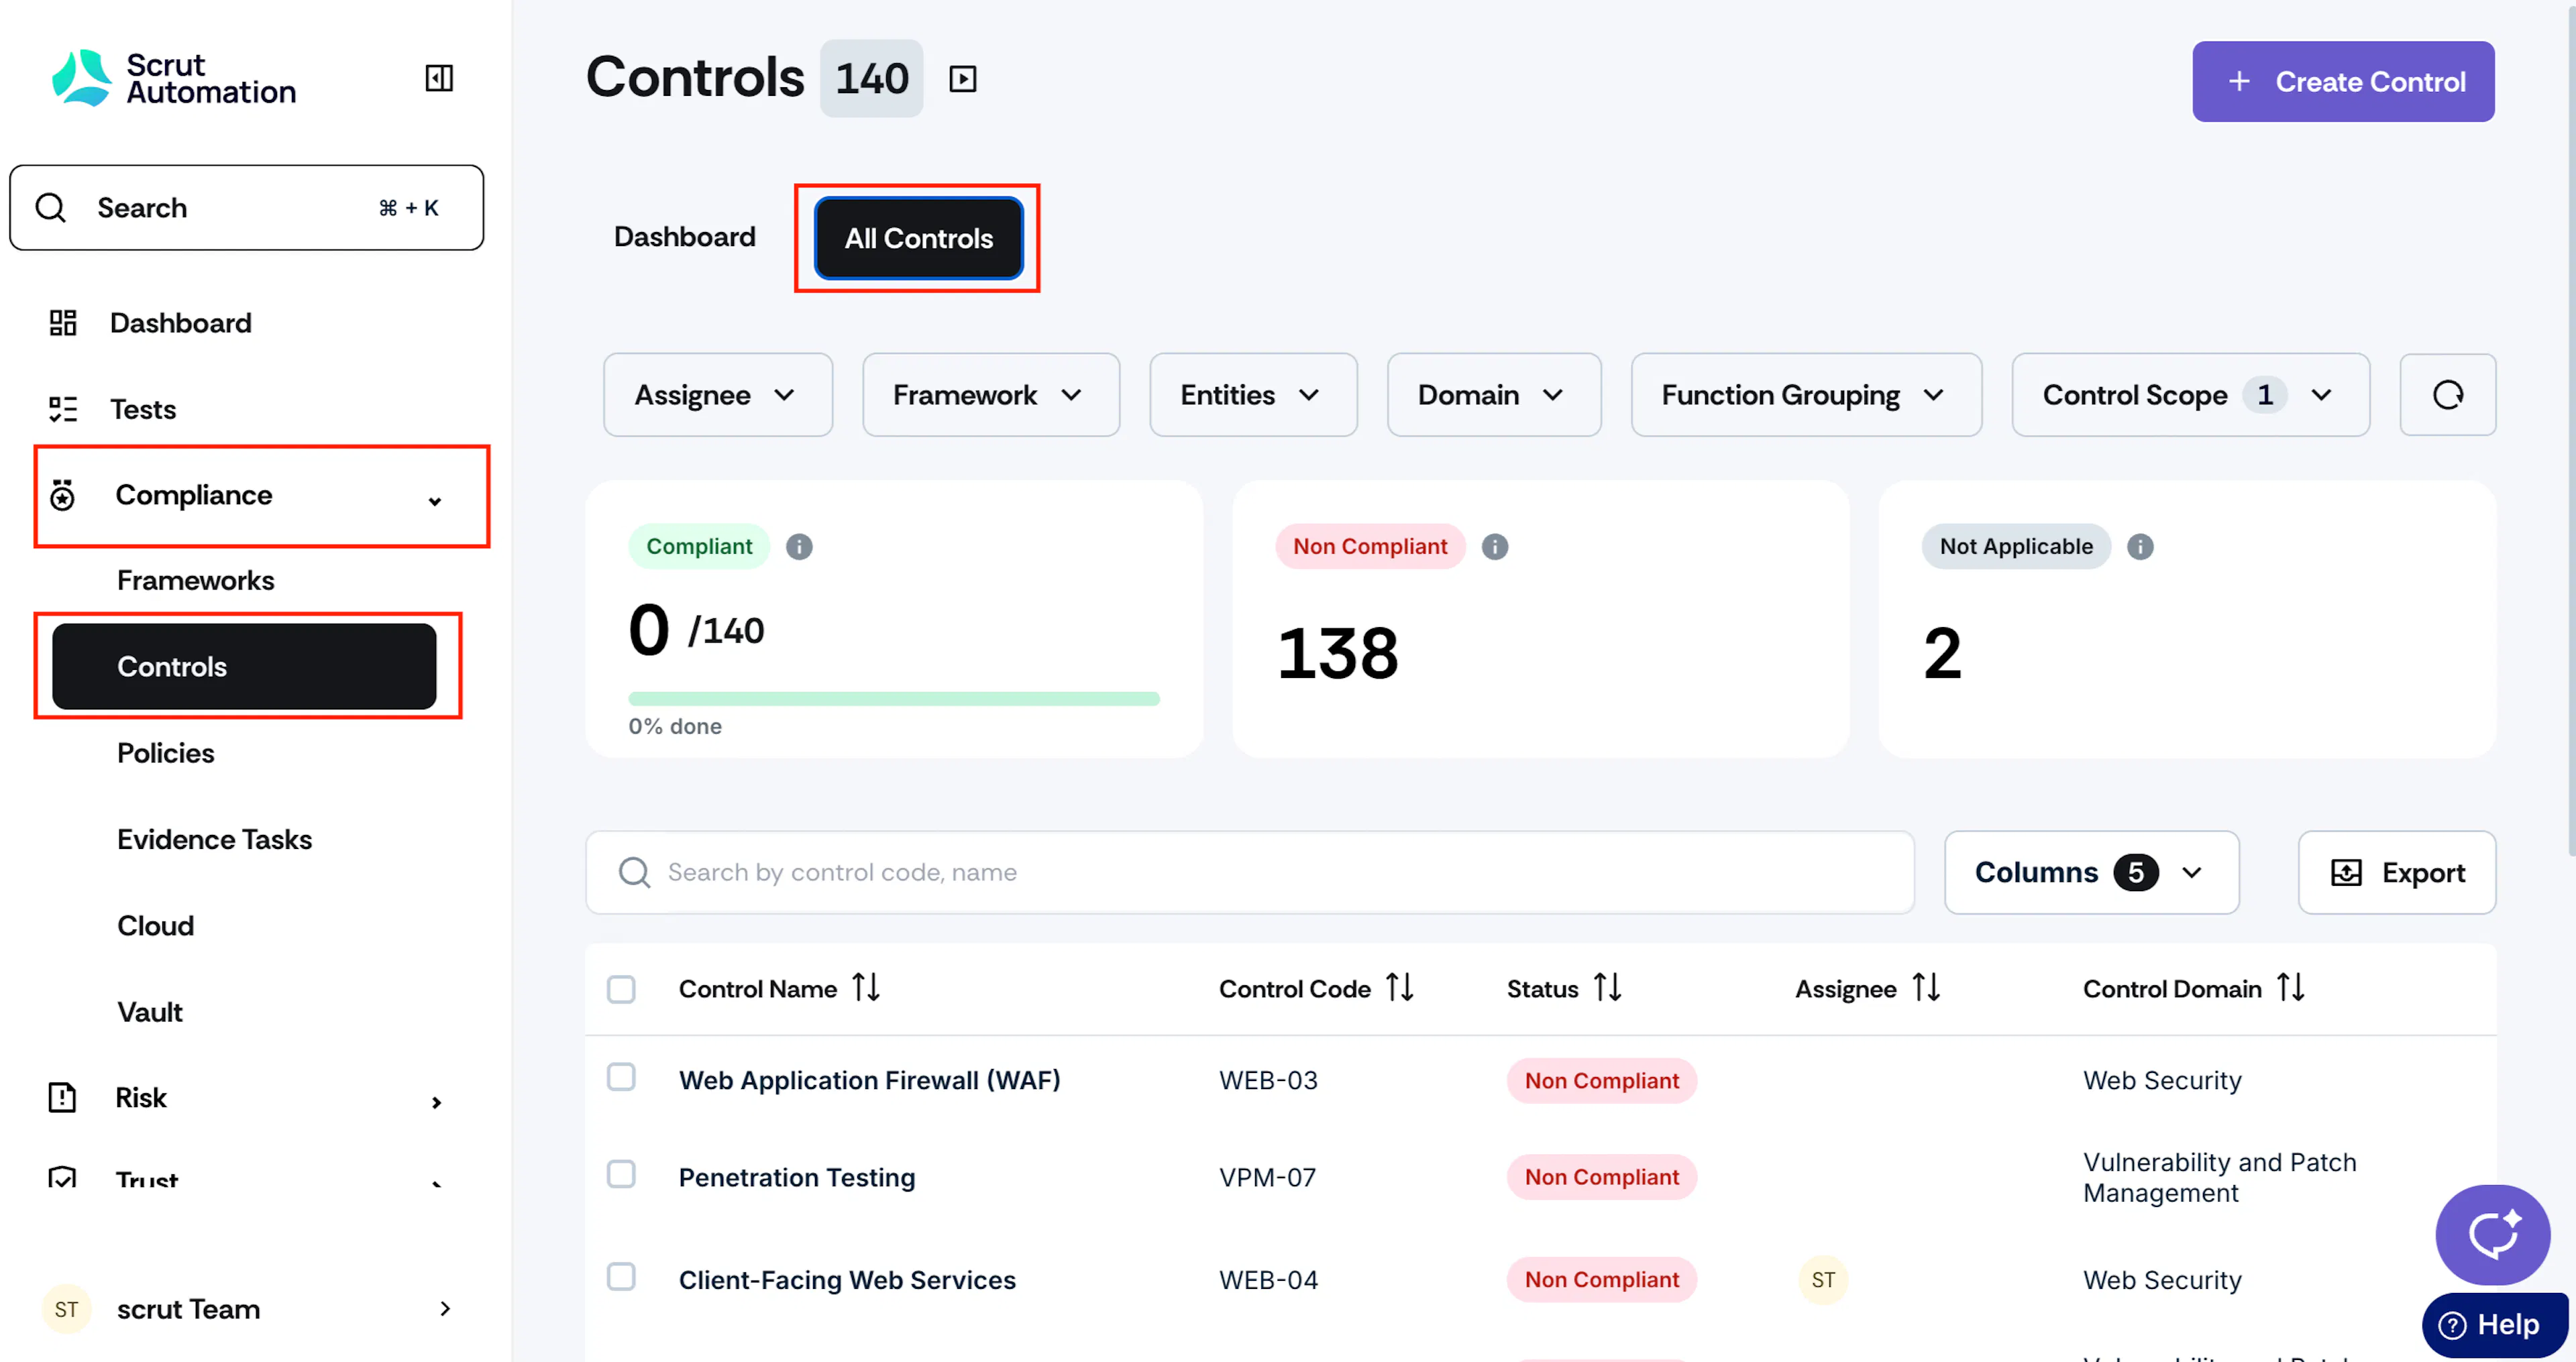
Log in to Scrut, expand the Compliance menu on the left navigation panel, and click Controls.
-
Click All Controls and click the control you wish to modify. Use the search bar at the top to quickly find a specific control.
Pro Tip!
You can search a control by name or code.
-
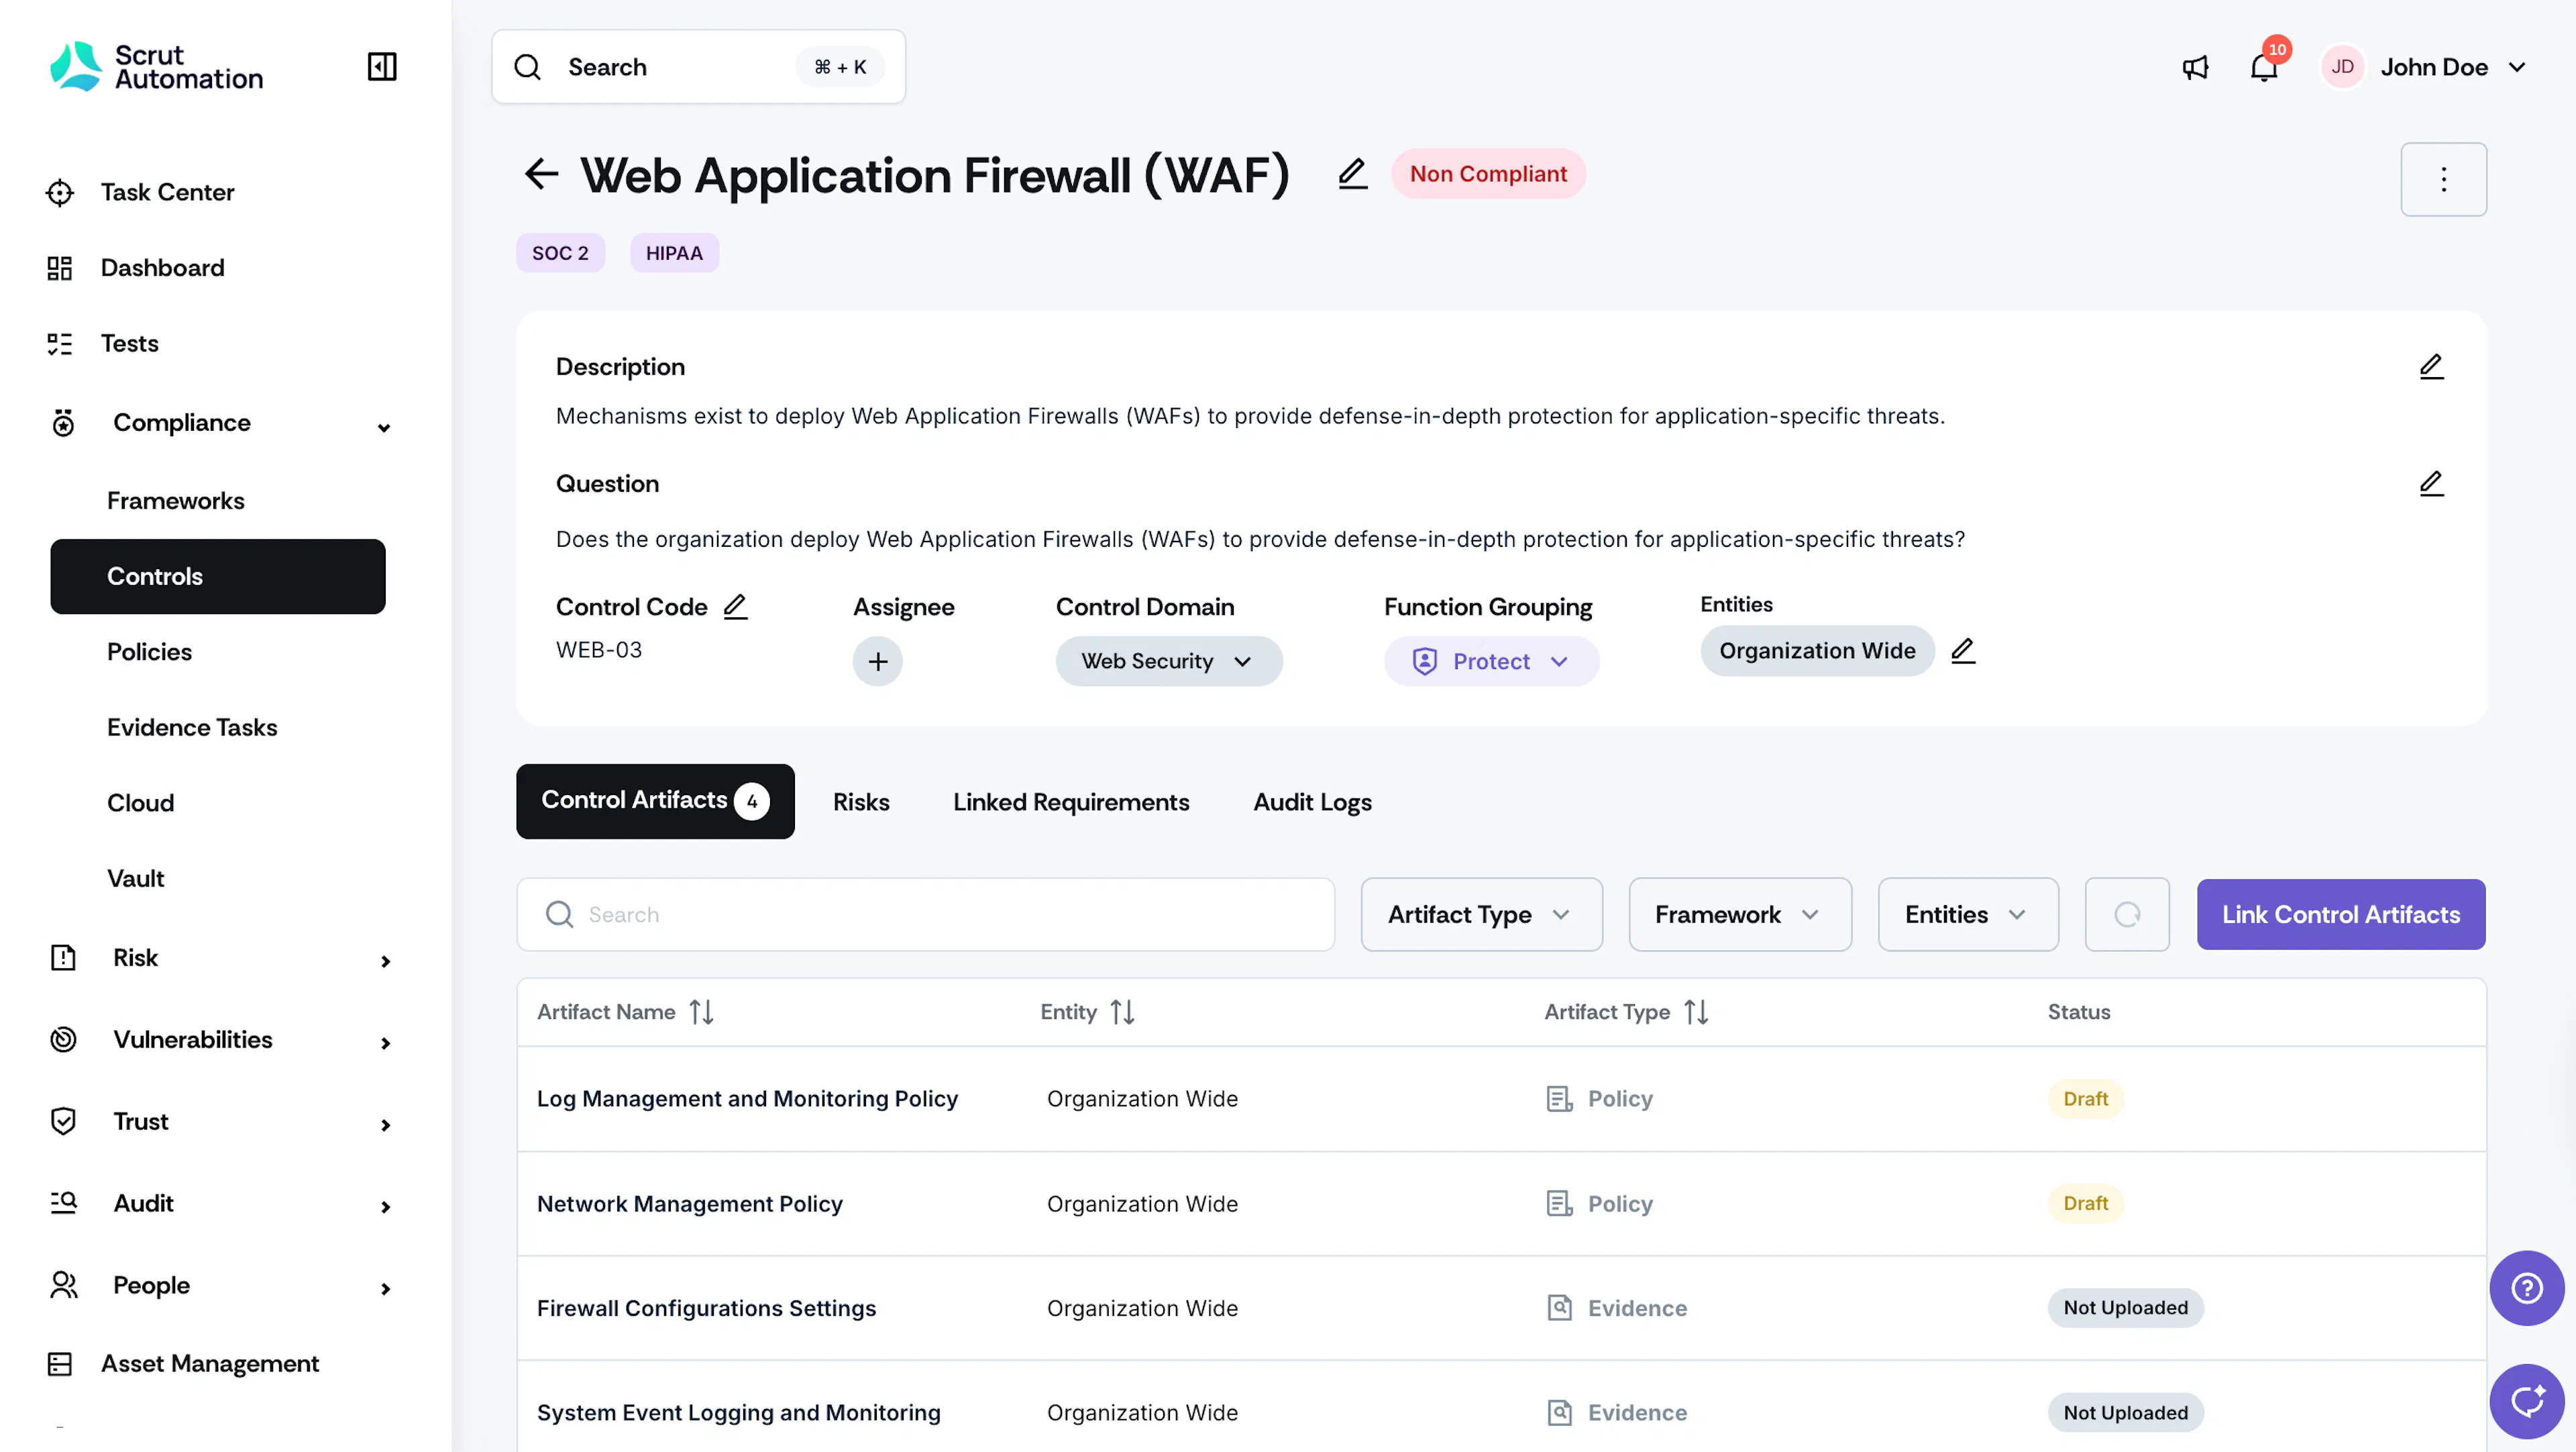
Click the pencil icon next to the field you want to edit. You can modify all fields, including:

- Control Name
- Description
- Question
- Control Code
- Assignee
- Control Domain
- Function Grouping
- Entities
-
Watch for the success notification message indicating that the control has been updated.
Edit Multiple Controls
Rather than modifying controls individually, you can select multiple controls at once and perform bulk updates or deletions.
-
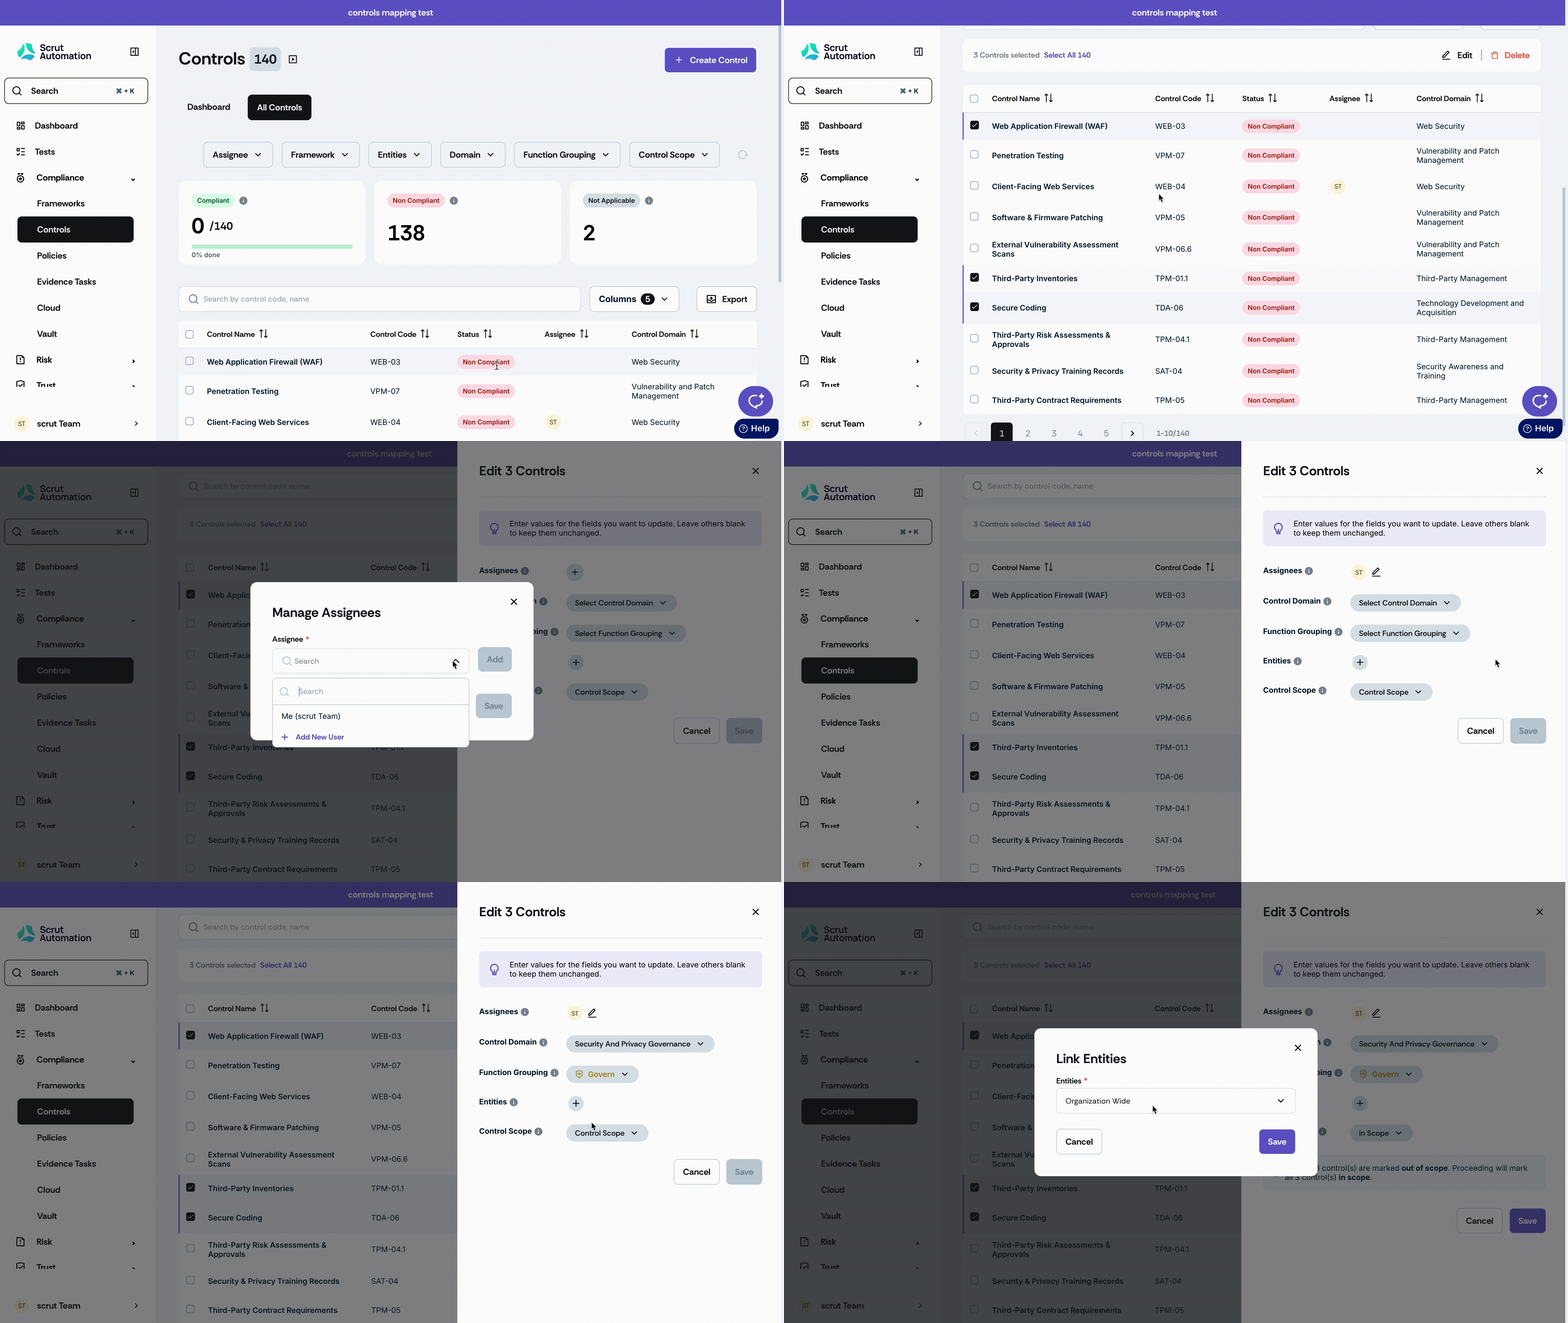
Navigate to Compliance → Controls → All Controls and select the ones you want to modify. You can select multiple controls at once.
-
After selecting the controls, click the consolidated Edit icon at the top of the table.
-
This allows you to update key fields for the selected controls, such as:
- Assignee: Reassign the controls to different team members
- Control Domain: Change the control domain
- Function Grouping: Update the function grouping of the controls
- Entities: Modify which entities are associated with the controls
- Control Scope: Set controls in or out of scope
-
Click Save.
Delete a Control
Warning!
Once you delete a control, it cannot be undone. So, proceed with caution.
-
Navigate to the Controls → All Controls dashboard and click on a specific control.
-
Click the three-dots icon on the top-right and select Delete Control.

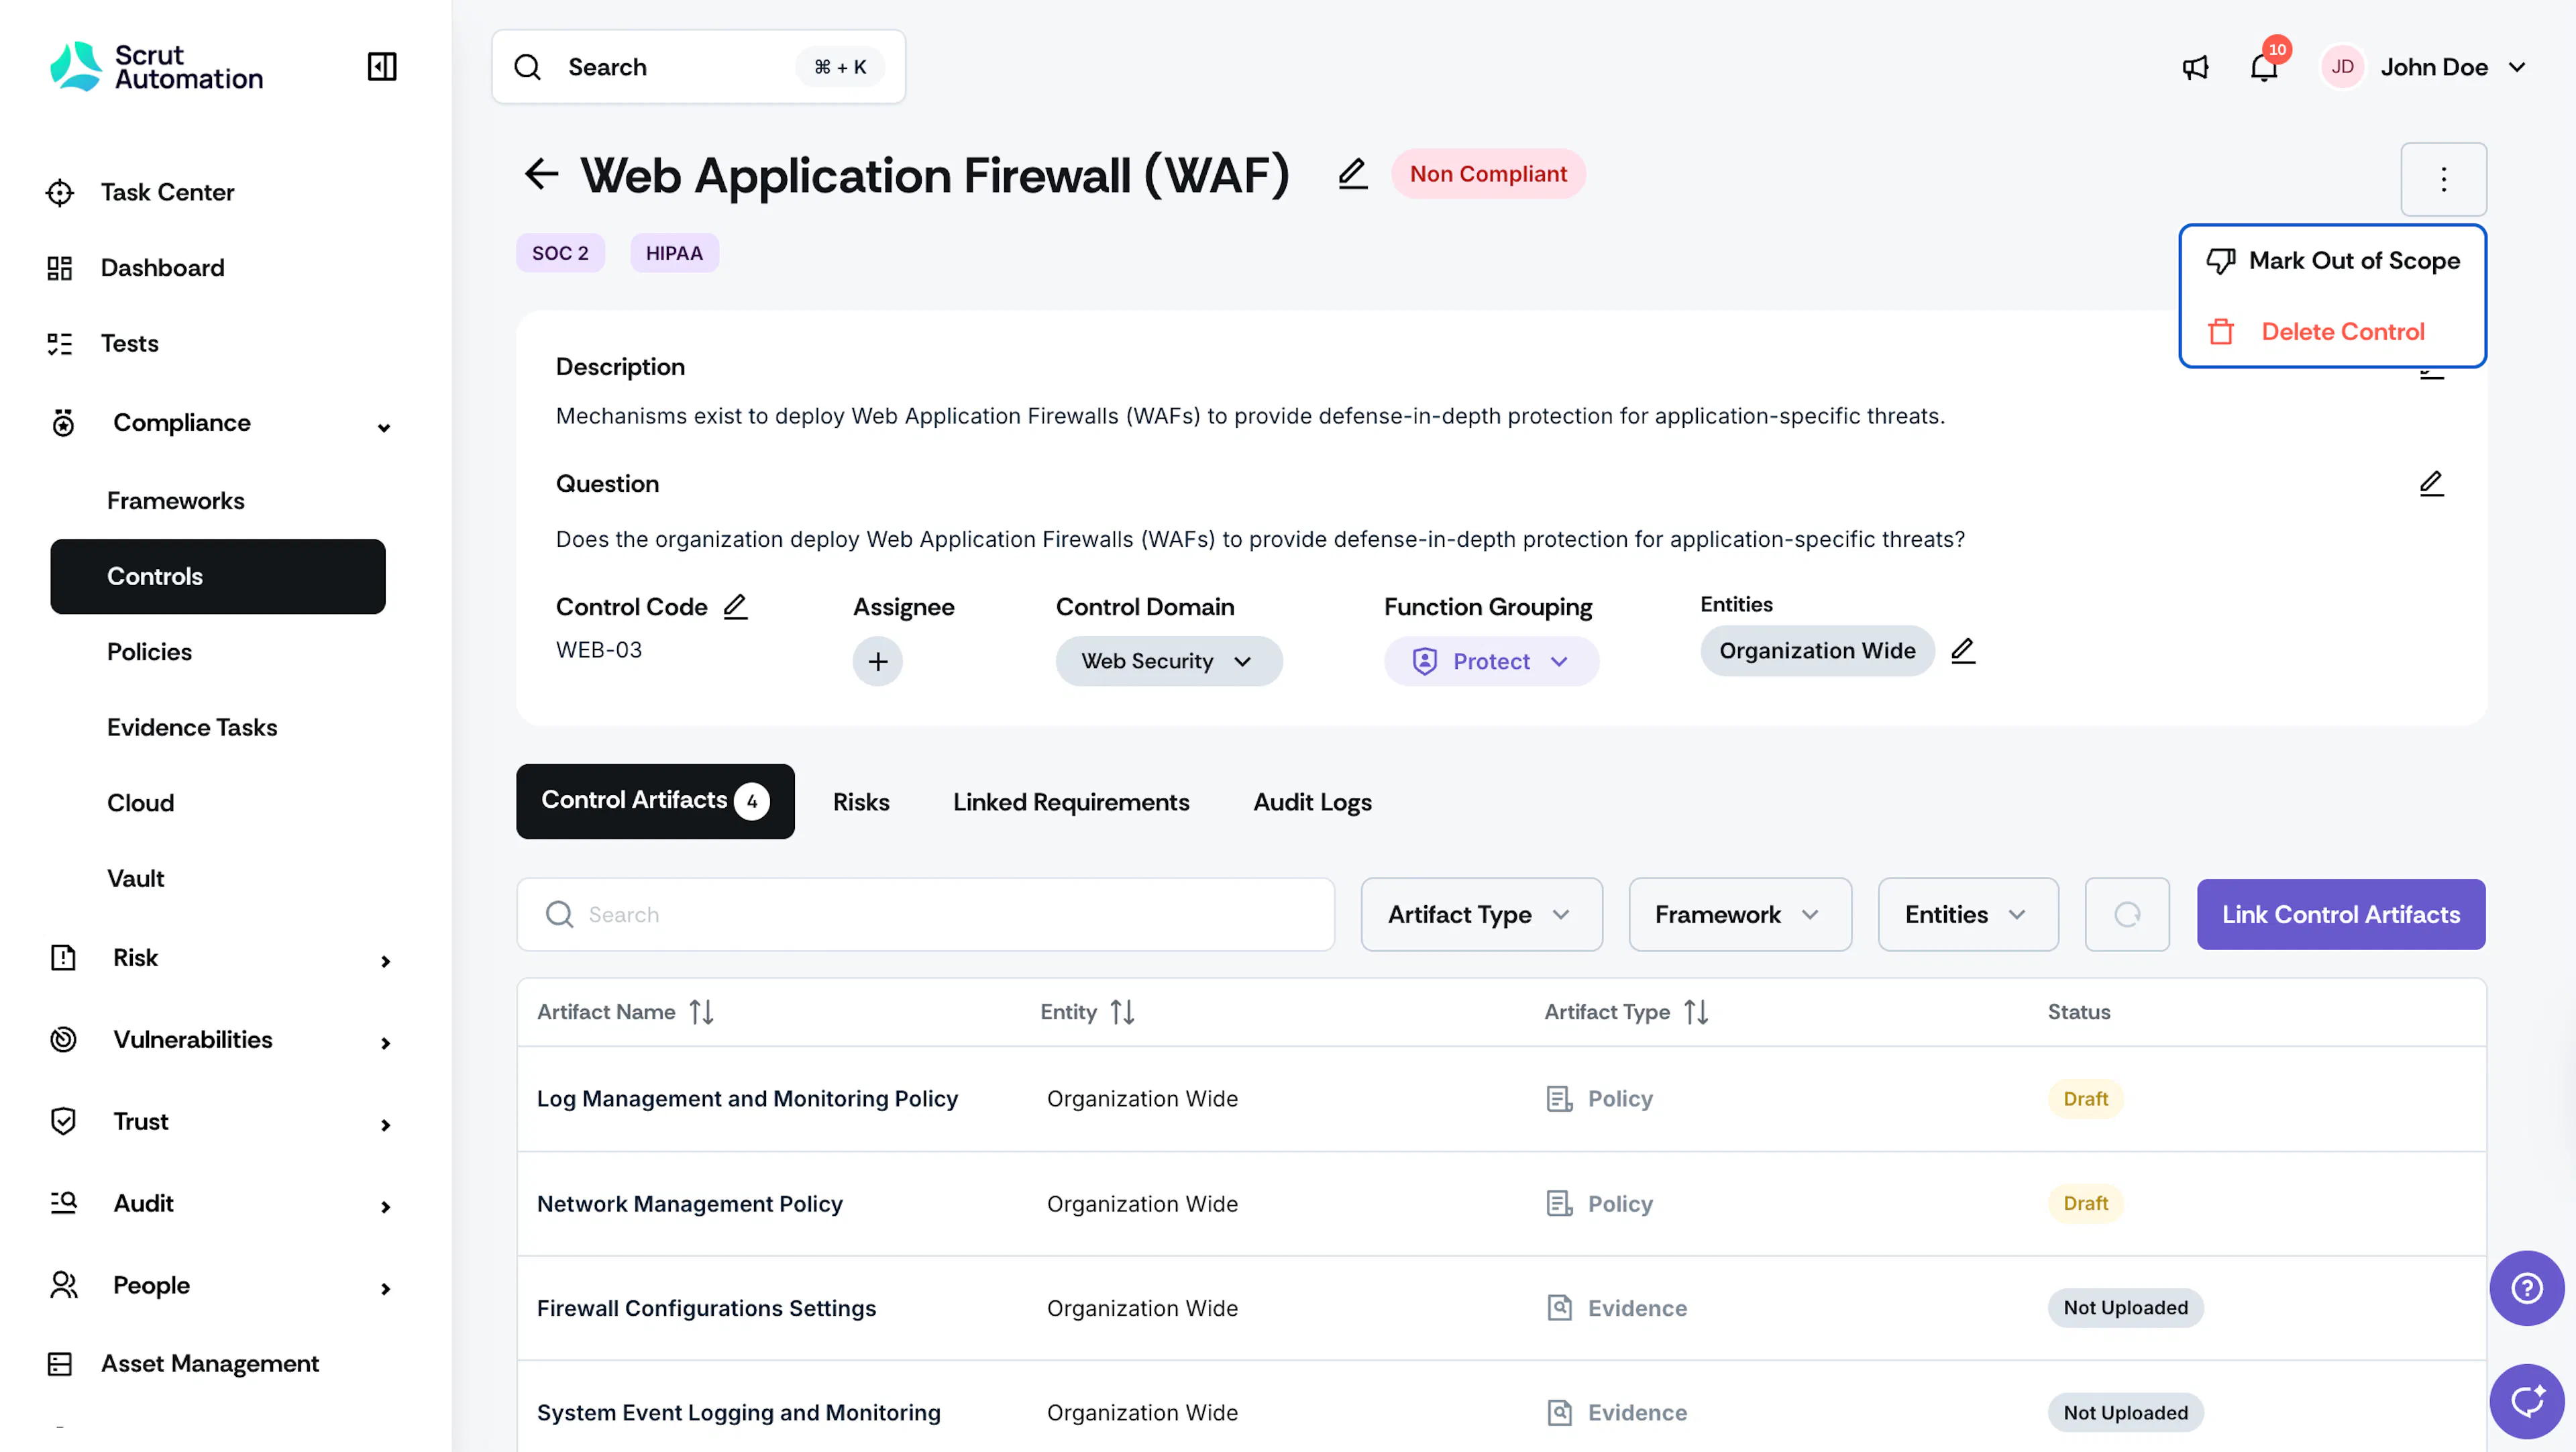
-
A confirmation window opens.
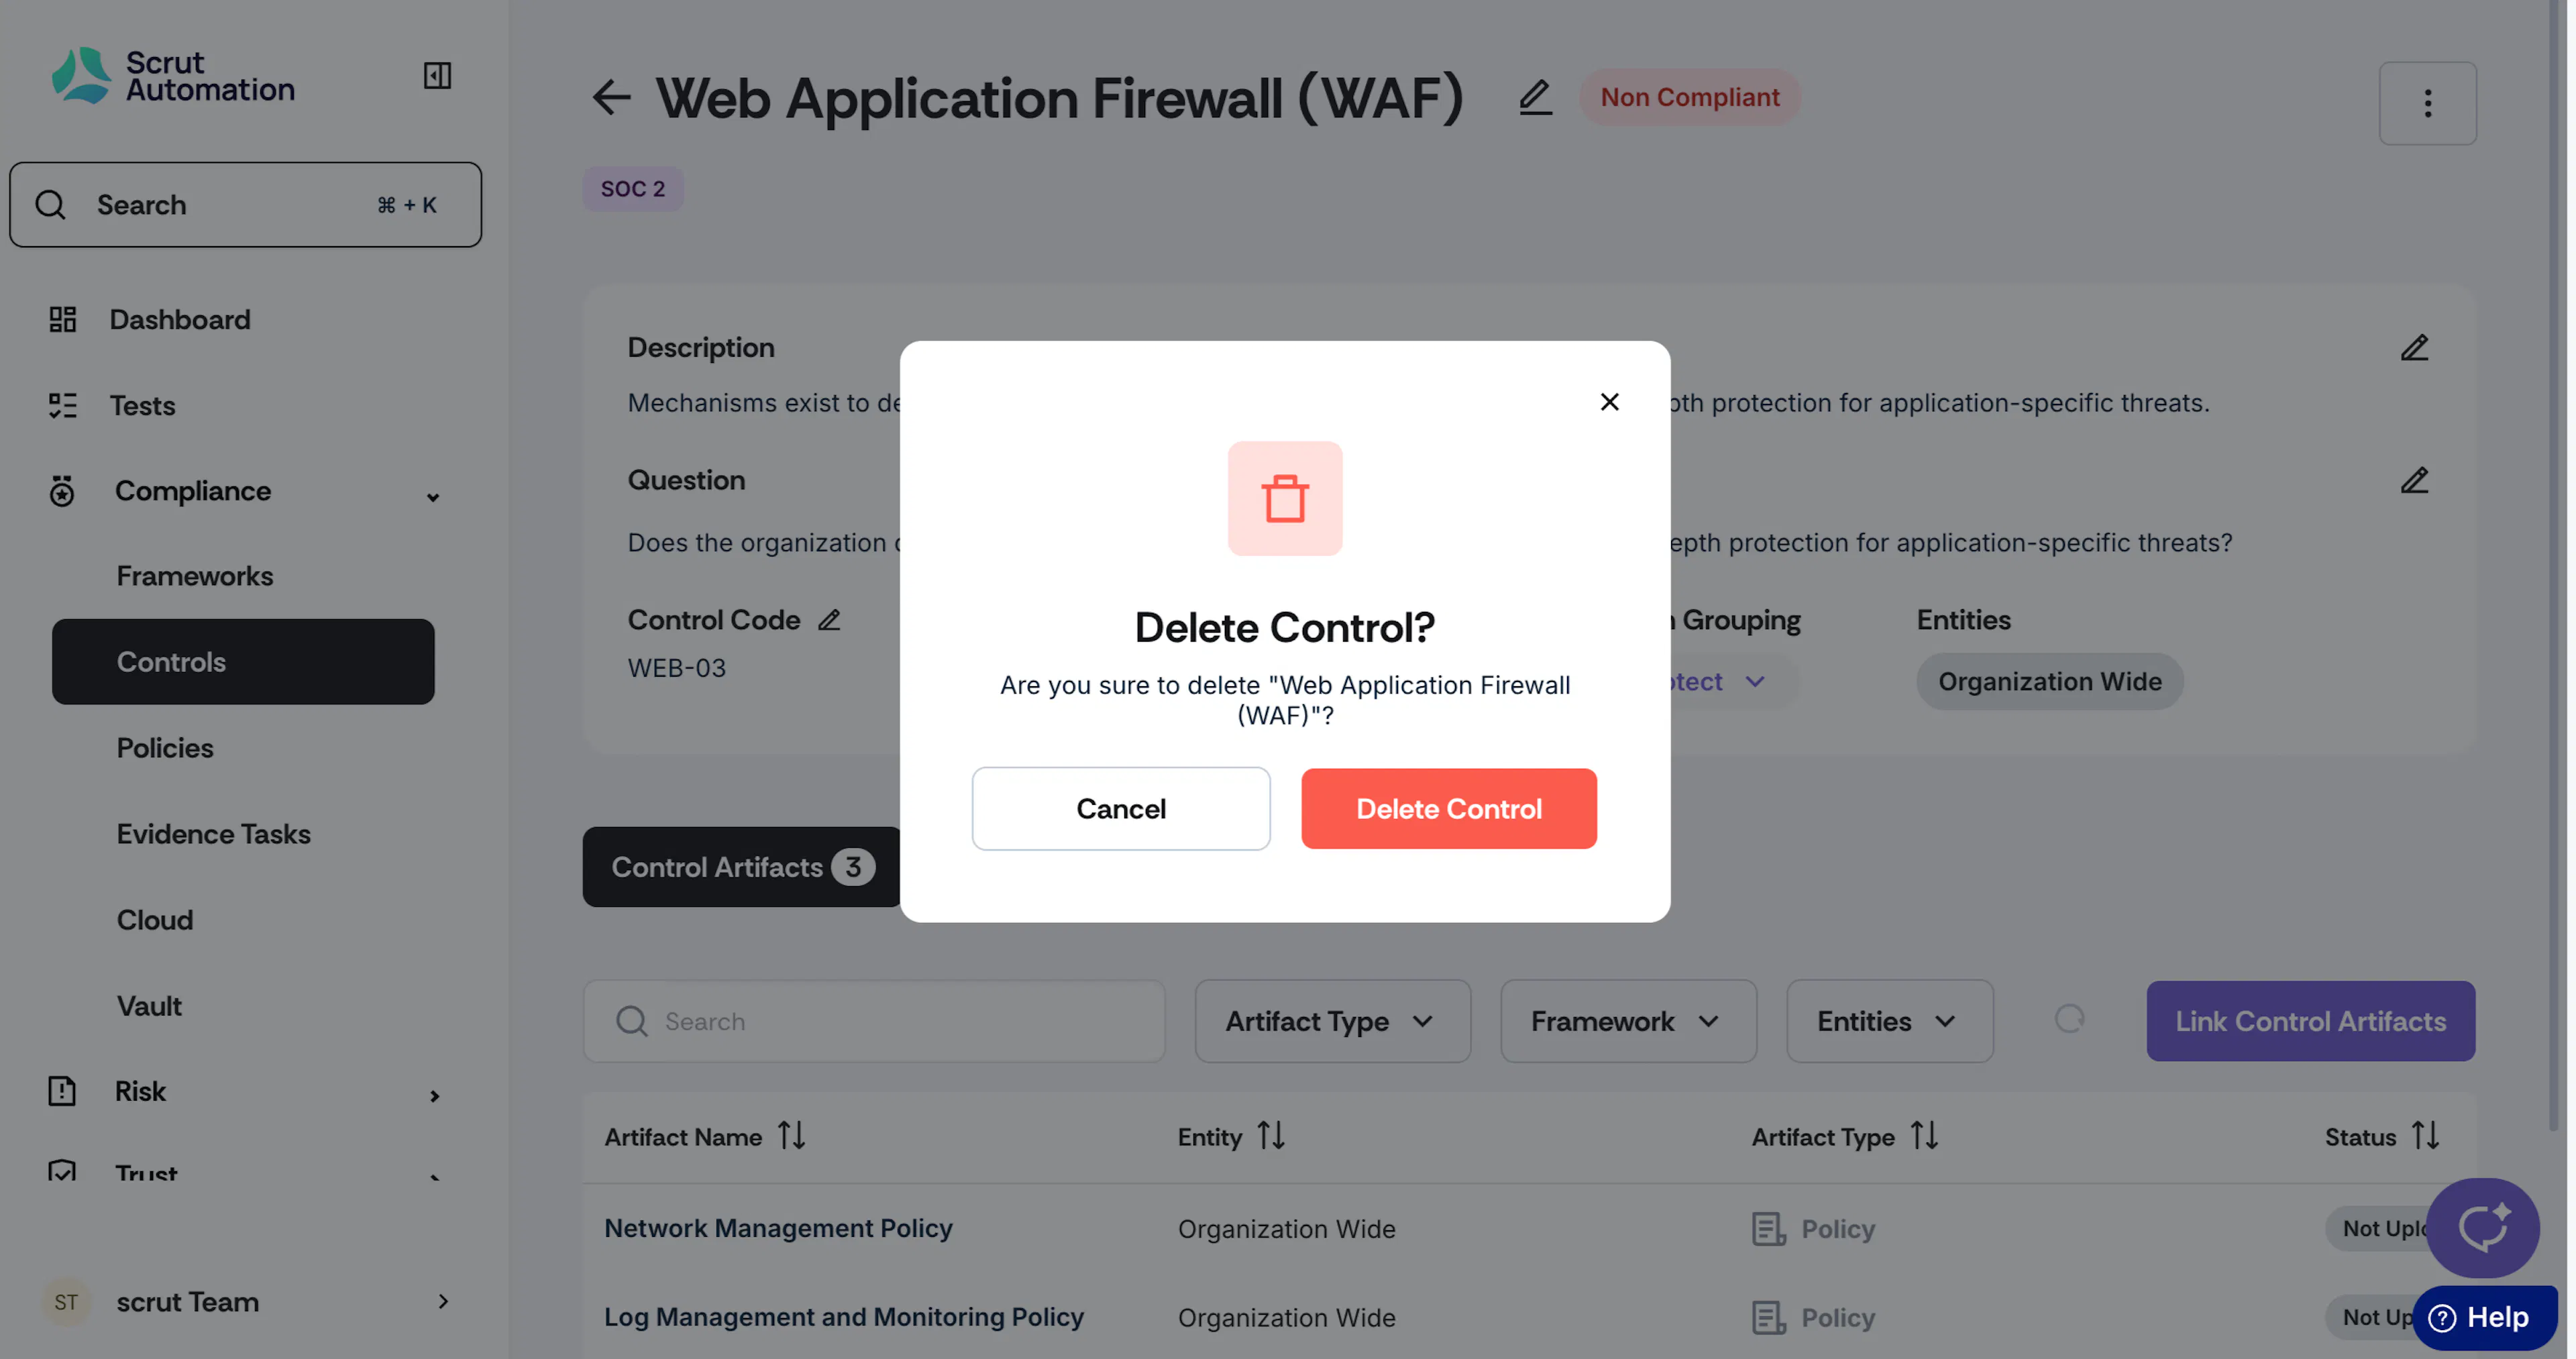
-
Click Delete Control.
Delete Multiple Controls
-
Navigate to Compliance → Controls → All Controls and select the ones you want to delete. You can select multiple controls at once.
-
After selecting the controls, click the consolidated Delete icon at the top of the table.
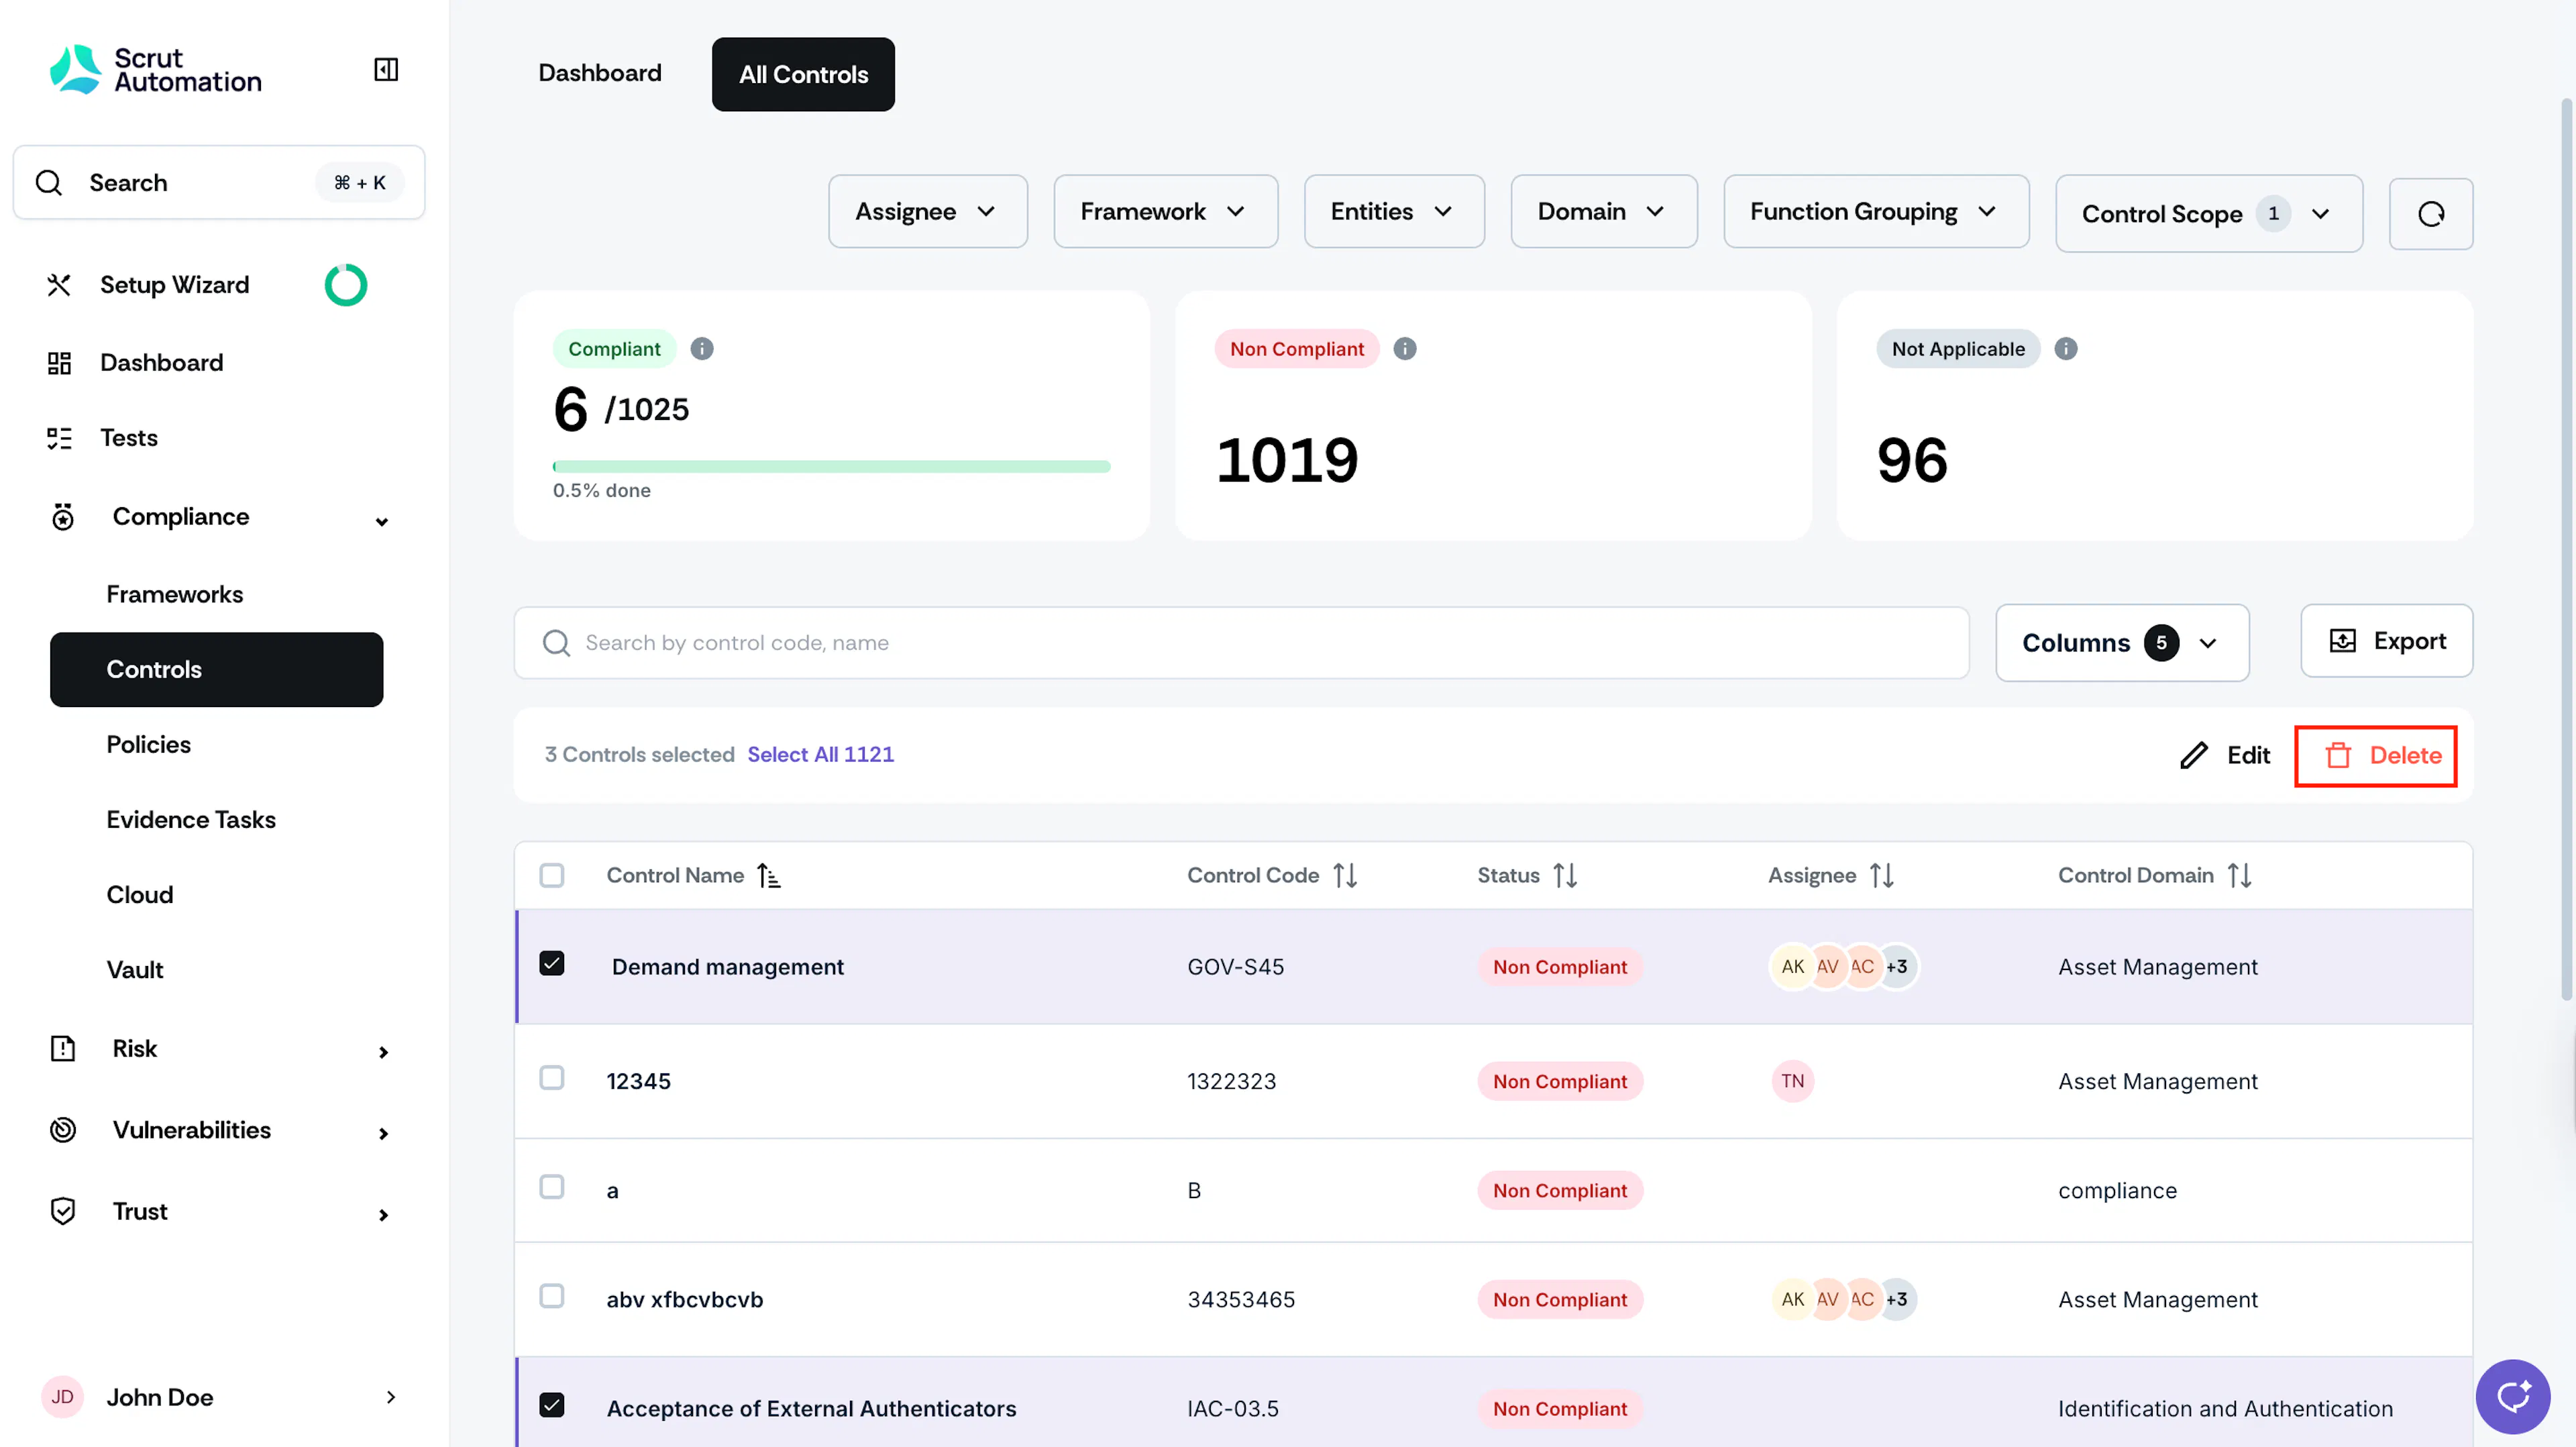
-
Click Delete again to confirm your action.
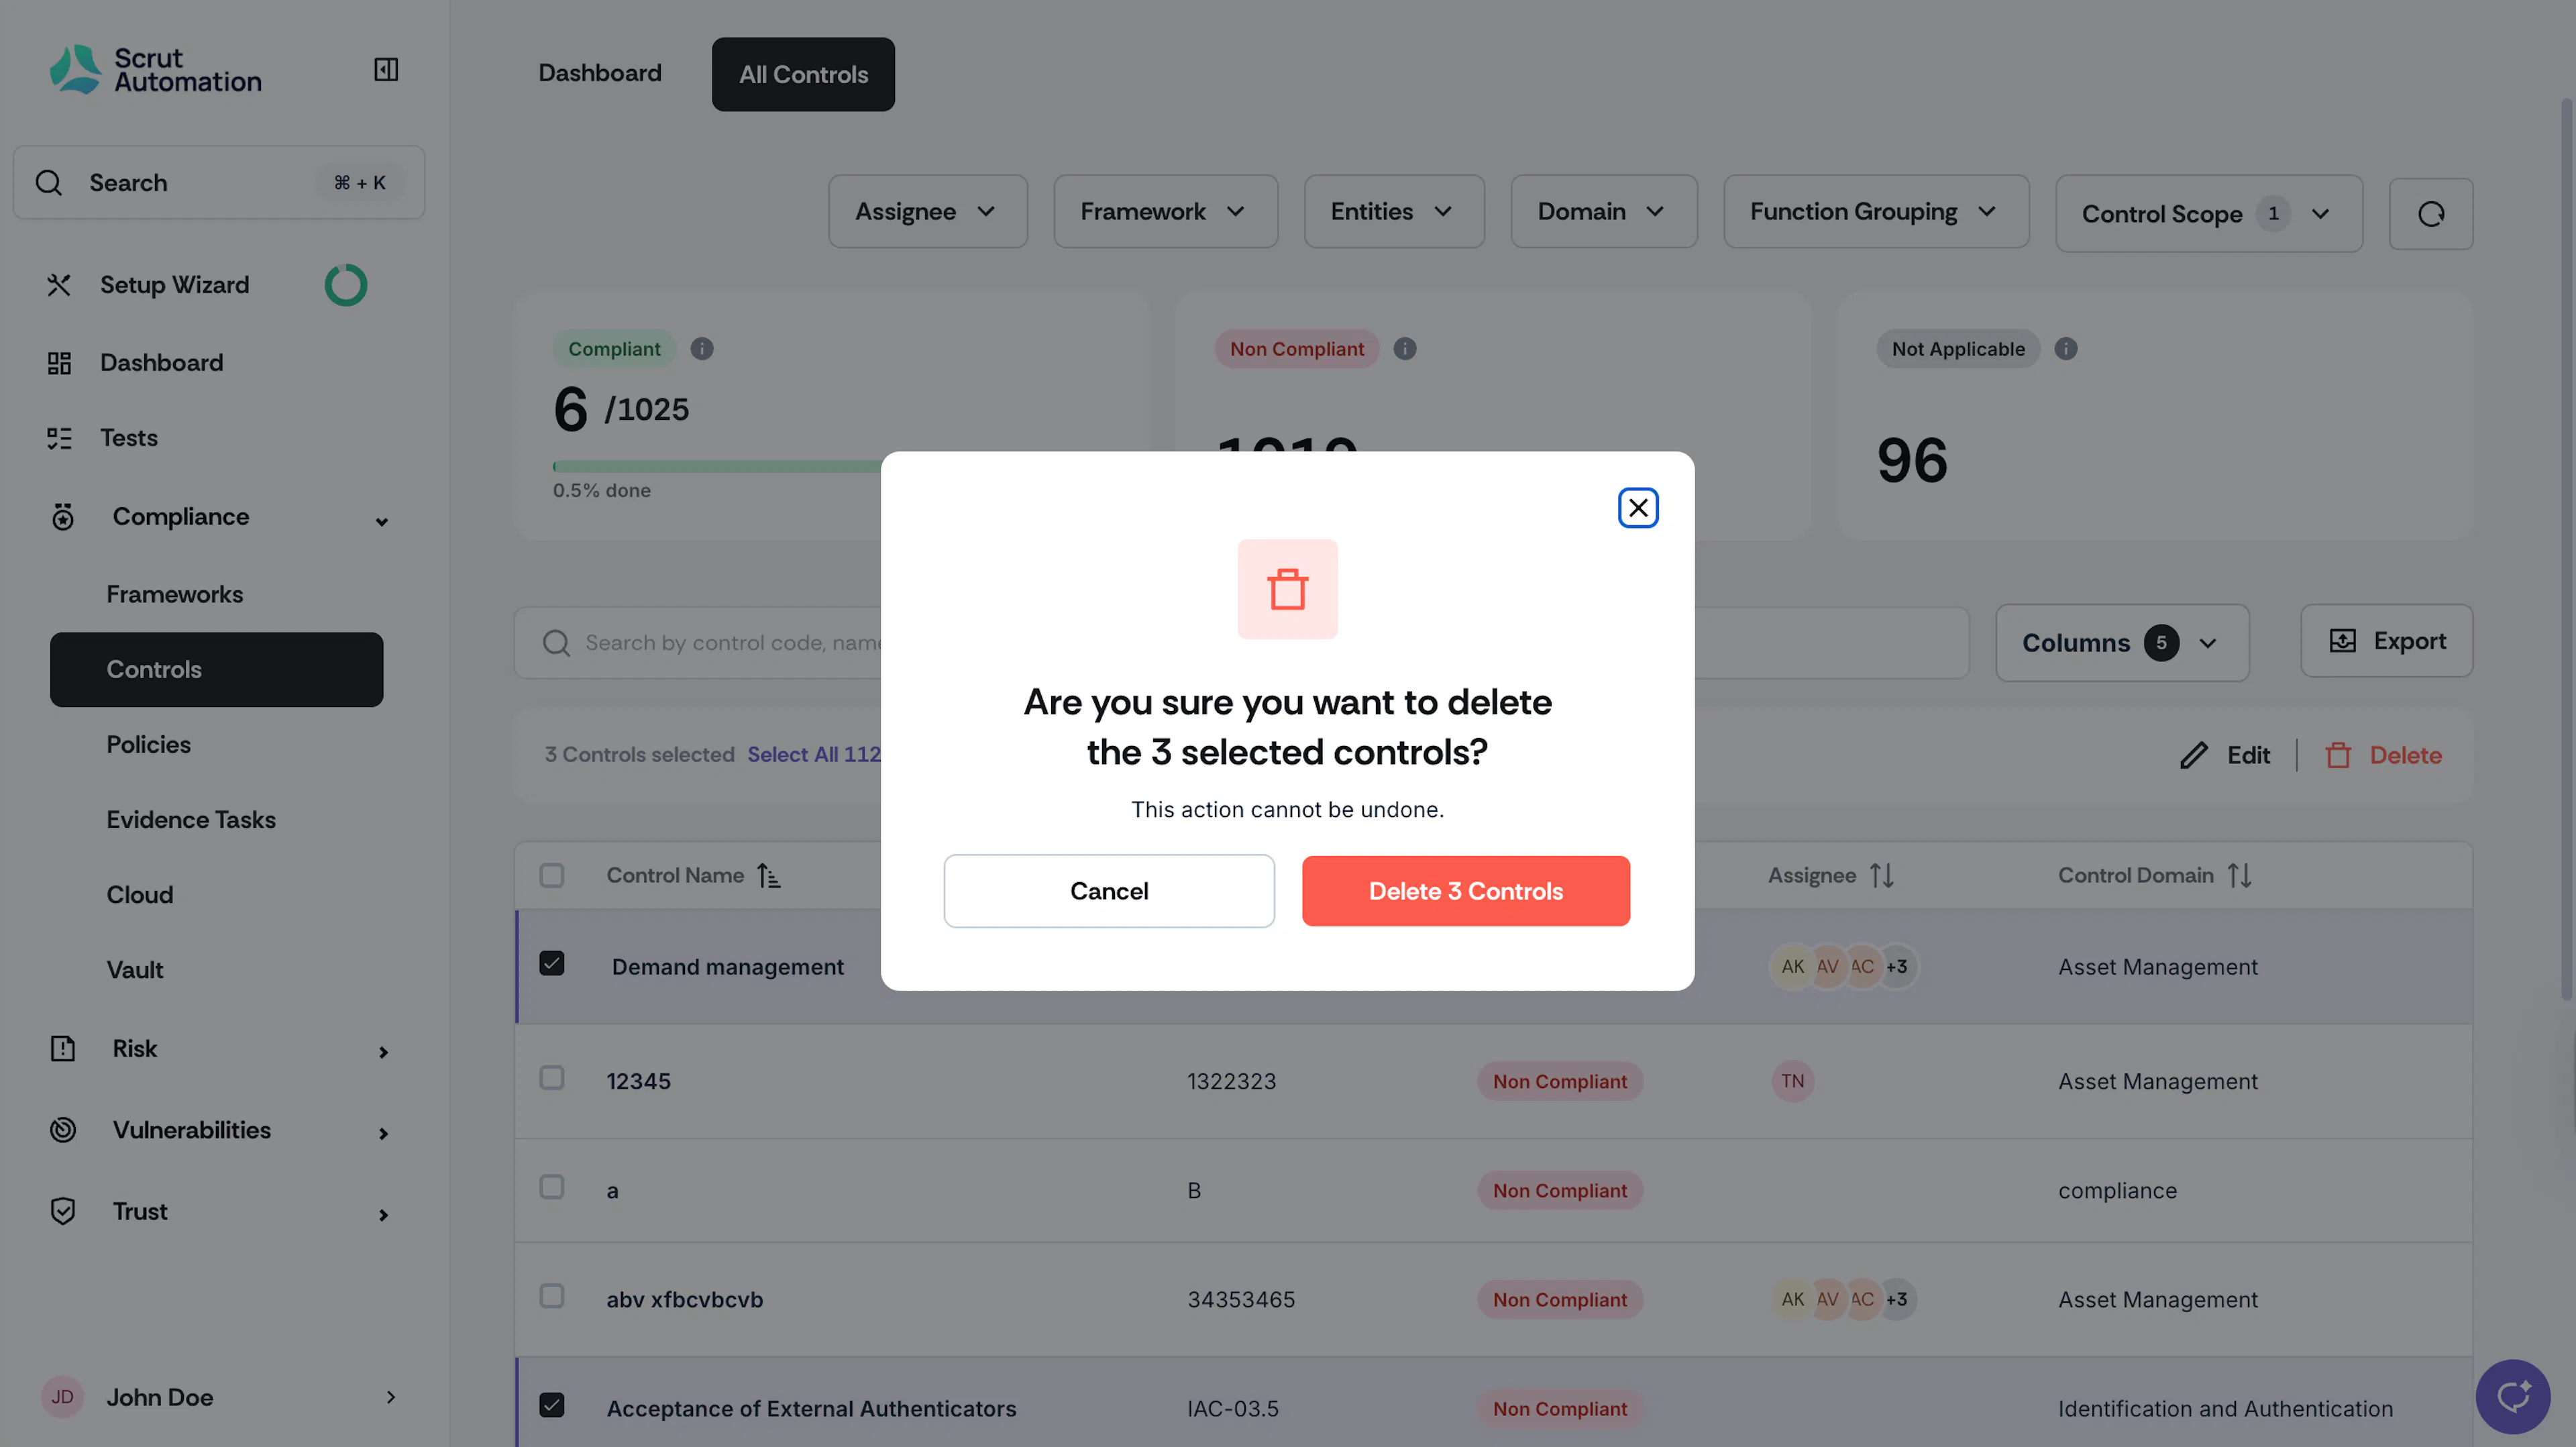
Mark a Control Out of Scope
-
Navigate to the Controls → All Controls dashboard and click on a specific control.
-
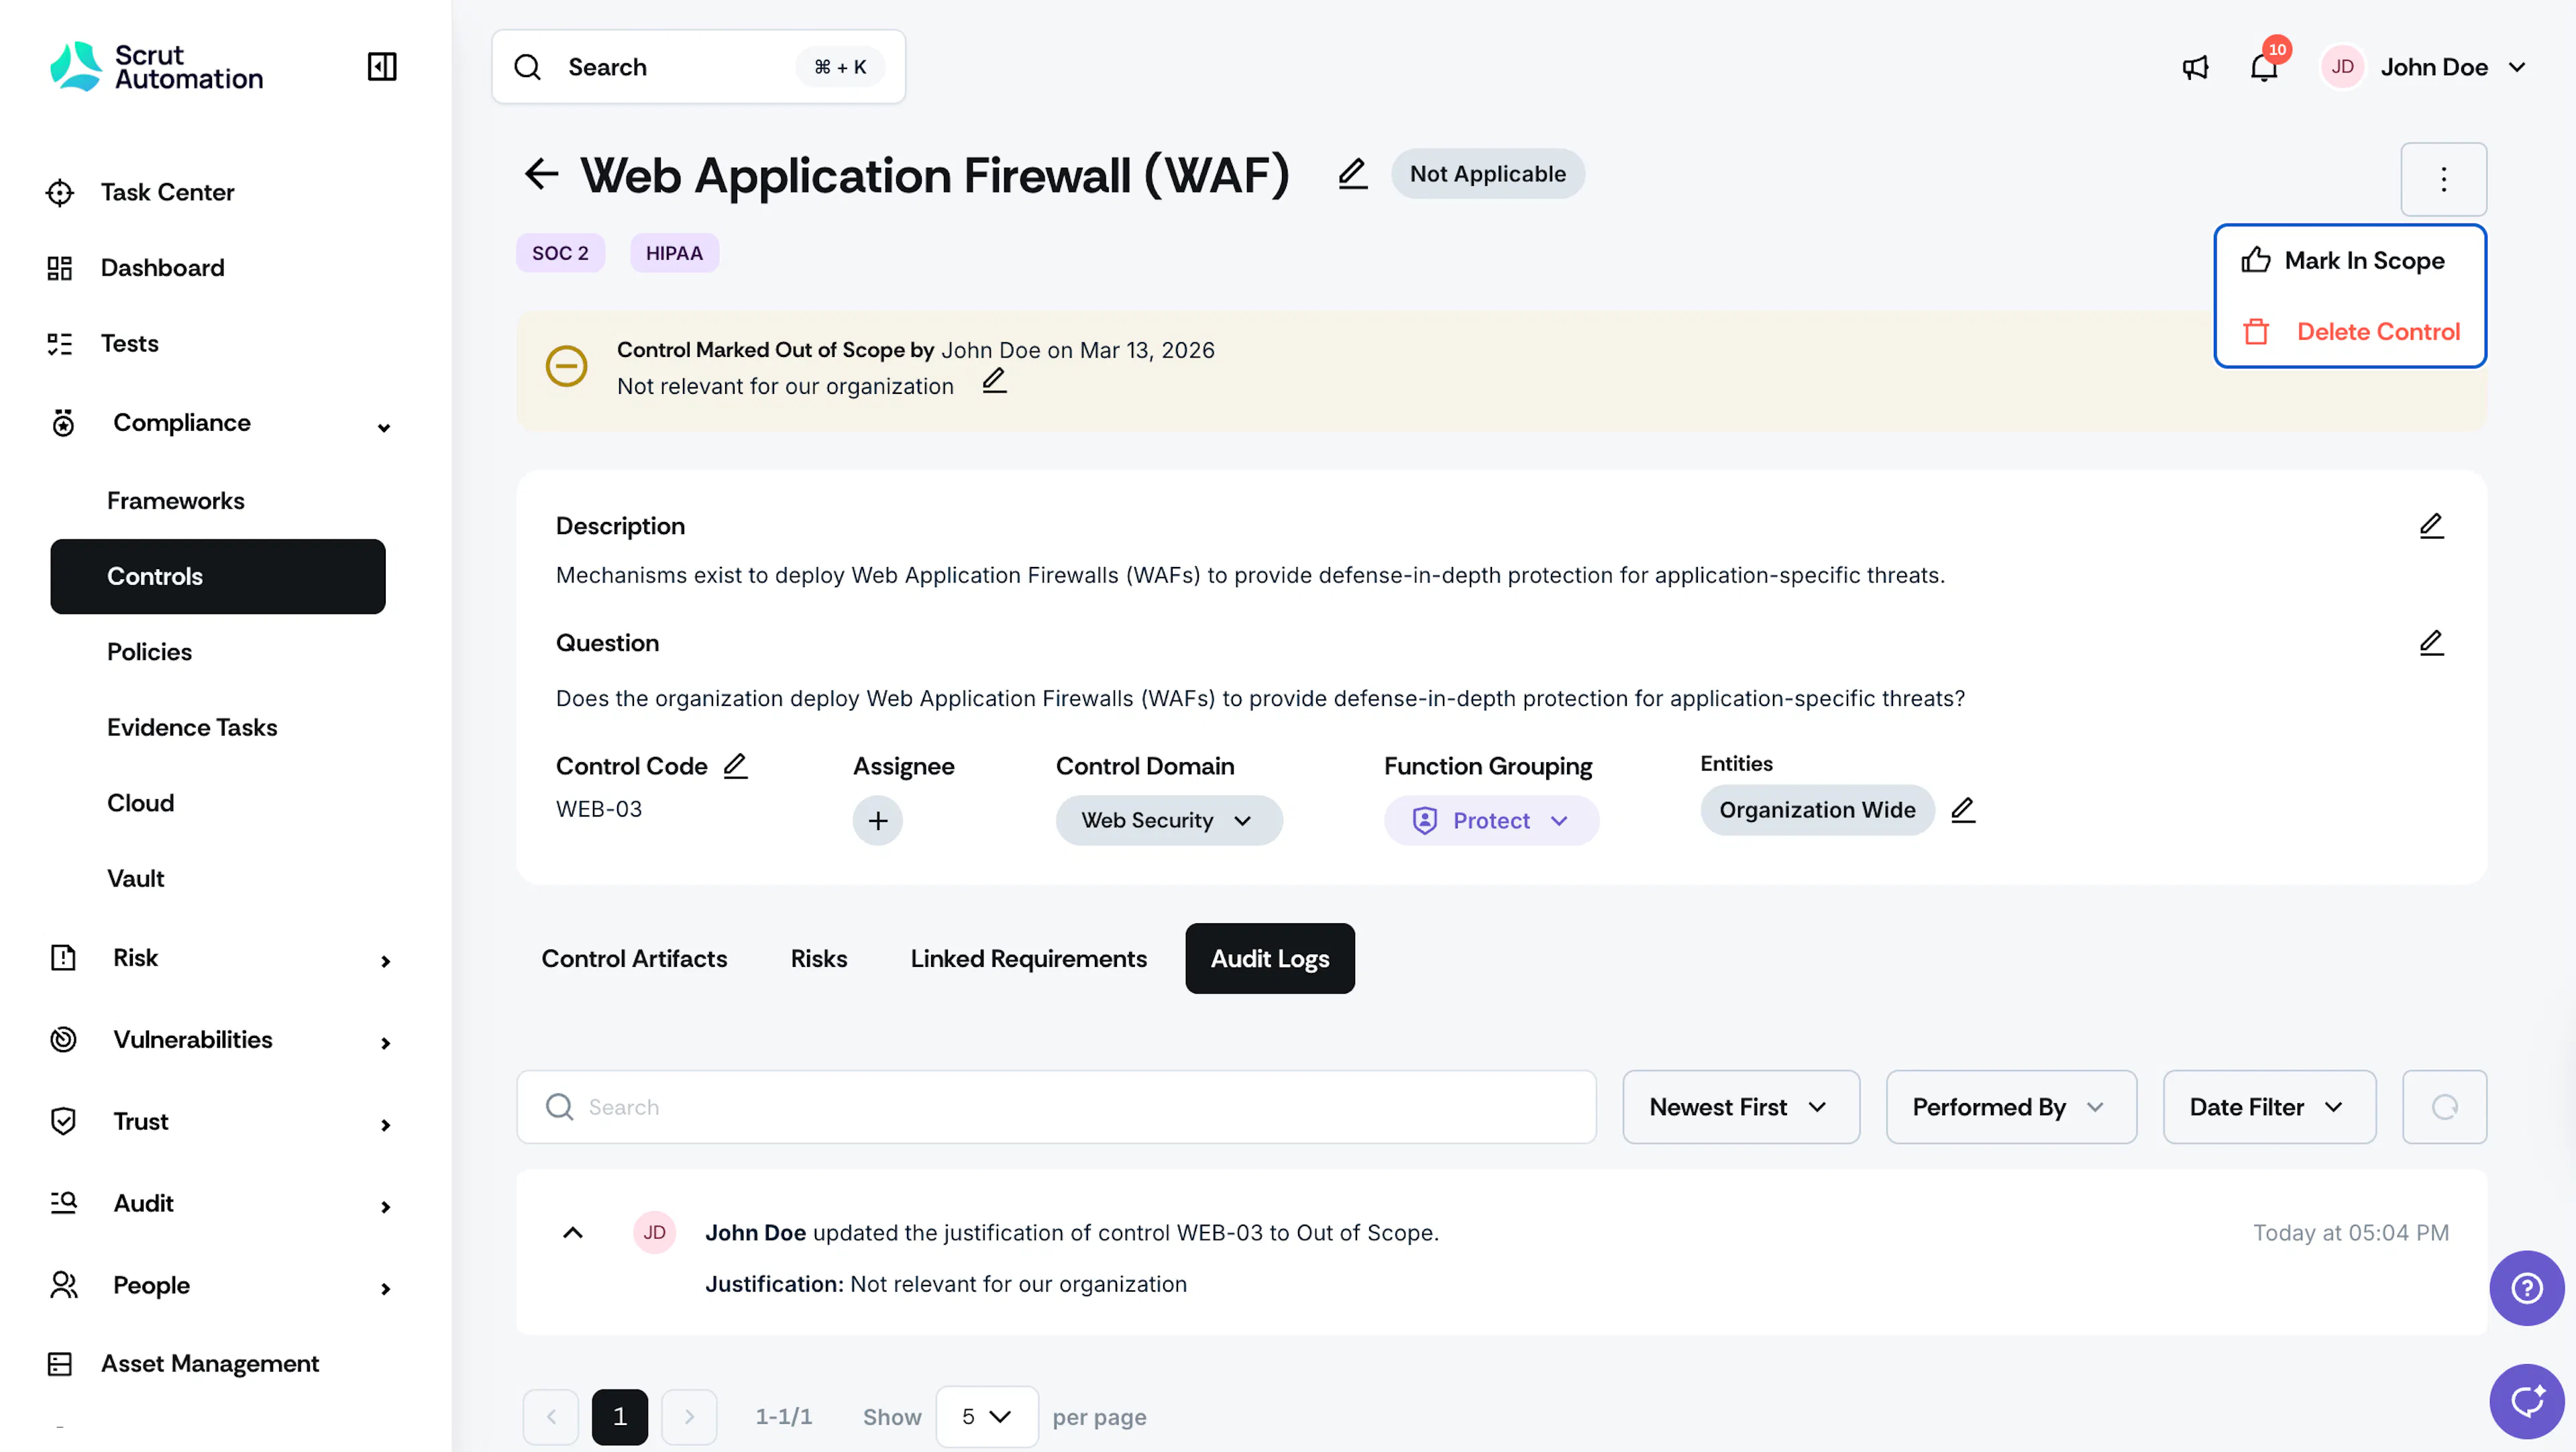
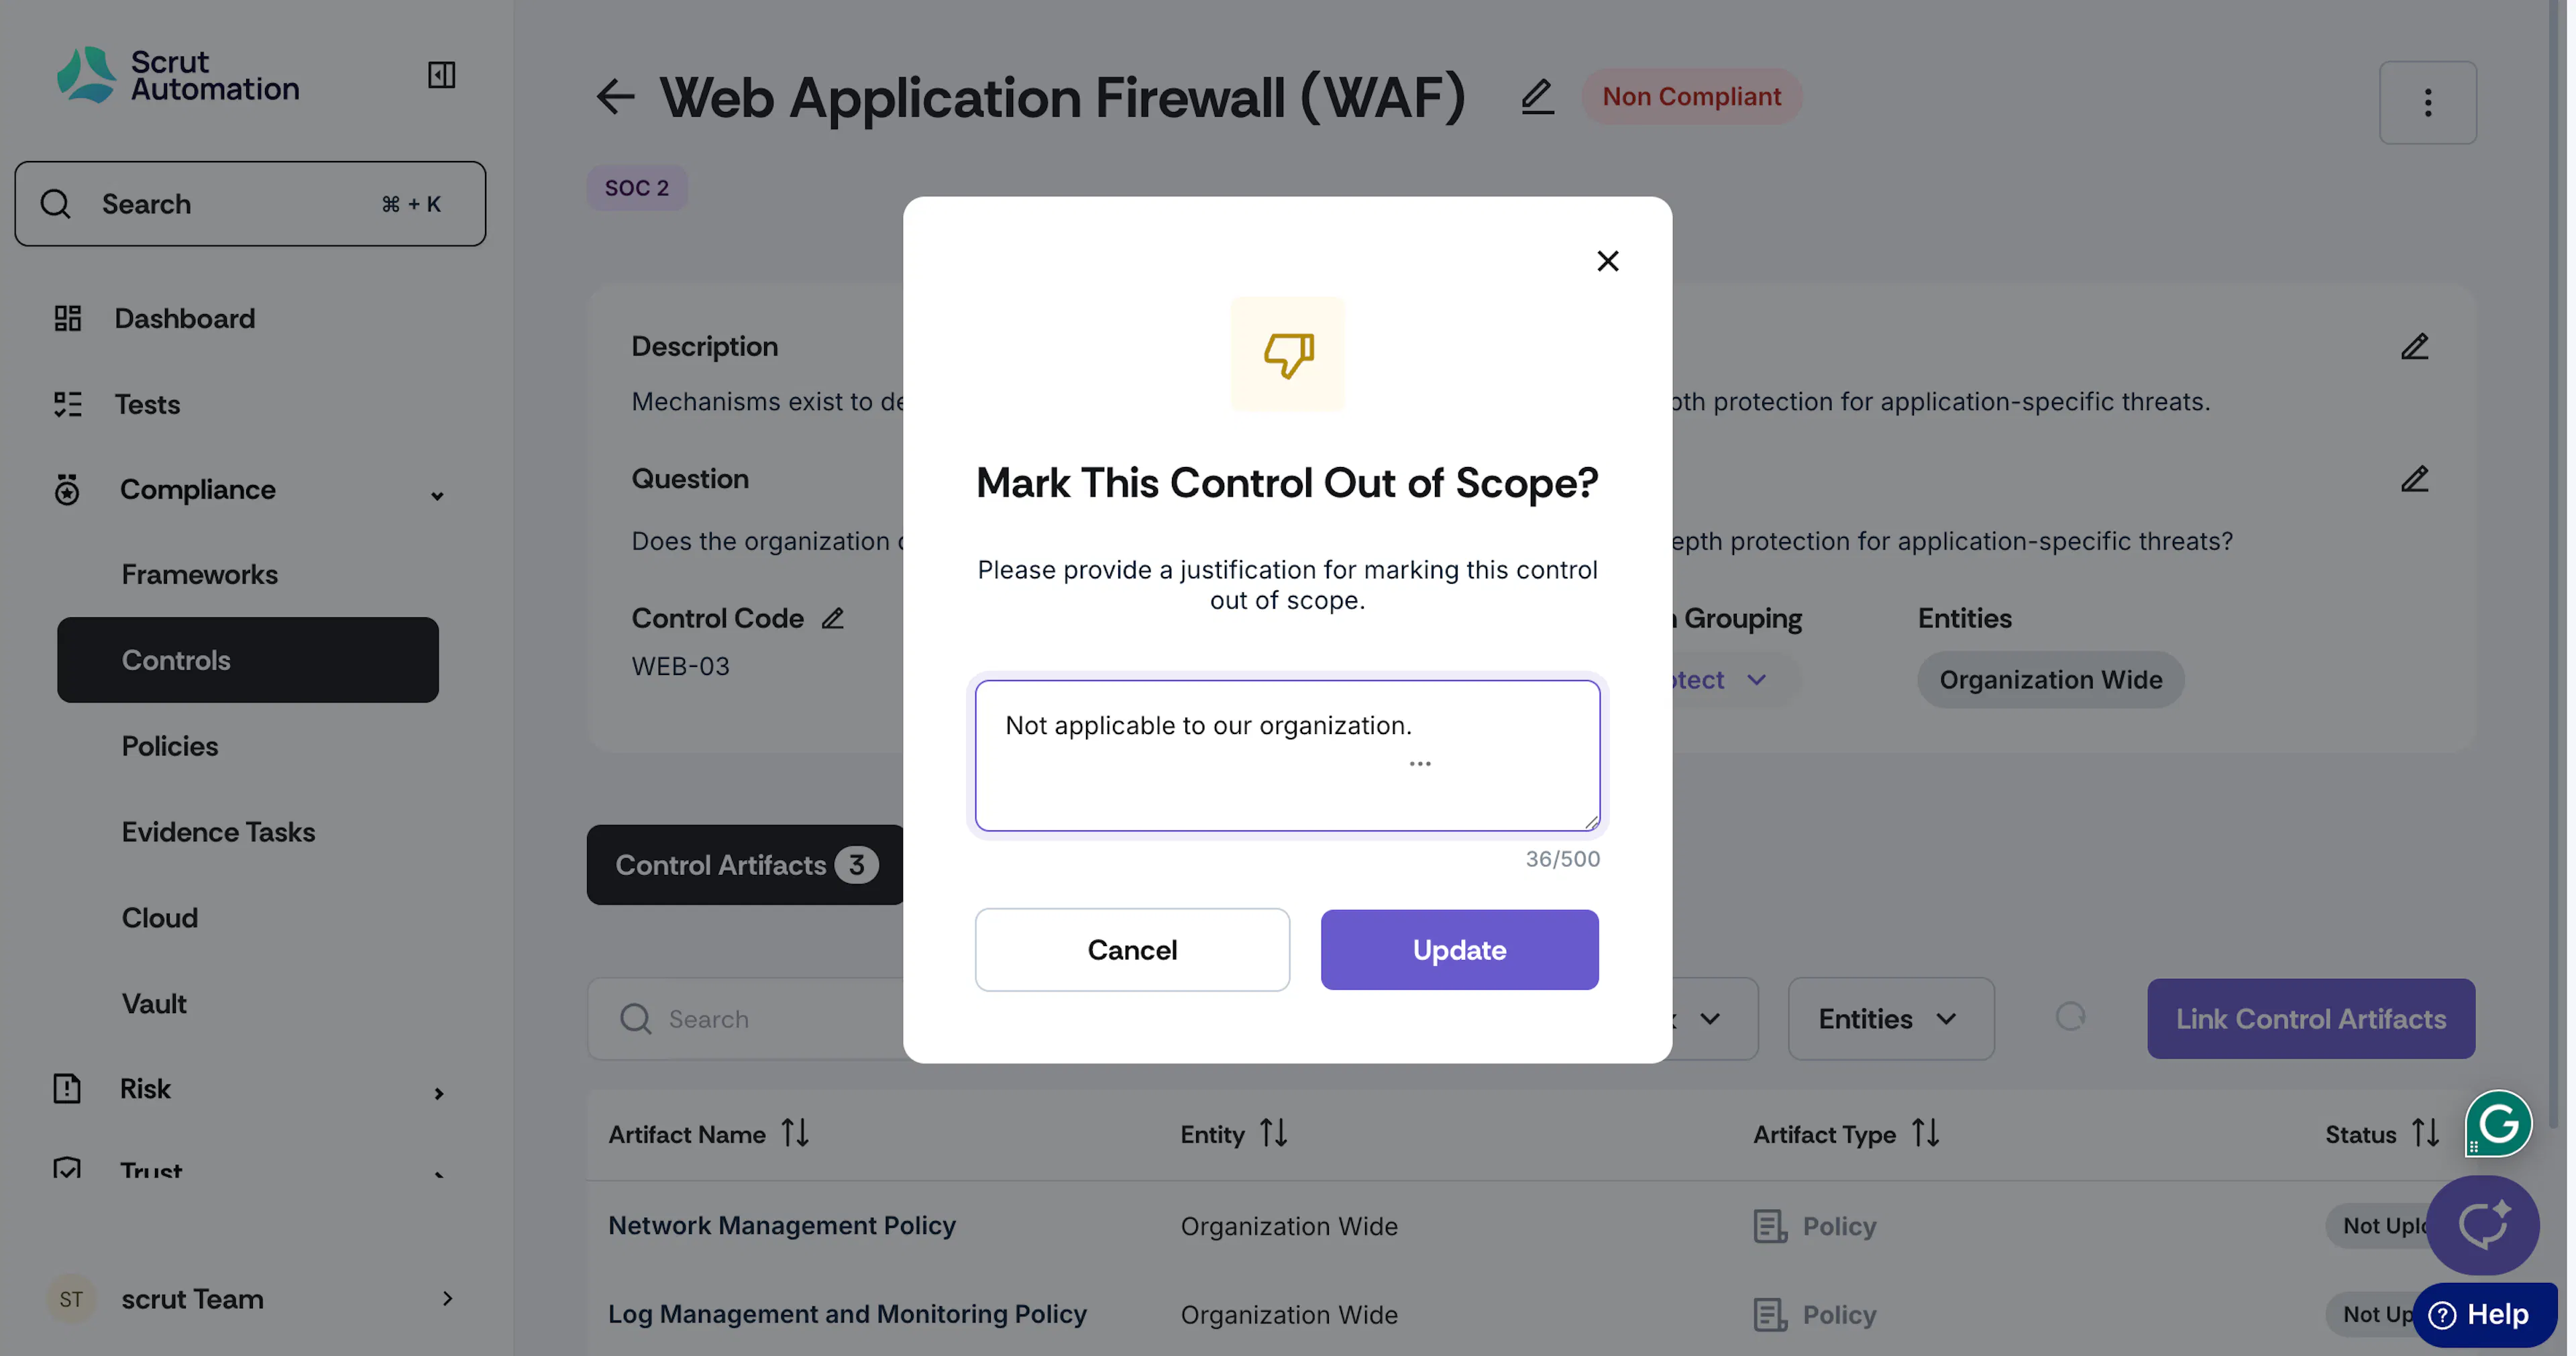
Click the three-dots icon on the top-right and select Mark Out of Scope.
-
Enter your justification for marking the control out of scope.
Note:
It’s mandatory to provide a justification to mark a control out of scope.
Watch out for the success notification, “Control marked out of scope successfully!”
Key Points:
-
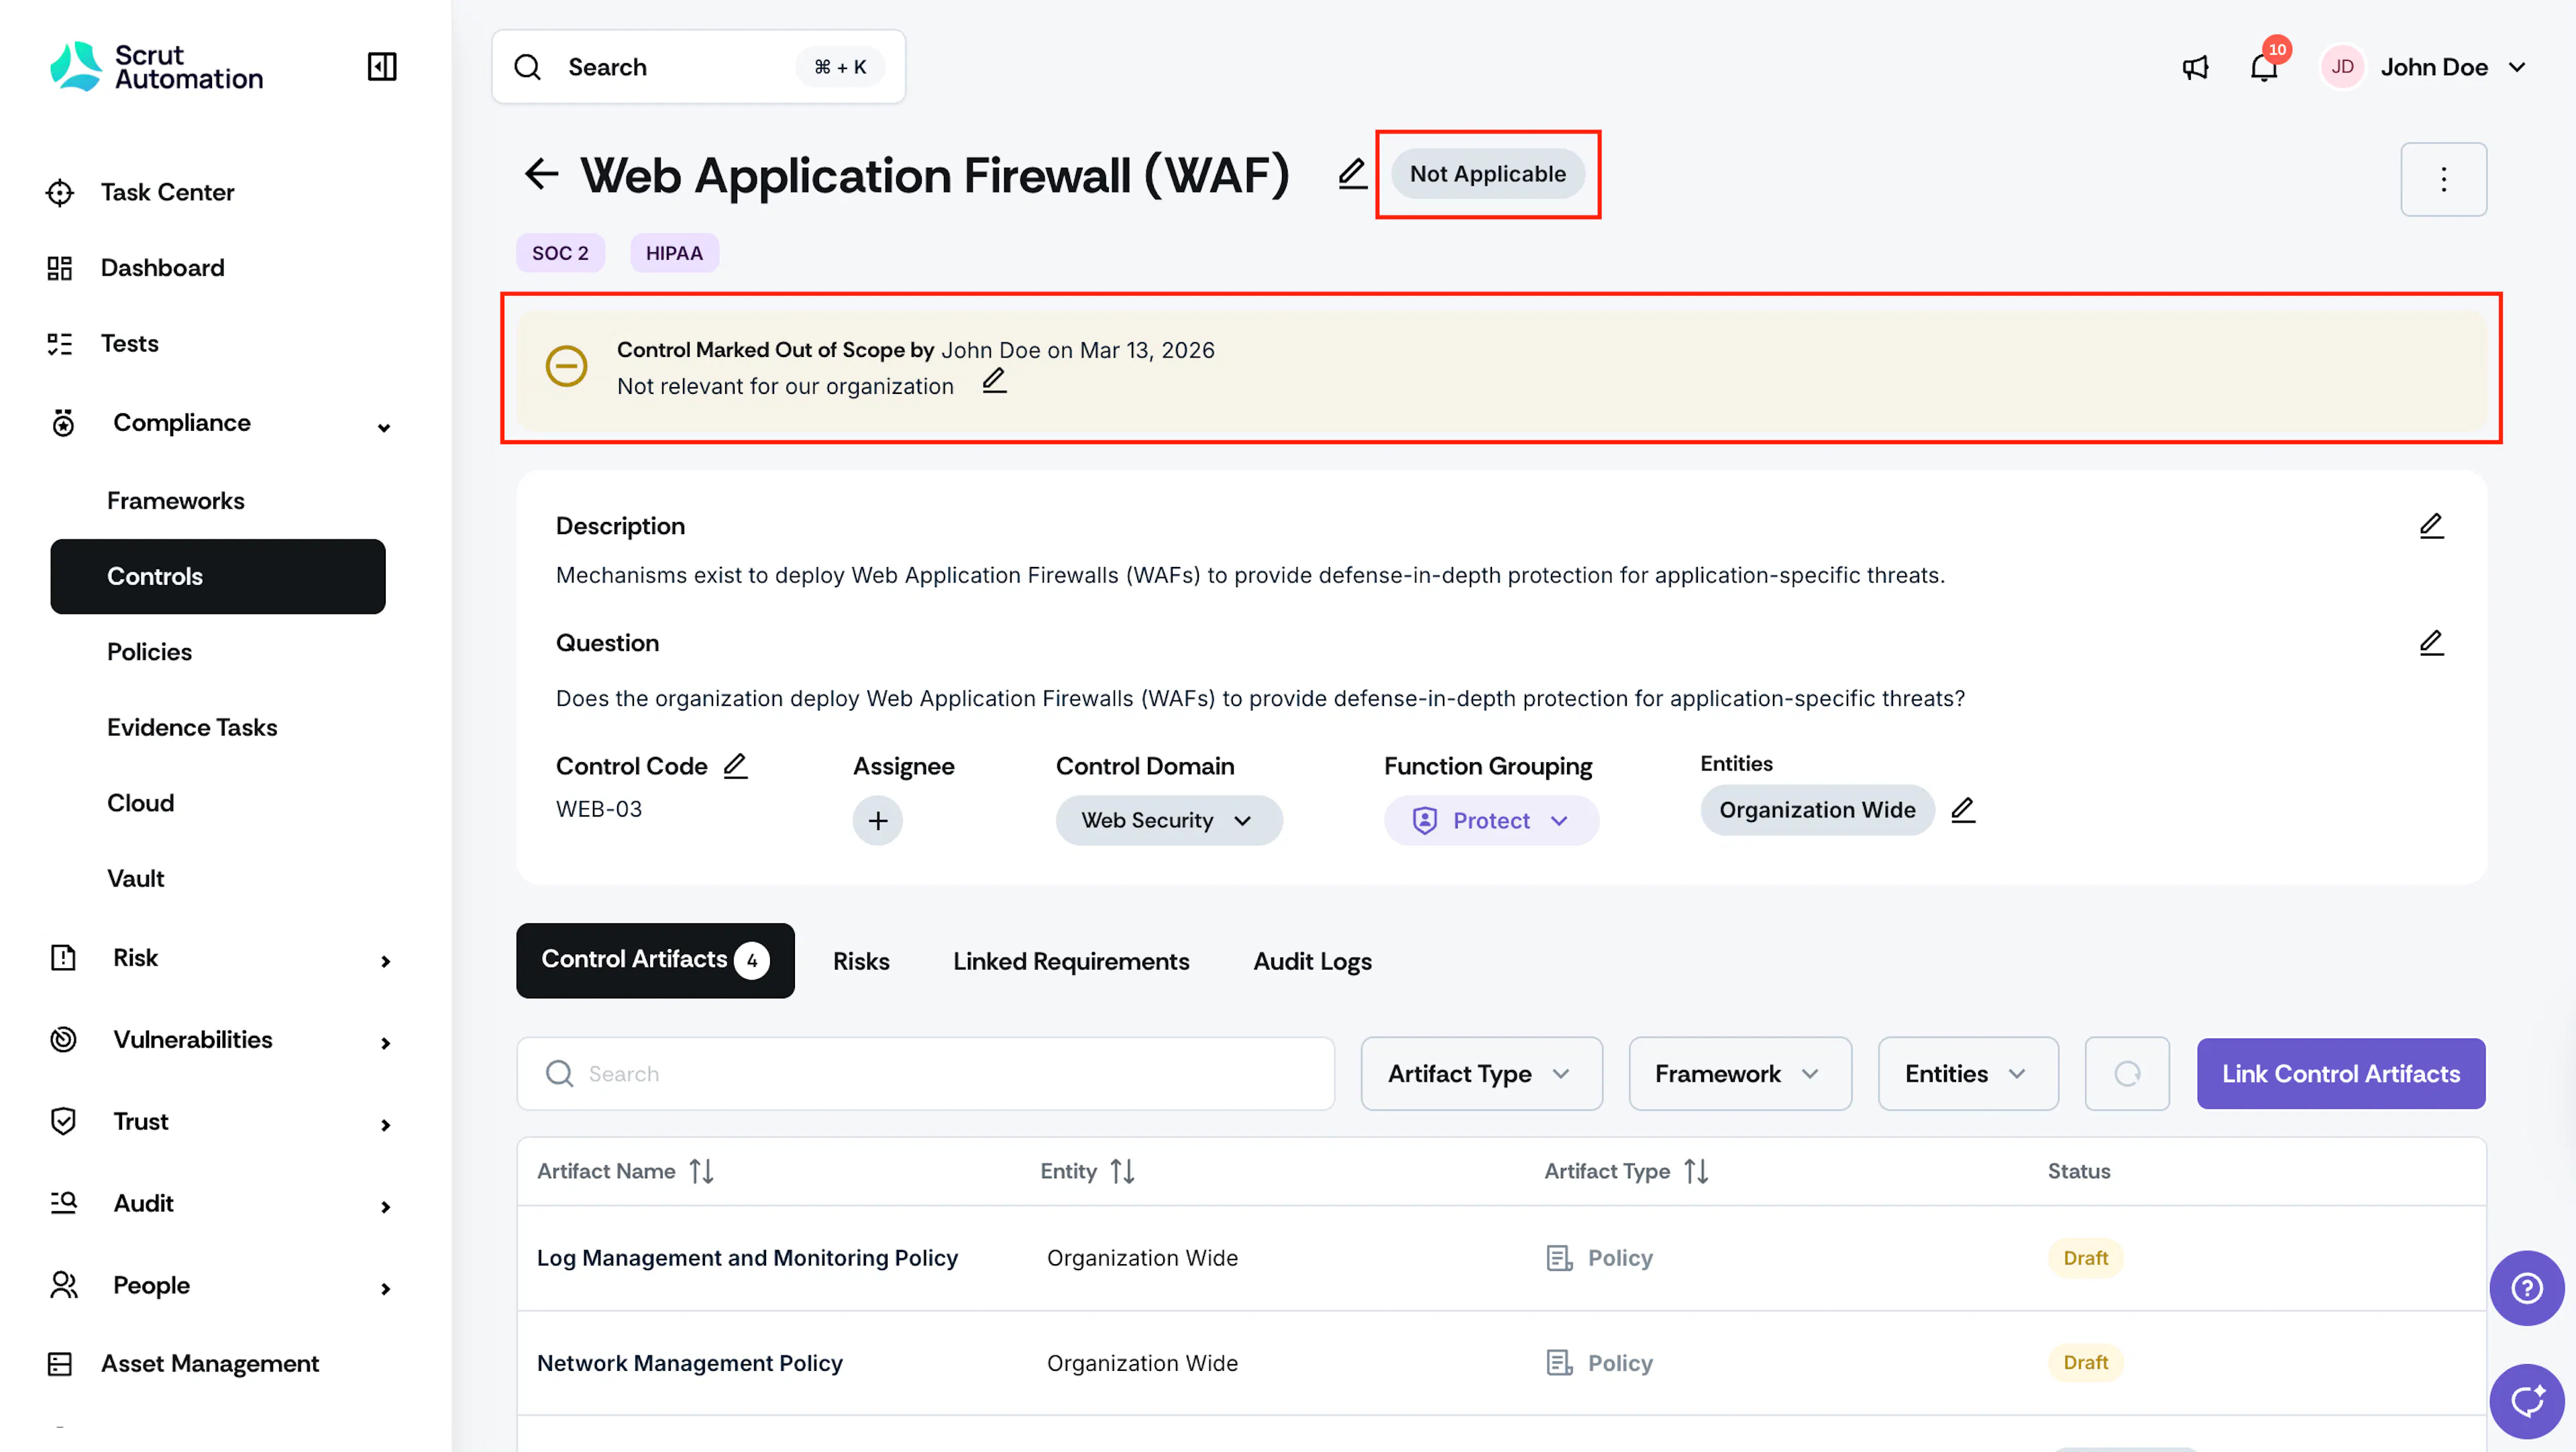
Once you mark a control out of scope, Scrut updates its status to Not Applicable.
-
The justification you provide will be visible on the control details page.
-
To reverse the action, click the three-dot icons and select Mark In Scope. Scrut will remove the previously added justification and show the success message, “Control marked in scope successfully!”
-
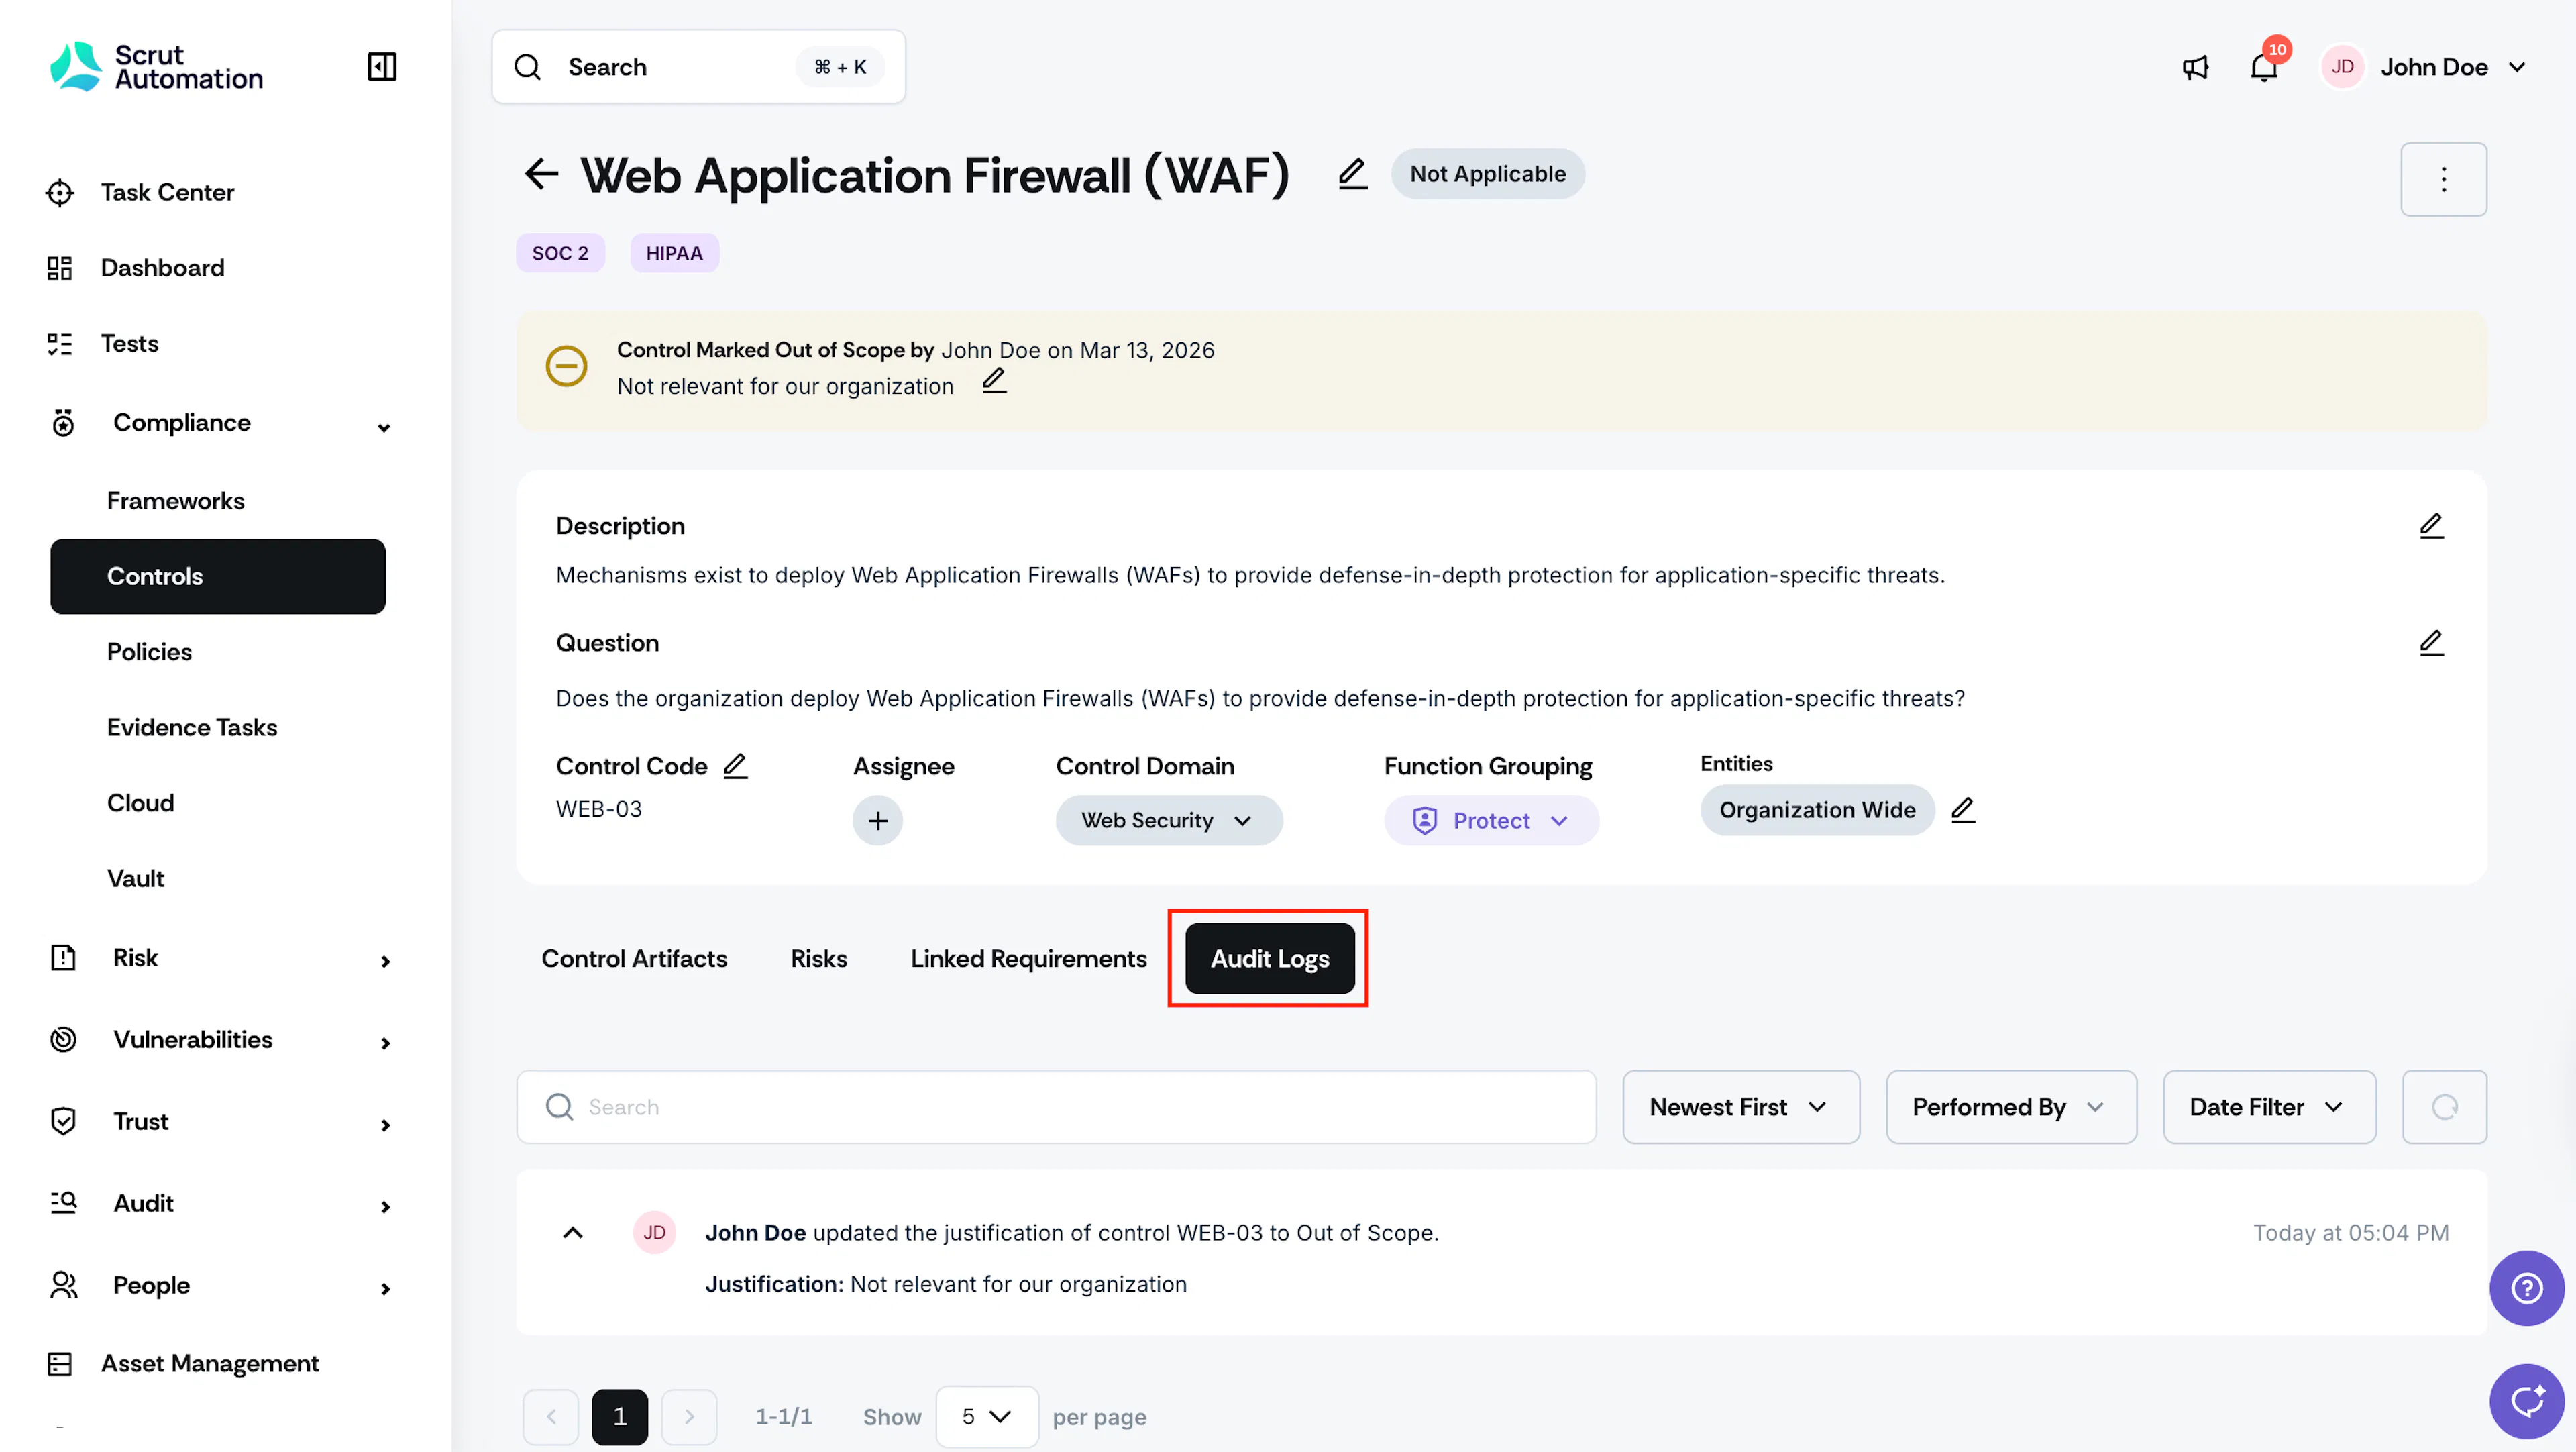
The audit log captures all scope changes.
Mark a Control In Scope
-
Navigate to the Controls → All Controls dashboard and click on the control you want to mark in scope.
-
Click the three-dots icon on the top-right and select Mark In Scope.