

Quick Start Guide: Evidence Automation
Heads Up!
This feature is currently available only for organizations with at least one of the following frameworks: ISO 27001, SOC 2, GDPR, or HIPAA. To know more, contact your CSM.
This guide walks you through setting up and managing evidence automation in Scrut from start to finish. Follow the steps in order to connect your integrations, activate automation for your evidence tasks, confirm coverage, and keep your evidence healthy over time.
Before You Begin
Evidence Automation works by linking two types of automation sources to your evidence tasks: Automated Tests and Scrut Monitors. As you complete the steps in this guide, Scrut will automatically assign an Evidence Collection status to each evidence task. There are four statuses:
- Automation Ready: Scrut can automate this evidence, but a required integration is missing, or a Scrut monitor requires configuration.
- Partially Automated: At least one automation source is active, but you still need to submit additional manual proof.
- Fully Automated: All evidence requirements are covered by active automation. No manual upload needed.
- Manual Only: No automation is available. Manual upload is always required.
You don't need to assign these statuses yourself. Scrut sets them automatically based on your integrations, monitor activity, and the coverage decisions you make in Step 4.
Step 1: Identify Your Automation Opportunities
Find out which evidence tasks Scrut can automate for you.
-
Navigate to Compliance → Evidence Tasks → All Evidences.
-
Locate the Evidence Collection card at the top of the page.

-
Click Automation Ready in the graph to filter the evidence list.
-
The filtered list shows every evidence task that Scrut can automate once you connect the right integrations.
-
Each task indicates which integrations are required. Common ones include AWS, Azure, GCP, GitHub, Jira, and Okta.
Pro Tip!
If multiple evidence tasks need the same integration, connecting it once unlocks automation for all of them. Prioritize integrations that appear across the most evidence tasks.
Step 2: Connect Your Integrations
Connecting an integration is the primary action that activates evidence automation.
-
Click Integrations in the left nav bar.
-
Go to the Integrations Library tab and connect tools that drive up evidence automation.
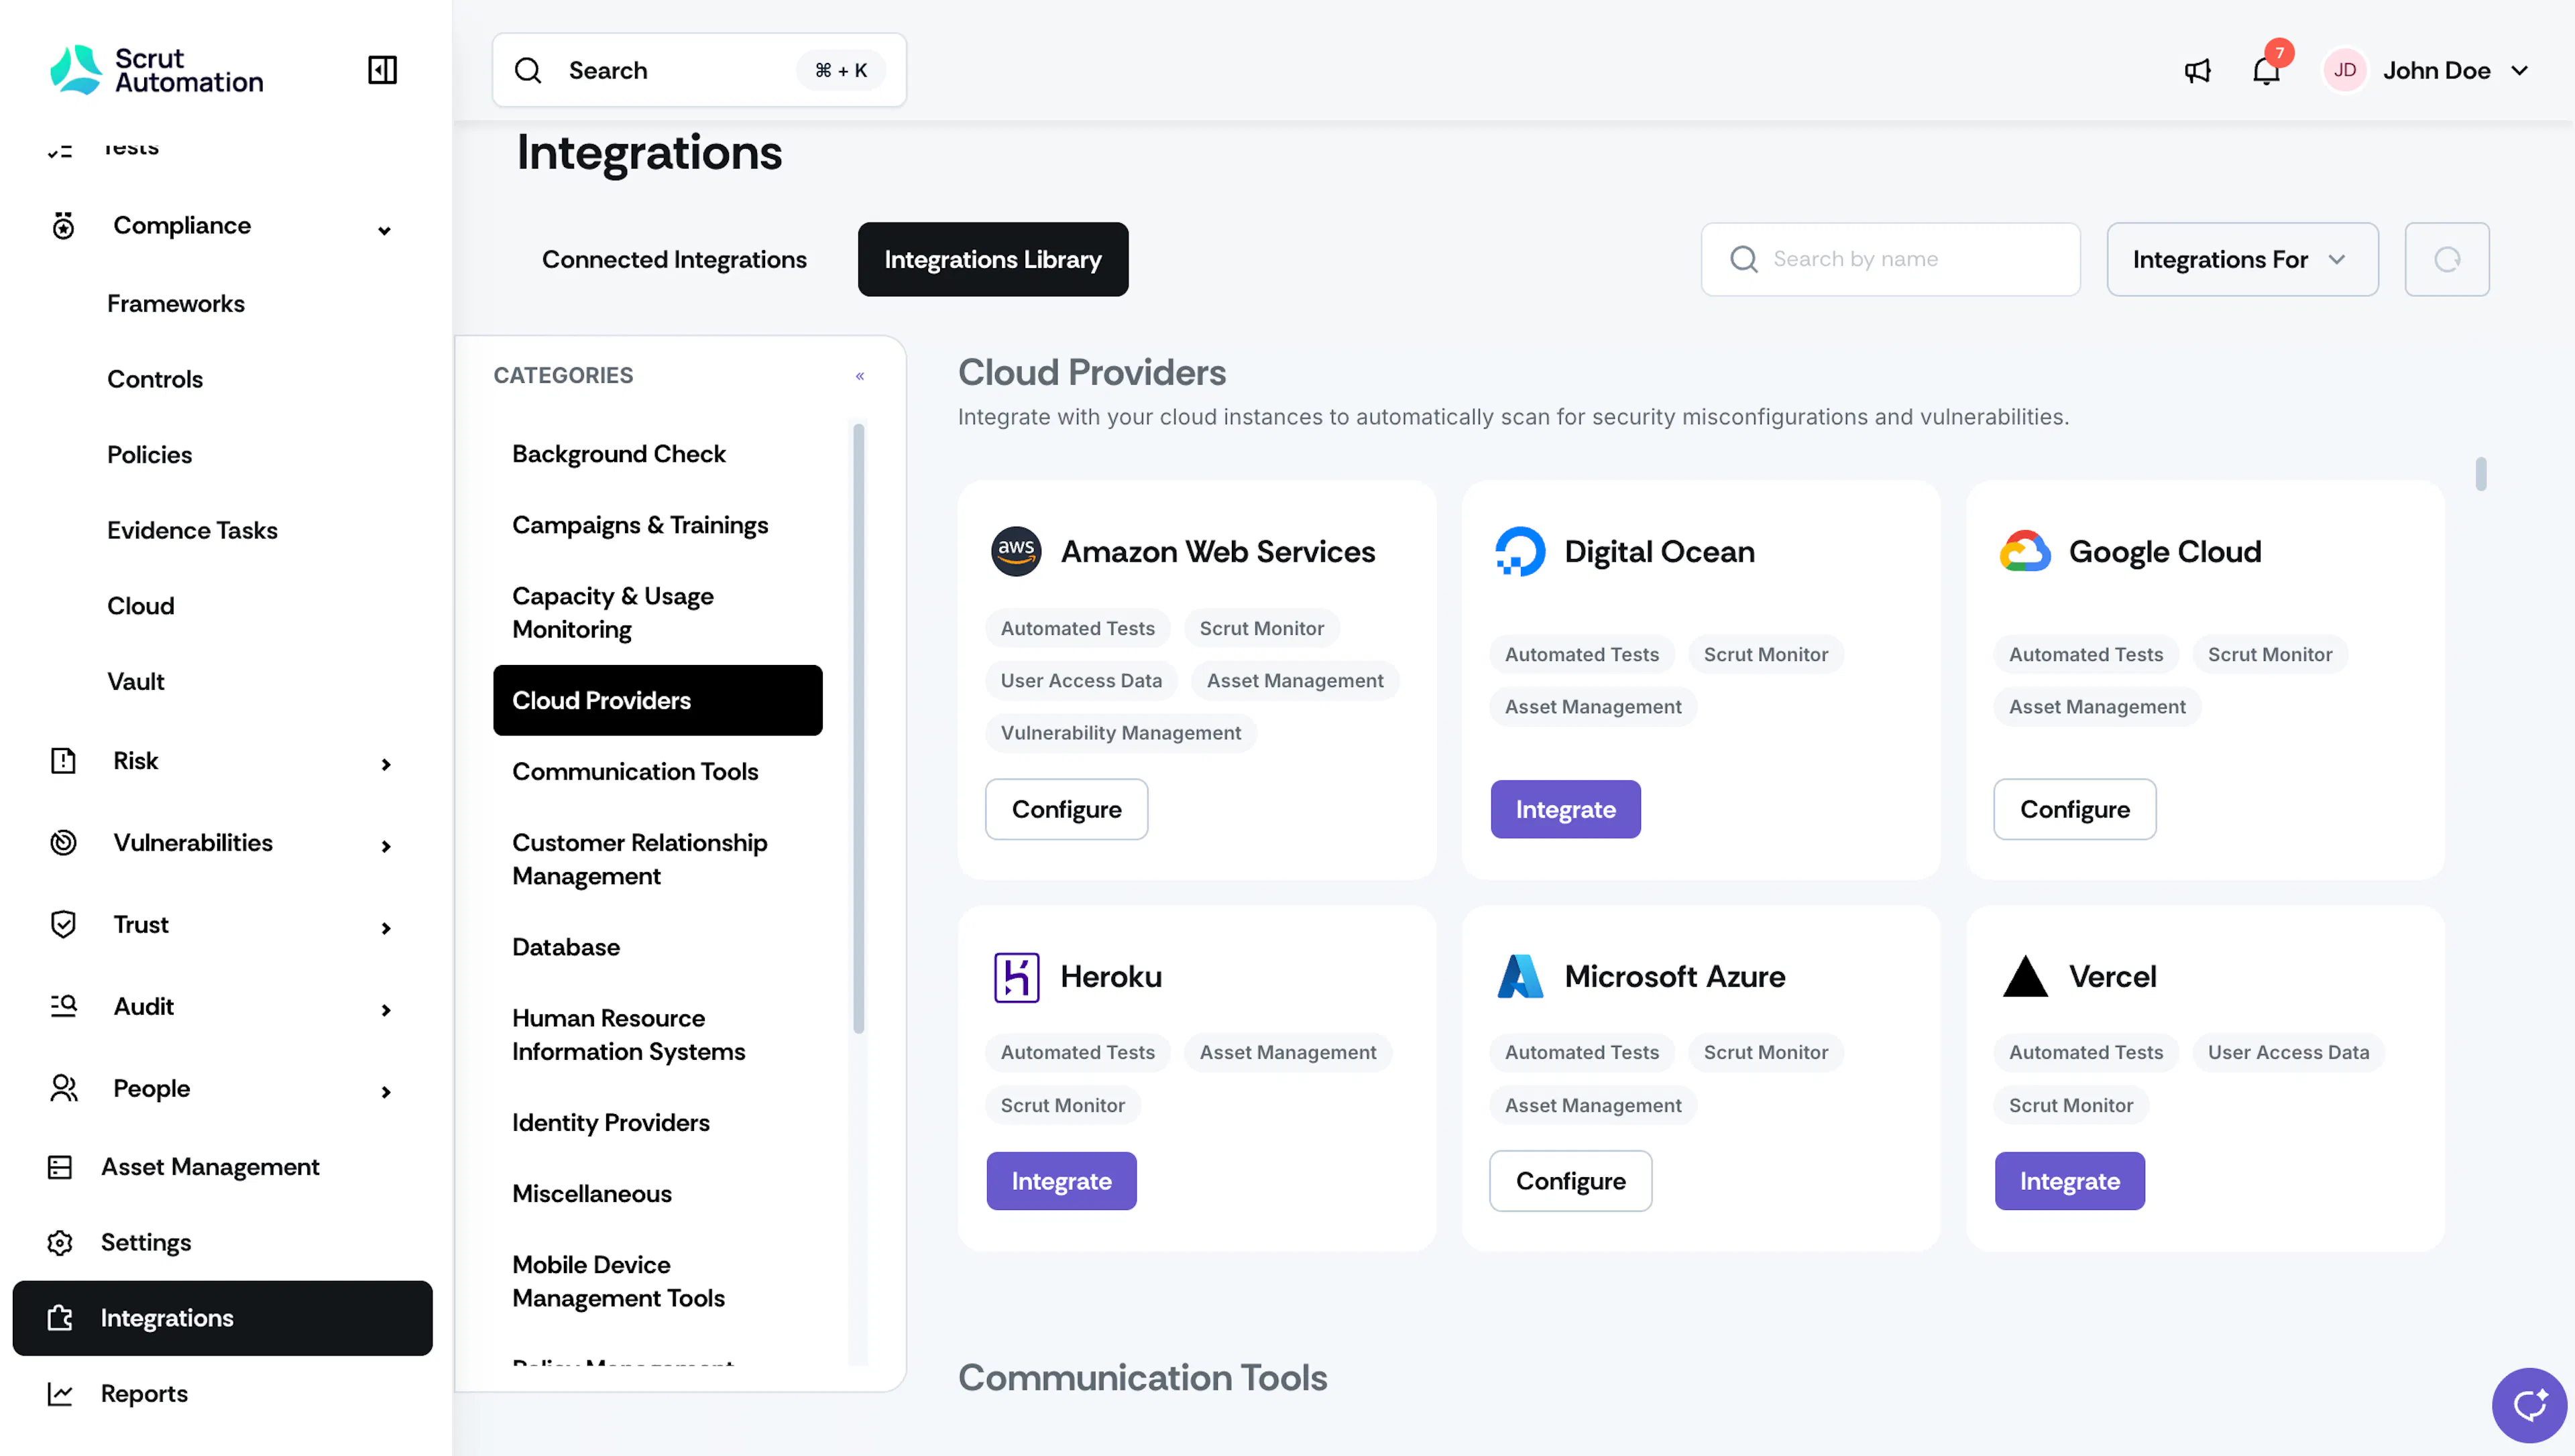
What happens when you connect an integration:
Evidence tasks that were Automation Ready will move to Partially Automated once integrations are active.
Automated Tests are automatically mapped to relevant evidence tasks based on your framework requirements. No setup needed.
Scrut Monitors are created in one of two ways:
- Internal monitors (for modules like Asset Inventory, Access Reviews, and Employee Checklists) are created and activated automatically with no setup needed.
- Integration-based monitors are created as placeholders with the status Setup Required. You'll complete their setup in Step 3.
Step 3: Complete Monitor Setup and Configure Scrut Modules
Some automation sources require additional configuration before they can start collecting data.
Complete Scrut Monitor Setup
-
Navigate to Compliance → Evidence Tasks → All Evidences.
-
Click Automation Ready in the graph to filter the evidence list.
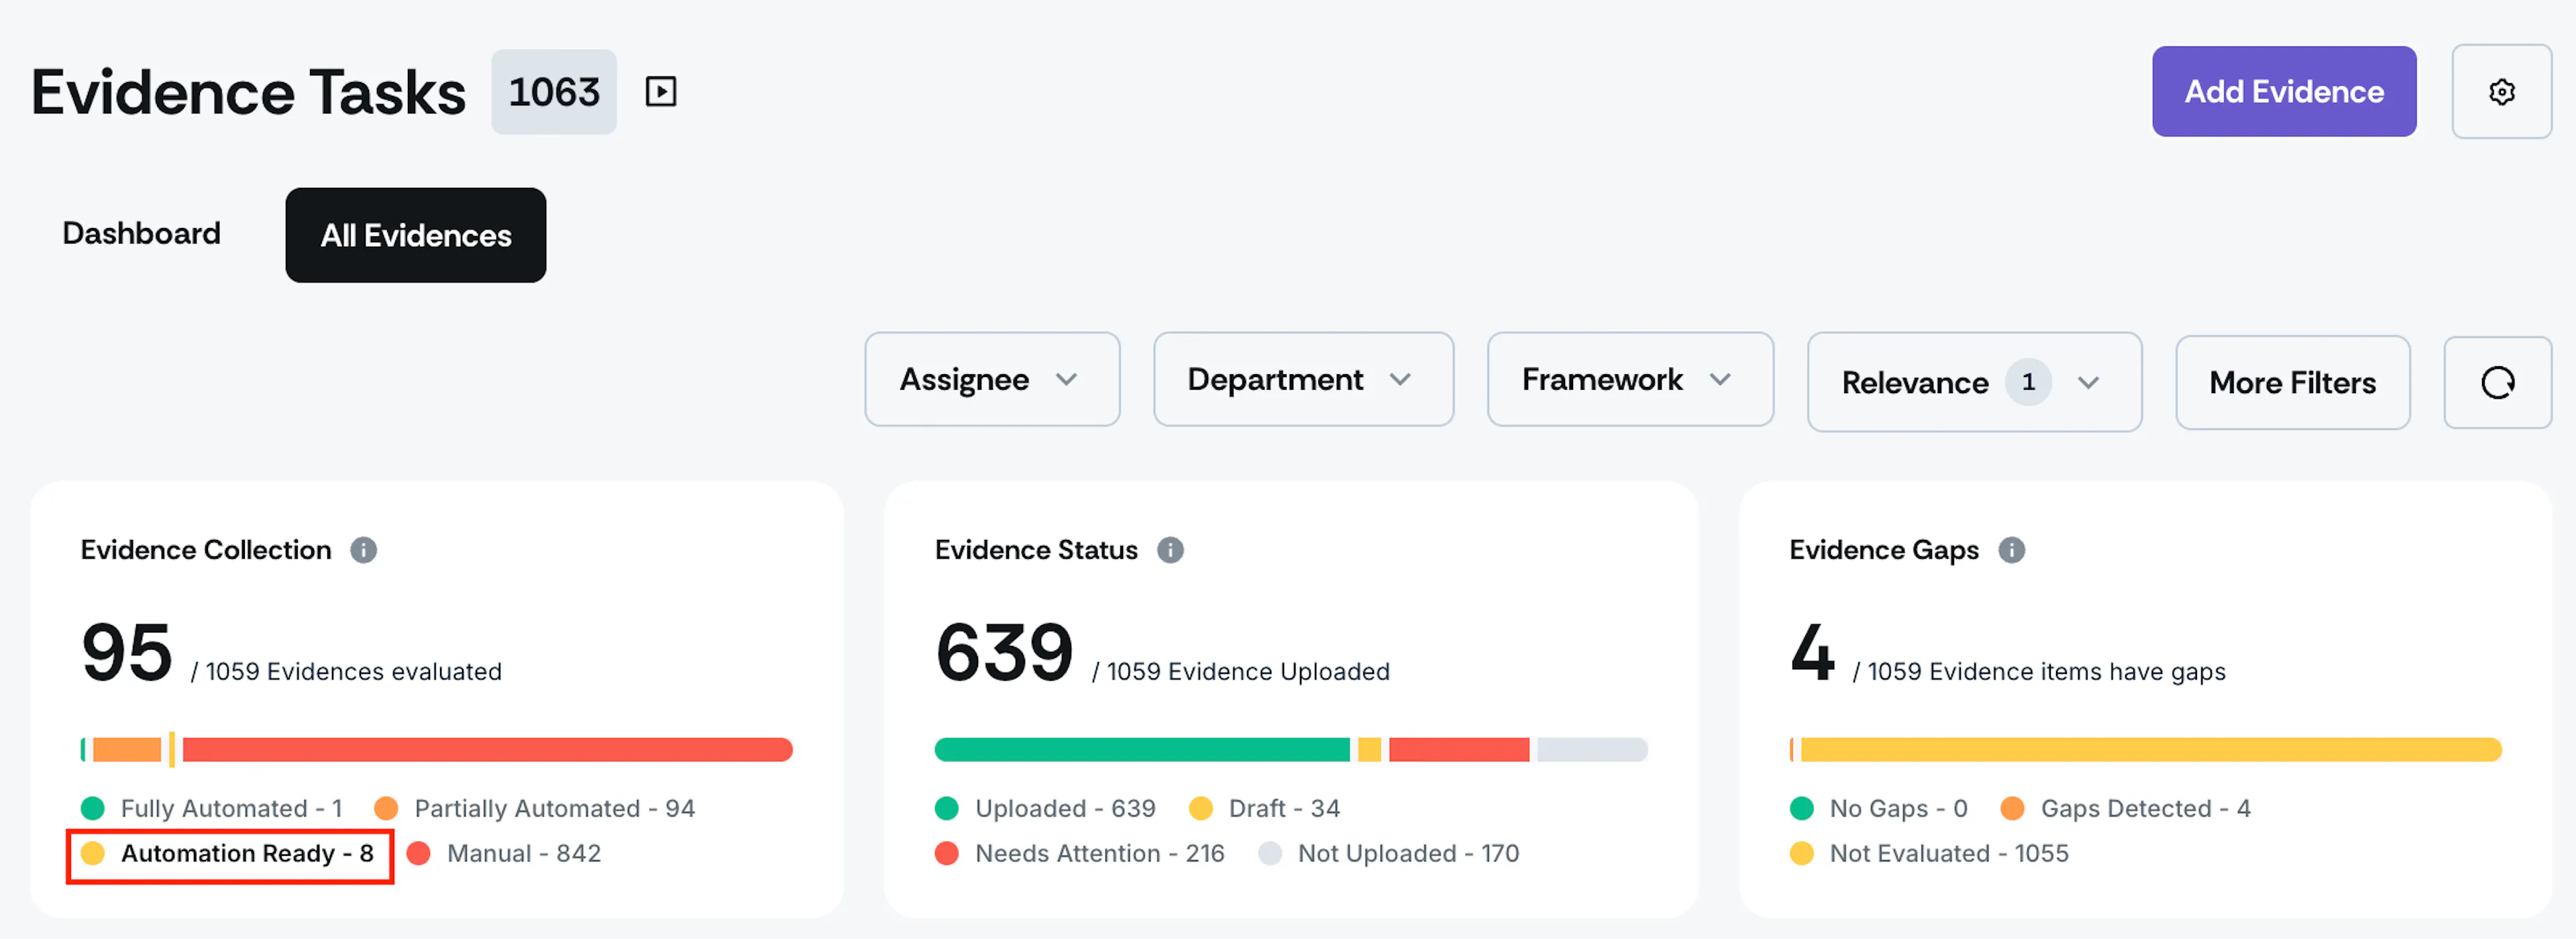
-
Open an evidence task that shows a Setup Required monitor in the Automation Sources section.
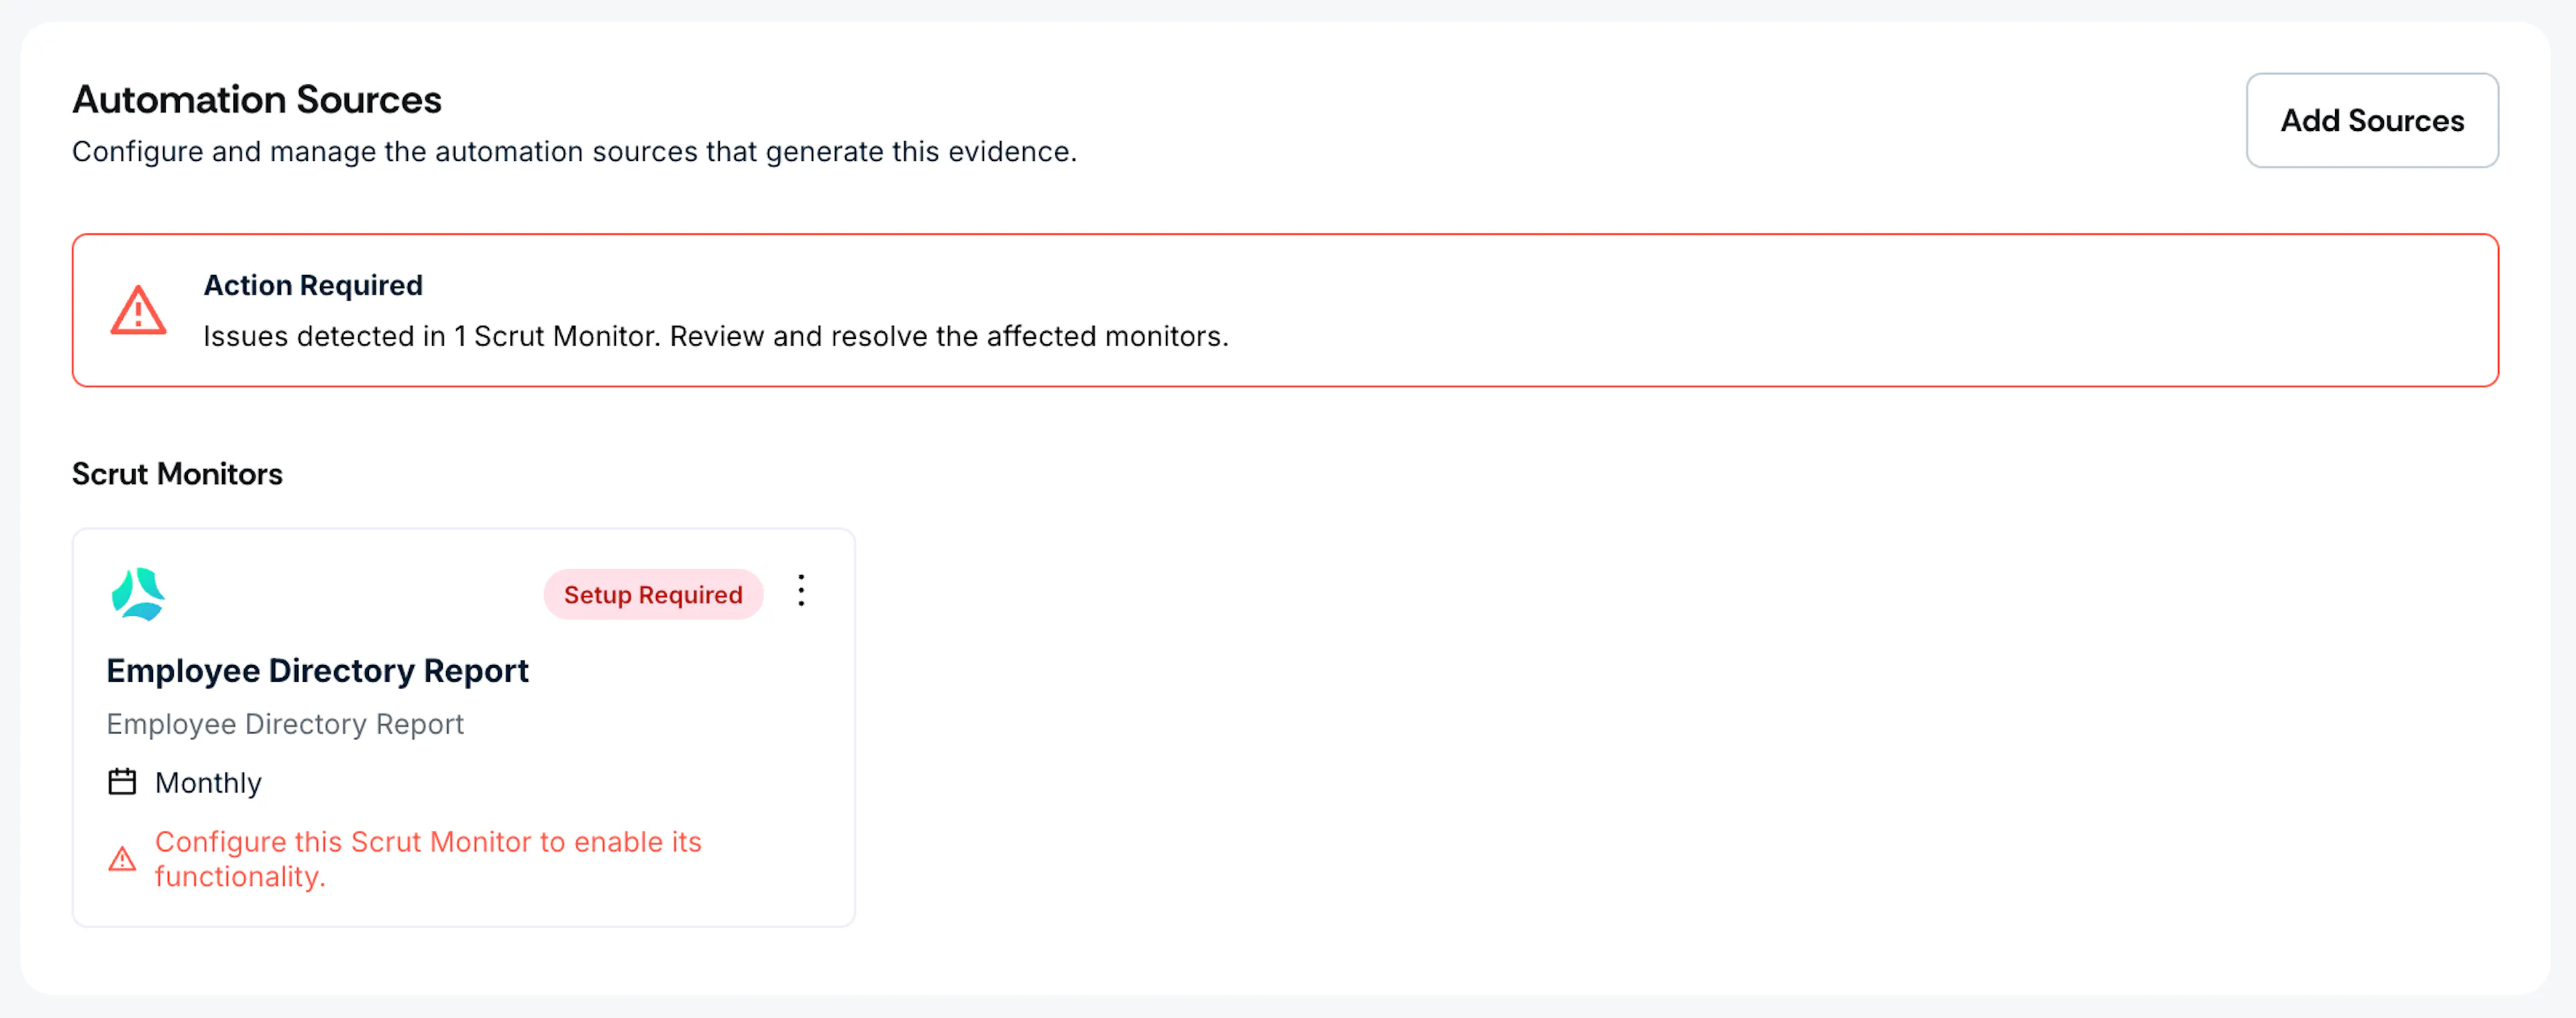
-
Click the monitor to open its configuration.
-
Provide the required details. Depending on the integration, this may include:
- A repository or branch (for GitHub or GitLab)
- A project or board (for Jira or Asana)
- A resource group or account (for AWS, Azure, or GCP)
-
Save the configuration.
The monitor activates, and the evidence task moves from Automation Ready to Partially Automated.
Complete Tasks in other Scrut modules
Internal monitors are powered by data from other Scrut modules. Setting these up gives Scrut what it needs to generate evidence automatically.
- Policies: Upload or create security policies, set review schedules, and assign policy owners.
- People → Access: Set up access reviews, define reviewers, and set review schedules.
- Employee Checklists: Create onboarding and offboarding checklists.
- Training Campaigns: Set up security awareness training, assign it to employees, and track completion.
- Risk Register: Document identified risks, assign risk owners, and track treatment status.
- Vendor Management: Add vendors and third-party providers, and track security assessments.
As you set up these modules, Scrut automatically creates internal monitors, collects data, passes relevant Automated Tests, and attaches proof documents to evidence tasks.
Pro Tip!
Prioritize modules that align with your framework requirements. Your CSM can help you identify which ones to set up first.
Step 4: Confirm Your Automation Coverage
For each evidence task with active automation, you confirm whether that automation covers all the systems your organization uses. Your answer determines the final automation status.
-
Navigate to Compliance → Evidence Tasks → All Evidences.
-
Click Partially Automated in the graph to filter the evidence list.
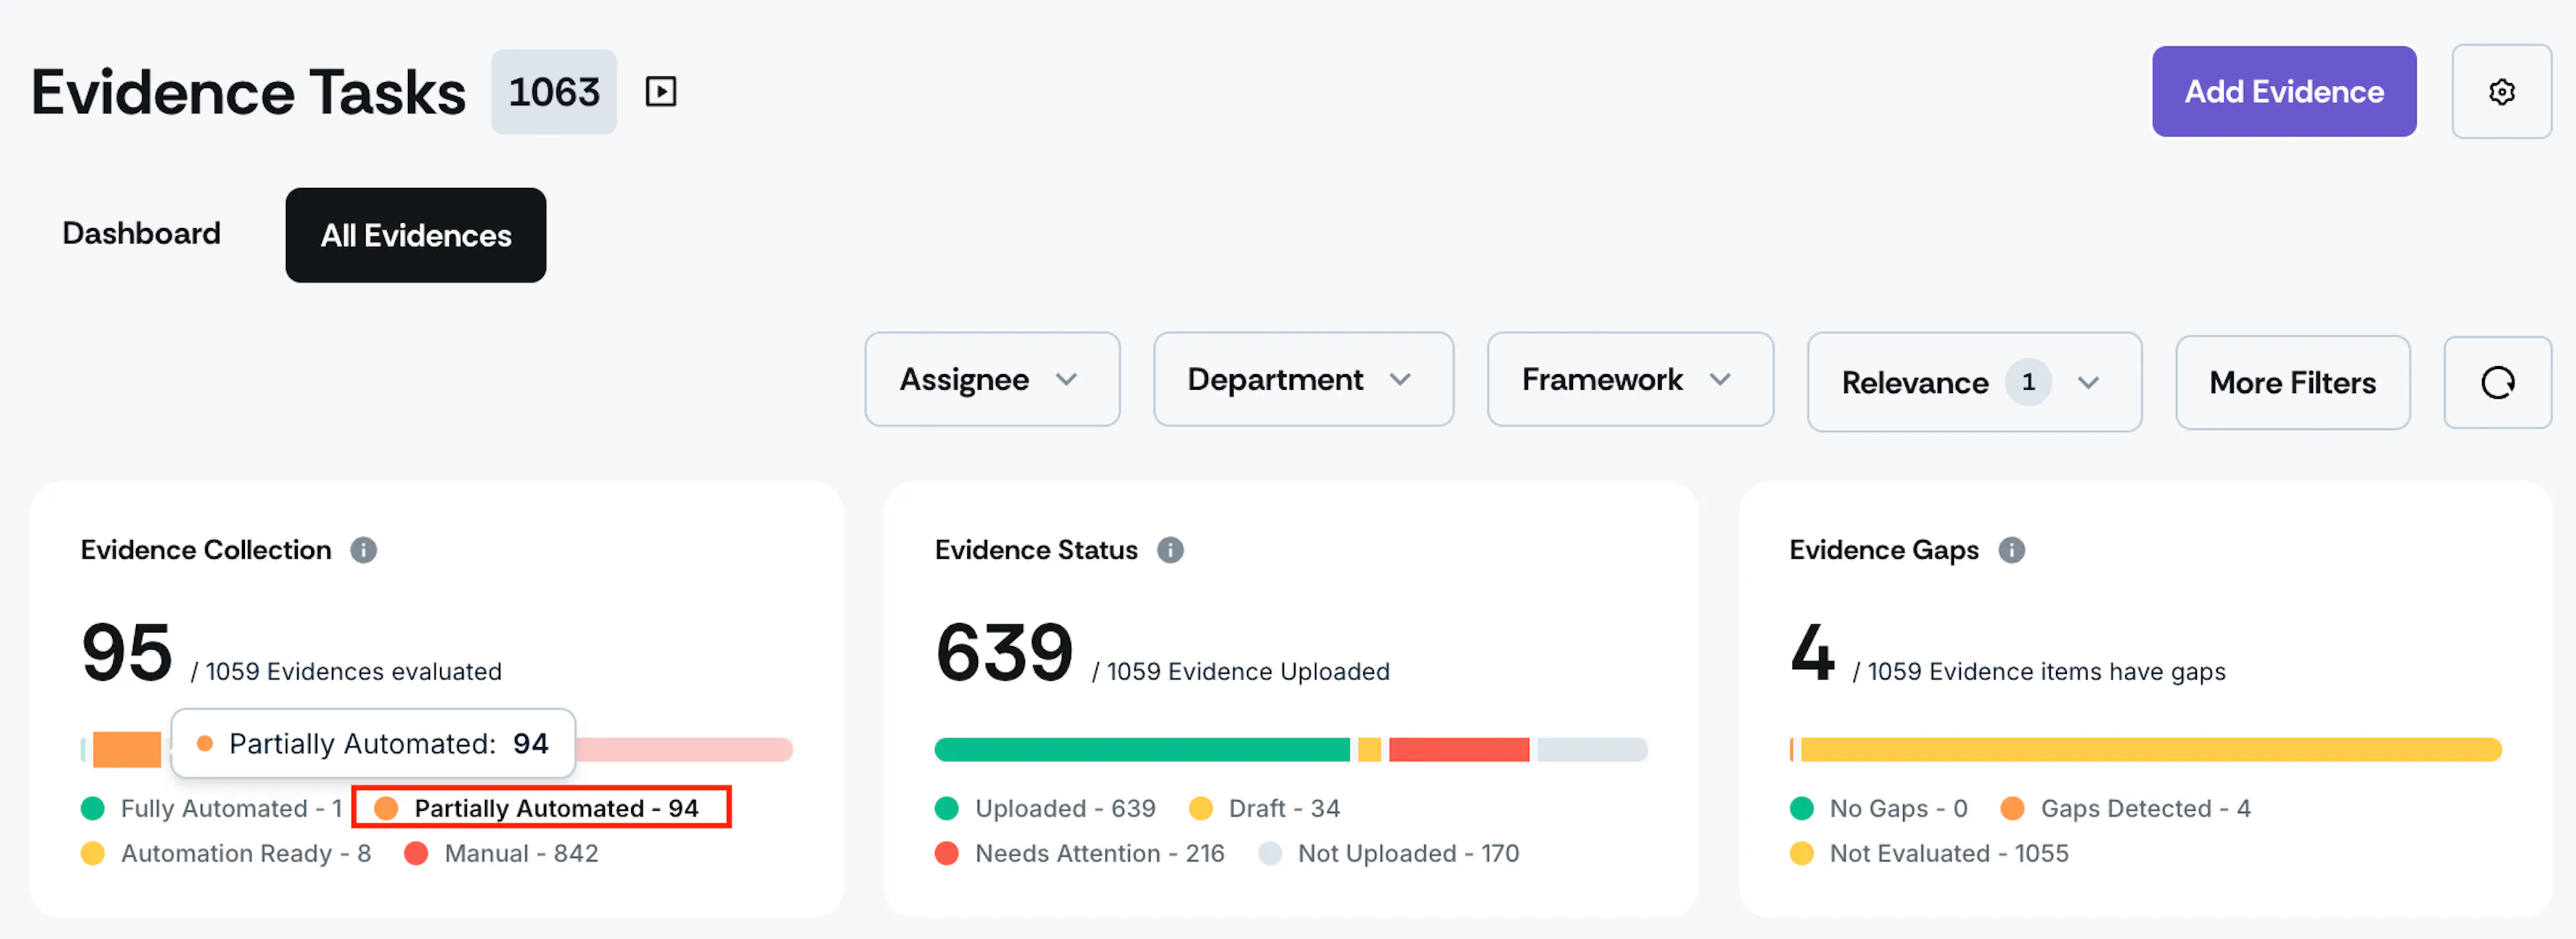
-
Open an evidence task.
-
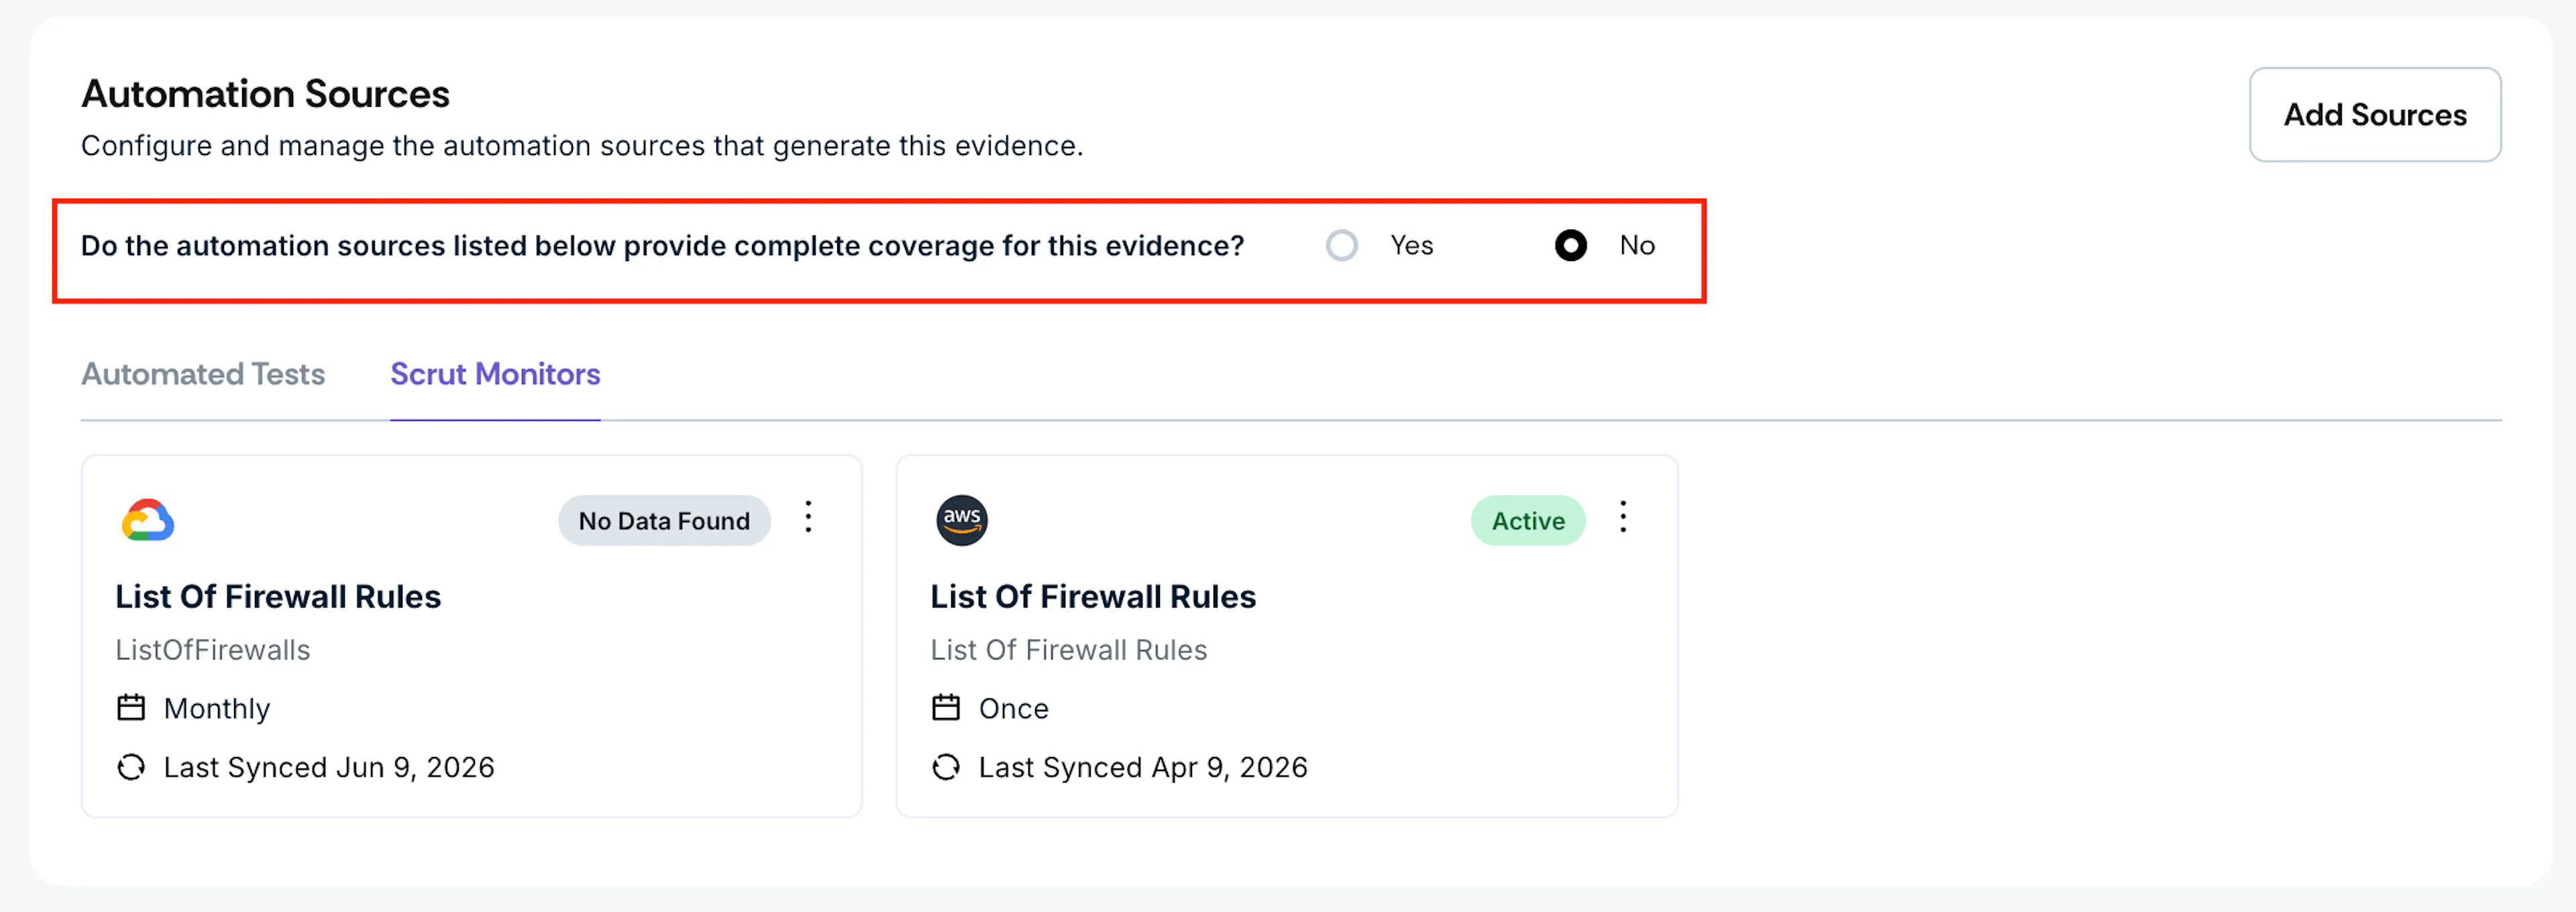
Scroll to the Automation Sources section and review the linked tests and monitors. Check what data is being collected and which systems it covers.
-
Locate the coverage question: "Does this automation cover all systems relevant to this evidence?"
-
Select your answer:
- Click Yes if all your systems are covered. The evidence moves to Fully Automated.
- Click No if some systems fall outside Scrut's automation scope. The evidence stays at Partially Automated.
-
If you selected No, click Add Attachment and upload proof for the systems not covered by automation.
Heads Up!
Automation never automatically marks an evidence task as complete. You always need to verify the evidence and click mark it as complete to move it to the Uploaded status.
When to select Yes (Fully Automated):
- All systems relevant to this control are covered by active tests or monitors
- The automated data meets your auditor's requirements
- No additional documentation is needed
Examples: Your organization uses only AWS for cloud infrastructure, and AWS tests cover the encryption requirement. Your entire employee directory syncs from Okta.
When to select No (Partially Automated):
- You use tools or cloud providers that Scrut doesn't integrate with
- Your auditor requires documentation beyond what automation collects
- Some of your infrastructure is outside the automation scope
Examples: You use both AWS (automated via Scrut) and Alibaba Cloud (not integrated). Your GitHub monitor captures most change management evidence, but some legacy systems use SVN.
Pro Tip!
When marking No, add a note in the Comments tab explaining which systems are automated, which need manual proof, and what documents to upload. This context is valuable during audits.
Step 5: Maintain Your Evidence Regularly
Evidence automation requires periodic review to stay healthy. Use the following routine to keep your evidence current.
Weekly
Filter by Partially Automated and upload any missing manual proof for systems not covered by automation.
Monthly
- Filter by Automation Ready and evaluate whether any new integrations can be connected to activate pending automation.
- Check for failed Automated Tests and investigate any compliance issues.
- Verify that all integrations are still healthy. If a monitor shows an unhealthy status, reconnect or fix the affected integration. Evidence tasks return to their previous automation status automatically once the integration is healthy.
Before audits
Filter by Manual Only and confirm that all manual documents are current and uploaded. Manual evidence tasks always require a manual upload. Common examples include:
- Visitor logs: Scans or photos of physical sign-in sheets at the front desk, showing names, dates, times, and escort signatures.
- Certificates of Destruction (CoD): Signed PDFs from a certified e-waste disposal vendor proving that old hard drives were physically shredded or degaussed (demagnetized).
Filter by Fully Automated and confirm that tests are passing and monitors are healthy. No action is needed for healthy fully-automated evidence tasks.
Step 6: Respond to Integration Changes
Disconnecting an integration affects your evidence tasks immediately.
When you disconnect an integration:
- Automated Tests linked to that integration are hidden from the evidence task (but not deleted).
- Scrut Monitors from that integration become unhealthy.
- If no other active automation exists for an evidence task, the automation status downgrades from Fully Automated or Partially Automated to Automation Ready.
- If no other data is attached, the evidence status changes to Not Uploaded.
To fix it:
- Navigate to Integrations.
- Reconnect the affected integration or fix the permission issue.
Once the integration is healthy, all affected evidence tasks automatically return to their previous automation status.
Best Practices
Work with your CSM
Your CSM is a useful resource throughout this process, not just at setup. They can help you identify which integrations will provide the most value for your specific frameworks, advise on Fully vs. Partially Automated decisions, and clarify what auditors typically expect for specific evidence tasks.
If you're unsure whether automation is sufficient for a particular evidence task, check with your CSM before marking it as Fully Automated.
Train your team
Anyone involved in compliance should understand how Evidence Automation works before an audit cycle begins. Make sure your team knows the difference between the four automation statuses, when to upload manual evidence vs. rely on automation, and how to check whether tests are passing or monitors are healthy.
Share this guide with your team as a starting reference. The workflow in Steps 1 through 6 covers everything they need to get up to speed.
Reach out to support@scrut.io or contact your CSM for further assistance.