

Quick Start Guide: Setup Wizard
Who can use this feature
- Supported on Foundation, Growth, and Scale plans
Welcome to Scrut! This guide will walk you through the setup wizard step-by-step and answer common questions you may have while onboarding to the Scrut platform.
Getting Started
When you first log into Scrut as an admin, you’ll be automatically directed to the Setup Wizard, which will guide you on how to set up your organization in Scrut.
The wizard consists of four main sections:
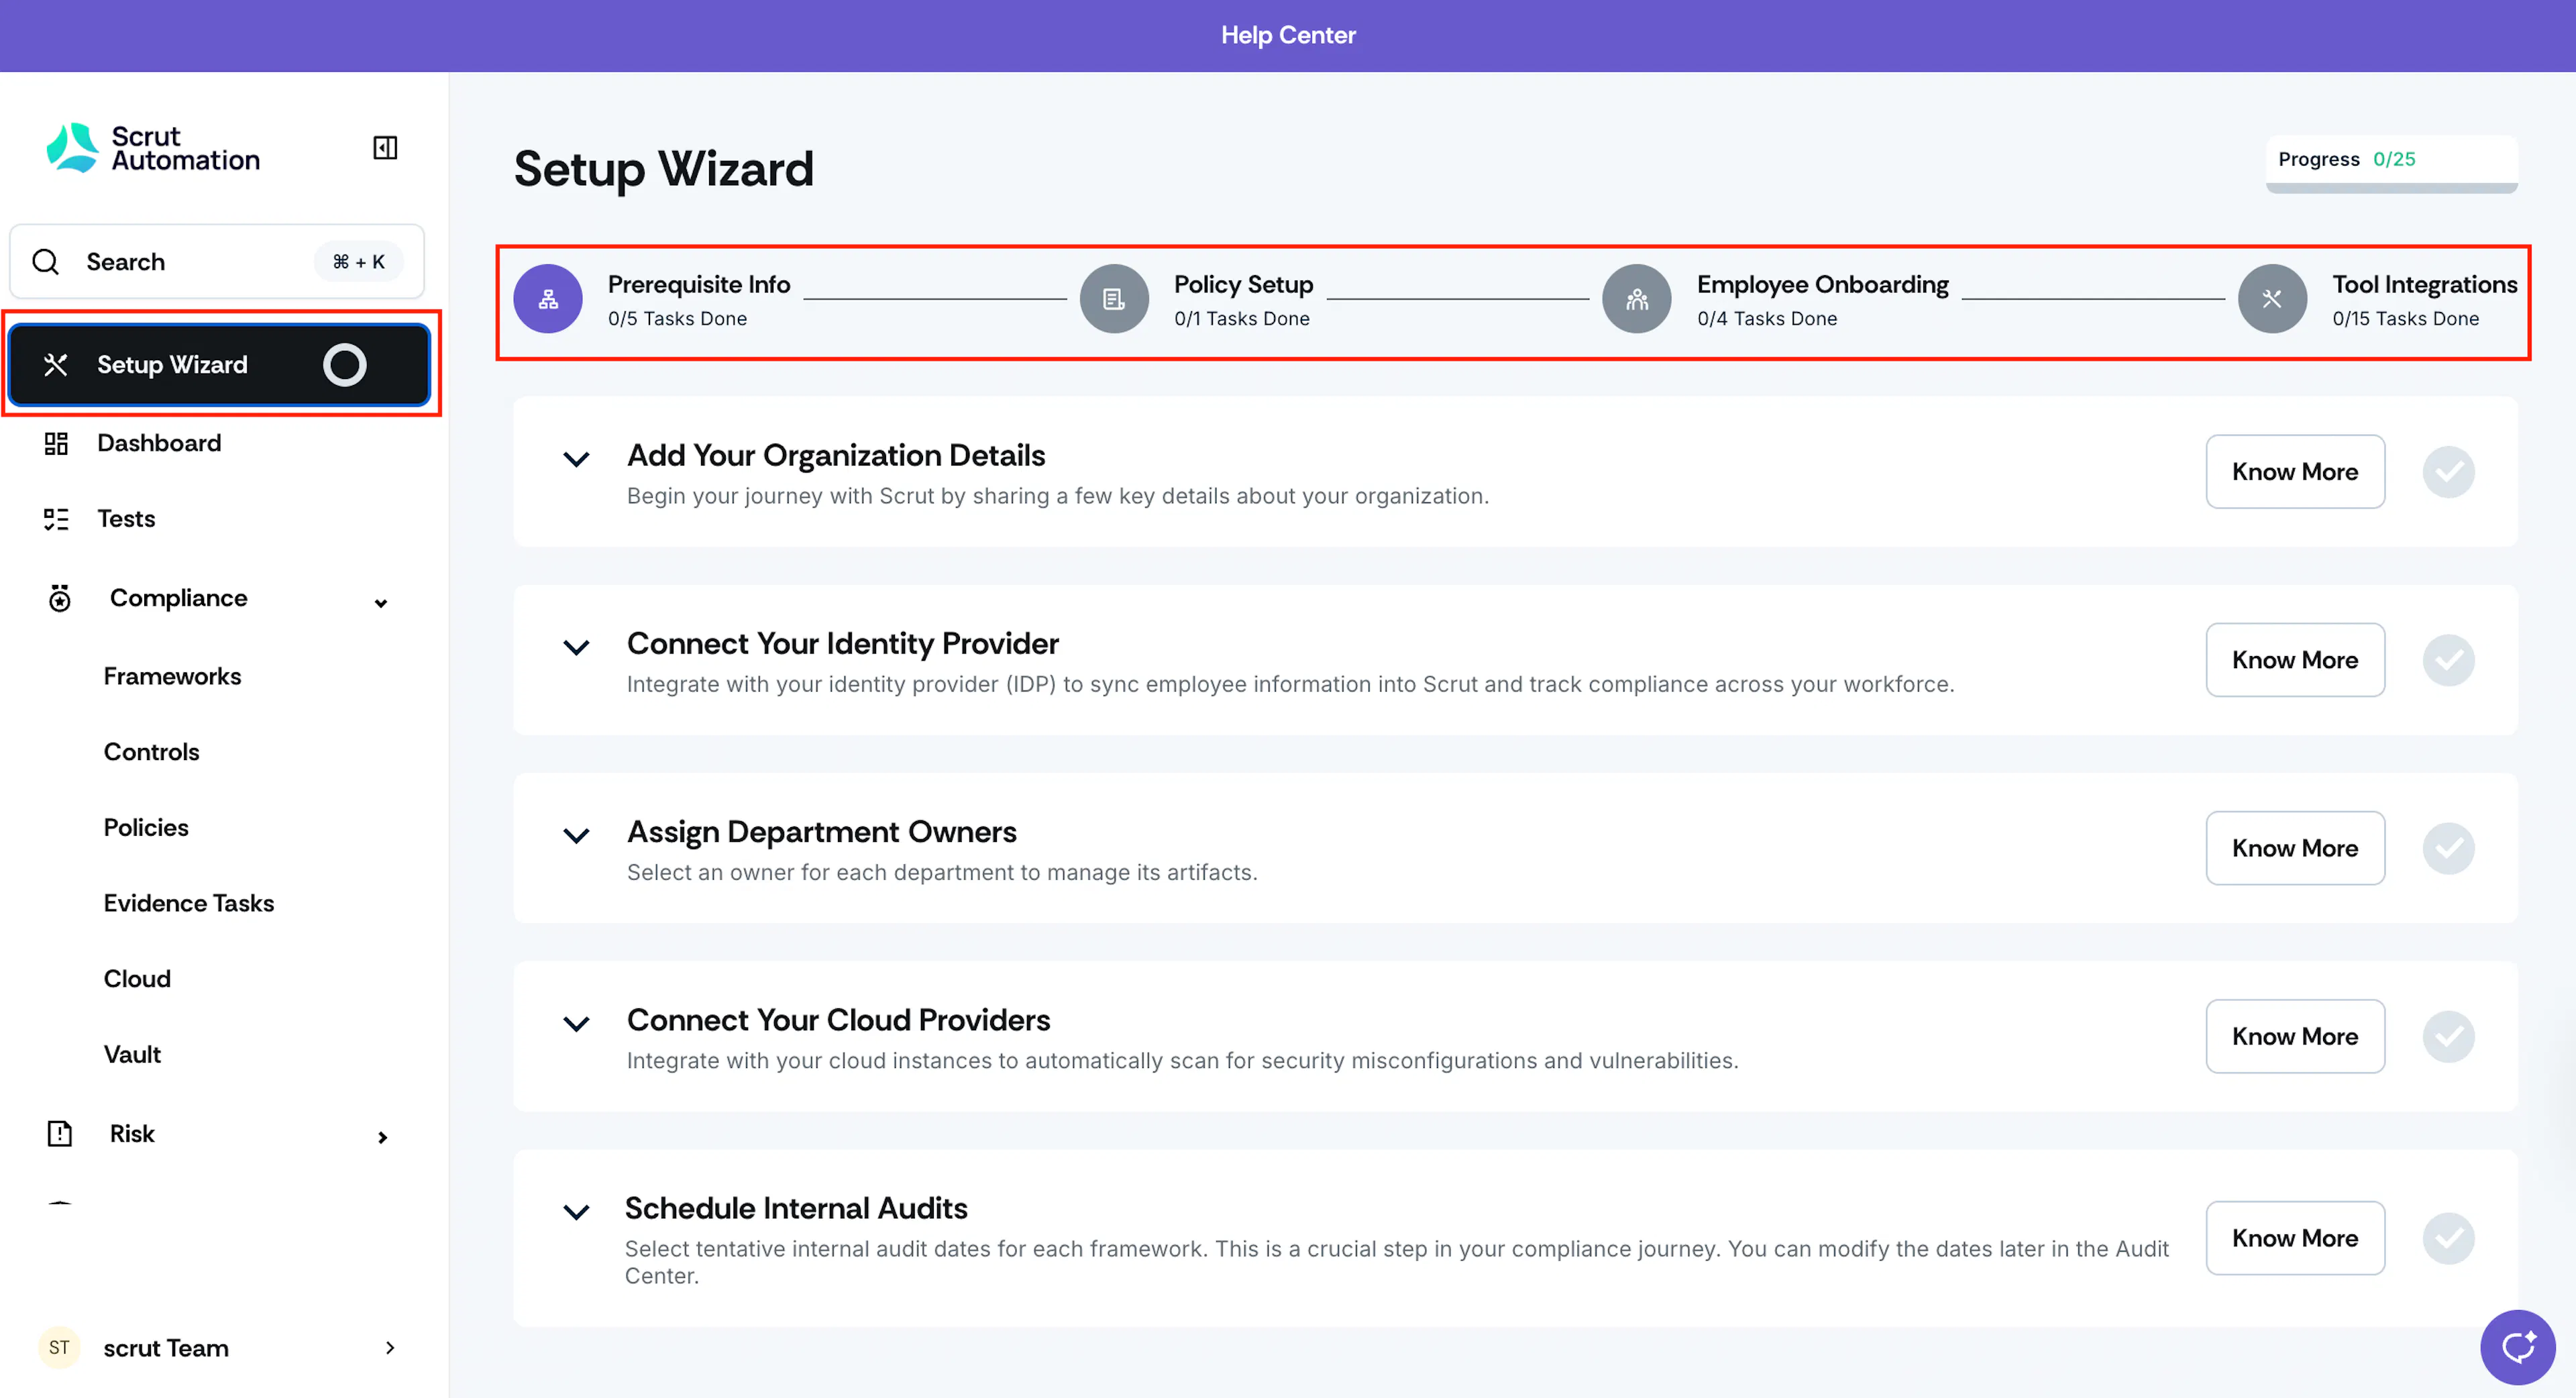
Let’s take a closer look at each of these sections and their subtasks.
Section 1: Prerequisite Information
This section ensures your organization’s essential details are properly configured across all Scrut modules.
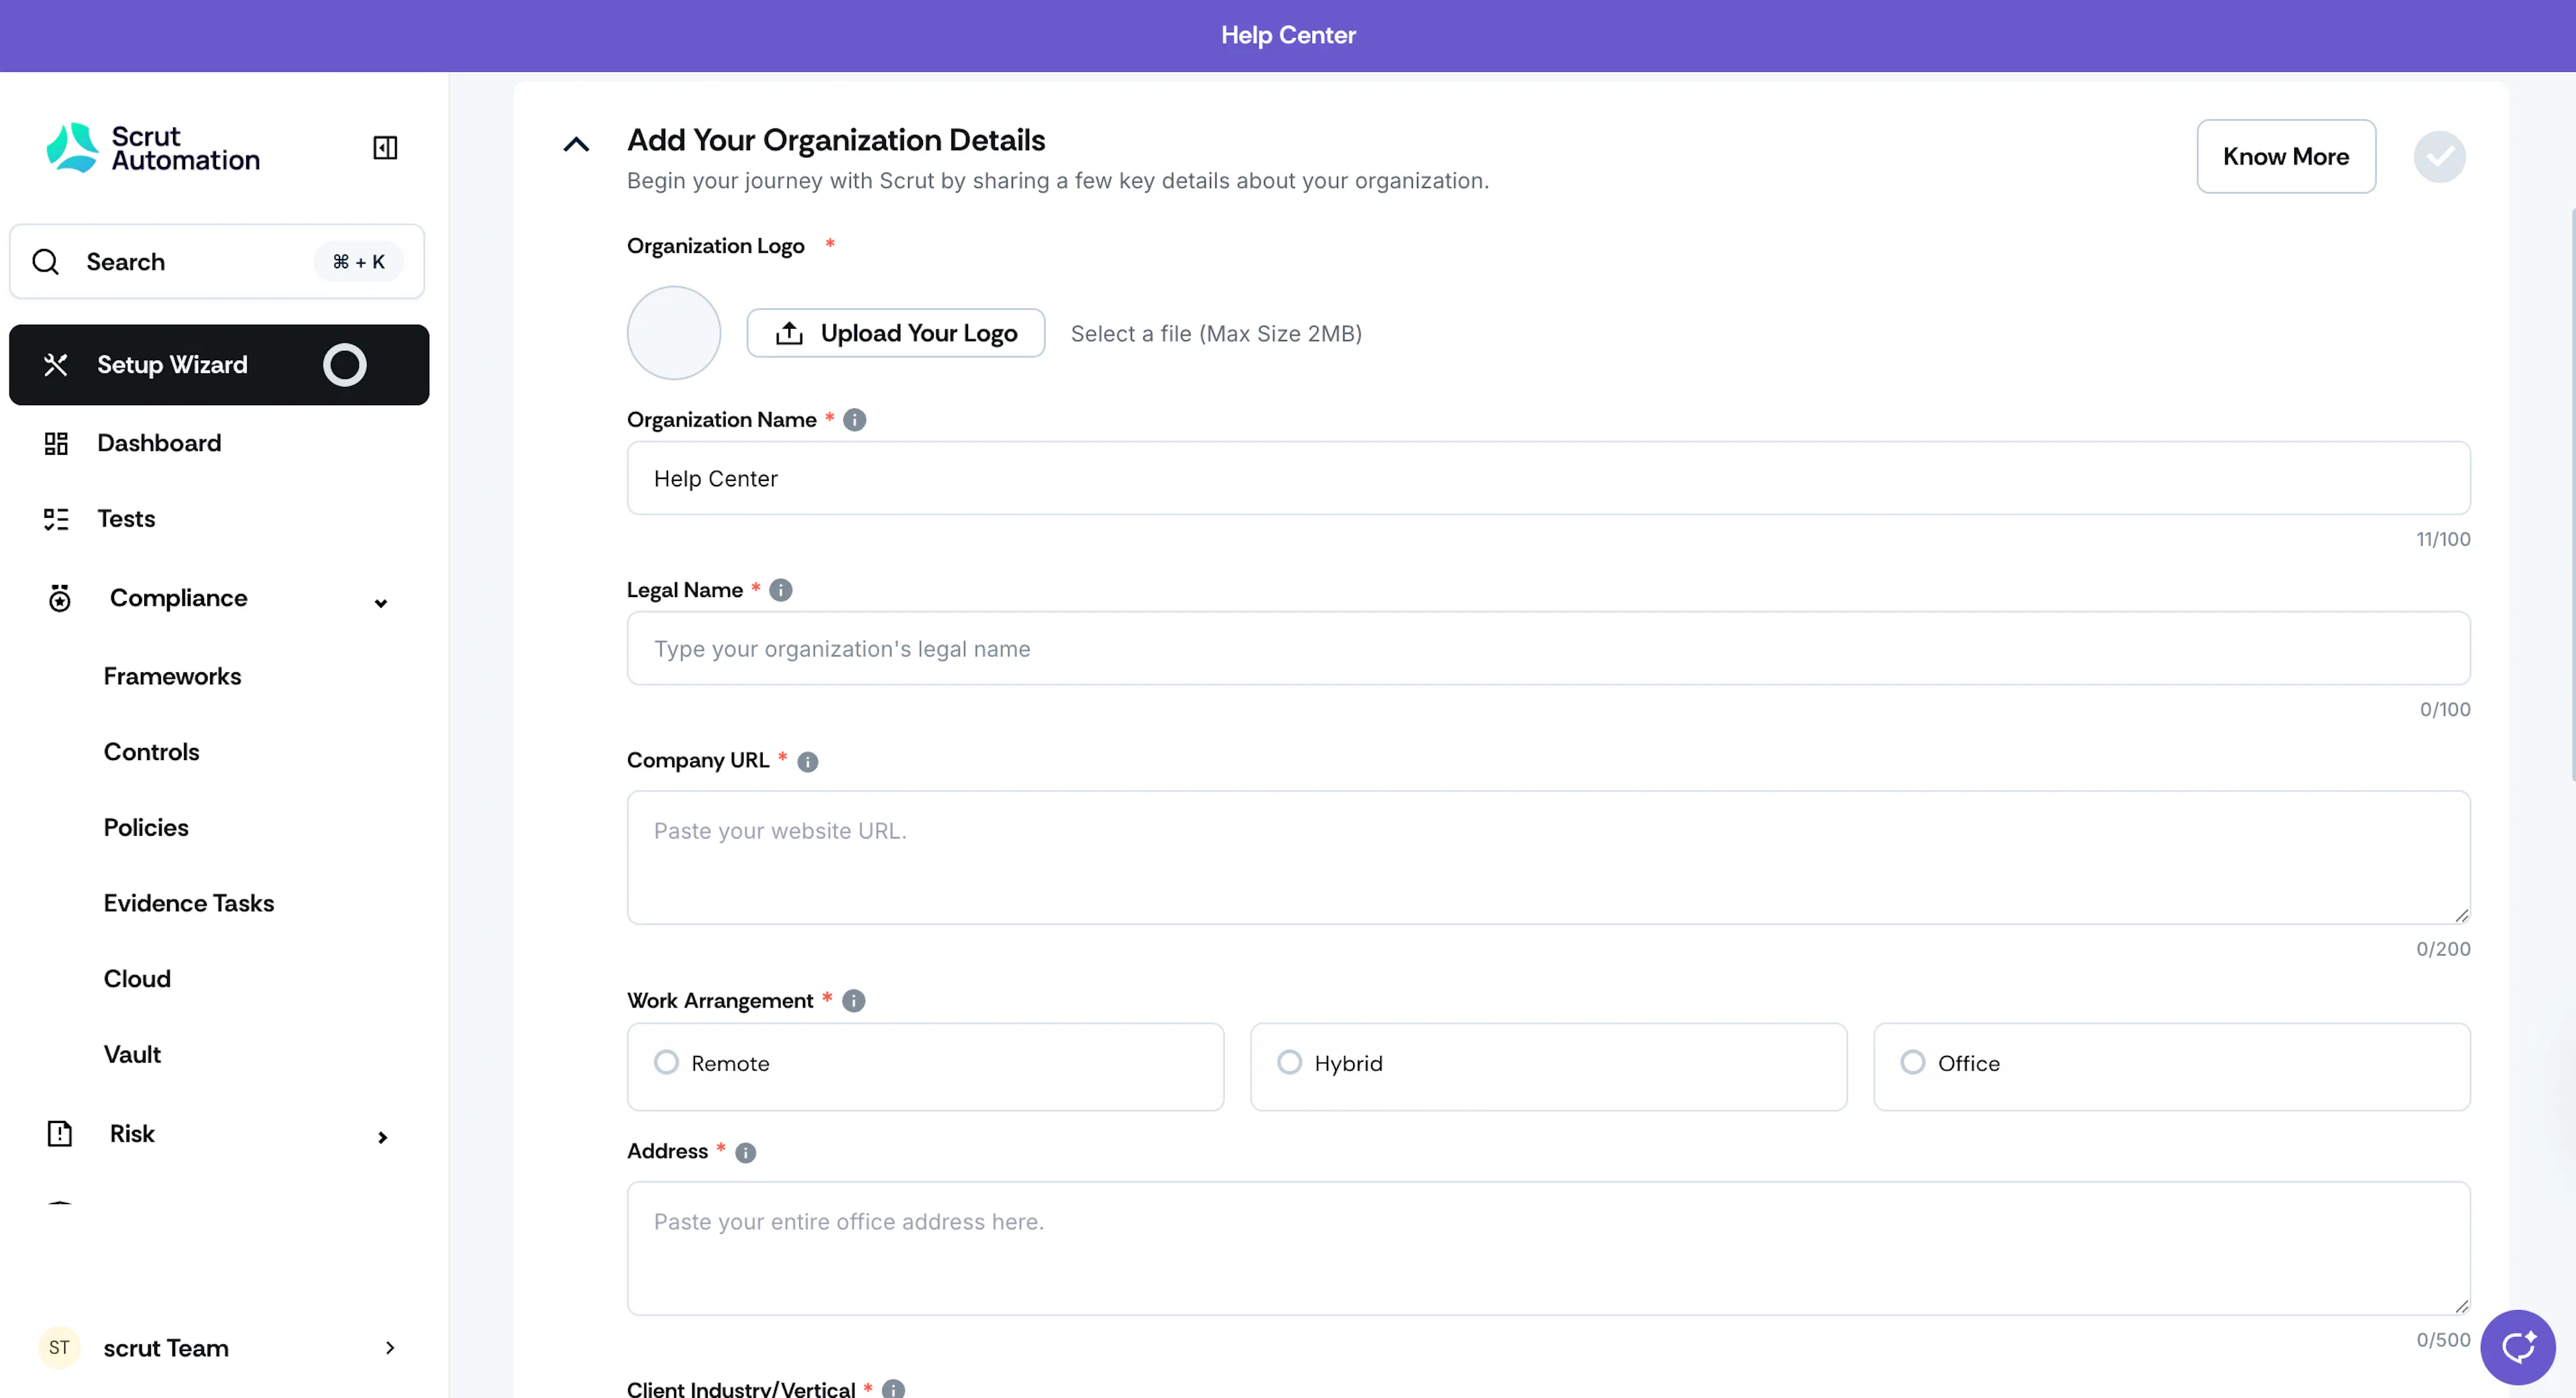
1: Add Your Organization Details
Begin your journey with Scrut by sharing a few key details about your organization, such as logo, organization name, legal name, website URL, work arrangement, business address, industry/vertical, geographical scope, and fiscal year.
2: Connect Your Identity Provider
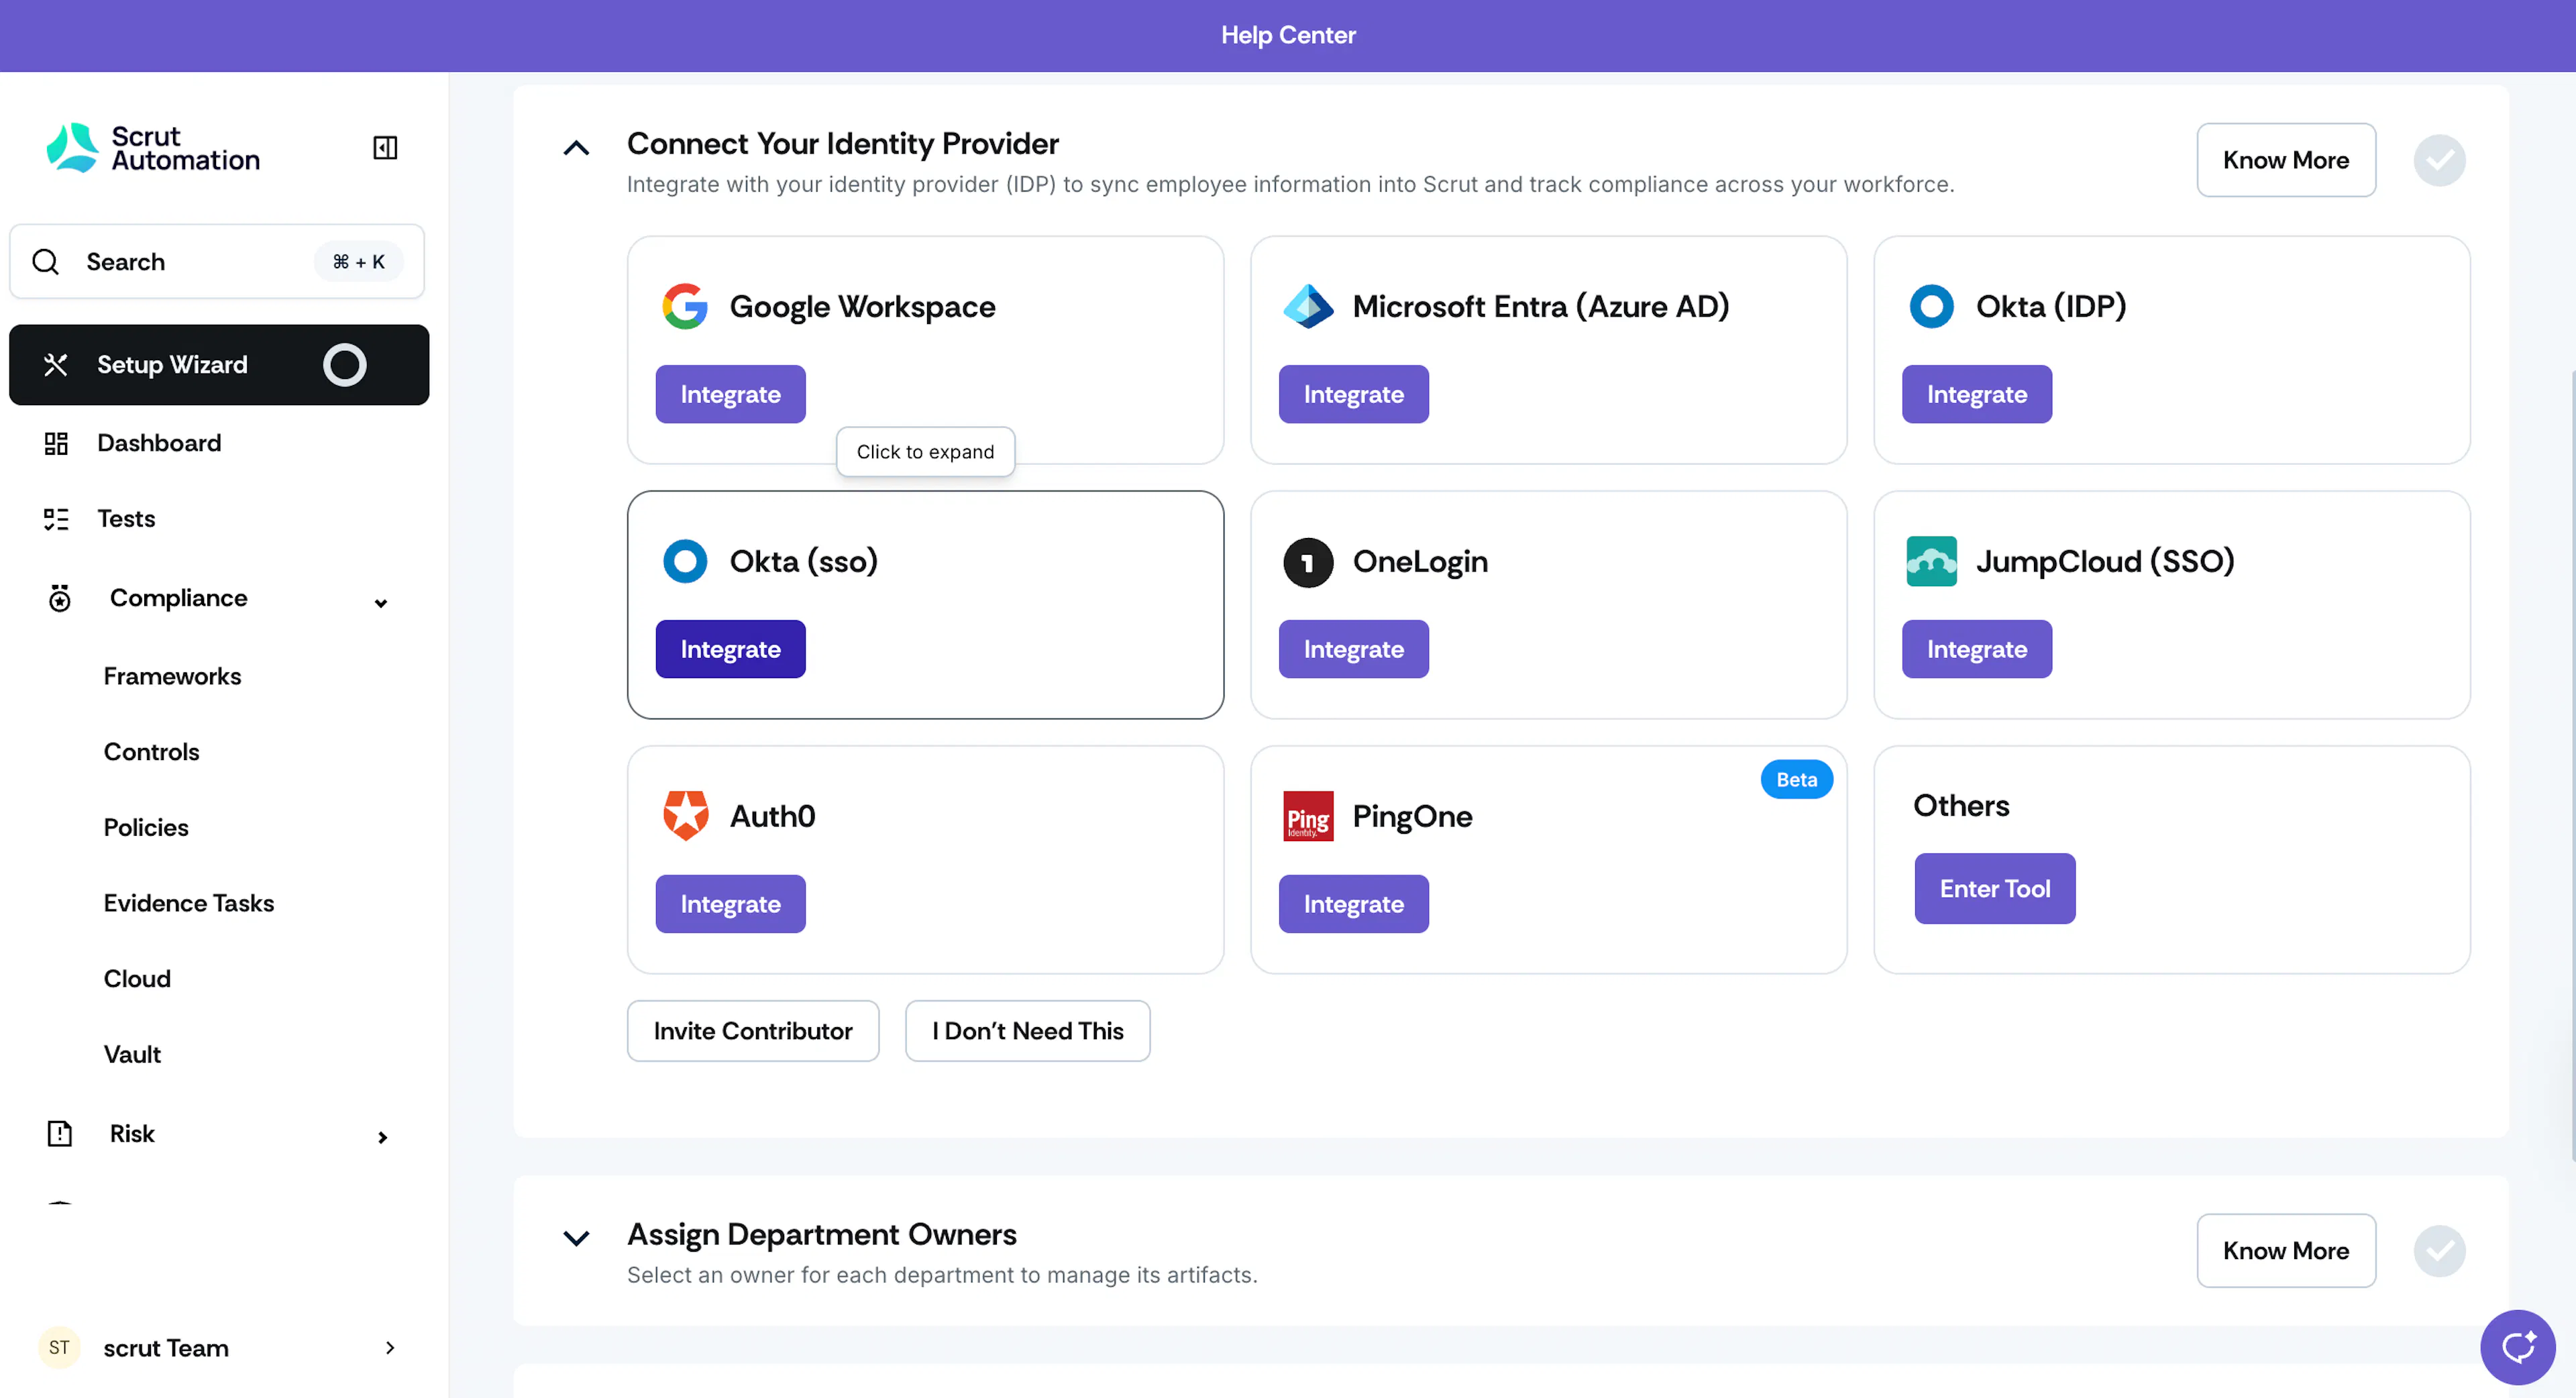
Integrate with your Identity Provider (IdP) to sync employee information into Scrut. This is critical to monitor and ensure compliance across your workforce.
Scrut supports integrations with several IdPs such as Google Workspace, Microsoft Entra (Azure AD), Okta (IDP), OneLogin, JumpCloud, Auth0, and PingOne. Refer to these integration guides for detailed instructions on connecting with your IdP.
3: Assign Department Owners
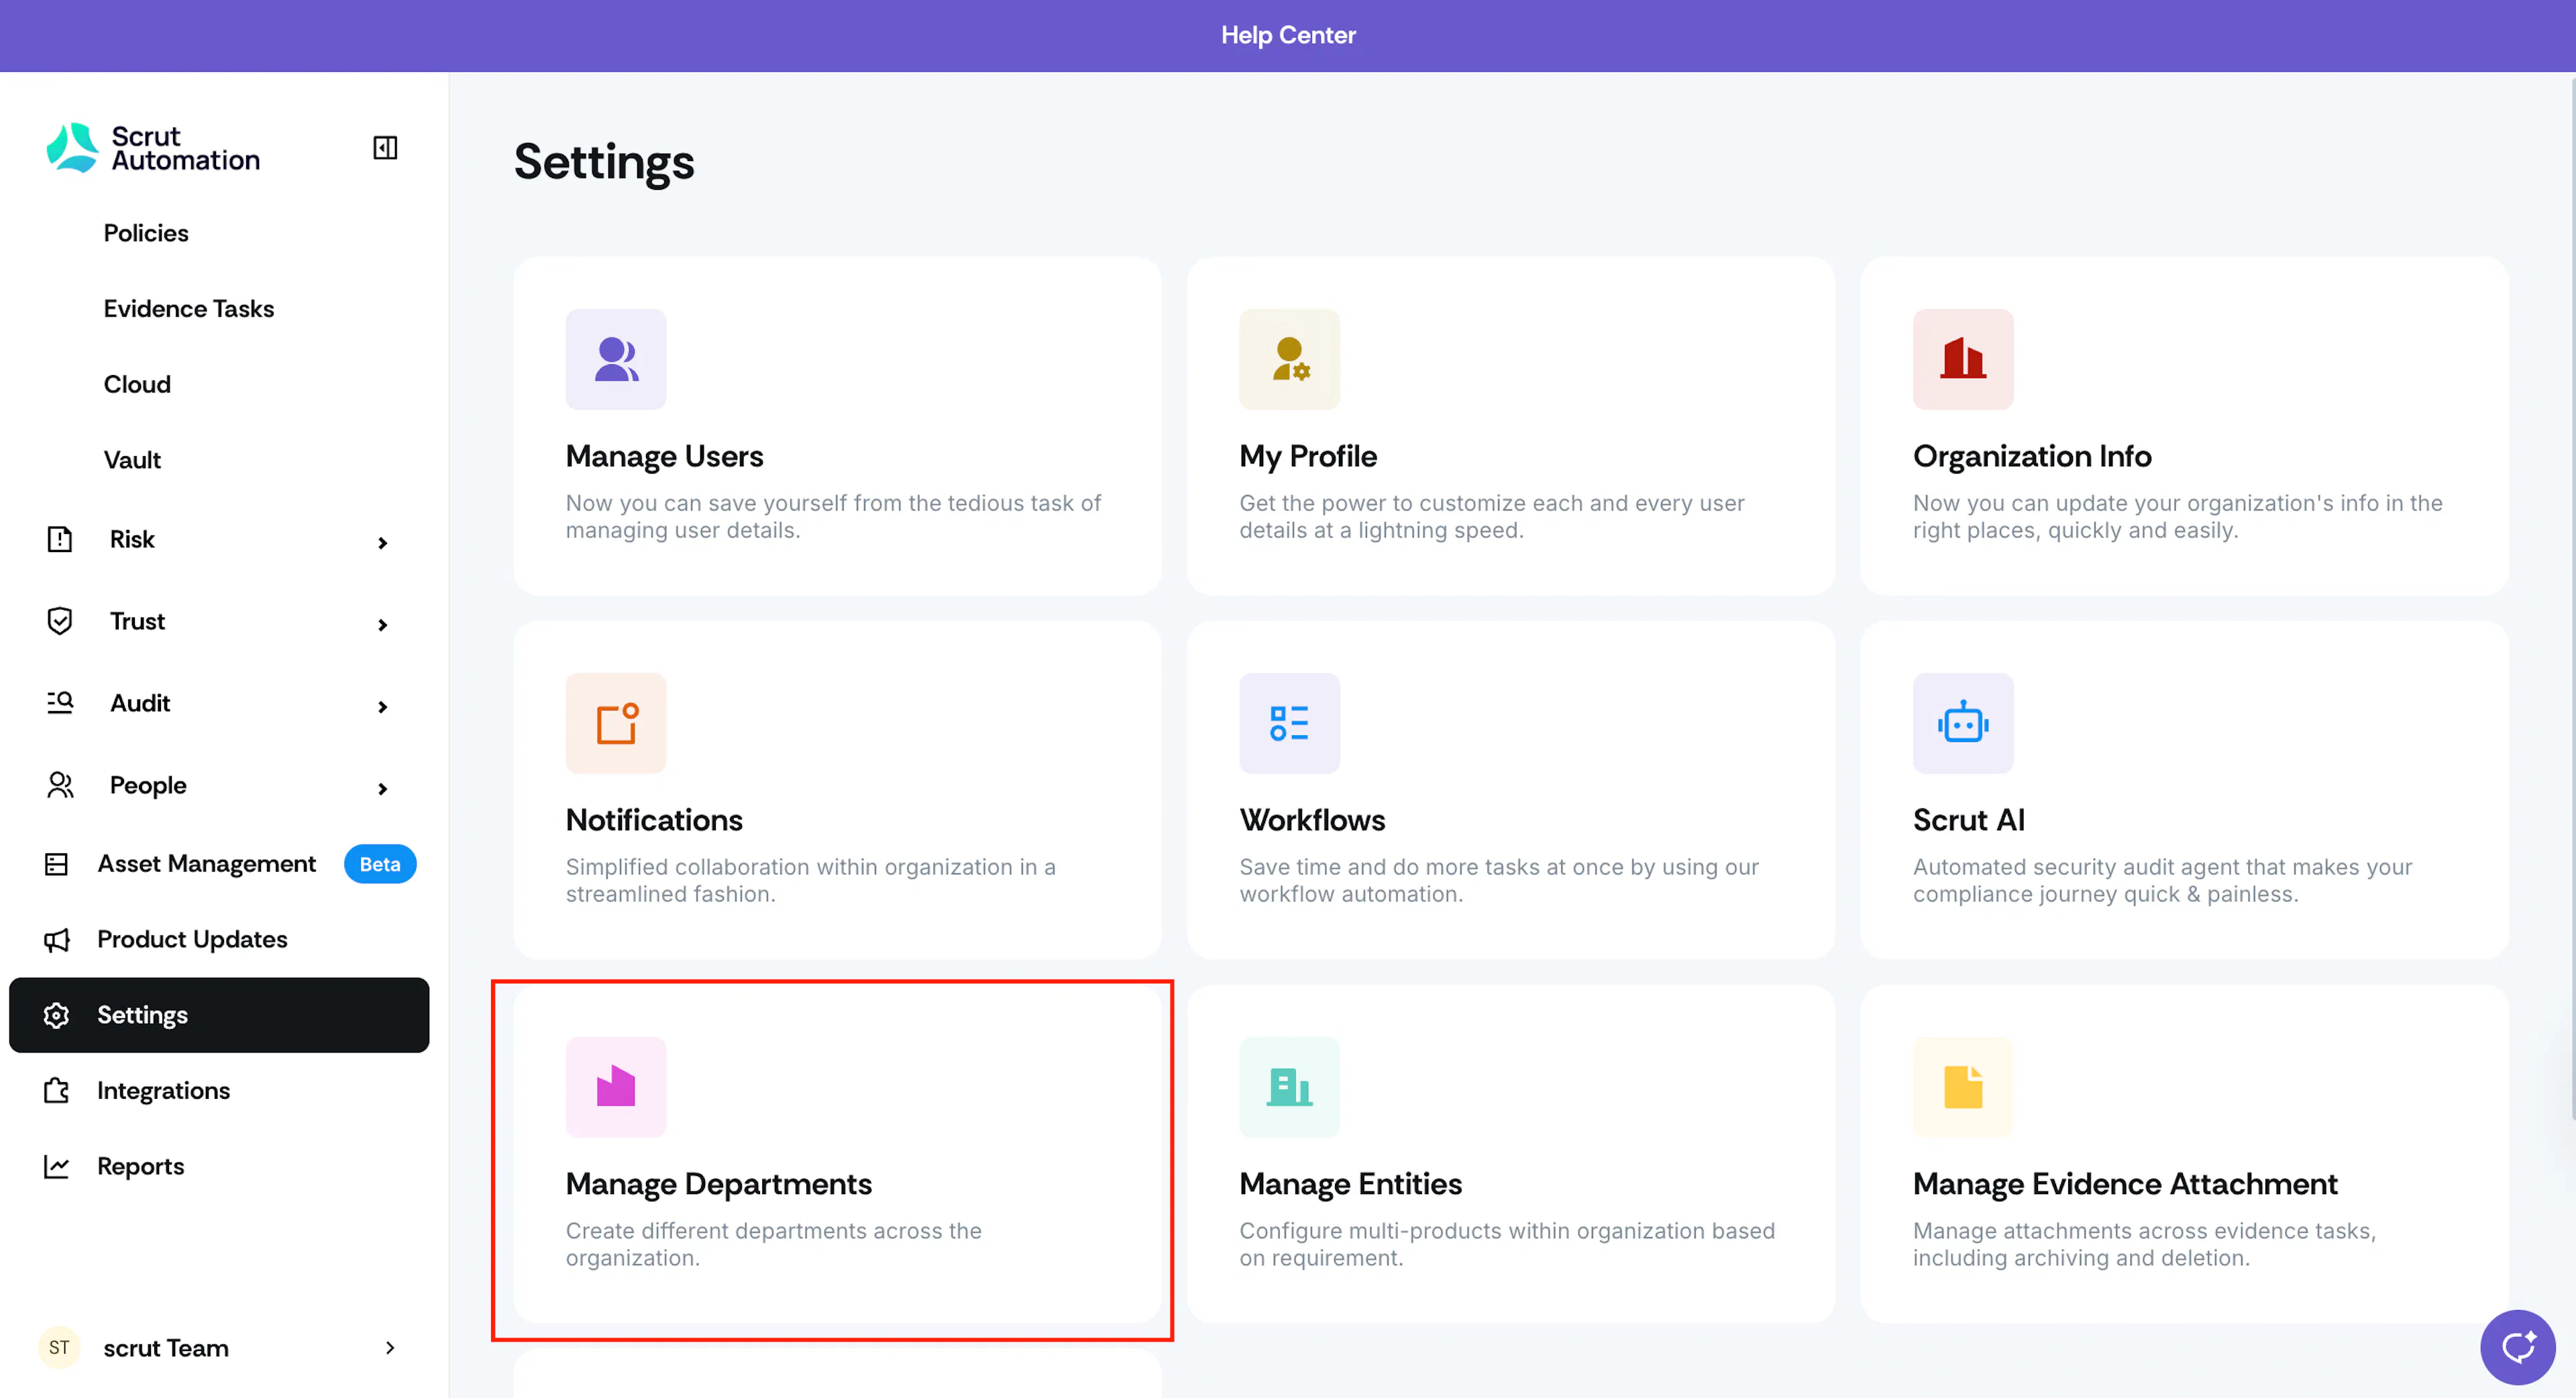
Assign a teammate or colleague to serve as the owner for each Scrut department. The designated owner will be responsible for overseeing and managing all artifacts associated with that particular department.
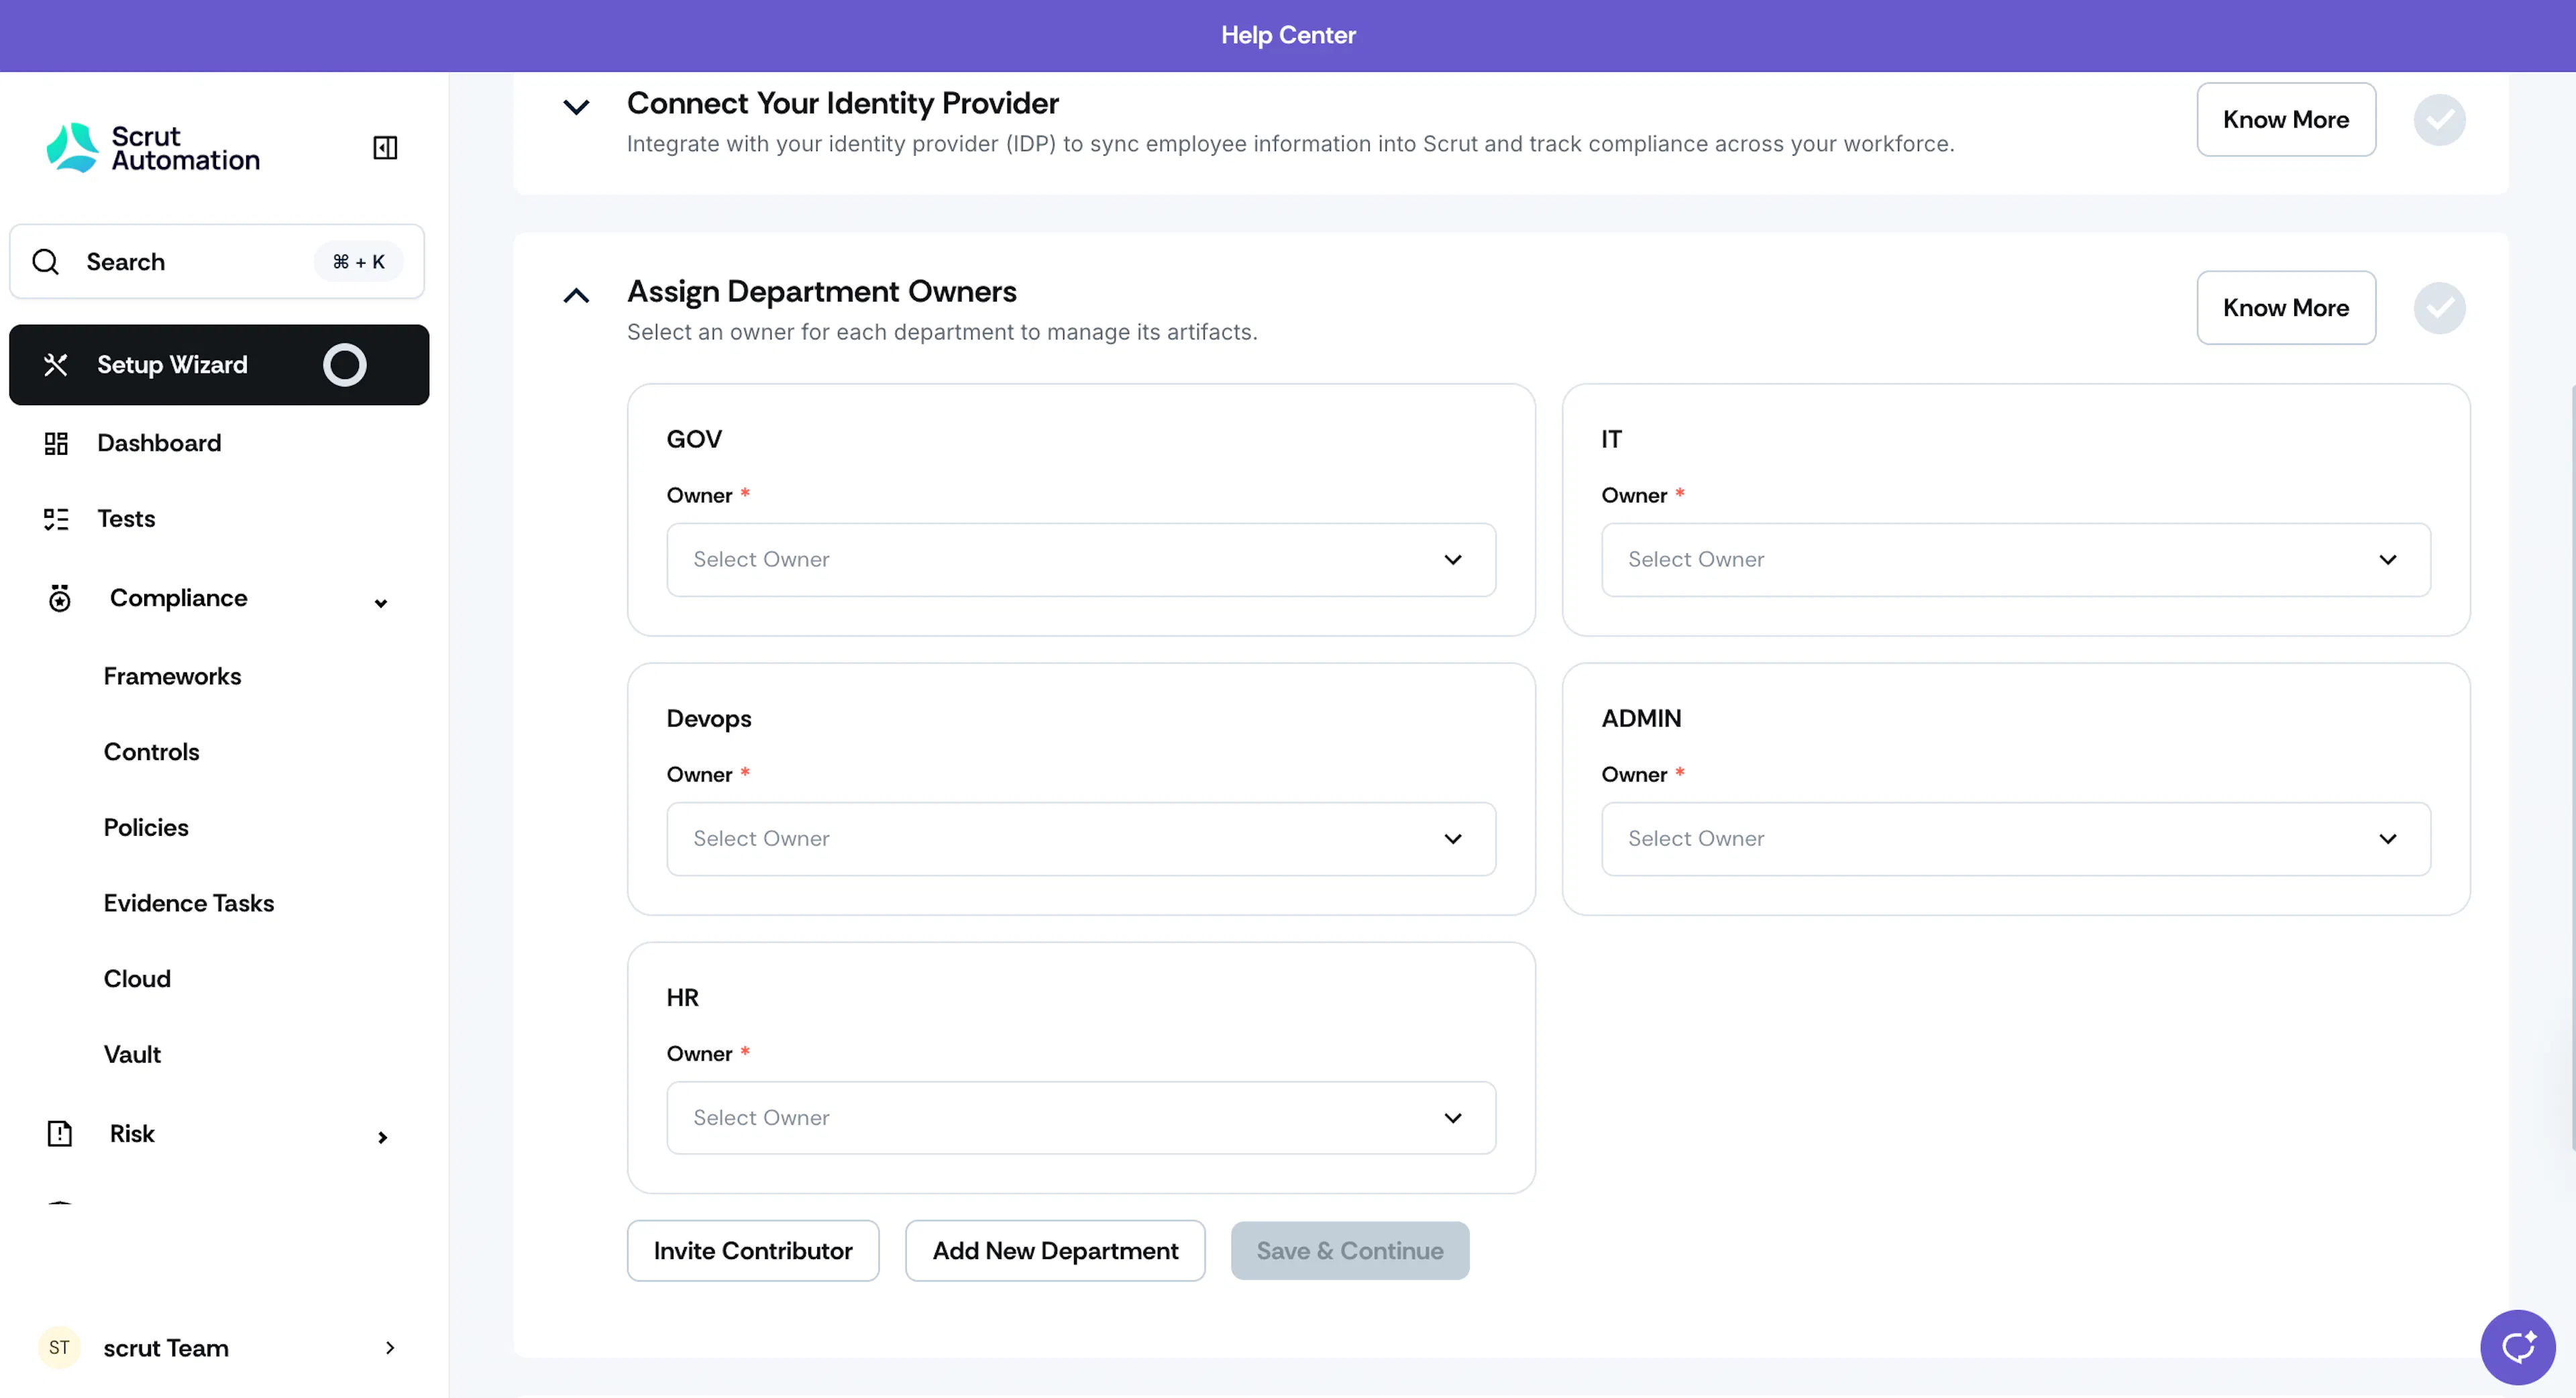
It's important to note that even if your organization does not have all the departments listed here, you are still required to assign an owner for each department. This requirement exists because the artifacts within Scrut are linked to these departments, and proper management is essential for organization and clarity. You may assign the same individual to serve as the owner for multiple departments if necessary. However, please note that each department may have only one designated owner to ensure clear accountability. You can also add new departments based on your organizational structure.
Additionally, you have the flexibility to modify the owners as needed at any time. Go to Settings → Manage Departments to change owners, as required.
4: Connect Your Cloud Providers
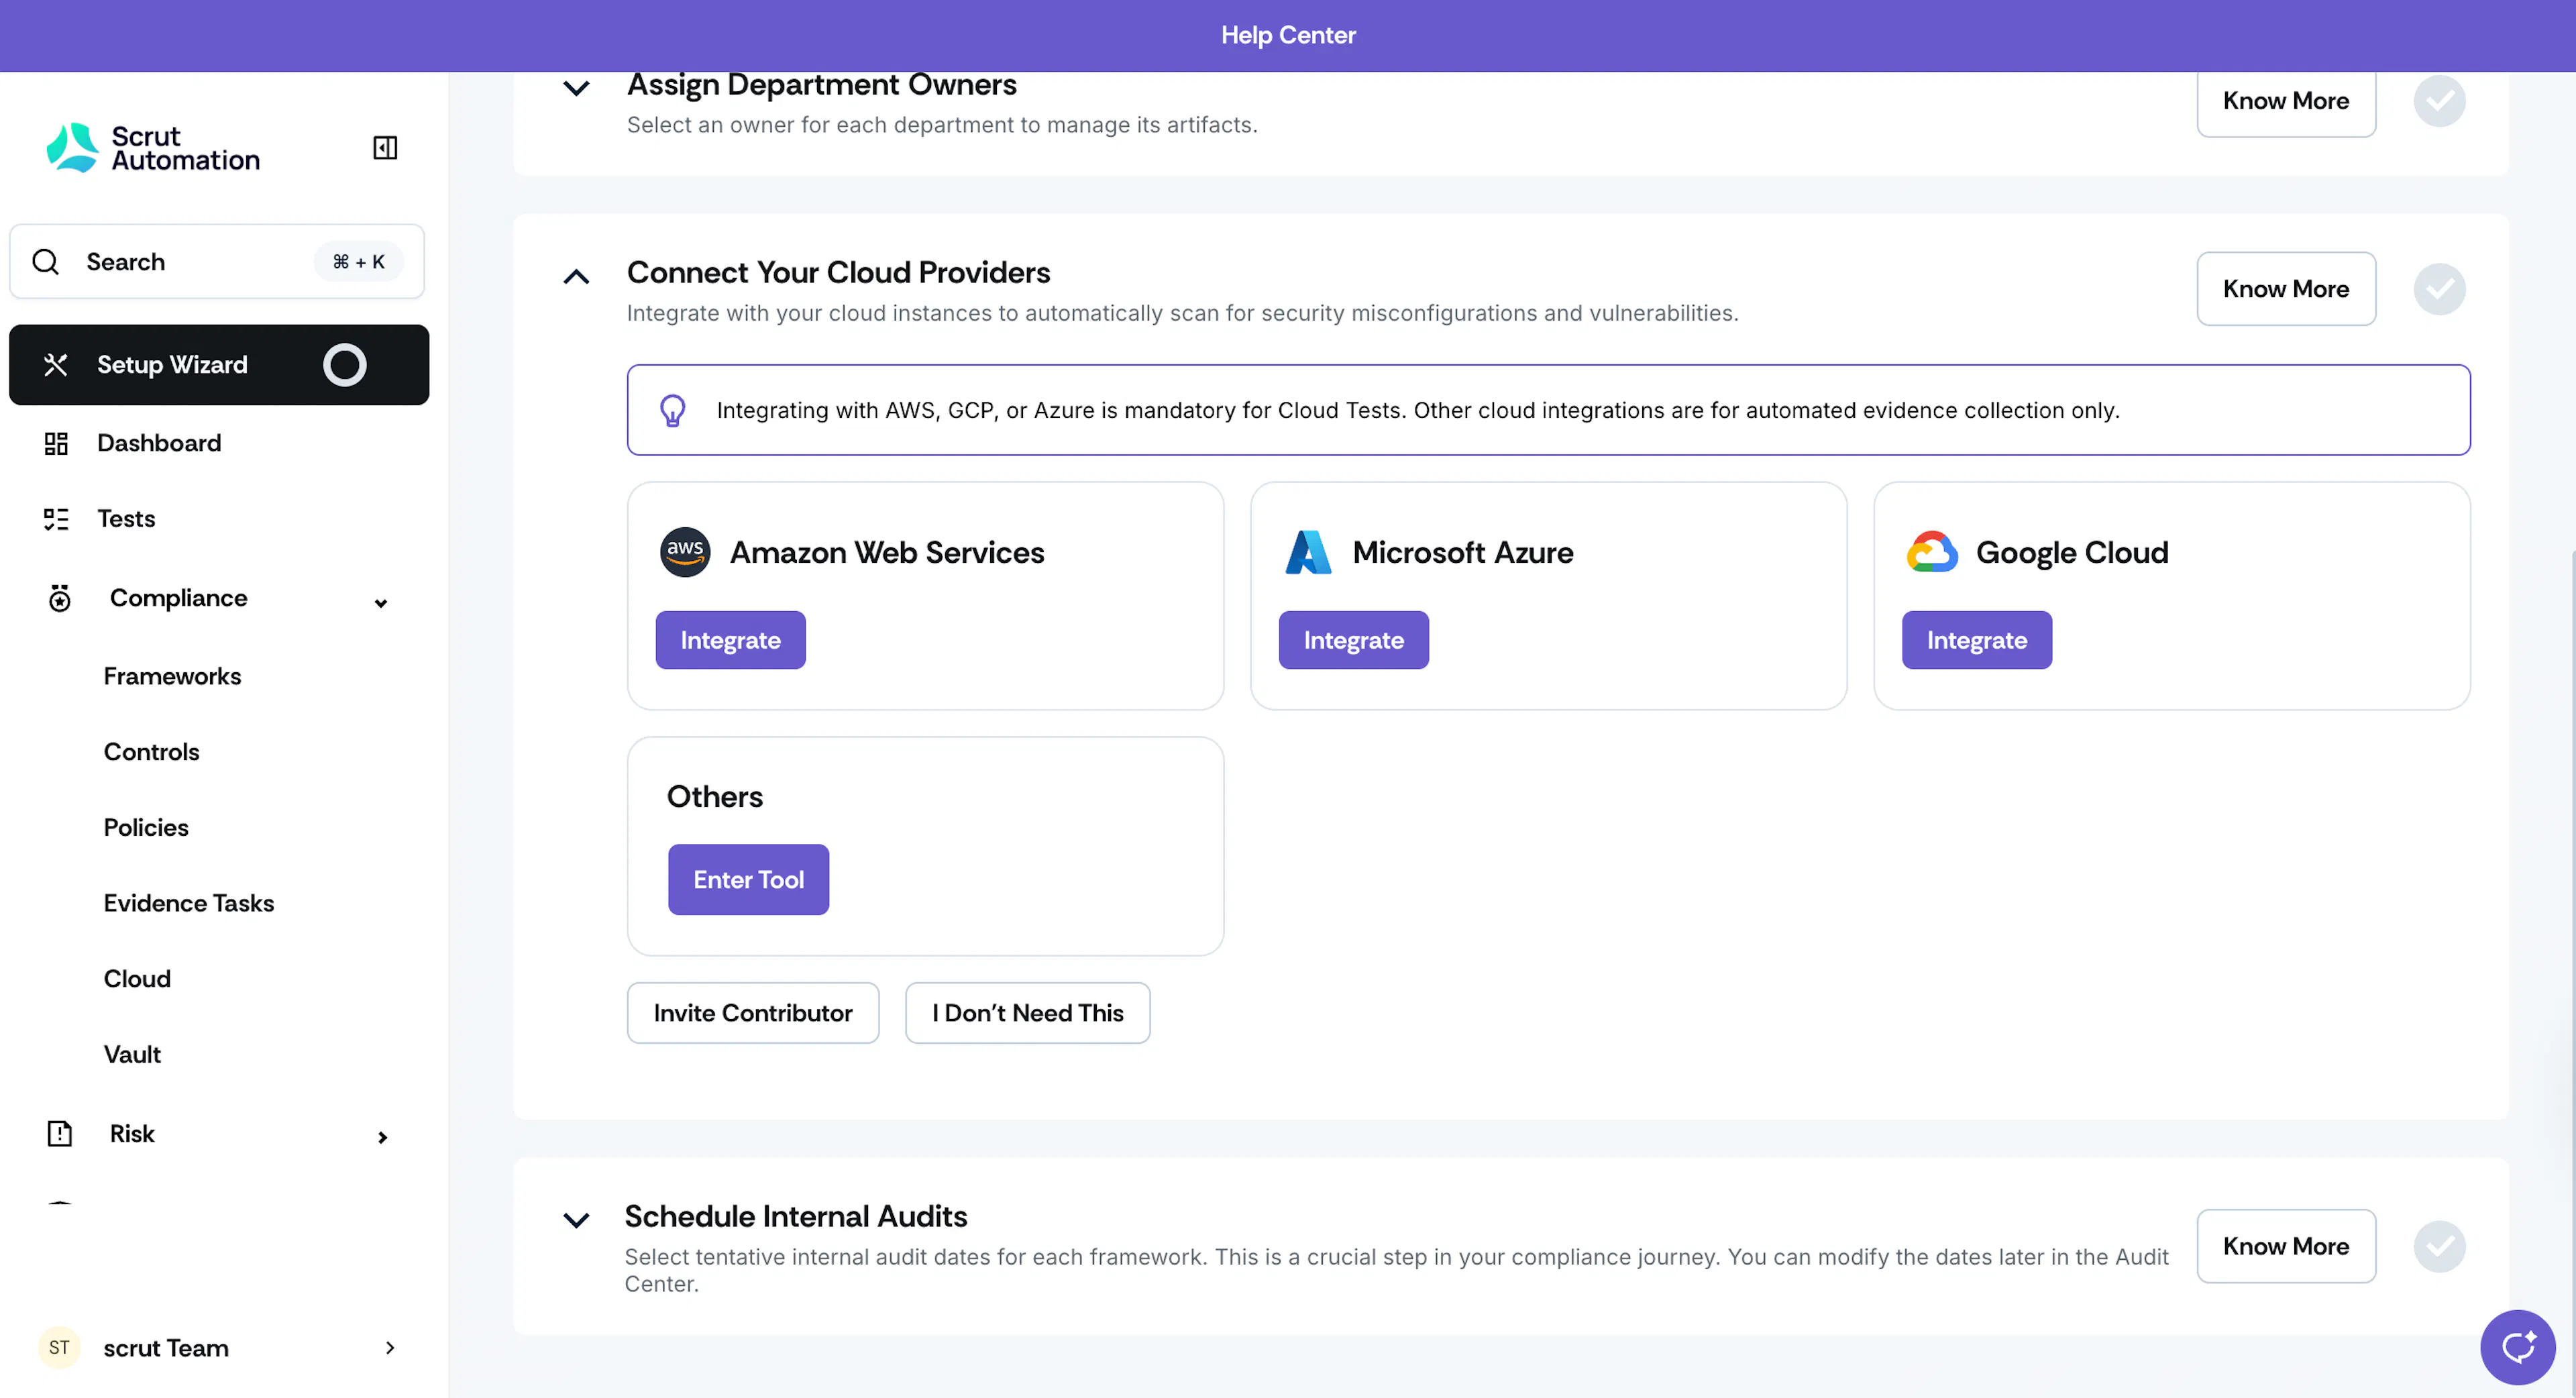
Integrate with your cloud providers to automatically scan for security misconfigurations and vulnerabilities.
Note: Integrating with AWS, GCP, or Azure is mandatory for Scrut to run automated cloud scans (tests) on your cloud infrastructure. These tests generate essential automated evidence to support compliance with various regulatory standards and help maintain a secure cloud environment.
Refer to these help guides for step-by-step instructions on connecting your cloud provider with Scrut.
5: Schedule Internal Audits
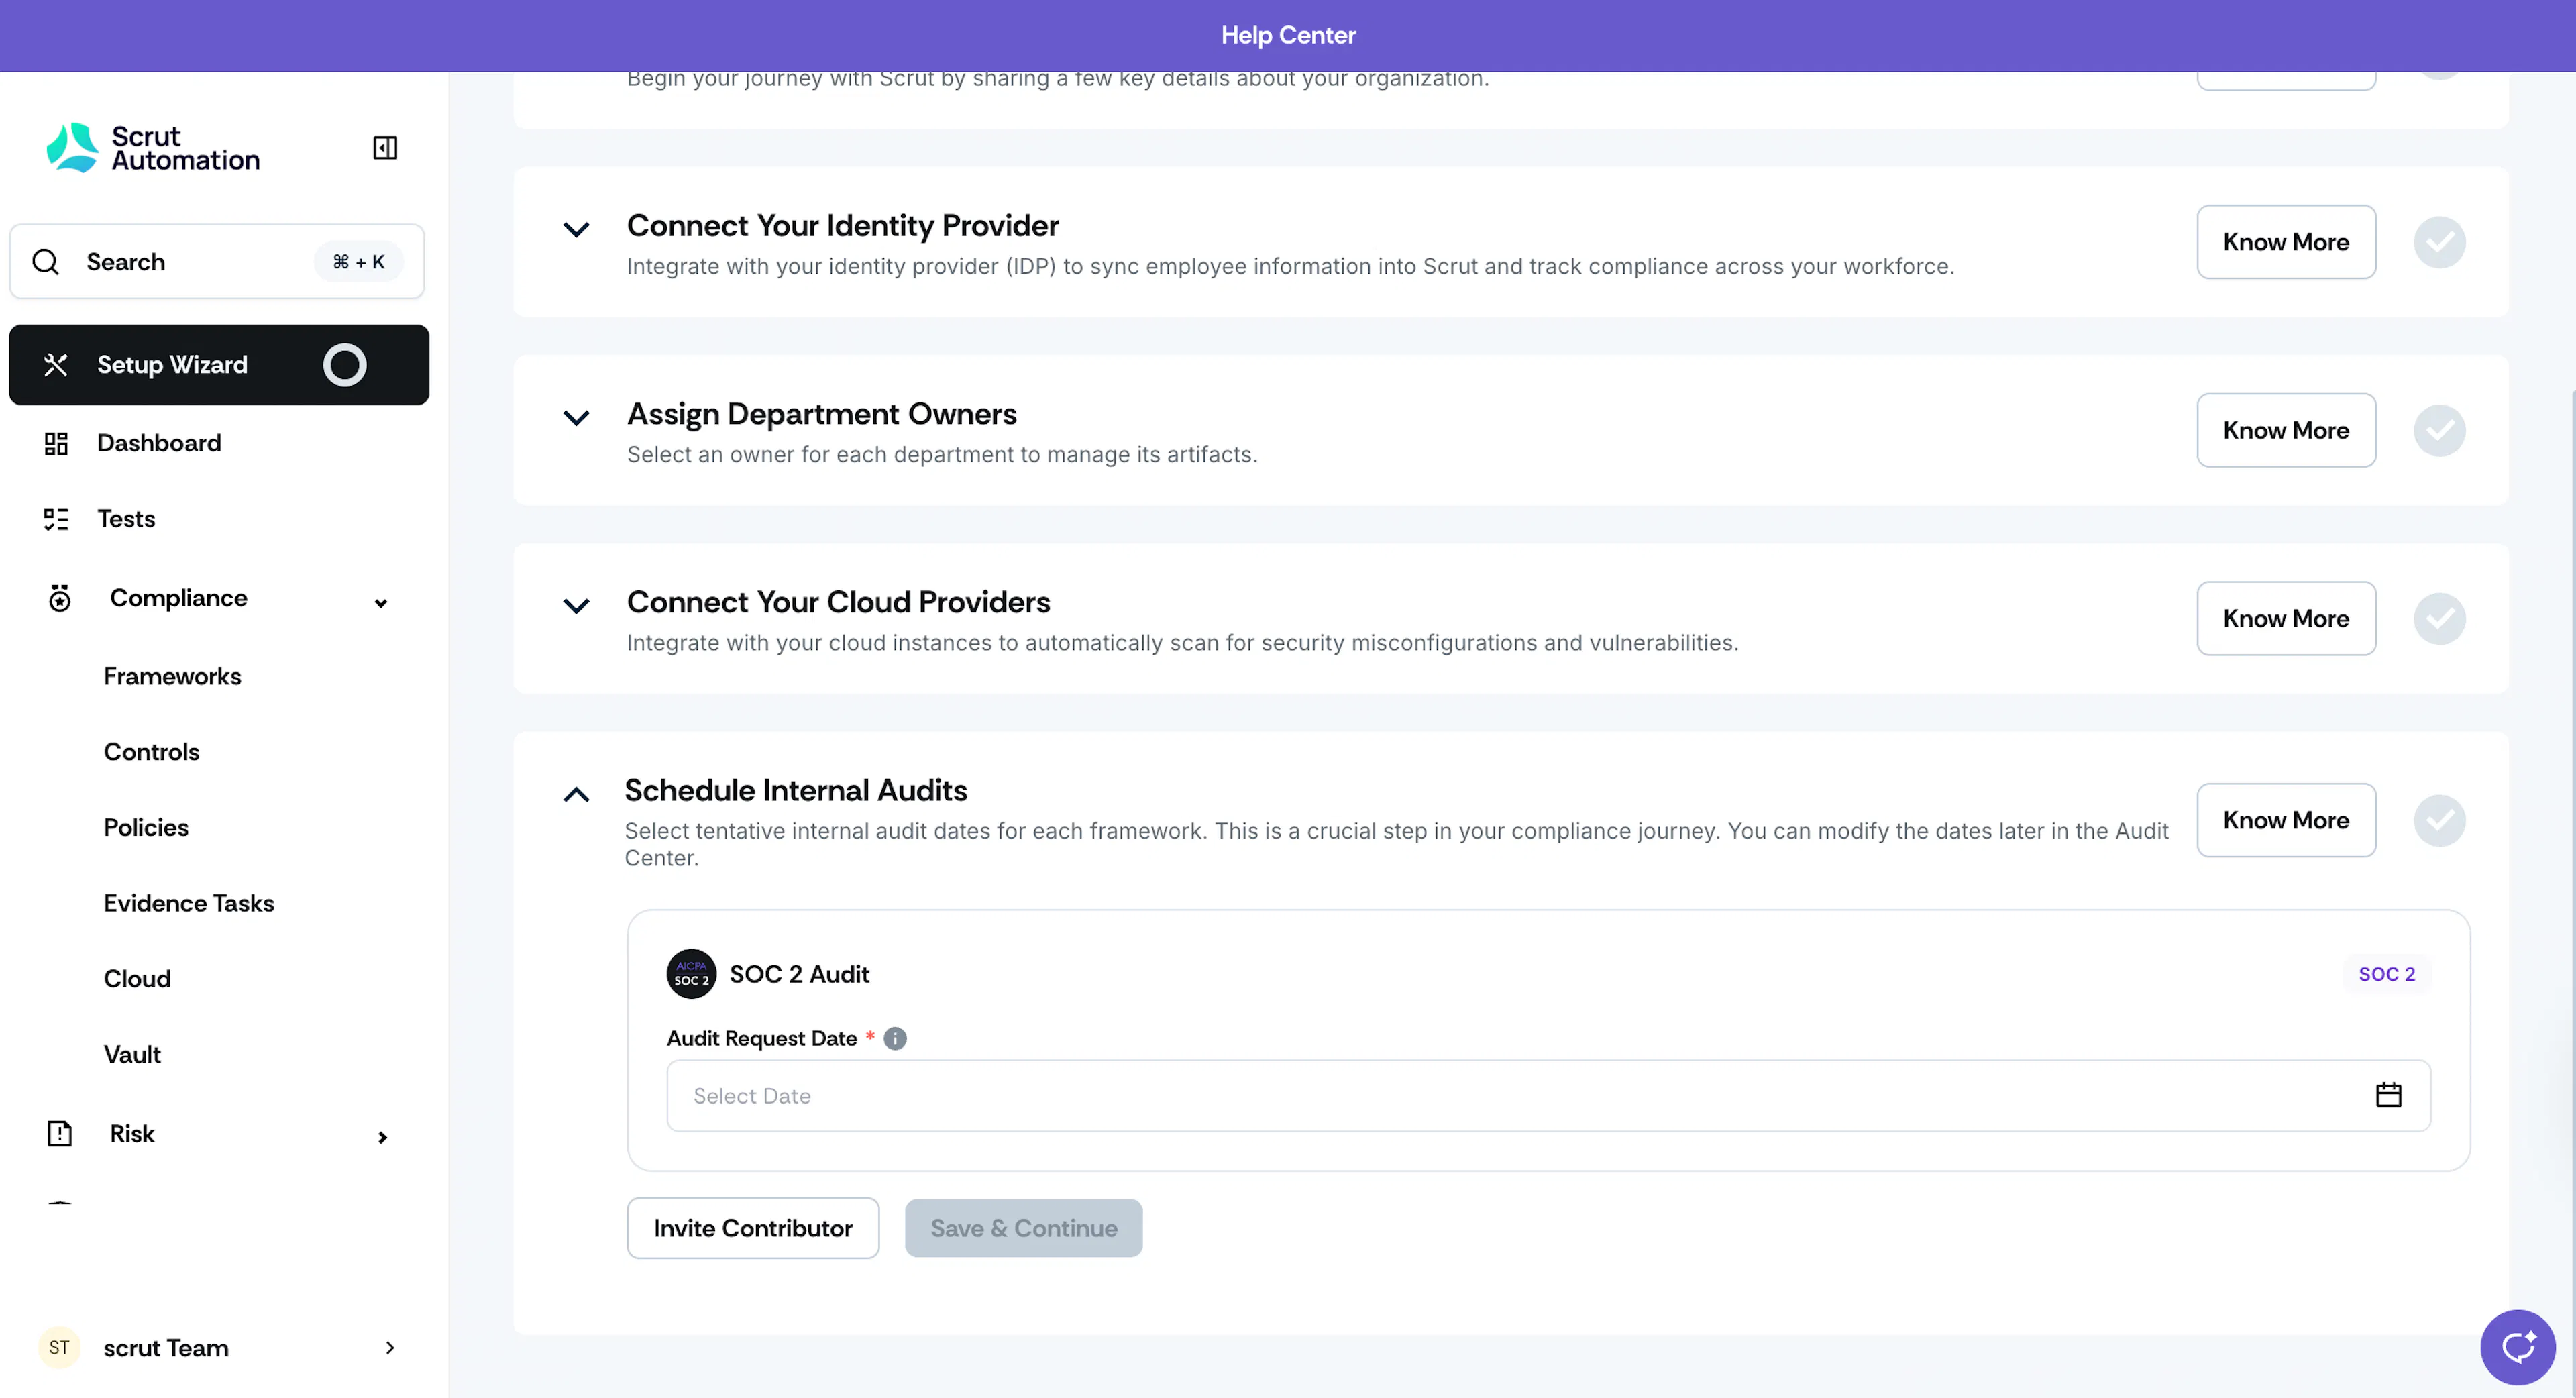
Select tentative internal audit dates for each framework that you’re working towards. Ideally, we recommend setting the audit date at 4 to 6 weeks after your kick-off call, contingent upon having all necessary policies and evidence in place. If you’re unsure of when to schedule it, you can connect with your CSM for guidance.
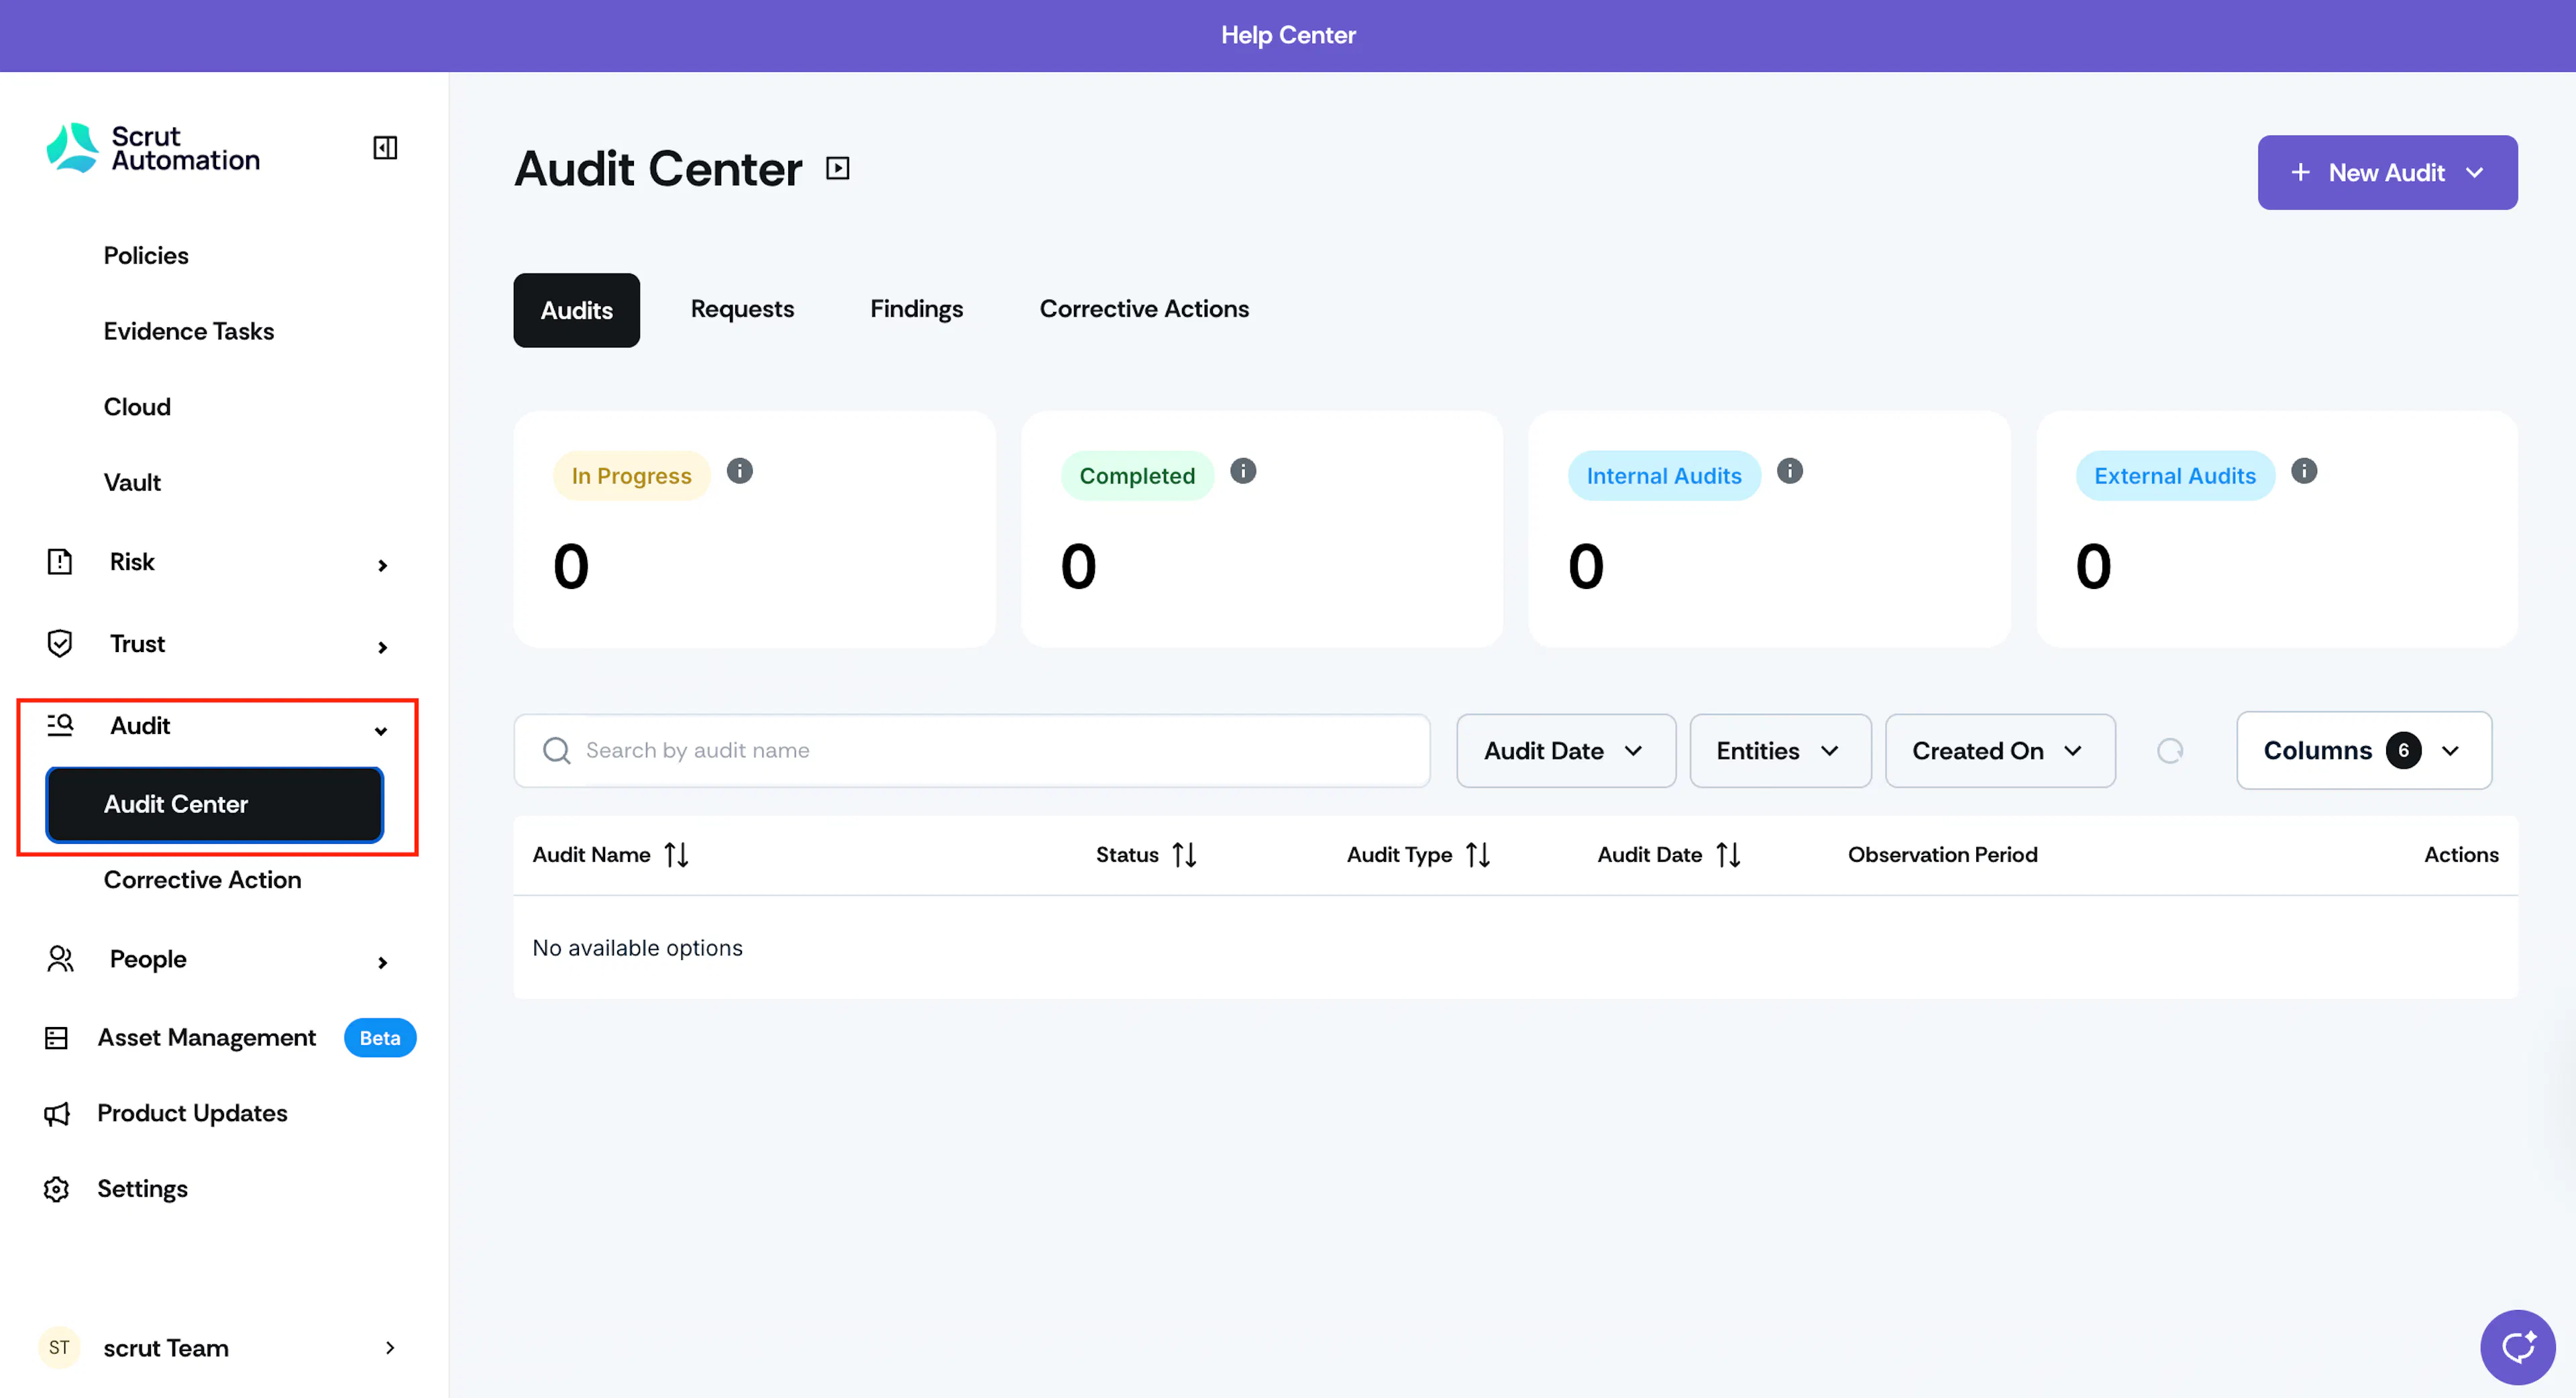
Note: You can always modify the date you set here later by navigating to the Audit → Audit Center.
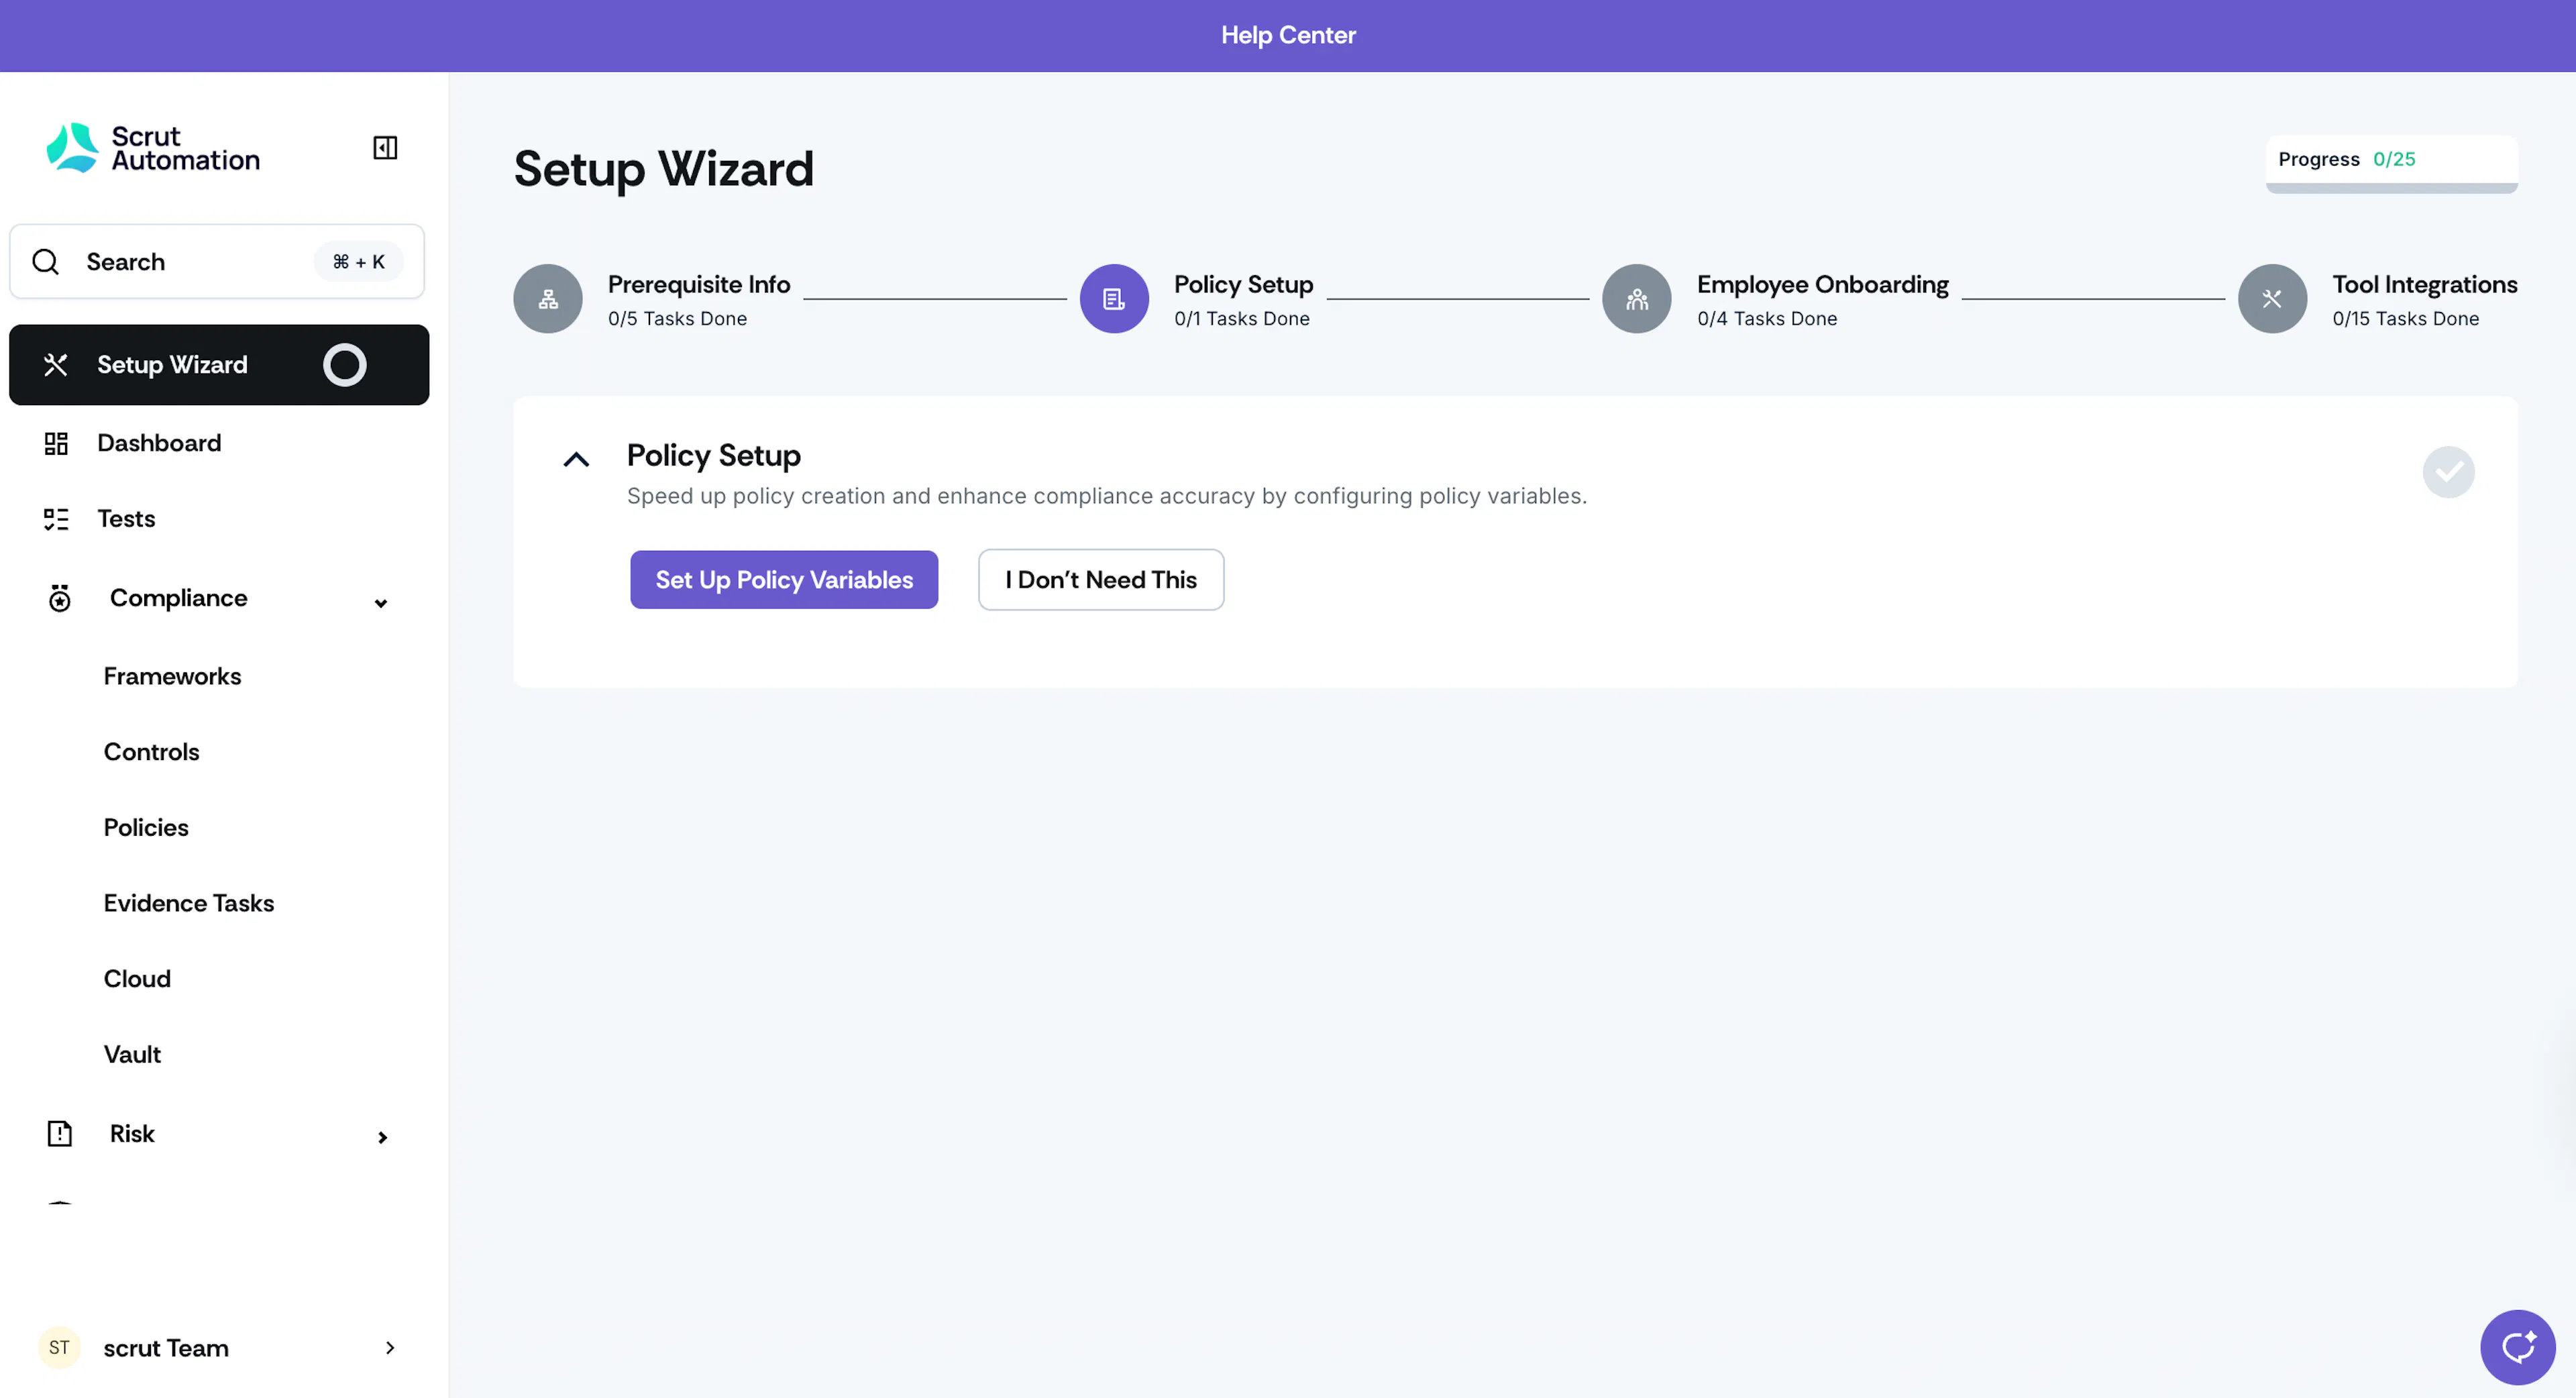
Section 2: Policy Setup
If your organization has policy variables enabled, you can configure all variables in this step. For more information about what policy variables are, how they can help you create policies faster, and how to configure them, please refer to our help guide.
Section 3: Employee Onboarding
The tasks in this section help you configure the tools and processes that will manage your employee lifecycle.
1: Configure Your Mobile Device Management Tool
Integrate with your Mobile Device Management (MDM) tool to manage and secure company and employee devices. Scrut supports several MDM tools, including Jamf Pro, JumpCloud, Kandji, Microsoft Intune, Fleet, NinjaOne, Sophos, Kite Cyber, and others. Refer to these integration guides for detailed instructions on connecting your MDM with Scrut.
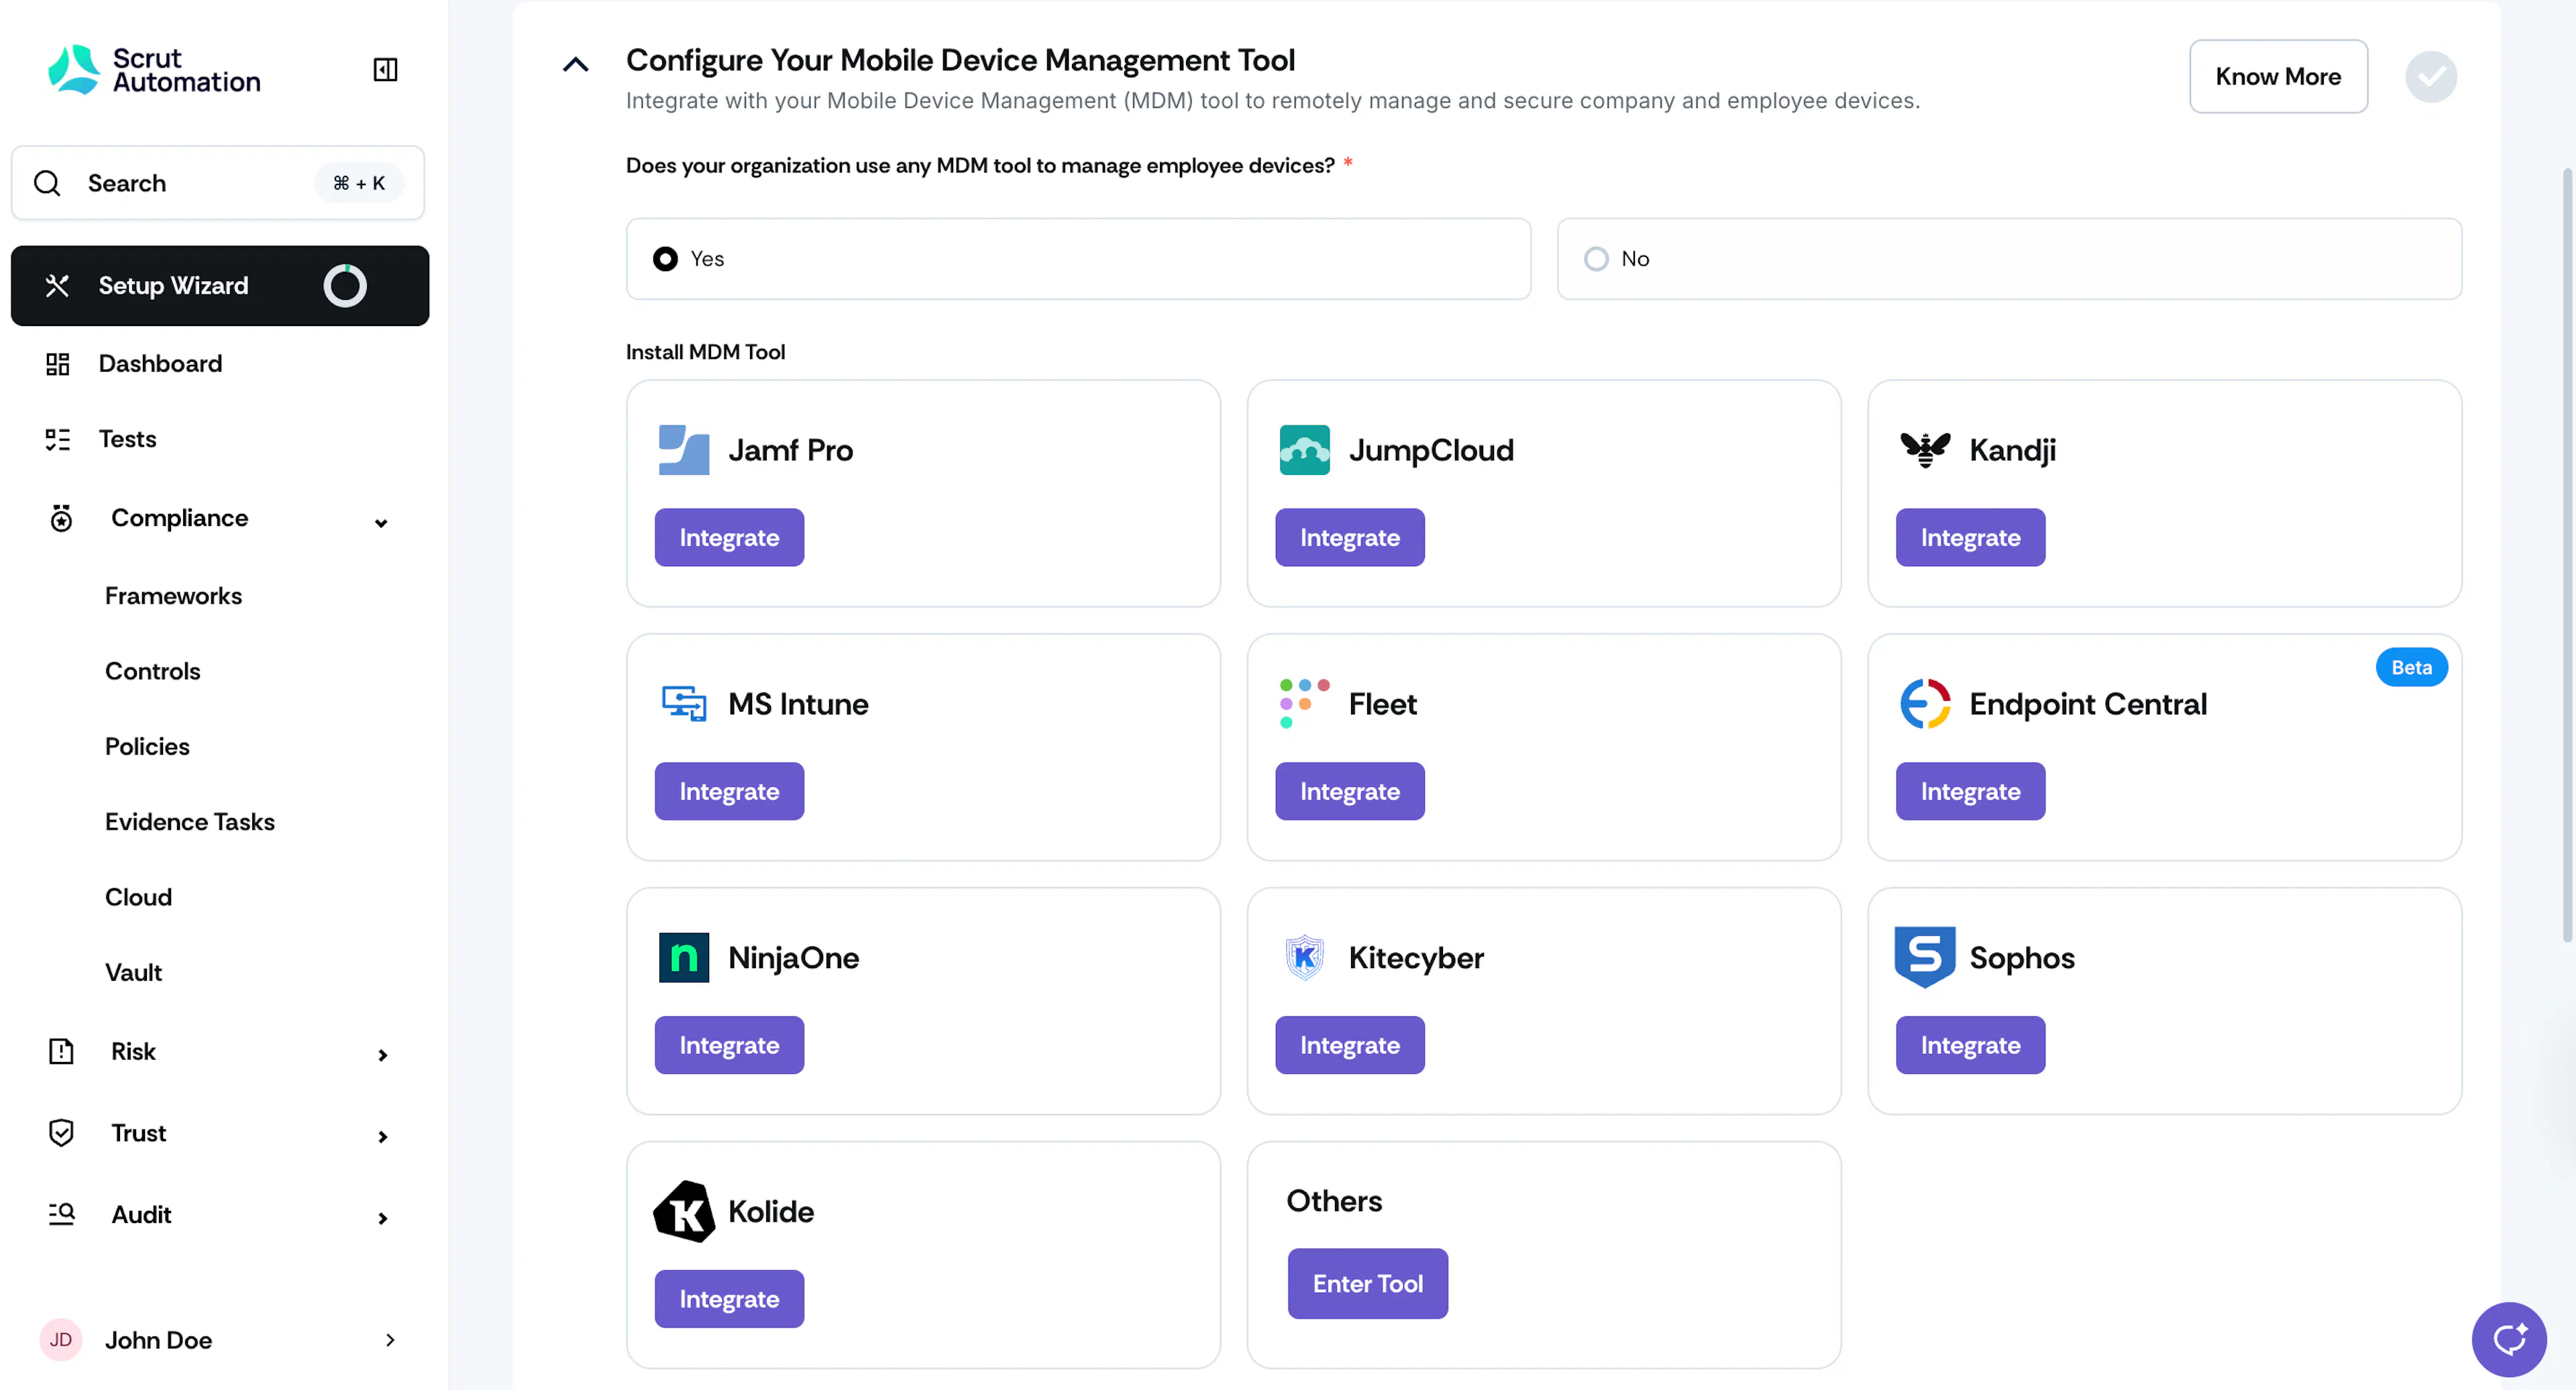
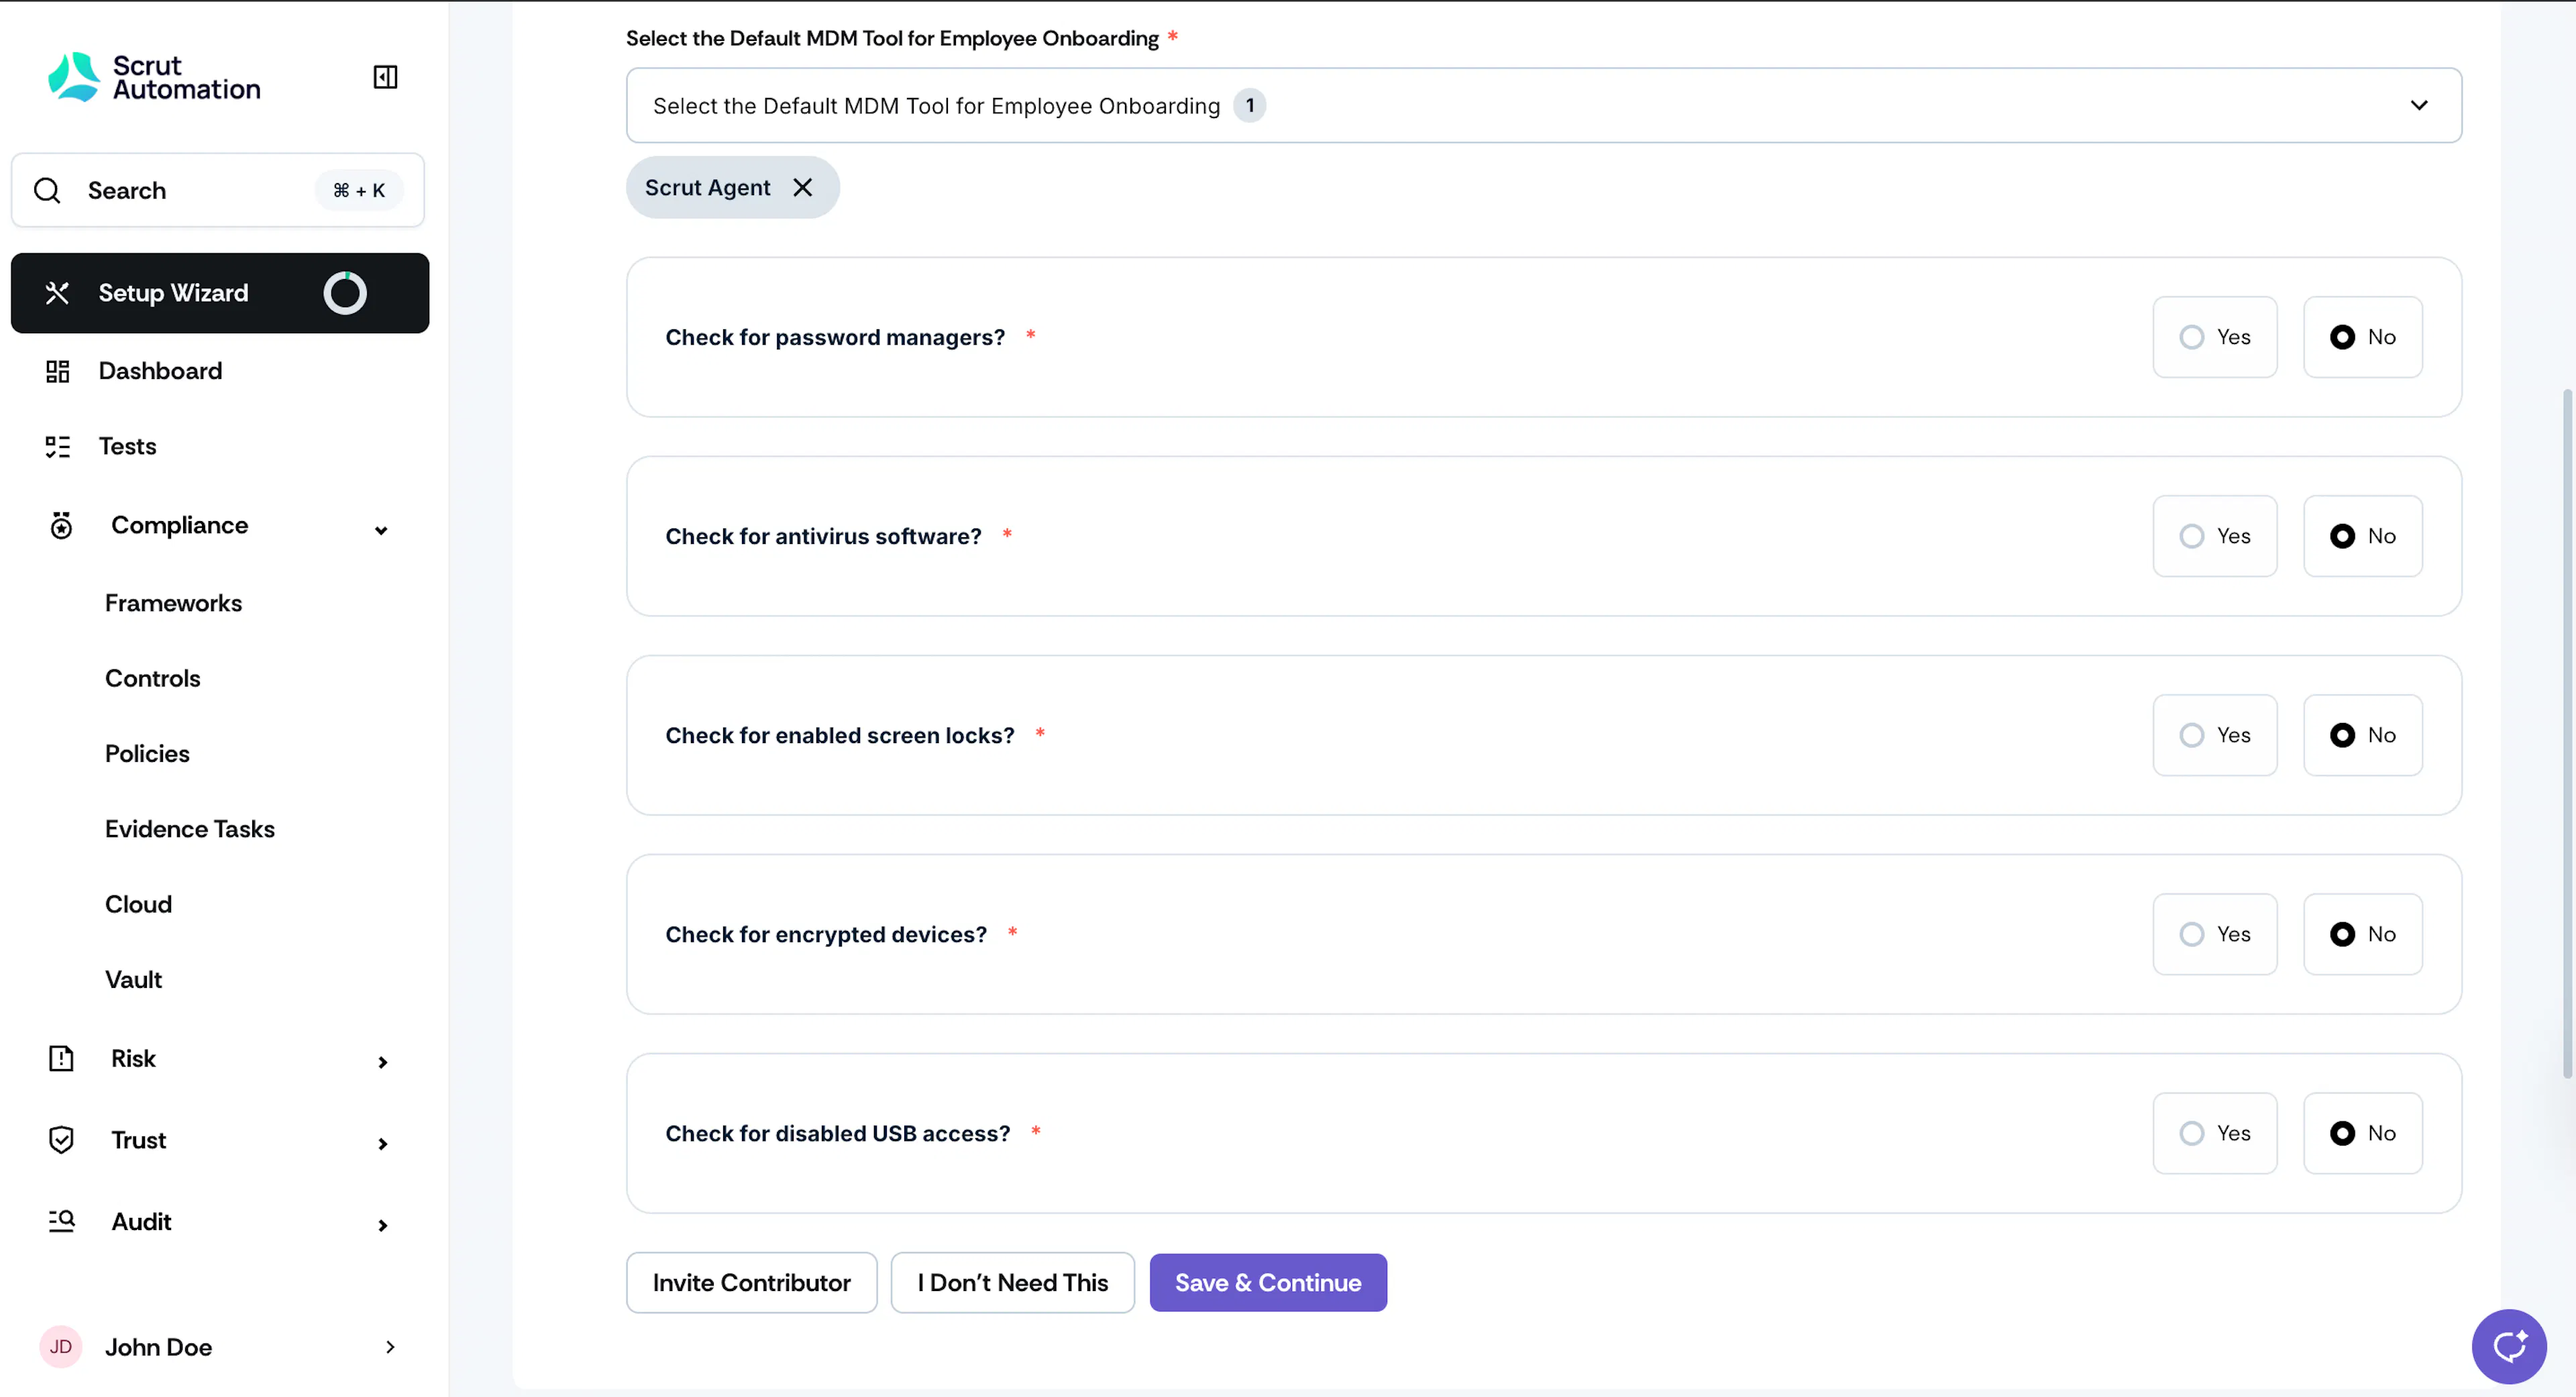
If you don’t have an MDM tool, you can use Scrut Agent as your MDM. Scrut Agent is a lightweight tool that runs in the background. You can use it to perform essential security checks on employee devices and enhance your organization’s security posture. Once you’ve selected your MDM, enable the device security checks you want to monitor on employees’ devices.
2: Configure Your Background Verification Tool
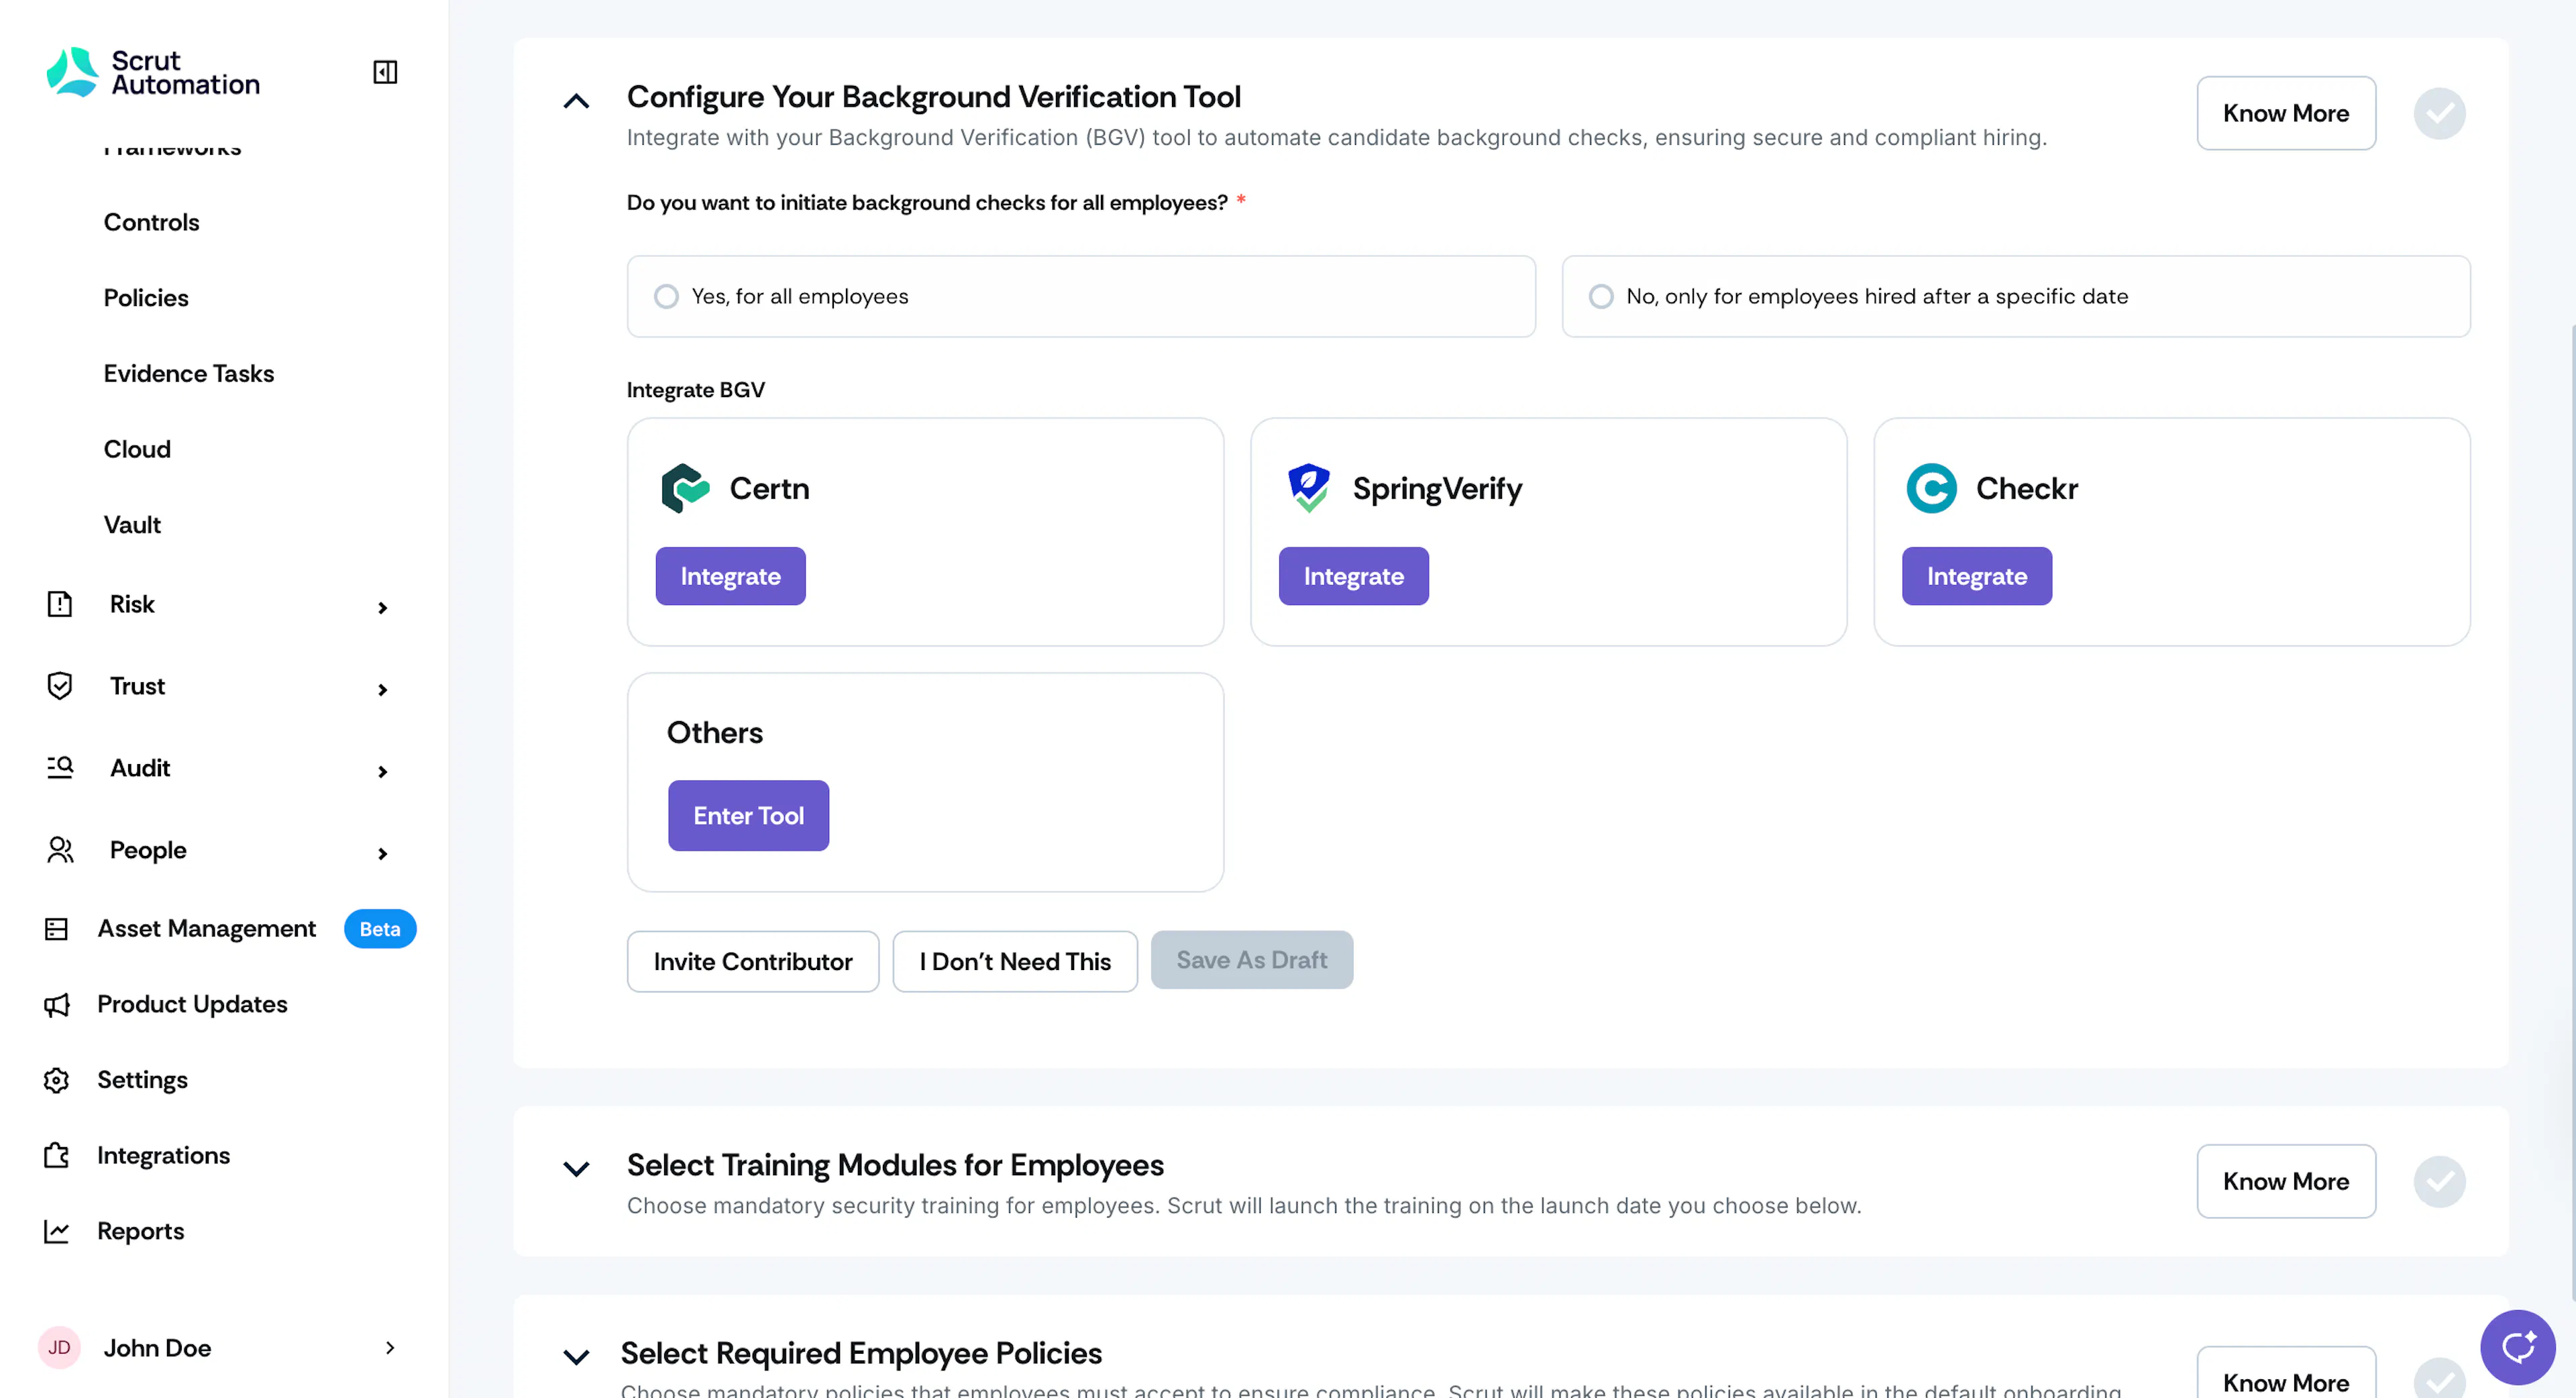
Connect your background verification (BGV) tool to automate candidate background checks, ensuring secure and compliant hiring. You can choose to start background checks for either:
- All employees (OR)
- Employees hired after a specific date
Scrut supports several BGV tools, including Certn, SpringVerify, and Checkr. Refer to these integration guides for detailed instructions on connecting with your BGV tool.
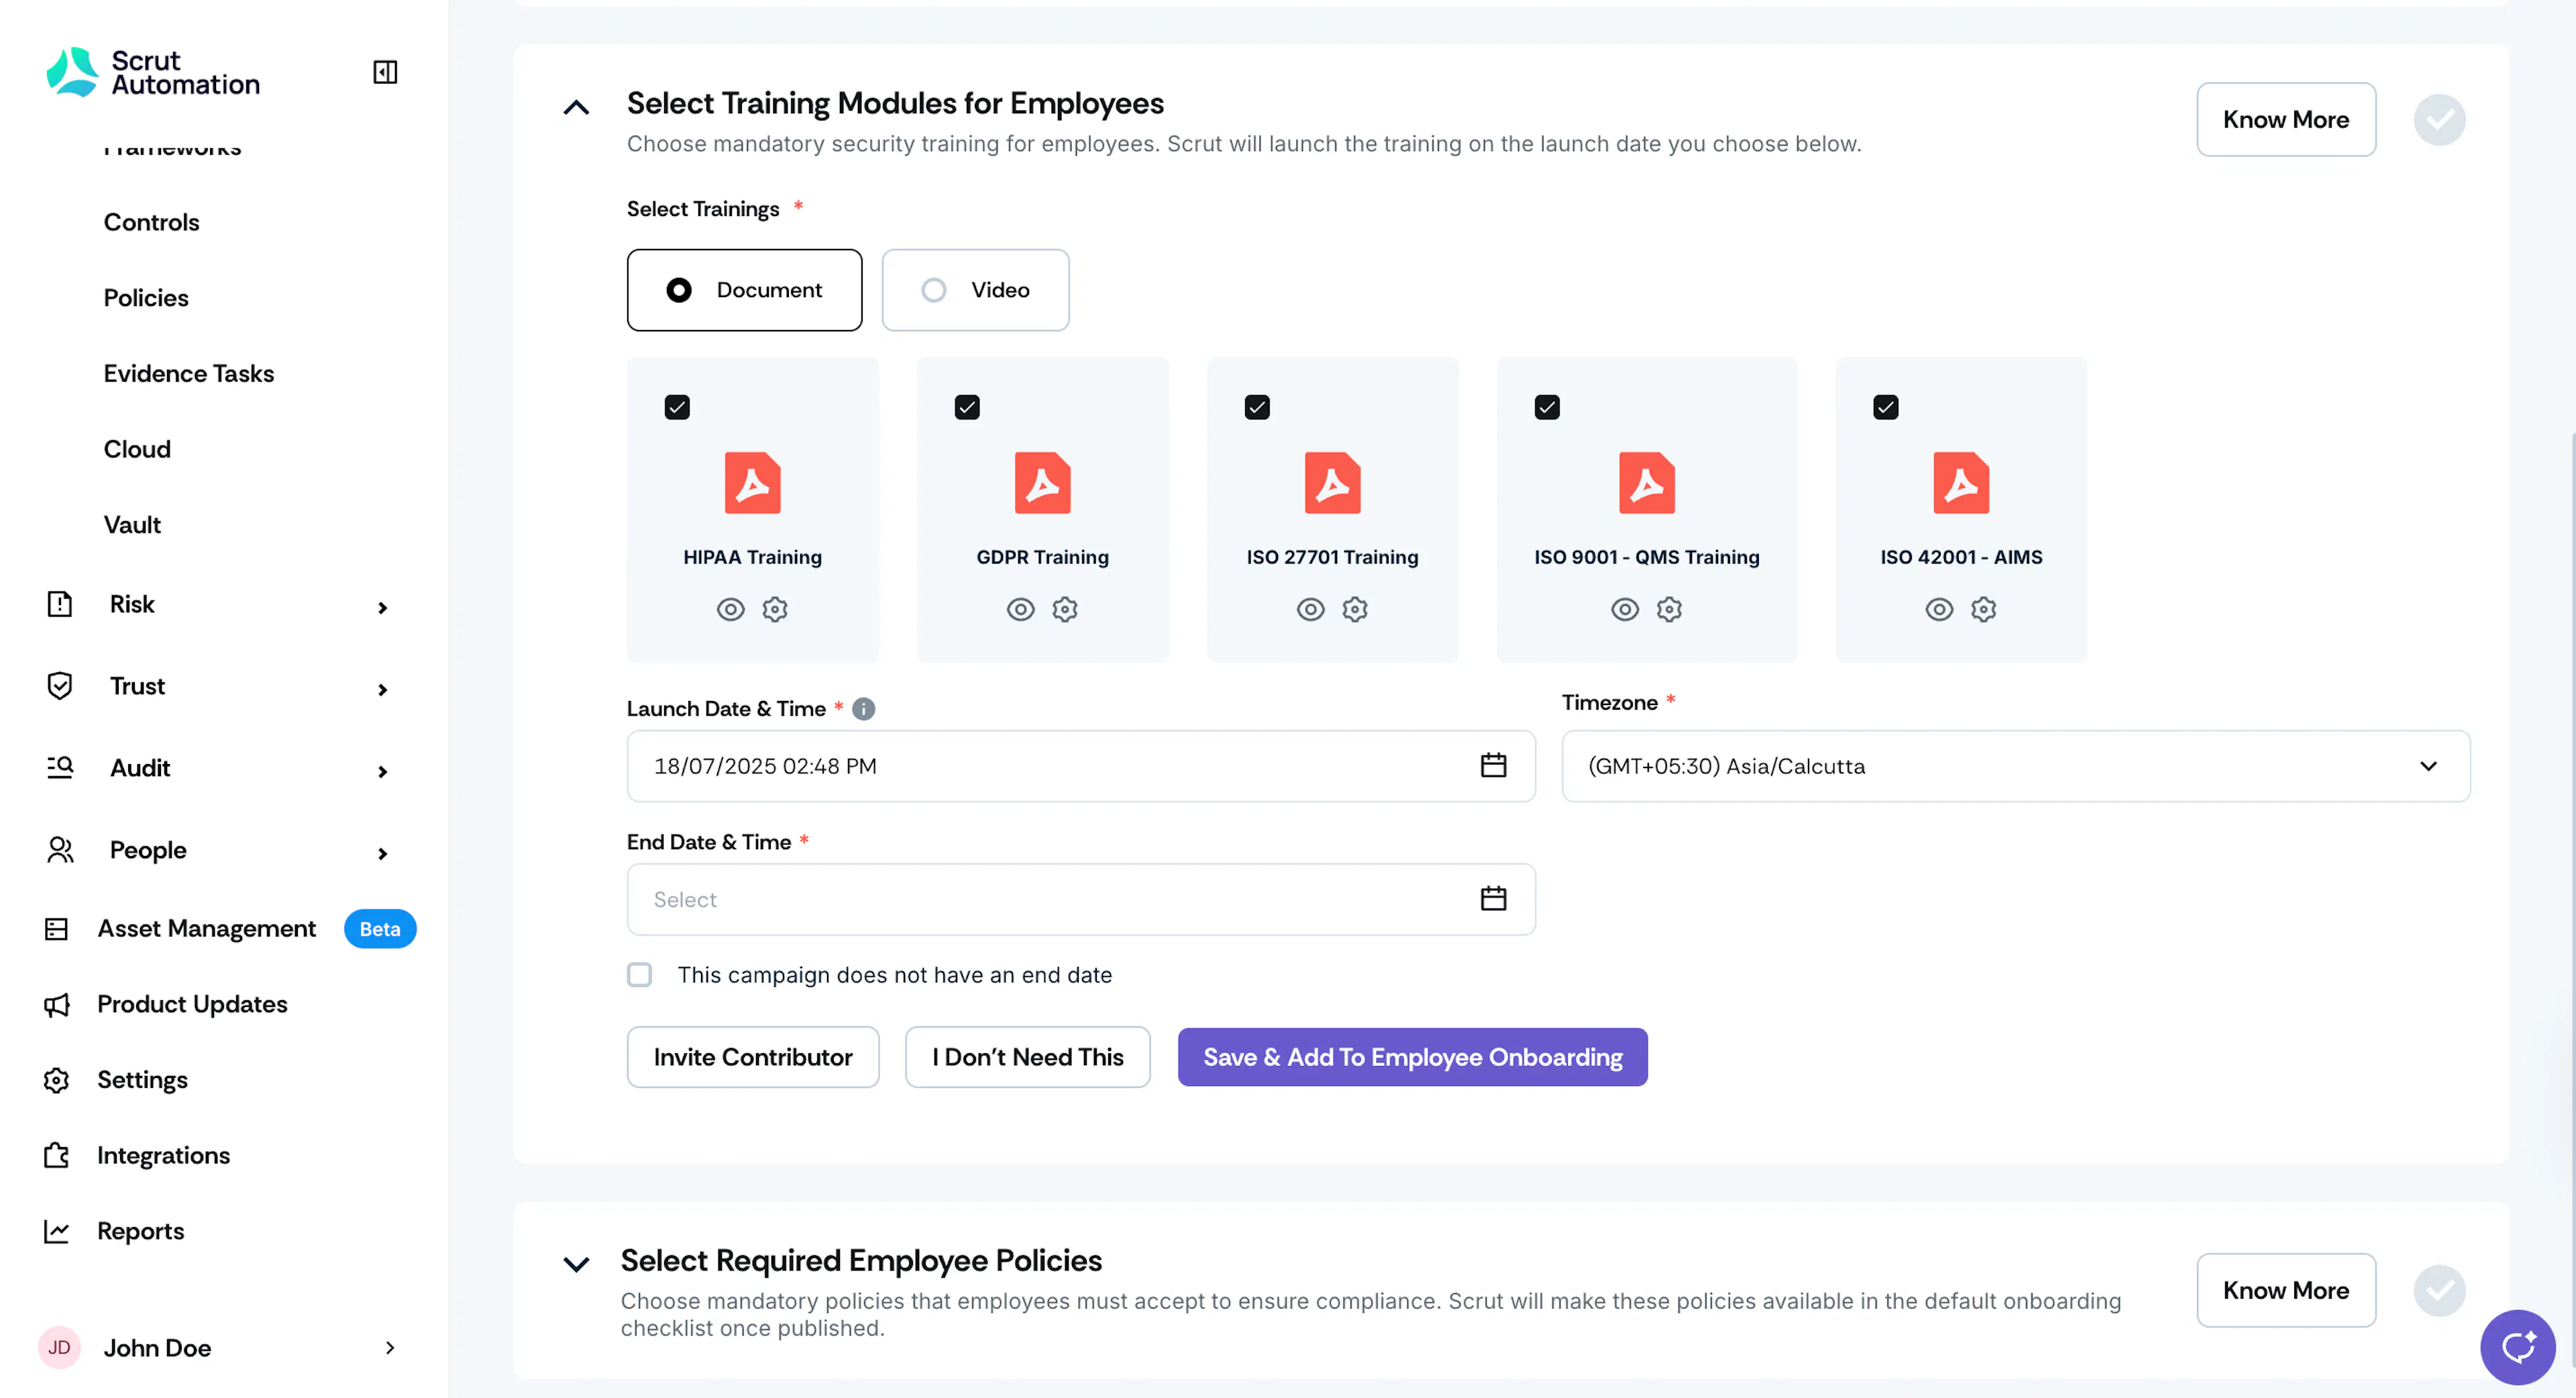
3: Select Training Modules for Employees
Scrut provides several security training programs tailored to compliance standards such as HIPAA, GDPR, ISO 27001, ISO 9001 QMS, and ISO 42001 AIMS. You can select the training programs your employees need to complete based on your specific compliance requirements.
Set a start date and an end date, then save your choices to add them to the employee onboarding process. Scrut will launch the training on the scheduled date, and employees will access it through the Scrut Employee Portal. To remind employees to complete their training, navigate to Settings → Notifications to enable email reminders. They will receive emails reminding them to complete the training before the deadline.
Pro Tip!
Allow sufficient time between launch and end dates for employees to complete the program.
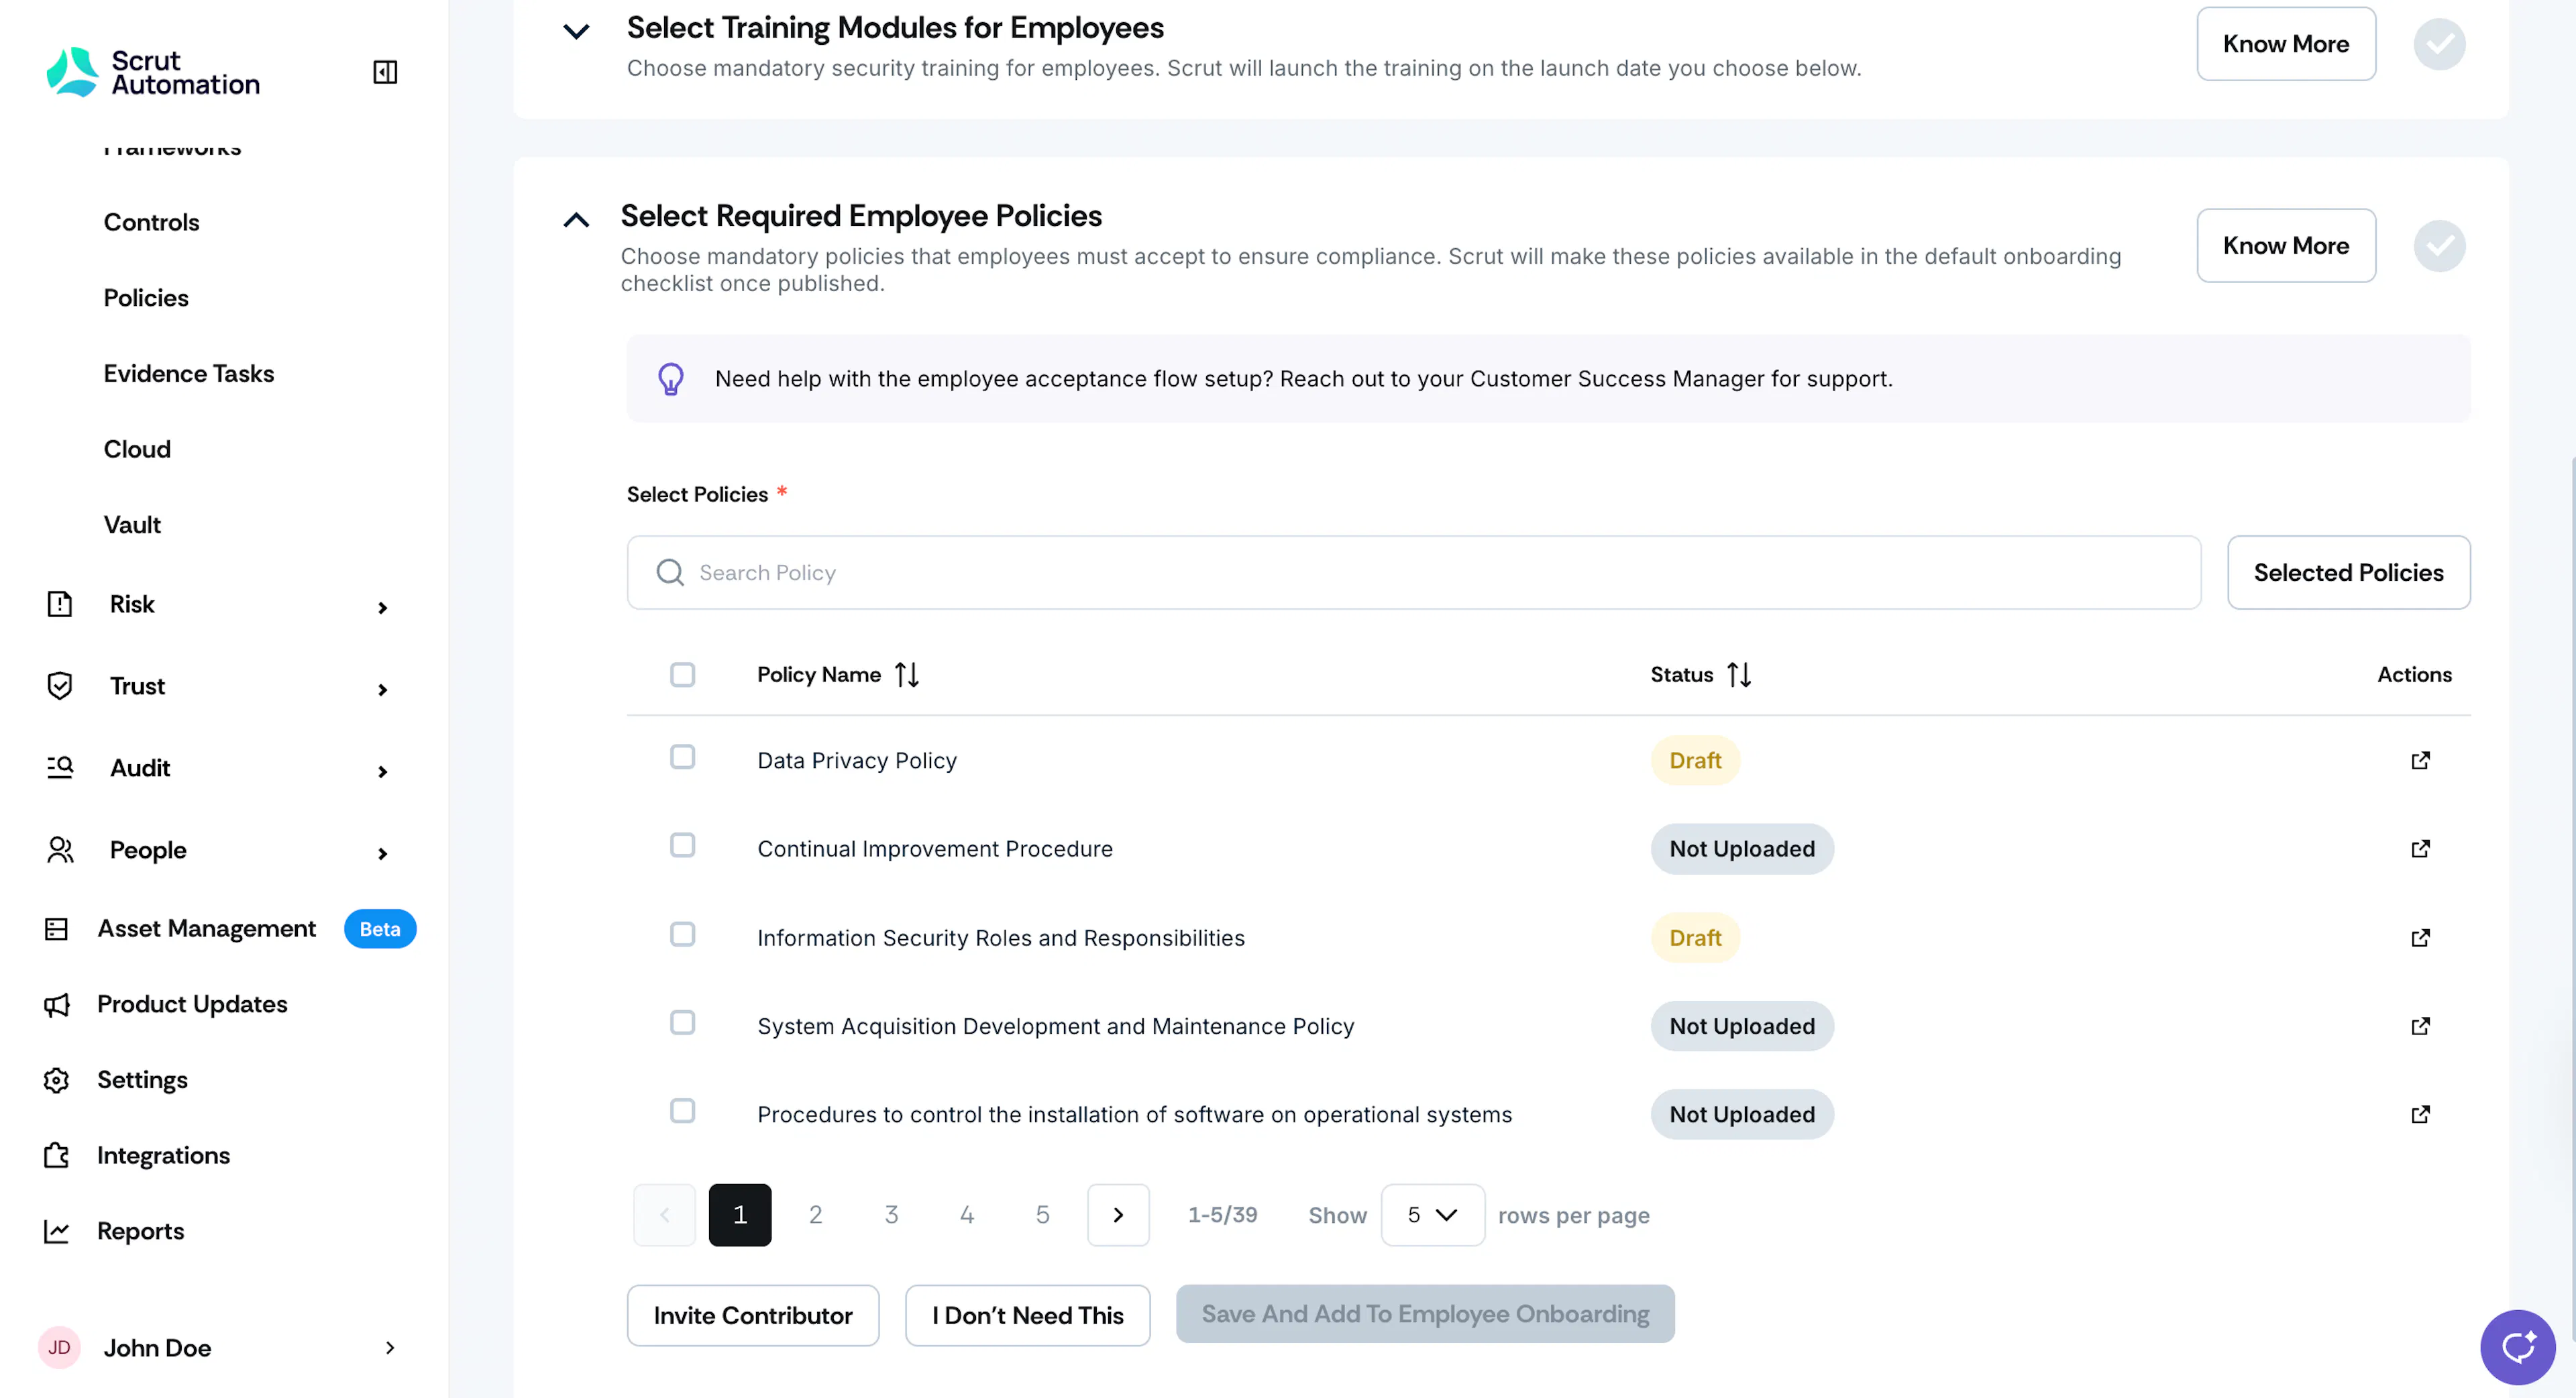
4: Select Required Employee Policies
By default, Scrut shows the policies in your compliance framework. Choose the policies that employees must accept to ensure compliance with a specific framework.
Once you publish these policies, Scrut will add them to the default onboarding checklist. If you need help publishing policies or setting up the employee onboarding checklist, contact your CSM for personalized assistance or check our step-by-step help guide on using the Employee Module with groups and checklists.
Section 4: Tool Integrations
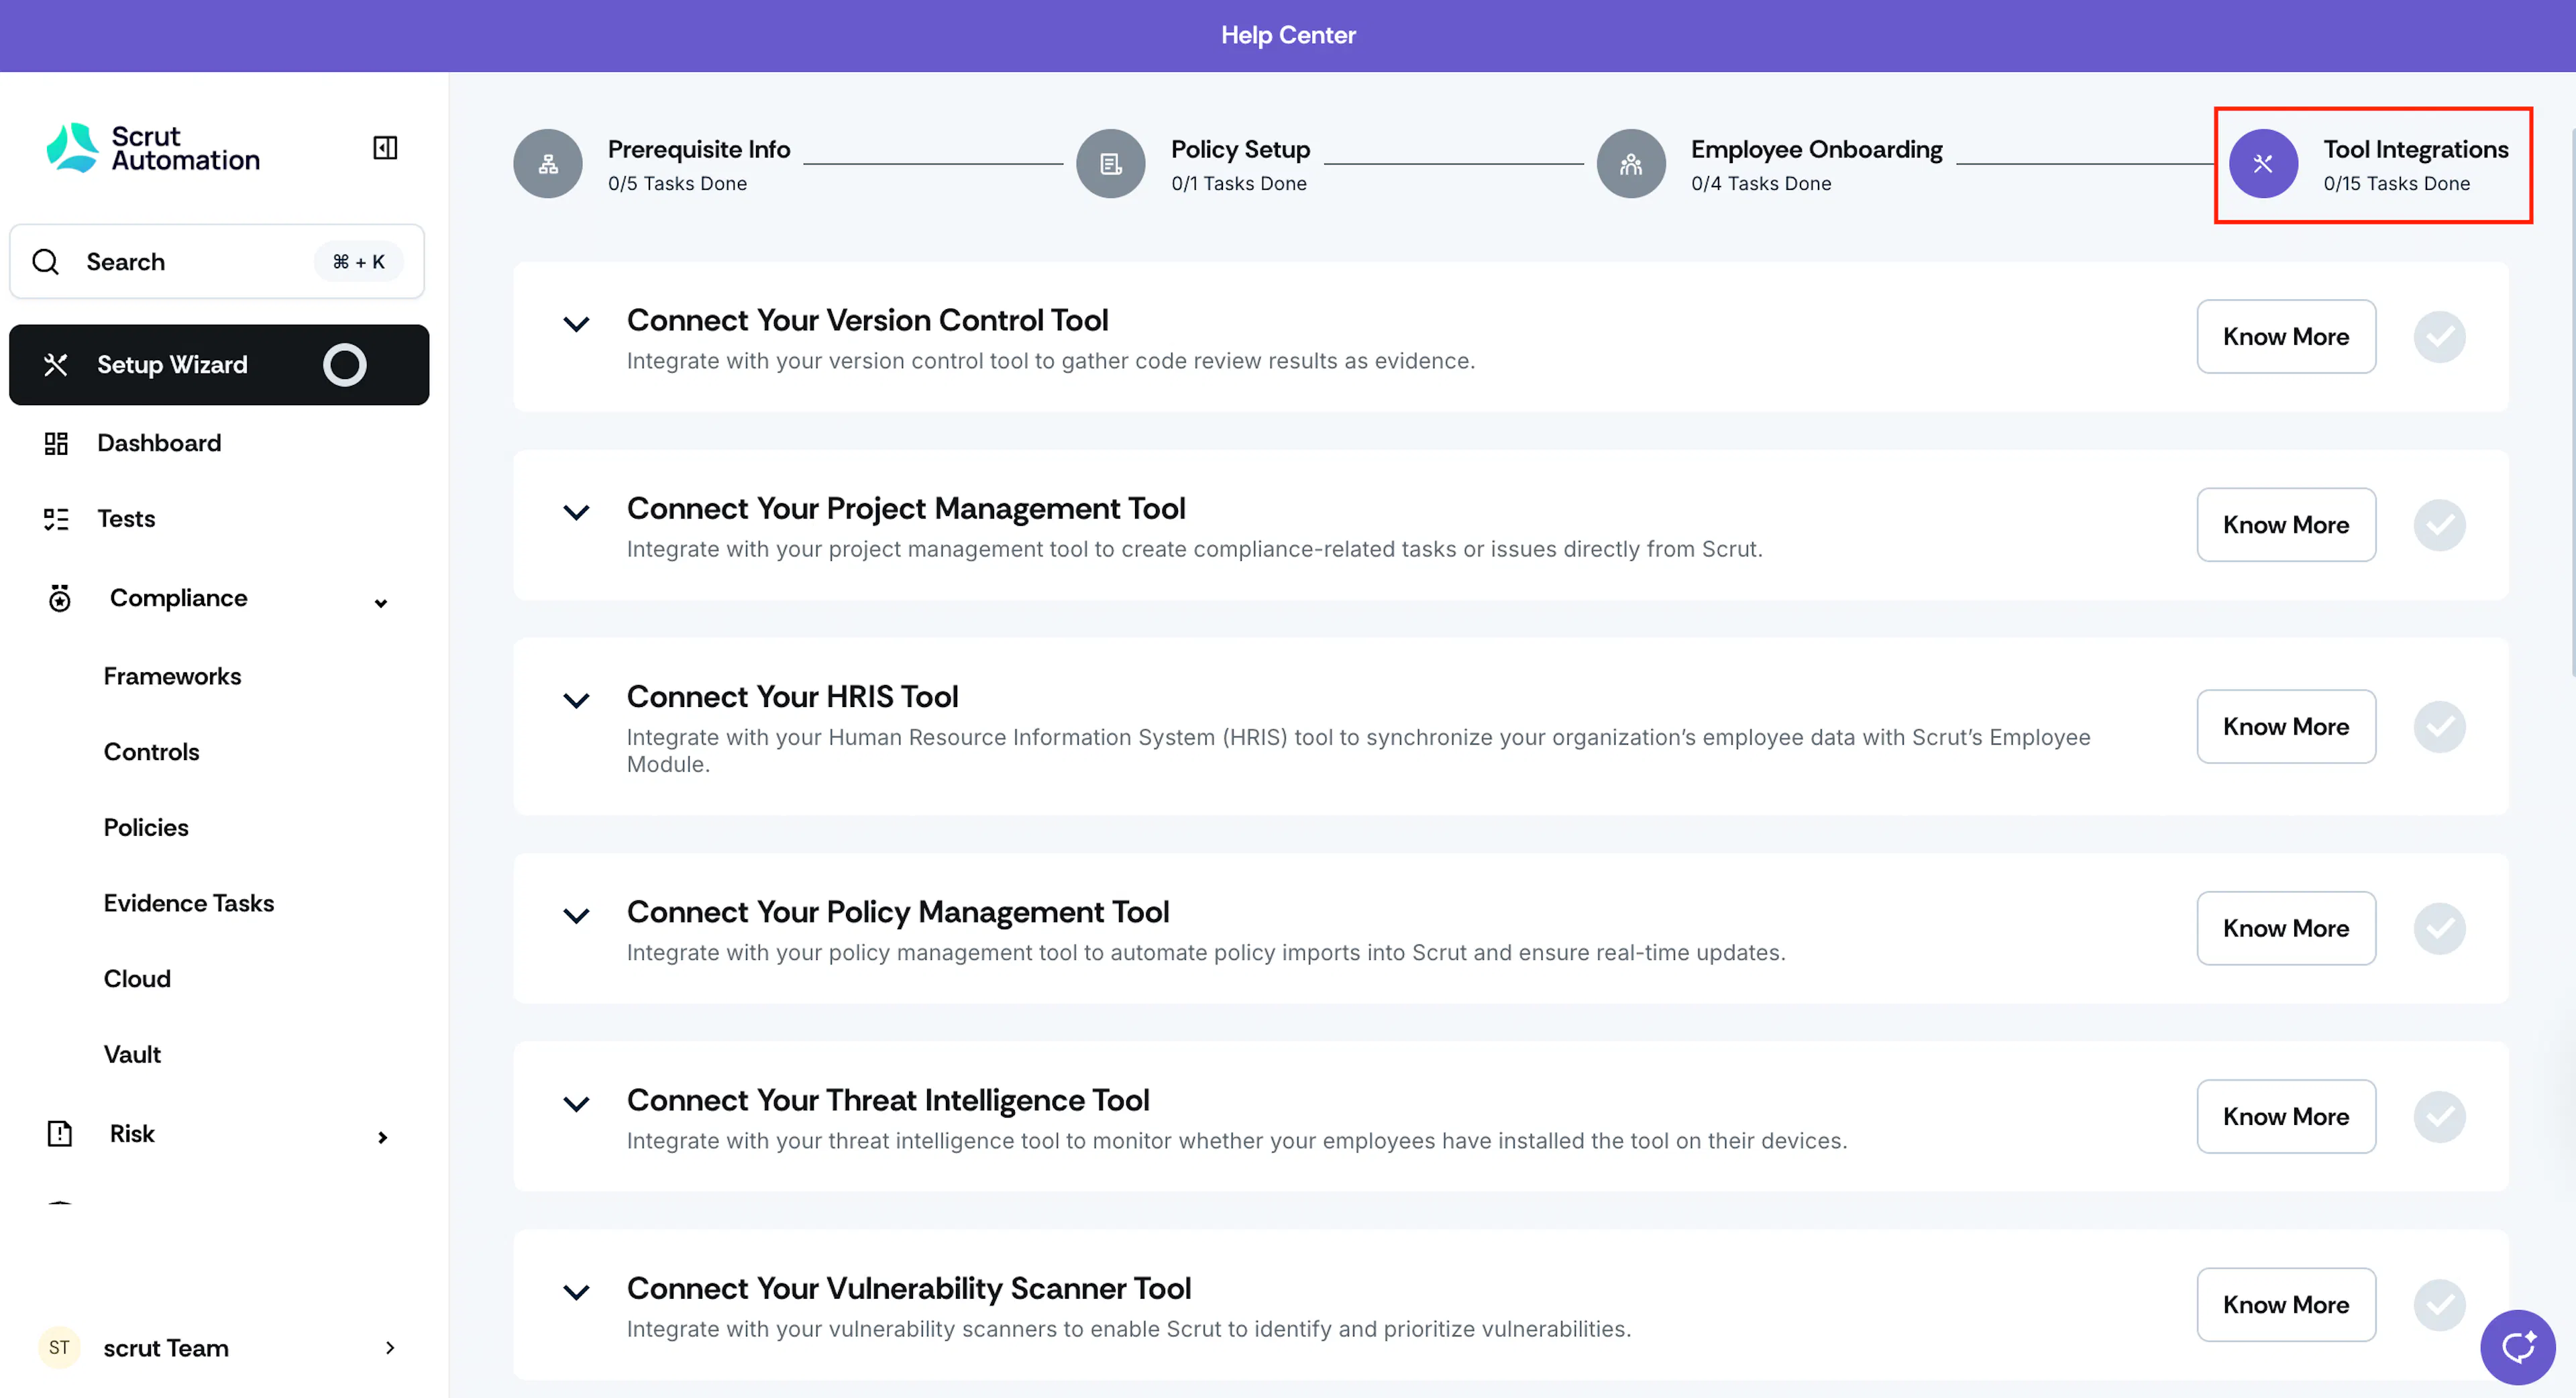
Use this section to connect your tech stack with Scrut. We support integrations with the following tool categories:
- Version Control Tool: To automatically gather code review results as evidence.
- Project Management Tools: To create and assign compliance-related tasks and tickets to the appropriate team members directly from Scrut.
- HRIS Tools: To sync your organization’s employee data with Scrut’s Employee module to manage and track employee compliance.
- Policy Management Tools: To automate policy imports into Scrut and ensure real-time updates.
- Threat Intelligence Tools: To monitor whether employees have installed the requisite threat intelligence tools on their devices and stay updated on security threats.
- Vulnerability Scanner Tools: To enable Scrut to monitor, identify, and prioritize vulnerabilities and identify security issues in your applications.
- Incident Management Tools: To allow Scrut to log, track, and resolve security incidents.
- Web Security & CDN Tools: To enhance your security posture by monitoring web application security.
- Capacity & Usage Monitoring Tools: To automate daily security scans.
- Database Tools: To monitor database security and ensure compliance with encryption controls.
- Communication Tools: Receive notifications, timely reminders, and digest messages about pending tasks directly in your preferred communication channel.
- Campaigns & Training Tools: To automatically fetch employee security training data as evidence.
- Ticket Management Tools: Create compliance-related tickets and assign them to the corresponding team members directly from Scrut.
- CRMs: To streamline access requests for your Trust Vault.
- Miscellaneous Tools: To enhance your security posture and streamline operations across platforms.
Note:
- You can integrate any number of these tools as required.
- If you prefer, you can skip integrating these tools for now and add them later via the Integrations module.
- To integrate a specific tool, select the desired tool from its category, click the Integrate button and follow the on-screen instructions.
- For detailed guidance, check our integration help guides.
FAQs & Troubleshooting
Need Help?
- Refer to our Integration Guides for step-by-step instructions on connecting your tech stack
- Contact support (support@scrut.io) for technical issues or questions
- Connect with your CSM for specific guidance on your compliance journey