

Discover Vendors via Google Workspace
Who can use this feature
- Supported on Foundation, Growth, and Scale plans
Follow these steps to connect Google Workspace to Scrut and automatically discover SSO applications as vendors.
Step 1: Integrate Google Workspace
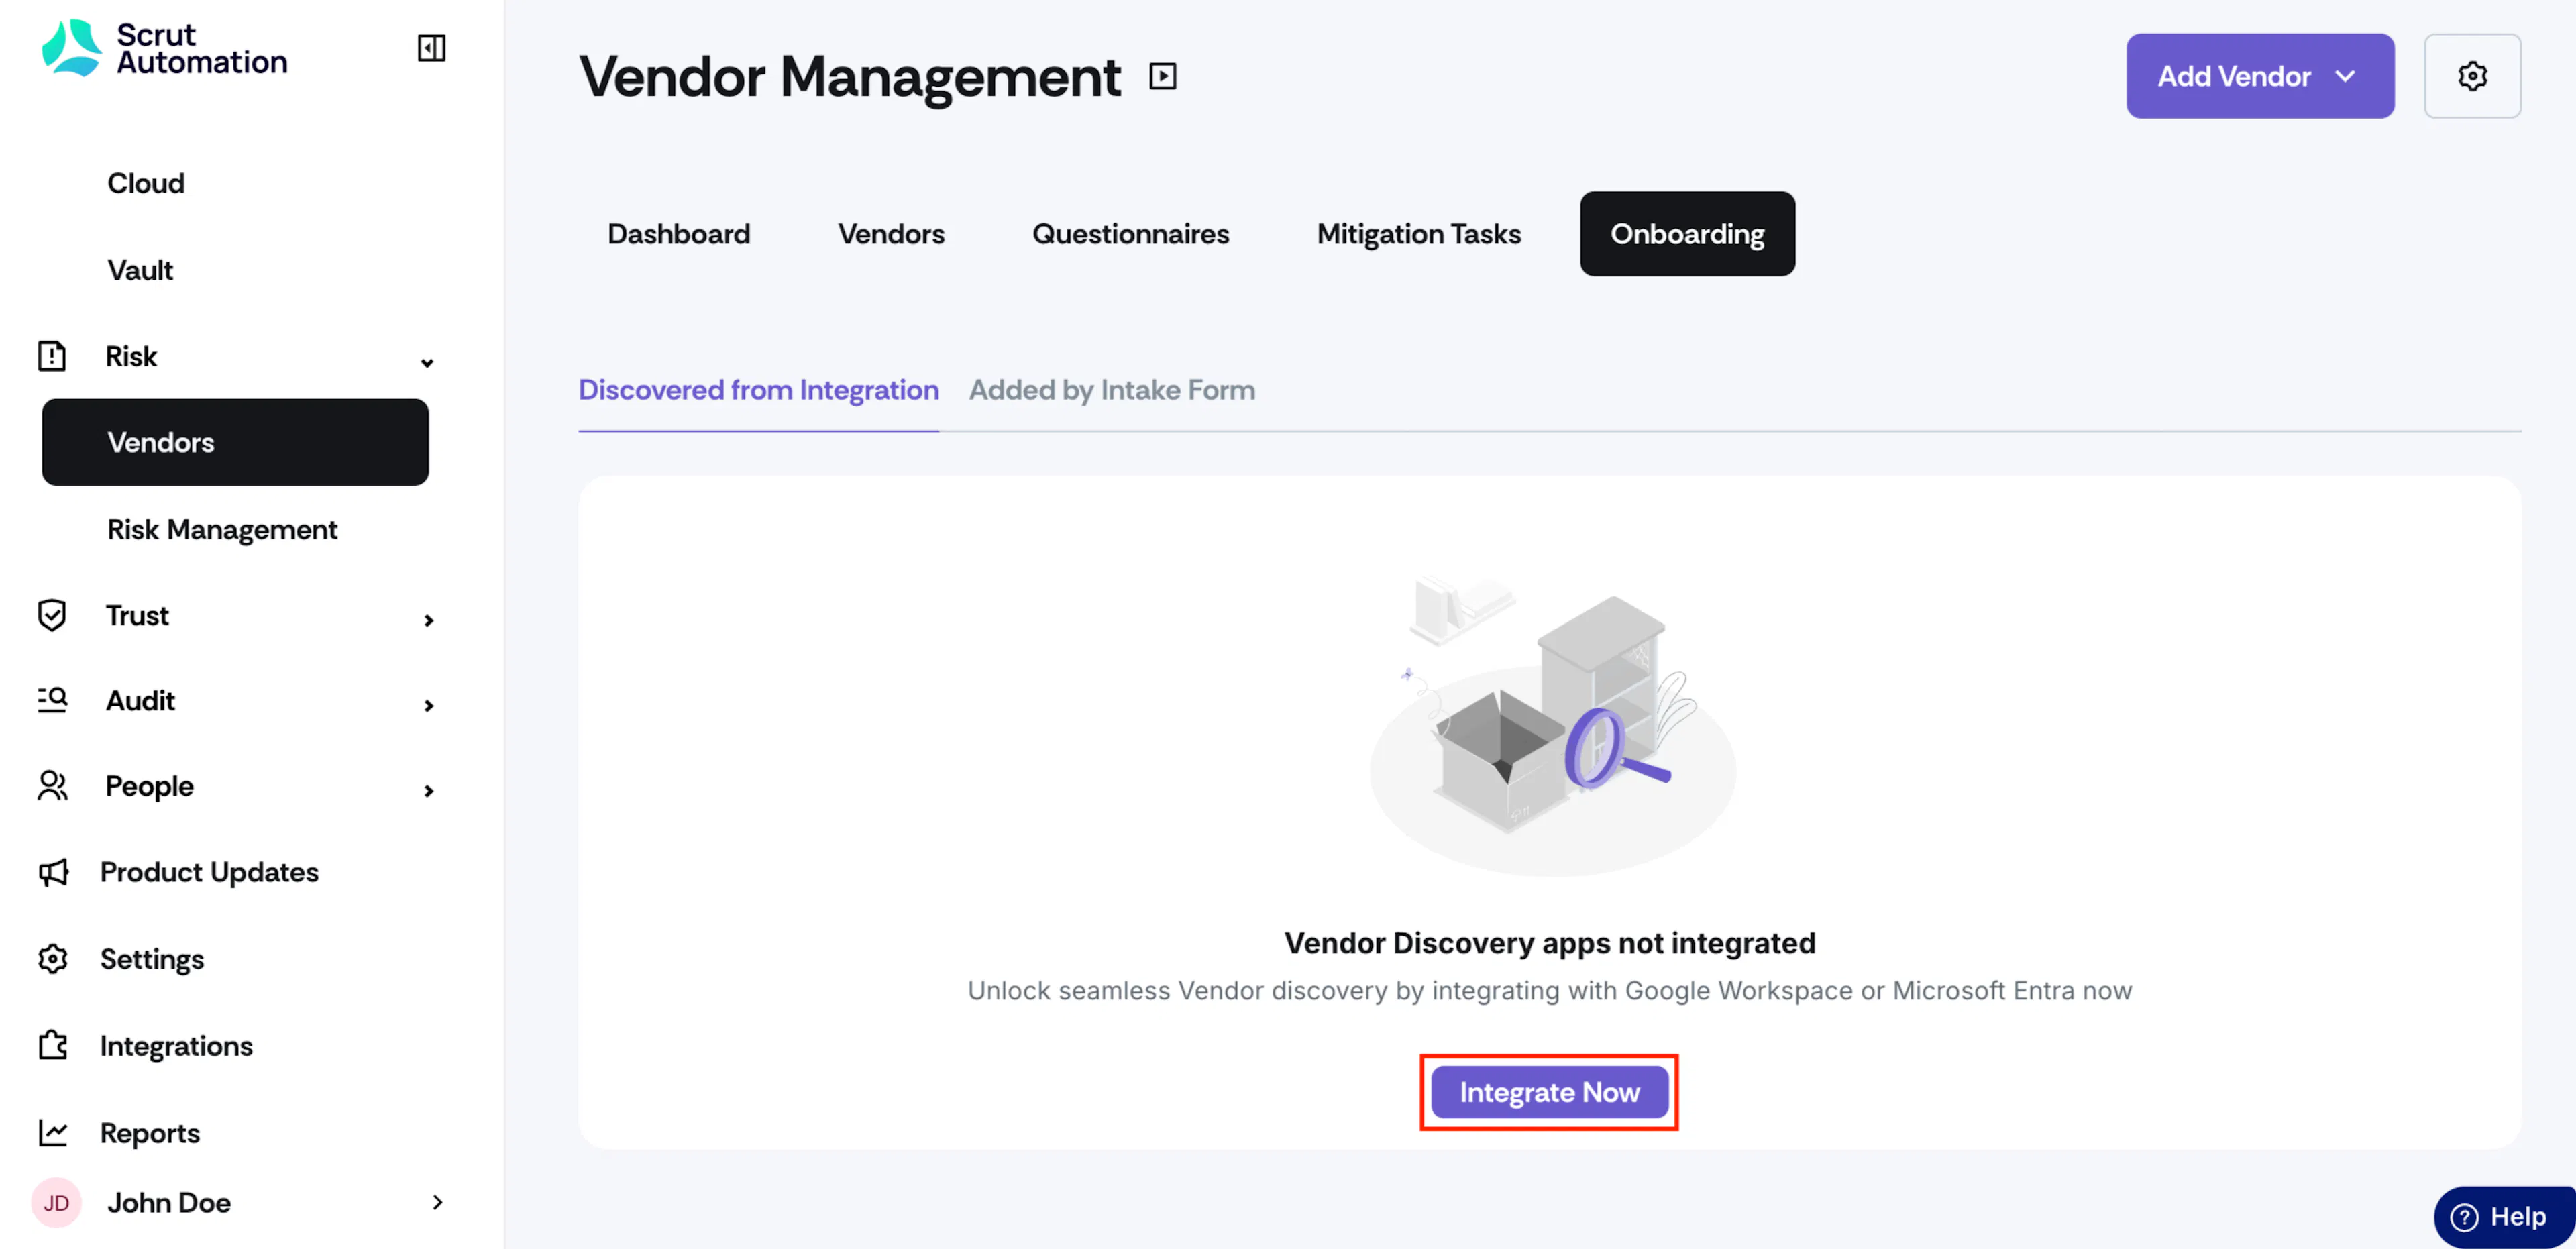
Navigate to Risk → Vendors → Onboarding and click Integrate Now.
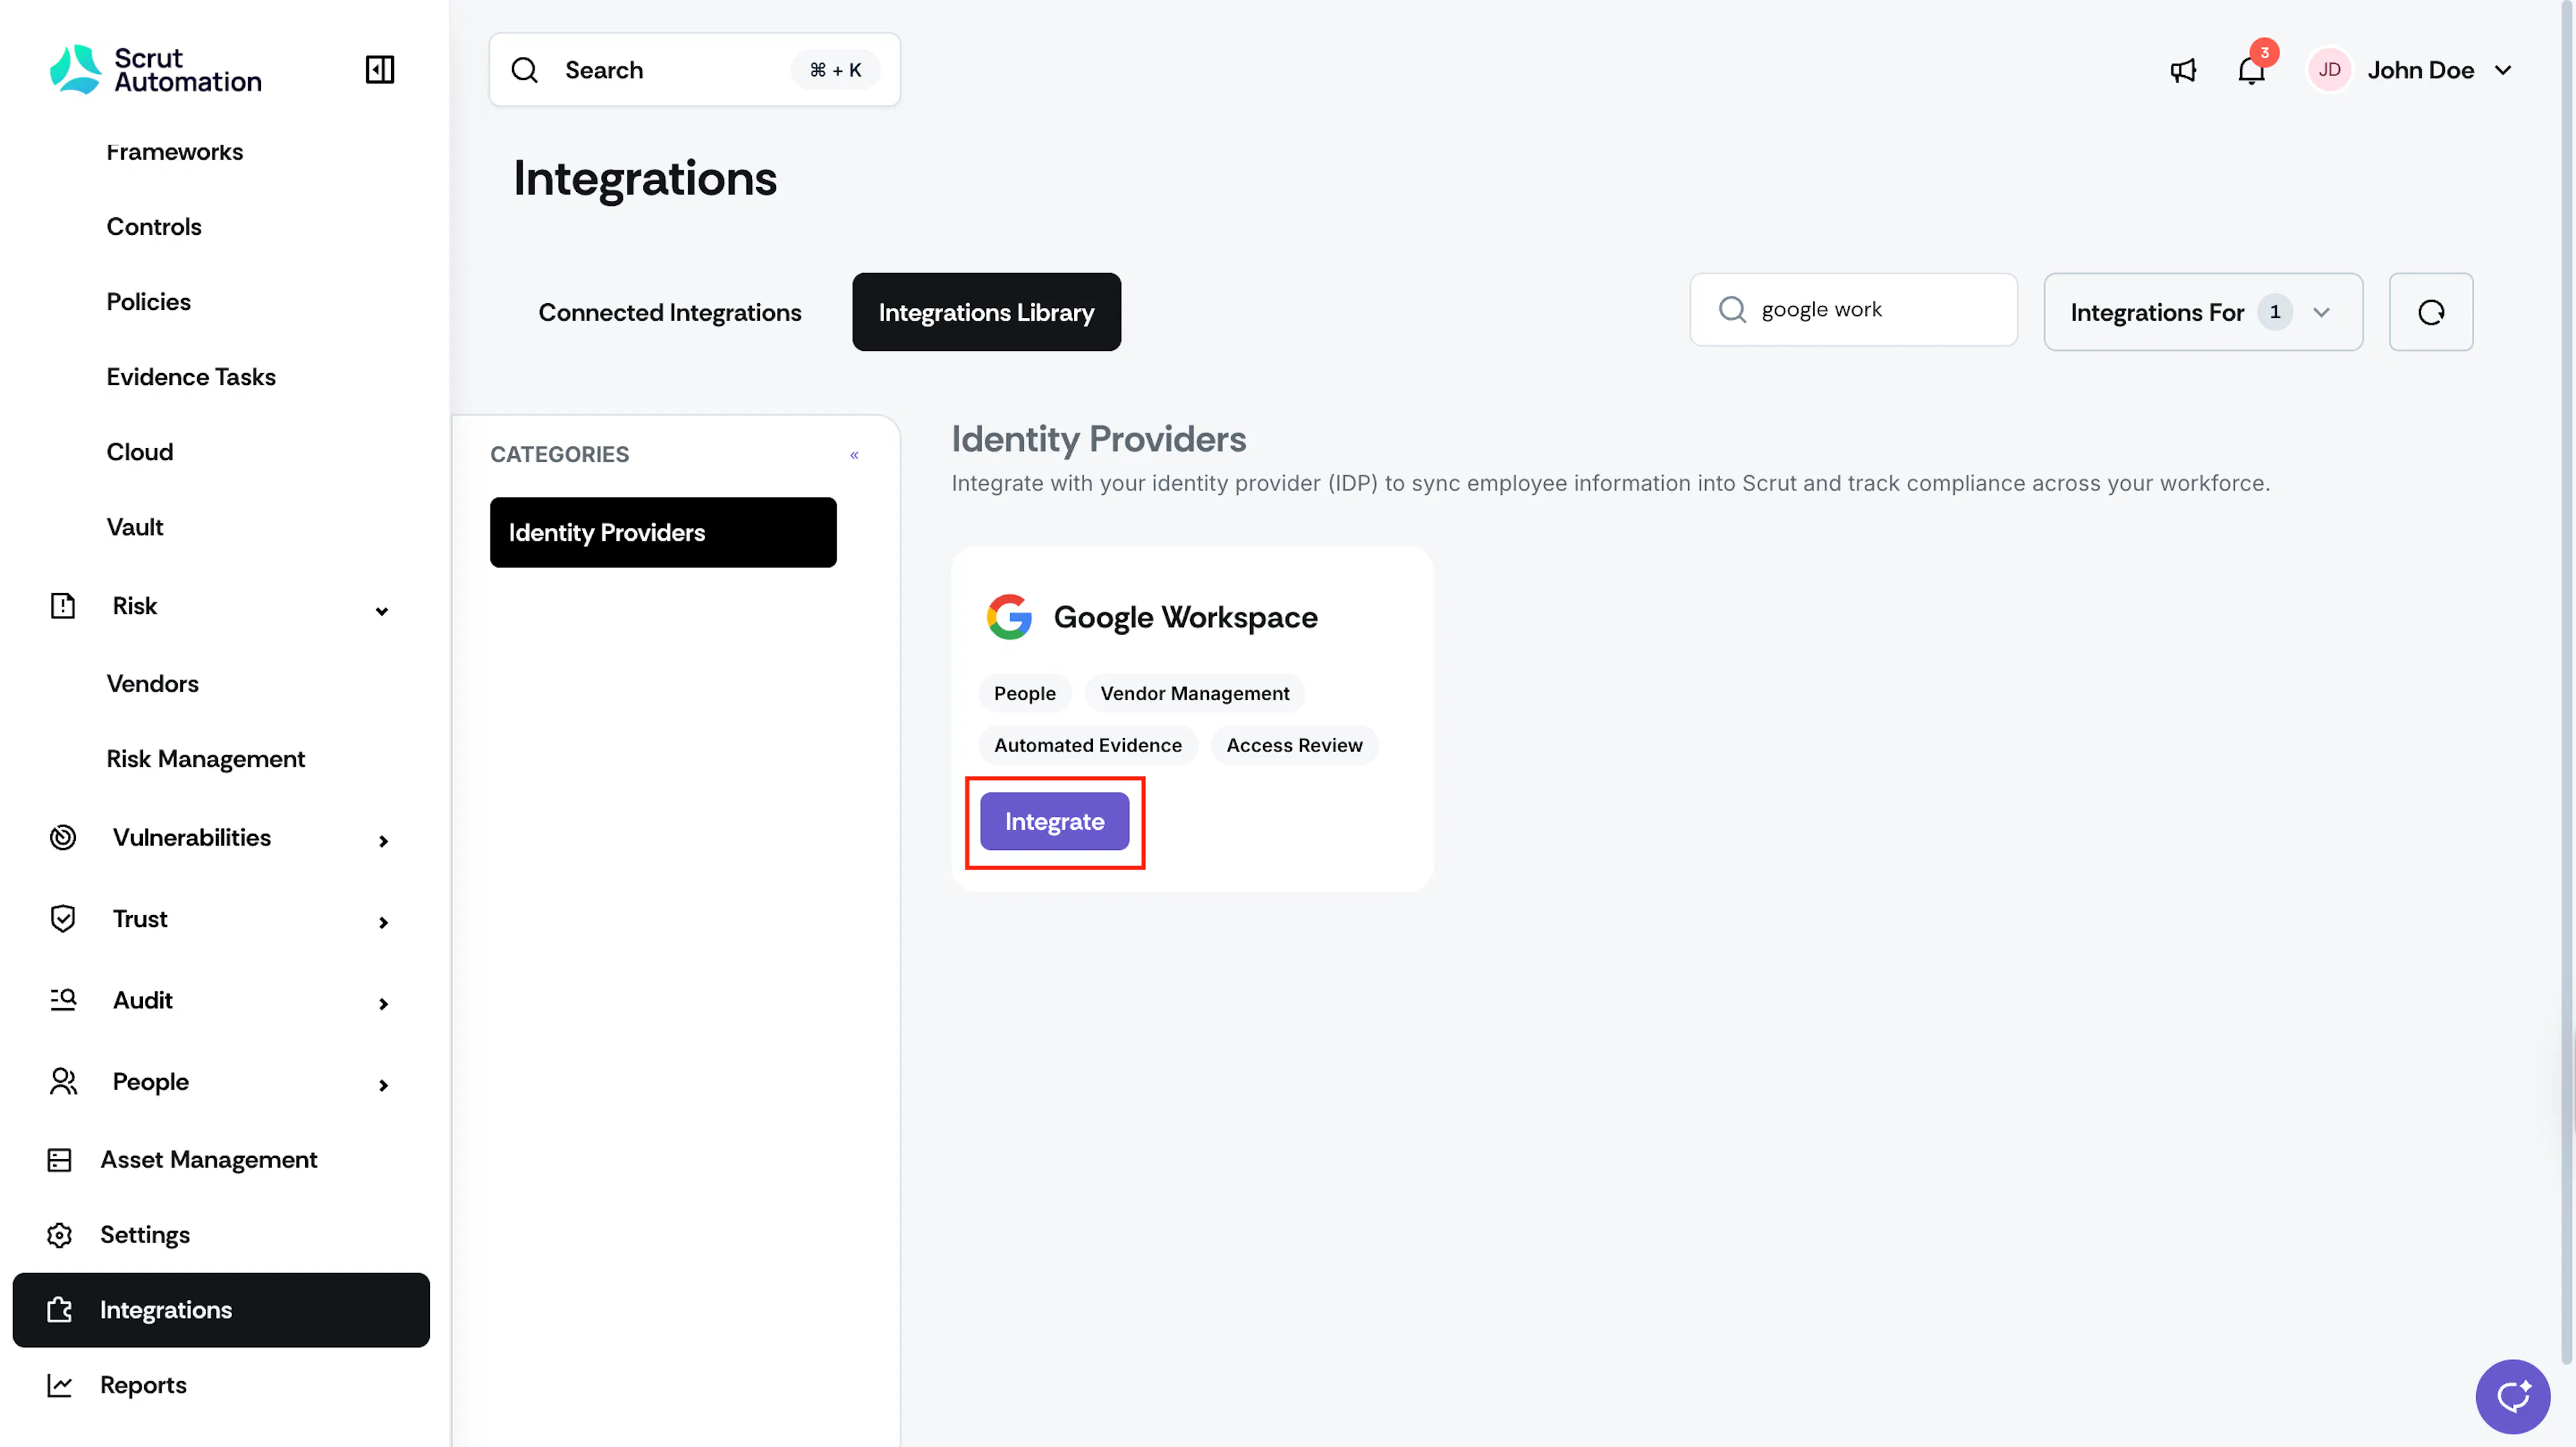
Alternatively, click the Integrations tab on the left navigation panel, search for Google Workspace and click Integrate.
Heads Up!
Need help setting up the integration? Refer to Integrating Google Workspace for step-by-step instructions.
Step 2: Review Discovered Applications
Once connected, Scrut automatically imports the applications authorized in your Google Workspace account. These appear on the Discovered from Integration page in Risk → Vendors → Onboarding, with the Source set to Google Workspace.
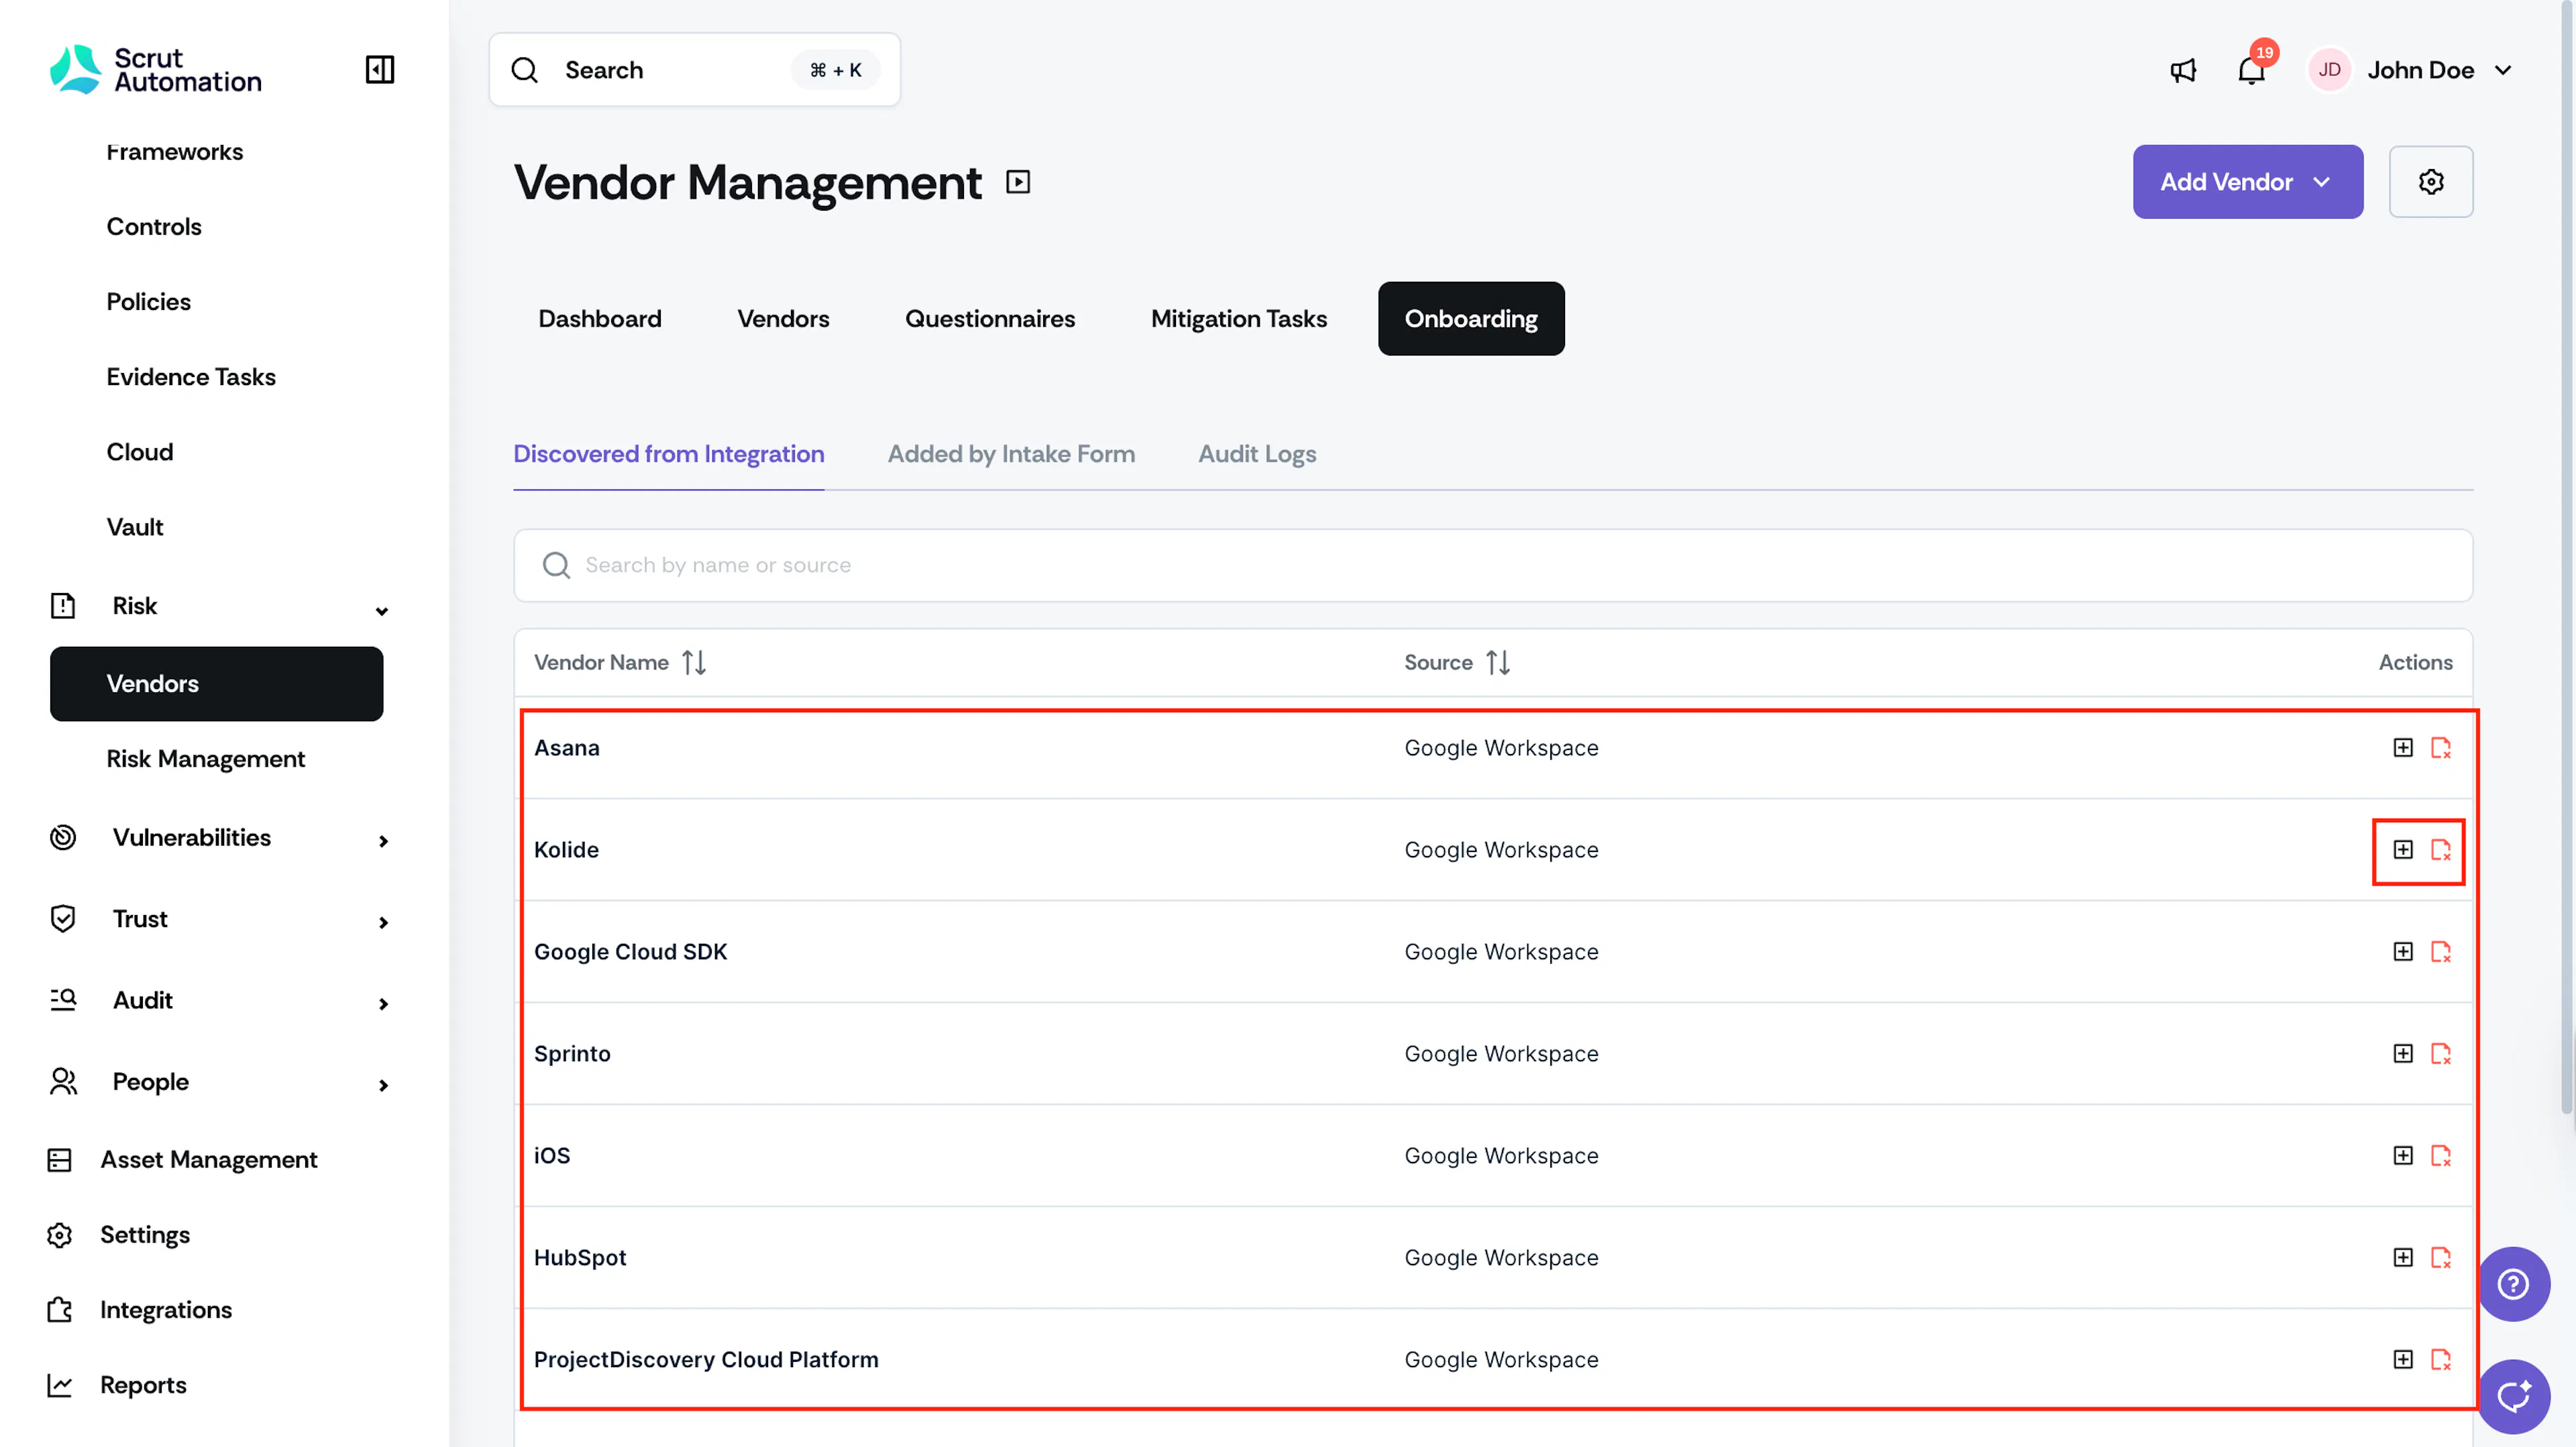
Review the imported applications and classify each one:
- Click Mark as Vendor to add it to your official vendor list.
- Click Not a Vendor to exclude it. It stays on this page for reference, but won't appear in your Vendor table.
- If an application shows a Duplicate Vendor badge, it matches a vendor already in your Vendor list. Review the match before adding or ignoring it.
- If an application shows a Flagged for Review label, it has broad or sensitive access to your organization's data. Click the application name to see why it was flagged and what it's allowed to do before you add or ignore it.
Pro Tip! For detailed instructions on adding, ignoring, and reviewing duplicate vendors, see Discover Vendors through SSO Integration.