Understand the Vendor Details Page
Knowing your vendors is a crucial part of your compliance journey. The Vendors page in the Vendor Management module provides a comprehensive overview of each vendor profile. This article explains the different components and sections of this page.
How To Access the Vendor Page
- Sign in to Scrut and go to Risk → Vendors using the left navigation menu.
- Click the Vendors tab.
- Click on any vendor in the list to view their details.
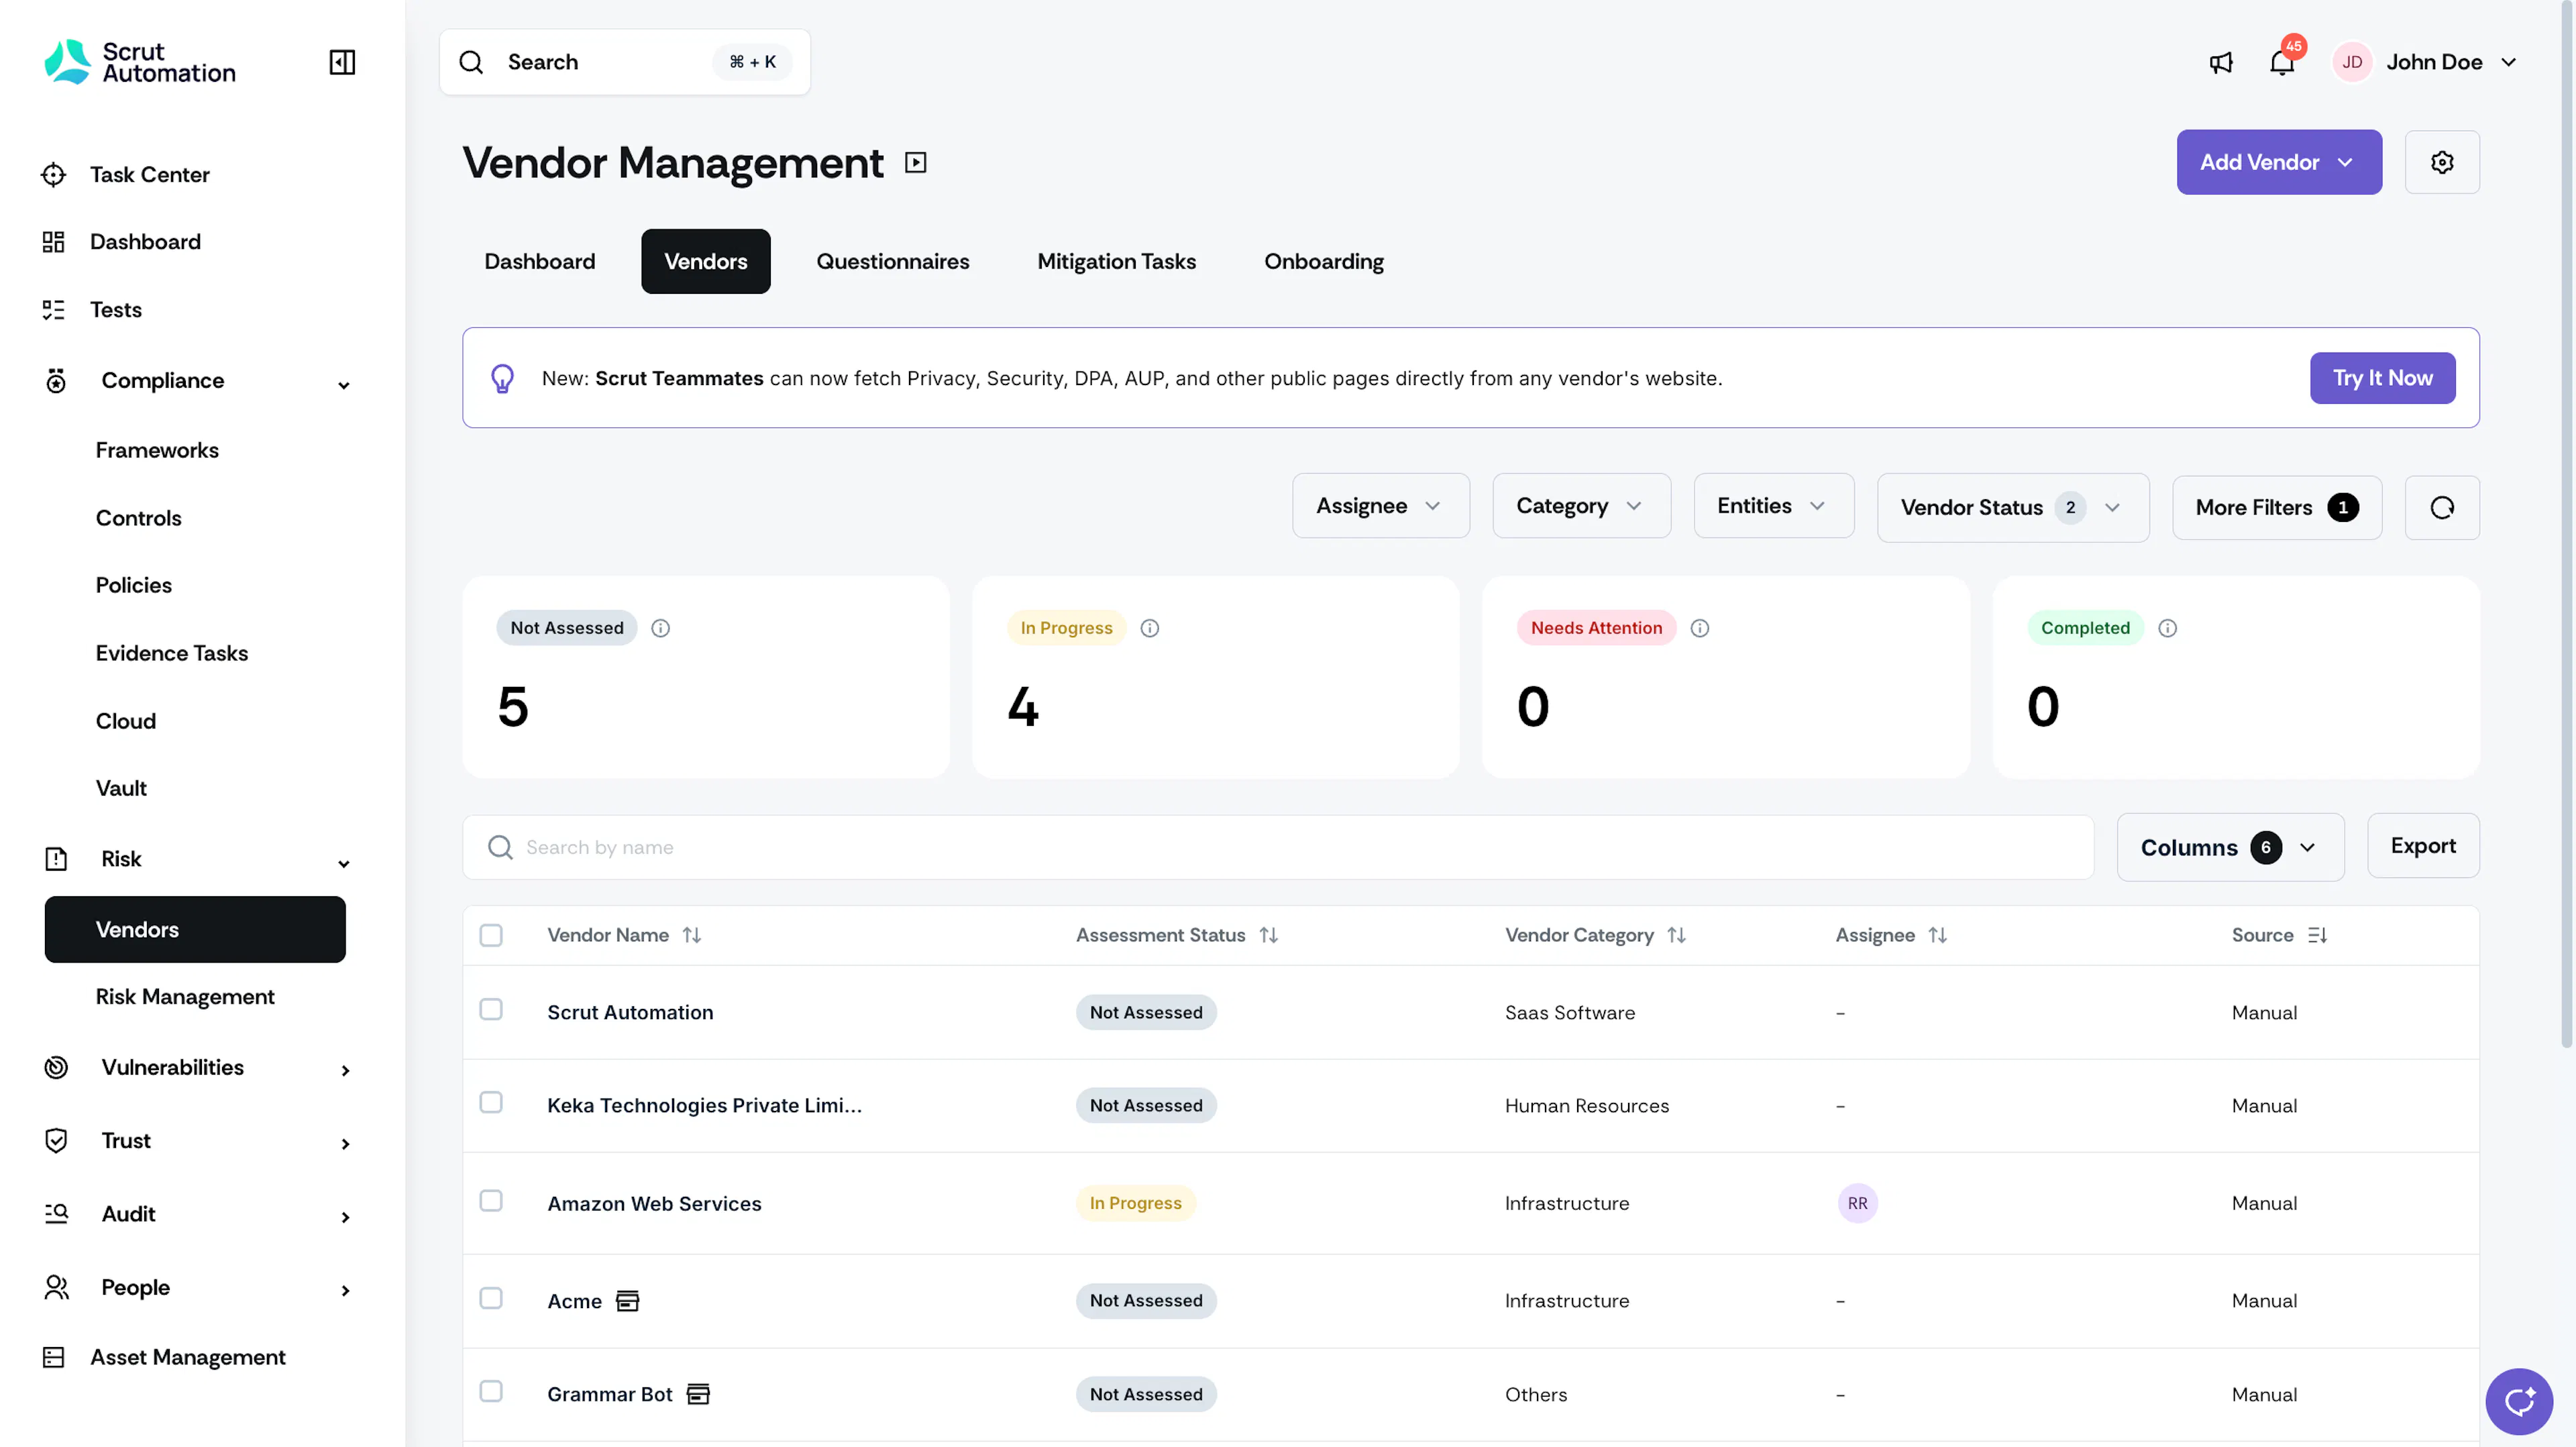
- This opens the Vendor page, where you can view and edit vendor information.
Key Information
Vendor Assessment Timeline
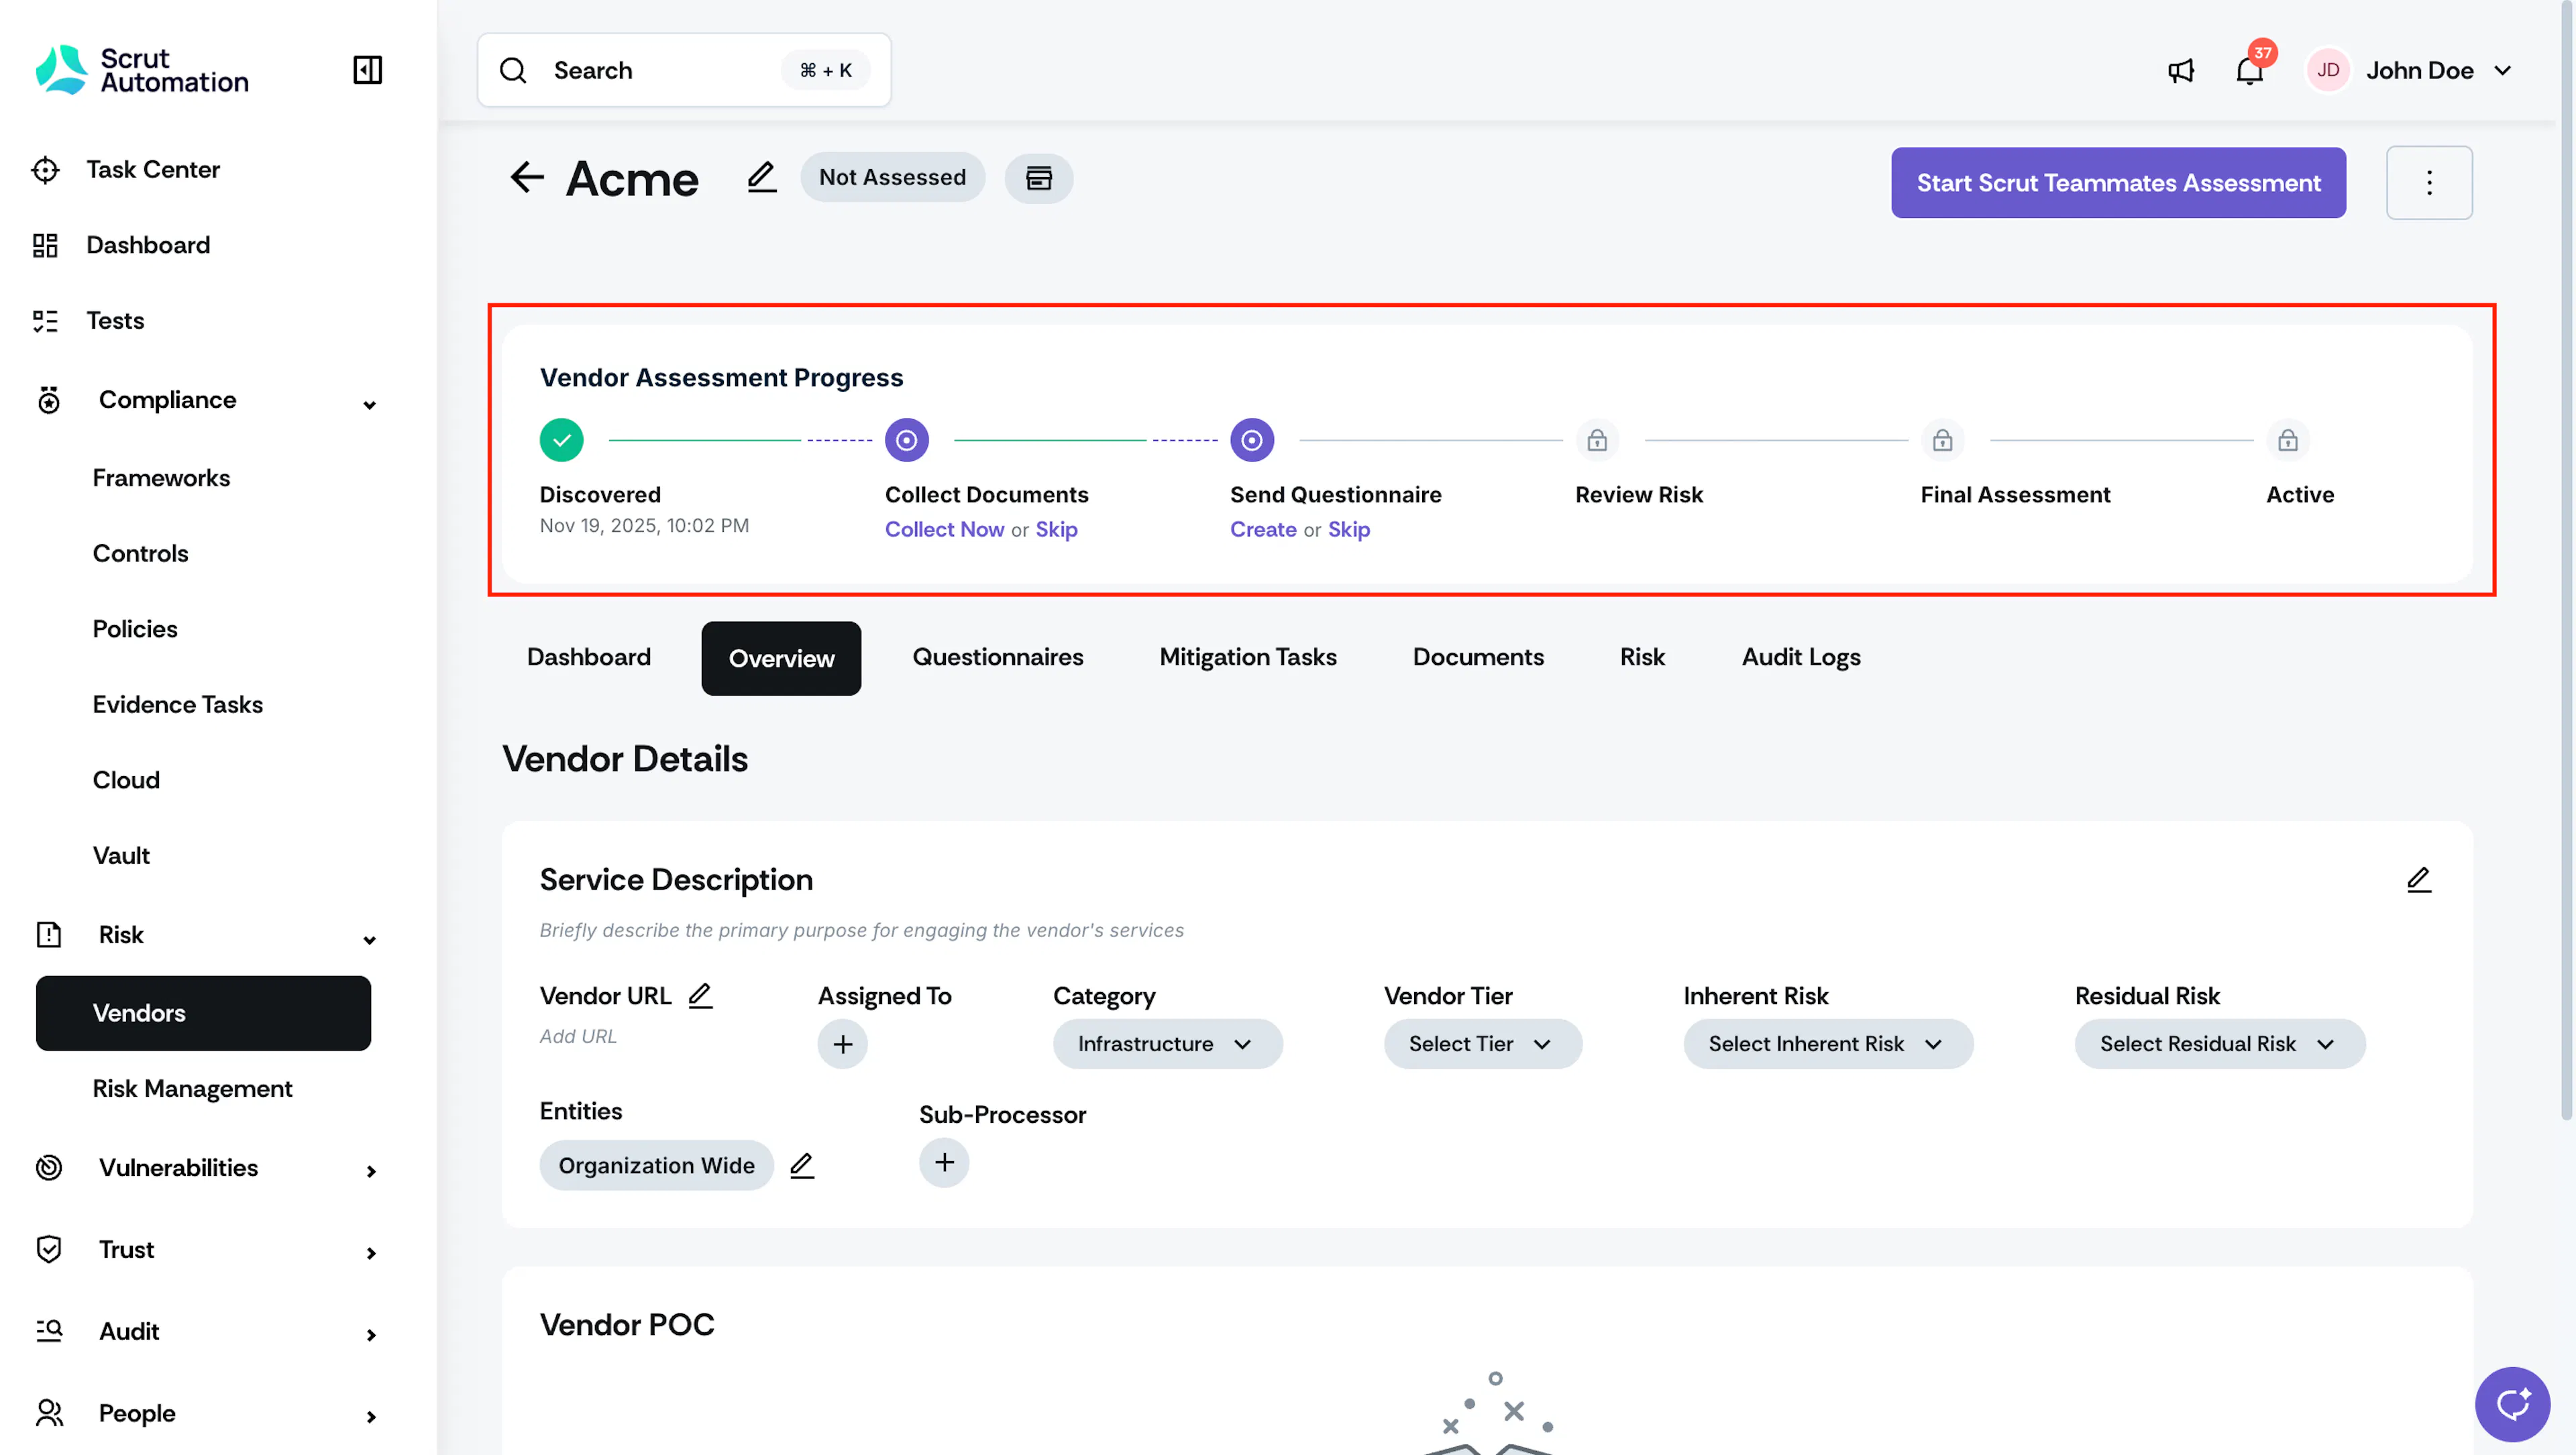
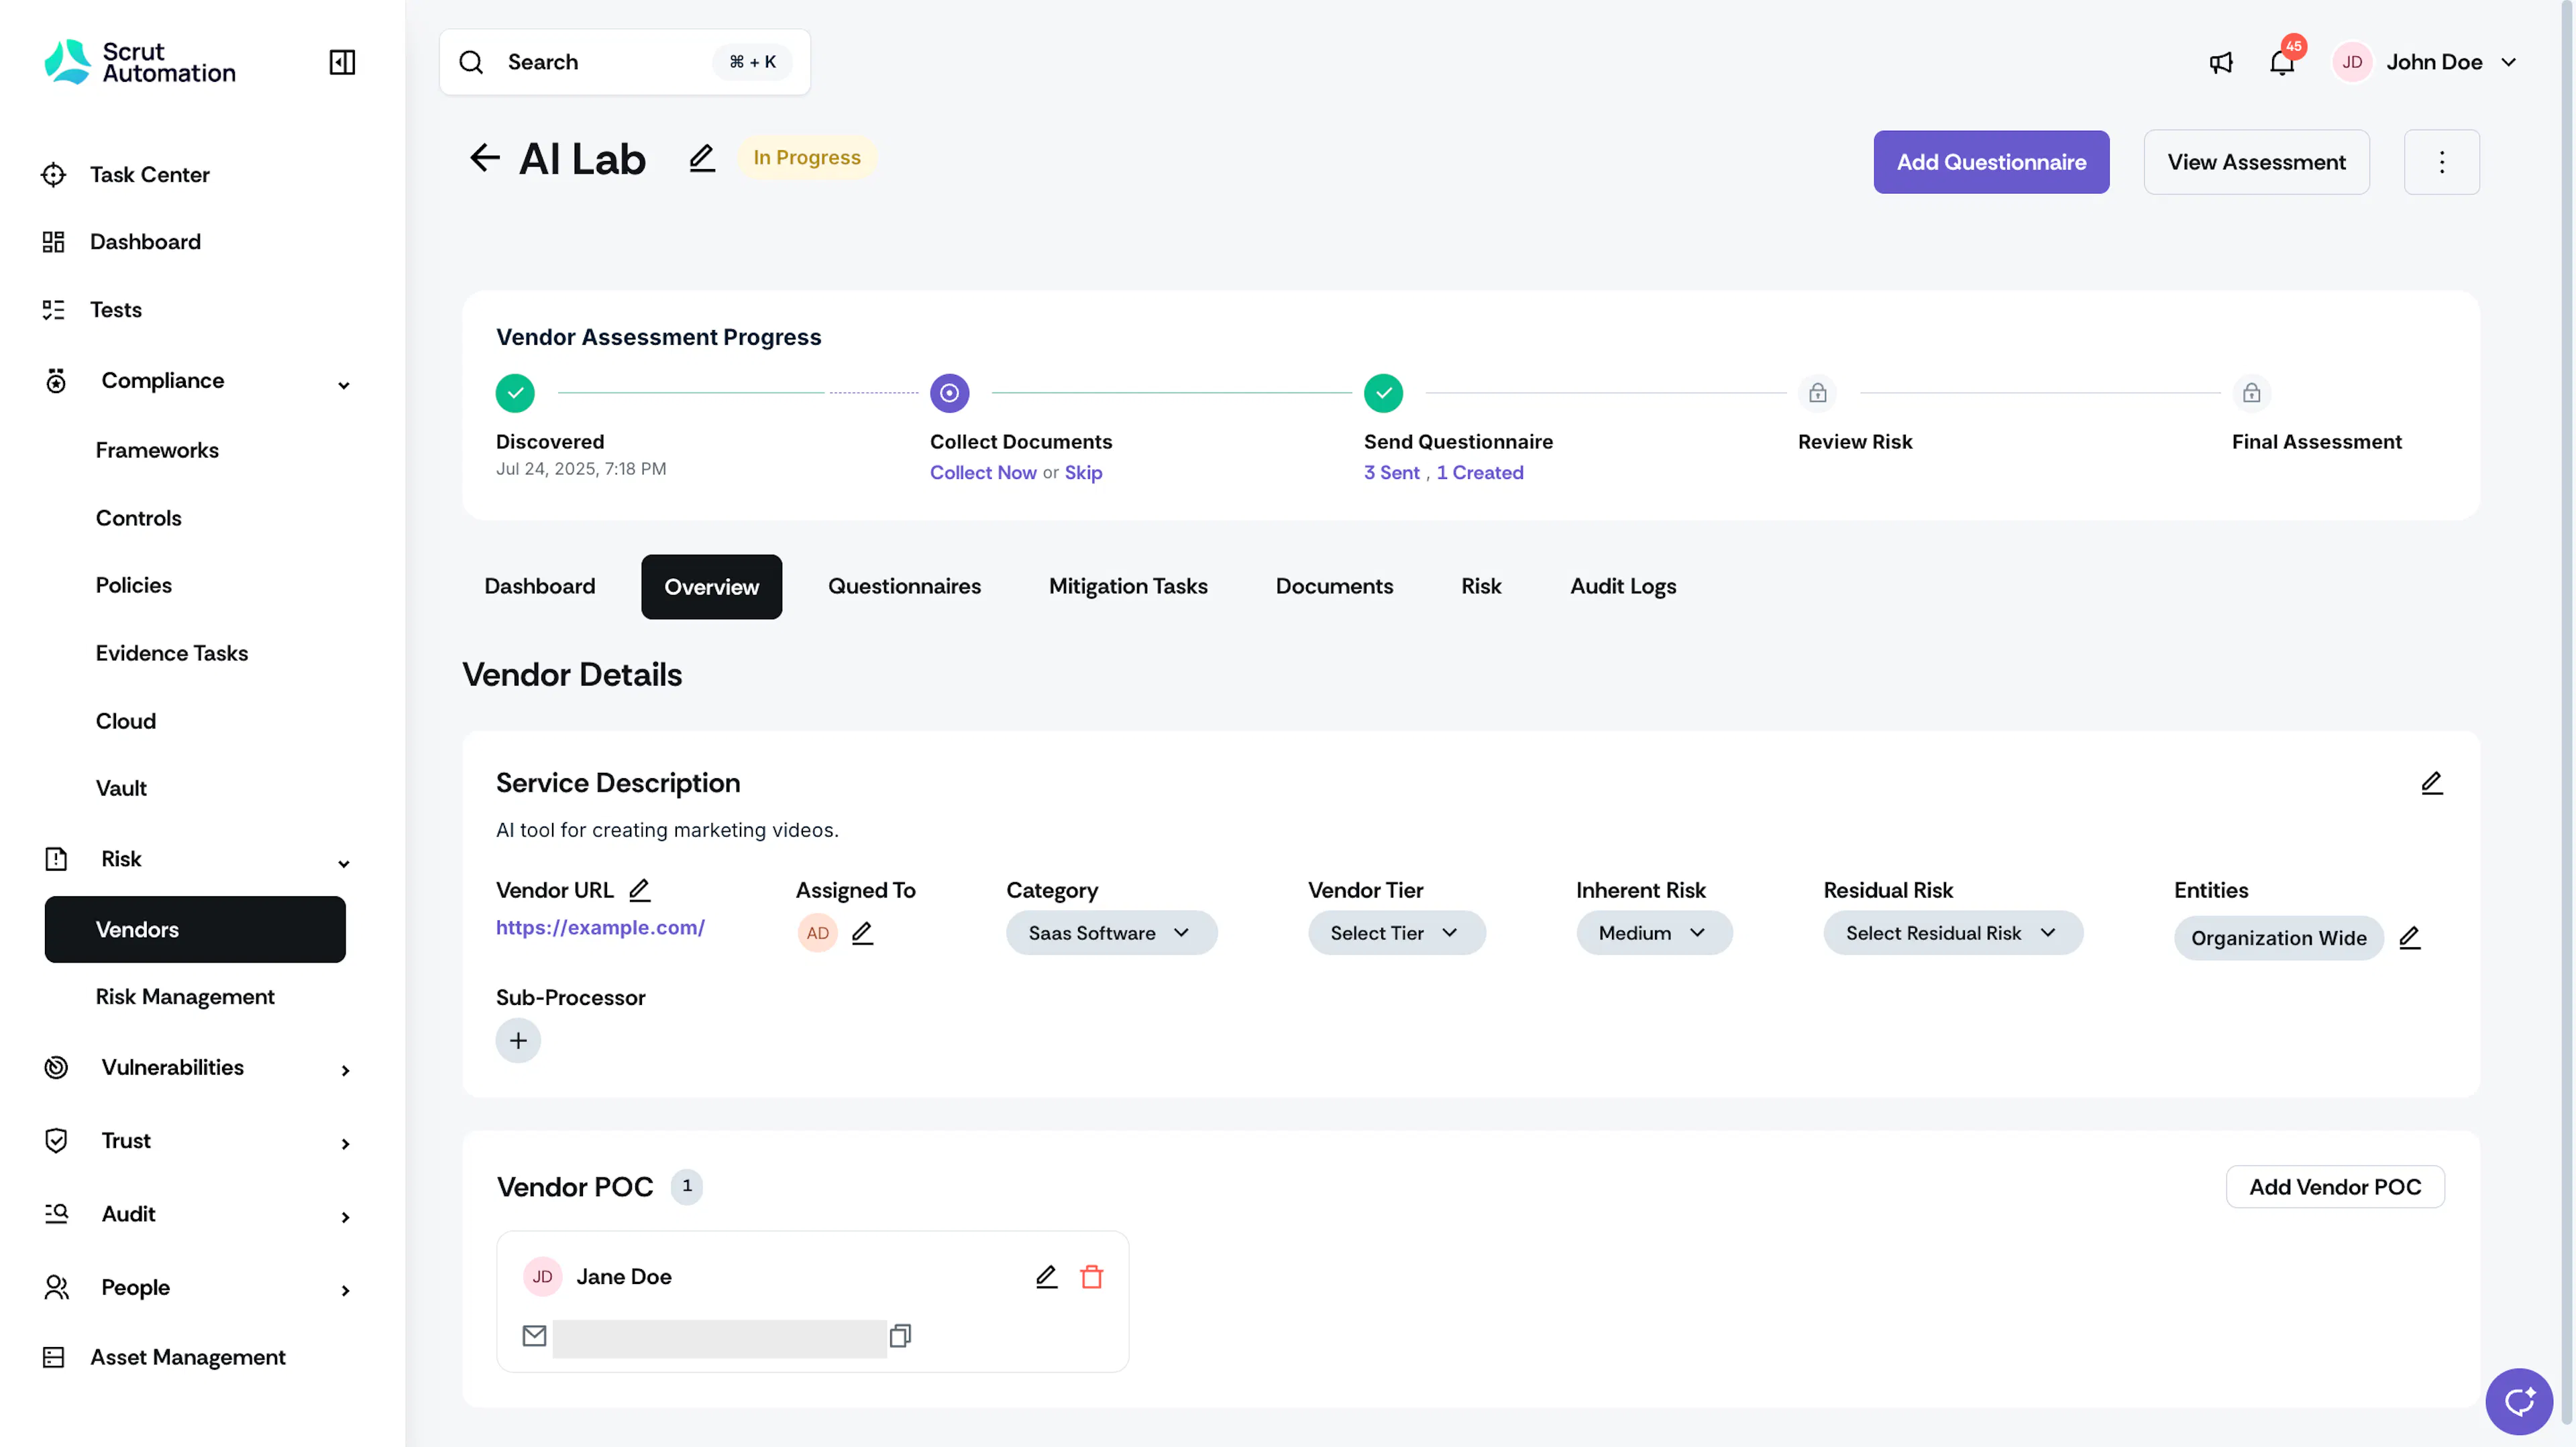
At the top of every vendor's detail page, the Vendor Assessment Progress timeline shows where the vendor stands across five stages, from Discovered through Final Assessment. See Track Vendor Assessment Progress for a full breakdown of each step.
Vendor Name and Assessment Status
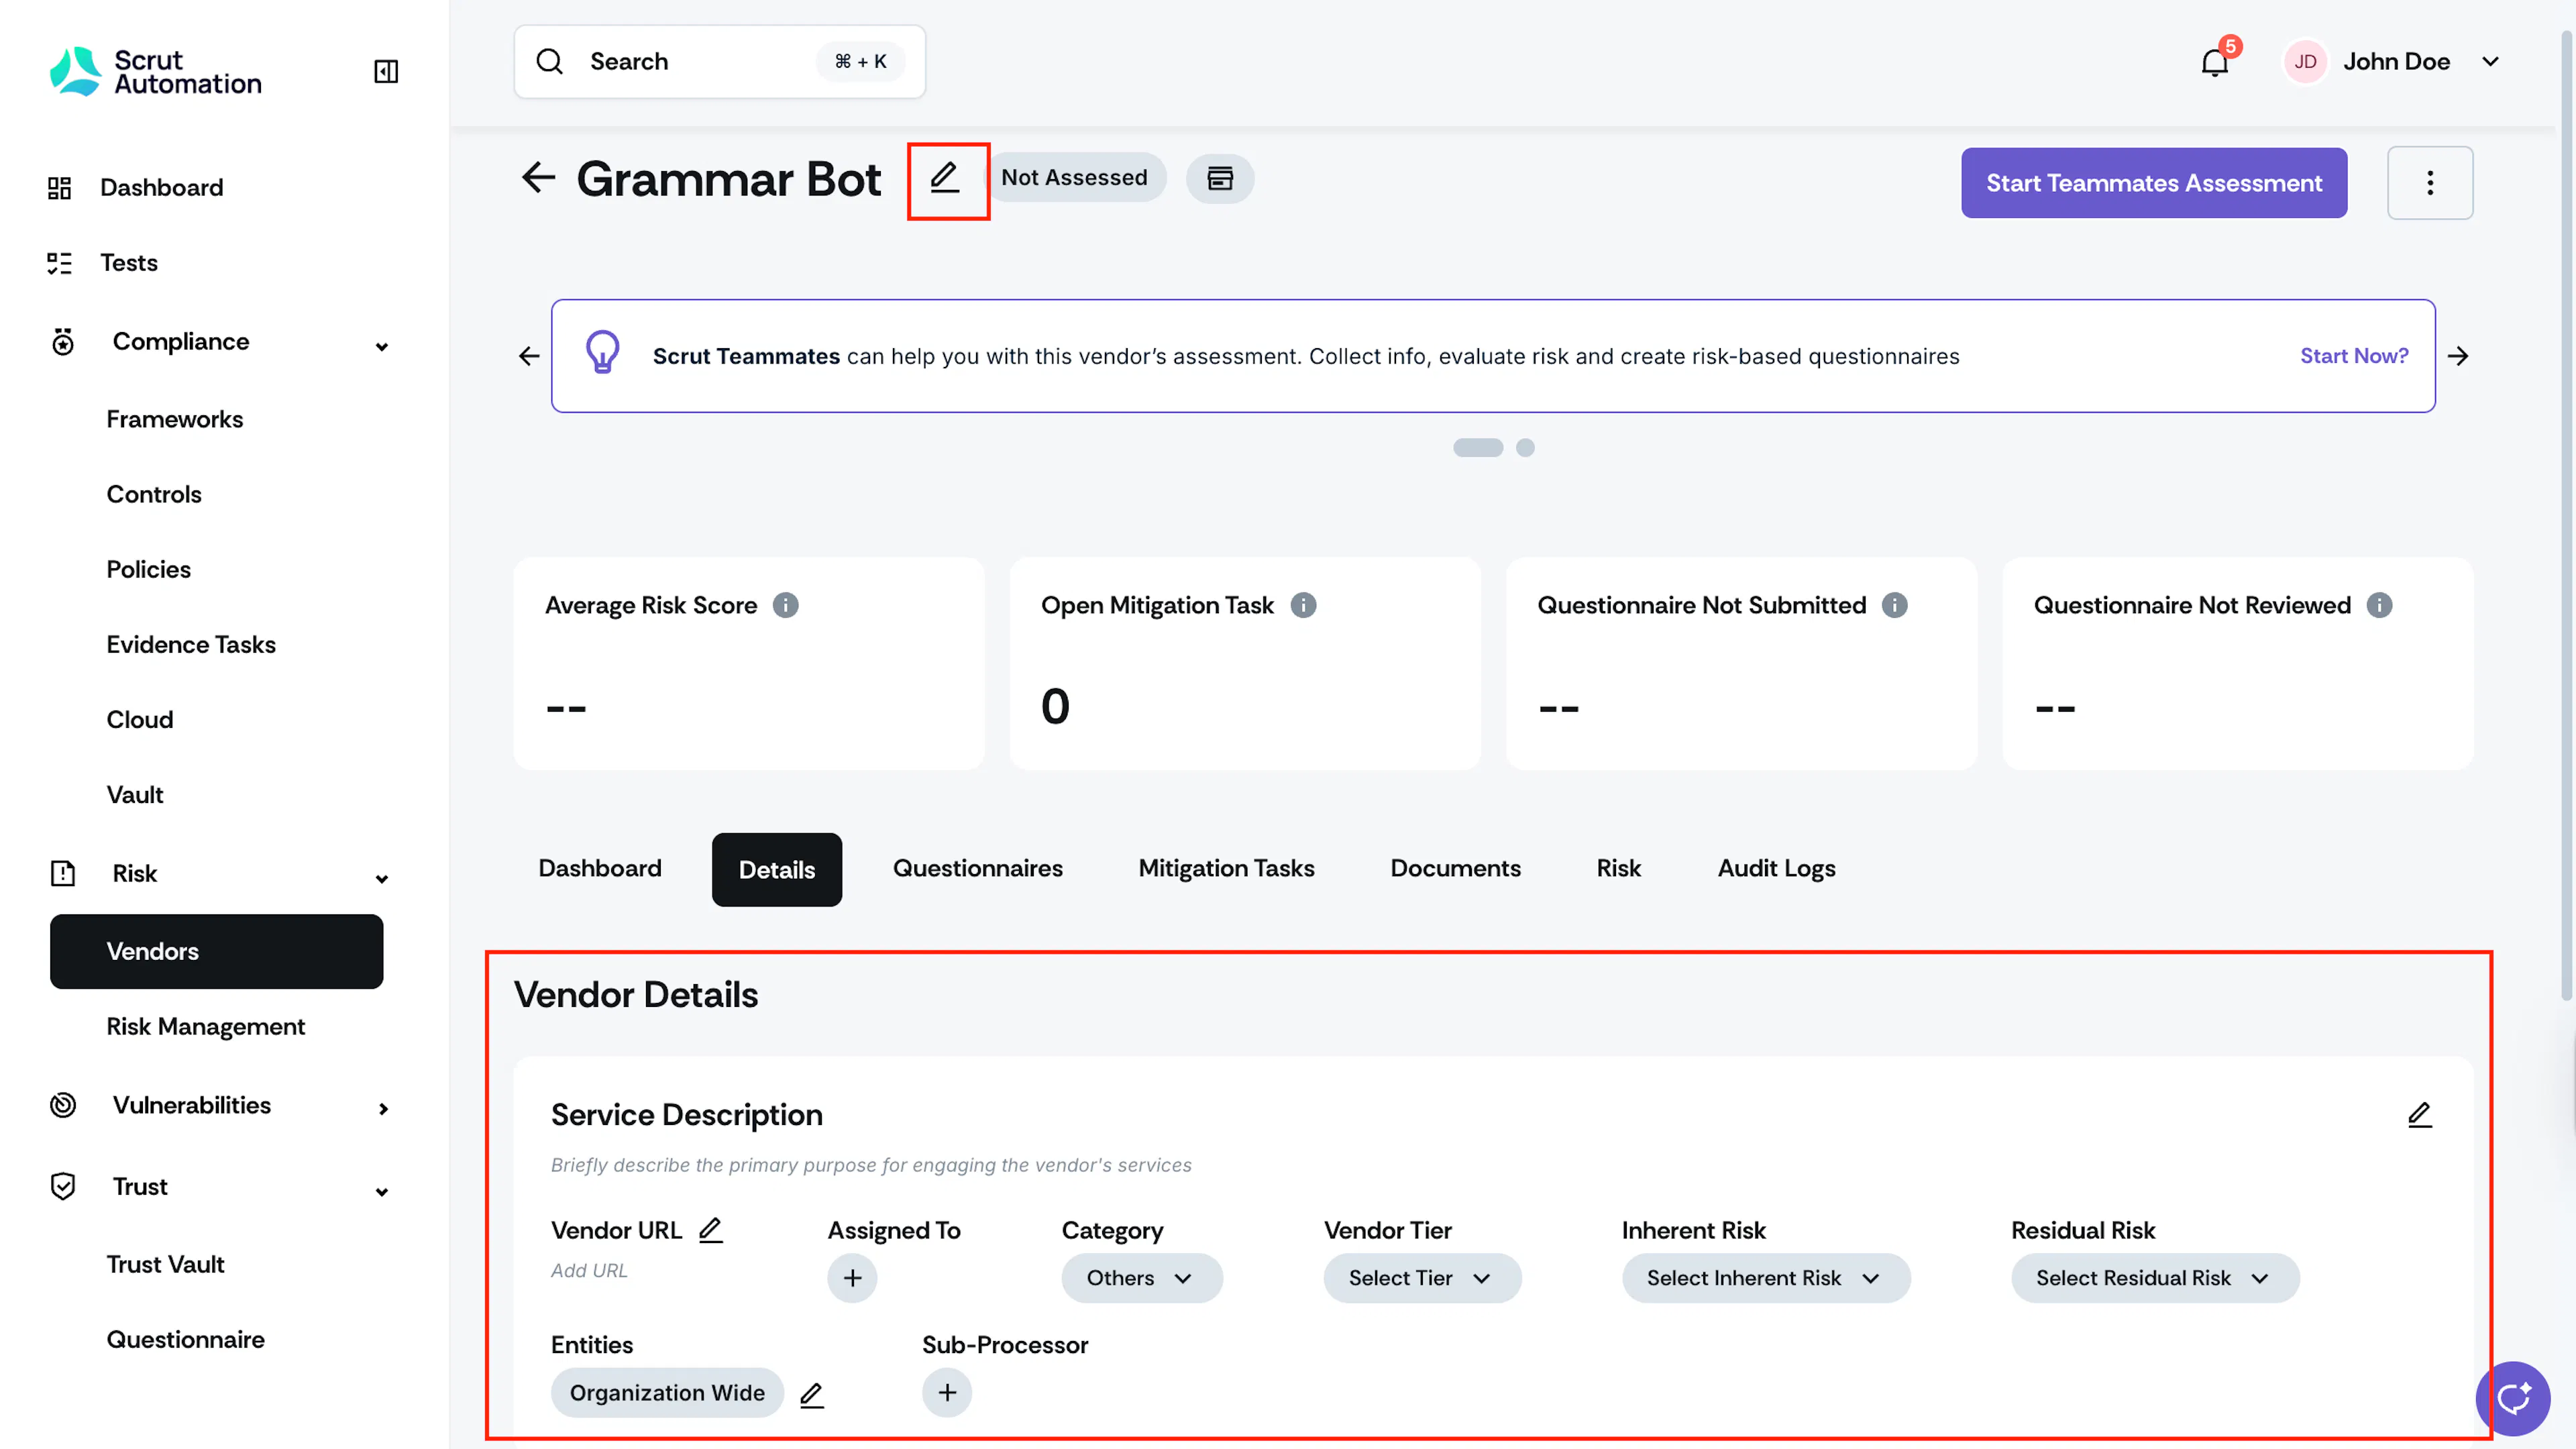
Vendor Name: At the top left corner of the page, you'll find the vendor's name with an option to edit it.
Vendor Assessment Status: The vendor's assessment status is displayed next to the vendor’s name, indicating the current evaluation status.
Vendor Metrics
The vendor overview page contains various sections, each presenting specific metrics to provide immediate insights. These sections include:

- Average Risk Score: Specifies the average risk score of the questionnaires that the vendor has submitted.
Calculation Method
- Retrieves all questionnaires from the vendor that are in an accepted state.
- Obtains all questions in a given questionnaire that are in an accepted state and calculates the average.
- Average = (Sum of the risk scores [if no risk score, then 0 is added]) / Total number of questions in that questionnaire in an accepted state.
- Calculate the average risk score for the vendor.
- Average = (Sum of all the risk scores calculated in step 2) / Number of questionnaires in an accepted state.
- Open Mitigation Tasks: Displays all vendor mitigation tasks that are in an open state.
- Questionnaires Not Submitted: Shows the number of questionnaires that the Vendor has not submitted.
- Questionnaires Not Reviewed: Shows the number of questionnaires submitted by the vendor that have not been reviewed yet.
Vendor Dashboard
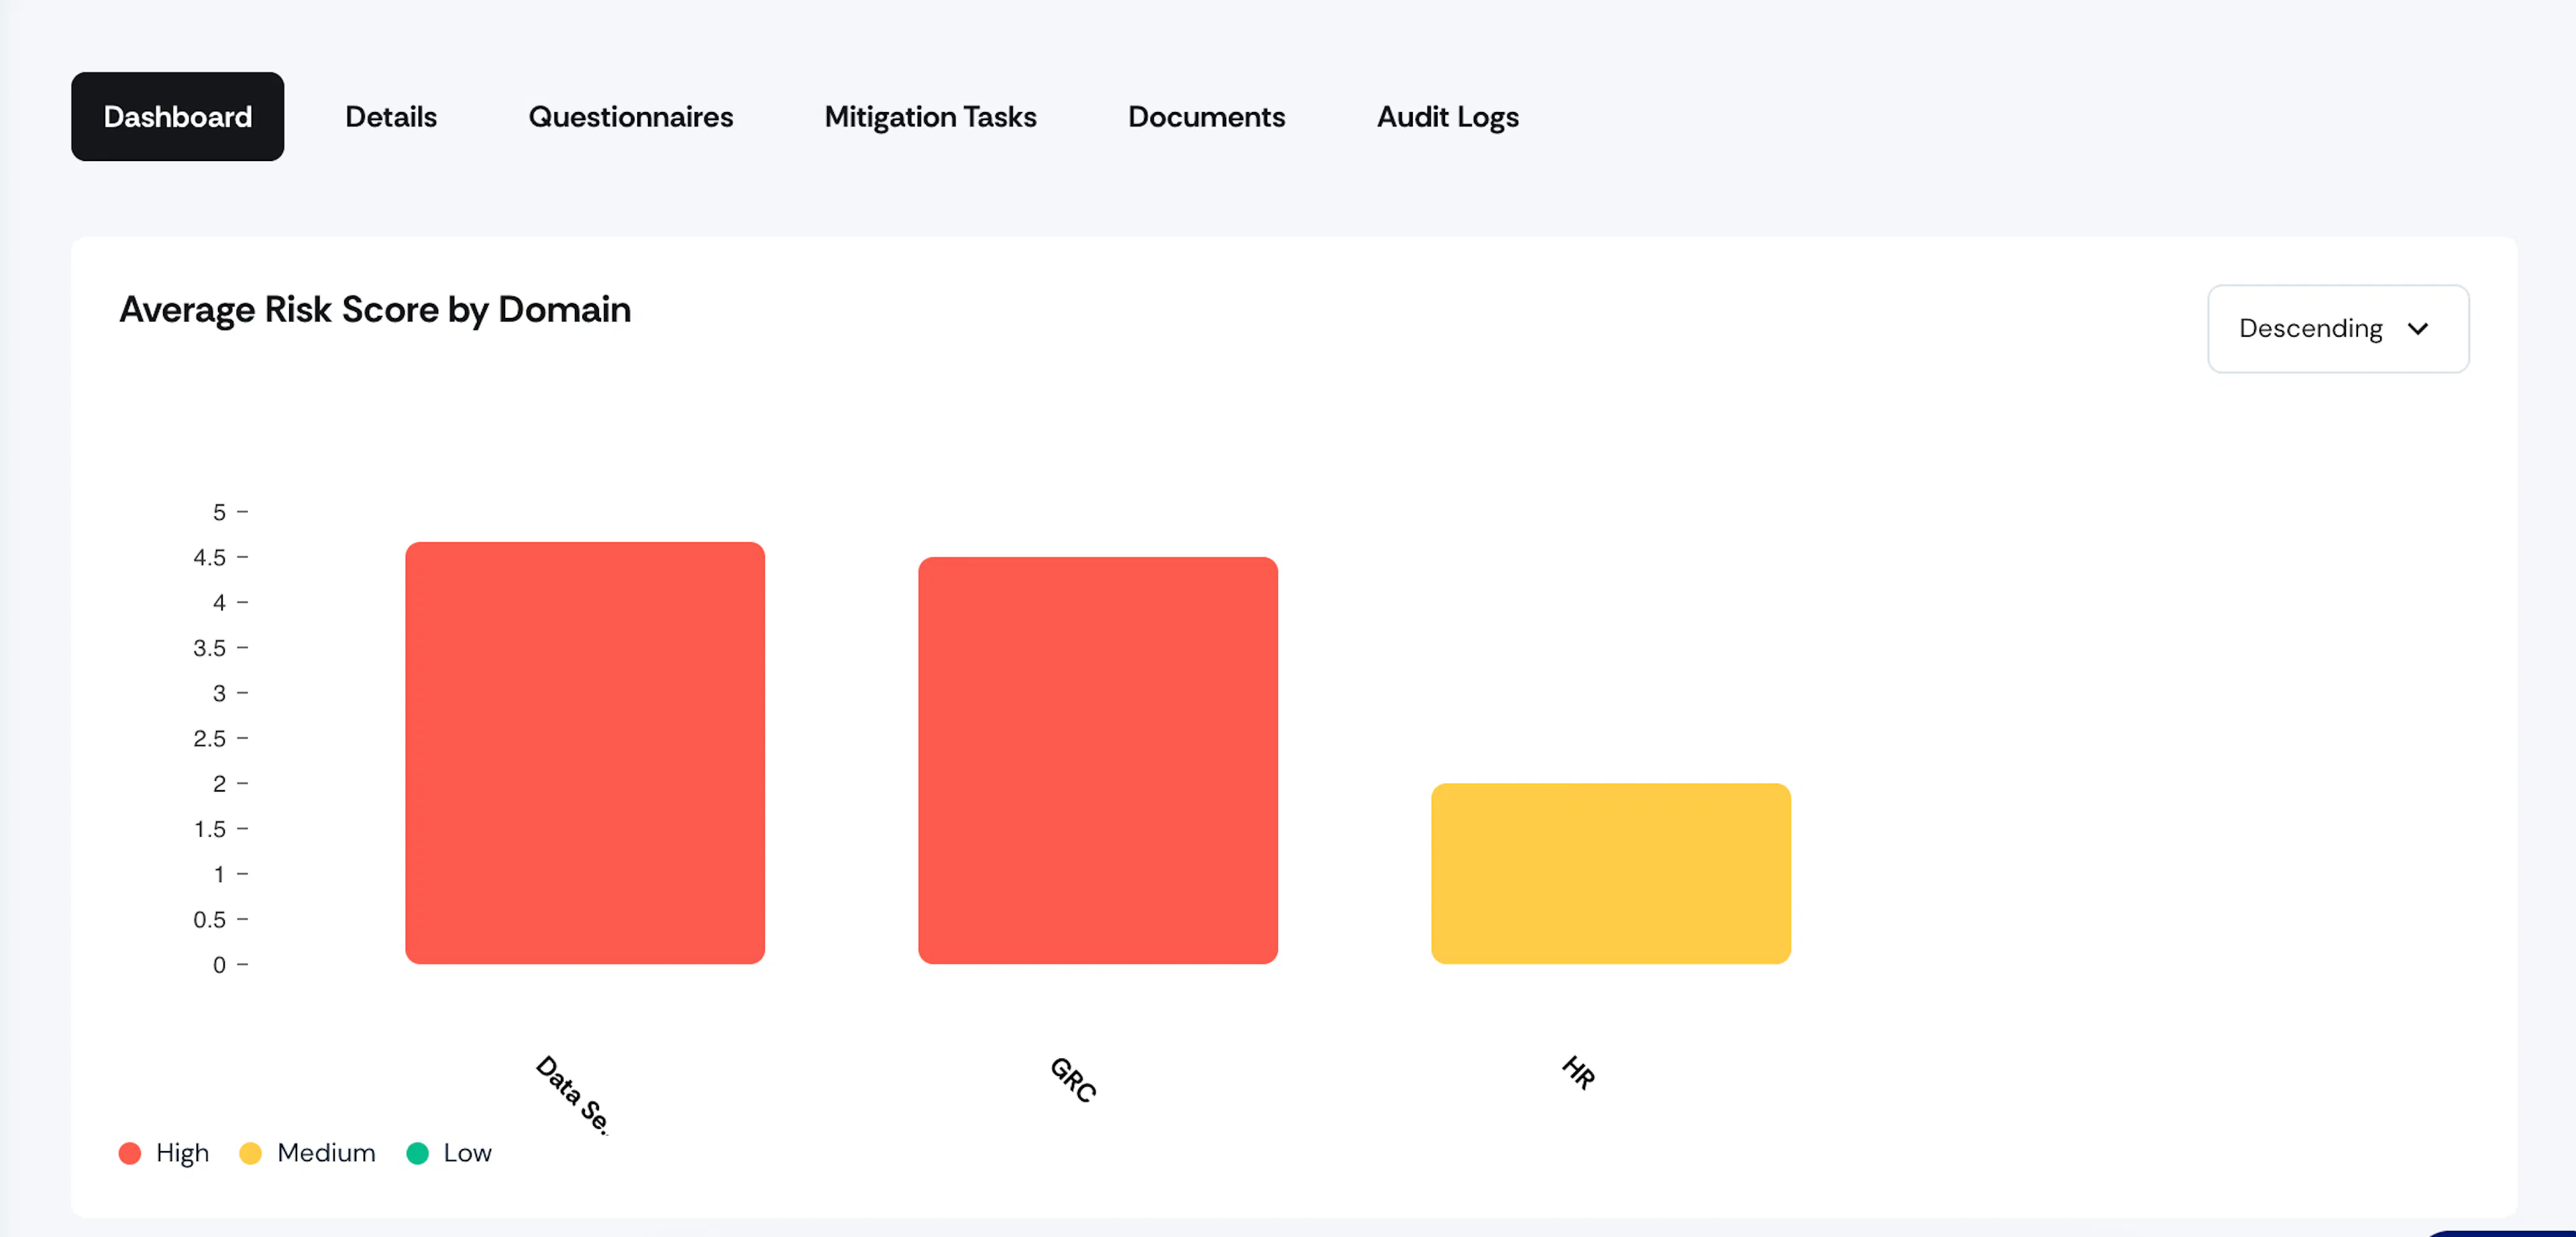
Risk Score by Domain
Displays a bar graph that breaks down the risk score by different domains, offering insights into specific areas of concern.
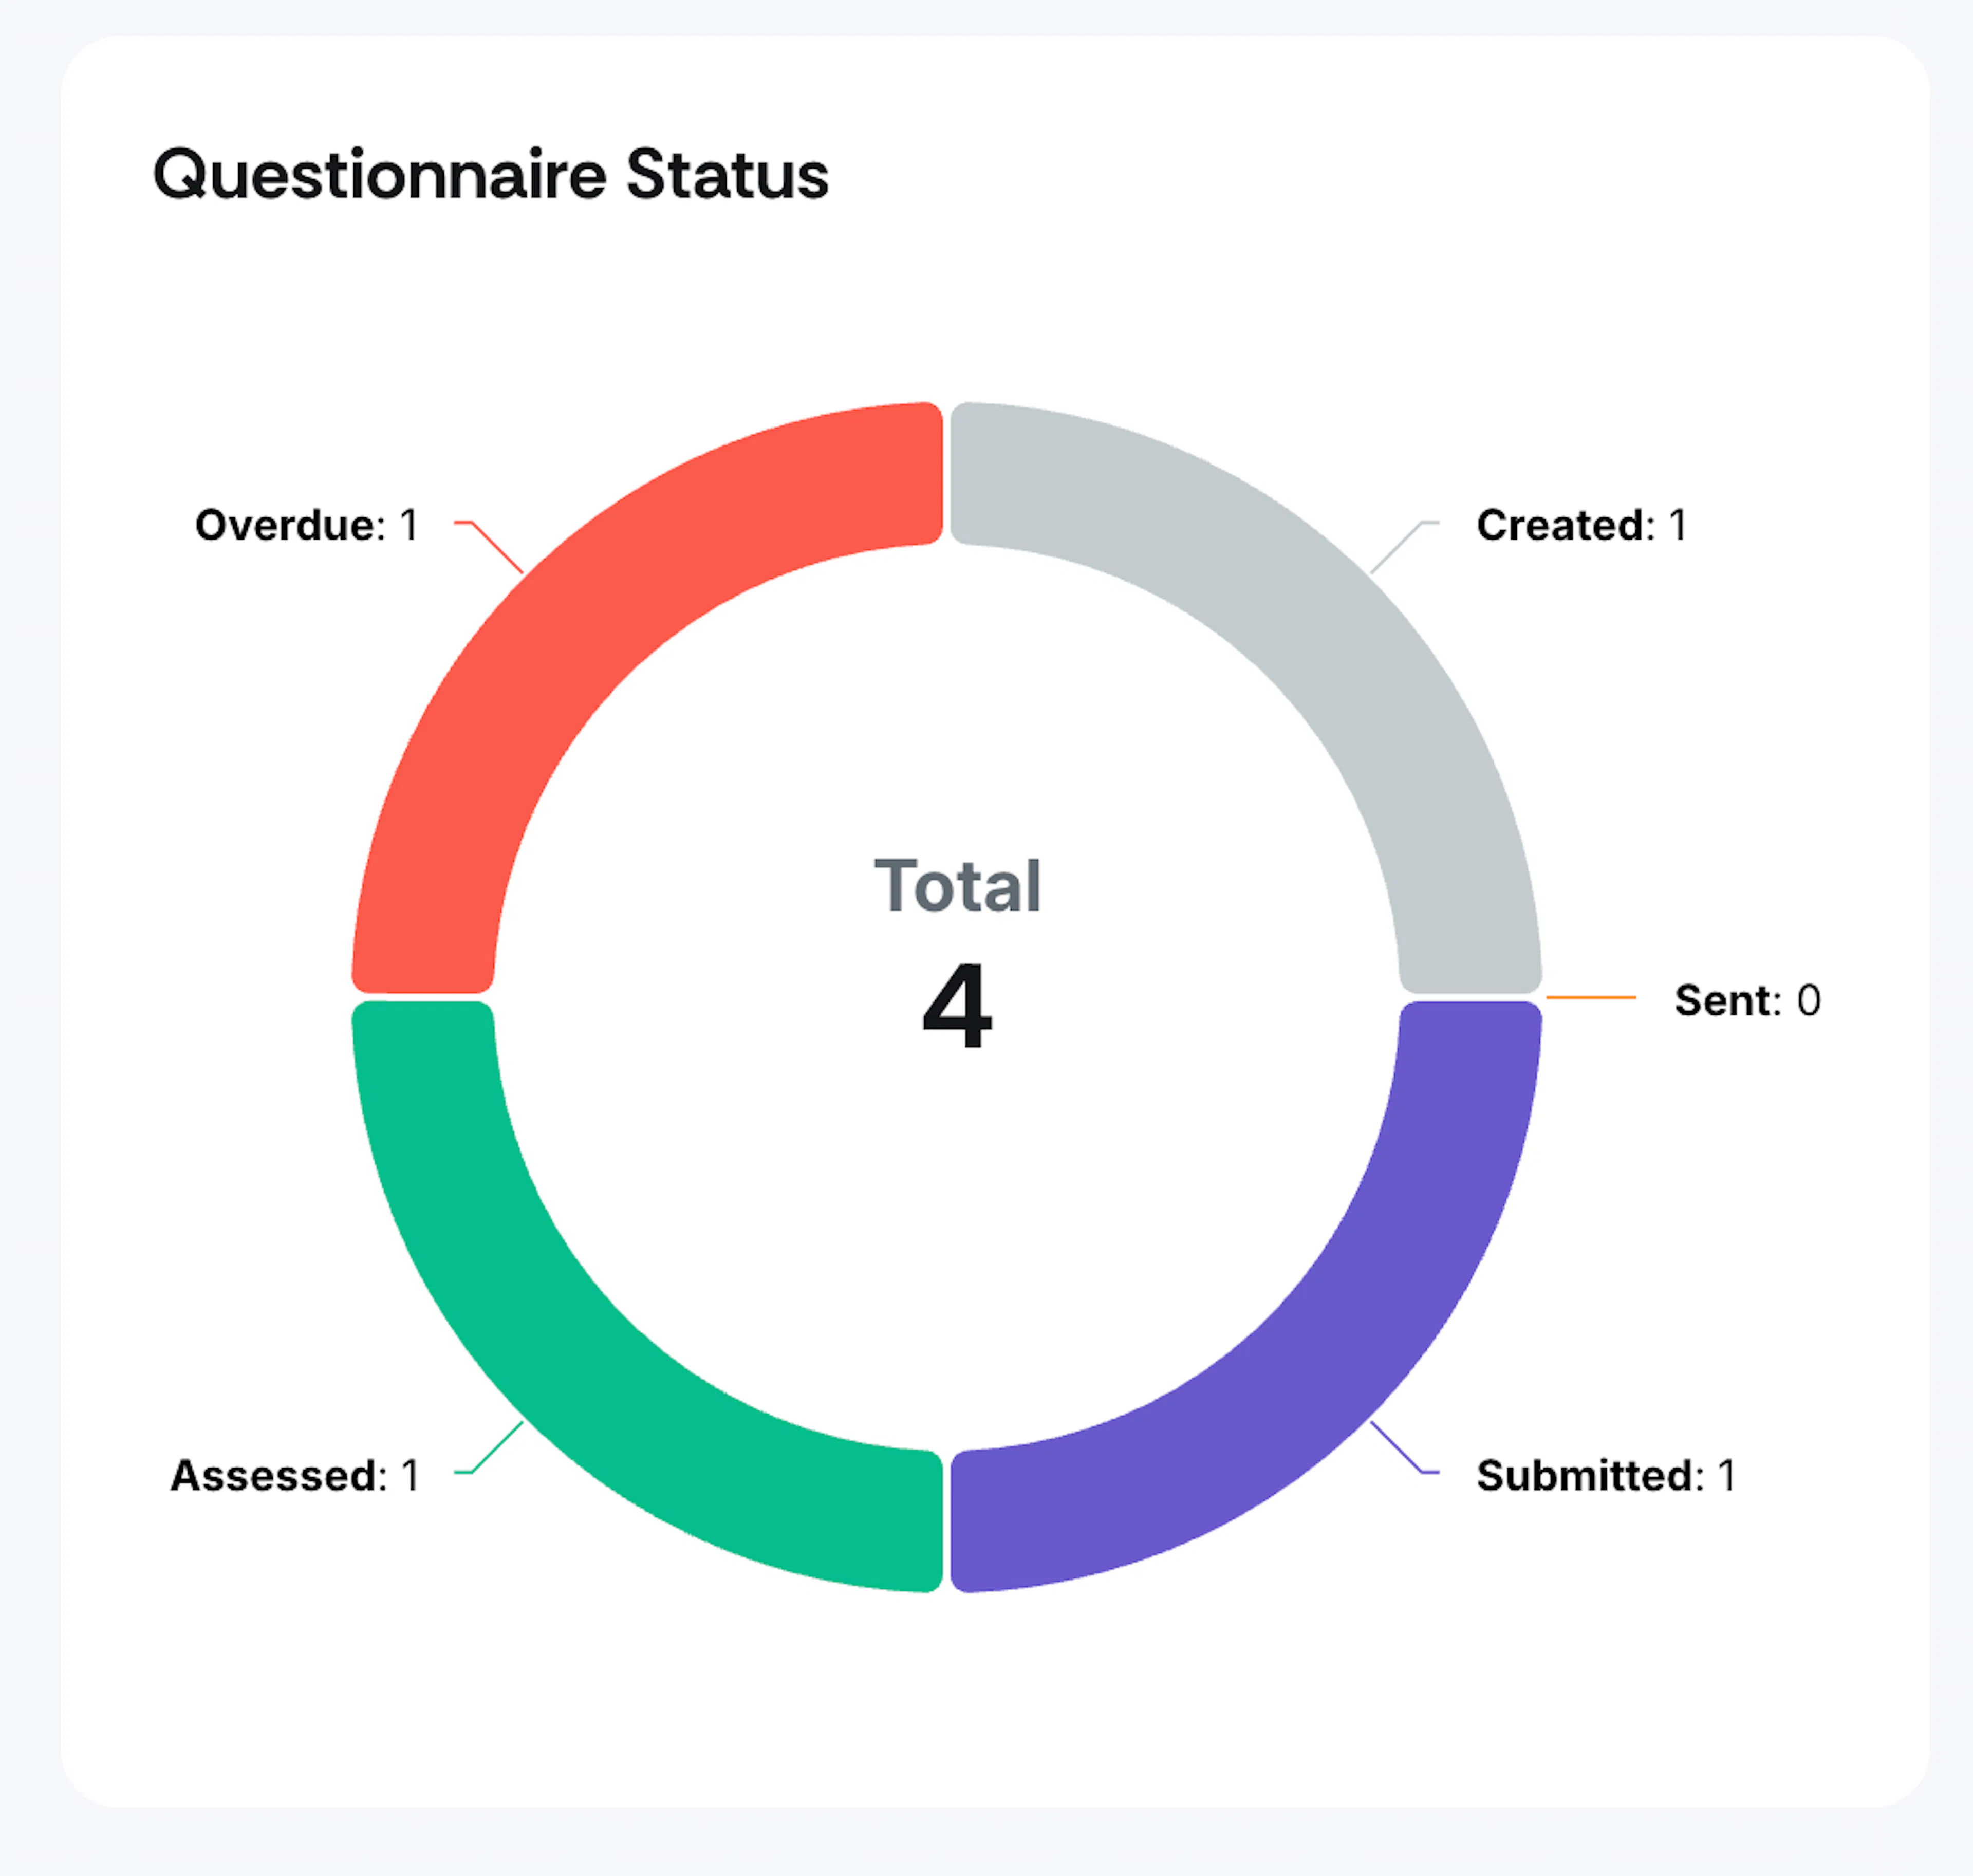
Questionnaire Status A donut chart that provides a visual representation of questionnaires, showcasing key stages such as Created, Sent, Submitted, Assessed, and Overdue.
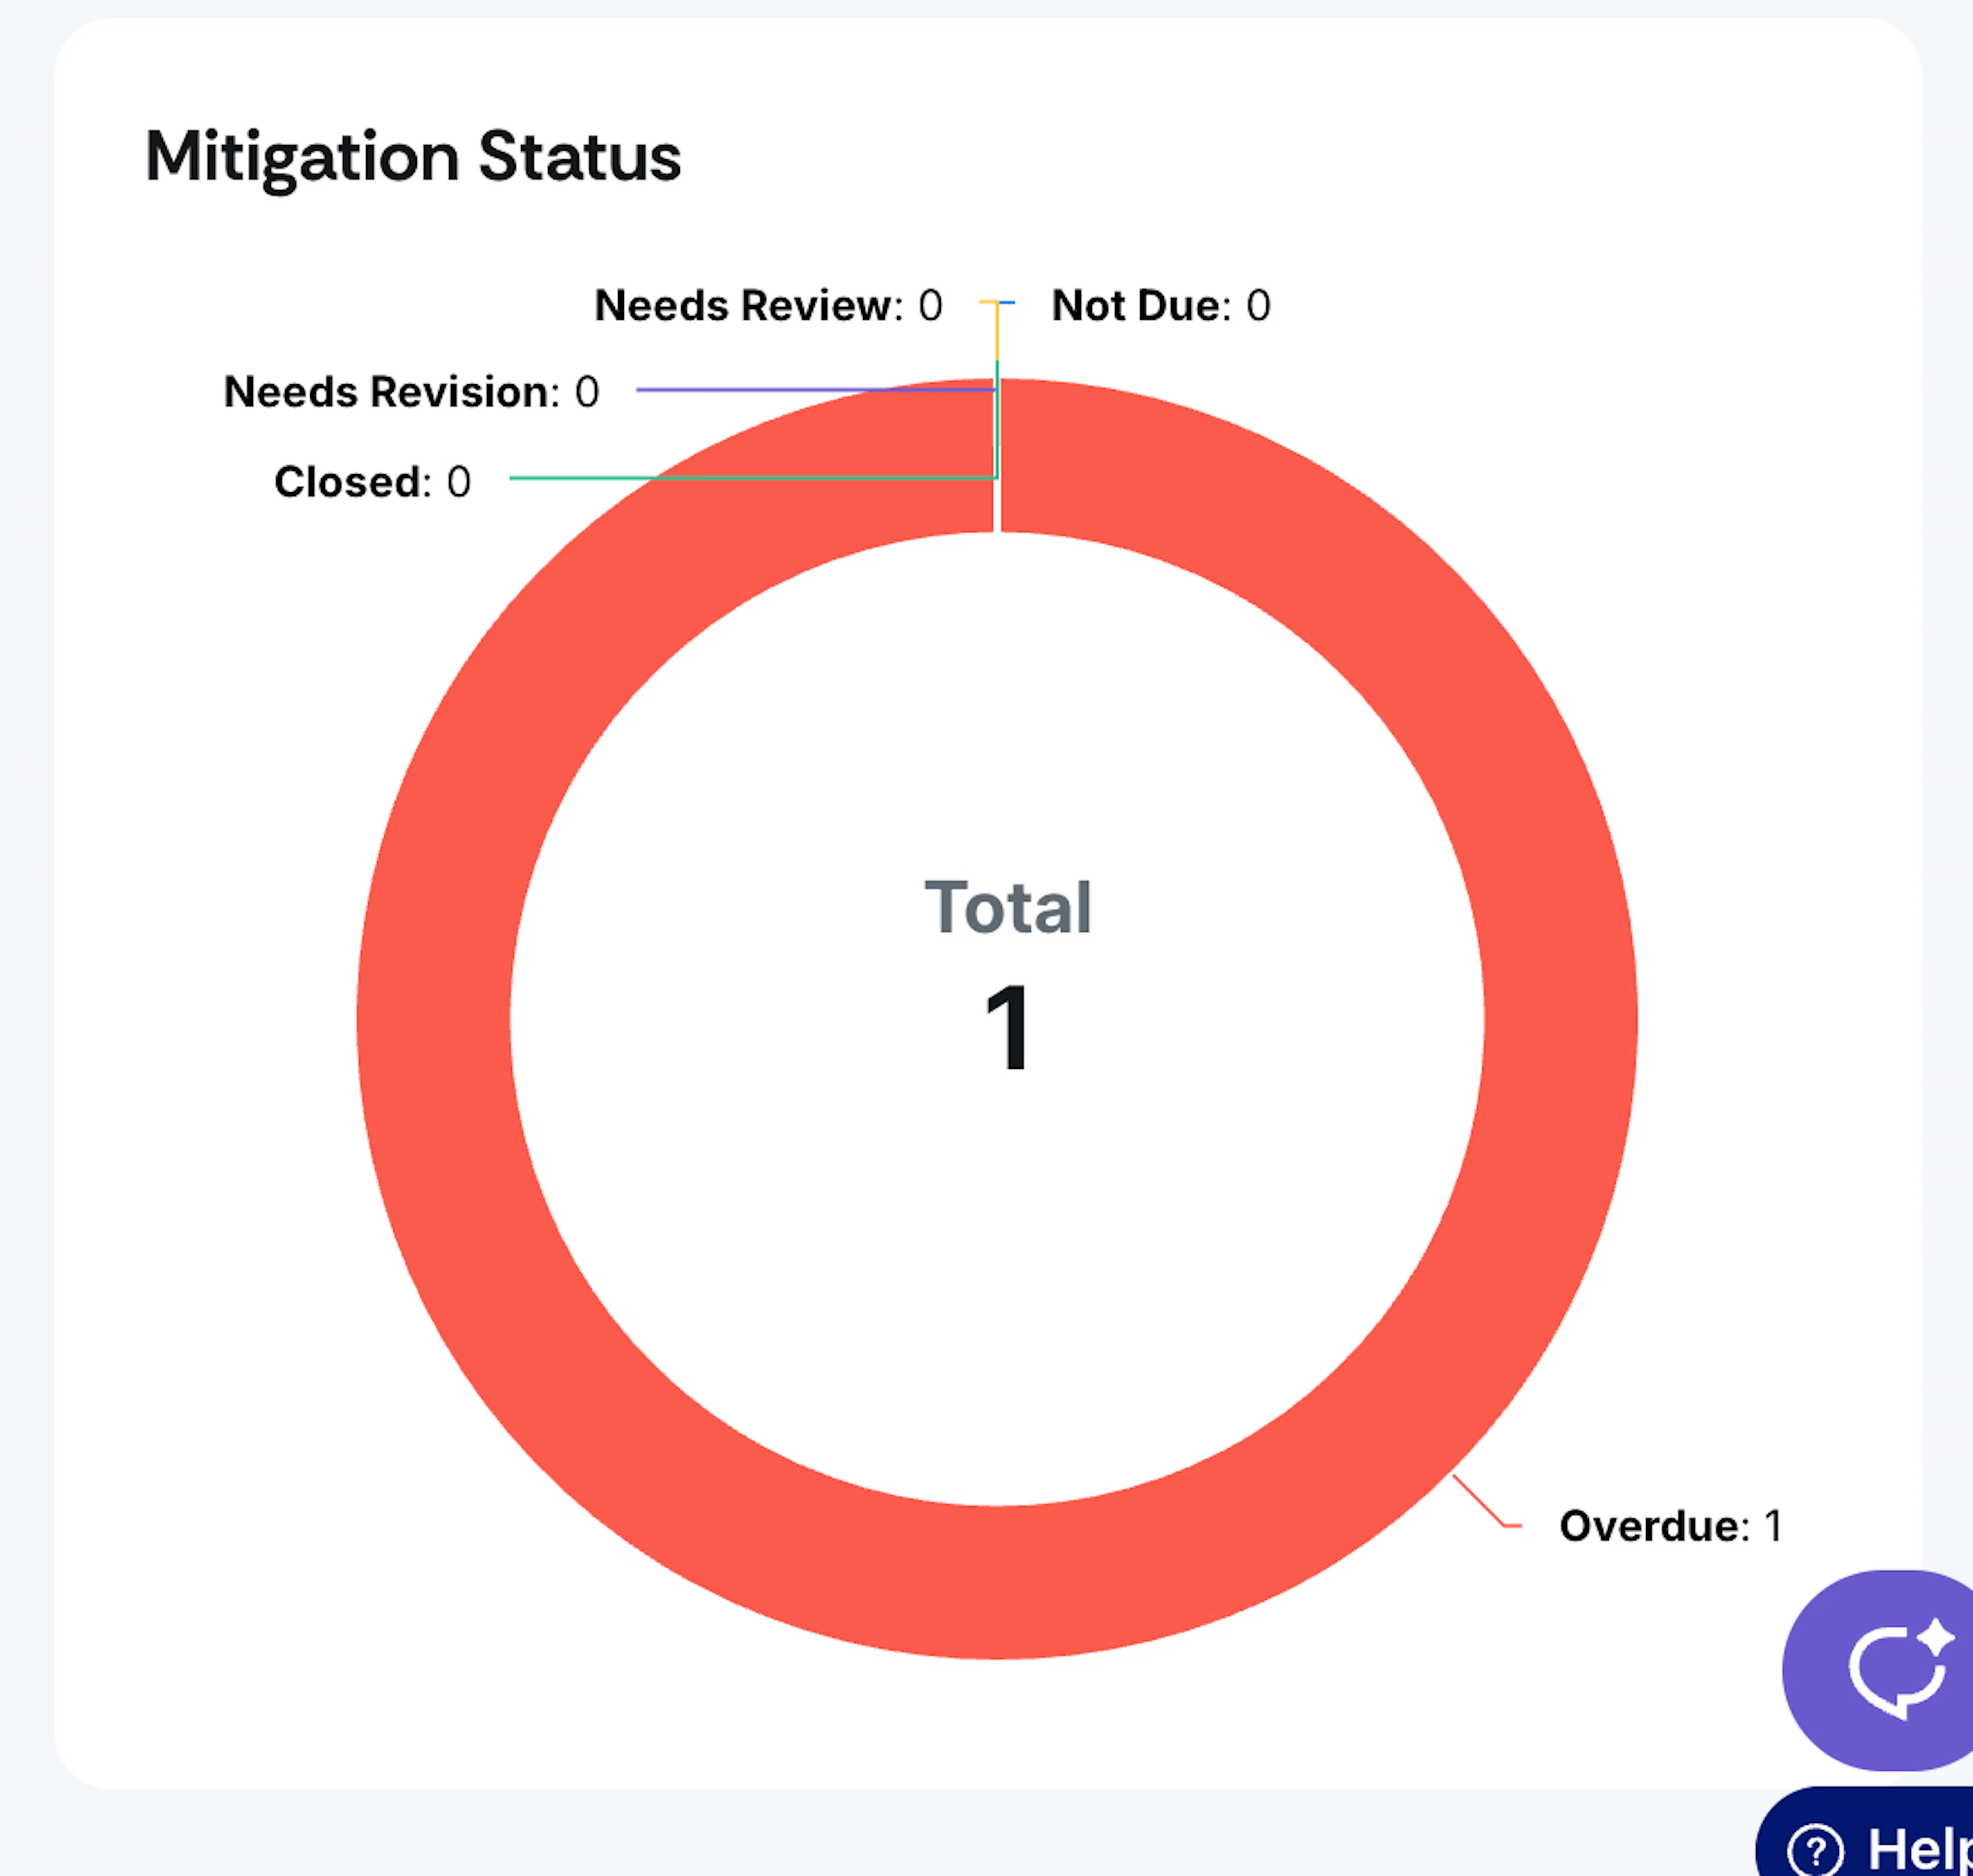
Mitigation Task Status A donut chart to track Overdue, Not Due and Closed mitigation tasks, providing a visual representation that ensures awareness of both ongoing and completed risk mitigation efforts.
Vendor Details
The Details tab provides you with in-depth information about the vendor.
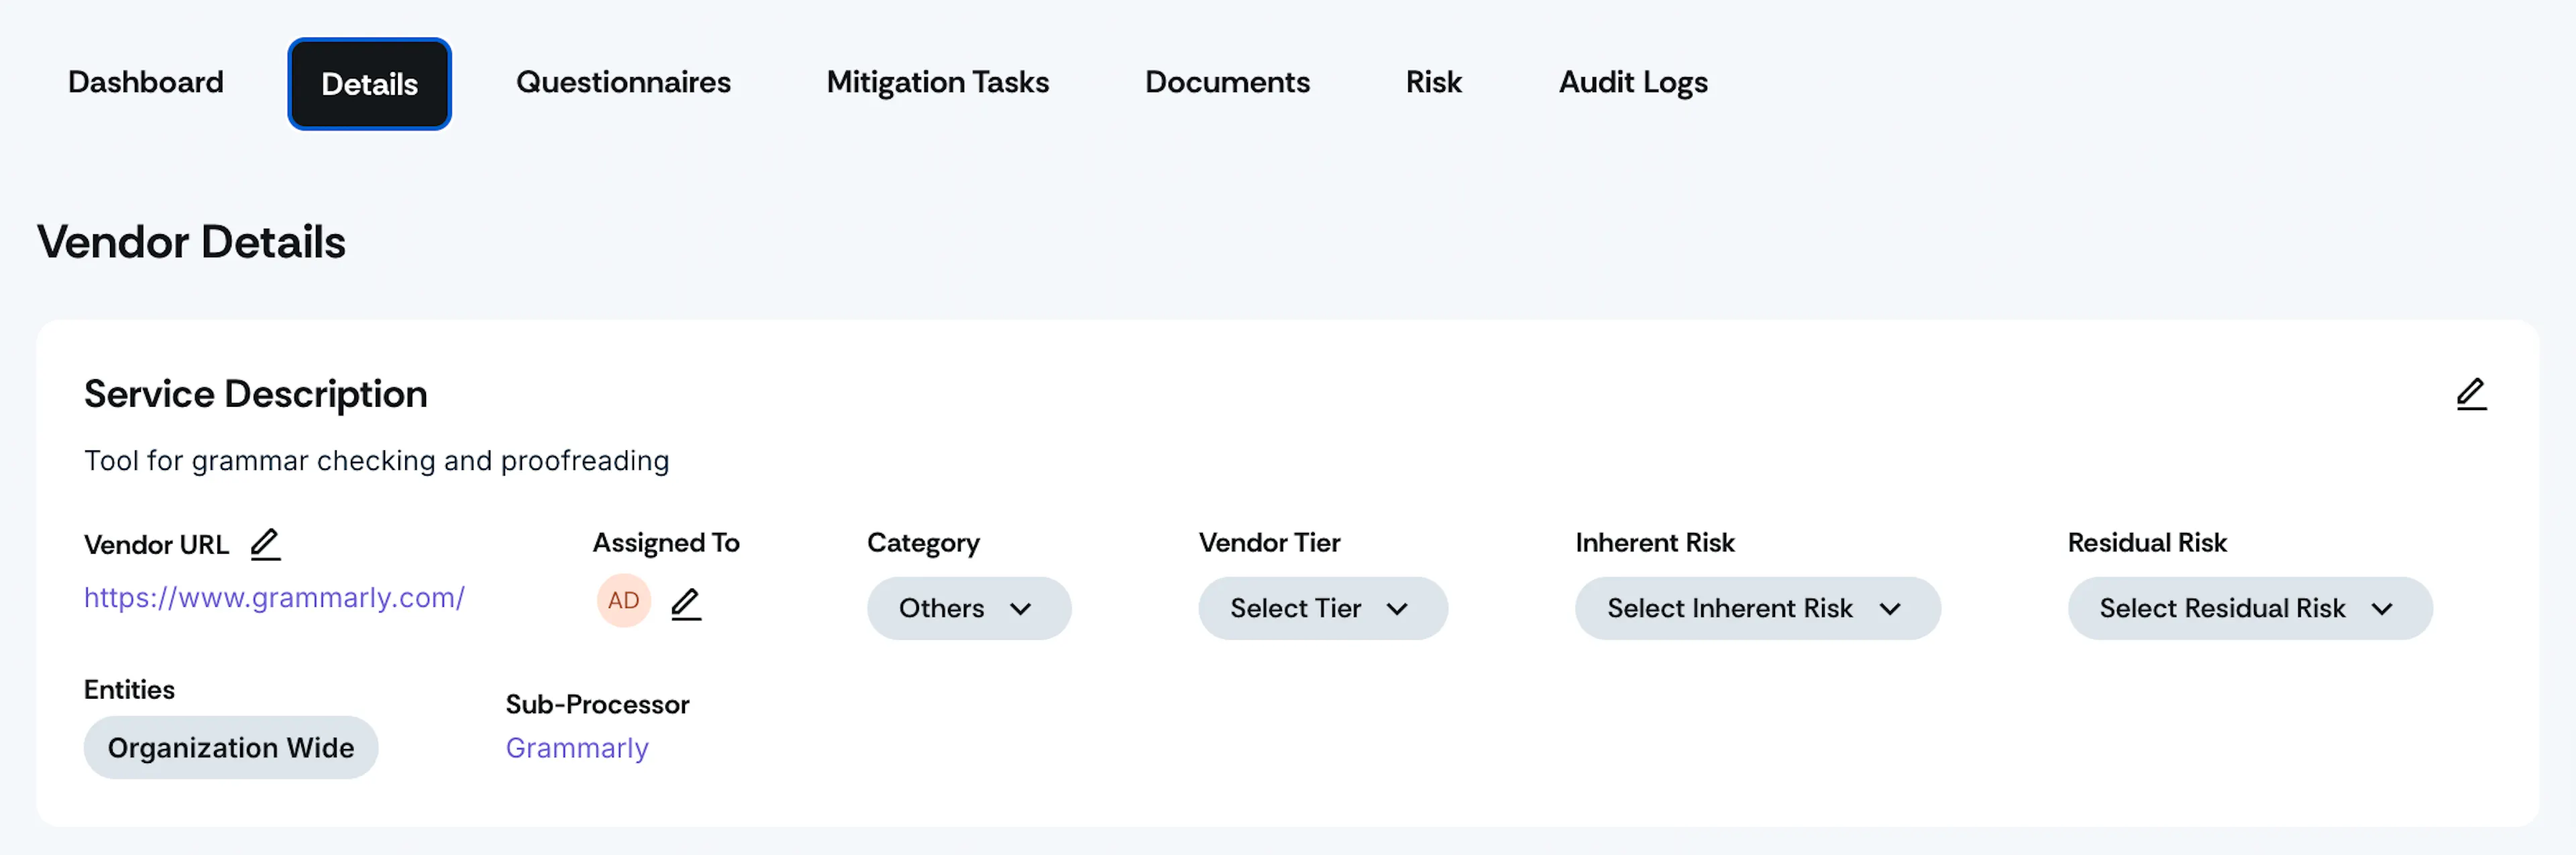
- Service Description: Briefly describe the reasons for engaging this vendor’s services.
- Vendor URL: Link to the official vendor website.
- Assigned to: Identify the individual responsible for monitoring and managing this vendor relationship. If required, you can easily reassign this role through a user-friendly dropdown.
- Category: The most appropriate category that represents the vendor's services or products.
- Vendor Tier: Categorize vendors based on their risk level or business impact to prioritize risk management efforts effectively. (e.g., Tier 1, Tier 2, or Tier 3).
- Inherent Risk: Gain insights into the inherent threat that the vendor poses to your organization before implementing any risk mitigation measures. This information is crucial when establishing a vendor profile within the platform. Options are Critical, High, Medium, or Low.
- Residual Risk: Understand the risk that remains after implementing risk mitigation controls. Based on the validated risk score, users can categorize the vendor's risk as Critical, High, Medium, or Low.
- Entities: This dropdown displays a comprehensive list of entities.
- Sub-Processor: Shows if the vendor is linked to sub-processors that will be displayed in the Trust Vault.
Note:
When the vendor is in assessed status, the "Recurrence" and "Next Assessment Date" fields will be visible in the vendor details.
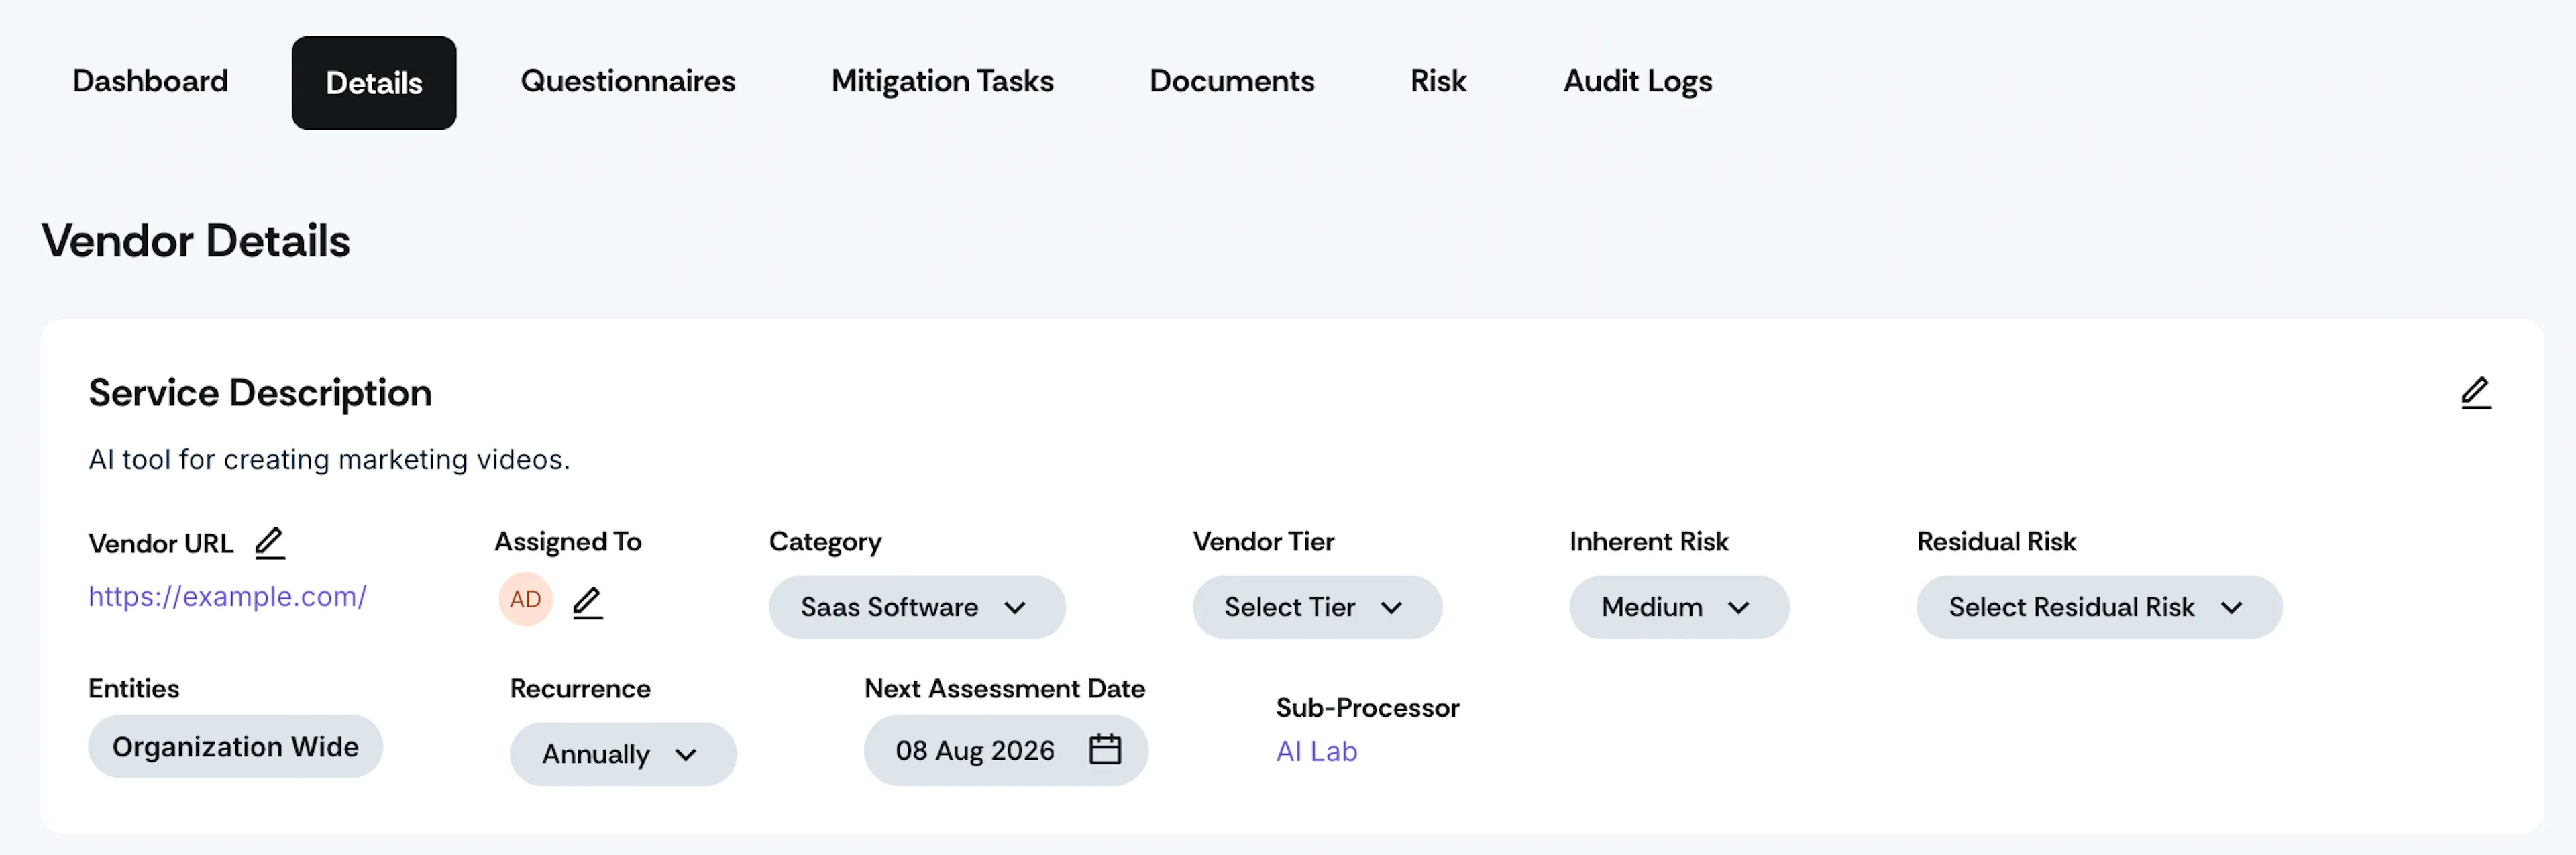
- Recurrence: Determine how frequently you wish to evaluate the vendor's risk. Options include Annually, Bi-Annually, Quarterly, Monthly, Never or allowing customization to align with your organization's risk assessment strategy.
- Next Assessment: Keep track of the vendor's upcoming risk assessment date.
Point of Contact
Access the name and email address of the vendor's Point of Contact (POC) to ensure seamless communication. You can add multiple POCs for greater flexibility and improved coordination.

Custom Fields

You can add more details about vendors in this section. Click the link to learn how to set up Custom fields for vendors.
Questionnaires
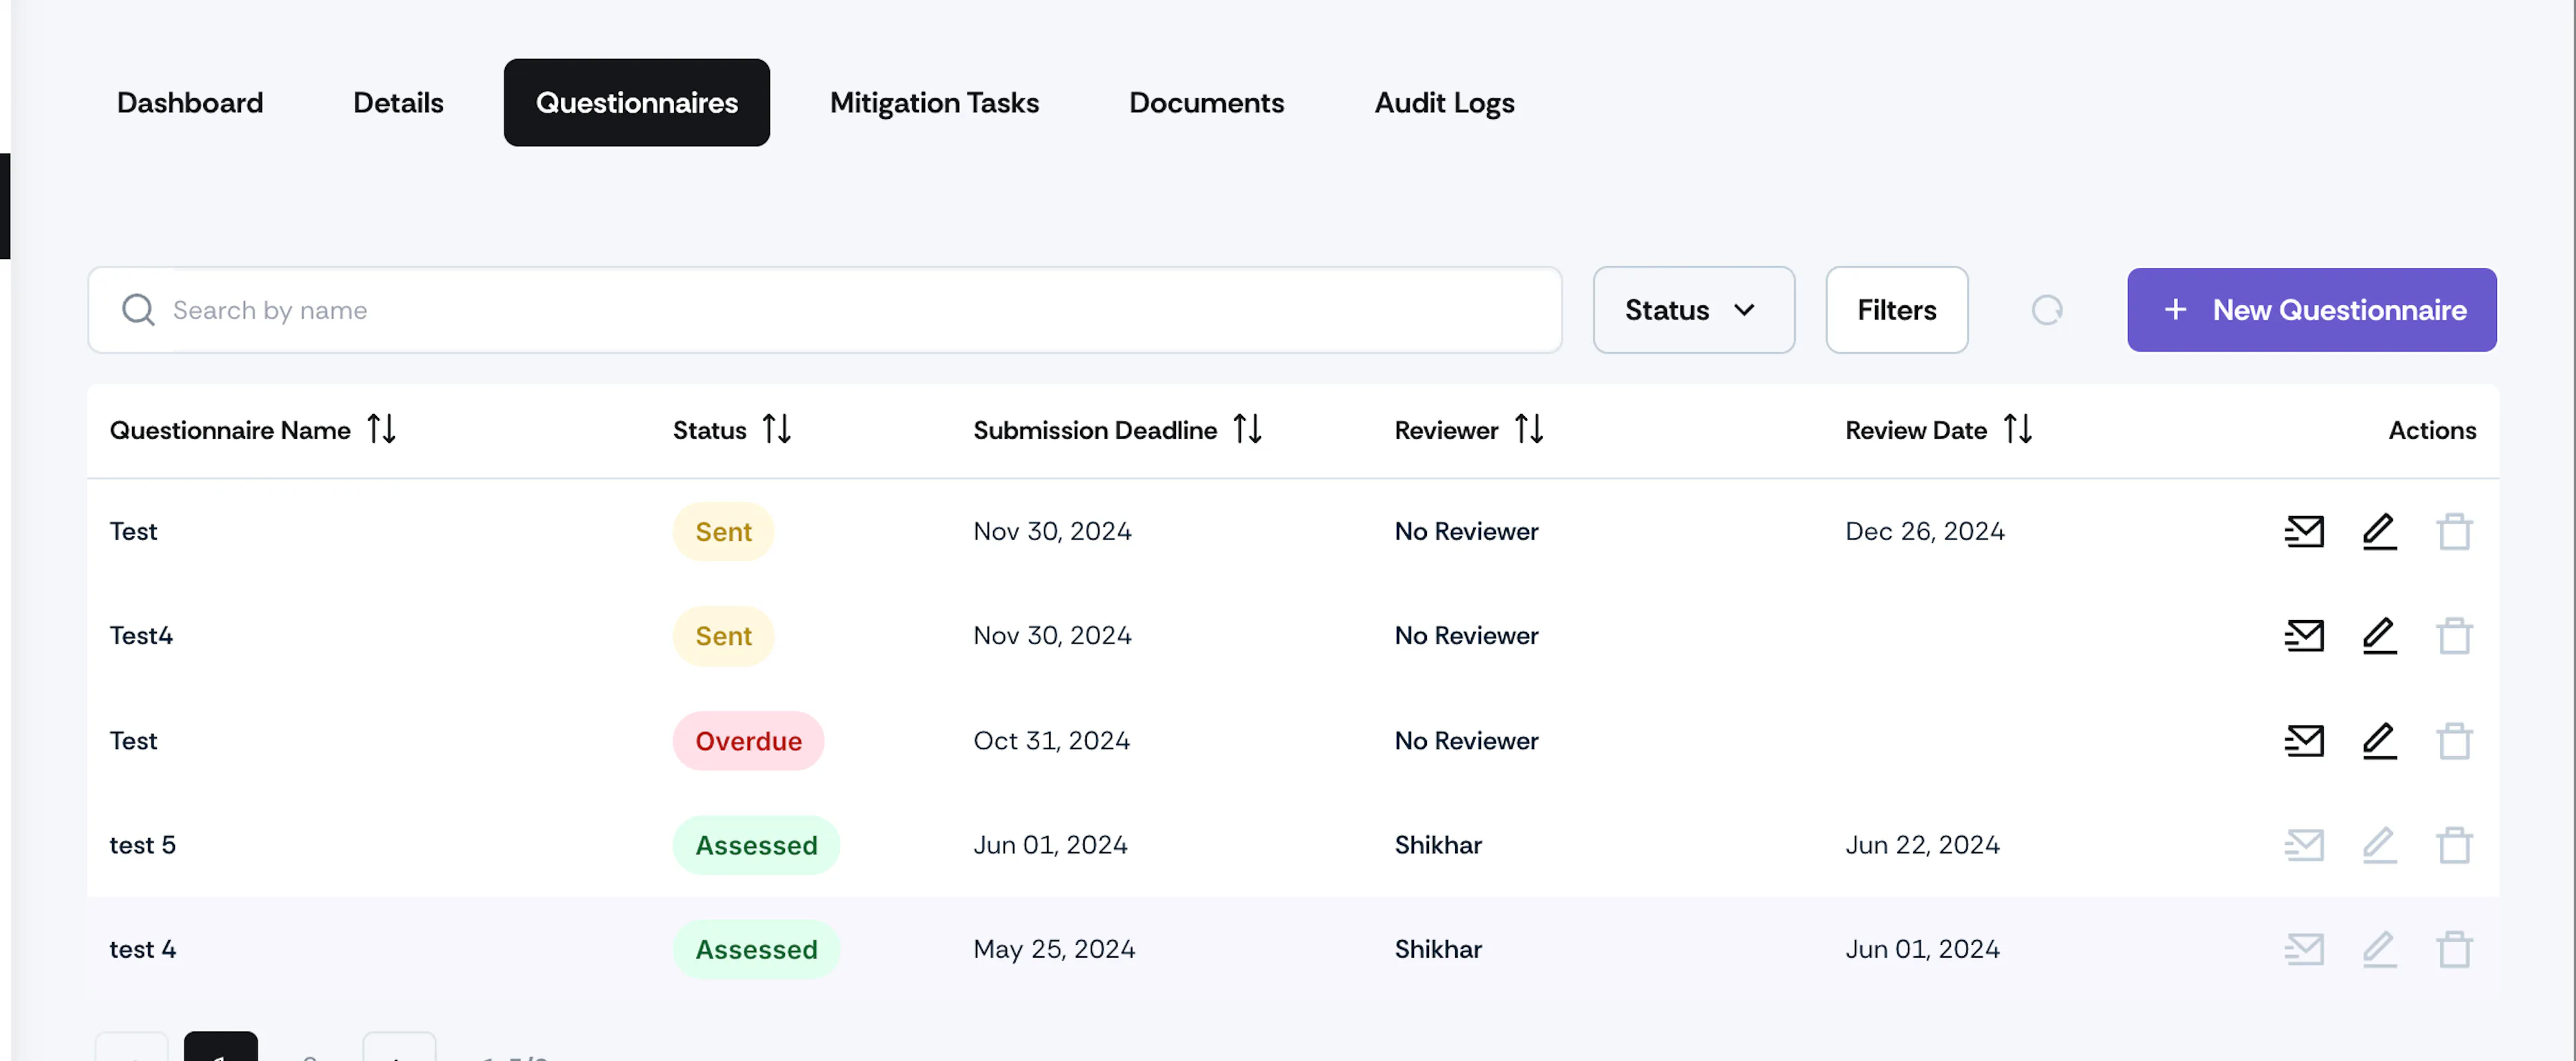
The Questionnaires tab provides a list of questionnaires you have sent to the vendor for risk assessment in the past. This tab provides details on questionnaire names, submission deadlines, review dates, reviewers, statuses, and actionable items. For a deeper dive, learn more about Vendor Questionnaires.
Mitigation Tasks
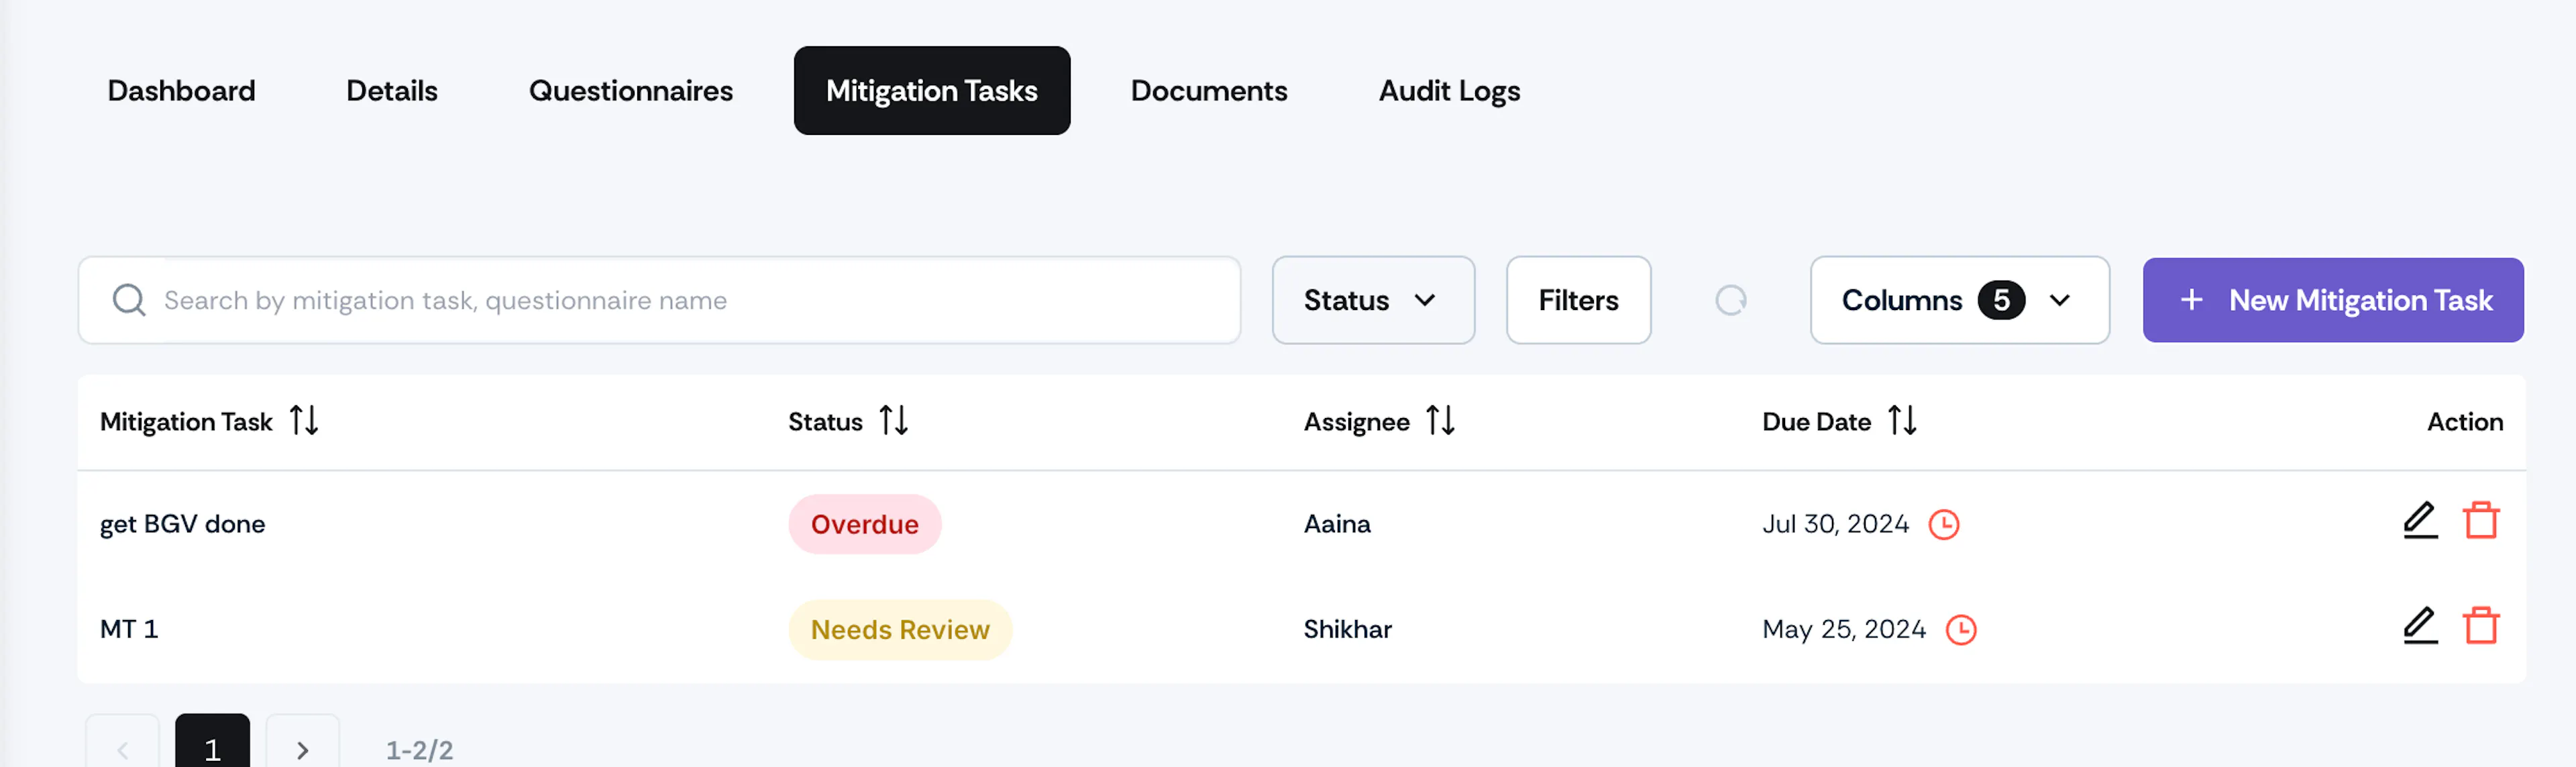
Mitigation Tasks help you gain insight into actions taken to mitigate and reduce risks associated with vendors. This section lists tasks, assignees, and task statuses, enabling effective management of mitigation tasks. Click on the link to explore Mitigation Tasks in more detail.
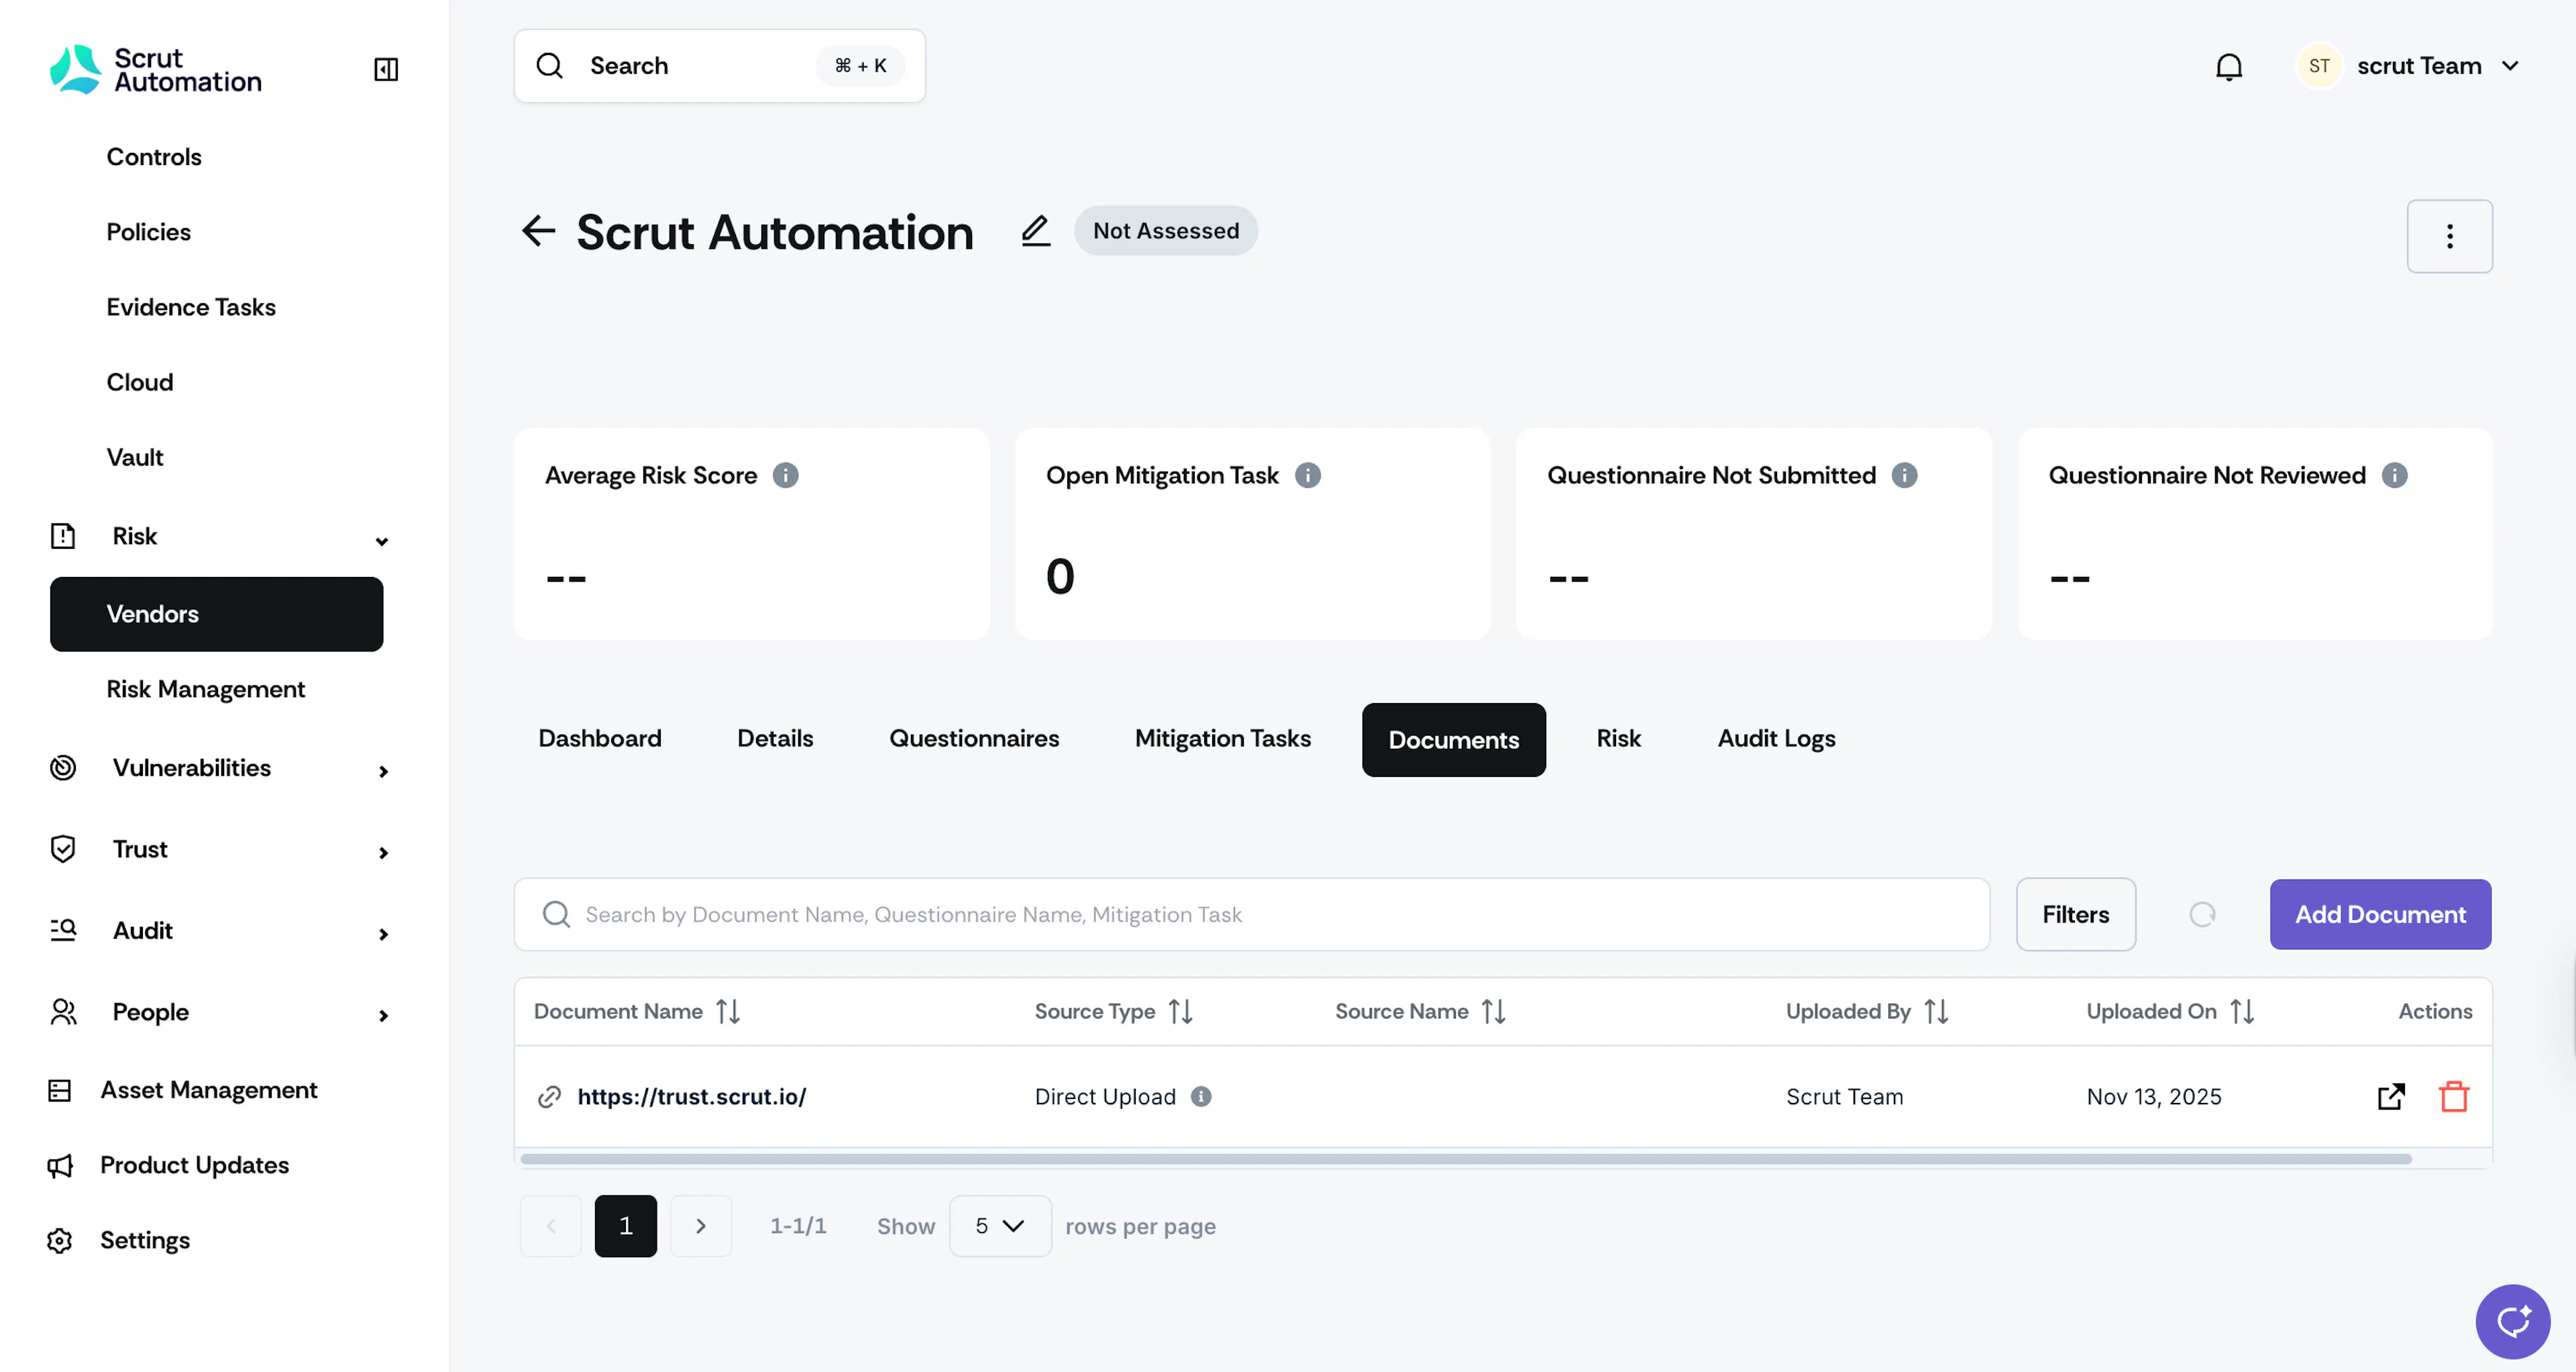
Vendor Documents
This tab contains a list of all documents and security pages linked to the vendor. To know more, see Vendor Documents.
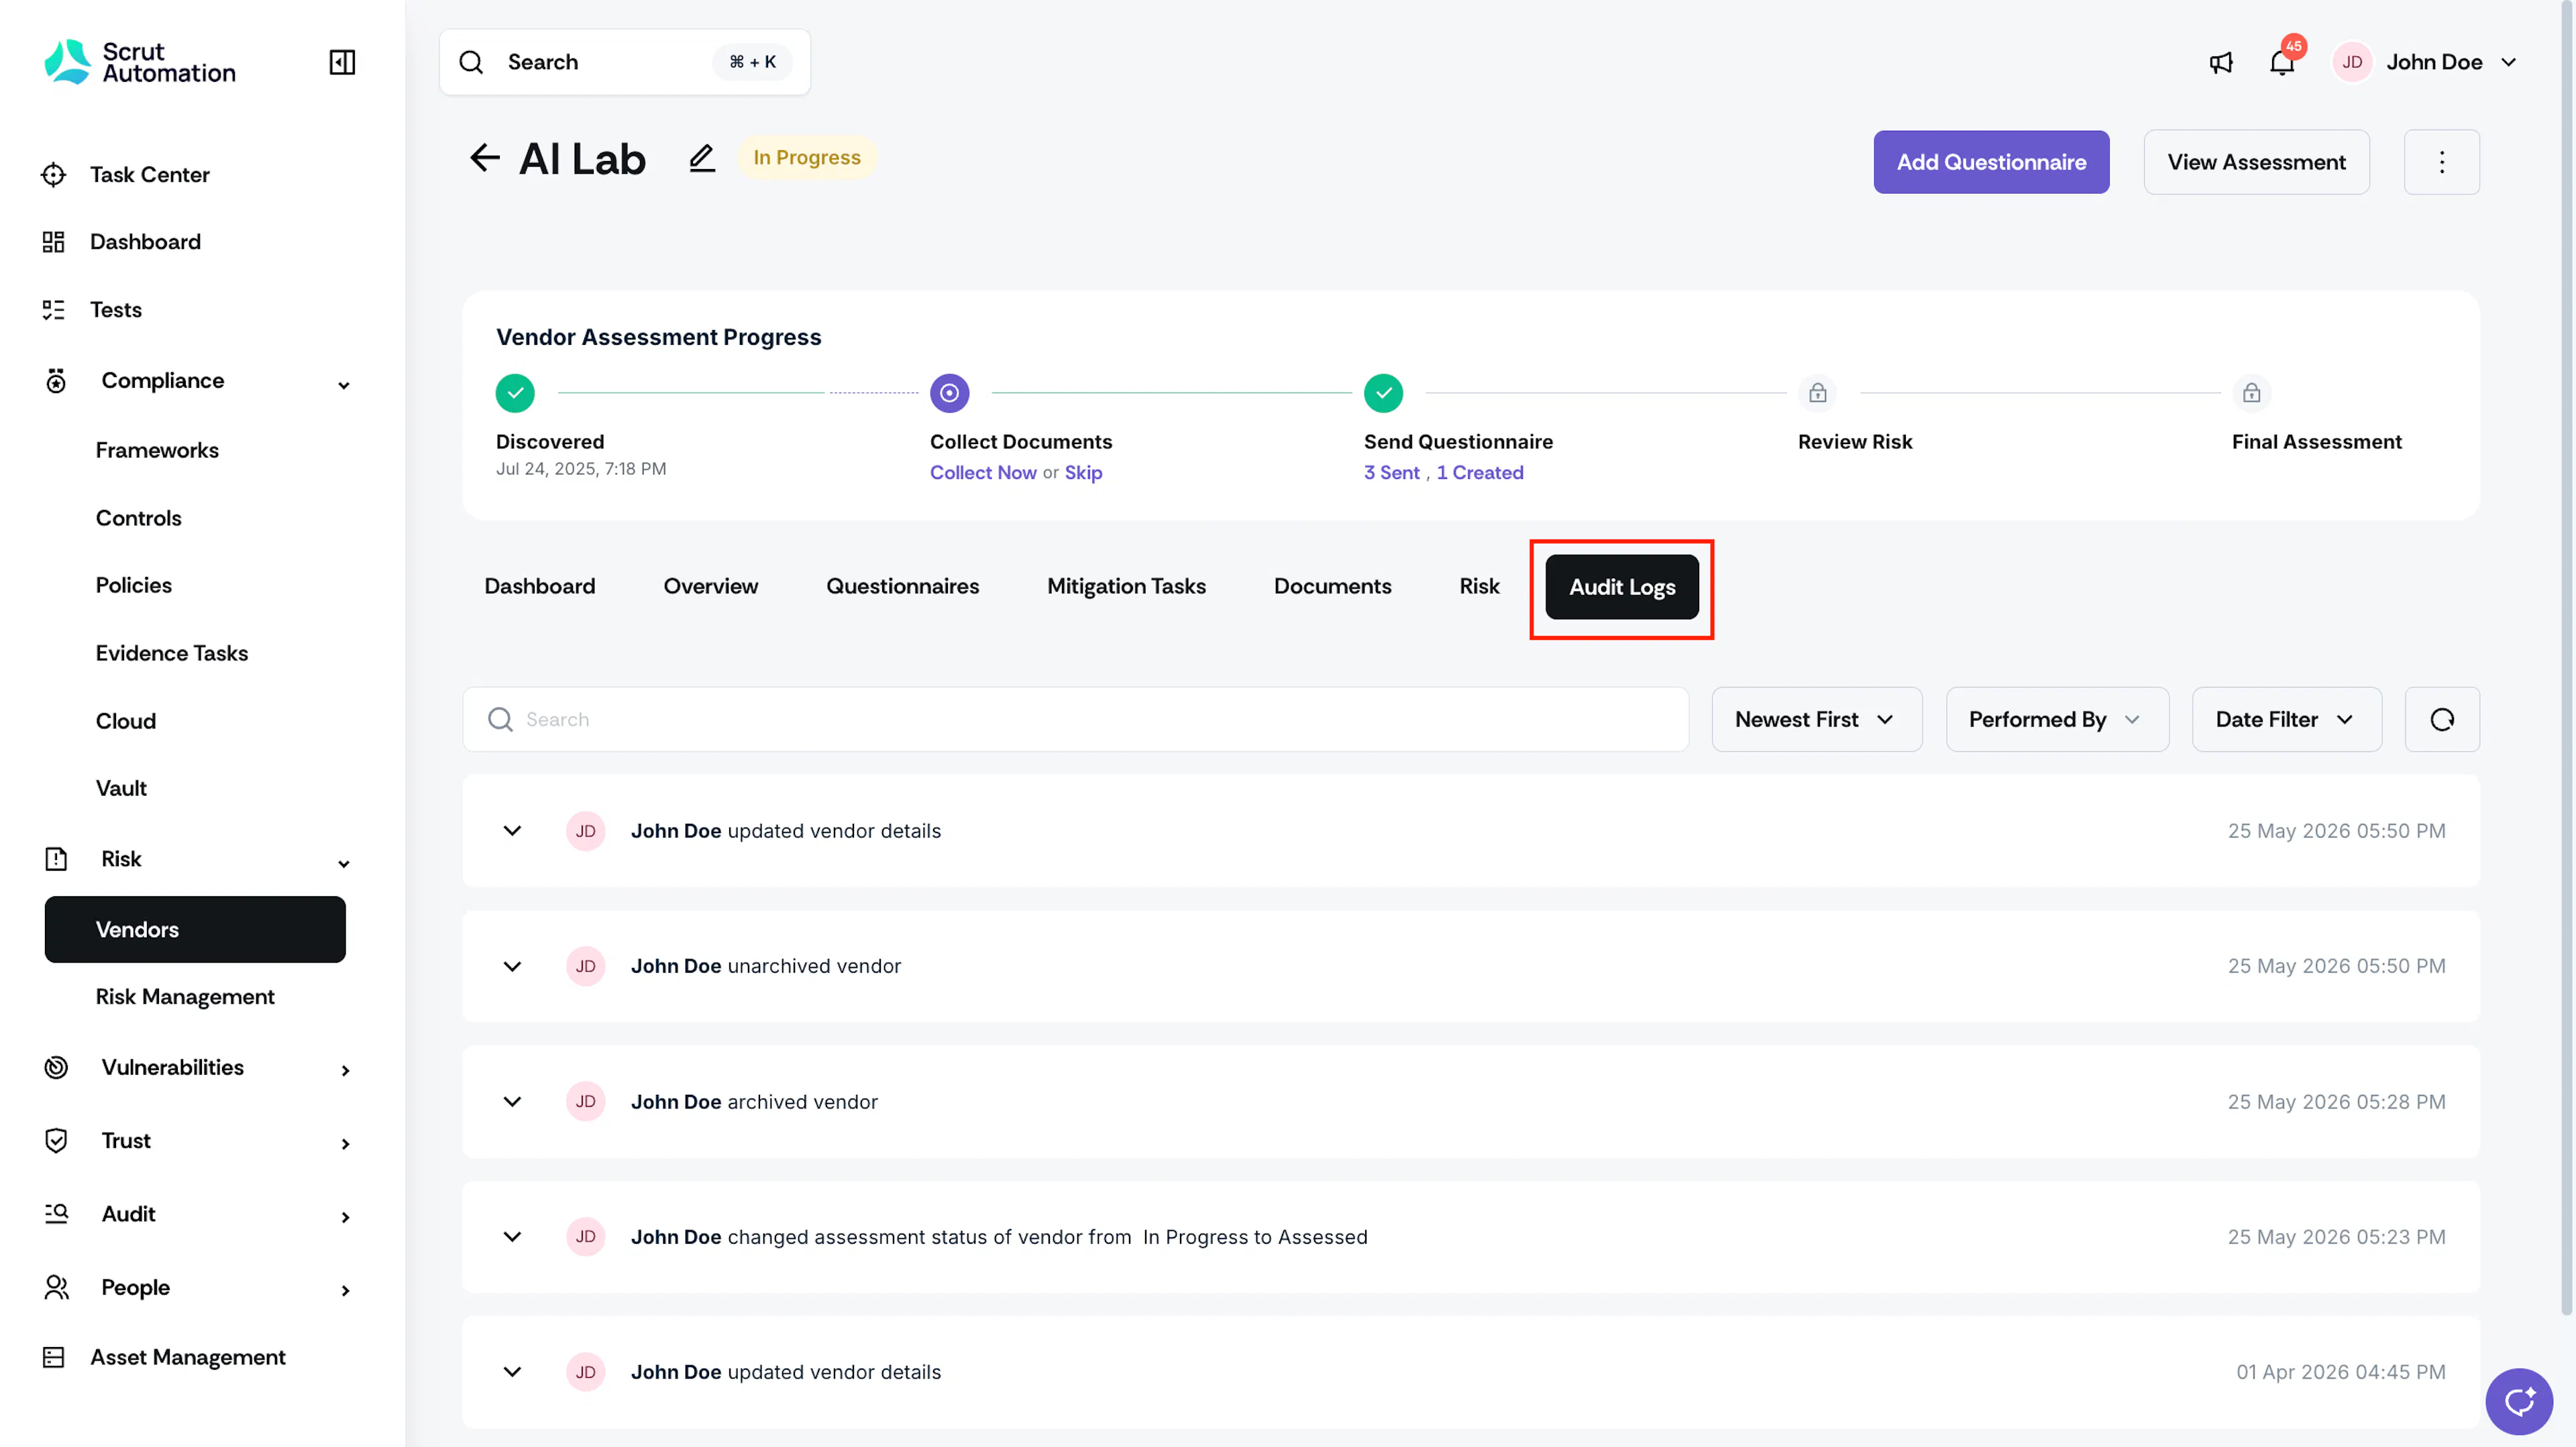
Audit Logs
Audit Logs help you stay informed about updates and actions taken within the Vendor module, ensuring transparency and accountability. Provides clear and accurate logging of vendor-level activities, minimizing confusion and enhancing usability.
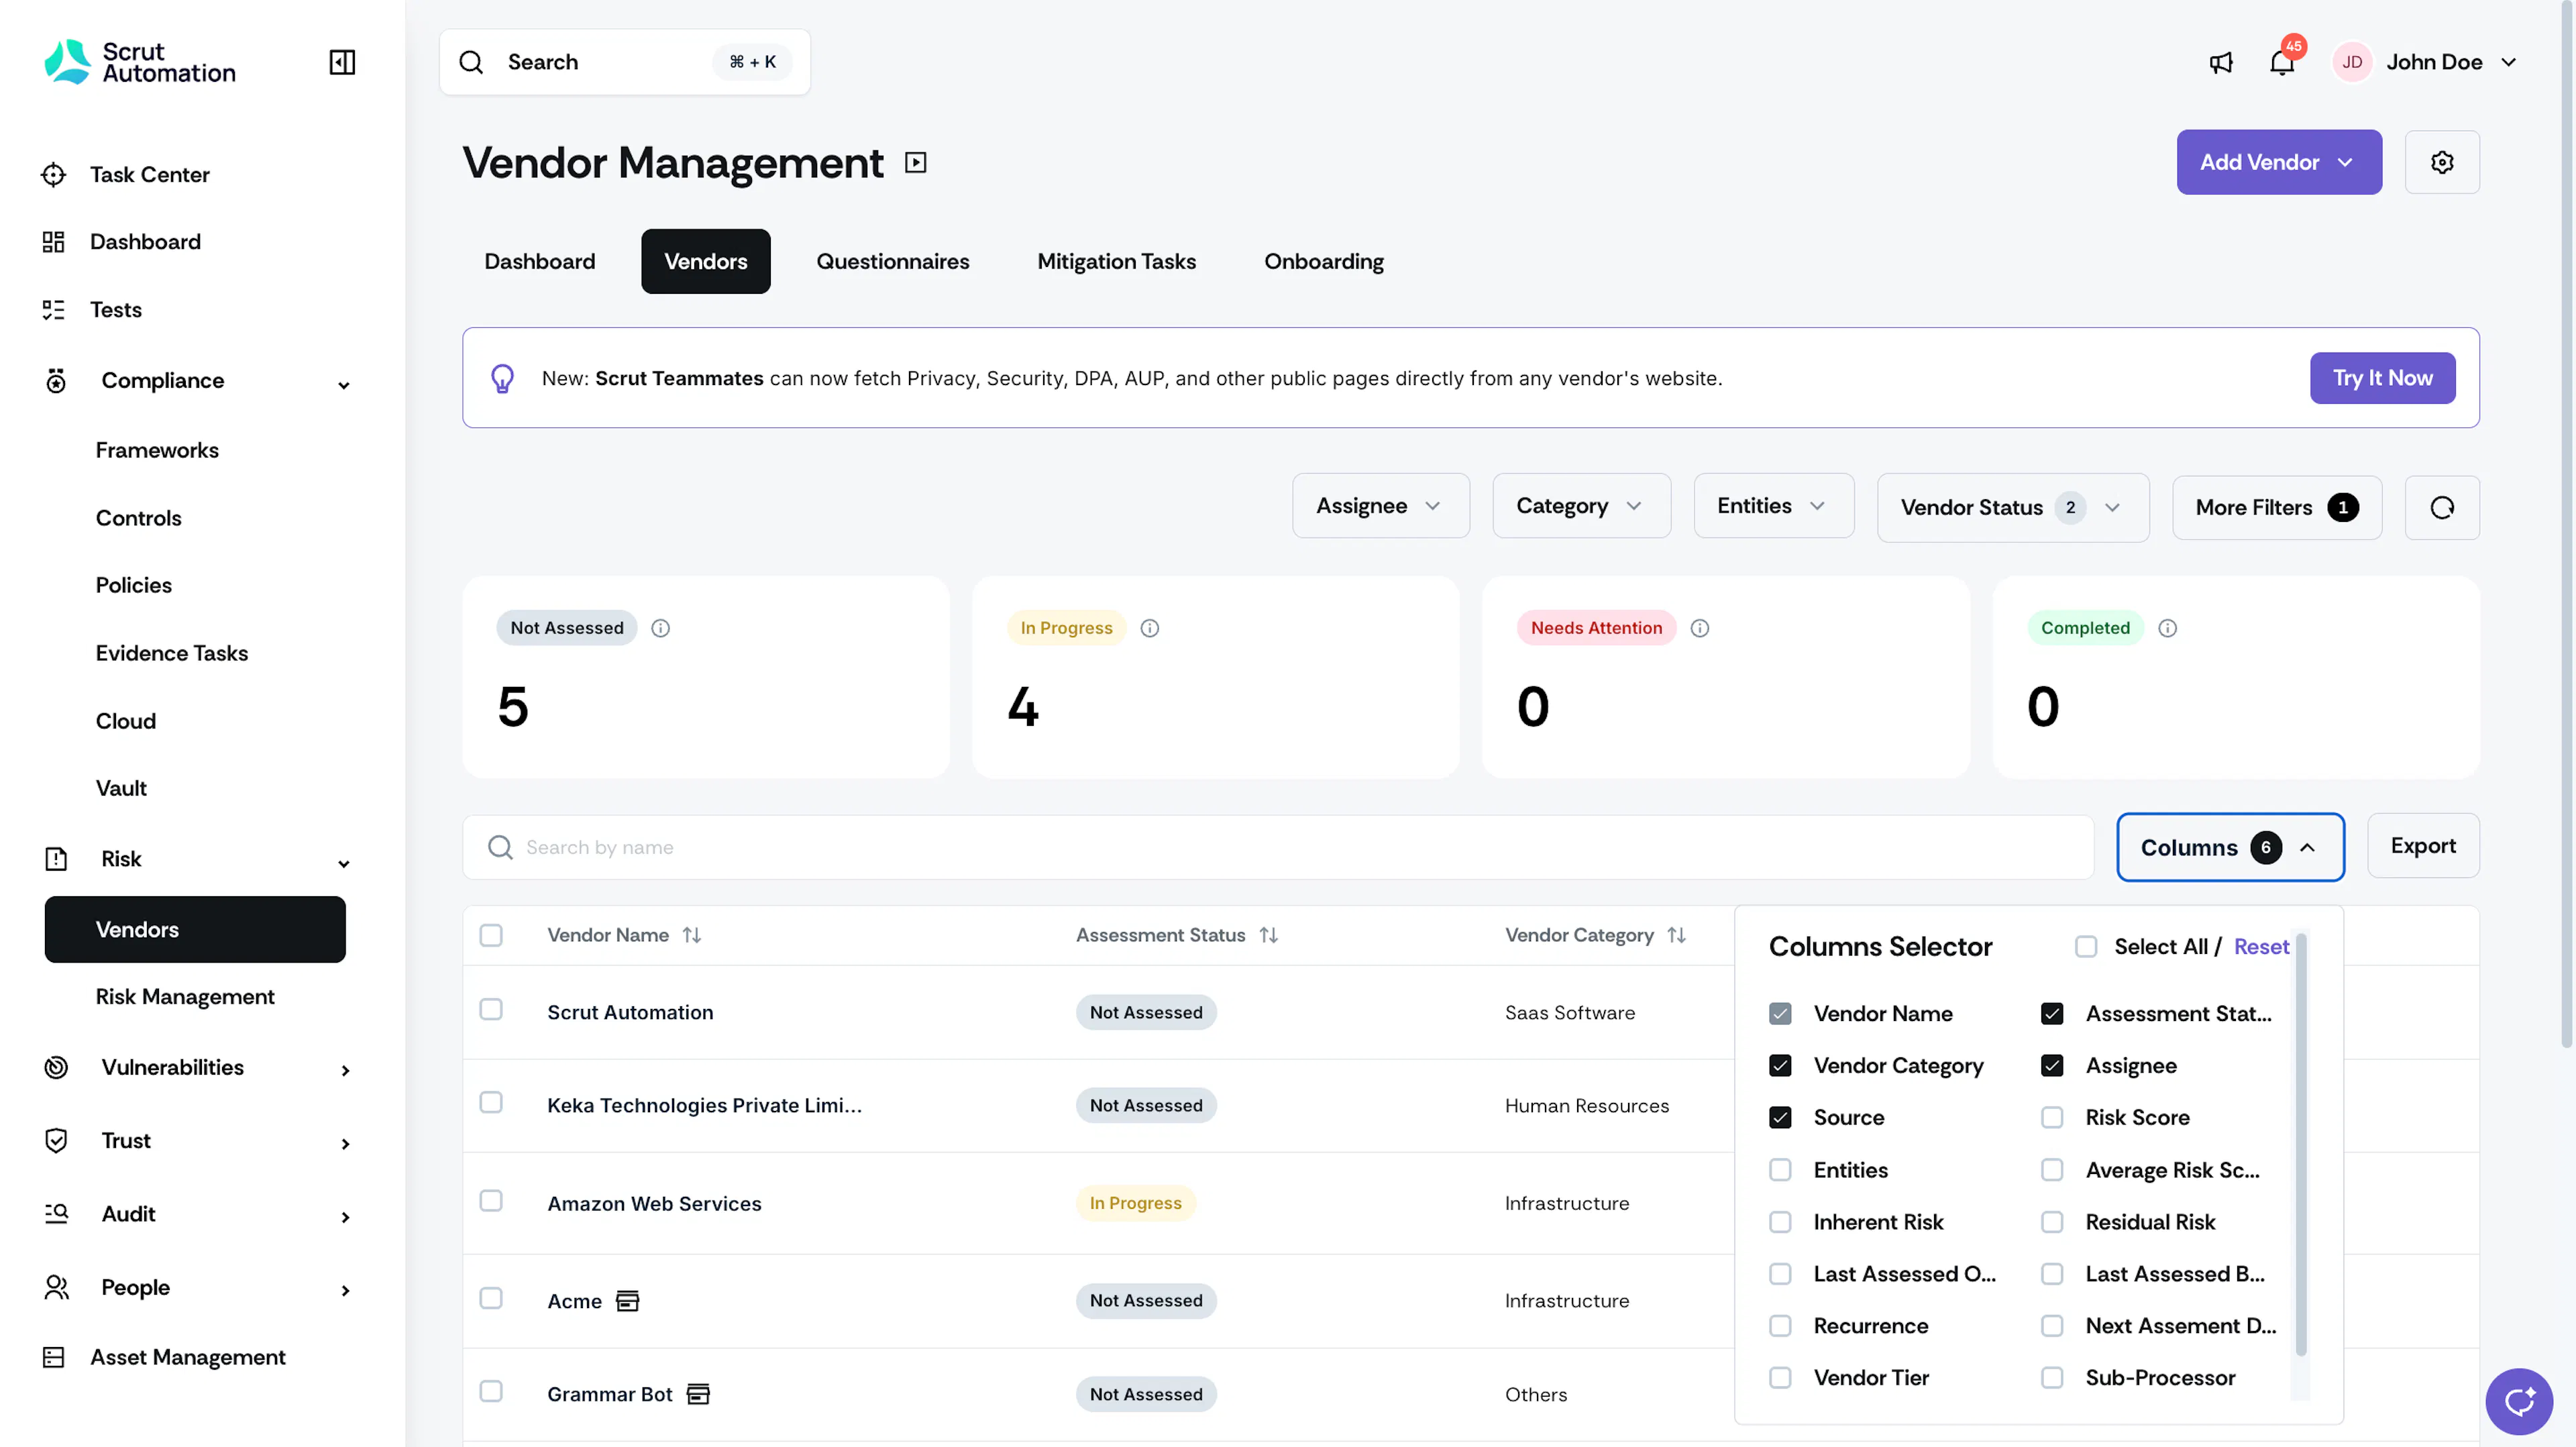
Customizing Columns in the Vendor Table
Follow these steps to customize the visible columns in the Vendor Table :
- Go to the Vendor Management Module.
- Click on the column selector in the Vendor Table.
- From the list of available columns, select or deselect the columns you want to display.