

Import & Sync Employee Details
The Employee module in Scrut helps you monitor personnel compliance. The first step to using this module is to import and sync employee information with Scrut. You can use any of the three methods:
This article explains how to use each of these methods.
1: Integrate With Your HRMS/HRIS
HRMS/HRIS tools are often the single source of truth for employee information in an organization. We strongly encourage this method for importing employee information. Scrut integrates with popular HRIS tools, including Zoho, BambooHR, Rippling, Workday, Keka, FreshTeam, and more, to automatically sync employee data into the platform. For a comprehensive overview of available HRIS integrations, see the complete list here.
Scrut also offers custom integration with other HRIS tools not listed here. You can connect with your CSM to check feasibility.
Follow these steps to integrate Scrut with your HRIS/HRMS:
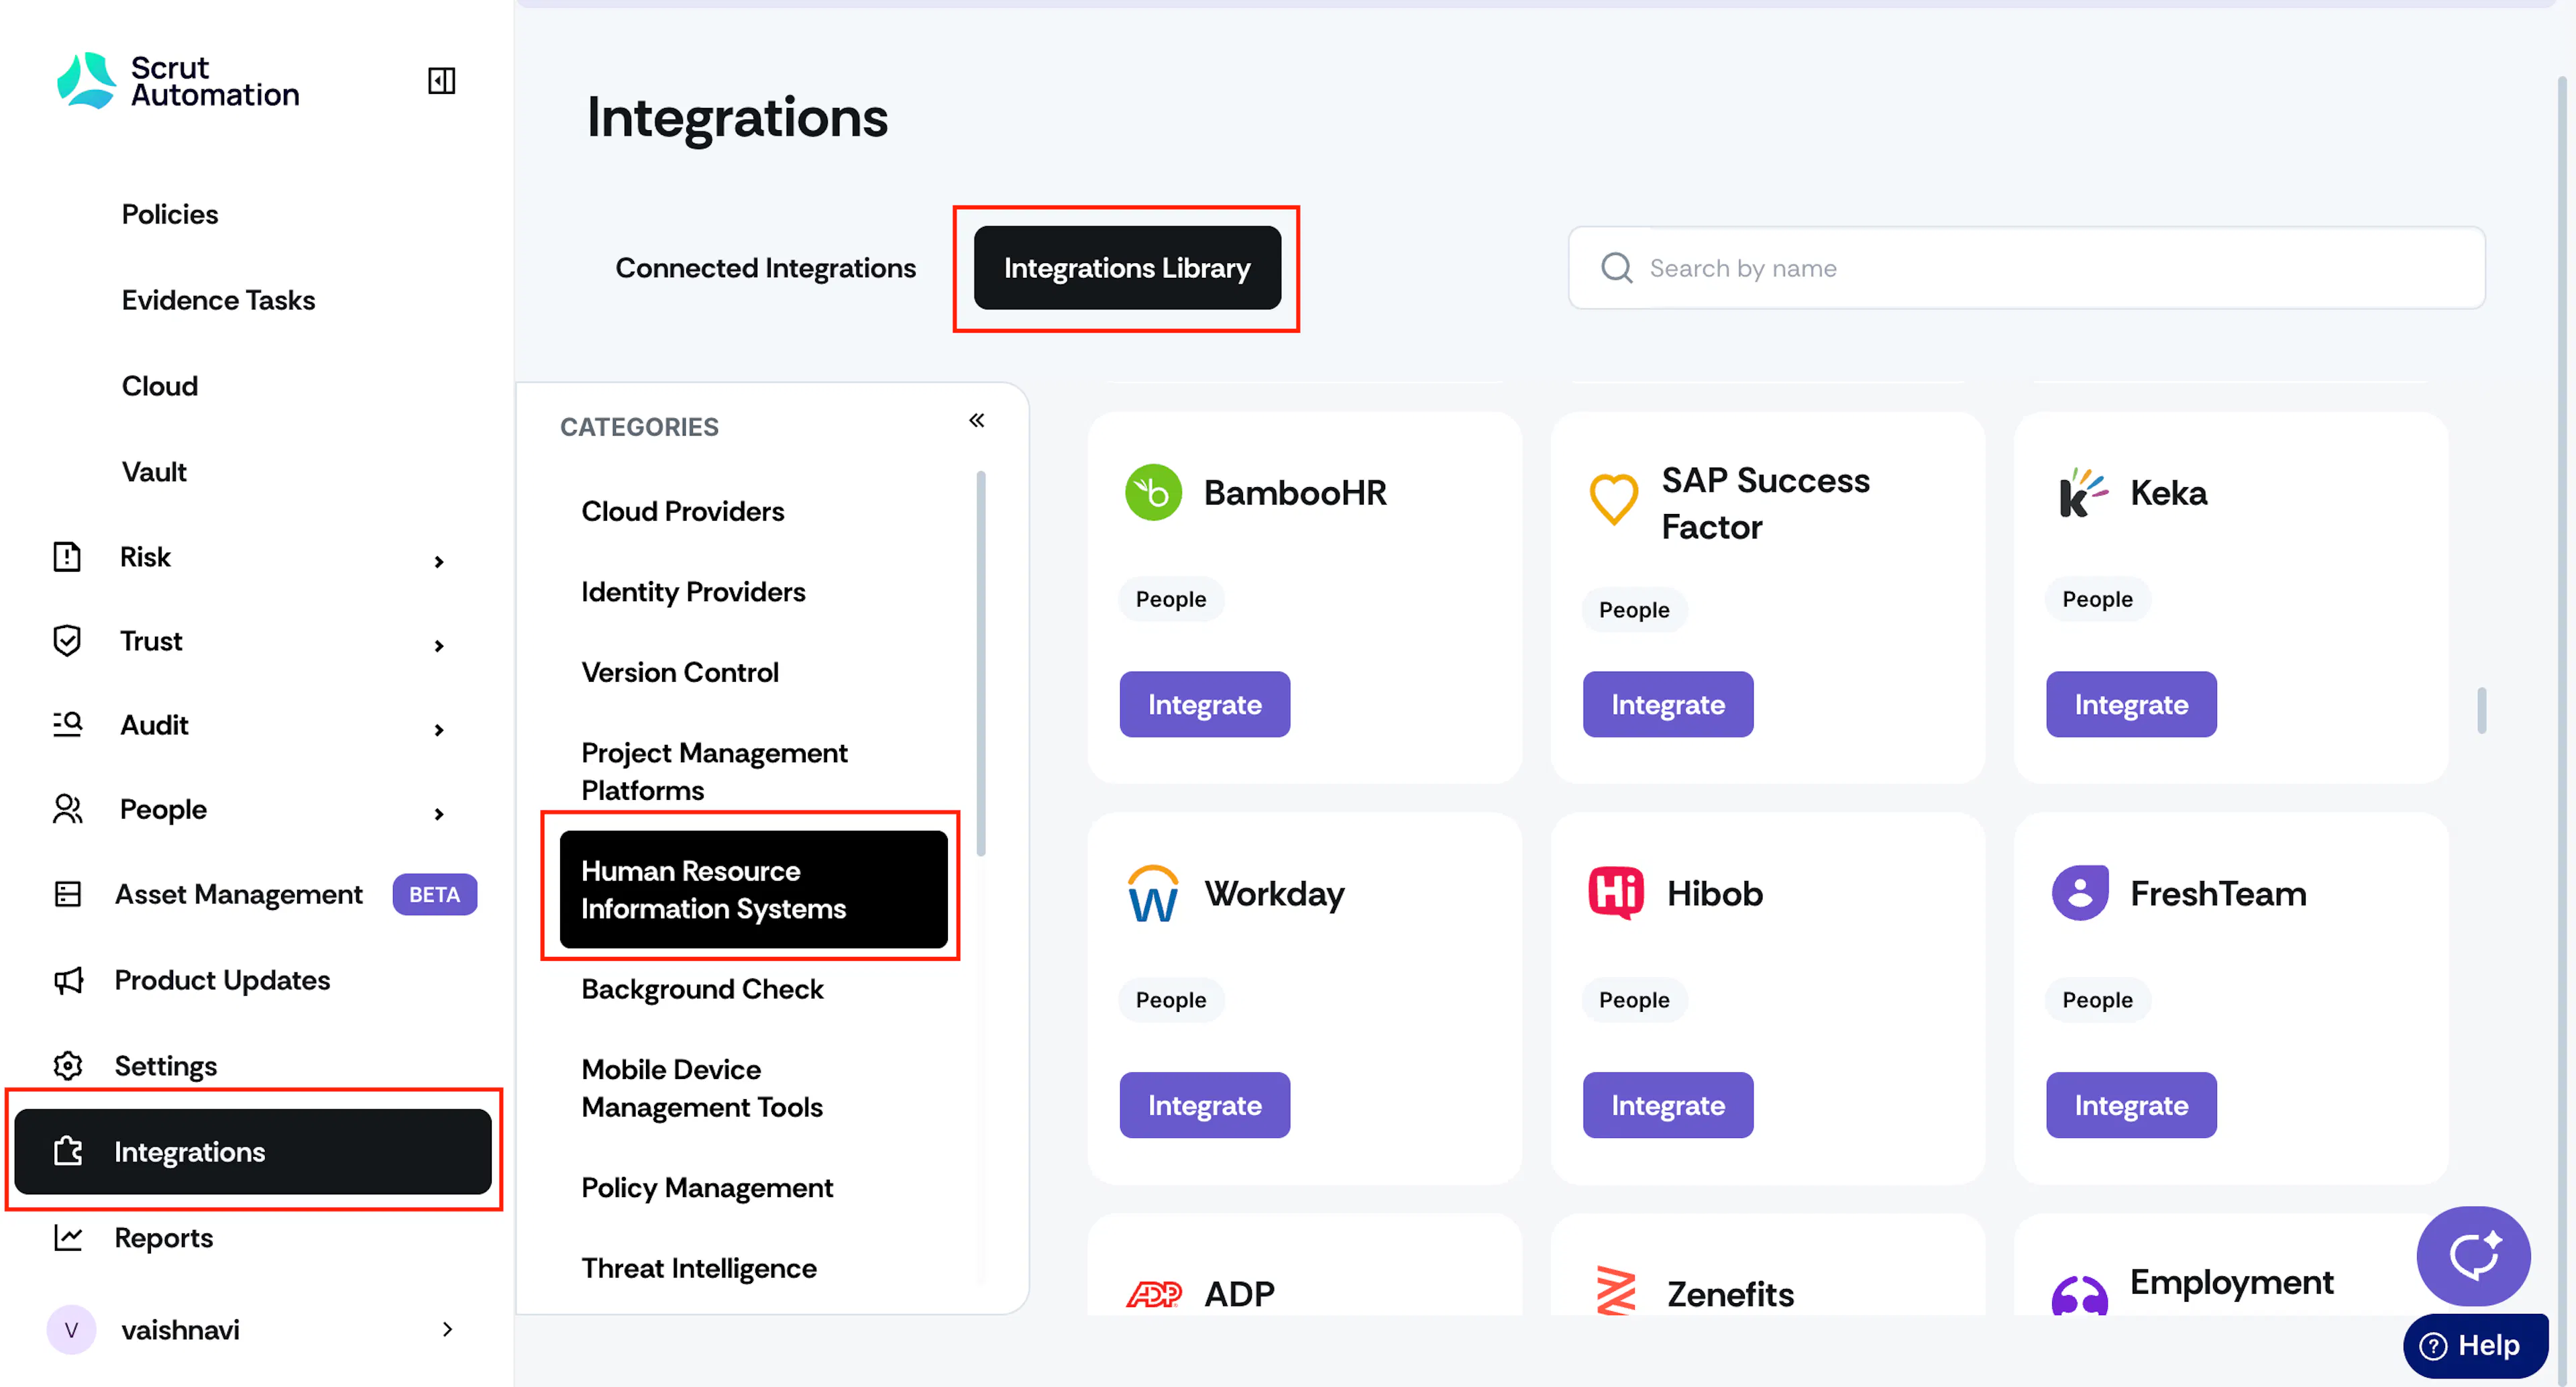
- Sign in to Scrut and click Integrations on the left navigation panel.
- Click the Integrations Library tab and Human Resource Information Systems (HRIS) in the Categories section.
- Select your HRIS tool from the list and click Integrate.
- Follow the on-screen instructions or refer to our integration guides to complete the process.
Note:
If you’re using an HRIS tool to import employees, Scrut fetches the following data into the People module:
- Employee name
- Joining date
- Source (HRIS tool name)
- Reporting manager’s name and department (if available in the HRIS tool)
2: Integrate With Your IdP
If you don't use an HRIS, you can import employees into Scrut by integrating with your Identity Provider (IdP). Scrut provides several out-of-the-box integrations with popular IdP tools, including Google Workspace, Azure Active Directory, Okta, and more. For a comprehensive overview of available IdP integrations, see here.
Scrut also offers custom integration with other IdPs. Contact your CSM to confirm feasibility.
Follow these steps to integrate Scrut with your IdP tool:
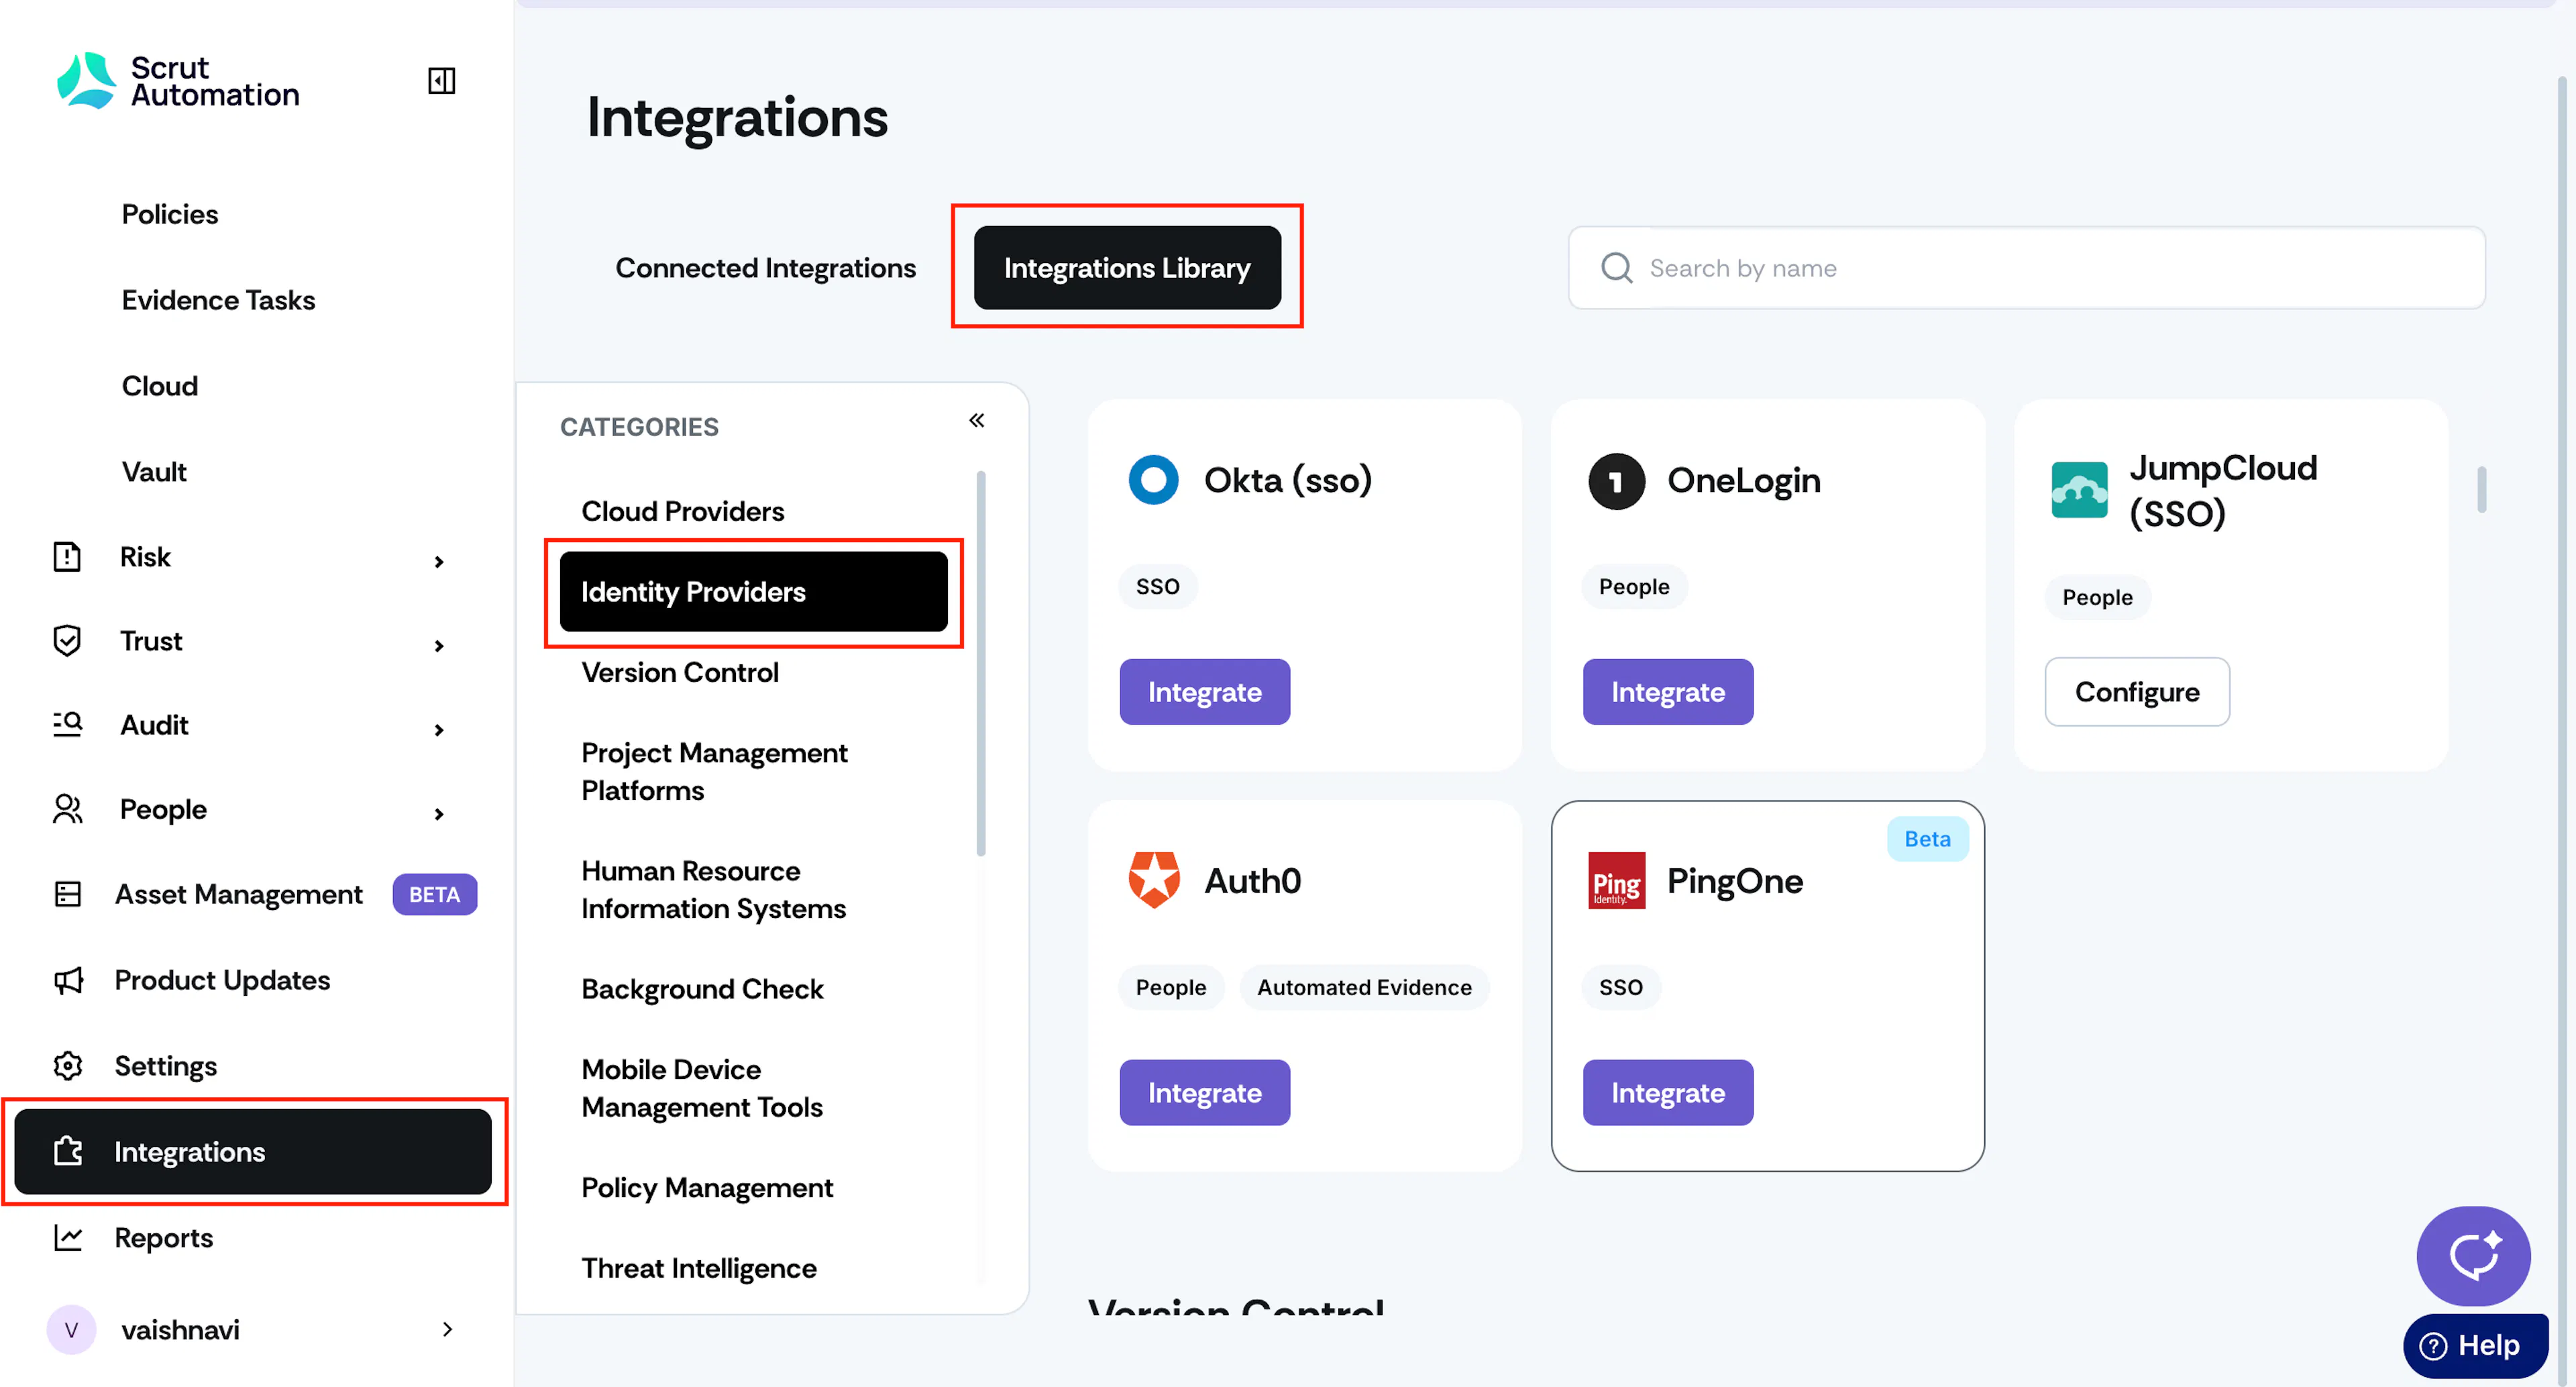
- Sign in to Scrut and click Integrations on the left navigation panel.
- Click the Integrations Library tab and Identity Provider (IdP) in the Categories section.
- Select your IdP from the list, then click Integrate.
- Follow the on-screen instructions or refer to our integration guides to complete the process.
Note:
If you’re using an IdP tool to import employees, Scrut fetches the following data into the People module:
- Employee name
- Joining date
- Source (IdP tool name)
- Reporting manager’s name (if assigned in the IdP)
Note:
When both your HRIS and IdP are integrated, Scrut prioritizes the employee data in your HRIS. For more info, see here.
3: Import Employees Manually
In Bulk via CSV
Use this method to import employees in bulk when you don’t have an HRIS or IdP.
-
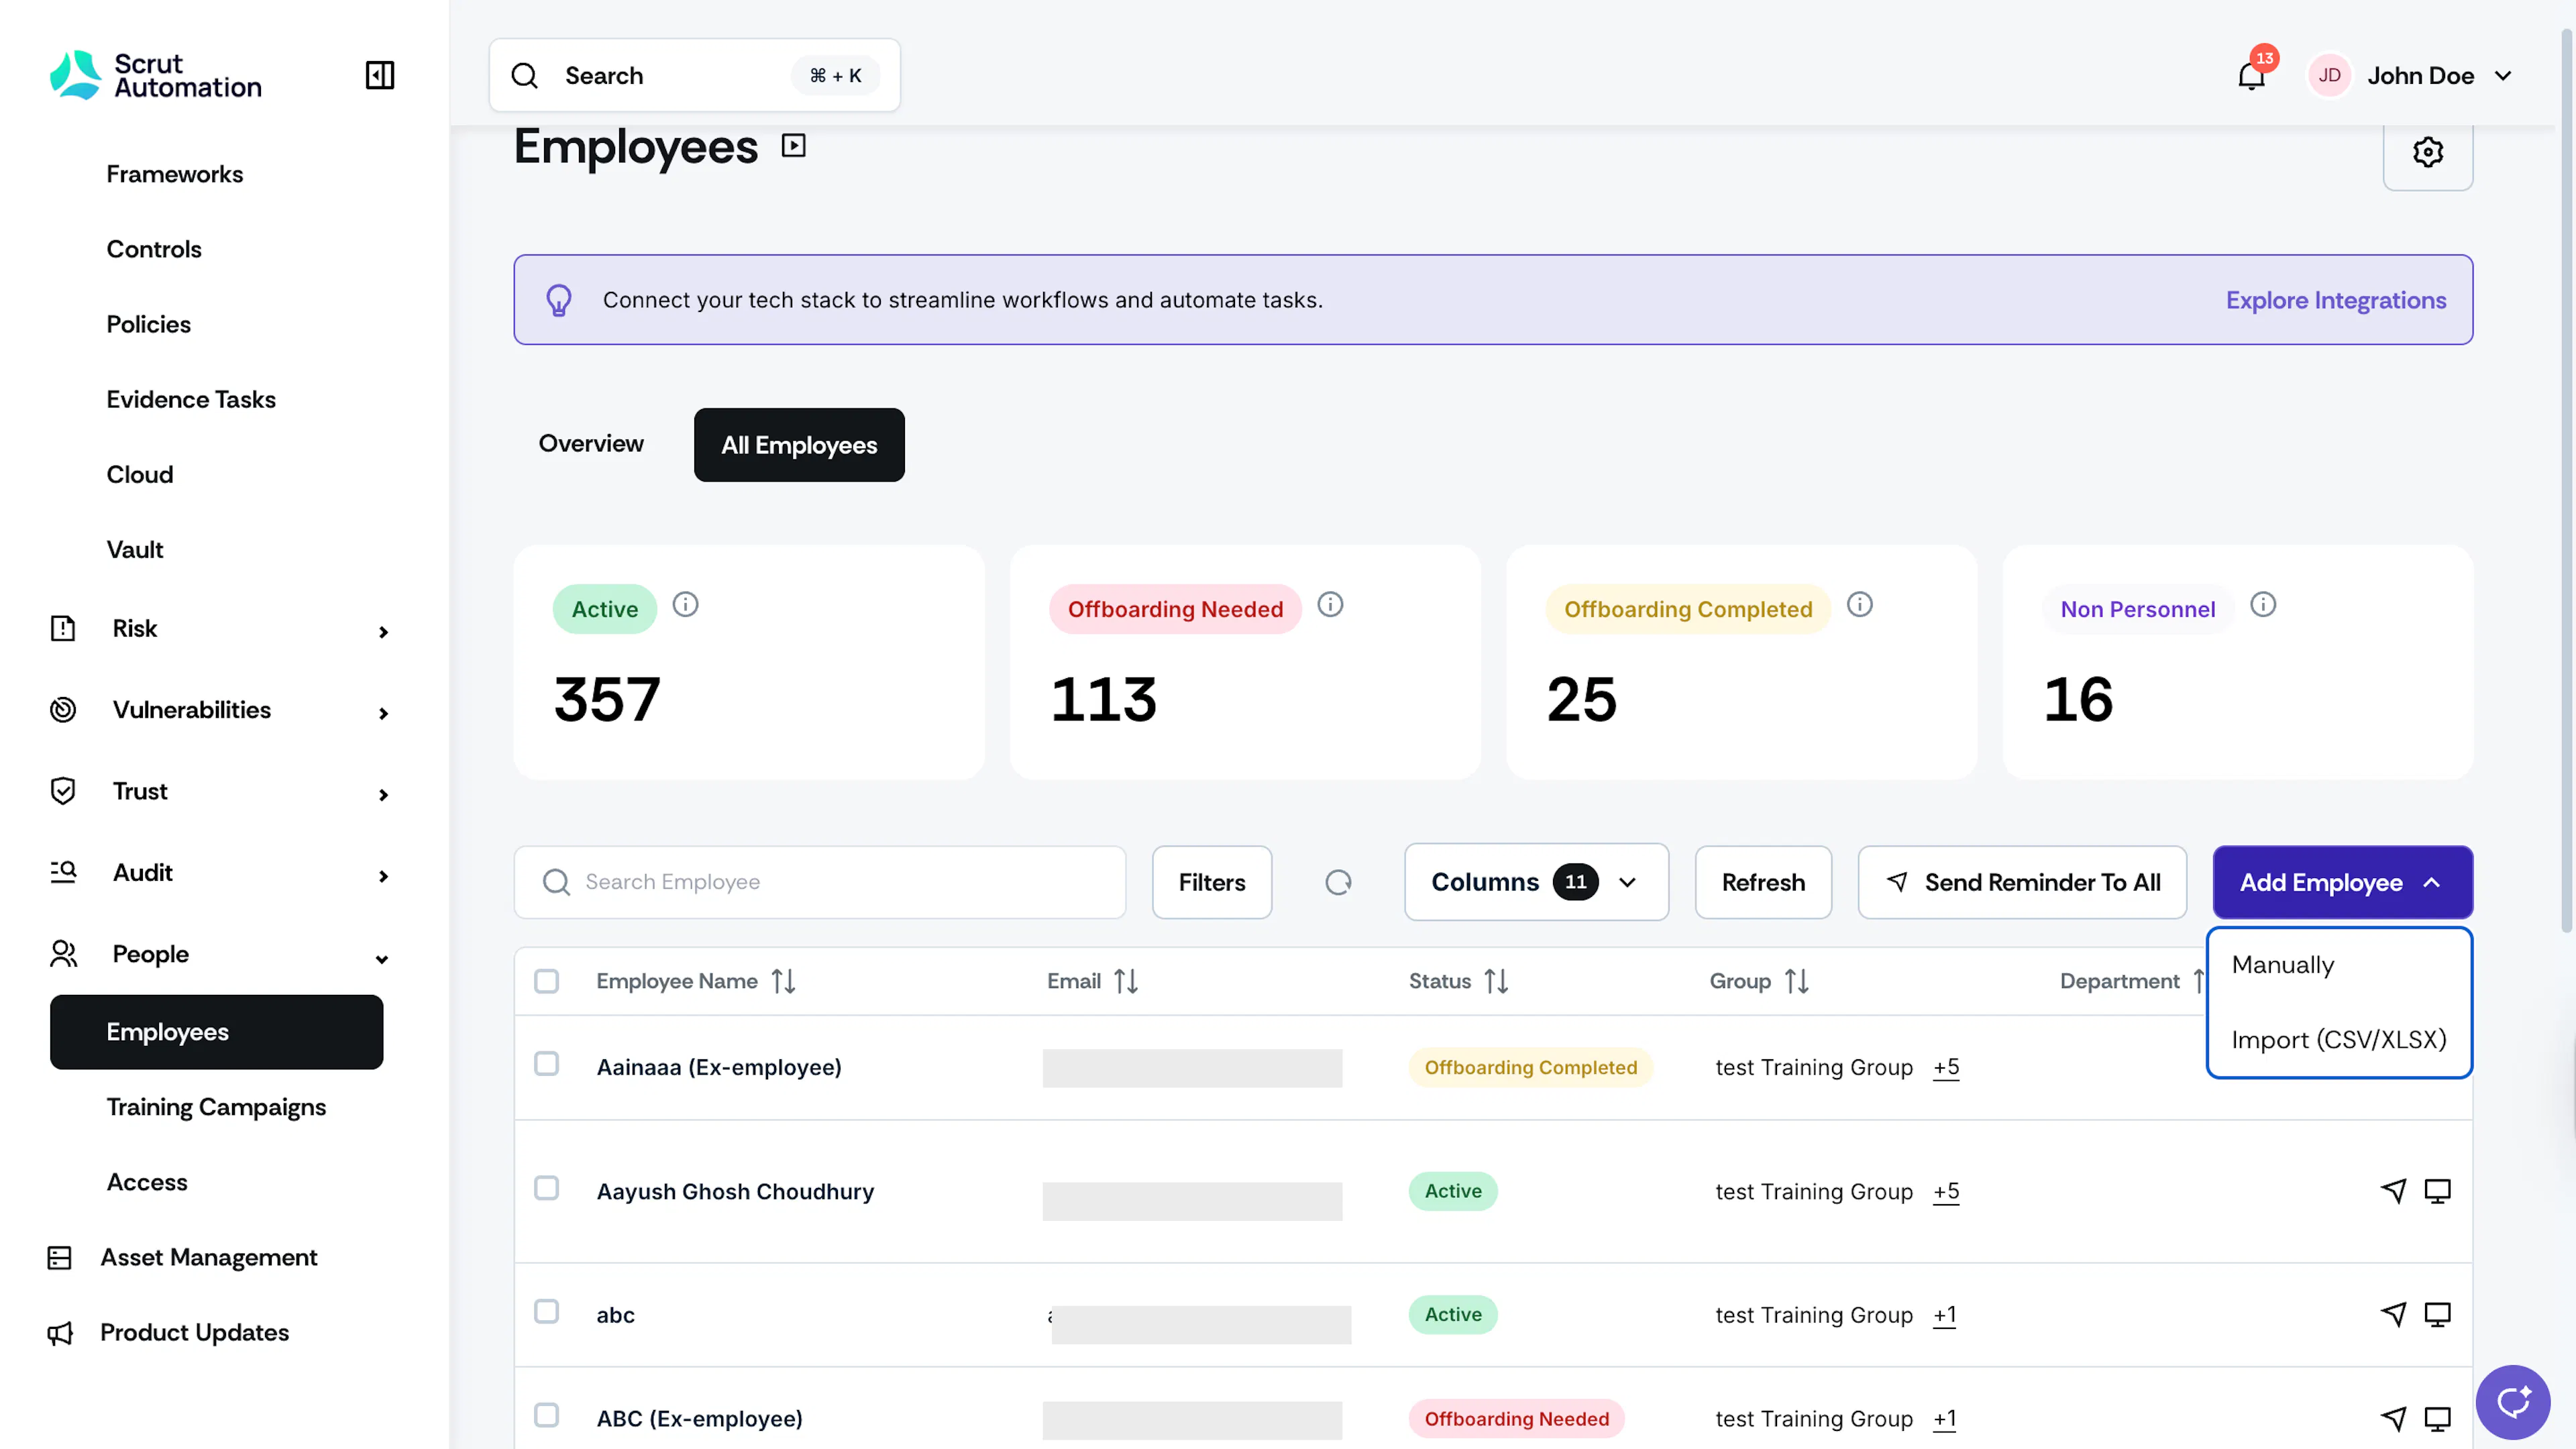
Sign in to Scrut and navigate to People → Employees using the left navigation panel.
-
Go to the All Employees tab, click the Add Employee button, and choose Import (CSV/XLSX).
-
Download the template and copy and paste the employee details into it.
Pro Tip!
Refer to the section below for detailed instructions on adding data to the template.
-
Drag and drop the template file, or click to upload it manually.
-
Choose Employee Groups. You have two options to assign employee groups:
- Use Groups from the Import File: With this option, employees will be assigned to groups based on the values of the Group column in your template. If any employee’s group information is missing, Scrut will automatically assign them to the default employee group. You can edit this assignment later if needed.
- Select Group(s) for All: This allows you to assign one or more groups to all employees in the template. If you choose this option, the template will disregard any group information.
-
Select the “Notify employees immediately about new task assignments based on group” checkbox to alert employees about new task assignments.
-
Click Import.
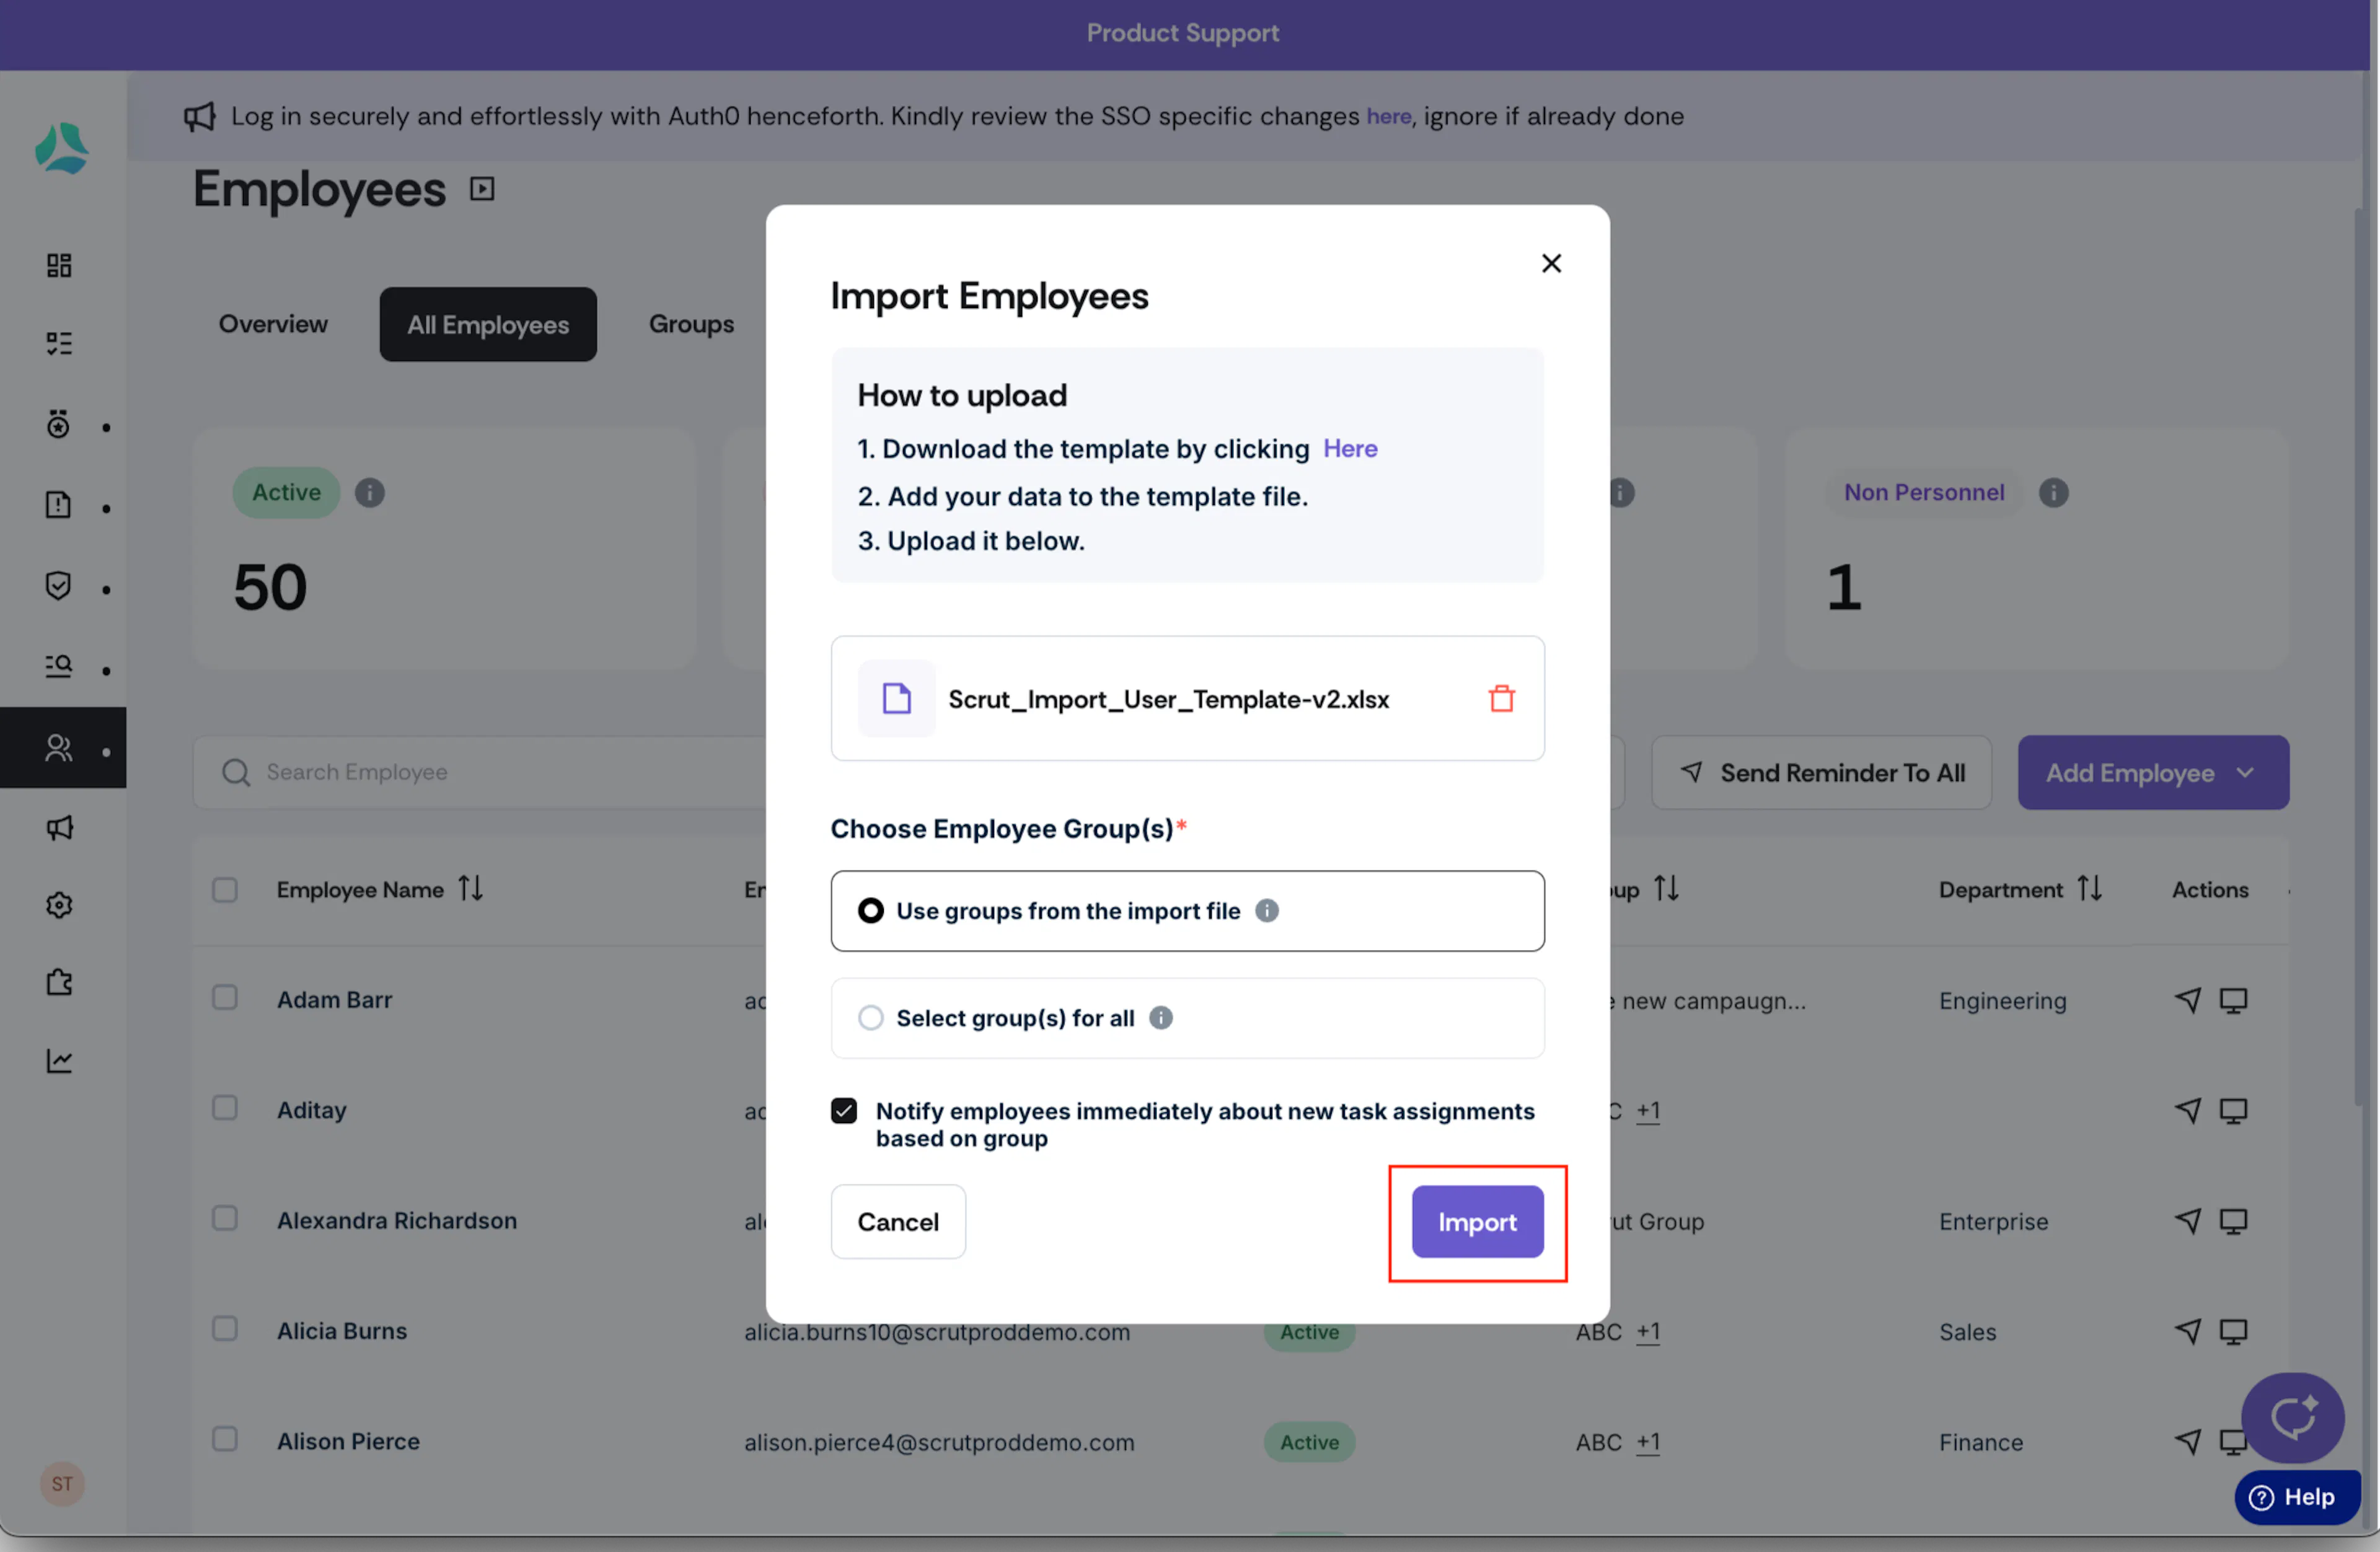
Scrut will process the file and email you once the import is complete.
Pro Tip:
When importing employees manually, if you want to include Reporting Manager details, please share it as a CSV file, and our team can upload it for you.
Tips for Using the Import Employee Template

- Do NOT remove the first row, as it contains column headers. Scrut requires this information to process employee details accurately.
- Delete the sample content in the second row, and add employee details from this row.
- Include each employee's information in a separate row.
- Name (Column A) and Email (Column B) are mandatory; other fields are optional.
- Joining Date (Column C) is an optional field. If you enter a date, ensure it is in the dd-mm-yyyy format. E.g. 15-02-2025.
- You can update the names and group details of existing employees using the import CSV method. However, you cannot change the joining date.
- Avoid using extra formatting, such as background colors, when entering employee details in the template.
Error Report
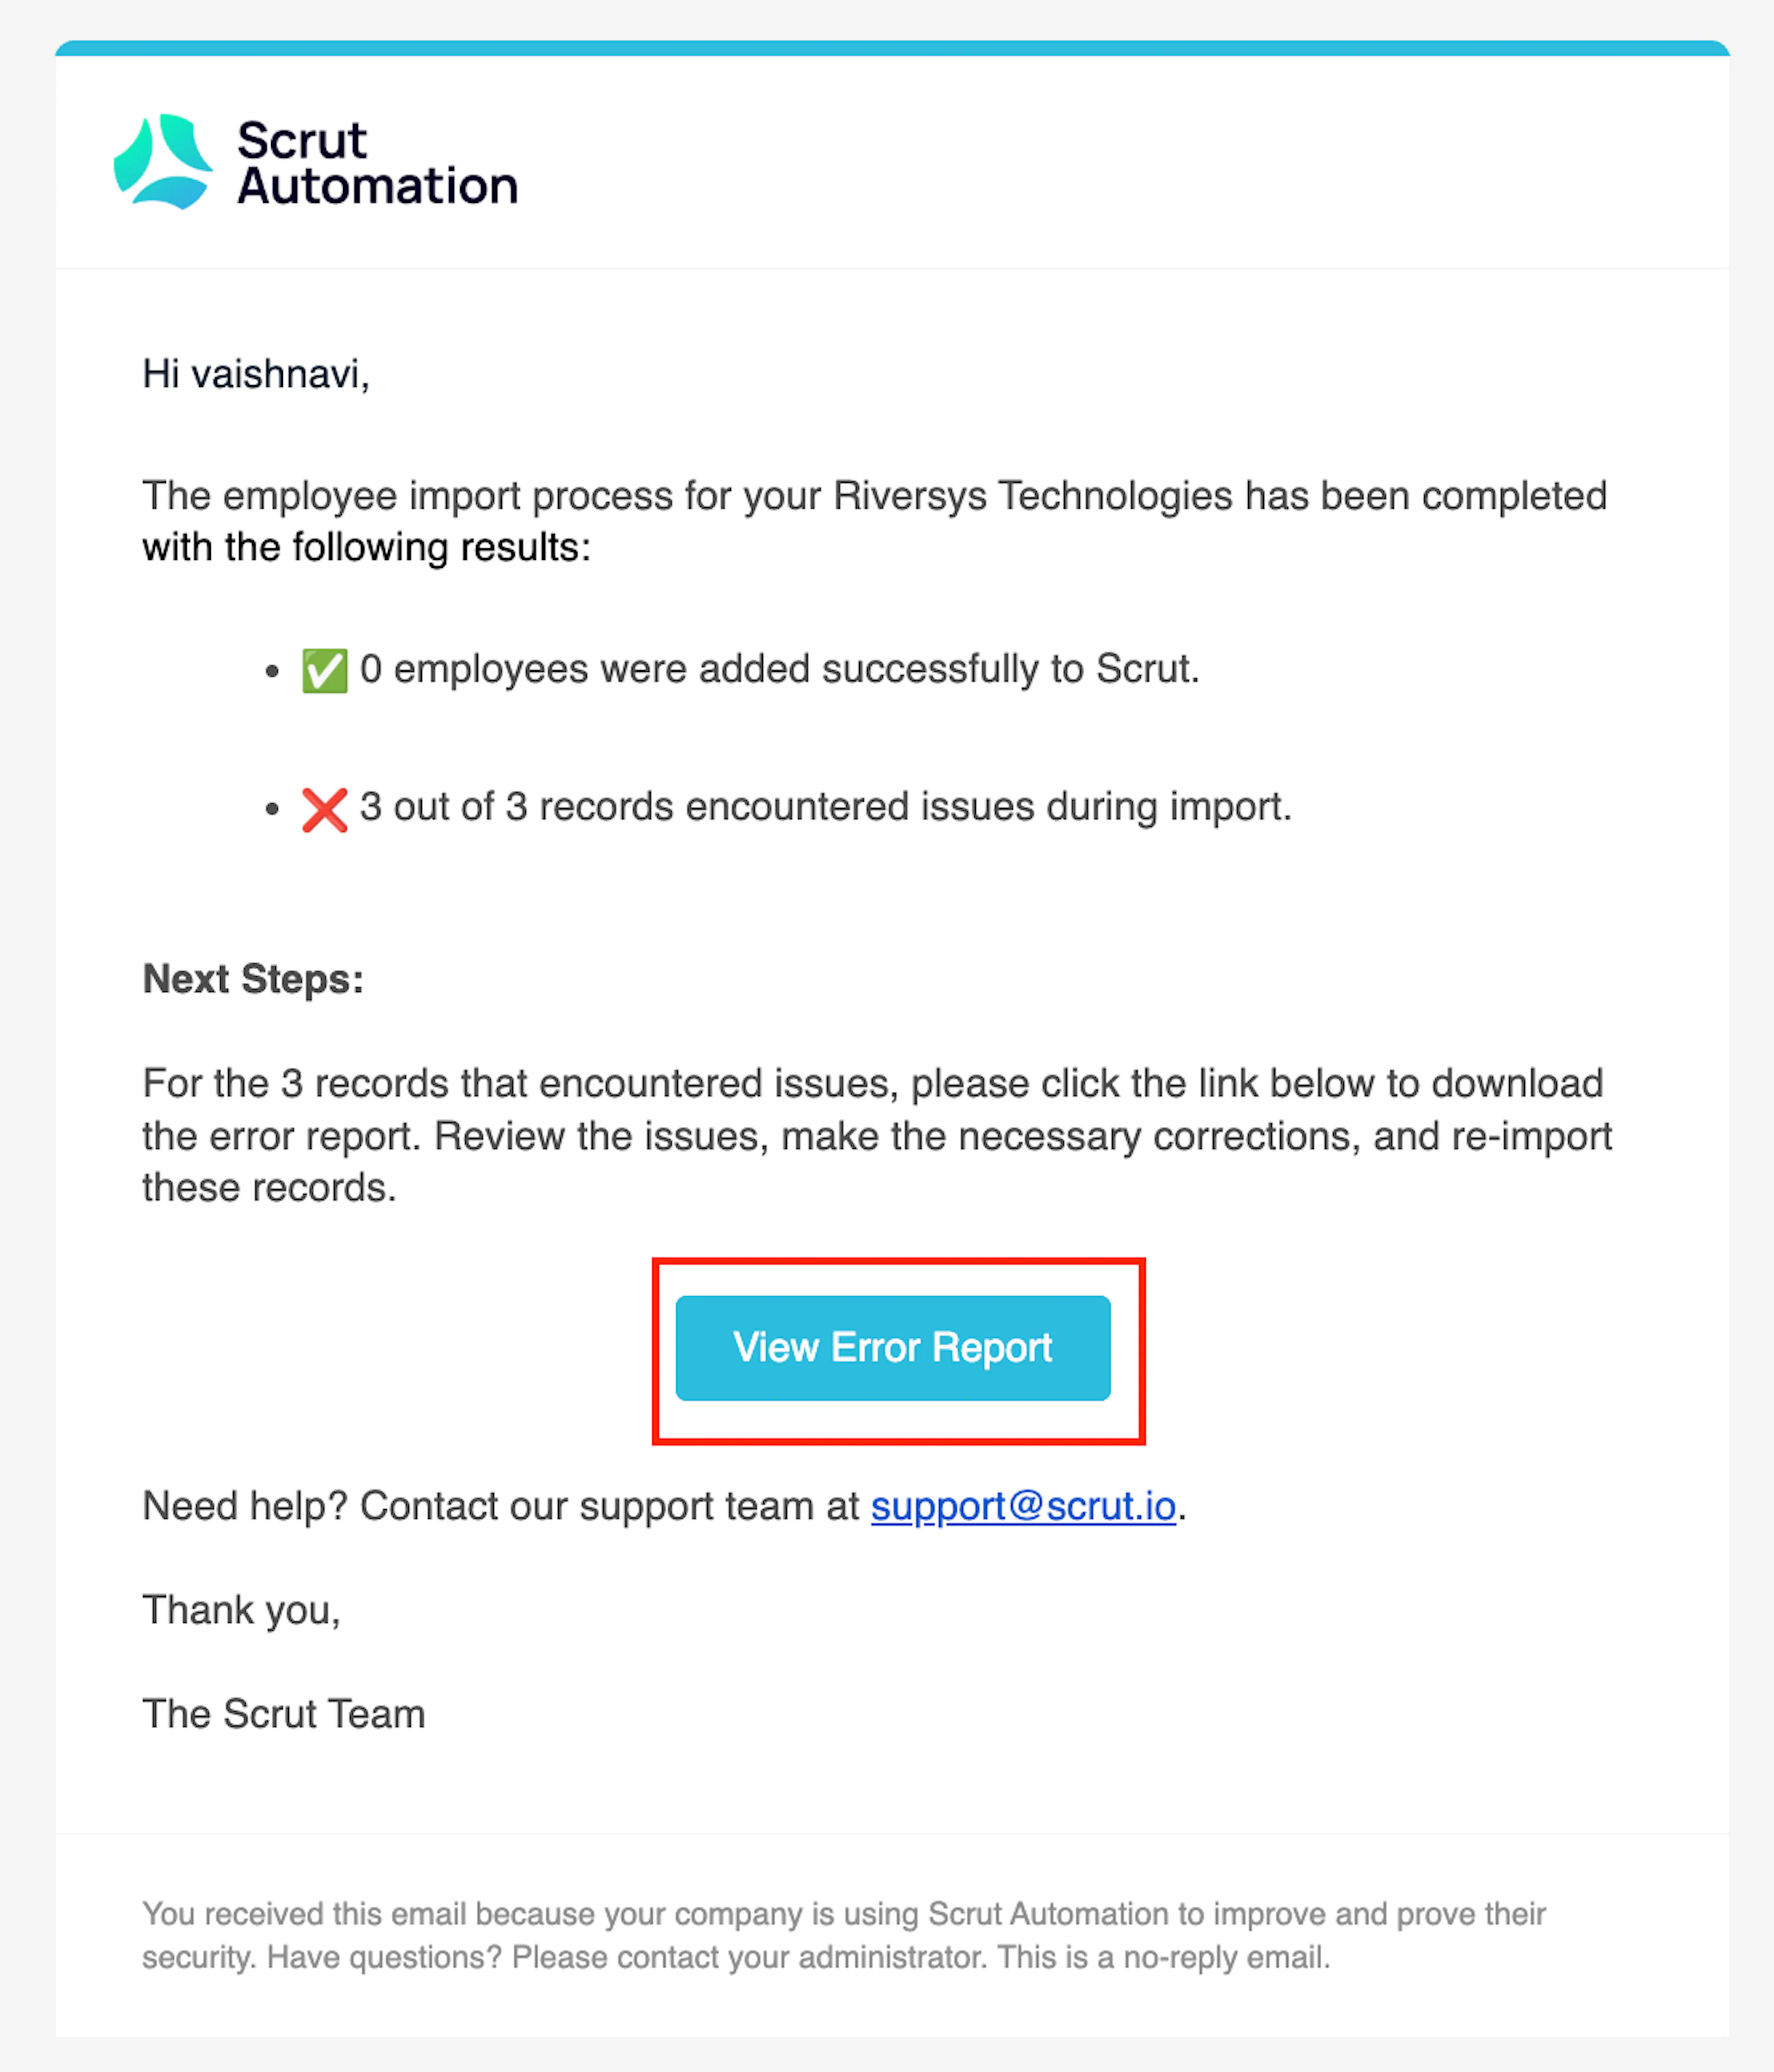
If you encounter any errors during the employee import, you will receive a detailed error report via email from Scrut once the process is completed. Download it, review the issues, rectify them, and repeat the import process.
Add a Single Employee Manually
Ideally, we don't recommend this method because it’s manual and time-consuming. However, this method can be effective when you need to add individual employee information or update specific employee details.
Note:
If you’ve integrated your HRIS or IdP with Scrut, details of newly onboarded employees will automatically reflect in the People module.
- Sign in to Scrut and navigate to People → Employees using the left navigation panel.
- Go to the All Employees tab, click the Add Employee button, and choose Add New Employee.
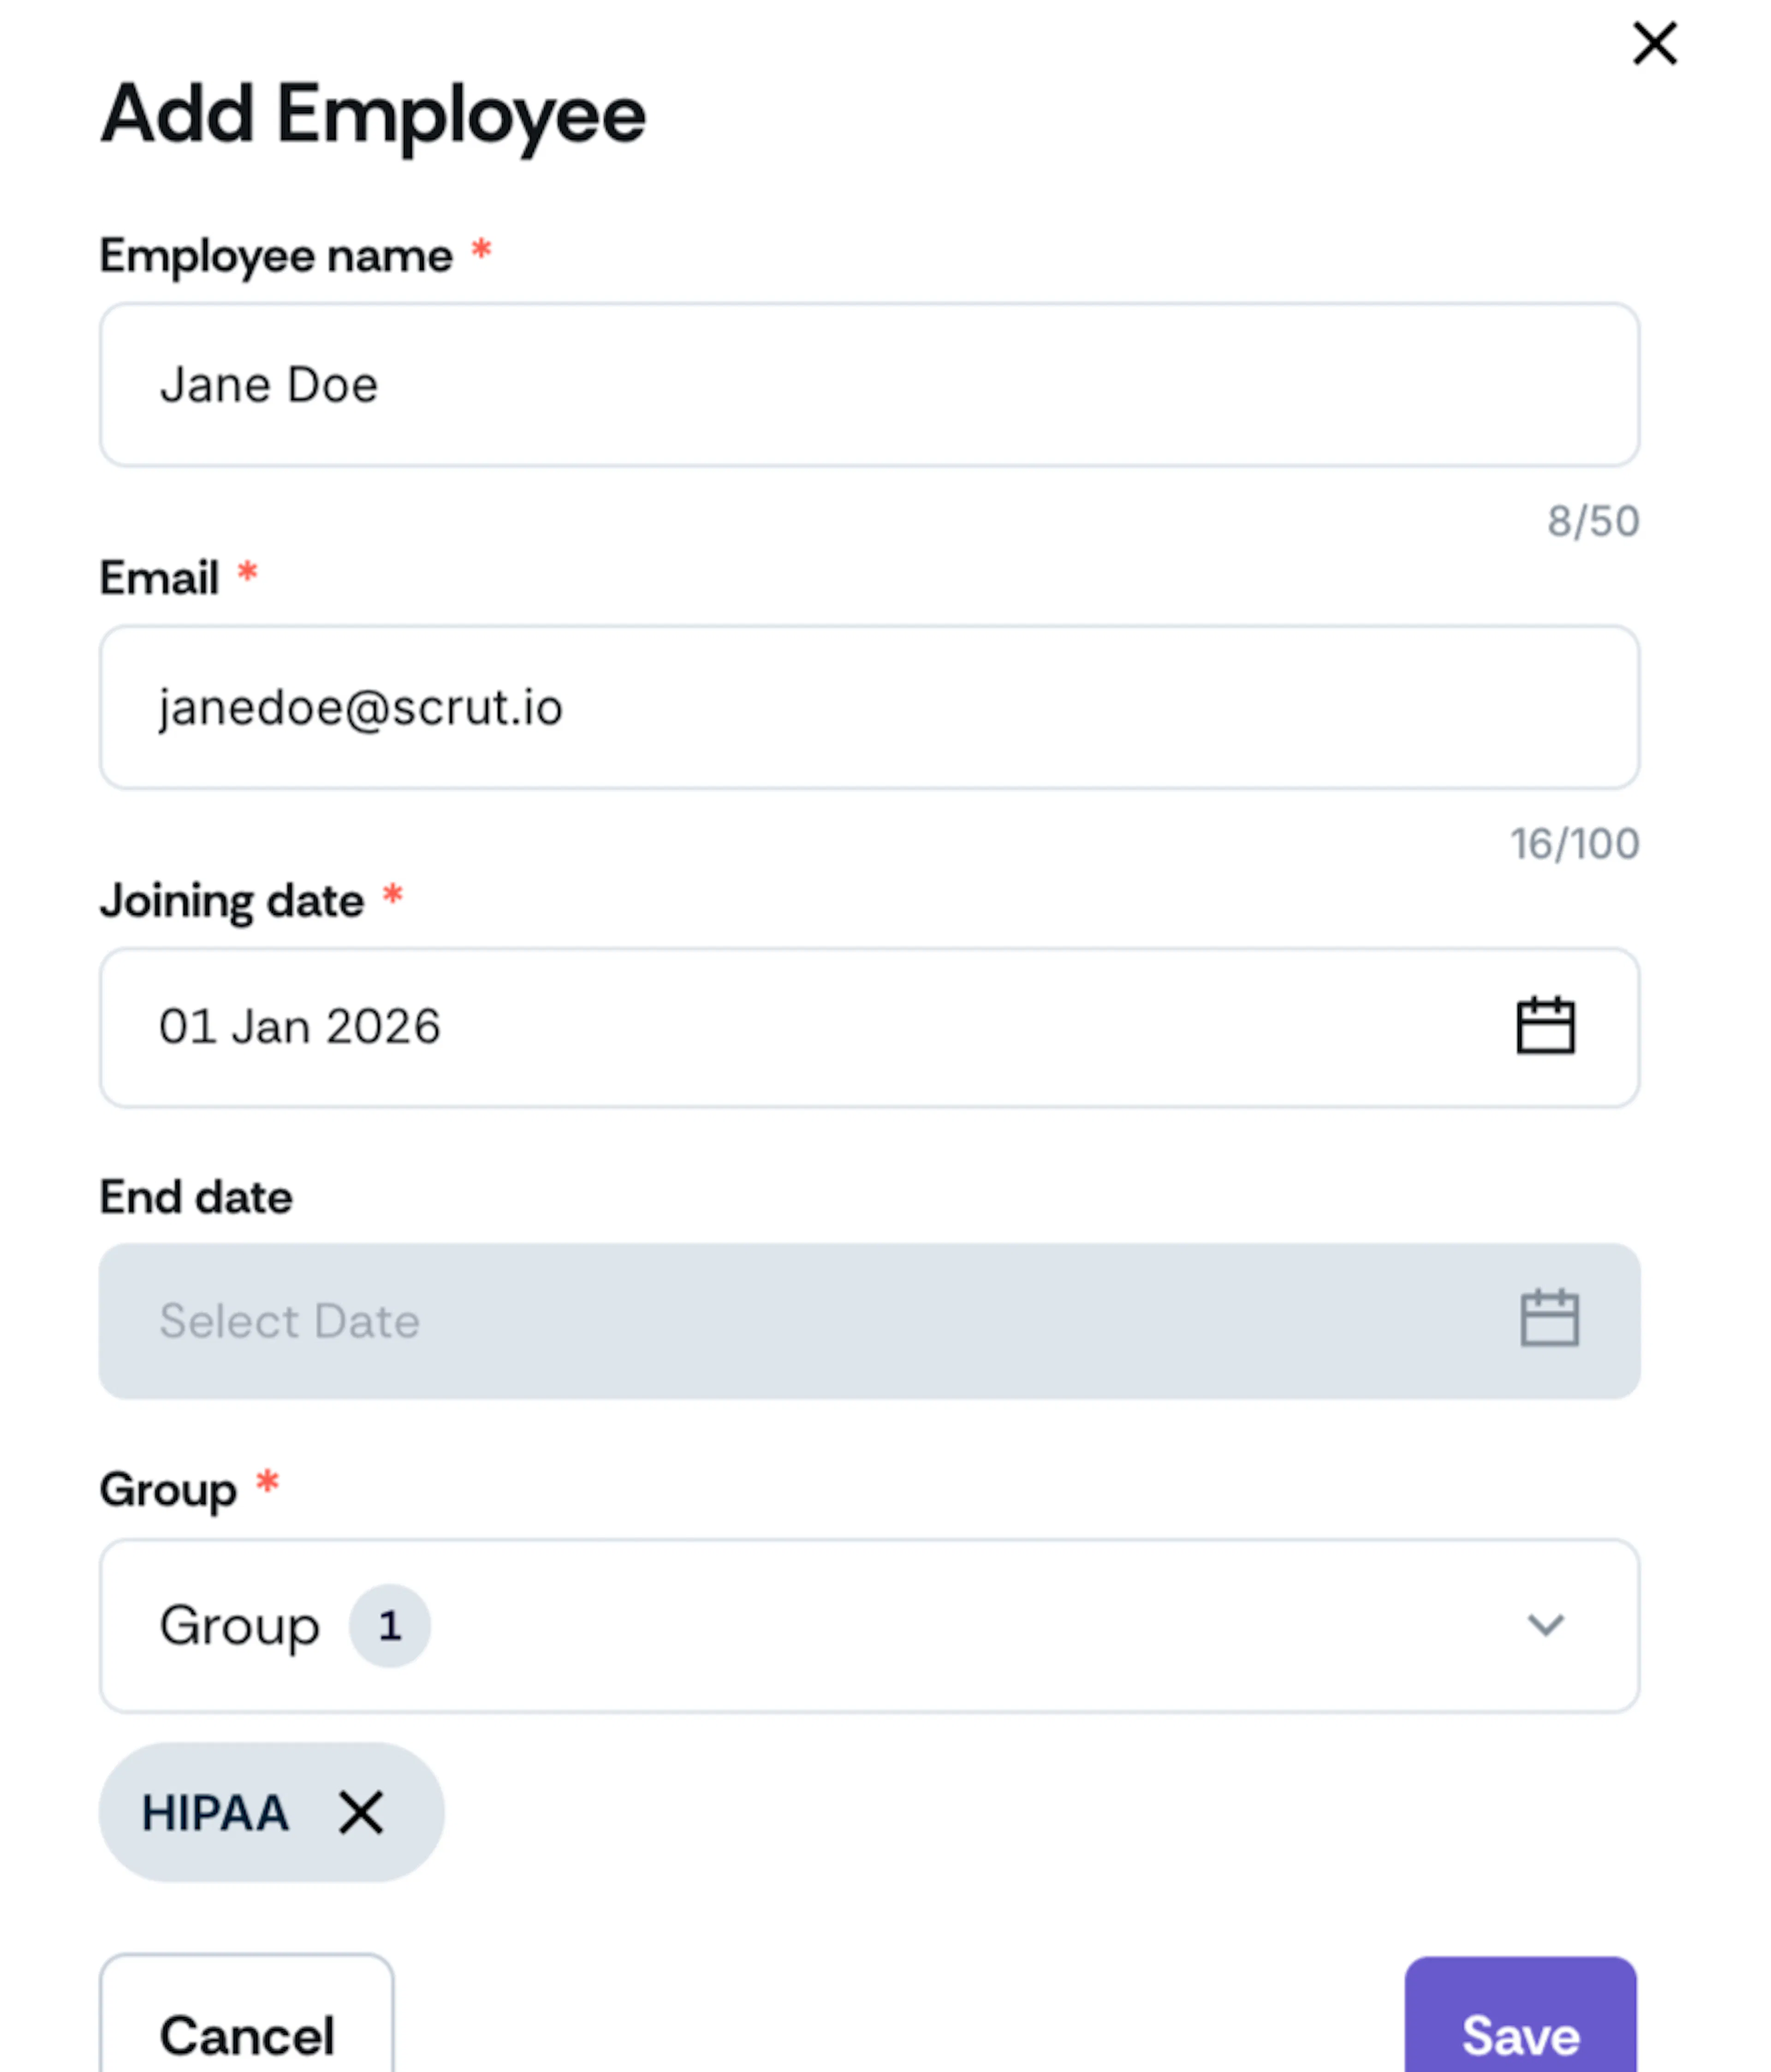
- Fill in the following details:
- Employee Name: Enter the employee’s name.
- Email: Enter the employee's business (company) email address.
- Joining Date: Choose the date on which the employee joined your organization.
- Group: Select the employee group.
- Click Save.
FAQs
If the problem persists, please contact support@scrut.io for assistance.