Configure Scope for Azure Integration
Important Update: Reconfiguration Required
Scrut has enhanced the Azure integration to provide you with greater control over your compliance monitoring. We’ve modified the Scrut-Azure integration from a broad tenant-based approach to a more granular, subscription-based model. This means you now have the flexibility to select which Azure subscriptions you want Scrut to monitor for each tenant connection.
How This Benefits You
Previously, the Azure integration monitored all subscriptions within a connected tenant. With this enhancement, you can now:
- Configure scope: Select only the Azure subscriptions that are relevant to your compliance requirements. For example, if your Azure tenant includes subscriptions for development, testing, and production environments, but only your production subscriptions are in scope for your ISO 27001 audit, you can now configure the integration to monitor only your production subscriptions.
- Improve performance: Focus on subscriptions that matter, reducing noise and unnecessary data in the Cloud Tests module in Scrut.
- Better organization: Assign custom nicknames to individual subscriptions for easier identification and management within Scrut.
Heads Up!
Your current Azure integration will continue to function as intended. Scrut will handle the migration in the background without any disruptions to your workflow. However, if you'd like to modify the integration scope to select specific subscriptions, you’ll need to complete the steps given below.
Azure Reconfiguration Guide
Follow these steps to modify the integration scope by choosing specific subscriptions within a connected tenant:
-
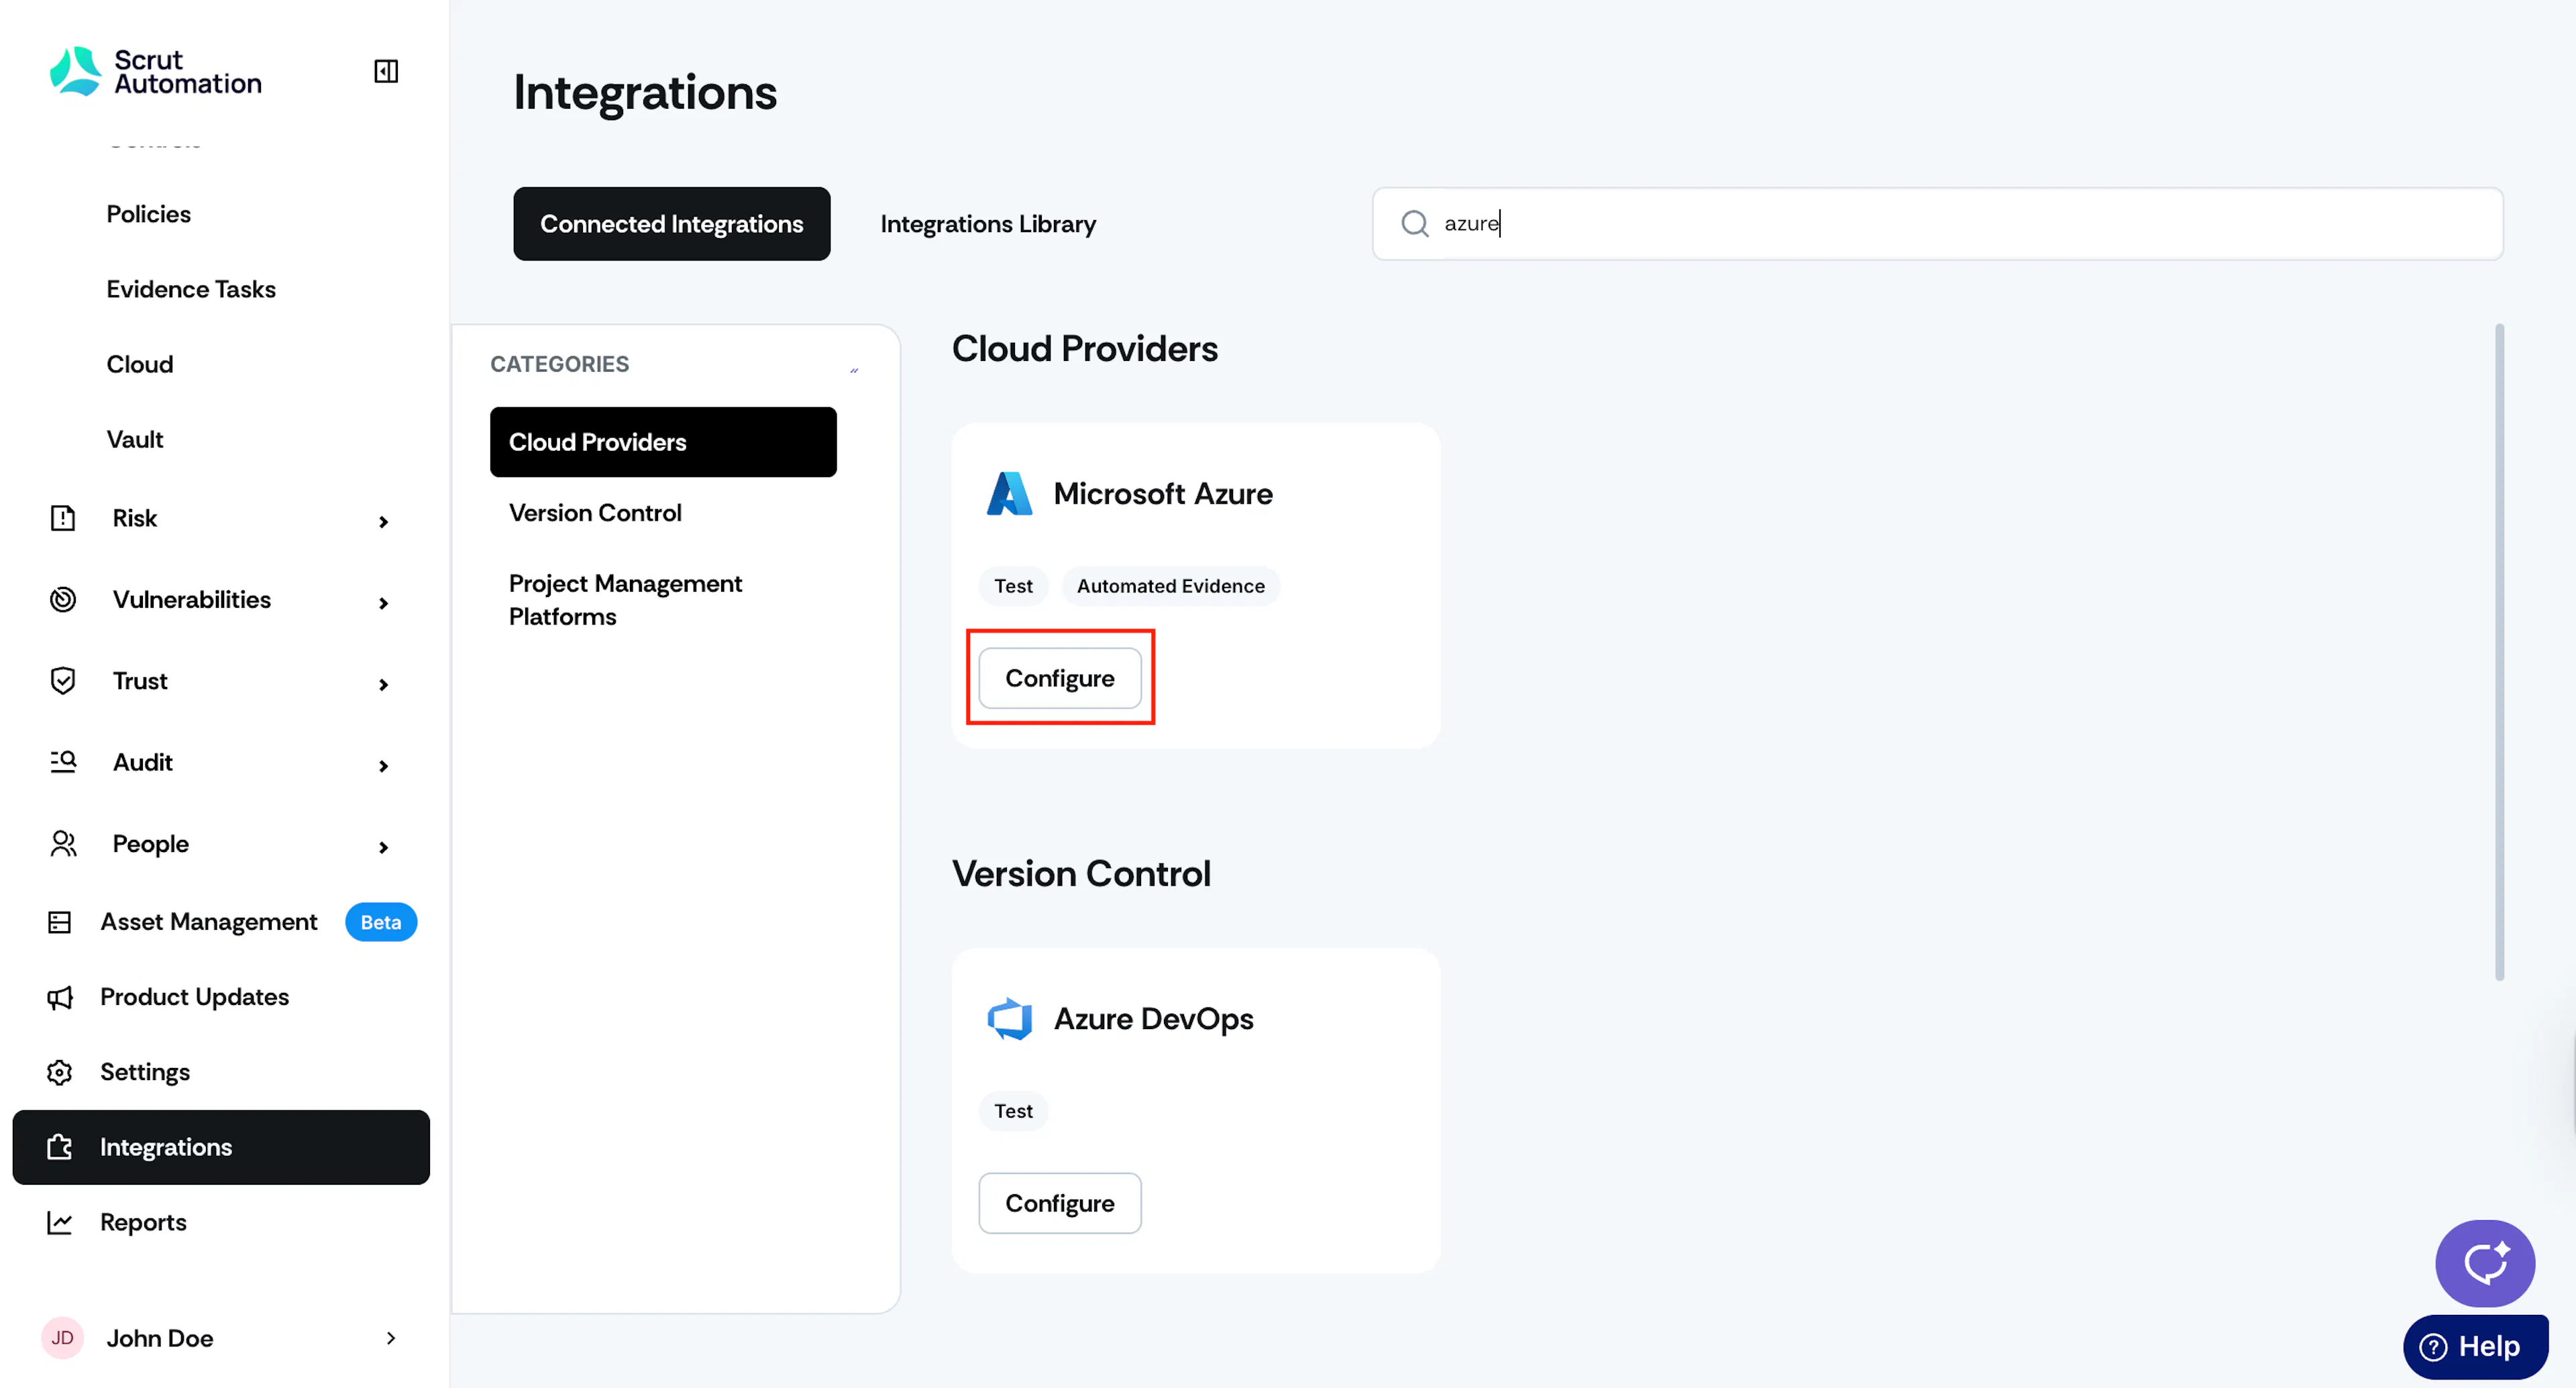
Sign in to Scrut and click Integrations on the left navigation panel.
-
Click Connected Integrations and search for Azure.
-
Click the Configure button on the Azure integration tile.
-
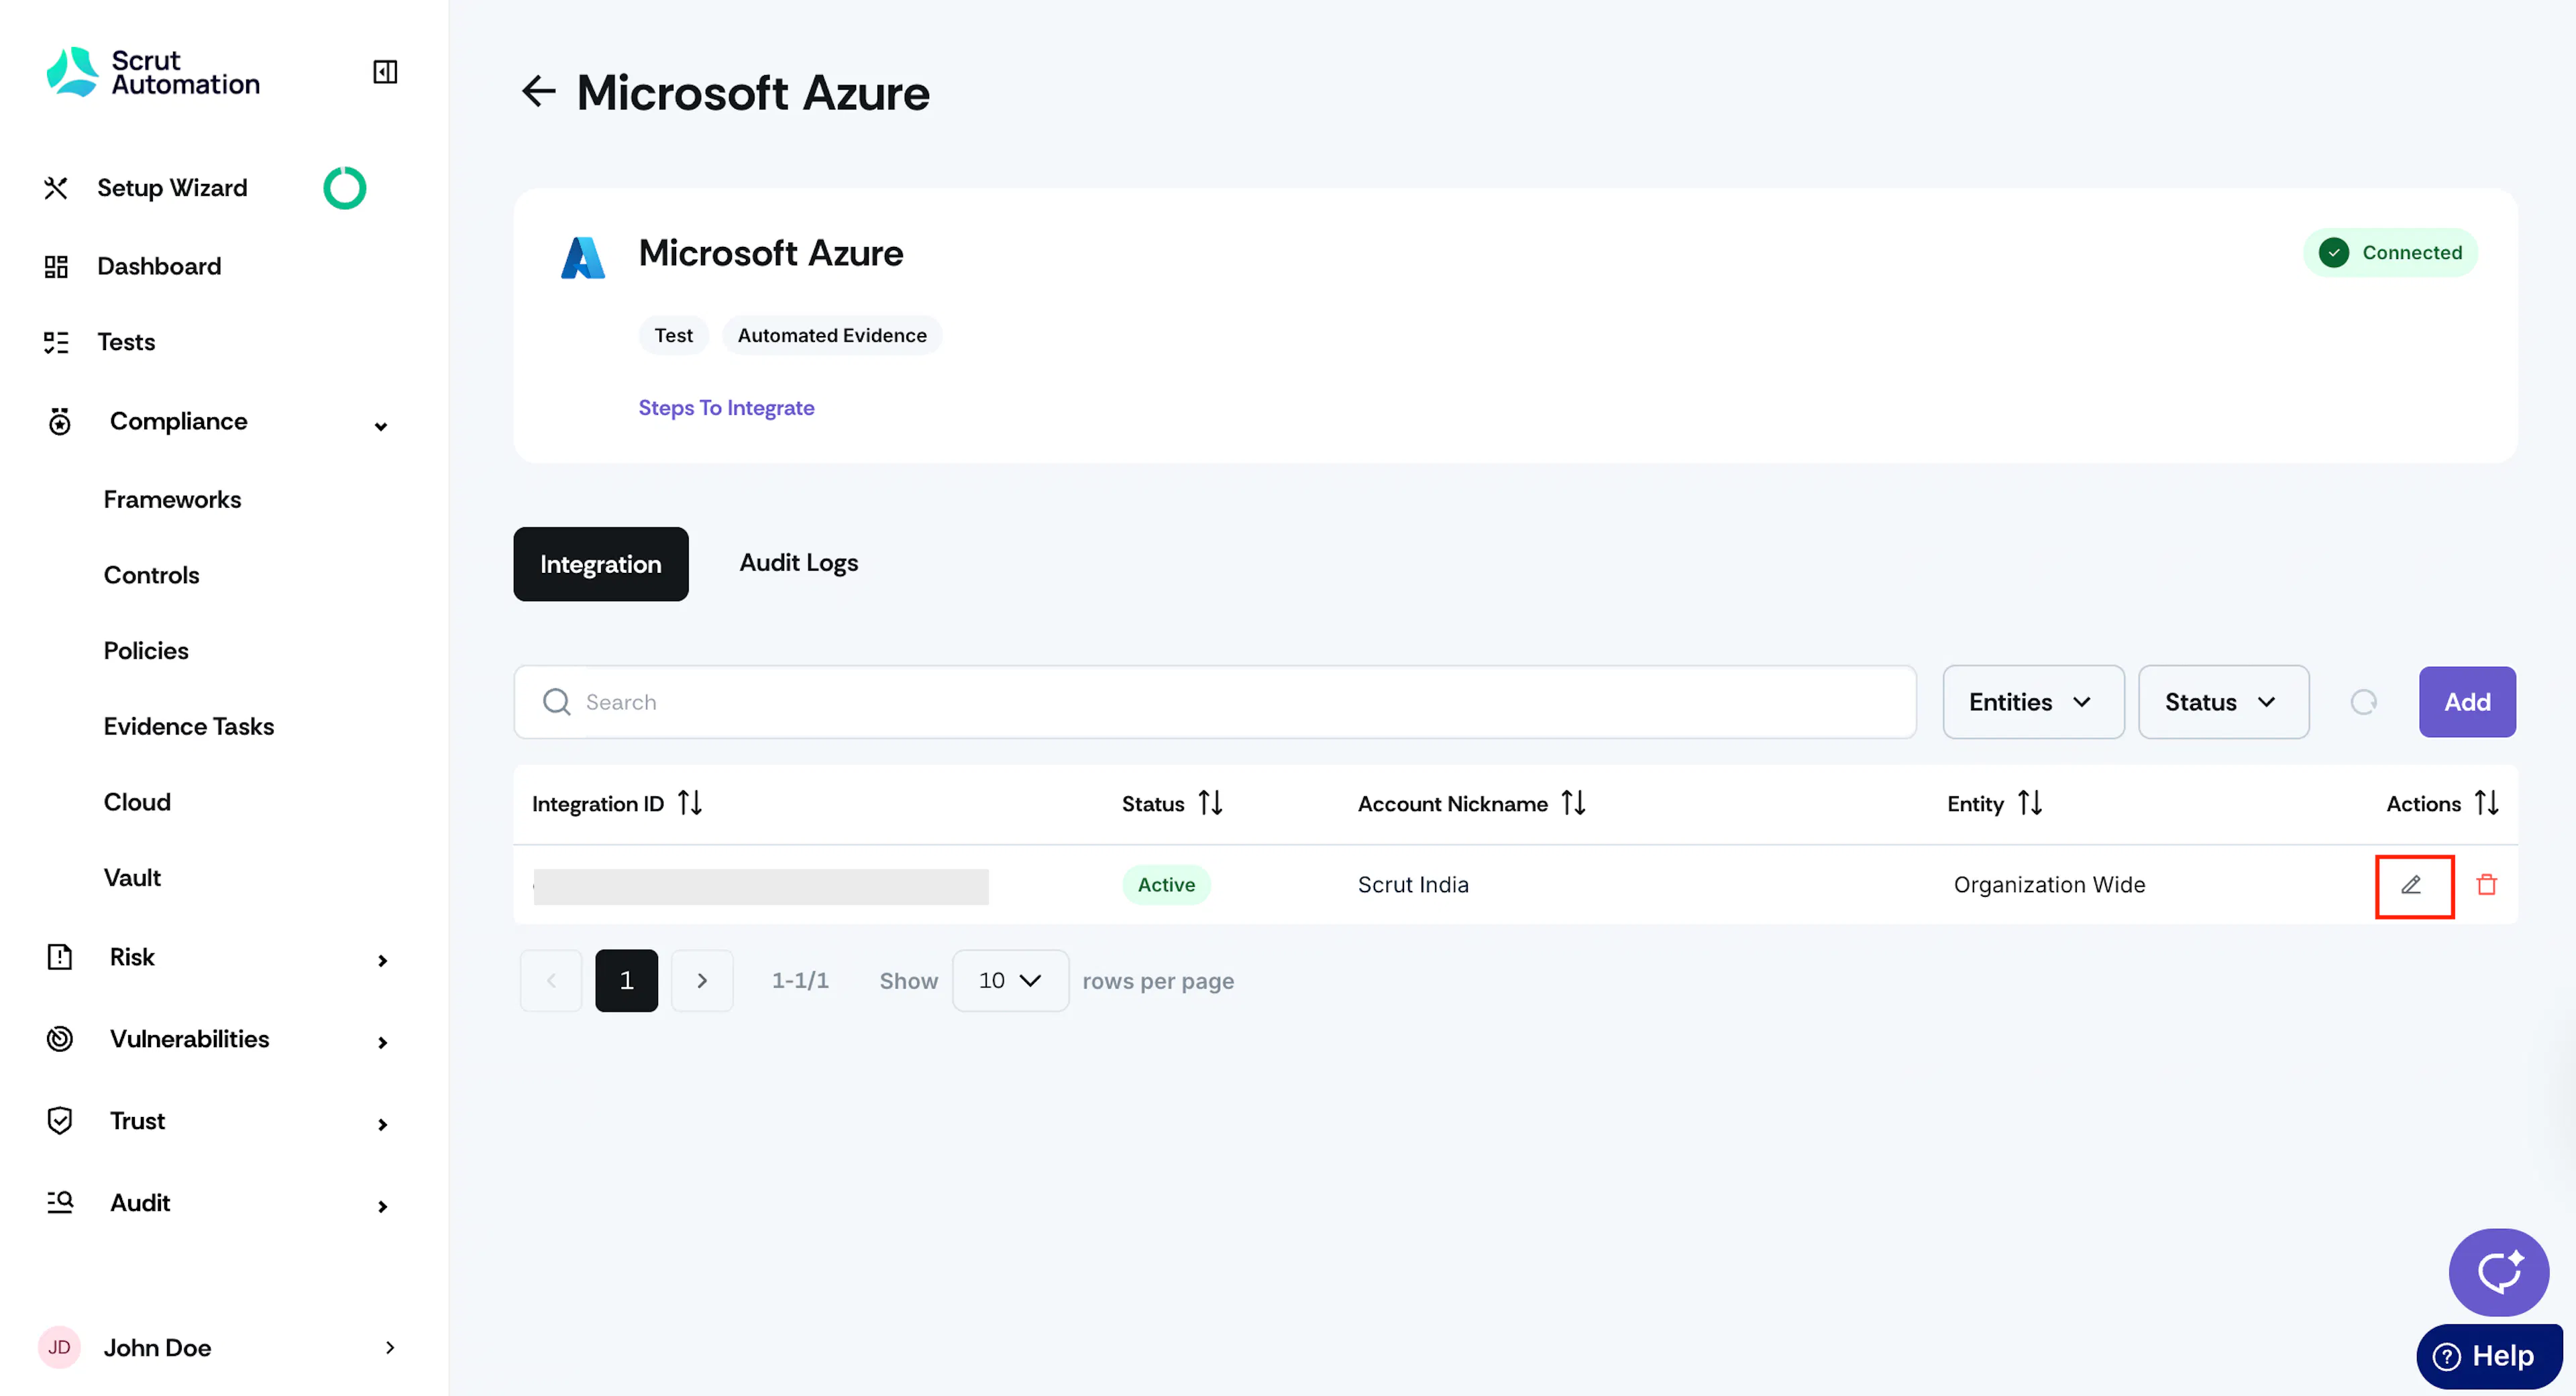
Click the edit icon in your connected Azure integration.

-
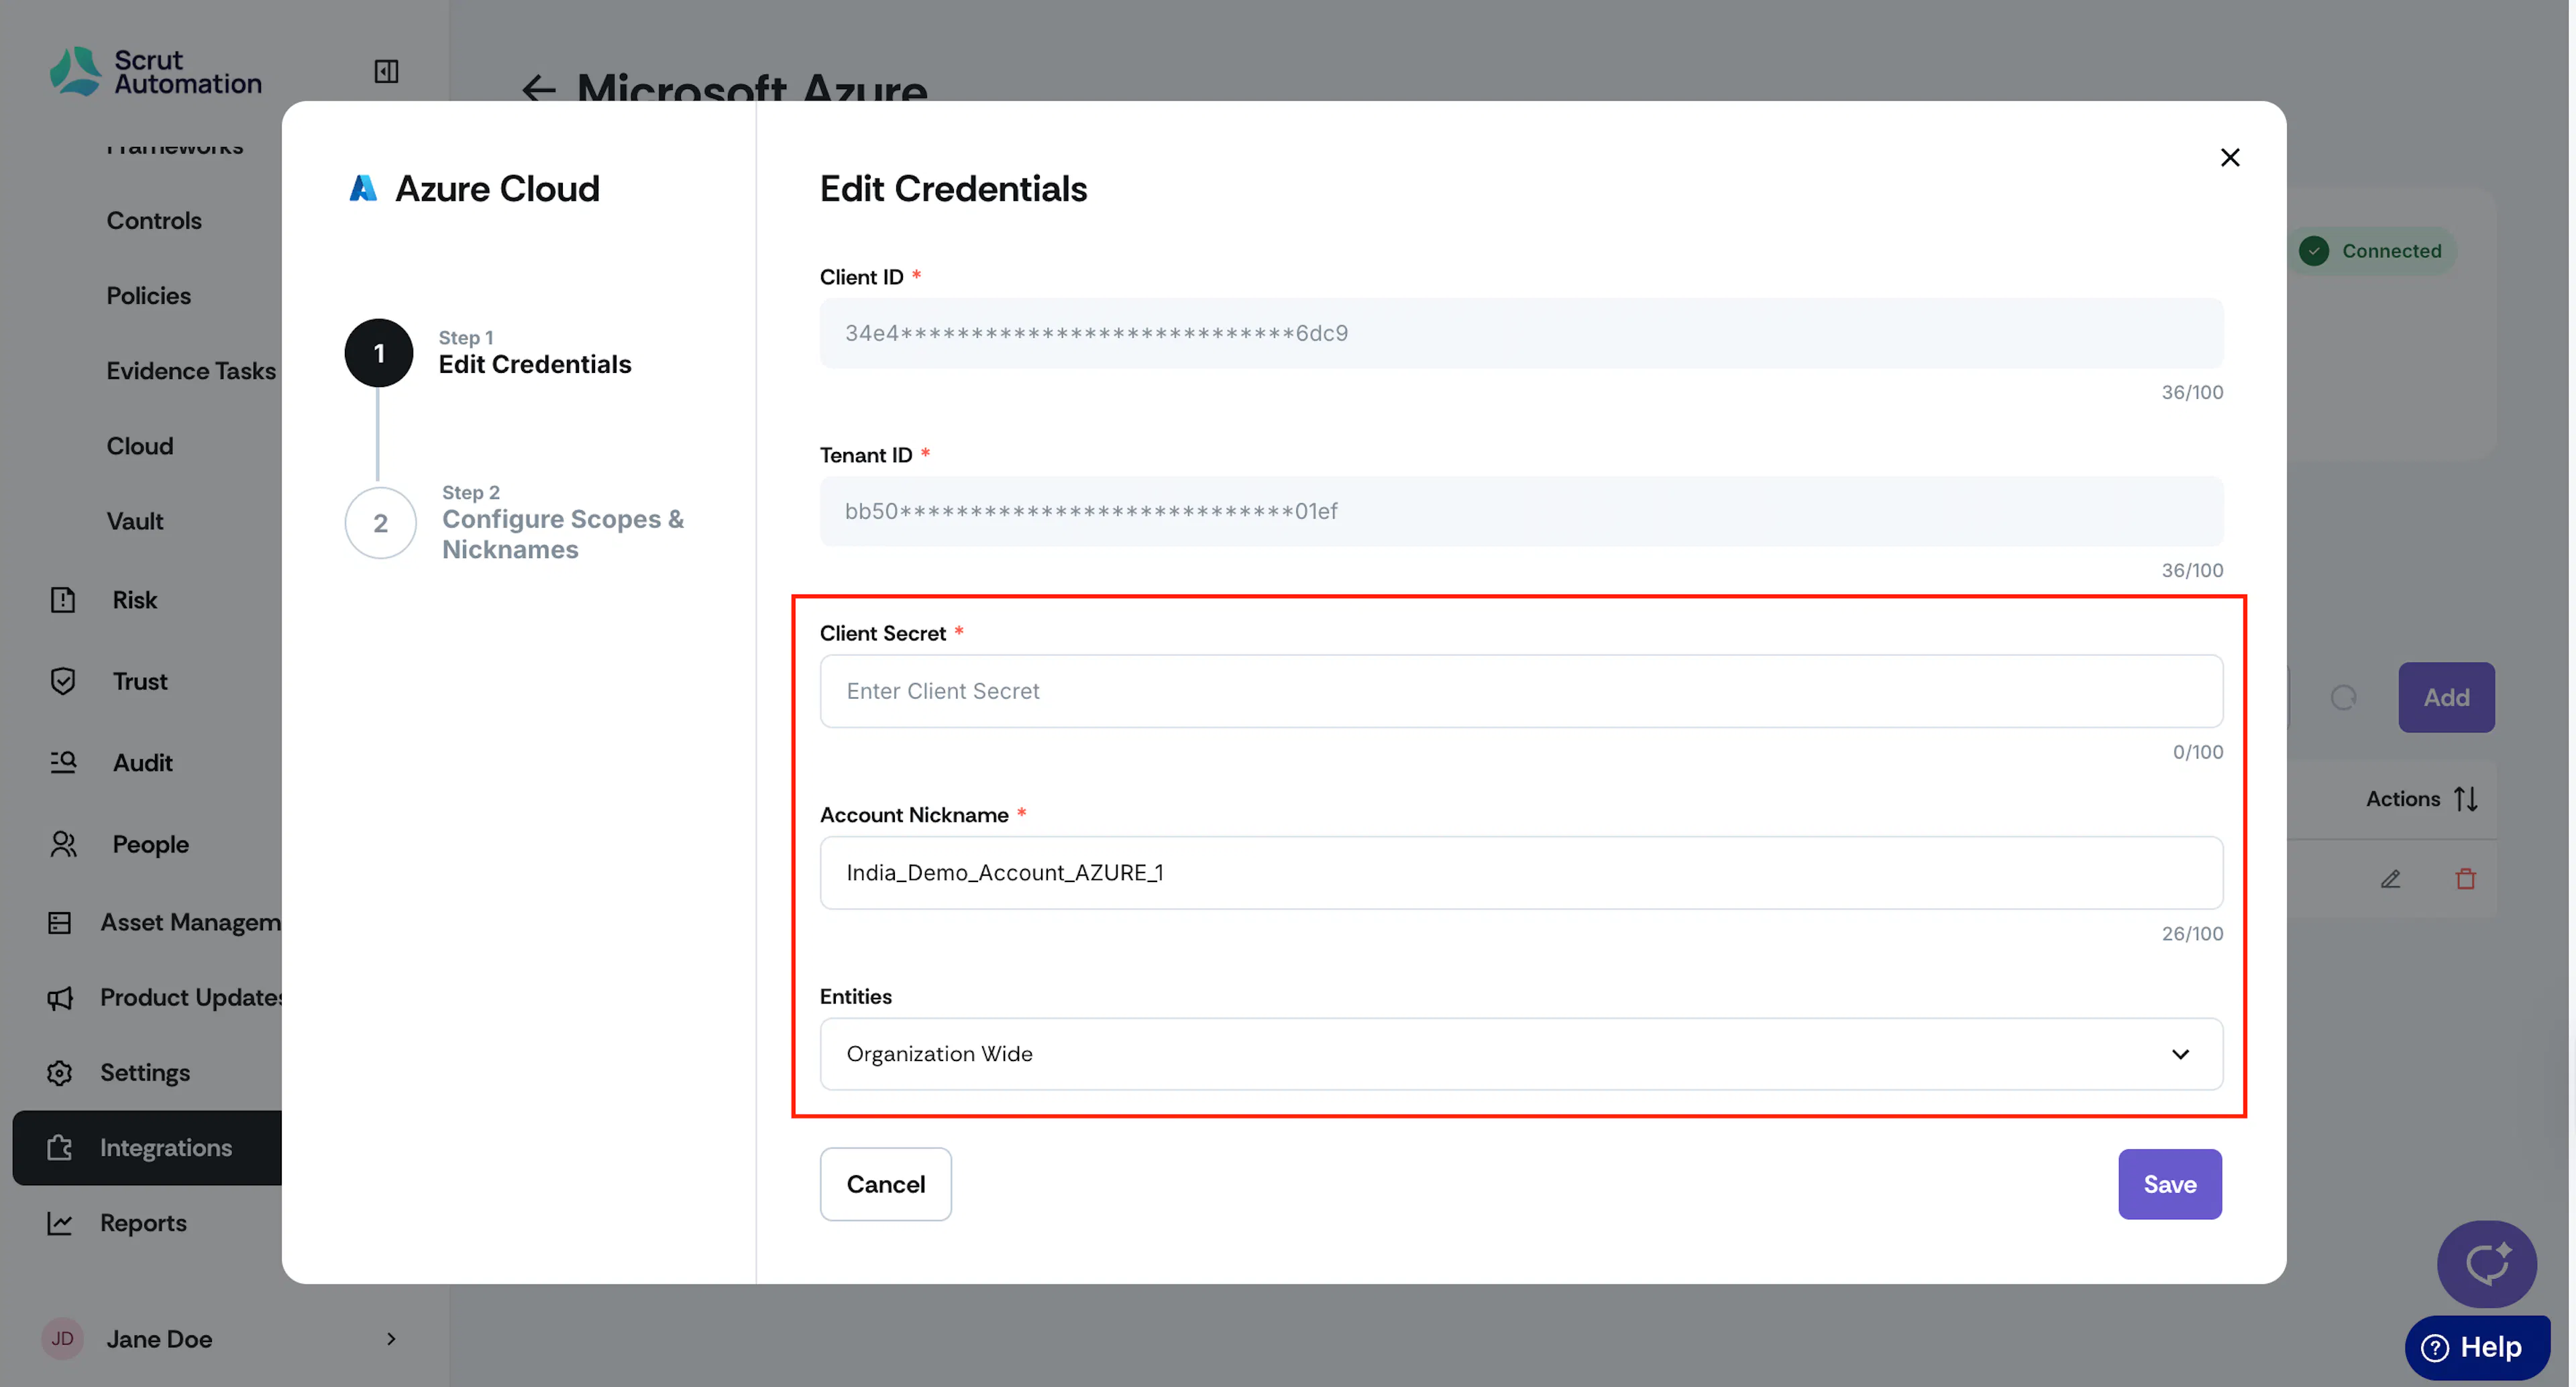
Scrut will automatically fill in the Client ID, Tenant ID, and Client Secret.
- However, if you need help finding these details, refer to our guide on obtaining Azure credentials.
-
Note: You can also edit the Client Secret. Azure has a rule that the client-secret key changes every 90 days, so you may need to update it.
-
Enter an Account Nickname and choose the Entities to which the integration applies.
-
Click Save.
-
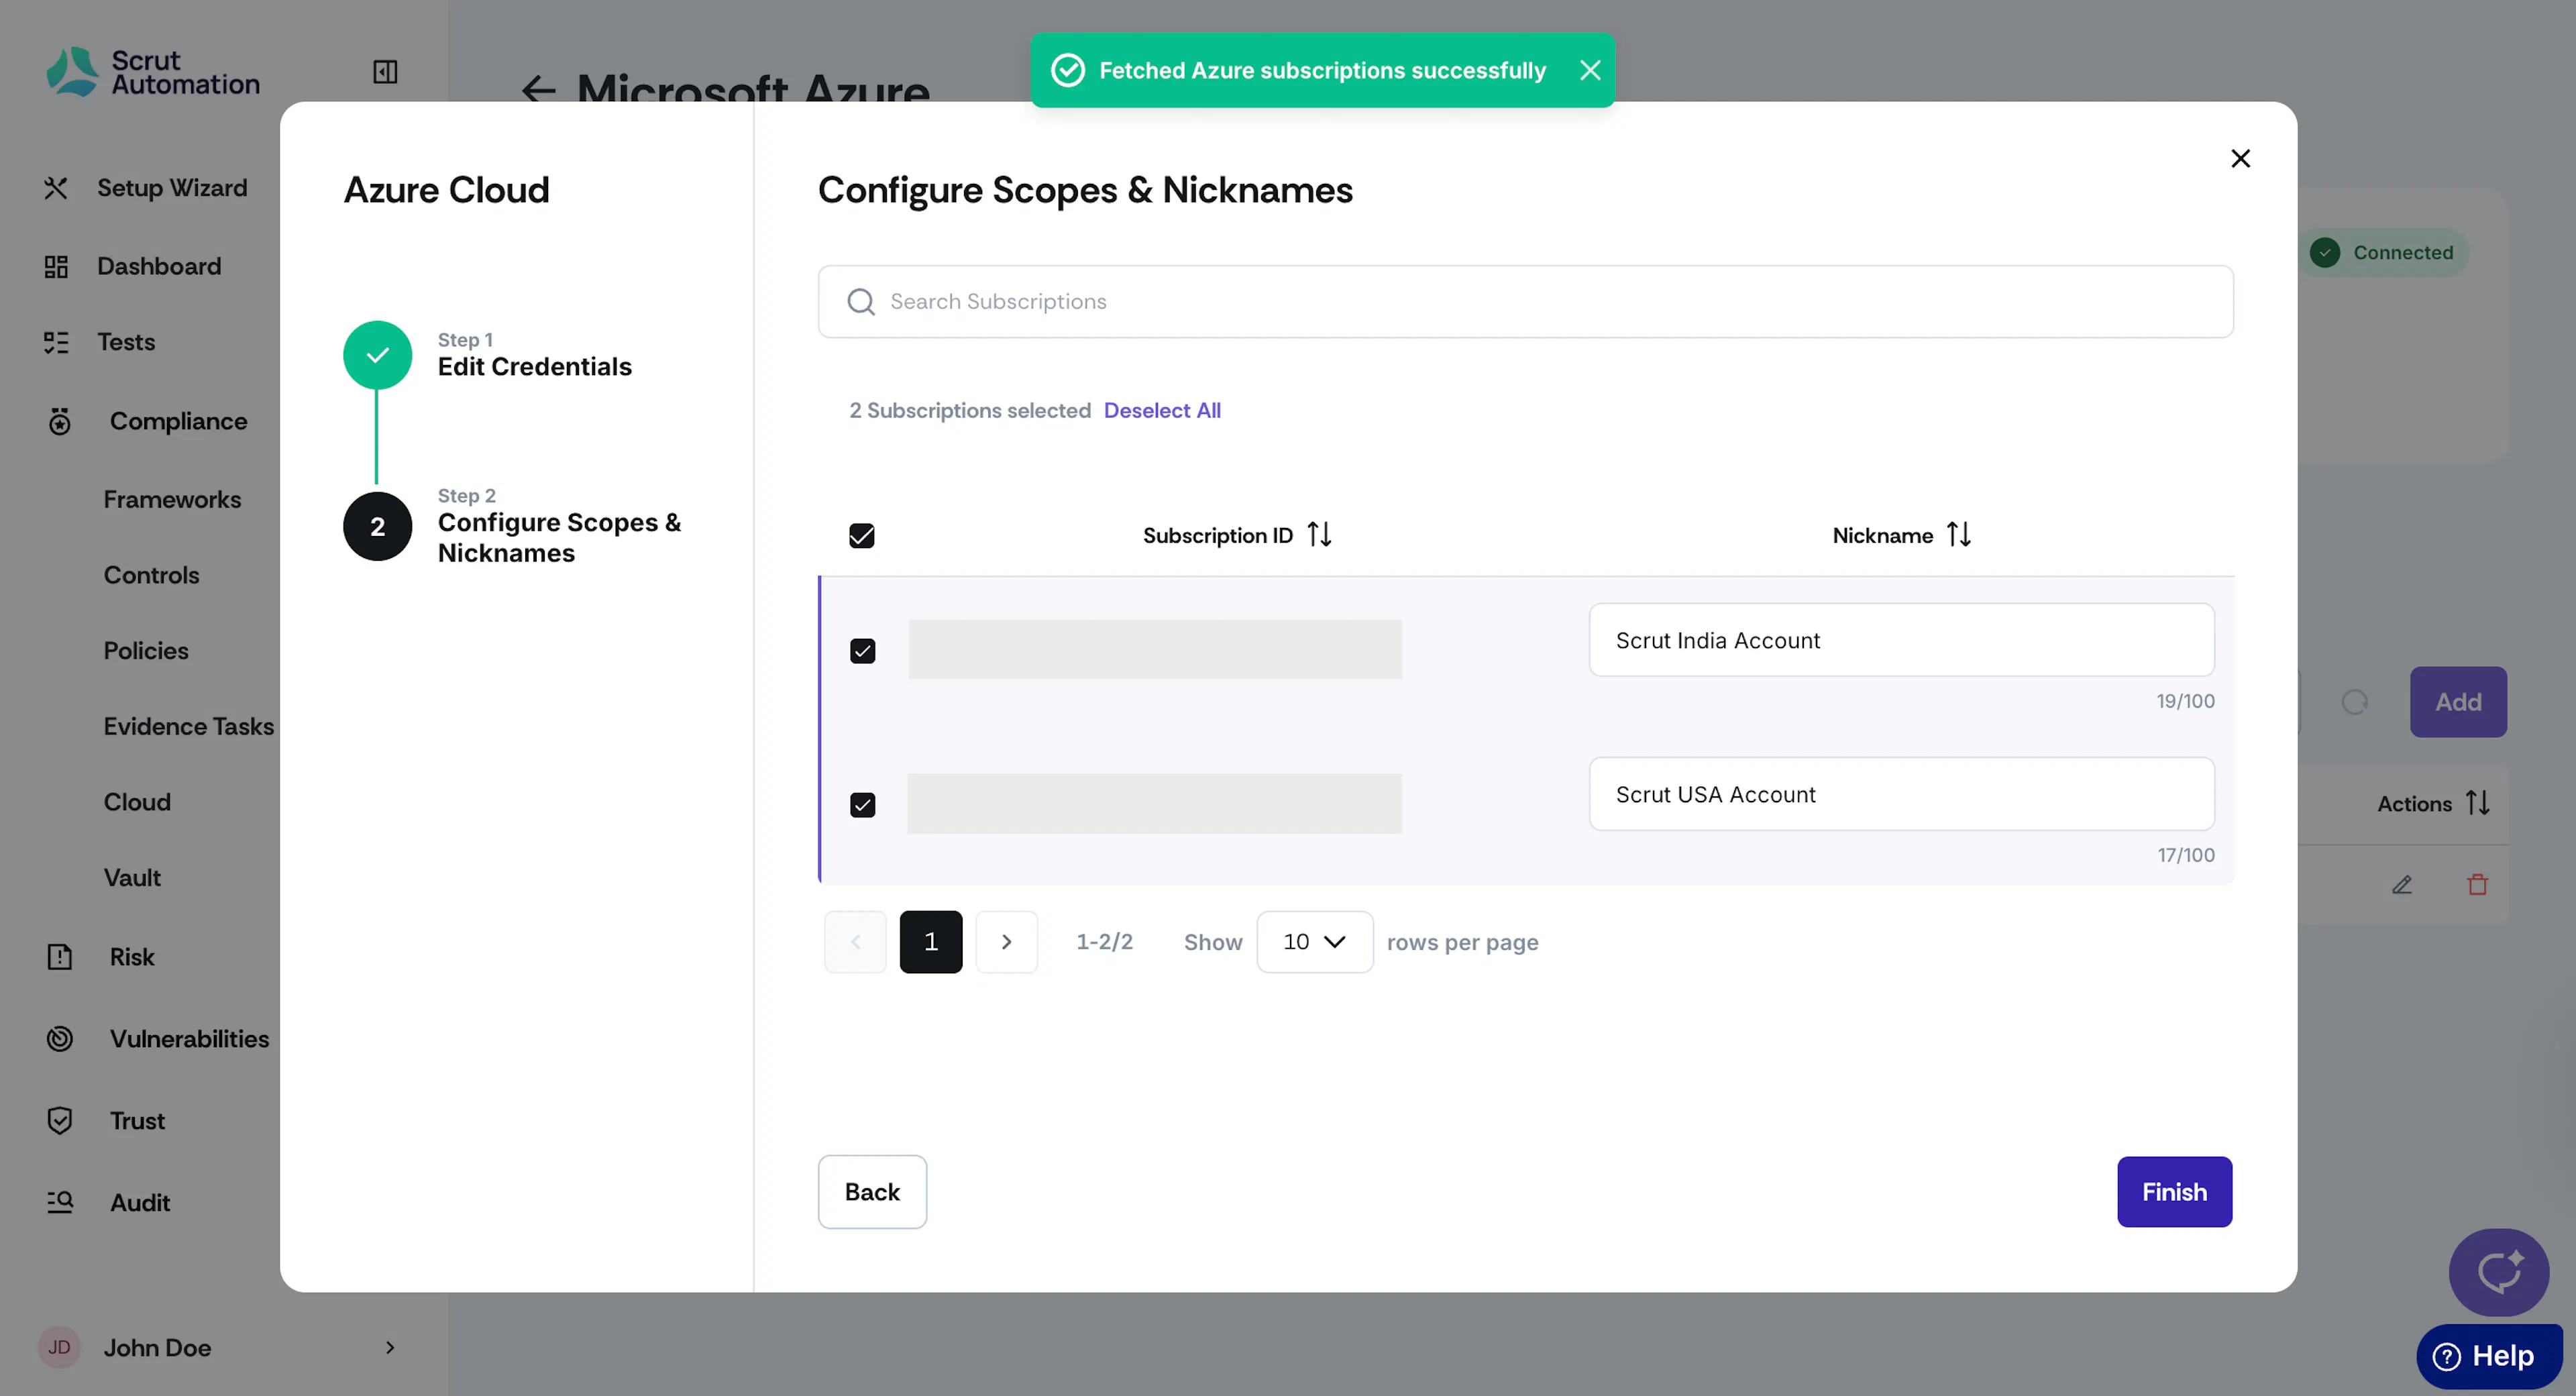
Watch out for the “Integration Successful” and “Fetched Azure subscriptions successfully” notifications.
-
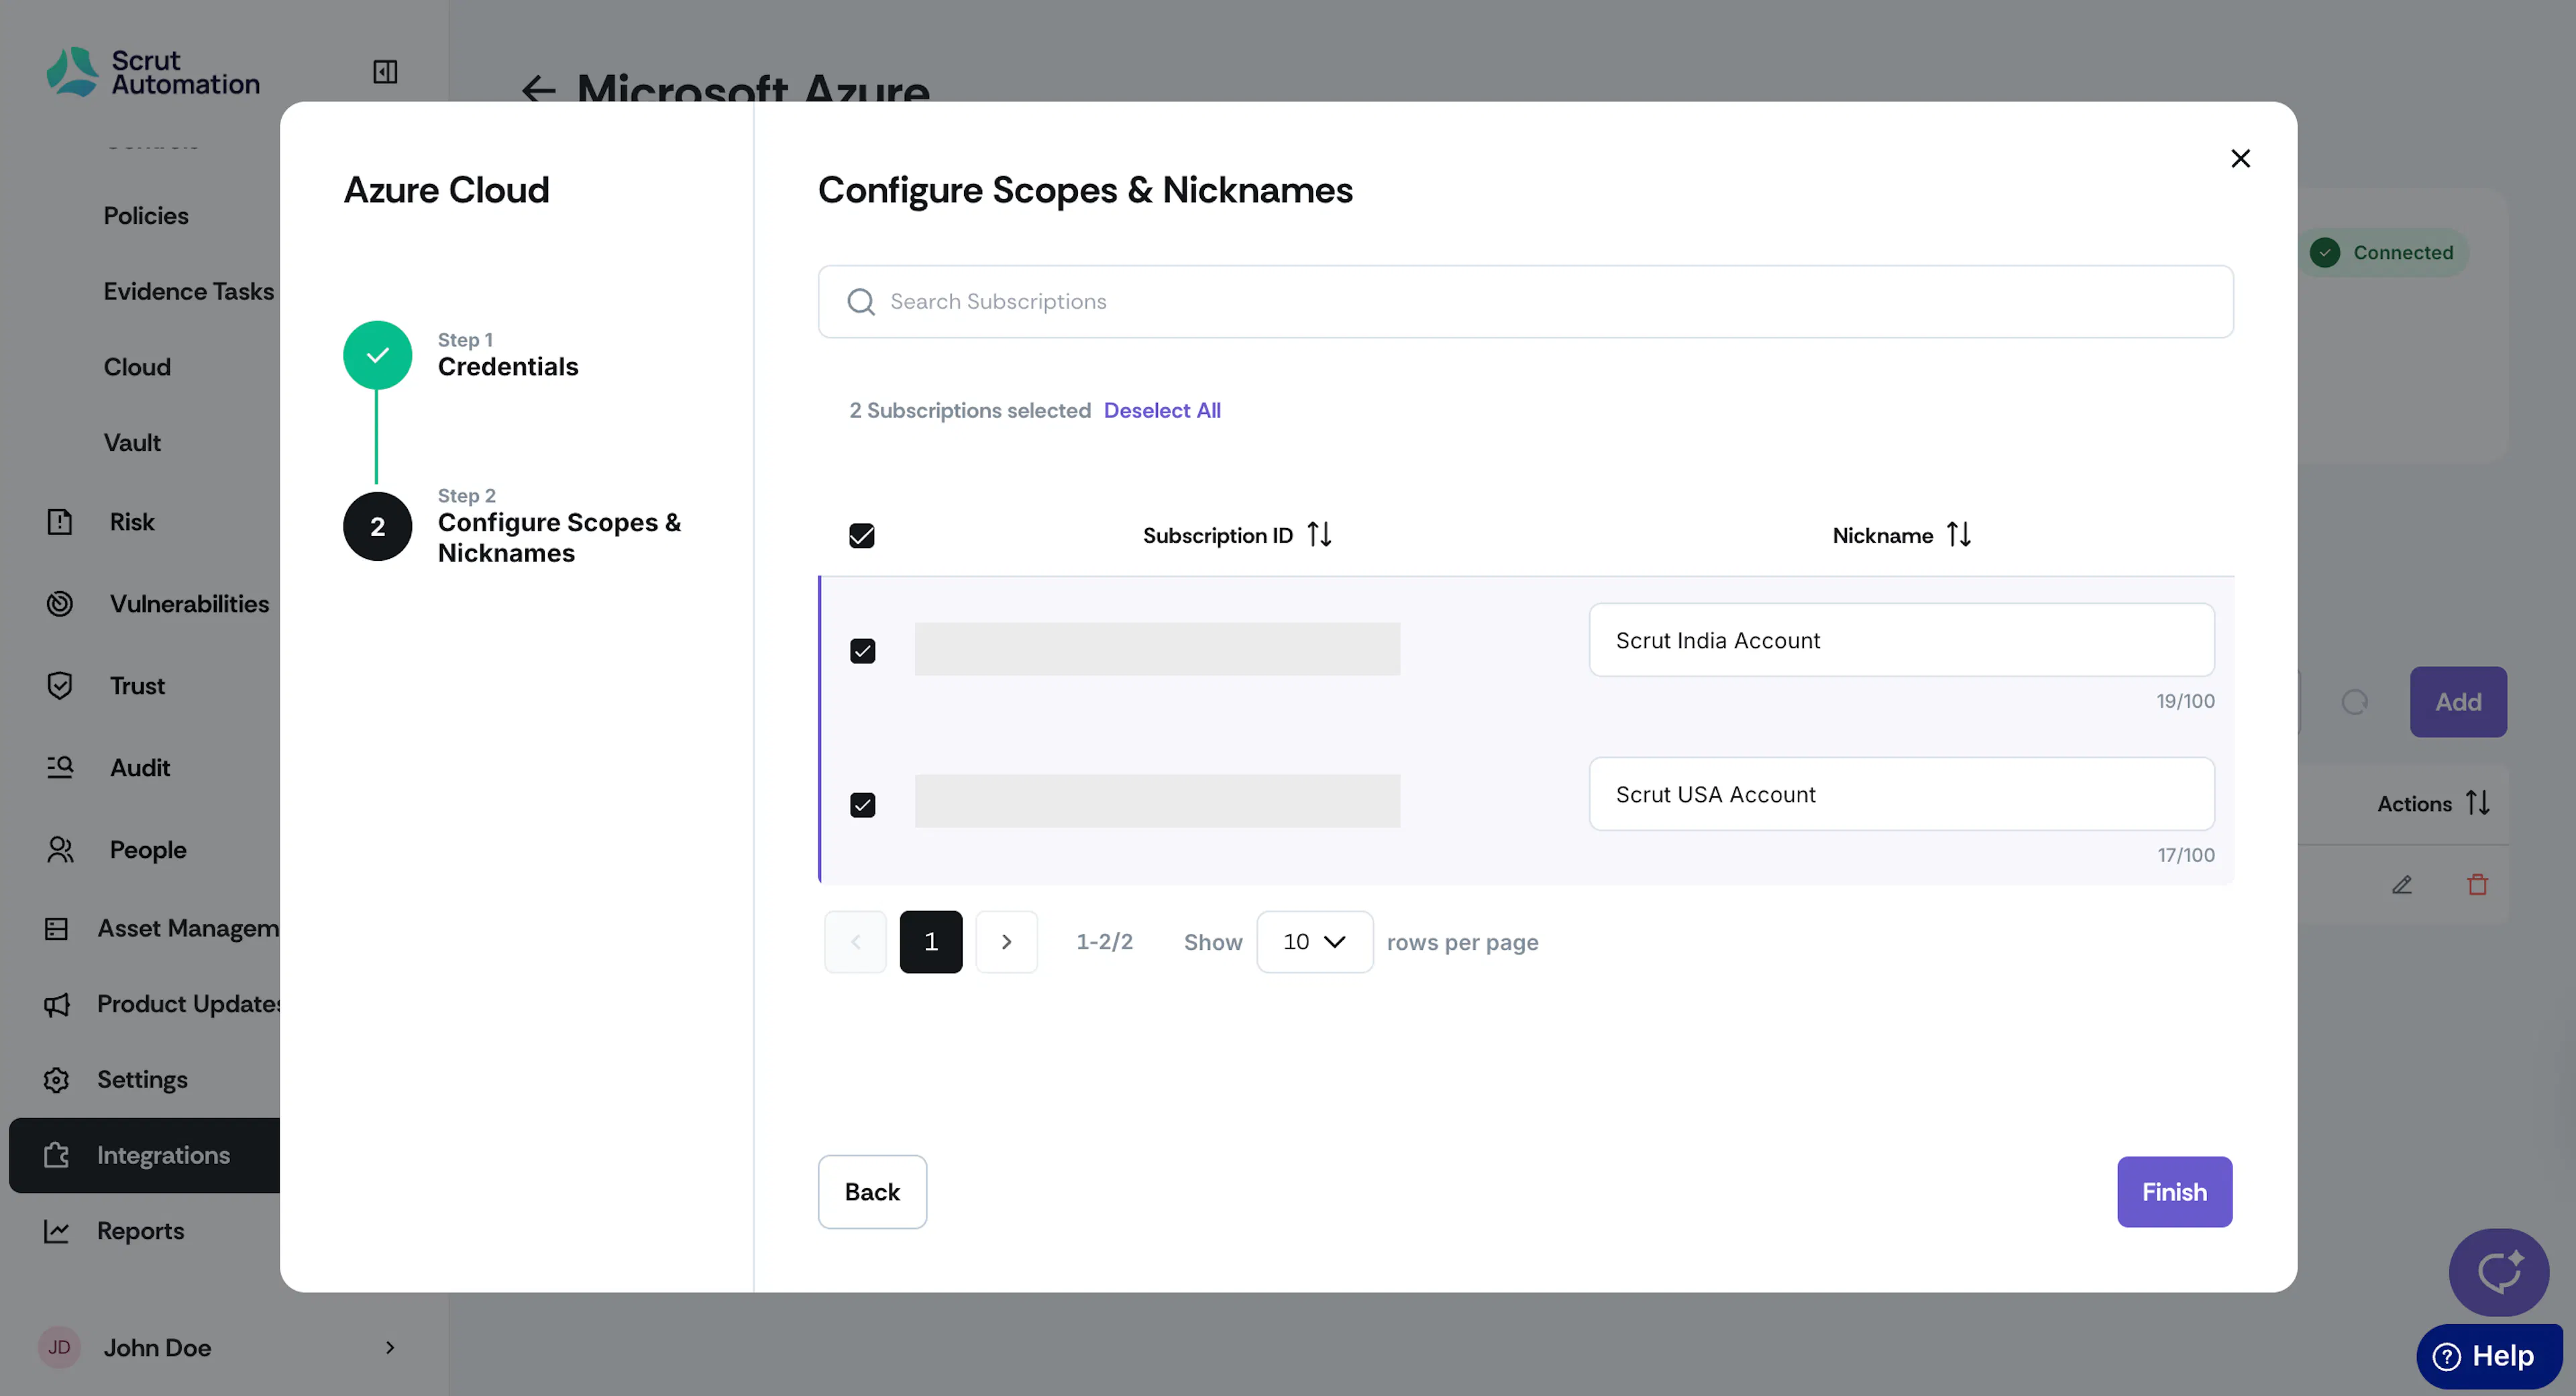
Select the Azure subscriptions you want to connect with Scrut.
-
Enter a suitable nickname for each, and click Finish.
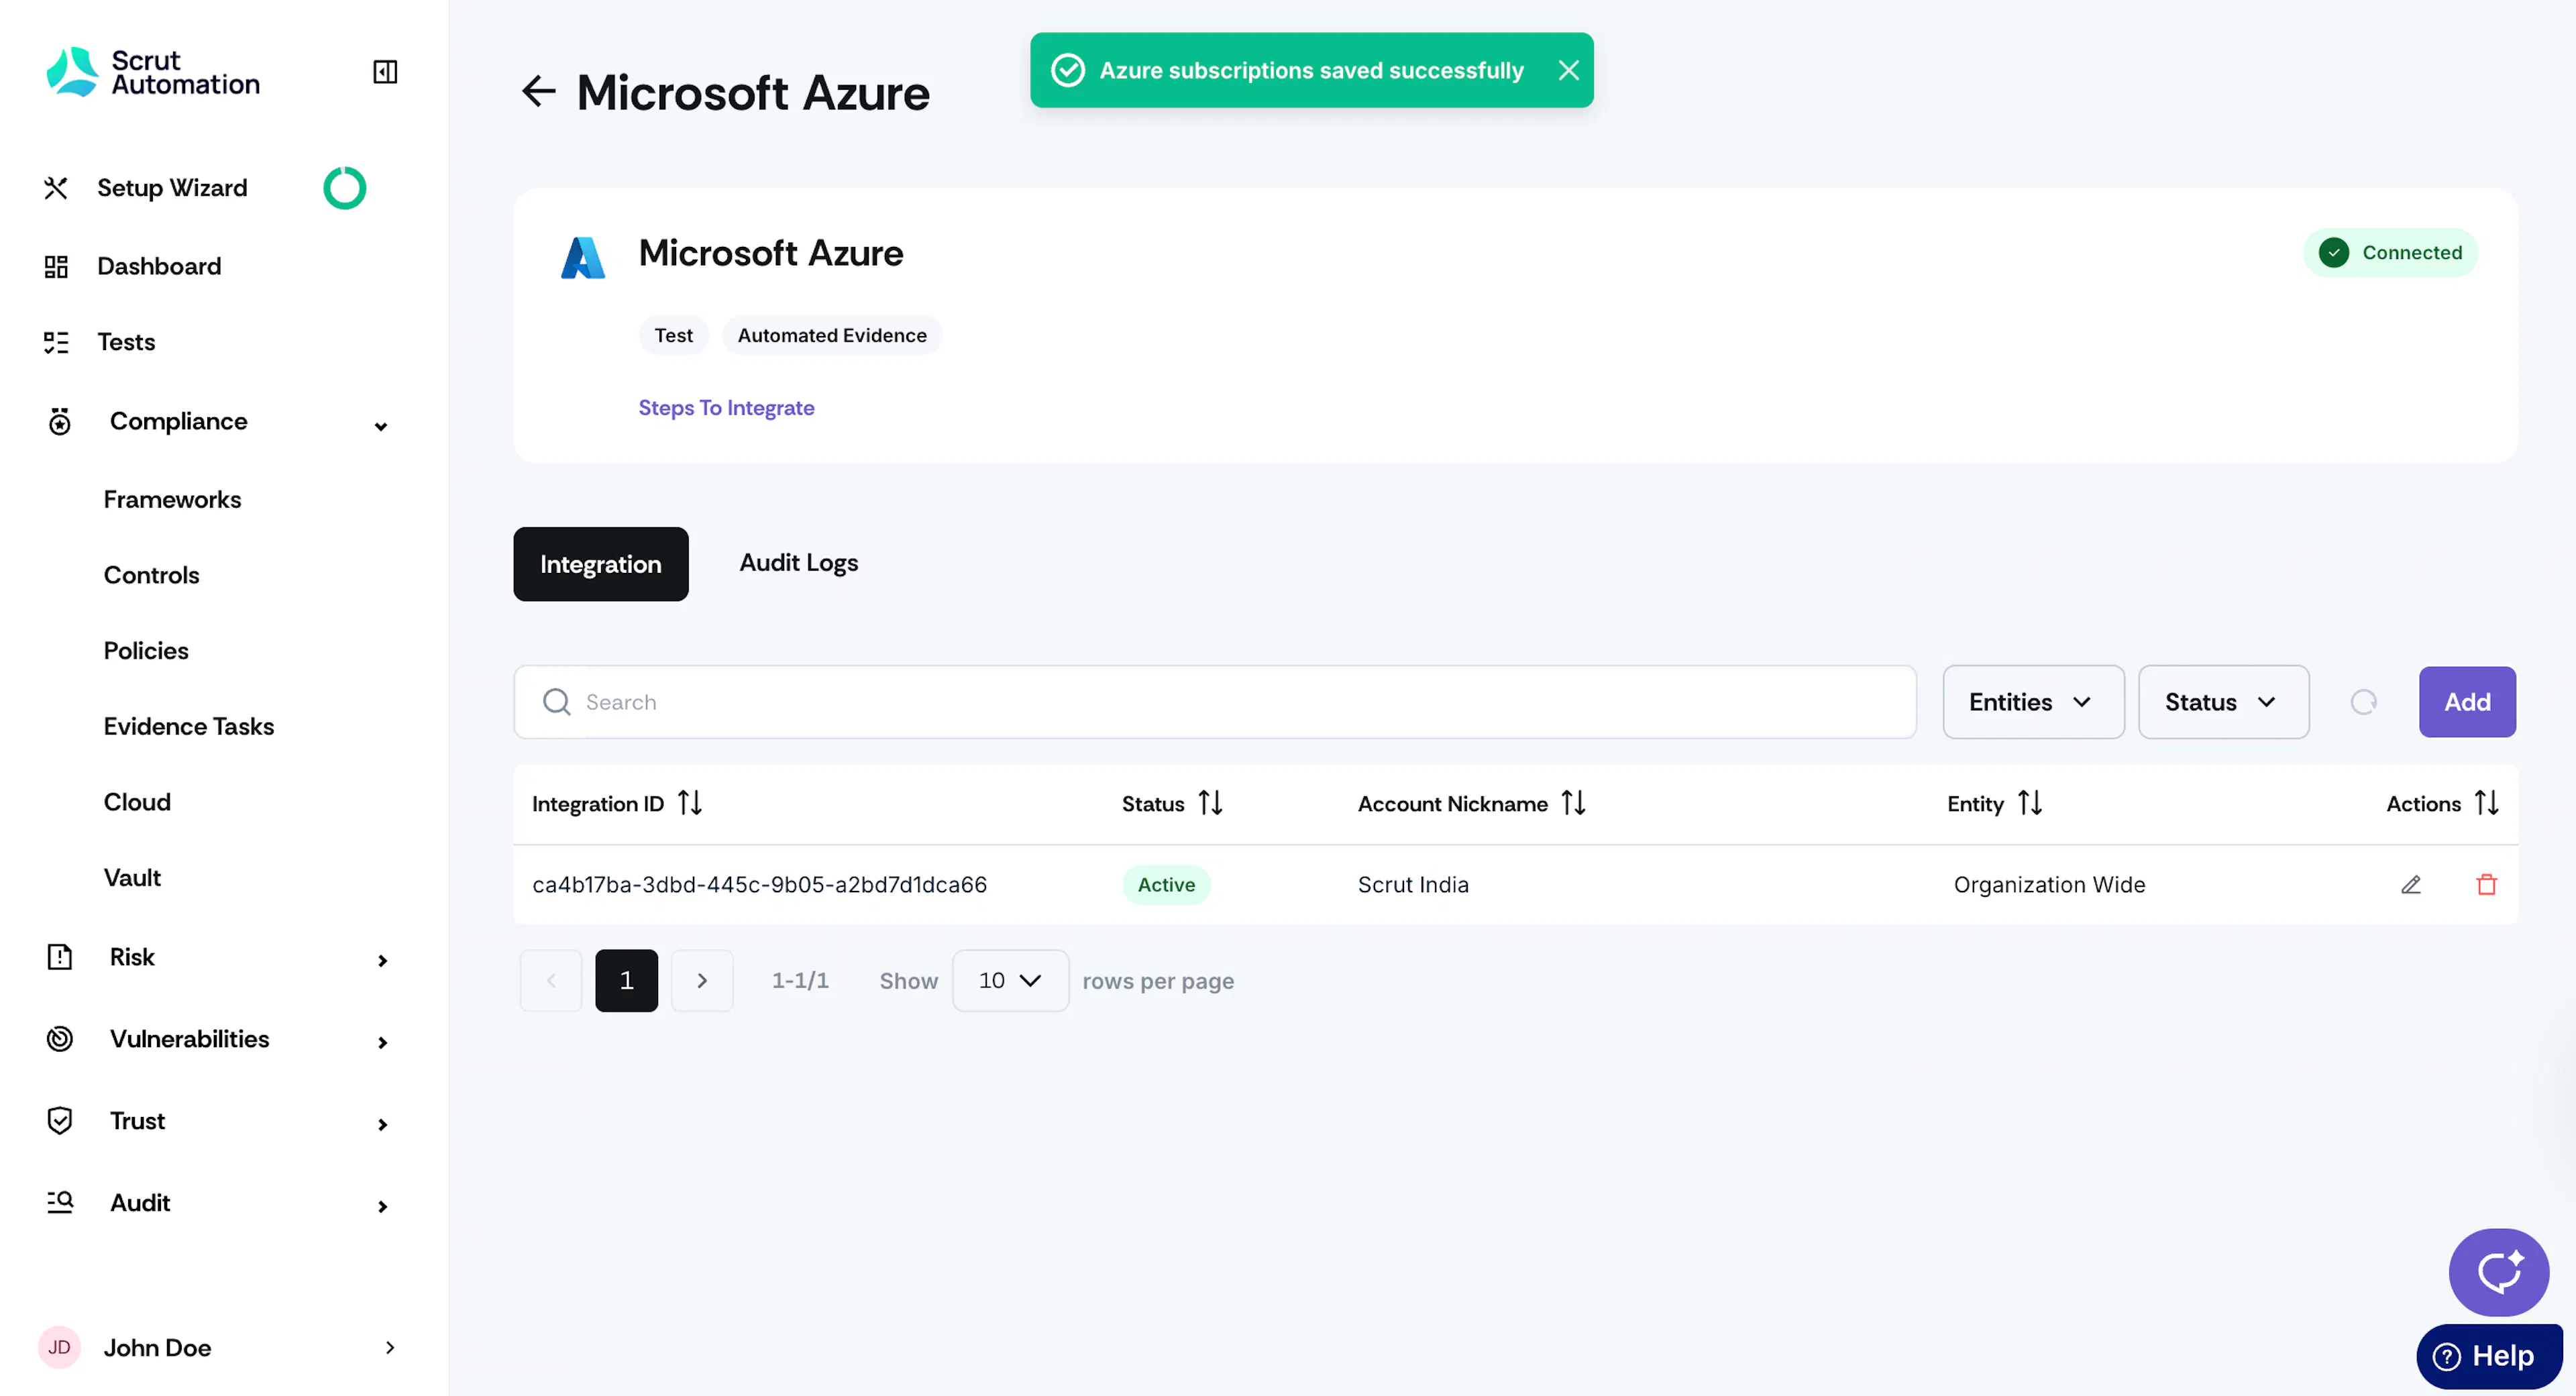
Watch out for the “Azure subscriptions saved successfully” message and the connected status flag.
Azure Integration Guide for First-Time Users
If you’re connecting Azure for the first time with Scrut, follow the step-by-step instructions here.
Azure Integration Guide
Viewing Subscription-based Data in Scrut
-
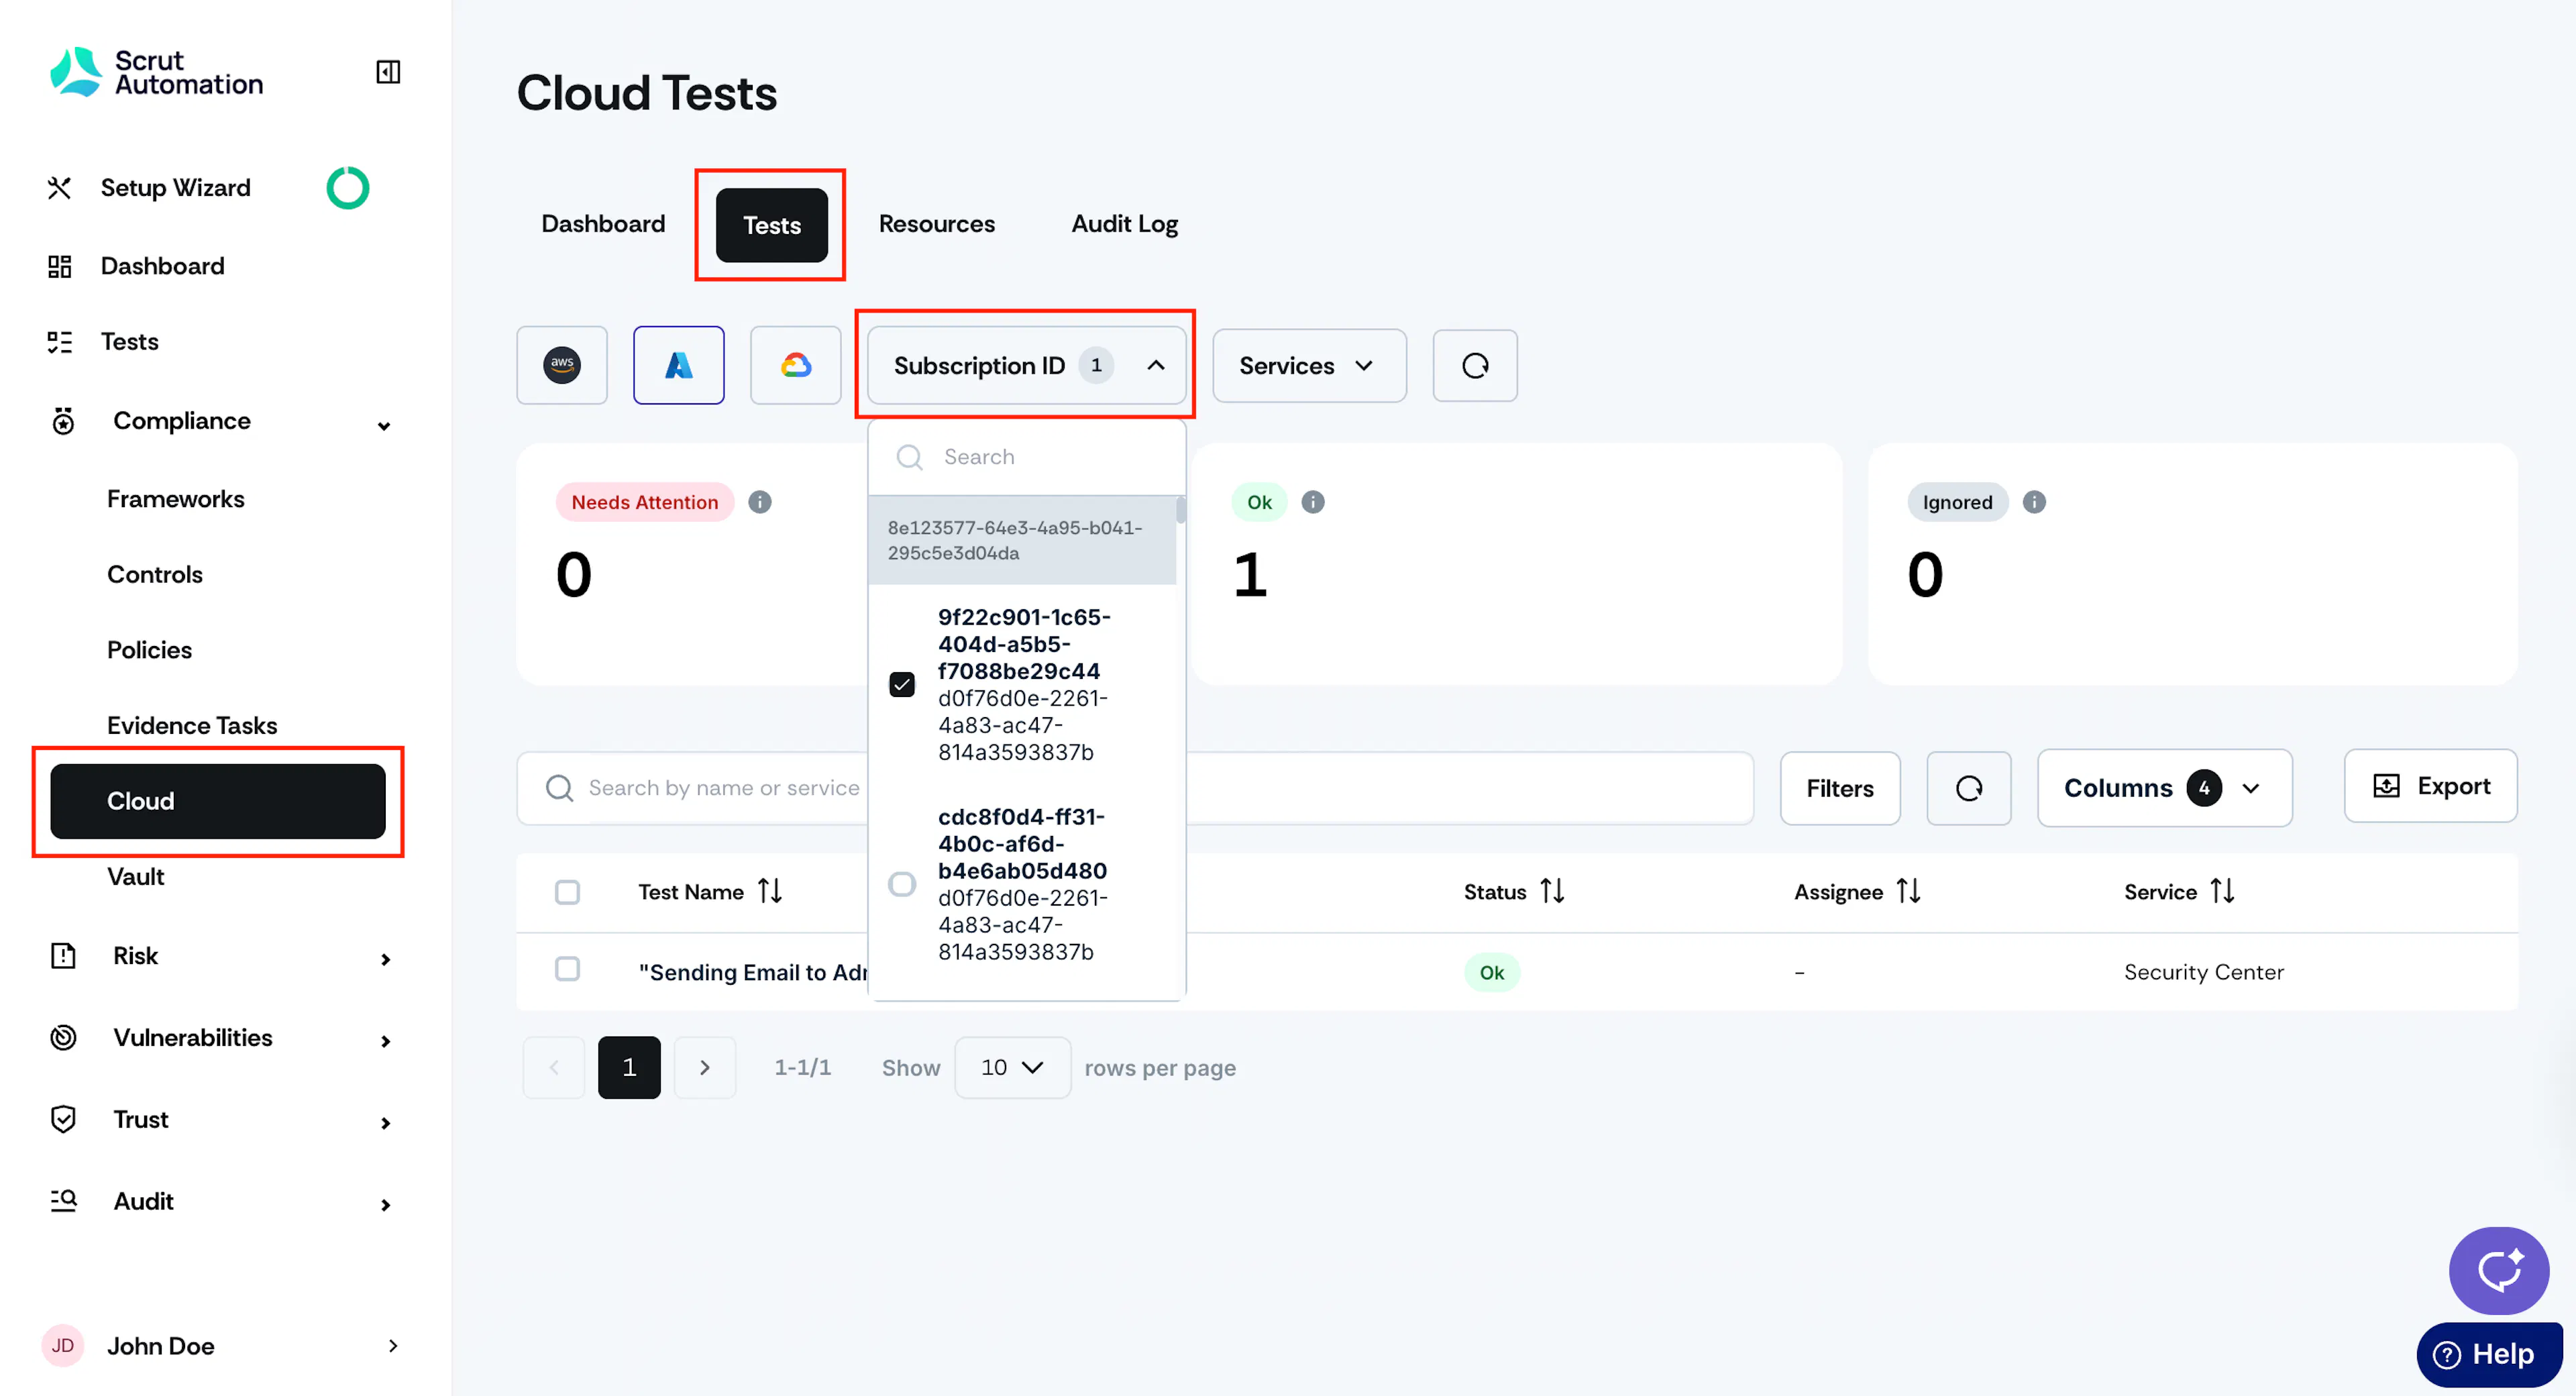
Go to the Cloud module and click the Azure filter.
-
Use the Subscription ID filter to view data relevant to specific subscriptions.
-
This filter is available for the following tabs in the Cloud Tests module:
- Dashboard
- Tests
- Resources