

Integrate NetSuite
The Scrut - NetSuite integration fetches user access data, permissions, and role assignments from your NetSuite account and syncs them with the Access Review module. This integration enables your organization to maintain comprehensive visibility over user access rights and streamline periodic access reviews for compliance and security.
Heads Up!
The data synced from NetSuite flows into the Access Review module in Scrut.
Prerequisites
Before starting the integration, ensure you have the following access and permissions:
Access
-
You must be a Scrut Admin (or Contributor with access to the Integrations module)
-
NetSuite account with REST Web Services enabled
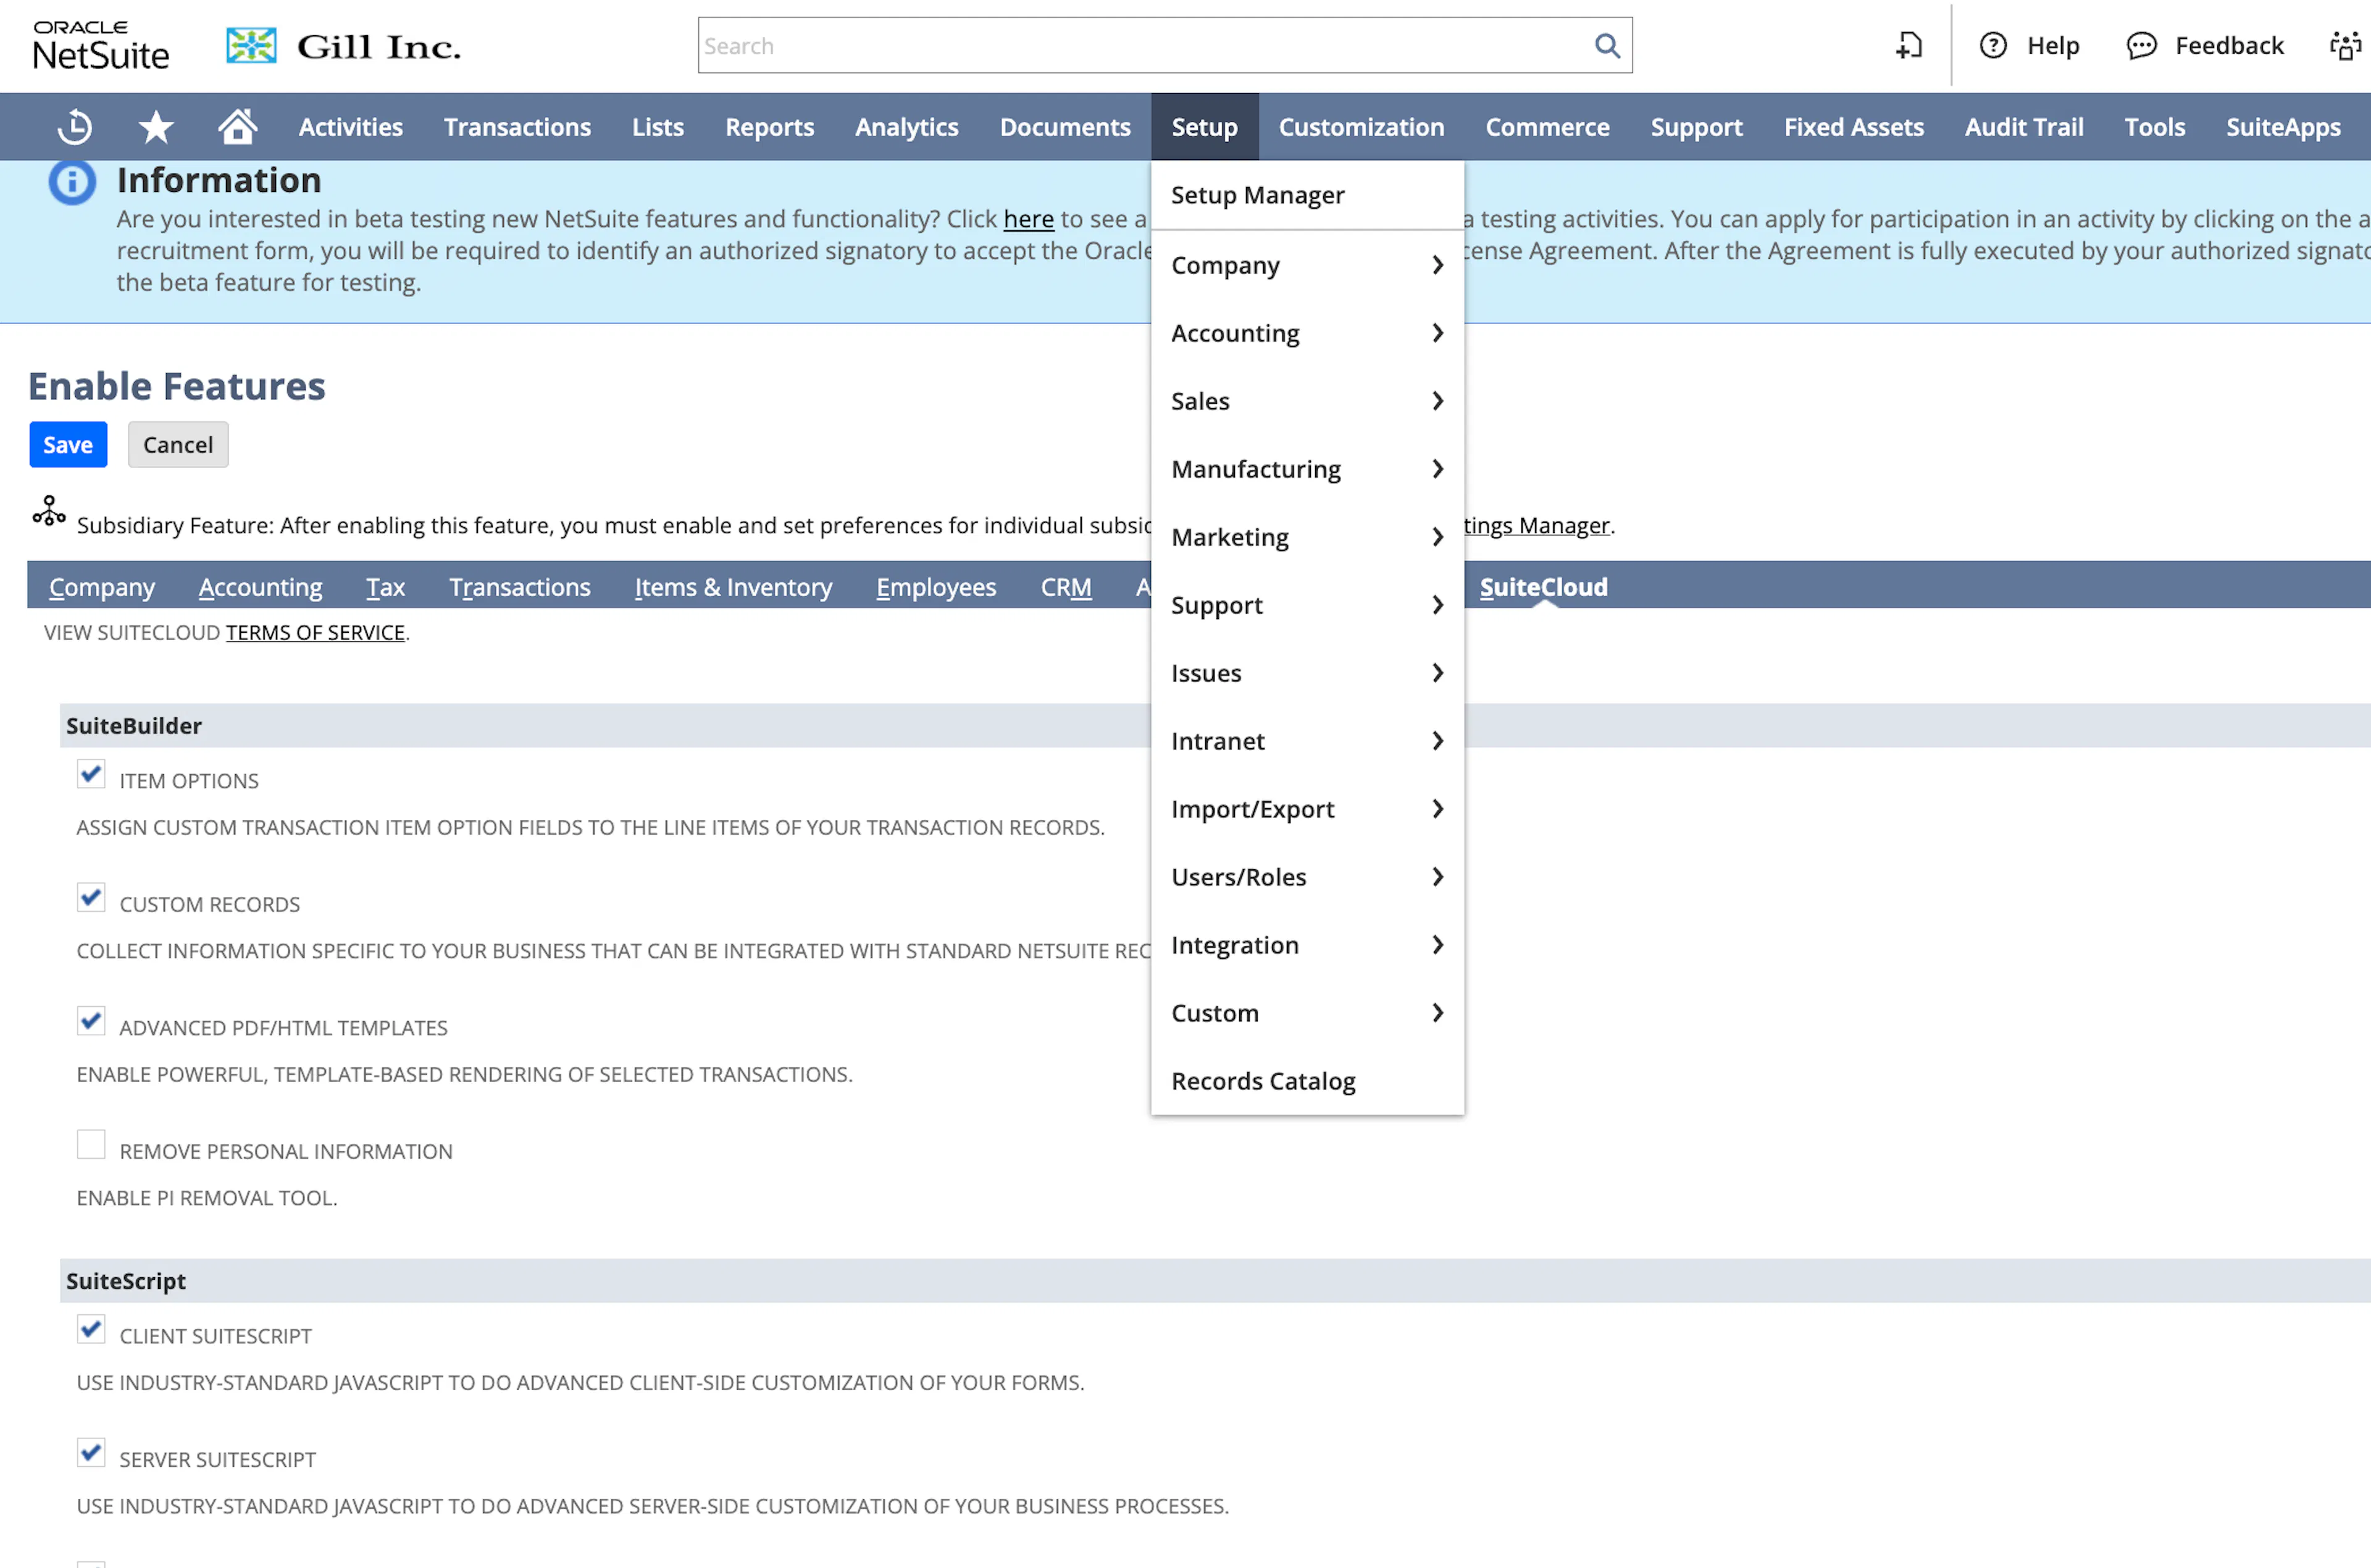
- To enable REST Web Services, navigate to Setup → Company → Enable Features and select the REST Web Services checkbox in the SuiteCloud tab
-
Token-based Auth enabled in your organization’s NetSuite account
-
You must be a NetSuite admin to fetch the Consumer Key, Consumer Secret, Token ID, and Token Secret
Permissions
Scrut requires read-only access to the following data in NetSuite
- User Accounts: View name, email, and user role
Pro Tip!
We recommend logging into your NetSuite account before starting the integration to avoid doing so later.
How To Connect NetSuite With Scrut
Step 1: Enable Token-Based Auth in Your NetSuite Account
-
Navigate to Setup → Company → Enable Features in your NetSuite account.
-
Select the SuiteCloud tab, scroll down and select the Token-Based Authentication checkbox under the Manage Authentication section.
Step 2: Fetch the Required Credentials from NetSuite
For this integration, you need to fetch the following details from NetSuite:
- Account ID
- Consumer Key
- Consumer Secret
- Token ID
- Token Secret
In this section, we explain how to fetch these required credentials:
-
Log in to your NetSuite account with admin permissions.
-
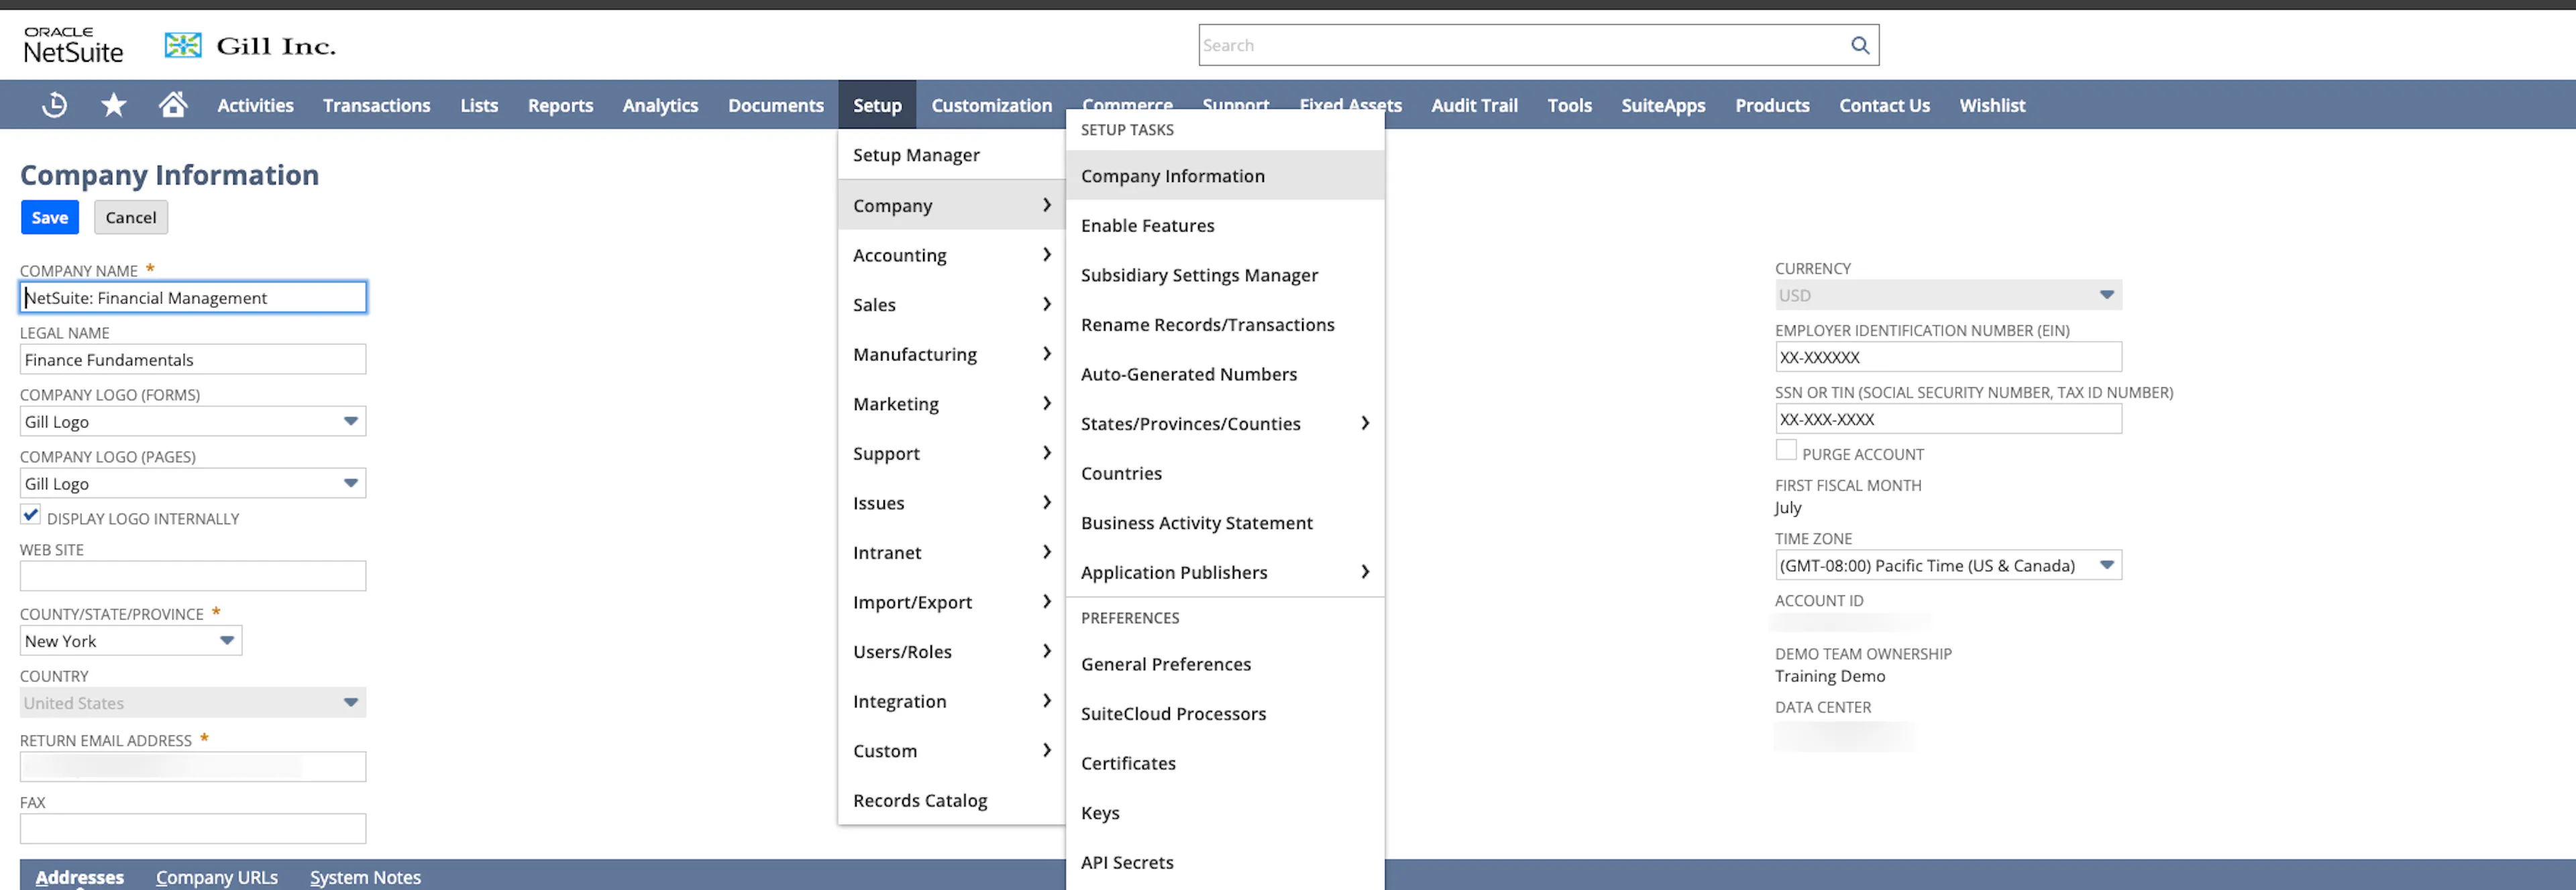
Navigate to Setup → Company → Company Information and copy the Account ID from there. Save it in a safe location as you’ll need to enter it in Scrut in the next step.
-
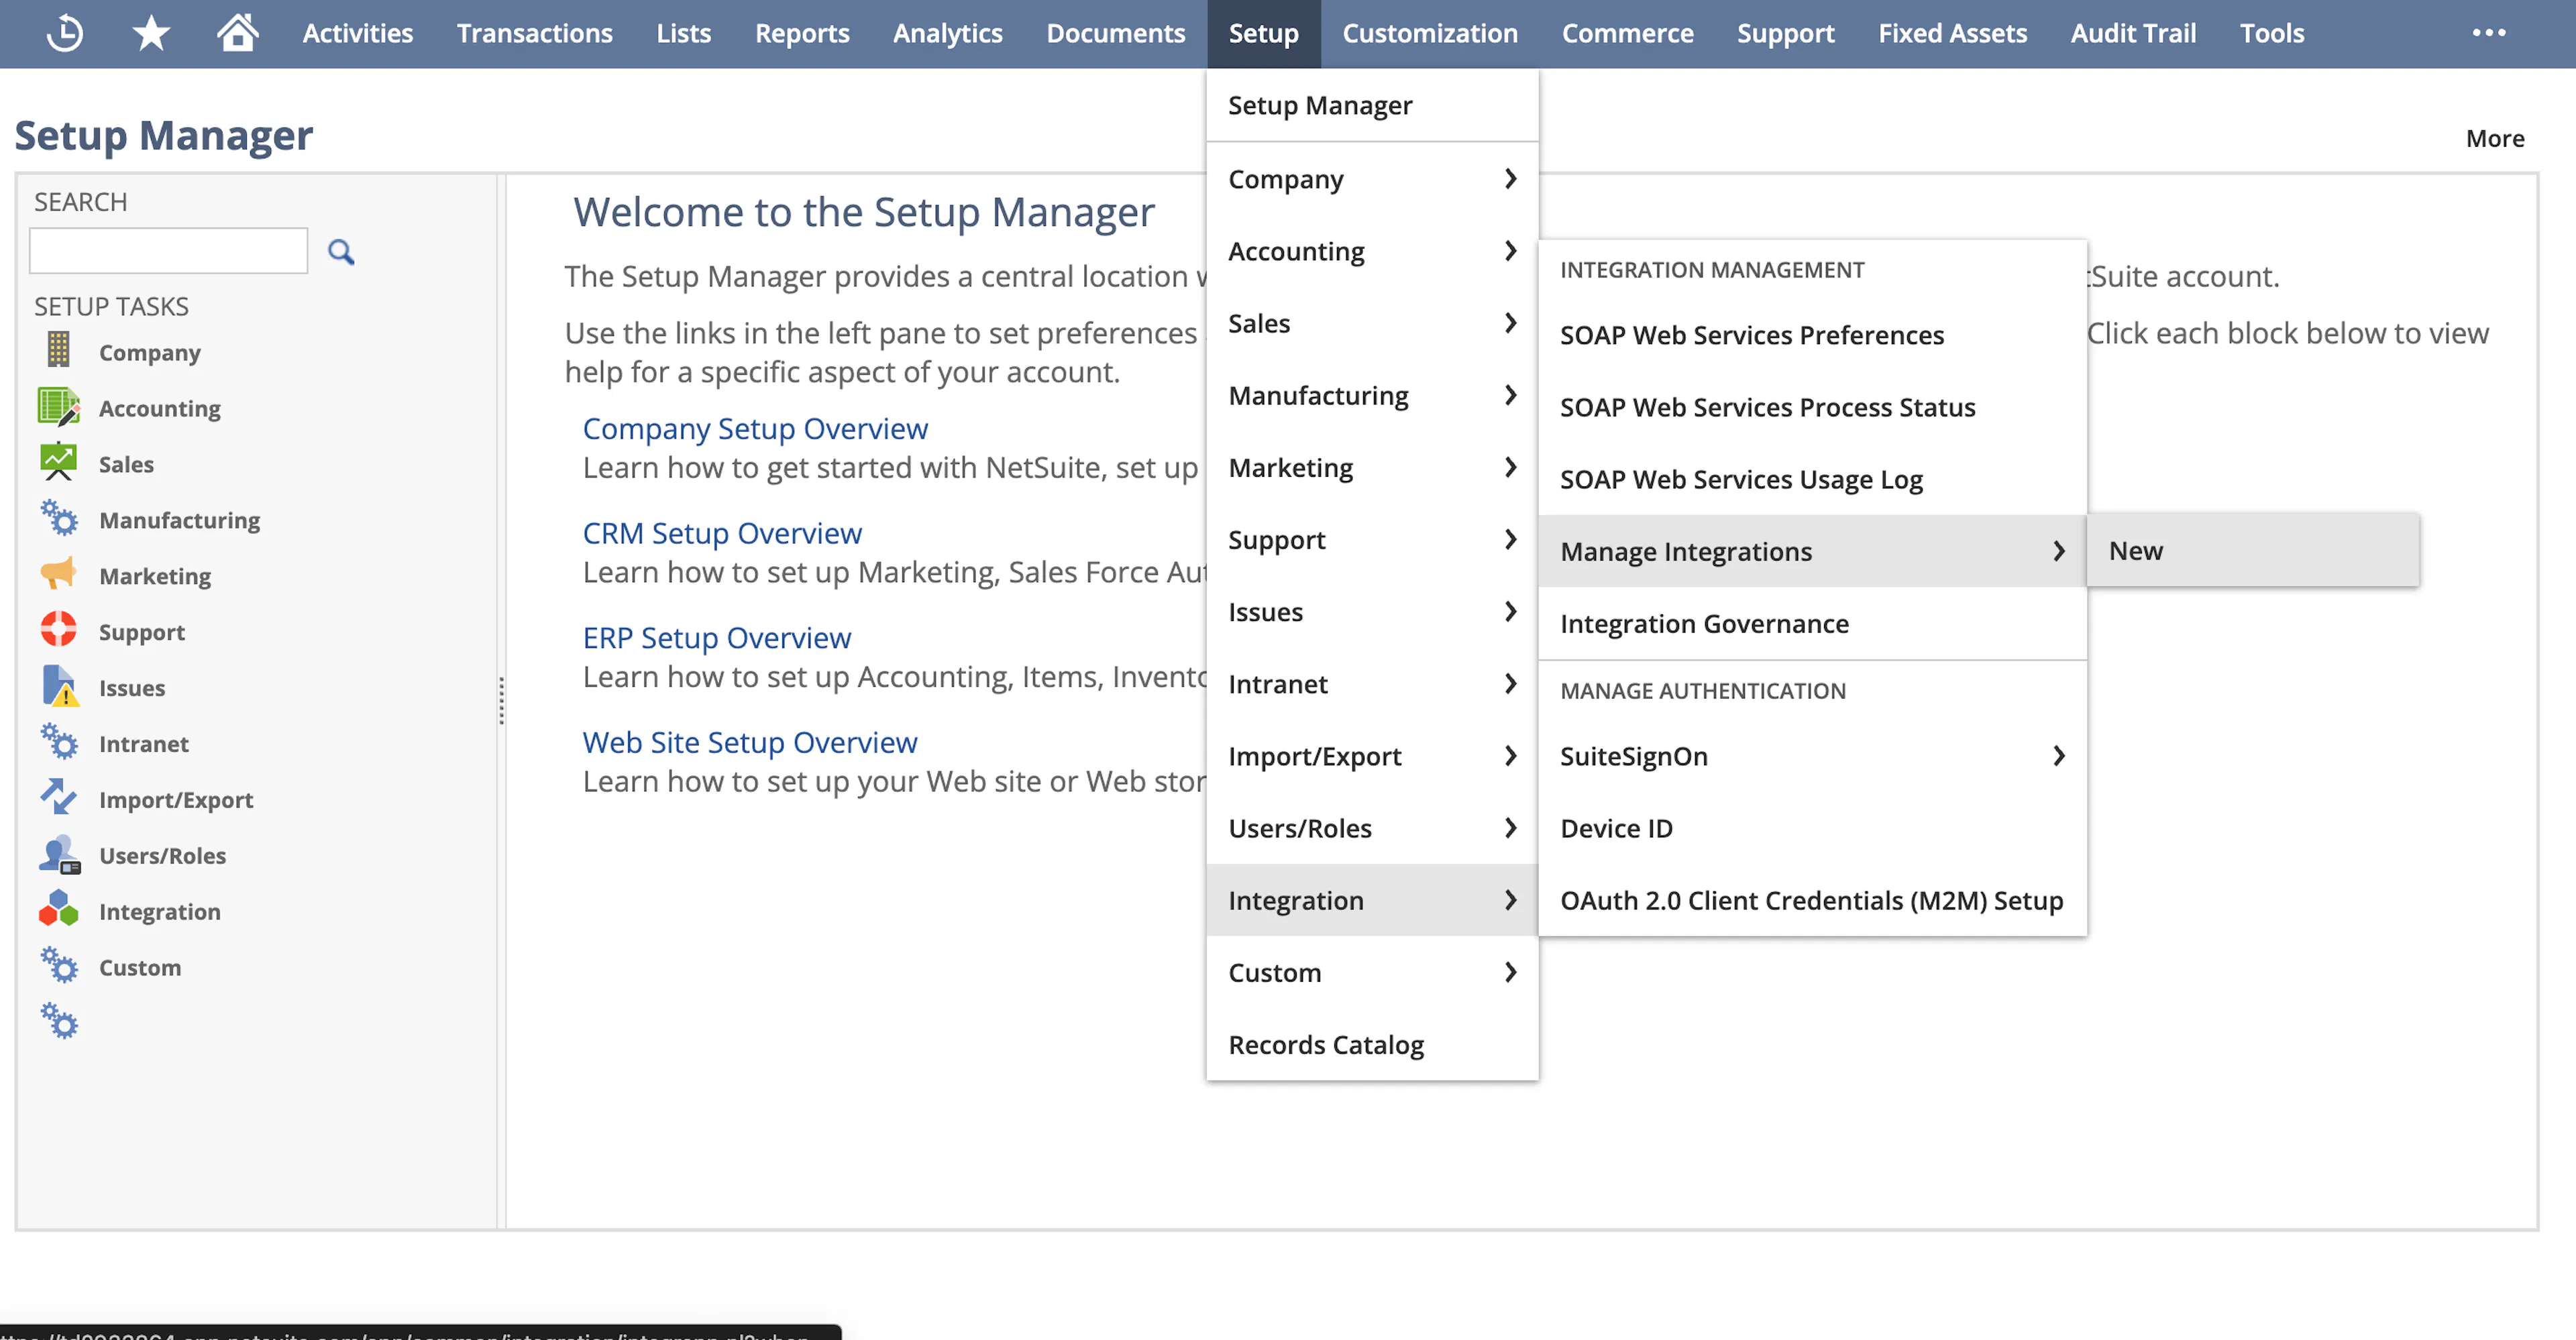
Click Setup → Integration → Manage Integrations and choose New.
-
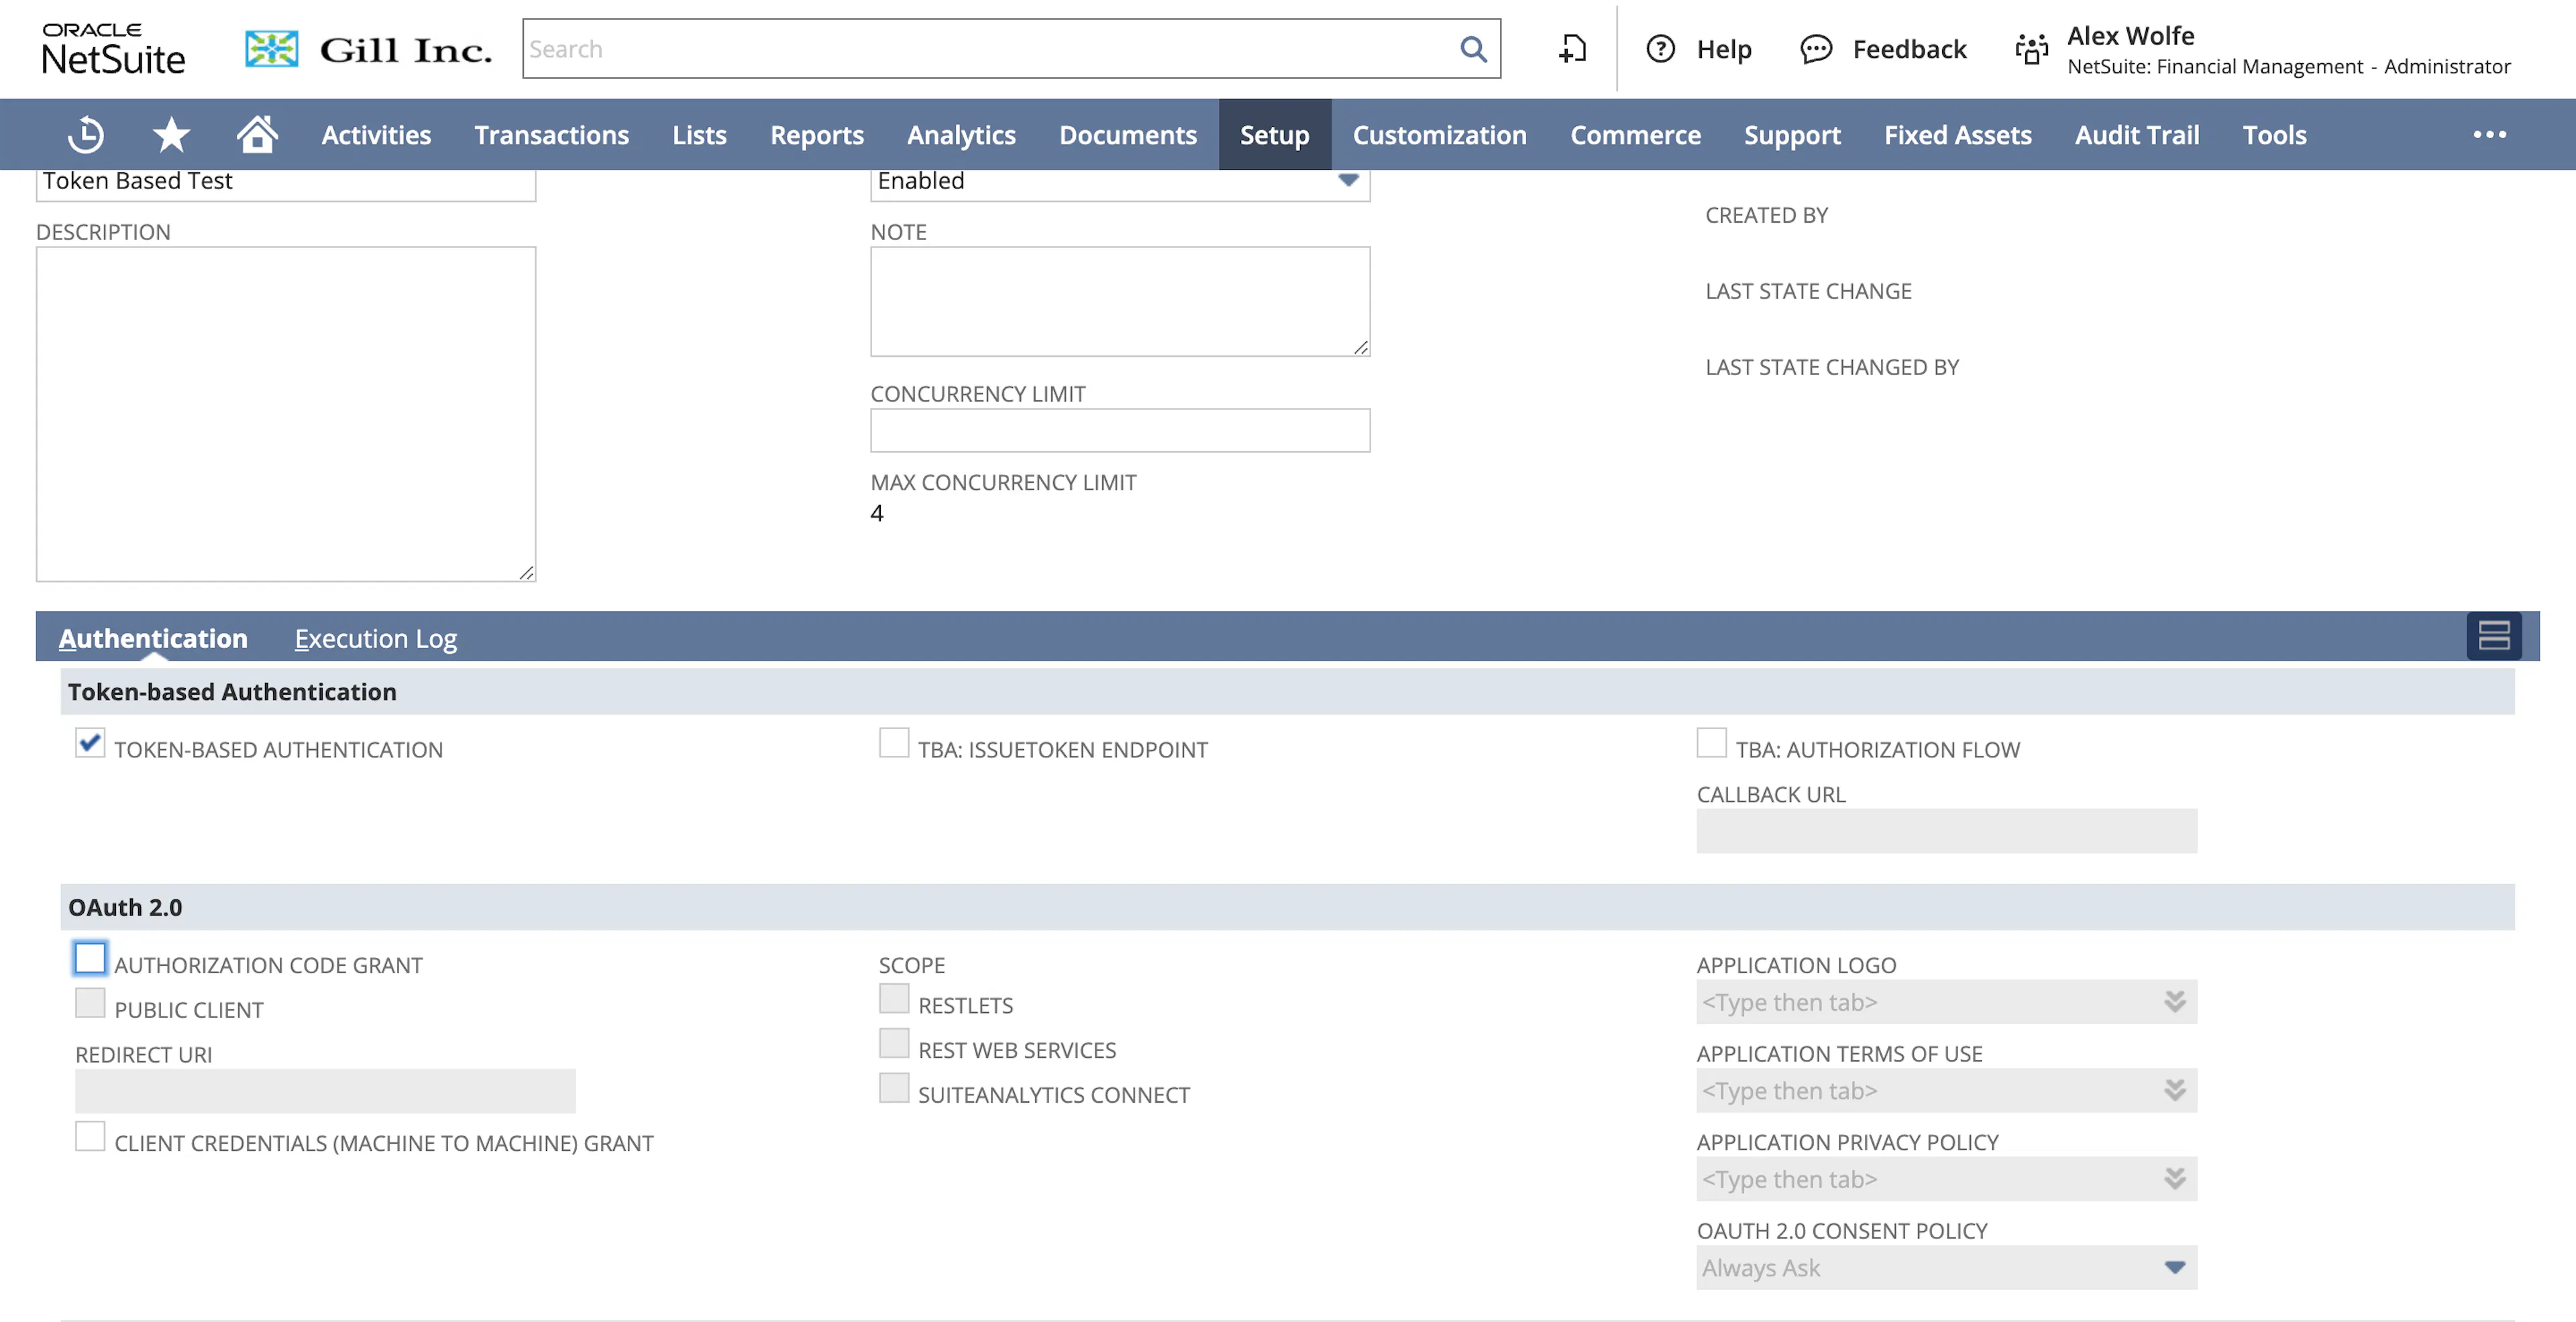
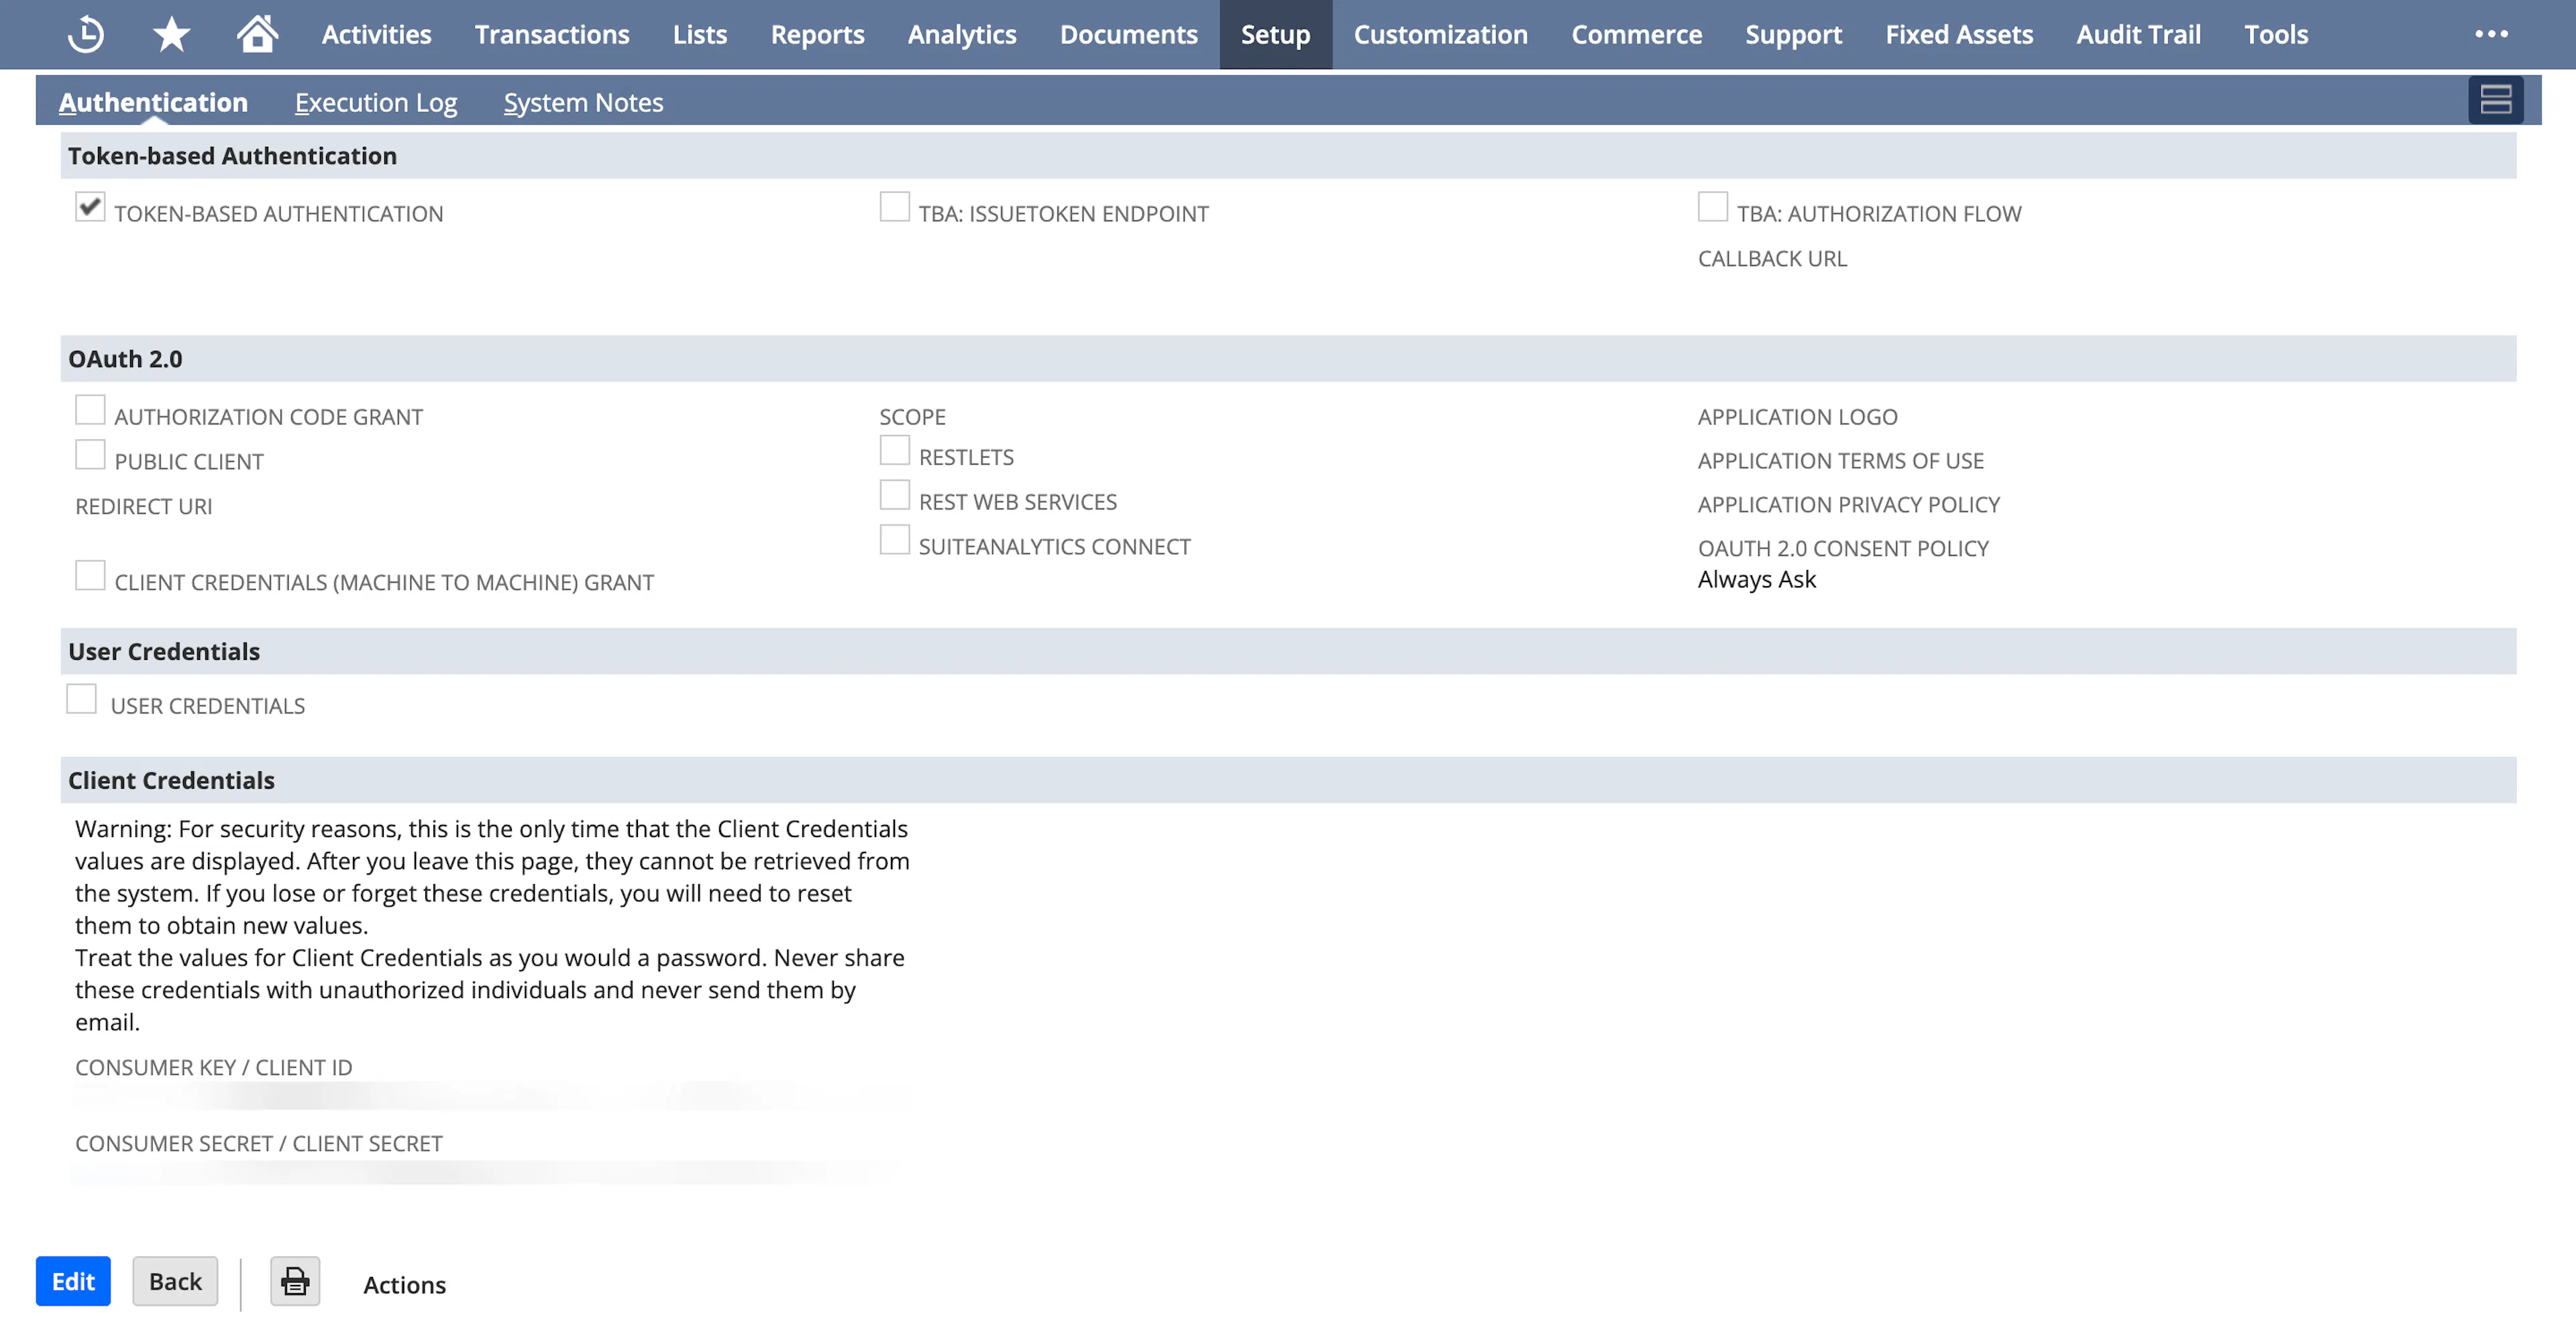
Enter an app name, such as Scrut Integration. Under Authentication → Token-based Authentication, uncheck the TBA: Authorization Flow checkbox. Uncheck the Authorization Code Grant checkbox under OAuth 2.0.
-
Click Save and copy the Consumer Key and Consumer Secret displayed in the Client Credentials section. Save it in a safe location, as you’ll need to enter these details in Scrut in the next step.
-
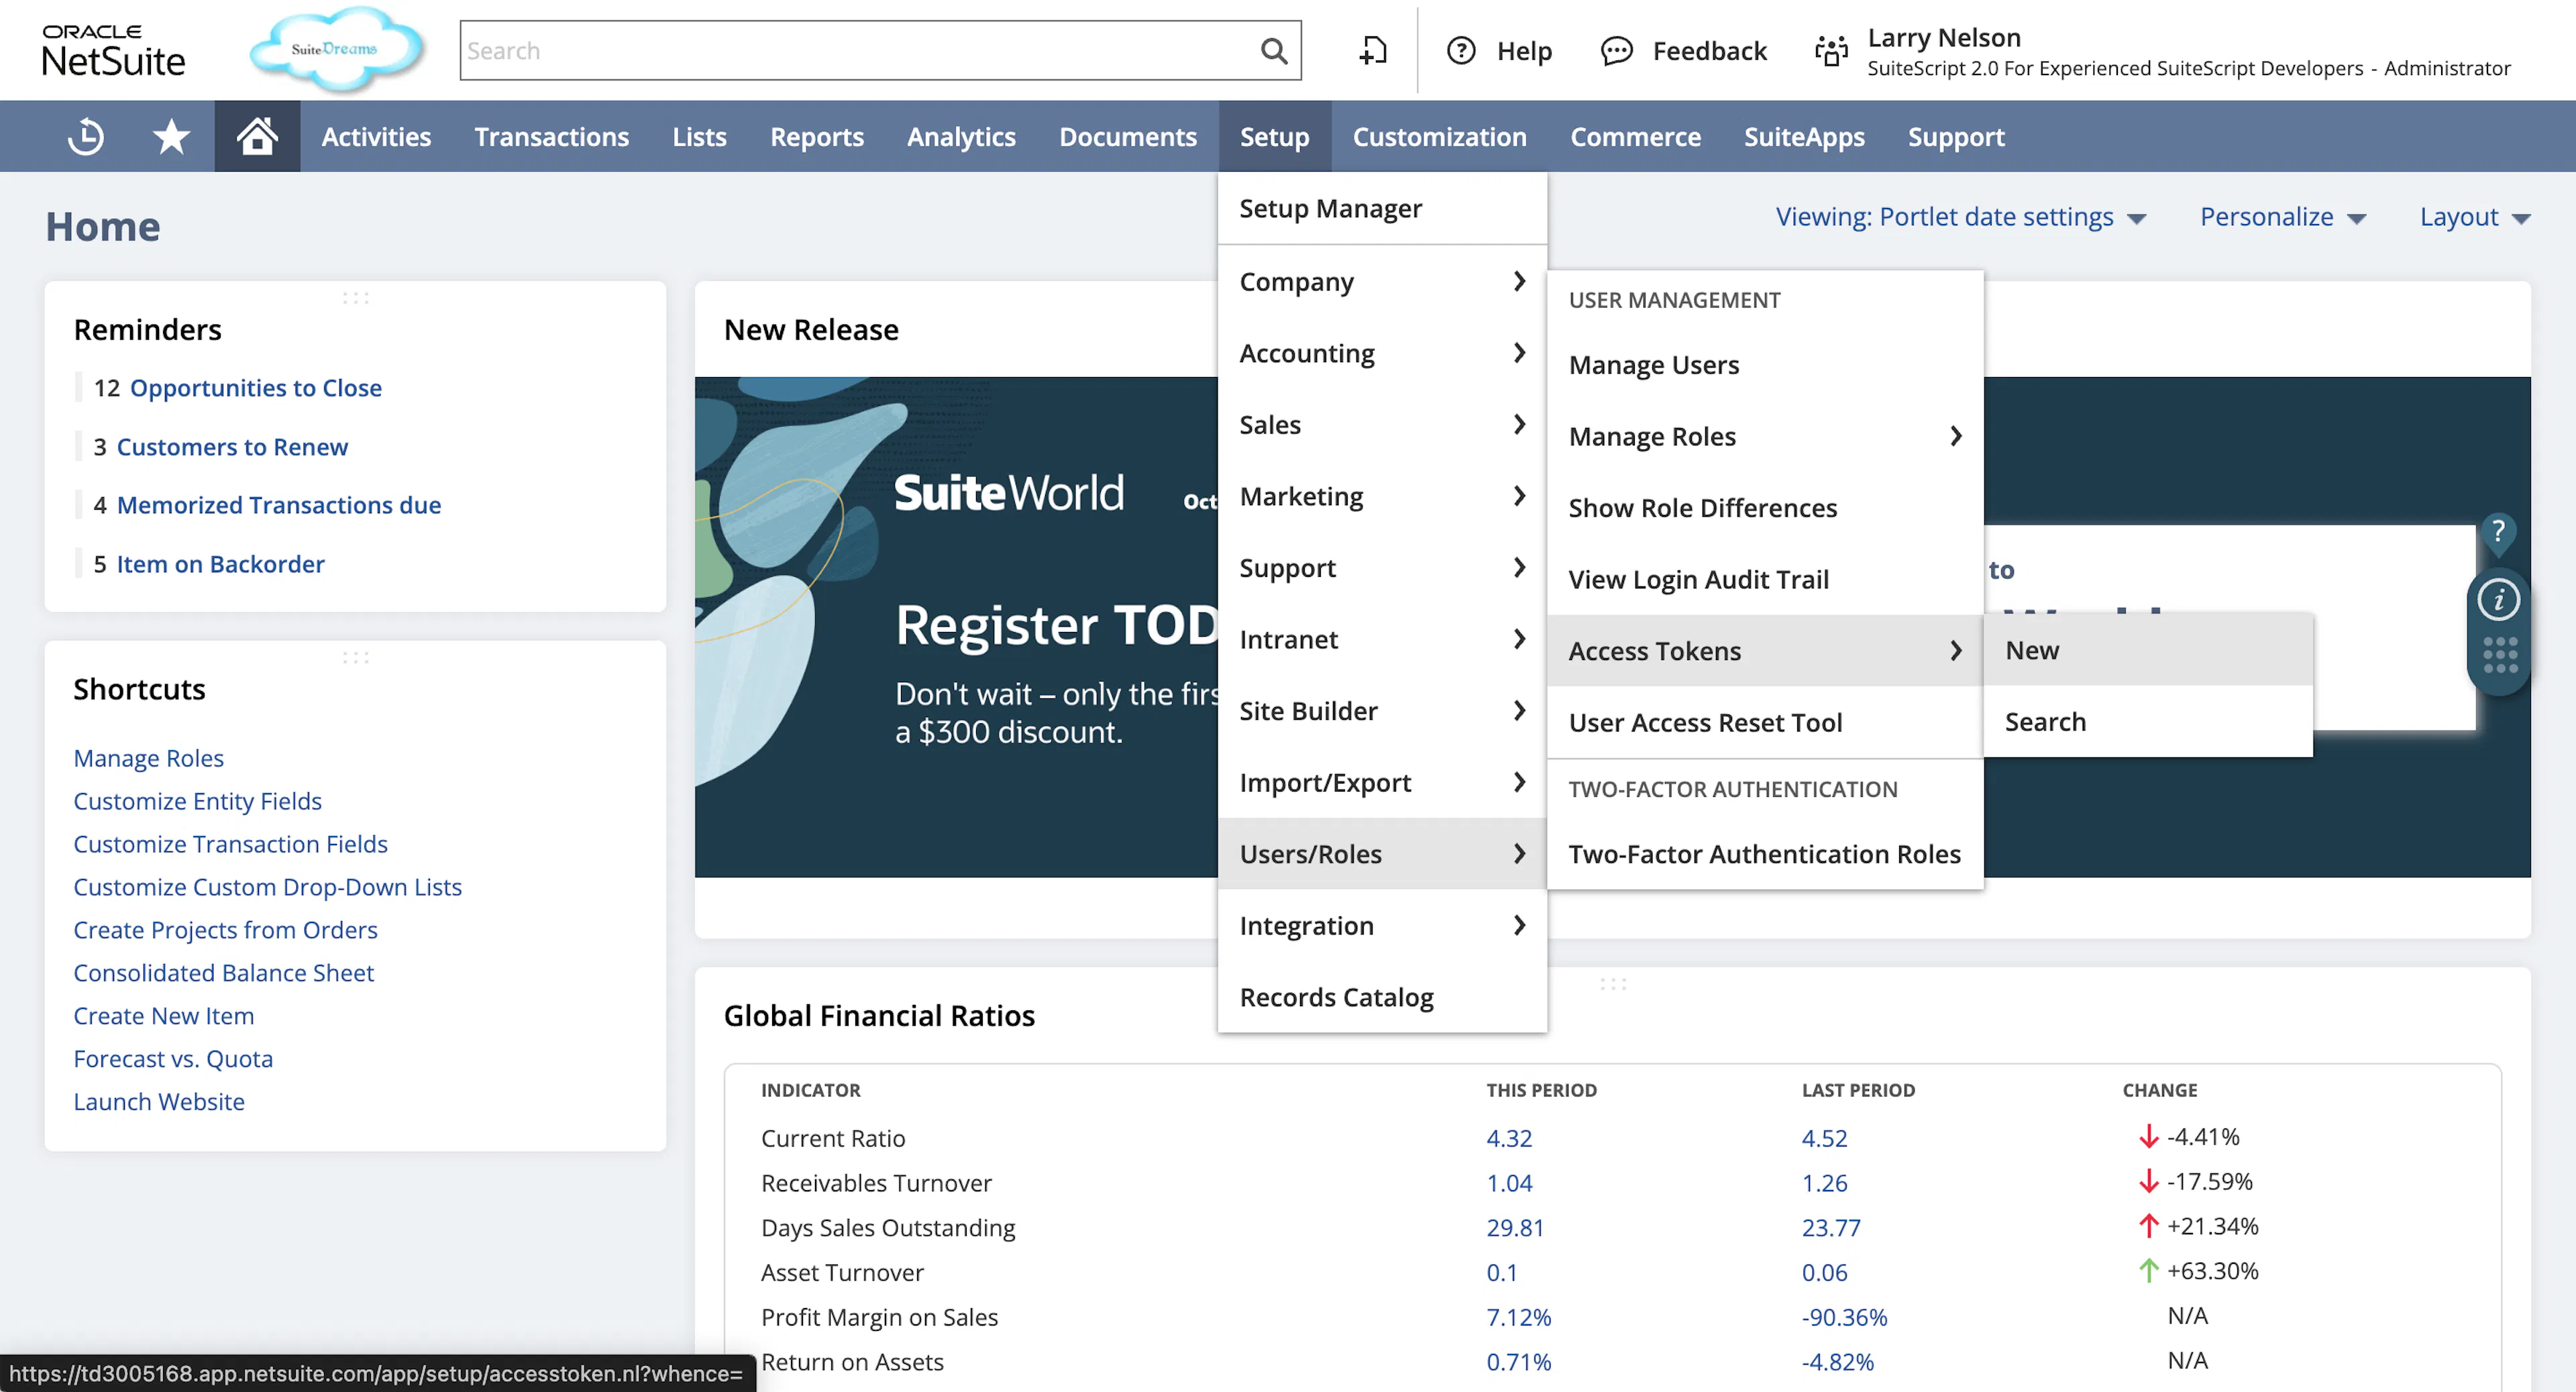
Navigate to Setup → Users/Roles → Access Tokens and click New.
-
Click New My Access Token, and select the integration created above from the Application Name dropdown. Enter a Token Name and click Save.
Important:
Make sure you select the correct app in the Application name dropdown.
-
Copy the Token ID and Token Secret displayed in the Token ID/Secret section. Save it in a safe location, as you’ll need to enter these details in Scrut in the next step.
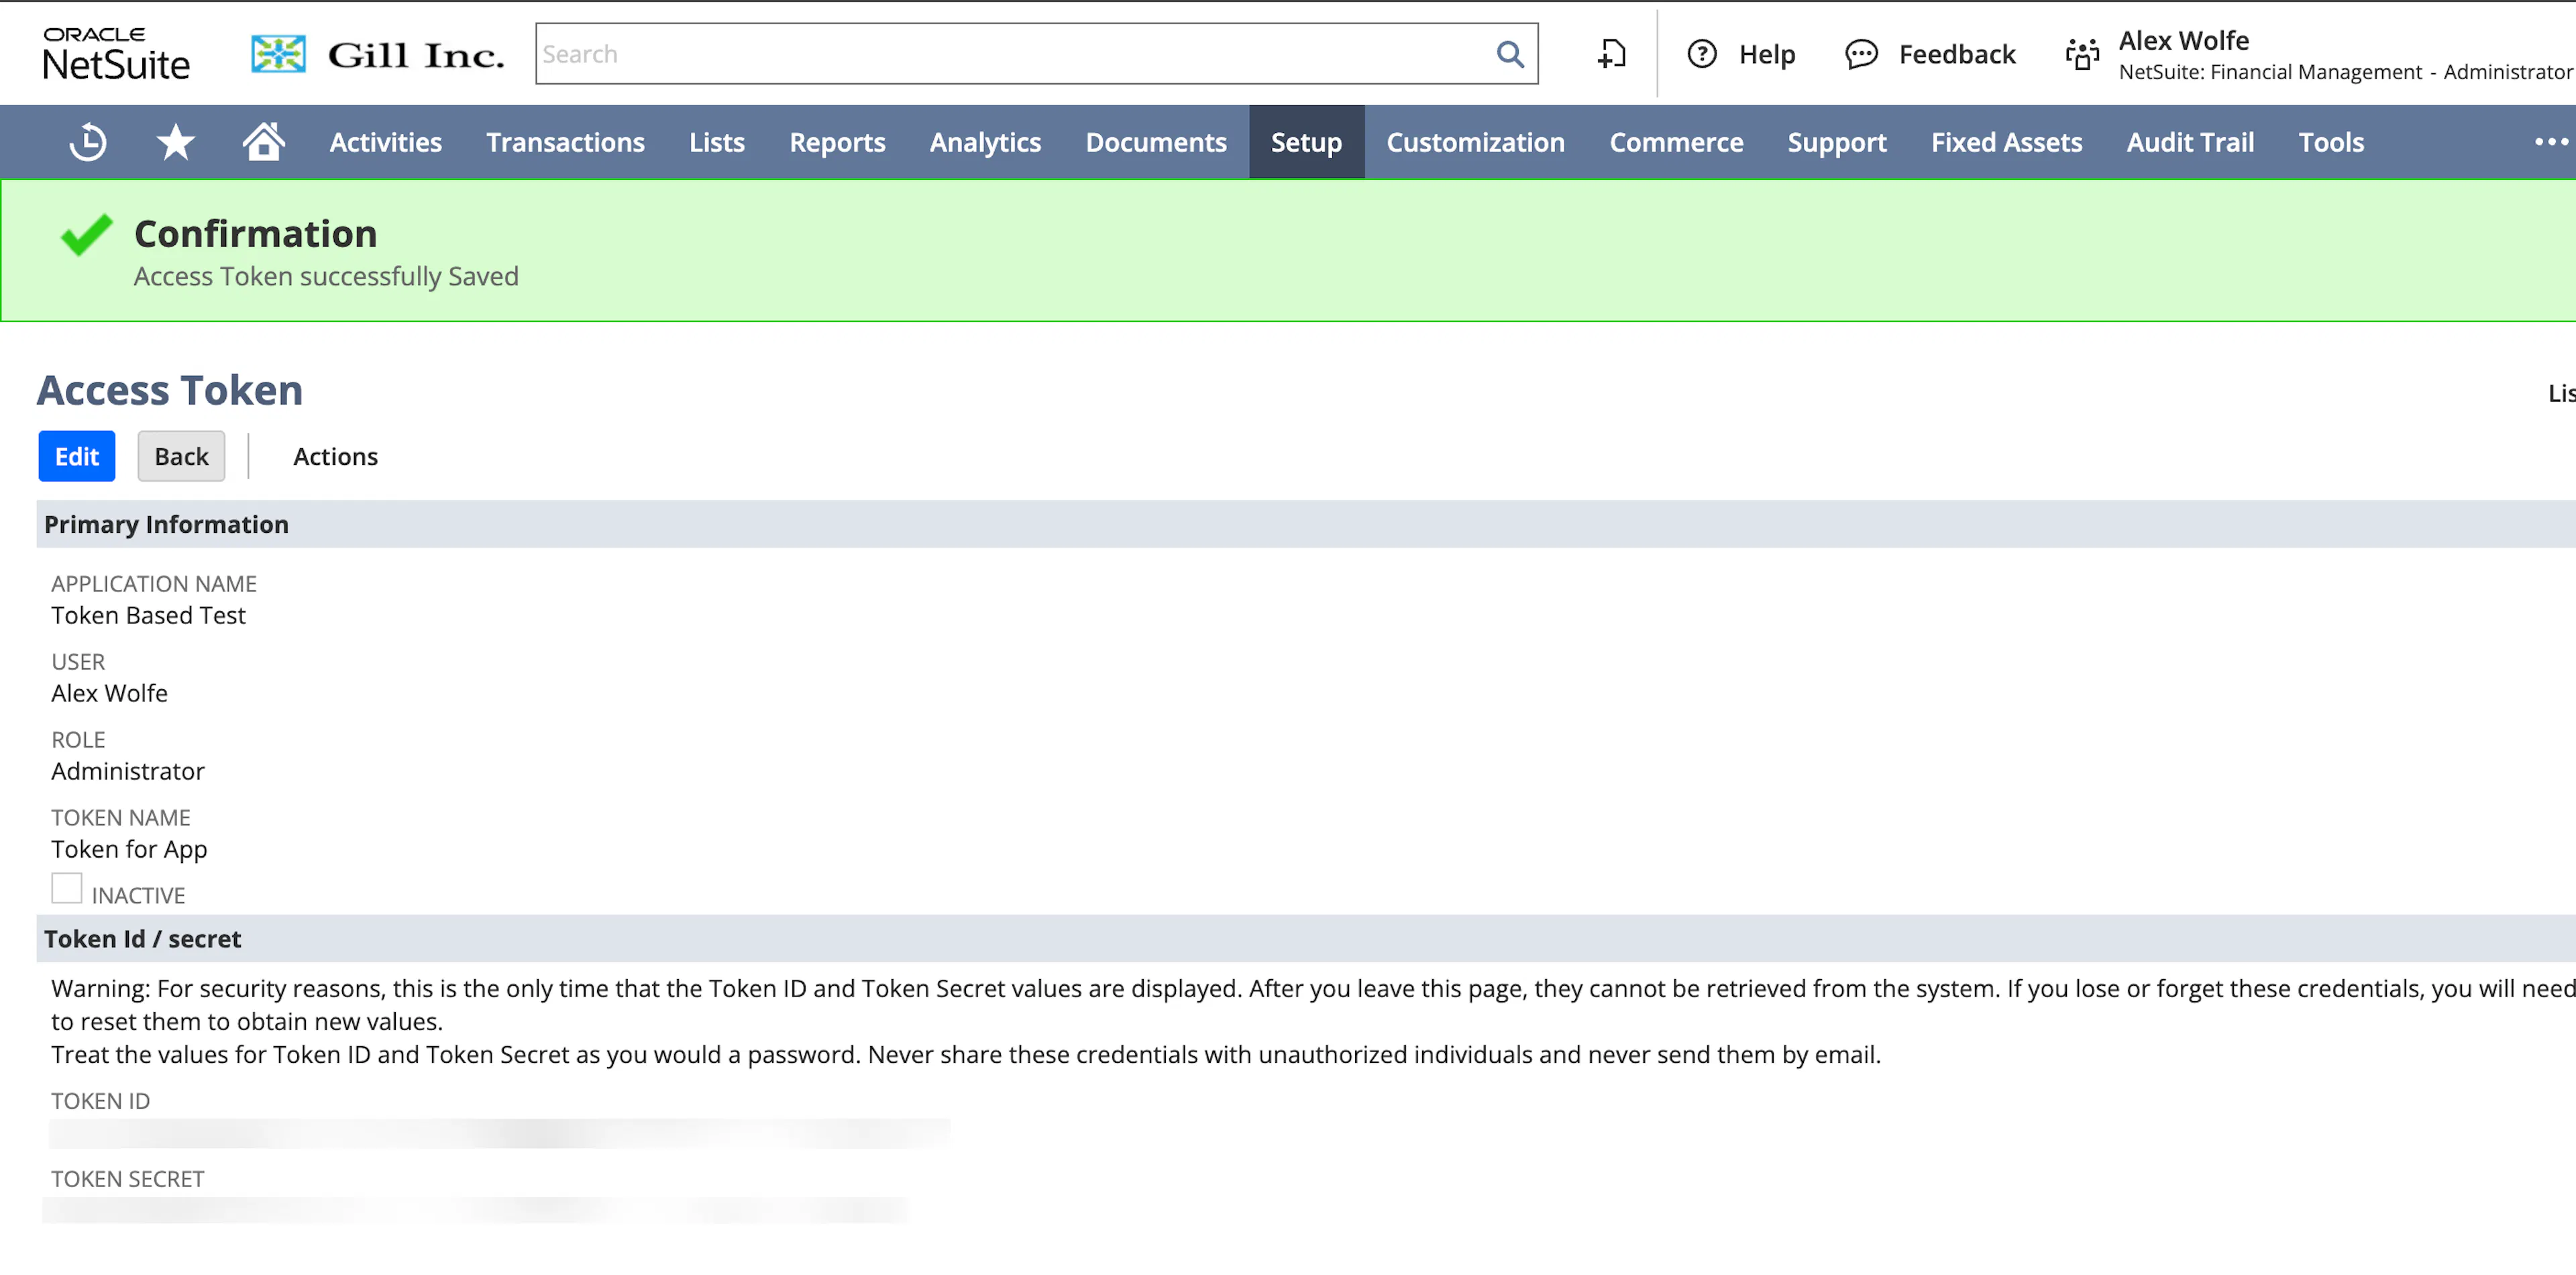
You now have all the details required for the Scrut integration.
Pro Tip!
Refer to this guide from NetSuite for more information on token-based authentication.
Step 2: Go To Integrations in Scrut
-
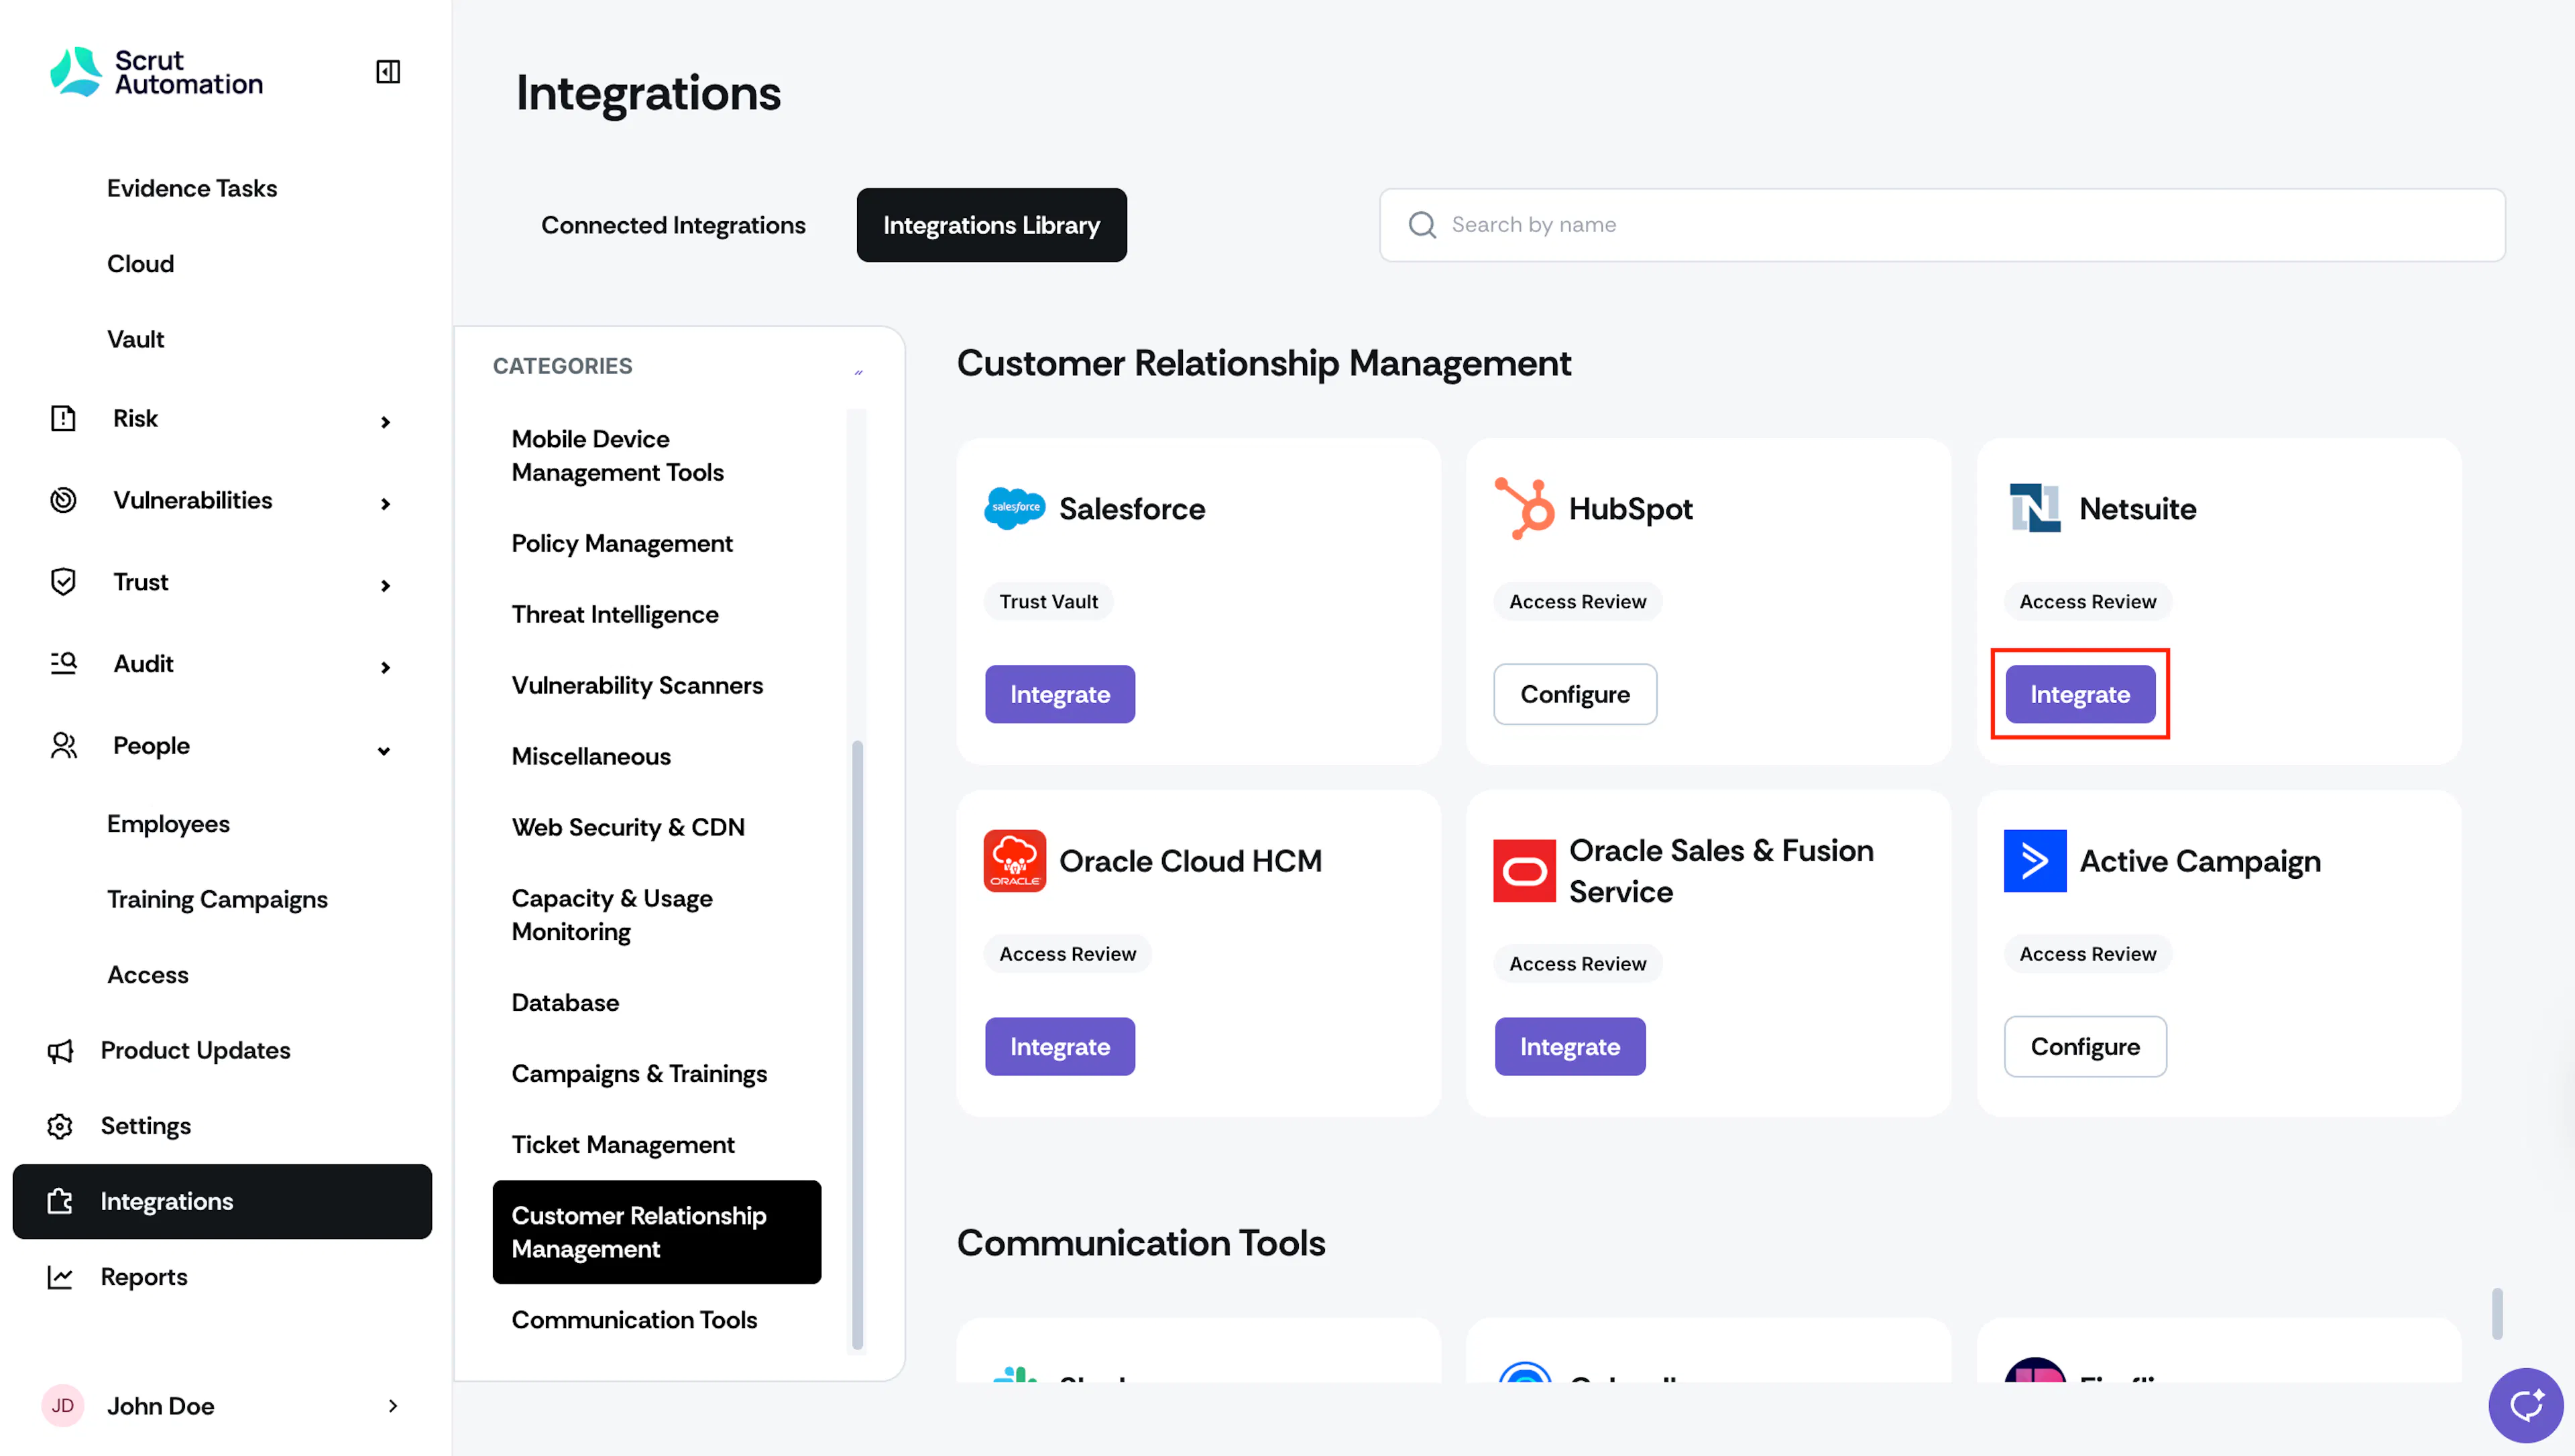
Sign in to Scrut and click Integrations on the left navigation panel.
-
Navigate to the Integrations Library tab, and choose Customer Relationship Management in the Categories section.
-
Scroll to the NetSuite tile and click Integrate.
-
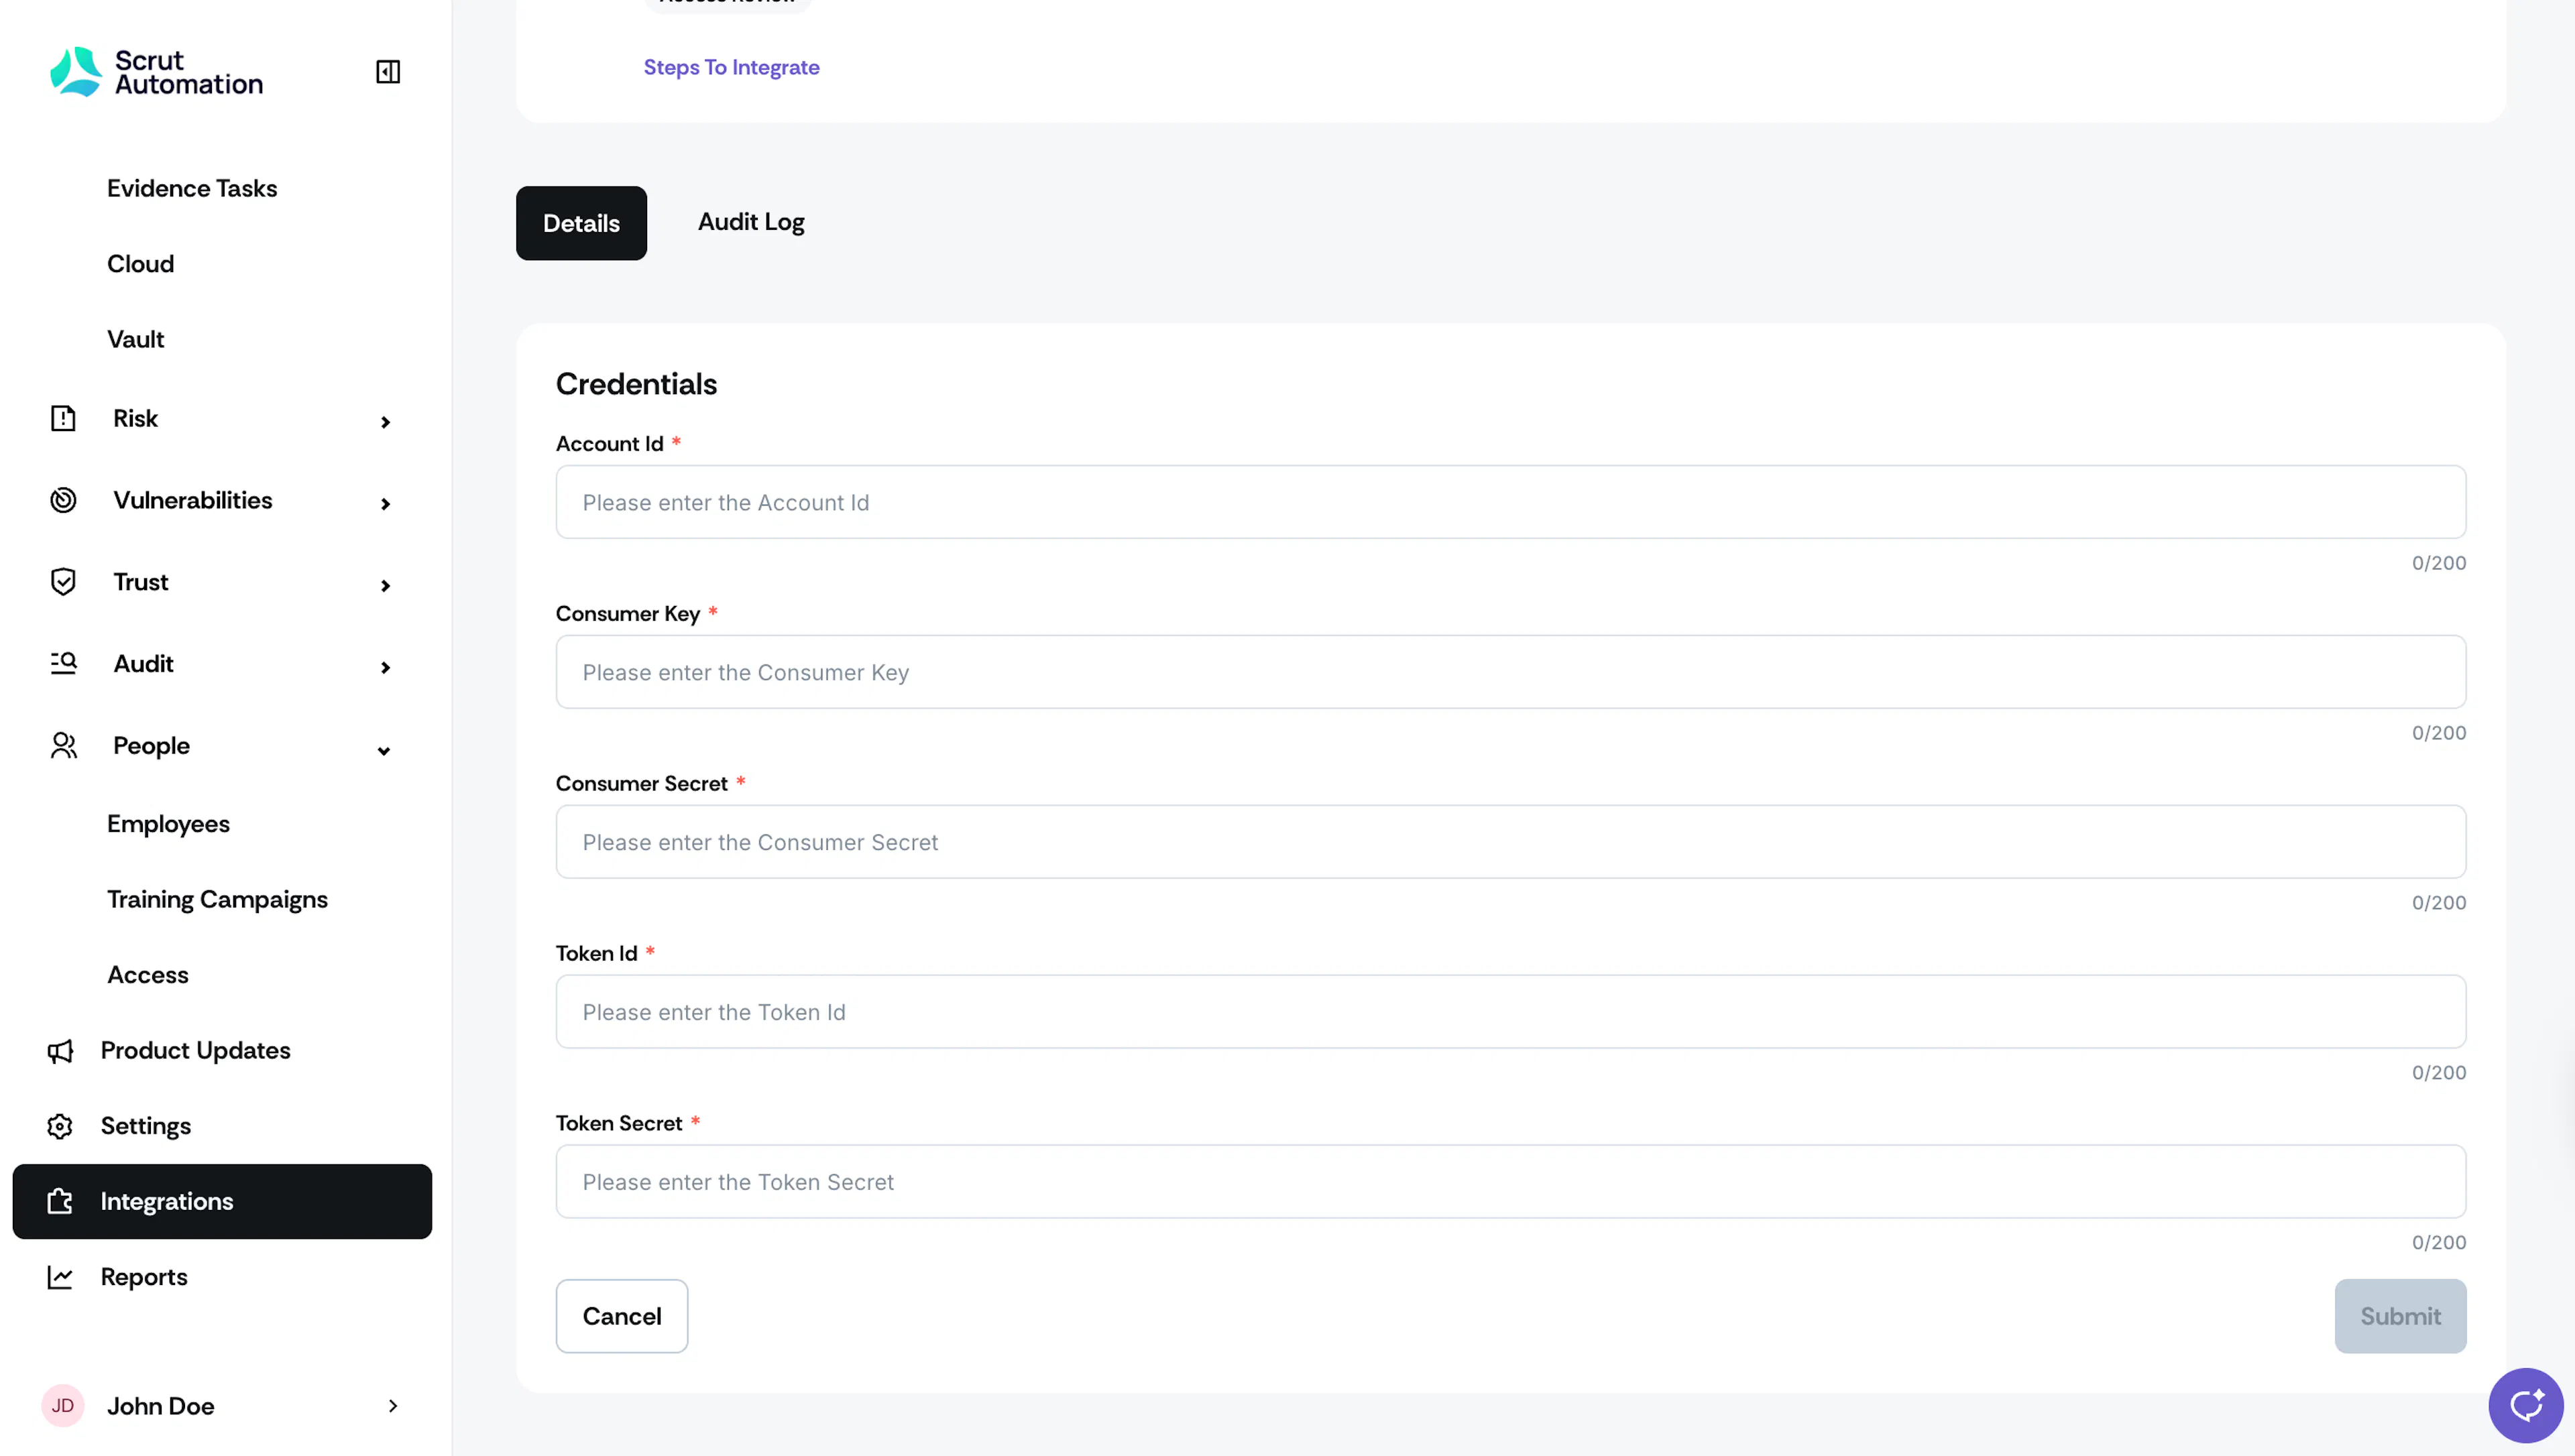
On the integration page, paste the credentials obtained in Step 2.
-
Click Submit.
-
Once authorization is done, you’ll see the “Connected Successfully” message and the Connected status indicator.
Synchronization Details
- Initial Sync: Upon completing the integration, Scrut will start syncing user data from NetSuite. This process typically takes a few hours to complete. Check the Audit Log on the NetSuite integration page in Scrut to review the status.
- Recurring Sync: After this, Scrut performs the sync once every 24 hours to fetch incremental data such as new users, role changes, and permission updates.
- Manual Sync: You can also click the Sync Now button to trigger an immediate data refresh.
Data Fetched from NetSuite
Scrut fetches the following access-related data points from NetSuite:
- User Name
- User Email
- User Role
Viewing NetSuite Data in Scrut
To view the data fetched from your NetSuite account, go to the People → Access → Overview tab. On this page, you can see the user details for your NetSuite account.
You can also create an Access Review (or edit an existing one) and include the NetSuite application in scope. Refer to this guide for step-by-step instructions on creating an access review.
Follow these steps to create a new access review for NetSuite:
- Go to People → Access and click Create New.
- Enter Review Details: Name, Description, Owner, and Review Days.
- In step 2, search for and select NetSuite in the Applications in Scope.
- Select Reviewer and Approver.
- Review the details and click Save Review.
From the Access Review page, click NetSuite to view user details in Scrut.
If you face any difficulties connecting NetSuite with Scrut, please contact the Scrut support team at support@scrut.io.