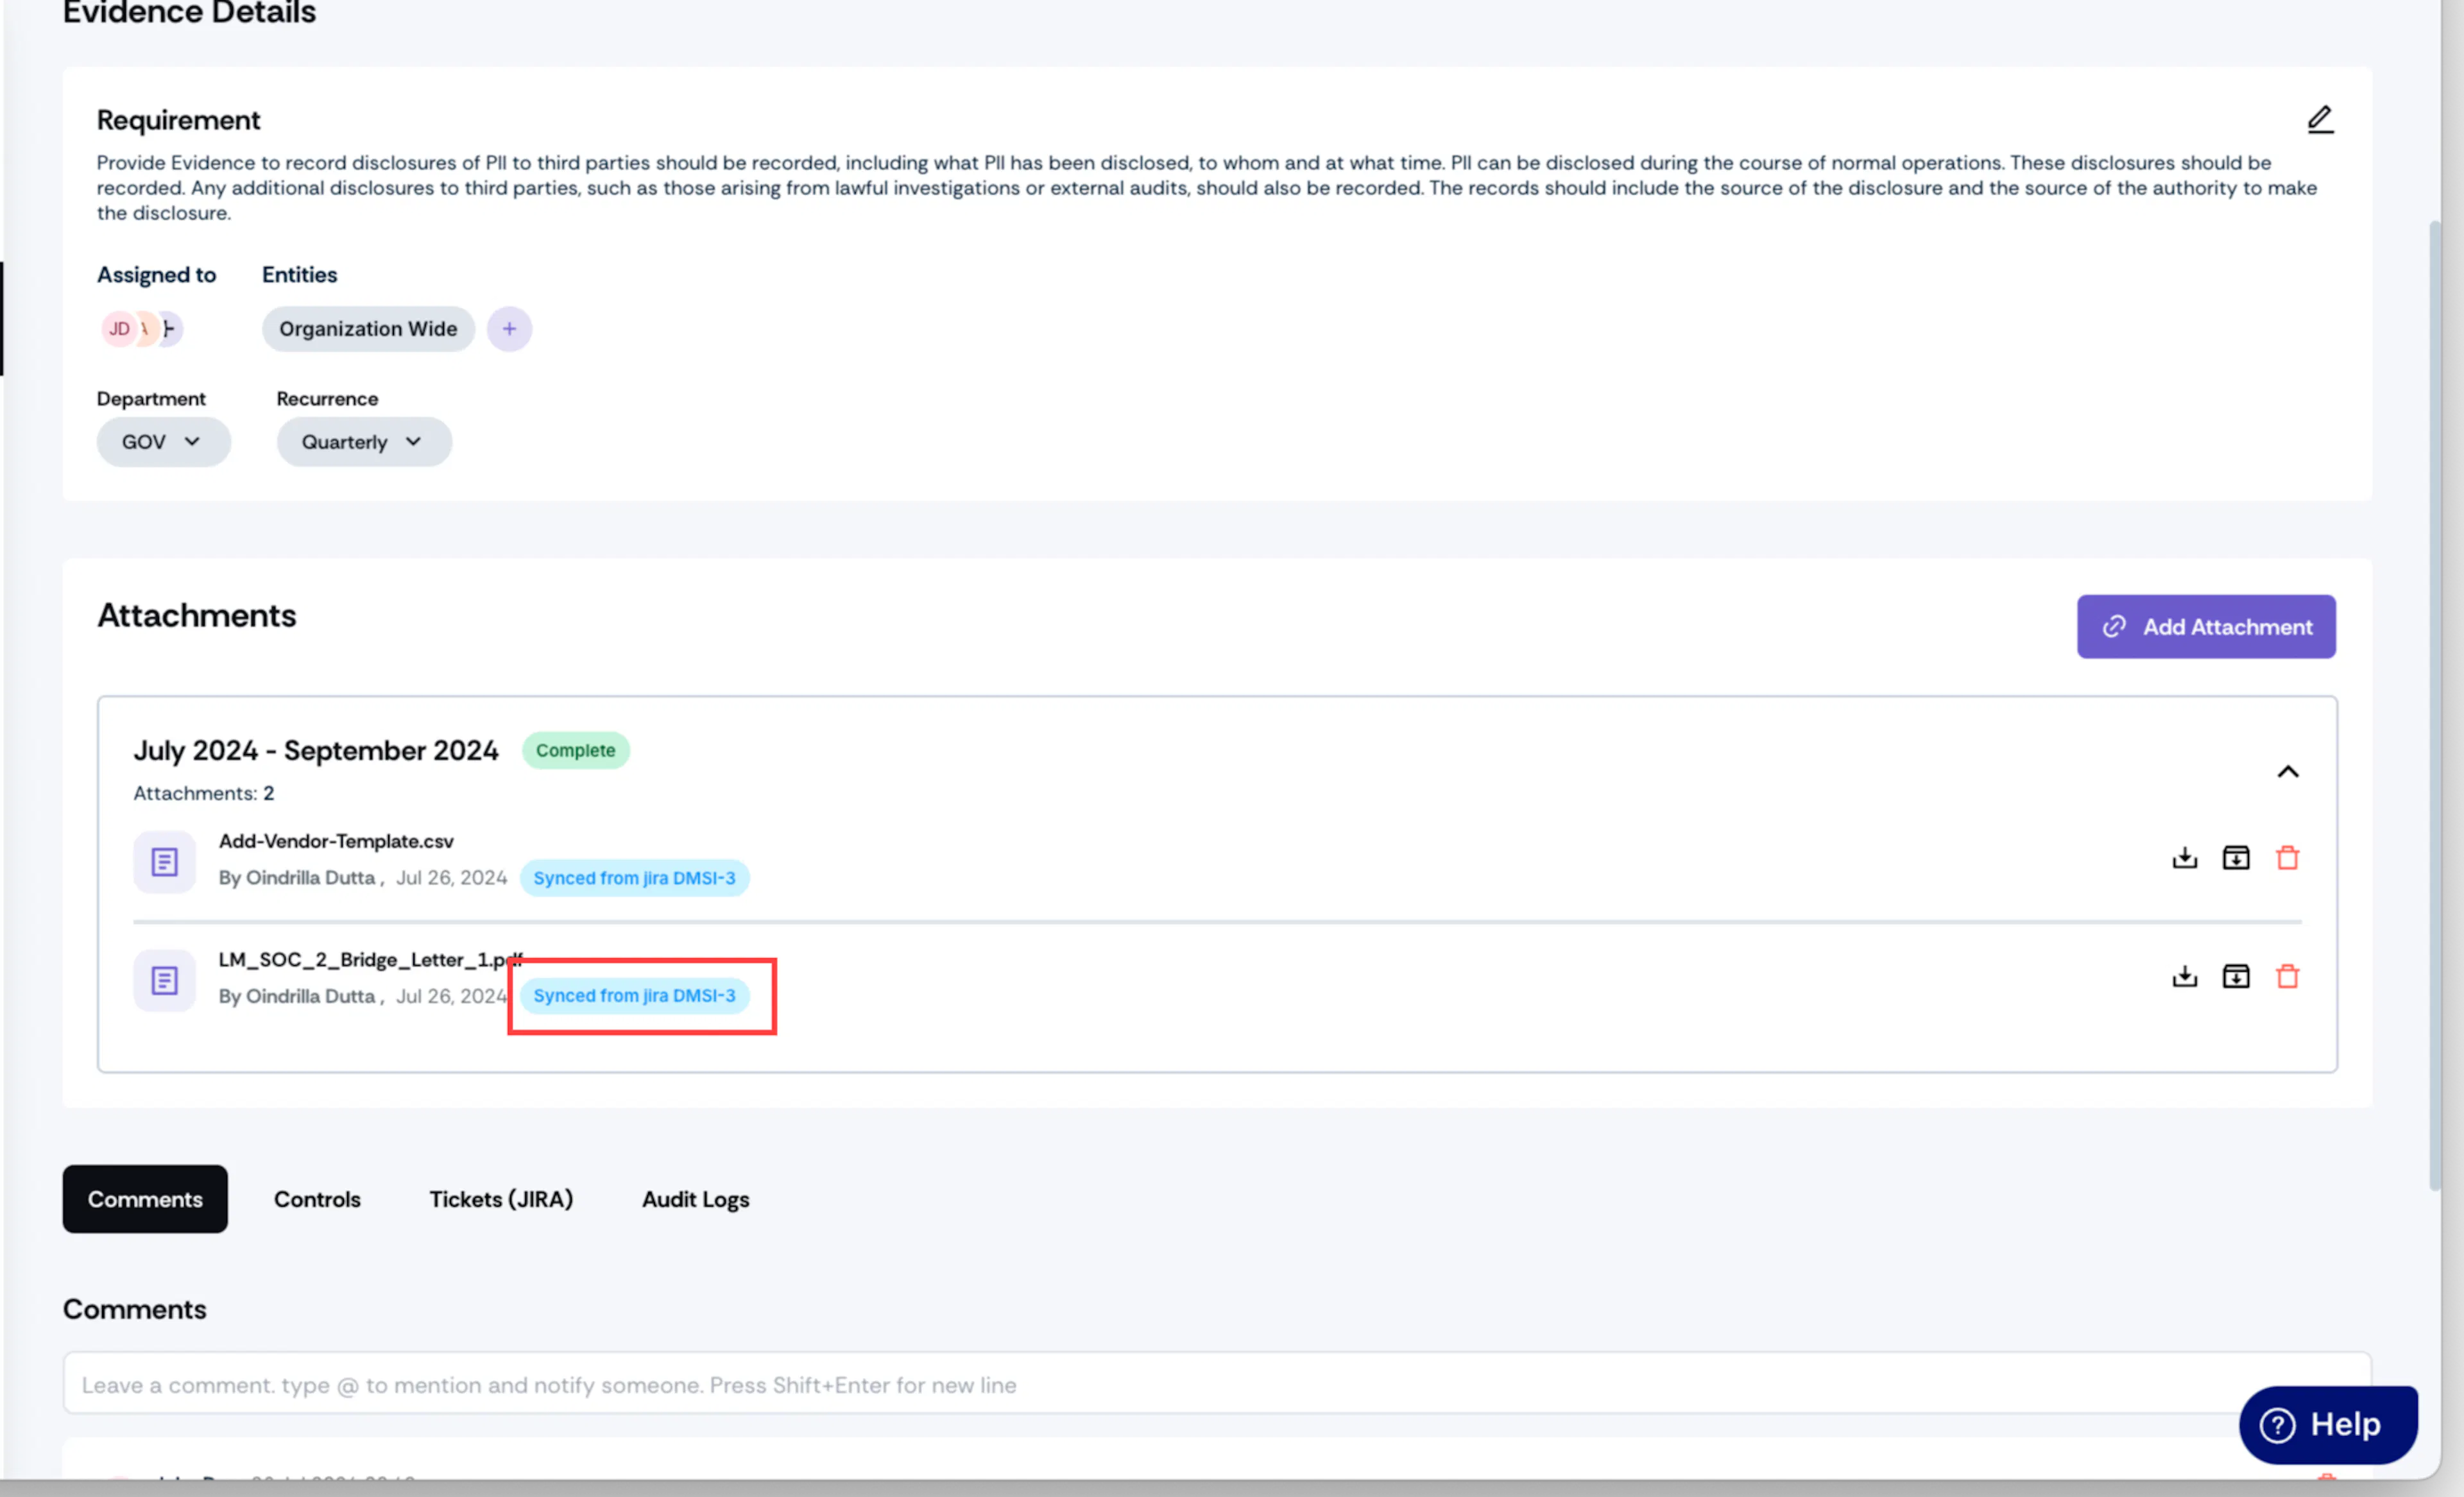
Setup Bi-Directional Sync With Jira for Evidence Management
The Scrut - Jira integration simplifies evidence management. Once you connect your Jira account with Scrut, the integration automatically imports and updates attachments from Jira tickets linked to your evidence tasks. Here’s how it works:
- Integrate Jira with Scrut: Begin by linking your organization’s Jira account with Scrut.
- Enable Automatic Import: Turn on automatic import of attachments from Jira to Evidence Tasks.
- Create or Link Jira Tickets: You can either create a new Jira ticket specifically for an evidence task or link an existing ticket.
- Automatic Syncing: Once the above steps are done, Scrut automatically retrieves any attachments added to the linked Jira ticket and synchronizes them with the corresponding evidence task. This means you no longer need to upload attachments manually.
- Ongoing Updates: If any attachment is modified in Jira, Scrut will automatically fetch the latest version and update it in the corresponding evidence task. This ensures that you always have the most current documents and files associated with your tasks.
This integration significantly reduces manual work and ensures that your evidence tasks are always up-to-date with the necessary documentation.
Prerequisites
- Ensure the Scrut - Jira integration is completed and working successfully. For step-by-step instructions, refer to this help guide.
Step 1: Enable Automatic Import of Attachments from Jira to Evidence Tasks
-
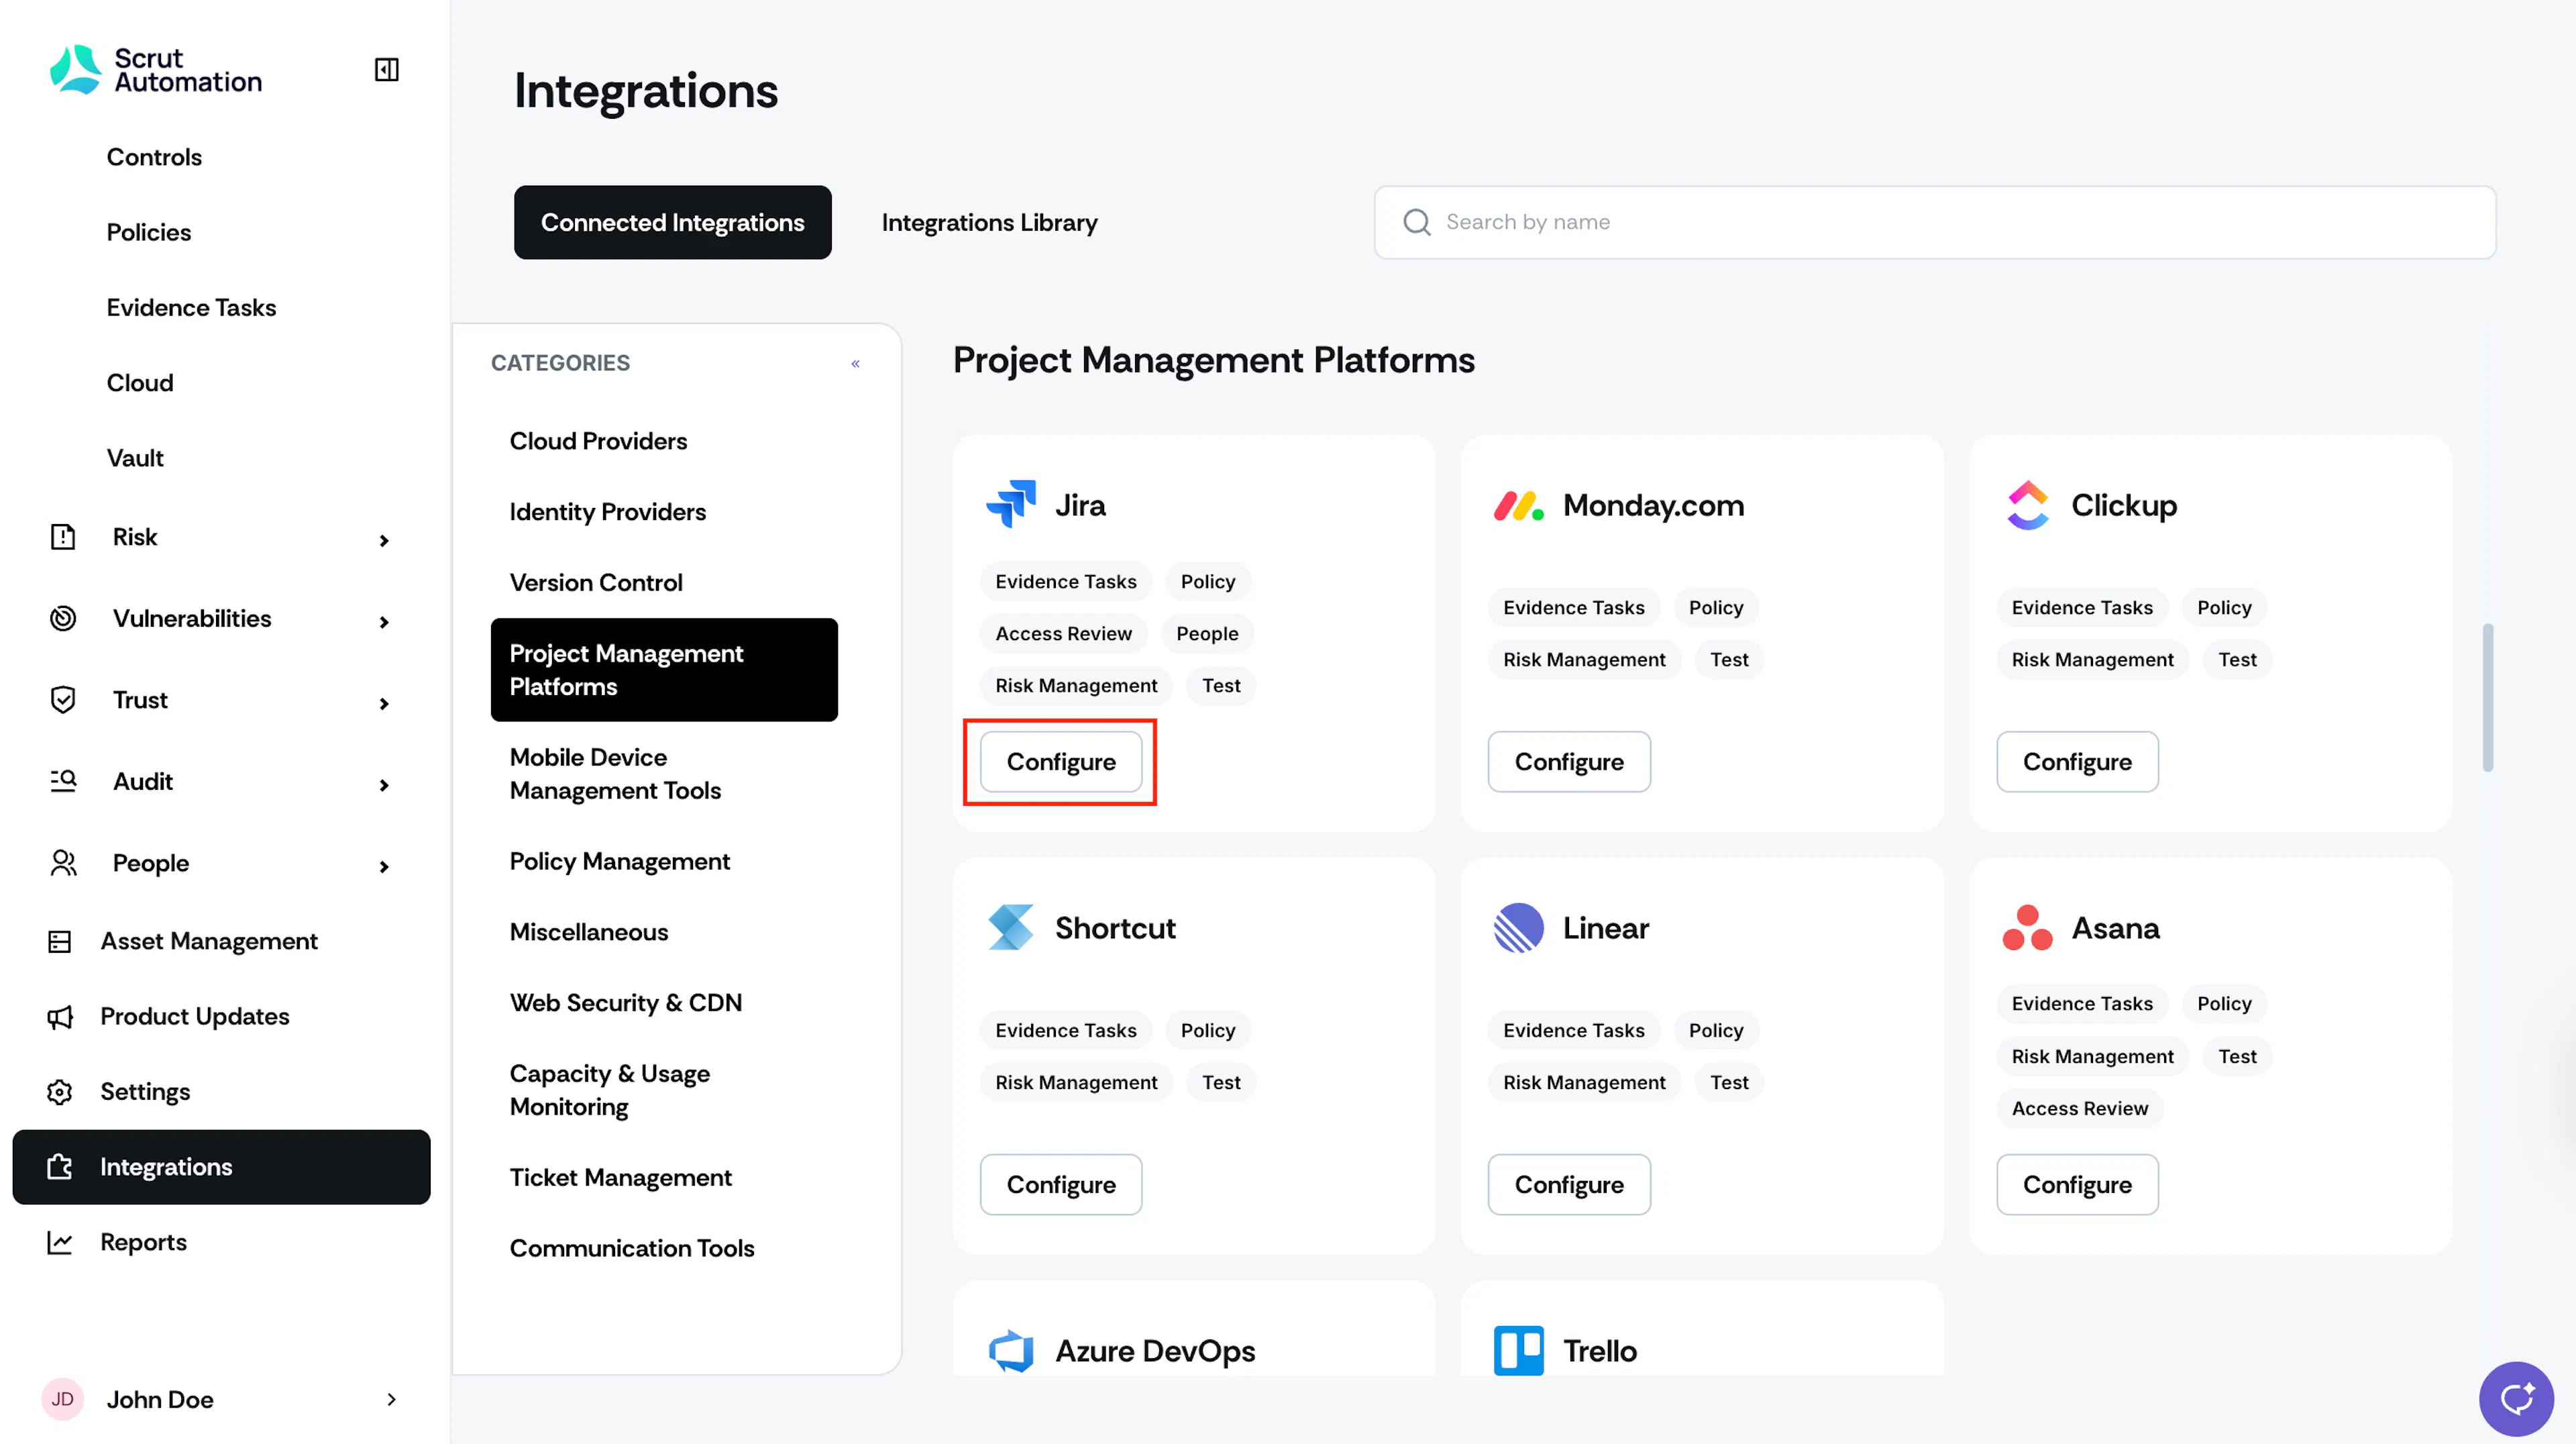
Navigate to Integrations → Connected Integrations → Project Management Platforms, and click the Configure button on the Jira integration tile.
-
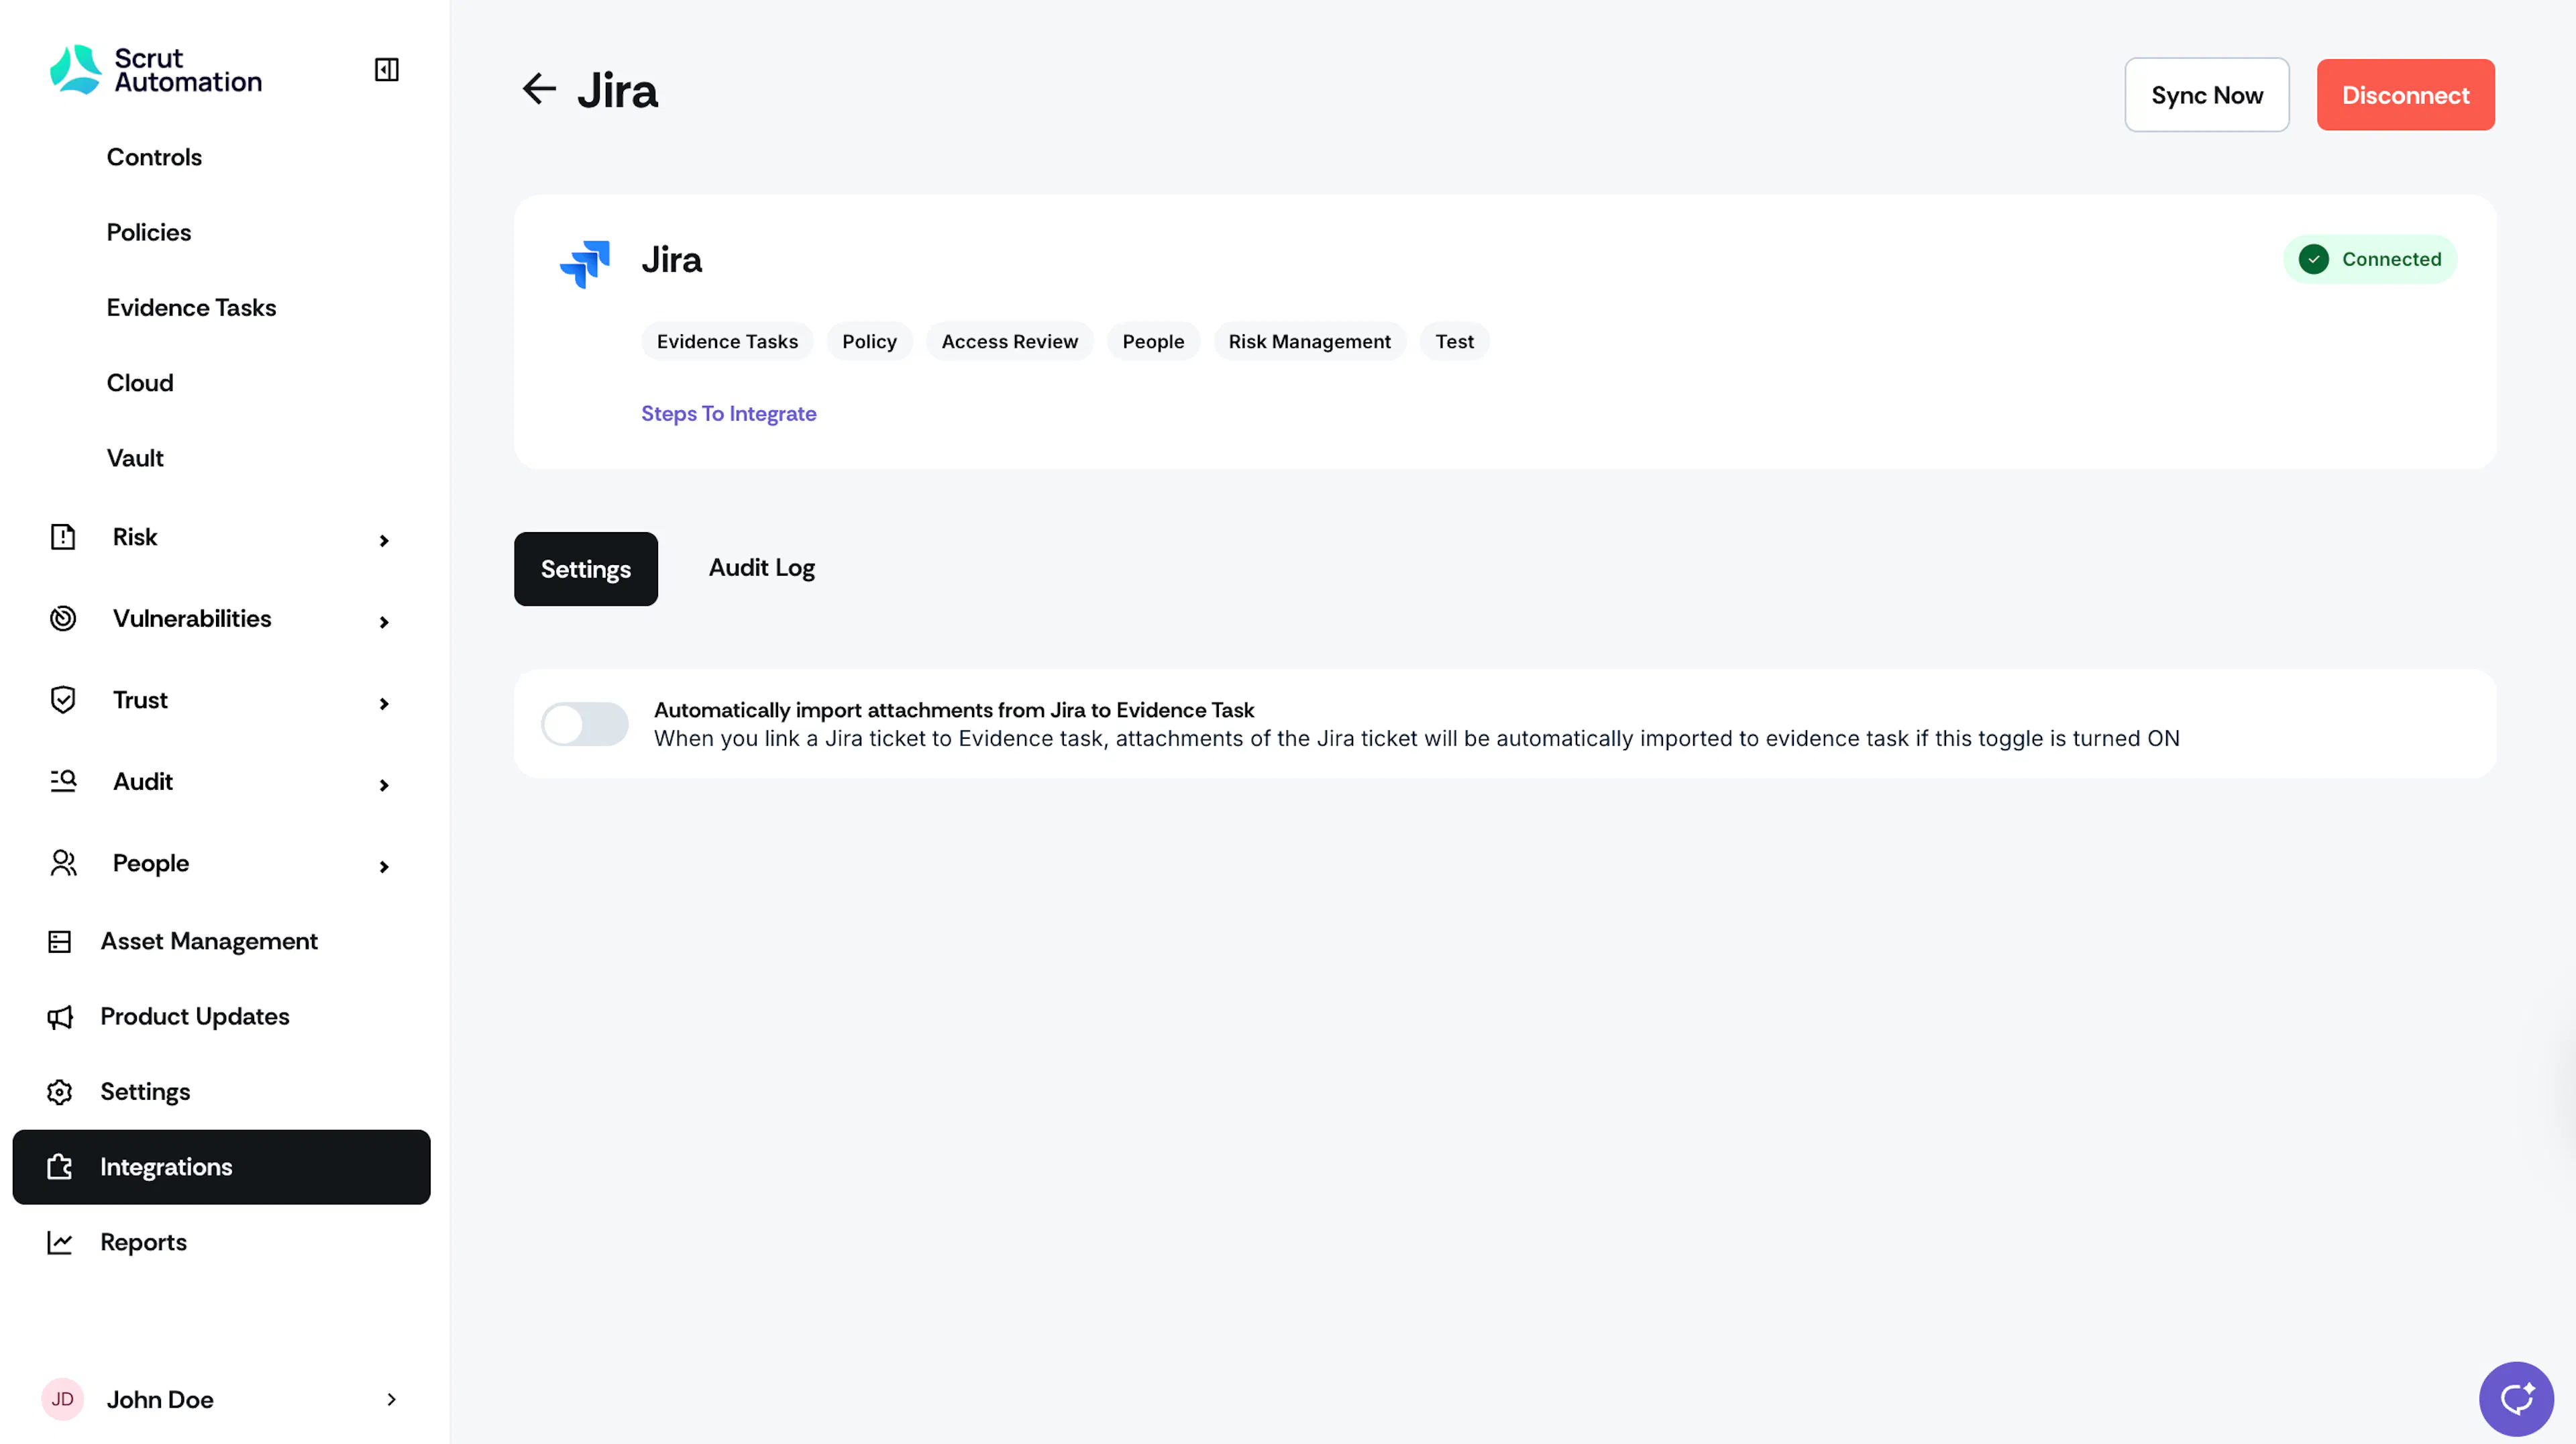
Navigate to the Settings tab on the Jira integration page, and turn on the toggle to enable the automatic import of attachments from Jira to Evidence Tasks.
-
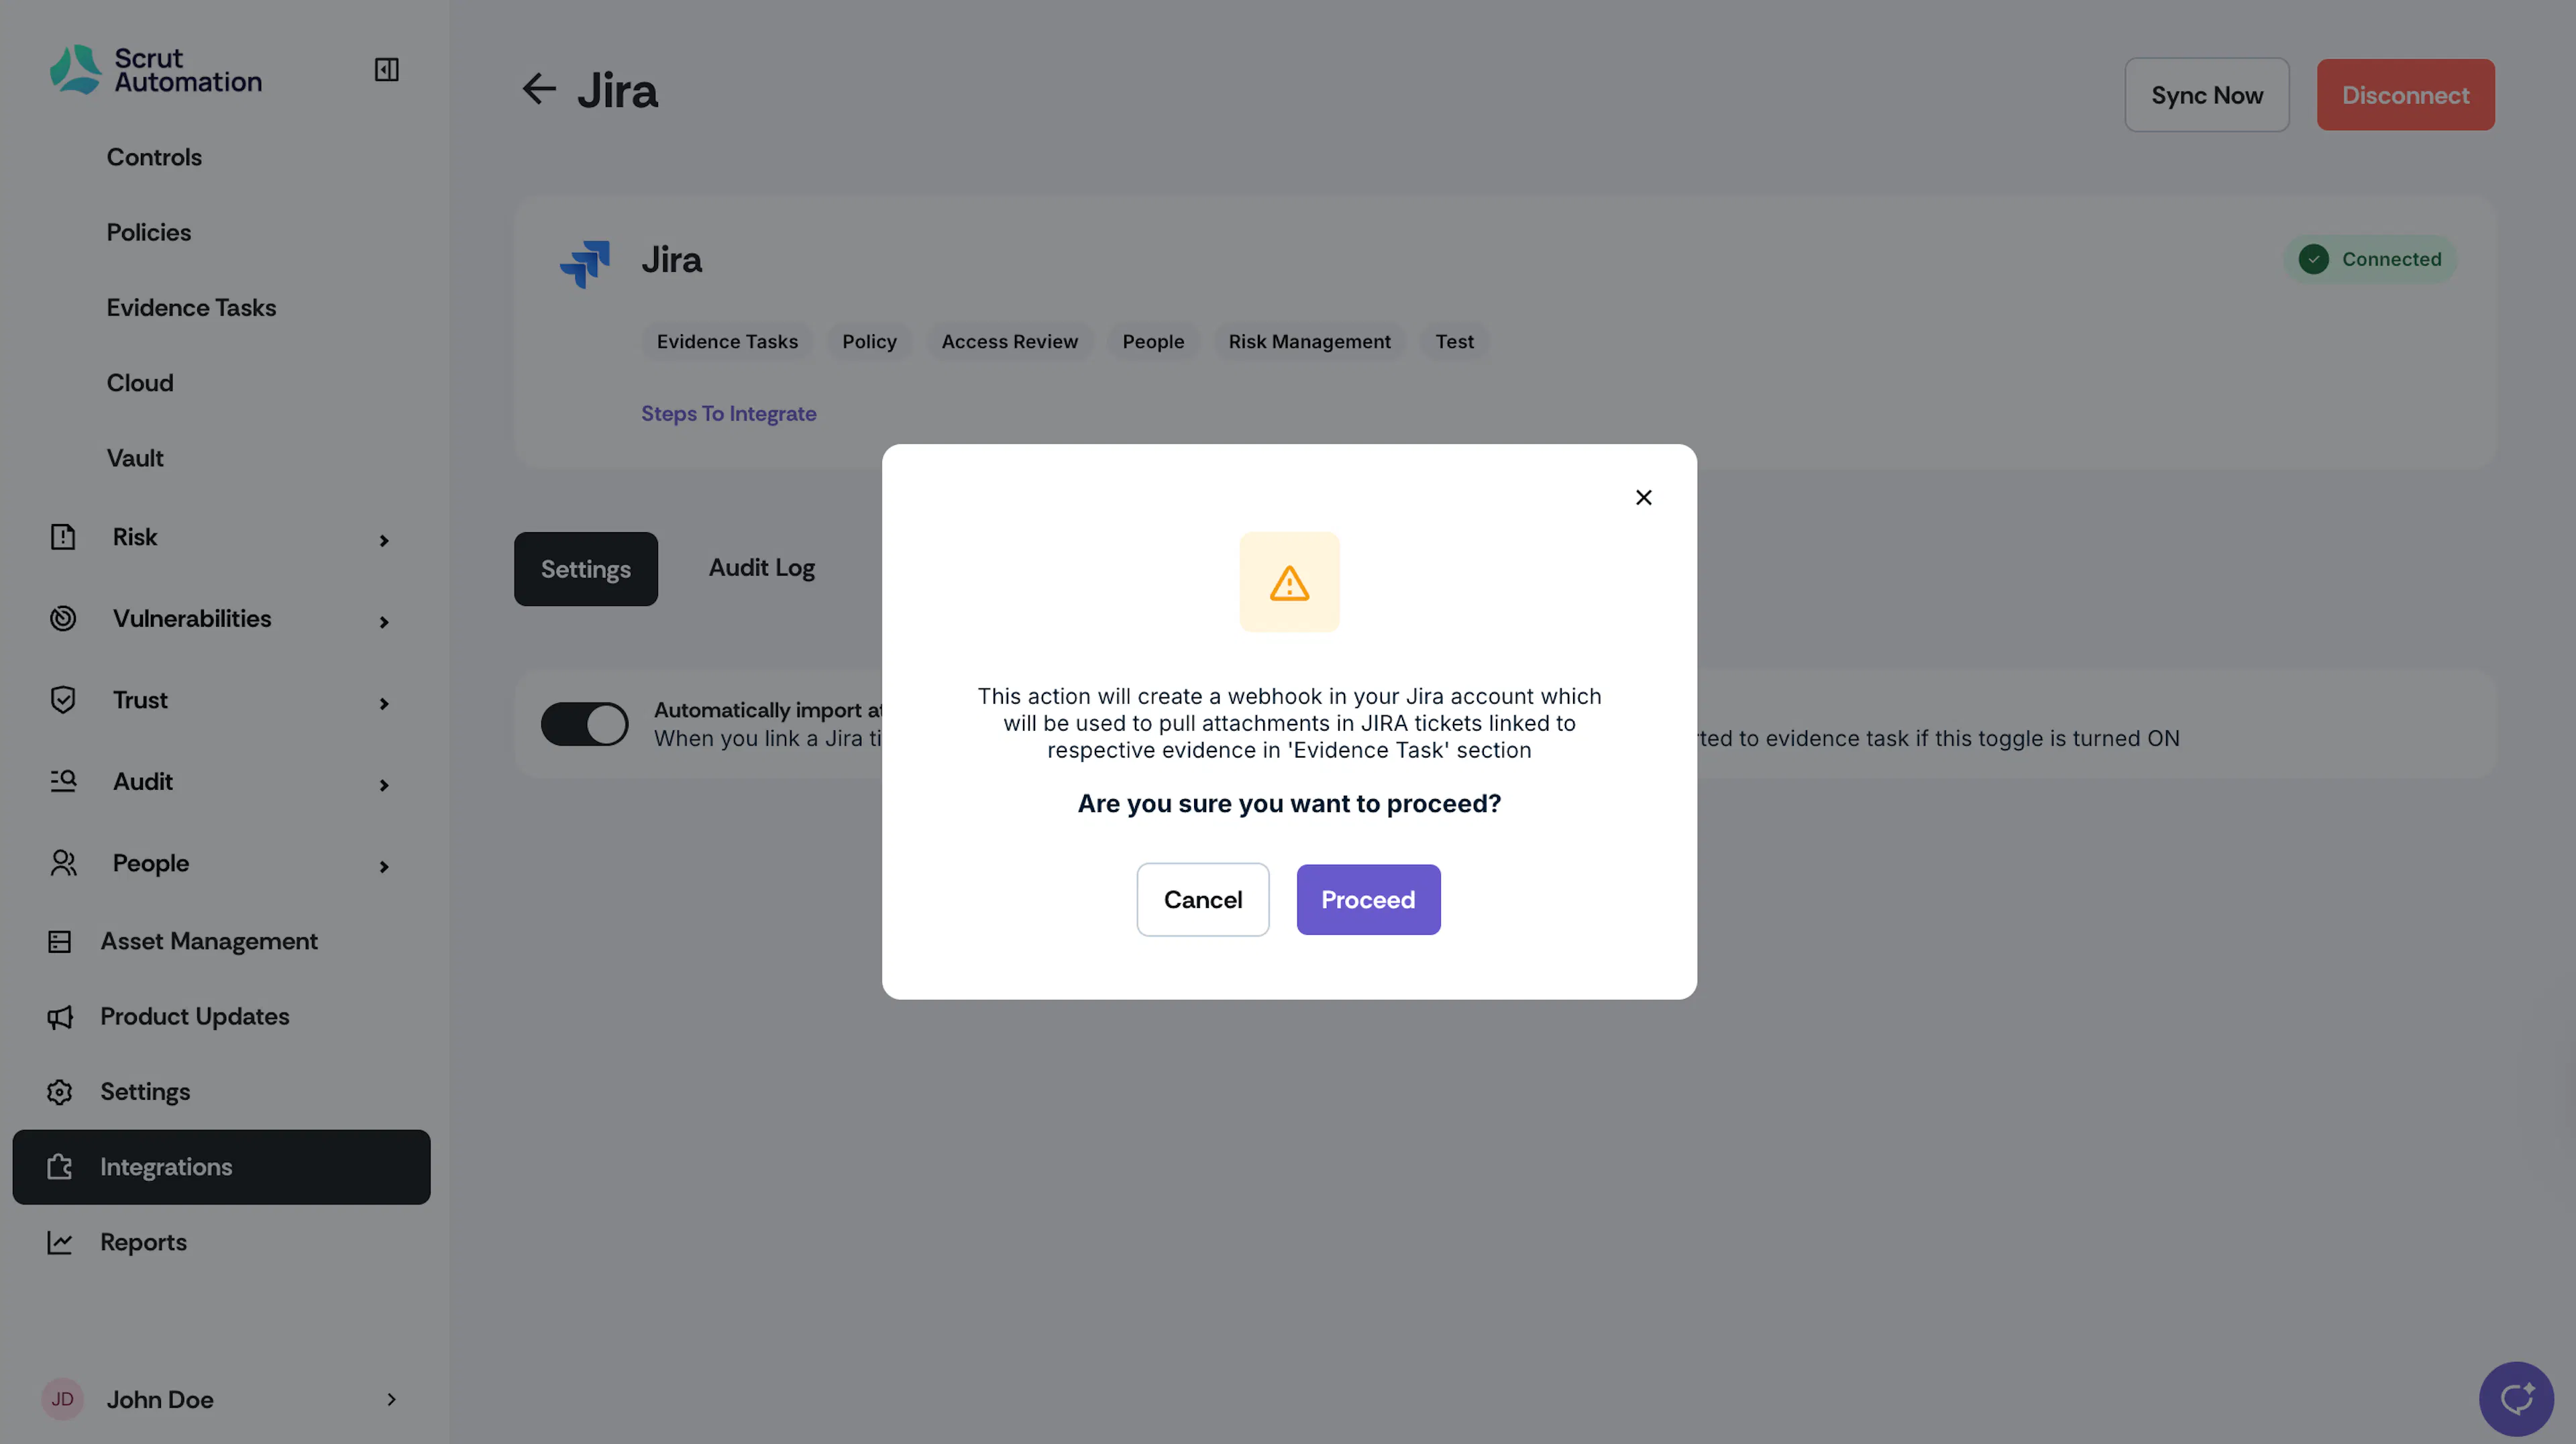
Click Proceed to continue.
Step 2: Automatically Import Evidence from Jira
-
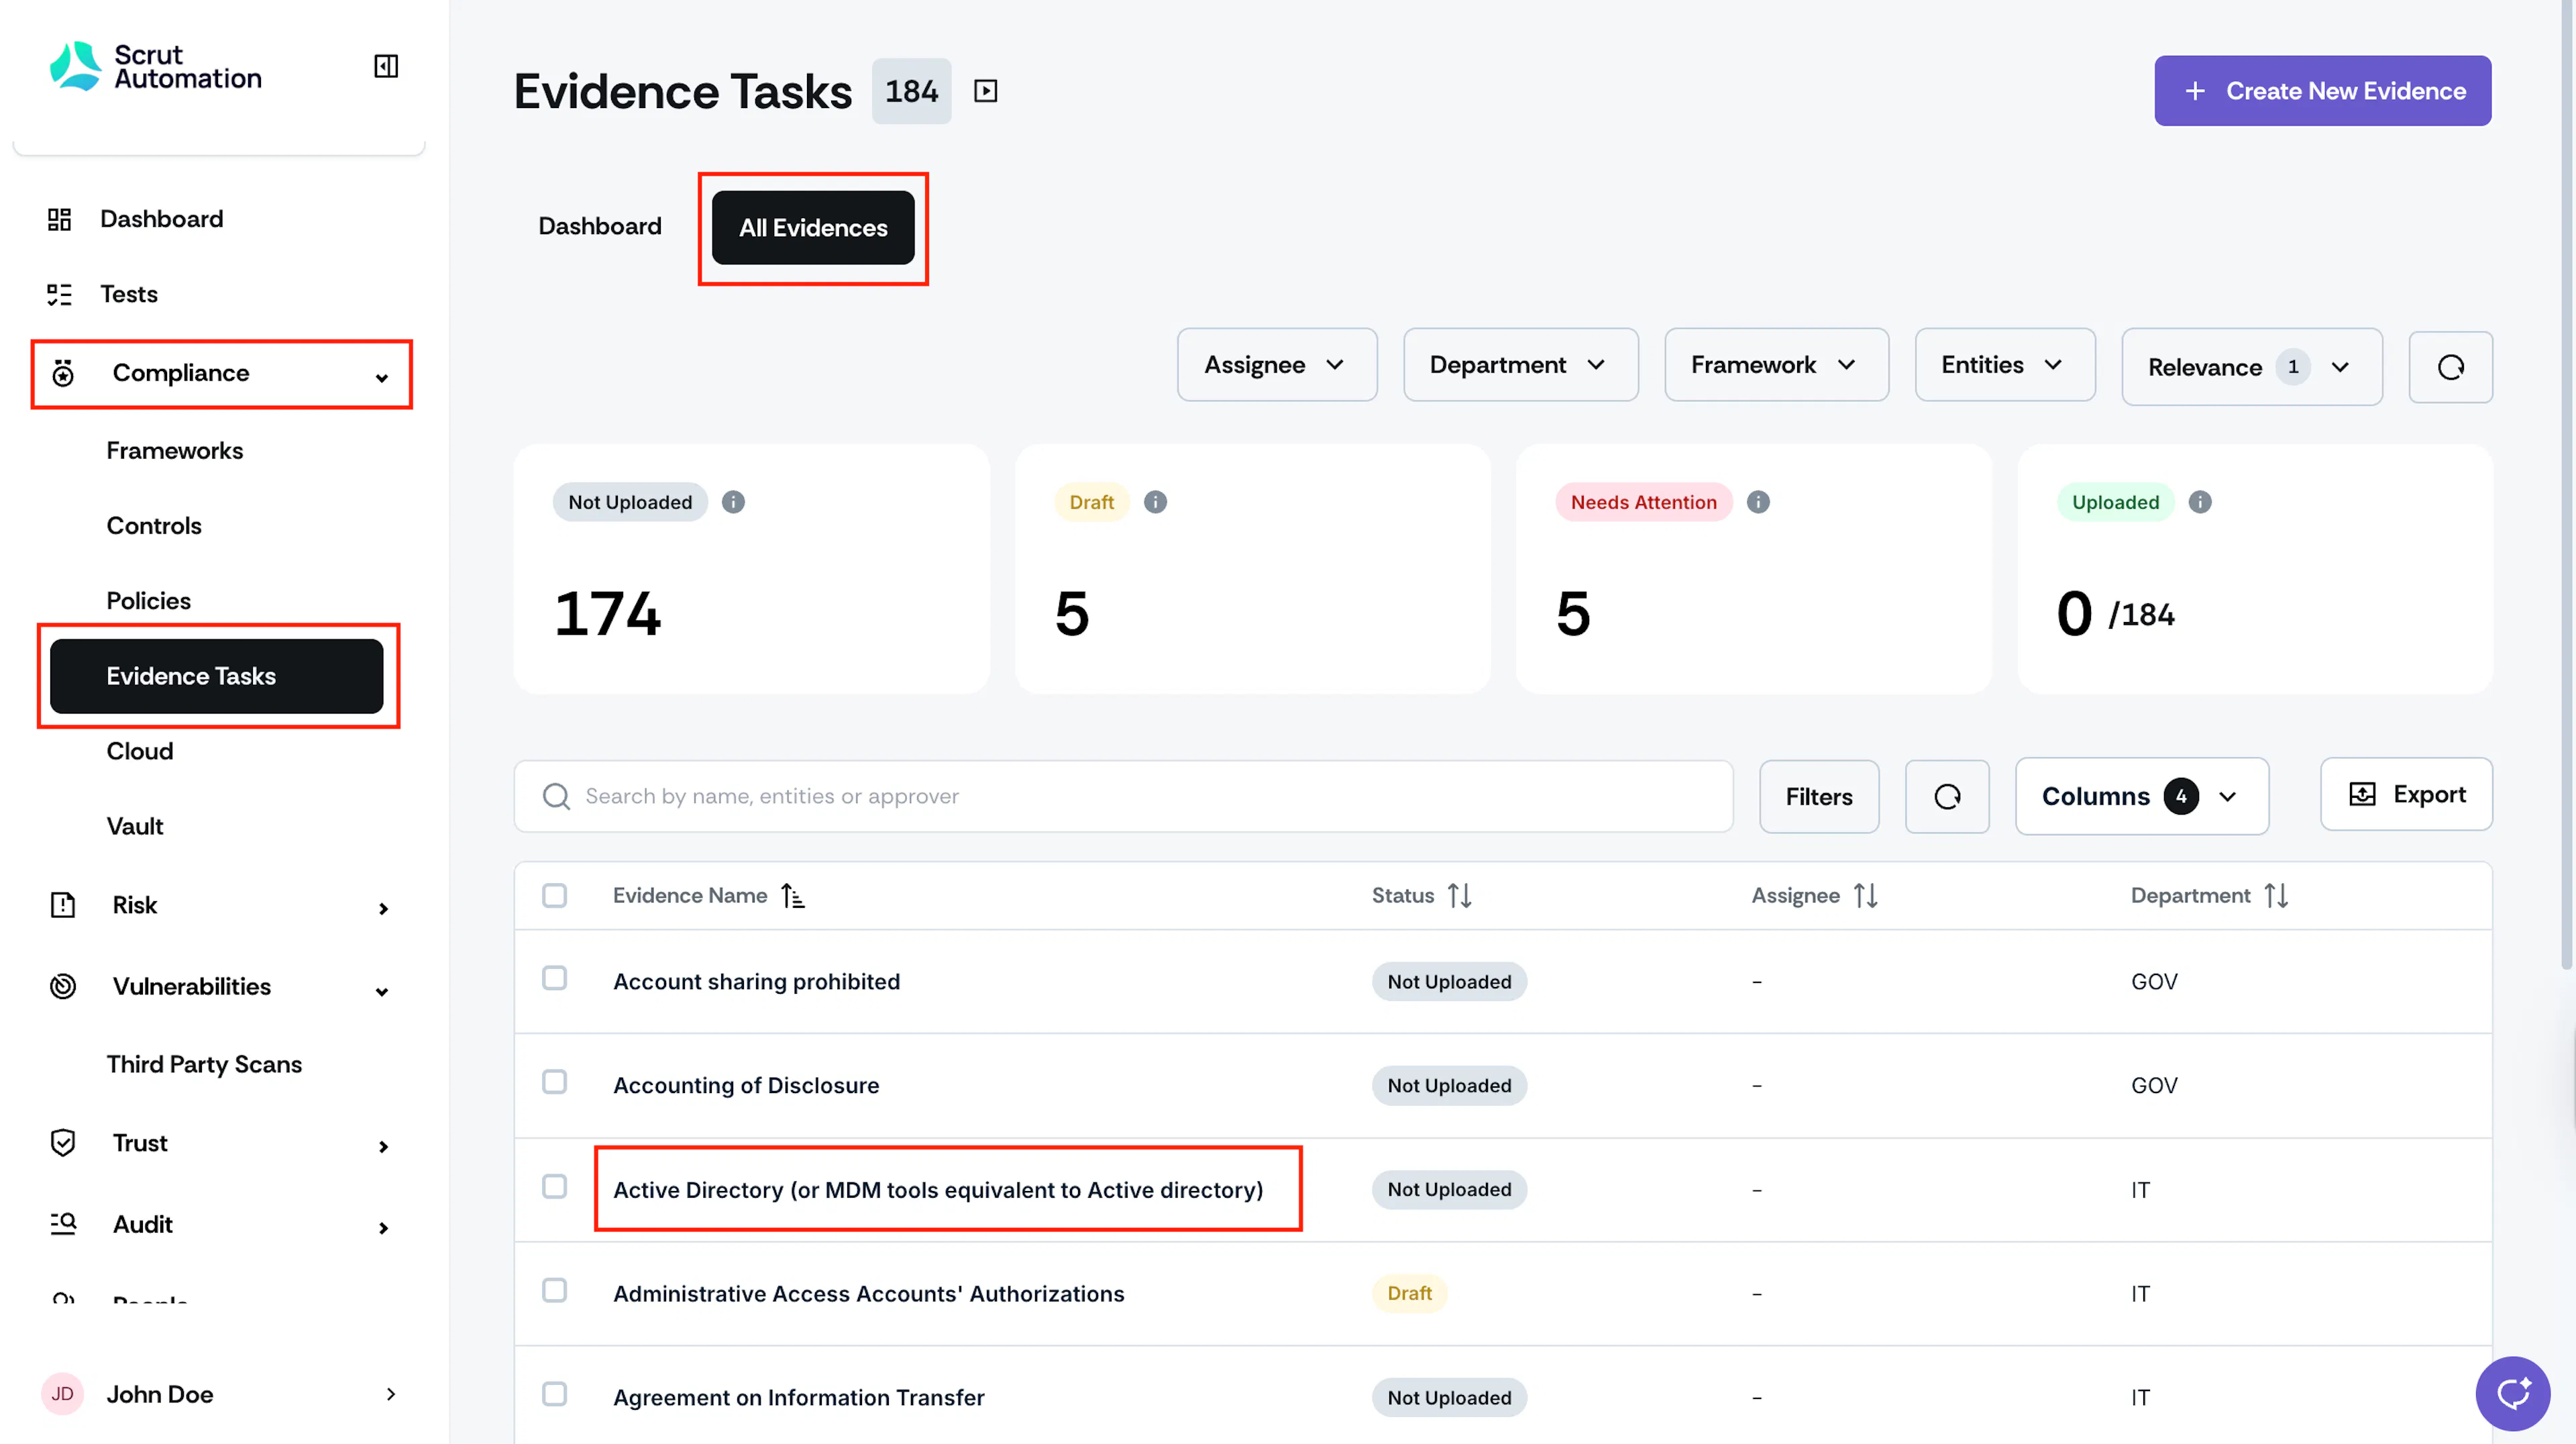
Go to Compliance → Evidence Tasks → All Evidences, and click on the task for which you want to automatically import evidence from Jira.
-
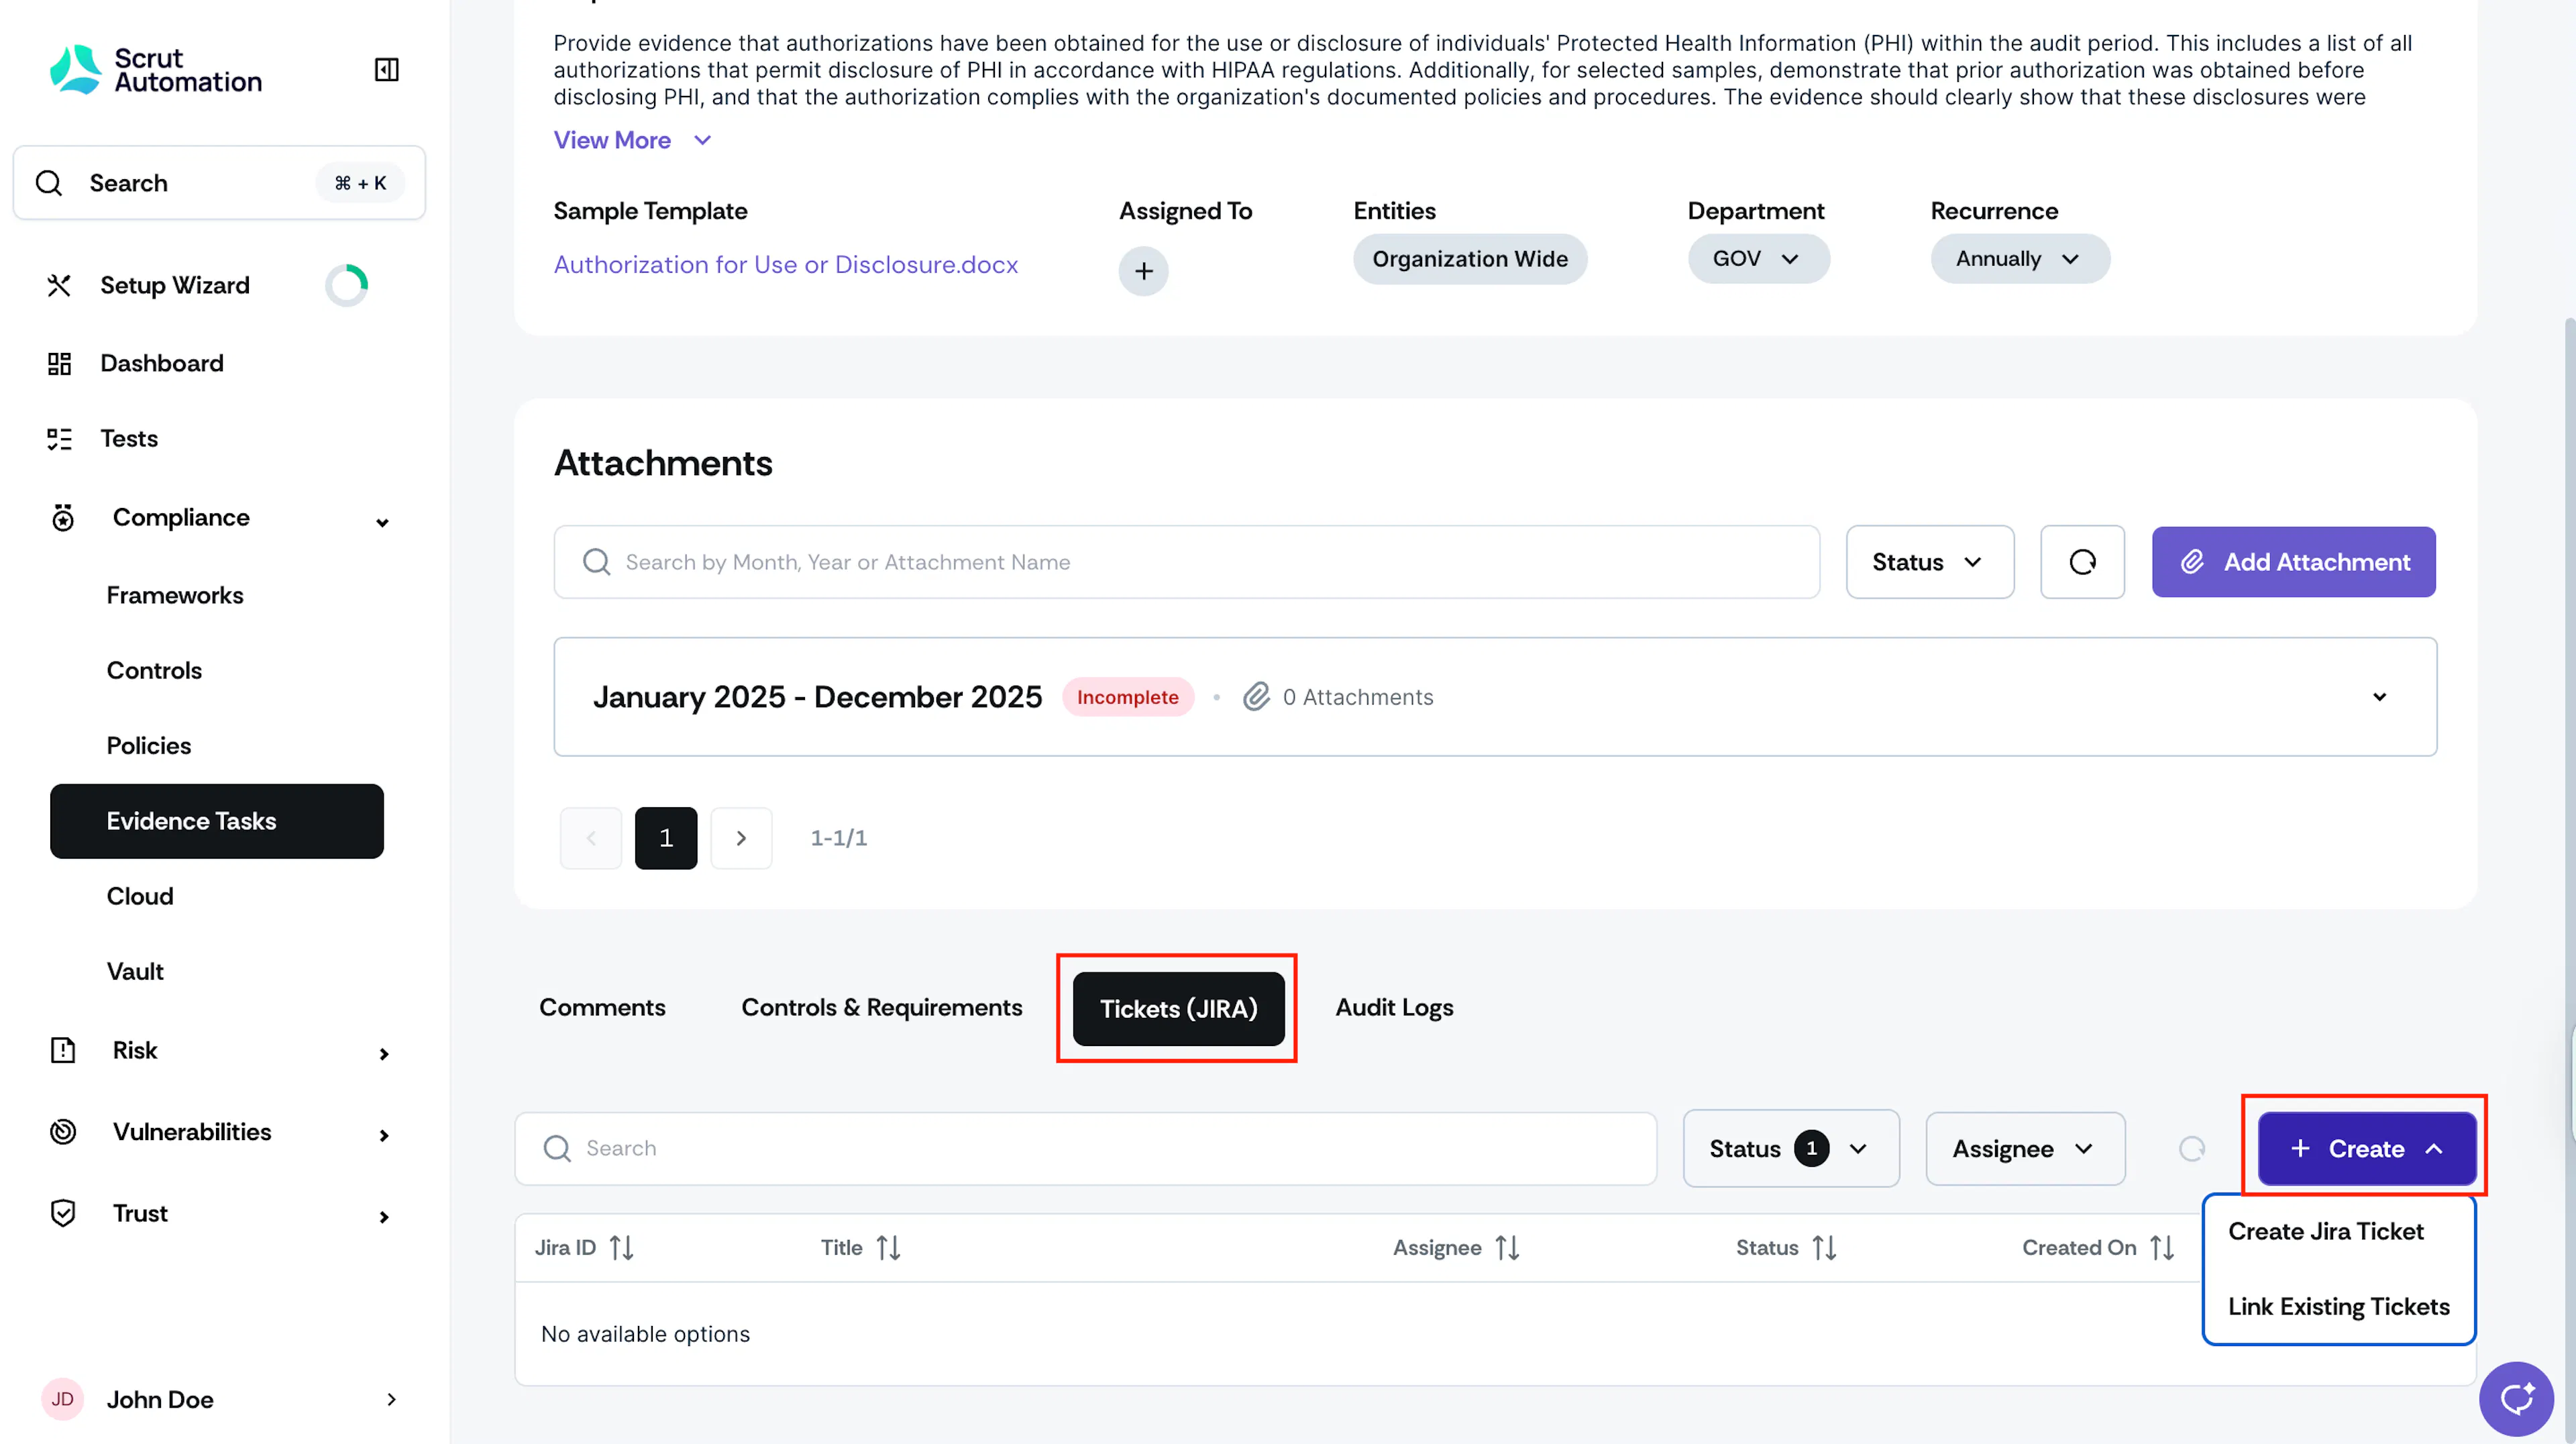
Once you’re on the Evidence Details page, scroll to the Tickets (Jira) tab.
-
Here, you have two options:
Create Jira Ticket
Choose this option if you want to create a fresh Jira ticket for this evidence task. Enter the ticket details.
-
Project: Select the project you want to assign this Jira ticket to.
-
Board: Choose your Jira board. Note: This dropdown will be unavailable if you don’t have boards in your Jira workspace.
-
Issue Type: Select the task type from the options available.
-
Title: Scrut automatically fills the title based on the artifact from which you create the ticket. The default format is: [Scrut - Module Name] Artifact Name. However, you can edit it if required.
-
Description: Click Autofill to let Scrut fill in the description with relevant metadata, such as assignee, evidence links, remediation steps, and more. You can edit the auto-filled text, as required.
Pro Tip!
Use the Preview to view how the description will appear in your Jira workspace. The description supports Markdown for text formatting.
-
Assignee: Select the assignee to whom you want to assign this ticket.
-
Due Date [Optional]: Choose the time frame for closing the ticket: 1, 3, 7, 15, or 30 days.
-
Optional Fields: To add extra details to the ticket, use the optional fields (Sprint, Epic Link, Priority, Components), as required.
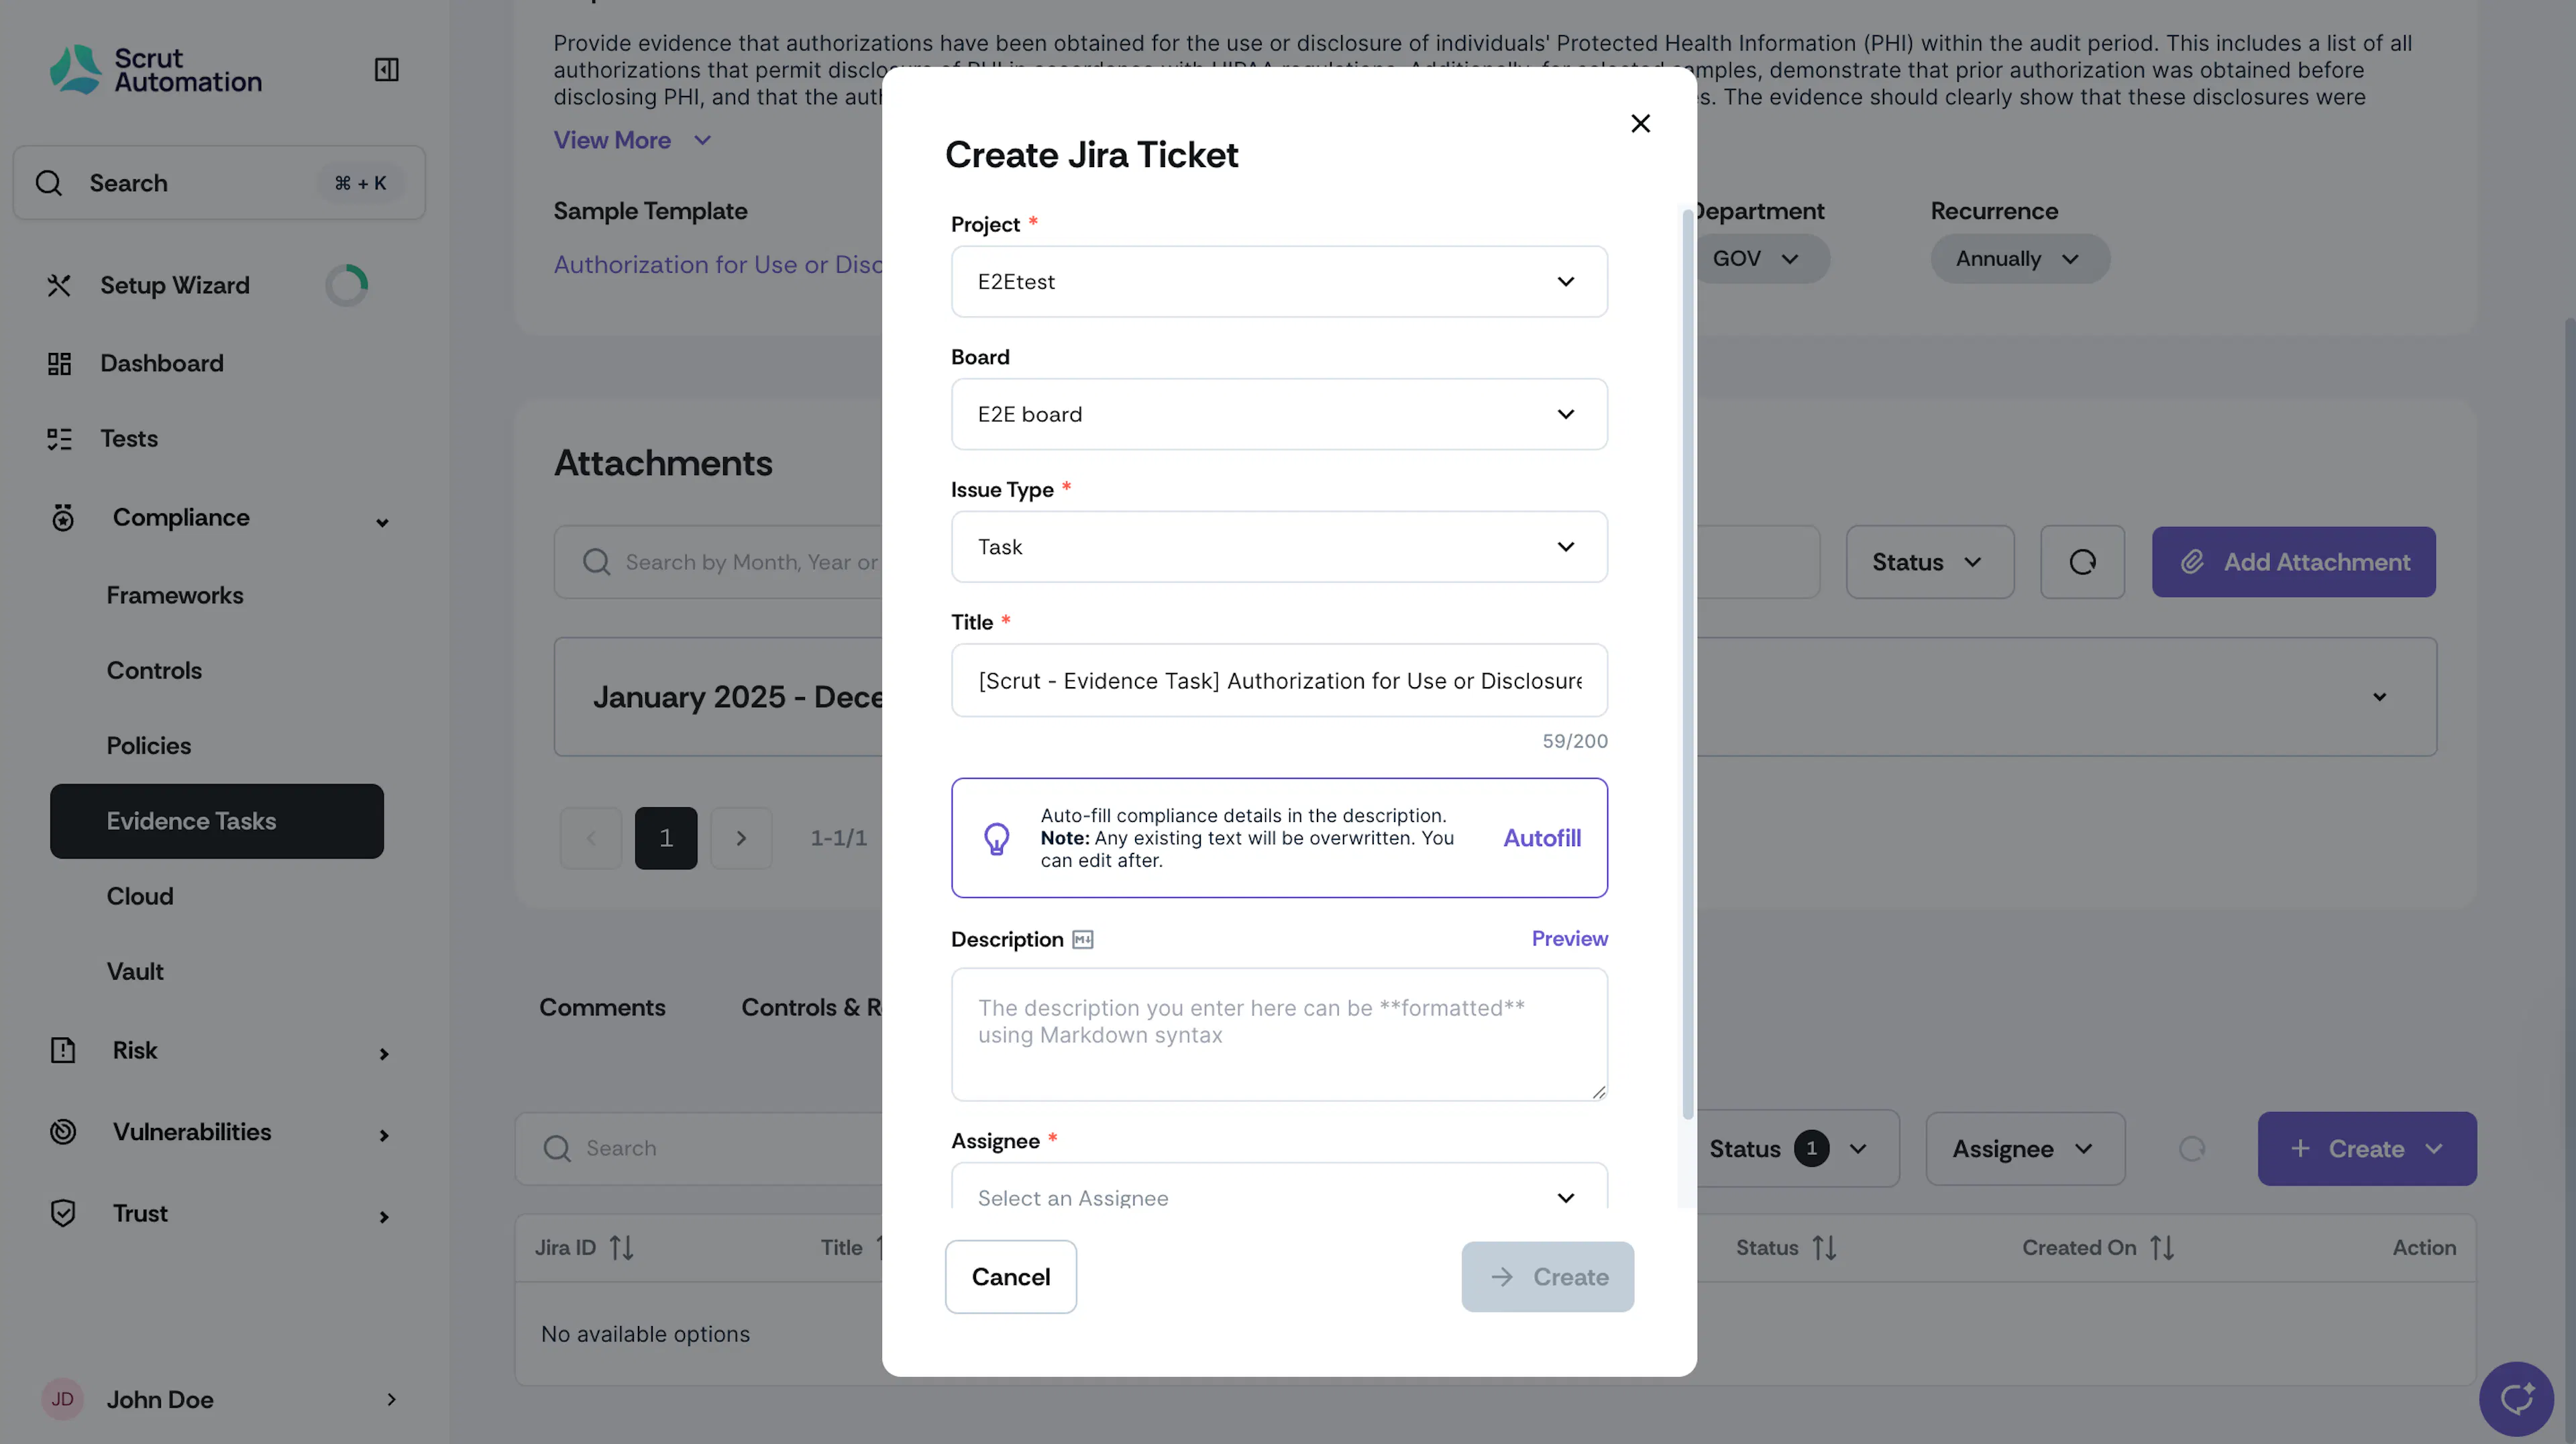
The newly created Jira ticket will be visible in the same tab.
Heads Up!
The ticket's status and other details are updated in real-time, eliminating the need to switch to JIRA for the latest updates on its status and progress.
Link Existing Jira Ticket
Choose this option if you want to link an existing Jira ticket to this evidence task.
- Enter the Jira ticket ID (or paste the ticket link).
- Select the ticket.
- Click Link.
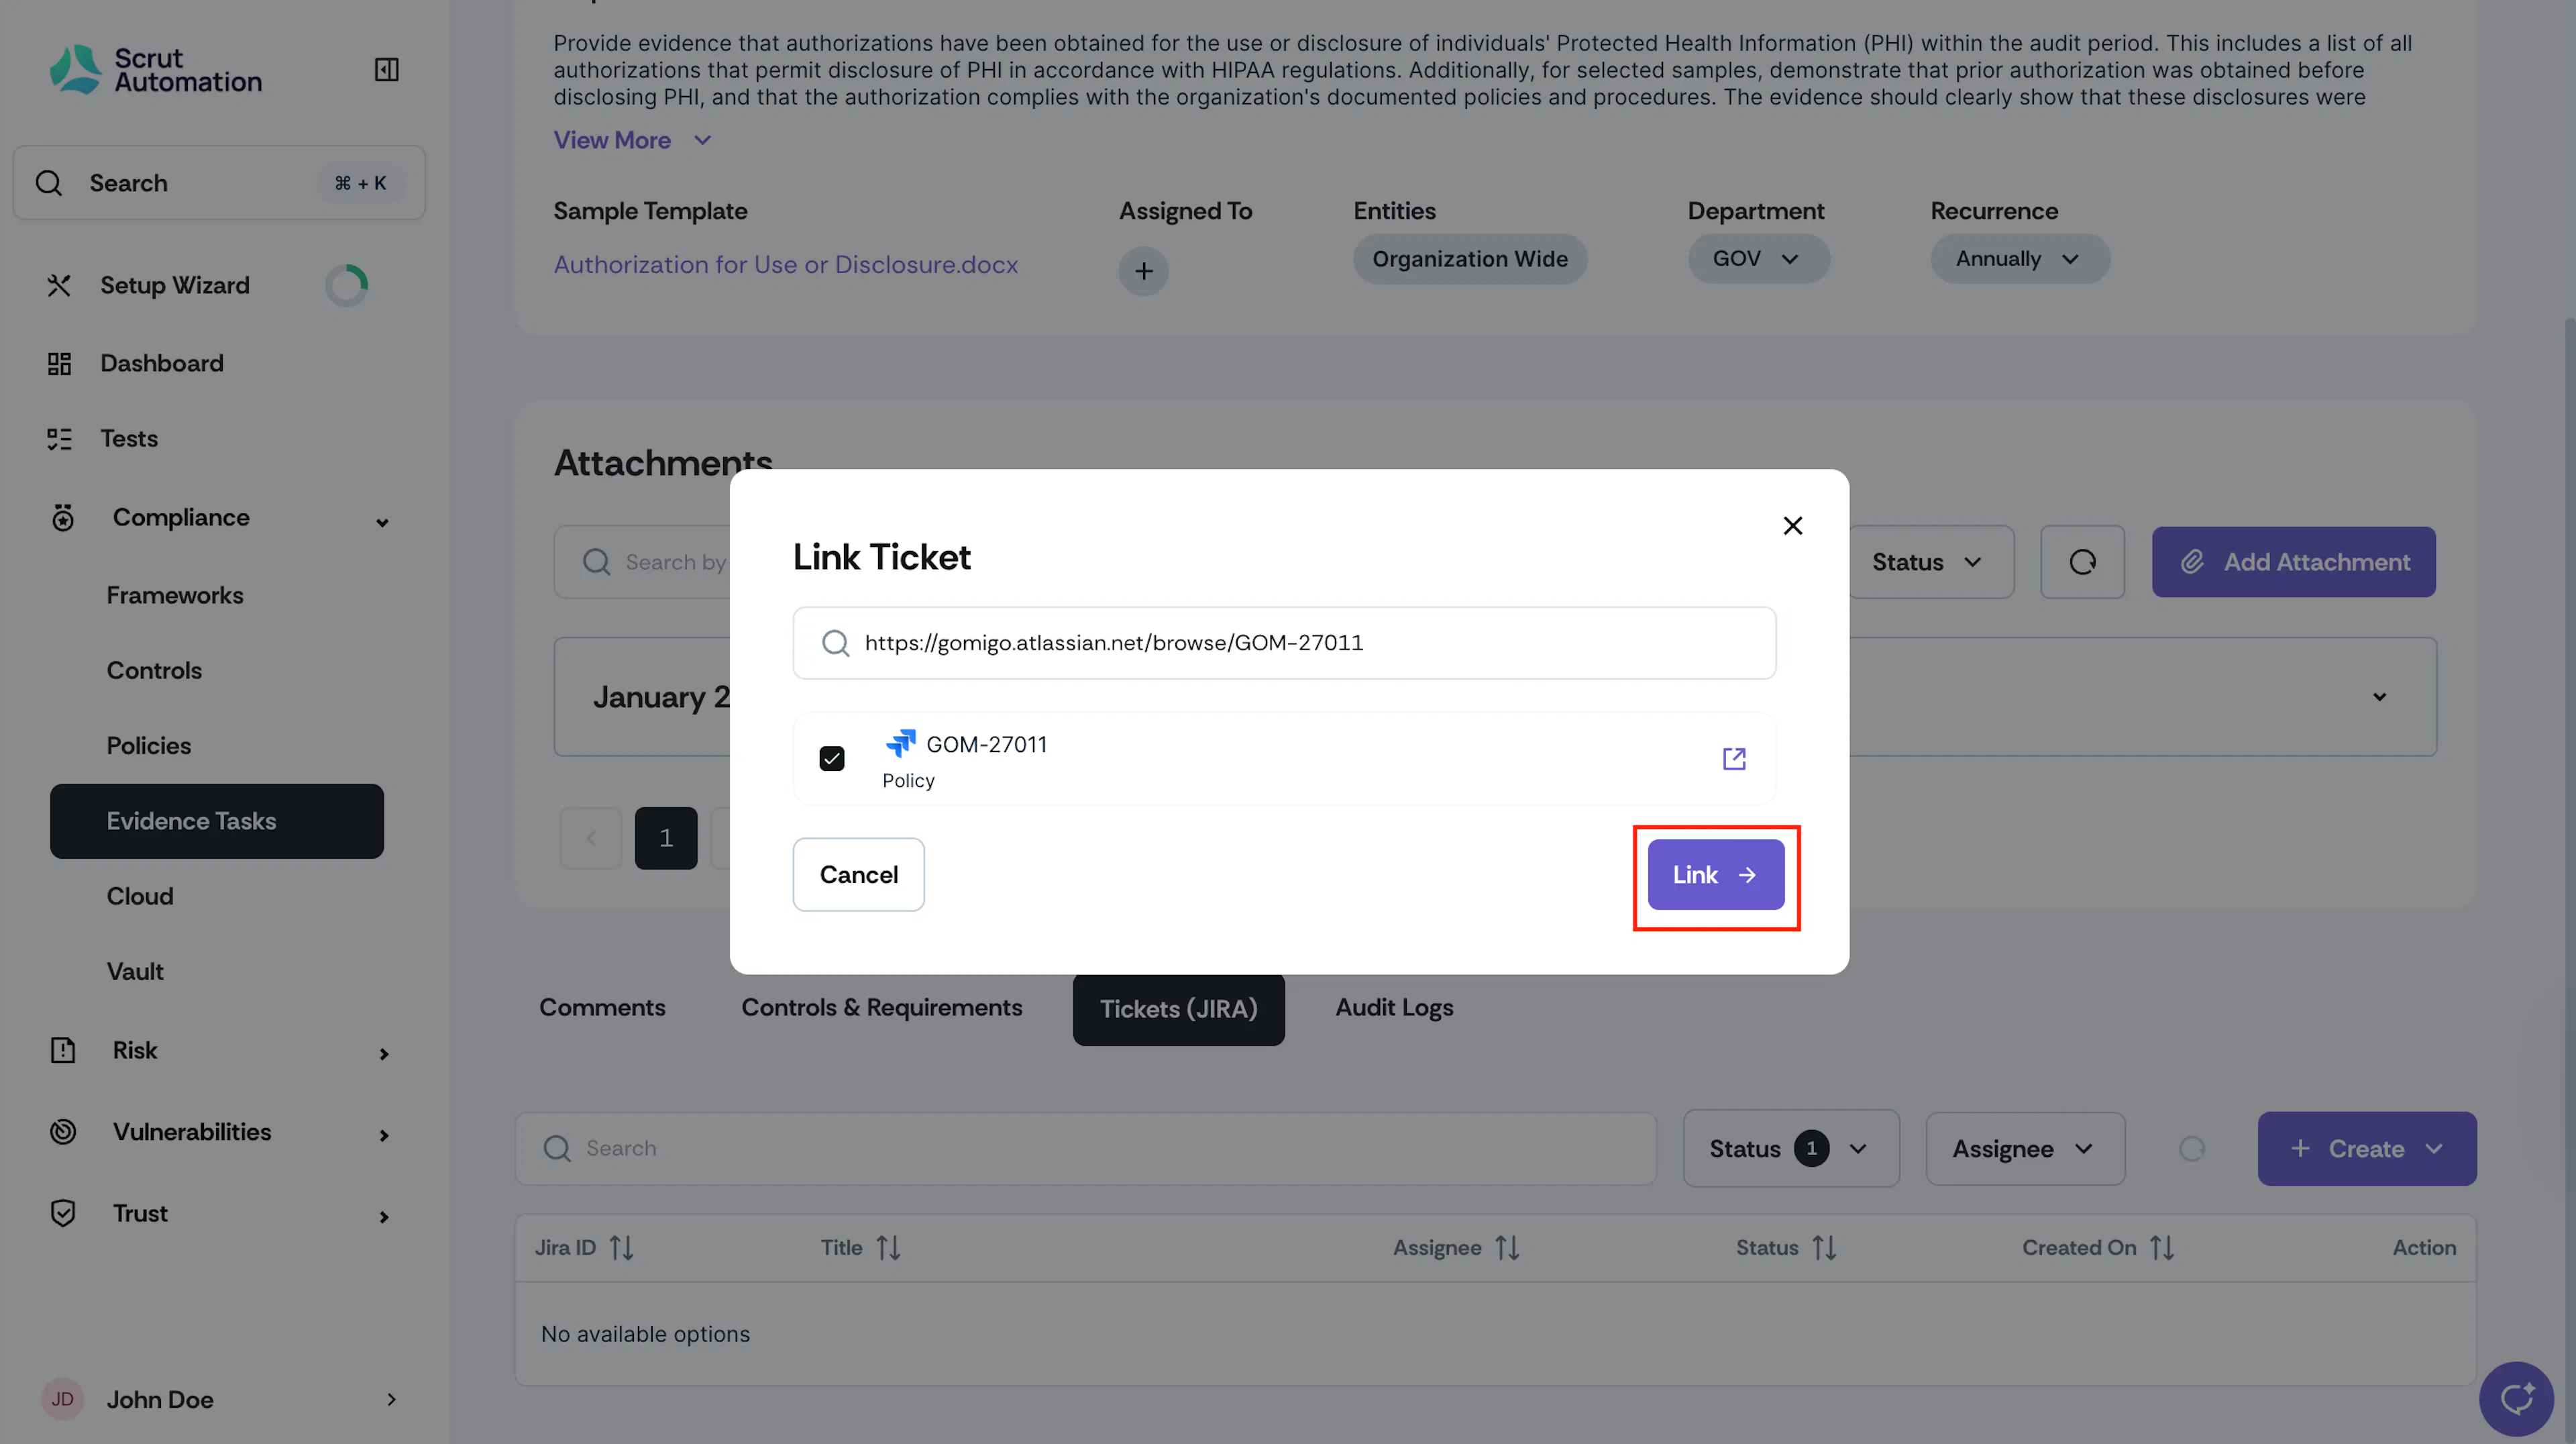
The linked Jira ticket will be visible in the same tab.
Pro Tips
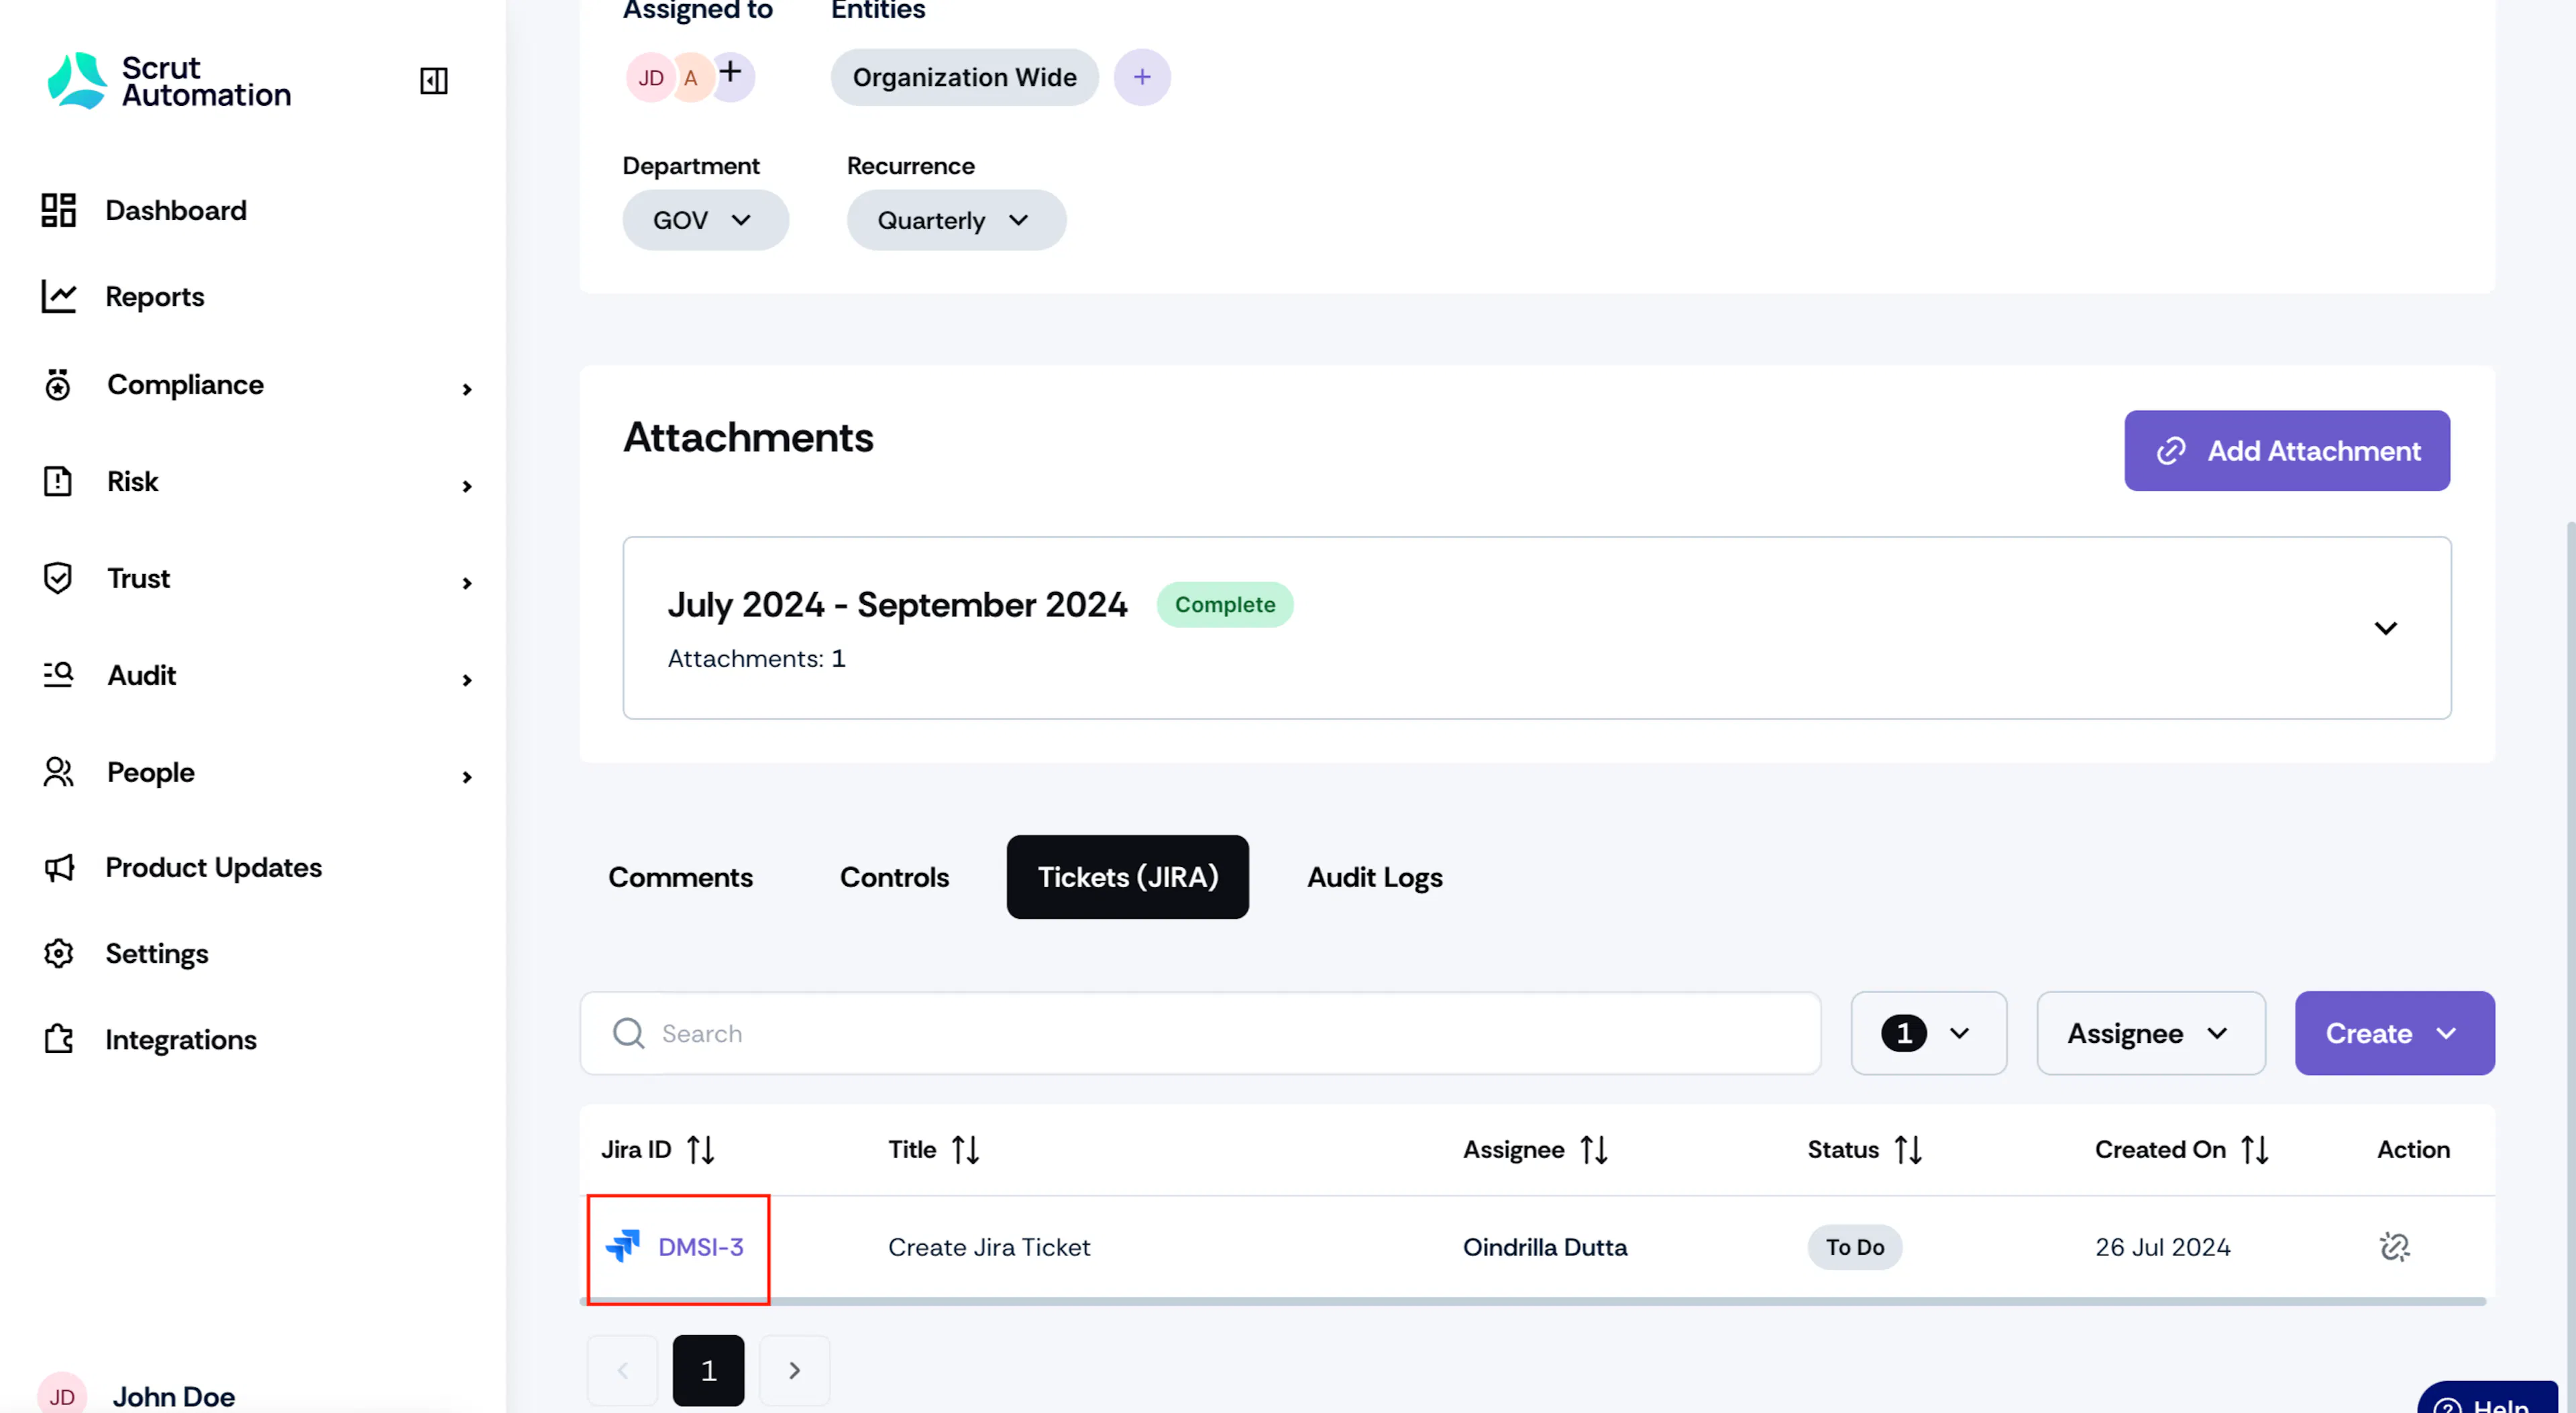
1: Access the Jira ticket directly from Scrut by clicking the hyperlink.
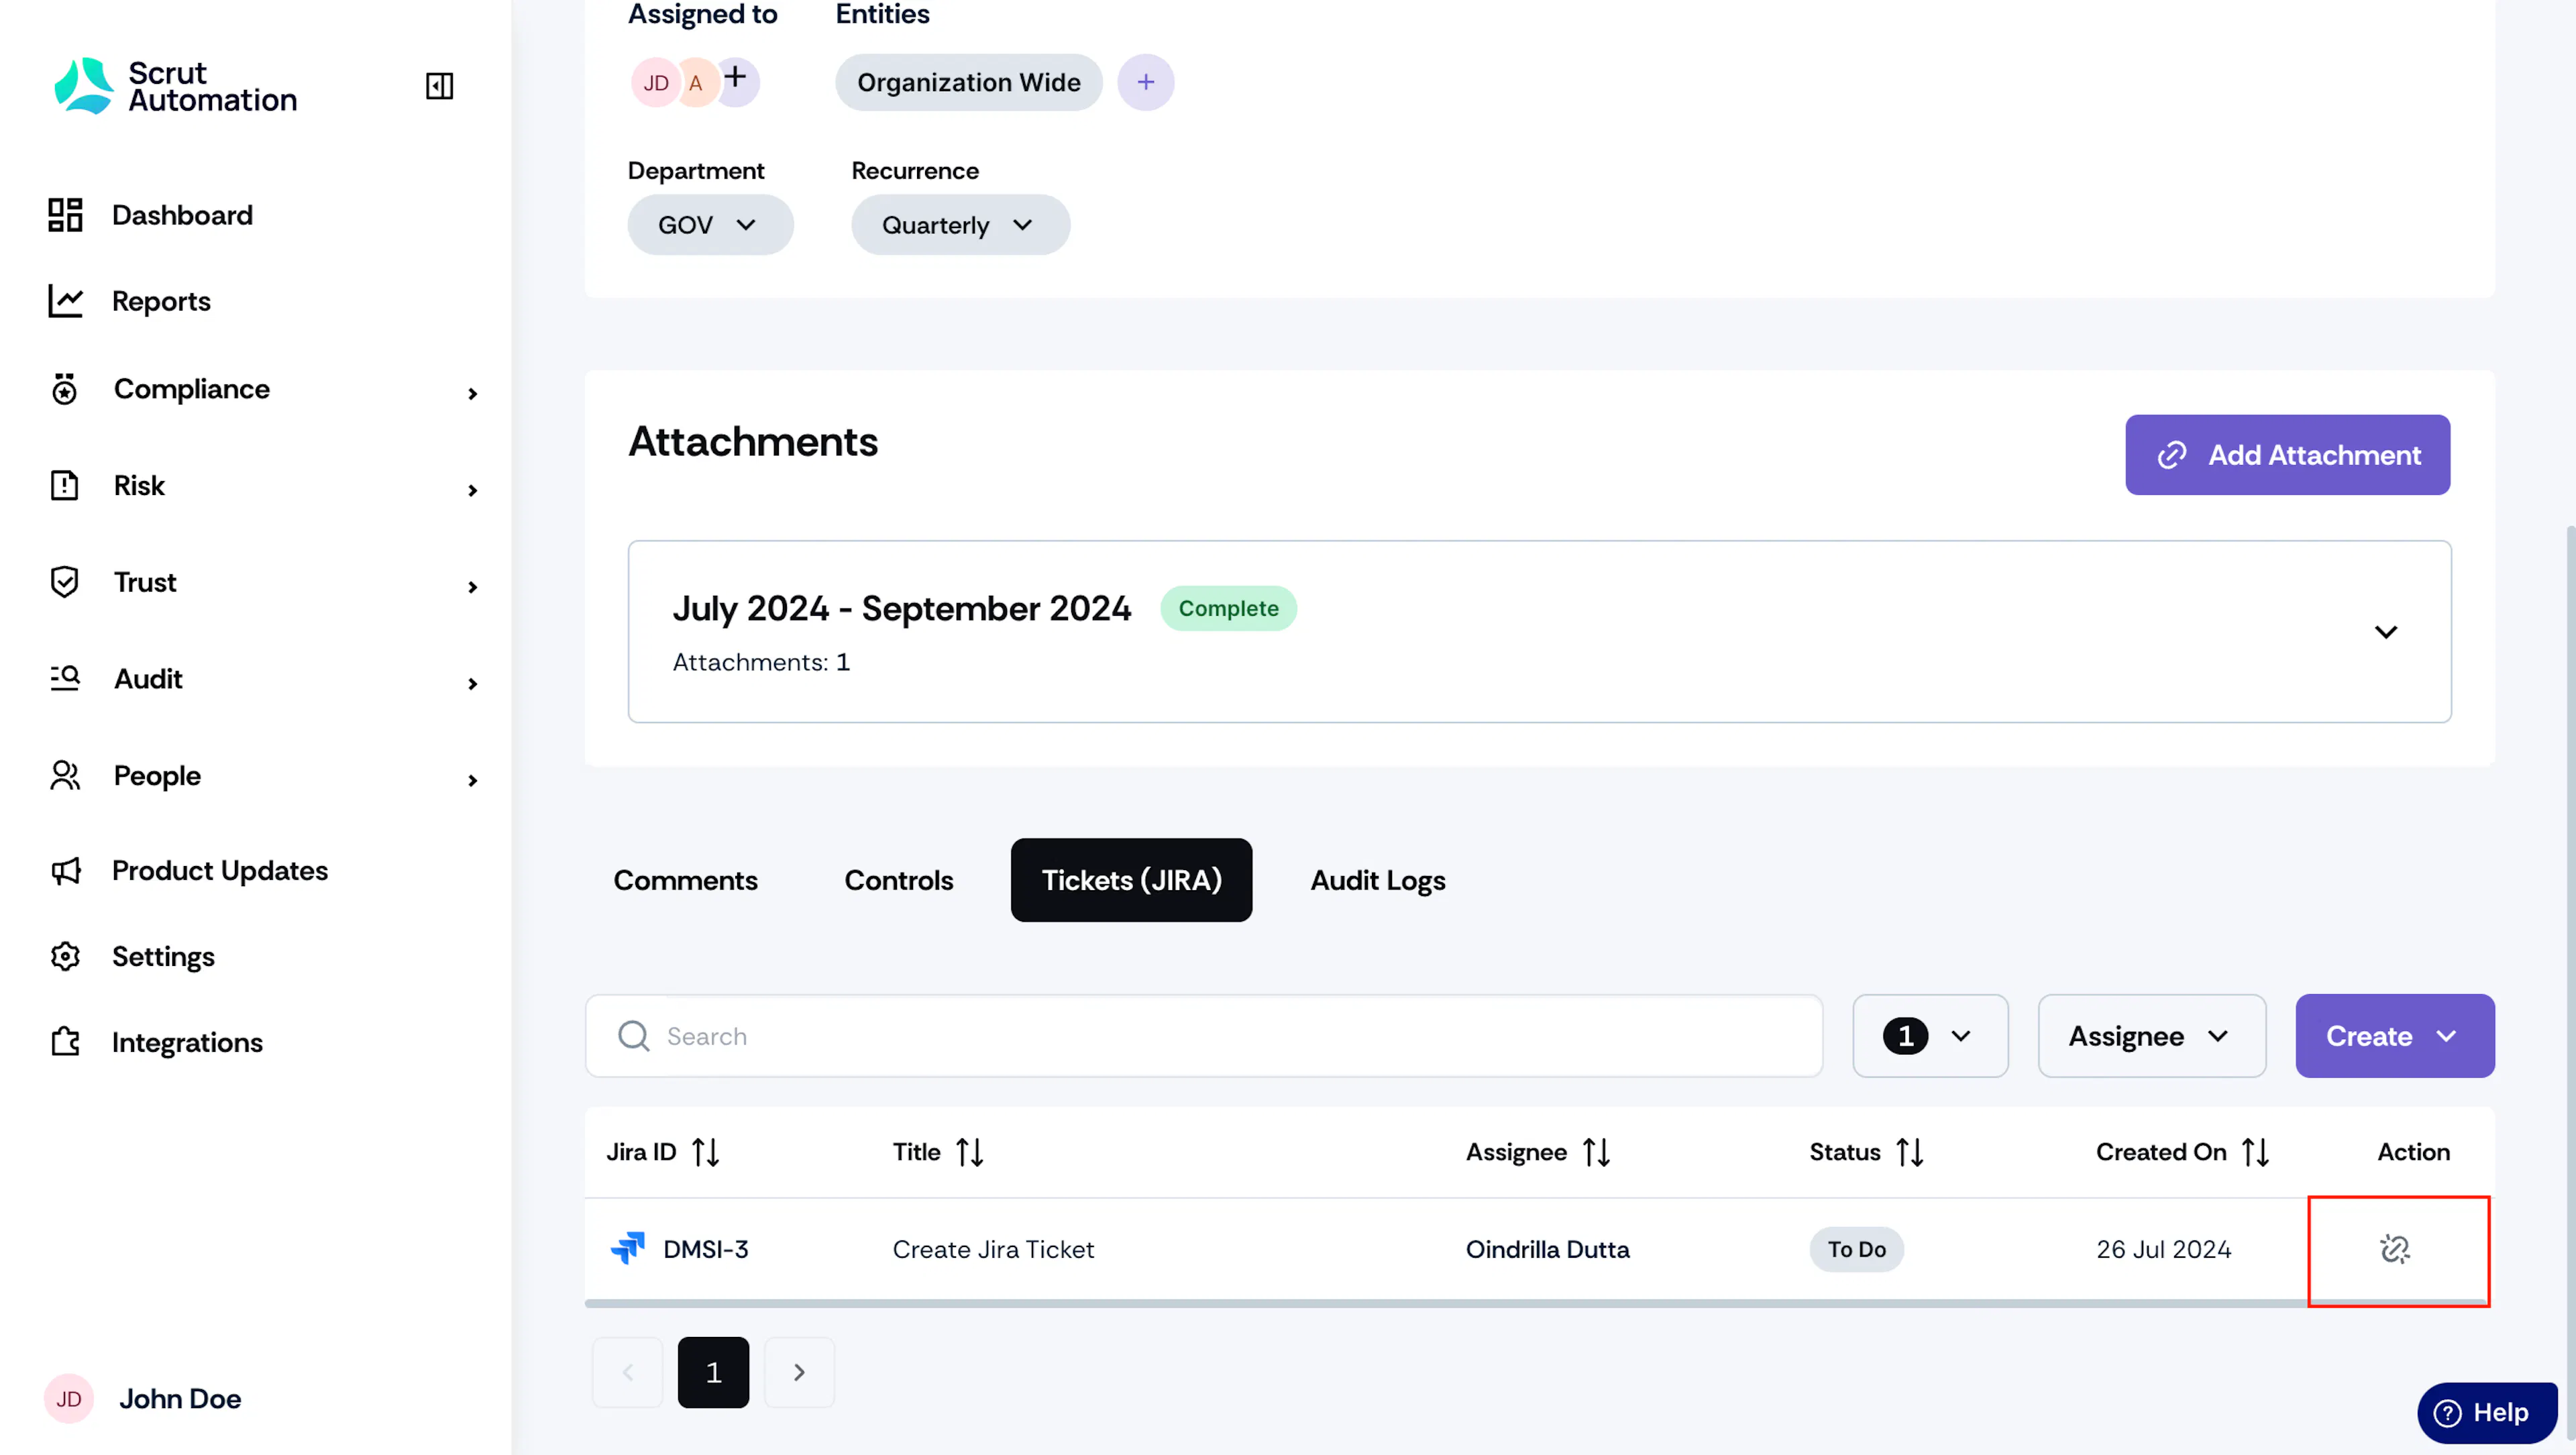
2: Unlink a Jira Ticket
To unlink a ticket, click the unlink icon in the Actions column.

What Next?
Once the attachment is added to Jira, it will get automatically synced to the linked evidence task.