Integrate Kolide
The Scrut-Kolide Integration fetches your employees’ device/endpoint data from your Kolide account and sends it to Scrut. In this article, we walk you through the process of connecting Kolide with Scrut.
Prerequisites
Before starting the integration, ensure you have the following permissions for your Kolide account:
-
Account Information: Login credentials for your Kolide account
-
Access: You must be a Kolide admin with “Full Access” to create and manage API keys
-
Permissions: Scrut needs the following permissions:
- Read devices: To read devices in your Kolide account
- Read checks: For automated tests
Pro Tip:
We recommend logging into your Kolide account before starting the integration to avoid doing so later.
How To Integrate Scrut With Kolide
Step 1: Generate an API Key in Kolide
Follow these steps to create an API key:
-
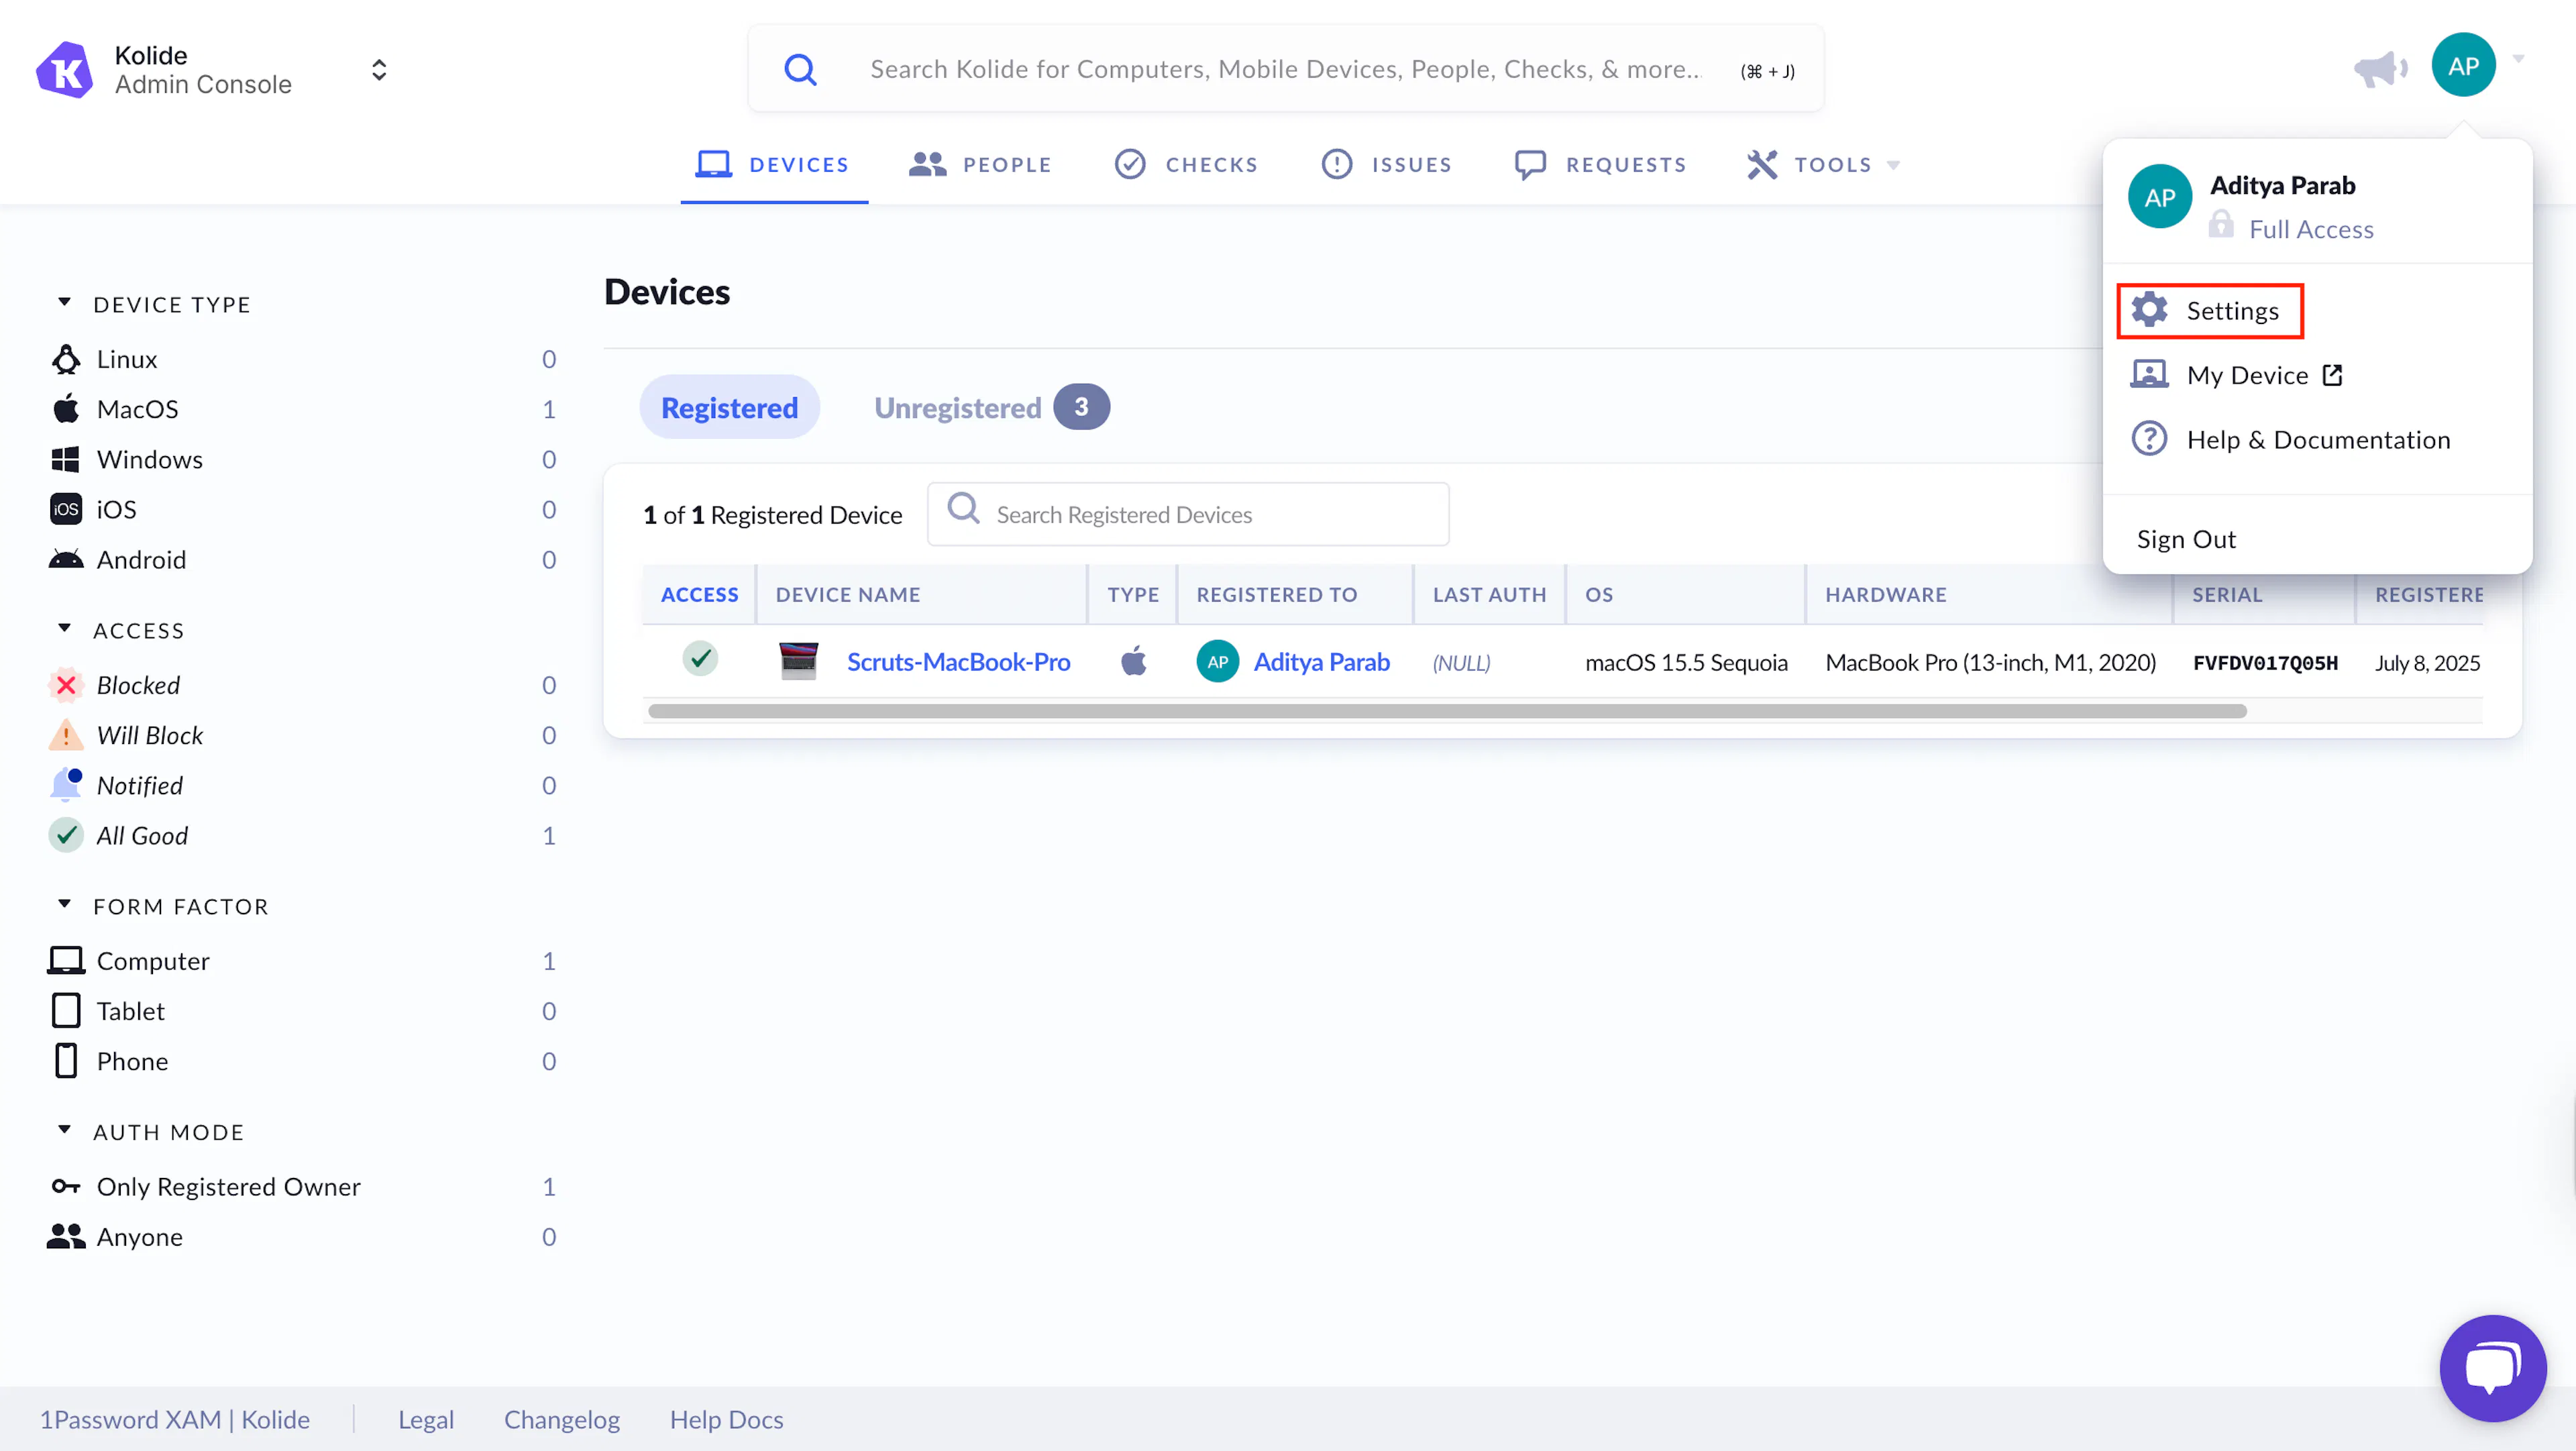
Sign in to Kolide and click your user avatar in the upper-right corner.
-
In the dropdown menu, click Settings.
-
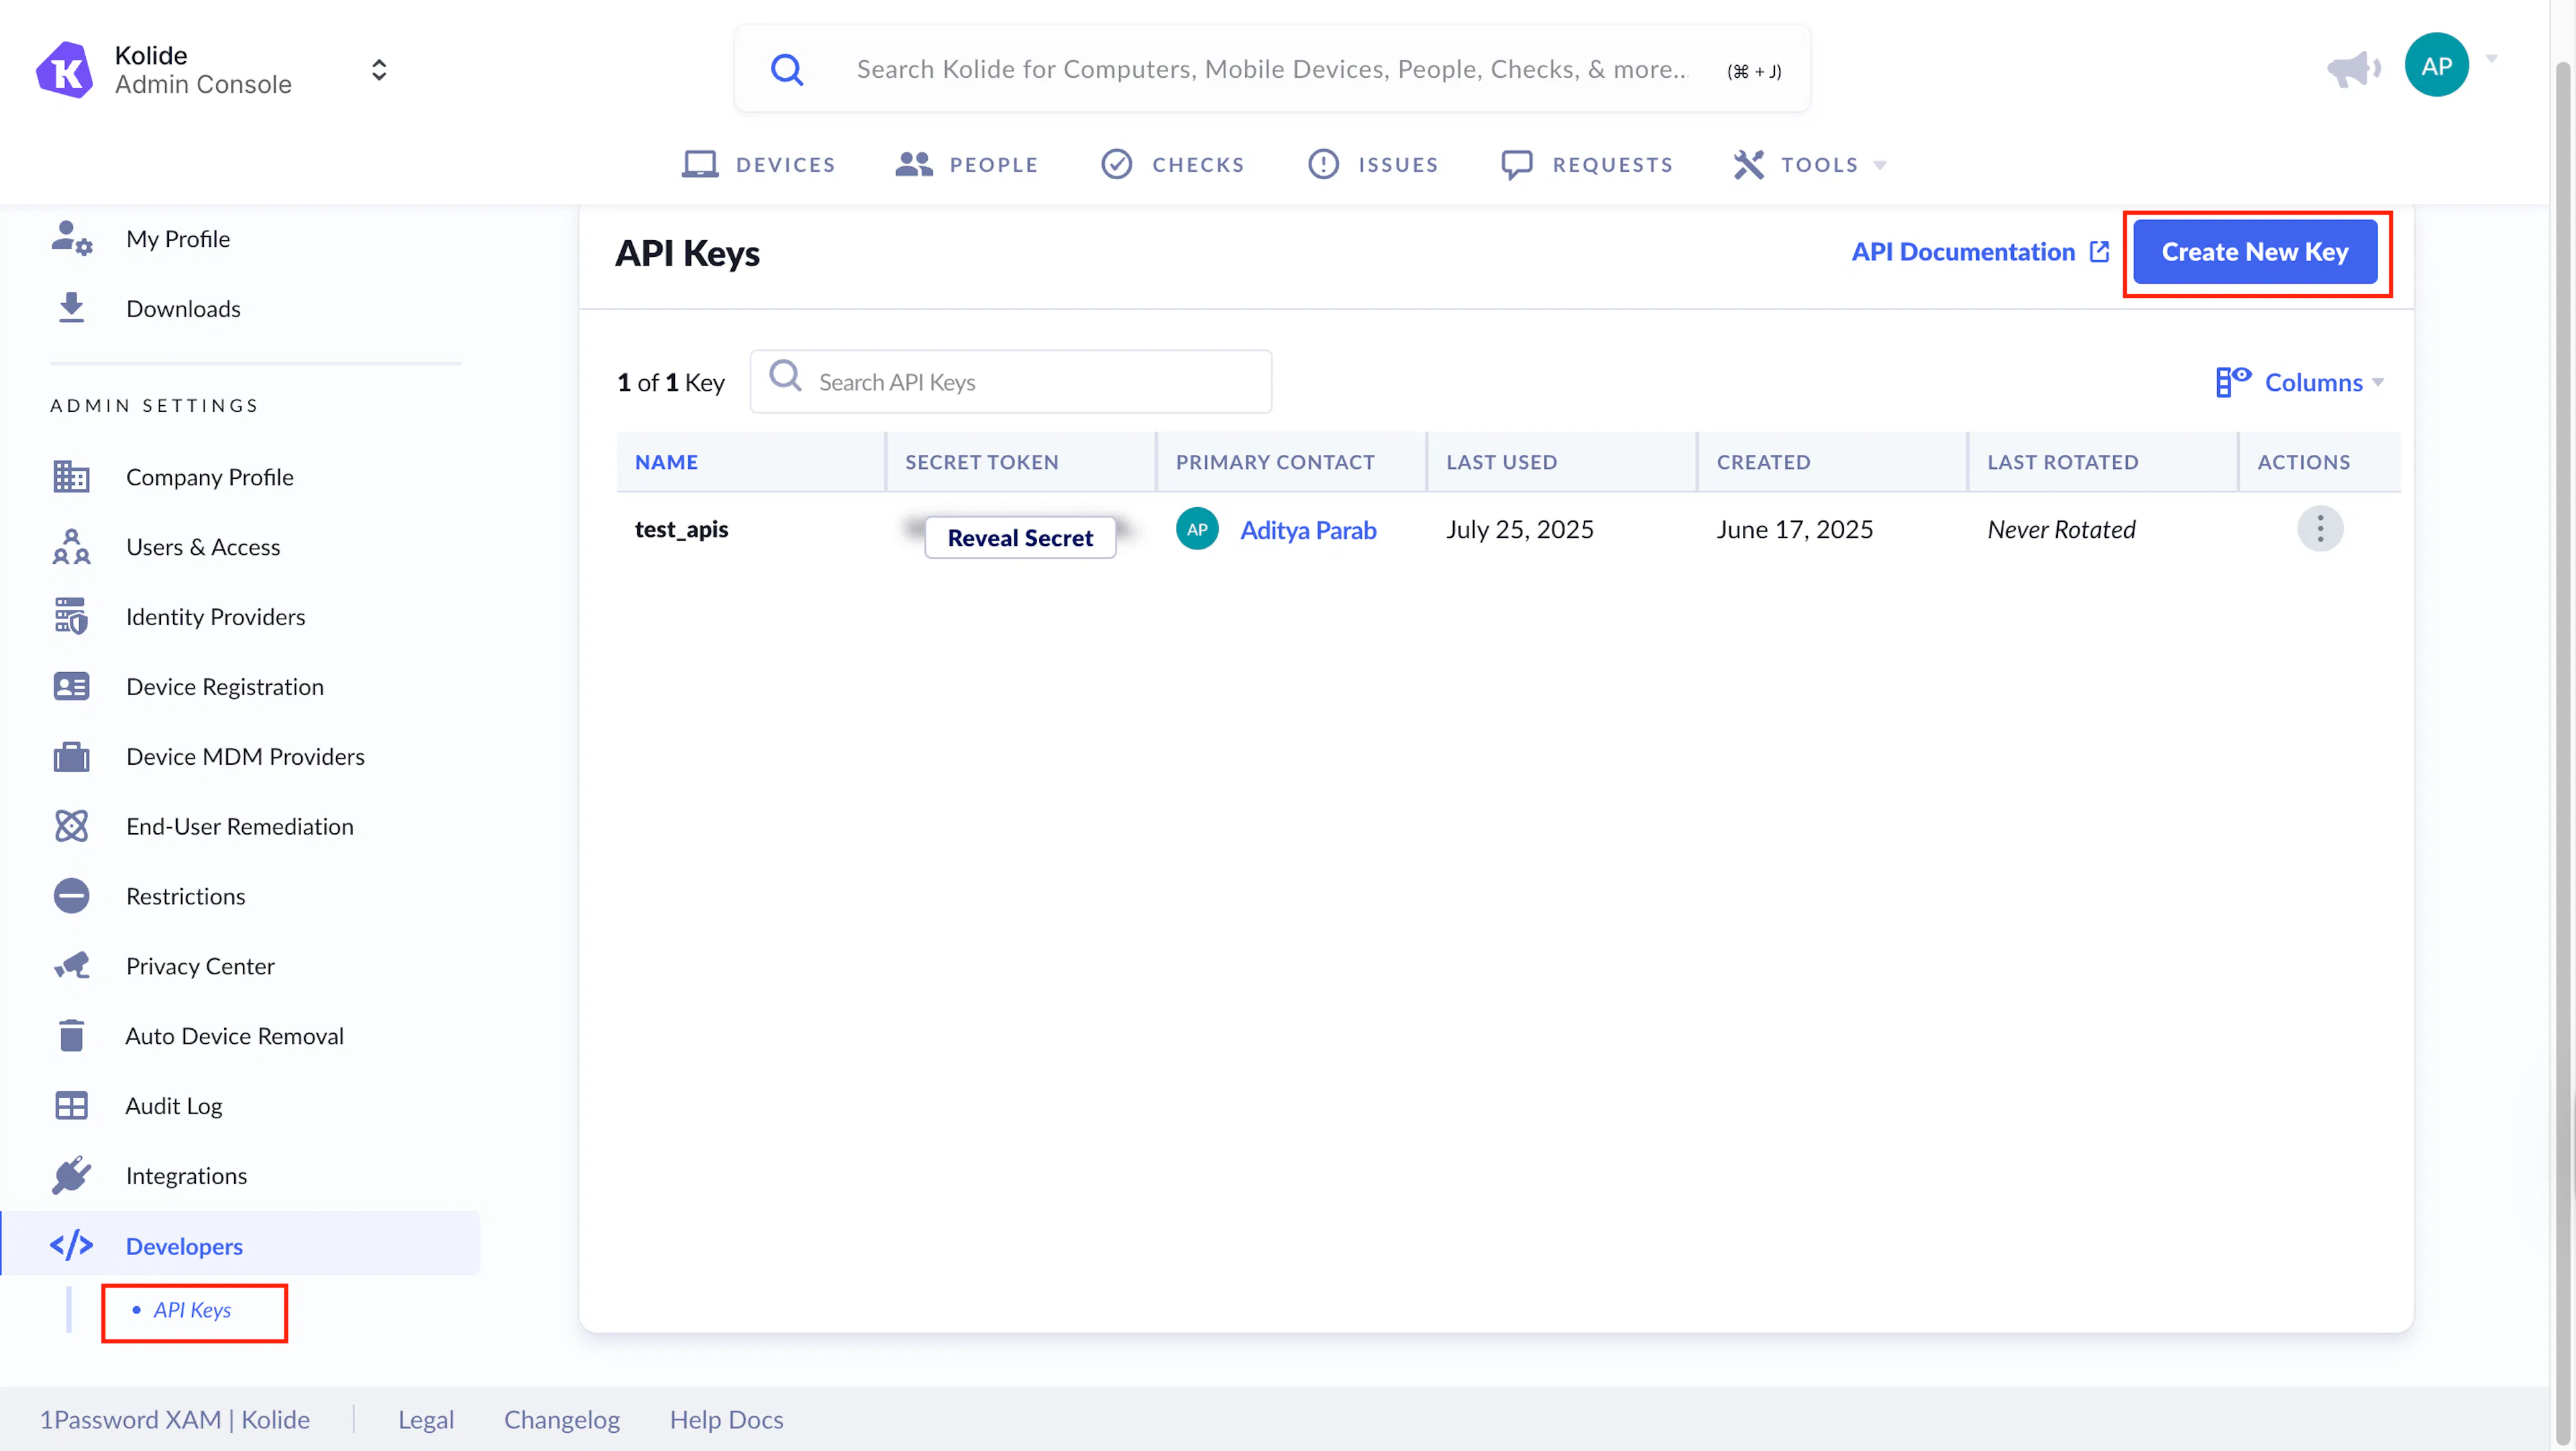
In the menu on the left, click Developers.
-
In the sub-menu that appears, click API Keys.
-
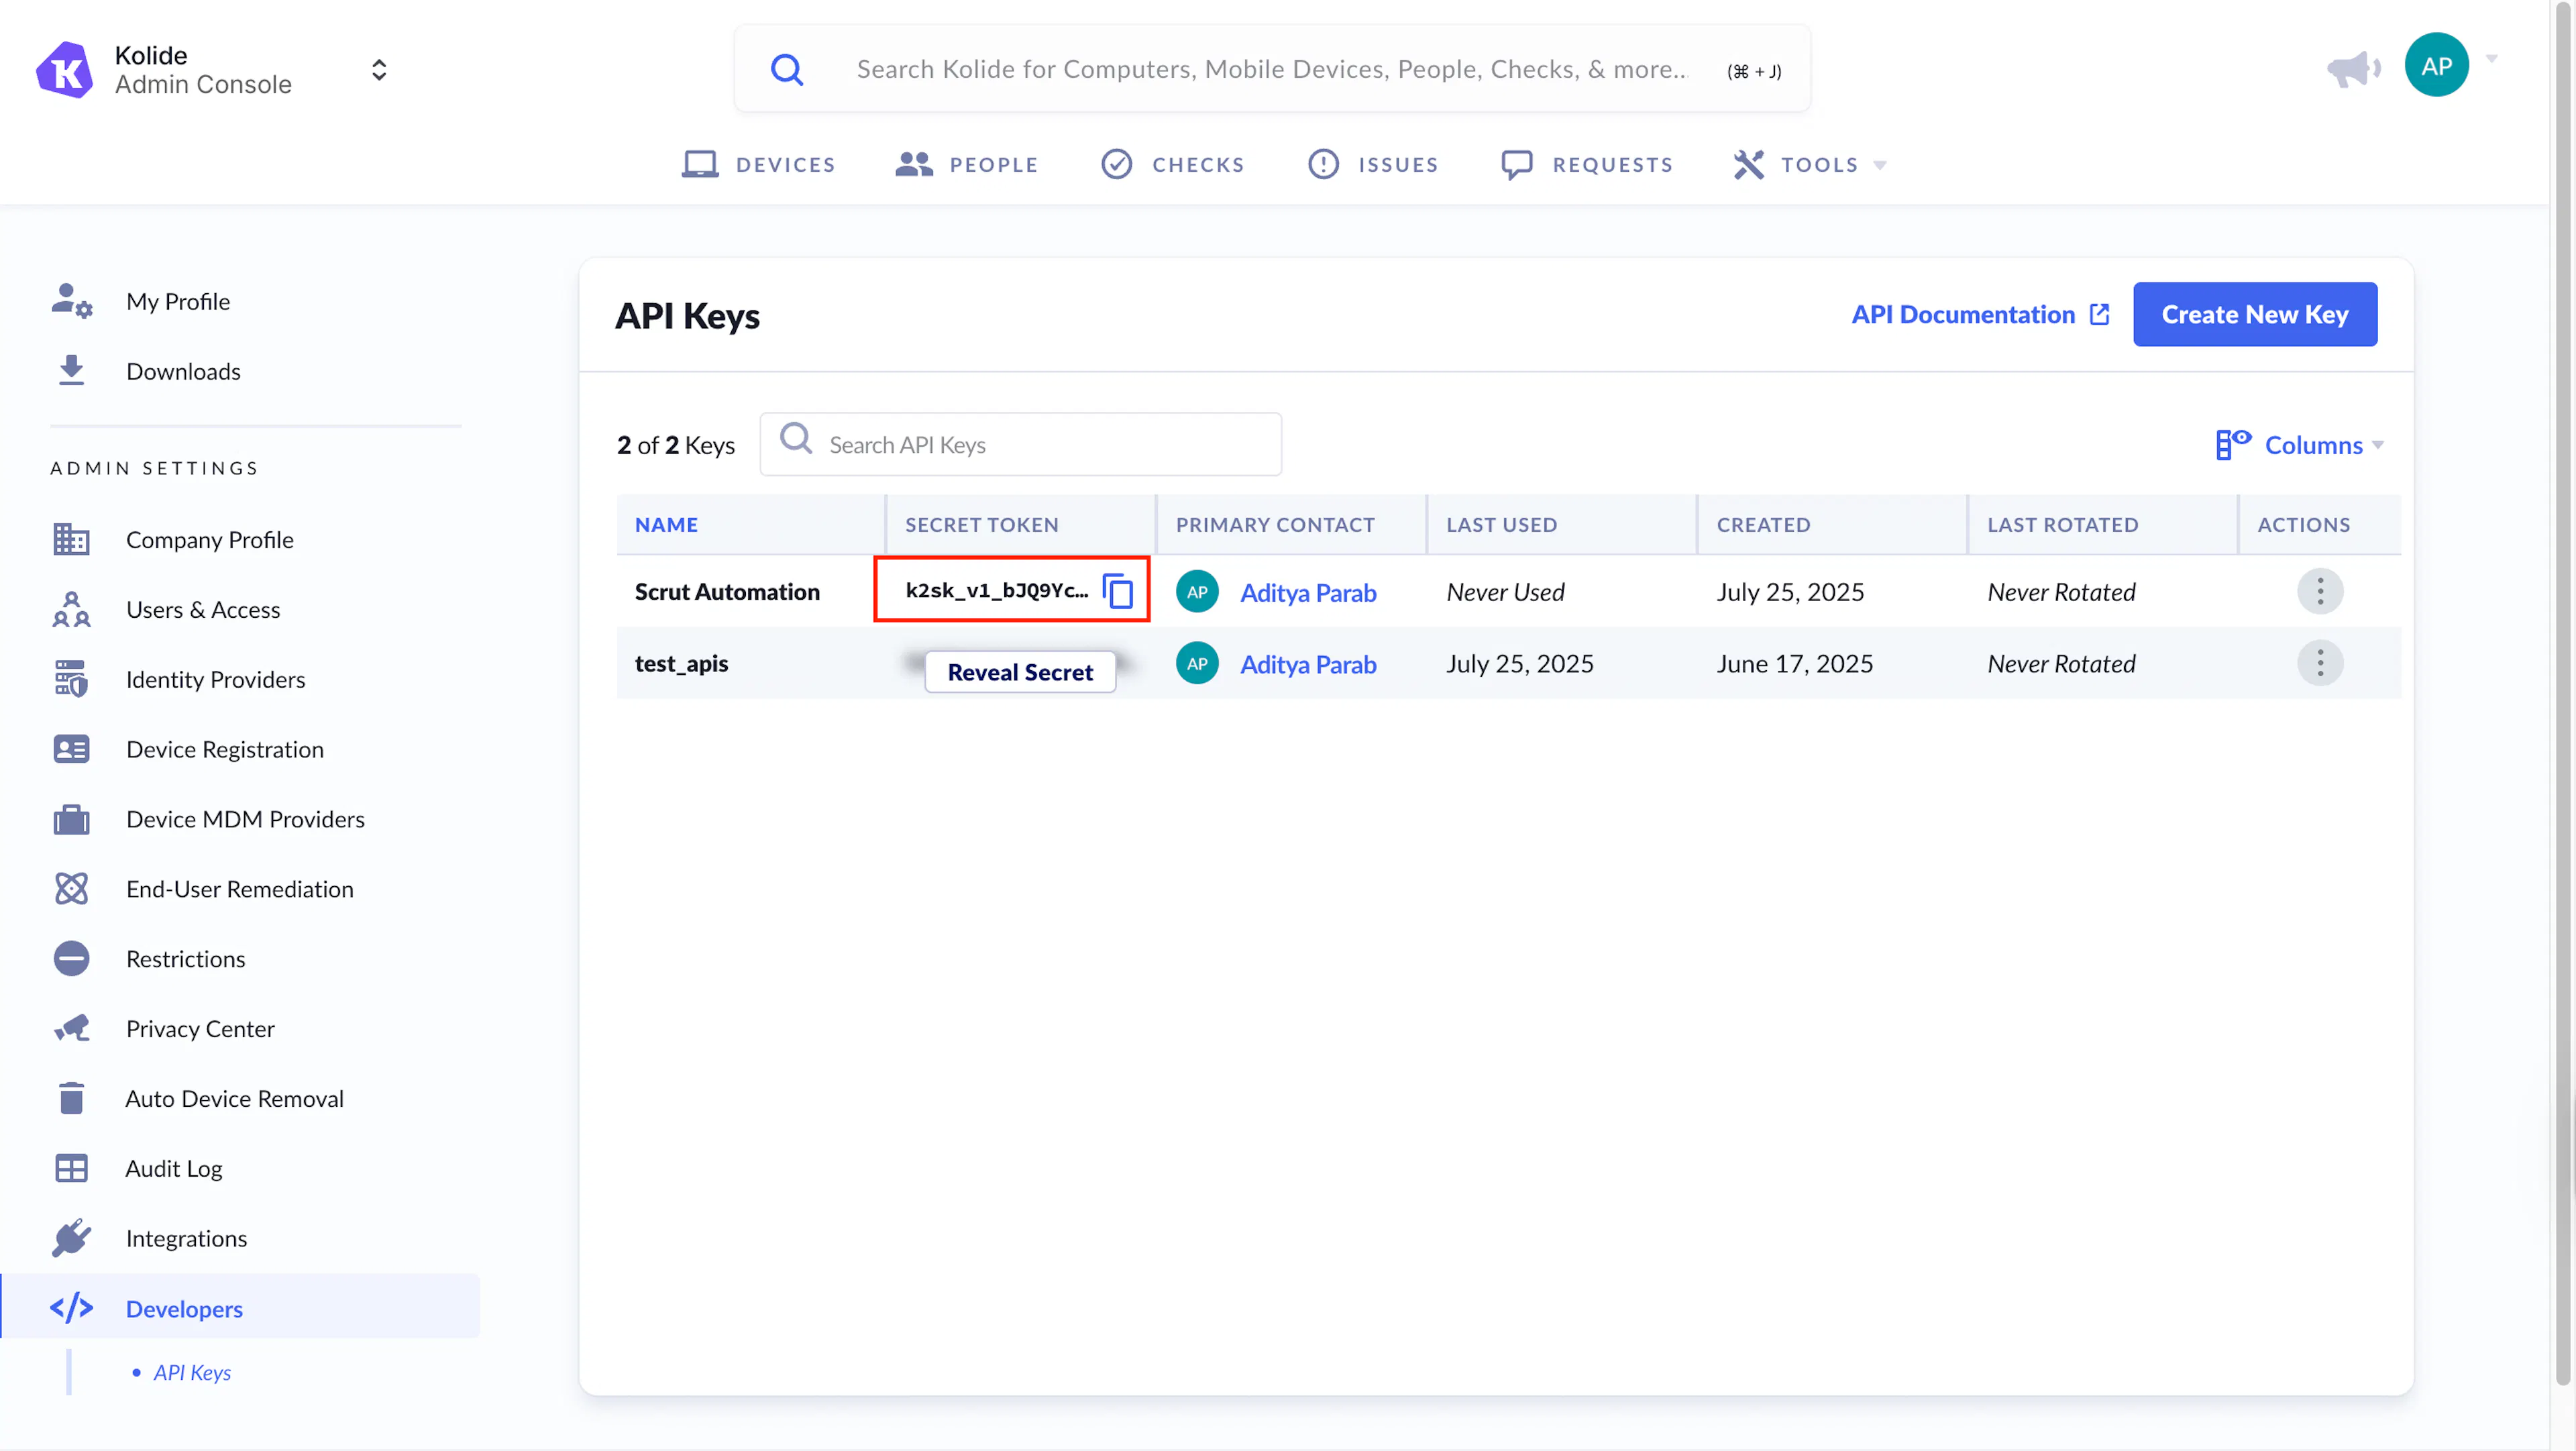
On the next screen, click Create New Key.
-
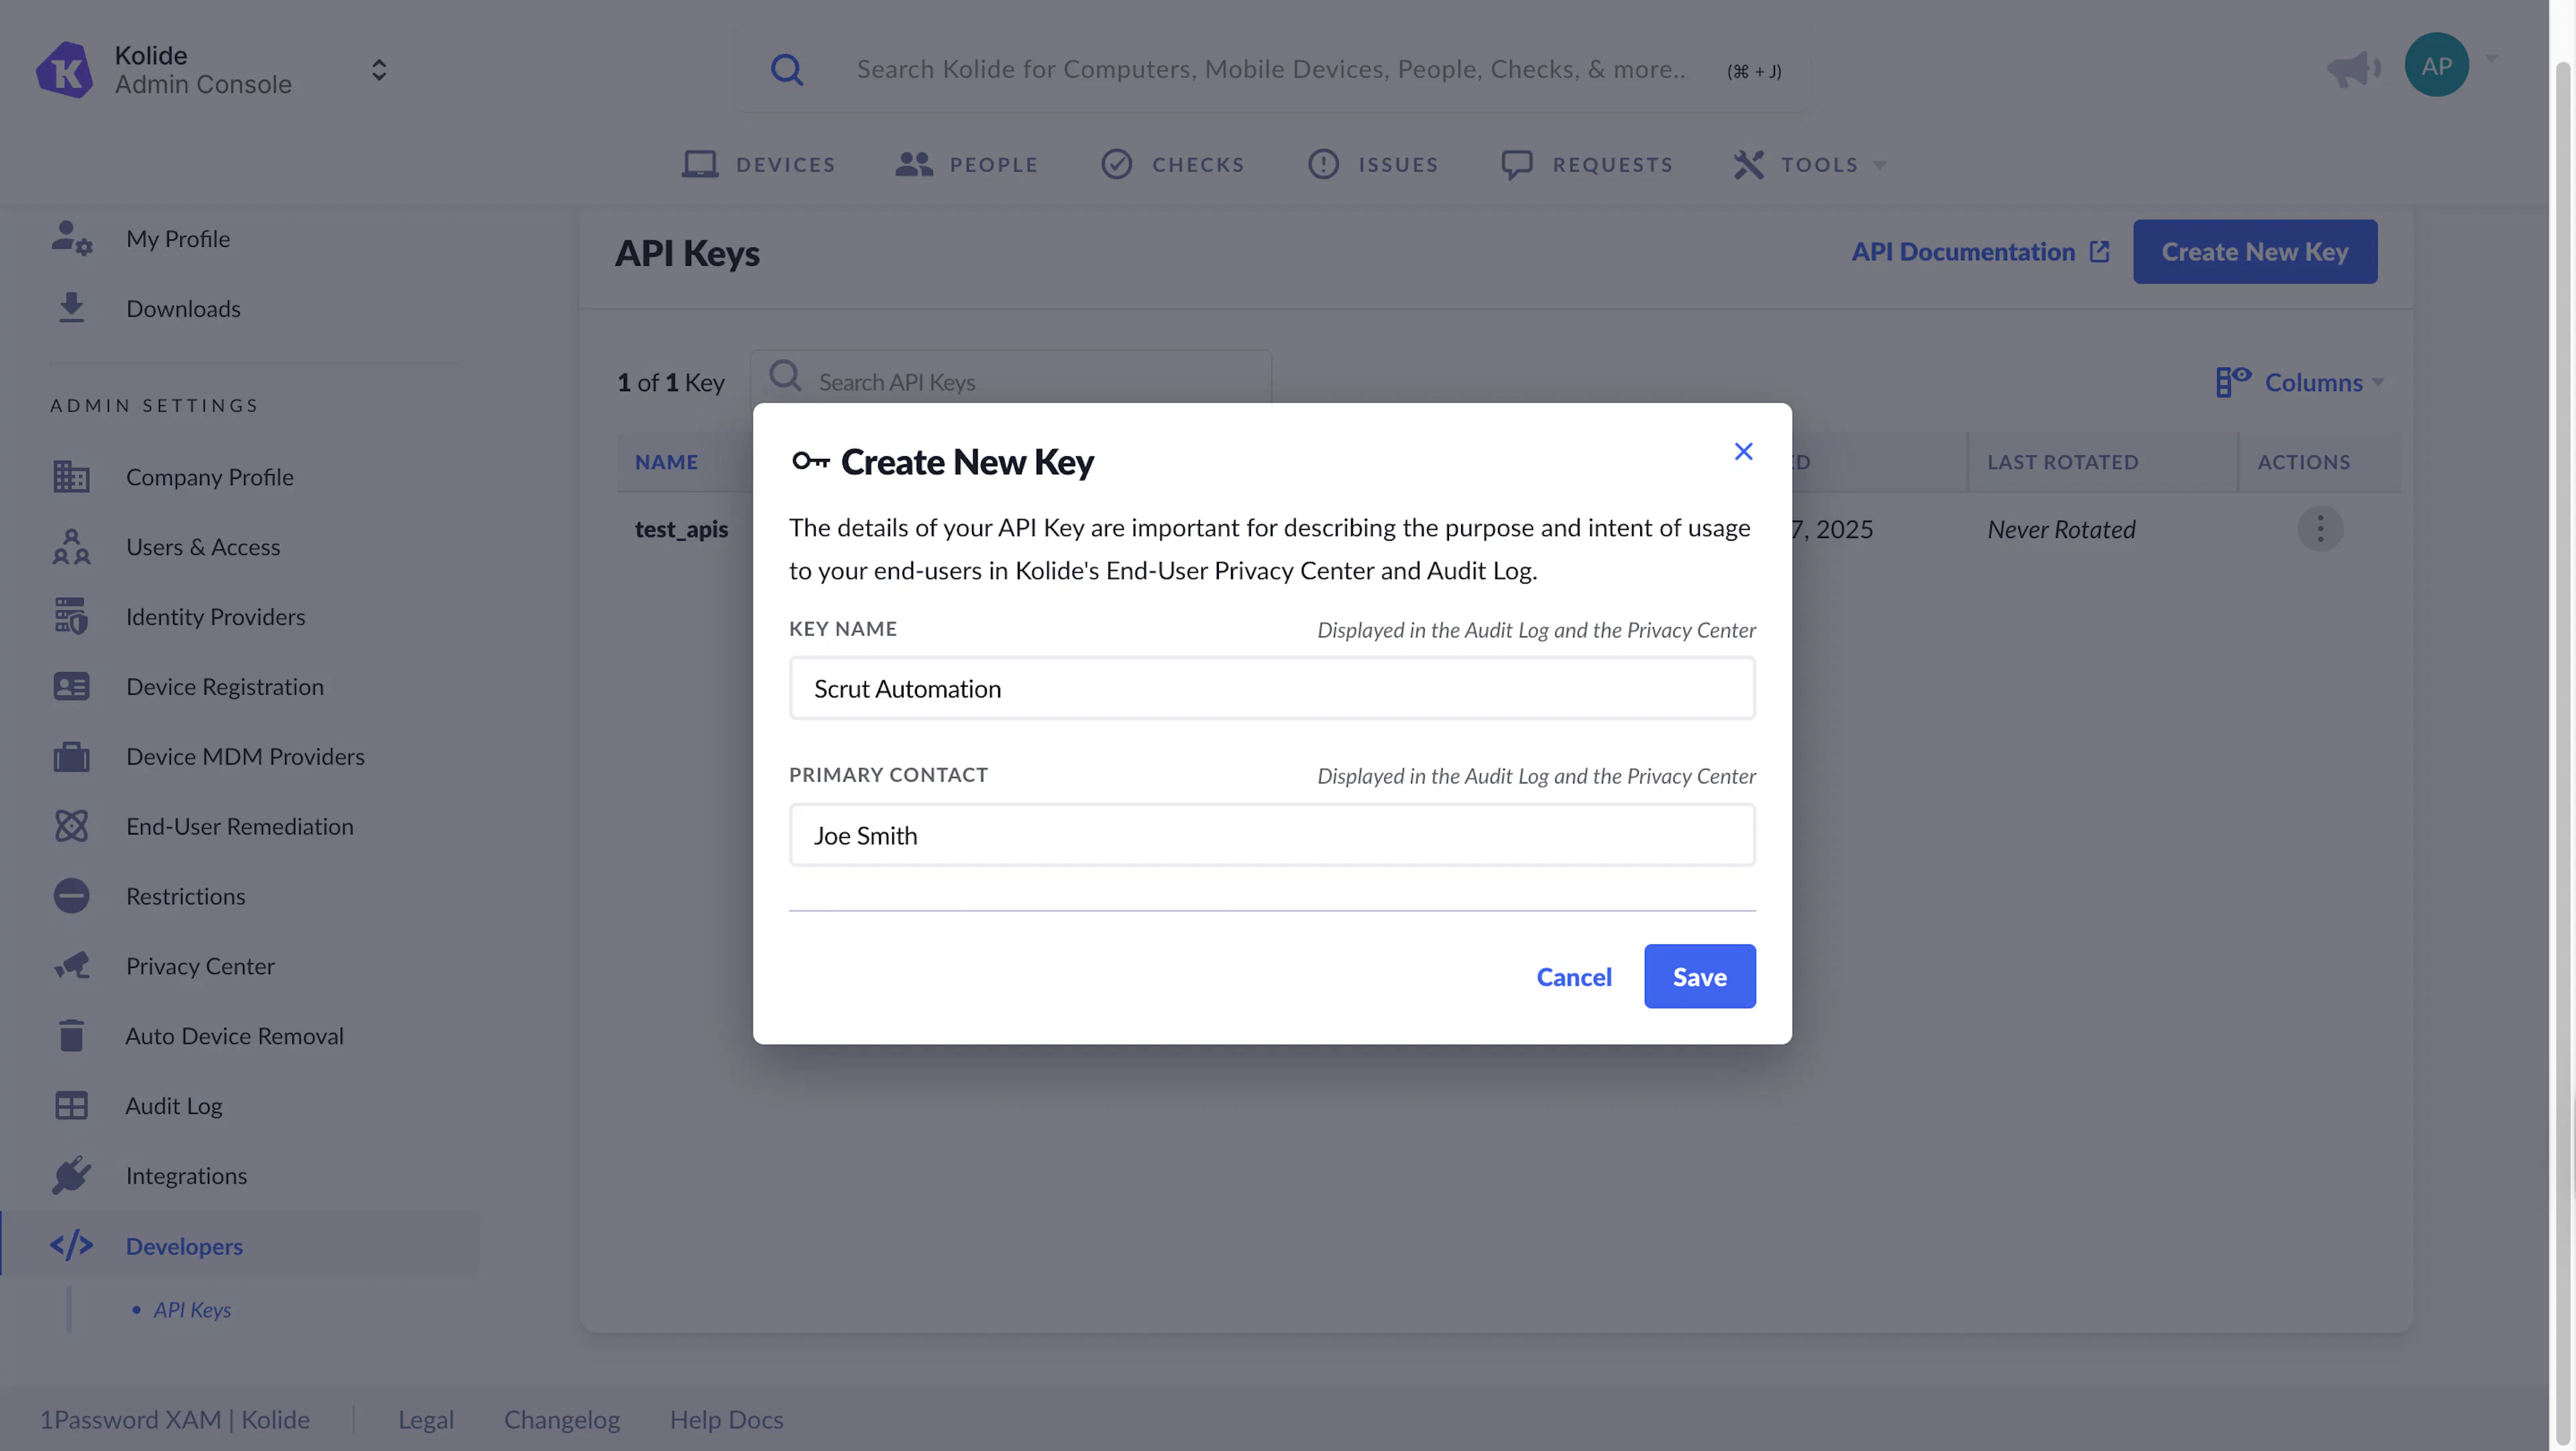
In the modal that appears:
- Enter a name for the key, such as Scrut Automation
- Enter the name of the Kolide administrator who will be responsible for this API key’s usage
-
Click Save.
-
Once saved, the API key is available in the table. Click the copy button and save it to a safe location. You’ll need to enter it in Scrut in Step 2.
Step 2: Connect Your Kolide Account in Scrut
-
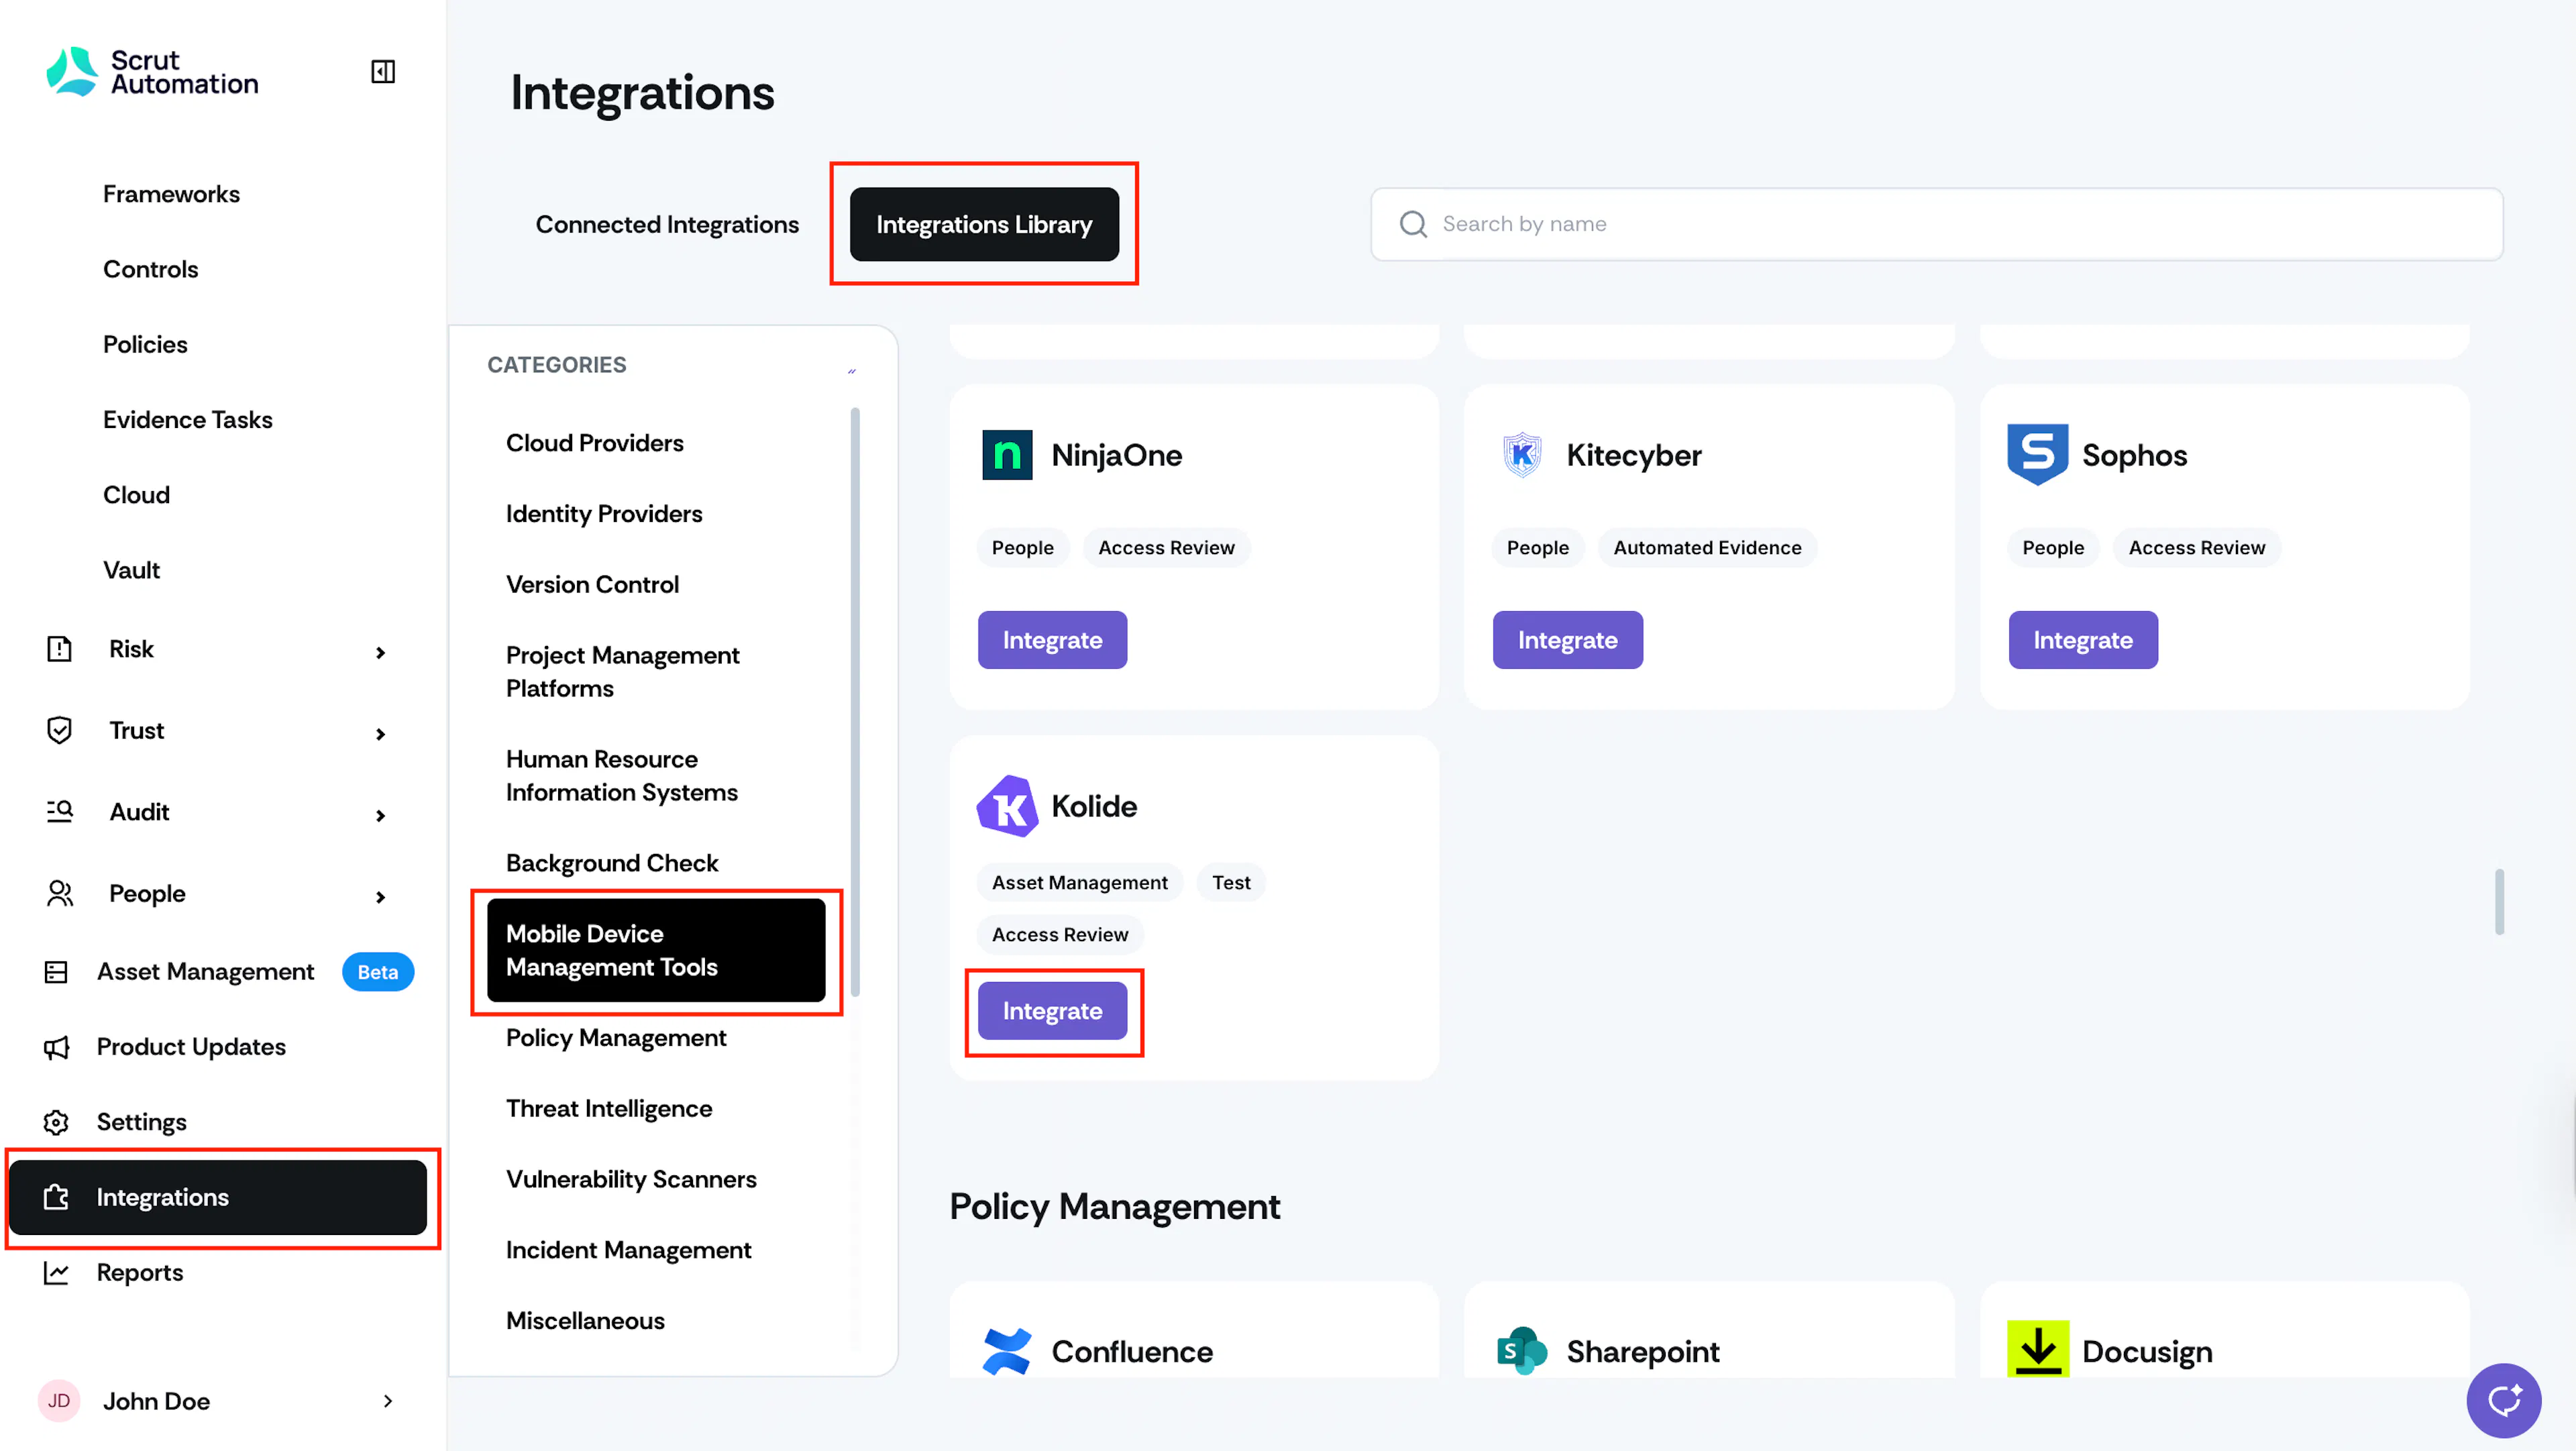
Sign in to your Scrut account and click Integrations on the left navigation panel.
-
Navigate to the Integrations Library tab and choose Mobile Device Management Tools in the Categories section.
-
Scroll to the Kolide tile and click Integrate.
-
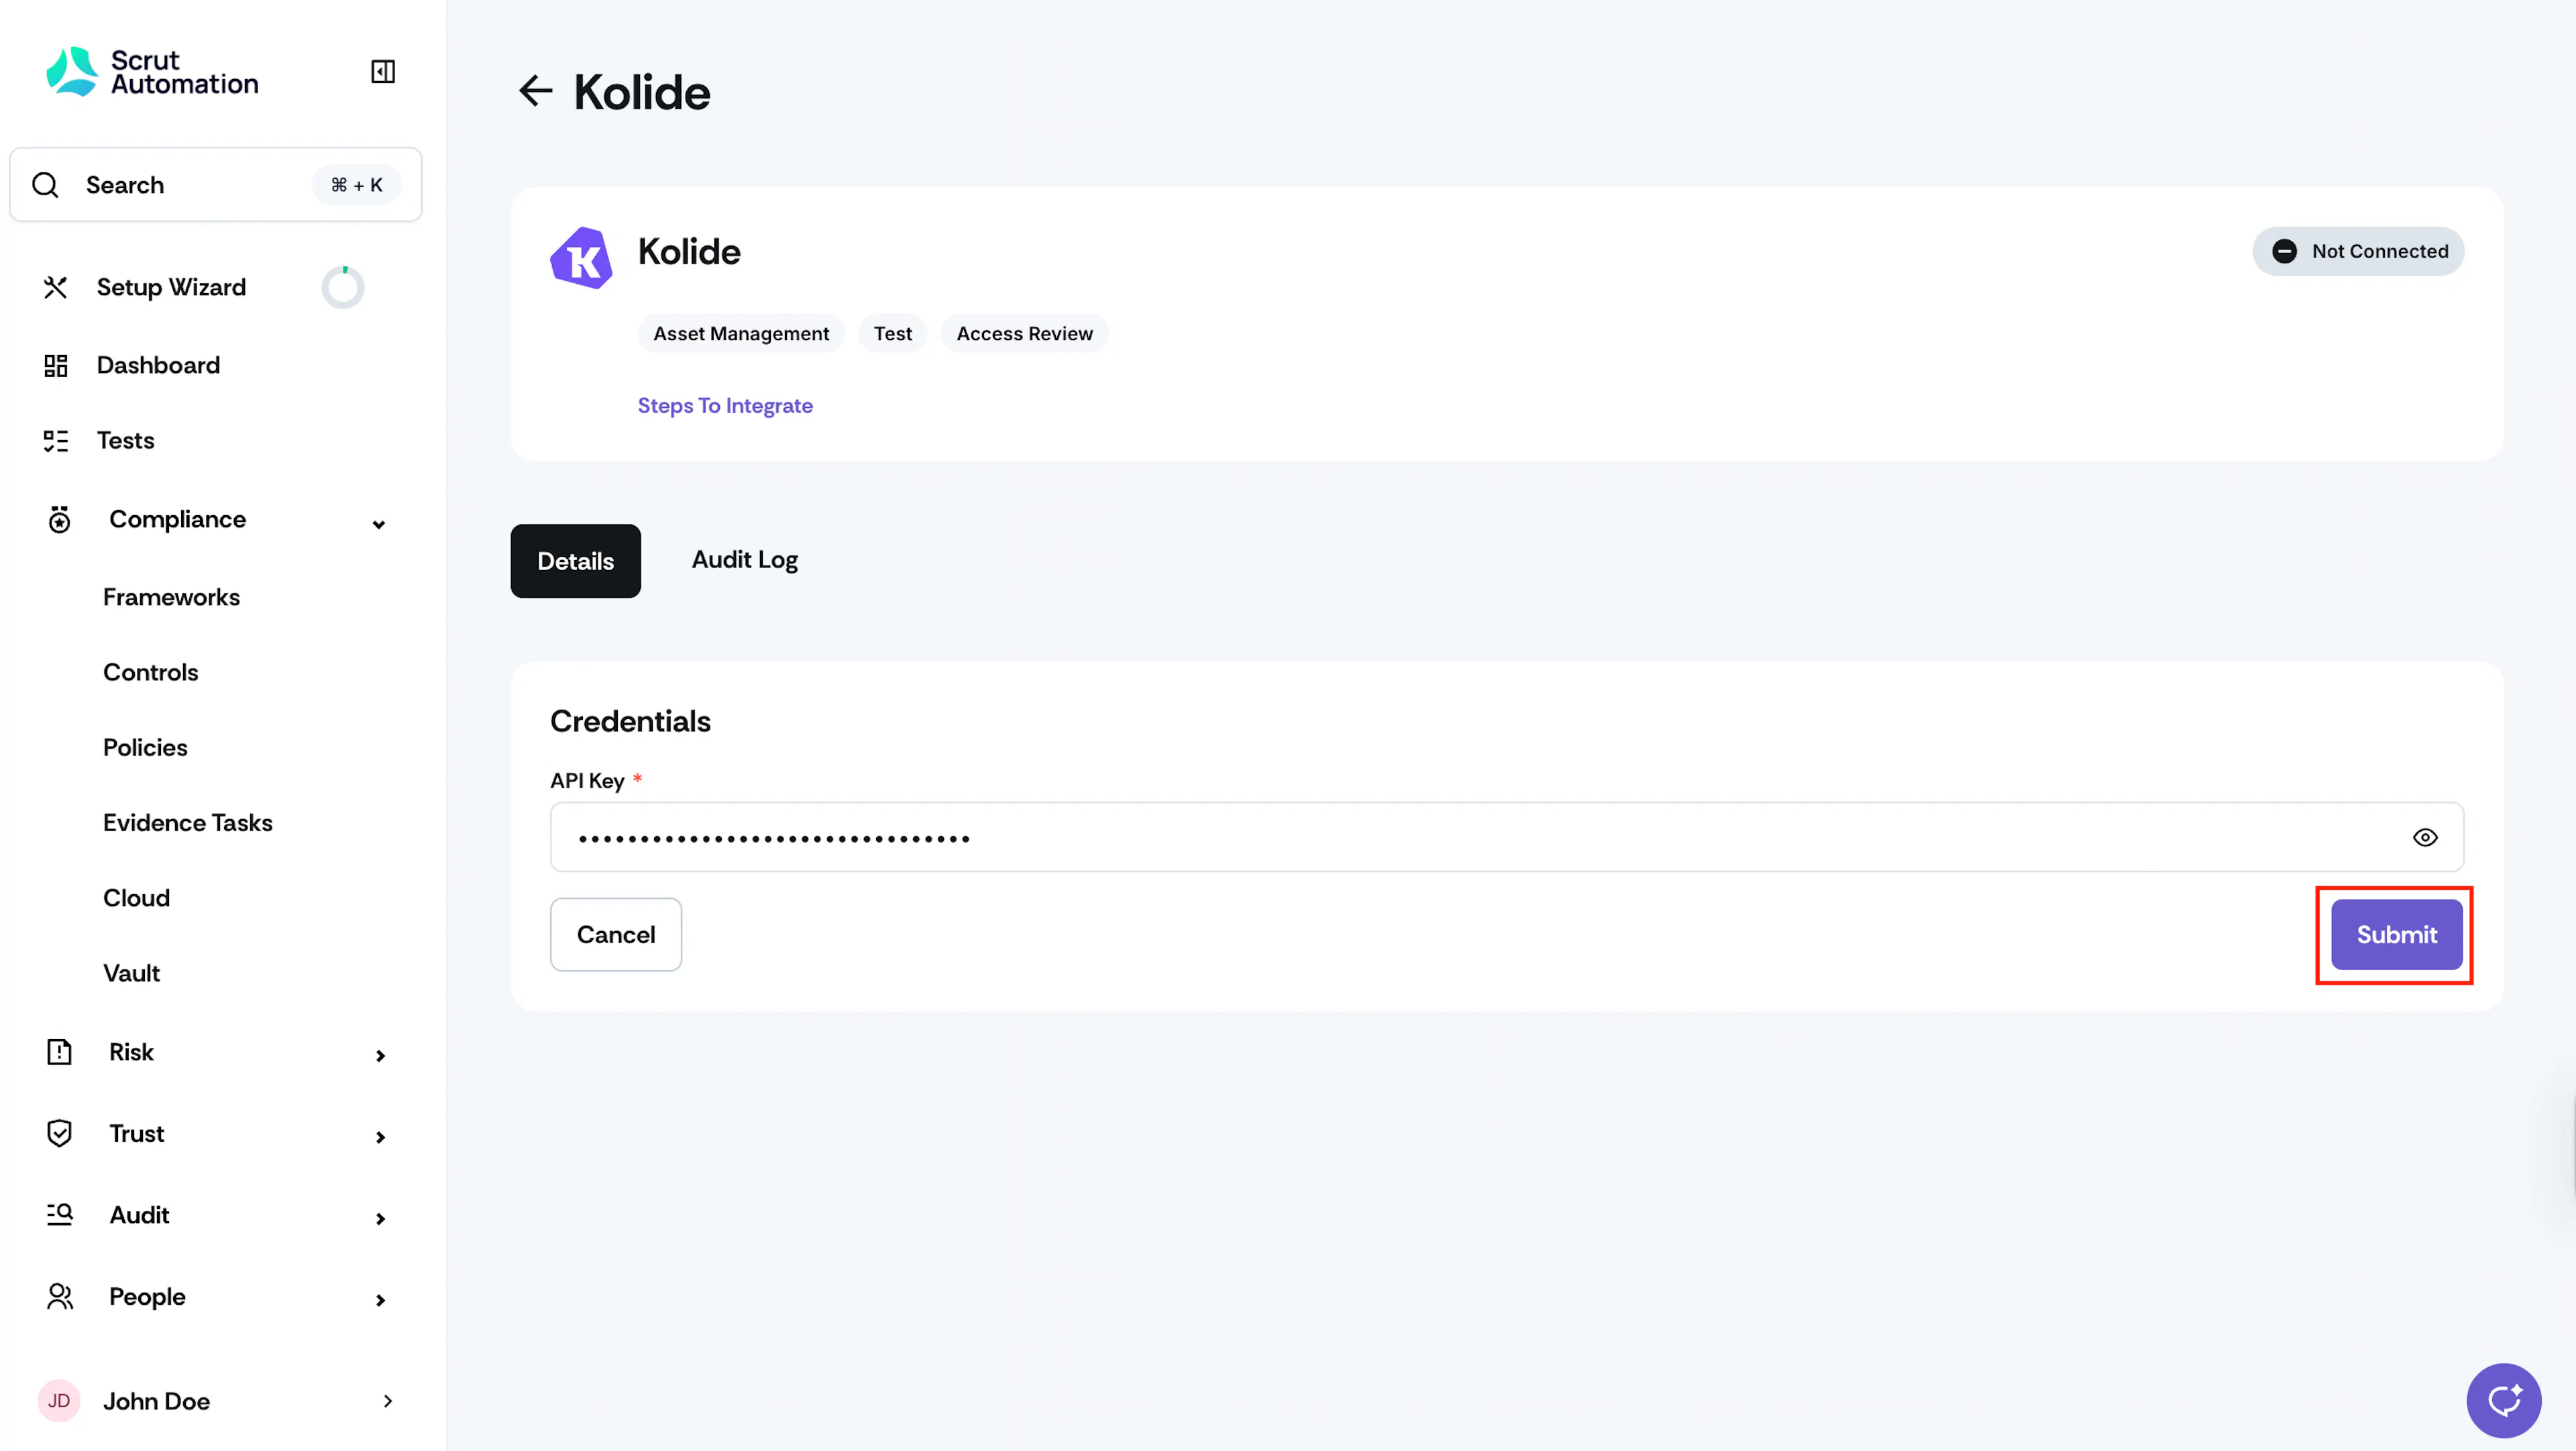
On the Kolide integration page, paste the API key from Step 1.
-
Click Submit.
-
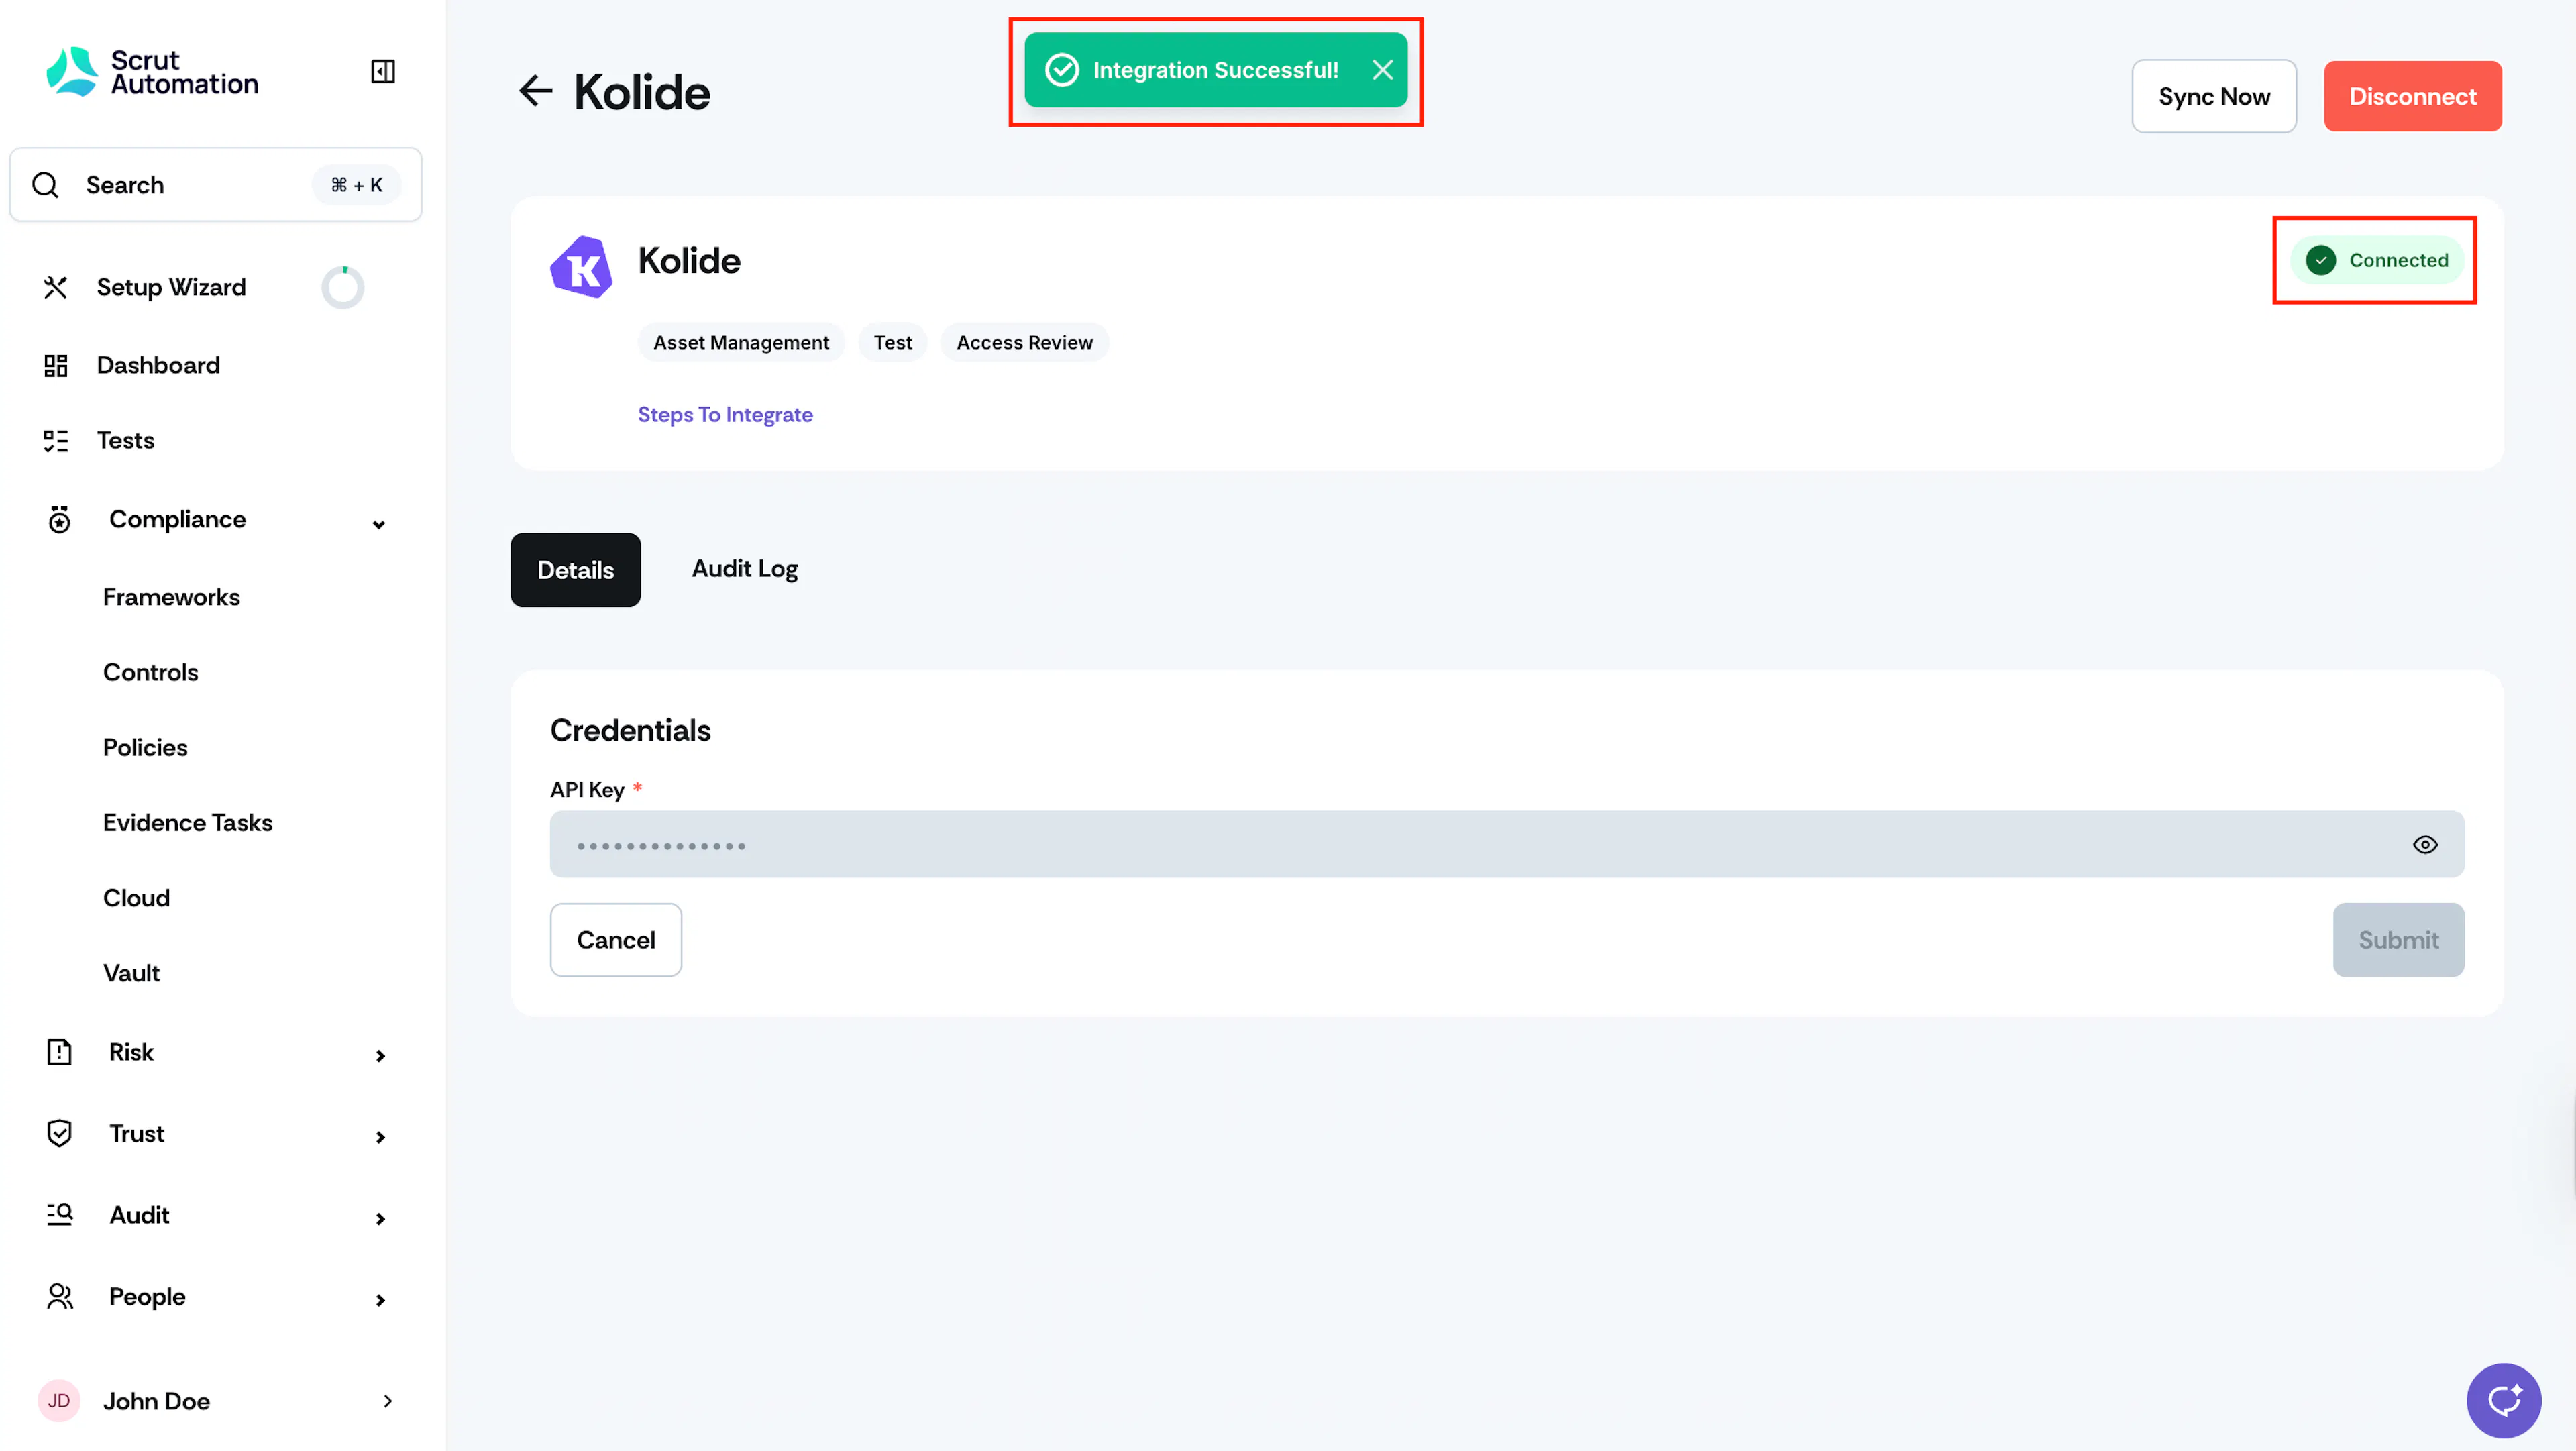
Once authorization is done, you’ll see the “Connected Successfully” message and the Connected status indicator.
Synchronization Details
- Initial Sync: Upon completing the integration, Scrut will immediately sync employees’ device data from Kolide.
- Recurring Sync: After this, Scrut performs the sync every 24 hours to fetch incremental data.
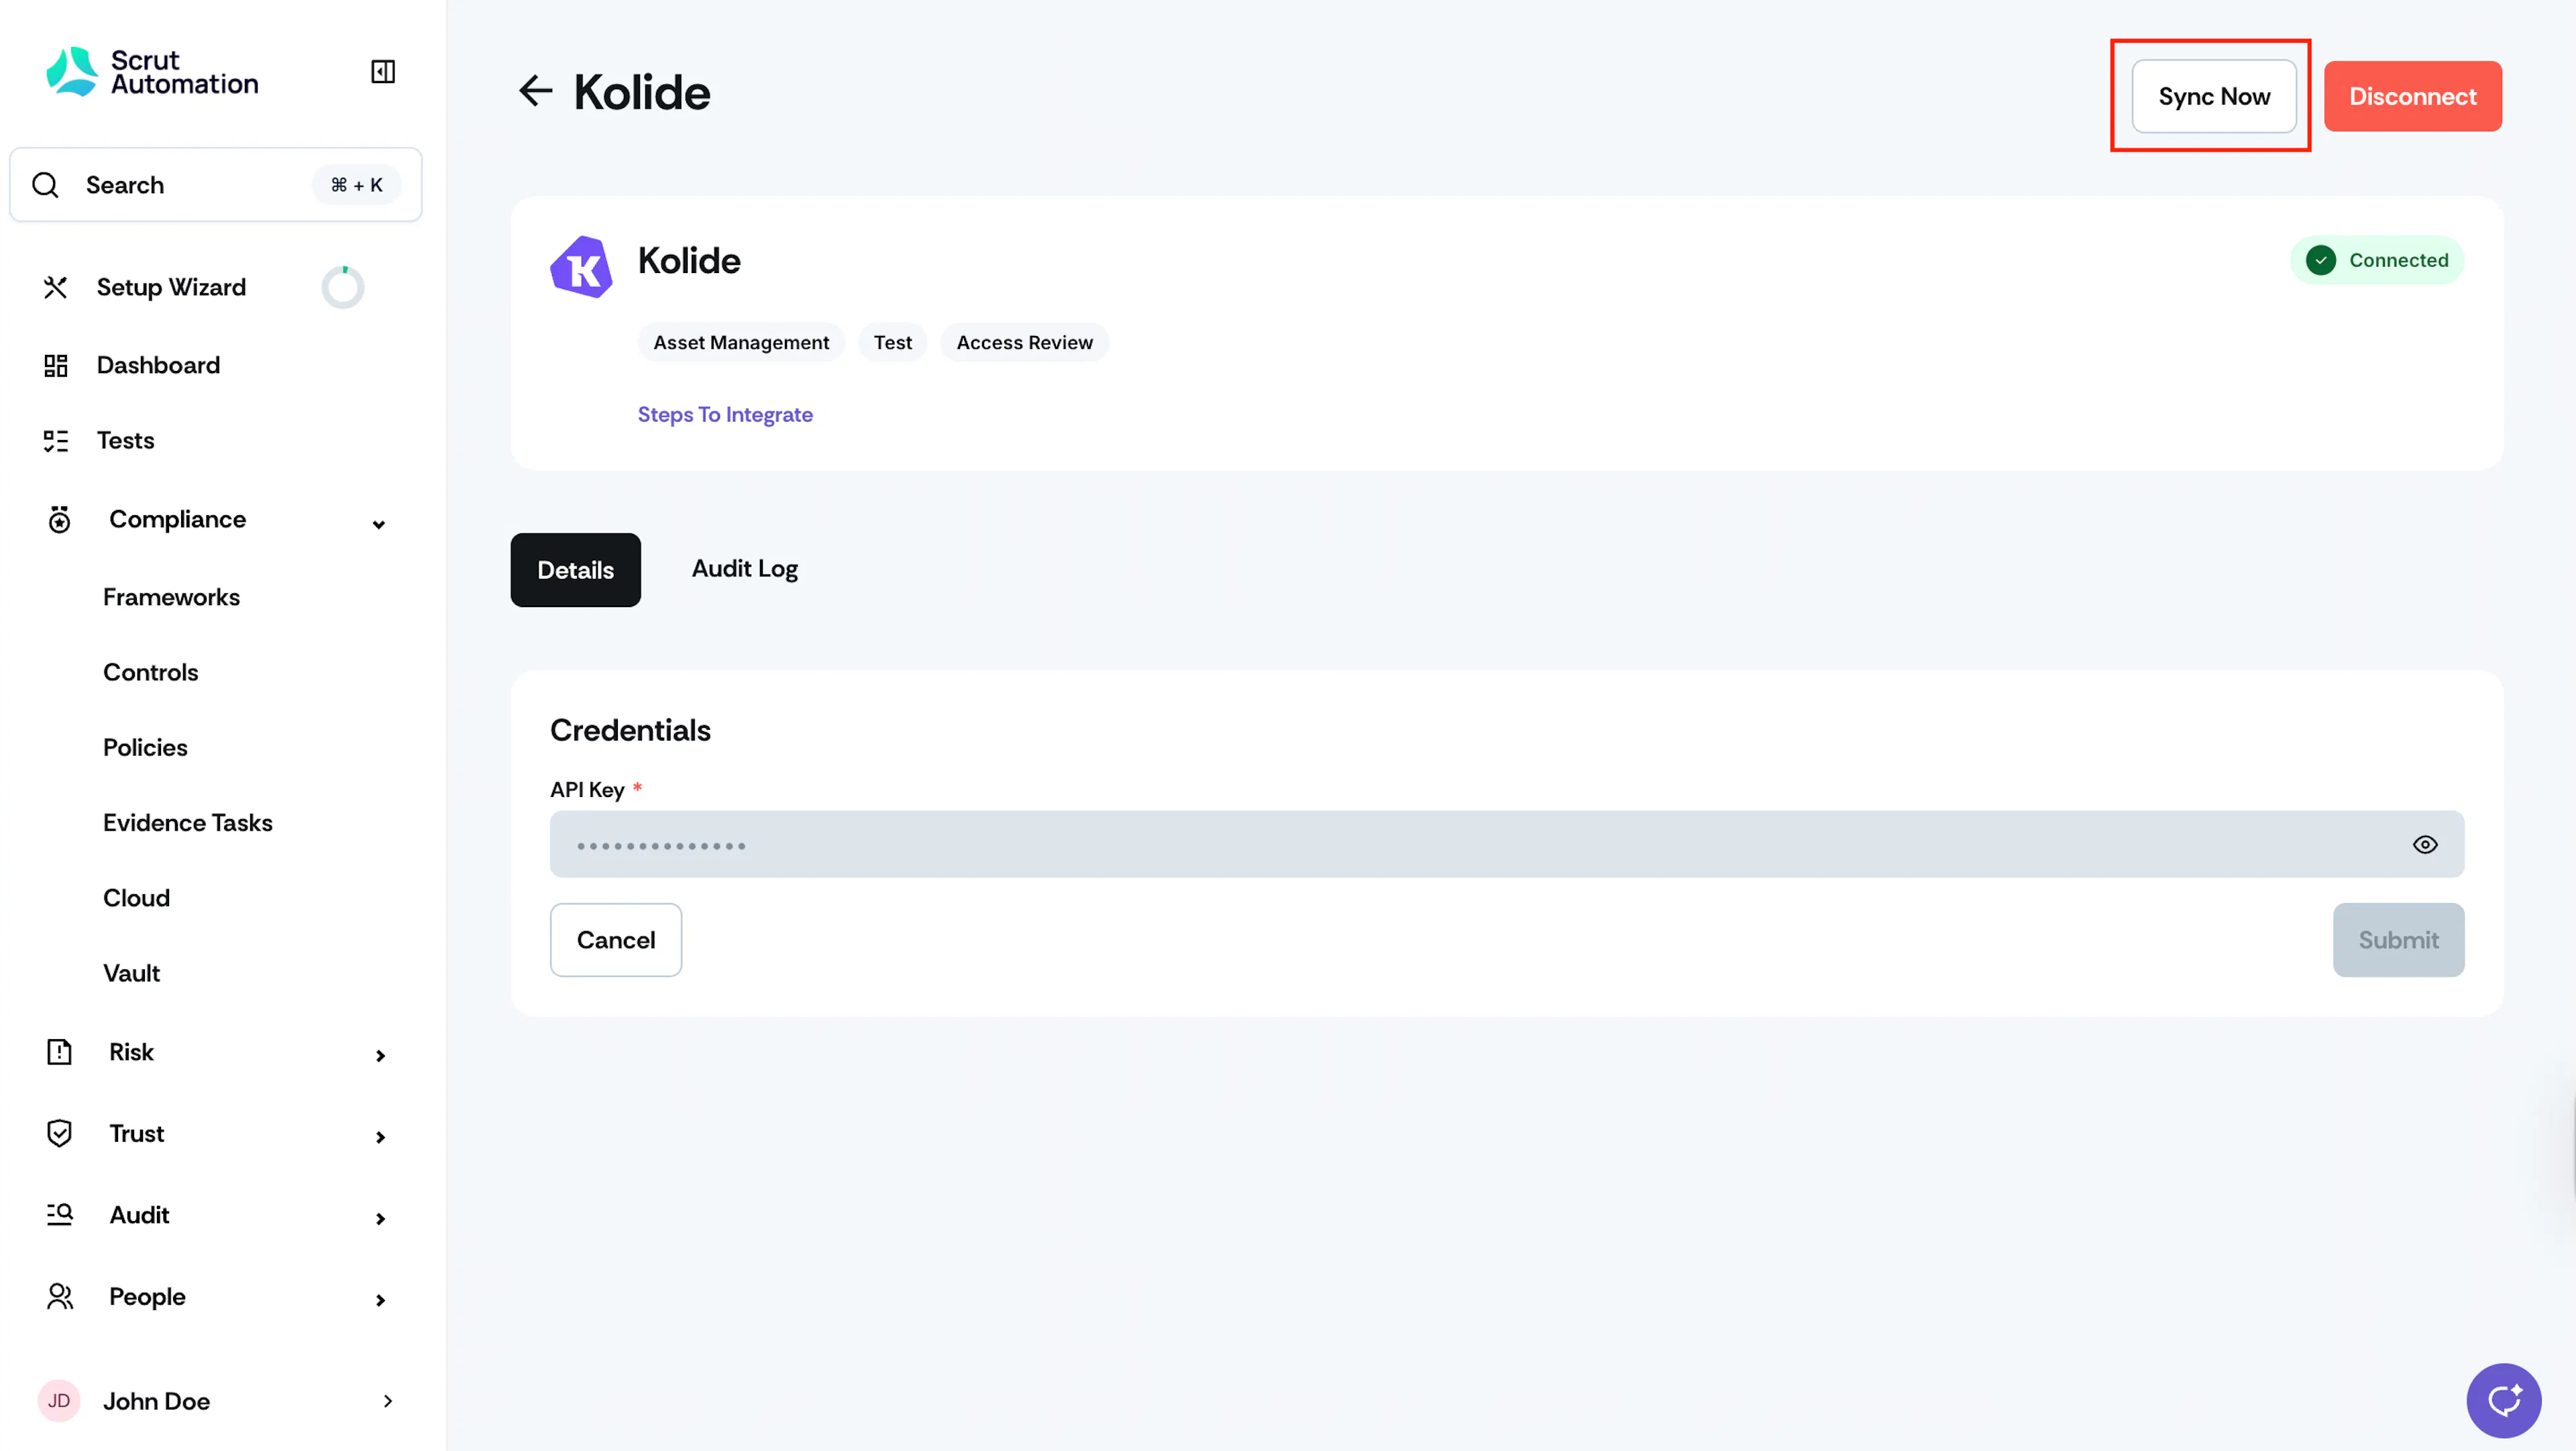
- Manual Sync: If you prefer, you can initiate a manual sync by clicking the Sync Now button on the Kolide integration page.
What Happens Next?
On successfully completing the integration, Scrut fetches data from Kolide and syncs it to the following modules:
1: People → Employees
Scrut will fetch the complete inventory of devices from Kolide and map them to employees using email as the unique identifier. Device details captured for audit purposes include:
- Device Name
- OS
- Serial Number
- Device Type
2: Asset Management
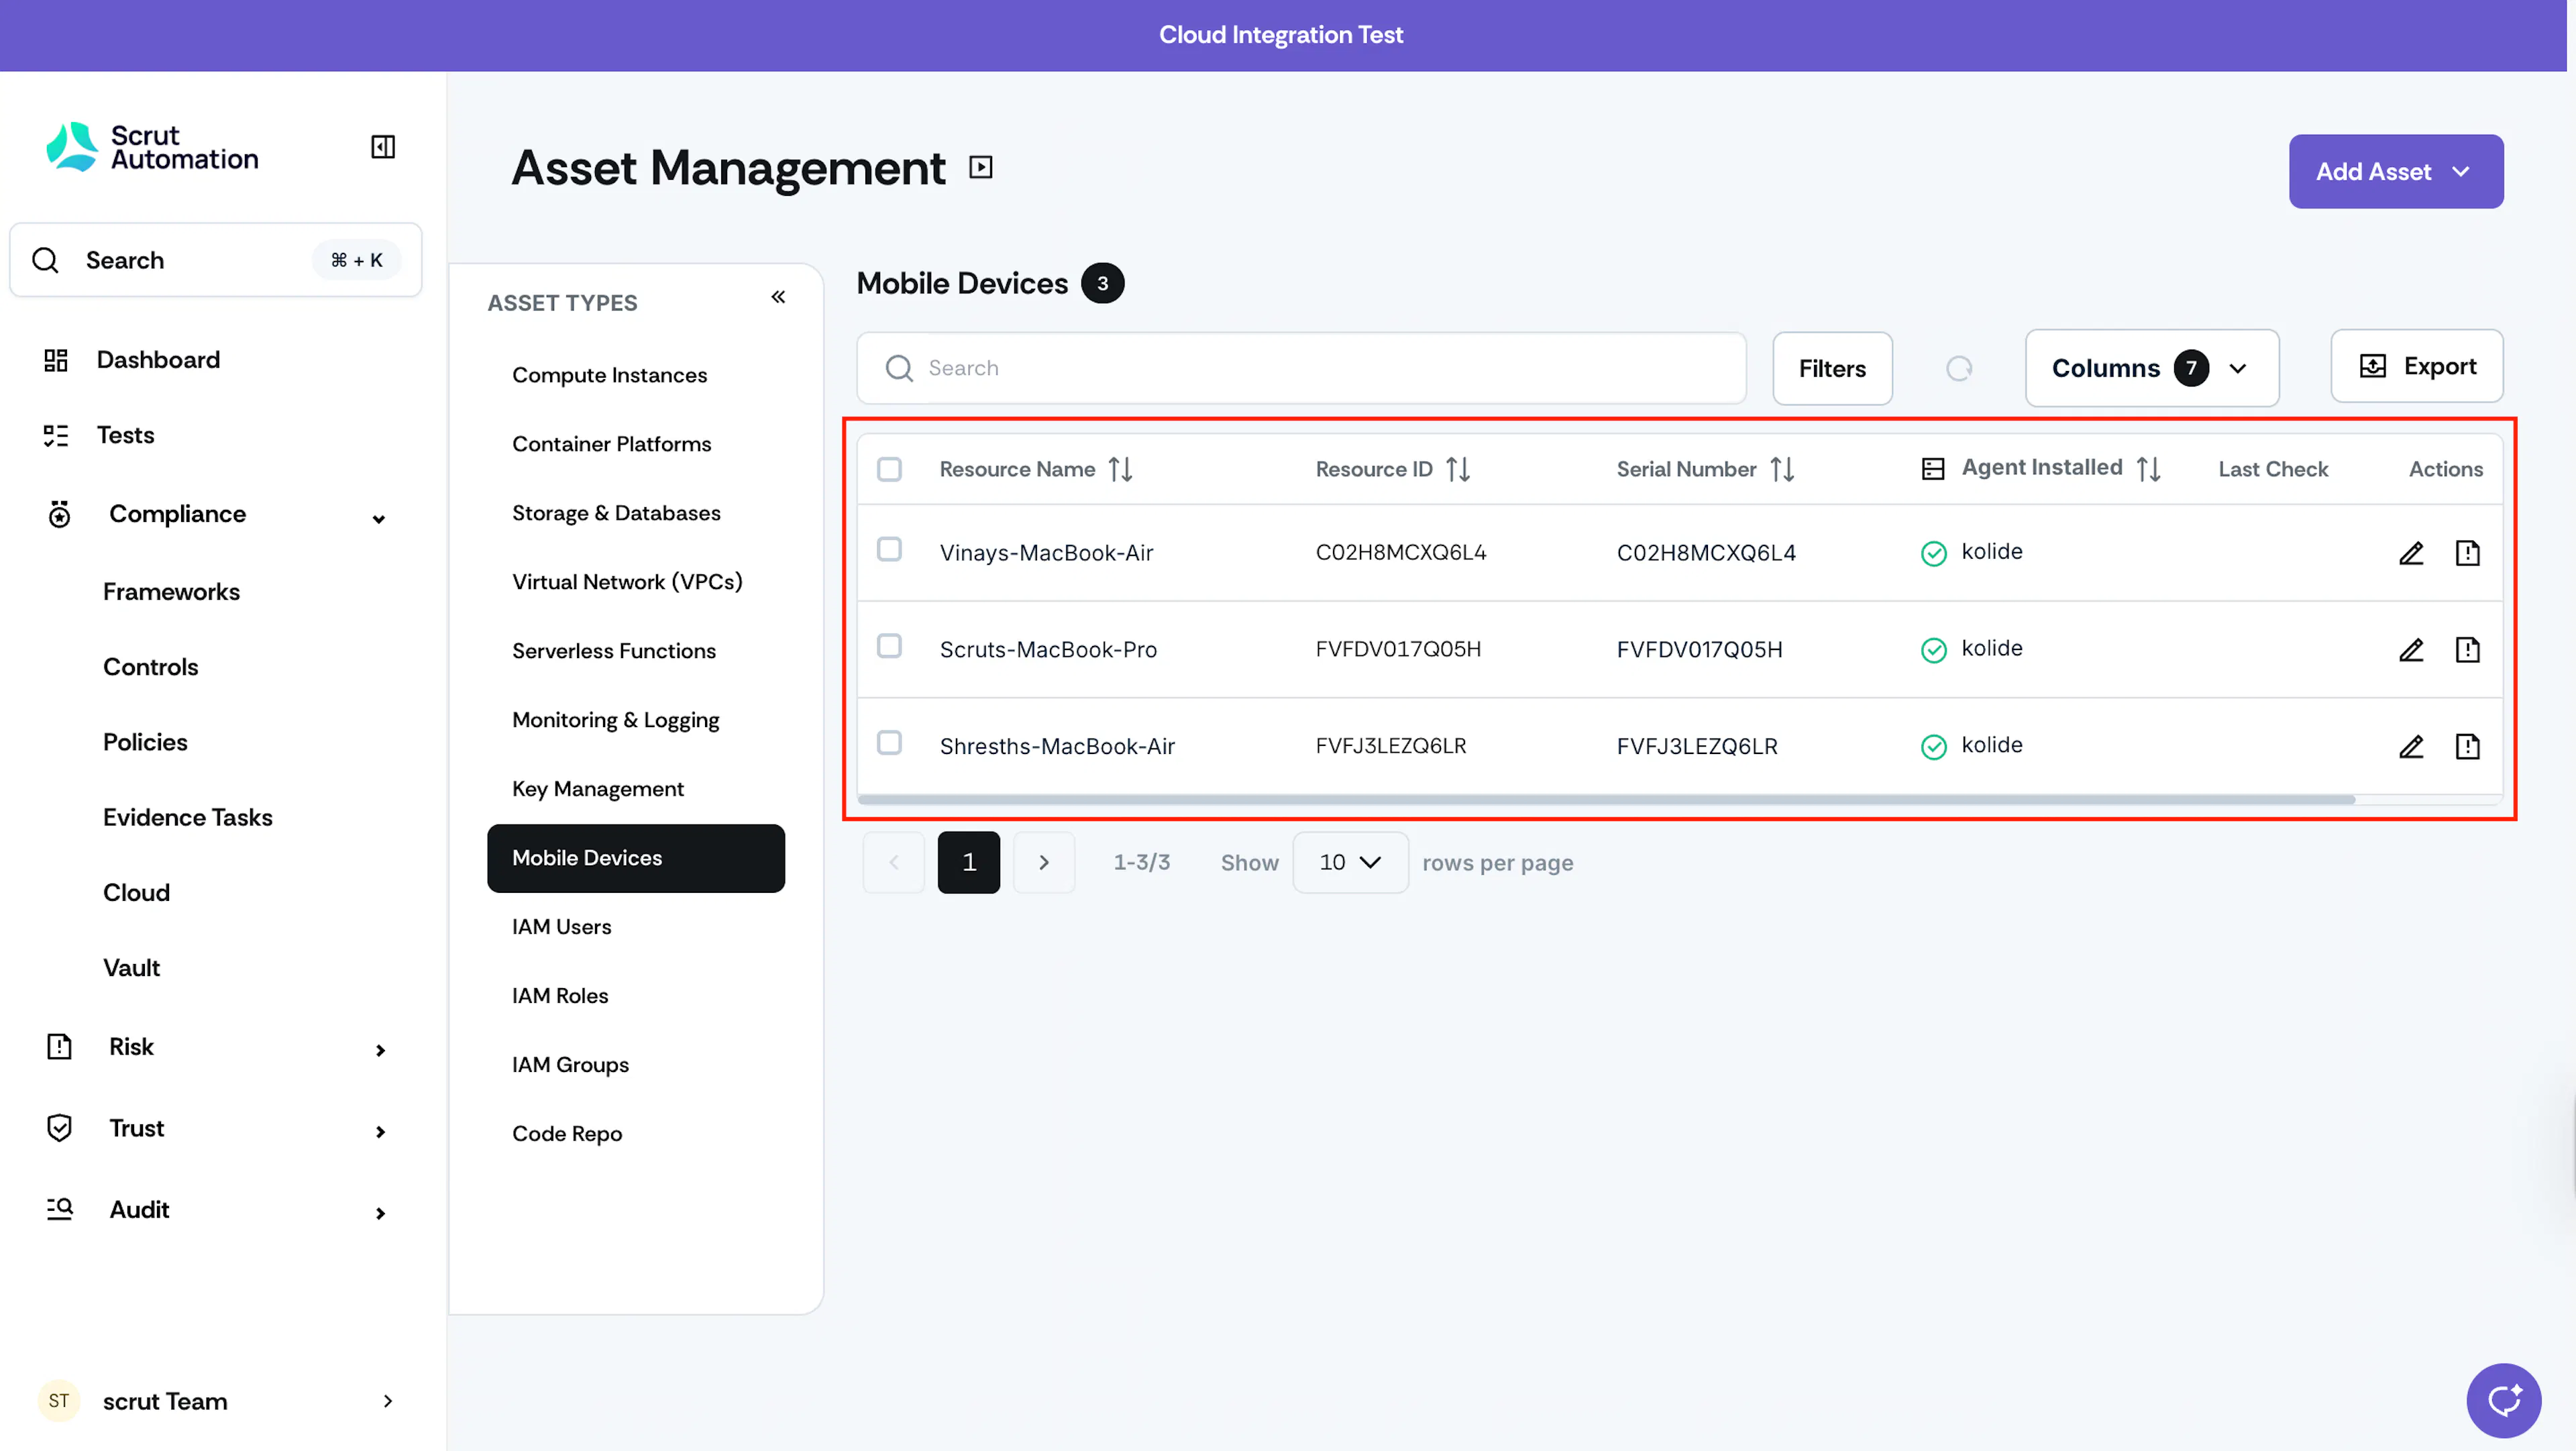
All device data that Scrut fetches from Kolide will be displayed in the Asset Management module. This creates a centralized asset directory, readily available for audit and compliance use cases.
- Click Asset Management on the left navigation panel.
- Go to the Mobile Devices section. This tab lists all the devices available in your Kolide account.
3: Access Reviews
Scrut will retrieve the list of all users with privileged access to Kolide. Admins can initiate and manage access reviews for Kolide directly within Scrut. Refer to this guide for step-by-step instructions on creating an access review.
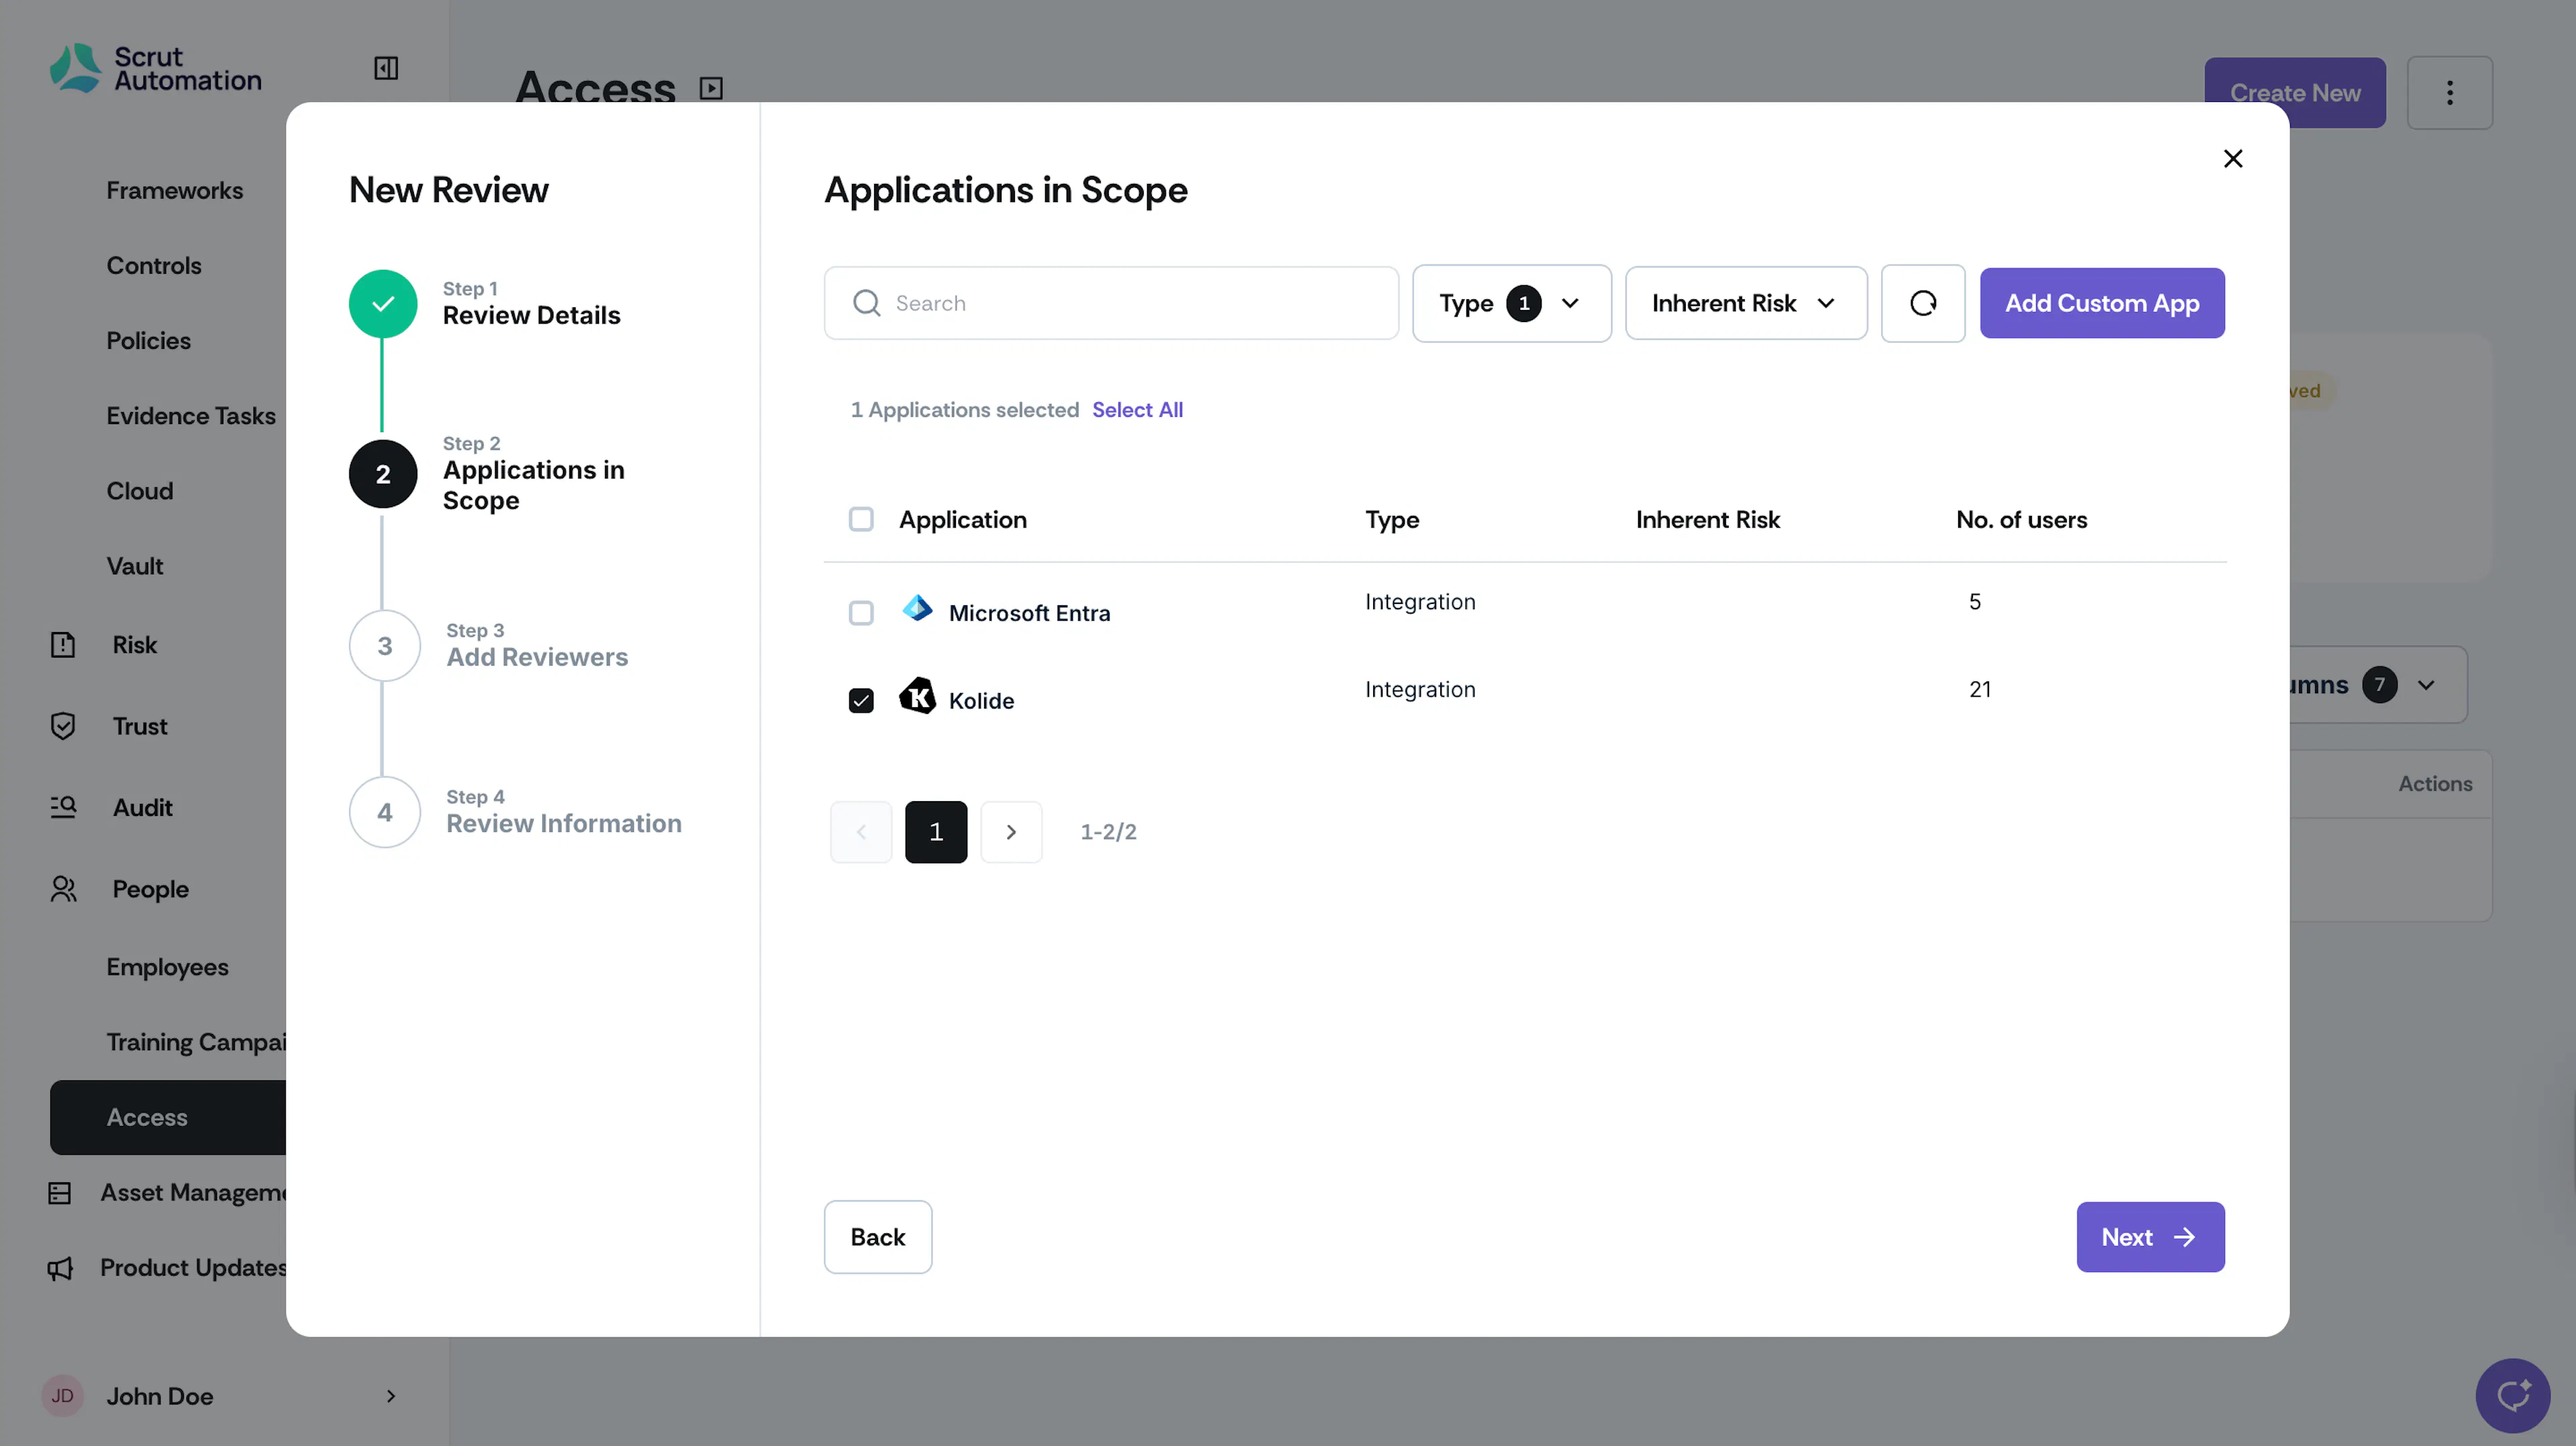
Follow these steps to create a new access review for Kolide:
- Go to People → Access Review and click Create New.
- Enter Review Details: Name, Description, Owner, and Review Days.
- In step 2, search for and select Kolide in the Applications in Scope.
- Select Reviewer and Approver.
- Review the details and click Save Review.
4: Automated Tests for Evidence Collection
Kolide’s native “Checks” will be automatically pulled into the Automated Tests module.
- Direct Control Mapping: Kolide checks can be mapped to framework controls within Scrut, serving as live audit evidence.
- No Manual Export/Upload: Customers no longer need to export check results from Kolide and upload them to Scrut.
- Custom Check Support: Any custom checks created in Kolide are also fetched and shown in Scrut automatically.
- Real-Time Sync: If a check is paused or deleted, or if a device is marked out of scope, those updates are immediately reflected in Scrut.
This ensures full synchronization between Kolide and Scrut, making evidence management effortless. To view Kolide checks data in Scrut:
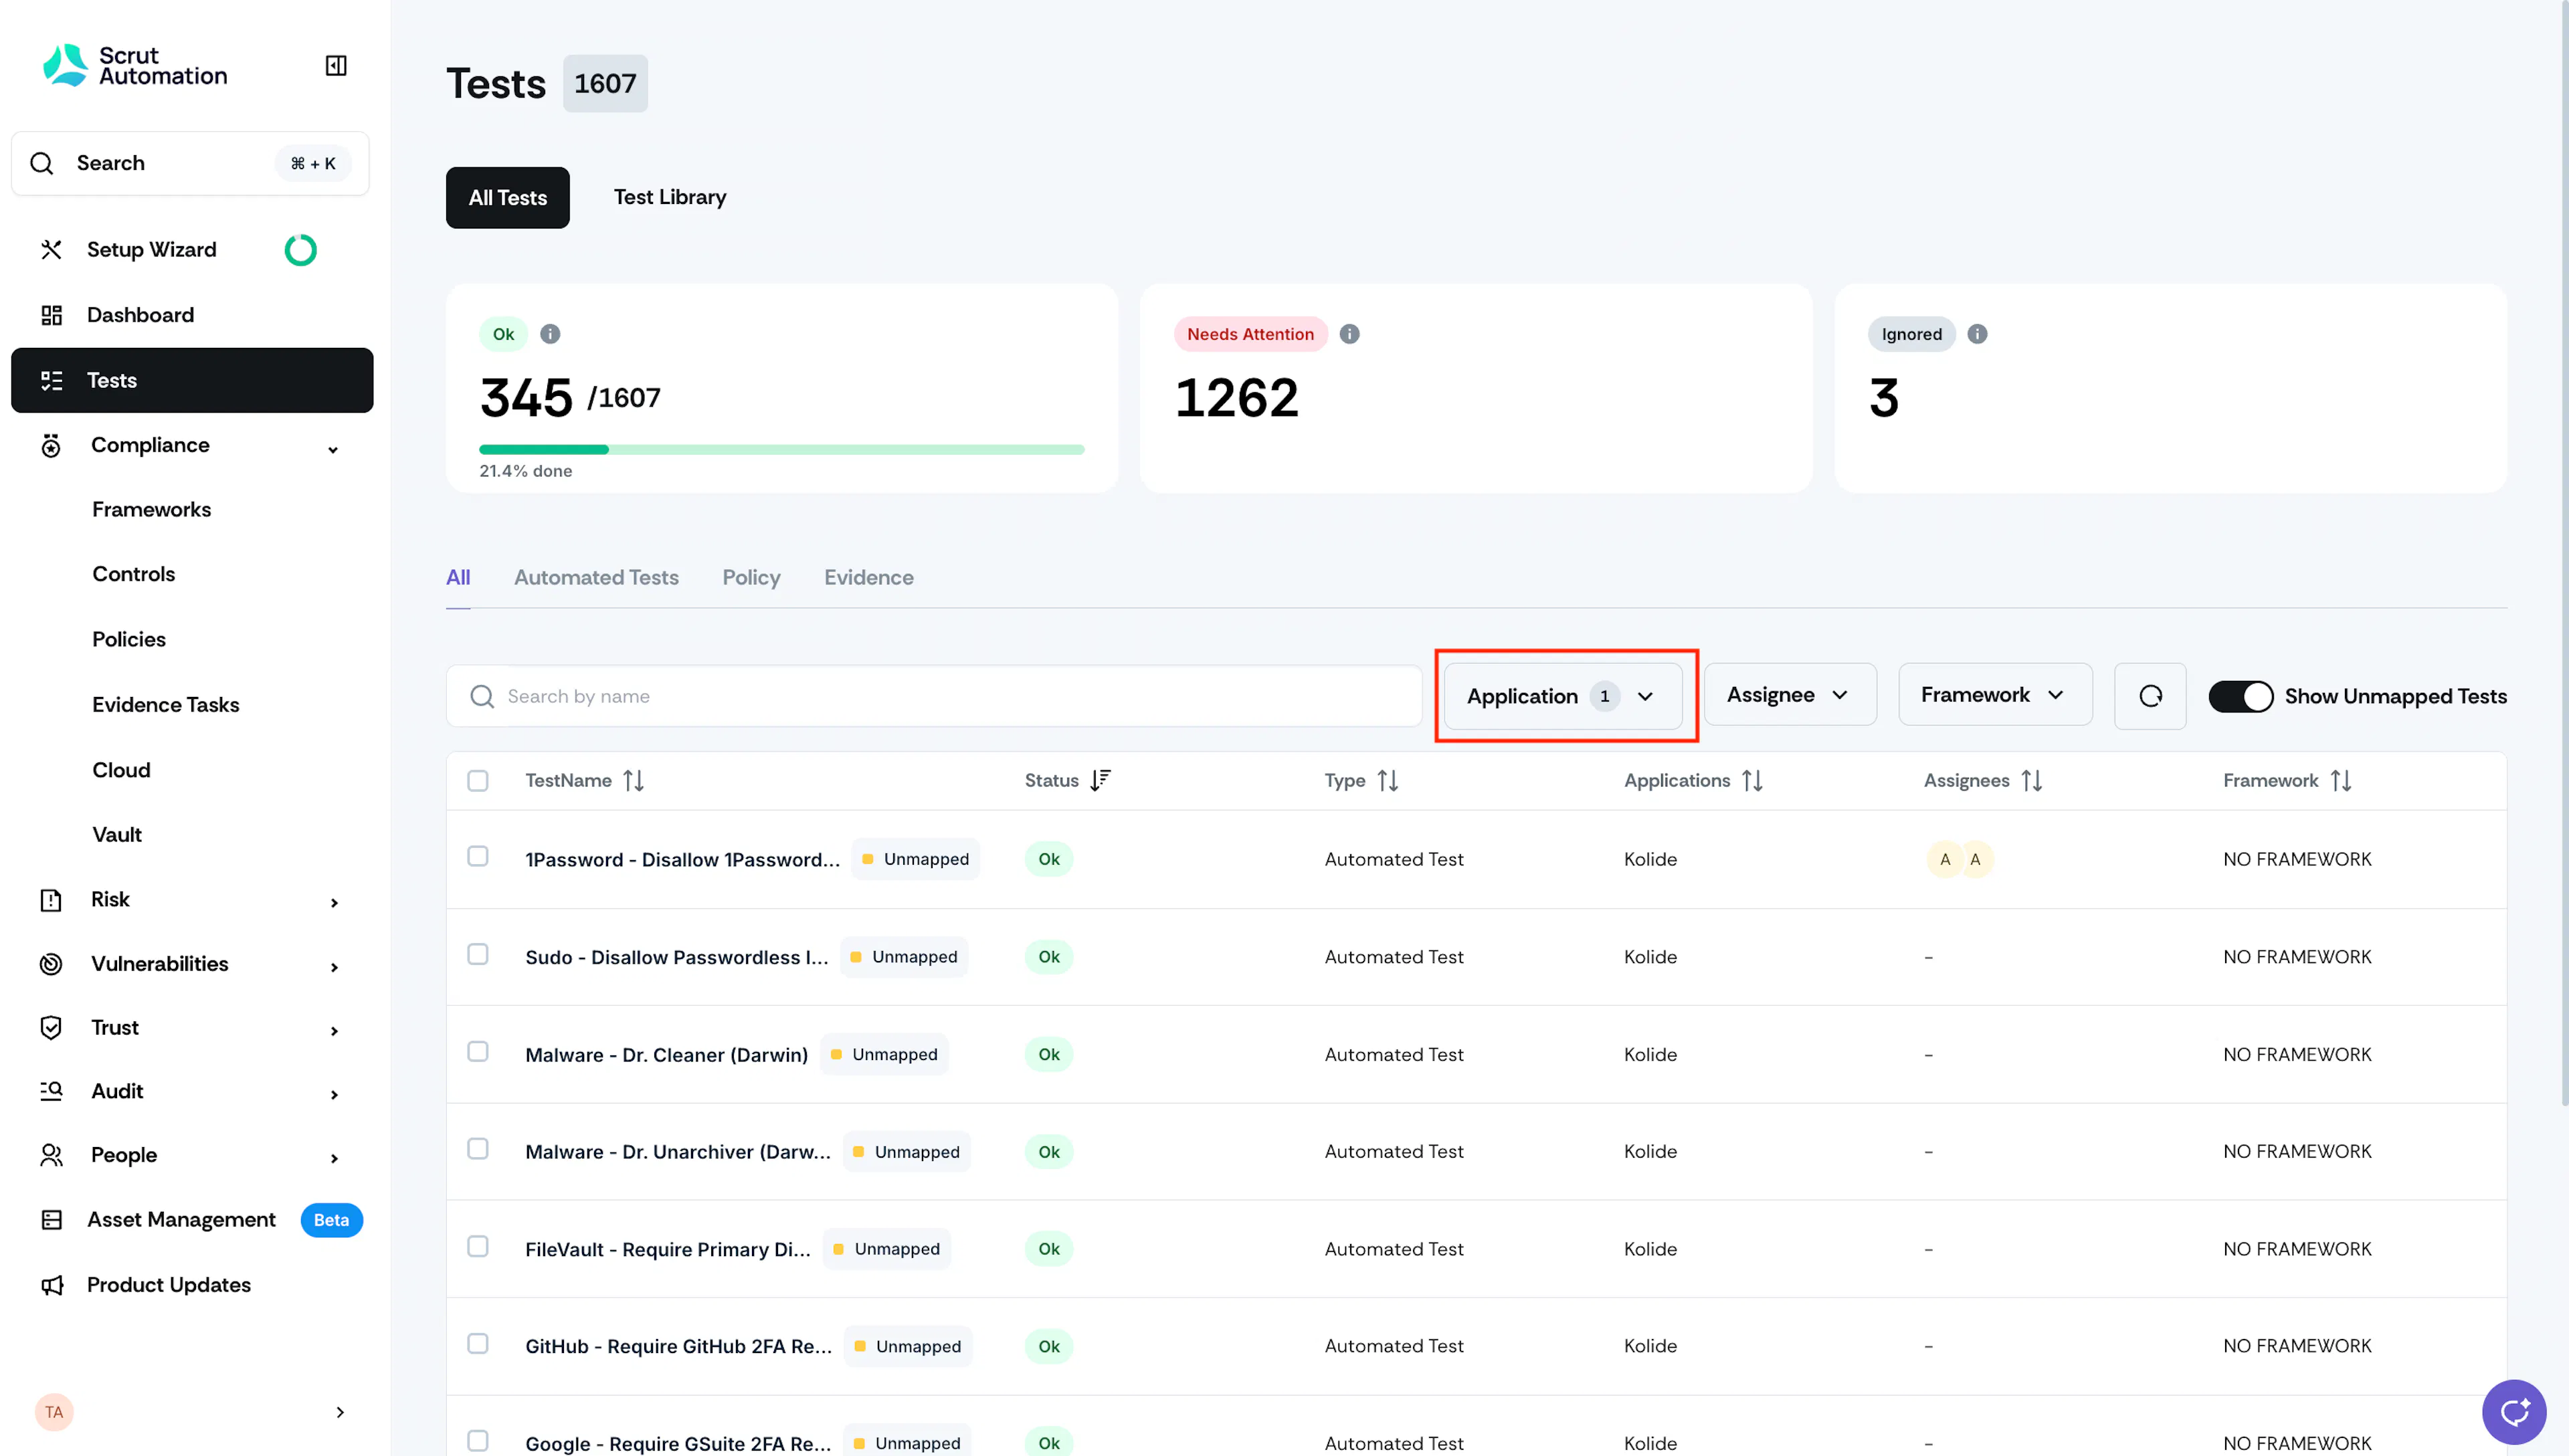
- Click Tests on the left navigation panel.
- Click the Application filter and select Kolide.
- This lists all automated tests Scrut runs on your connected Kolide account.