

Integrate NinjaOne
The Scrut-NinjaOne Integration fetches your employees’ device/endpoint data from your NinjaOne account and sends it to Scrut. Upon successfully completing the integration, Scrut will display the fetched data in the following modules:
How To Integrate Scrut With NinjaOne
Prerequisites
Before starting the integration, ensure you have the following permissions for your NinjaOne account:
-
Account Information: Your NinjaOne login email address
-
Admin Access: You must be a NinjaOne admin to grant the following permissions:
- Read access: To allow Scrut to monitor data and the organization structure
- Offline access: To enable read access to your NinjaRMM account, even when you’re offline
Pro Tip:
We recommend logging into your NinjaOne account before starting the integration to avoid doing so later.
Step 1: Copy Client ID and Client Secret from NinjaOne
-
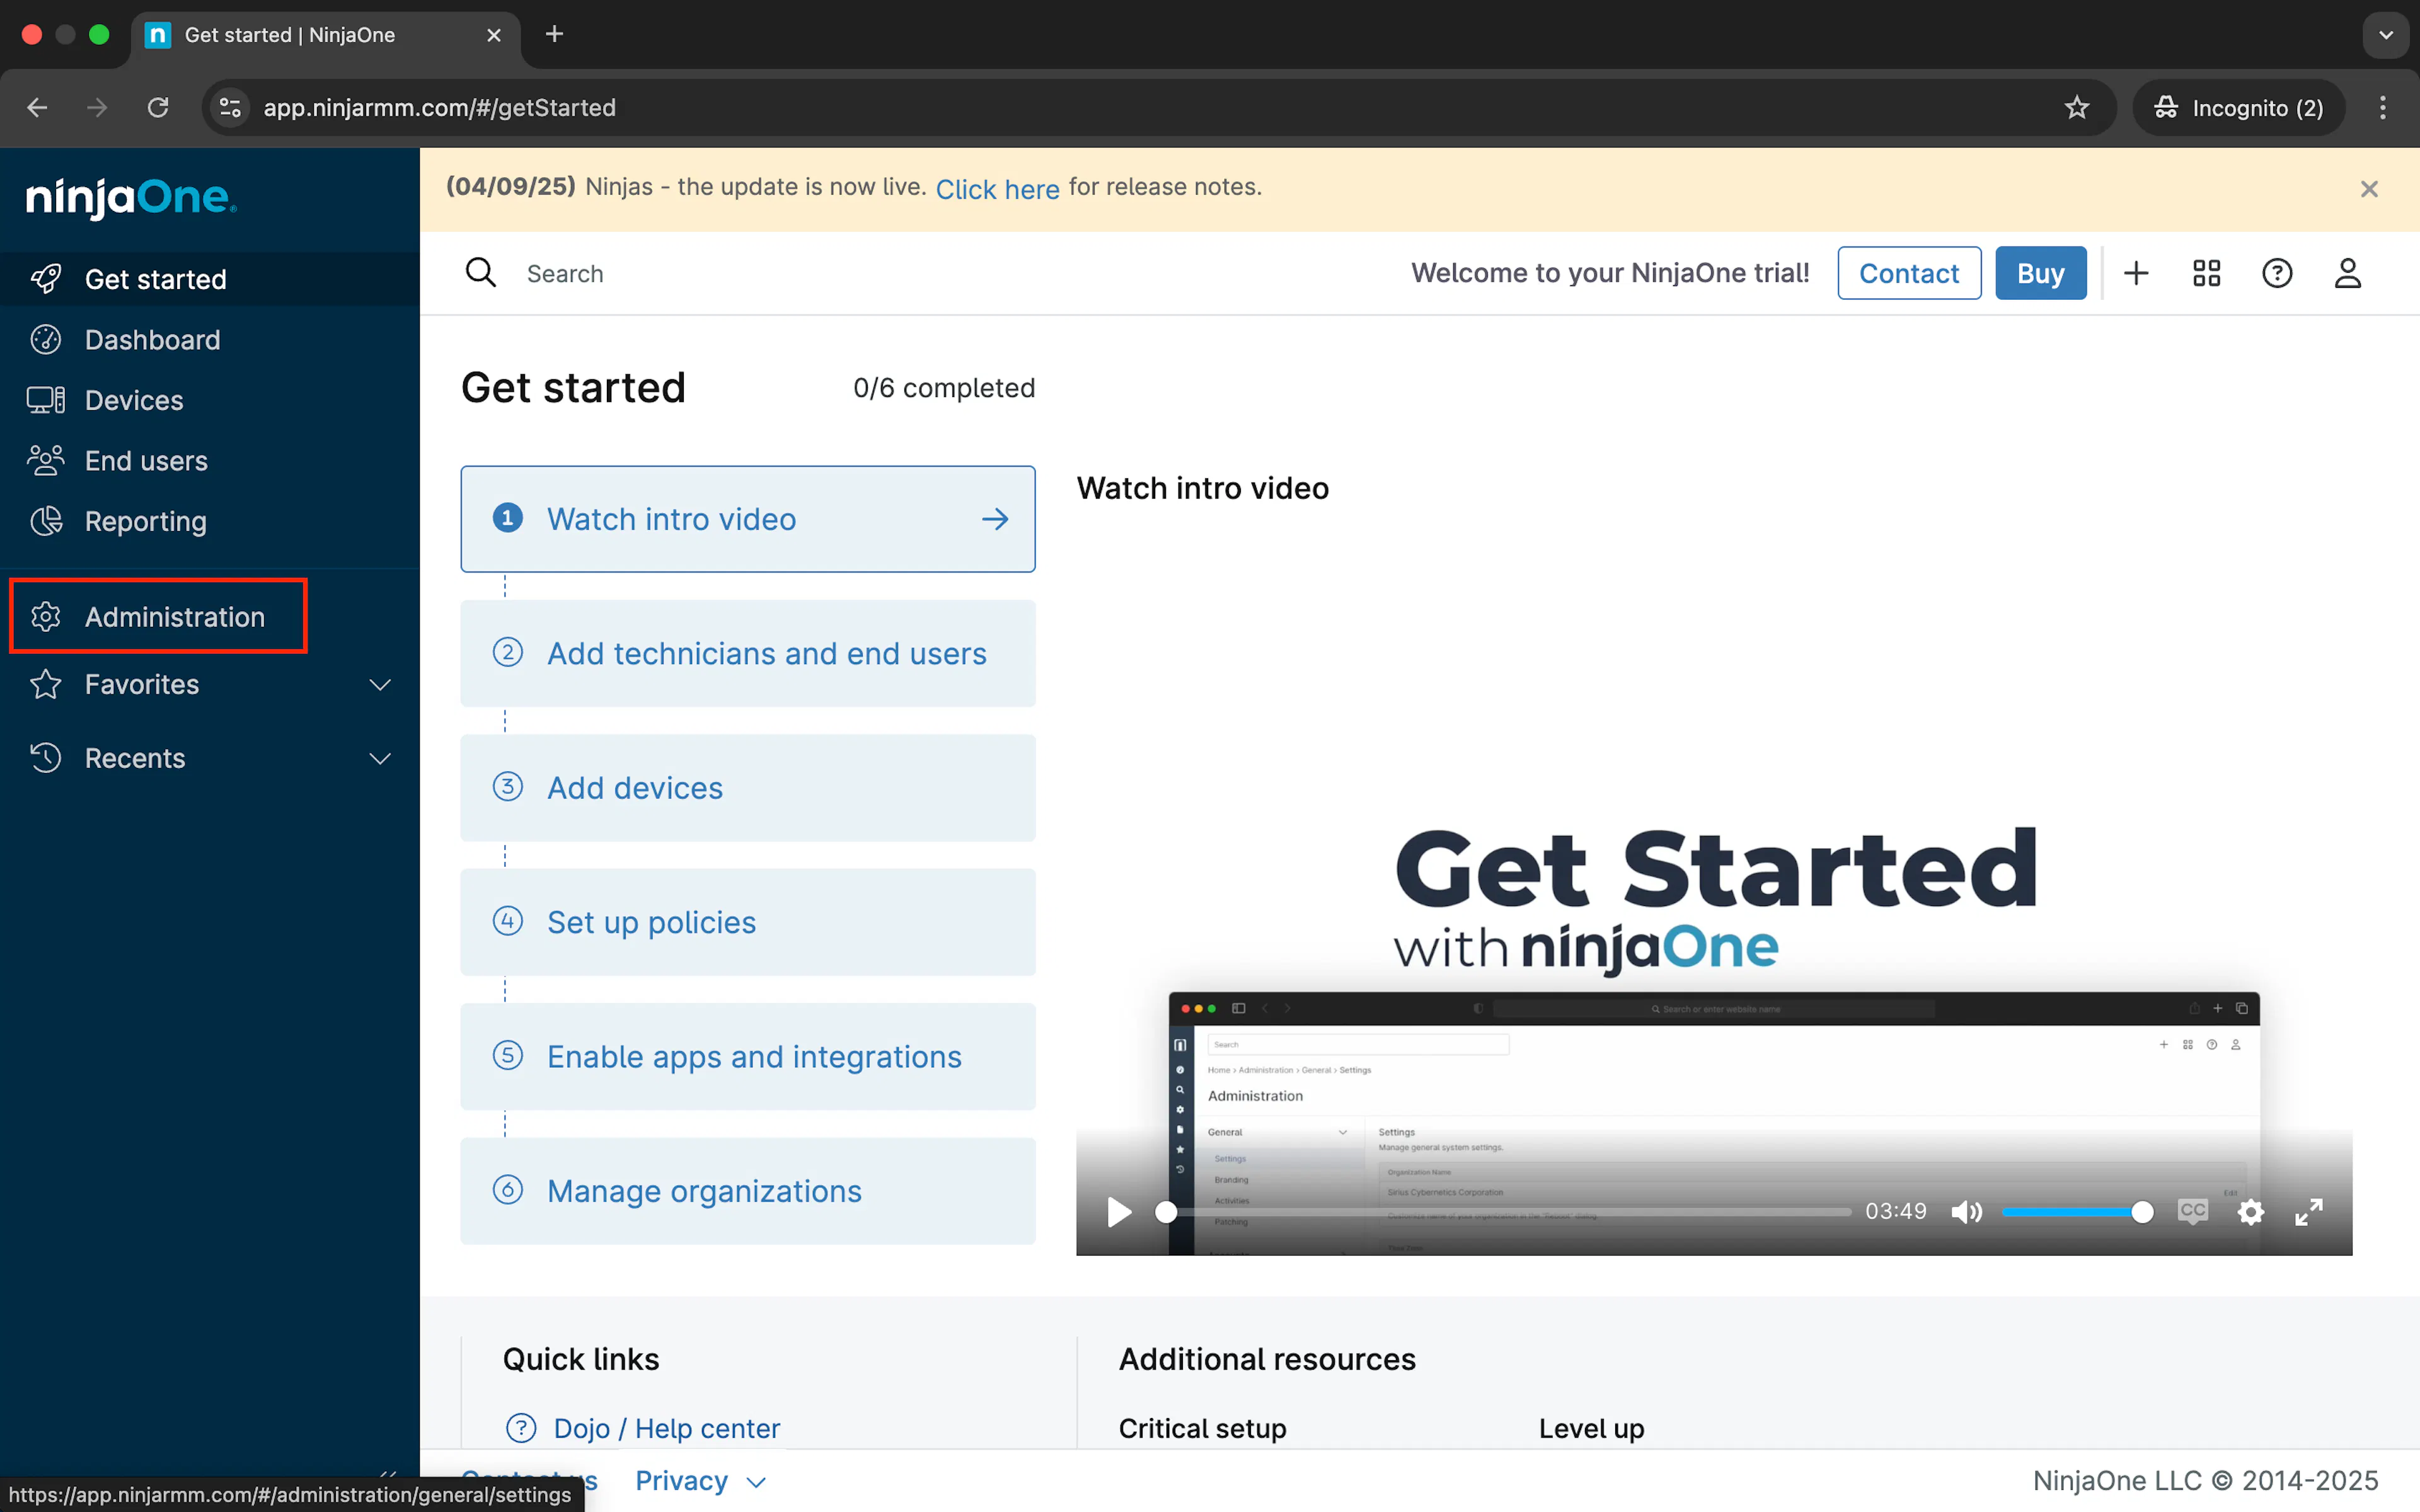
Log in to your NinjaOne account and click Administration in the left navigation panel.
-
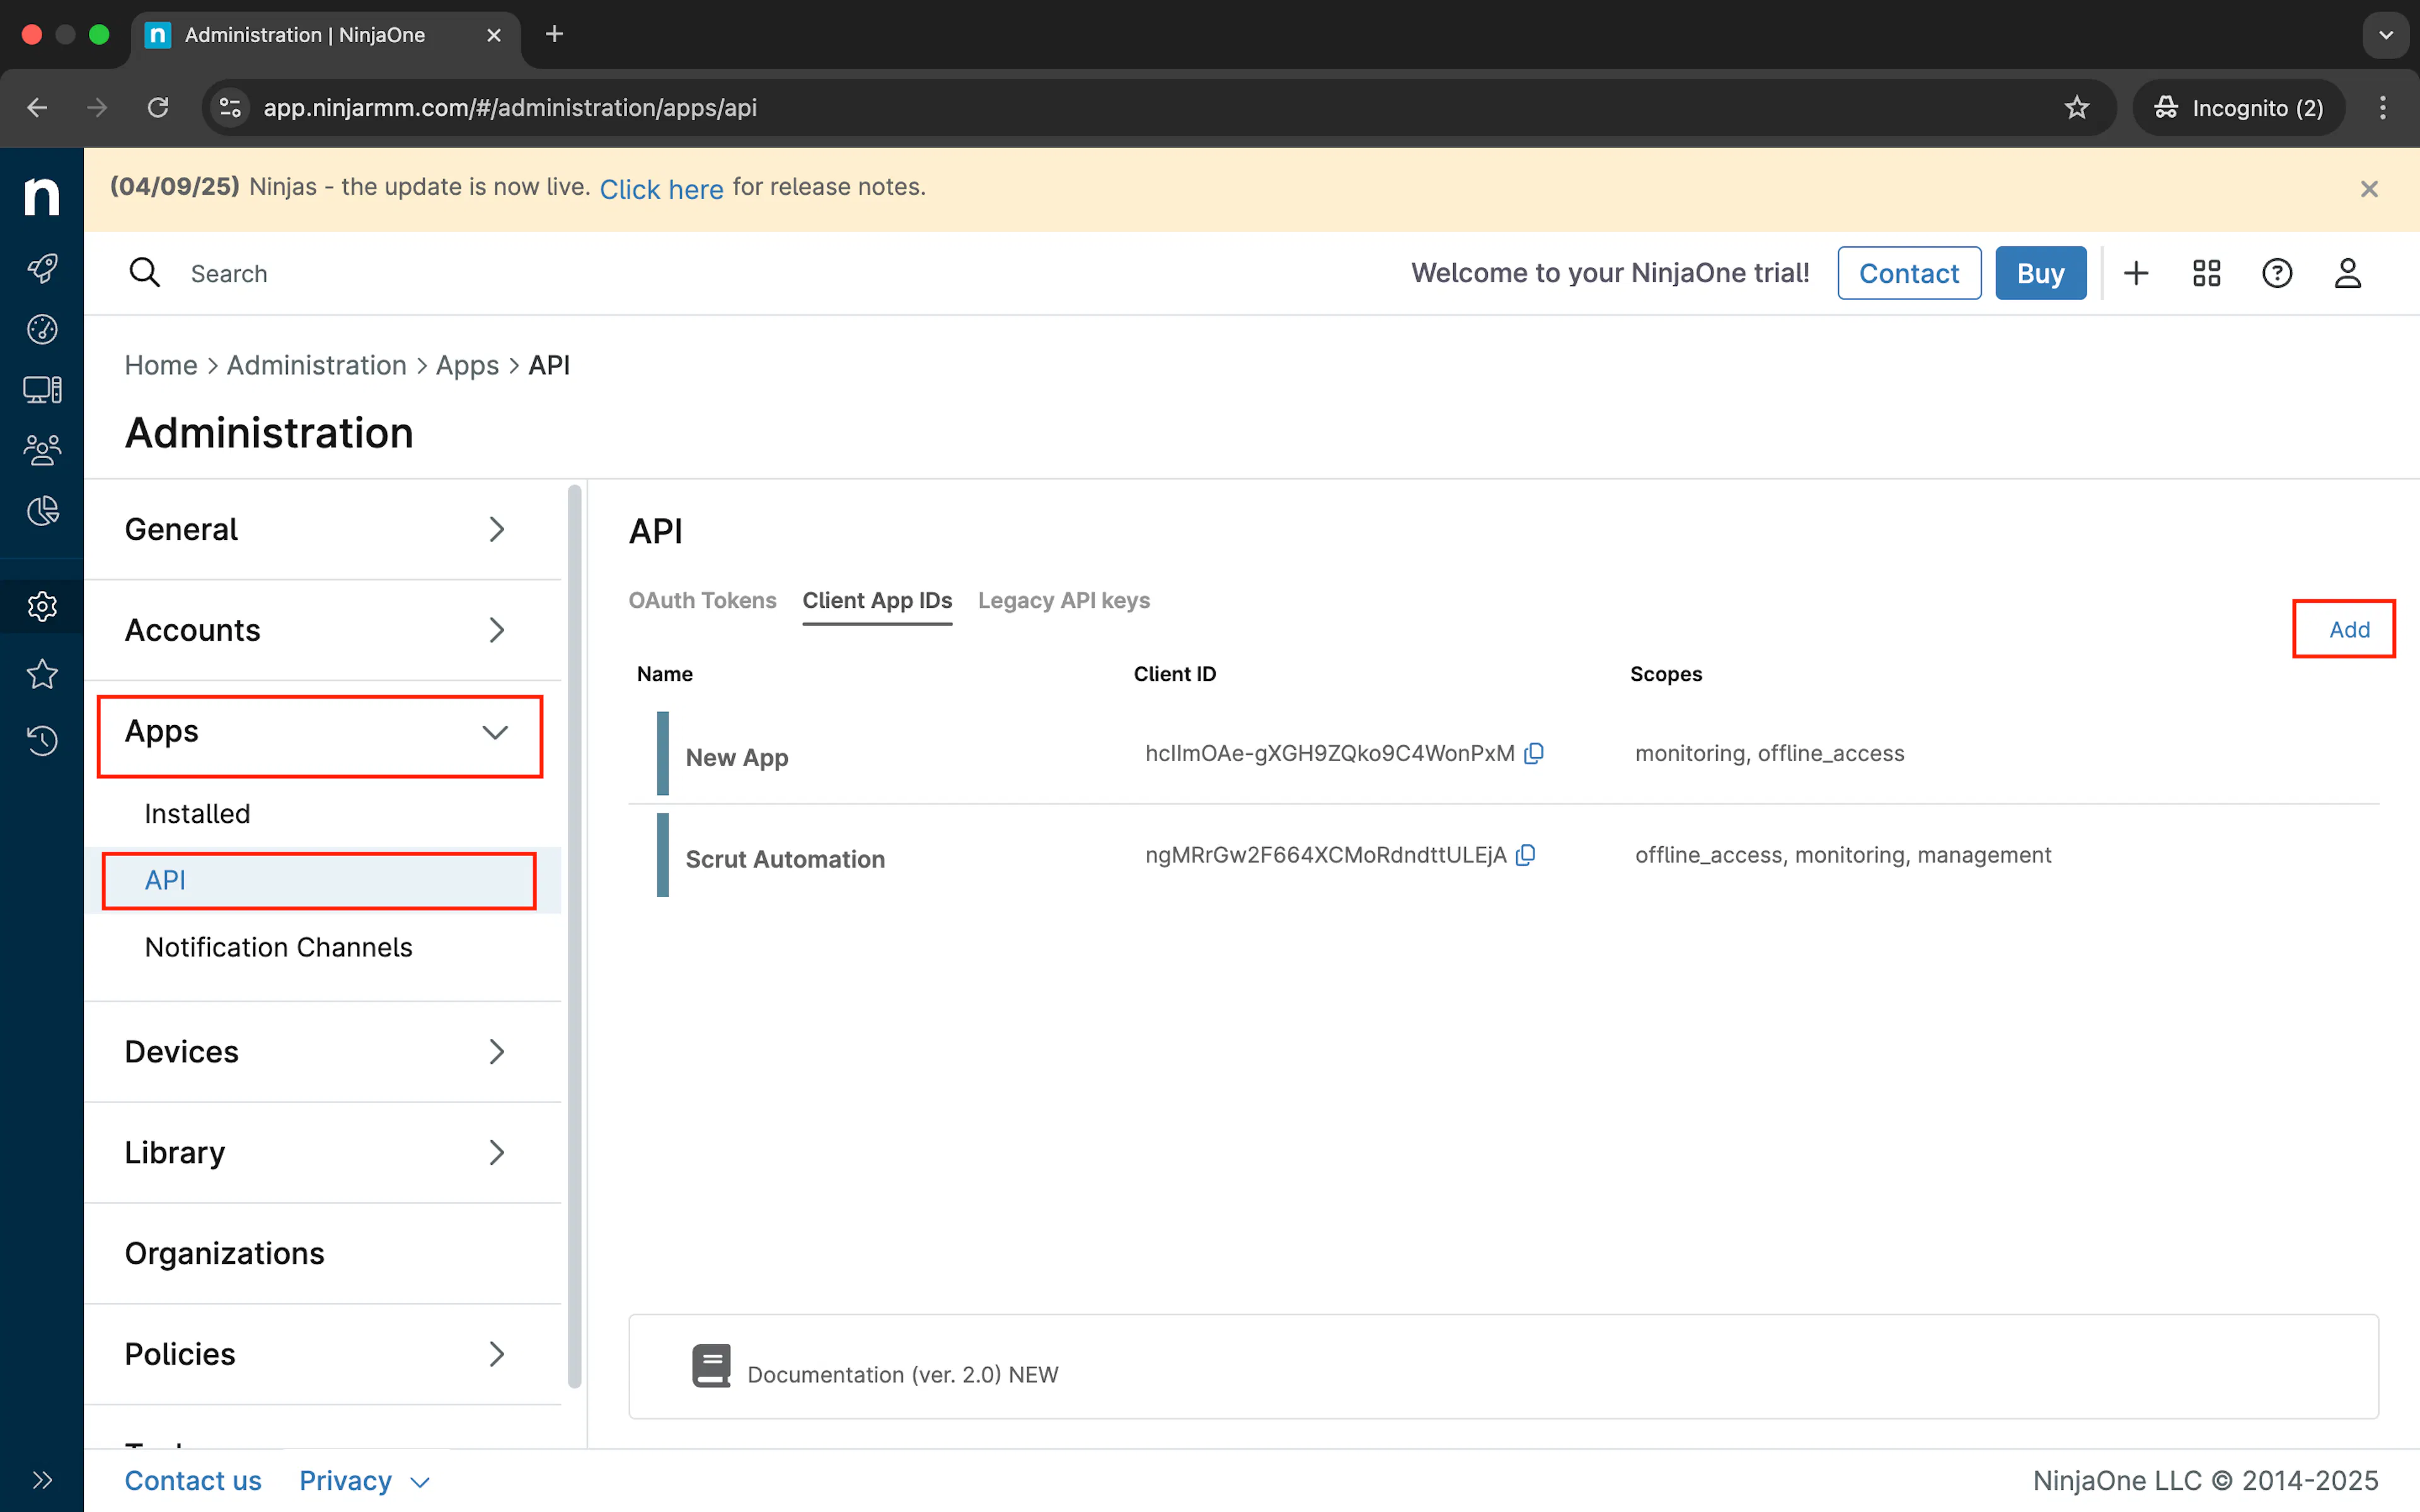
Go to App → API → Client App ID.
-
Click Add to create an app.
-
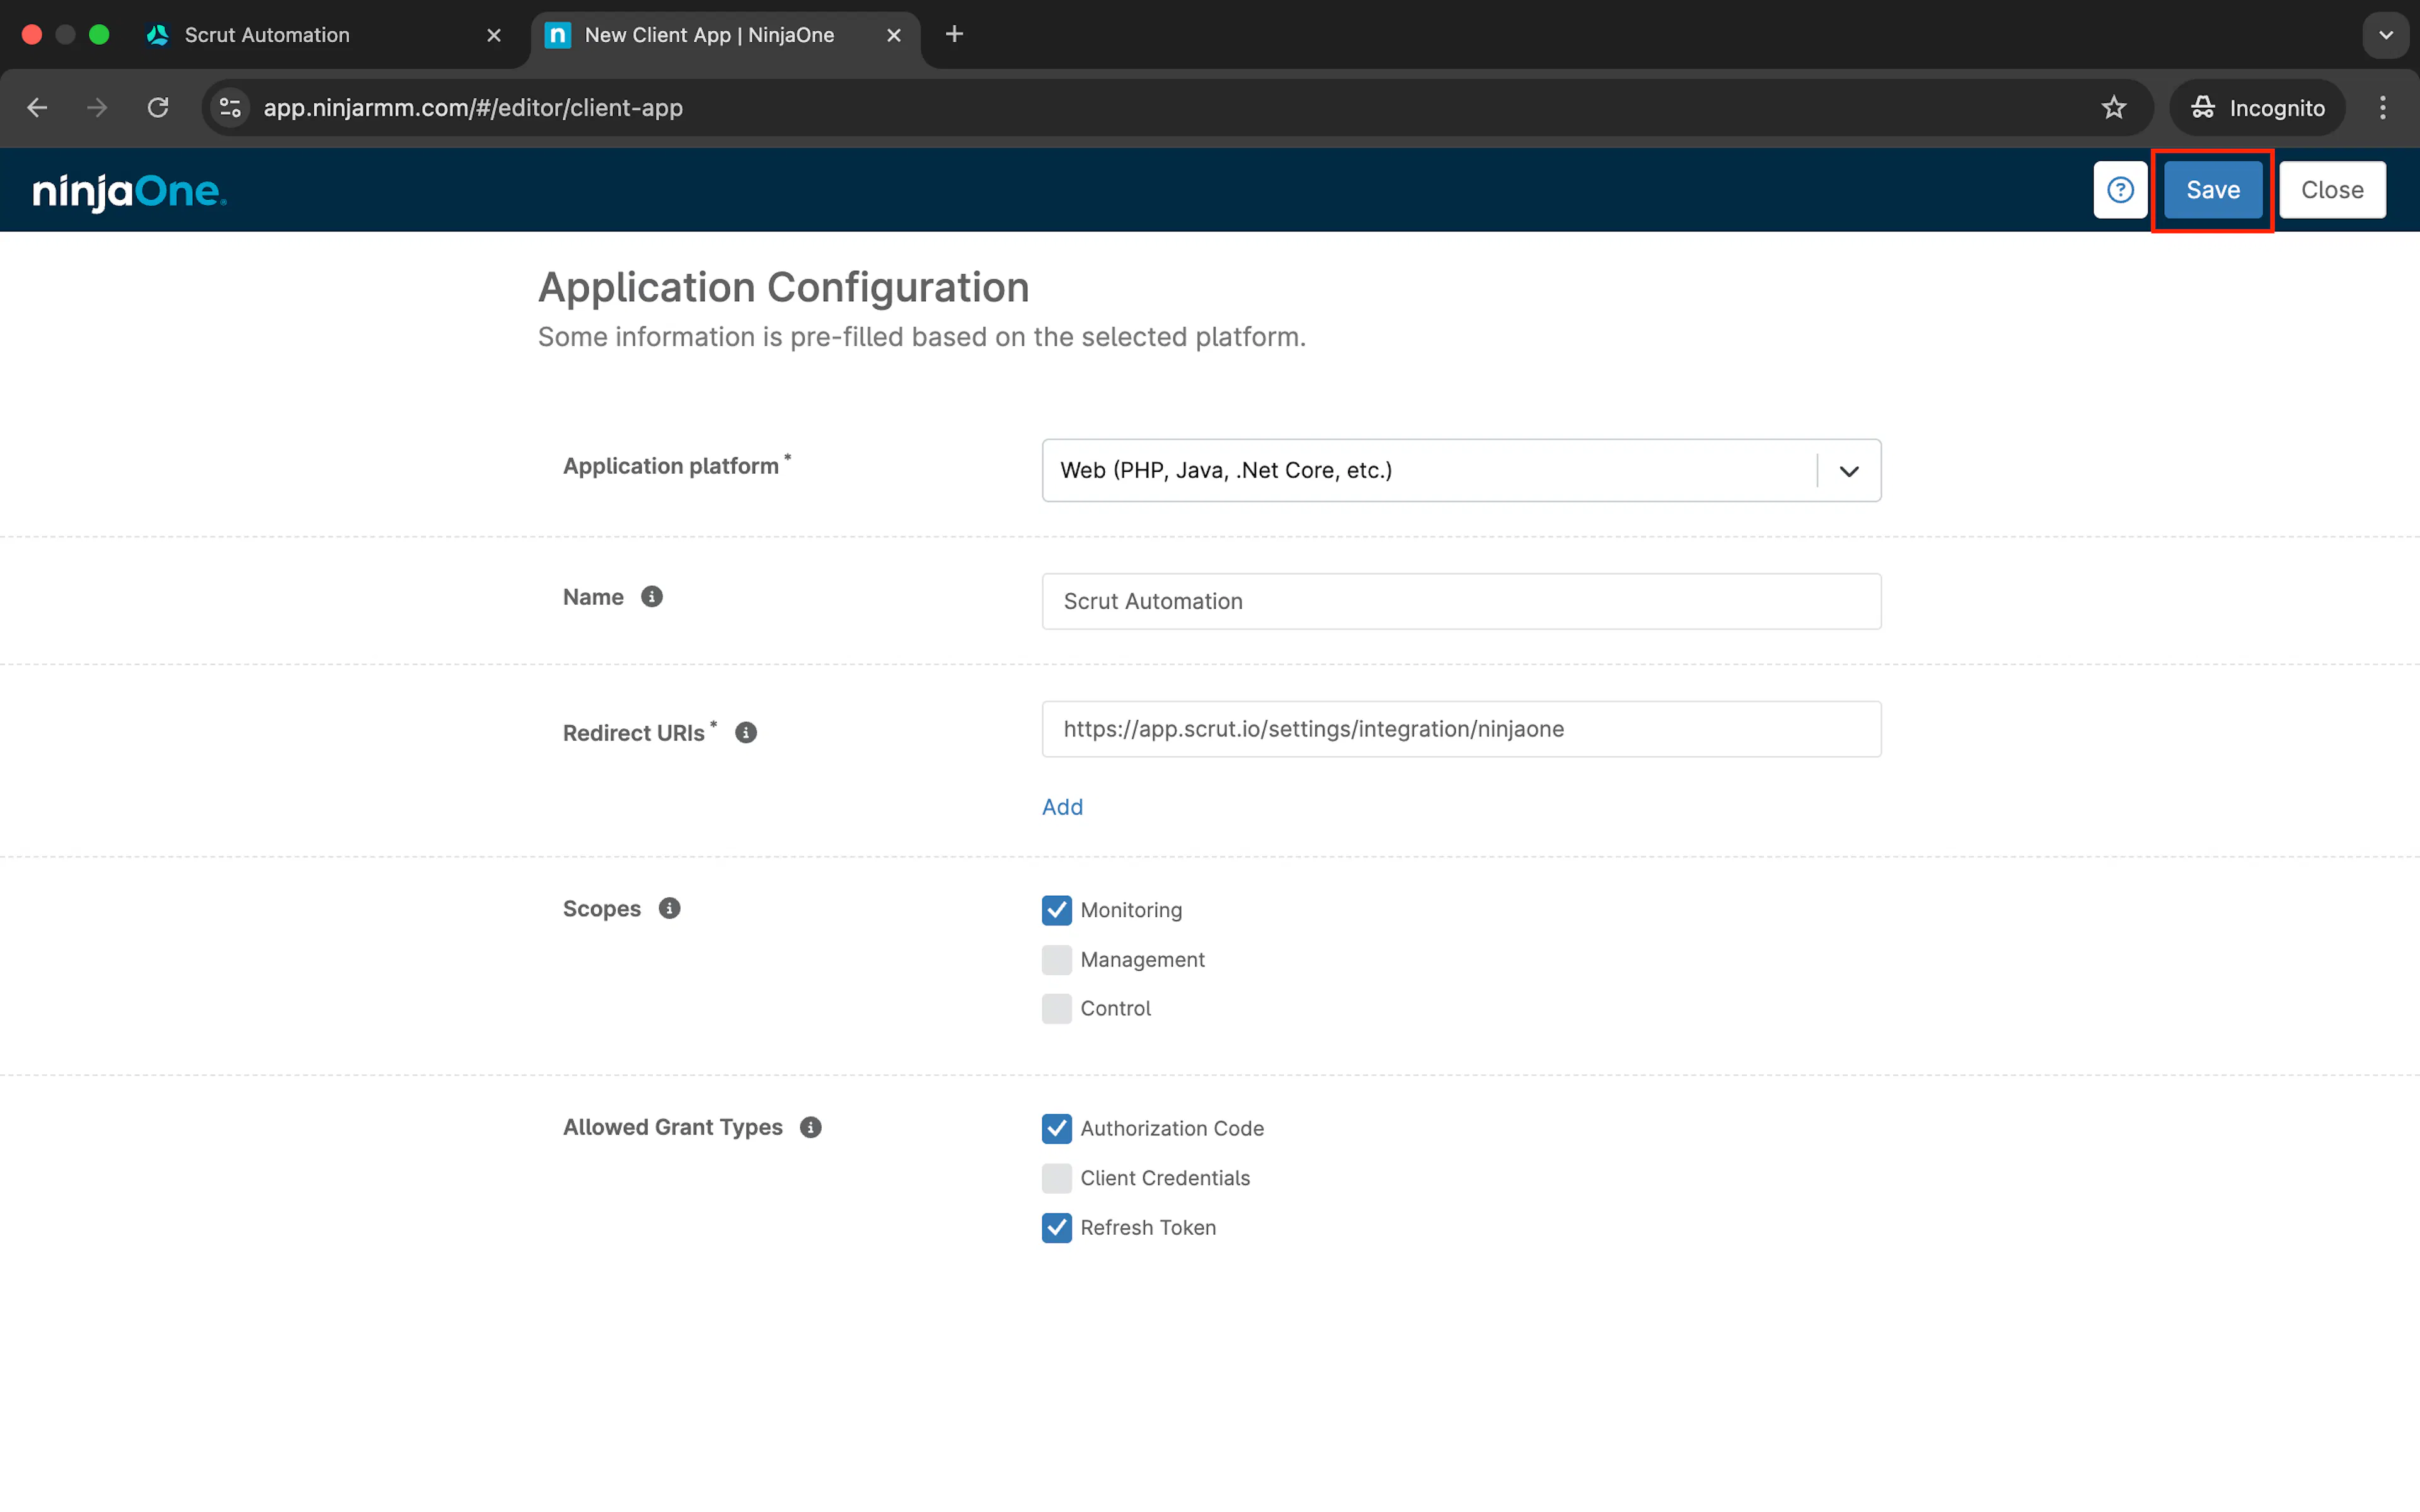
In the Application Platform dropdown, select Web (PHP, Java, .Net Core, etc.).
-
Enter and select the following information:
-
NAME: Give an arbitrary name (e.g., Scrut)
-
Redirect URLs: Enter the appropriate URL based on your Scrut instance region.
-
Scopes: Select Monitoring
-
Allowed Grant Types: Authorization Code and Refresh Token
-
-
Click Save.
-
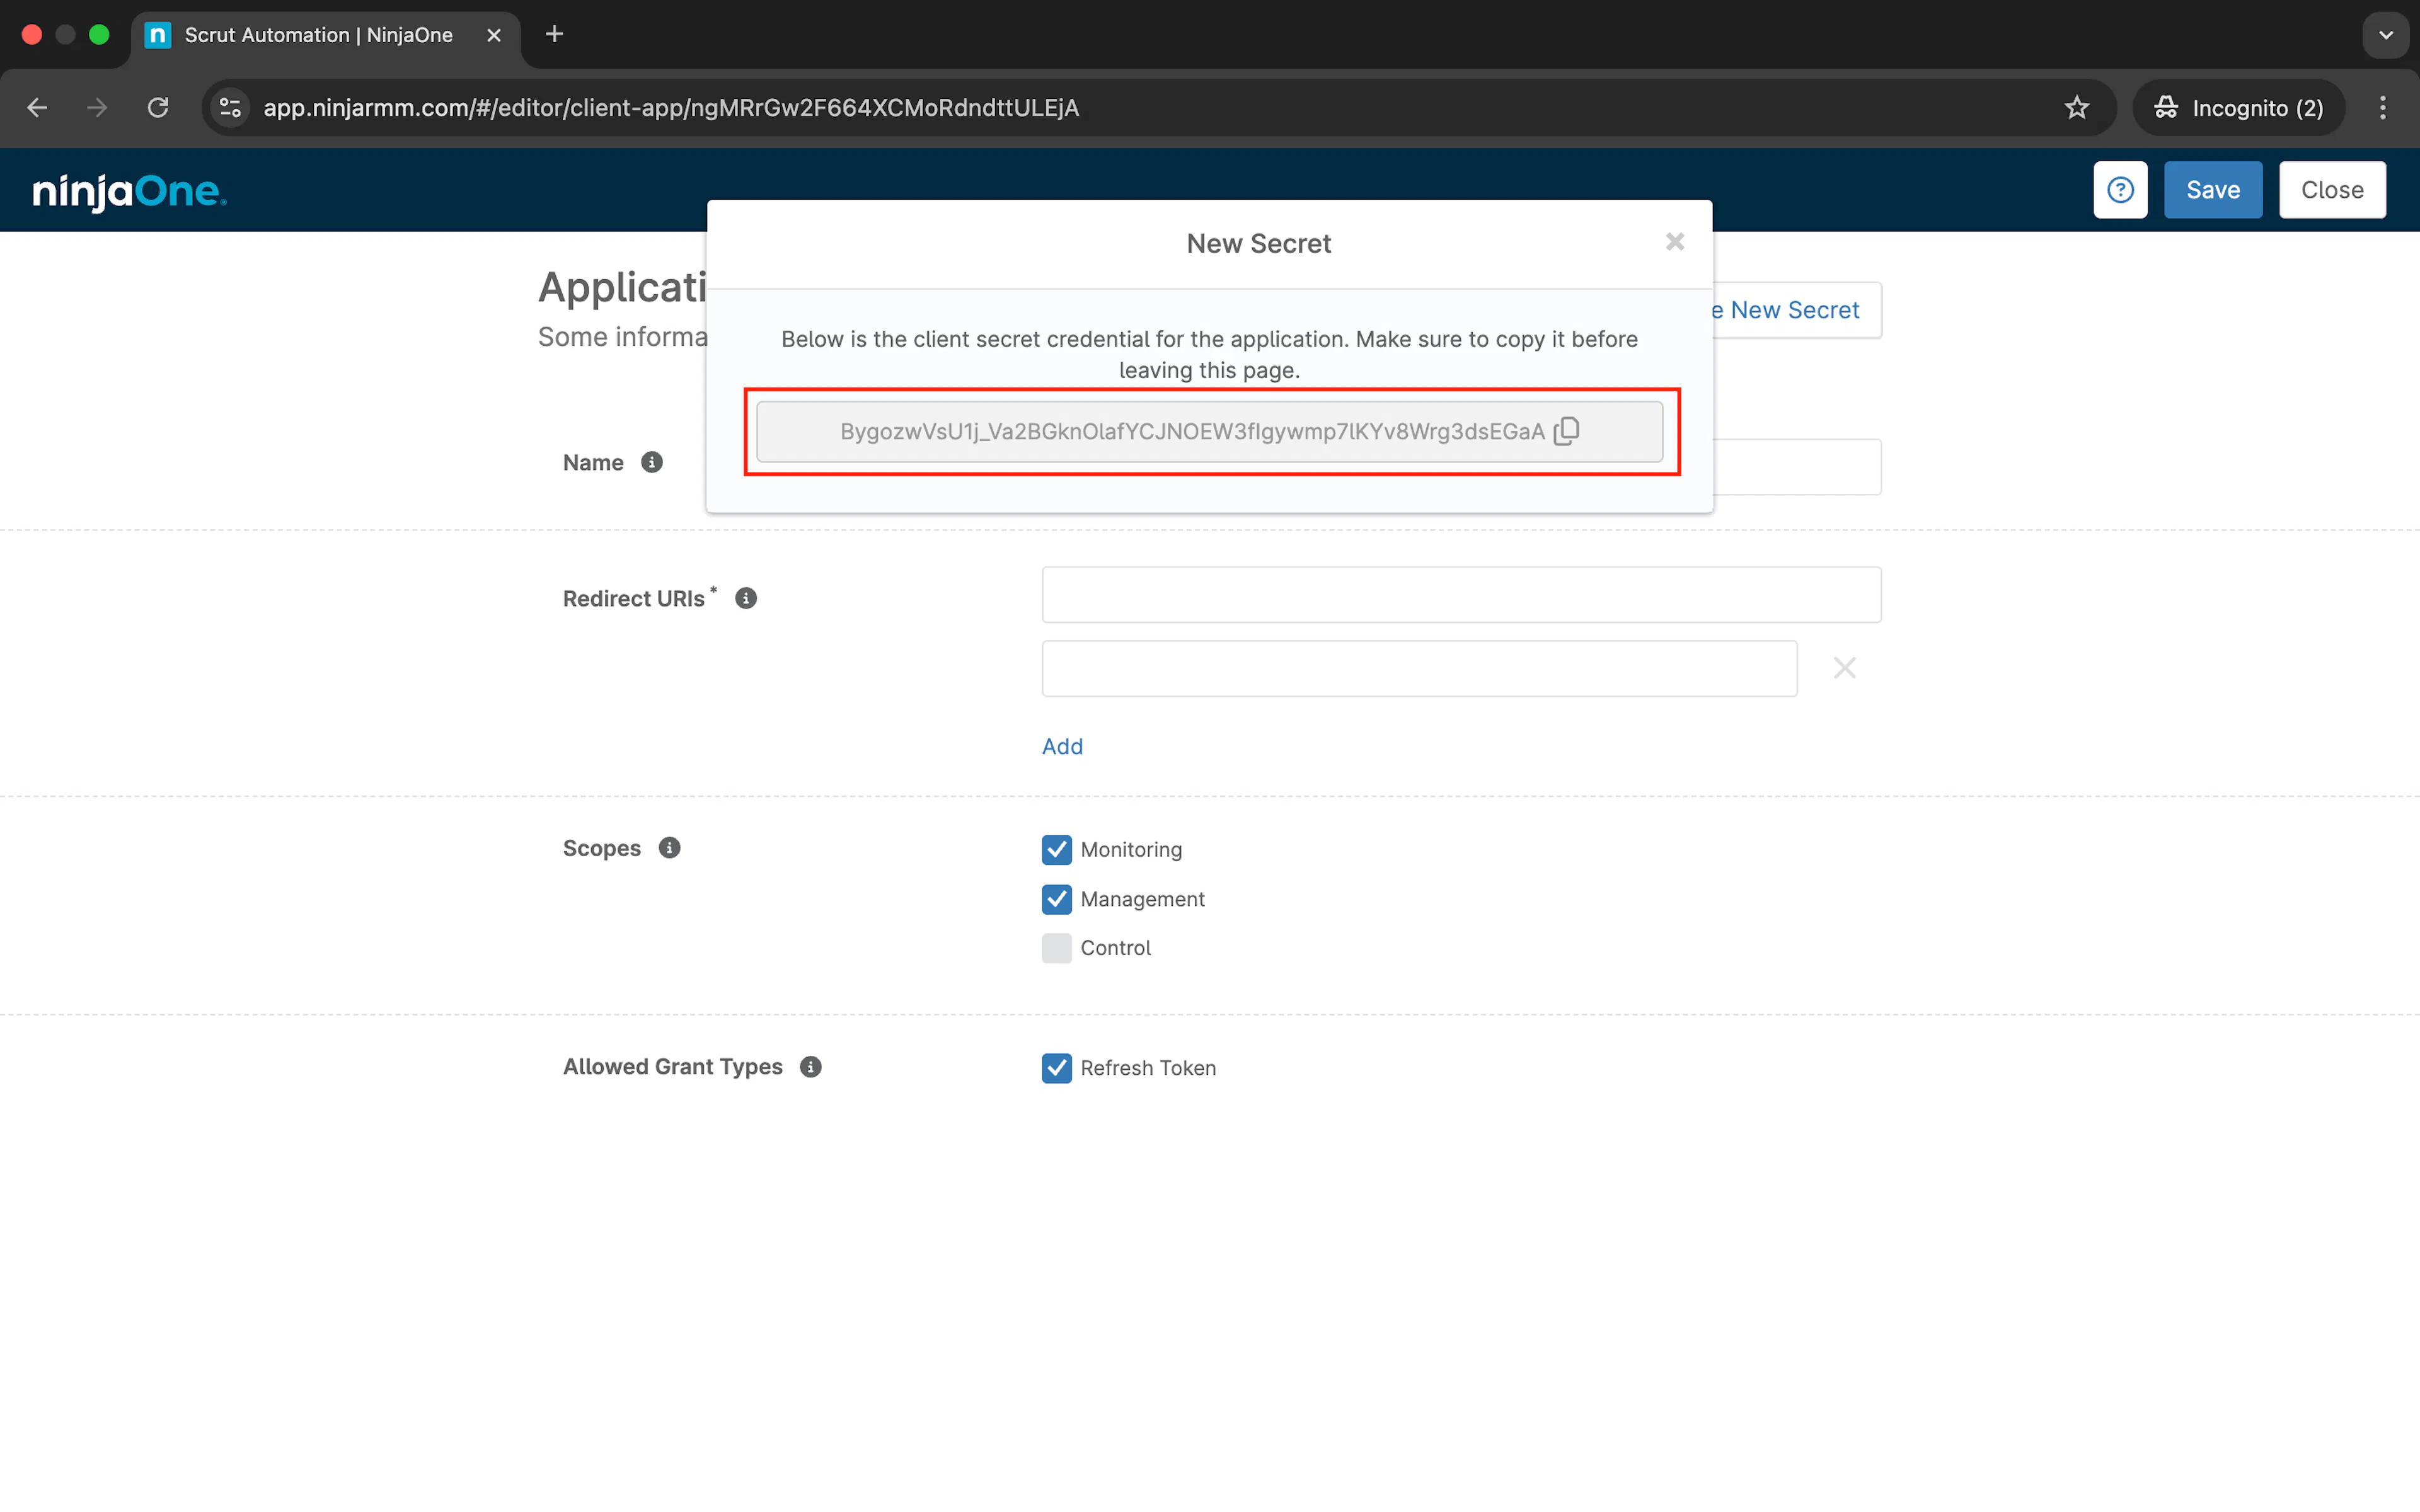
Copy and save the Client Secret displayed on the screen.
Note:
The Client Secret will not be redisplayed. So, ensure that you store it in a safe location for easy access later.
-
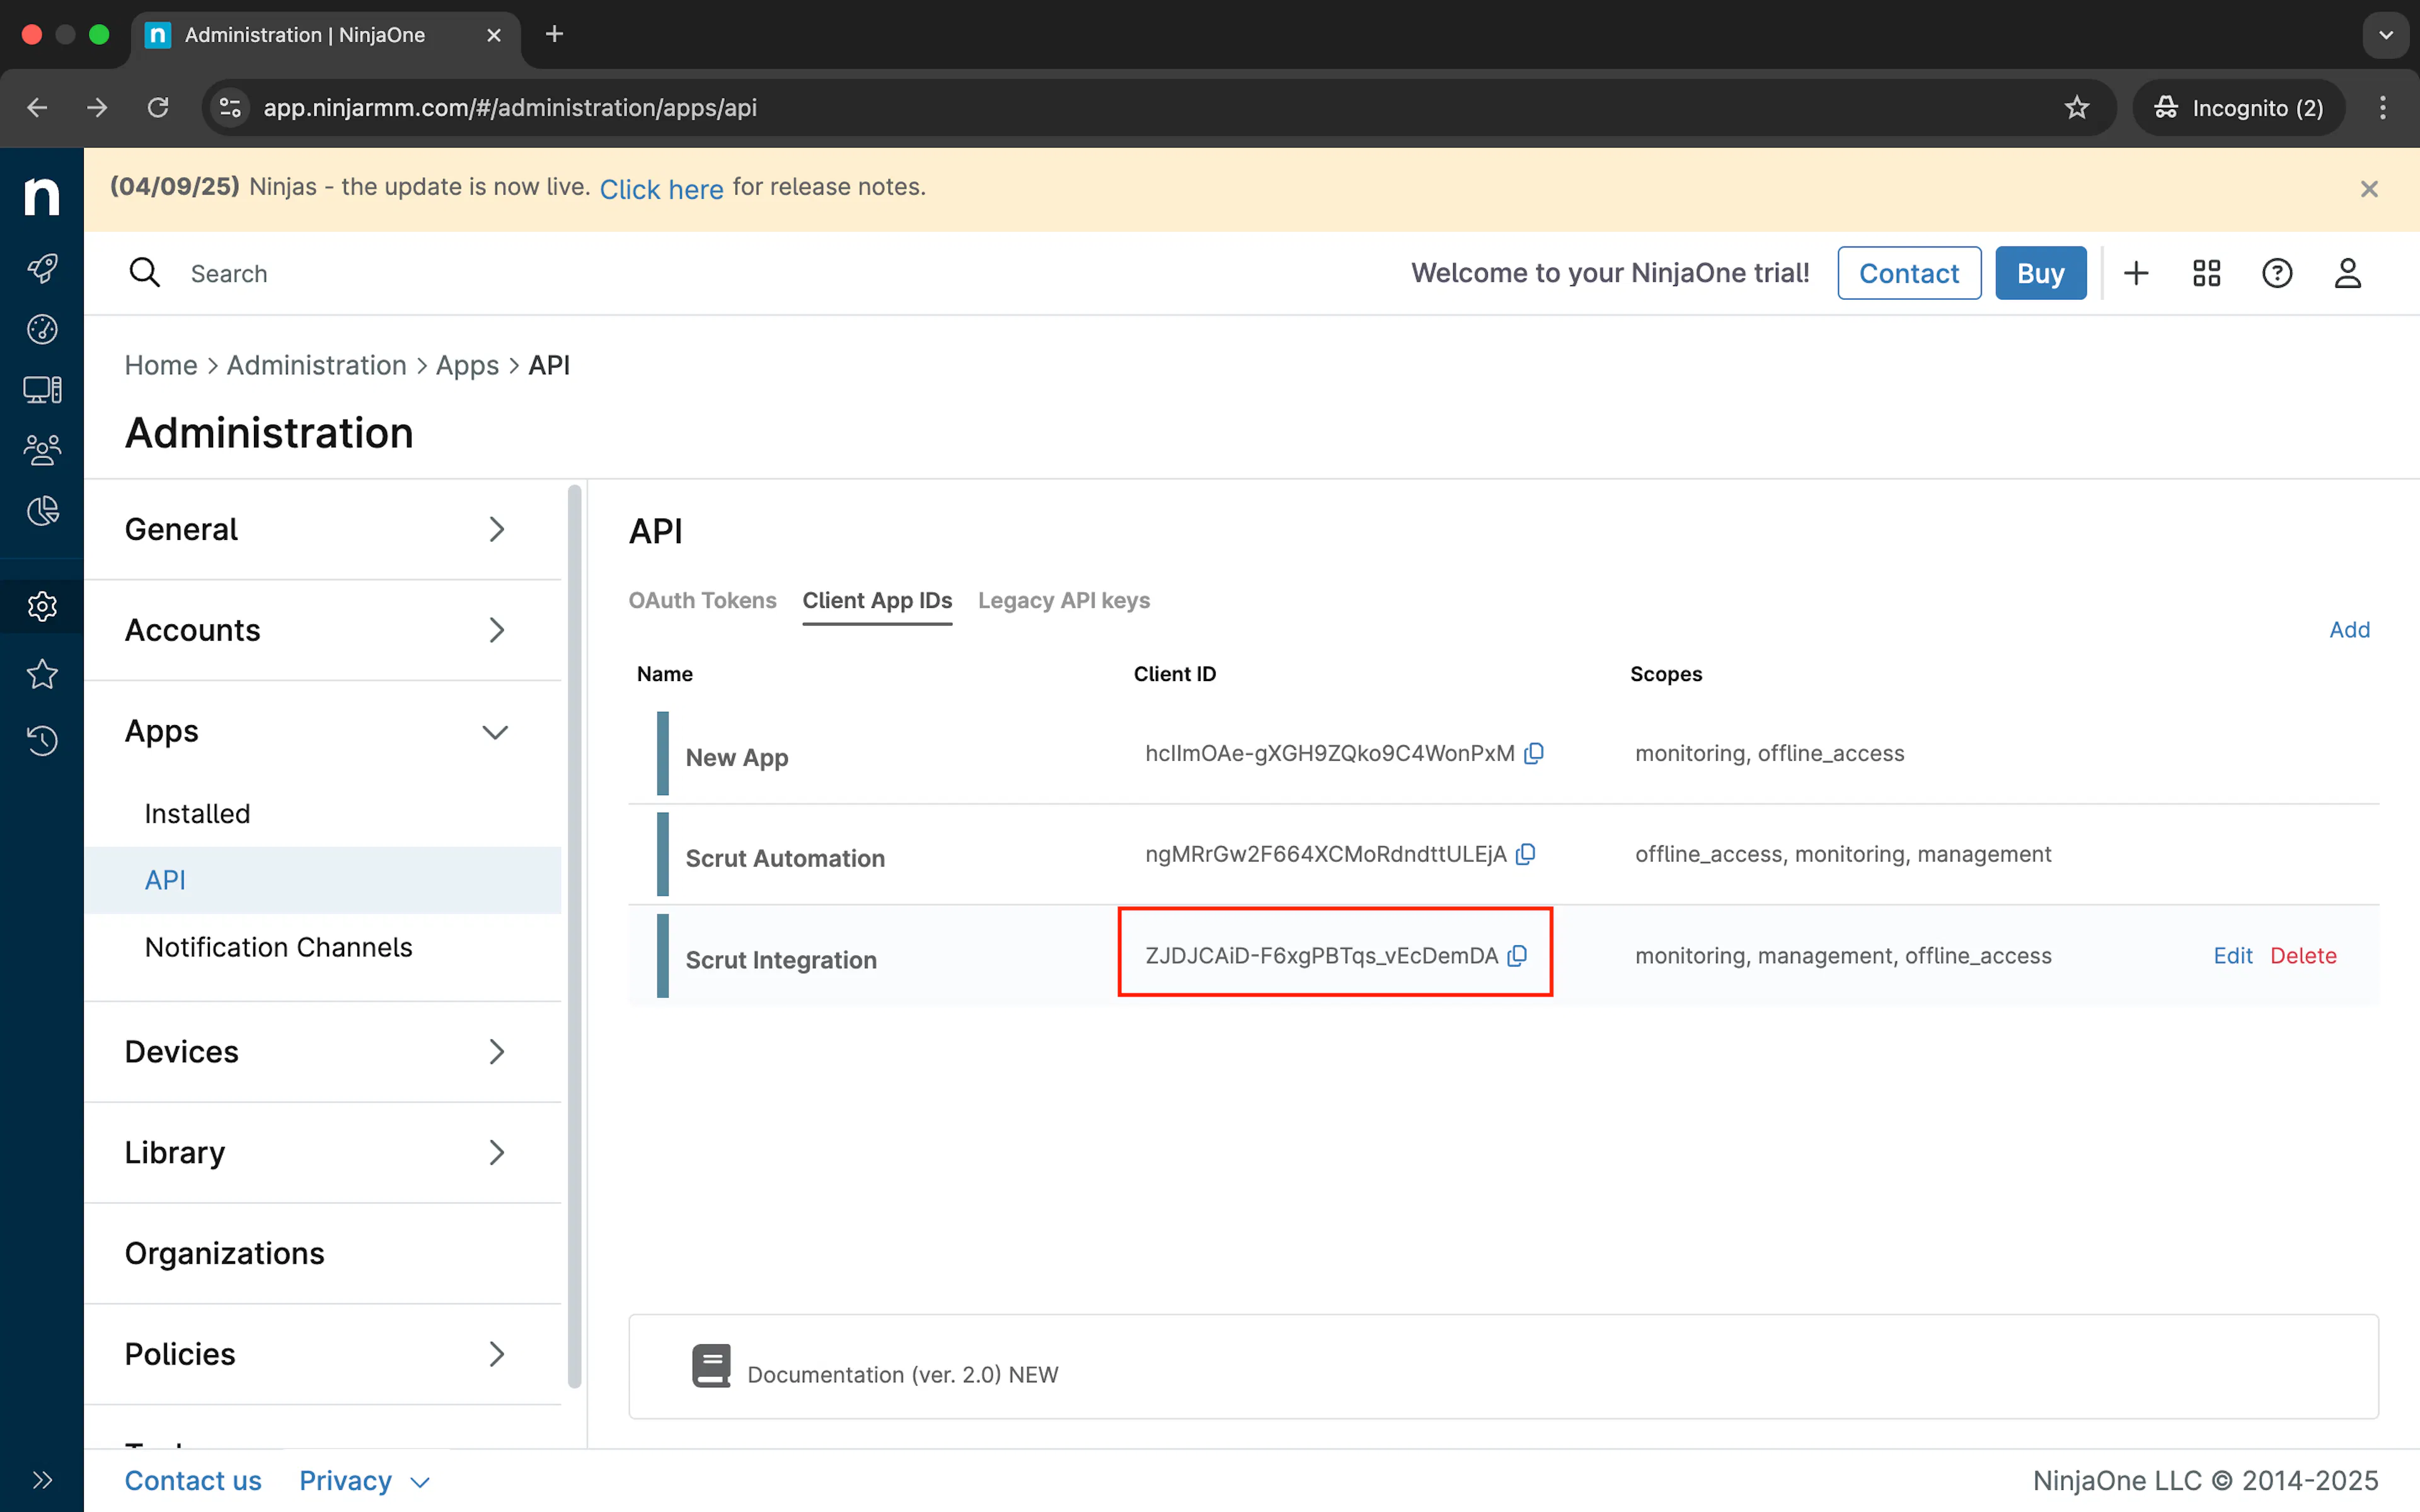
Return to the API page, where you can see the API you generated for the Scrut integration in the list of Client App IDs.
-
Copy and save the Client ID.
Important:
To avoid token expiry and ensure continuous syncing with NinjaOne, request NinjaOne support to enable sliding refresh tokens for the Scrut client ID. If this is not enabled, the token will expire and may interrupt the integration.
Step 2: Connect Your NinjaOne Account in Scrut
-
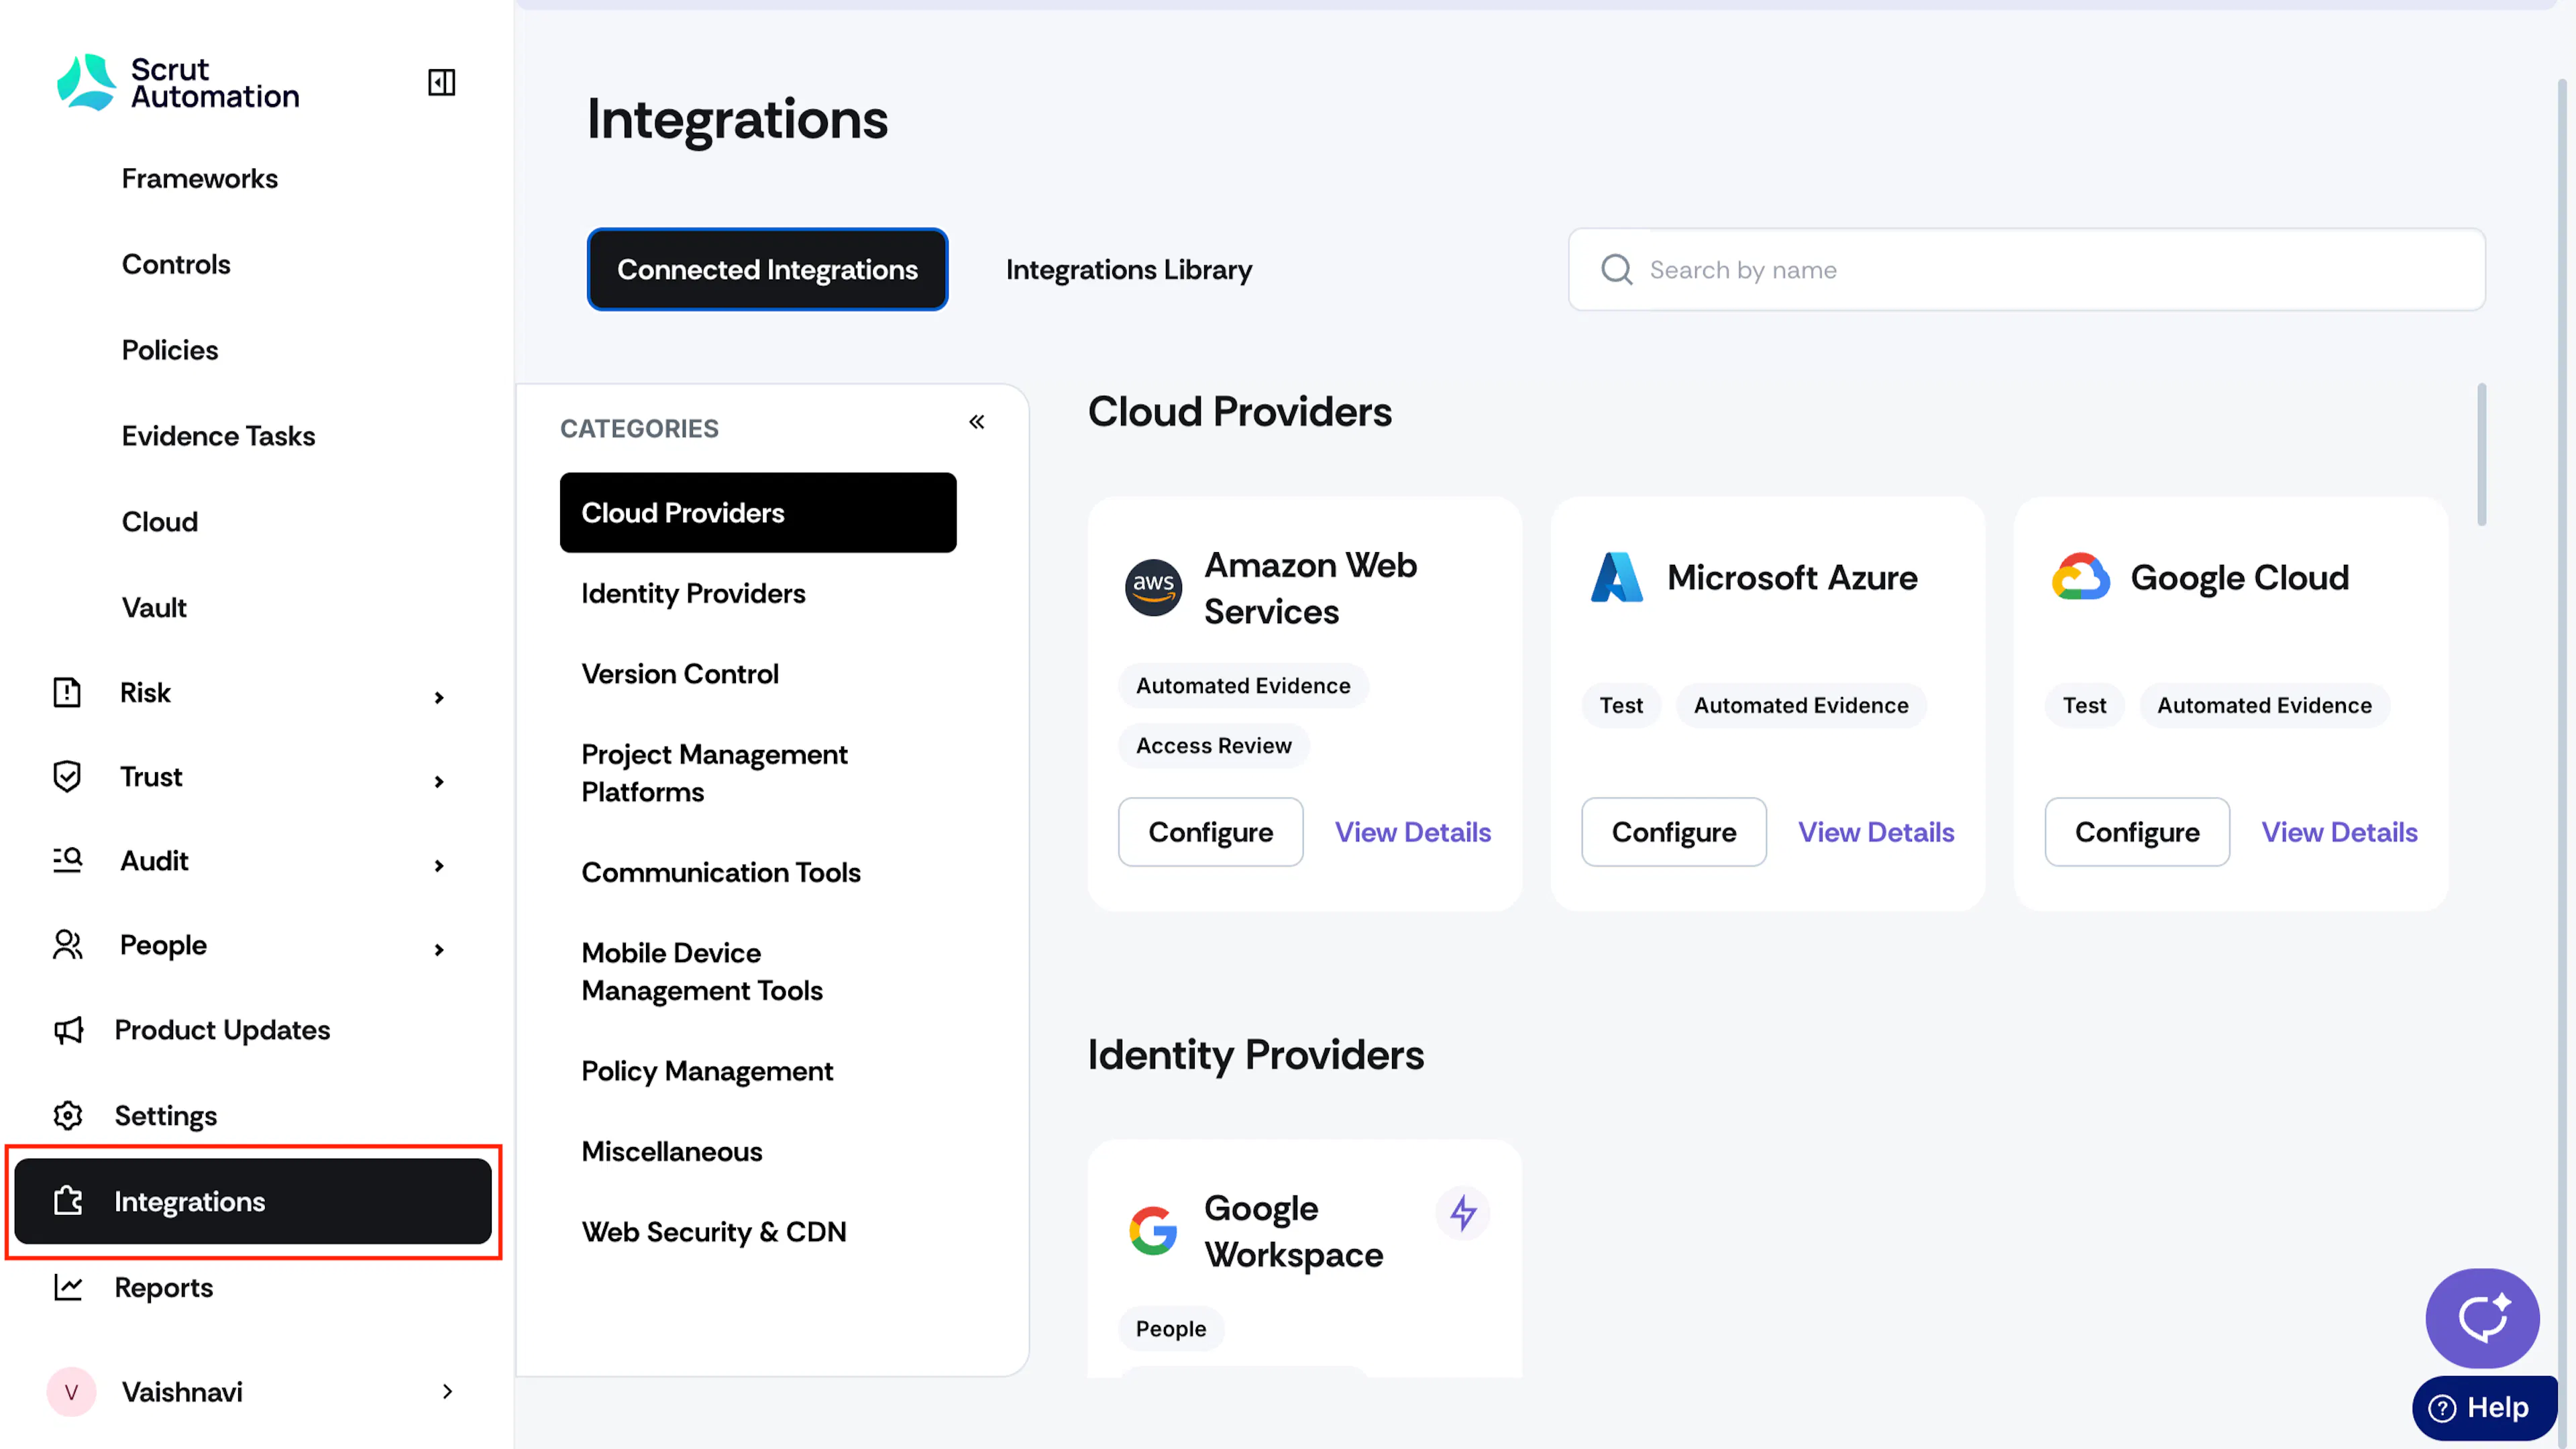
Log in to your Scrut account and click Integrations on the left navigation panel.
-
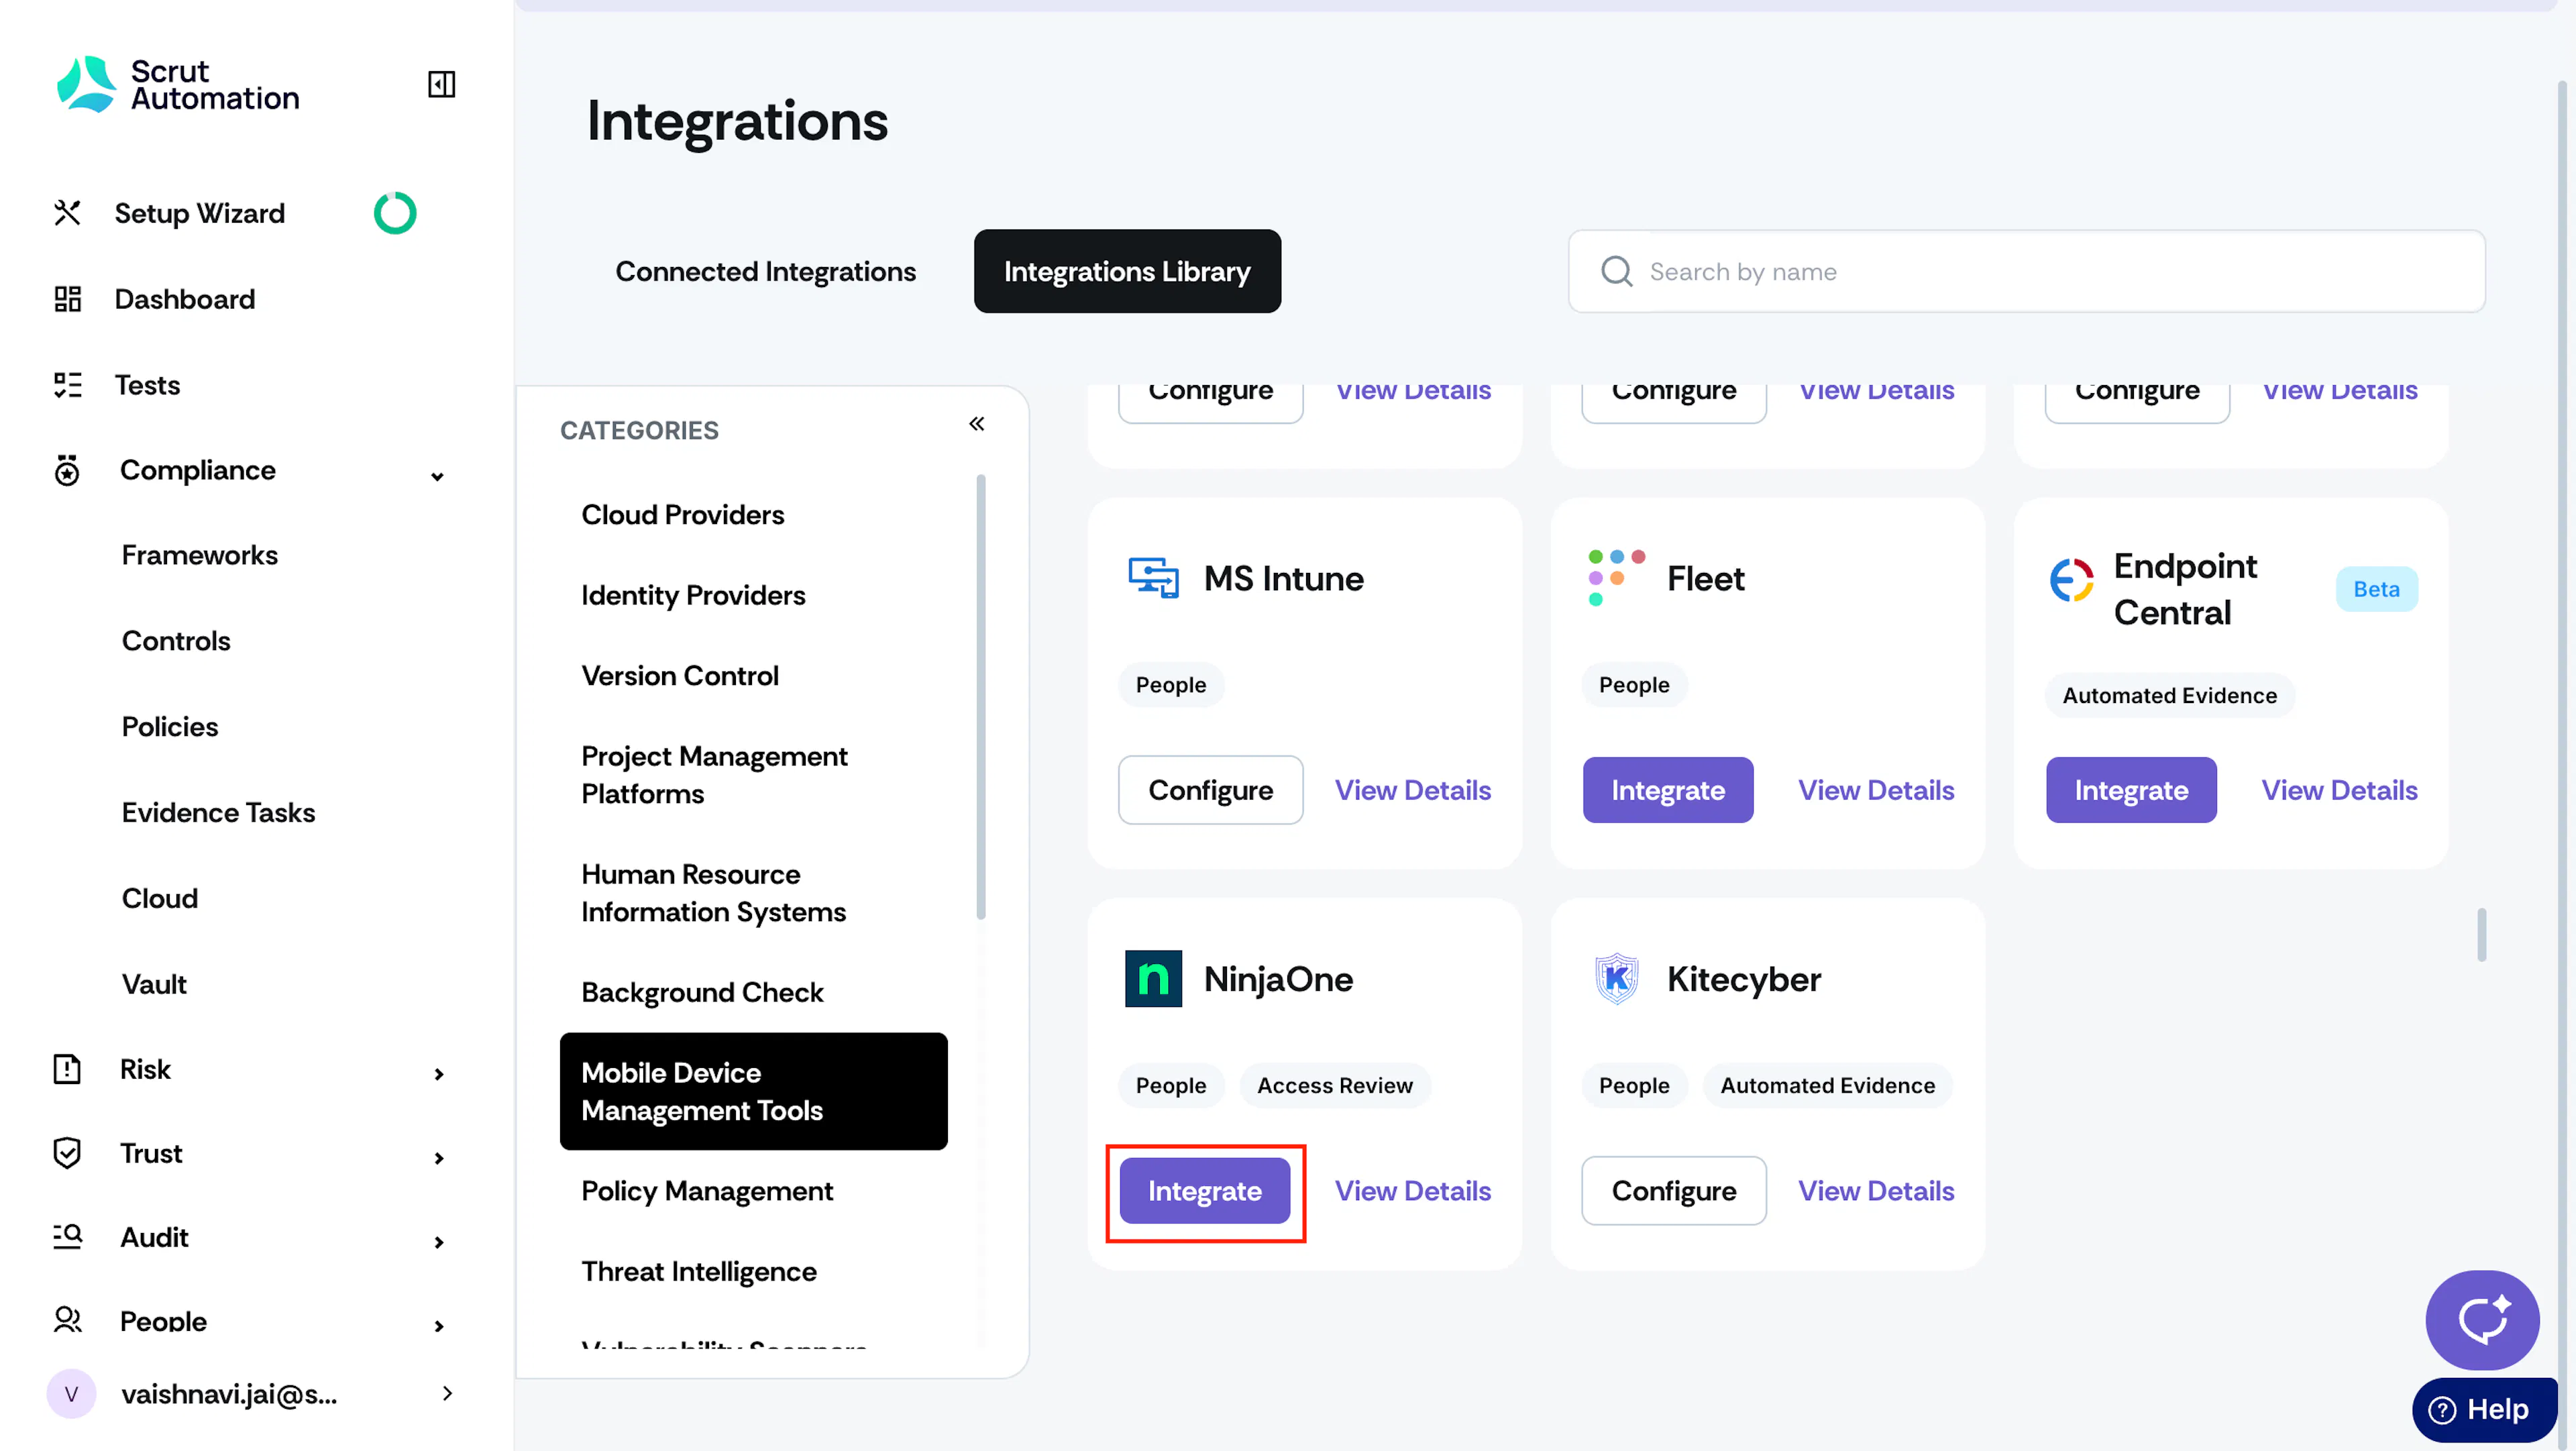
Navigate to the Integrations Library tab and choose Mobile Device Management Tools in the Categories section.
-
Scroll to the NinjaOne tile and click Integrate.
-
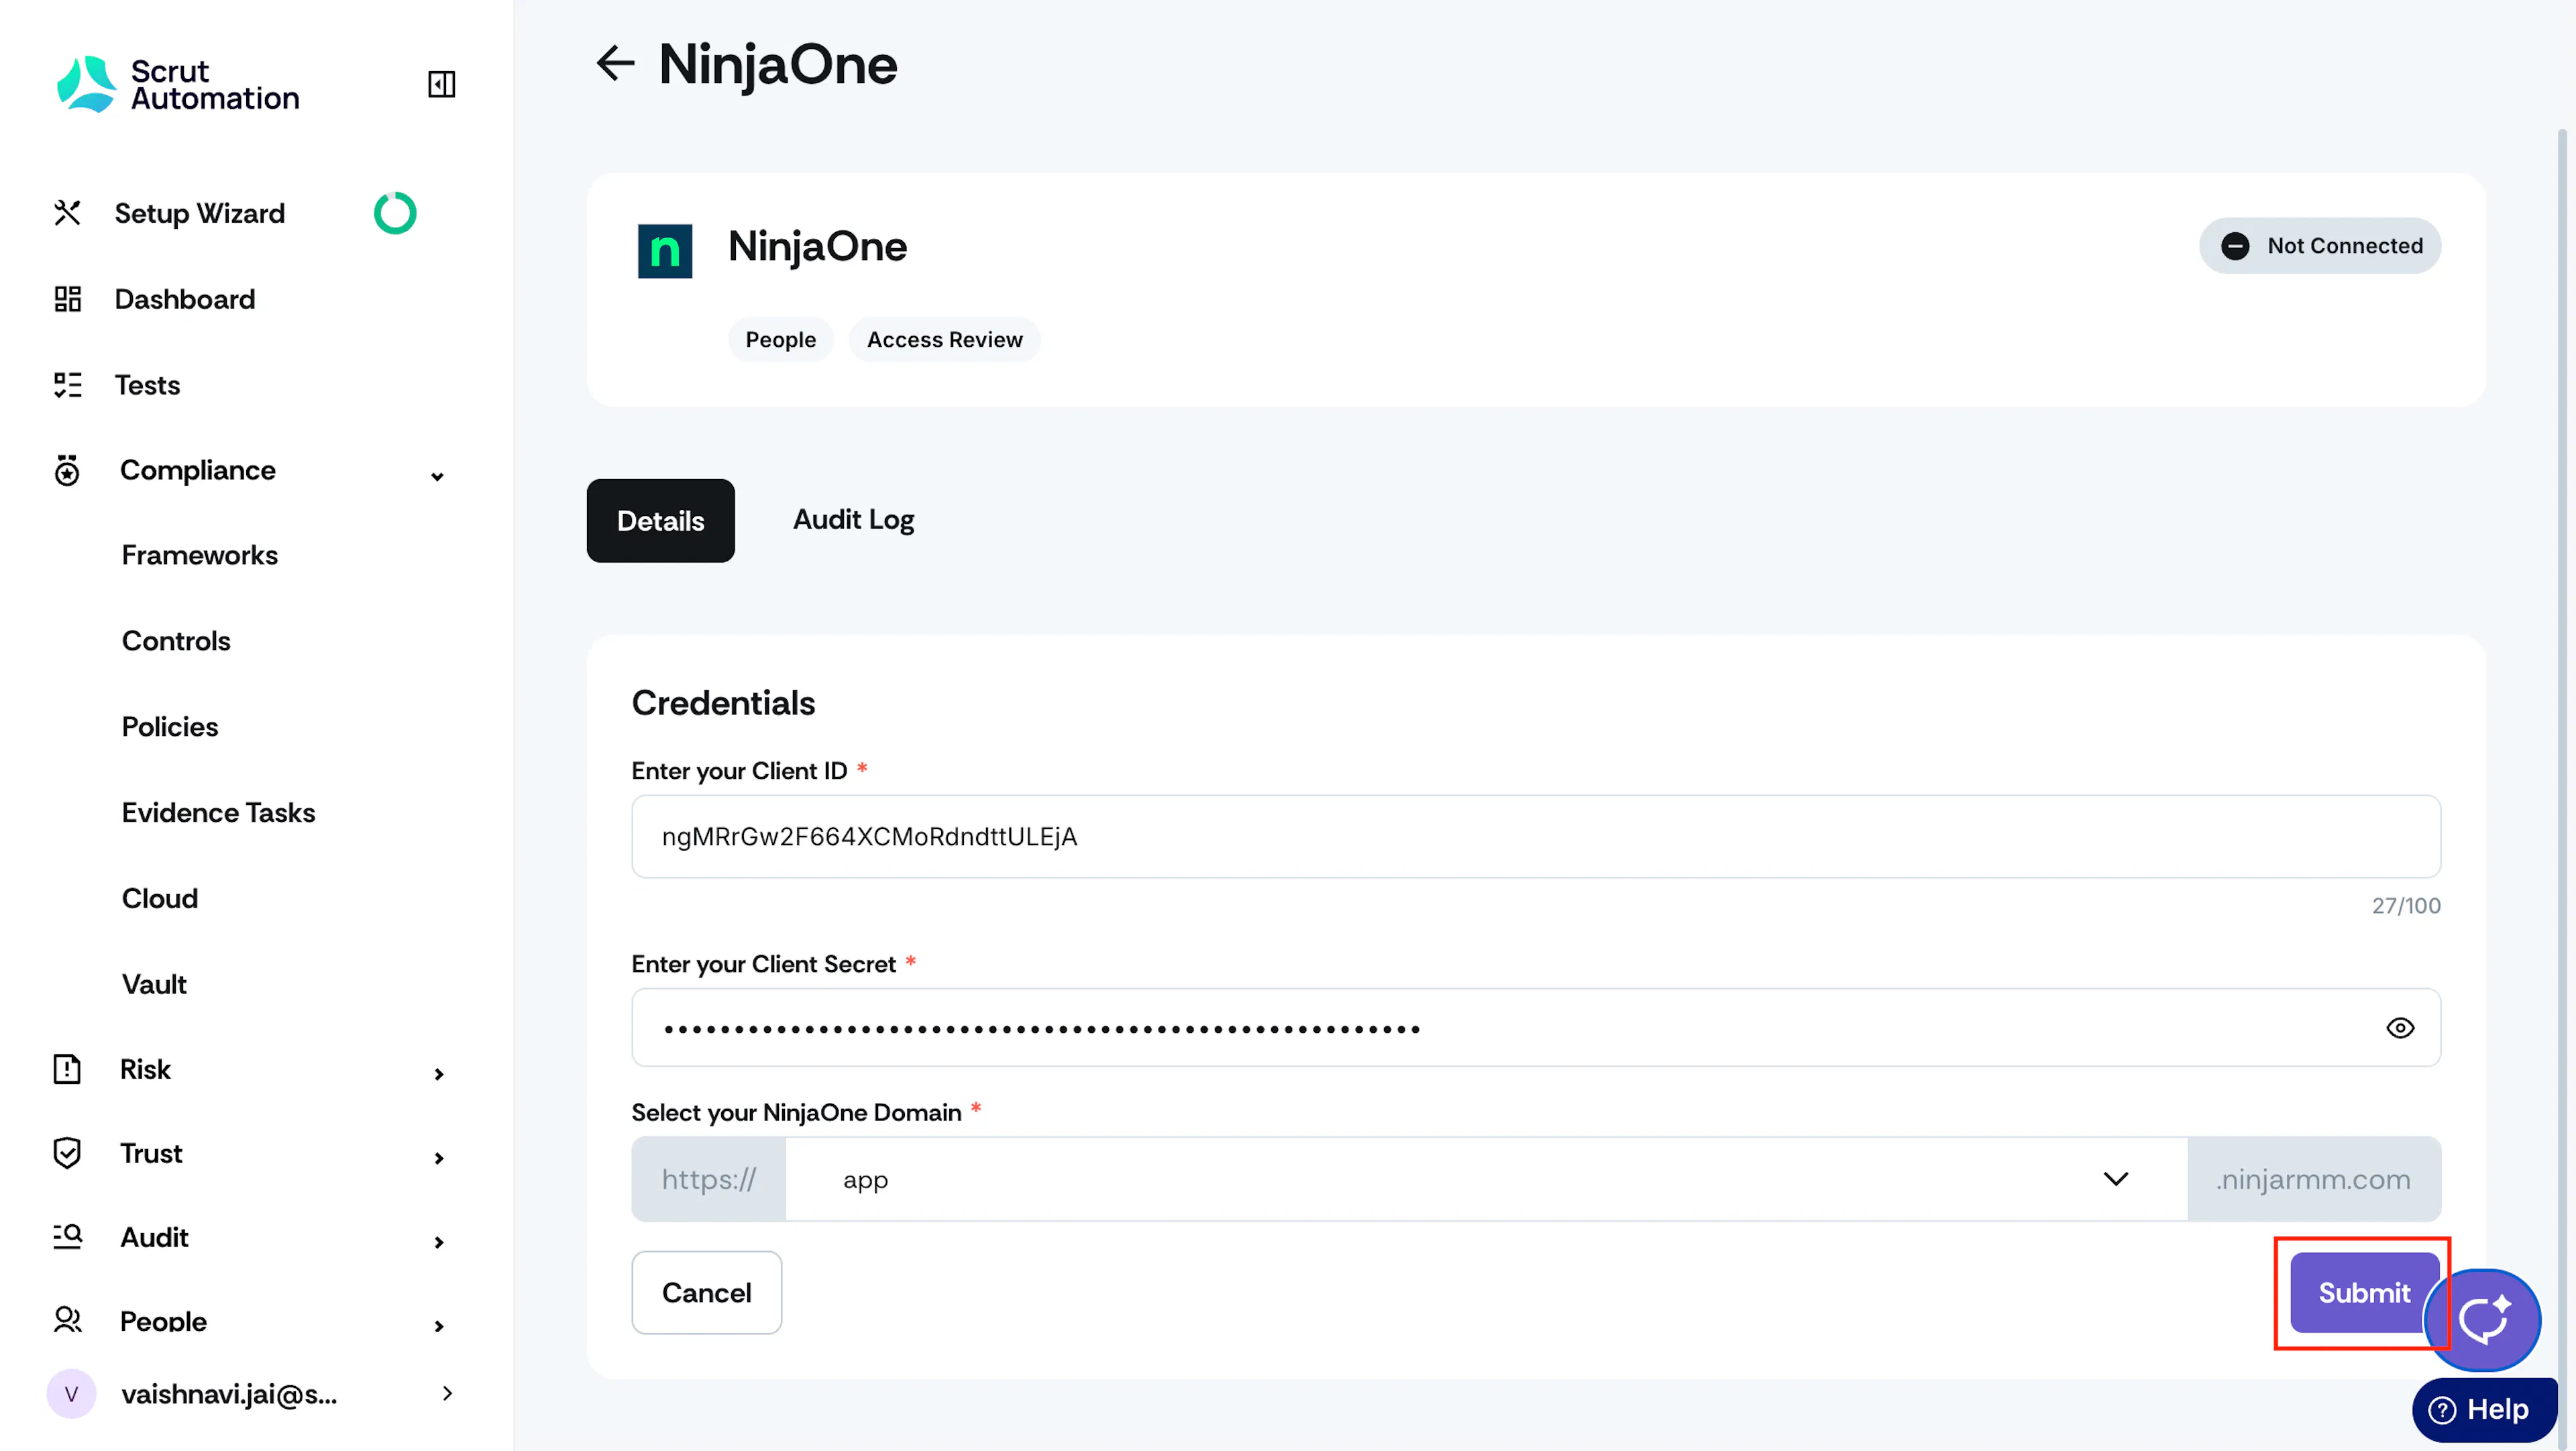
On the NinjaOne integration page, enter the following details from Step 1.
- Client ID
- Client Secret
-
Select your NinjaOne Domain based on your instance region.
- North America: App
- EMEA: EU
- APAC: OC
-
Click Submit.
-
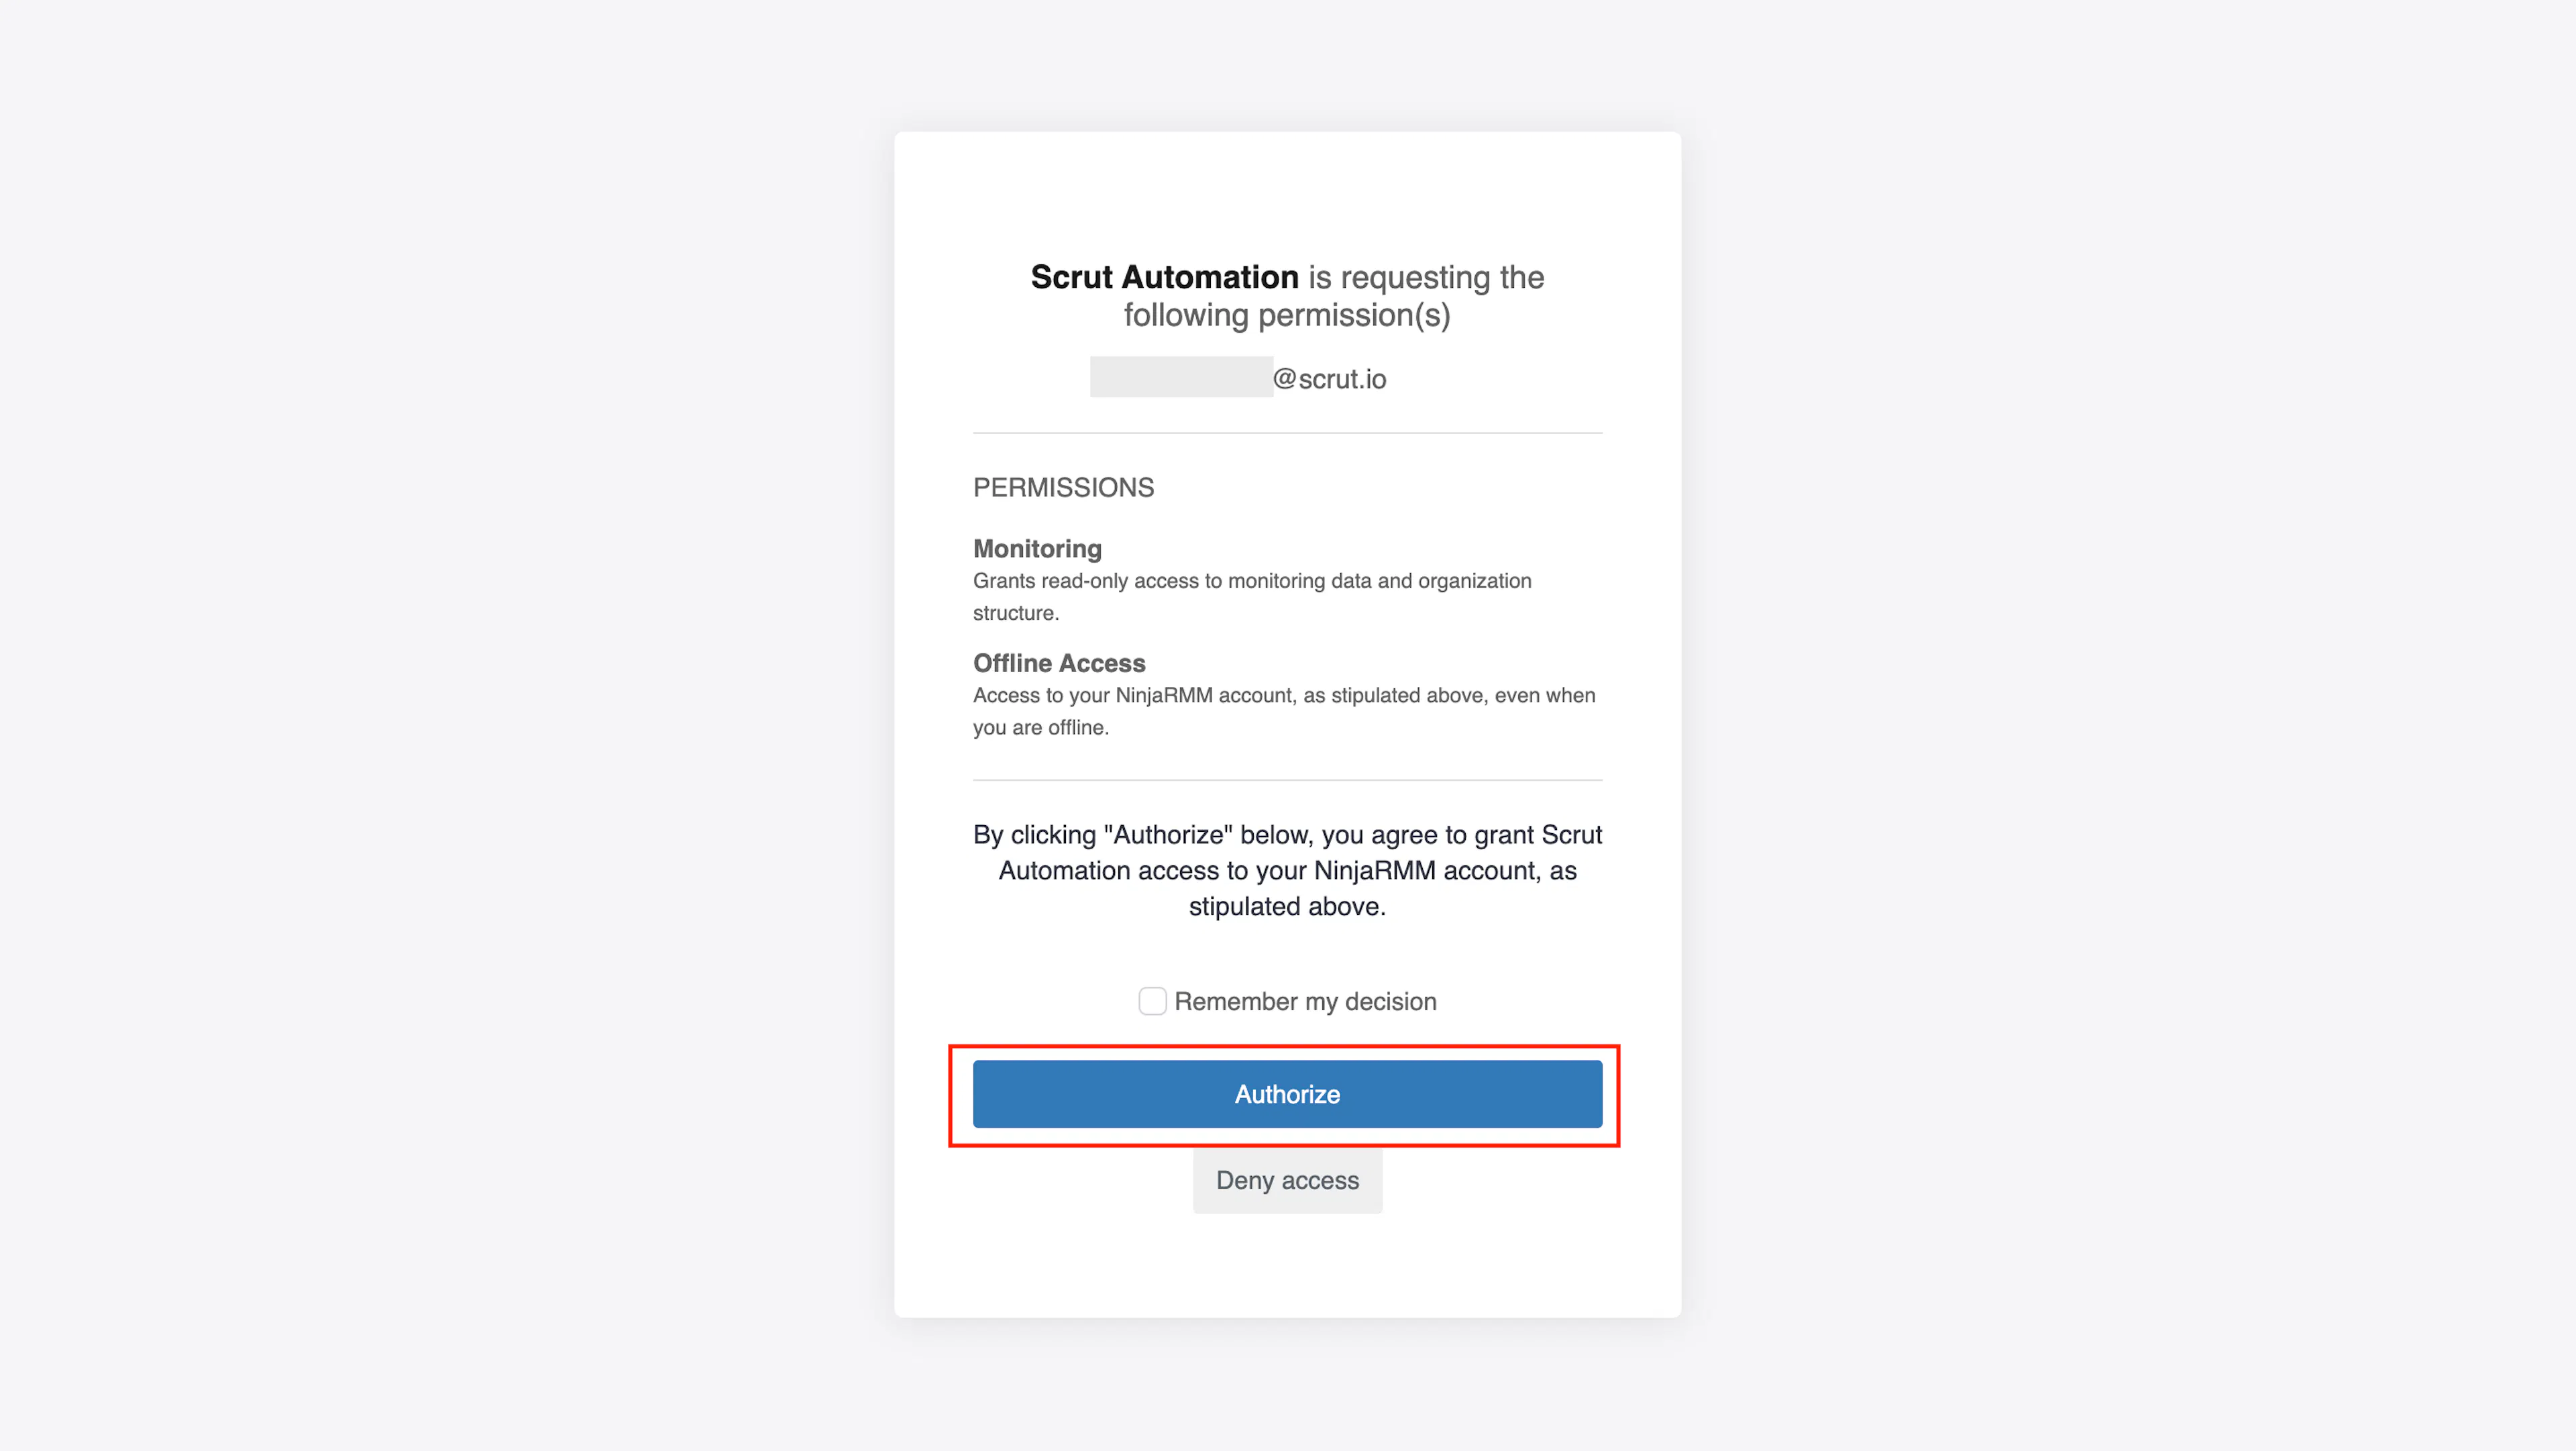
Click Authorize to grant the required permissions.
-
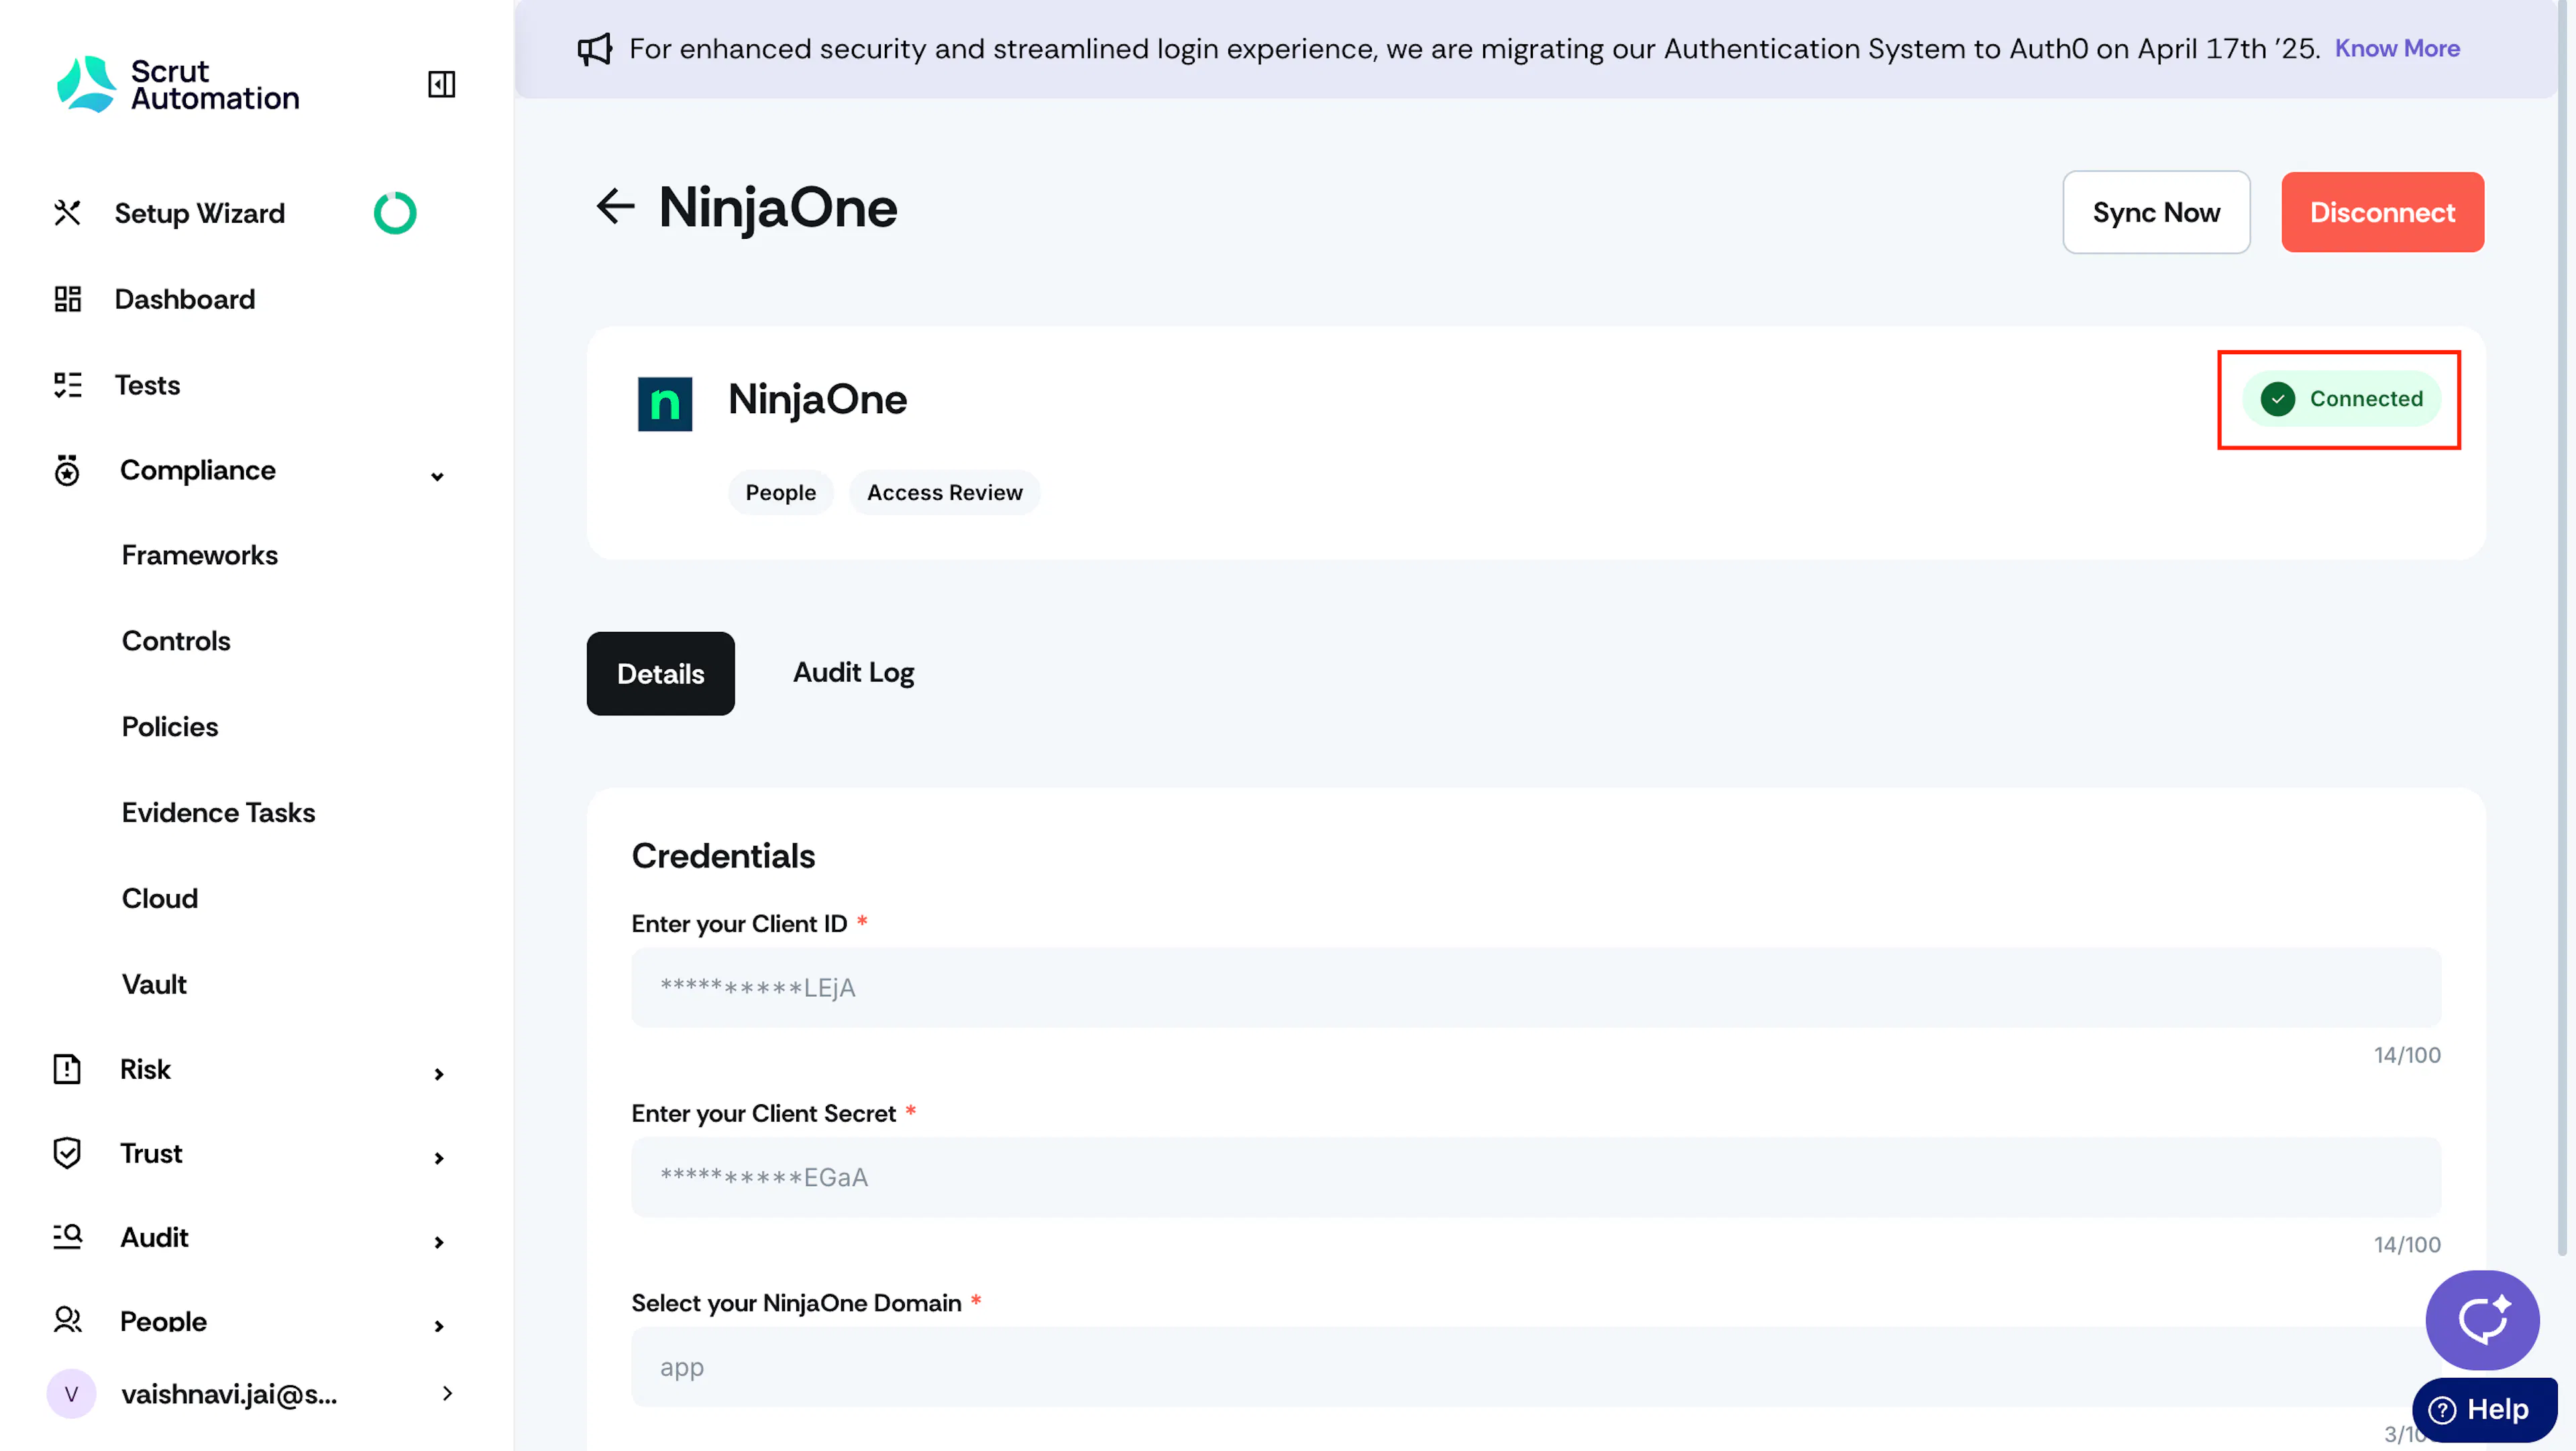
Once authorization is done, you’ll see the “Connected Successfully” message and the Connected status indicator.
Step 3: Verify User Assignments in NinjaOne
Important:
User-to-device mapping is critical for data synchronization between NinjaOne and Scrut. Only devices with assigned users will sync data with Scrut. If you've already assigned users to all devices, you can skip this step.
To verify or create user assignments:
-
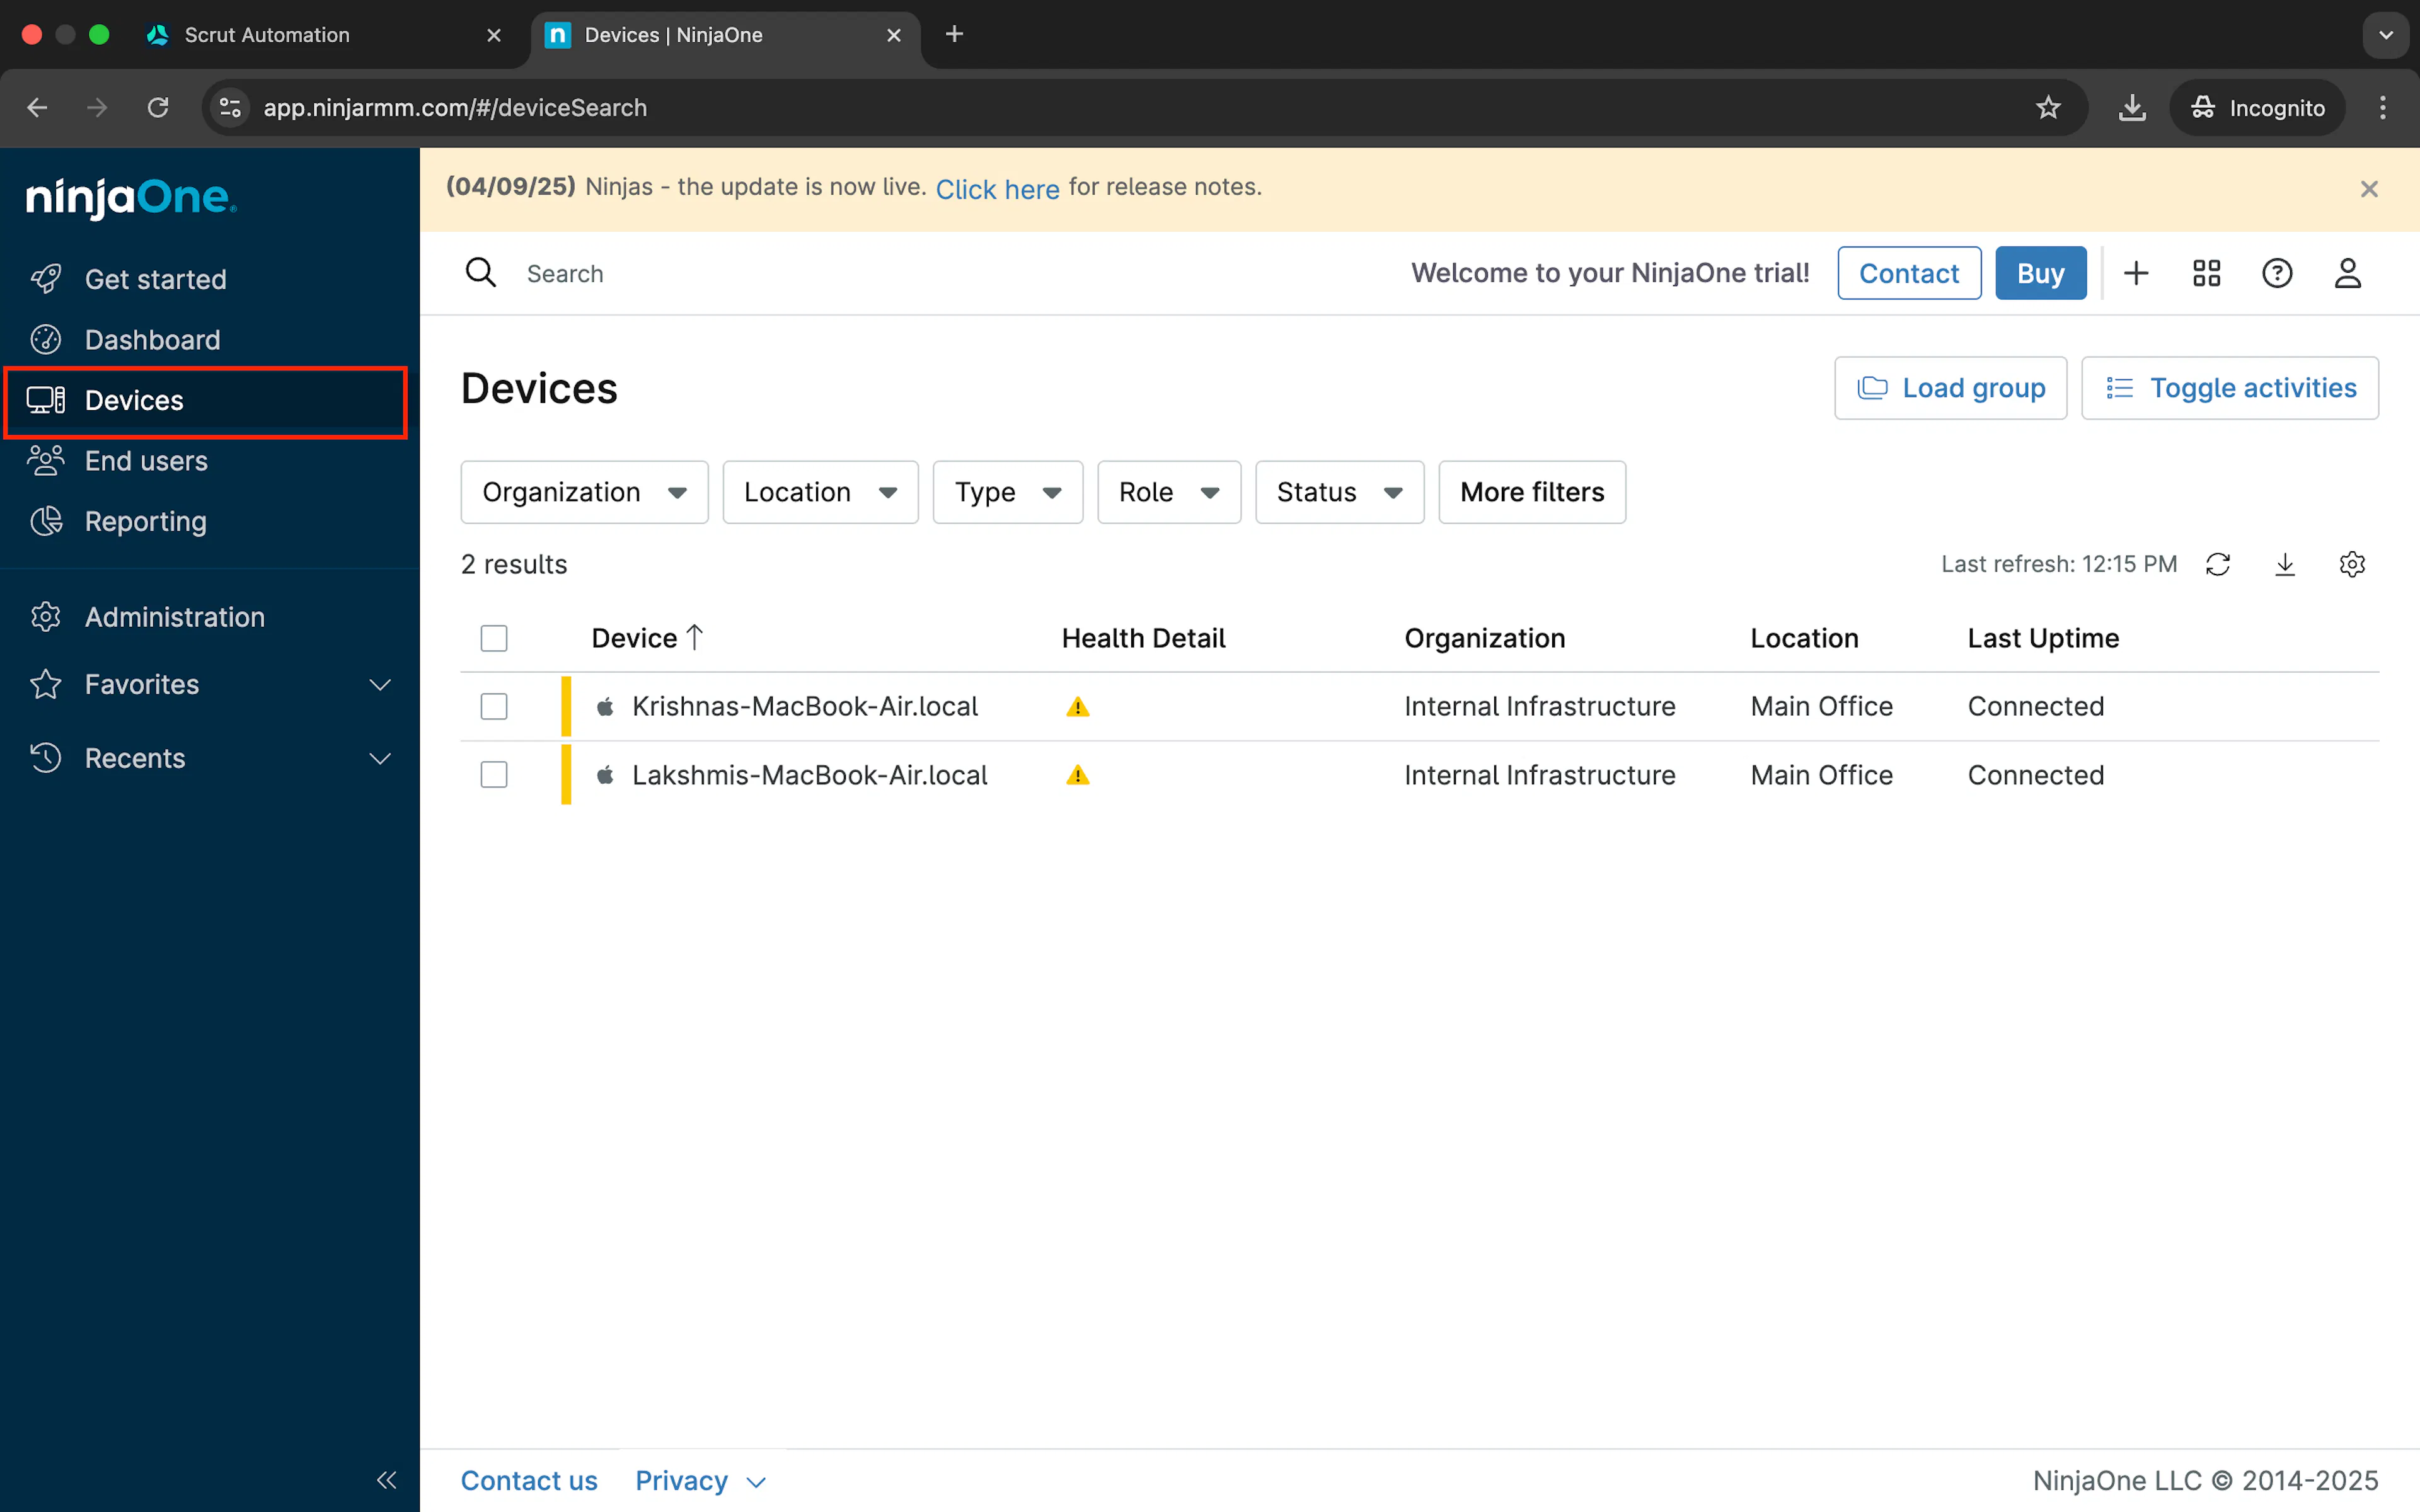
Access your NinjaOne dashboard and select Devices from the left navigation menu.
-
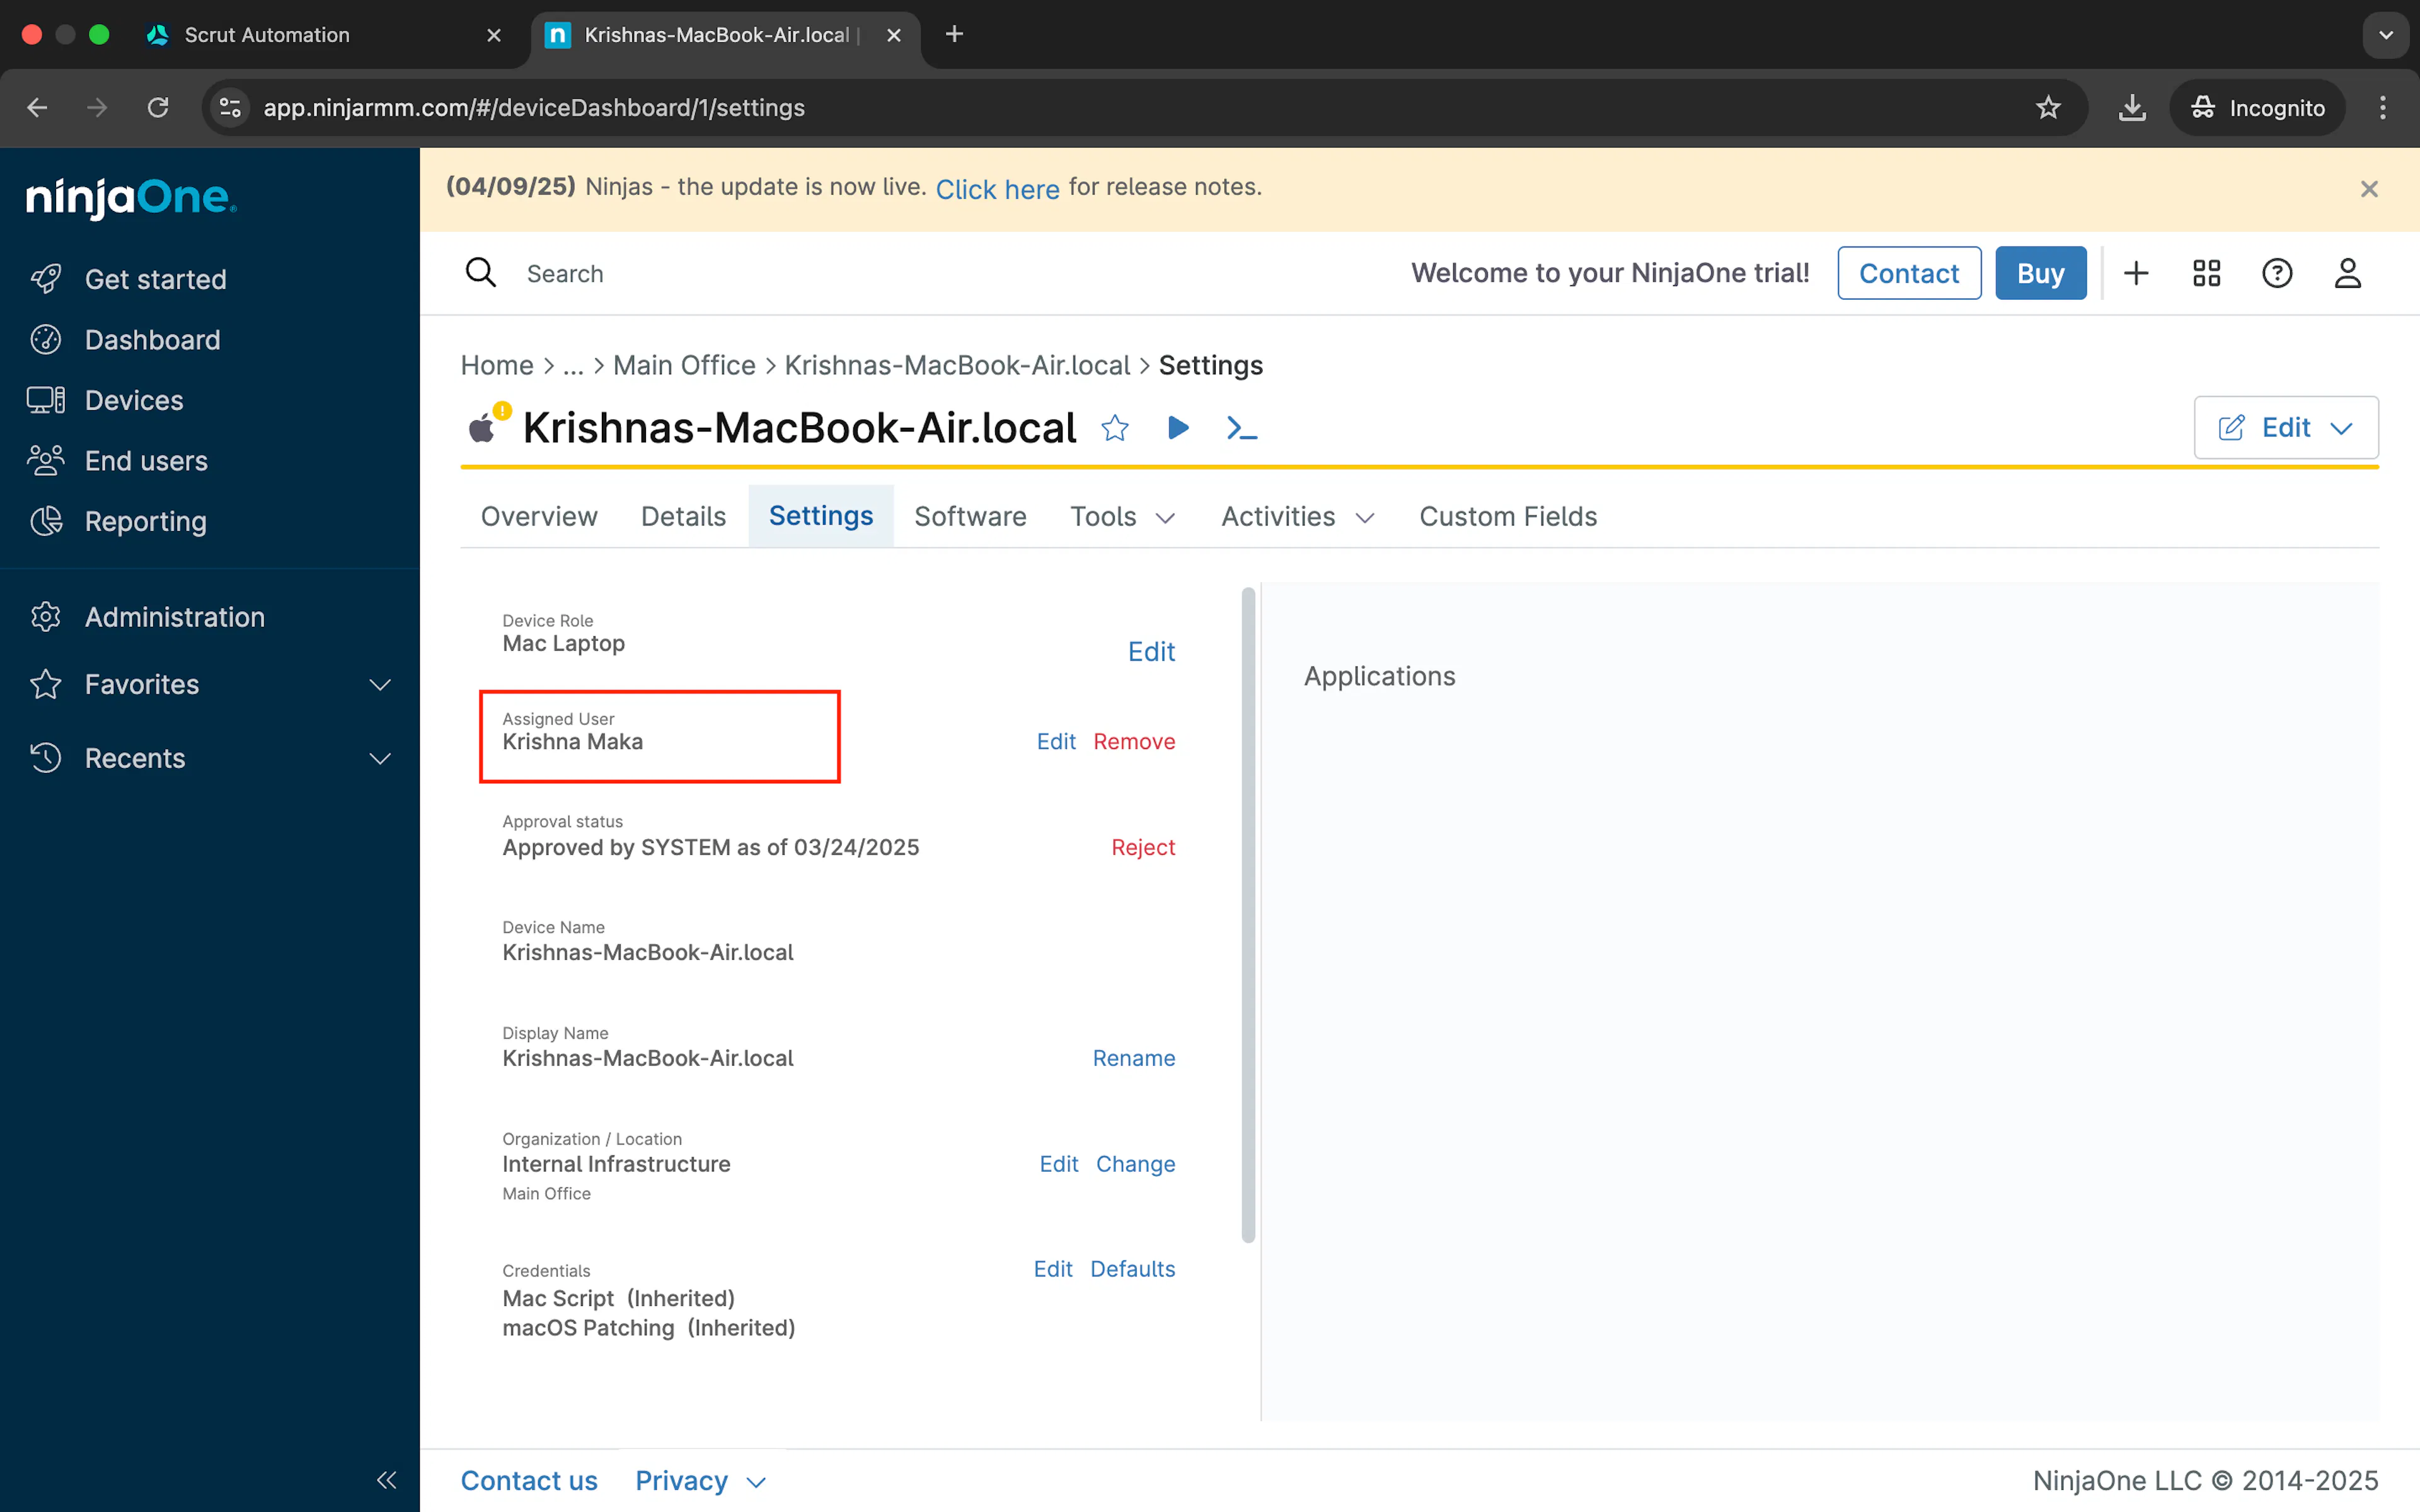
Click any device that needs verification, then navigate to the Settings tab.
-
Confirm a user is assigned to the device.
Complete this verification for all devices to ensure comprehensive data integration with Scrut.
Synchronization Details
- Initial Sync: On completing the integration, Scrut will sync employees’ device data from NinjaOne immediately.
- Recurring Sync: After this, Scrut performs the sync every 24 hours to fetch incremental data.
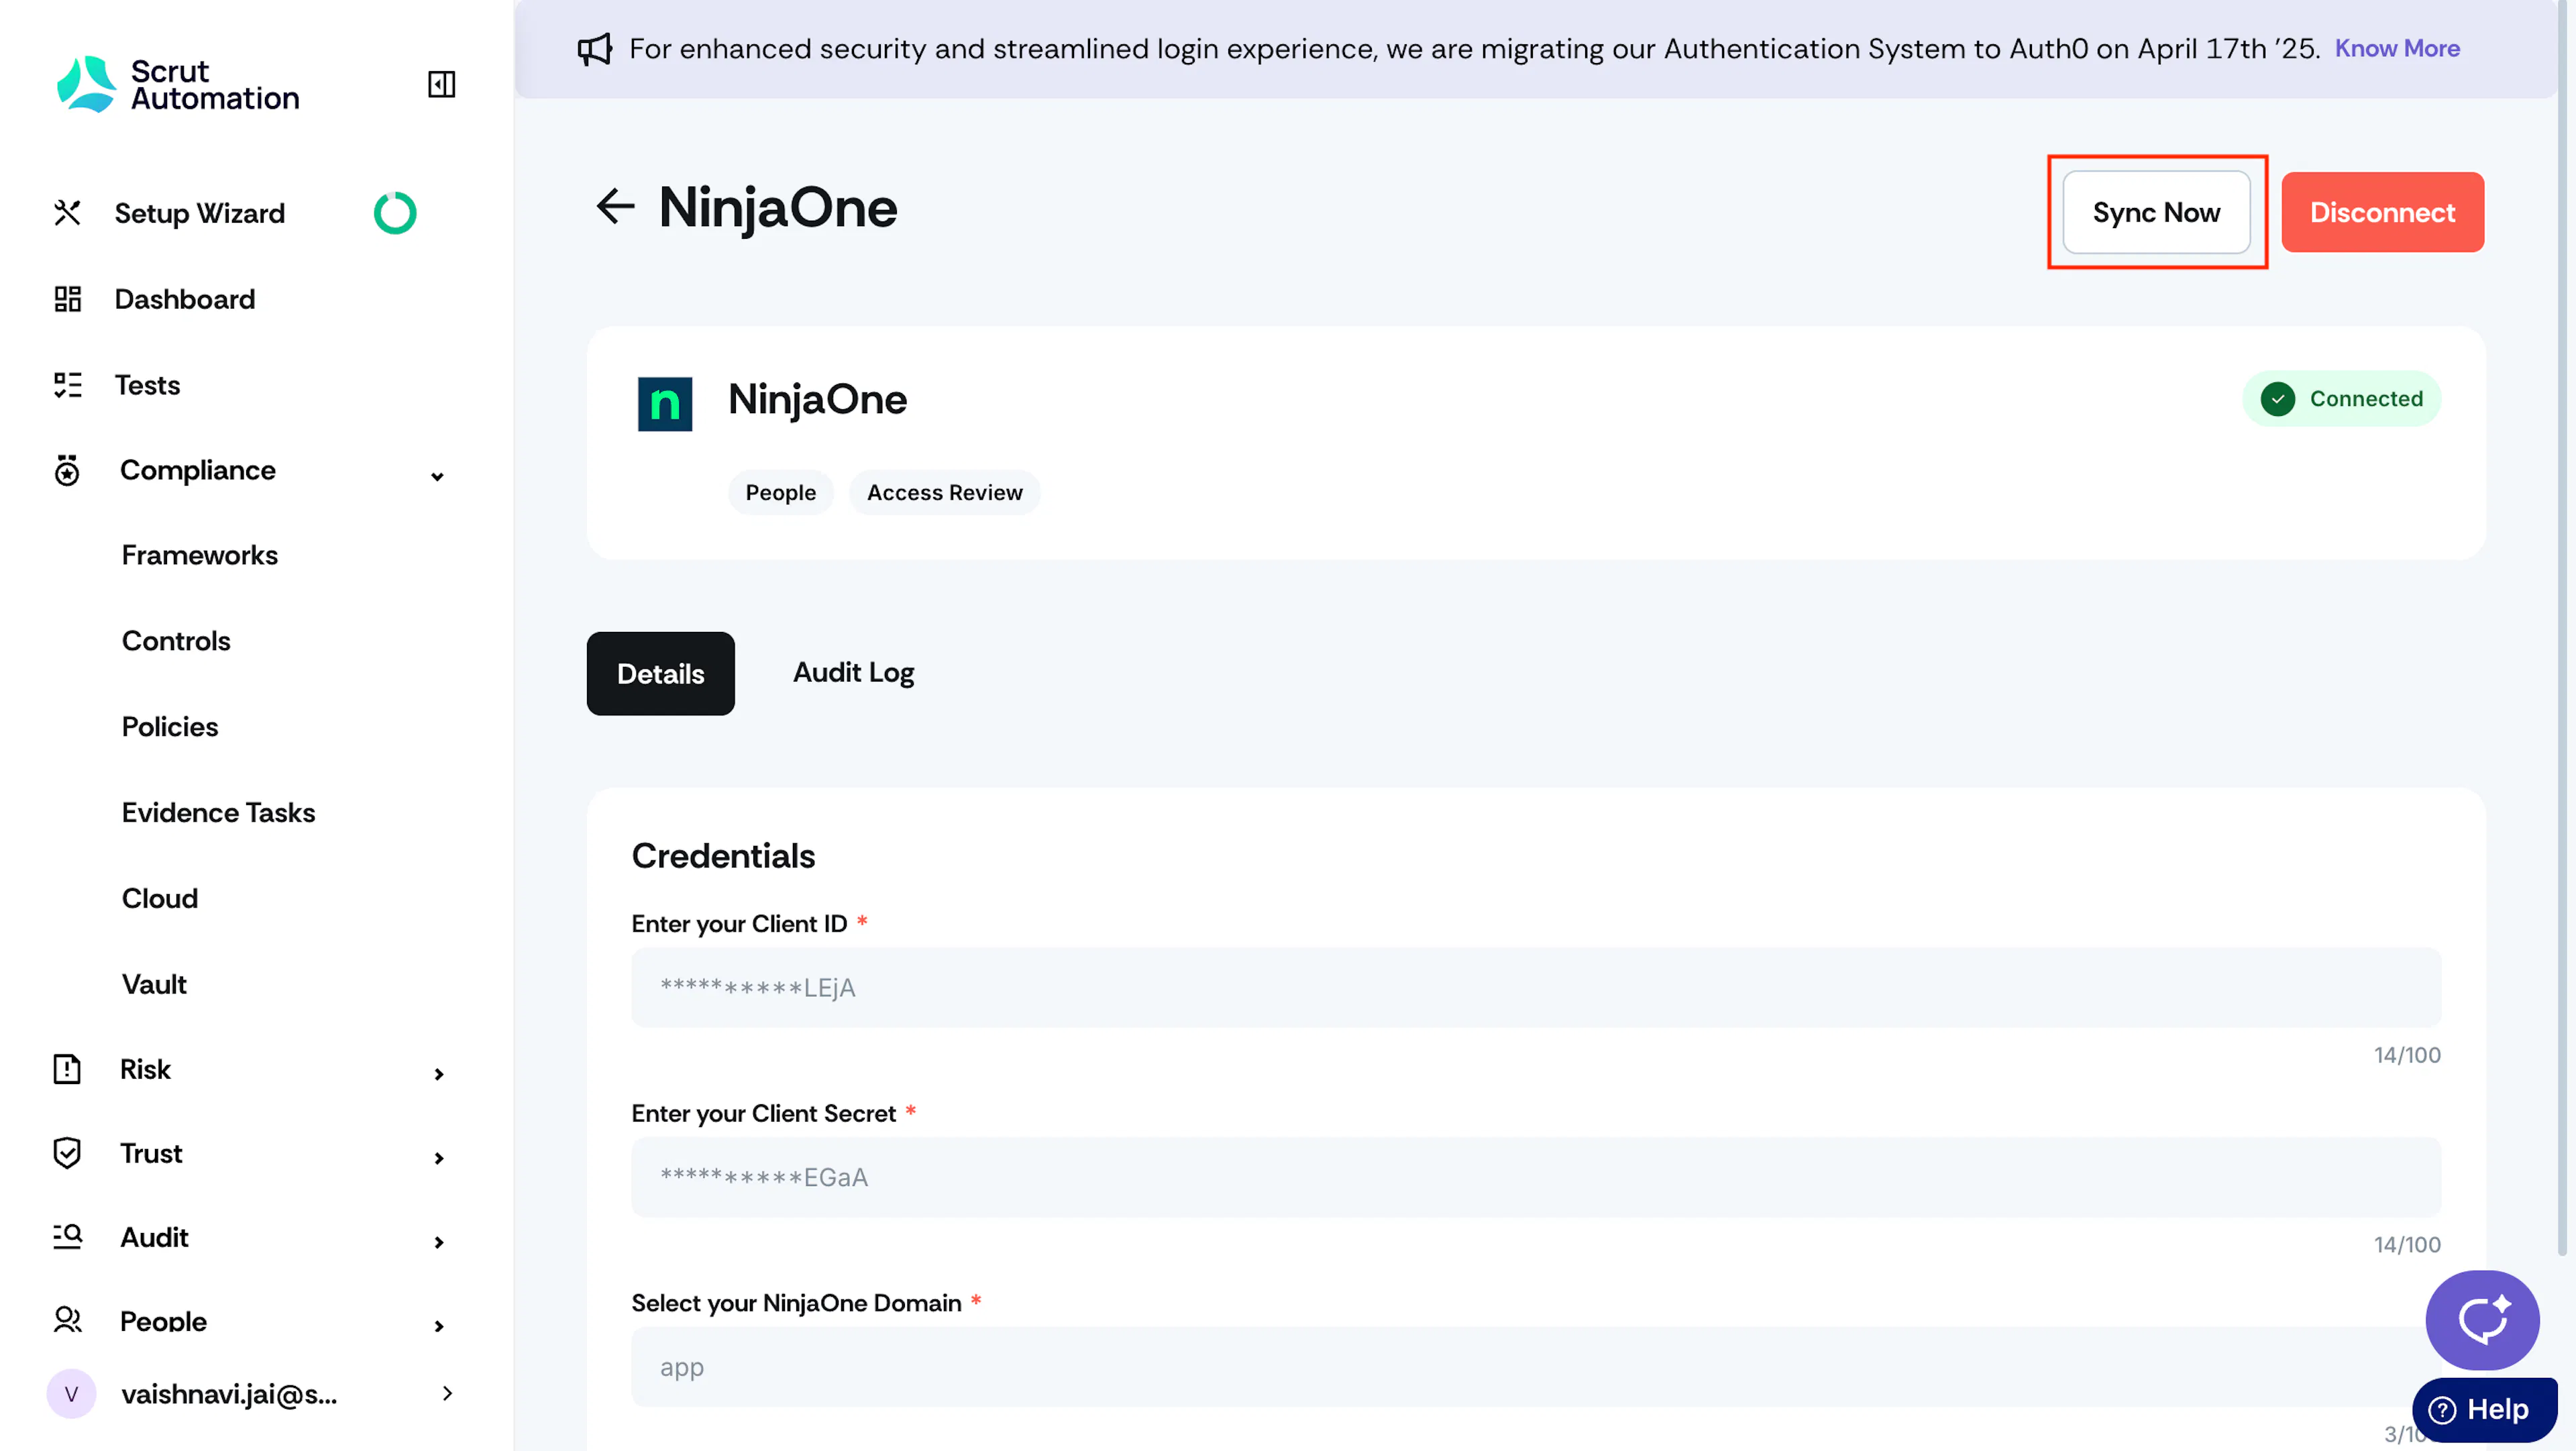
- Manual Sync: If you prefer, you can initiate a manual sync by clicking the Sync Now button on the NinjaOne integration page.
Device Data Fetched from NinjaOne
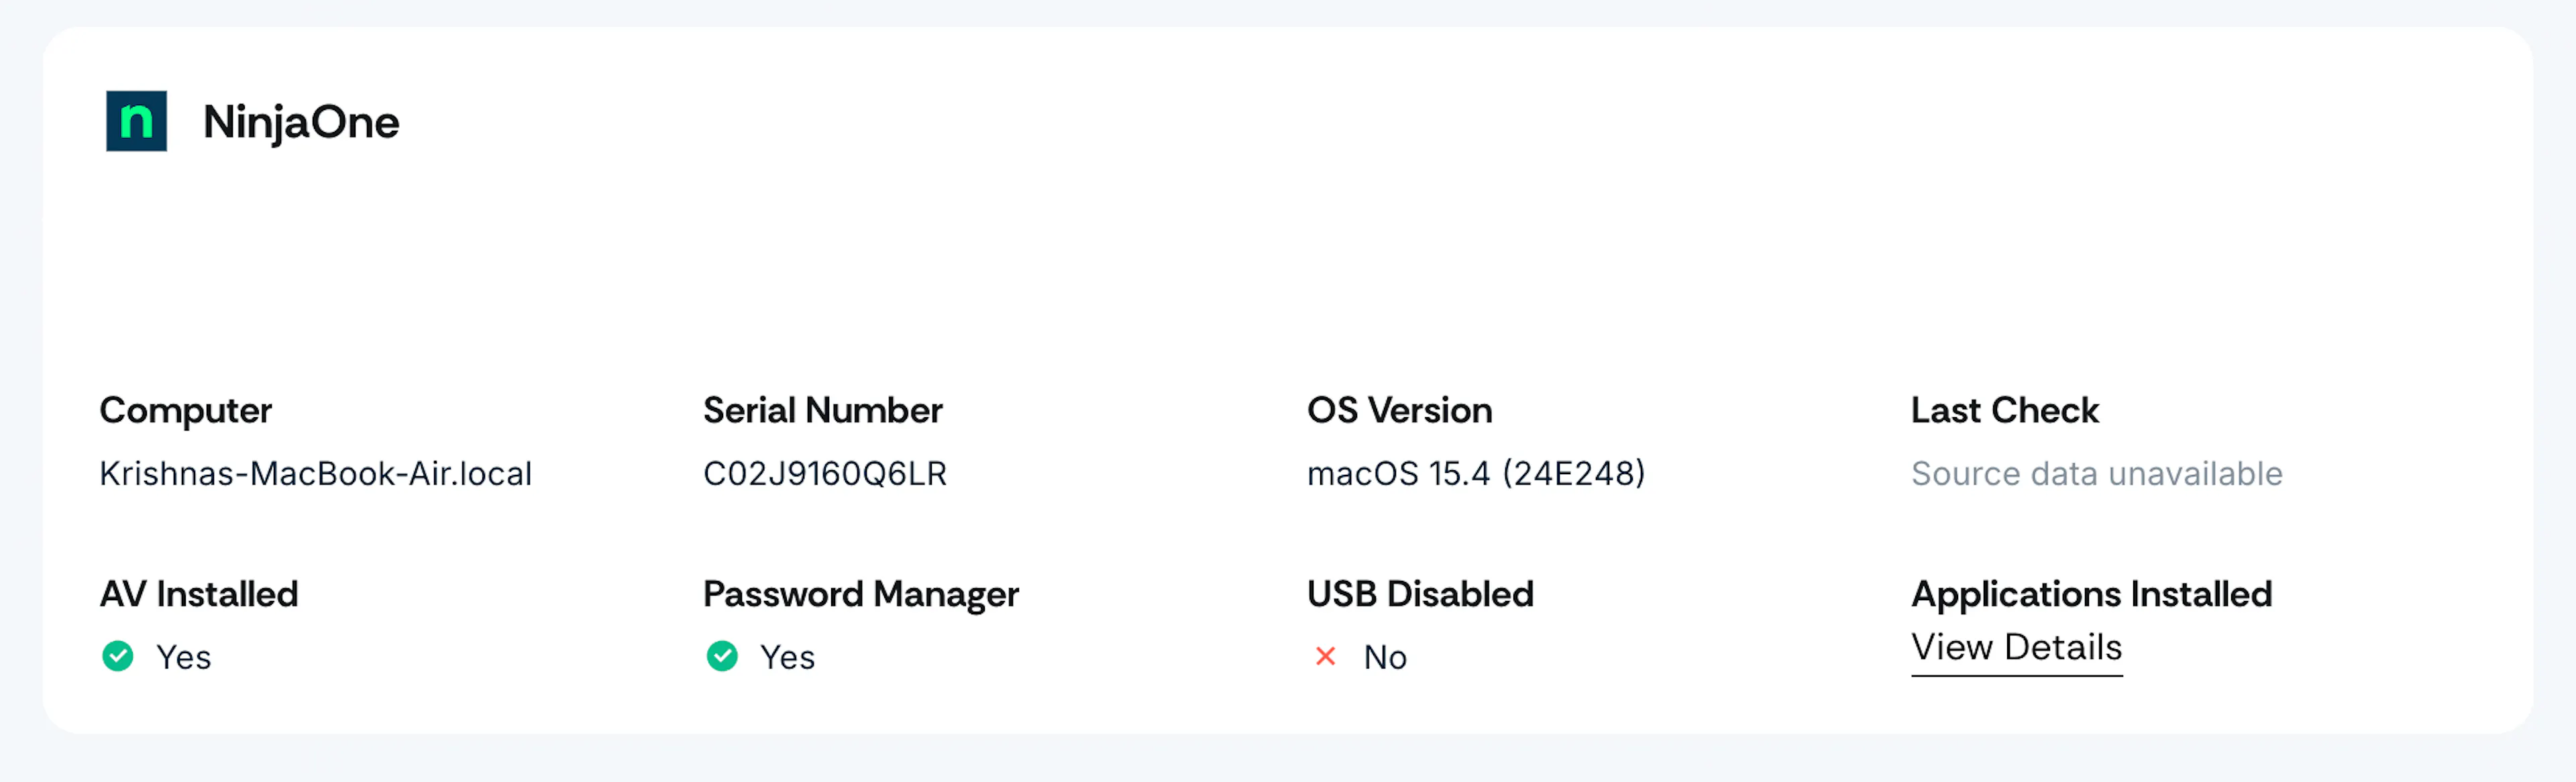
Scrut fetches the following data points for each employee device from NinjaOne:
- Device name
- Serial Number
- OS Version
- Last Checked Date
- Antivirus Installed (Names)
- Password Manager (Names)
- USB Disabled (Yes/No)
- Count and List of Applications Installed on the Device (Click View Details to view the application name and version number)
Viewing NinjaOne Data in Scrut
To view NinjaOne data in Scrut:
-
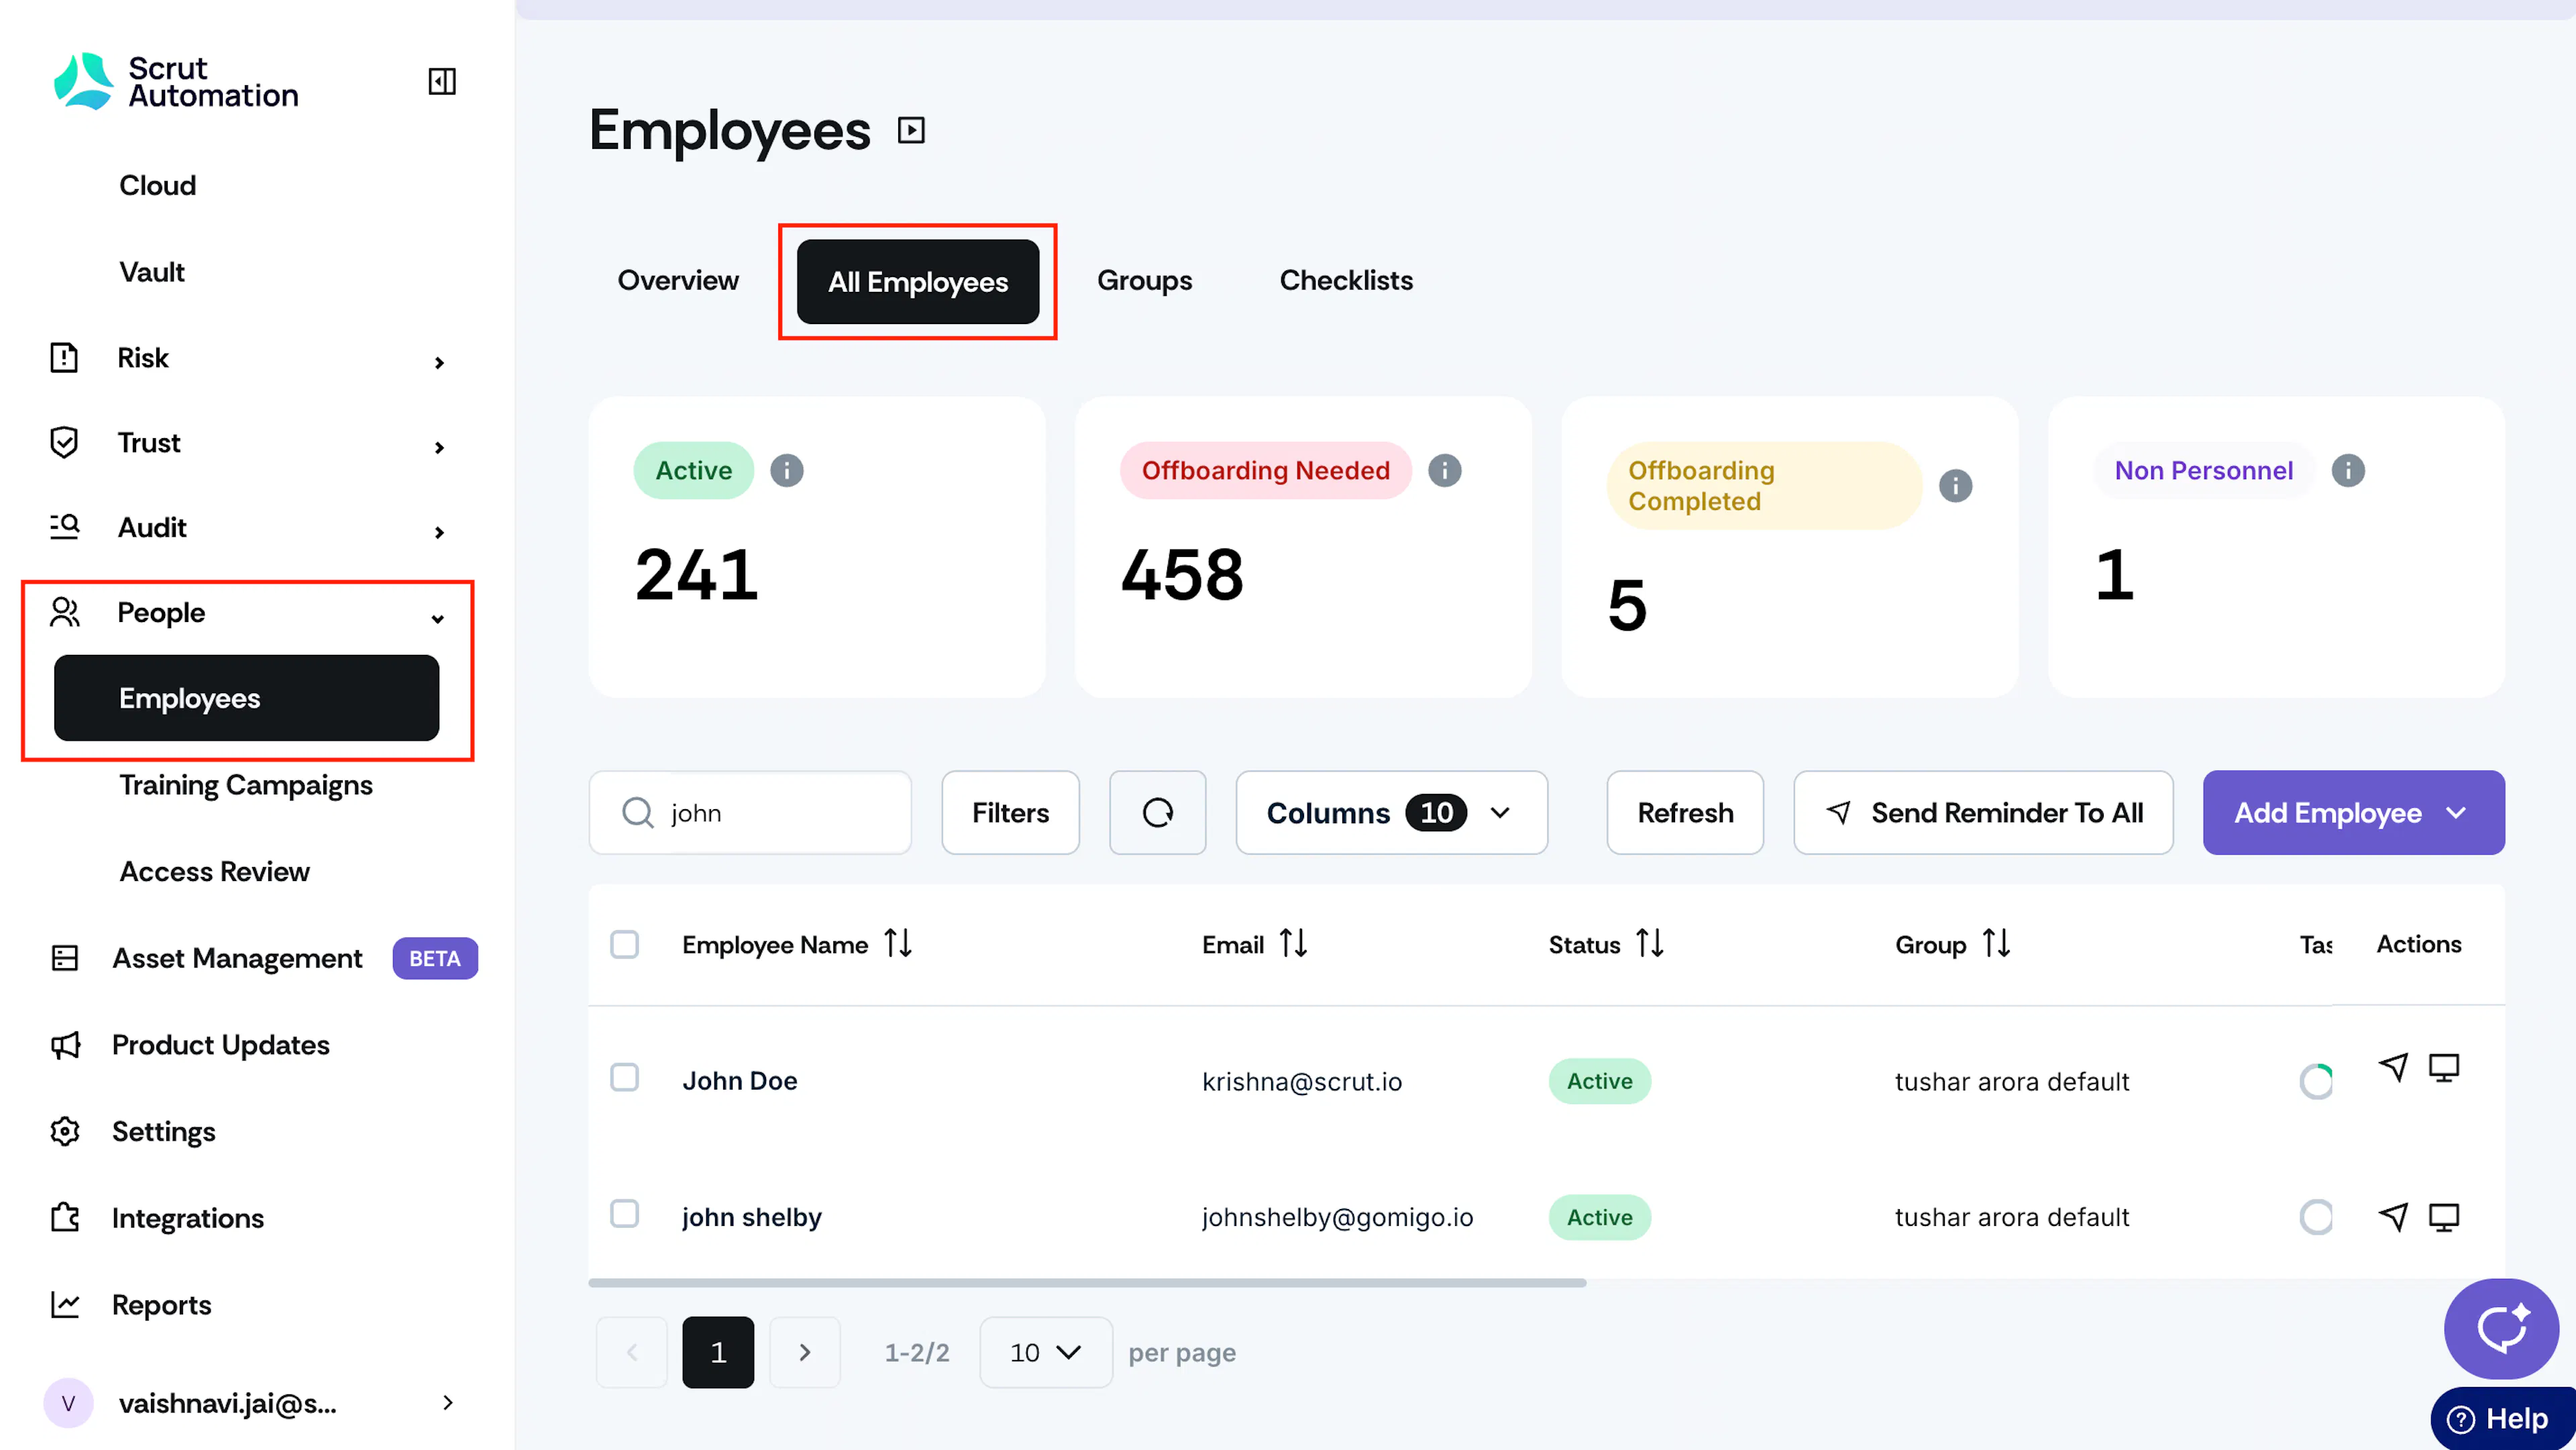
Click People → Employees on the left navigation panel in Scrut.
-
Navigate to the All Employees tab, search, and click on a specific employee.
-
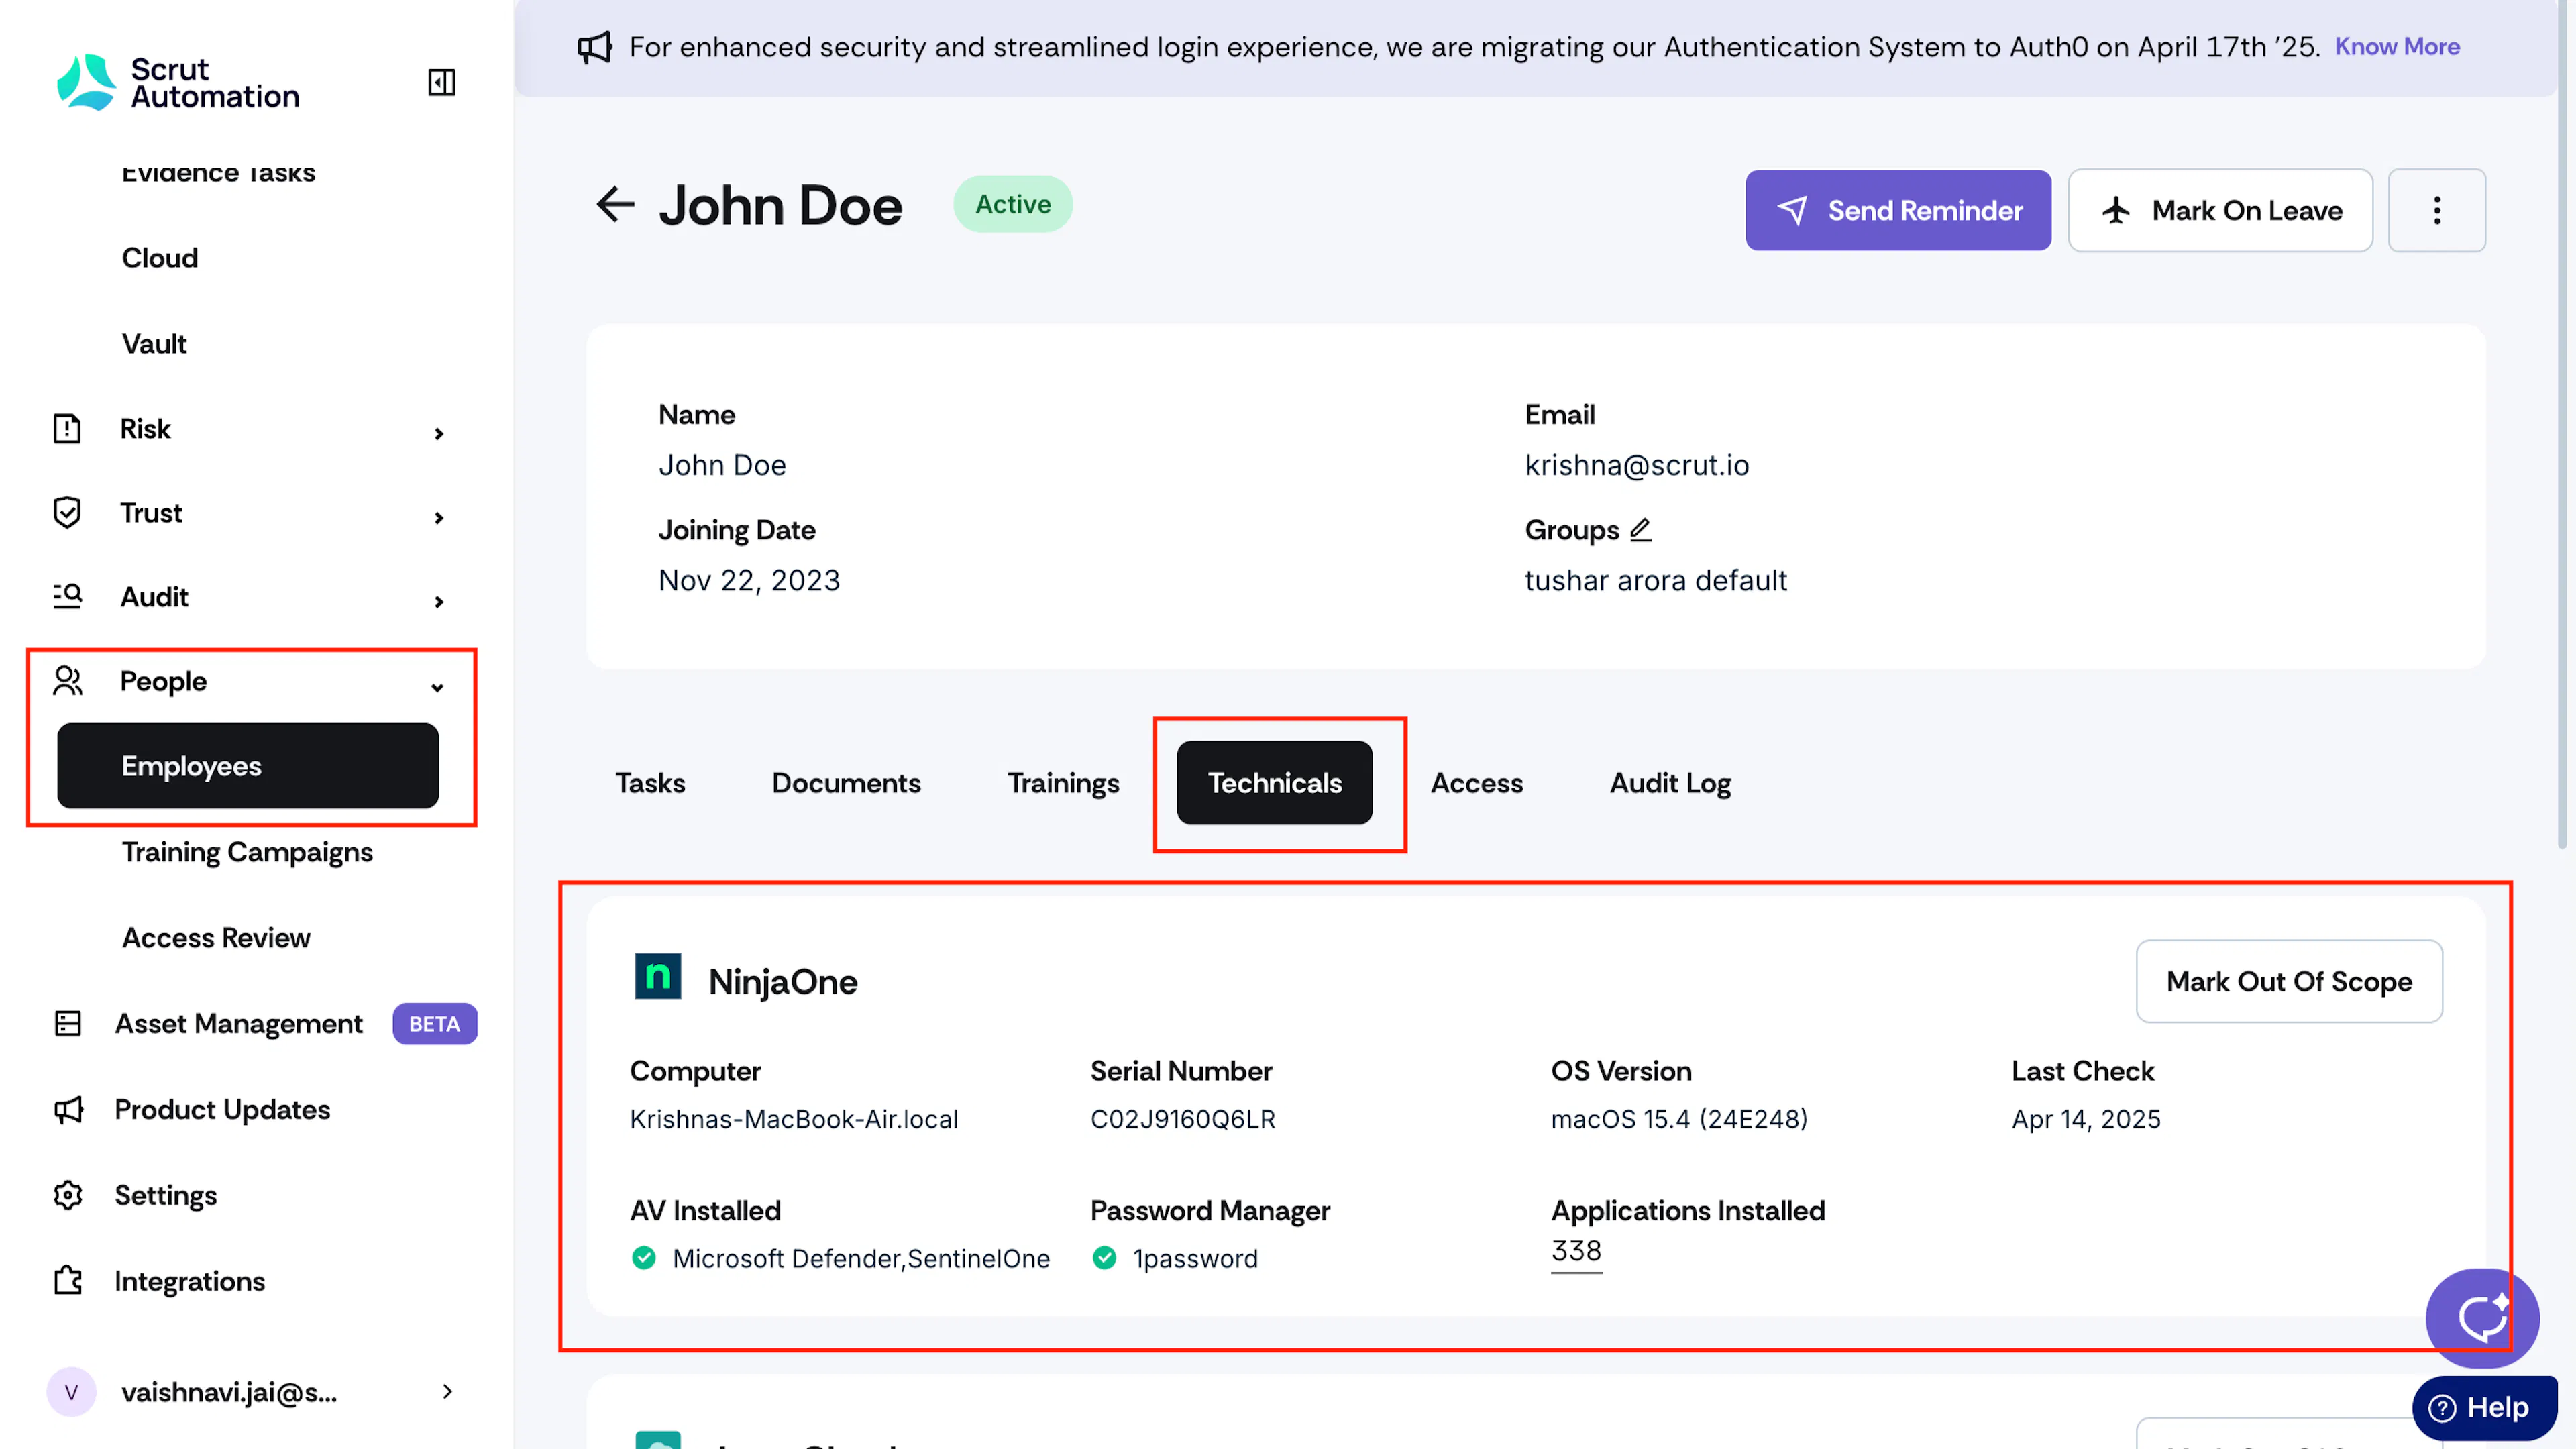
On the Employee page, click the Technicals tab.
-
Here, you can view the data Scrut fetches from NinjaOne.
Limitations
When using NinjaOne as your monitoring agent in Scrut (via People → Employees → Checklists), please be aware that the following device security checks cannot be automatically verified:
- Encrypt Storage Devices (HDD/SSD)
- Enable Screen Lock
- Disable Device USB
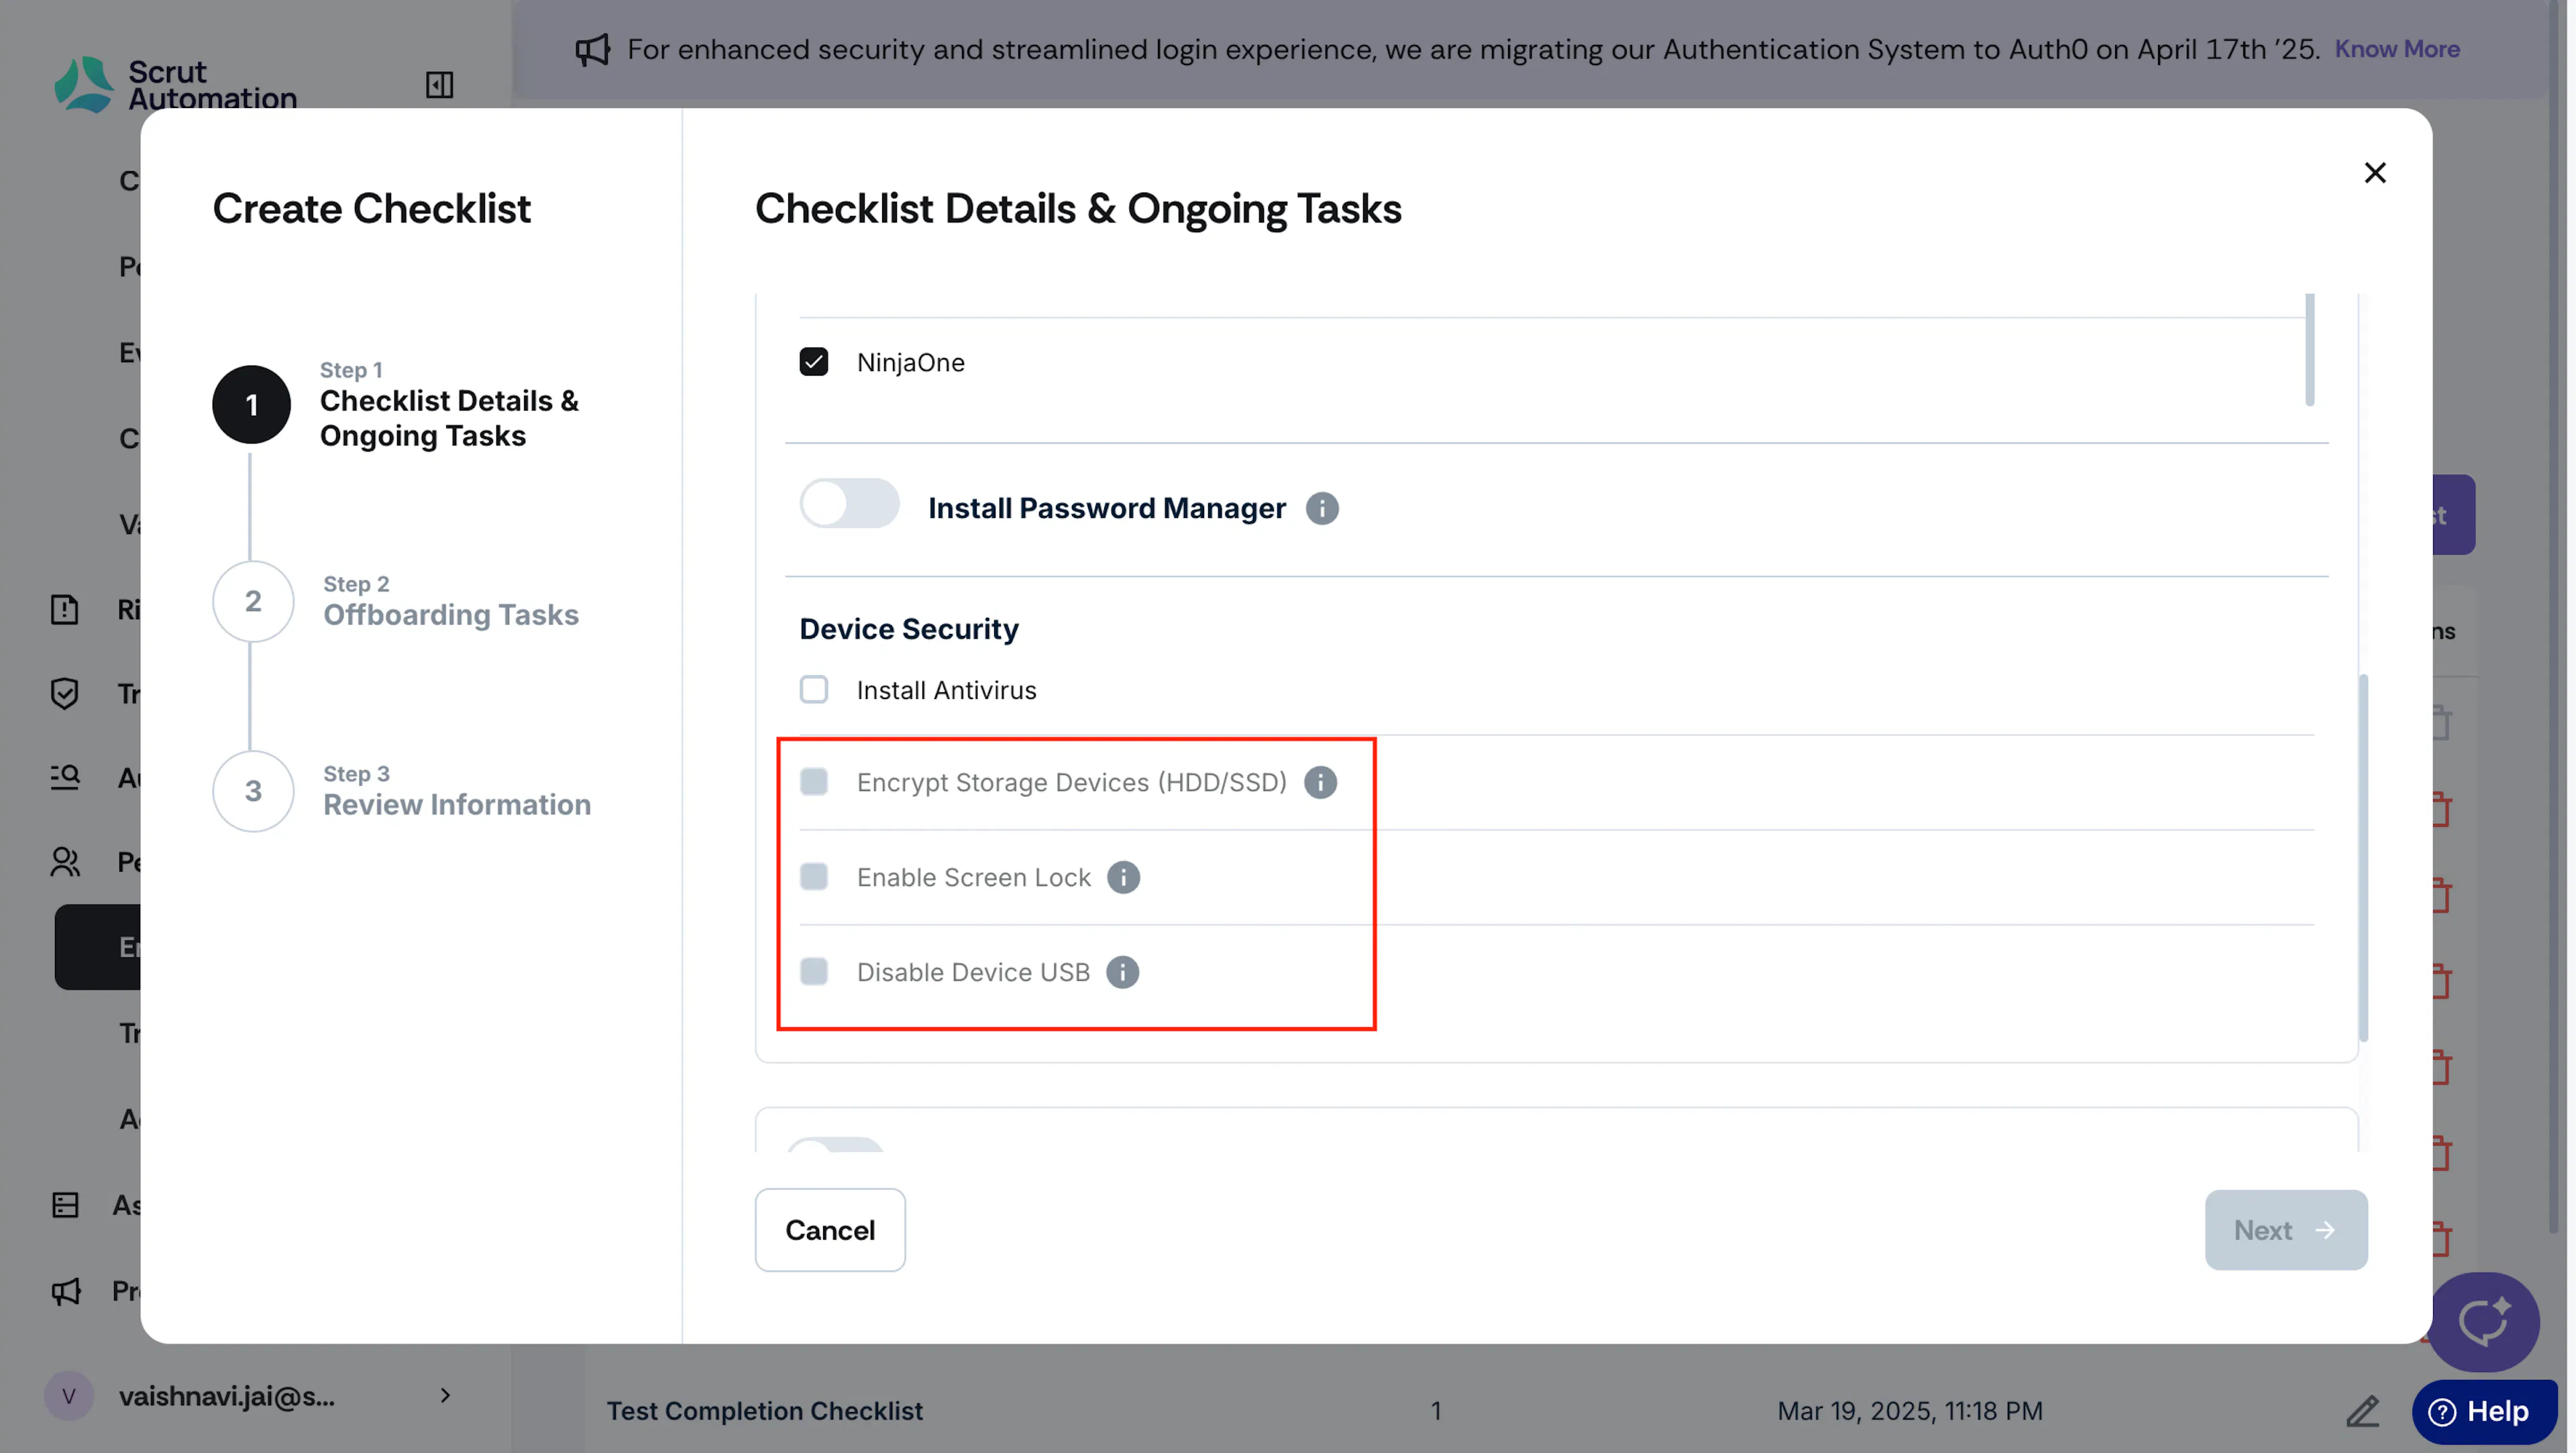
We recommend using an alternative monitoring agent, such as Scrut Agent, to verify these security measures.