

Integrate ClickUp
With the Scrut-ClickUp integration, you can create project management tasks directly in ClickUp from any compliance task module in Scrut. In this article, explain how to connect your ClickUp account with Scrut.
What This Integration Does in Scrut
- Task Management: Enables you to create project management tickets in Scrut and sync them to ClickUp.
Prerequisites
Before starting the integration, make sure you have the following:
- An active ClickUp account with workspace owner or admin access
Pro Tip!
Log in to your ClickUp account before starting the integration to avoid interruptions mid-setup.
Permissions and Access Requirements
For ClickUp
- You must be a workspace owner or admin in ClickUp to generate the Client ID and Secret required for the integration.
For Scrut
- Admin access to Scrut, or Contributor access with permissions to the Integrations module.
Integration Setup
Step 1: Generate a Client ID and Secret in ClickUp
-
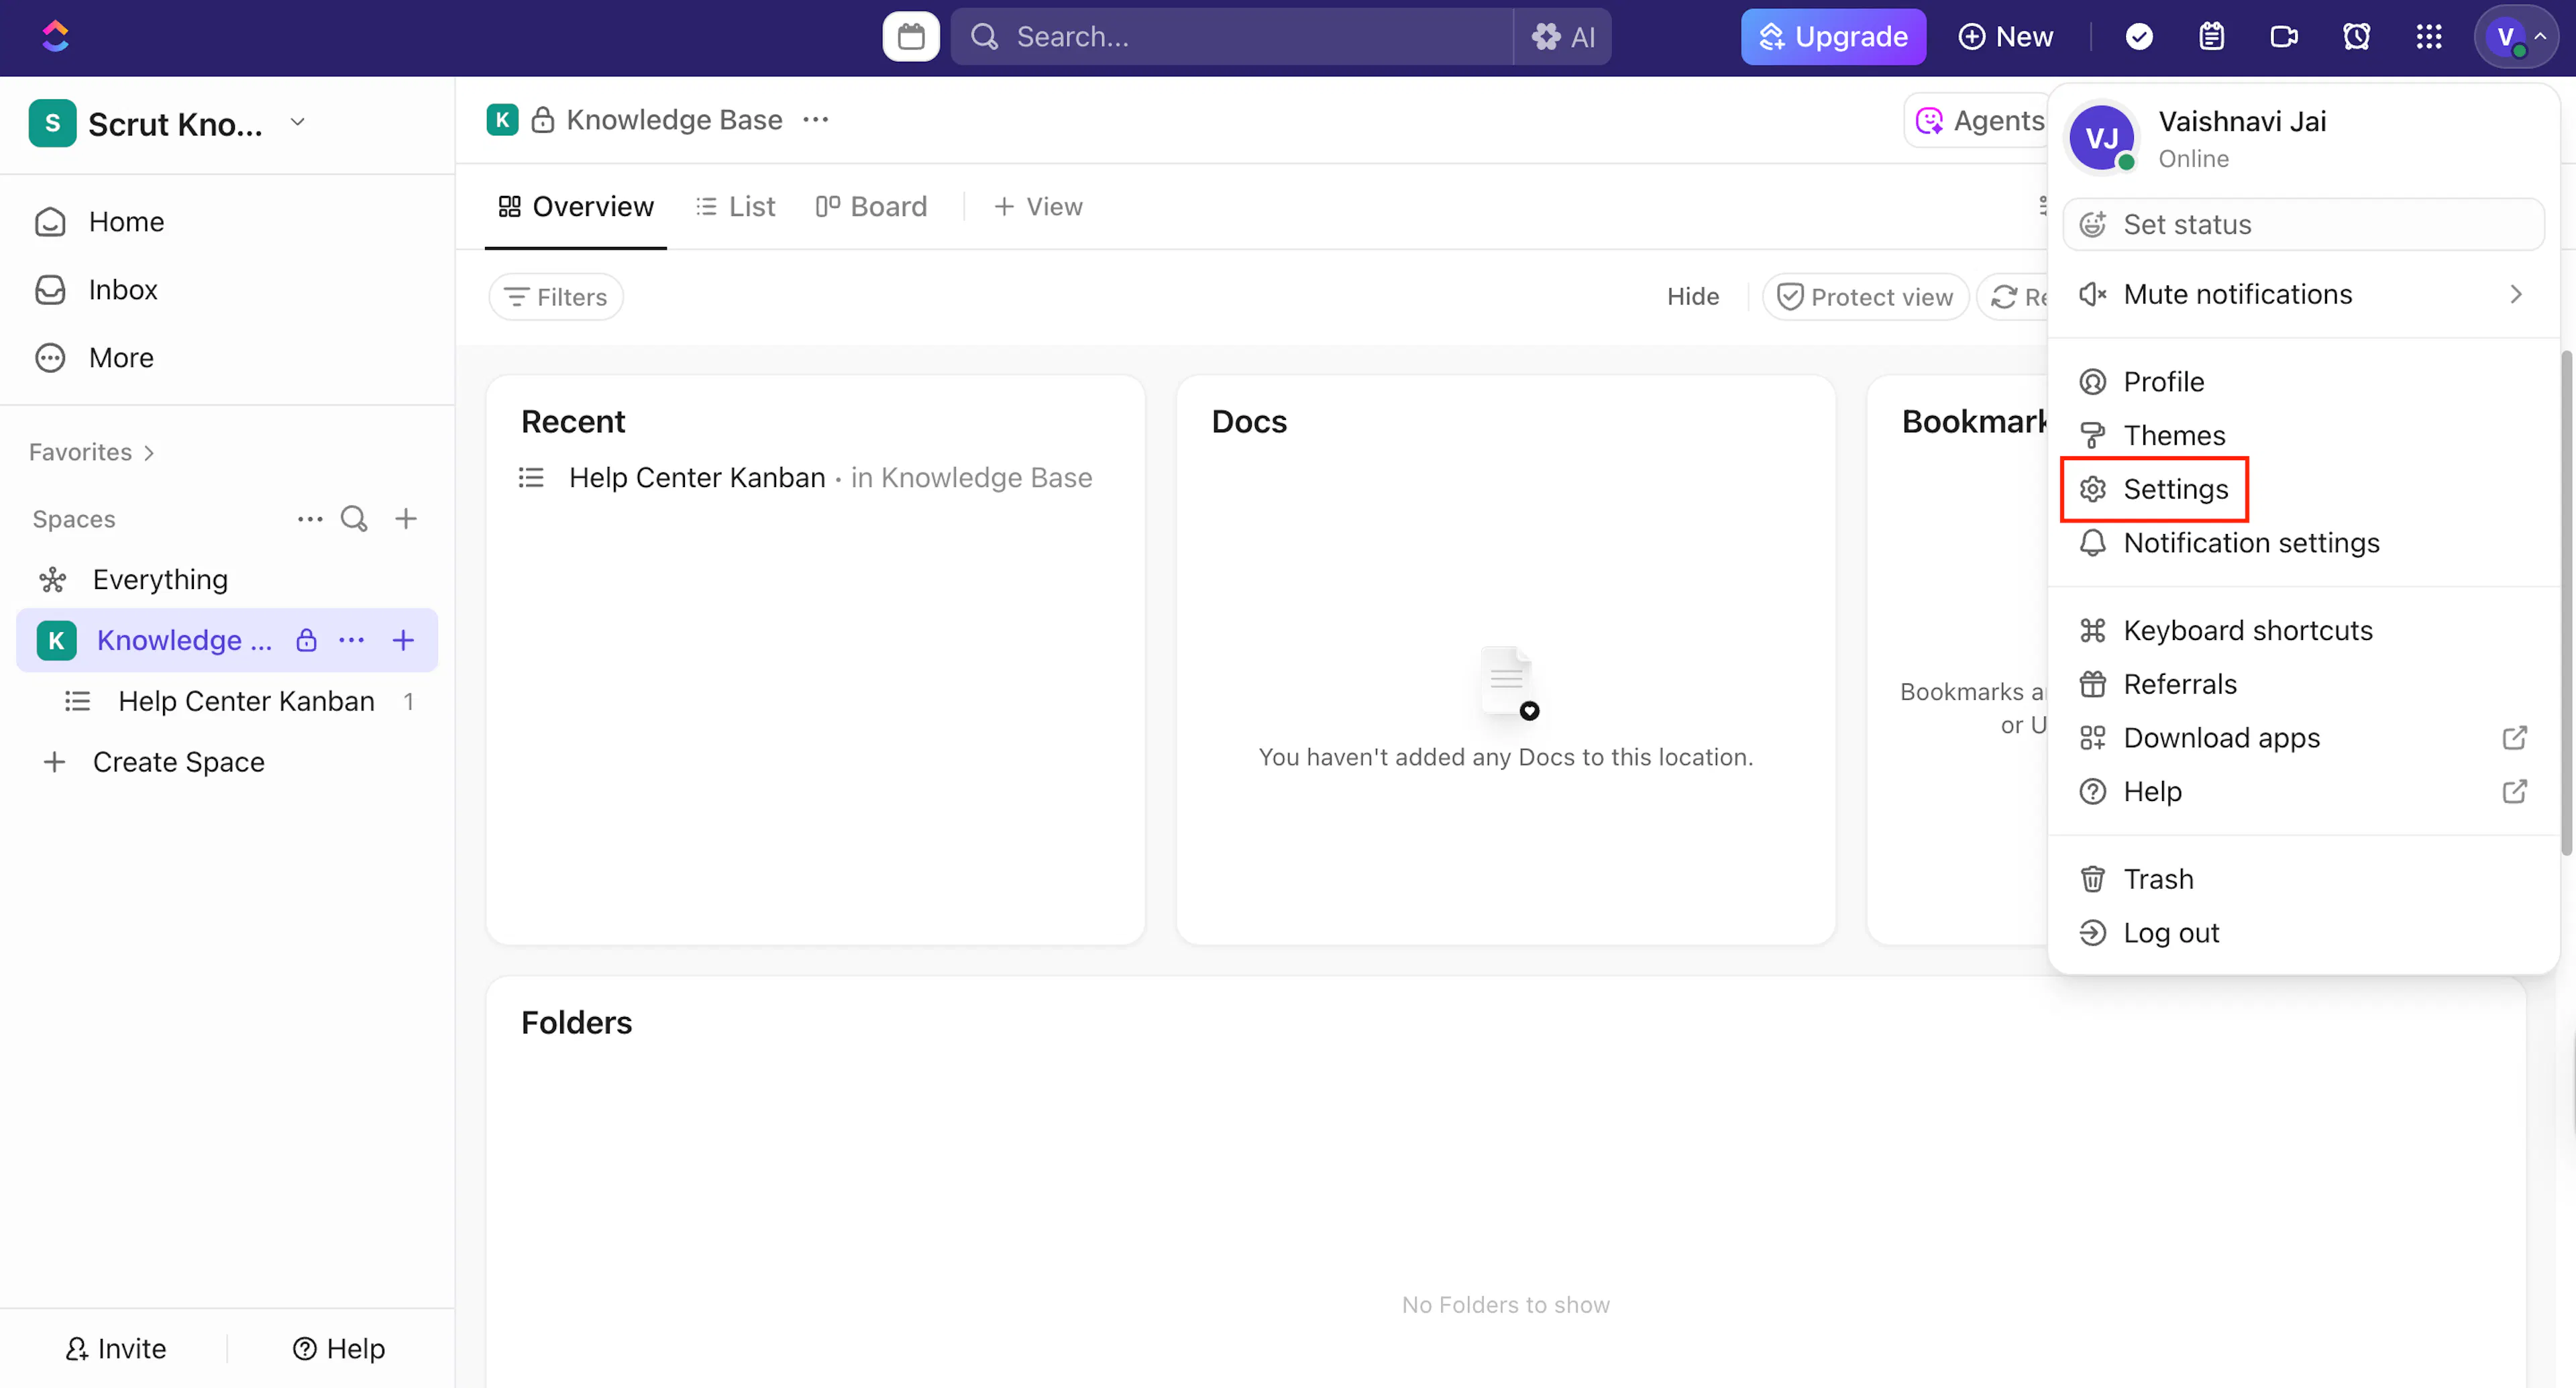
Sign in to your ClickUp account and click your avatar in the top-right corner.
-
Click Settings.
-
Navigate to the ClickUp API menu on the left navigation bar.
-
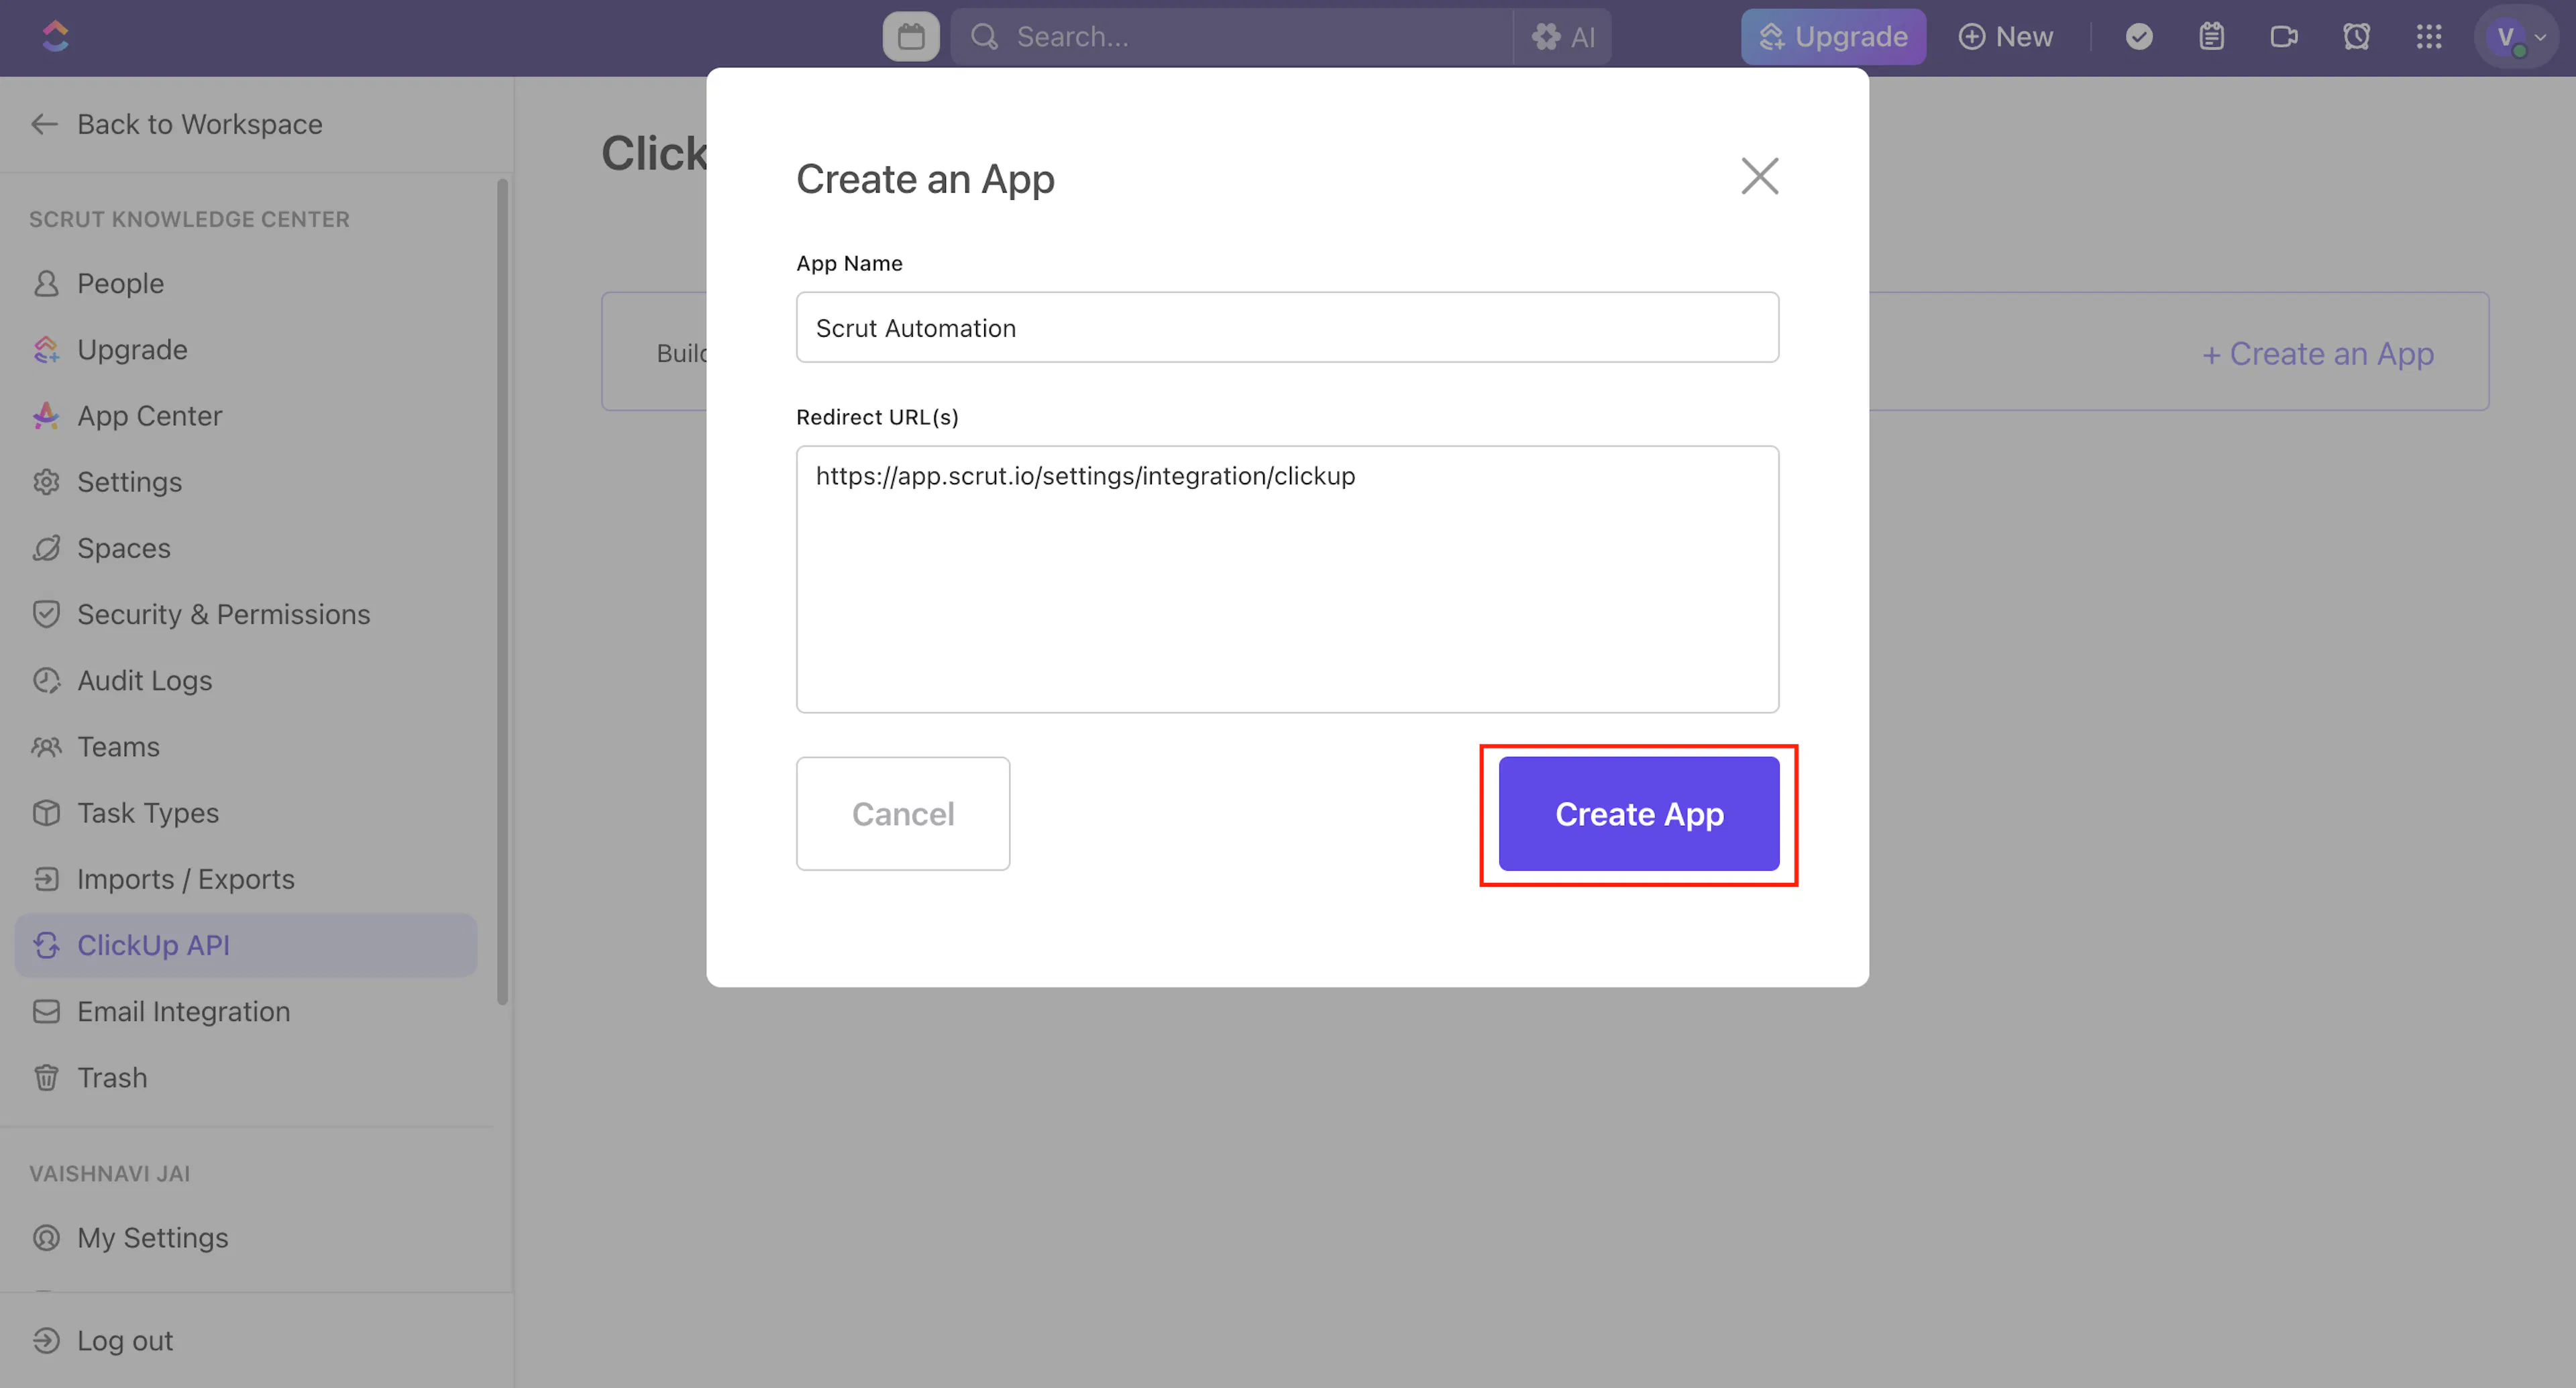
Navigate to ClickUp API Settings and click Create an App.
-
Enter a name for the app, such as Scrut Automation.
-
Enter the redirect URL for your Scrut region:
-
Click Create App.
-
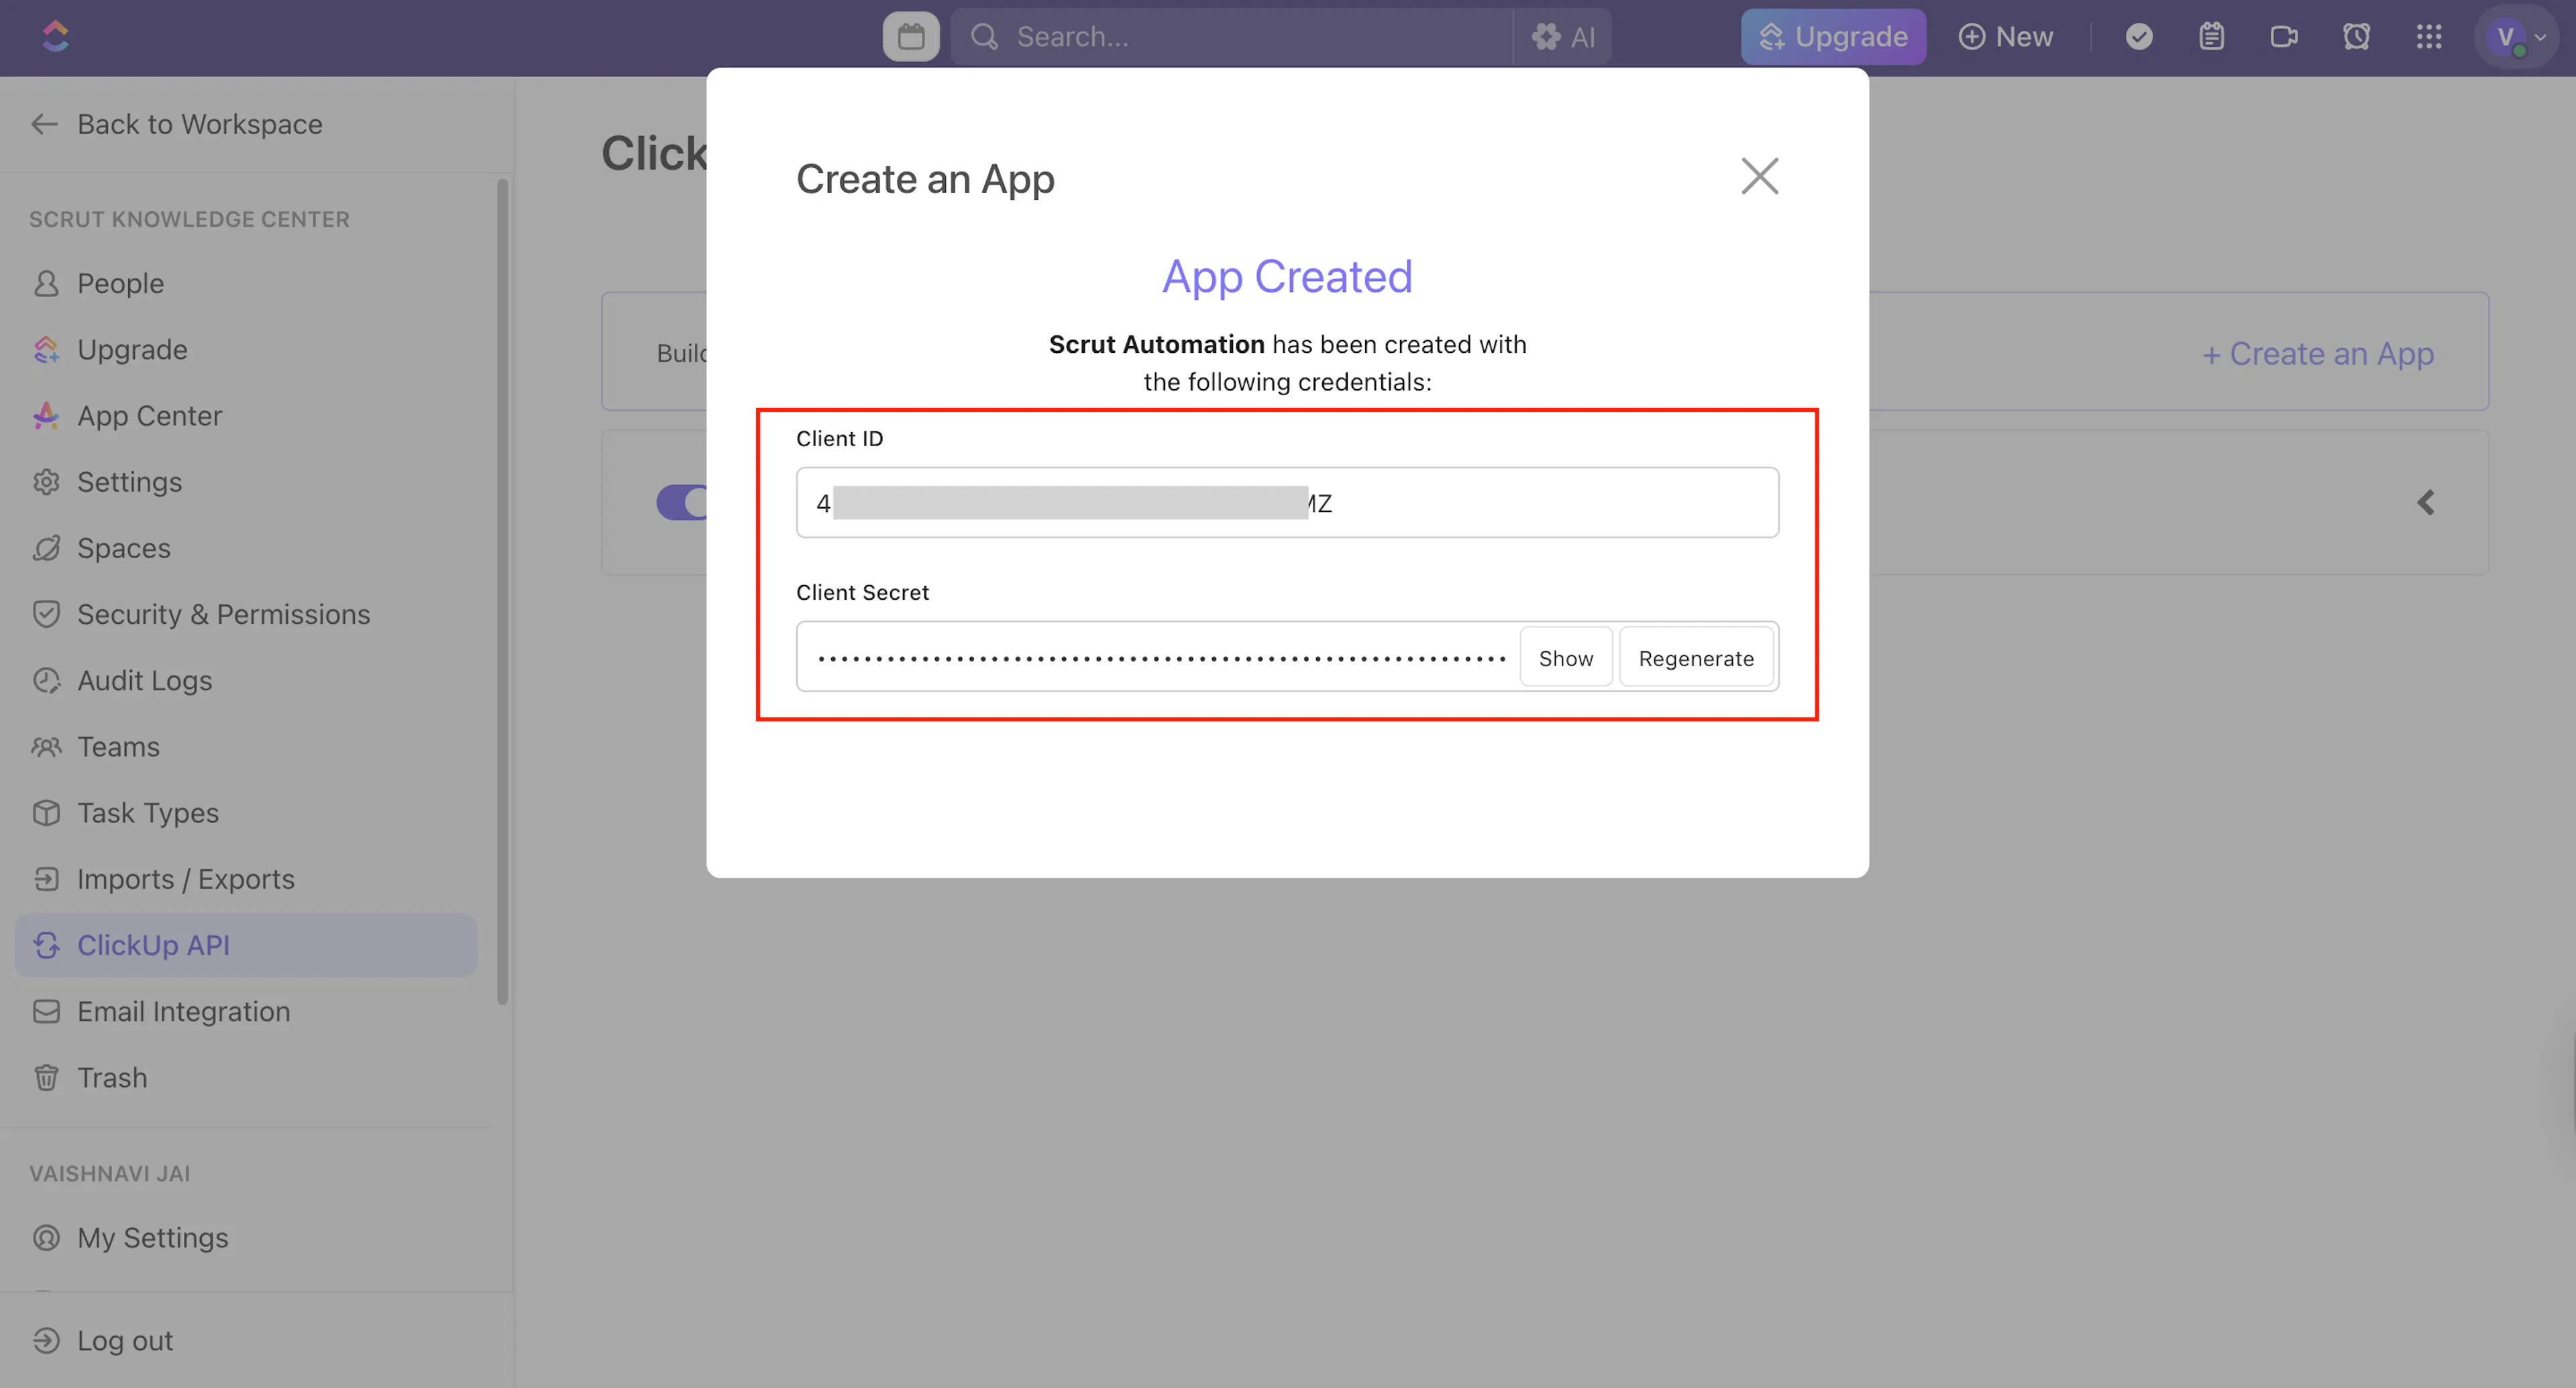
Copy the Client ID and Secret displayed on the screen.
Important: Save these credentials before navigating away. You will need them in the next step.
Note: To know more about the API, refer to ClickUp’s API help documentation.
Step 2: Connect ClickUp in Scrut
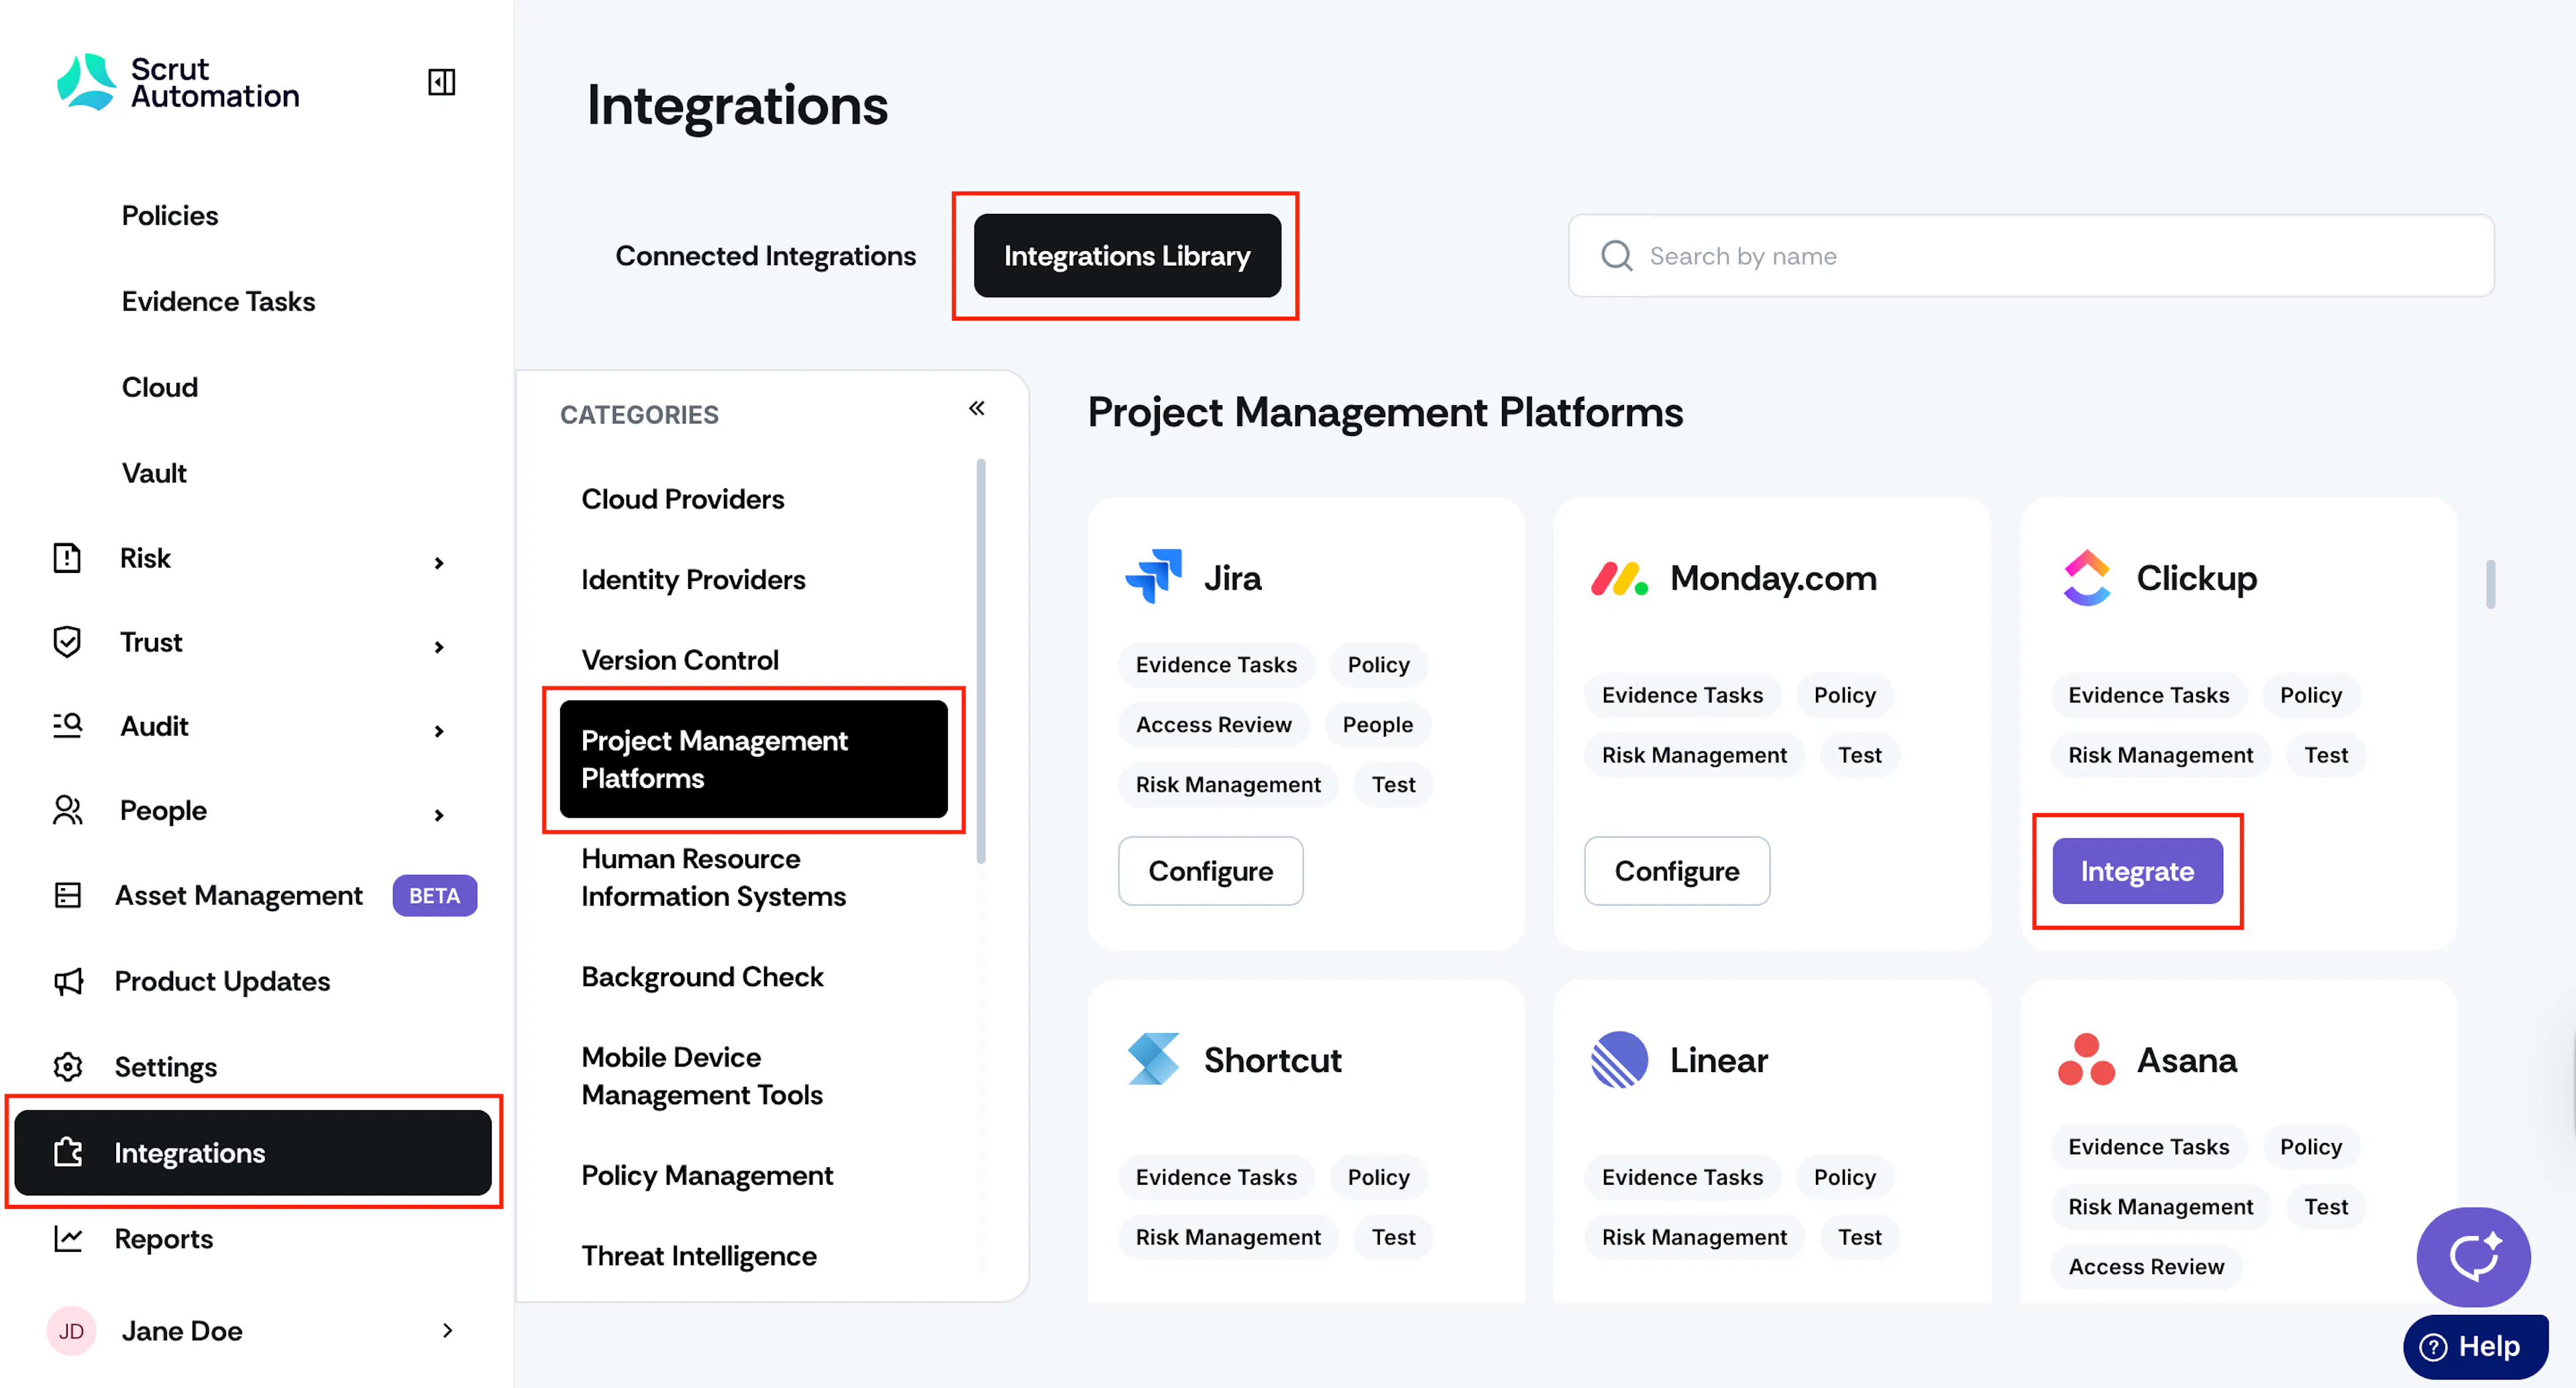
- Sign in to Scrut and click Integrations in the left navigation panel.
- Go to the Integrations Library tab.
- Scroll to the Categories section and select Project Management Platforms.
- Locate the ClickUp tile and click Integrate.
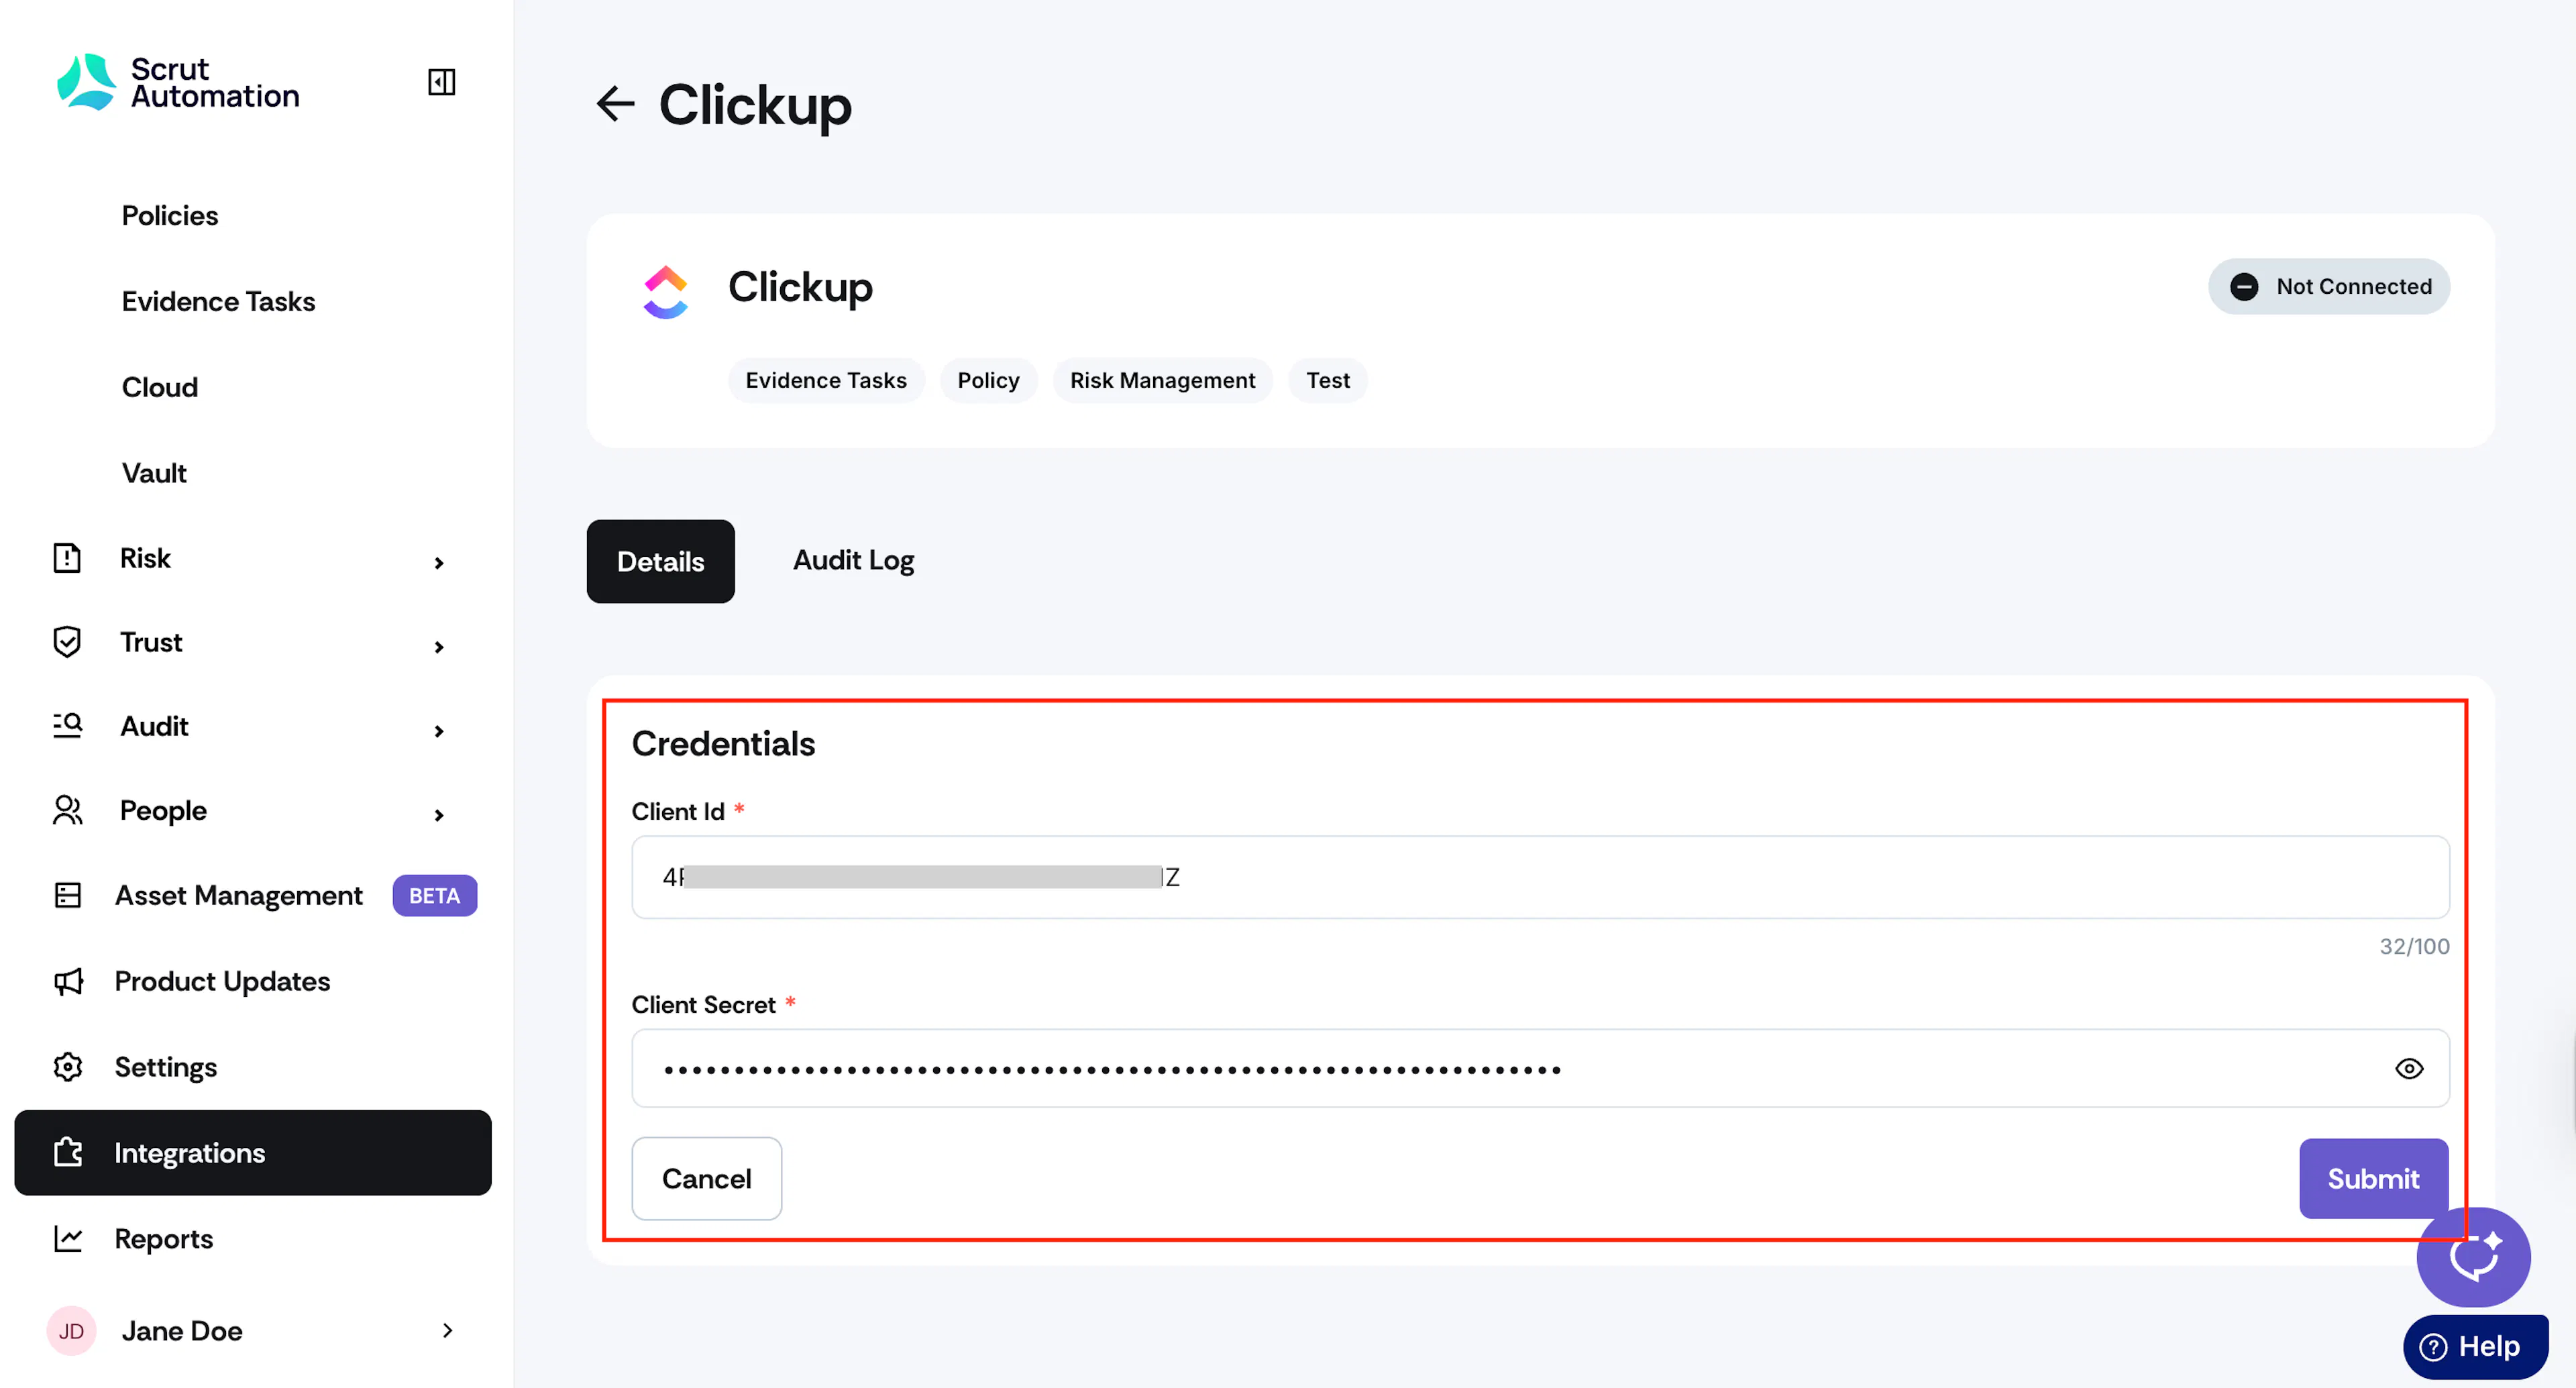
- Paste the Client ID and Secret you copied from Step 1.
- Click Submit.
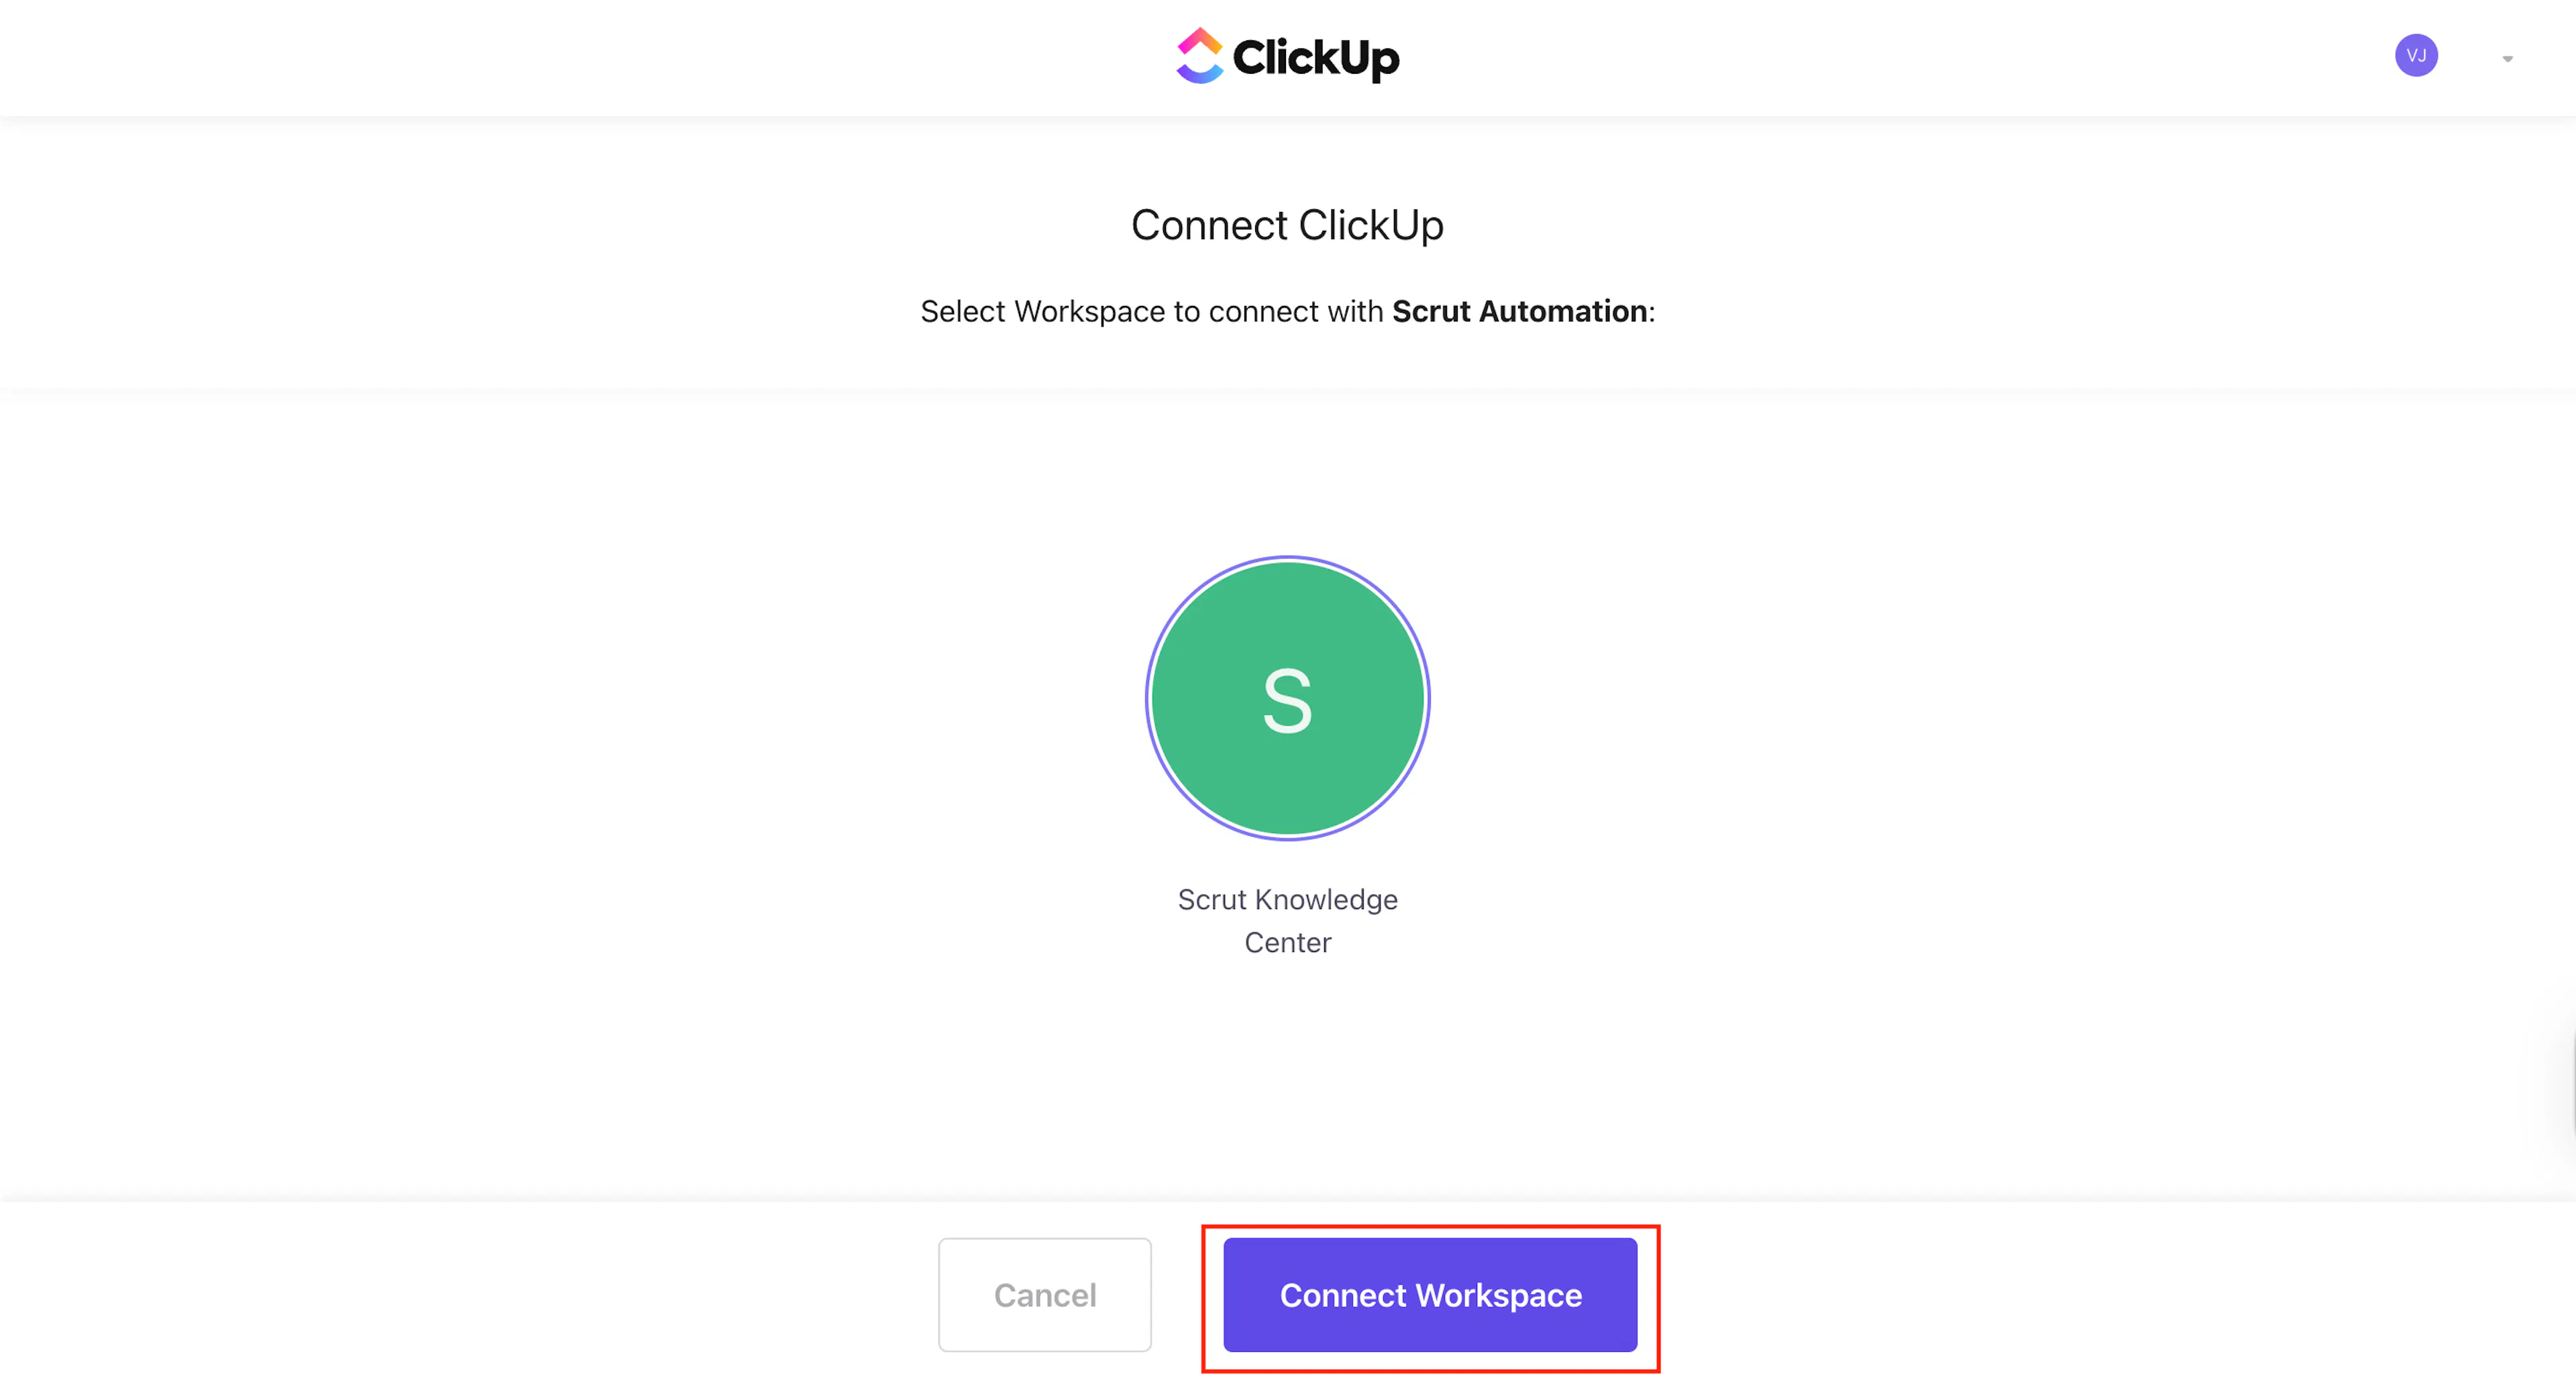
- Select the ClickUp workspace you want to connect with Scrut.
- Click Connect Workspace.
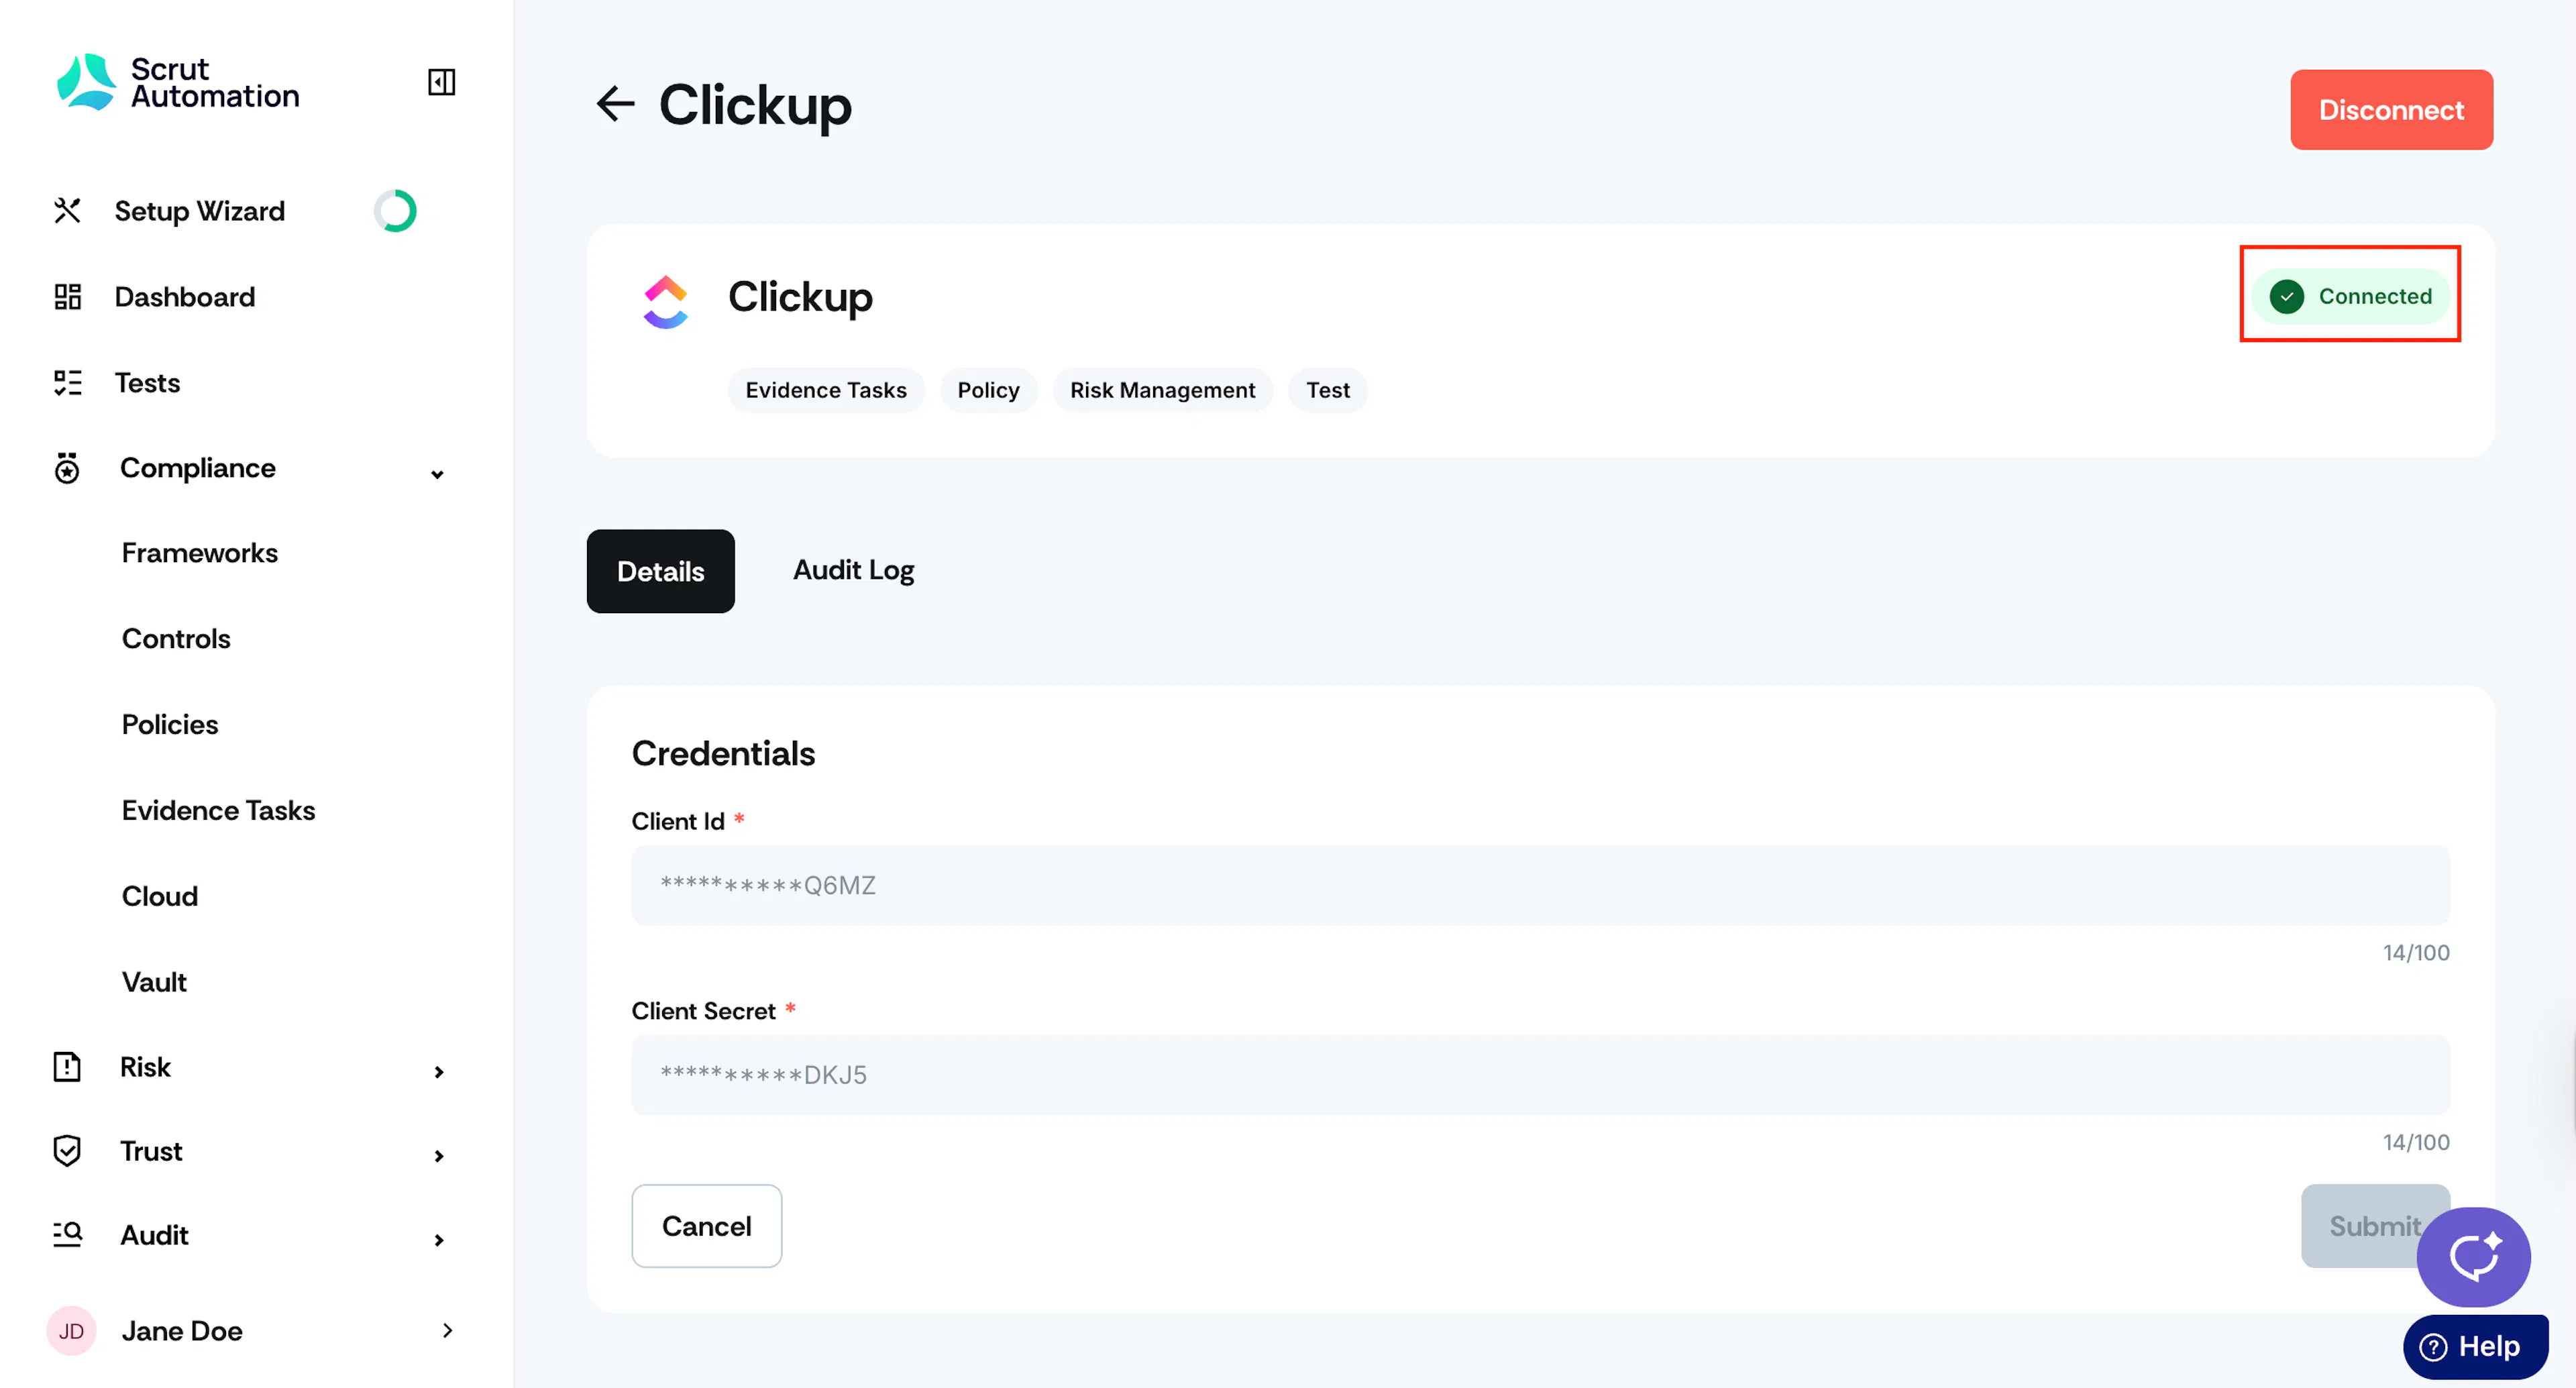
A "Connected Successfully" message confirms the integration is active, and the status indicator updates to Connected.
What Happens Next?
Initial data sync
The ClickUp integration does not pull data into Scrut. Instead, it pushes tasks from Scrut to ClickUp in real time when you create them. No background sync to monitor.
Create a ClickUp Task from Scrut
Once the integration is connected, you can create a ClickUp task from any of the following Scrut artifacts: Policies, Evidence Tasks, Tests, Cloud, Risk Management, and Audit Center (Requests, Findings, and Corrective Actions).
To create a task:
- Navigate to the relevant item in any of the modules listed above.
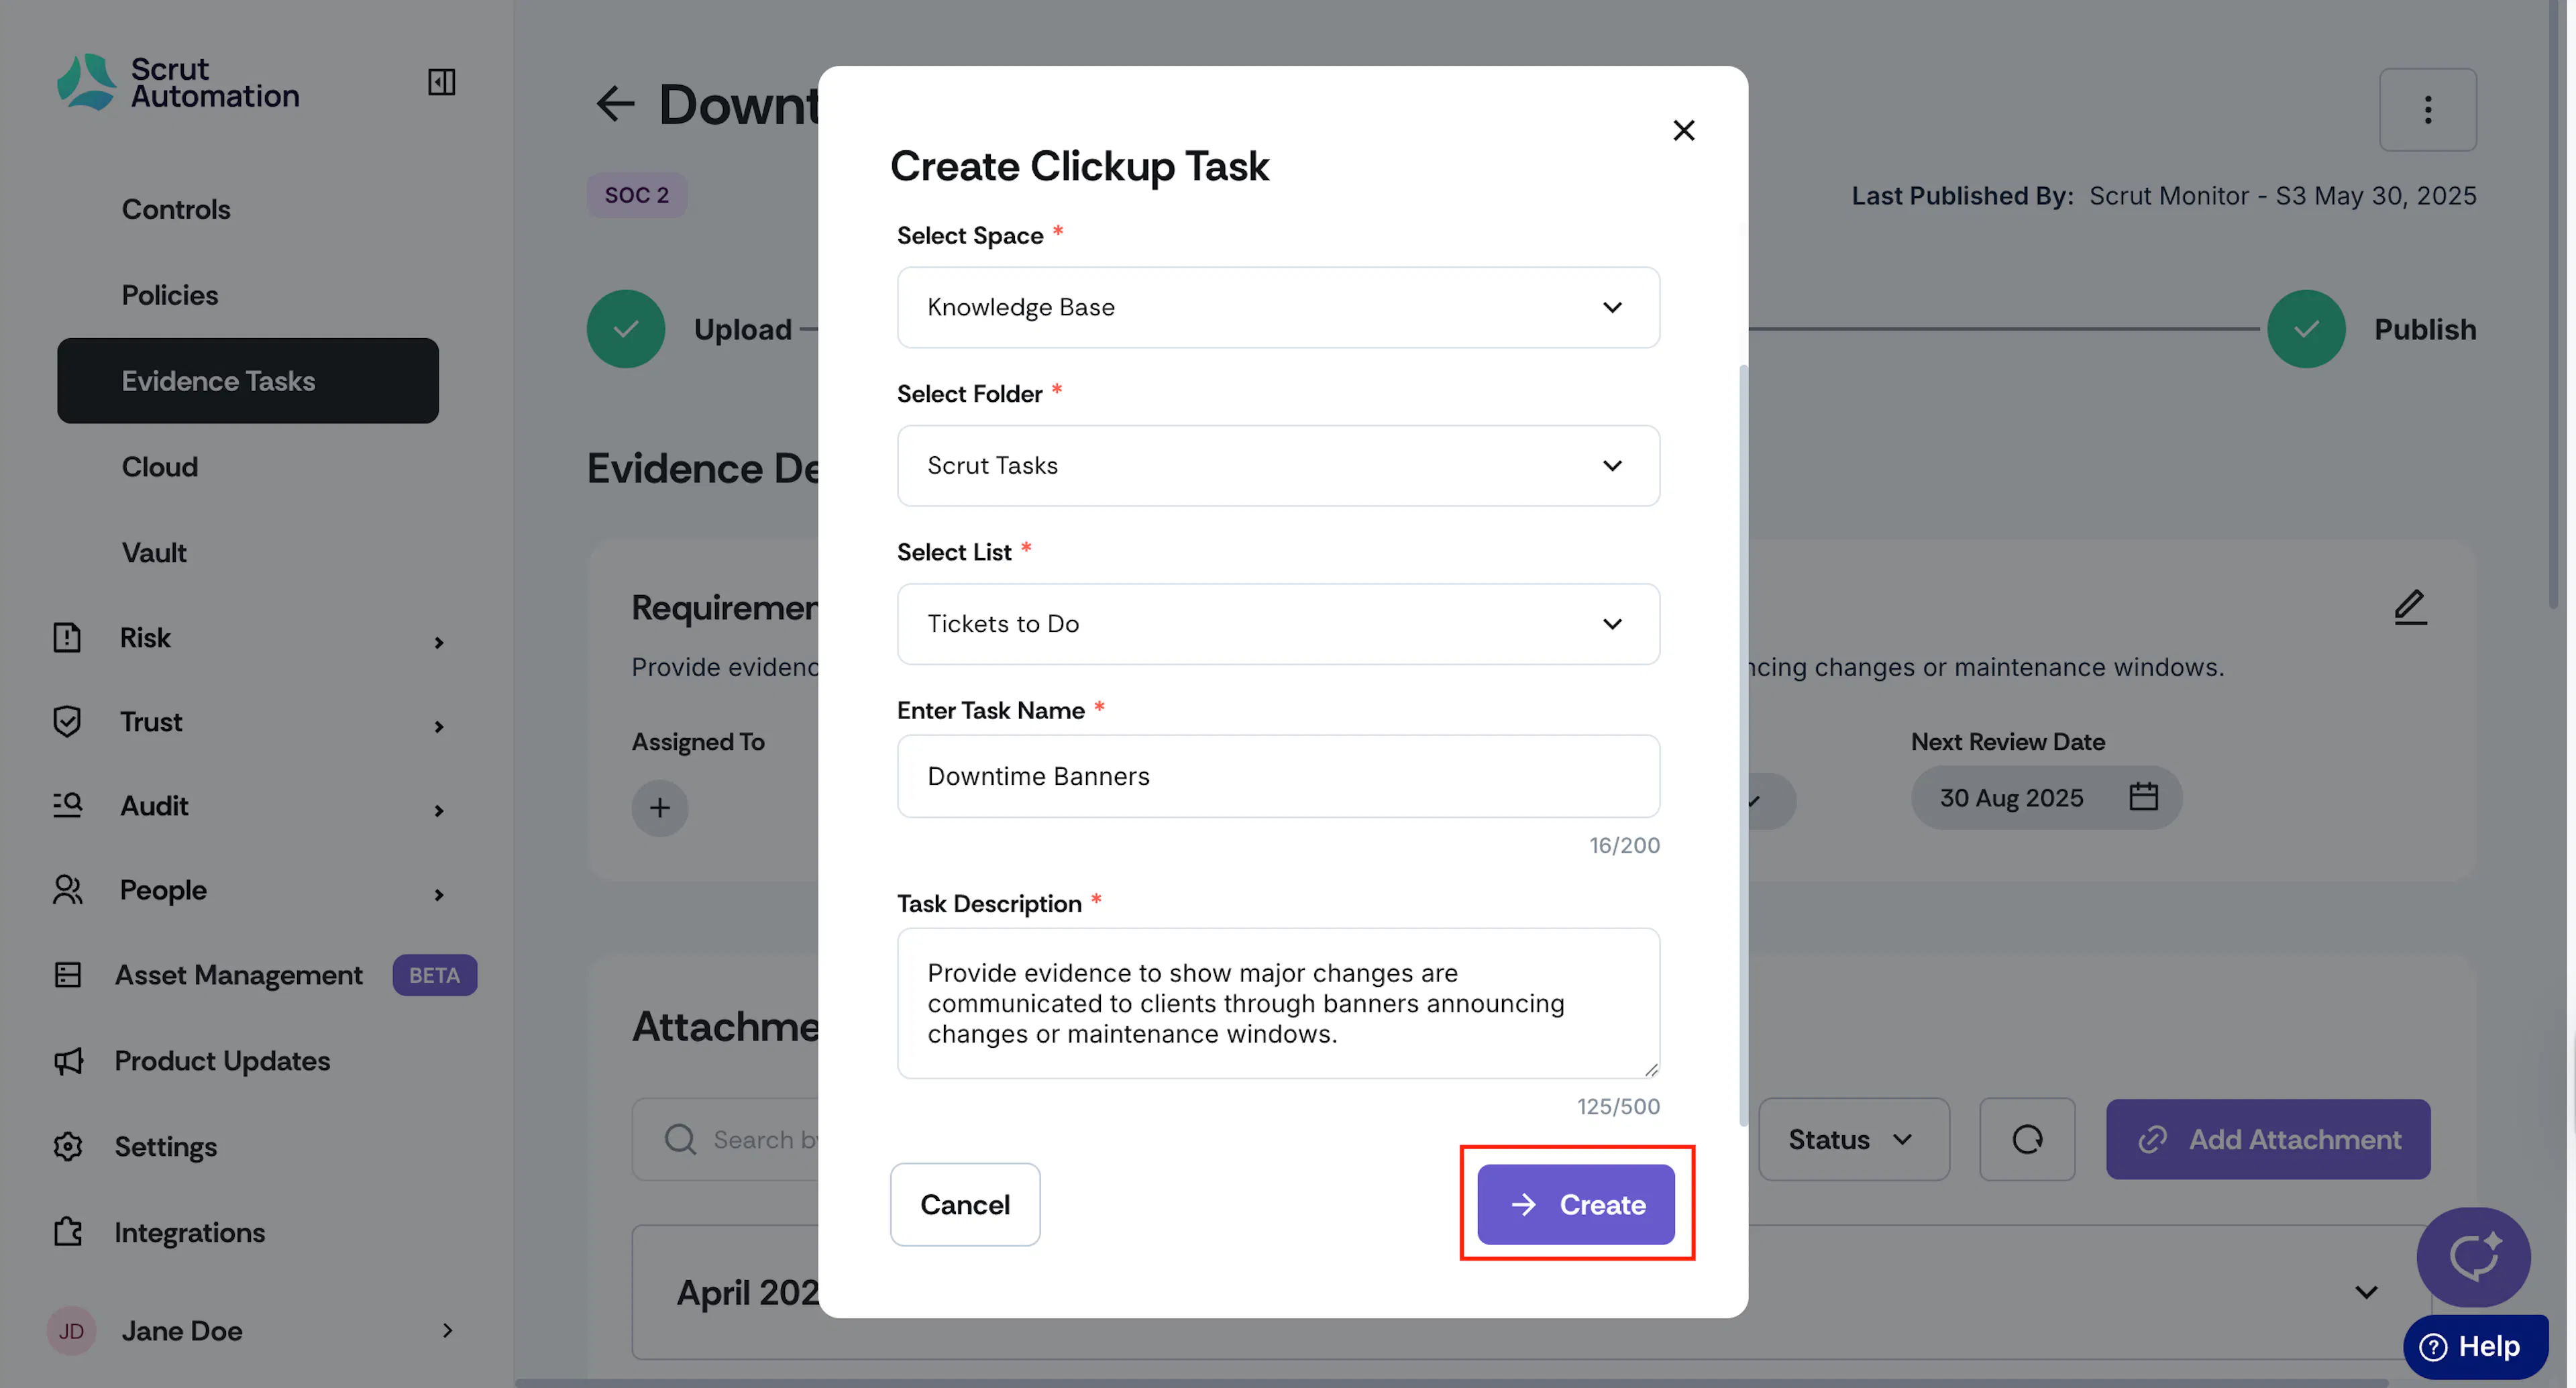
- Click the three-dots icon at the top-right of the page and select Create ClickUp Task.
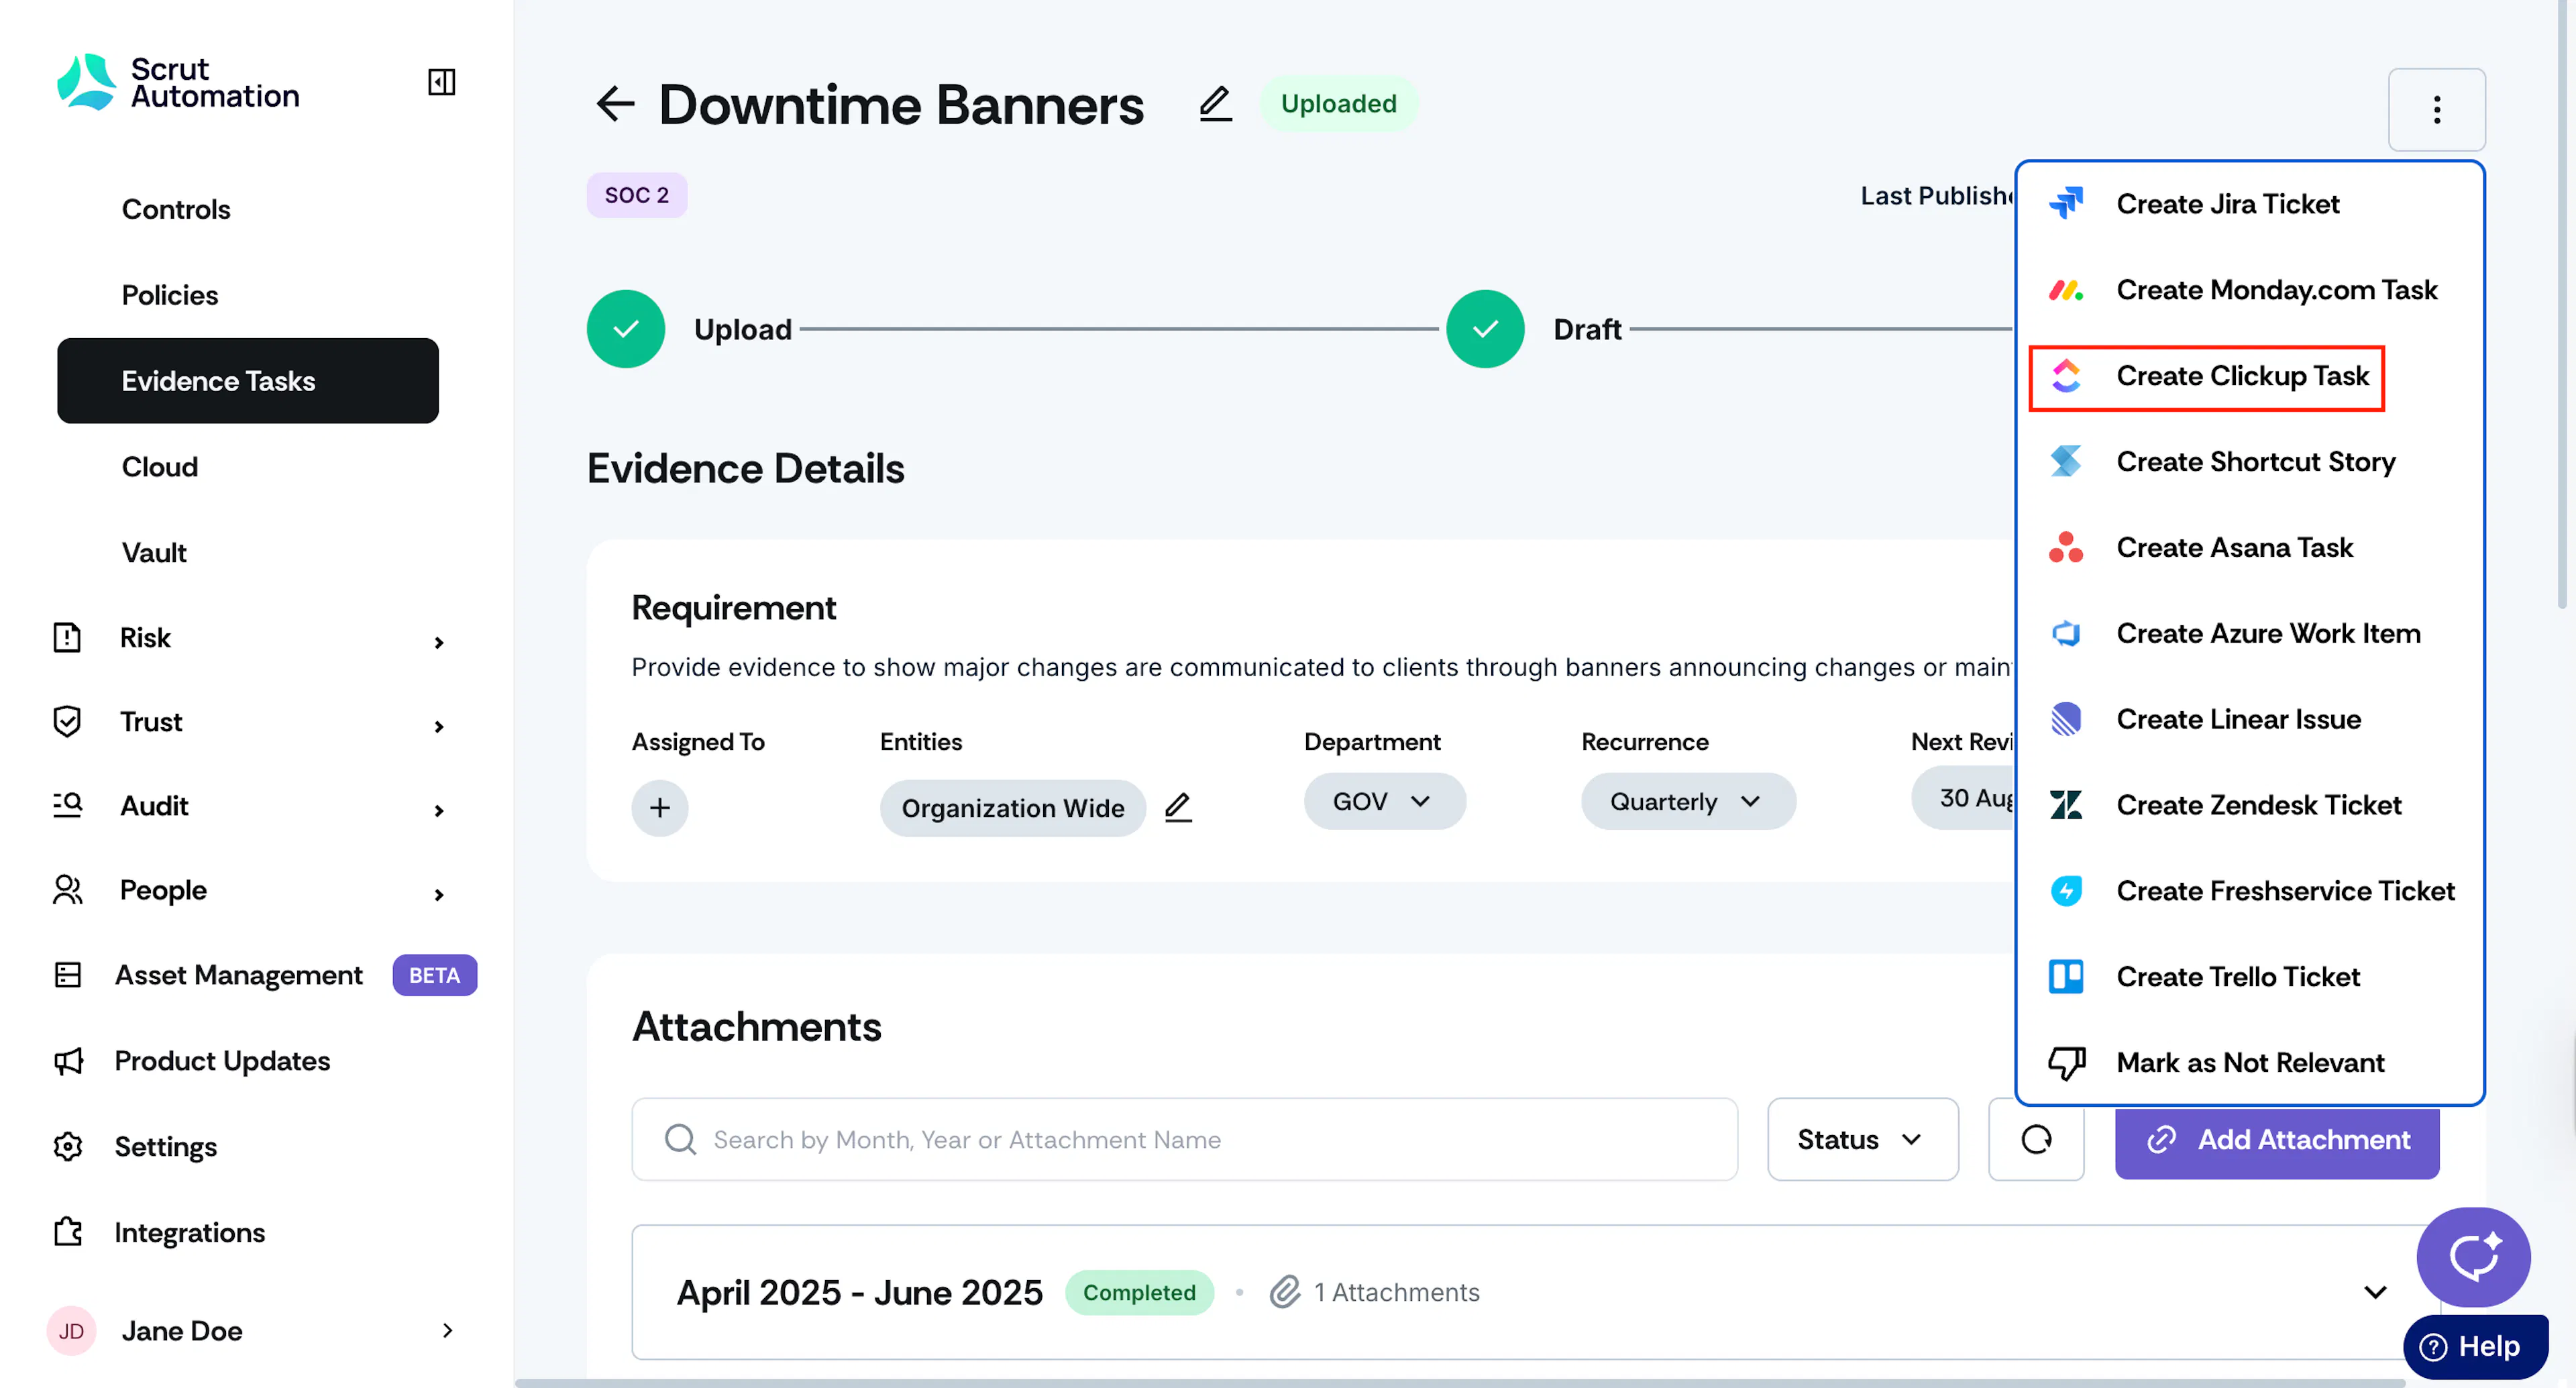
- Fill in the task details: Workspace, Space, Folder, List, Task Name, and Description. Scrut autofills the task name and description based on the compliance item. Edit them as needed.
- Click Create.
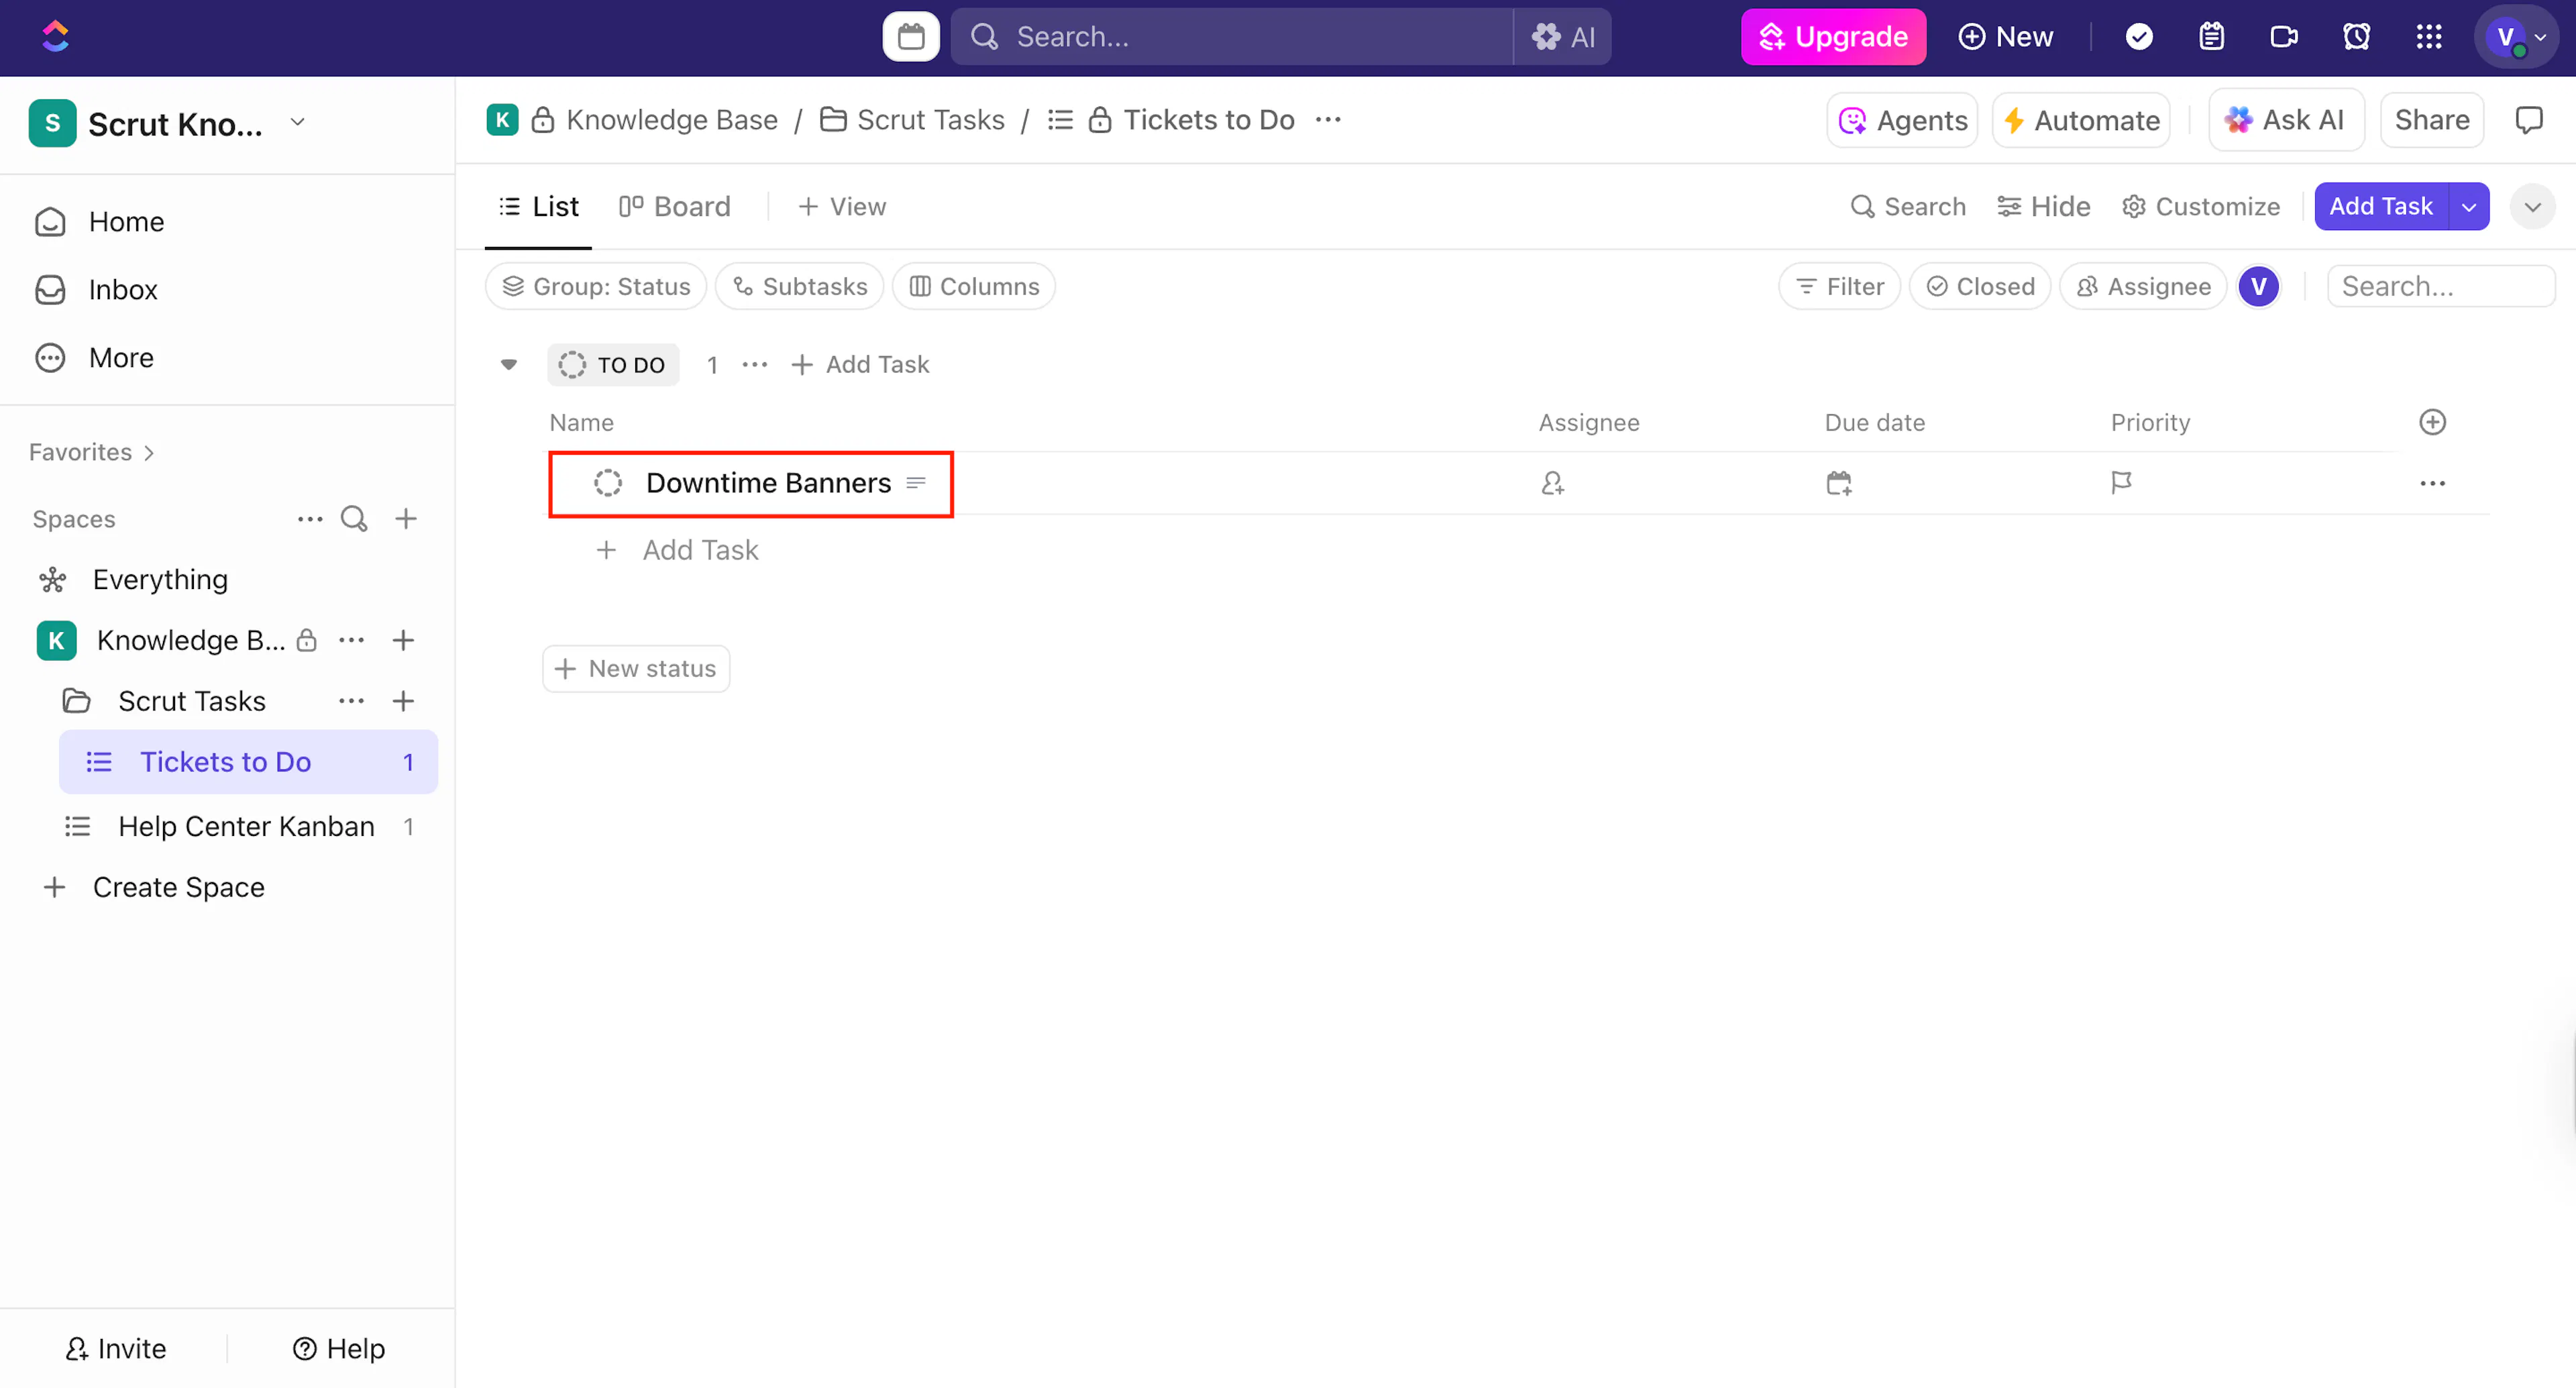
The task is created in ClickUp. You can open it in ClickUp to set the assignee, due date, priority and take further action.
Common Errors and Troubleshooting
Invalid Client ID or Secret
Possible solutions:
- Verify that you copied both credentials in full from the ClickUp API settings page.
- Check that no extra spaces were introduced when pasting.
- If credentials were regenerated after the initial setup, re-enter the updated values on the ClickUp integration page in Scrut and click Submit.
Integration Status Shows "Not Connected" After Setup
Possible solutions:
- Confirm you selected a workspace and clicked Connect Workspace before leaving the ClickUp authorization screen.
- Try disconnecting and reconnecting the integration from Integrations in Scrut.
Redirect URL Mismatch Error in ClickUp
Possible solutions:
- Confirm the redirect URL entered in ClickUp matches your Scrut region exactly.
- Check for trailing slashes or typos in the URL.
ClickUp Task Not Appearing After Creation
Possible solutions:
- Confirm that the correct workspace, space, folder, and list were selected in the task creation dialog.
- Refresh your ClickUp workspace and check the selected list.
- Check the Audit Log tab on the ClickUp integration page in Scrut for errors.
FAQs
Reach out to support@scrut.io or contact your CSM for further assistance.