

Integrate ServiceNow
The Scrut - ServiceNow integration fetches compliance data from your ServiceNow developer account and imports it into Scrut. Upon completing the integration, Scrut will display the fetched data in the following modules:
- Evidence Tasks
- Test
Prerequisites
Before starting the integration, ensure you have the following permissions for your ServiceNow account:
- Access Level: You require Admin access to your ServiceNow account.
Pro Tip:
We recommend logging into your ServiceNow account before starting the integration to avoid doing so later.
How To Integrate Scrut With ServiceNow
Step 1: Copy Client ID and Client Secret from ServiceNow
-
Log in to your ServiceNow Development dashboard and navigate to All → System OAuth → Application Registry.
-
Click on the New button to create a new OAuth endpoint.
-
Select Create an OAuth API endpoint for external clients.
-
Configure your new OAuth endpoint as needed, and set the Redirect URL based on your Scrut instance region.
-
This will generate the OAuth Endpoint with the Client ID and Client Secret you need.
Pro Tip!
For step-by-step instructions, refer to ServiceNow’s documentation.
-
Copy and save the Client ID and Client Secret, as you will need them in the next step.
Note:
The Client Secret will not be redisplayed. So, ensure that you store it in a safe location for easy access later.
Step 2: Connect Your ServiceNow Account in Scrut
-
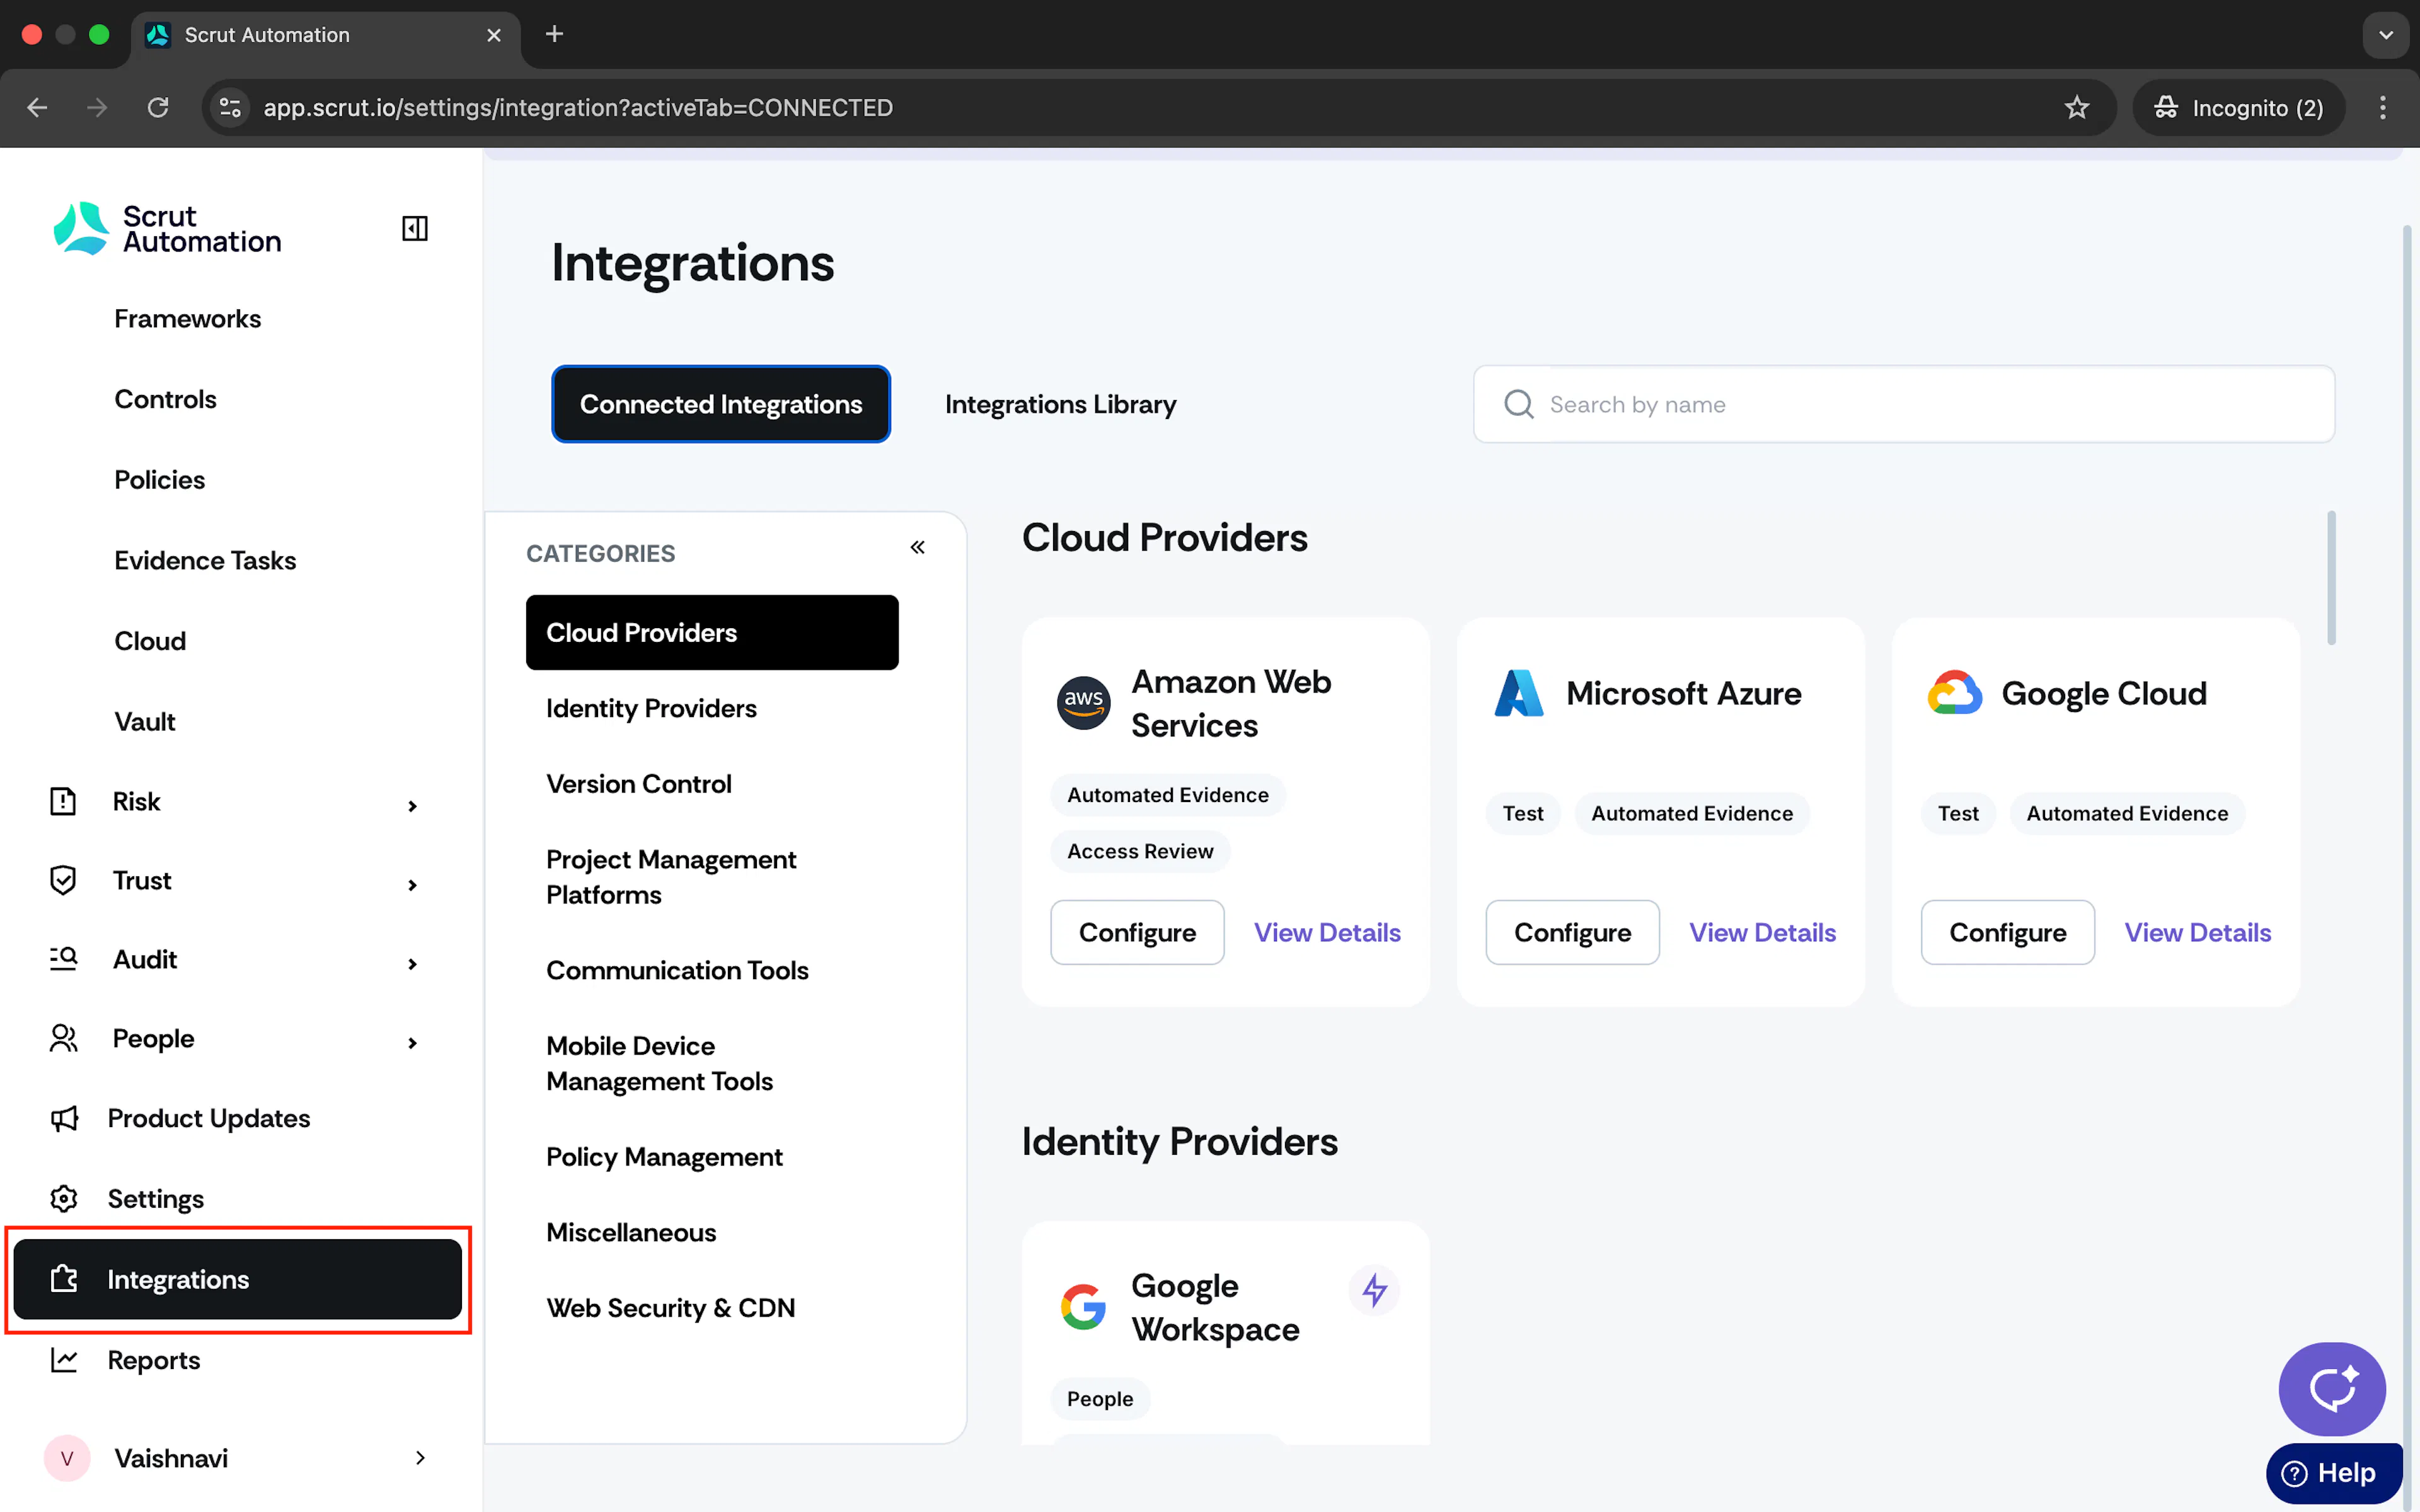
Sign in to your Scrut account and click Integrations on the left navigation panel.
-
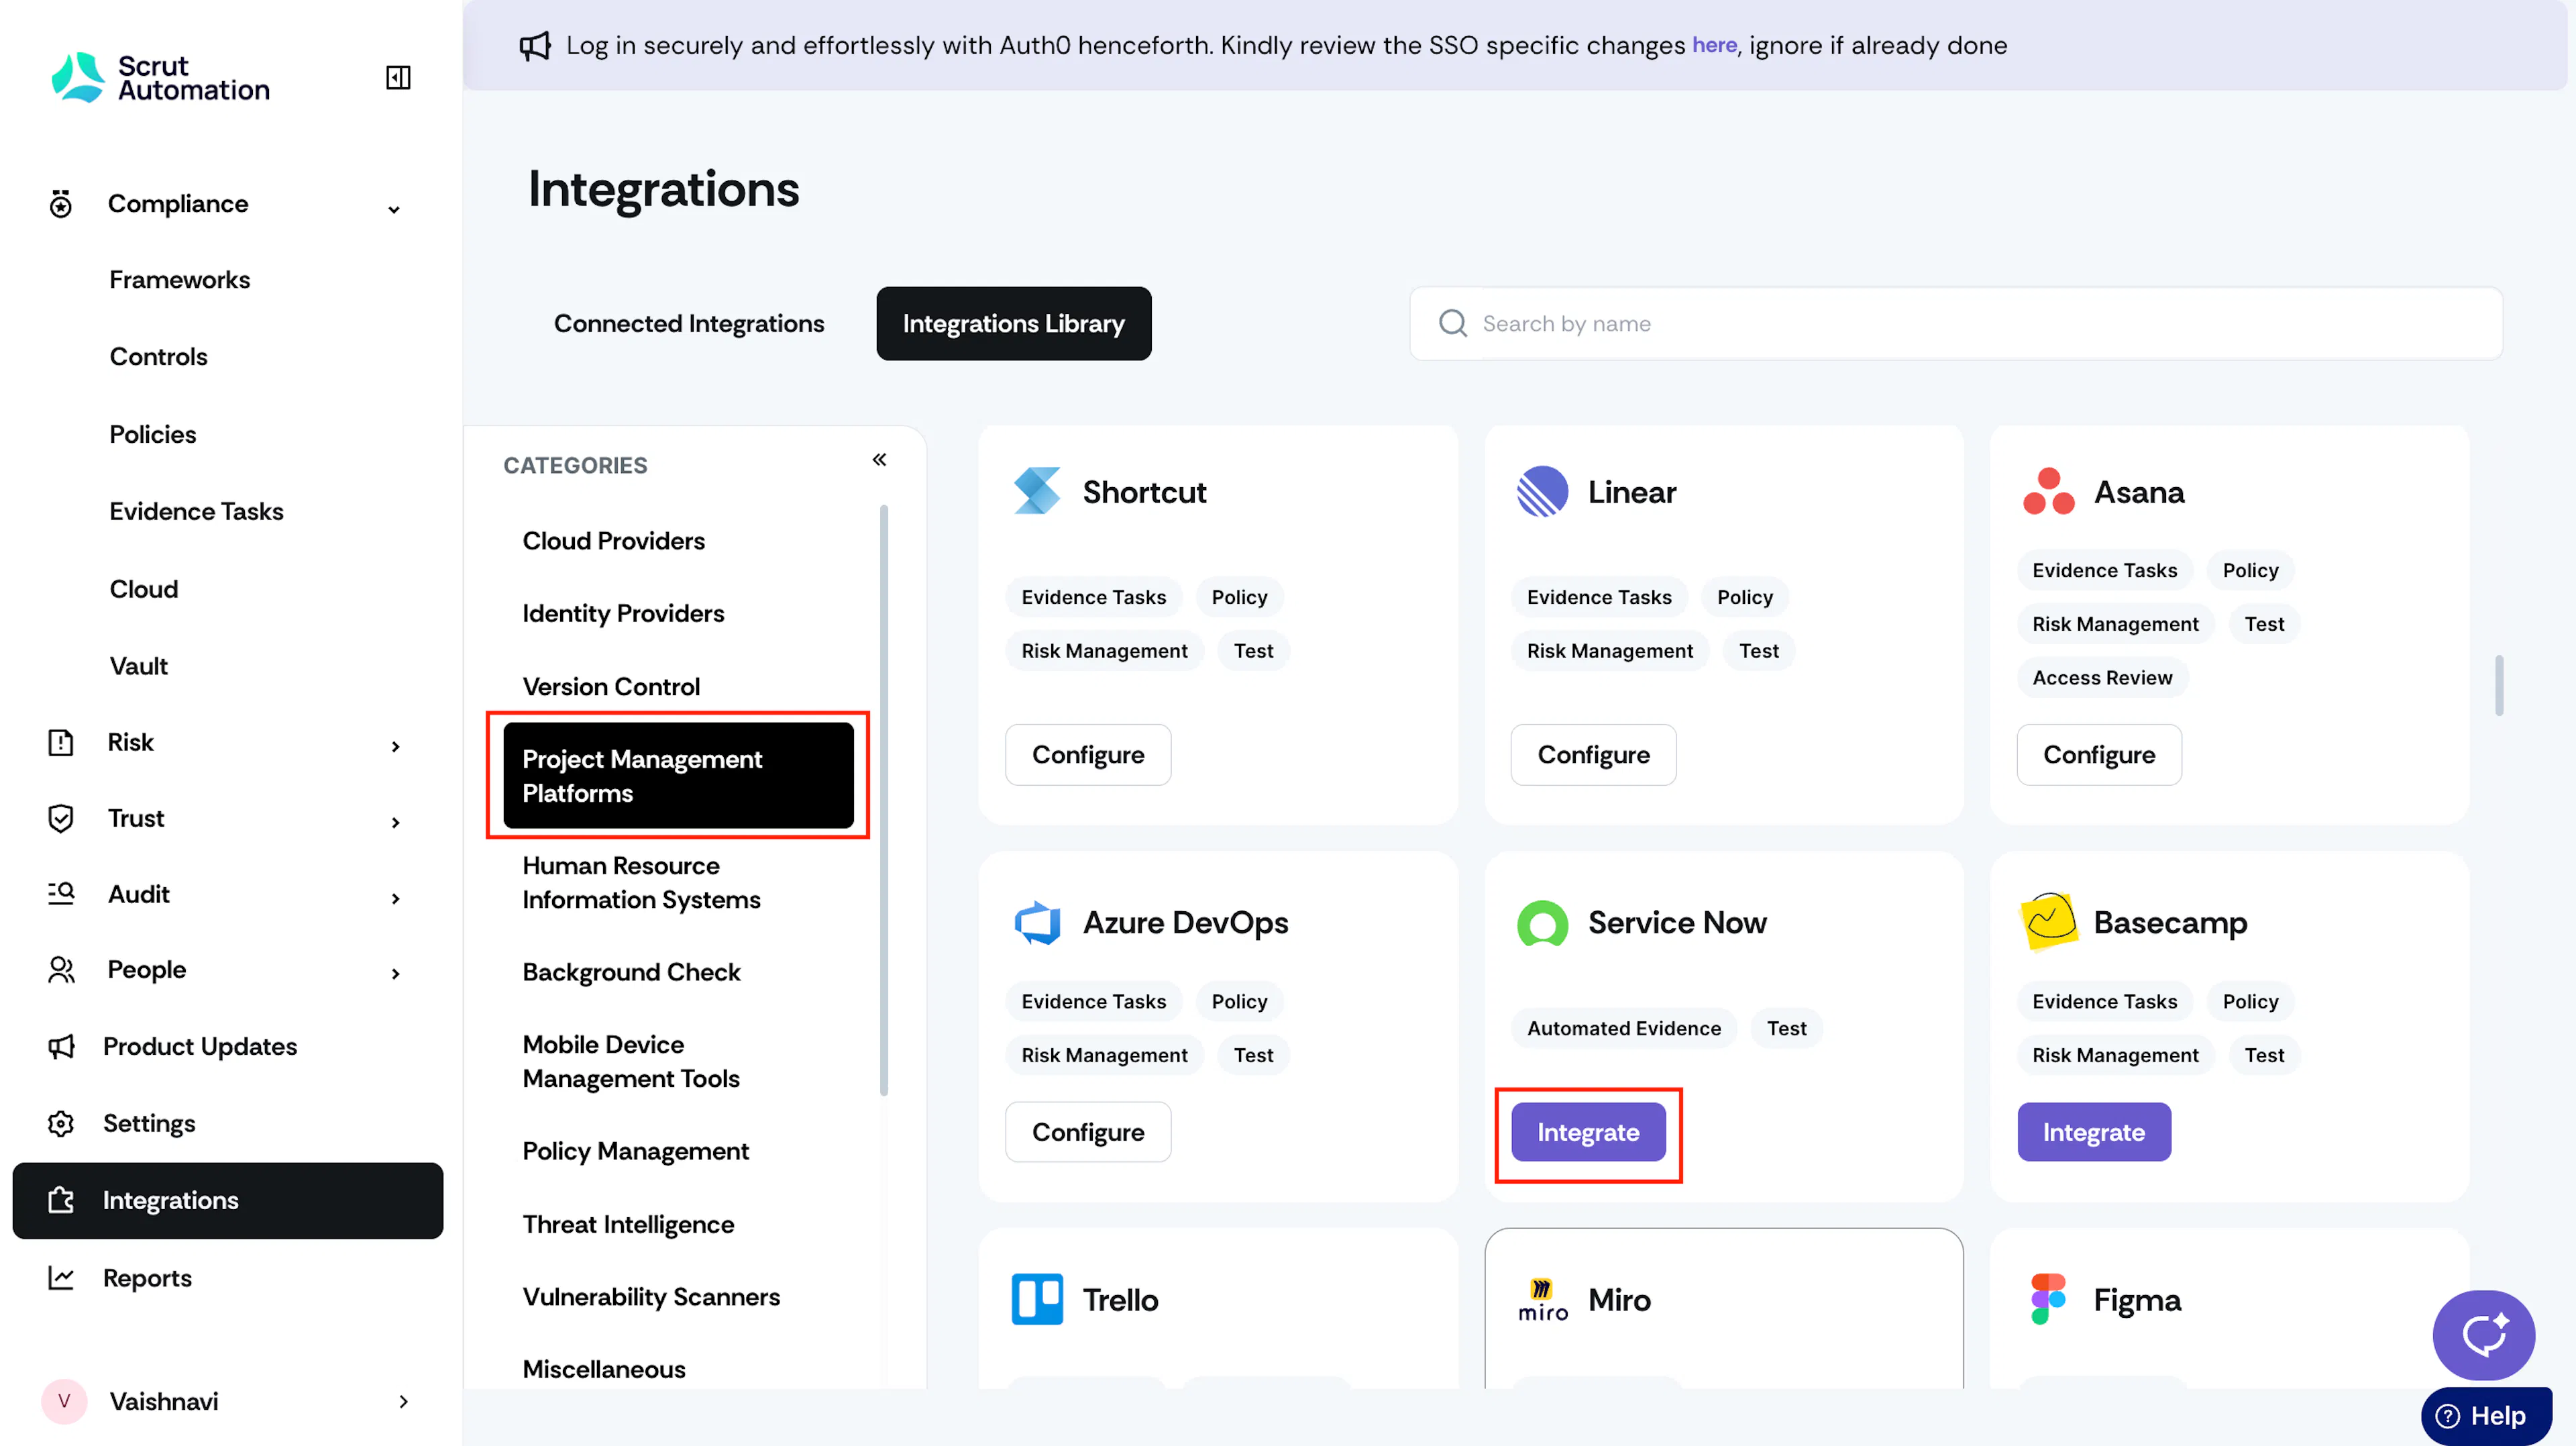
Navigate to the Integrations Library tab and choose Project Management Platforms in the Categories section.
-
Scroll to the ServiceNow tile and click Integrate.
-
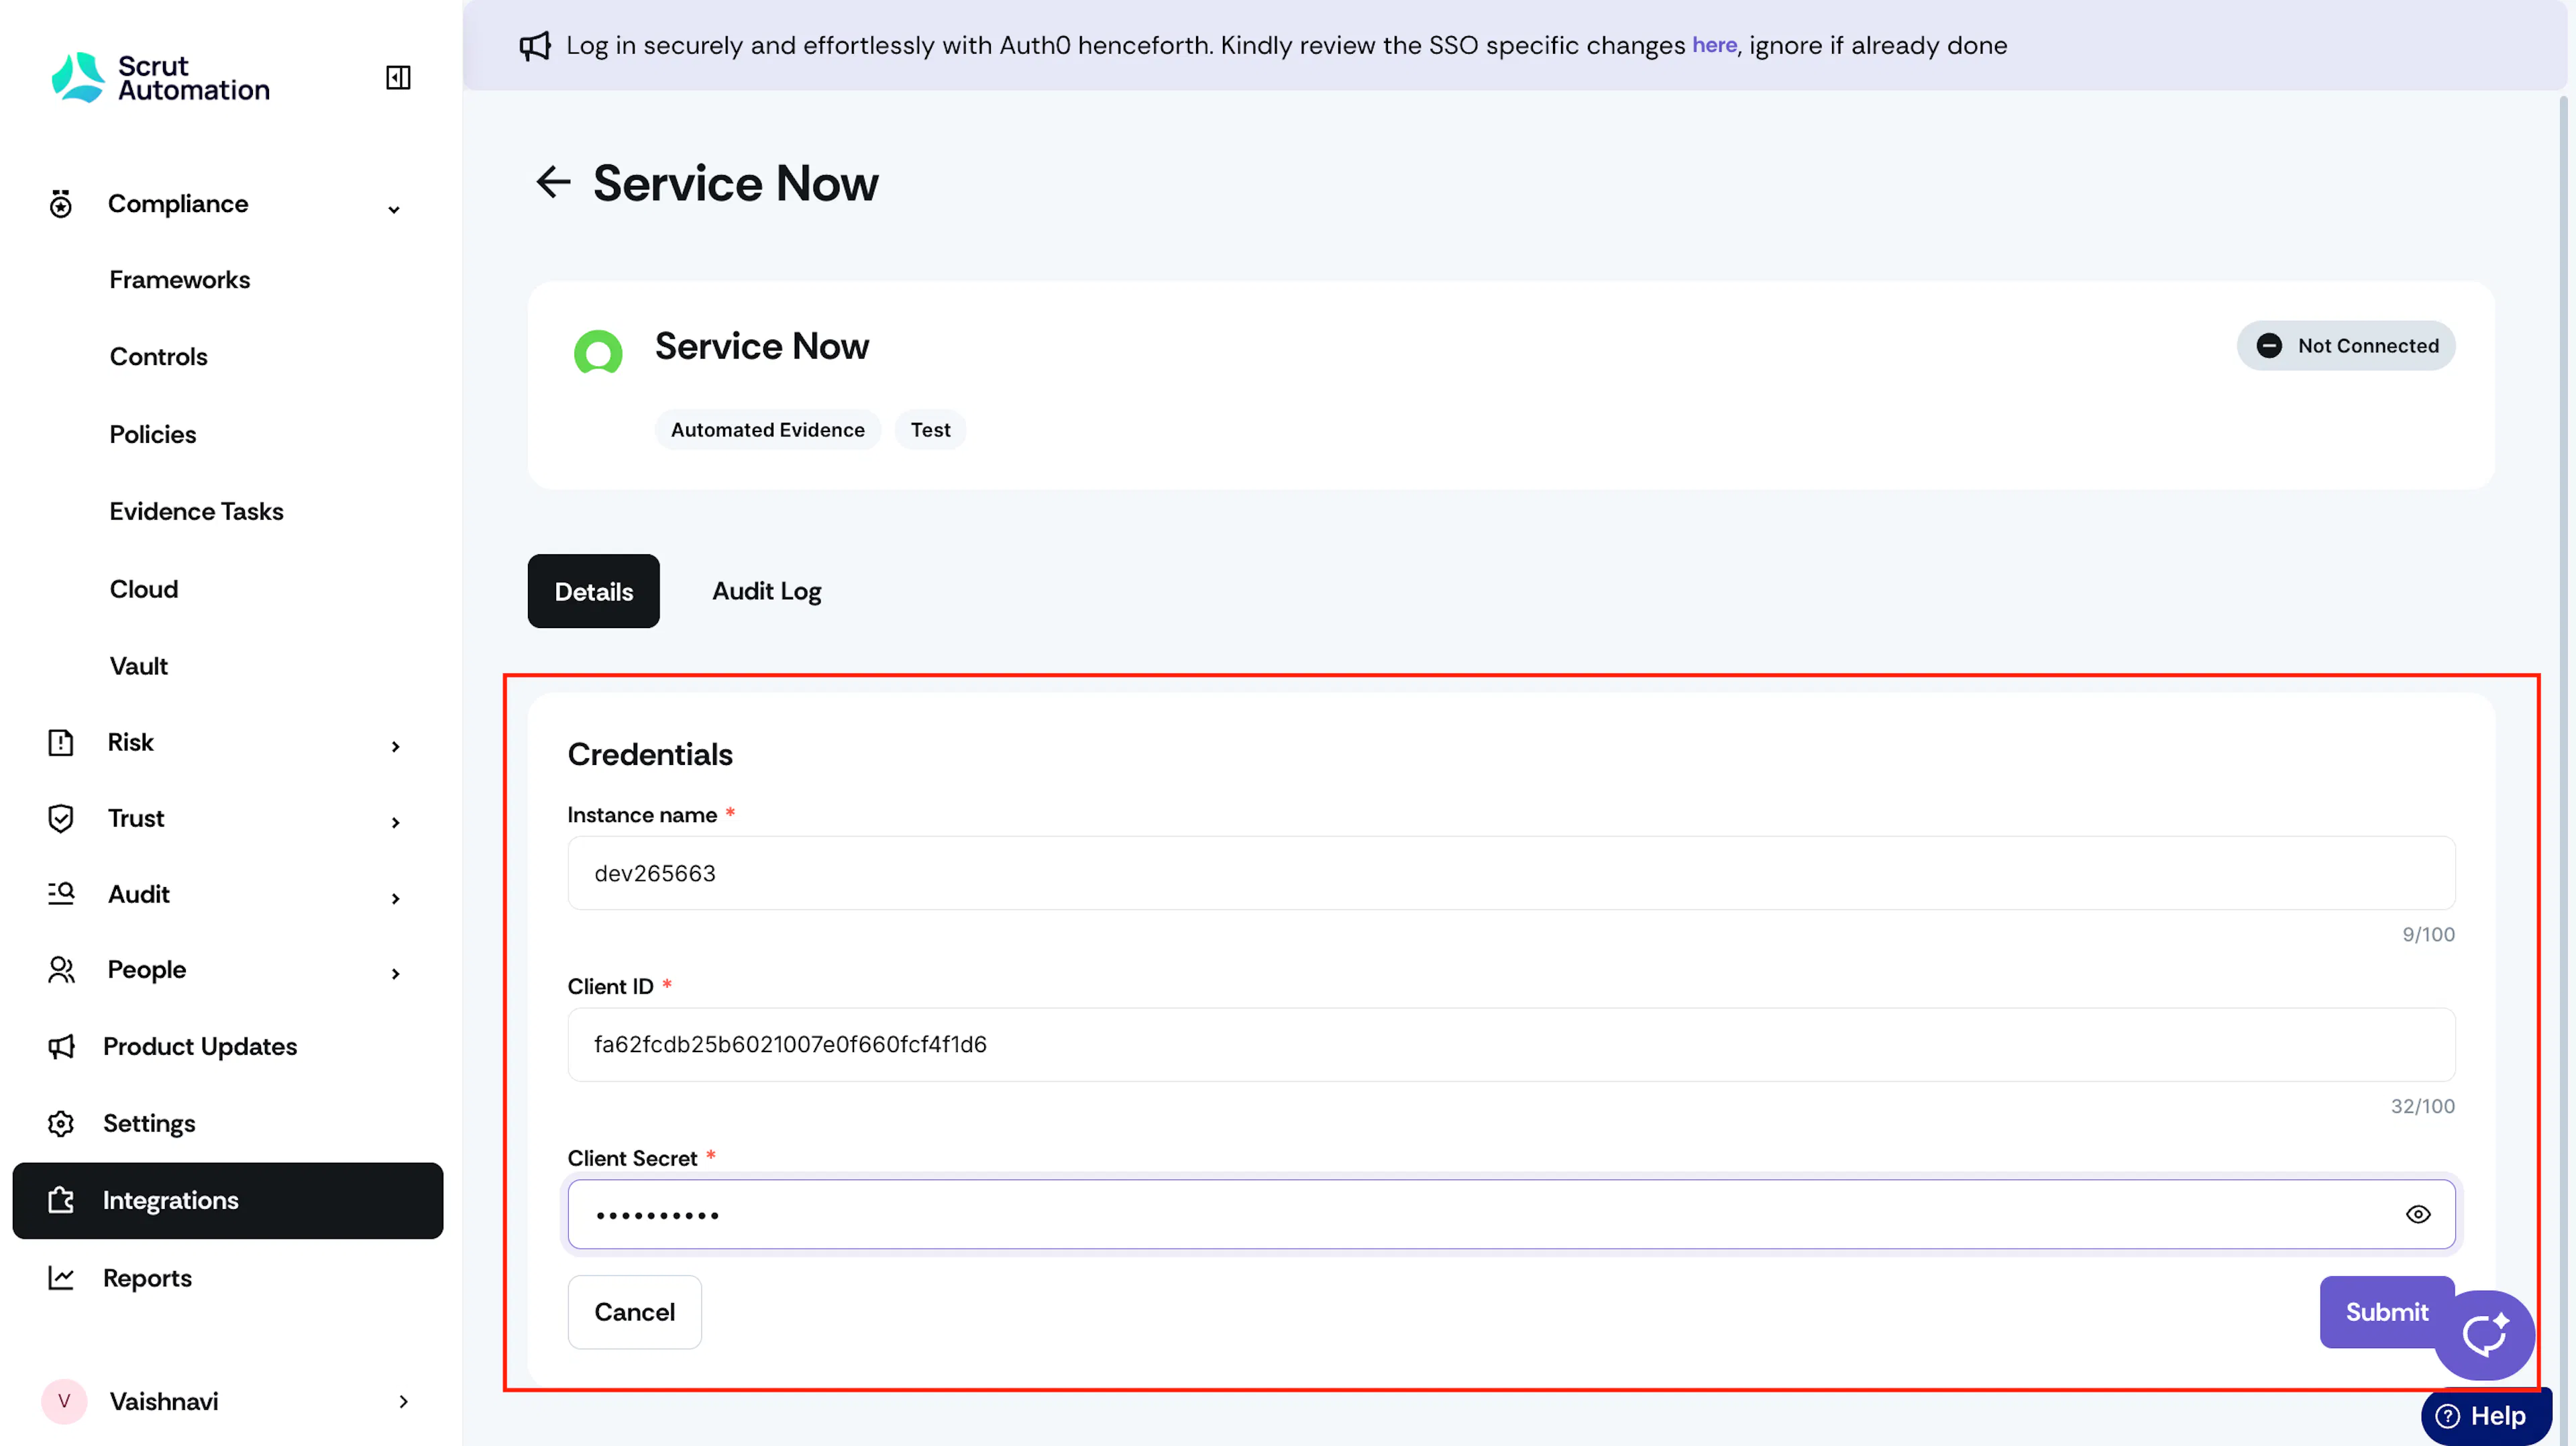
On the ServiceNow integration page, enter your ServiceNow Instance Name.
Heads Up!
ServiceNow instances follow this naming convention: https://<INSTANCE_NAME>.service-now.com, where <INSTANCE_NAME> is your ServiceNow Instance Name.
-
Paste the Client ID and Client Secret from Step 1.
-
Click Submit.
-
Click Authorize to grant the required permissions.
-
Once authorization is done, you’ll see the “Connected Successfully” message and the Connected status indicator.
Data Fetched from ServiceNow
Scrut fetches the following data points from ServiceNow:
- List of Users: Username, Name, Email, Title, Department, Active, MFA Enabled, Created
- List of Groups: Name, Description, Active, Manager, Parent, Updated
- List of Incidents: number, opened_at, short_description, caller_id.value, priority, state, category, assignment_group.value, assigned_to.value, sys_updated_on, sys_updated_by
- List of Tasks/Issues: active, assigned_to, sys_created_on, short_description, escalation number, priority, state
Note:
Refer to ServiceNow’s documentation for more information on the task table fields.
If you encounter any difficulties connecting ServiceNow with Scrut, please get in touch with the Scrut support team at support@scrut.io.