

Configure Policies in a Checklist
Learn how to add policies to an employee checklist, set each policy’s behavior, assign the checklist to a group, and track policy acceptance.
Adding policies to a checklist assigns them to employees as a Policy Acceptance task, so you can collect and track policy acknowledgments for your audits. This tutorial walks you through the full setup, from preparing your policies to tracking who has accepted them.
Before You Begin
Make sure that:
- Your employees are imported into Scrut through your HRIS, Identity Provider (IdP), or manual upload.
- The policies you want employees to accept are in Published status. You can add any policy to a checklist, but employees can only review and accept published policies. See Understand Policy Statuses for more detail.
- You know which policies employees must formally accept and which they only need to read.
Step 1: Set Each Policy's Behavior
Every policy has a Policy Behavior setting that decides how it appears in a checklist:
| Attribute | Requires Acceptance | Read-only |
|---|---|---|
| Appears as a checklist task | Yes | No |
| Has a due date and sends reminders | Yes | No |
| Can go overdue | Yes | No |
| Counts toward Policy Acceptance Rate | Yes | No |
| Counts toward checklist completion | Yes | No |
| Employee action required | Accept the policy | None, always available to read |
Requires Acceptance is the default for every policy. Change it only for policies you want to share as reference material. To change a policy's behavior:
- Navigate to Compliance → Policies.
- Click the All Policies tab and select the policy.
- On the Policy Details page, locate the Policy Behavior field.
- Select Requires Acceptance or Read-only.
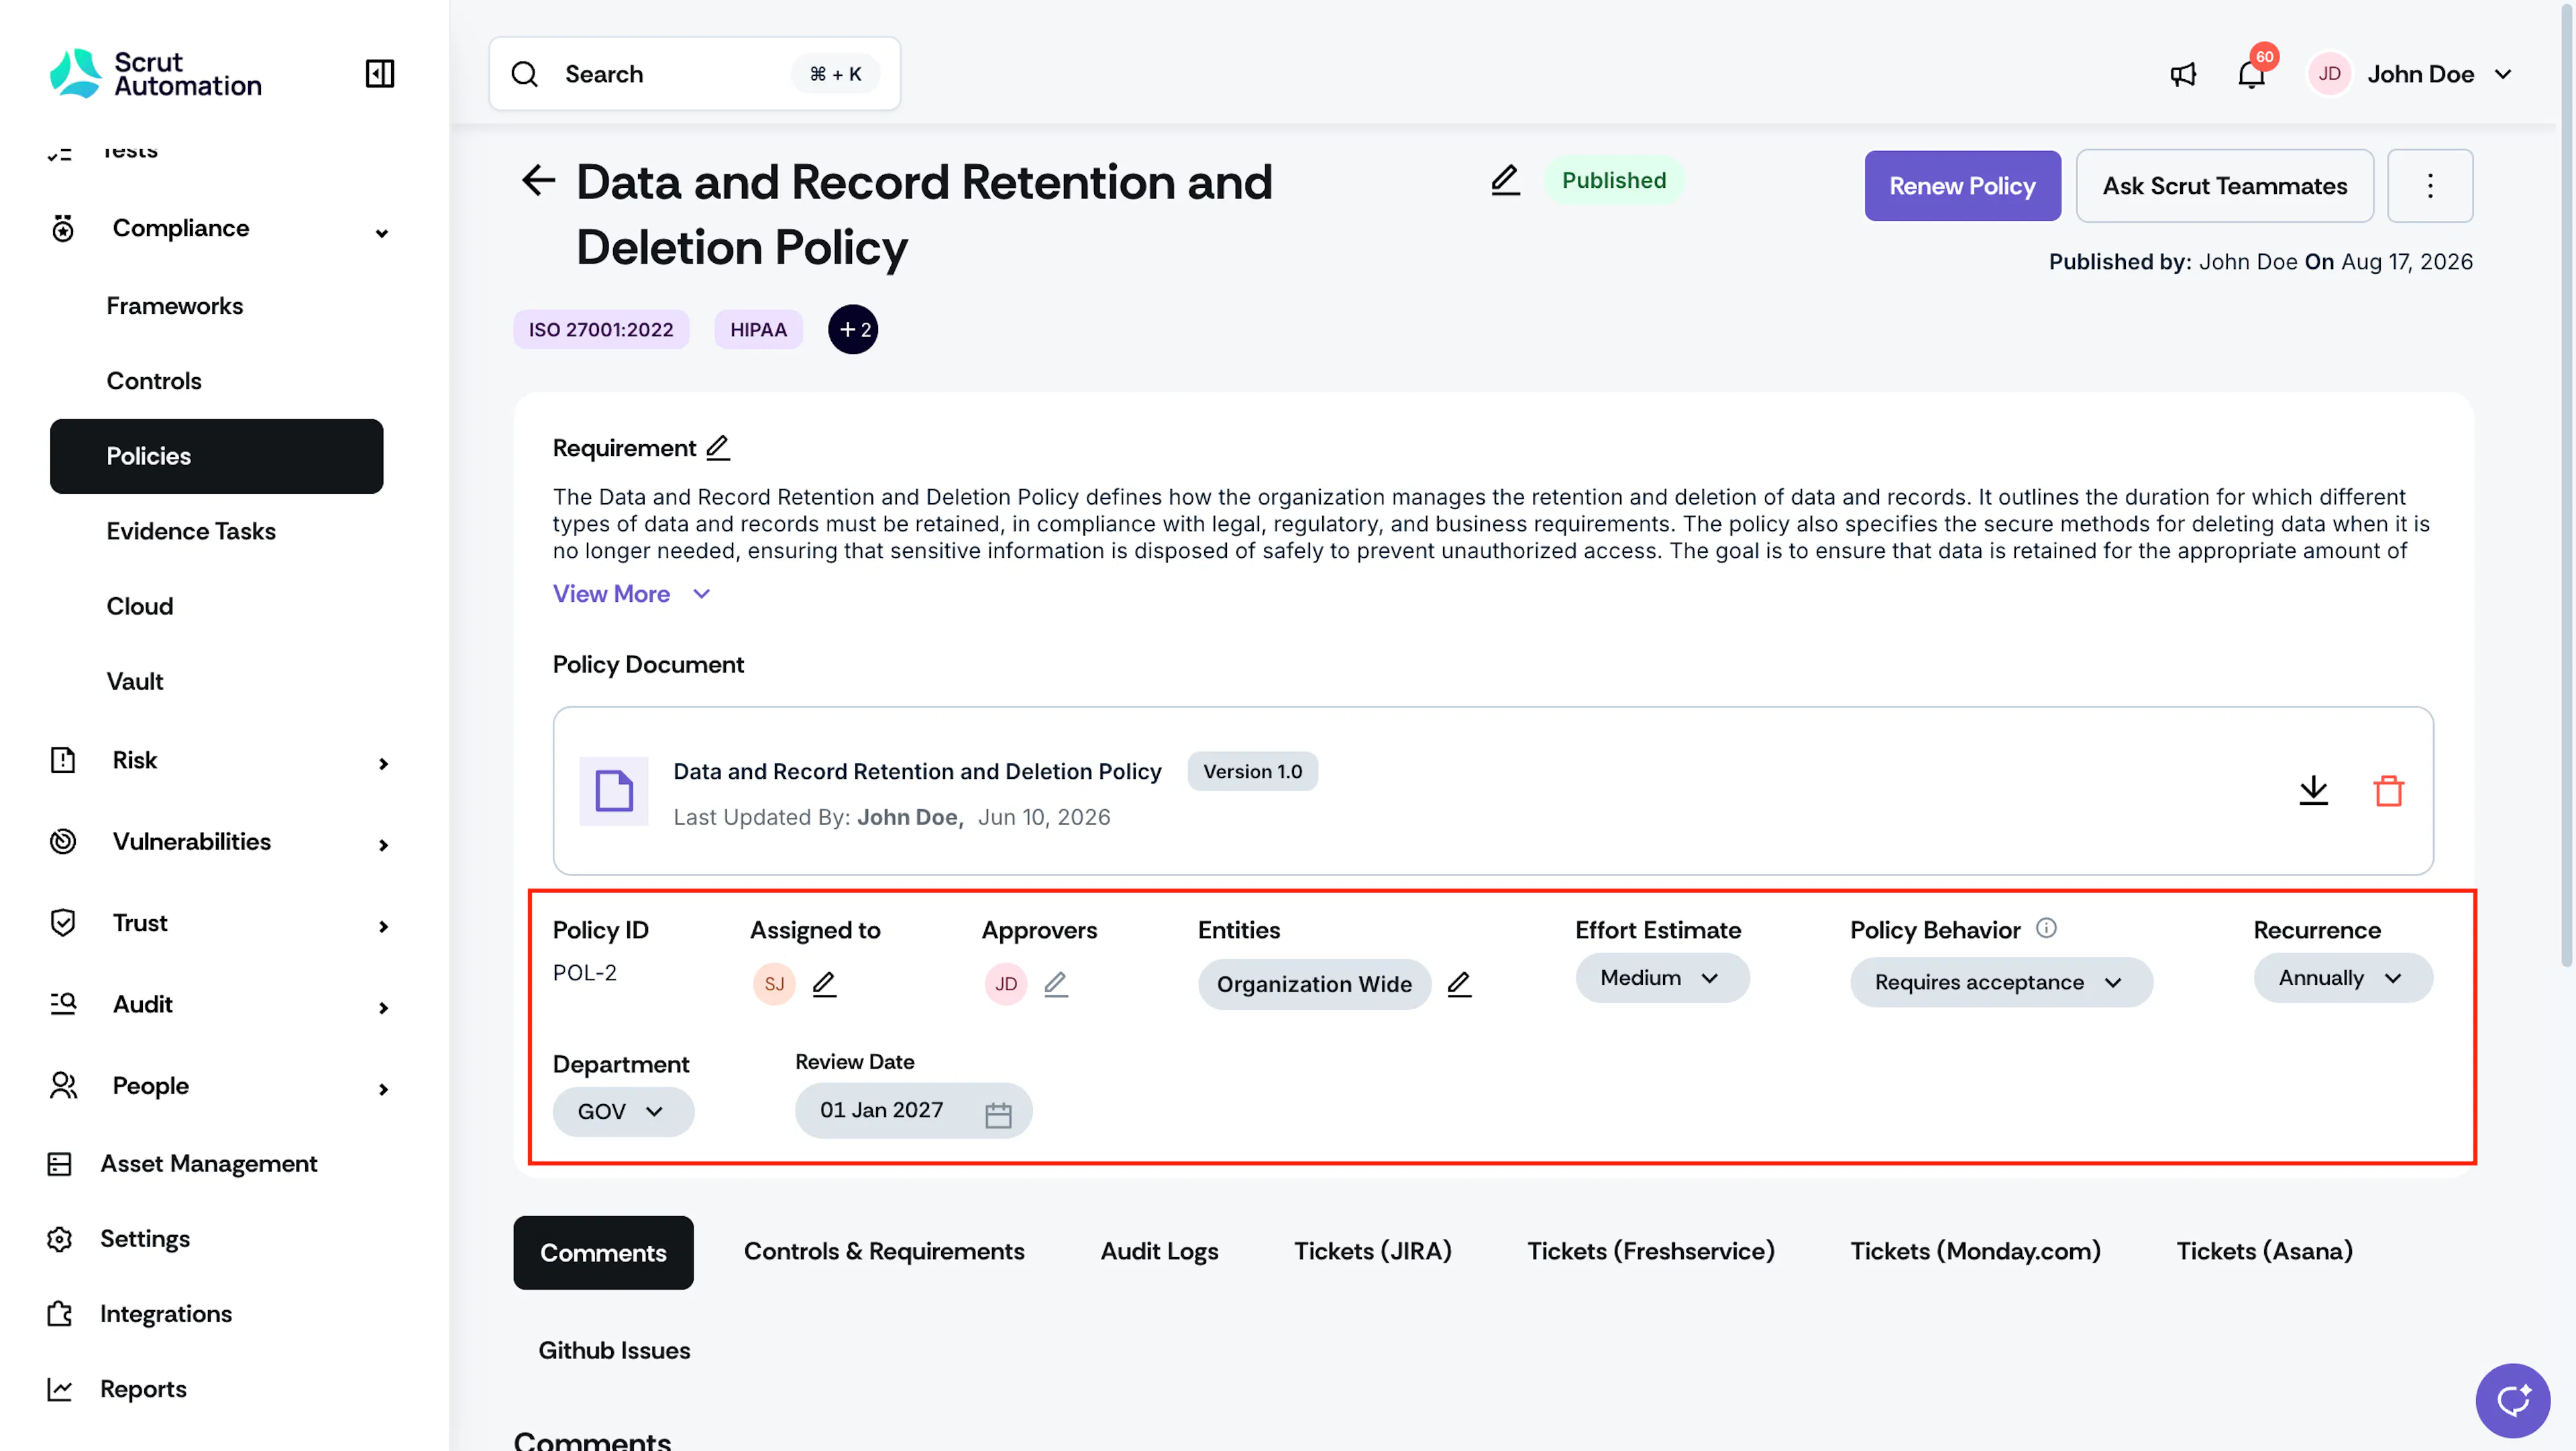
Heads Up! Policy Behavior is a global setting. It applies to every checklist and every employee the policy is assigned to, and you can't change it from the checklist screen.
Step 2: Open the Checklist
You can add policies to the Scrut Default checklist, which Scrut creates automatically when you import employees, or to a role-specific checklist you create.
- Navigate to People → Employees and click the Settings icon in the top-right.
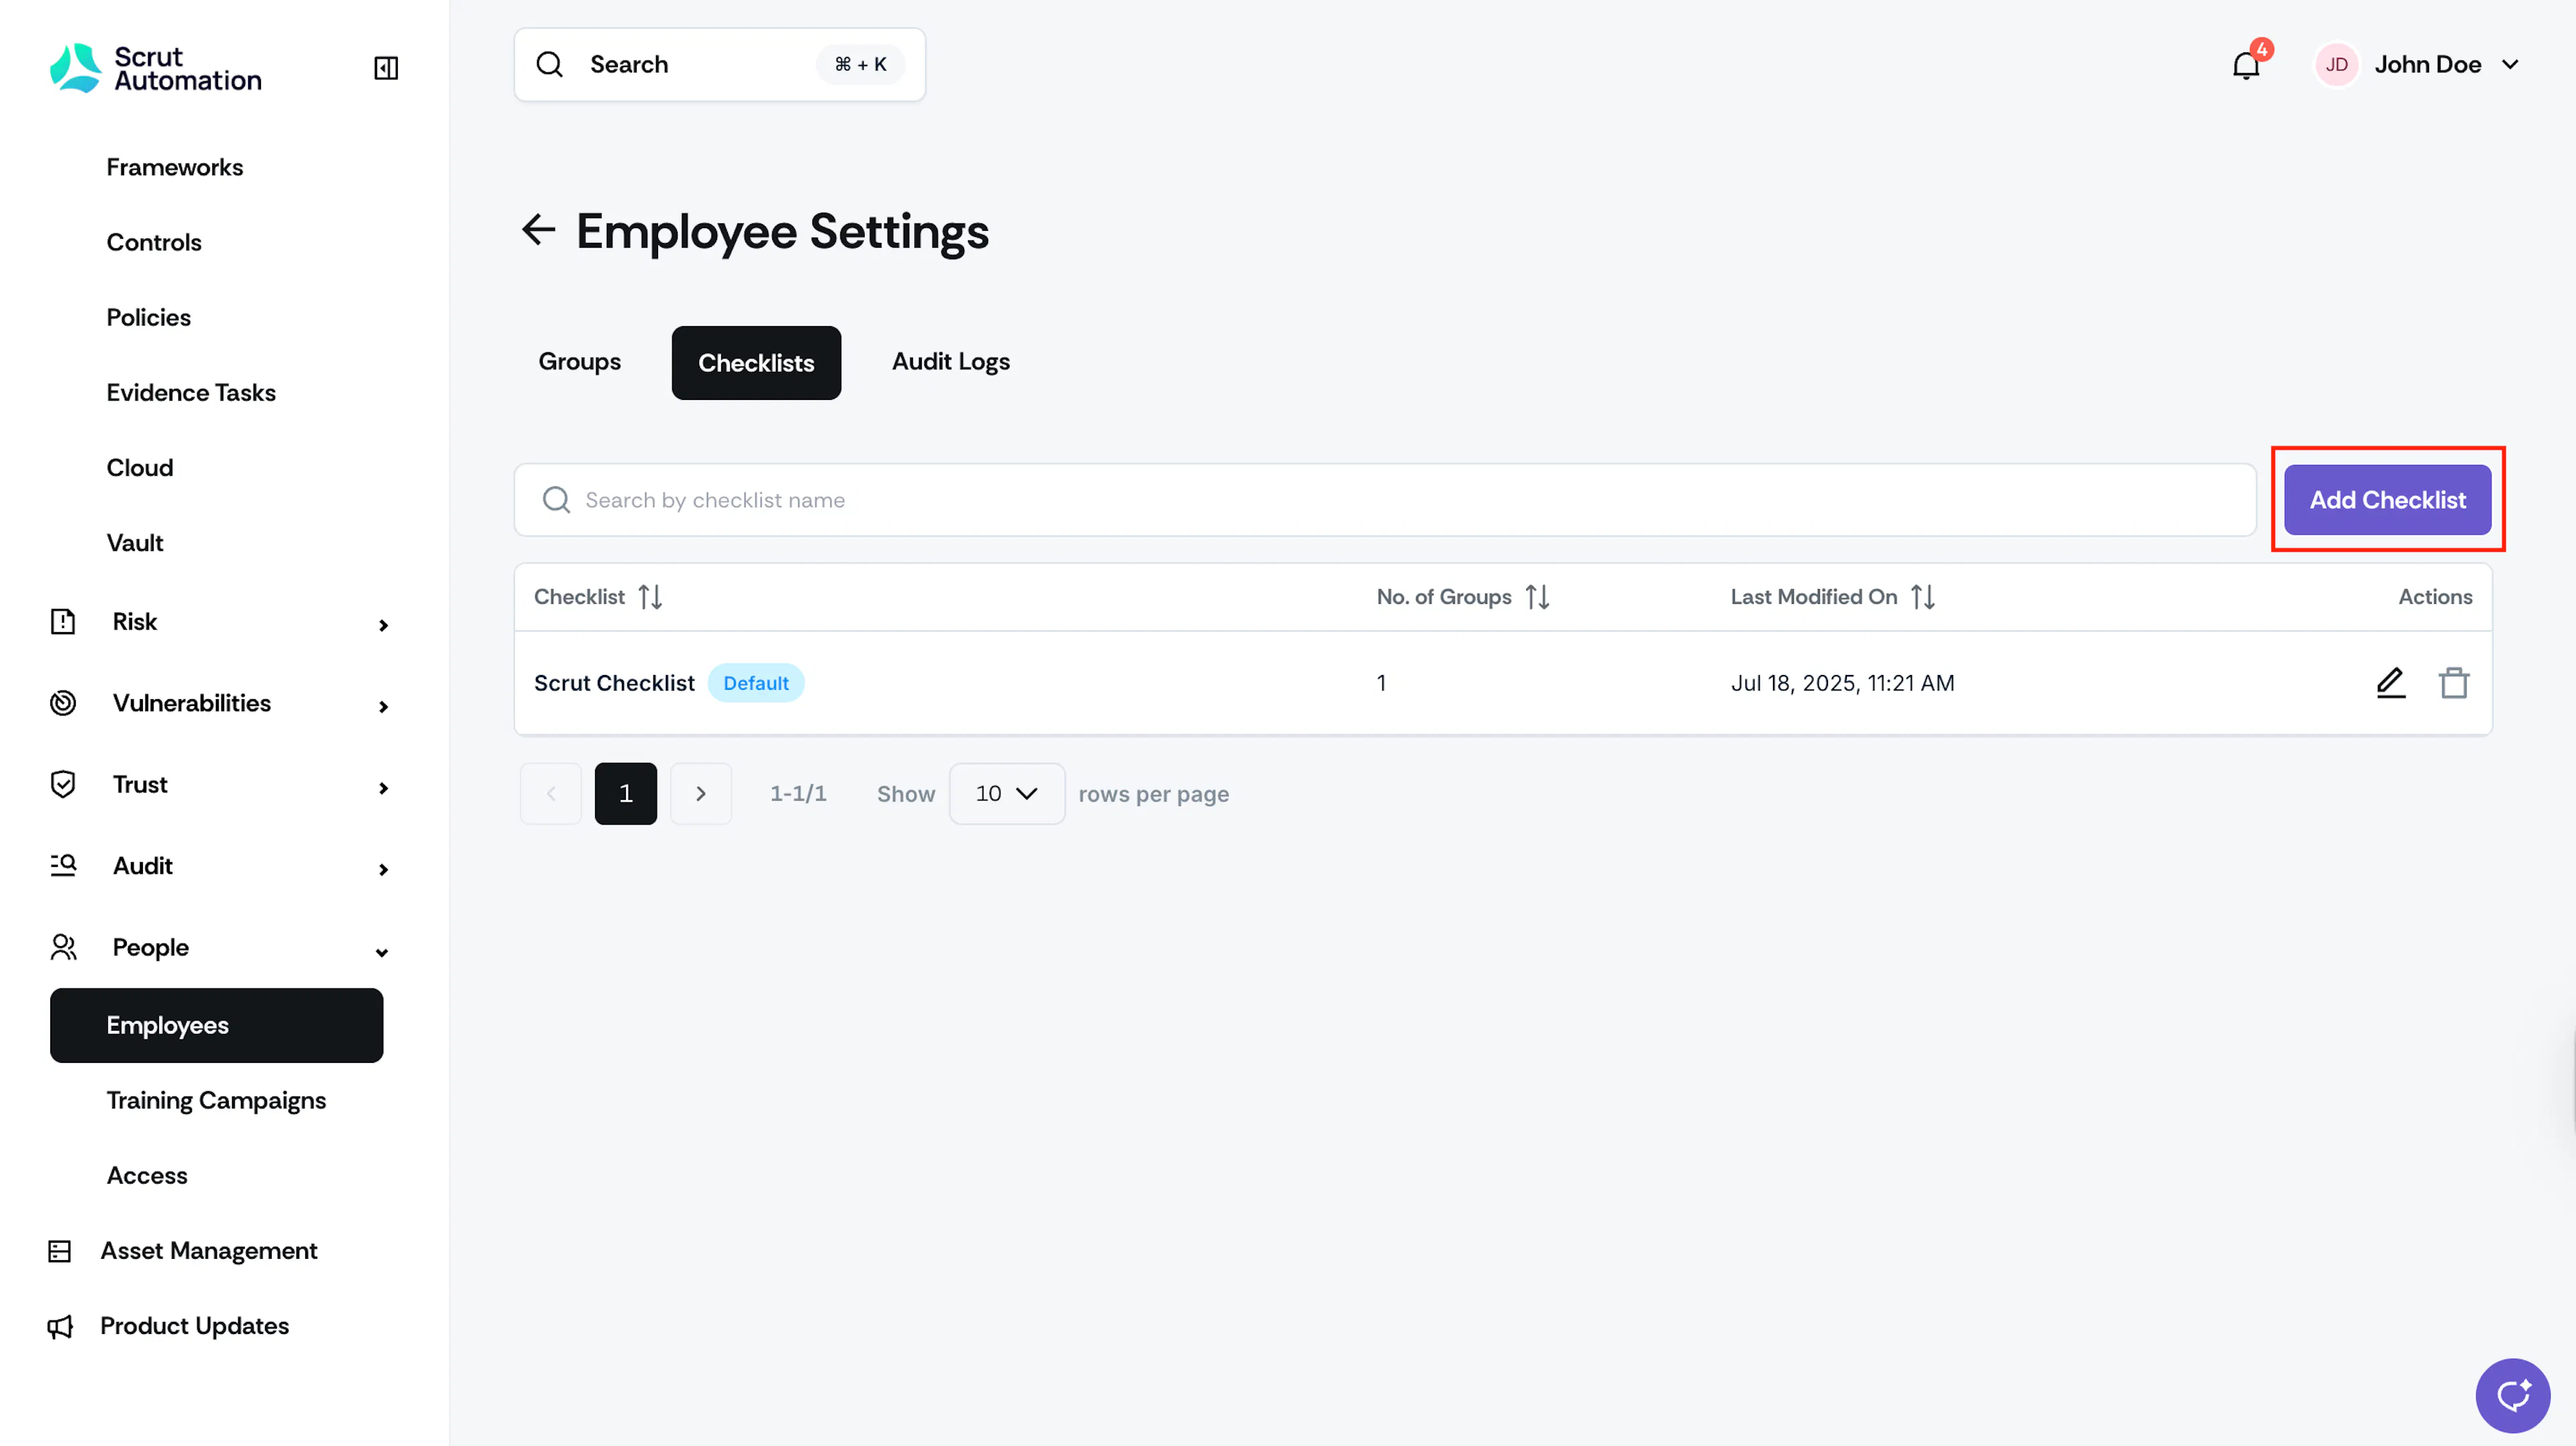
- Click the Checklists tab.
- Choose one of the following:
- To use the default checklist, locate Scrut Checklist and click Edit.
- To create a new checklist, click Add Checklist and enter a name for the checklist. Note: You can't delete the Scrut Default checklist, but you can rename it, for example, to "Compliance Essentials."
Step 3: Add Policies to the Policy Acceptance Task
-
Under Ongoing Tasks, locate the Policy Acceptance task.
-
Select the policies you want employees to accept.
Policies set to Read-only display a Read-only flag next to their name. You can include them so employees can read them, but they don't count toward checklist completion.
-
Turn on the Show Selected Policies toggle to review the policies you've selected.
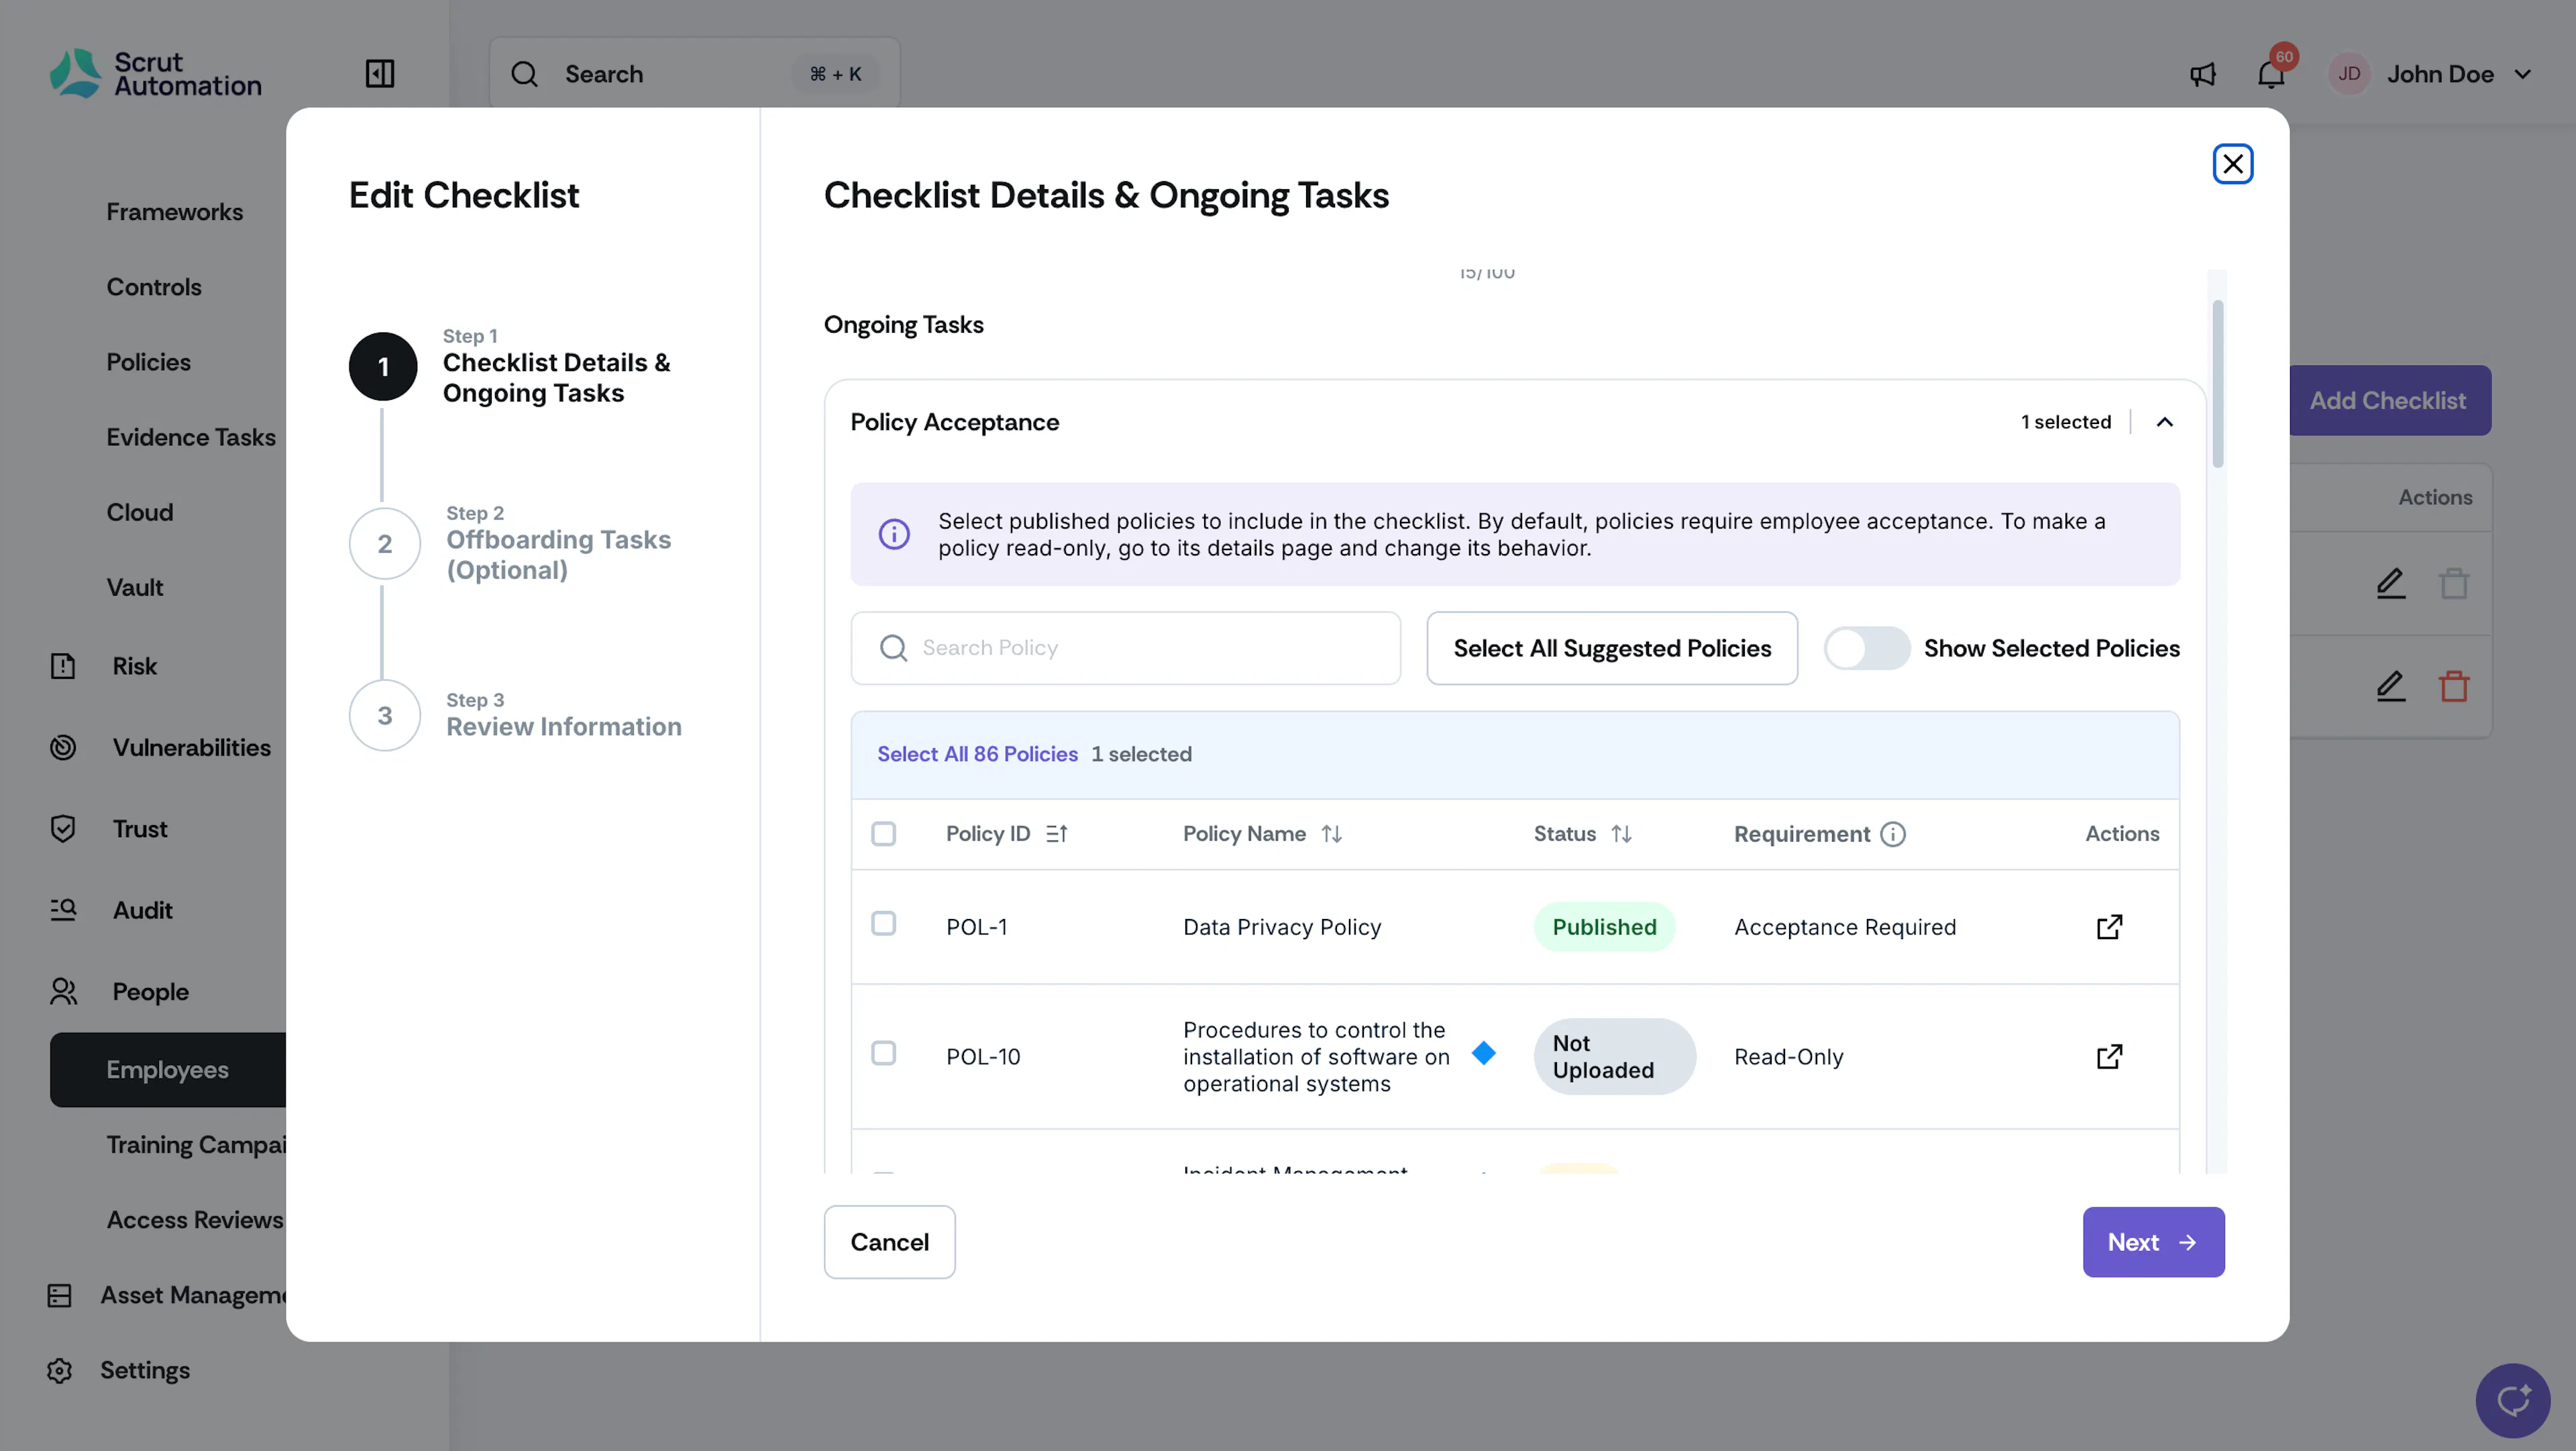
Pro Tip! Policies marked with a blue diamond are Scrut-suggested for your frameworks. Click Include Suggested Policies to add all of them at once.
Step 4: Save the Checklist and Notify Employees
- Configure any other ongoing or offboarding tasks you need in this checklist.
- Review your selections and save your changes.
- If you're editing an existing checklist, click Yes when prompted to notify employees about the new task assignments. Scrut notifies employees through email or Slack, depending on the notification channels you've set up.
The checklist now appears in the Checklists tab.
Step 5: Assign the Checklist to a Group
Note: Employees can see the policies assigned in a checklist in the employee portal only after you assign that checklist to their group.
If you edited the Scrut Default checklist, it's already assigned to the default group, which includes all employees. Skip to Step 6.
To assign a new checklist to a group:
- Navigate to People → Employees and click the Settings icon.
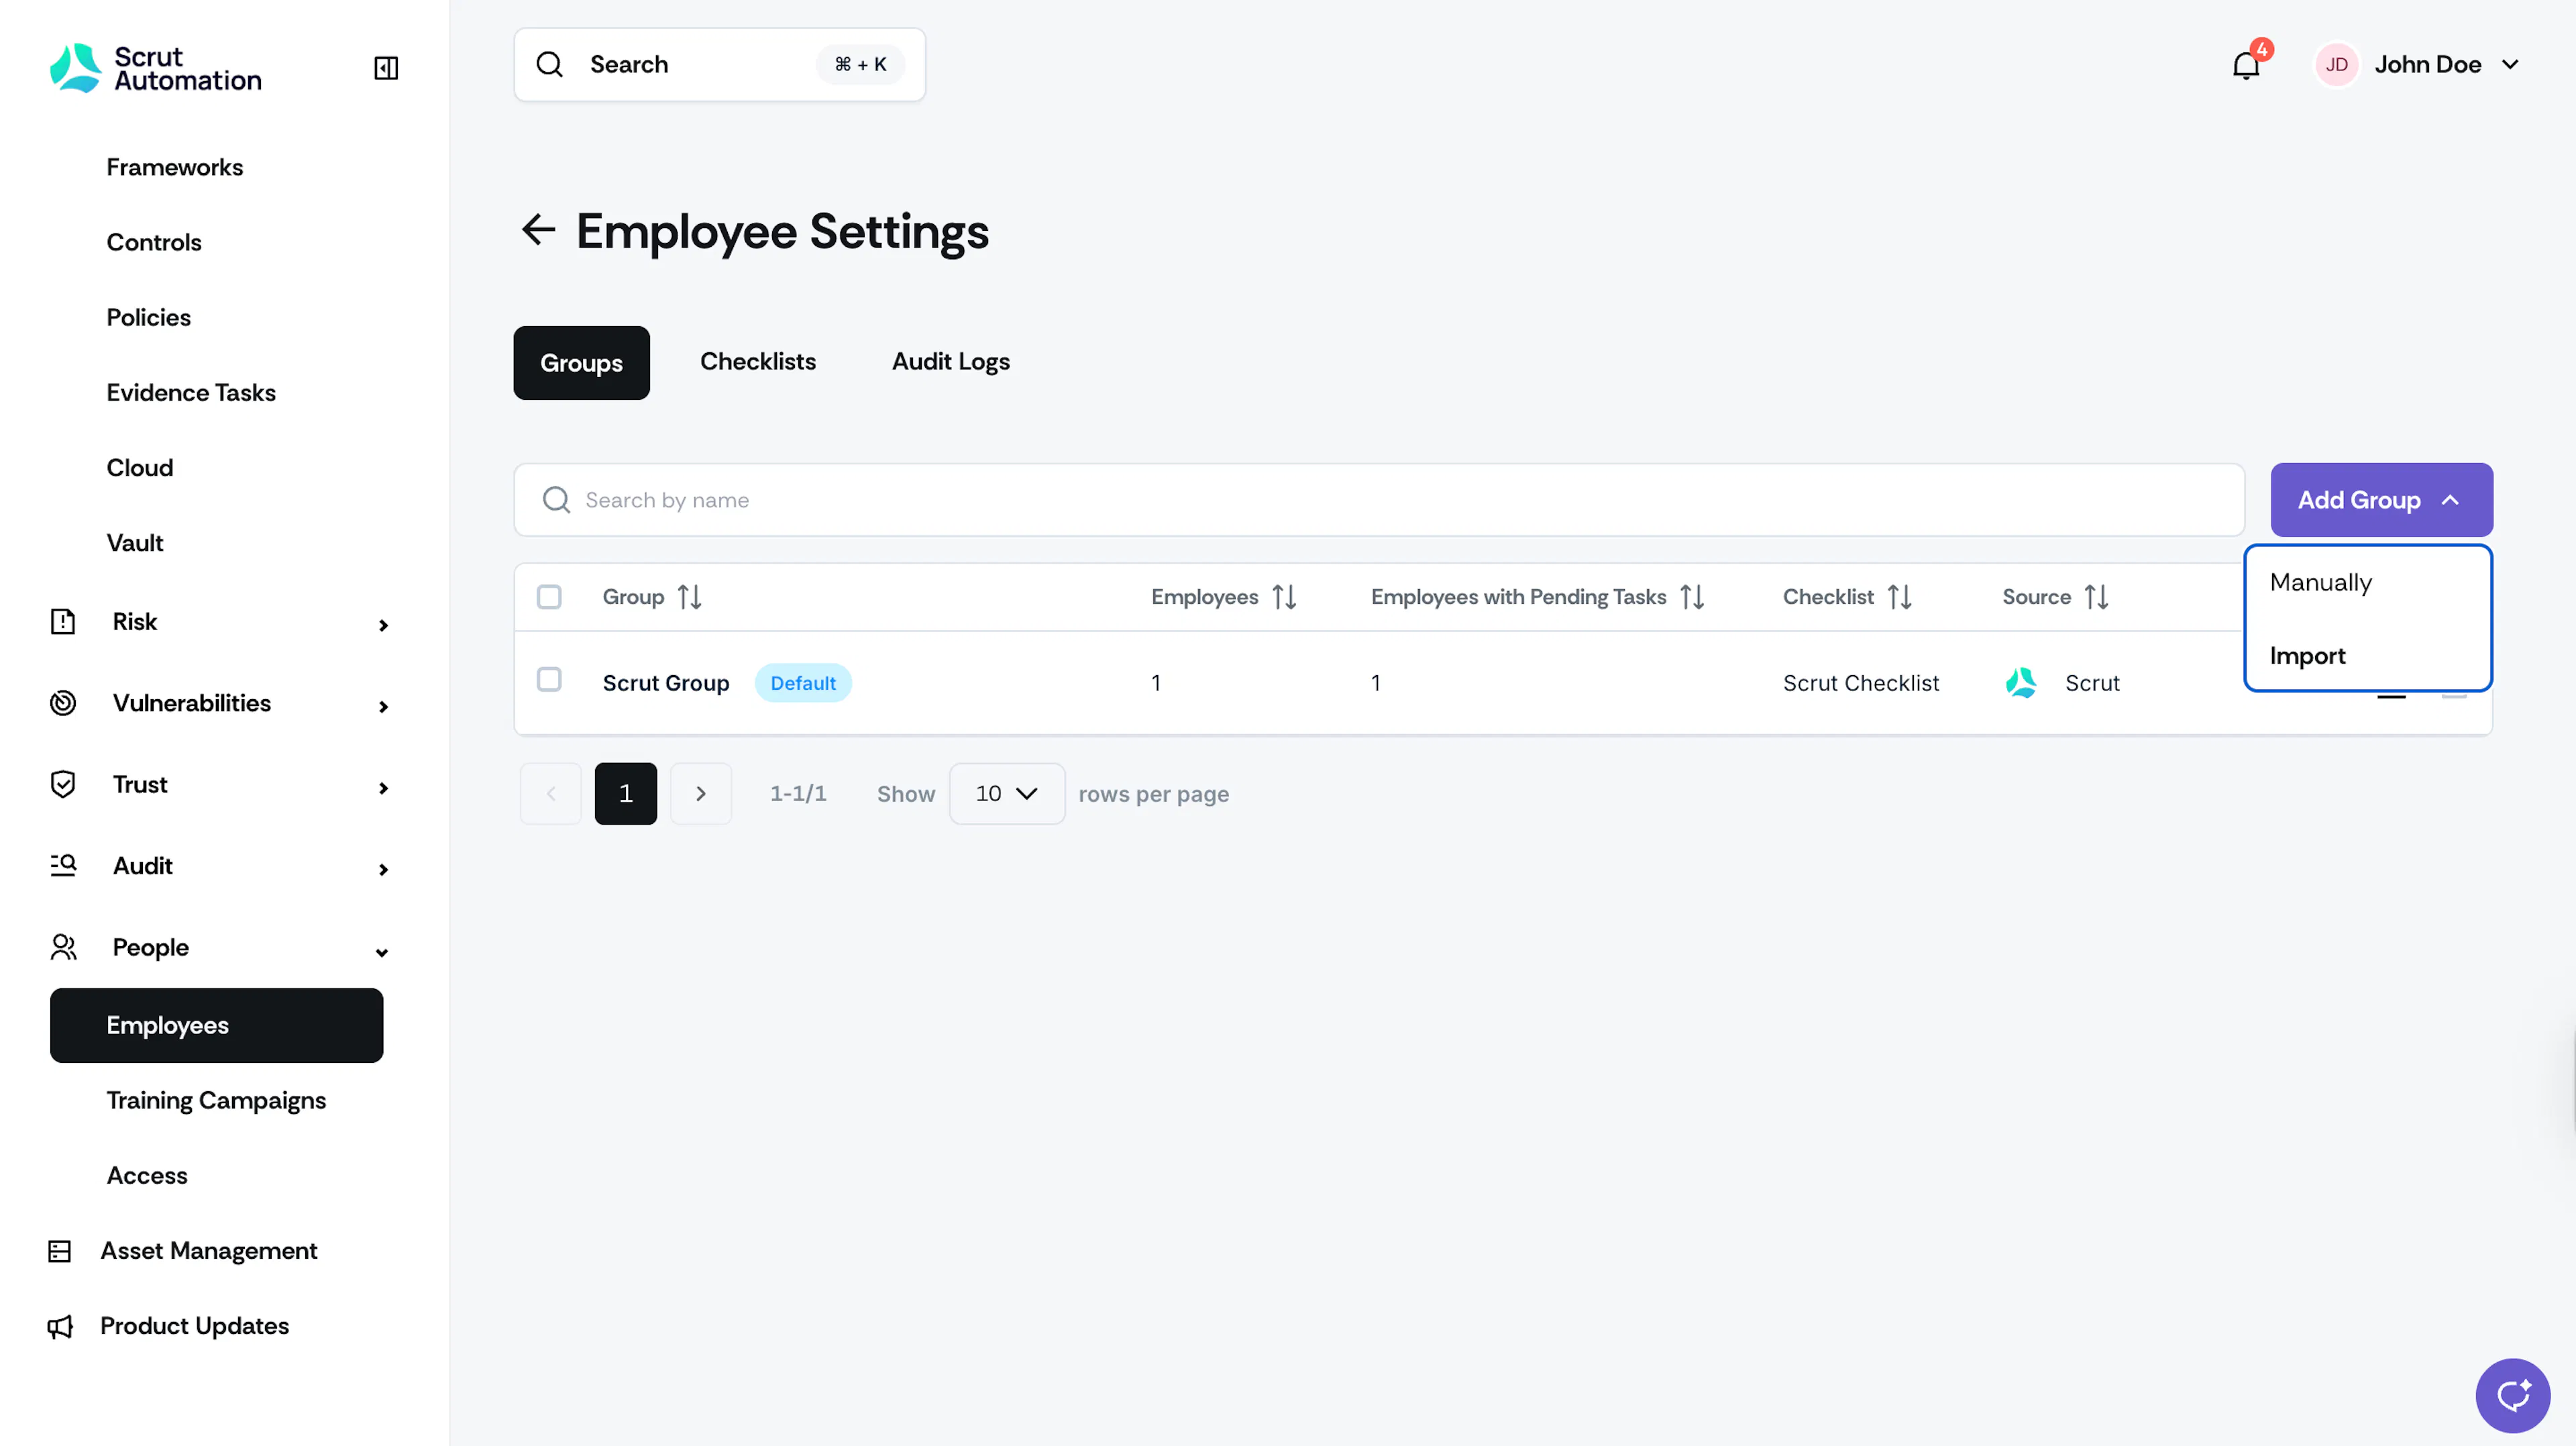
- Click the Groups tab and click Add Group.
- Click Add Manually, or click Import to use a group from your IdP.
- Enter the group name, or select the IdP group.
- Select the checklist you configured.
- Click Save.
Next, add employees to the group:
- Navigate to People → Employees and click the All Employees tab.
- Select the employees you want to add.
- Click Edit and select Group Actions.
- Select Add to Group or Move to Group.
- Select the group you created.
- Select the Notify employees about new task assignments checkbox.
- Click Save.
Employees in the group now see the assigned policies in the Employee Portal and receive an email with their login details.
Important: A group can have only one checklist at a time. To give different employees different sets of policies, create a separate checklist and group for each role, such as full-time employees, contractors, and interns.
Step 6: Track Policy Acceptance
As employees accept policies in the Employee Portal, Scrut syncs their progress to the Employees module.
- To see acceptance across your organization, navigate to People → Employees and check the Policy Acceptance Rate chart.
- To see an individual's progress, click the All Employees tab, select the employee, and open the Tasks tab.
- To follow up with an employee who has pending policies, select the employee and click Send Reminder.
Your policies are now configured in the checklist, and Scrut tracks each acceptance as part of your compliance posture.
FAQs
Contact support@scrut.io or your CSM for further assistance.