

Integrate Deel
The Scrut-Deel integration fetches employee data from your Deel account and syncs it with Scrut. In this guide, we walk you through the process of integrating your Deel account with Scrut.
Prerequisites
Before starting the integration, ensure you have the following access and permissions:
Account Requirements
- You must be a Scrut Admin (or Contributor with access to the Integration module)
- You need permissions to generate an API access token in your Deel account
Permissions
Scrut requires read-only access to the following data in Deel:
-
Organizations:read
- View basic information about your organizations, teams, legal entities, and agreements
-
People:read
- Read worker’s information such as profile, time off, etc.
-
Time-off:read
- Read time off related data like time off requests, balances, policies, and more
Pro Tip!
We recommend logging into your organization’s Deel account before starting the integration to avoid doing so later.
How To Integrate Deel With Scrut
Step 1: Fetch Access Token from Deel
For step-by-step instructions on how to generate the access token, refer to the Deel help documentation.
-
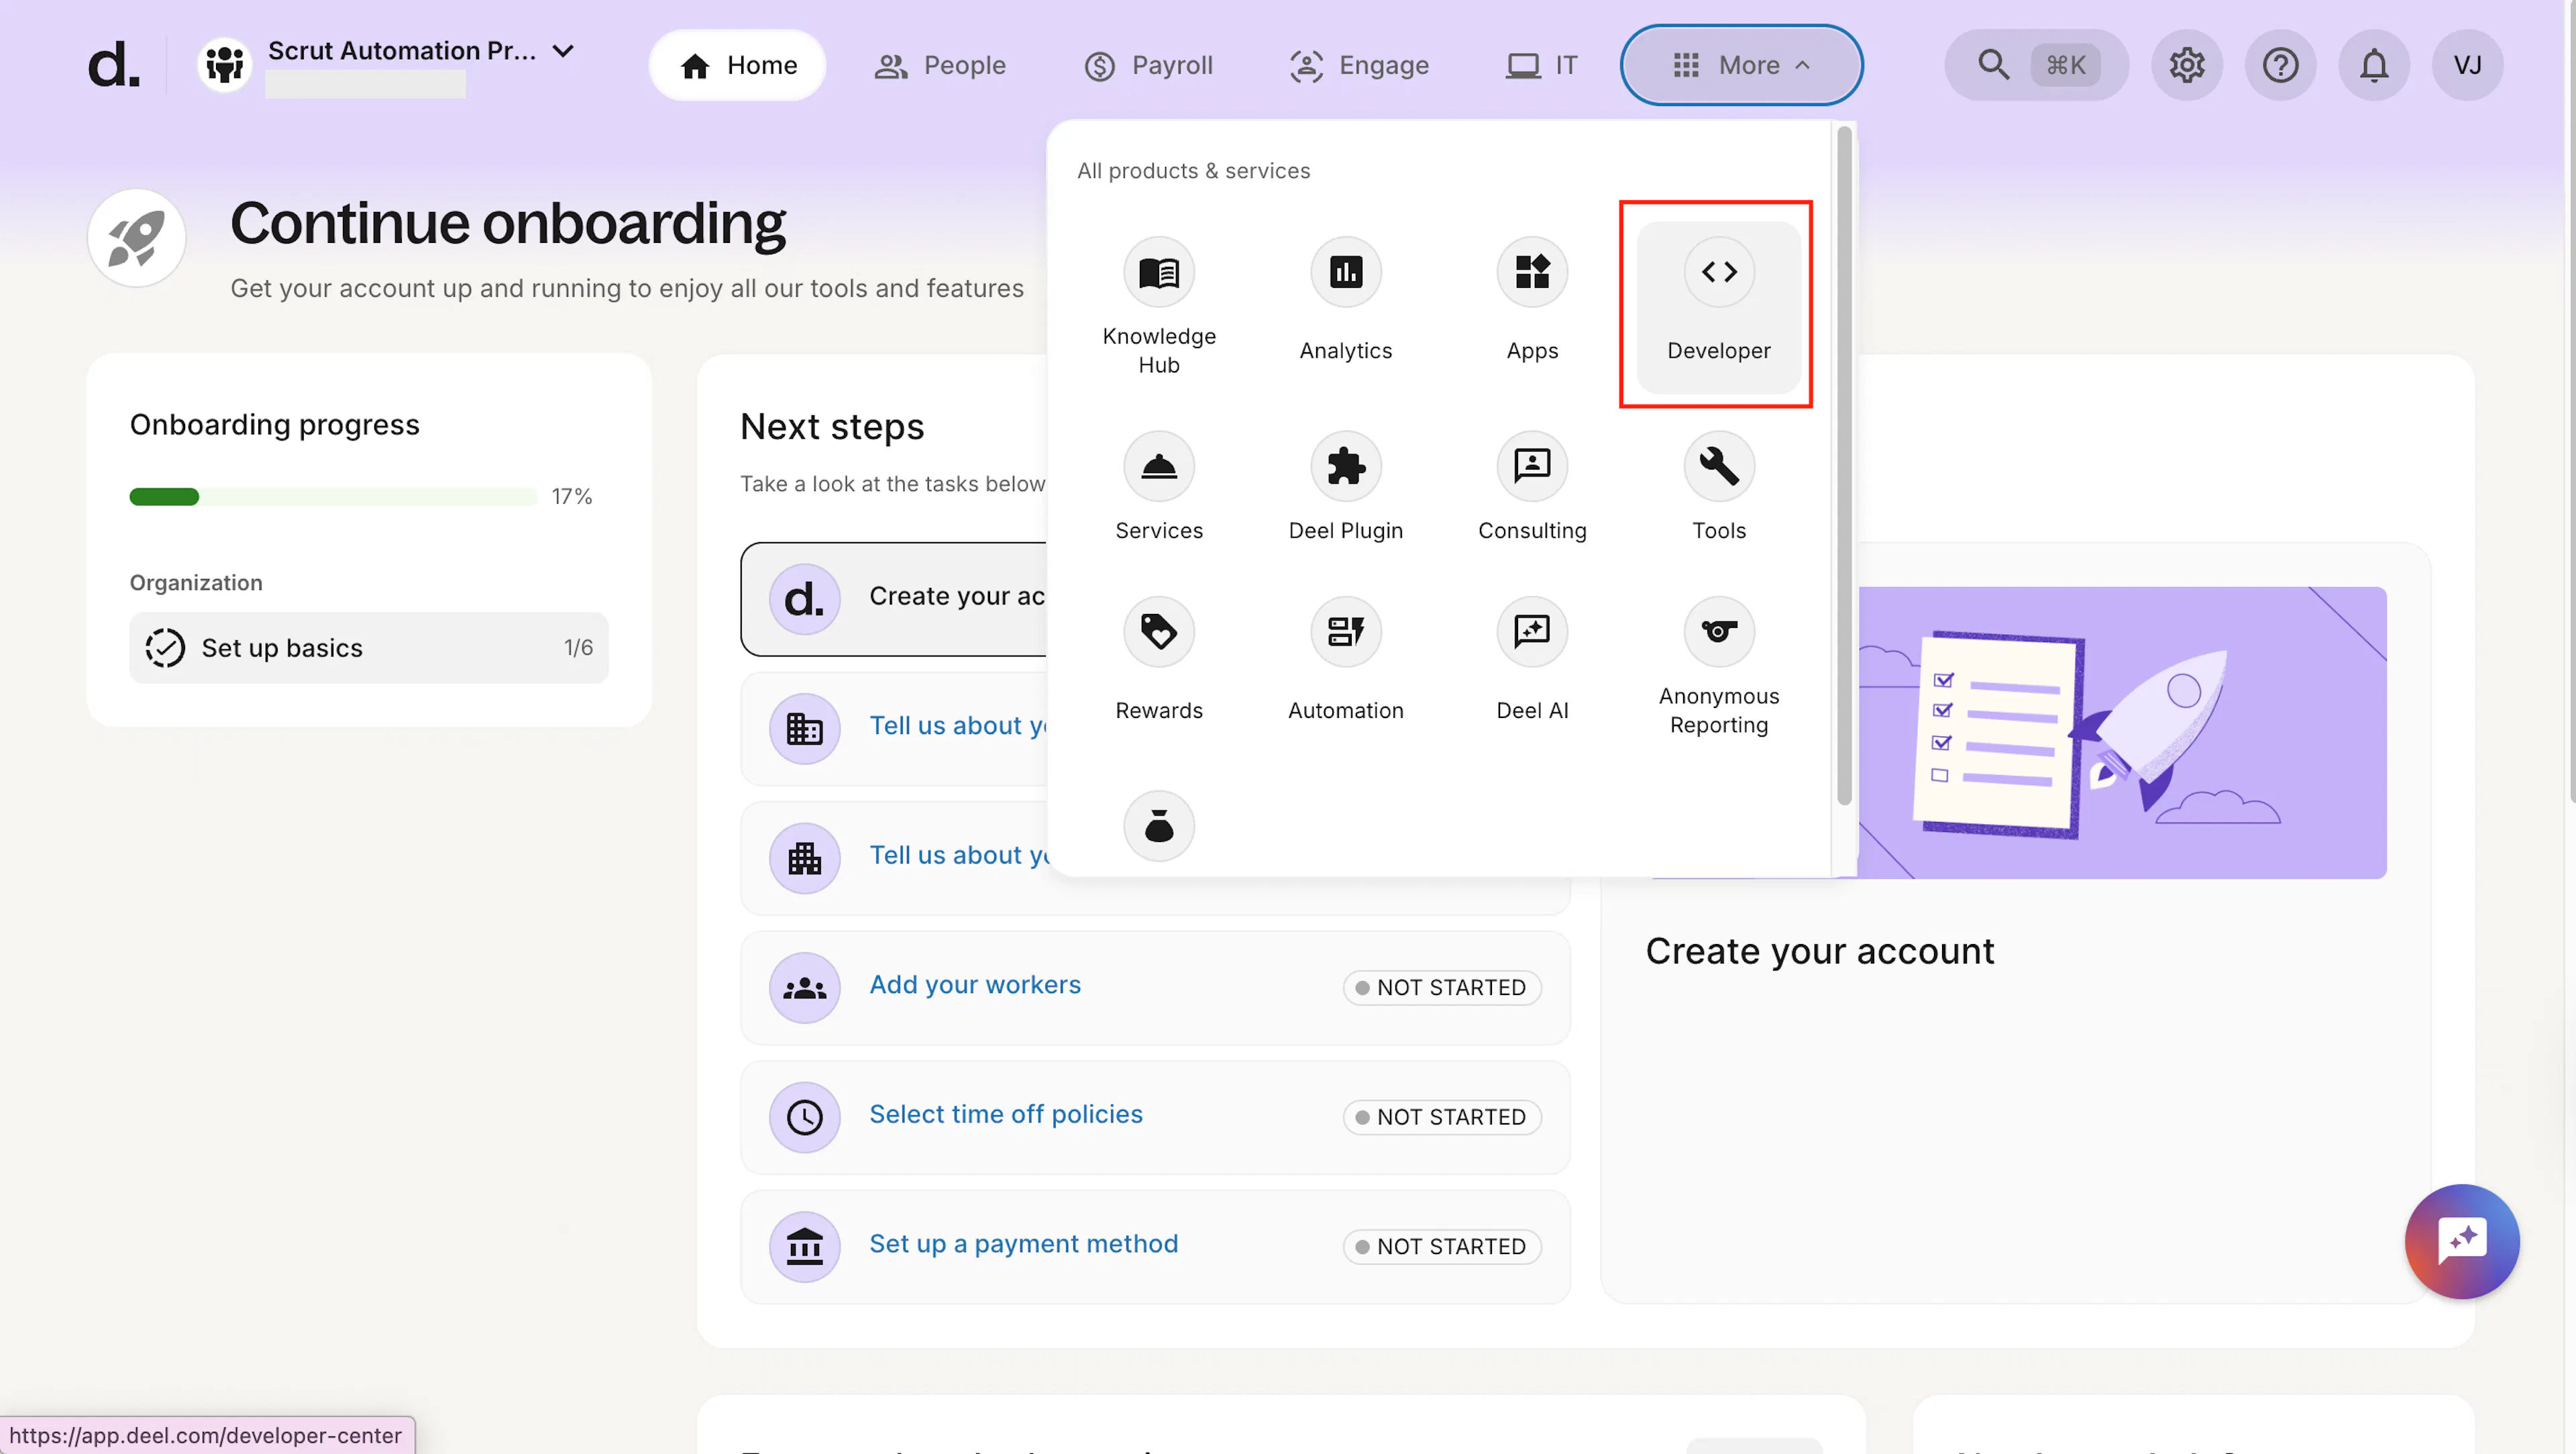
Log in to your organization’s Deel account, and go to More → Developer.
-
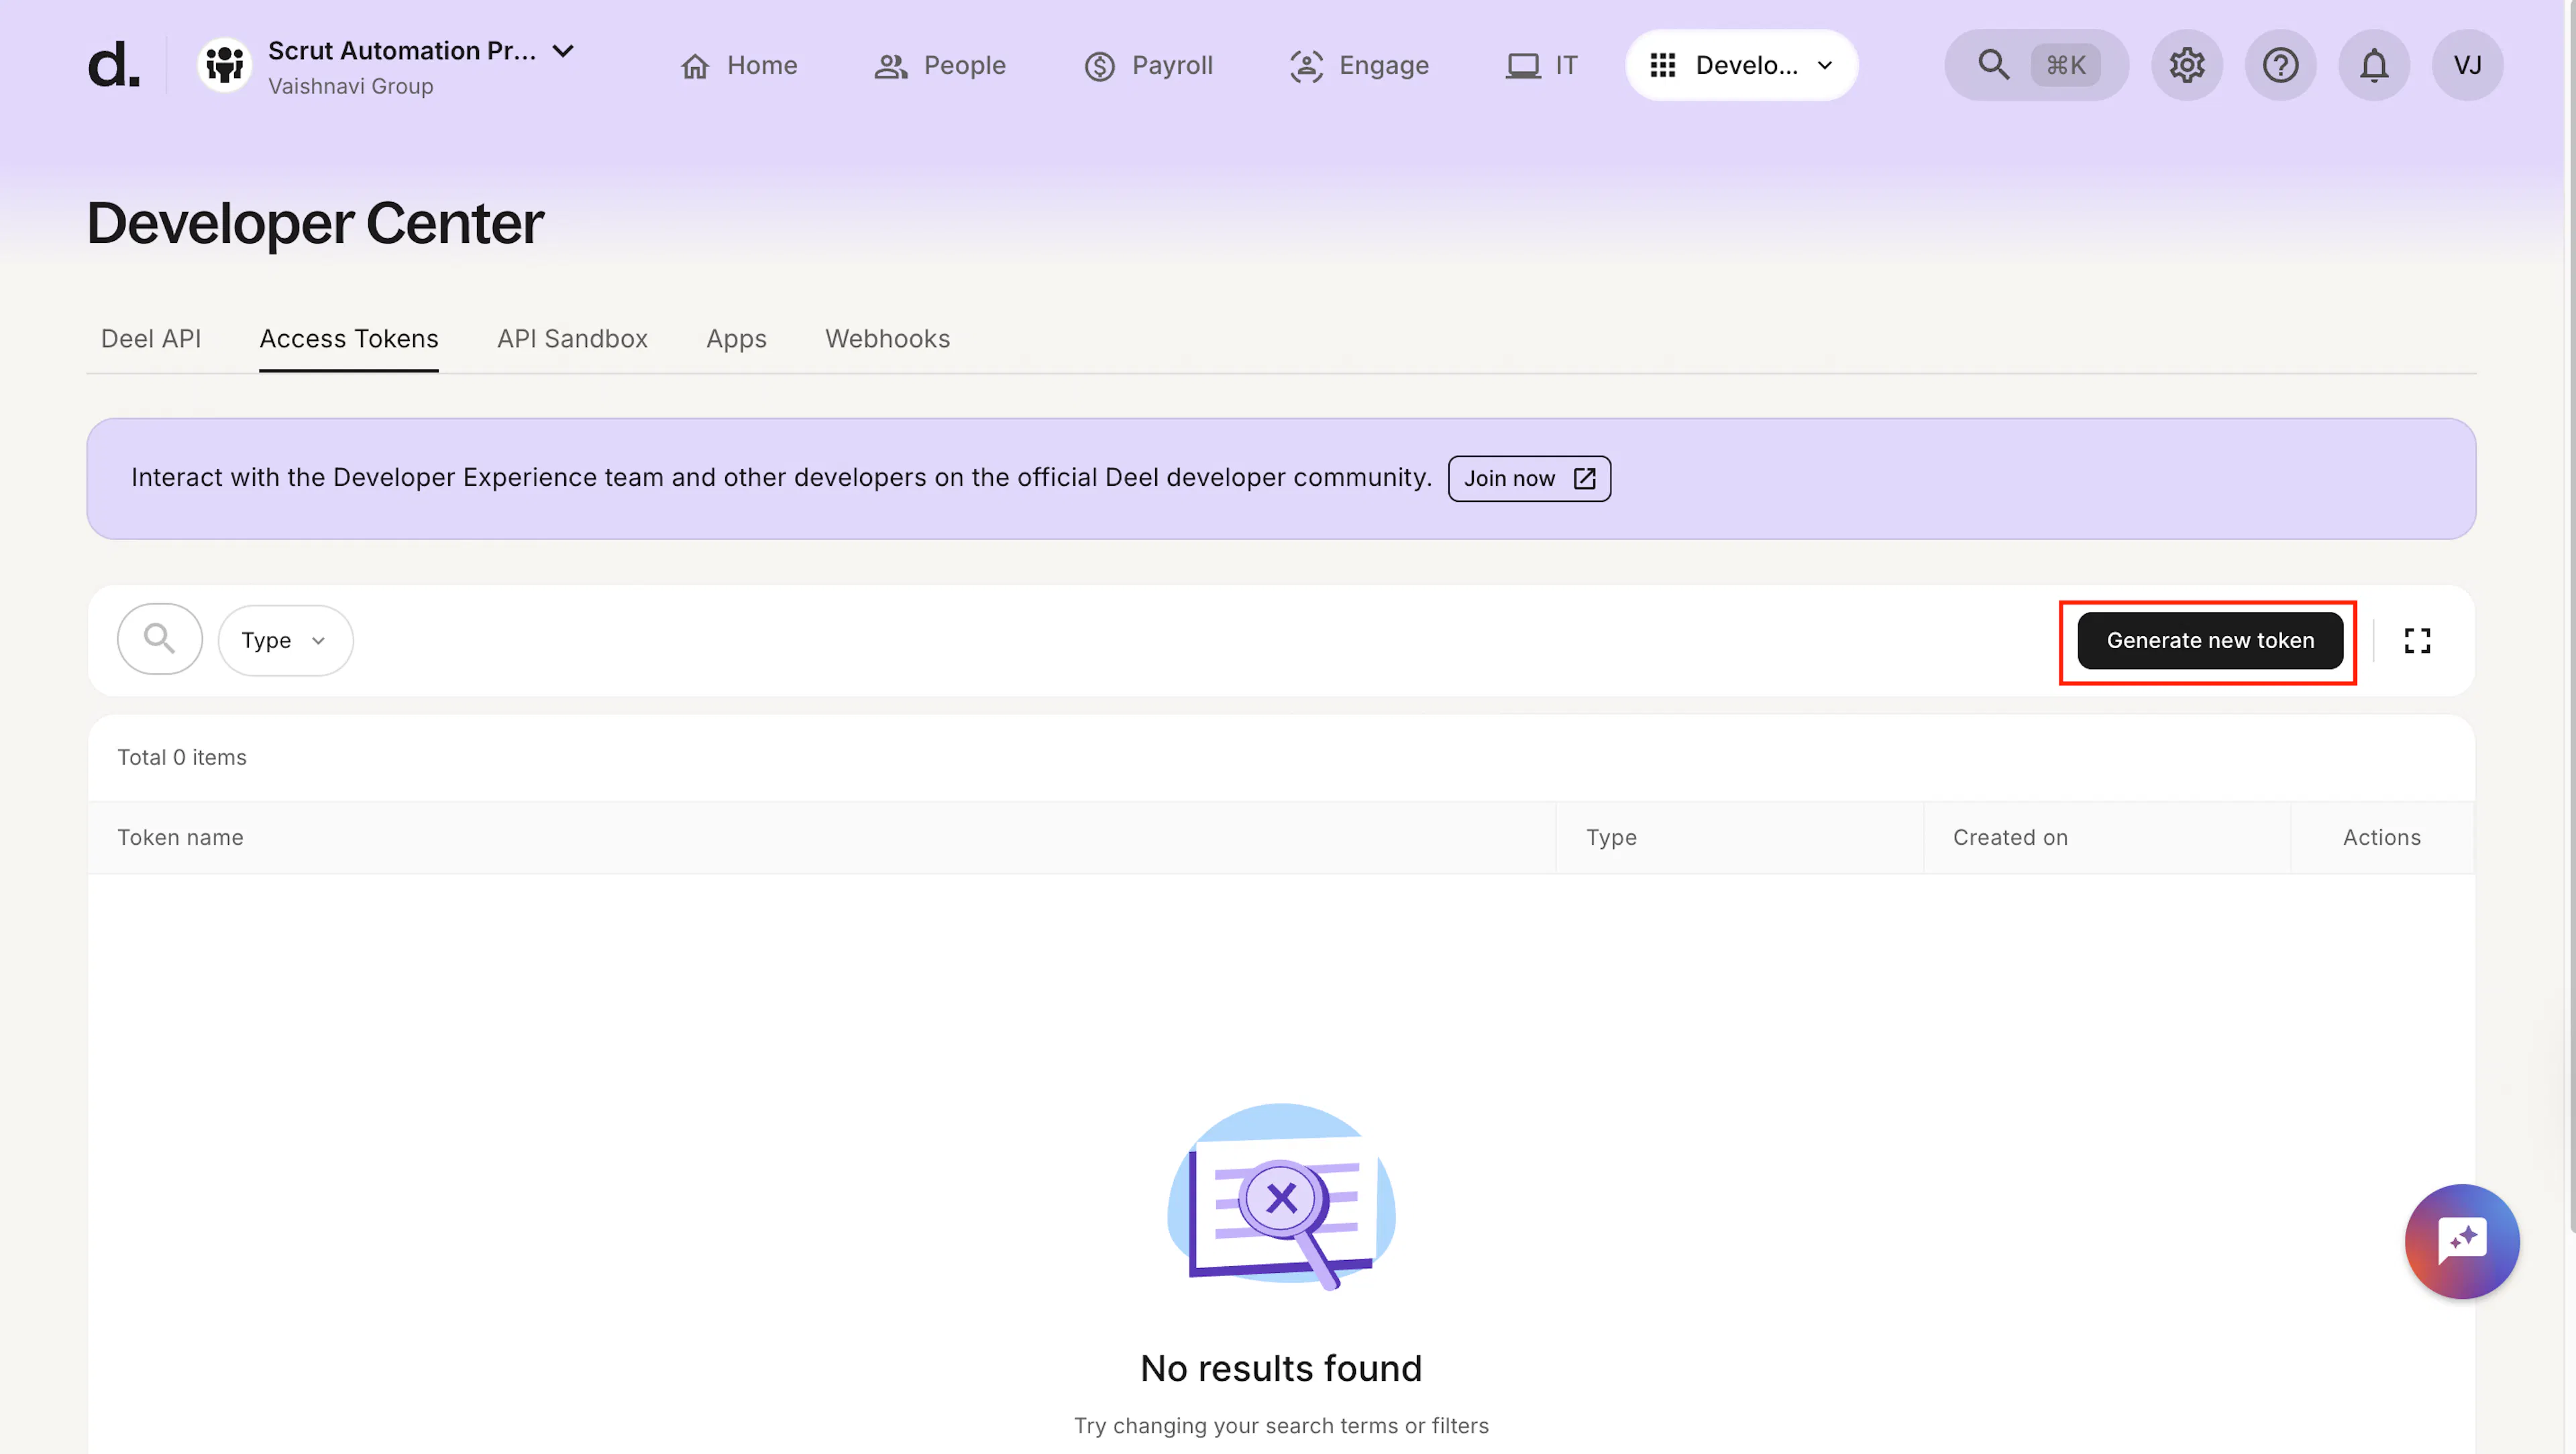
Go to the Access Tokens tab and click Generate new token.
-
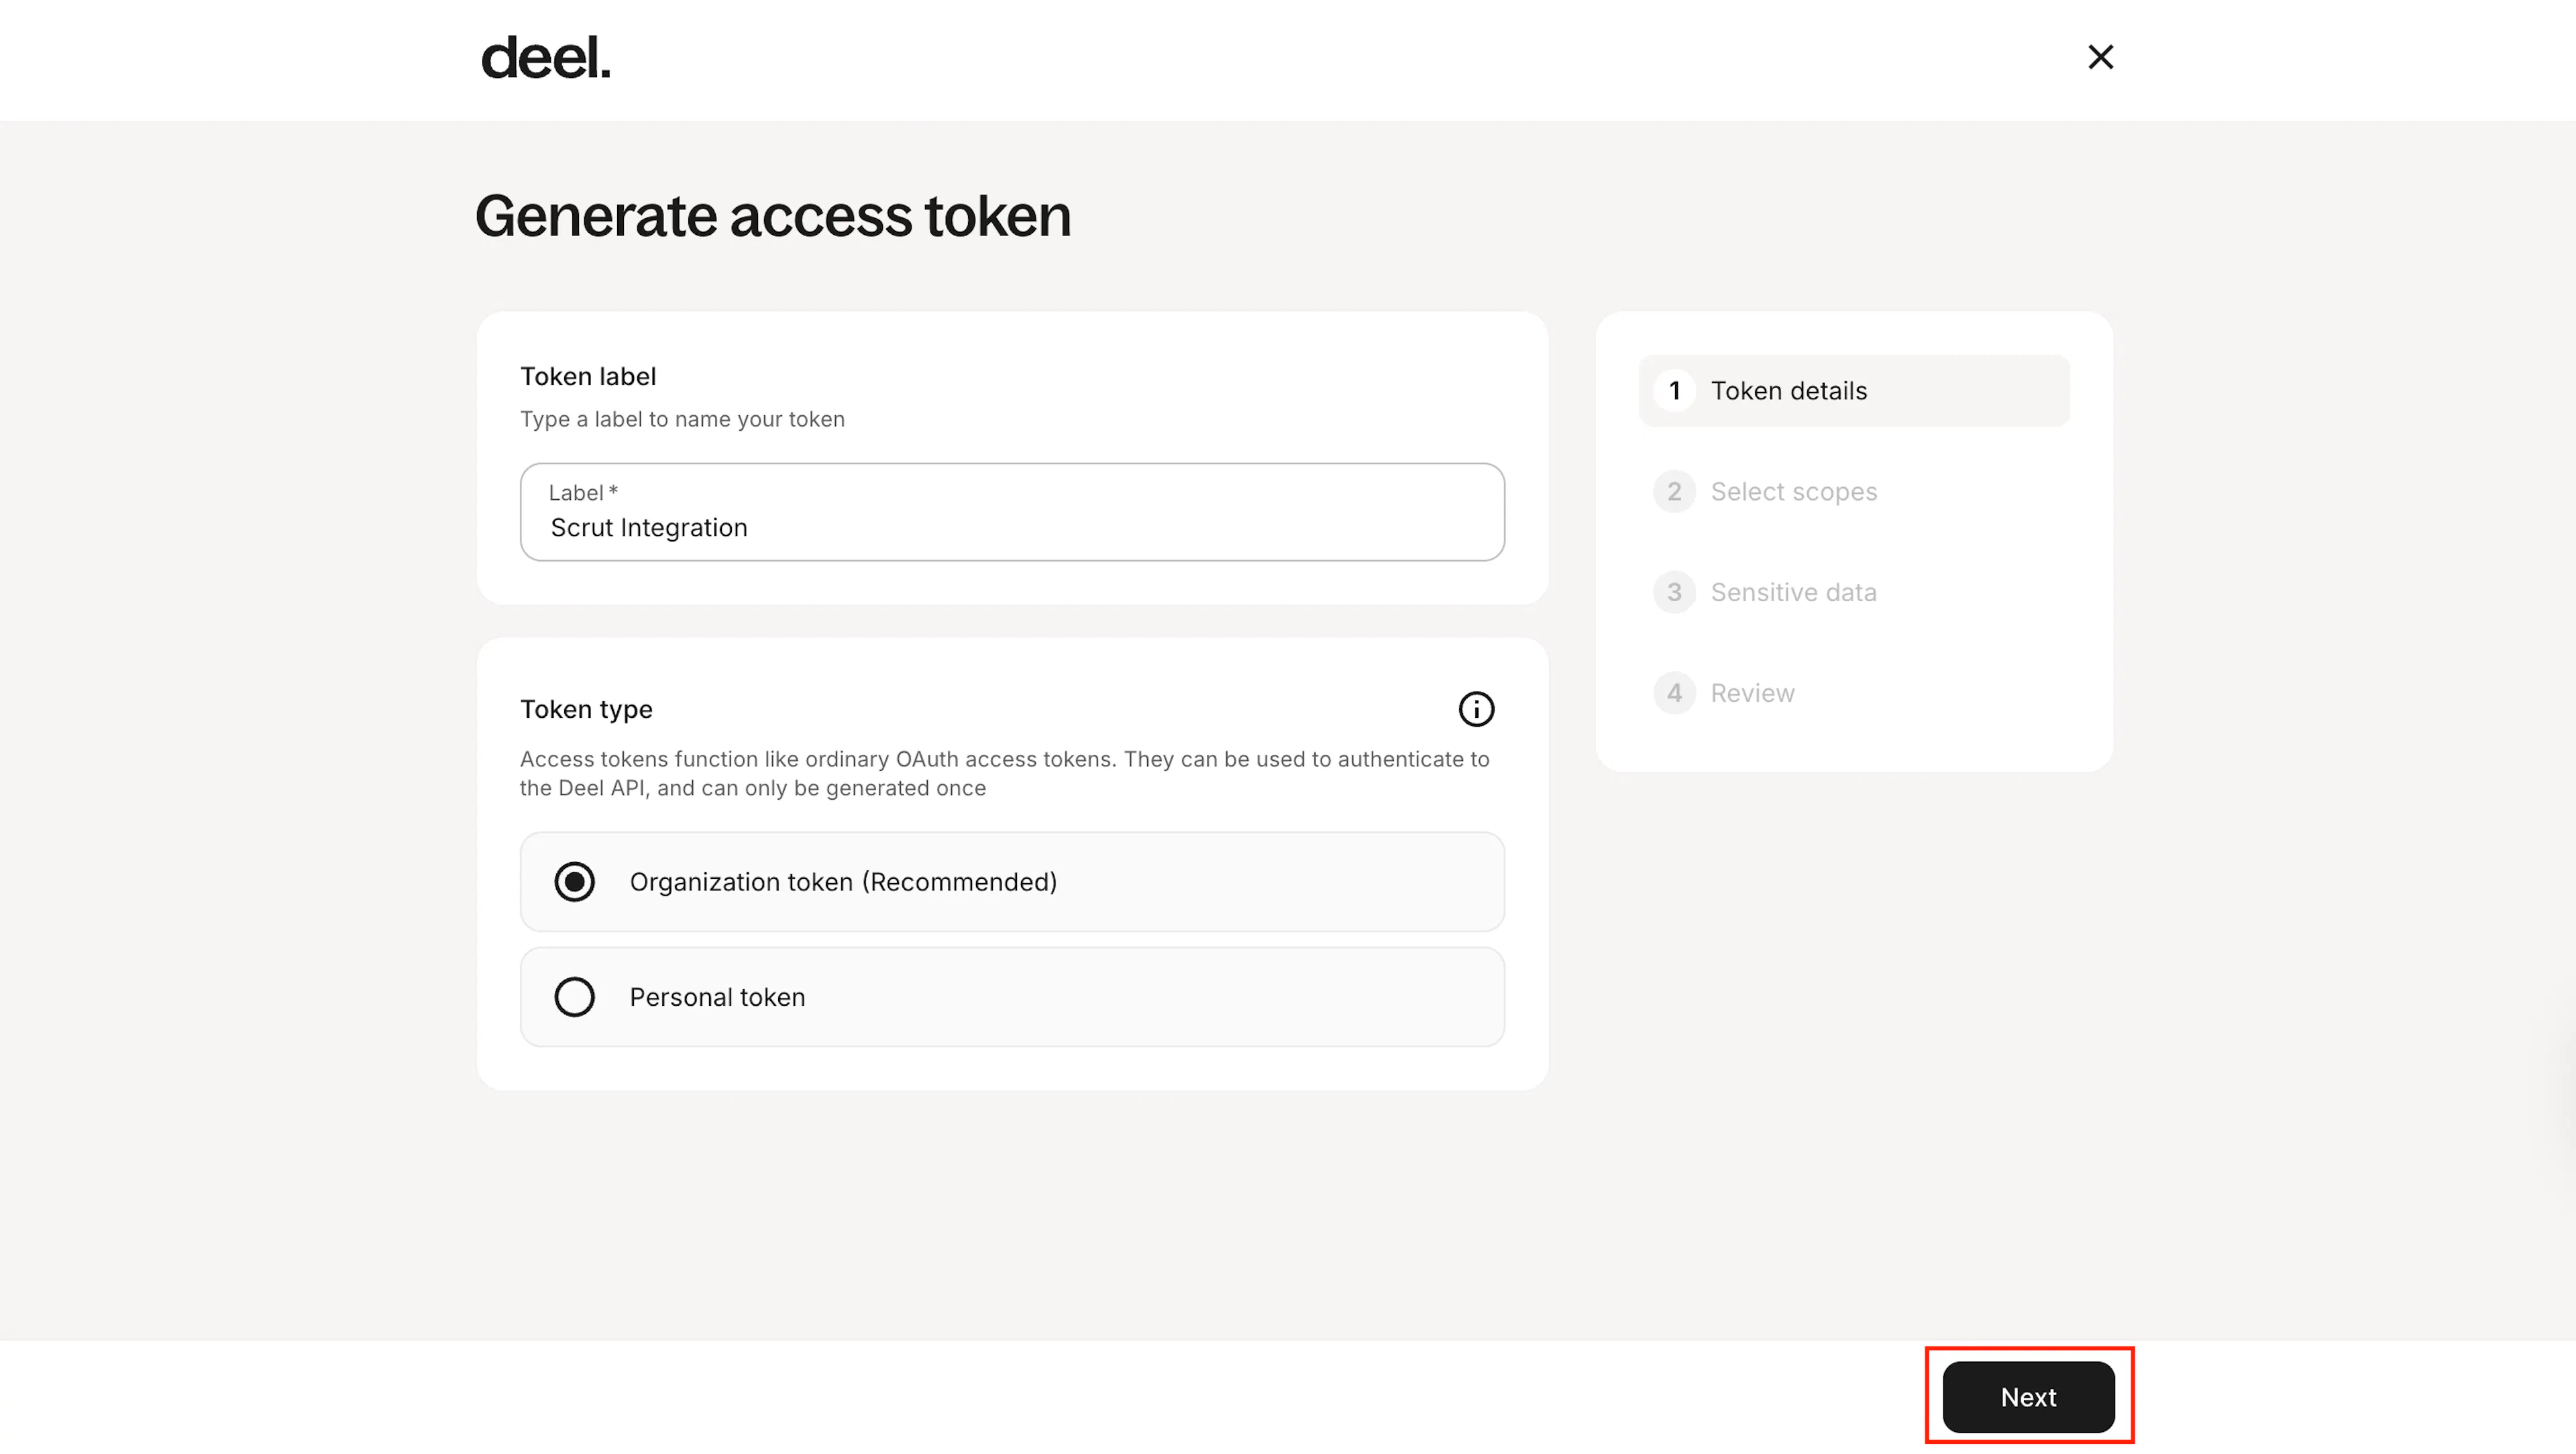
On the first step of the Generate access token wizard, enter a label for the token (e.g., Scrut), select the token type as Organization, and click Next.
-
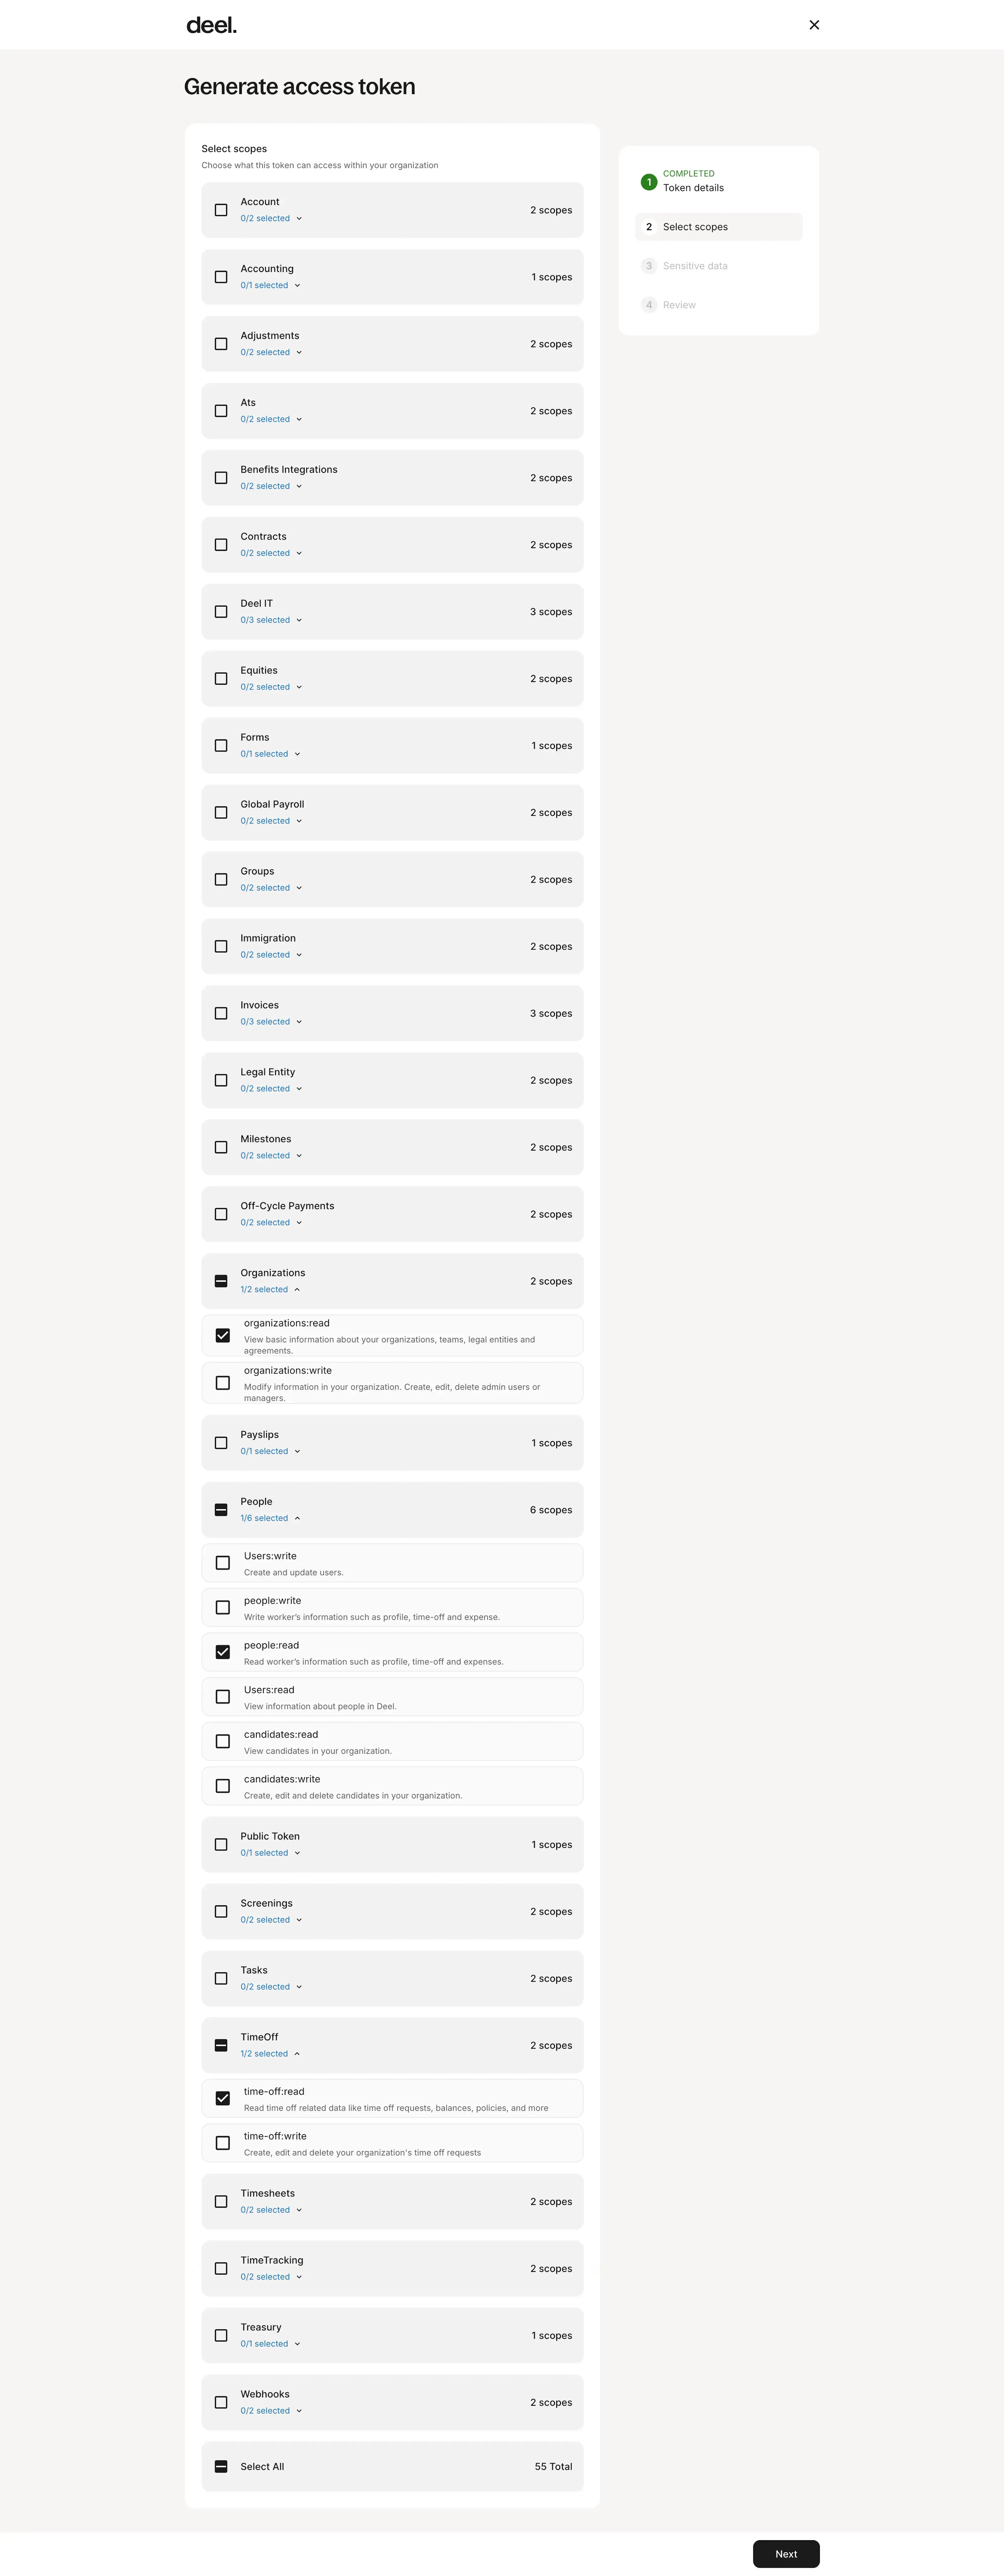
In the next step, select the following token scopes and click Next.
- Organizations:read
- People:read
- Time-off:read
-
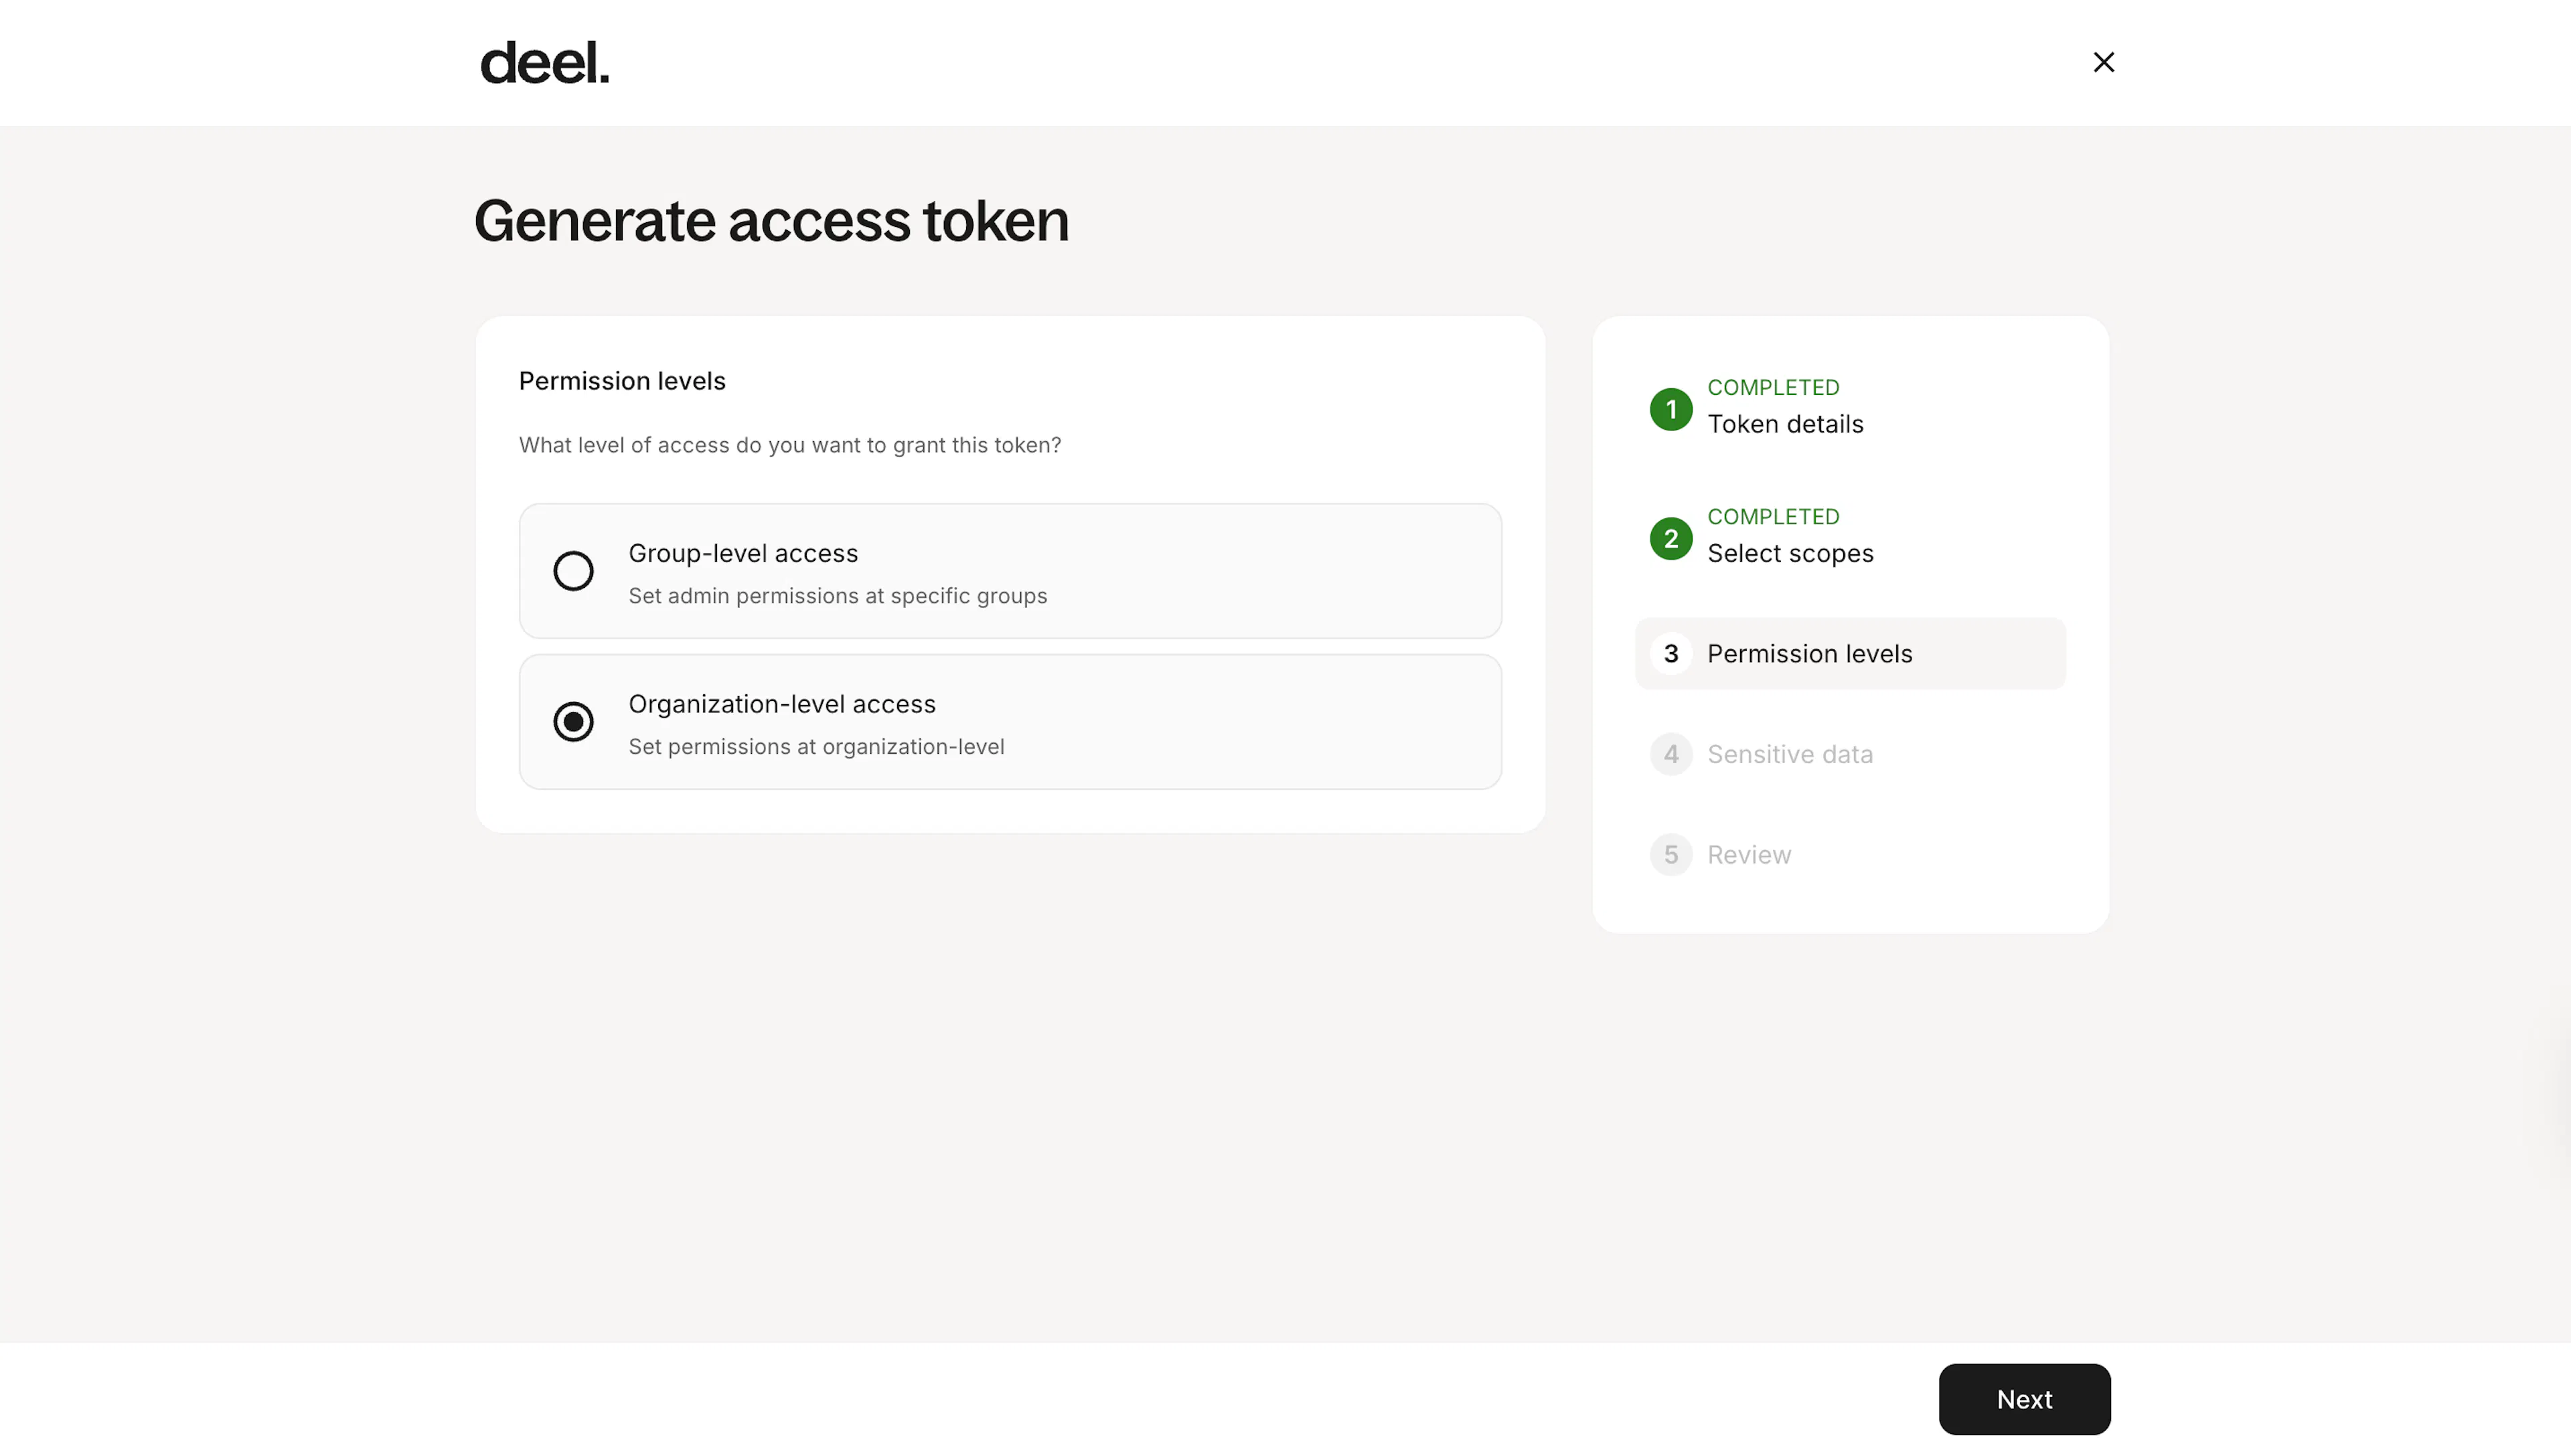
In the Permissions level, set organization-level.
-
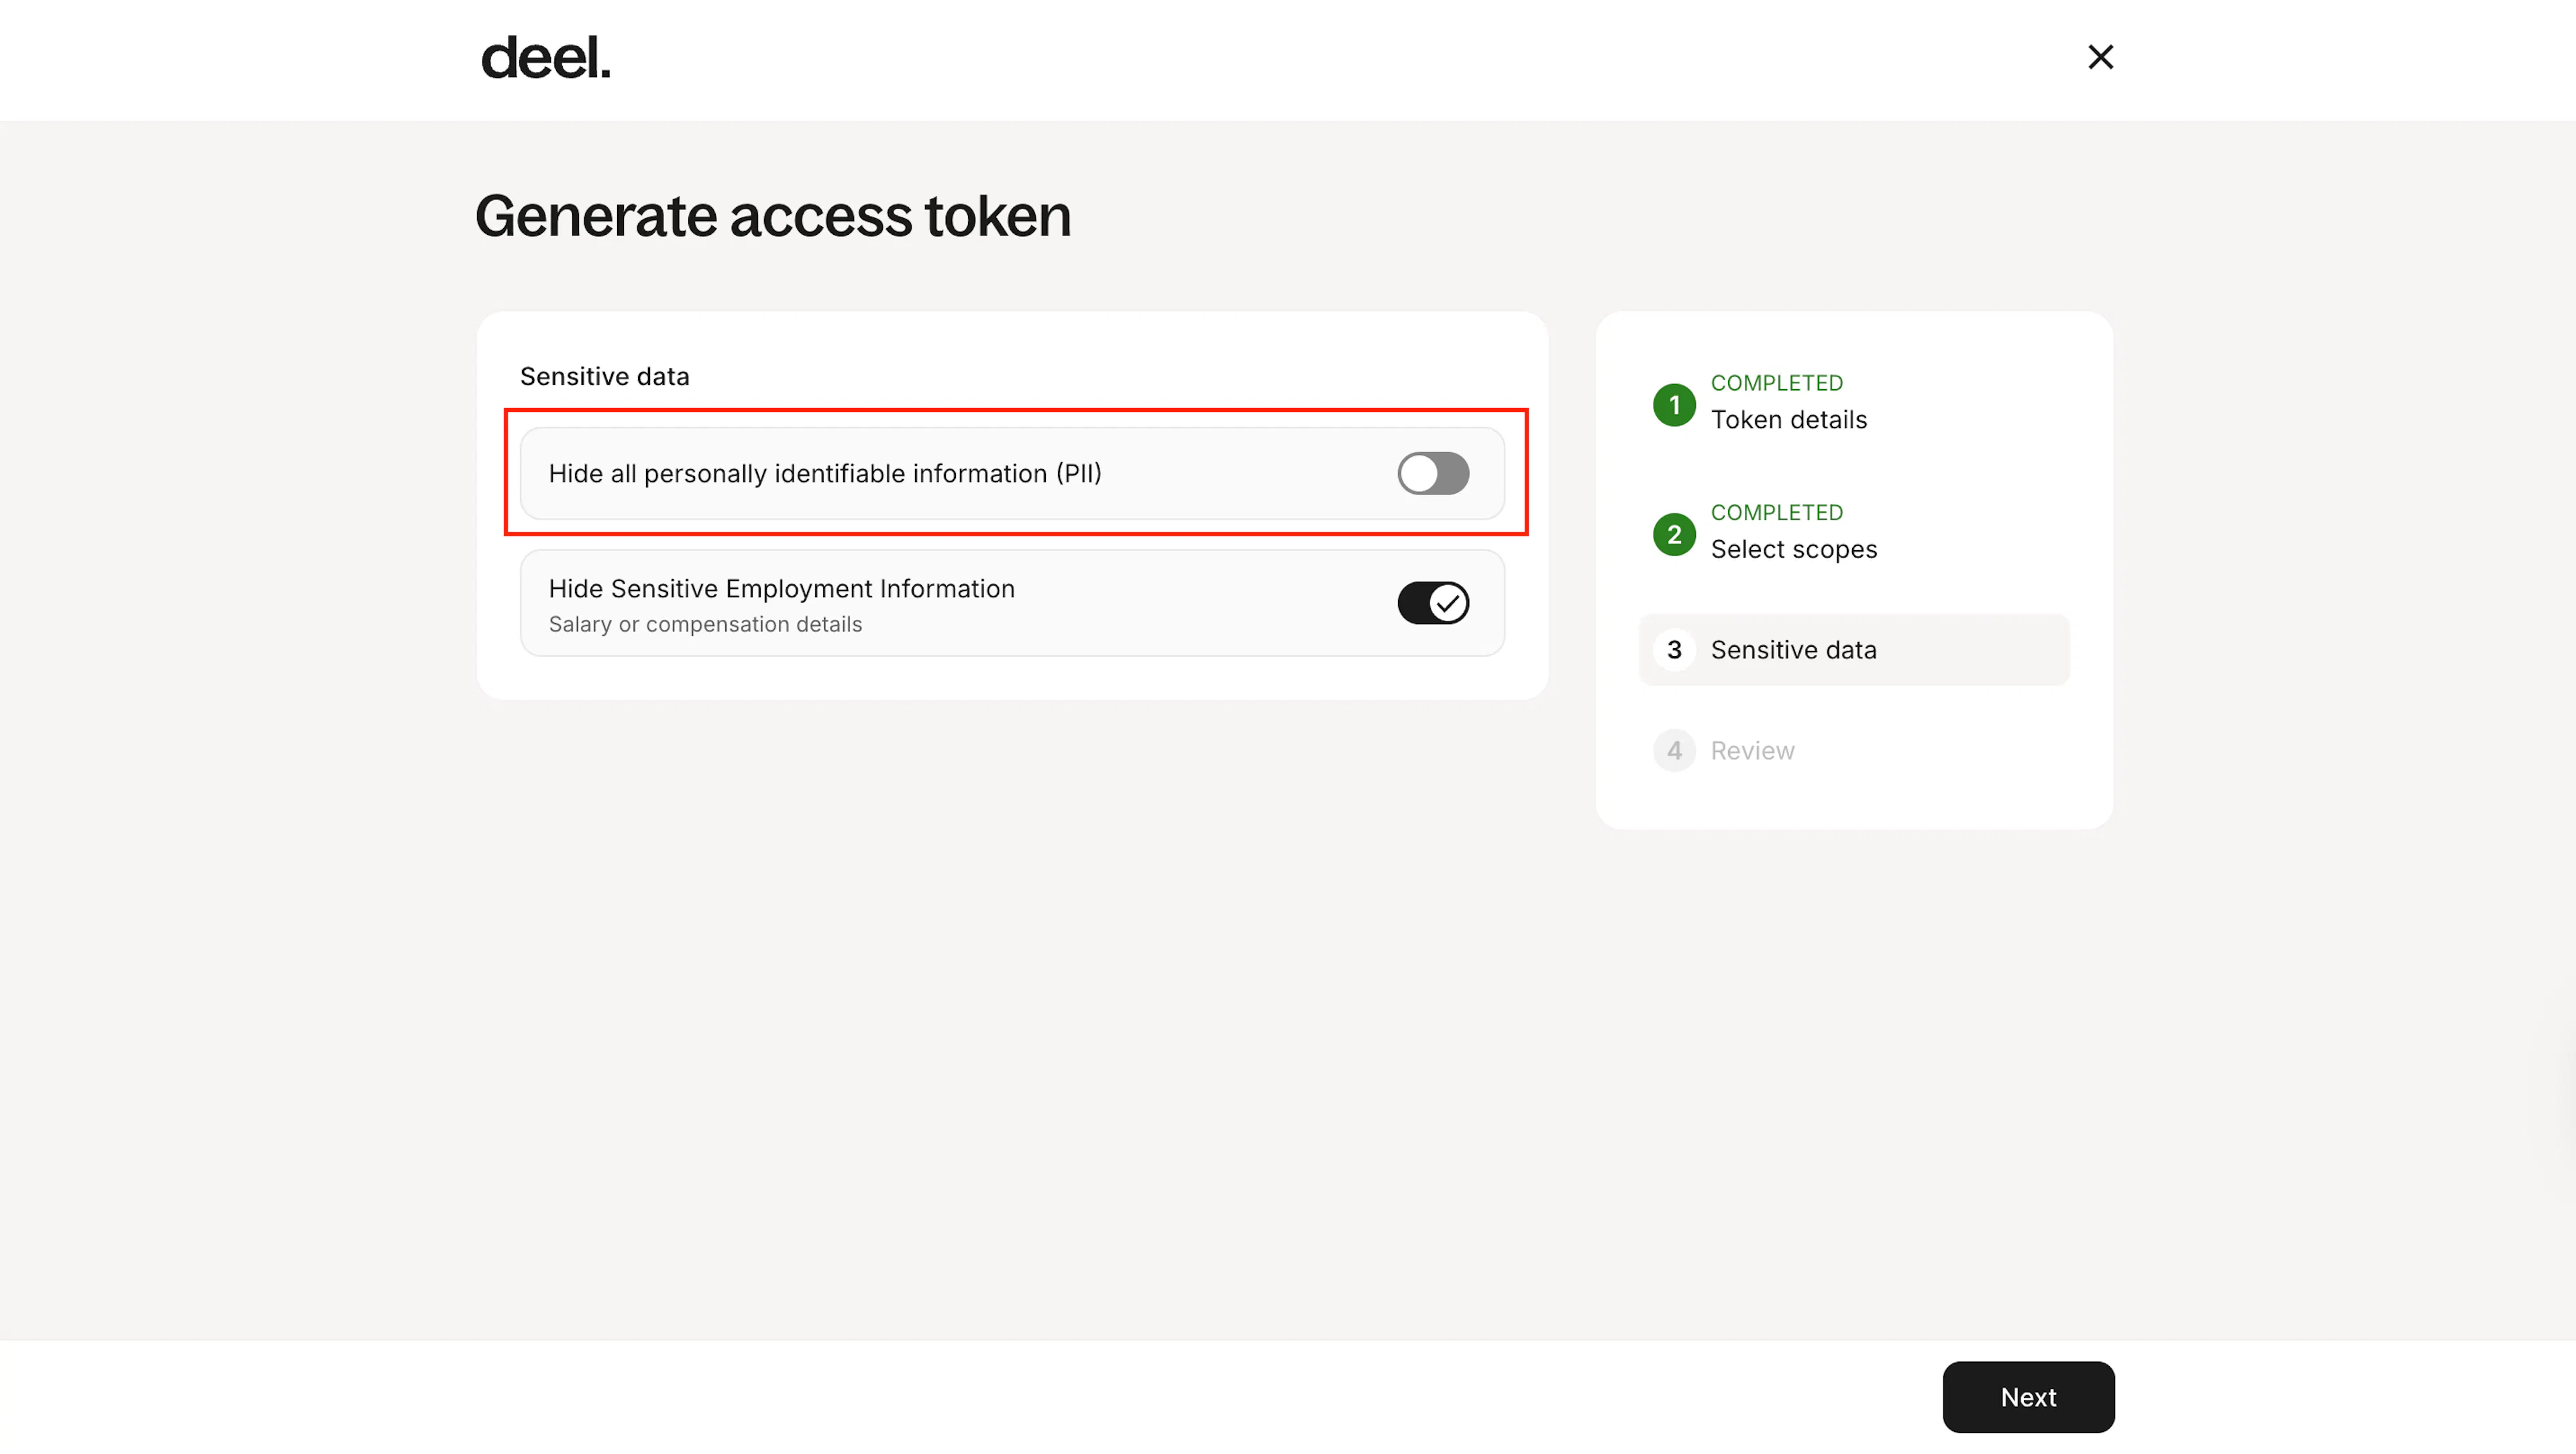
In the next step, ensure the “Hide all personally identifiable information (PII) toggle is turned OFF, as Scrut requires this access to read employee name and email. Click Next.
-
In the final step, click Generate.
-
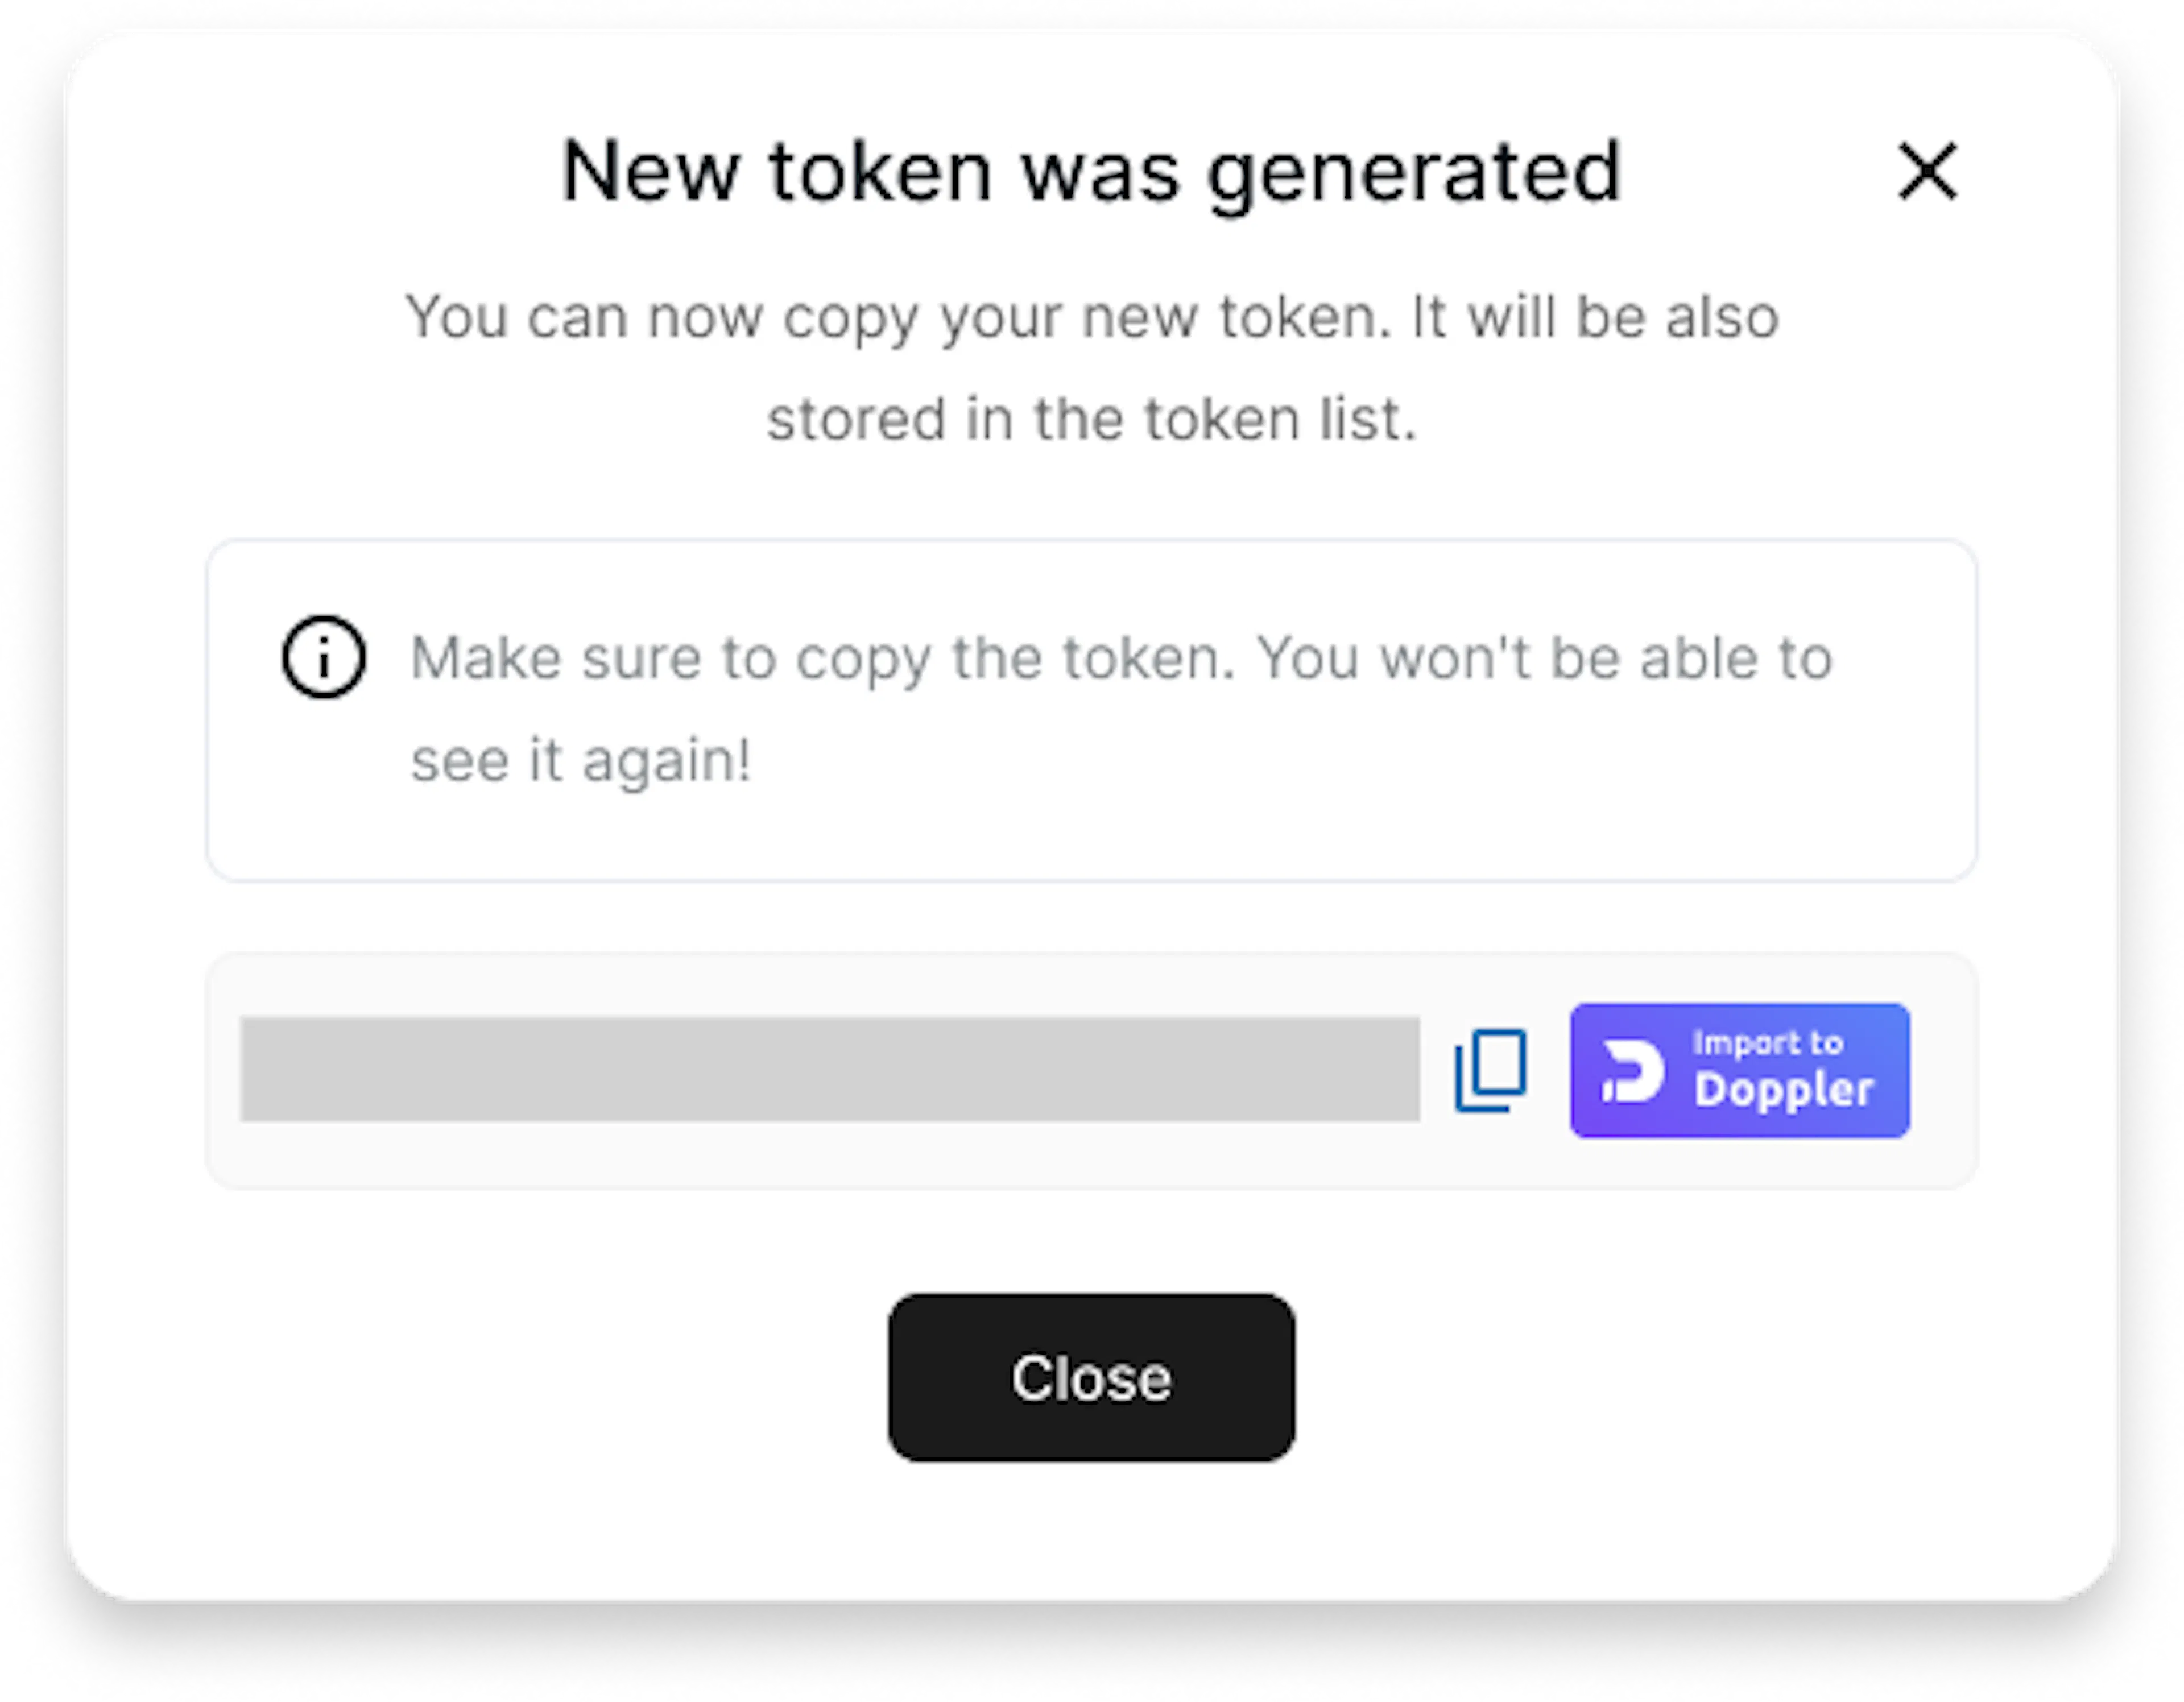
Copy the access token and save it in a safe location. You’ll need to enter it in Scrut in the next step.
Step 2: Navigate to Integrations in Scrut
-
Sign in to your Scrut account and click Integrations on the left navigation panel.
-
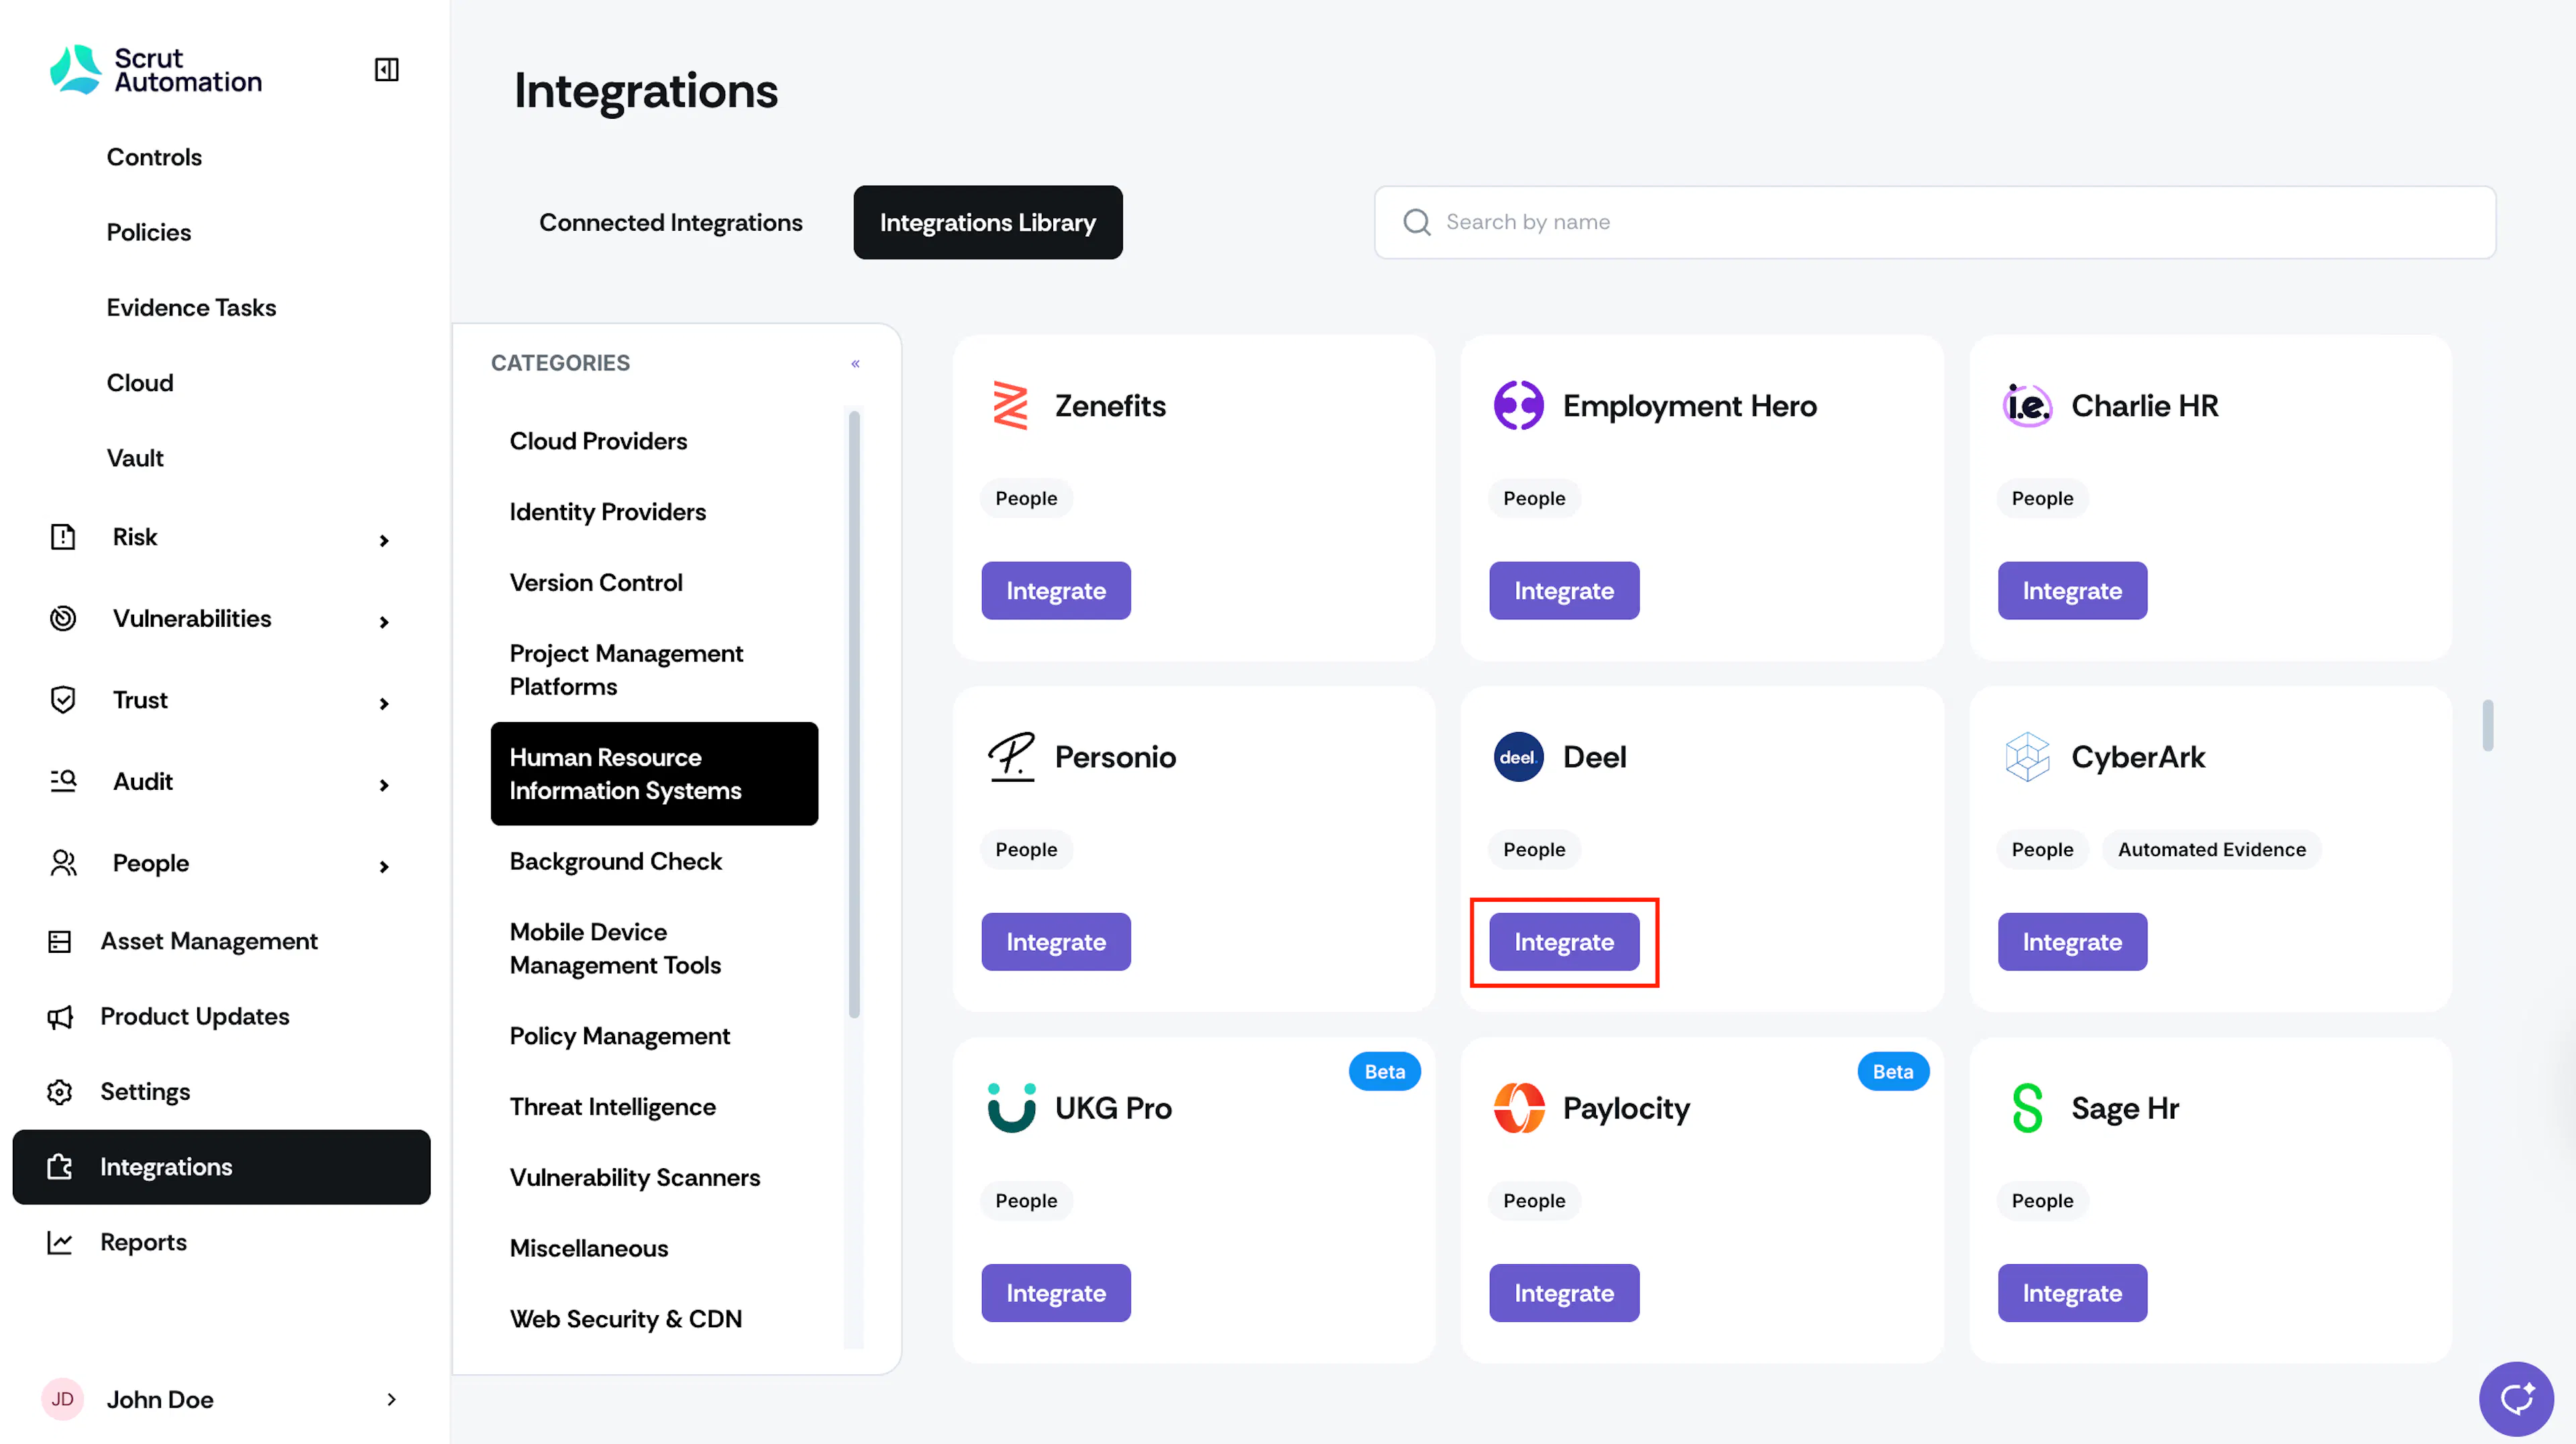
Navigate to the Integrations Library tab and select Human Resource Information Systems from the Categories section.
-
Scroll to the Deel tile and click Integrate.
-
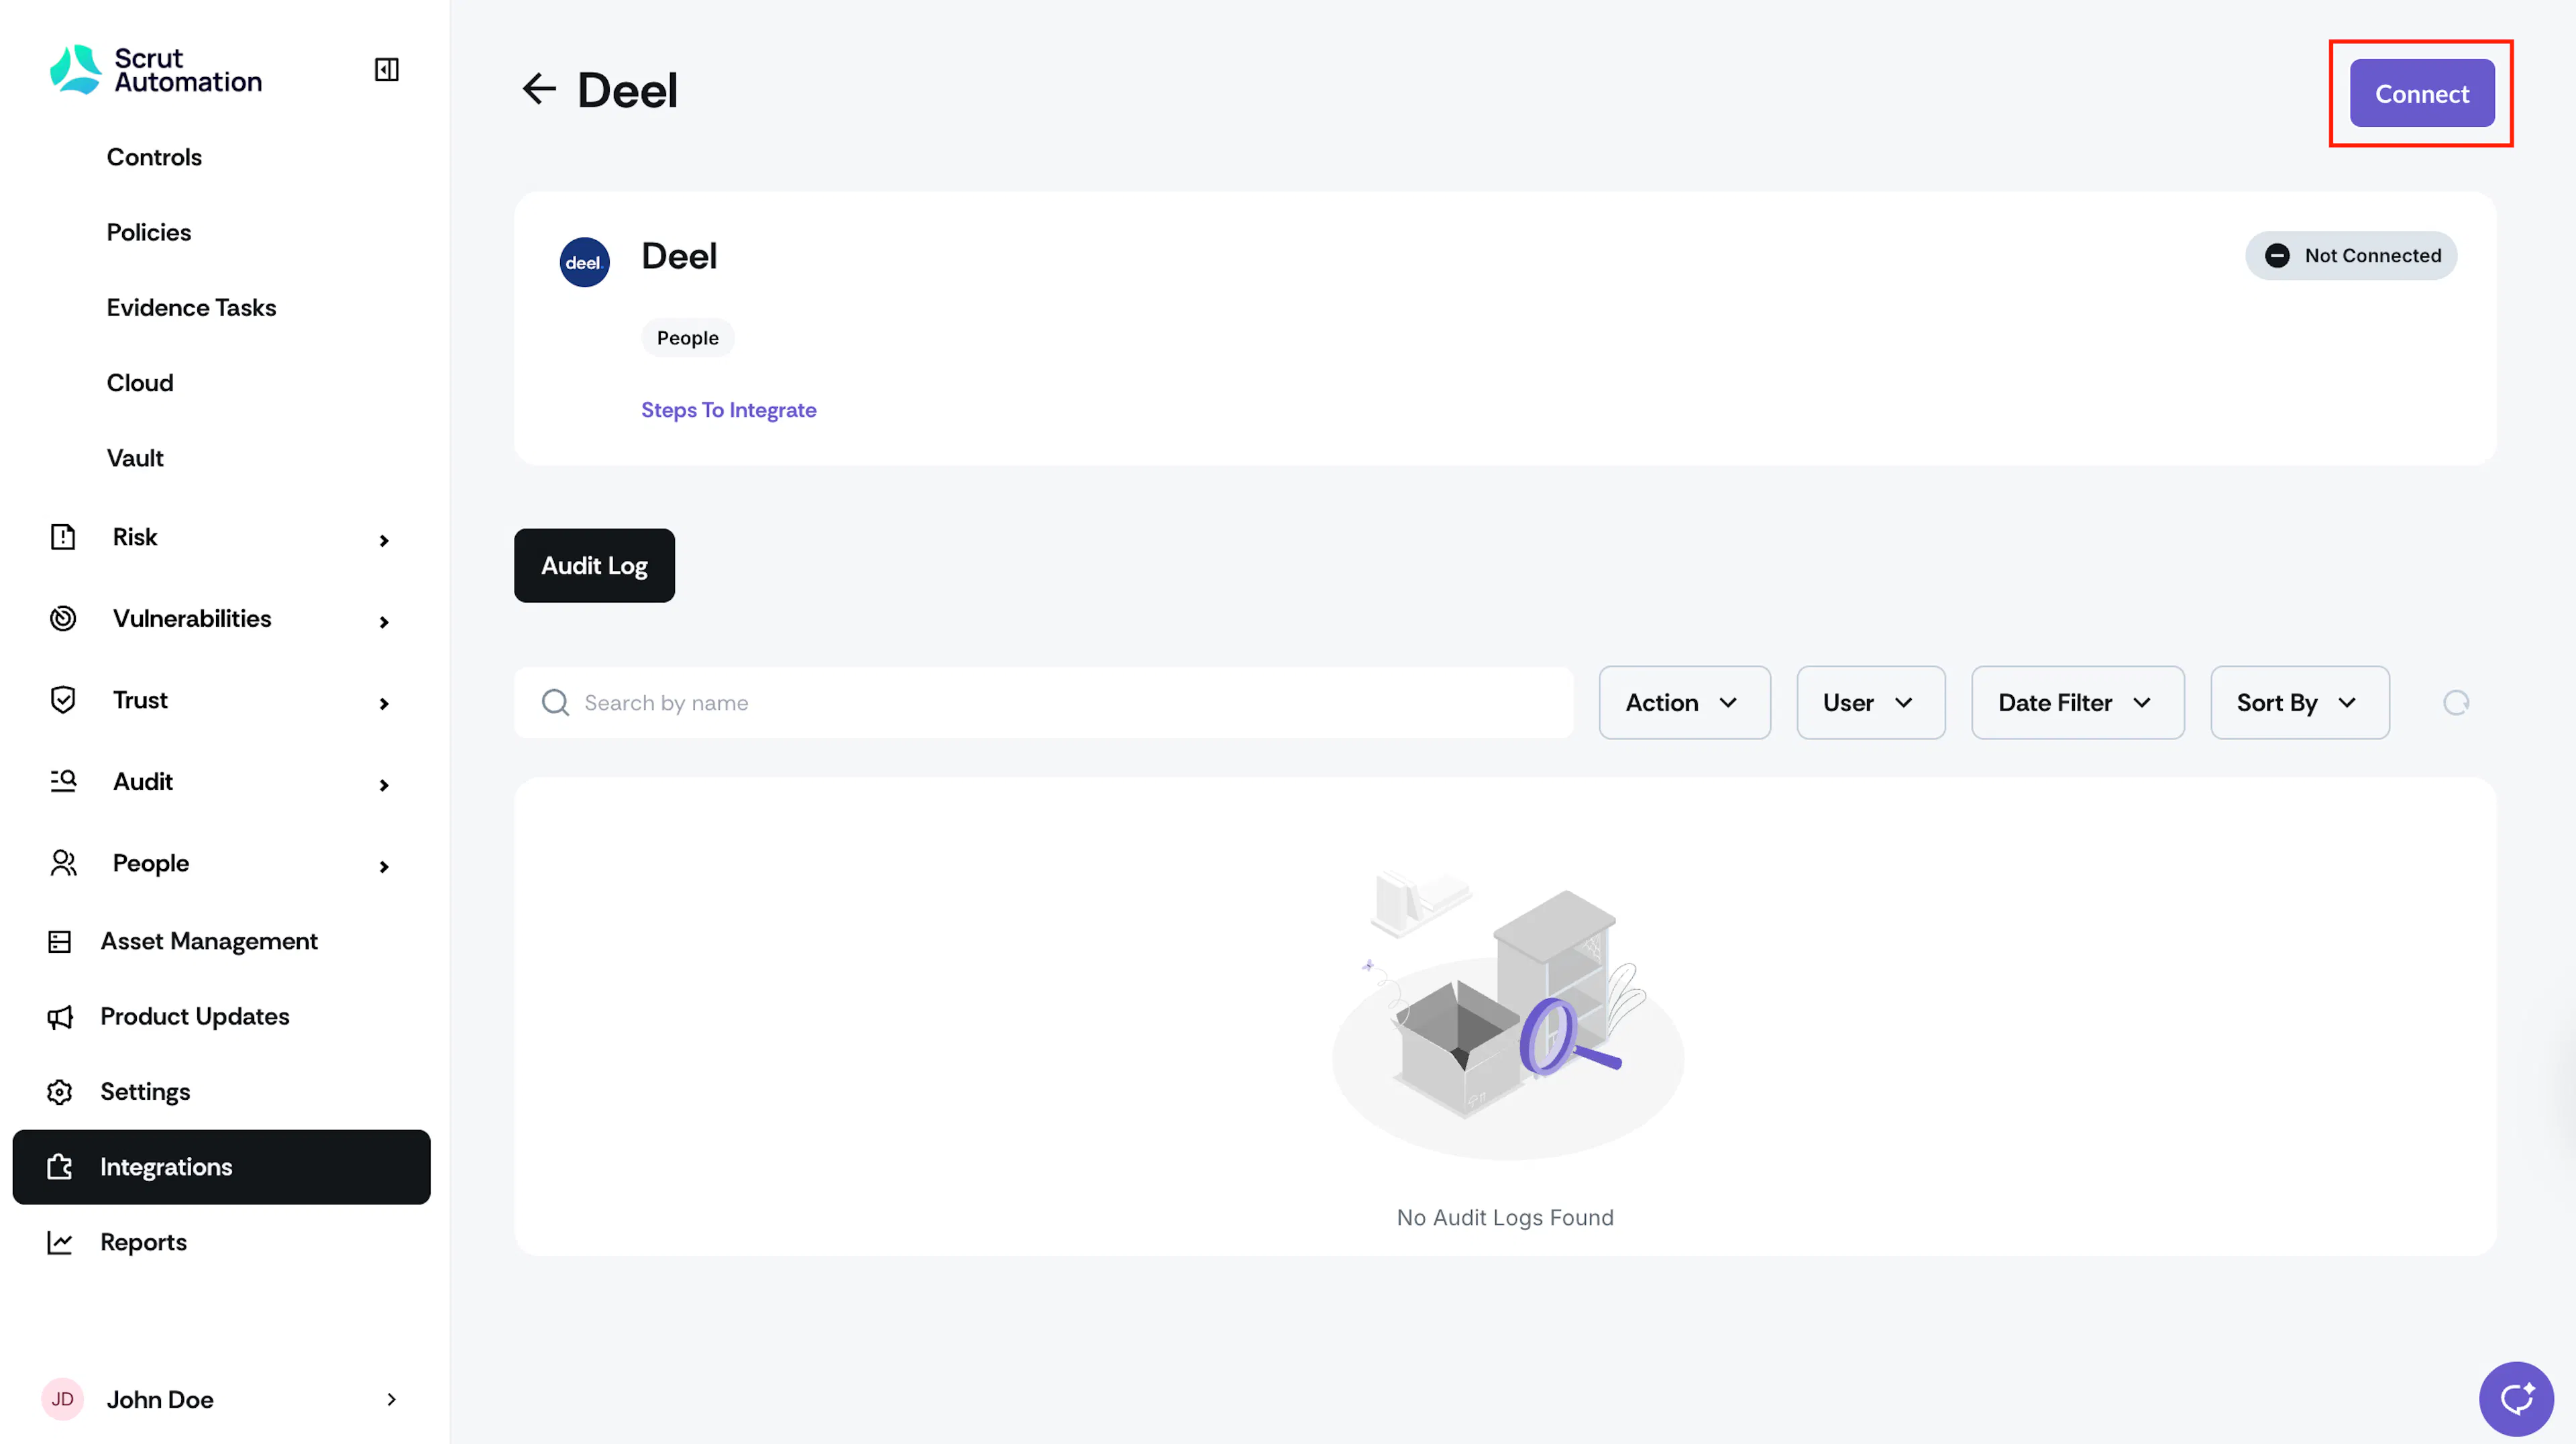
Click the Connect button at the top right of the Deel integration page.
-
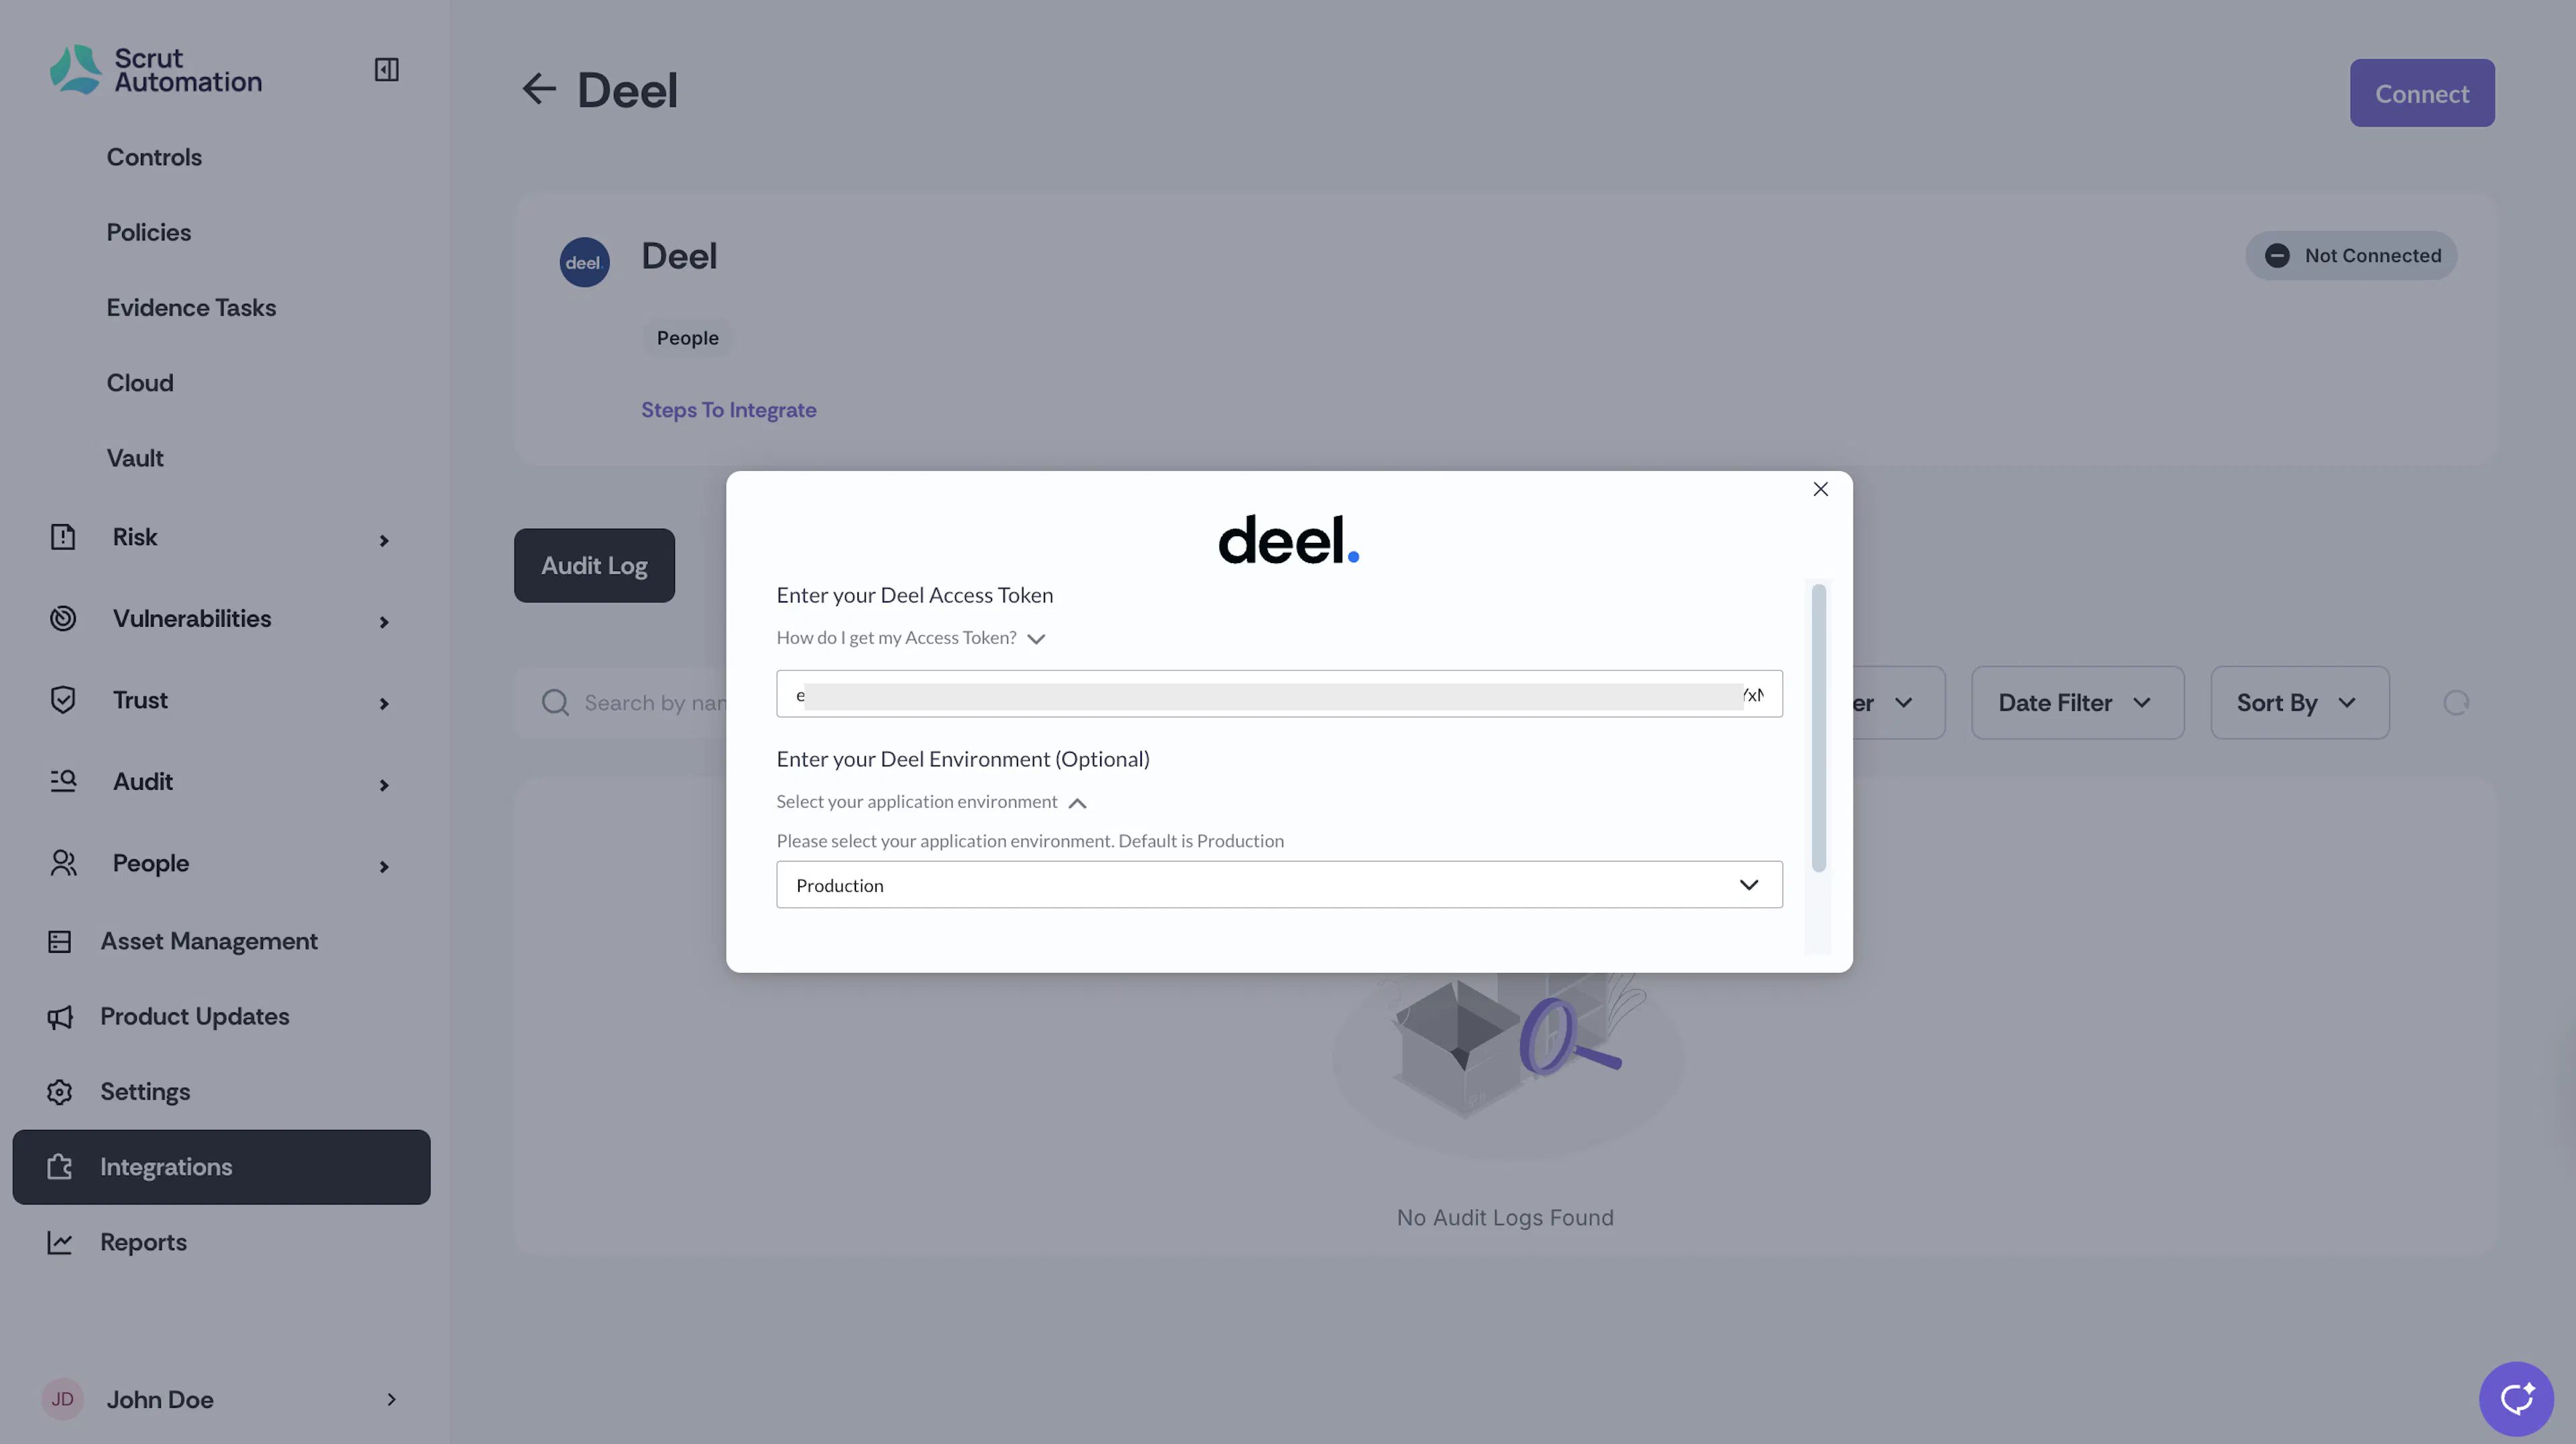
Enter the following details:
- Deel Access Token: Paste the Deel access token you generated in the previous step.
- Deel Environment (Optional): Select your application environment. By default, it is set to production.
-
Click Submit.
-
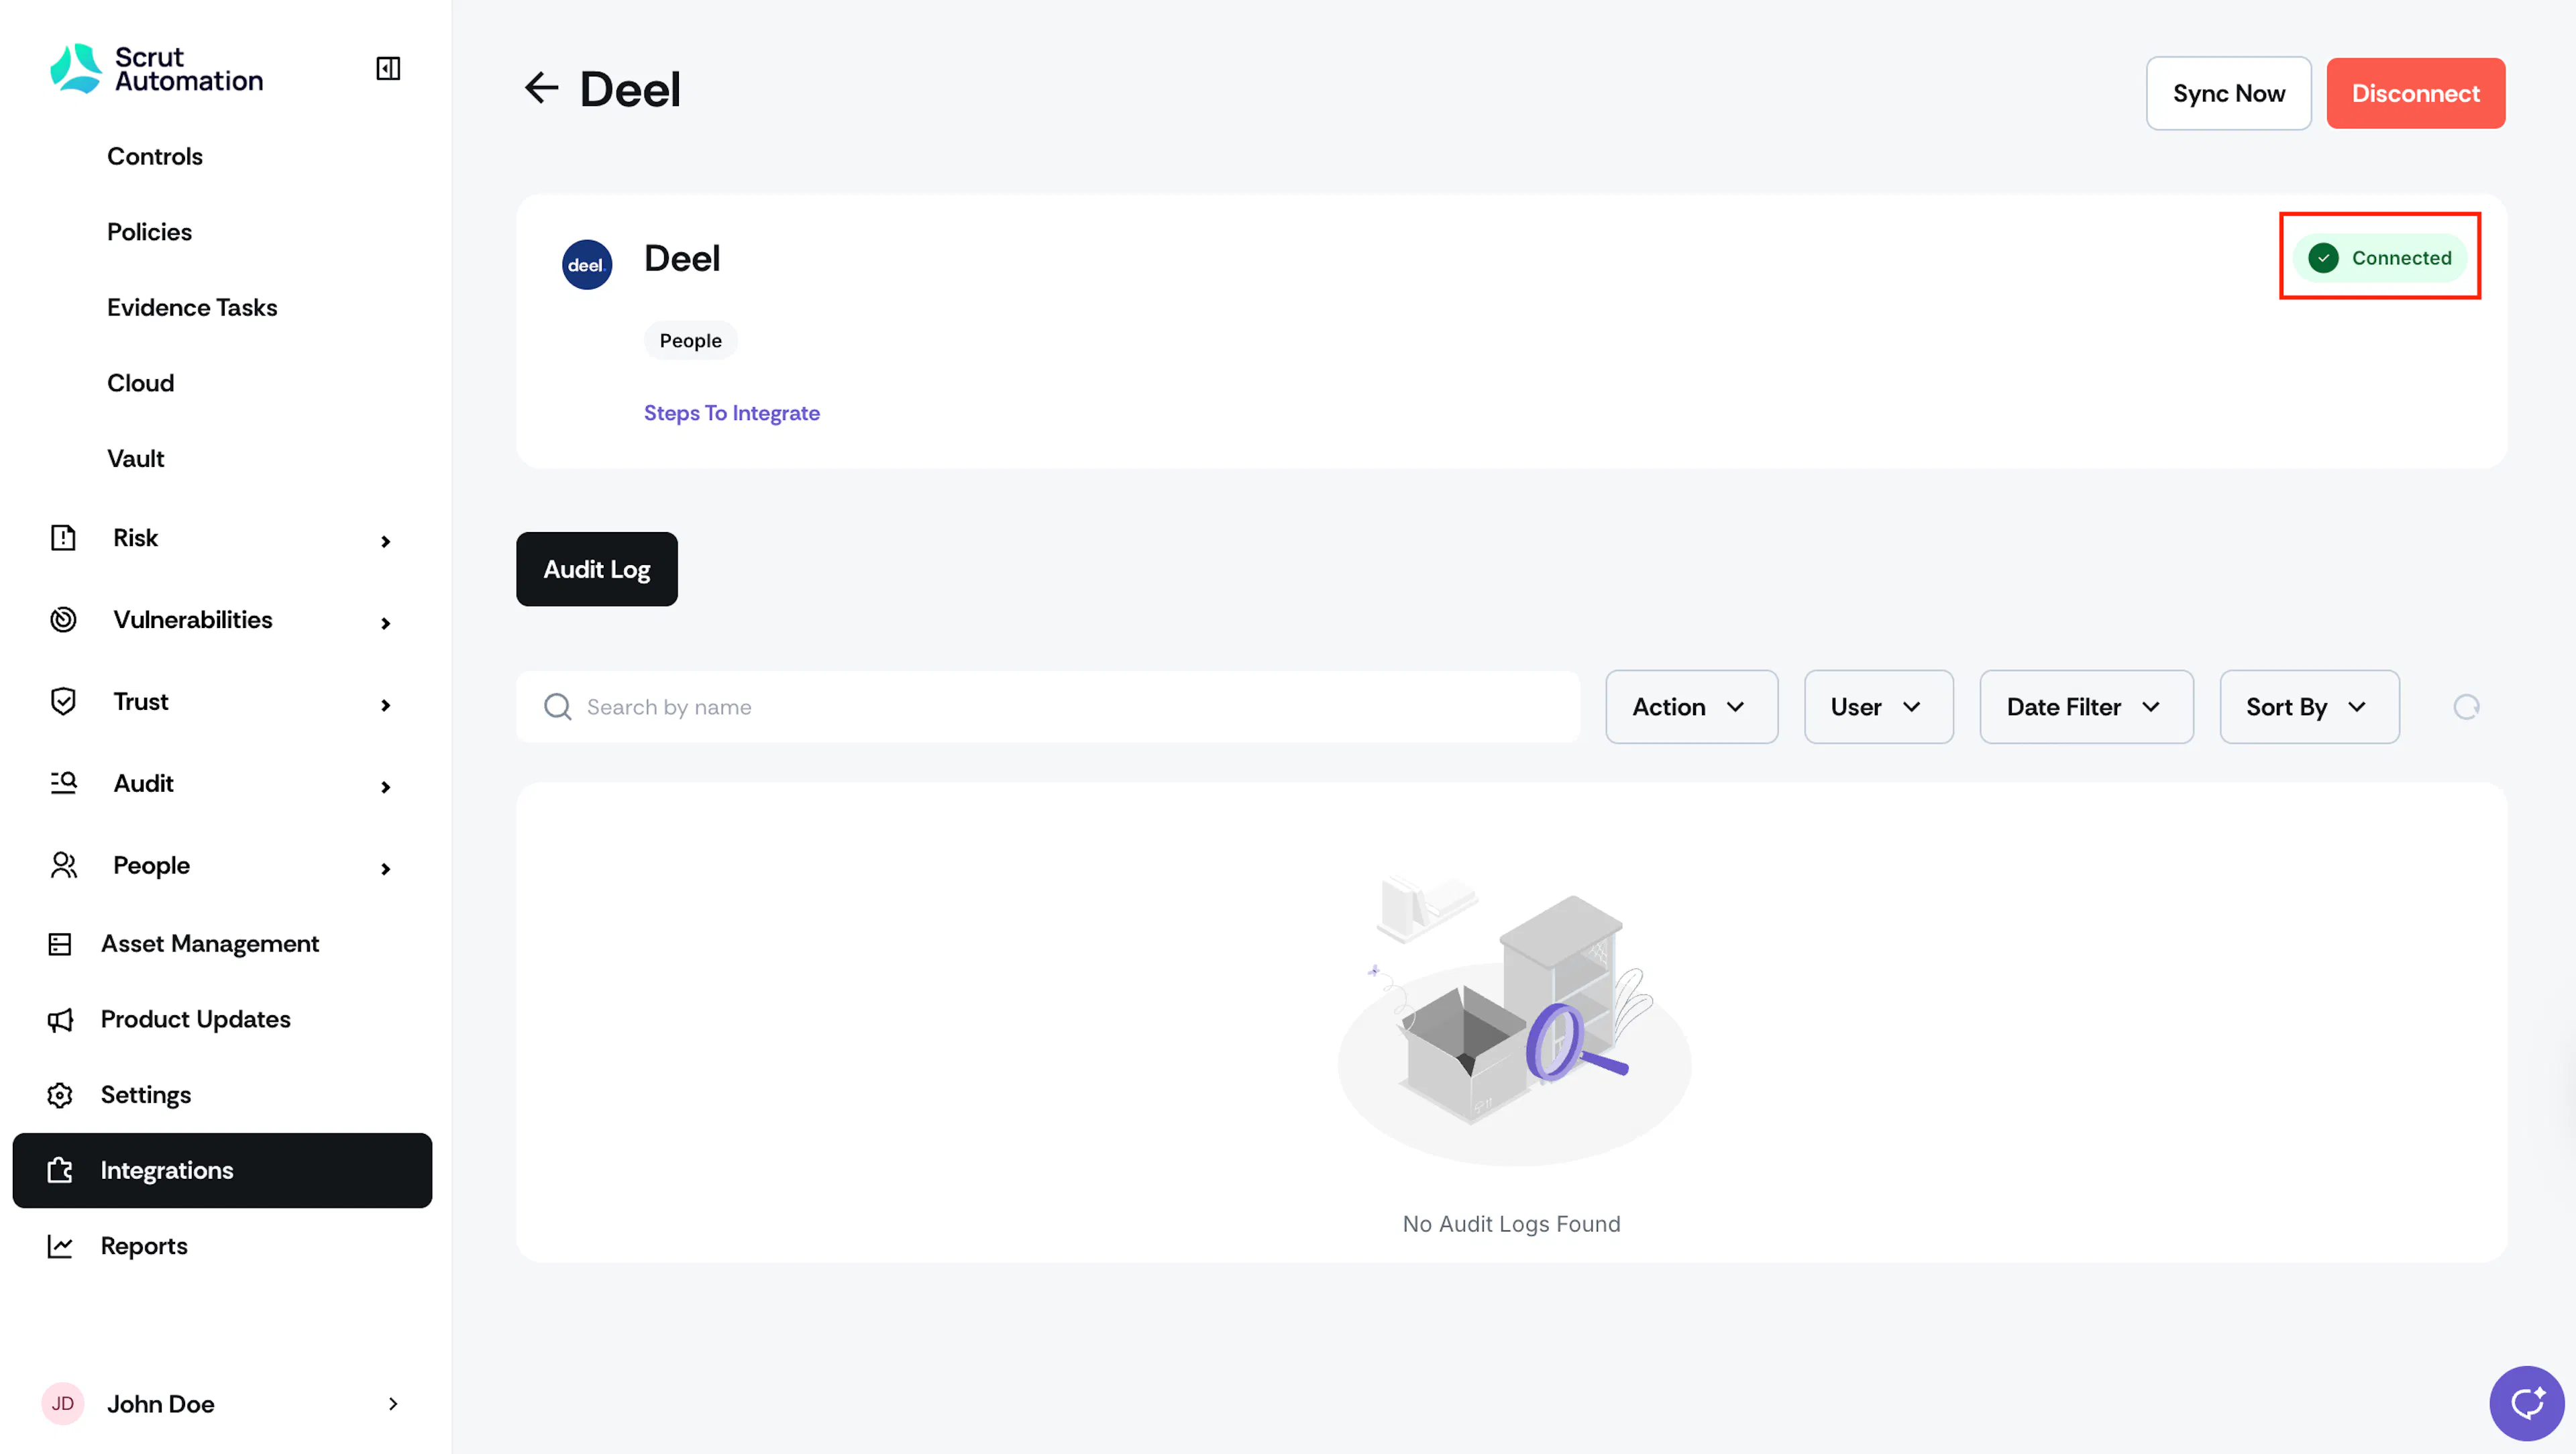
Once your Deel account is successfully integrated, you will see a connected flag on the Deel integrations page in Scrut.
Synchronization Details
- Initial Sync: Upon completing the integration, Scrut will immediately sync employee data from your Deel account.
- Recurring Sync: After this, Scrut performs the sync every 24 hours to fetch incremental data.
- Manual Sync: You can also initiate a manual sync by clicking the Sync Now button on the Deel integrations page.
Data Fetched from Deel
Scrut fetches the following data for all your employees from Deel:
- Employee name (First and last name)
- Email address
- Joining date
- Exit date (if applicable)
- Department and Role (if available)
- Email of reporting manager (if available)
- Leave data (start date, end date, and status)
Viewing Deel Data in Scrut
To view Deel data in Scrut:
- Go to People → Employees → All Employees.
- Click on any employee to view their details, including name, email, joining date, reporting manager, and more.
If you encounter any difficulties connecting your Deel account with Scrut, please contact our support team at support@scrut.io for assistance.