

Integrate Cloudflare
This article explains how to connect your Cloudflare account with Scrut.
What This Integration Does in Scrut
The Scrut - Cloudflare integration performs the following functions in Scrut:
- Automated Tests: Scrut runs automated compliance checks on your Cloudflare account. These tests evaluate firewall settings, rulesets, and zone configurations against applicable compliance frameworks.
- User Access Data: Scrut fetches user access information from your Cloudflare account for Access Reviews. This helps you monitor who has access to your domain zones and related configurations.
- Scrut Monitor: This integration automatically fetches evidence from your Cloudflare account via Scrut Monitors. This helps automate evidence gathering and significantly speeds up compliance workflows.
Access Requirements
To integrate with Cloudflare with Scrut, you need:
For Cloudflare
- Administrator access to generate API tokens
For Scrut
- Administrator (Or Contributor with access to the Integrations module)
Permissions
For Cloudflare
- Read all resources
Important:
Do not modify the default permissions under the "Read all resources" template. Altering permissions may cause the integration to fail.
Data Collected
This integration collects the following data from your Cloudflare account:
- Users – User access and membership information
- Domain Zones – Zone-level configuration data
- Rulesets – Security and traffic management rules
- Firewalls – Firewall configuration and related policies
Sync Frequency
- Data is synced automatically from your Cloudflare account to Scrut once every 24 hours
- You can also trigger a manual sync as required
How to Connect Cloudflare With Scrut
Step 1: Generate an API Token in Cloudflare
Follow these steps in your Cloudflare dashboard:
-
Log in to your Cloudflare account.
-
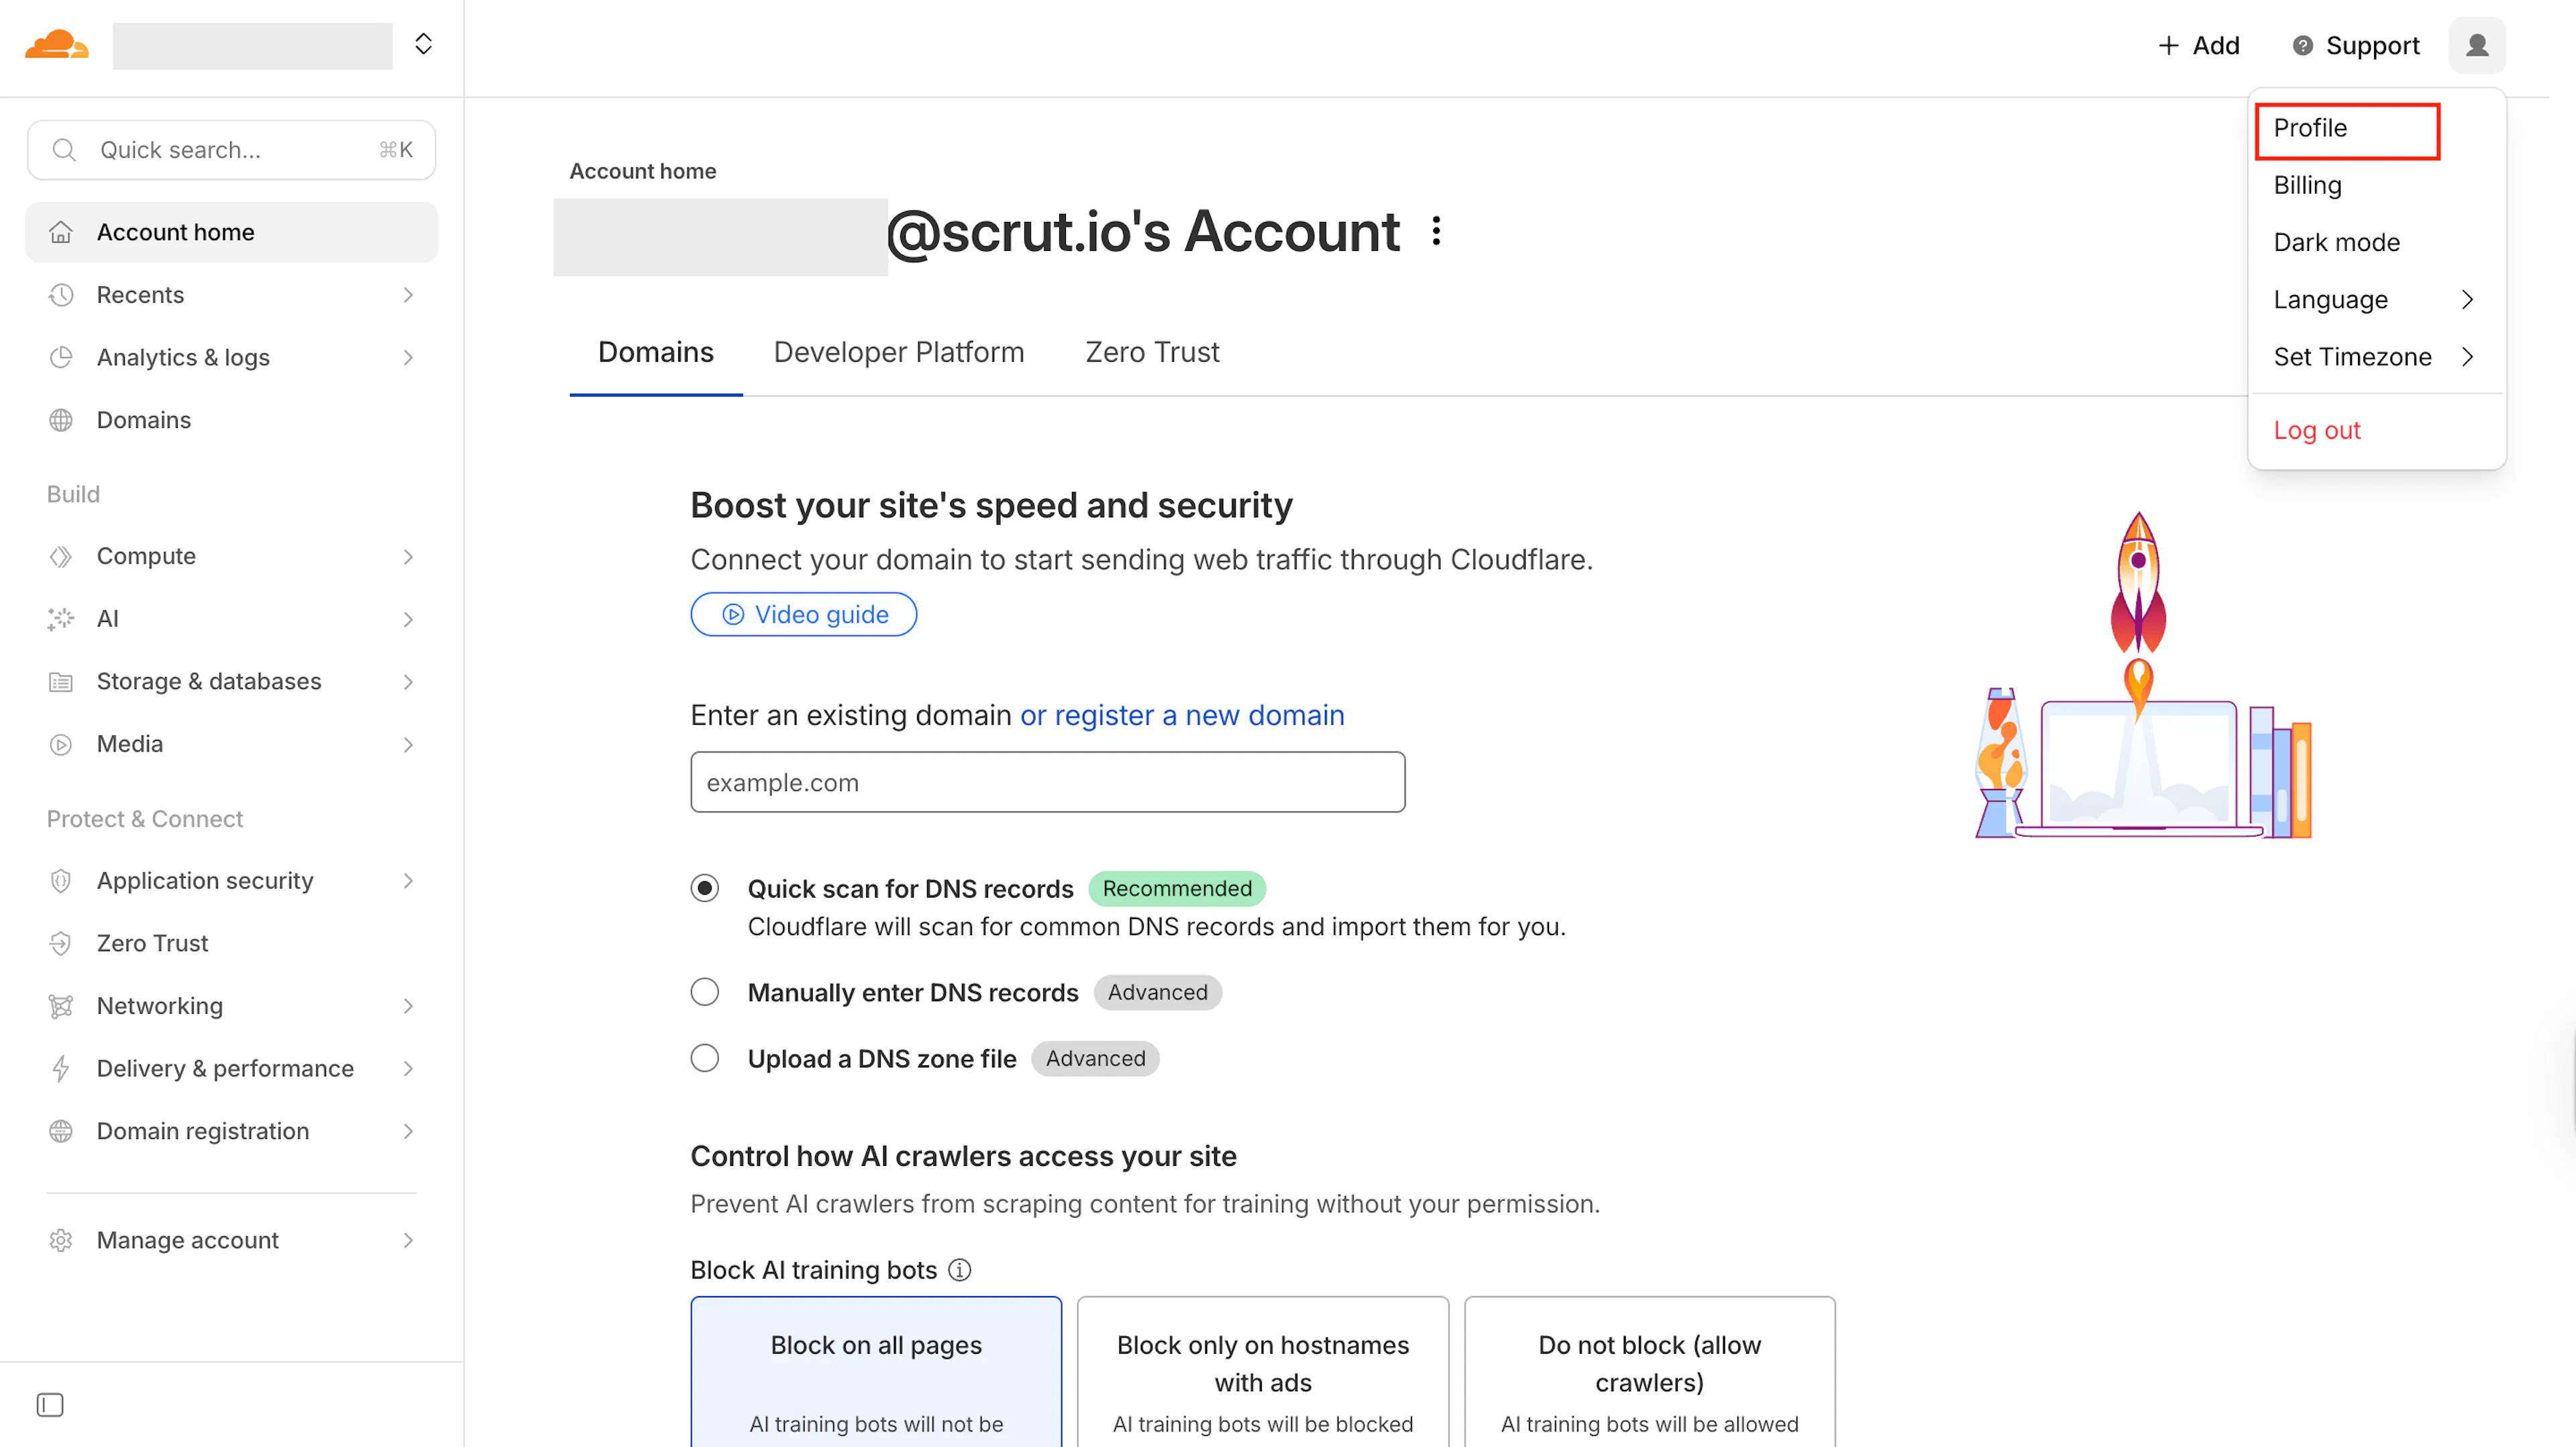
Click the user icon (top-right corner) and navigate to your Profile.
-
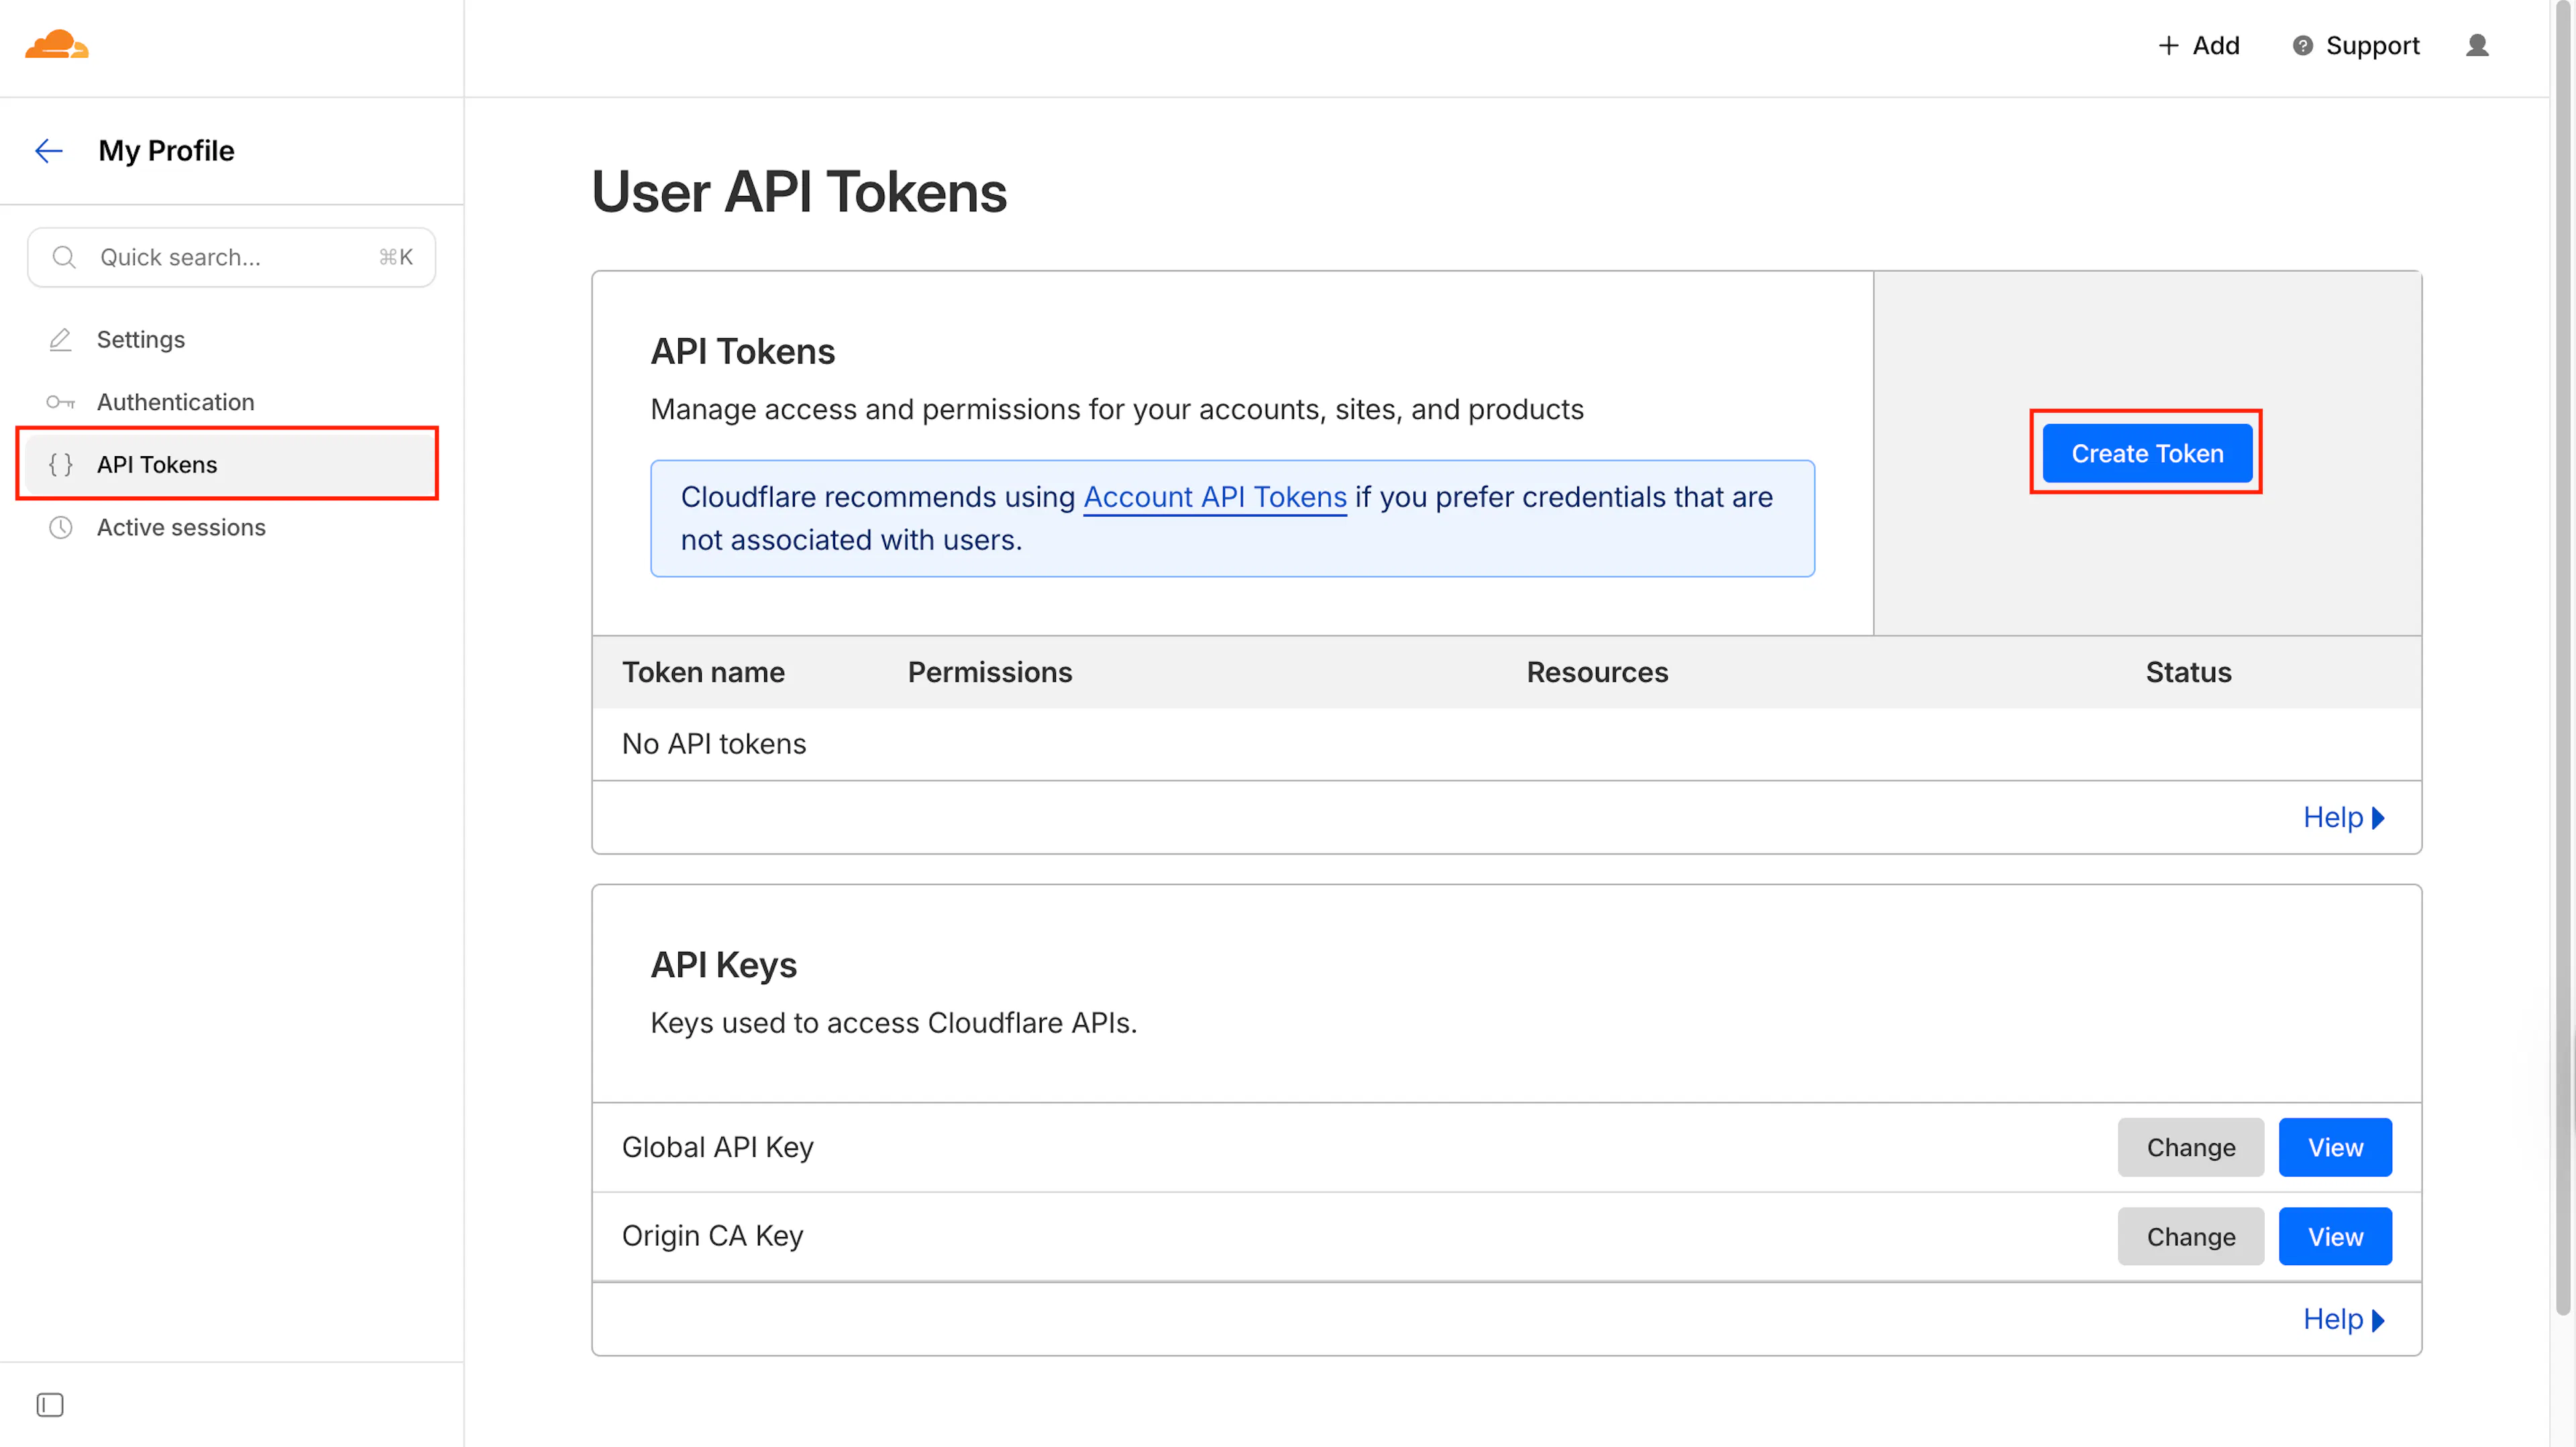
From the left-hand menu, select API Tokens and click Create Token.
-
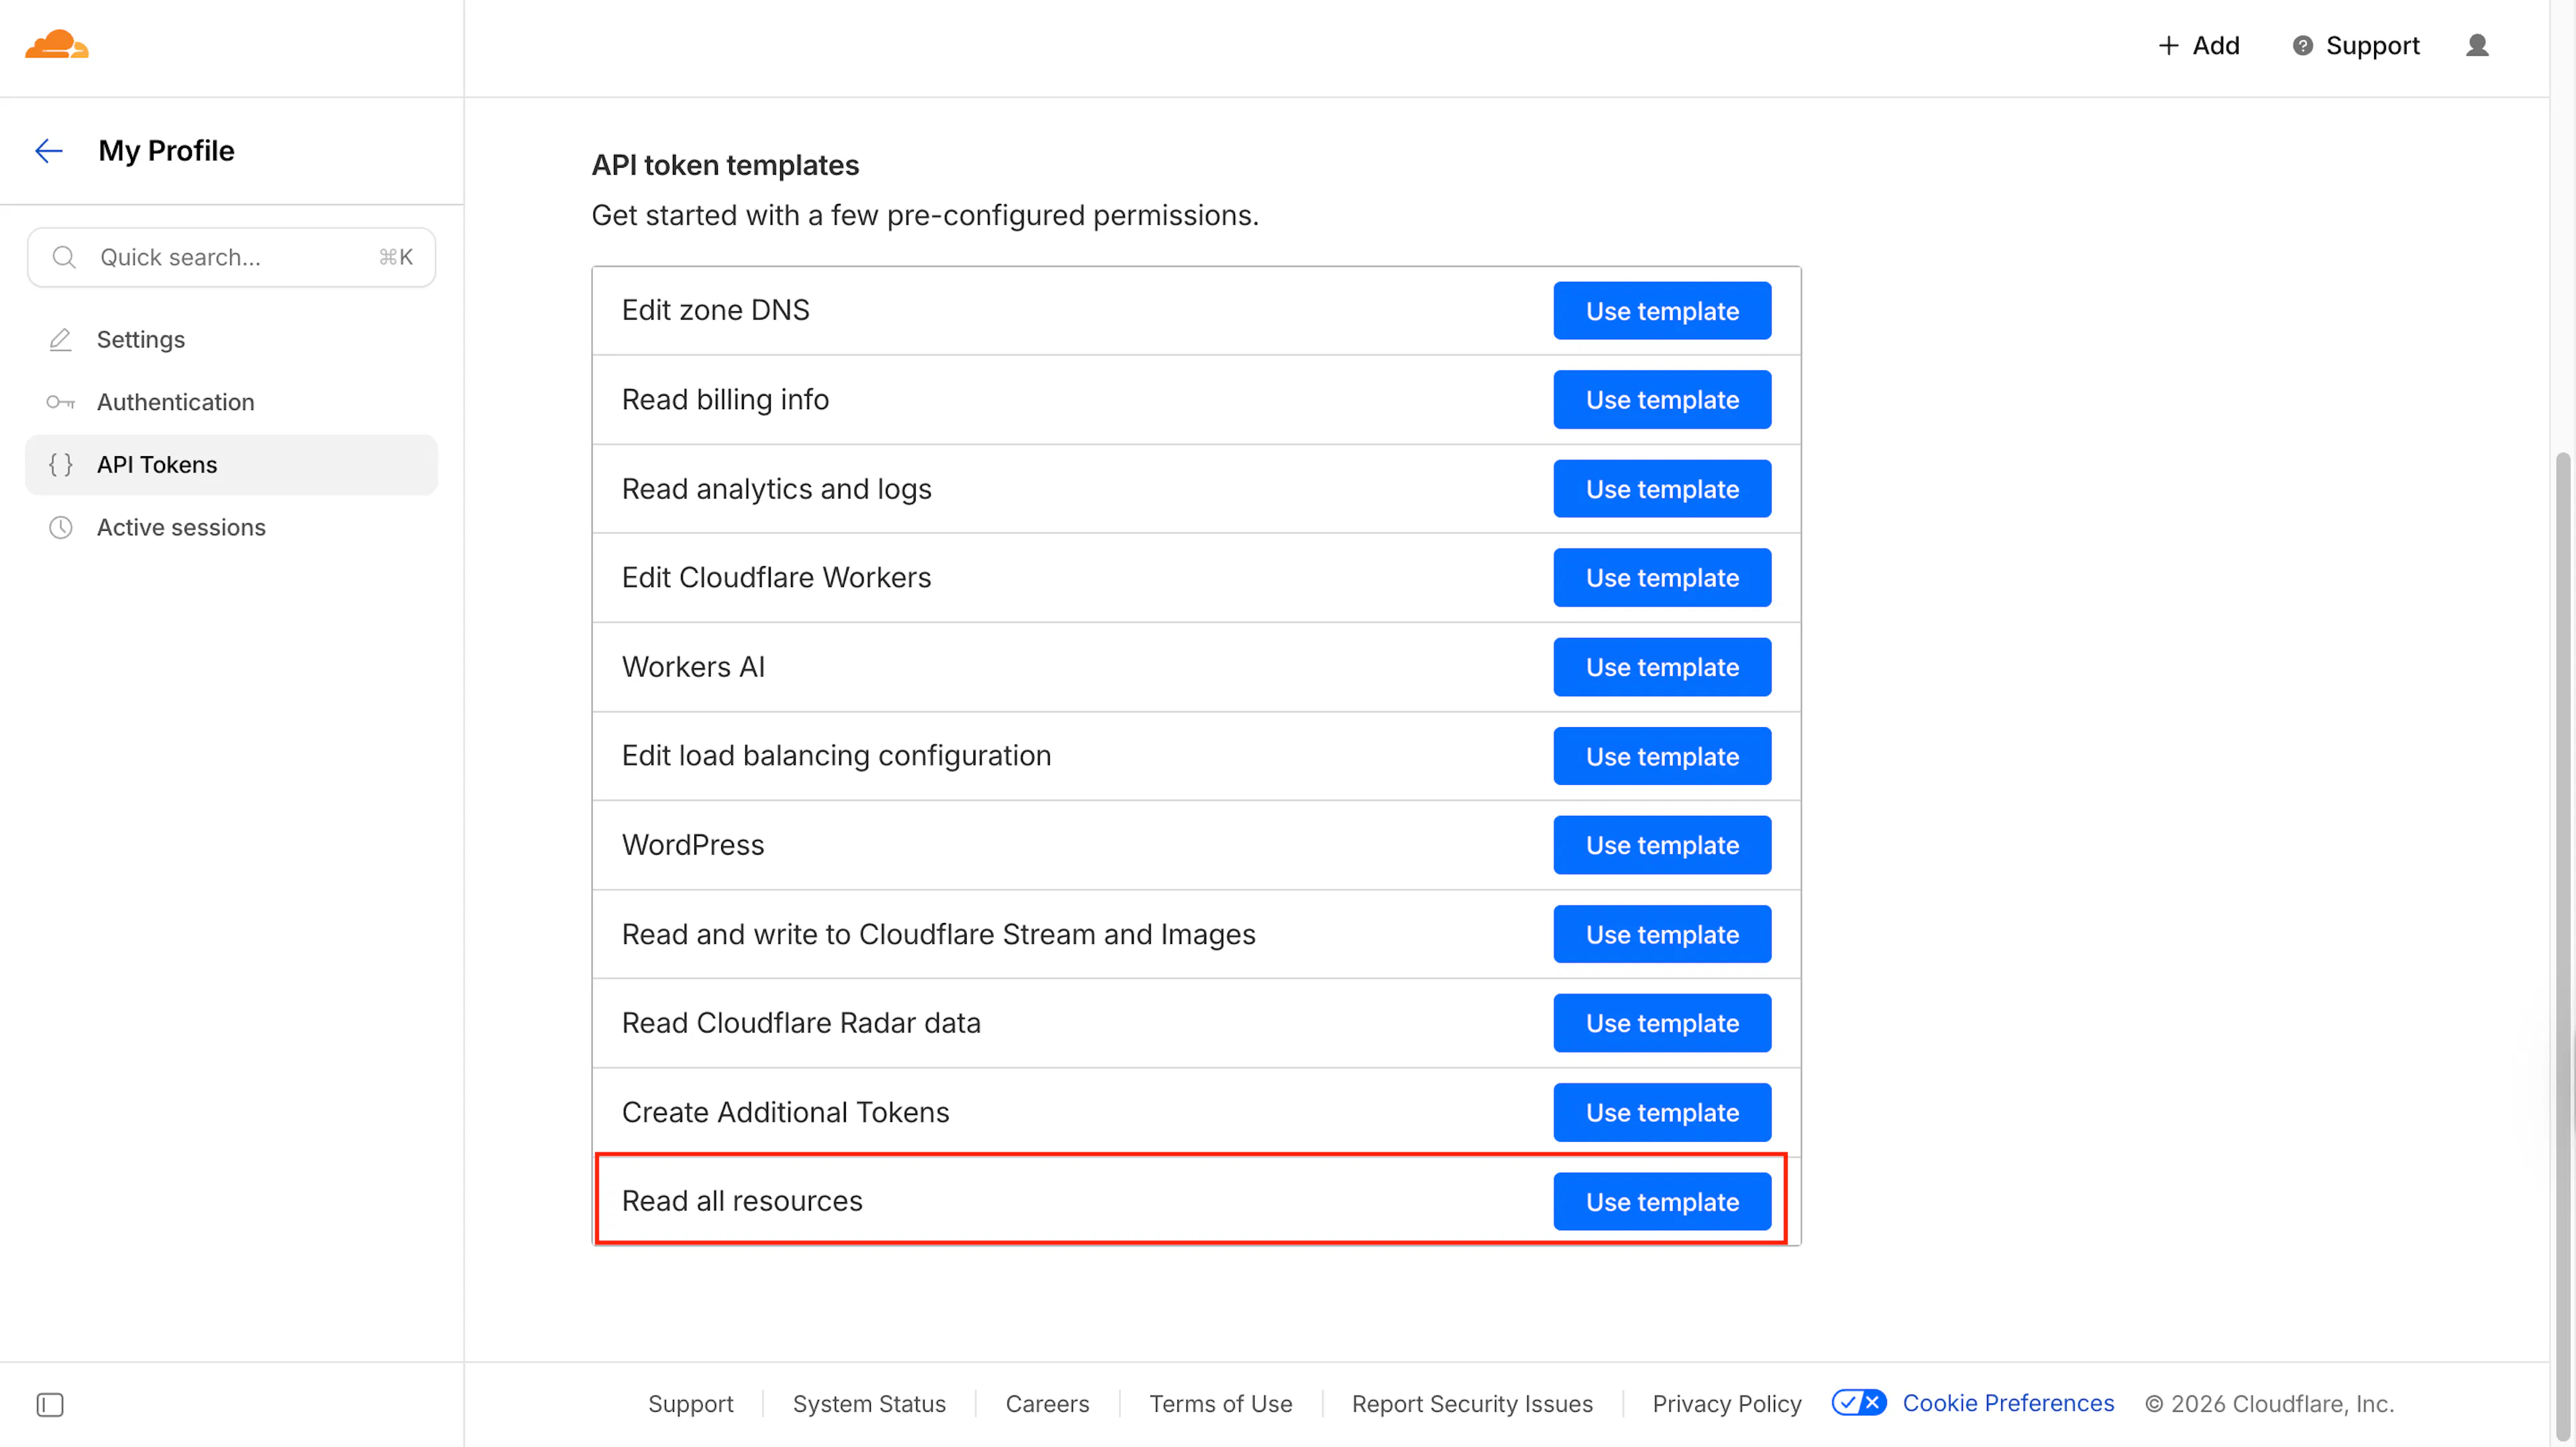
Under API Token Templates, click Use template next to Read all resources.
-
Edit the Token Name (for example:
Scrut Integration). Note the token name in a safe location, as you’ll need to enter it in Scrut in the next step.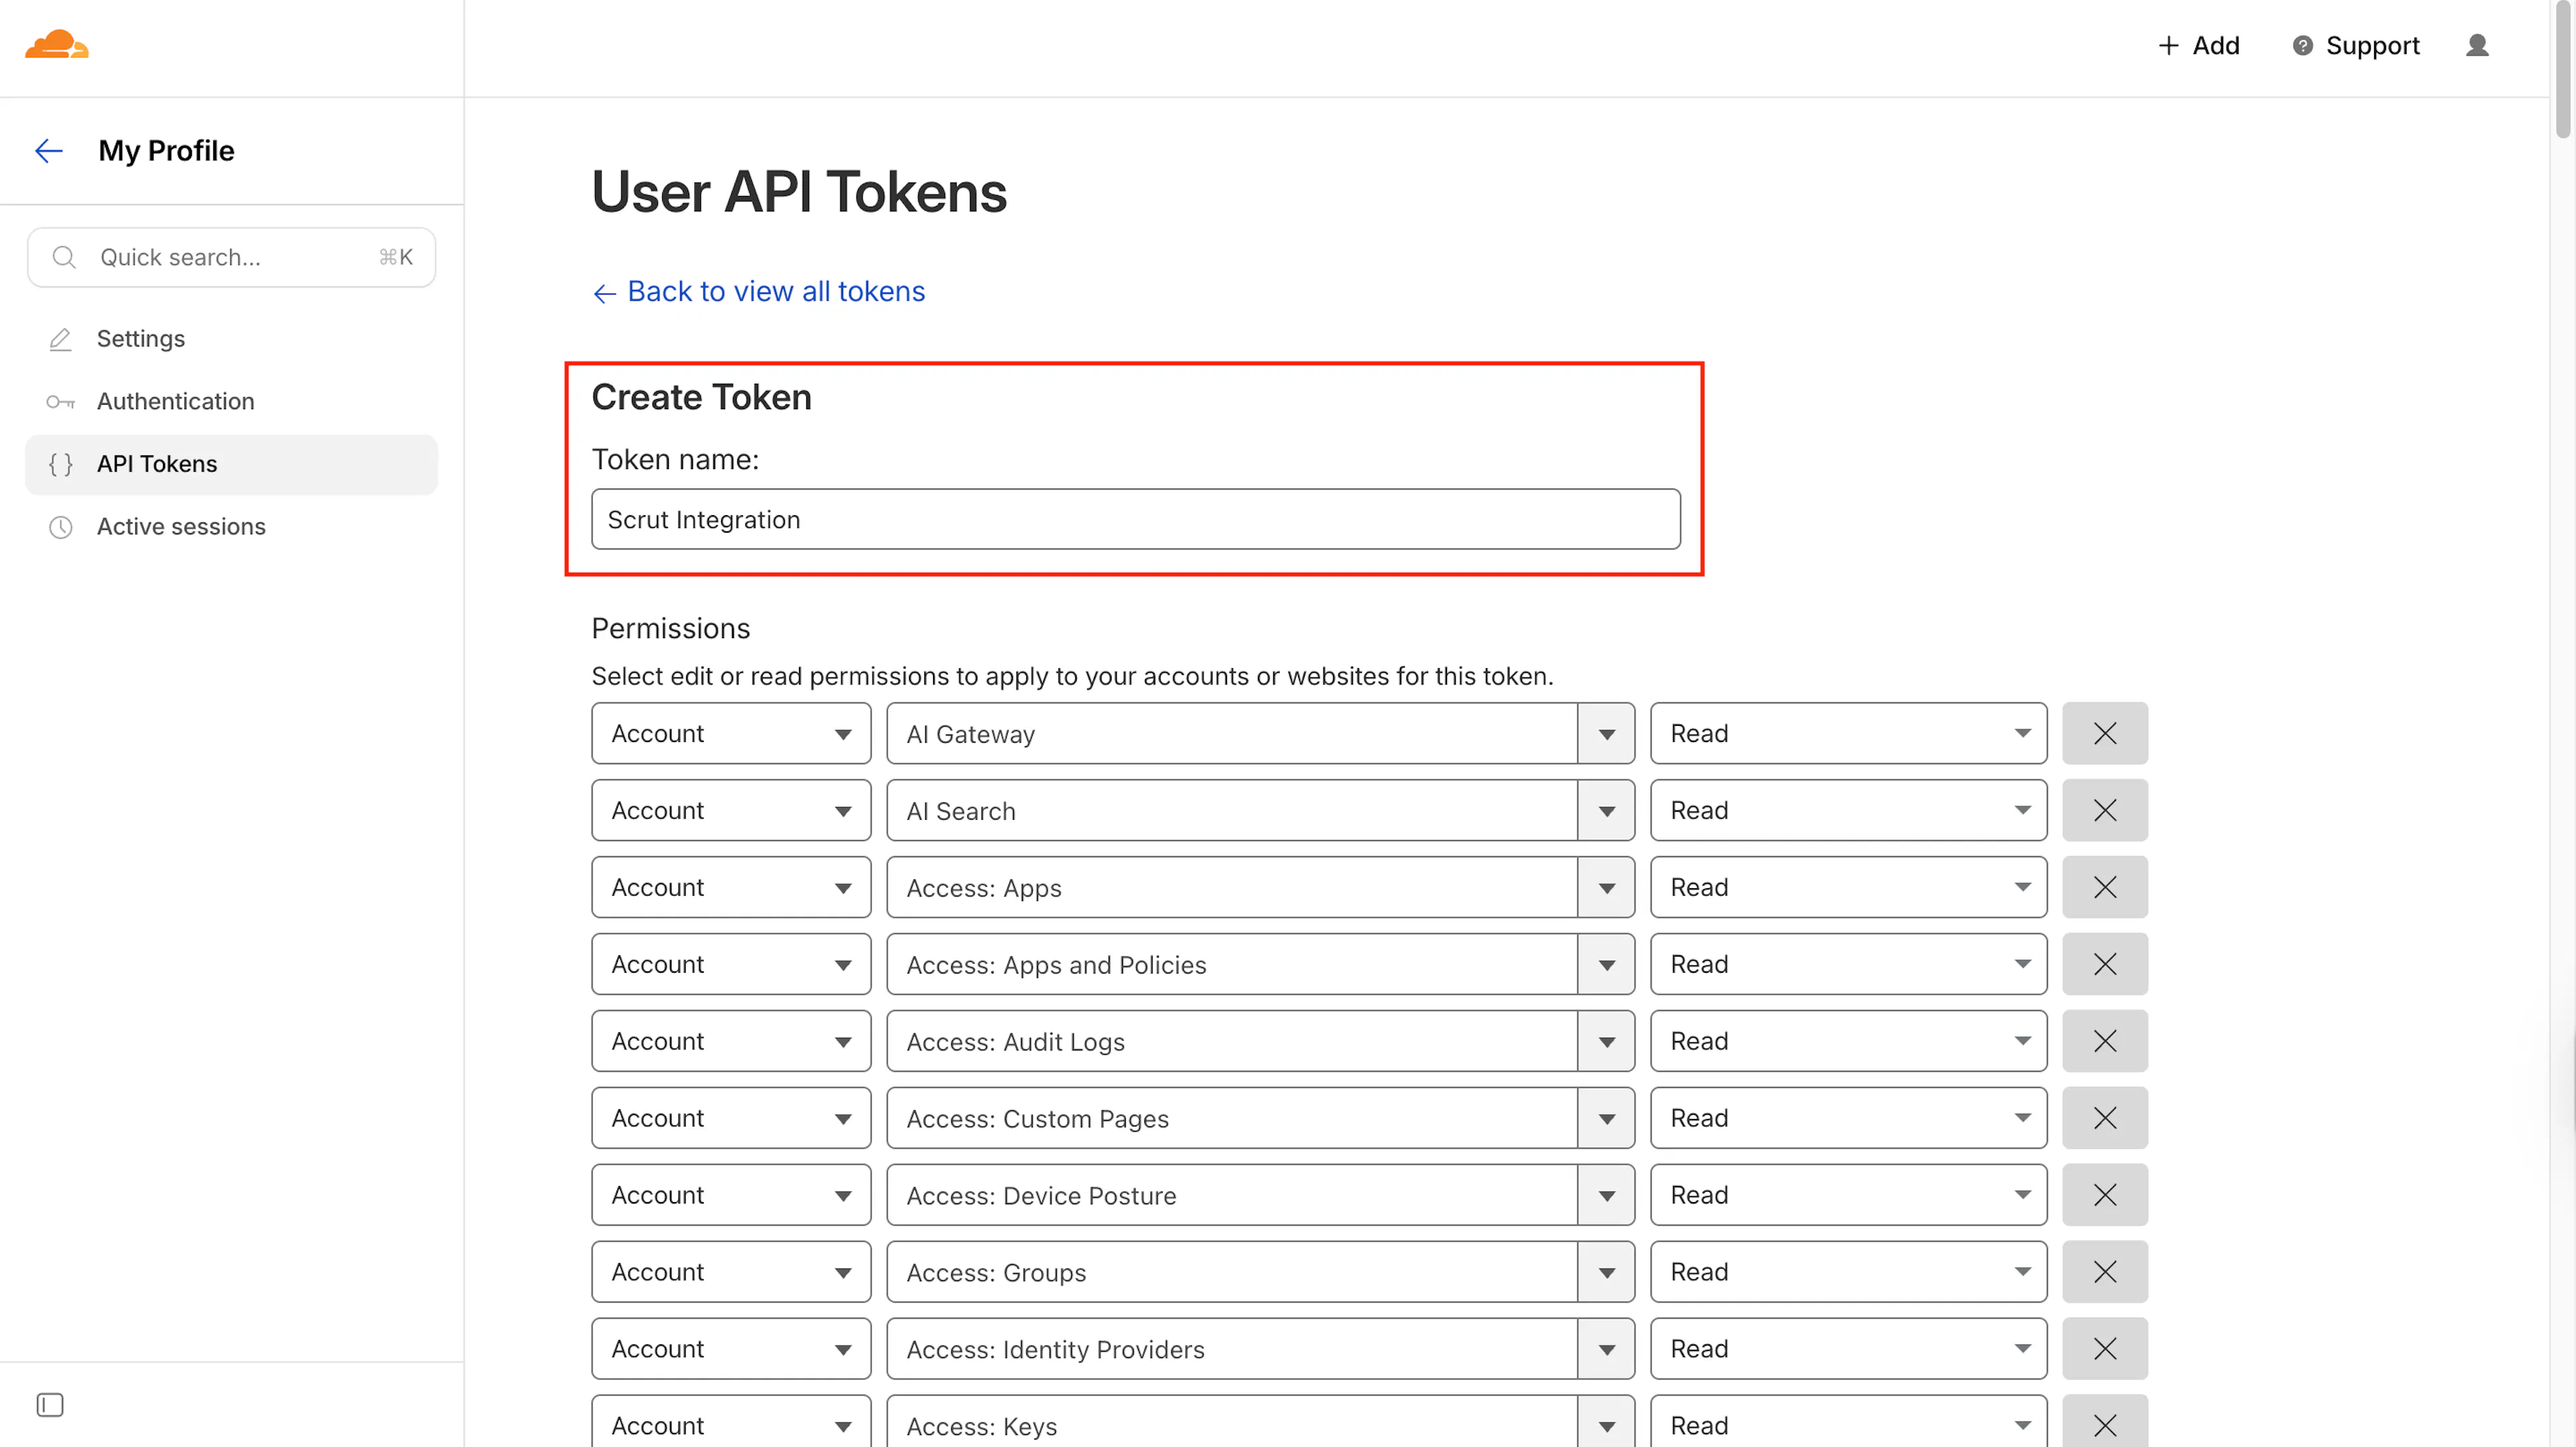
-
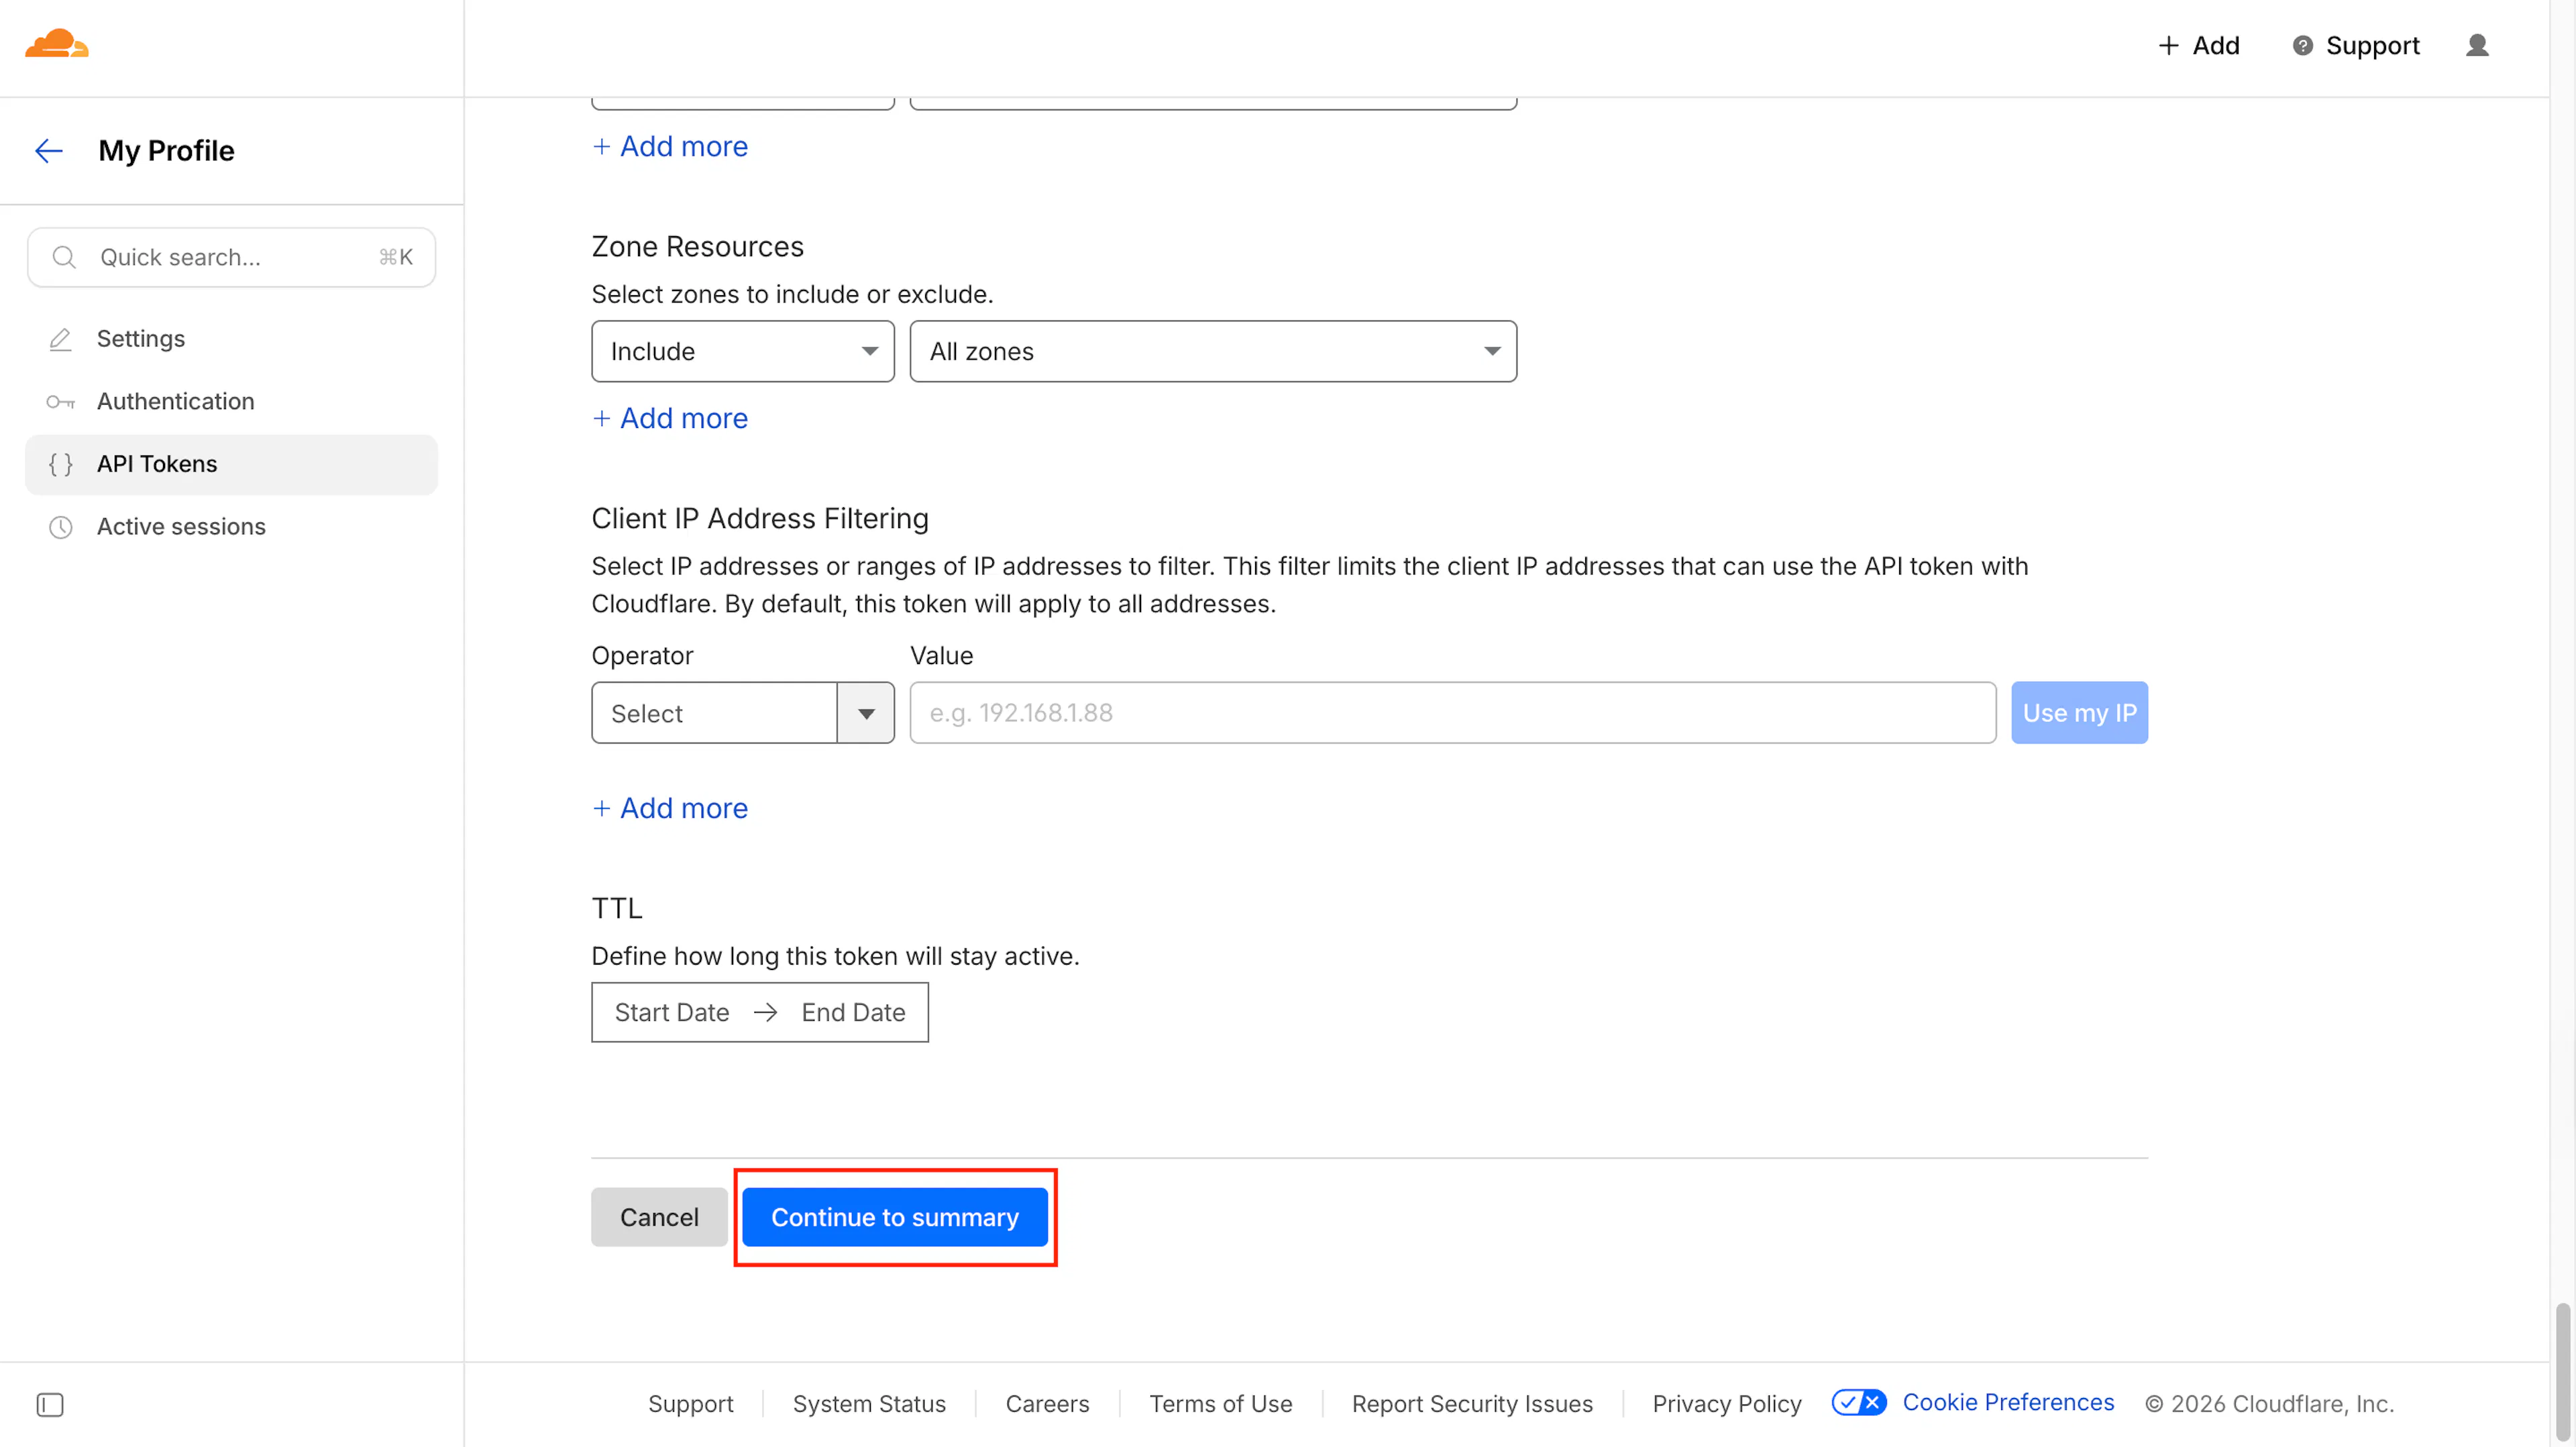
Scroll to the bottom and leave all default permissions unchanged.
Important:
Do not modify the default permissions, as it may cause the integration to fail.
-
Click Continue to Summary.
-
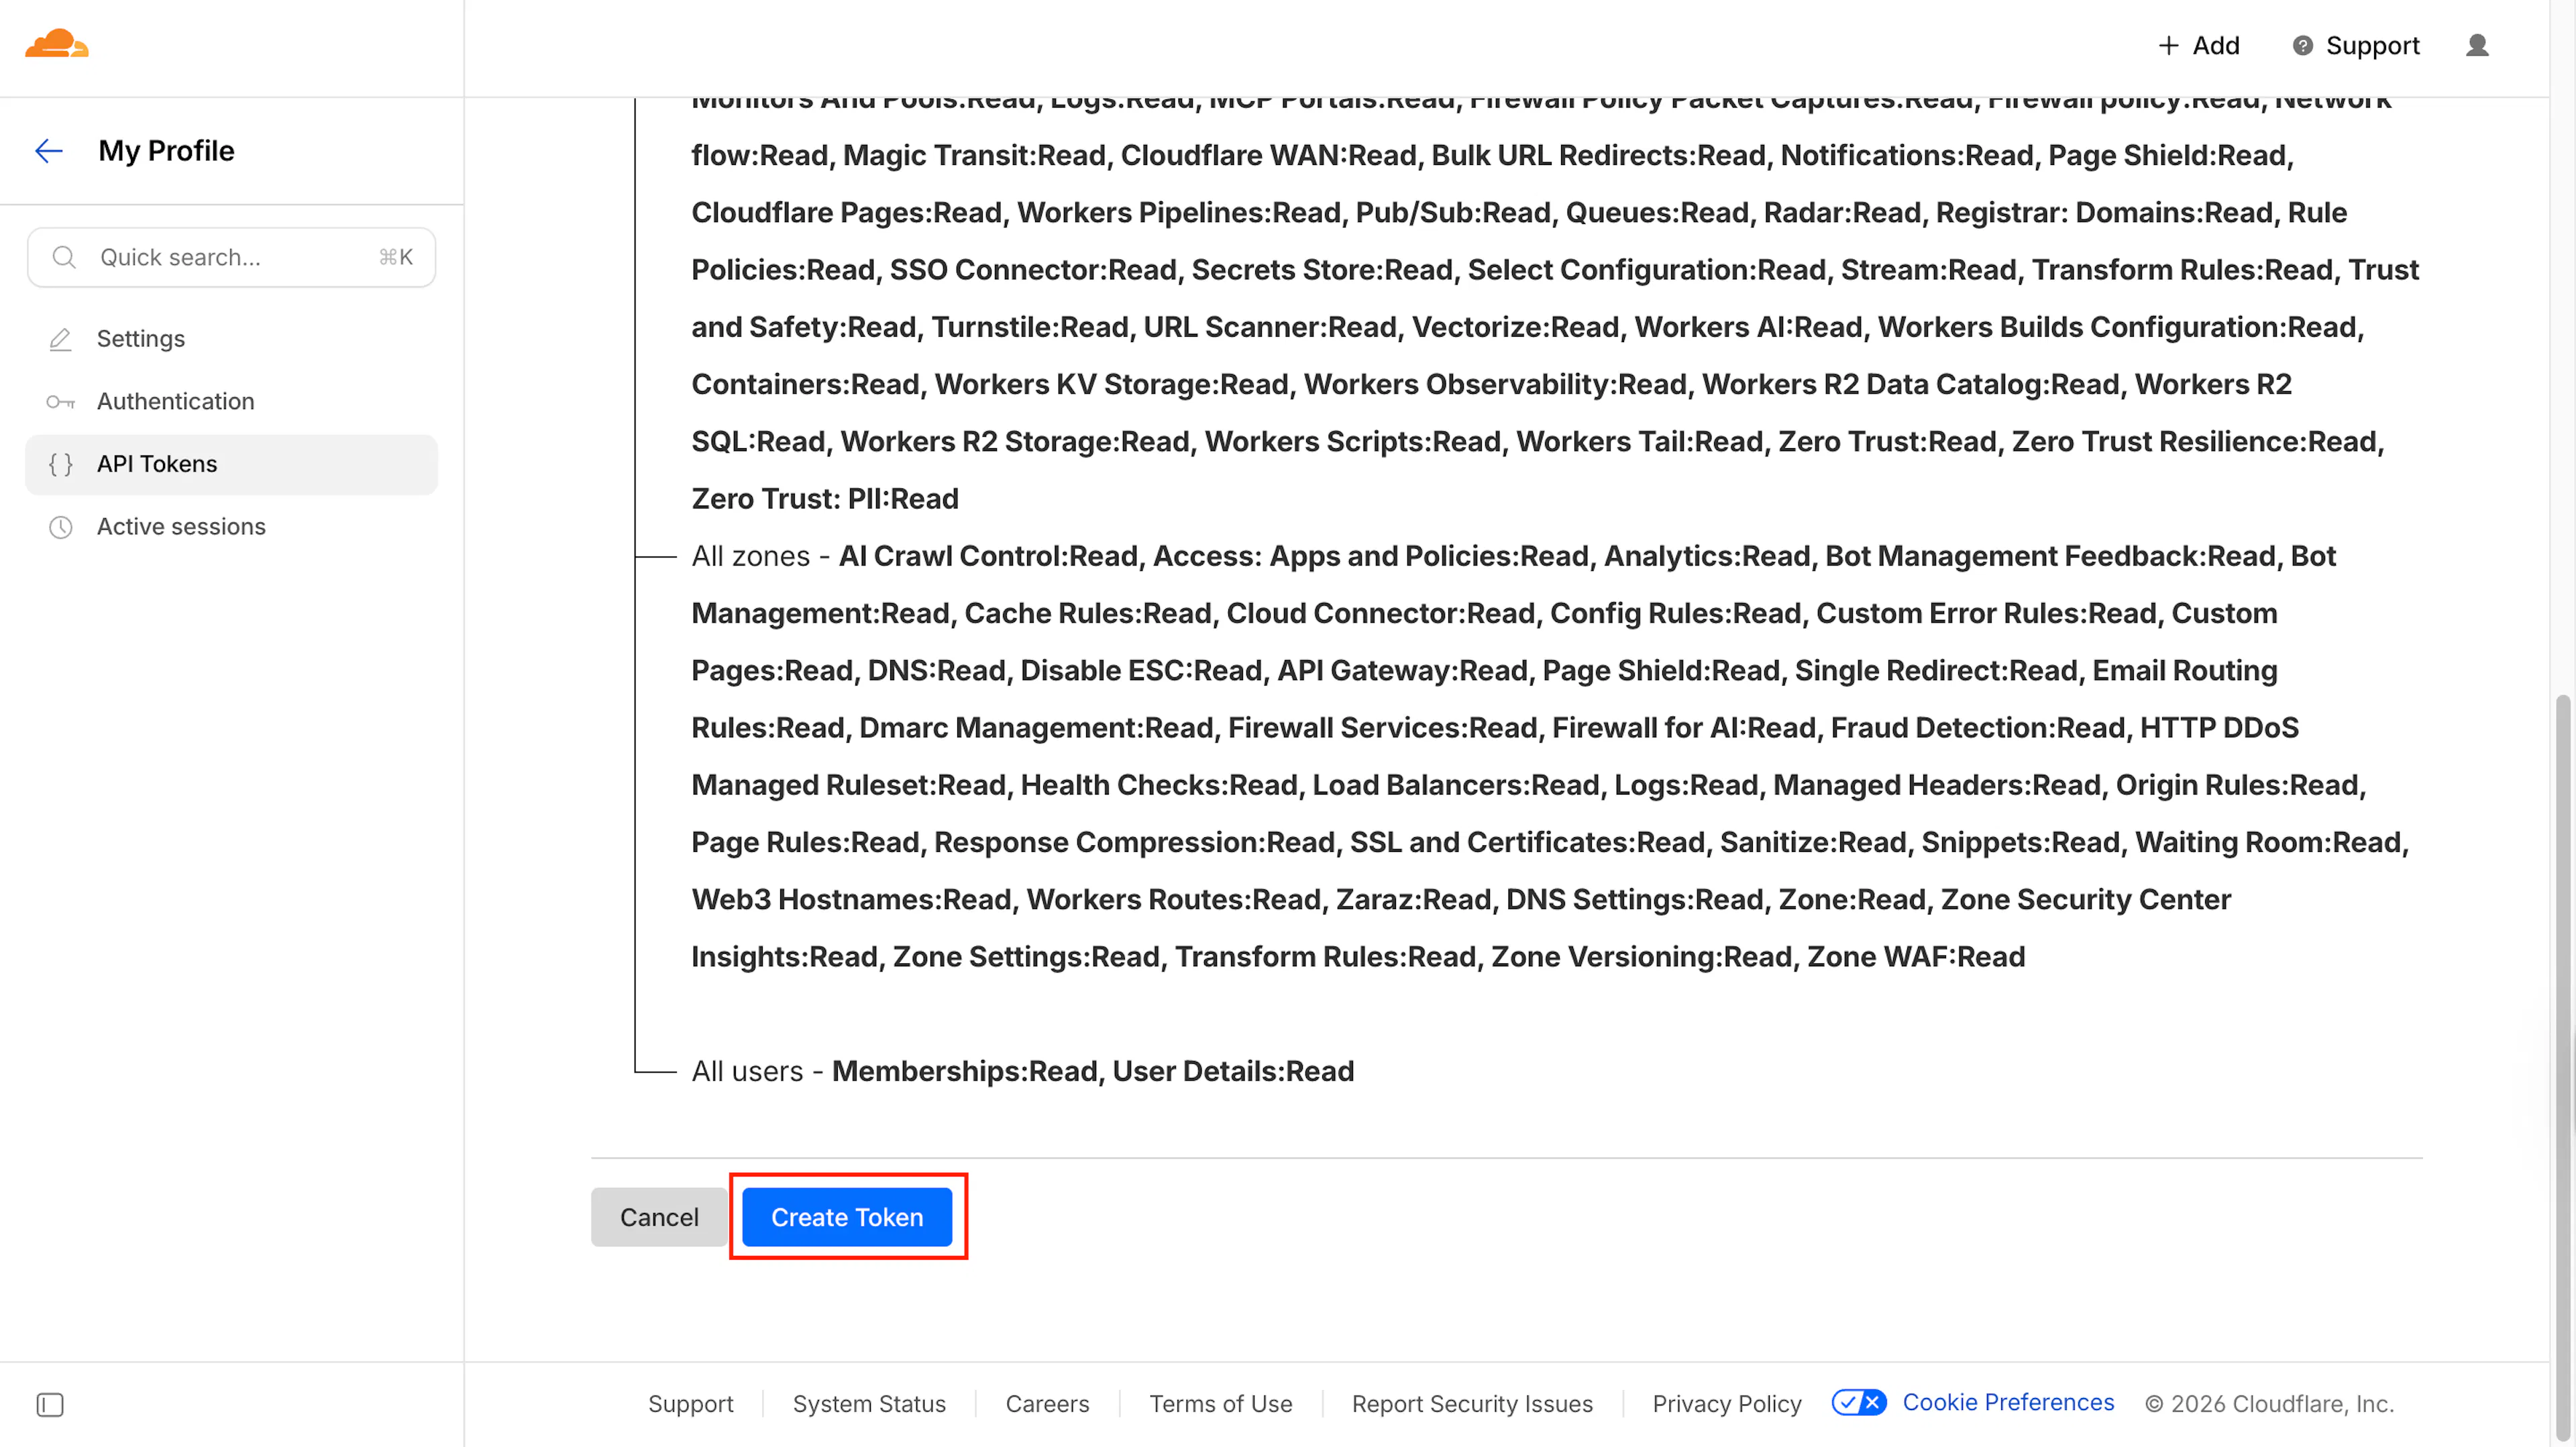
Review the permissions summary.
-
Click Create Token.
-
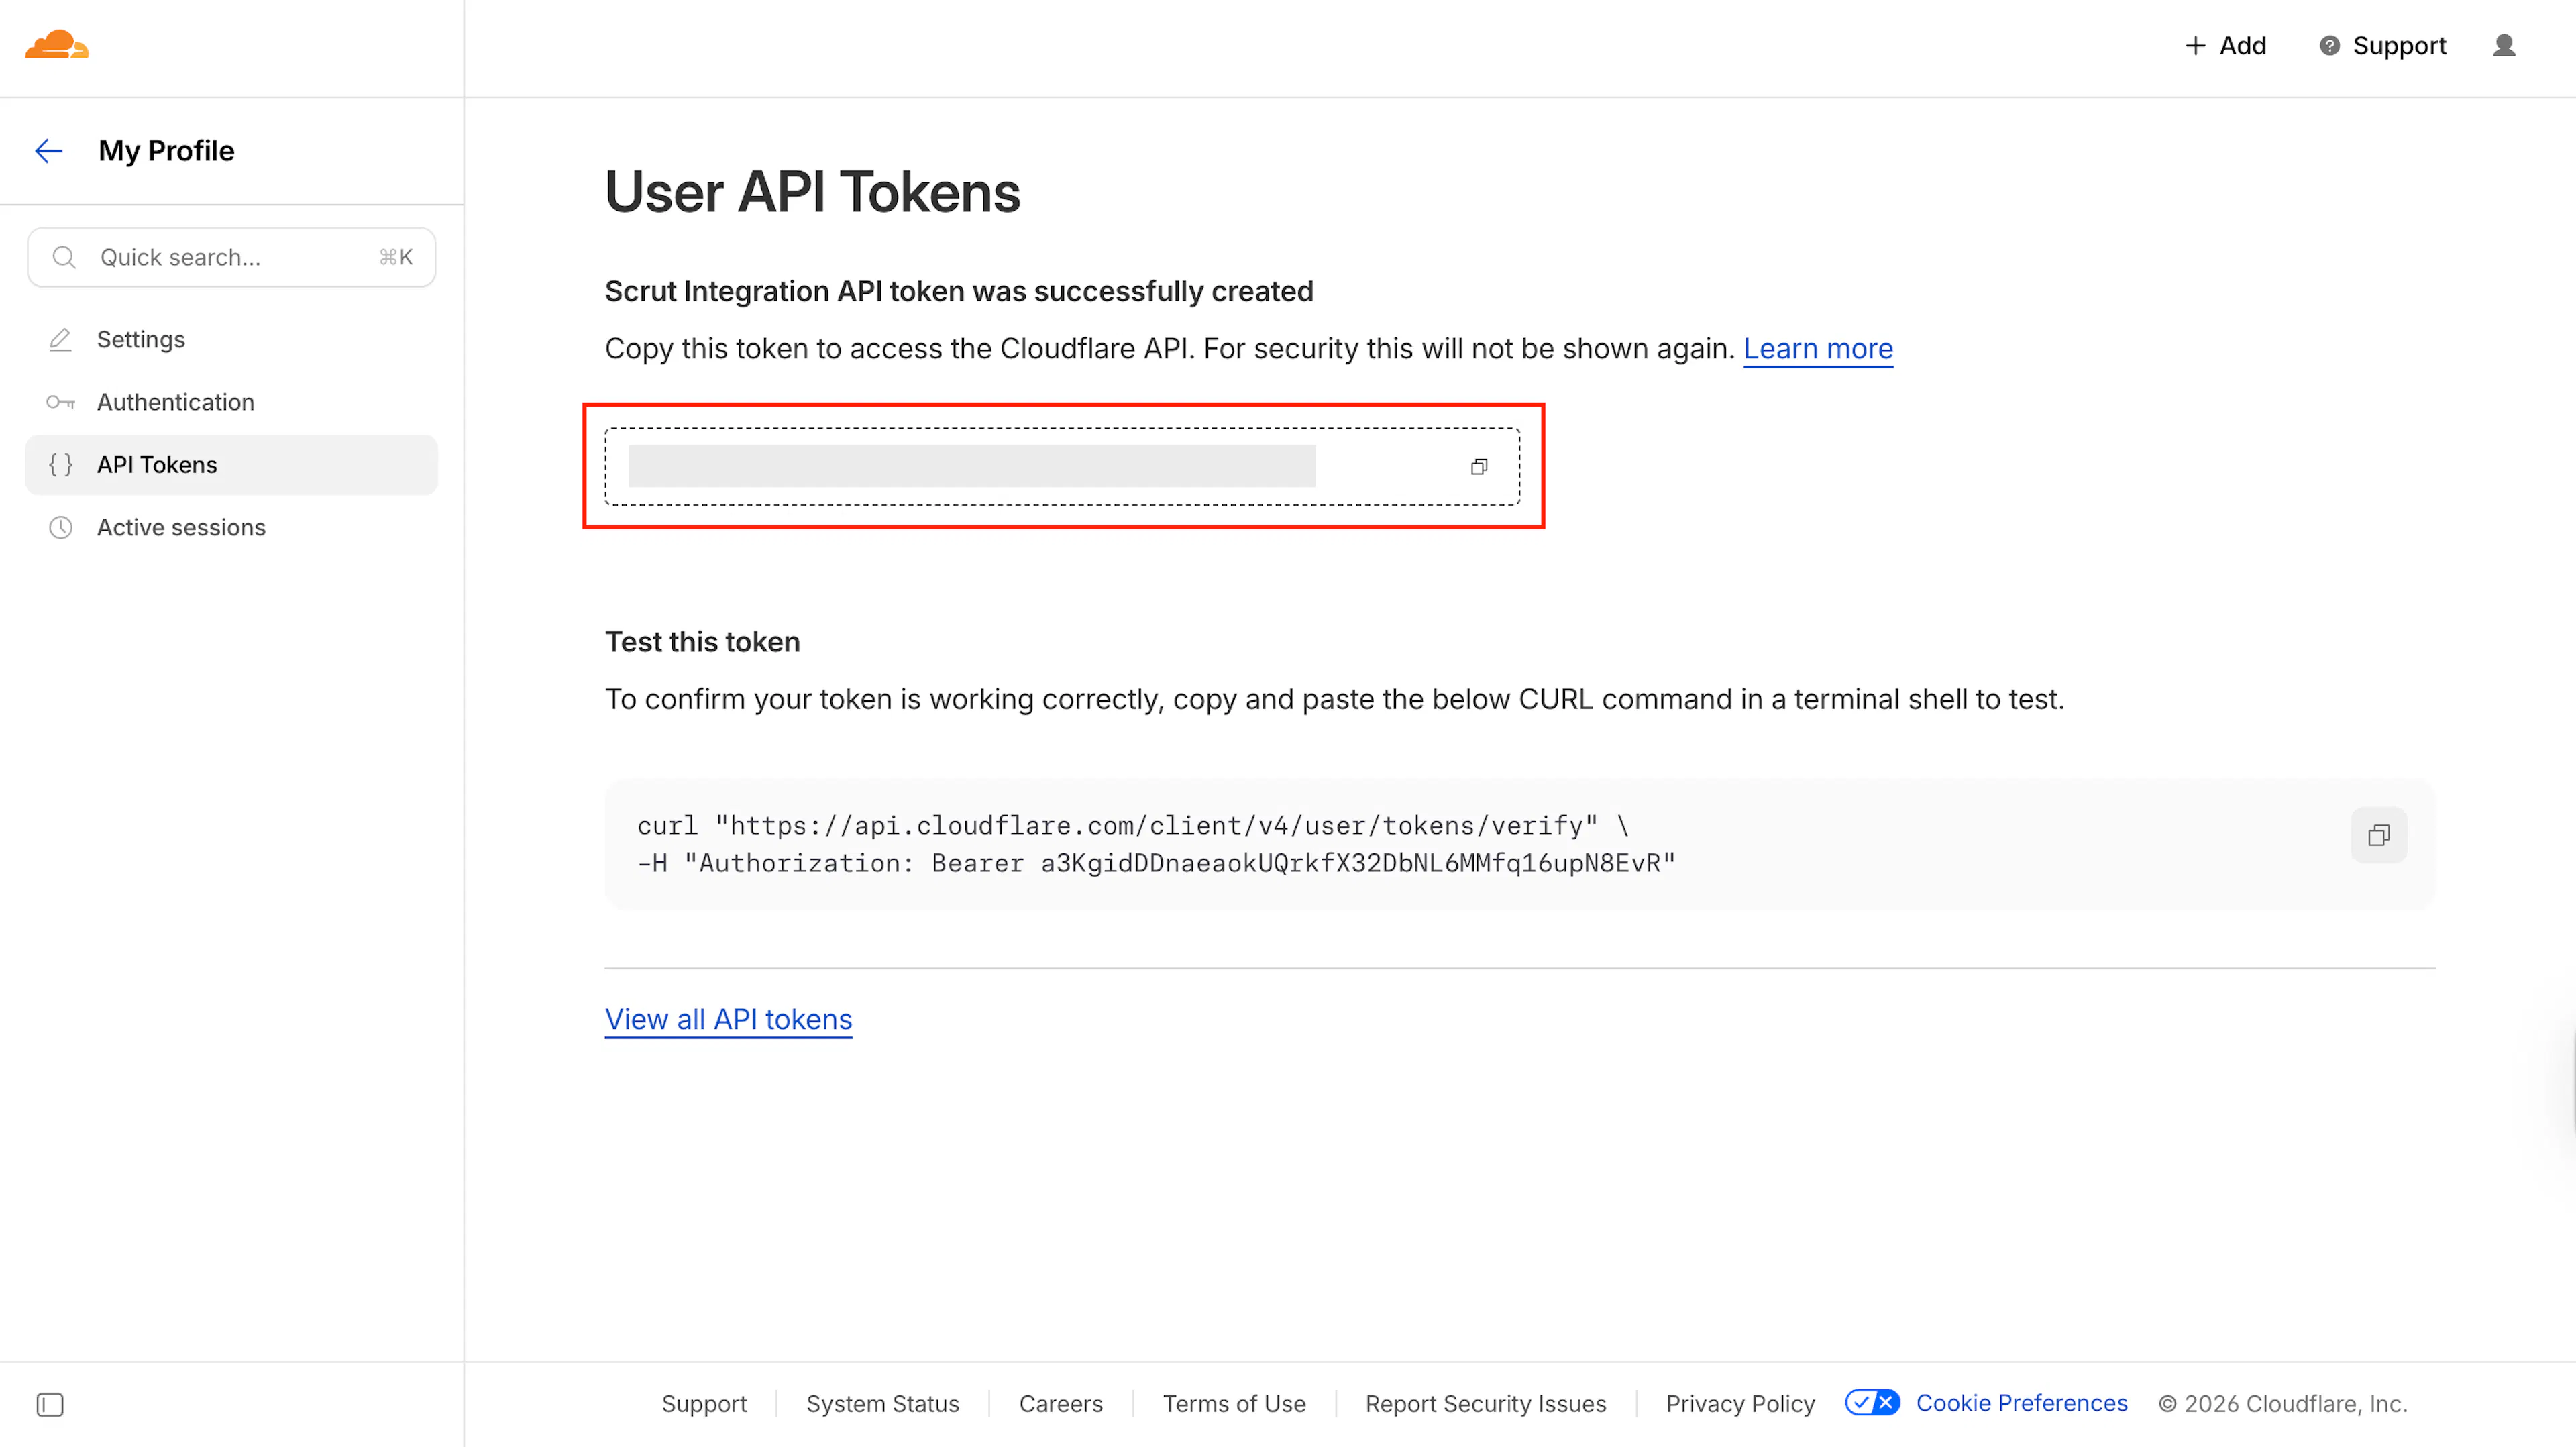
Copy the generated API token immediately.
Important:
The API token cannot be retrieved again after you leave the page. Make sure you copy and store it securely.
Step 2: Add Cloudflare Credentials in Scrut
-
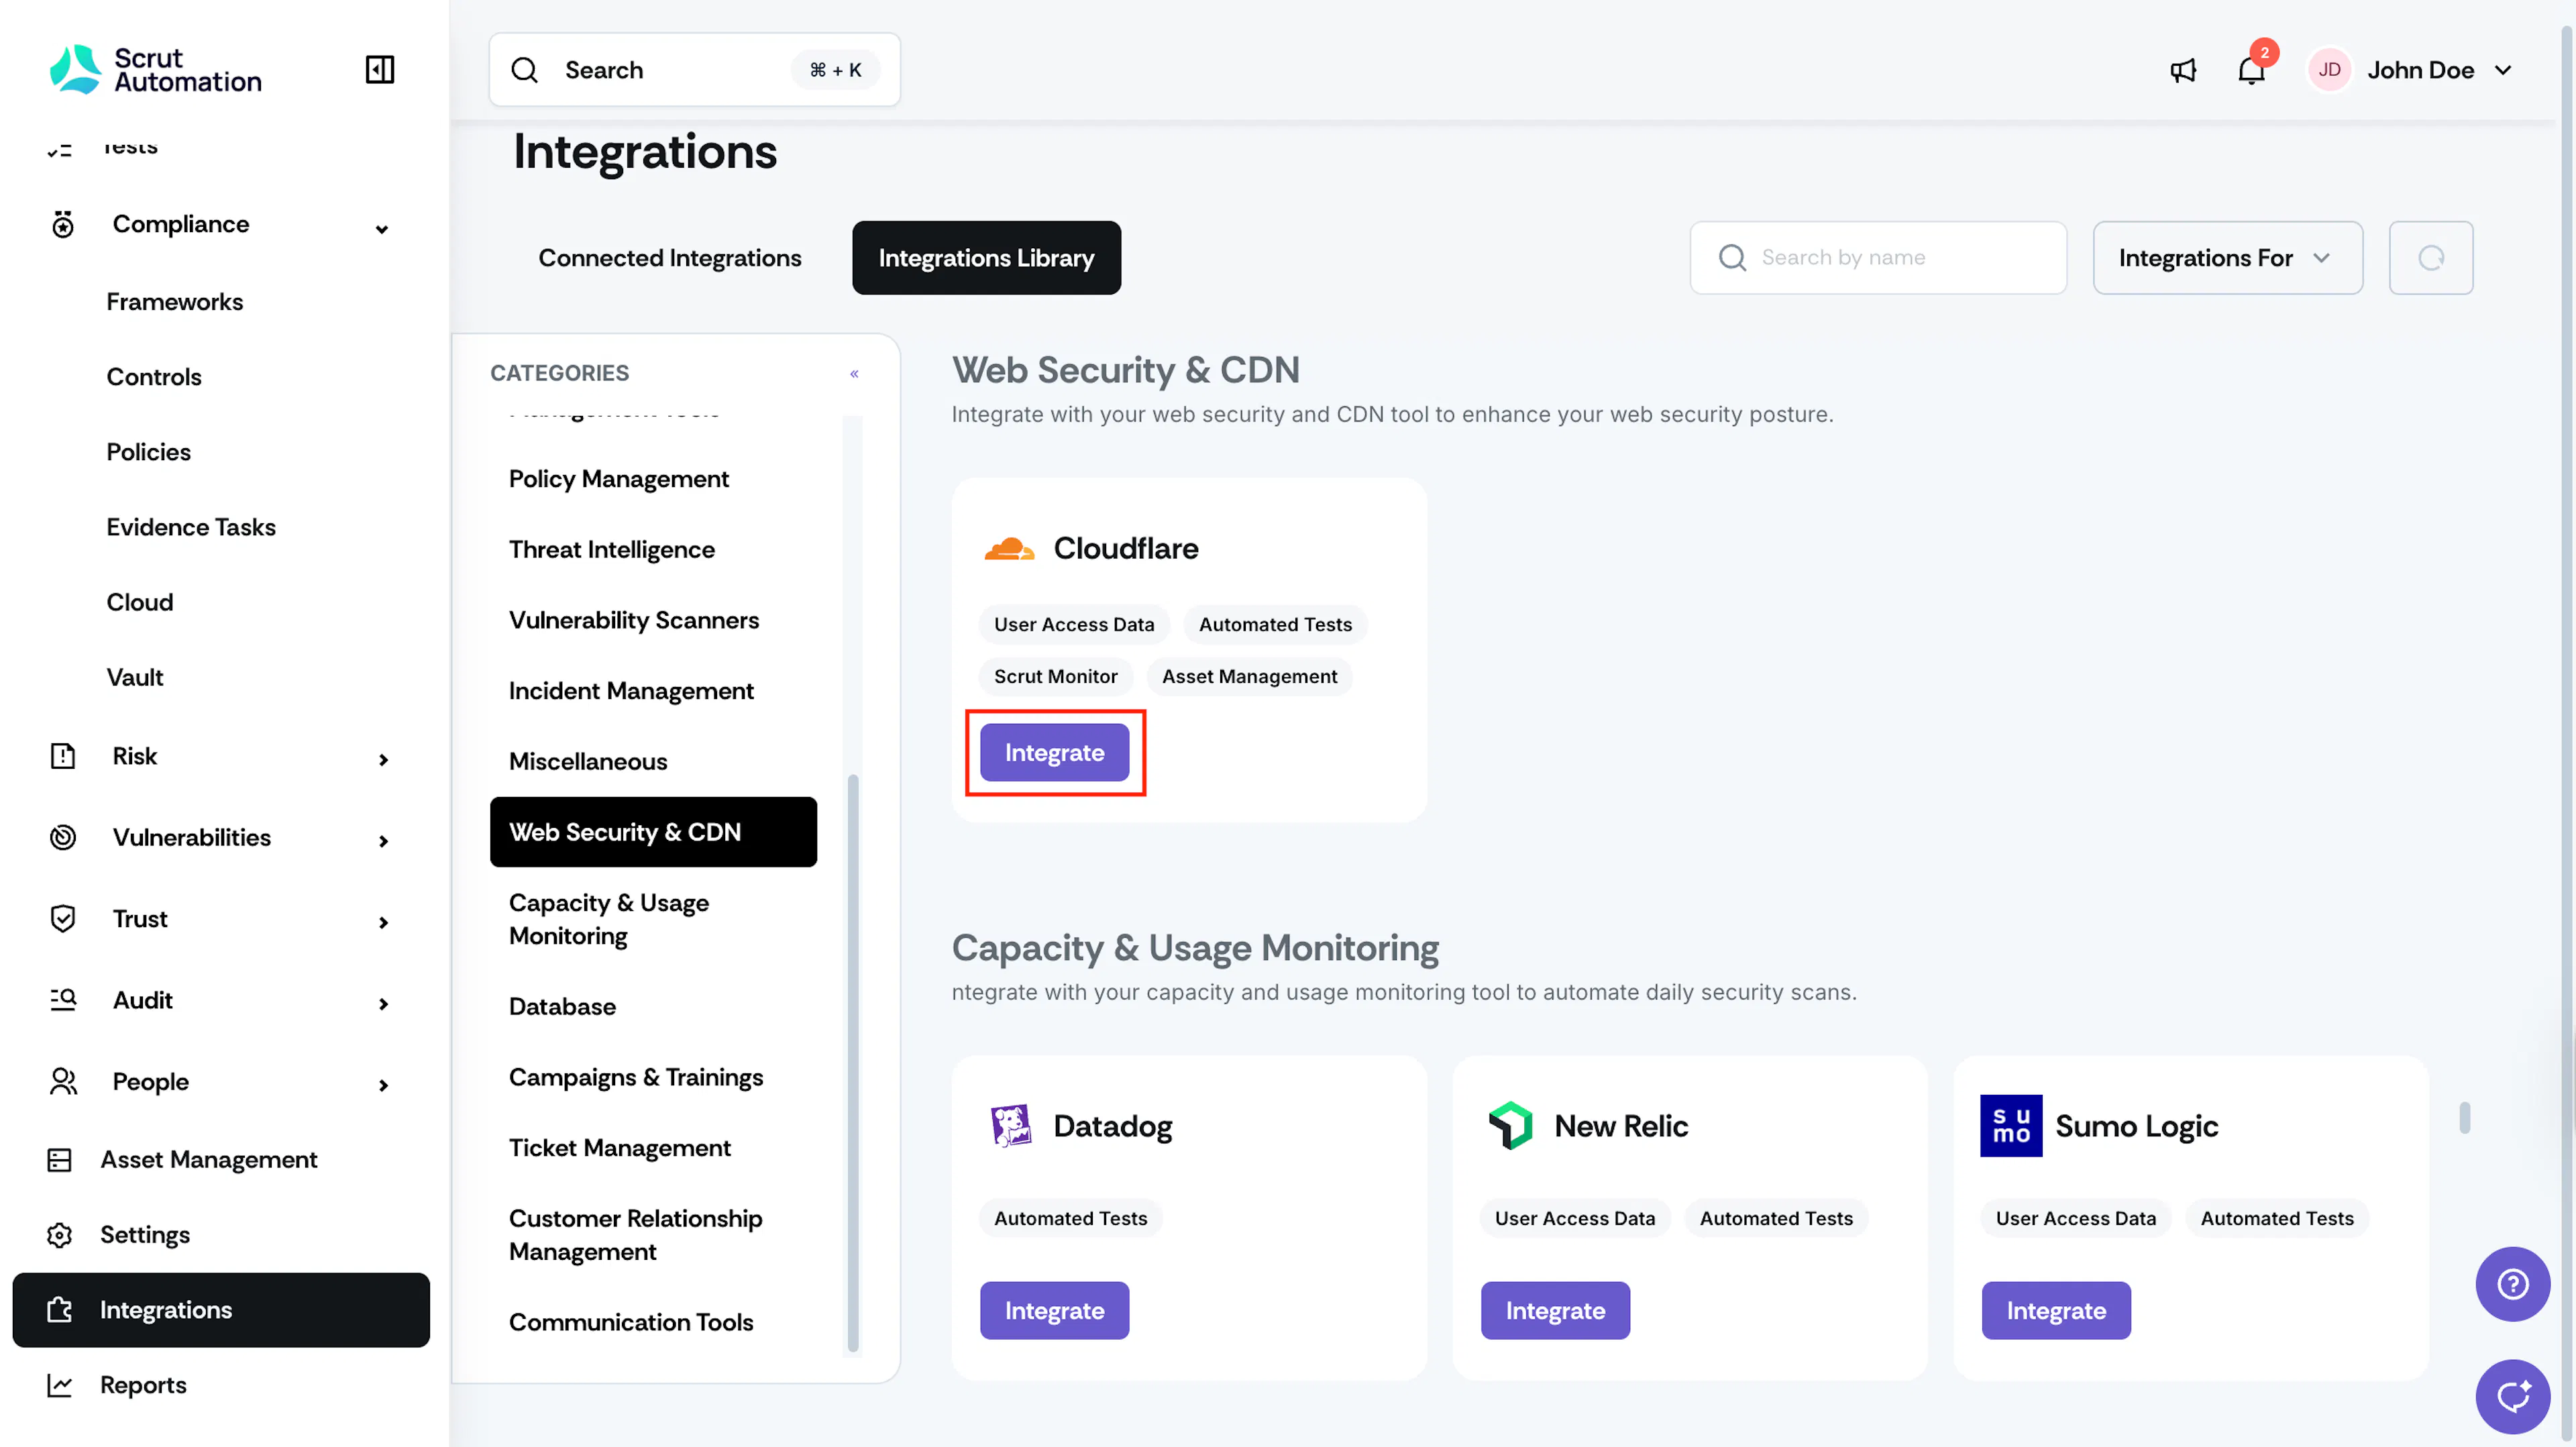
Log in to Scrut and click Integrations on the left navigation panel.
-
Go to the Integrations Library tab, and scroll to the Web Security & CDN section.
-
Click Integrate on the Cloudflare tile.
-
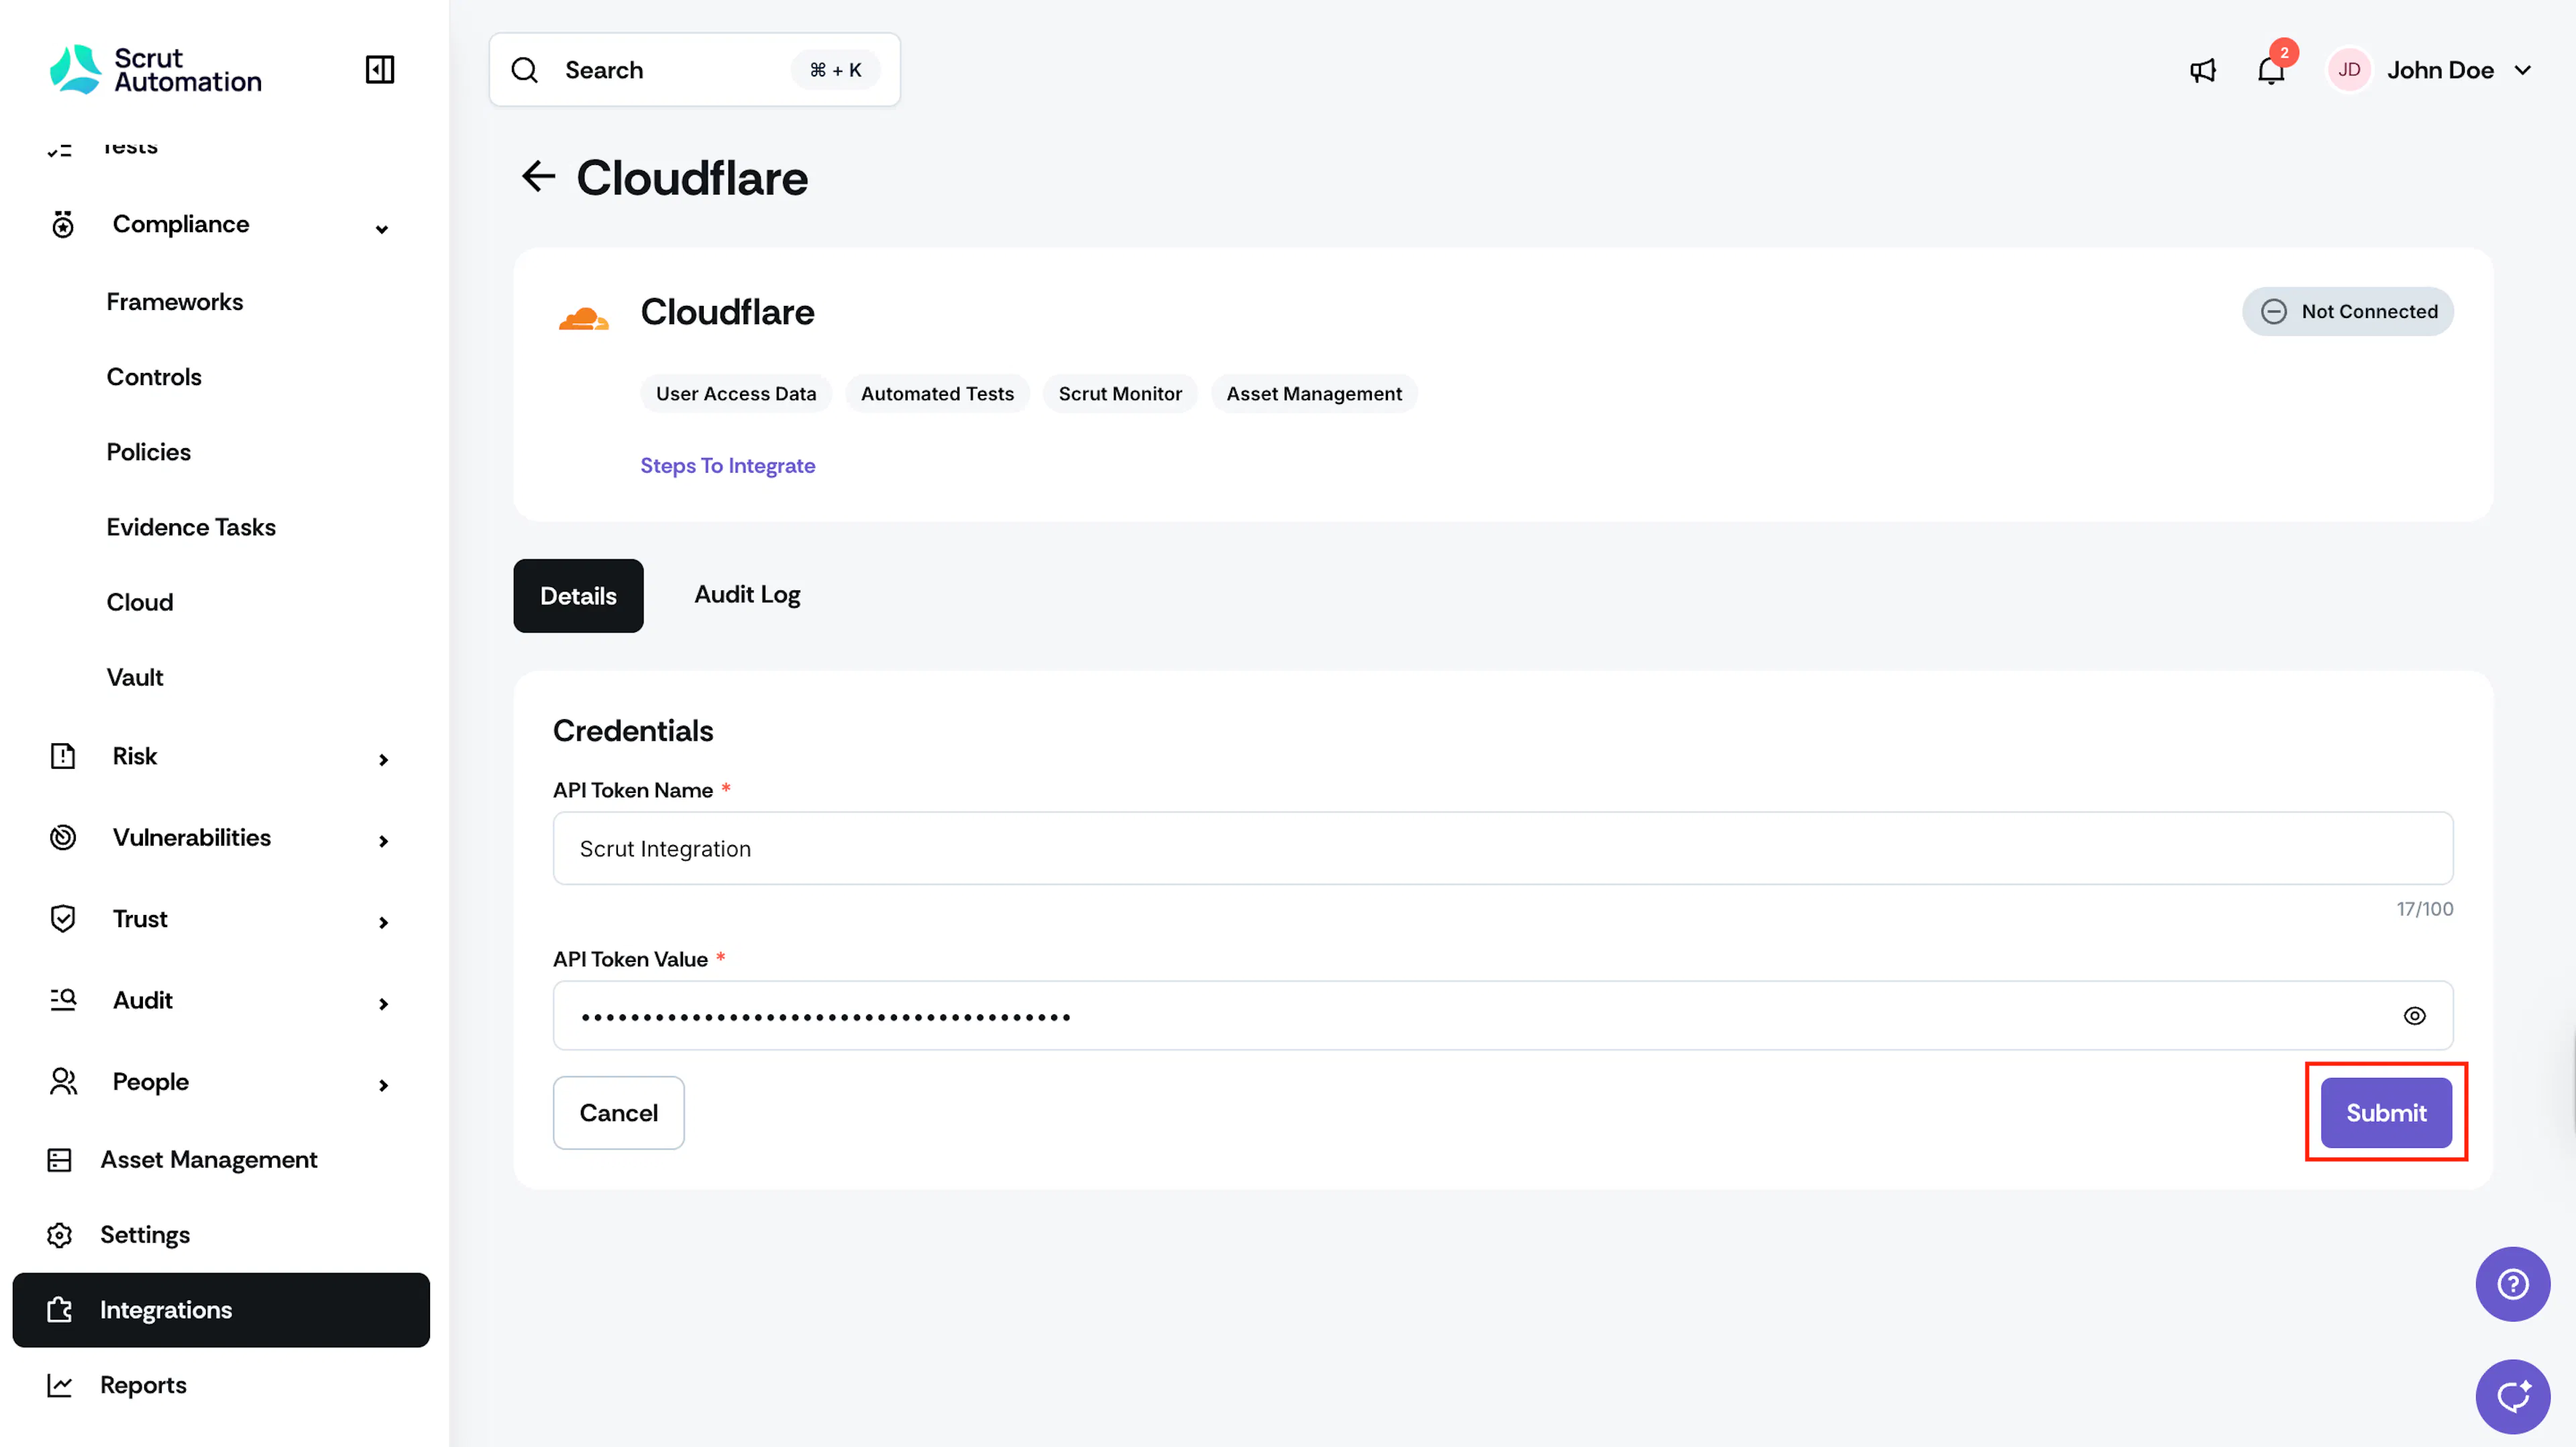
Enter the following details on the Cloudflare integration page:
- API Token Name
- API Token
-
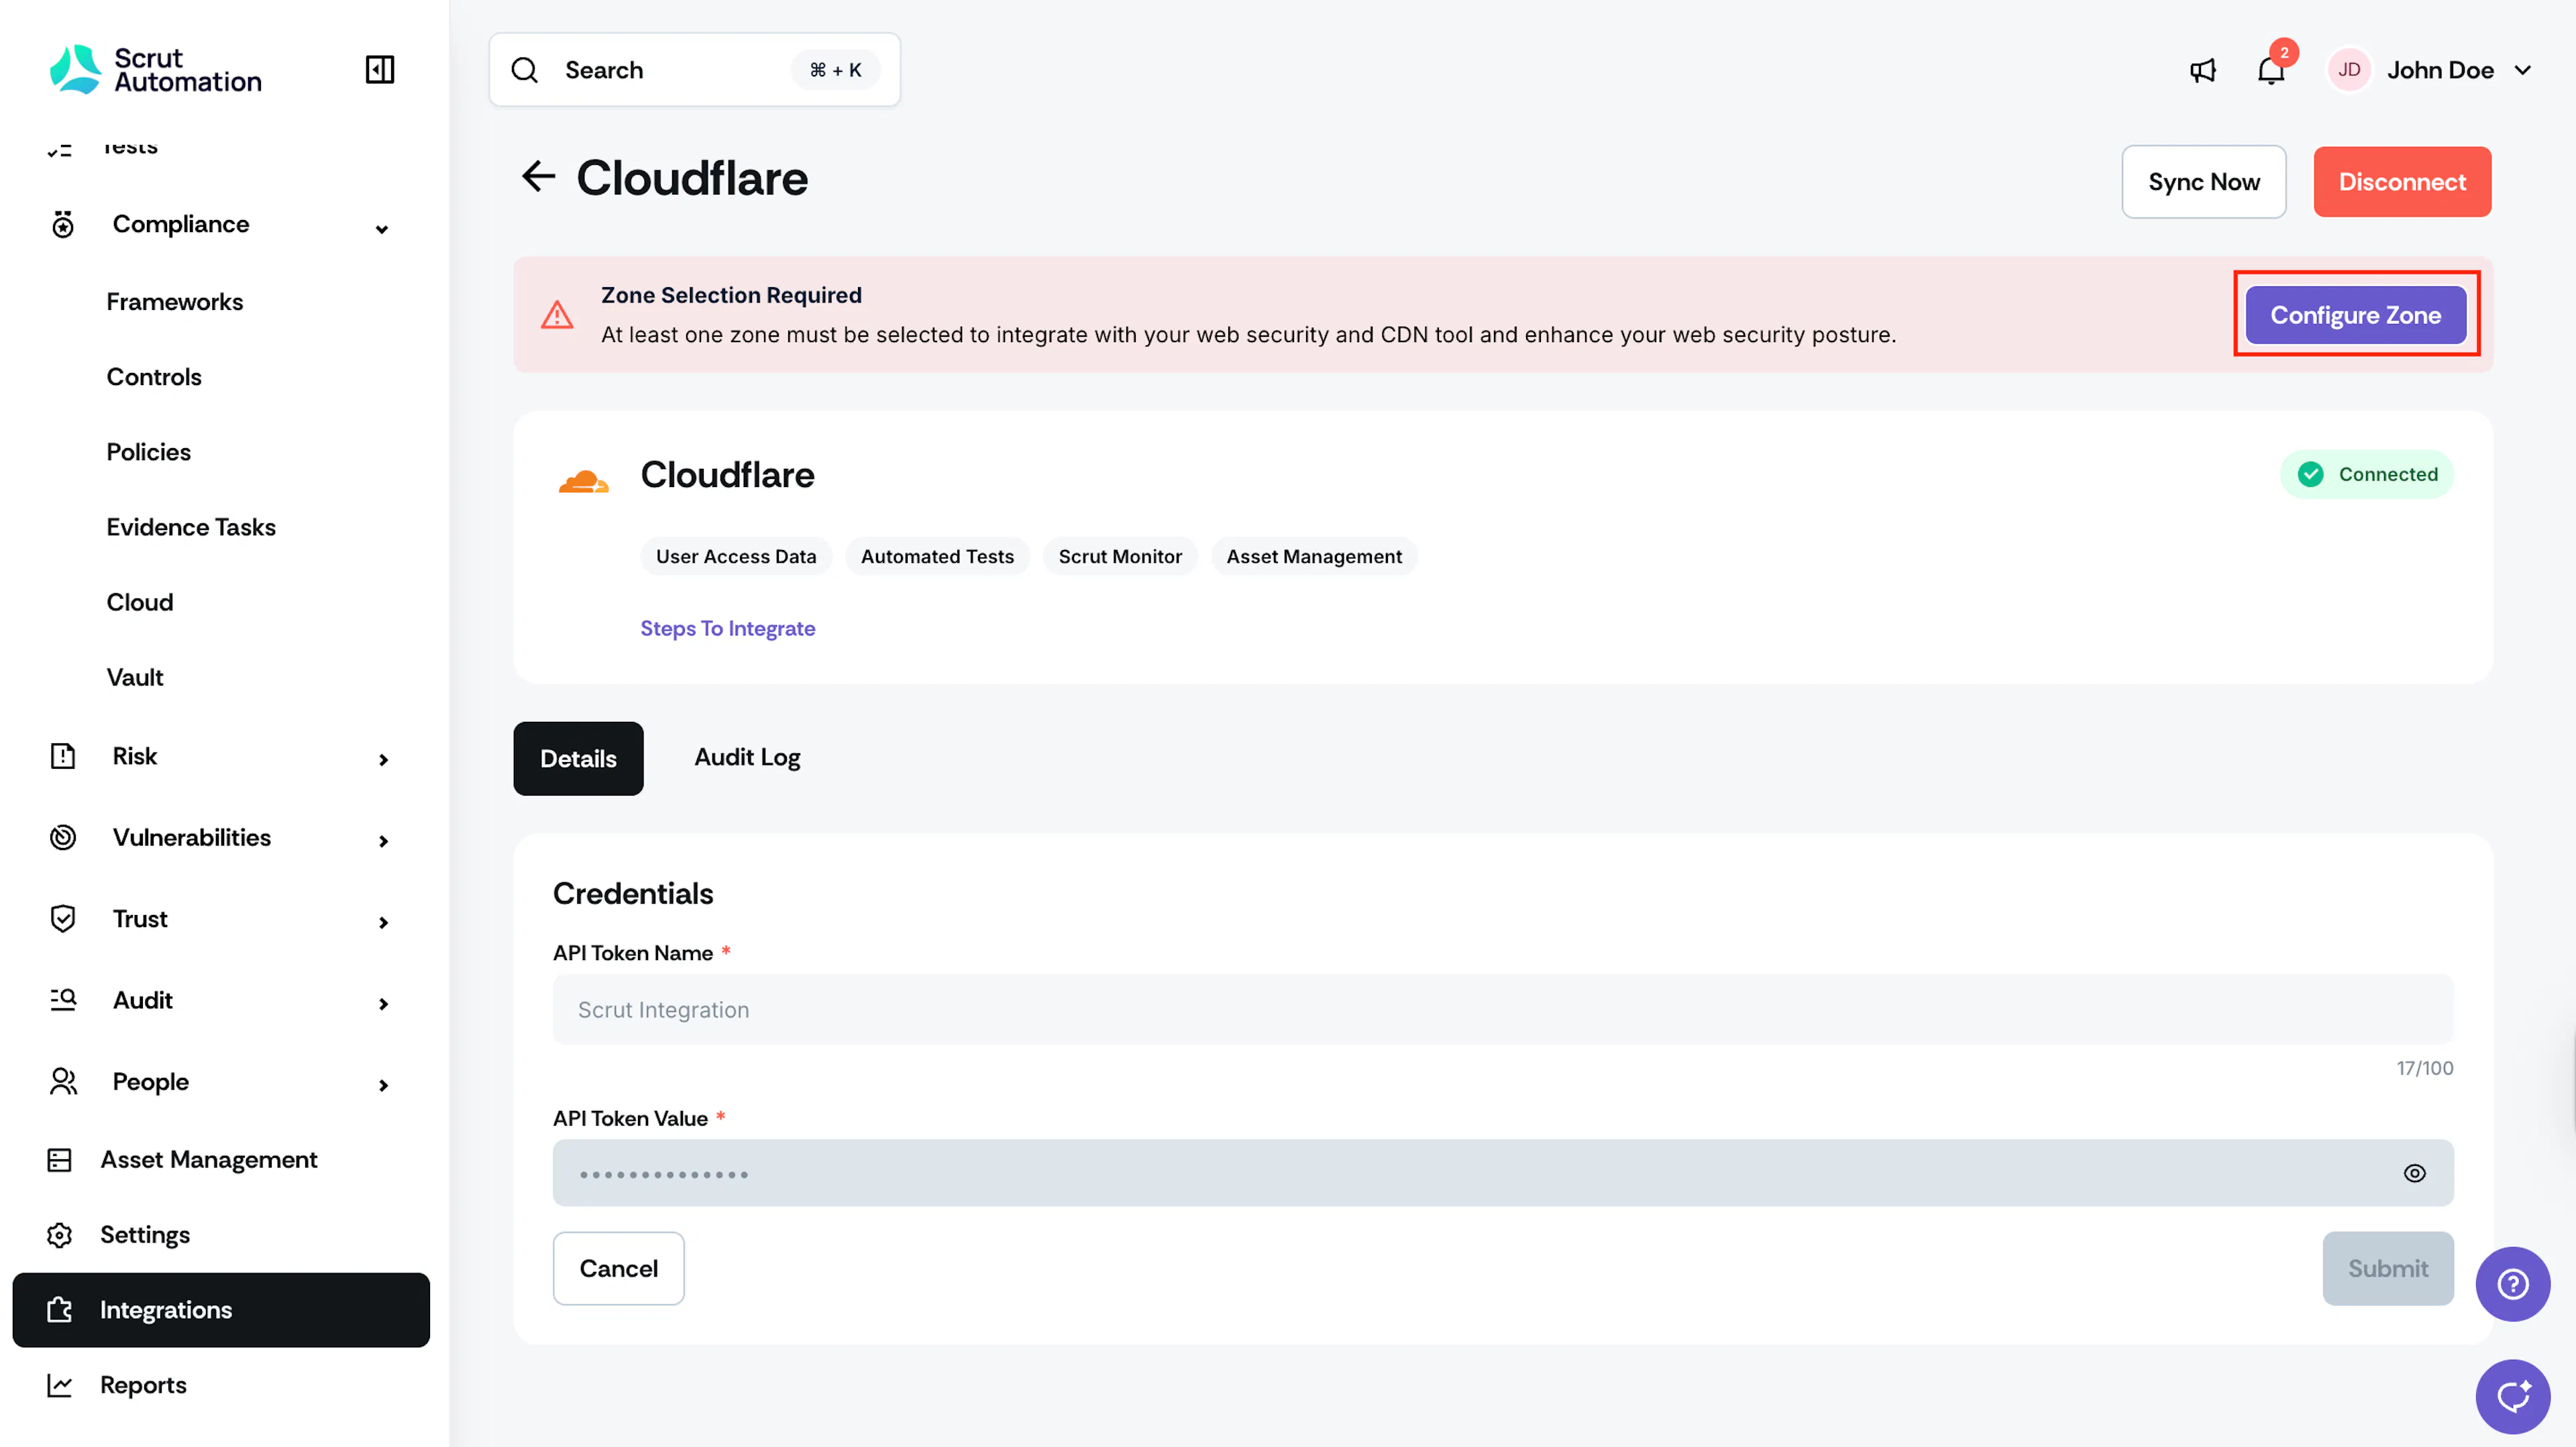
Click Configure Zone to retrieve available domain zones.
-
Select the appropriate Zones from the dropdown.
-
Click Submit.
What Happens Next?
Initial Data Sync
- The initial data sync starts automatically.
- Depending on the number of domain zones and configurations, this may take a few minutes.
- You can monitor sync activity in the Audit Logs section of the Cloudflare integration page.
After Sync Completion
Once the sync is complete, Scrut will:
- Run automated tests against firewall and ruleset configurations
- Fetch evidence automatically via Scrut Monitors
- You can create Access Reviews for user access data validation