

How To Manage Discovered Applications
Who can use this feature
- Supported on Foundation, Growth, and Scale plans
The Discovered tab shows every application detected through your SSO and MDM integrations that hasn't been classified yet. From here, you can move apps to Managed, flag them as Restricted, or hide them.
Before You Begin
Applications appear in the Discovered tab automatically after your SSO or MDM integration syncs. No manual action is needed to populate the list.
Mark an Application as Managed
Use this action when you want to bring an application into your formal governance workflow and include it in access reviews.
-
Navigate to Access Review → Applications → Discovered.
-
Locate the application you want to manage.
-
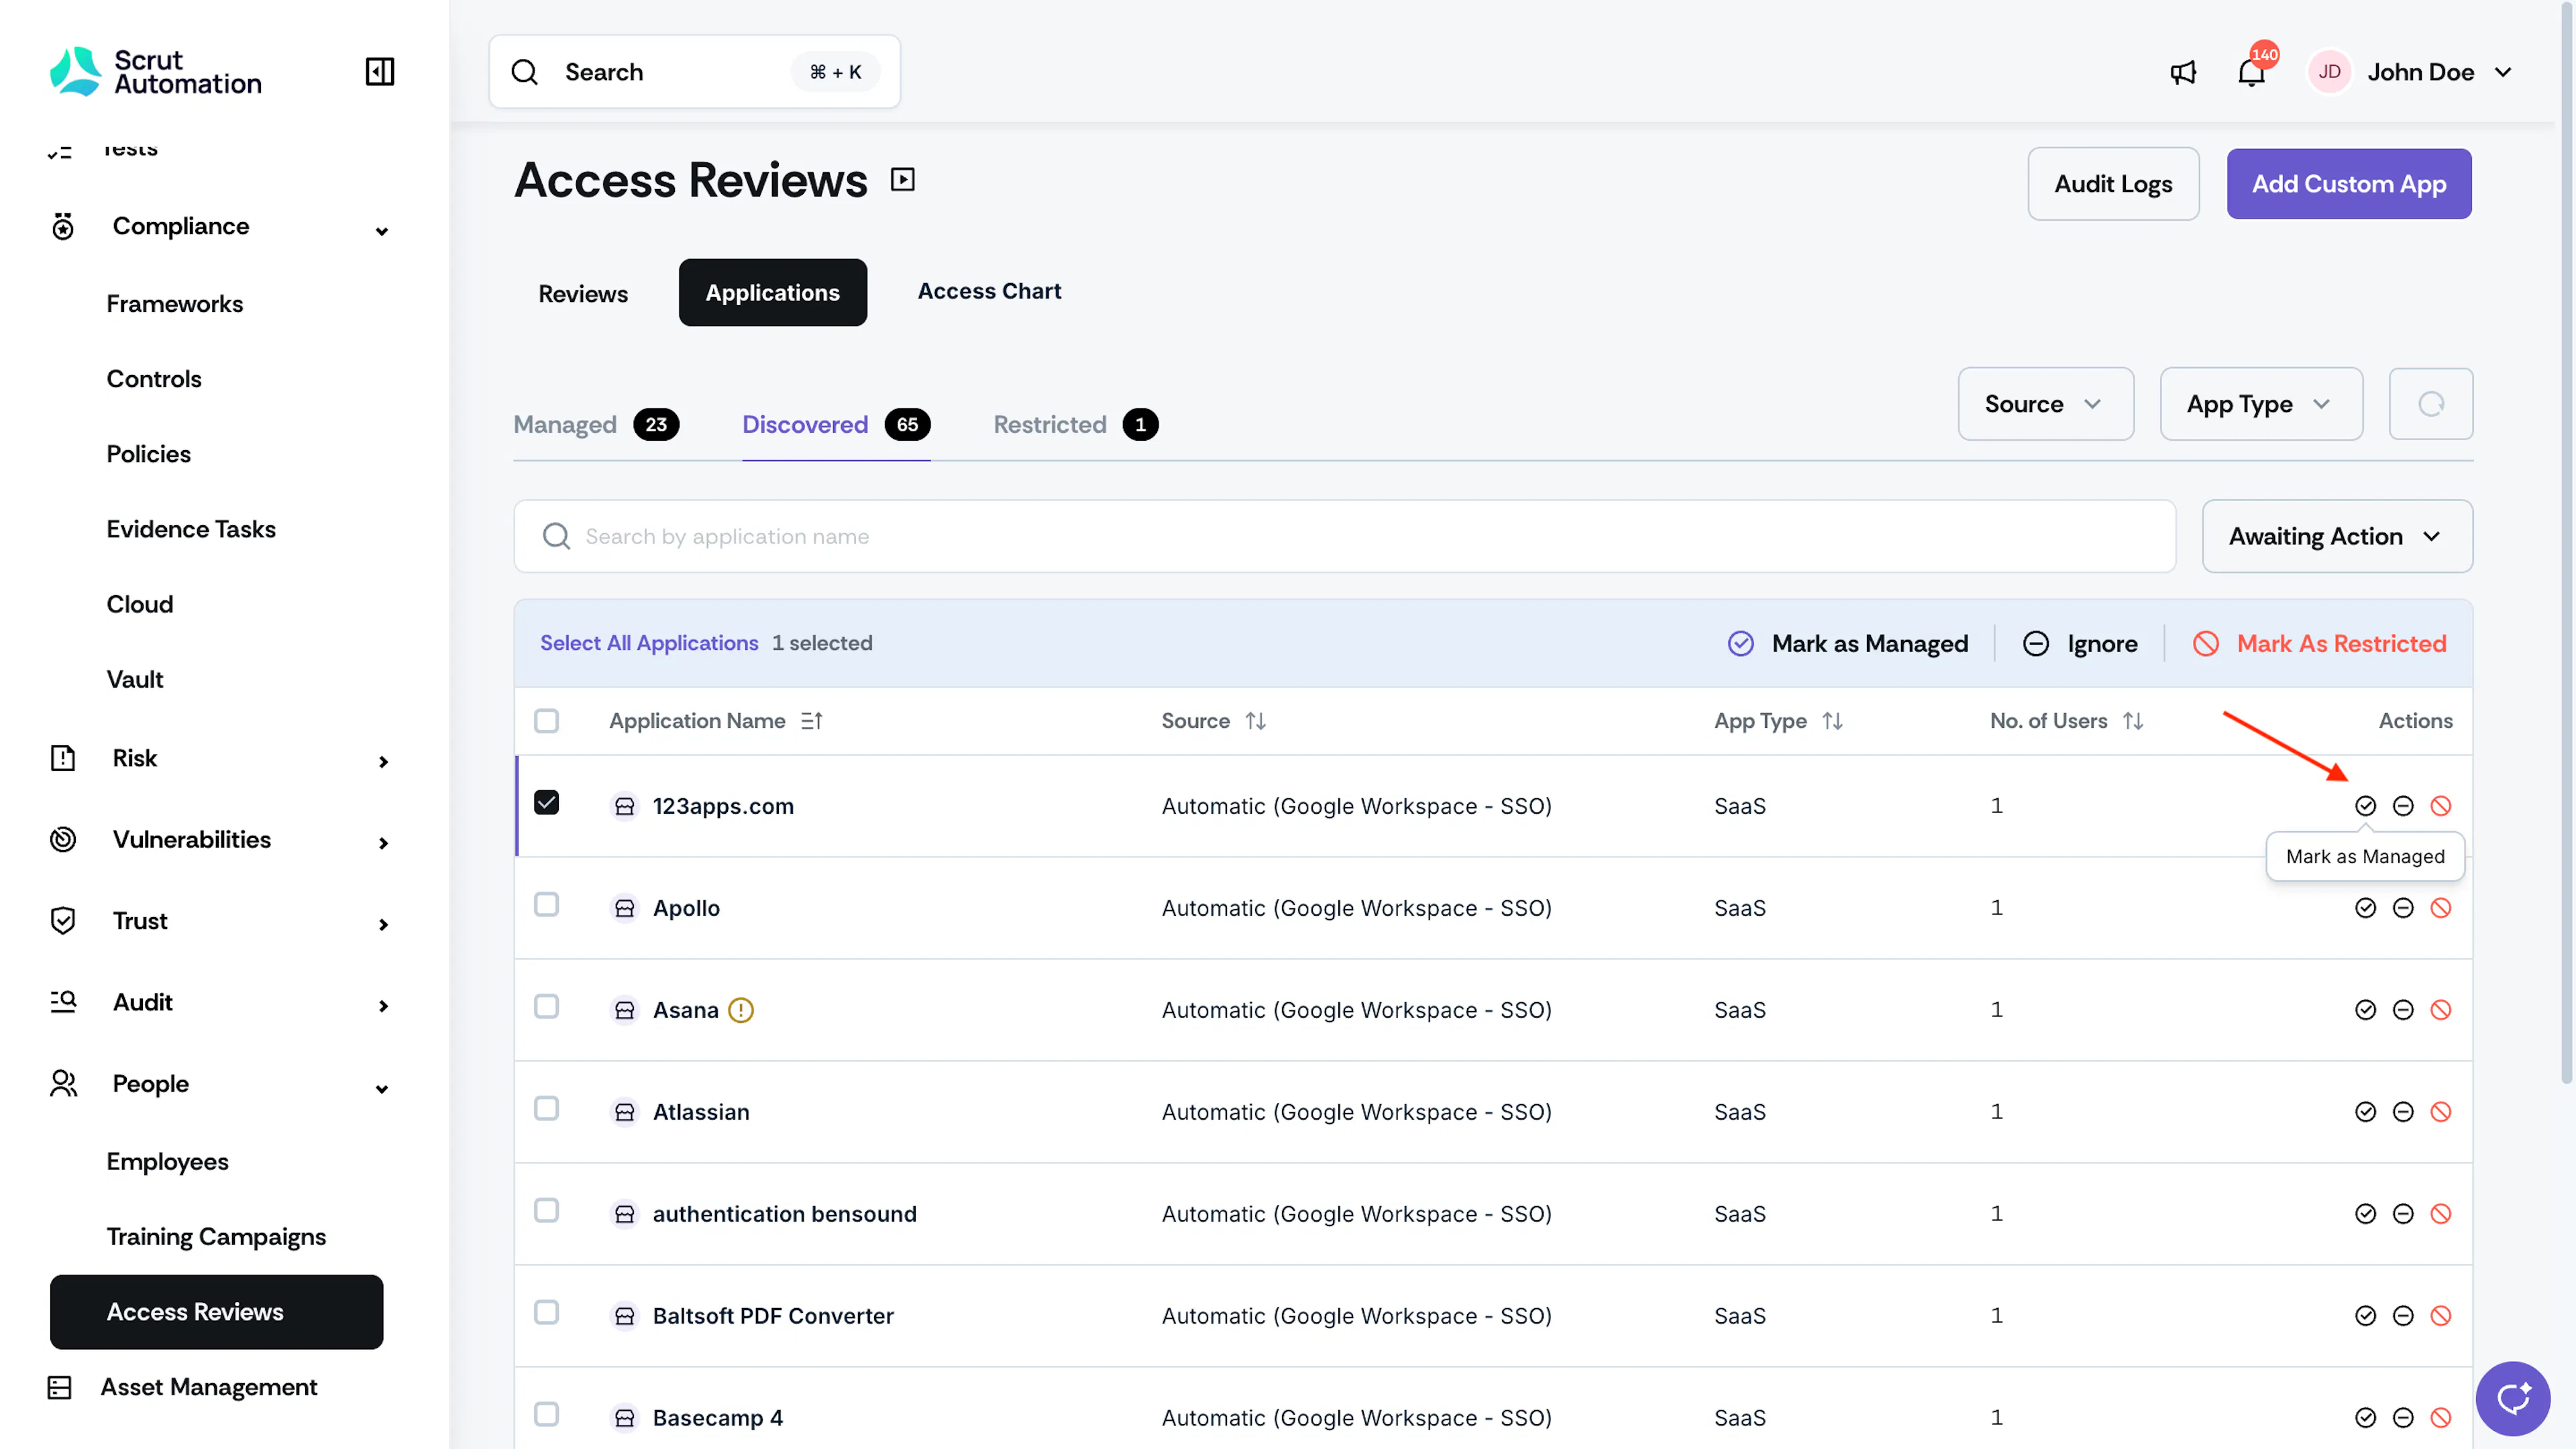
Click the Mark as Managed icon in the Actions column.
-
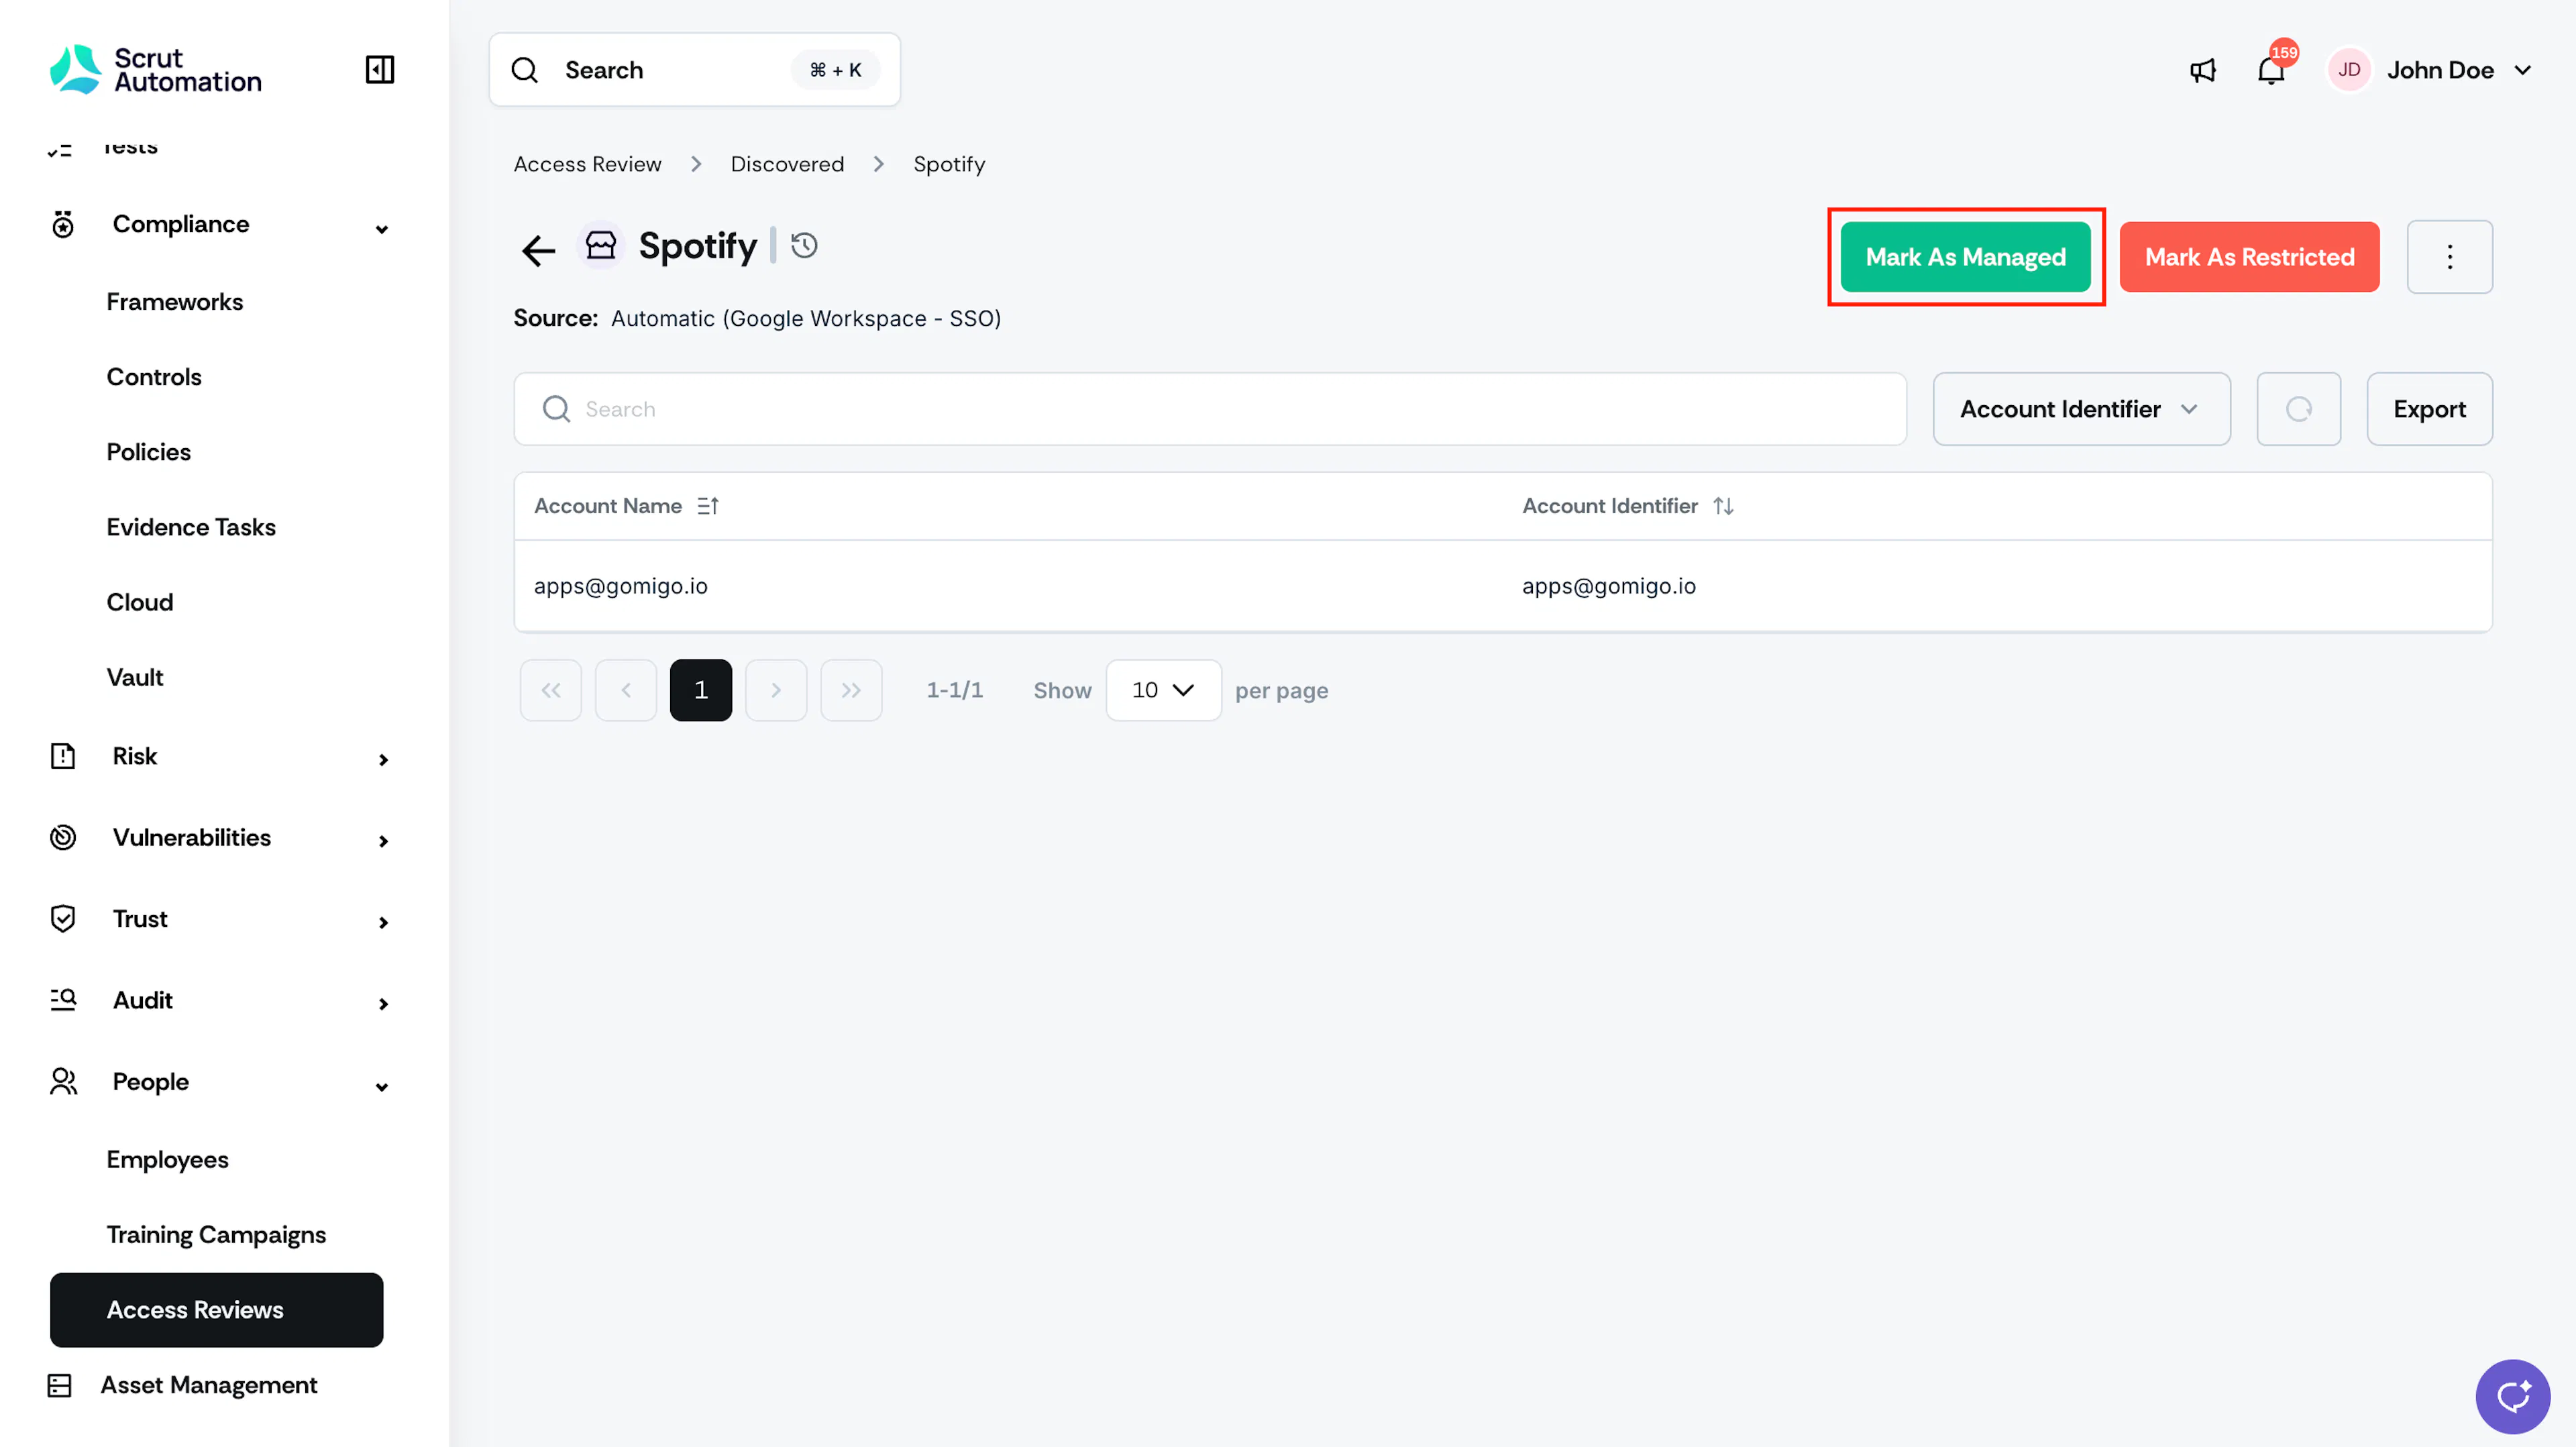
Alternatively, open the app and click Mark as Managed.
-
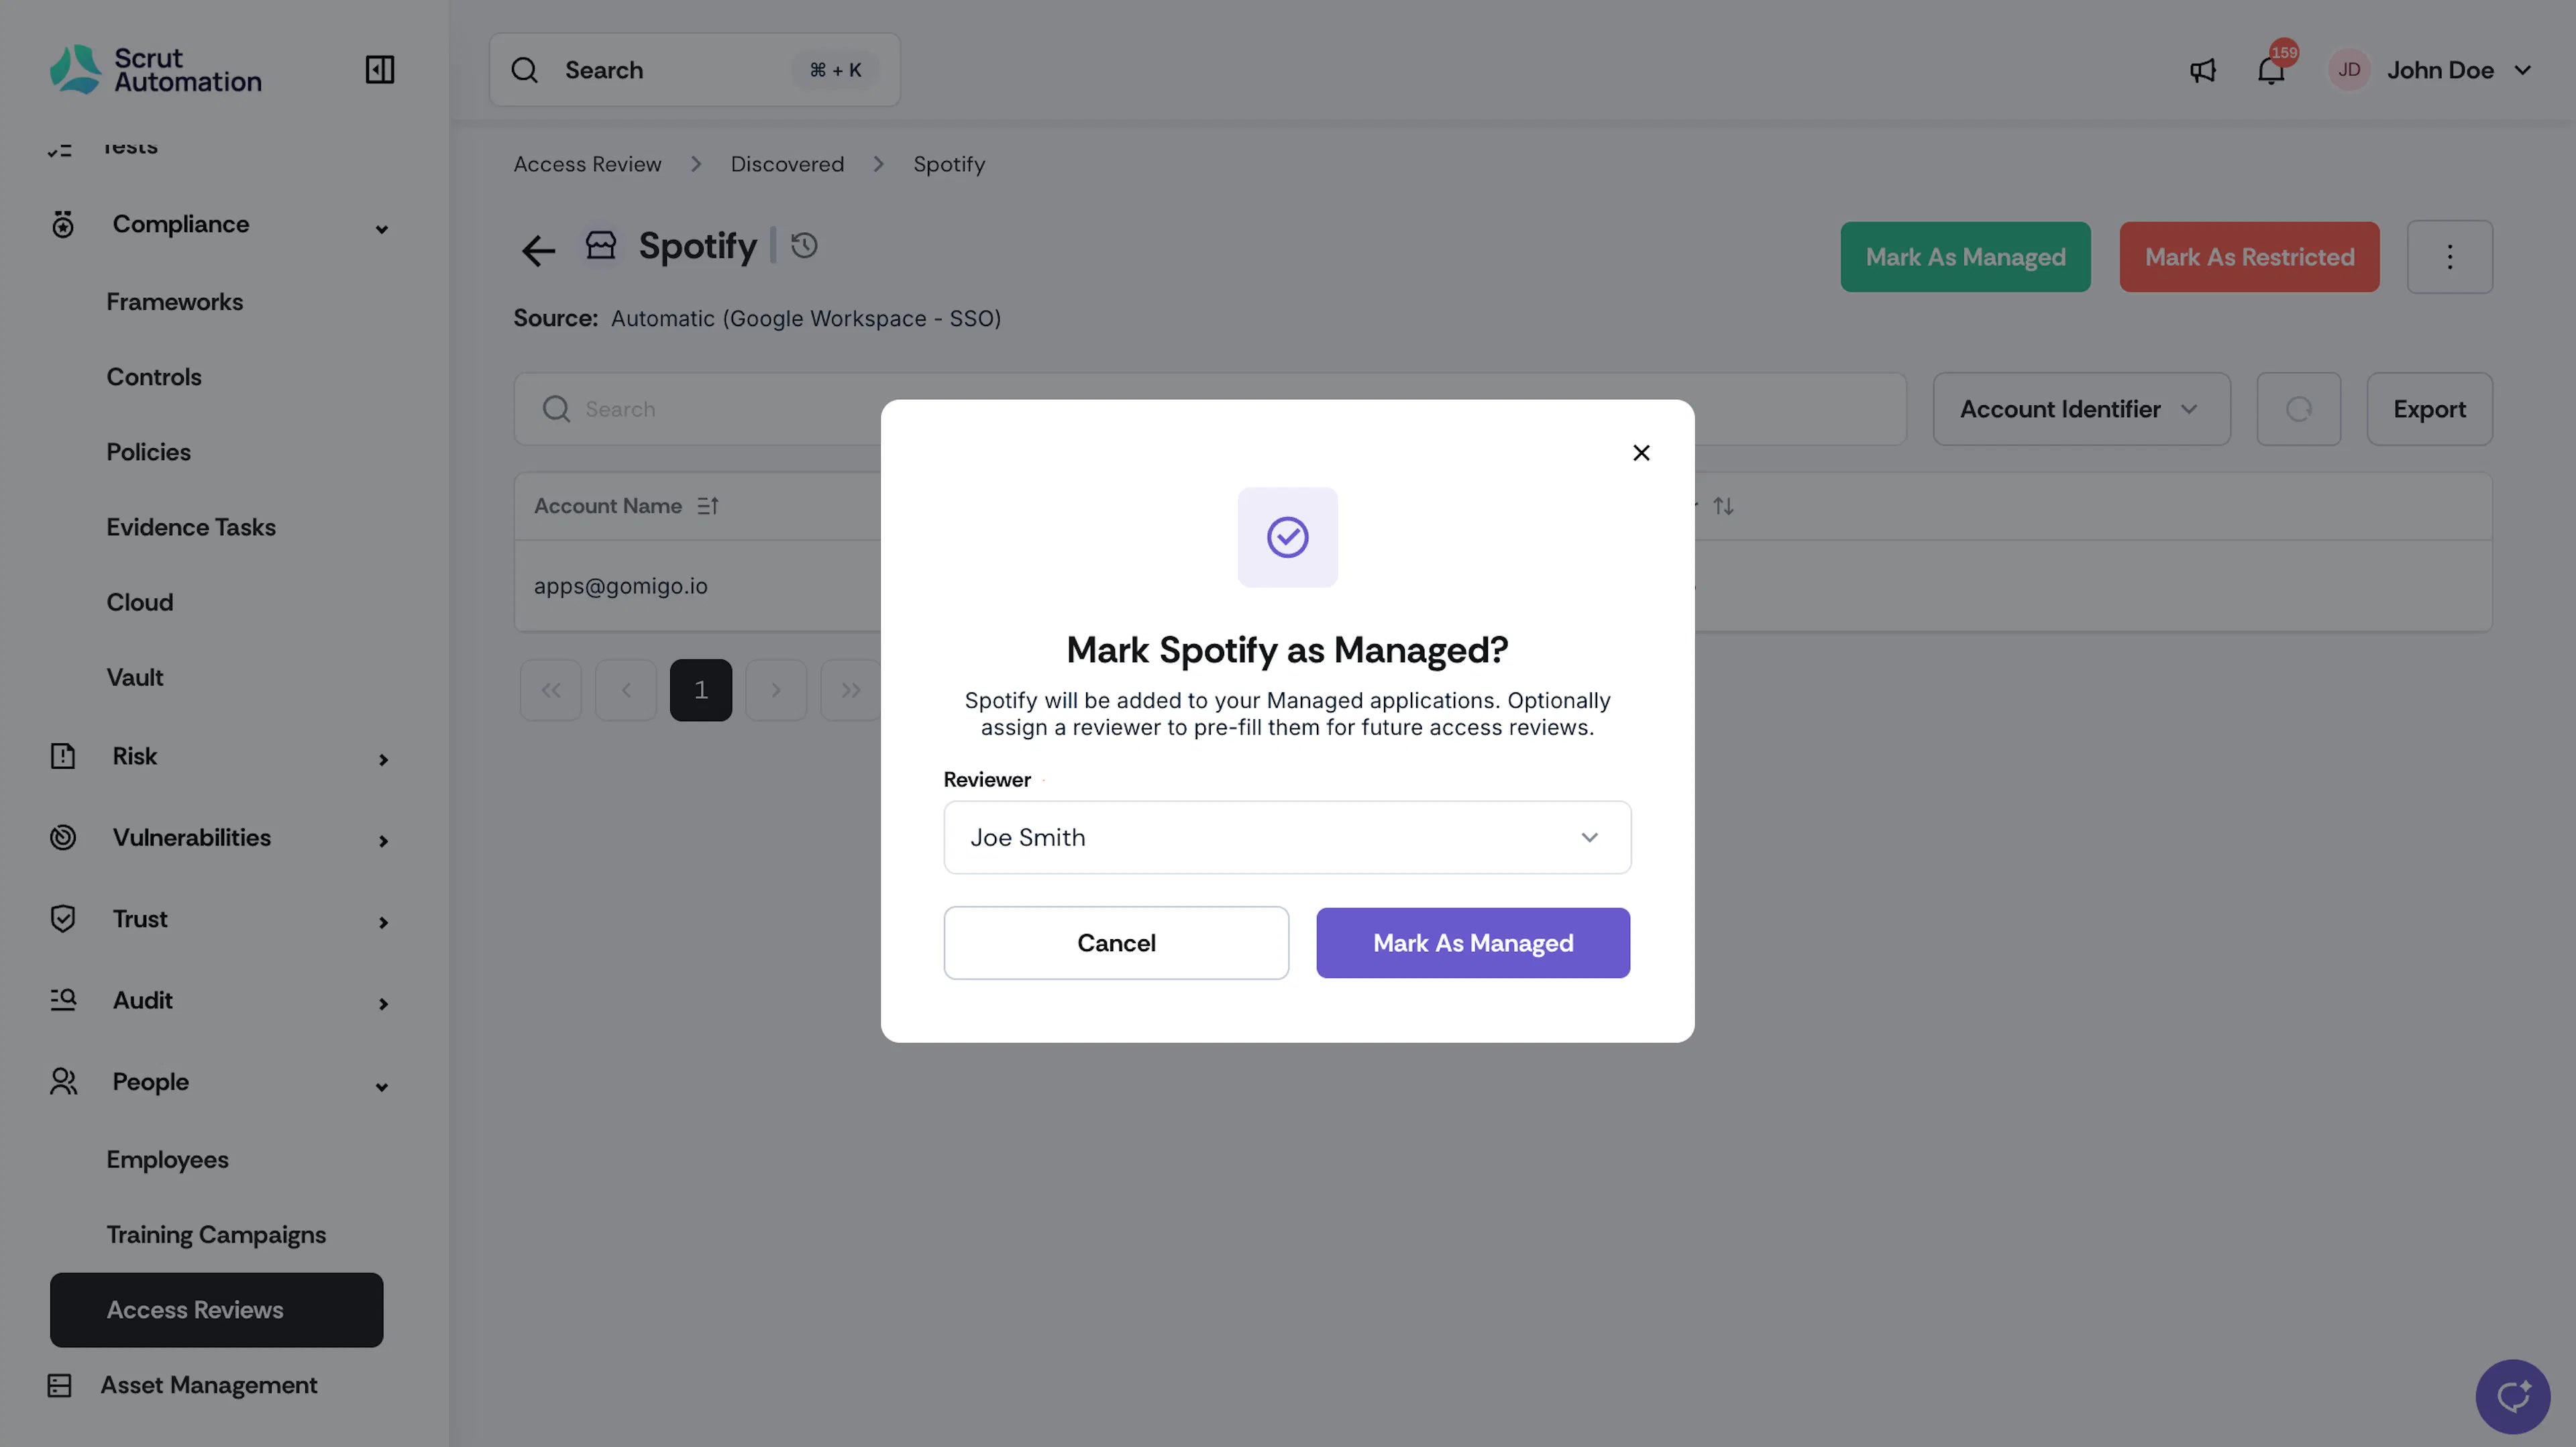
In the modal that appears, optionally select a Reviewer from the dropdown. The Reviewer handles the access reviews for this app. You can change it later, if needed.
-
Click Mark as Managed. The application moves to the Managed tab and retains all user data.
Mark Multiple Applications as Managed
-
Navigate to Access Review → Applications → Discovered.
-
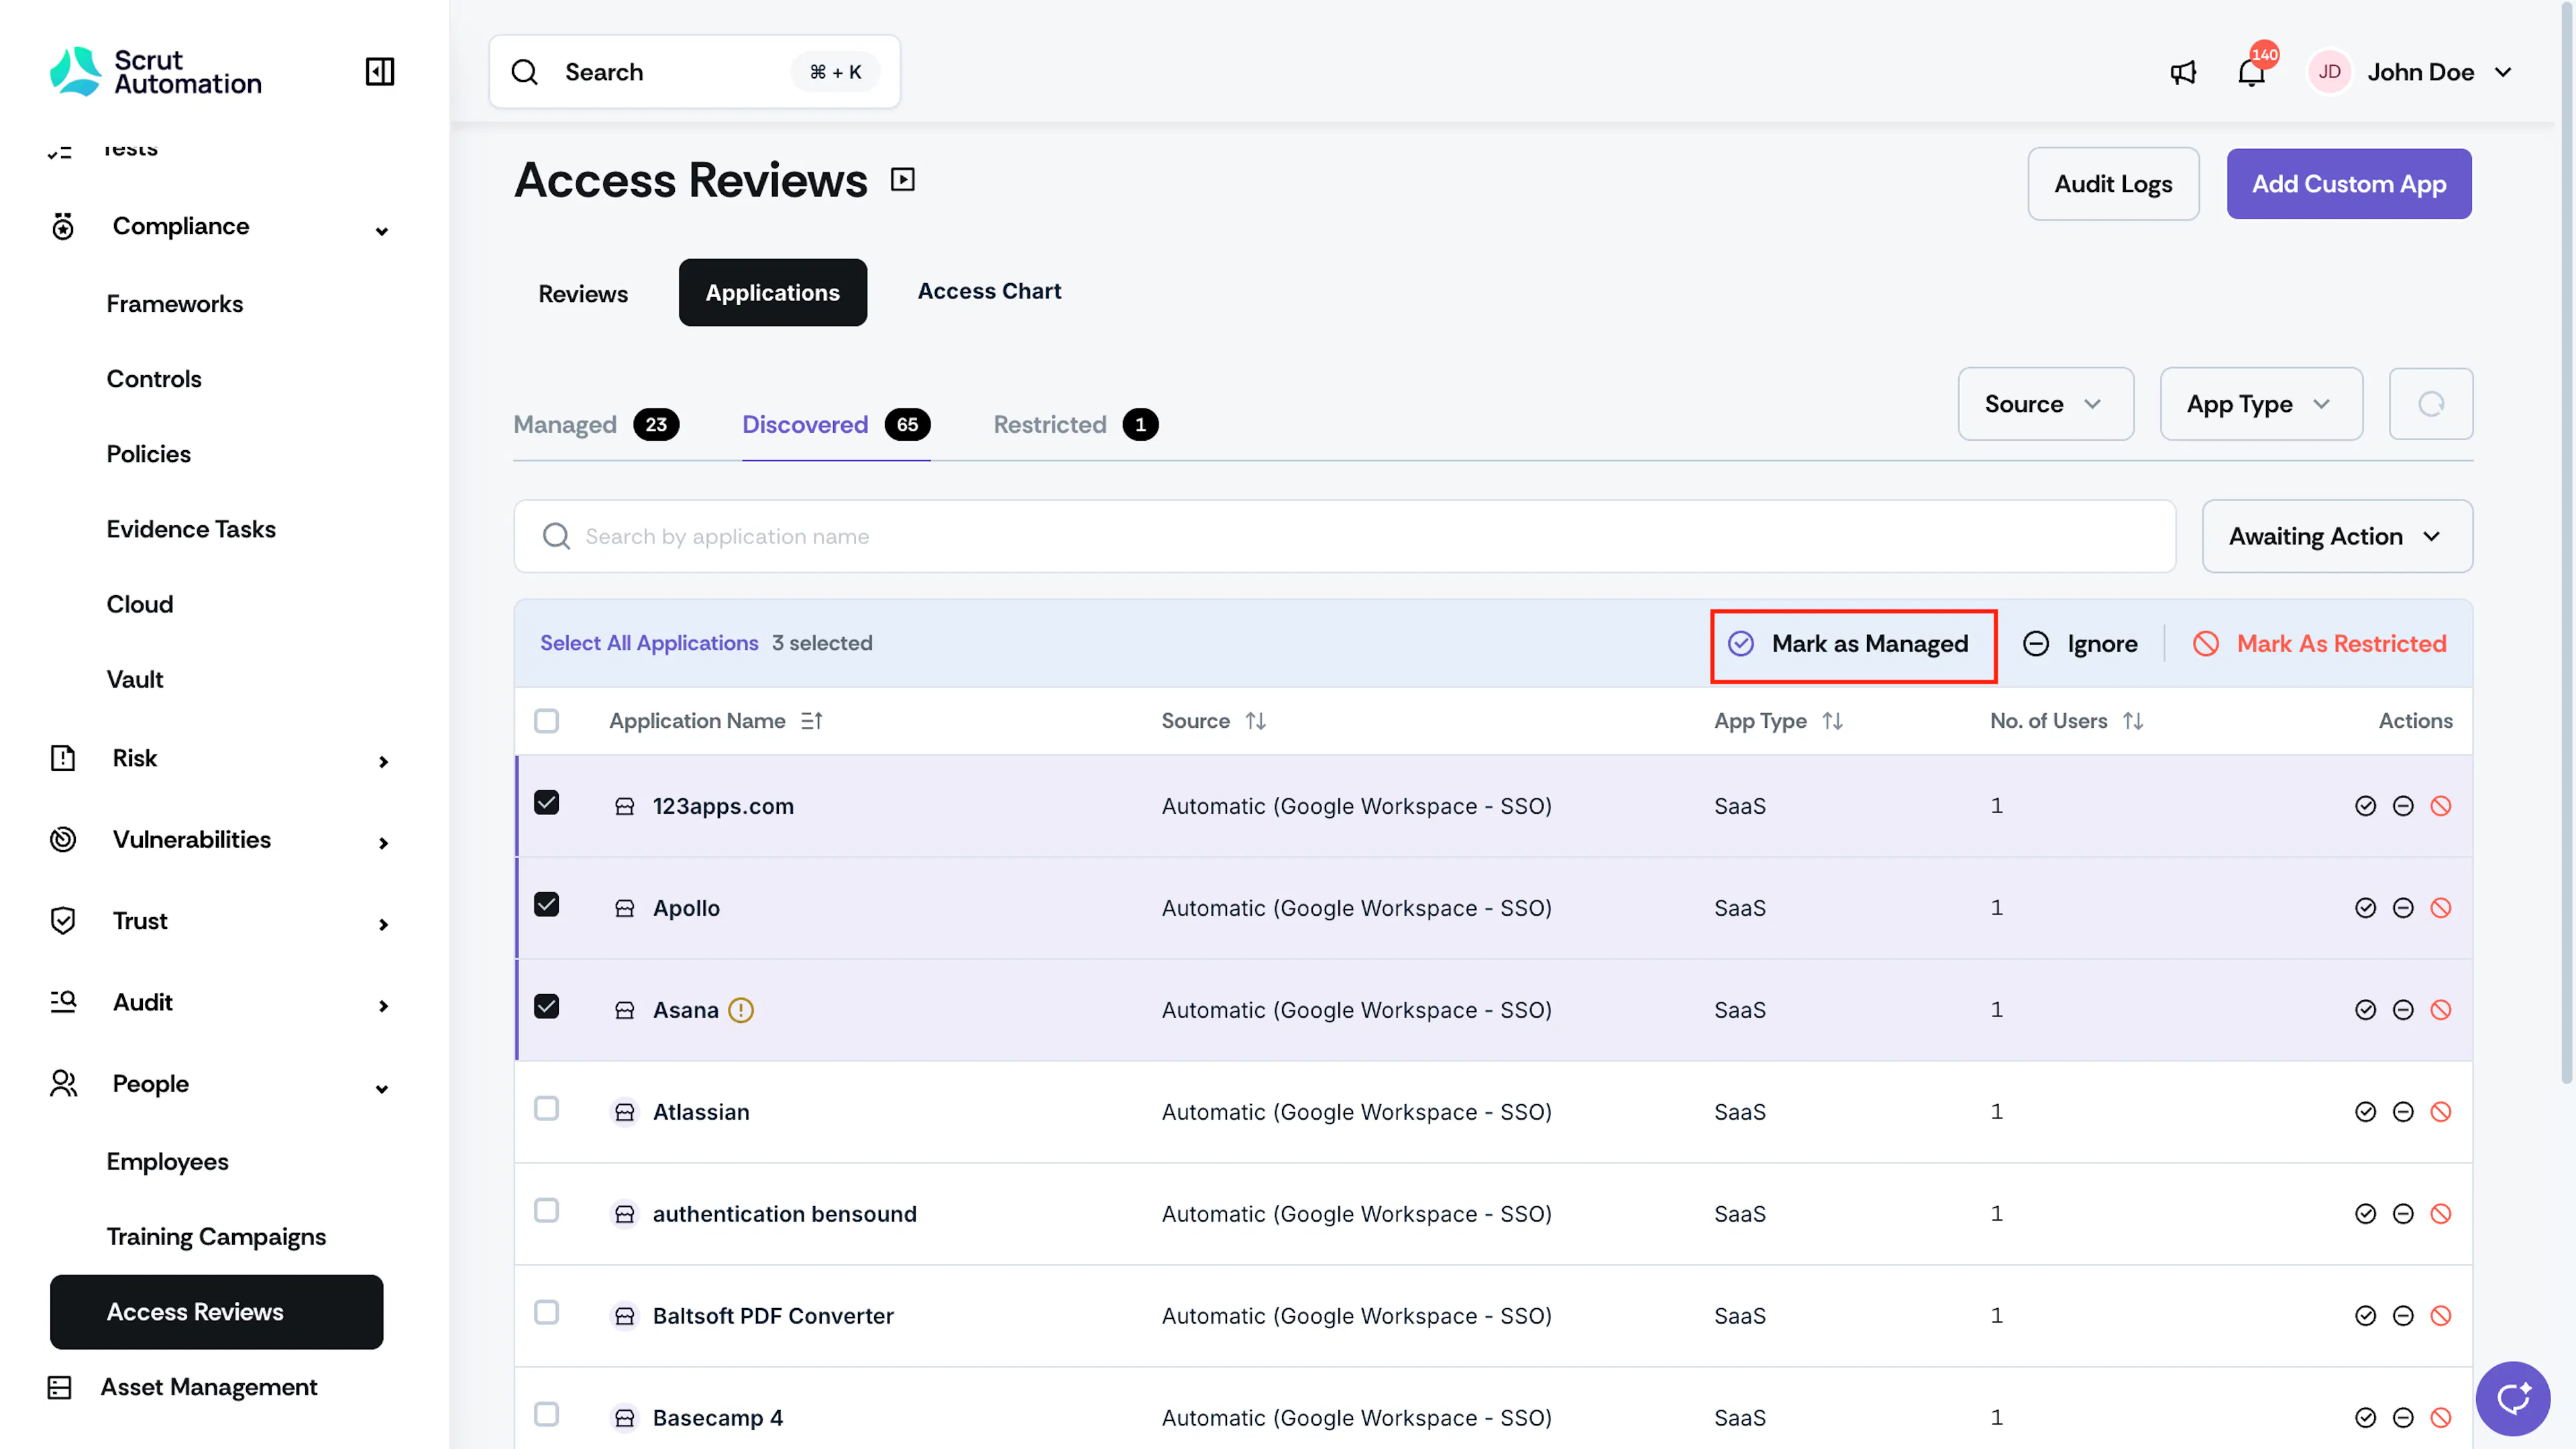
Select the checkbox next to each application you want to manage, or select the header checkbox to select all.
-
Click Mark as Managed on the bulk actions bar.
-
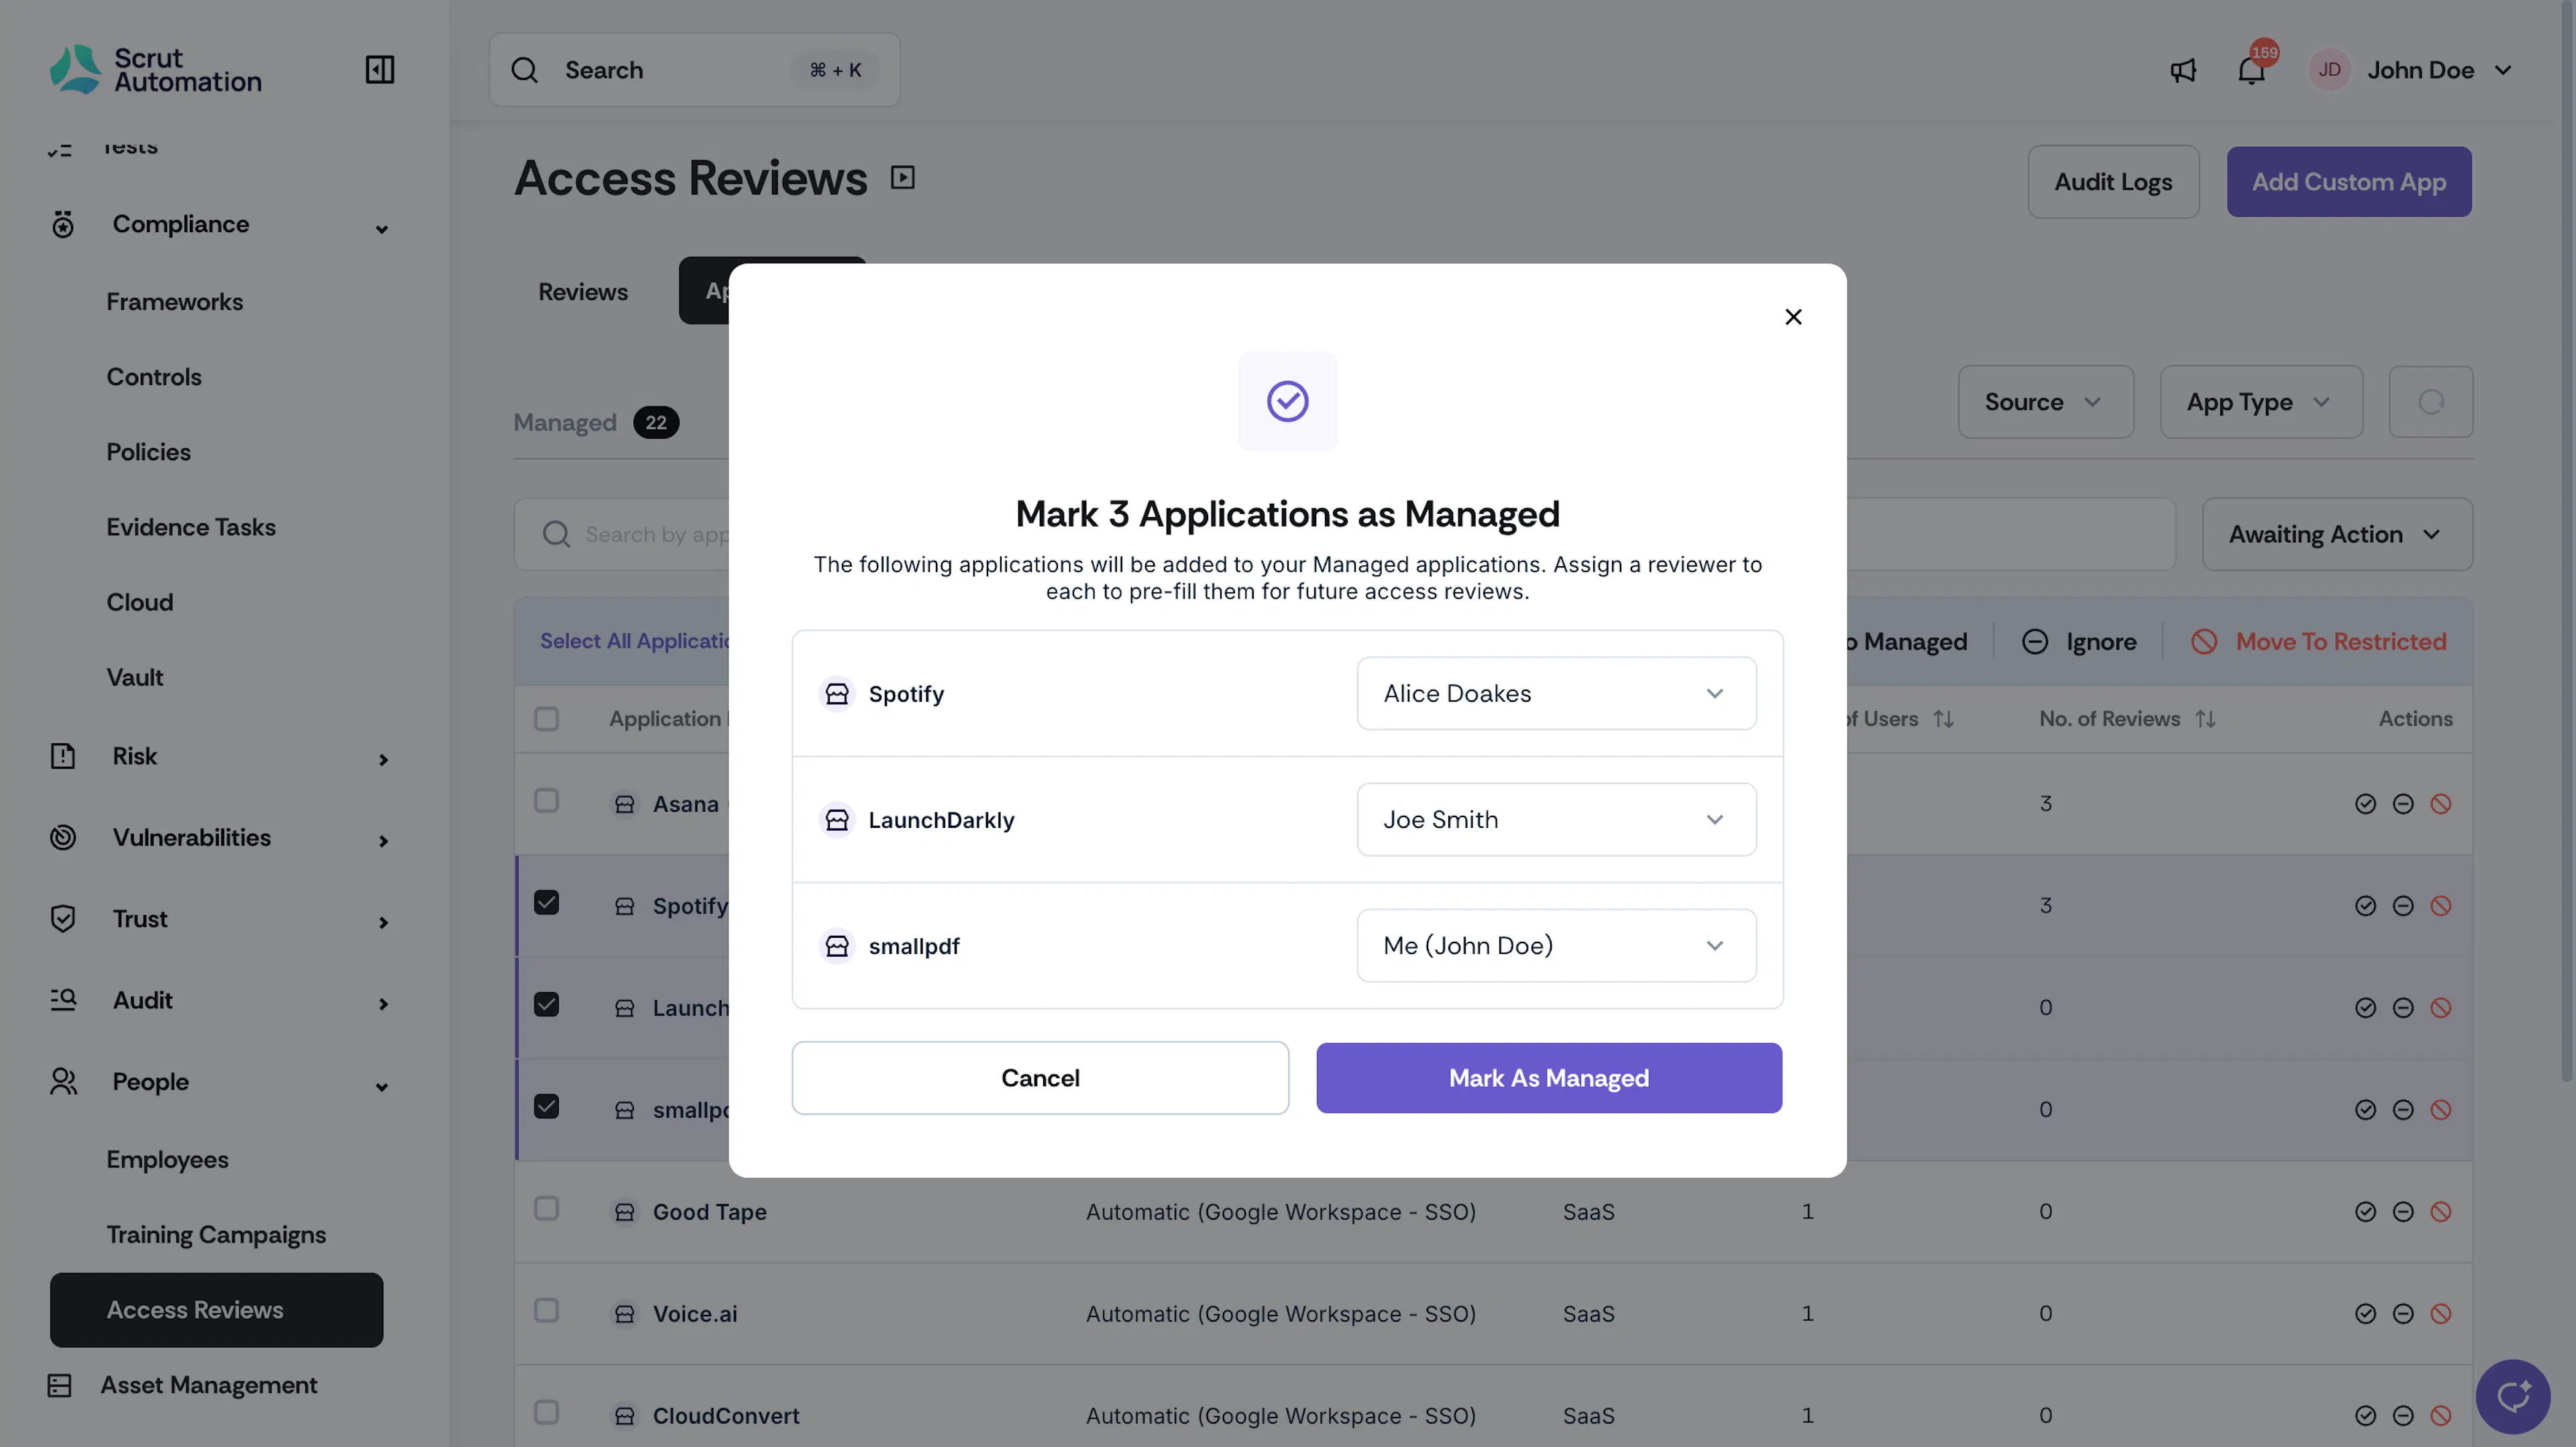
In the modal, review the list of selected applications. Optionally, assign a Reviewer to each app individually.
-
Click Mark as Managed. All selected apps move to the Managed tab.
Mark an Application as Restricted
You can mark an application as Restricted when it's not approved for use in your organization. For example, if it poses a security risk, handles sensitive data outside sanctioned tools, violates your acceptable use policy, or for any other reason. Once you mark it as restricted, you can send app removal instructions to all users of the app. Here's how:
Heads Up!
Scrut does not automatically block access to these apps; However, it tracks usage and allows you to directly send app removal notifications to employees who actively use them.
-
Navigate to Access Review → Applications → Discovered.
-
Locate the application.
-
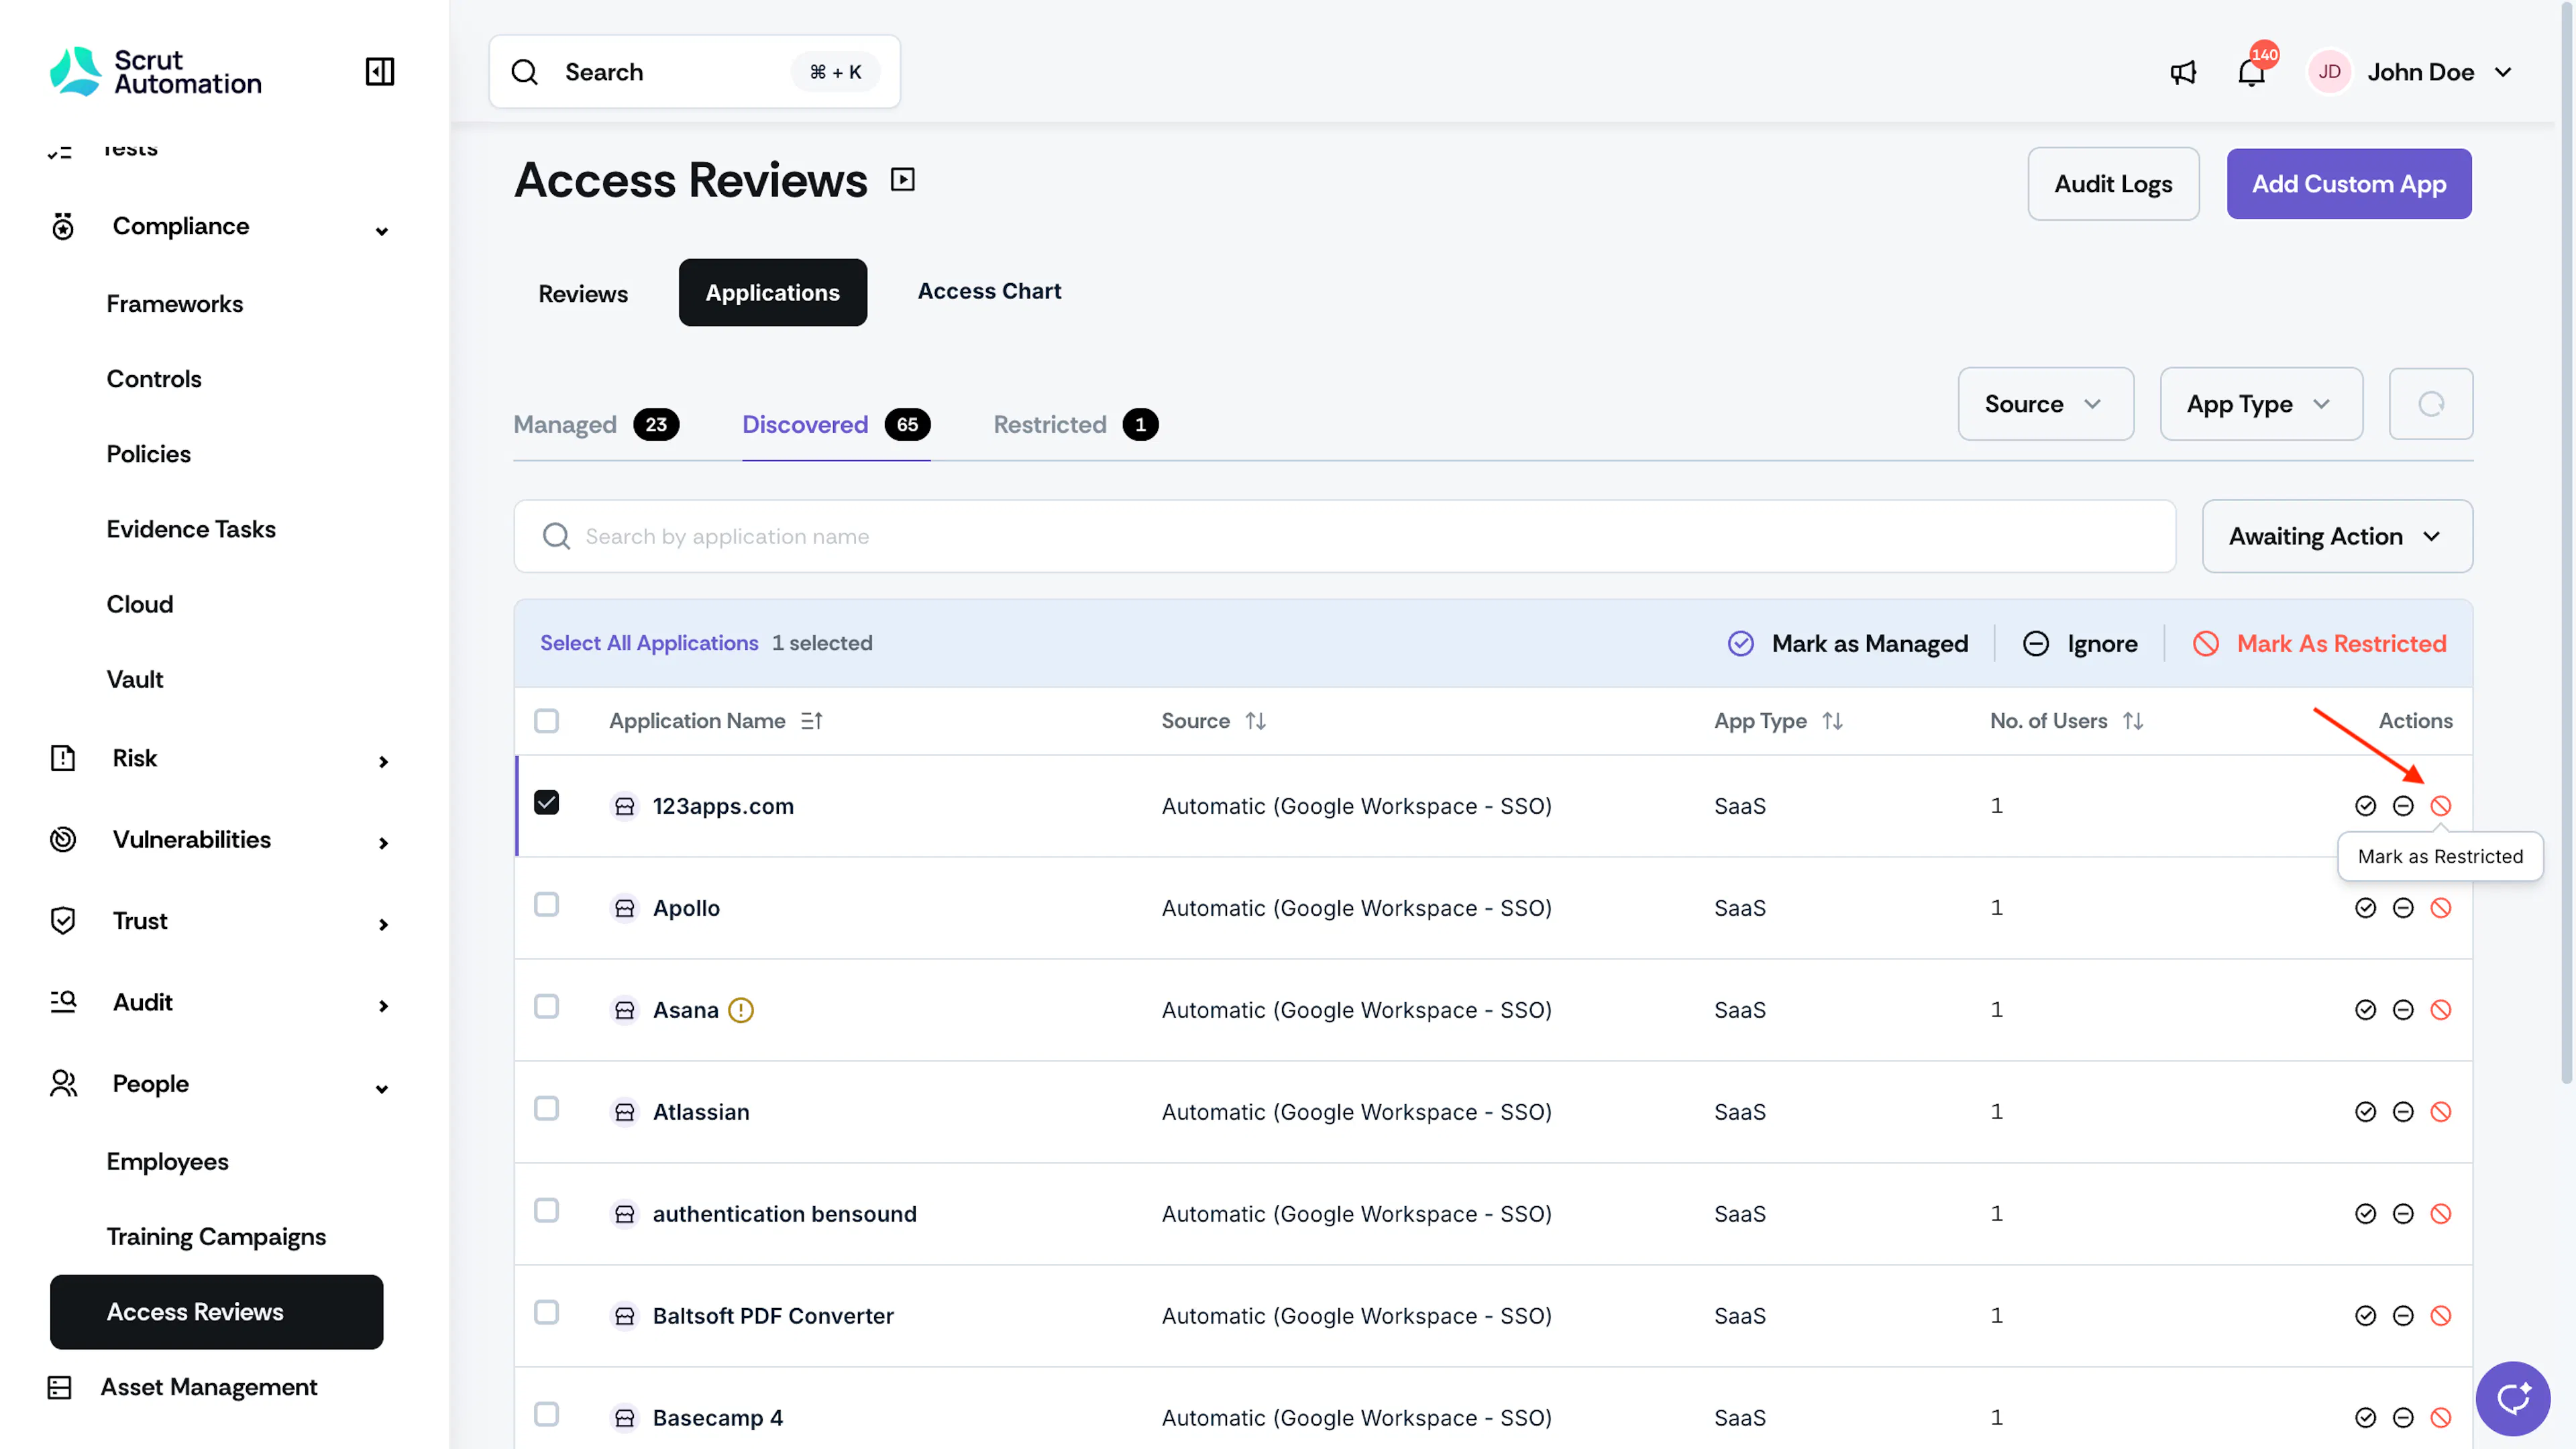
Click Move to Restricted in the actions column.
-
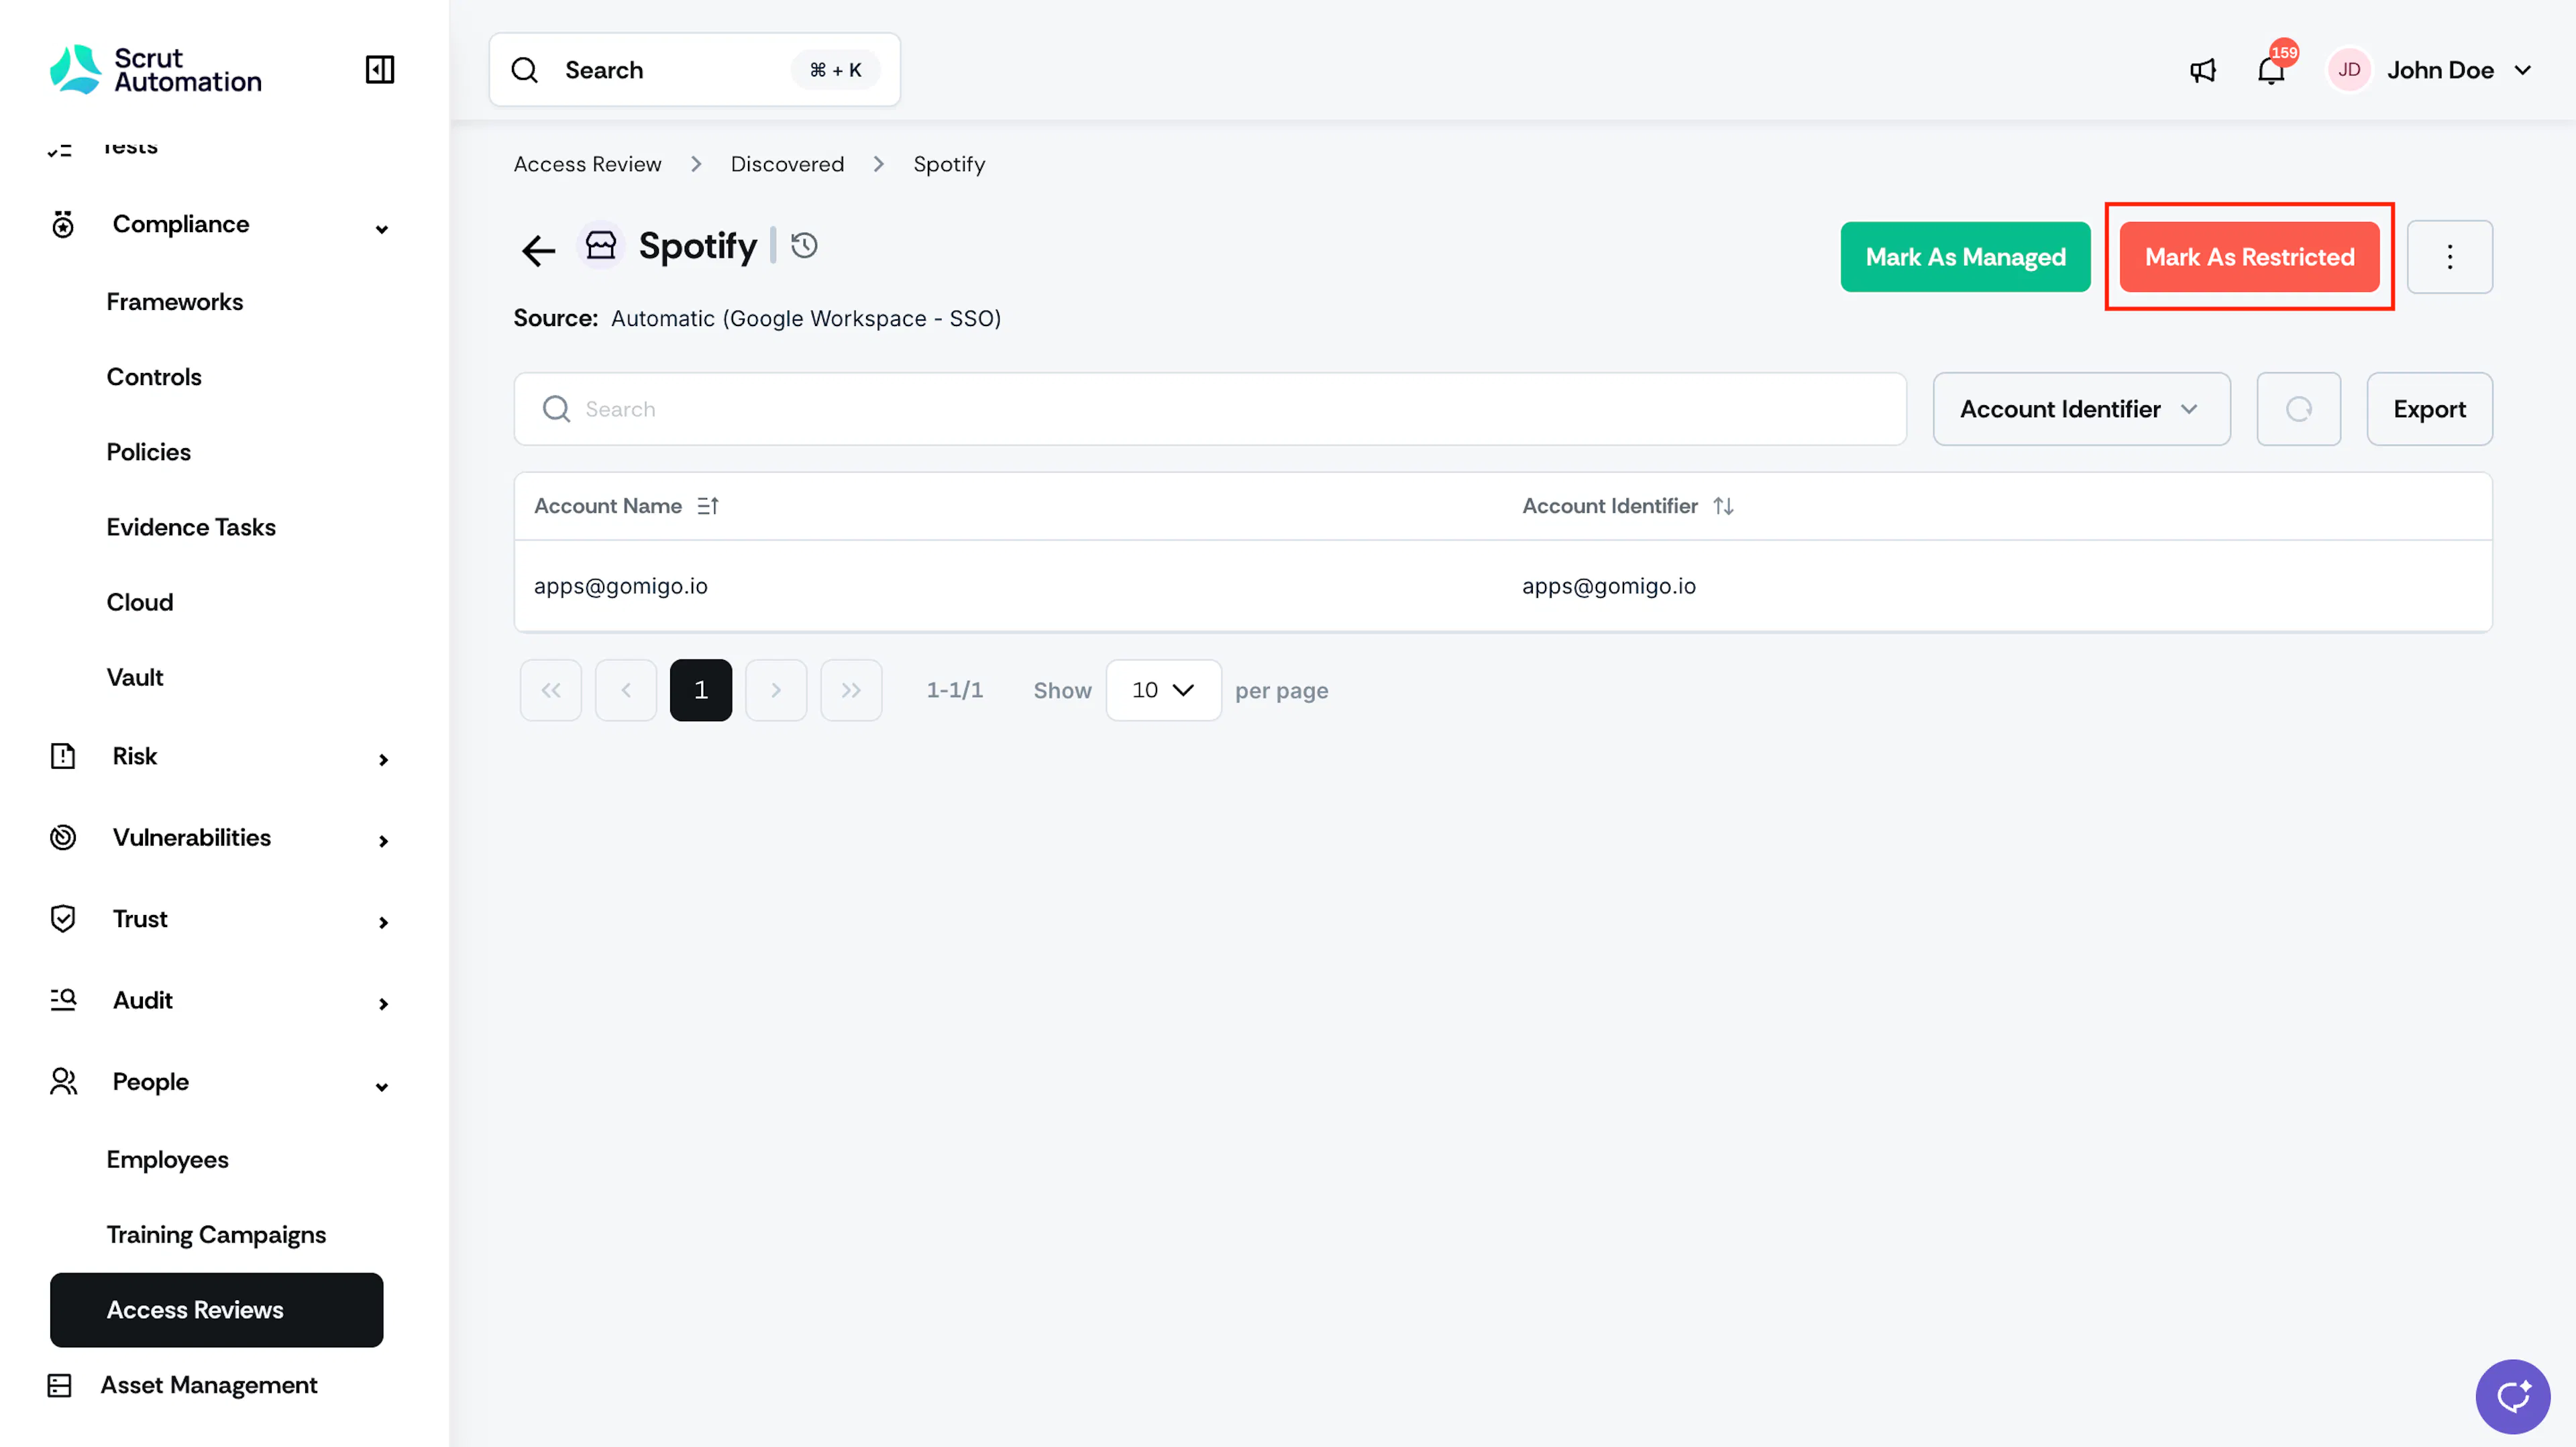
Alternatively, open the app and click Mark as Restricted.
-
Enter a justification. This field is required (up to 500 characters). Some examples:
- Not compliant with our data security policy
- Unapproved file-sharing tool; potential data exfiltration risk
- Free consumer app with no enterprise data controls
- Replaced by an approved alternative; use [approved tool] instead
- Not reviewed or vetted by IT
-
Click Mark as Restricted.
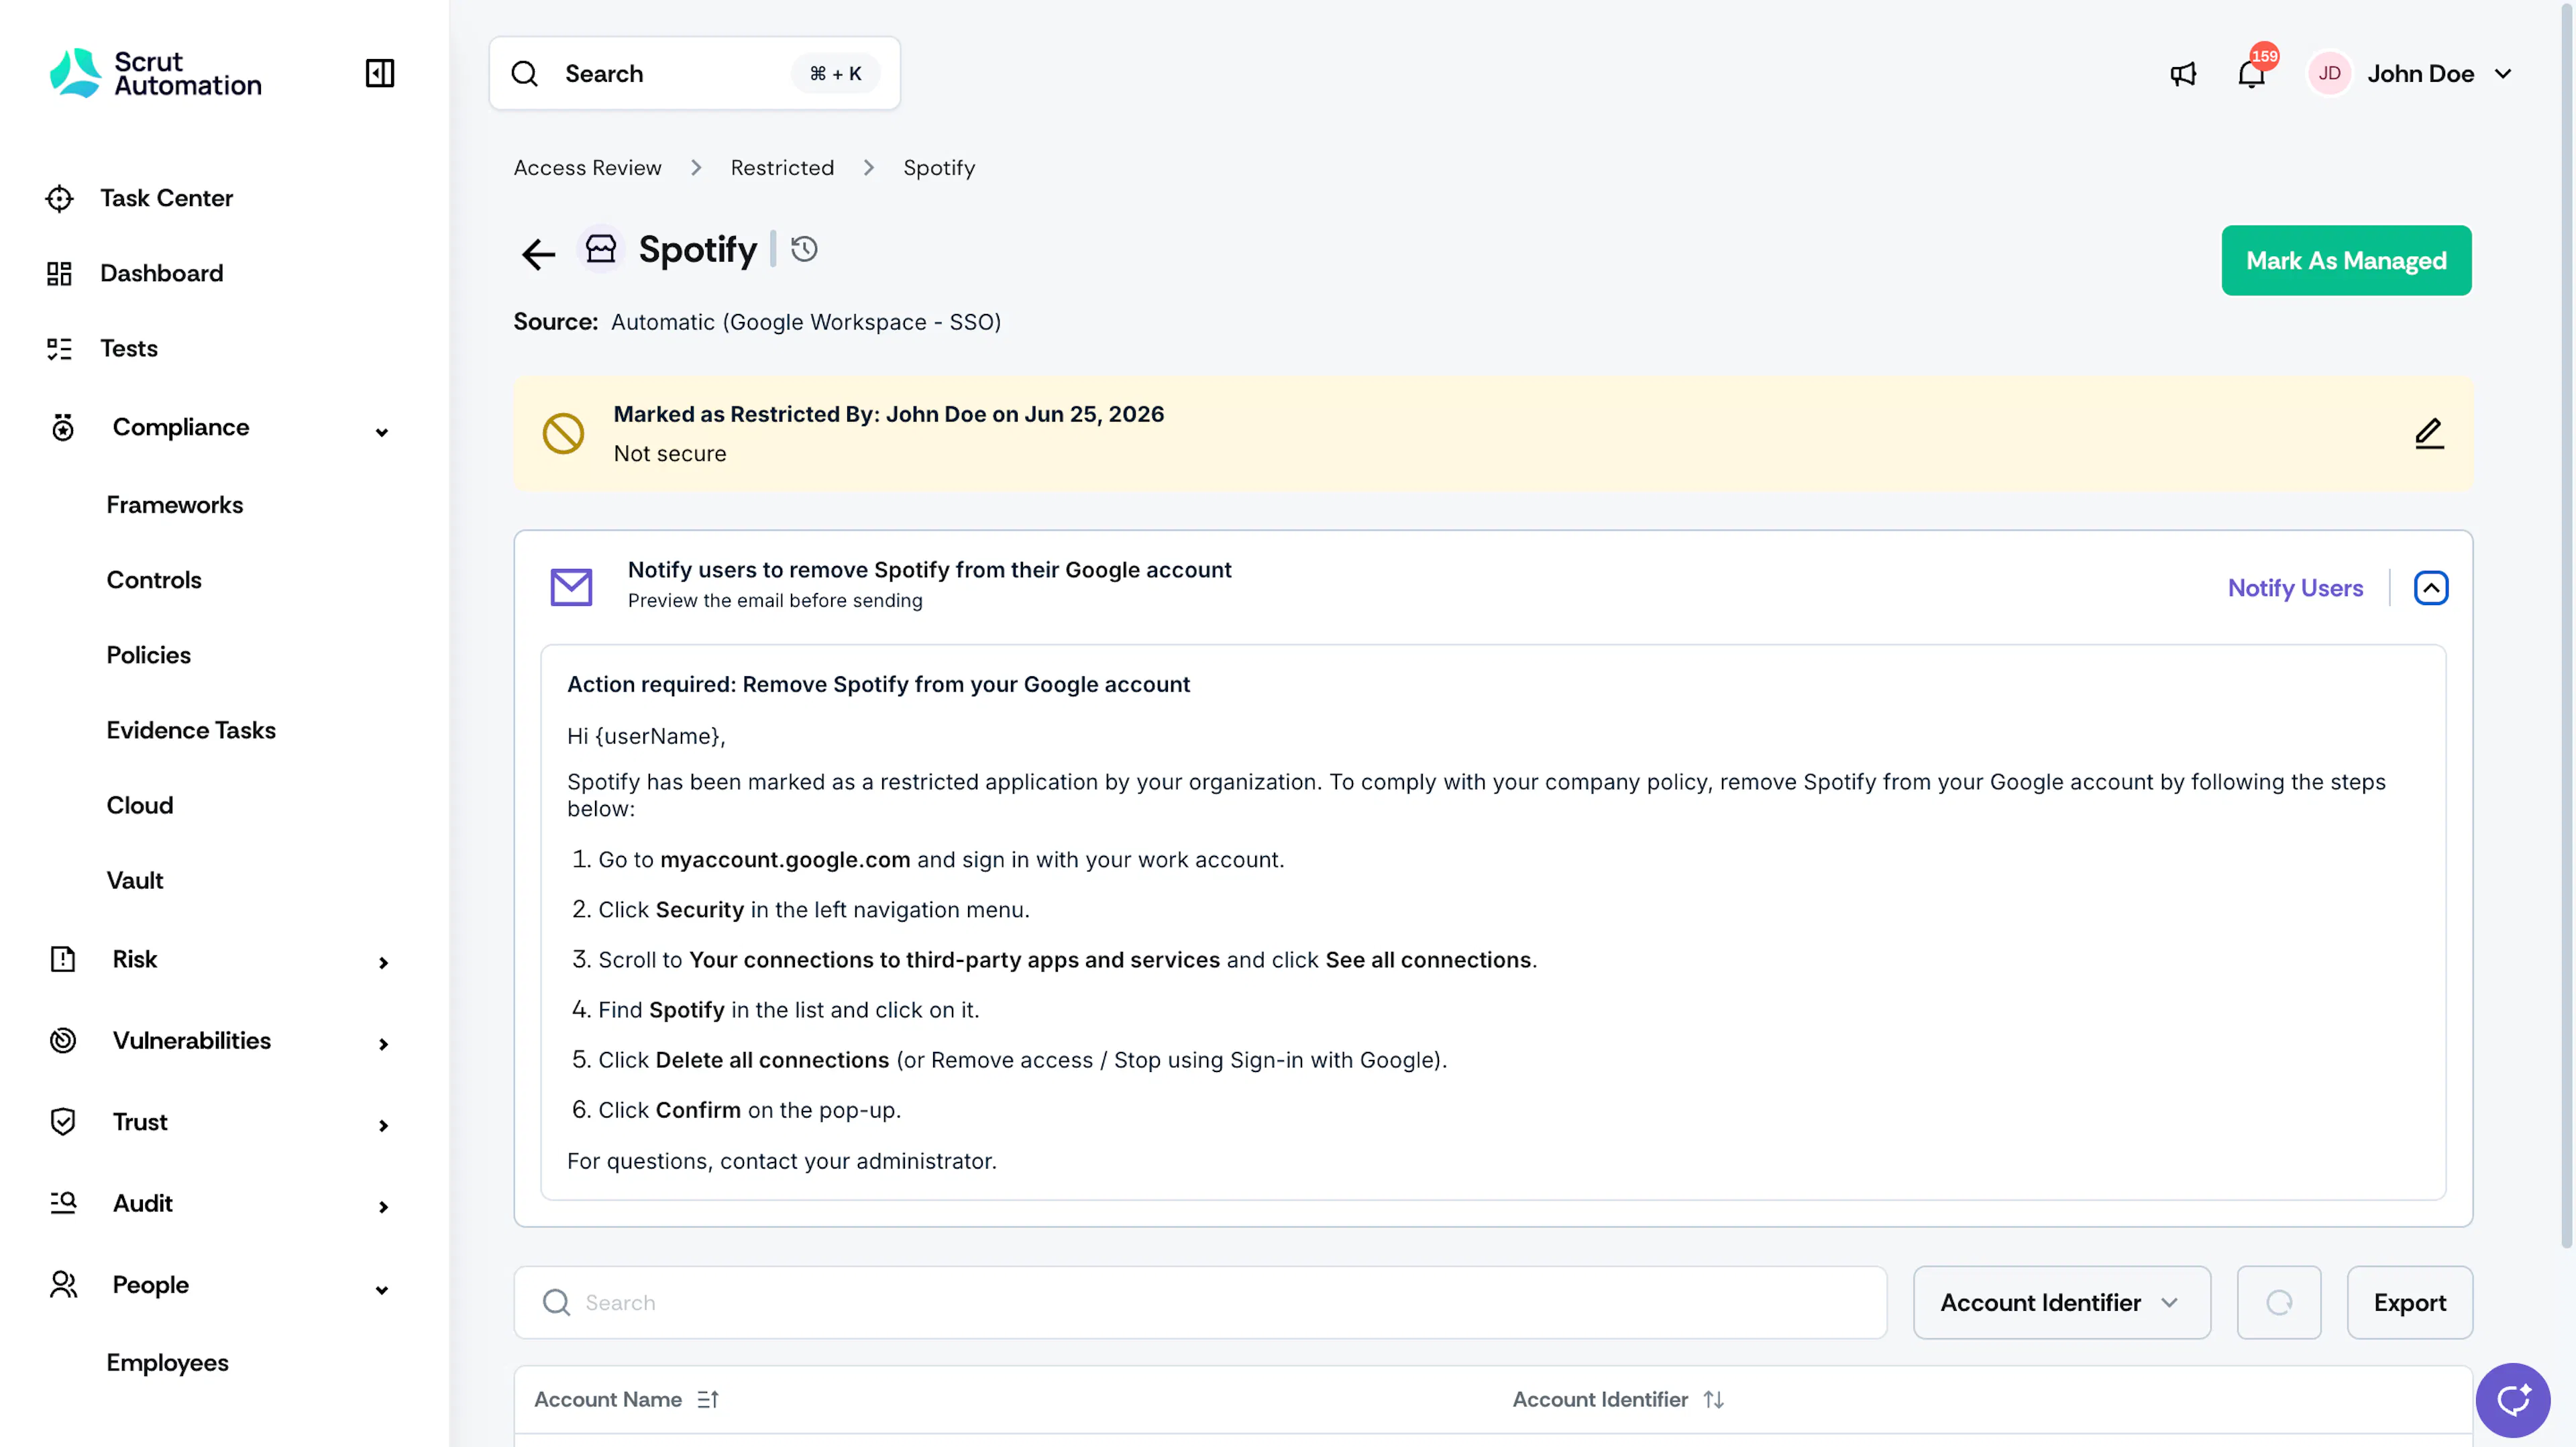
The application moves to the Restricted tab. The justification is recorded and visible in the app's detail view, along with the name of the person who restricted it and the date. See here for step-by-step instructions to send removal instructions to app users.
Note: You can move a previously restricted app to the Managed tab by clicking Mark as Managed here.
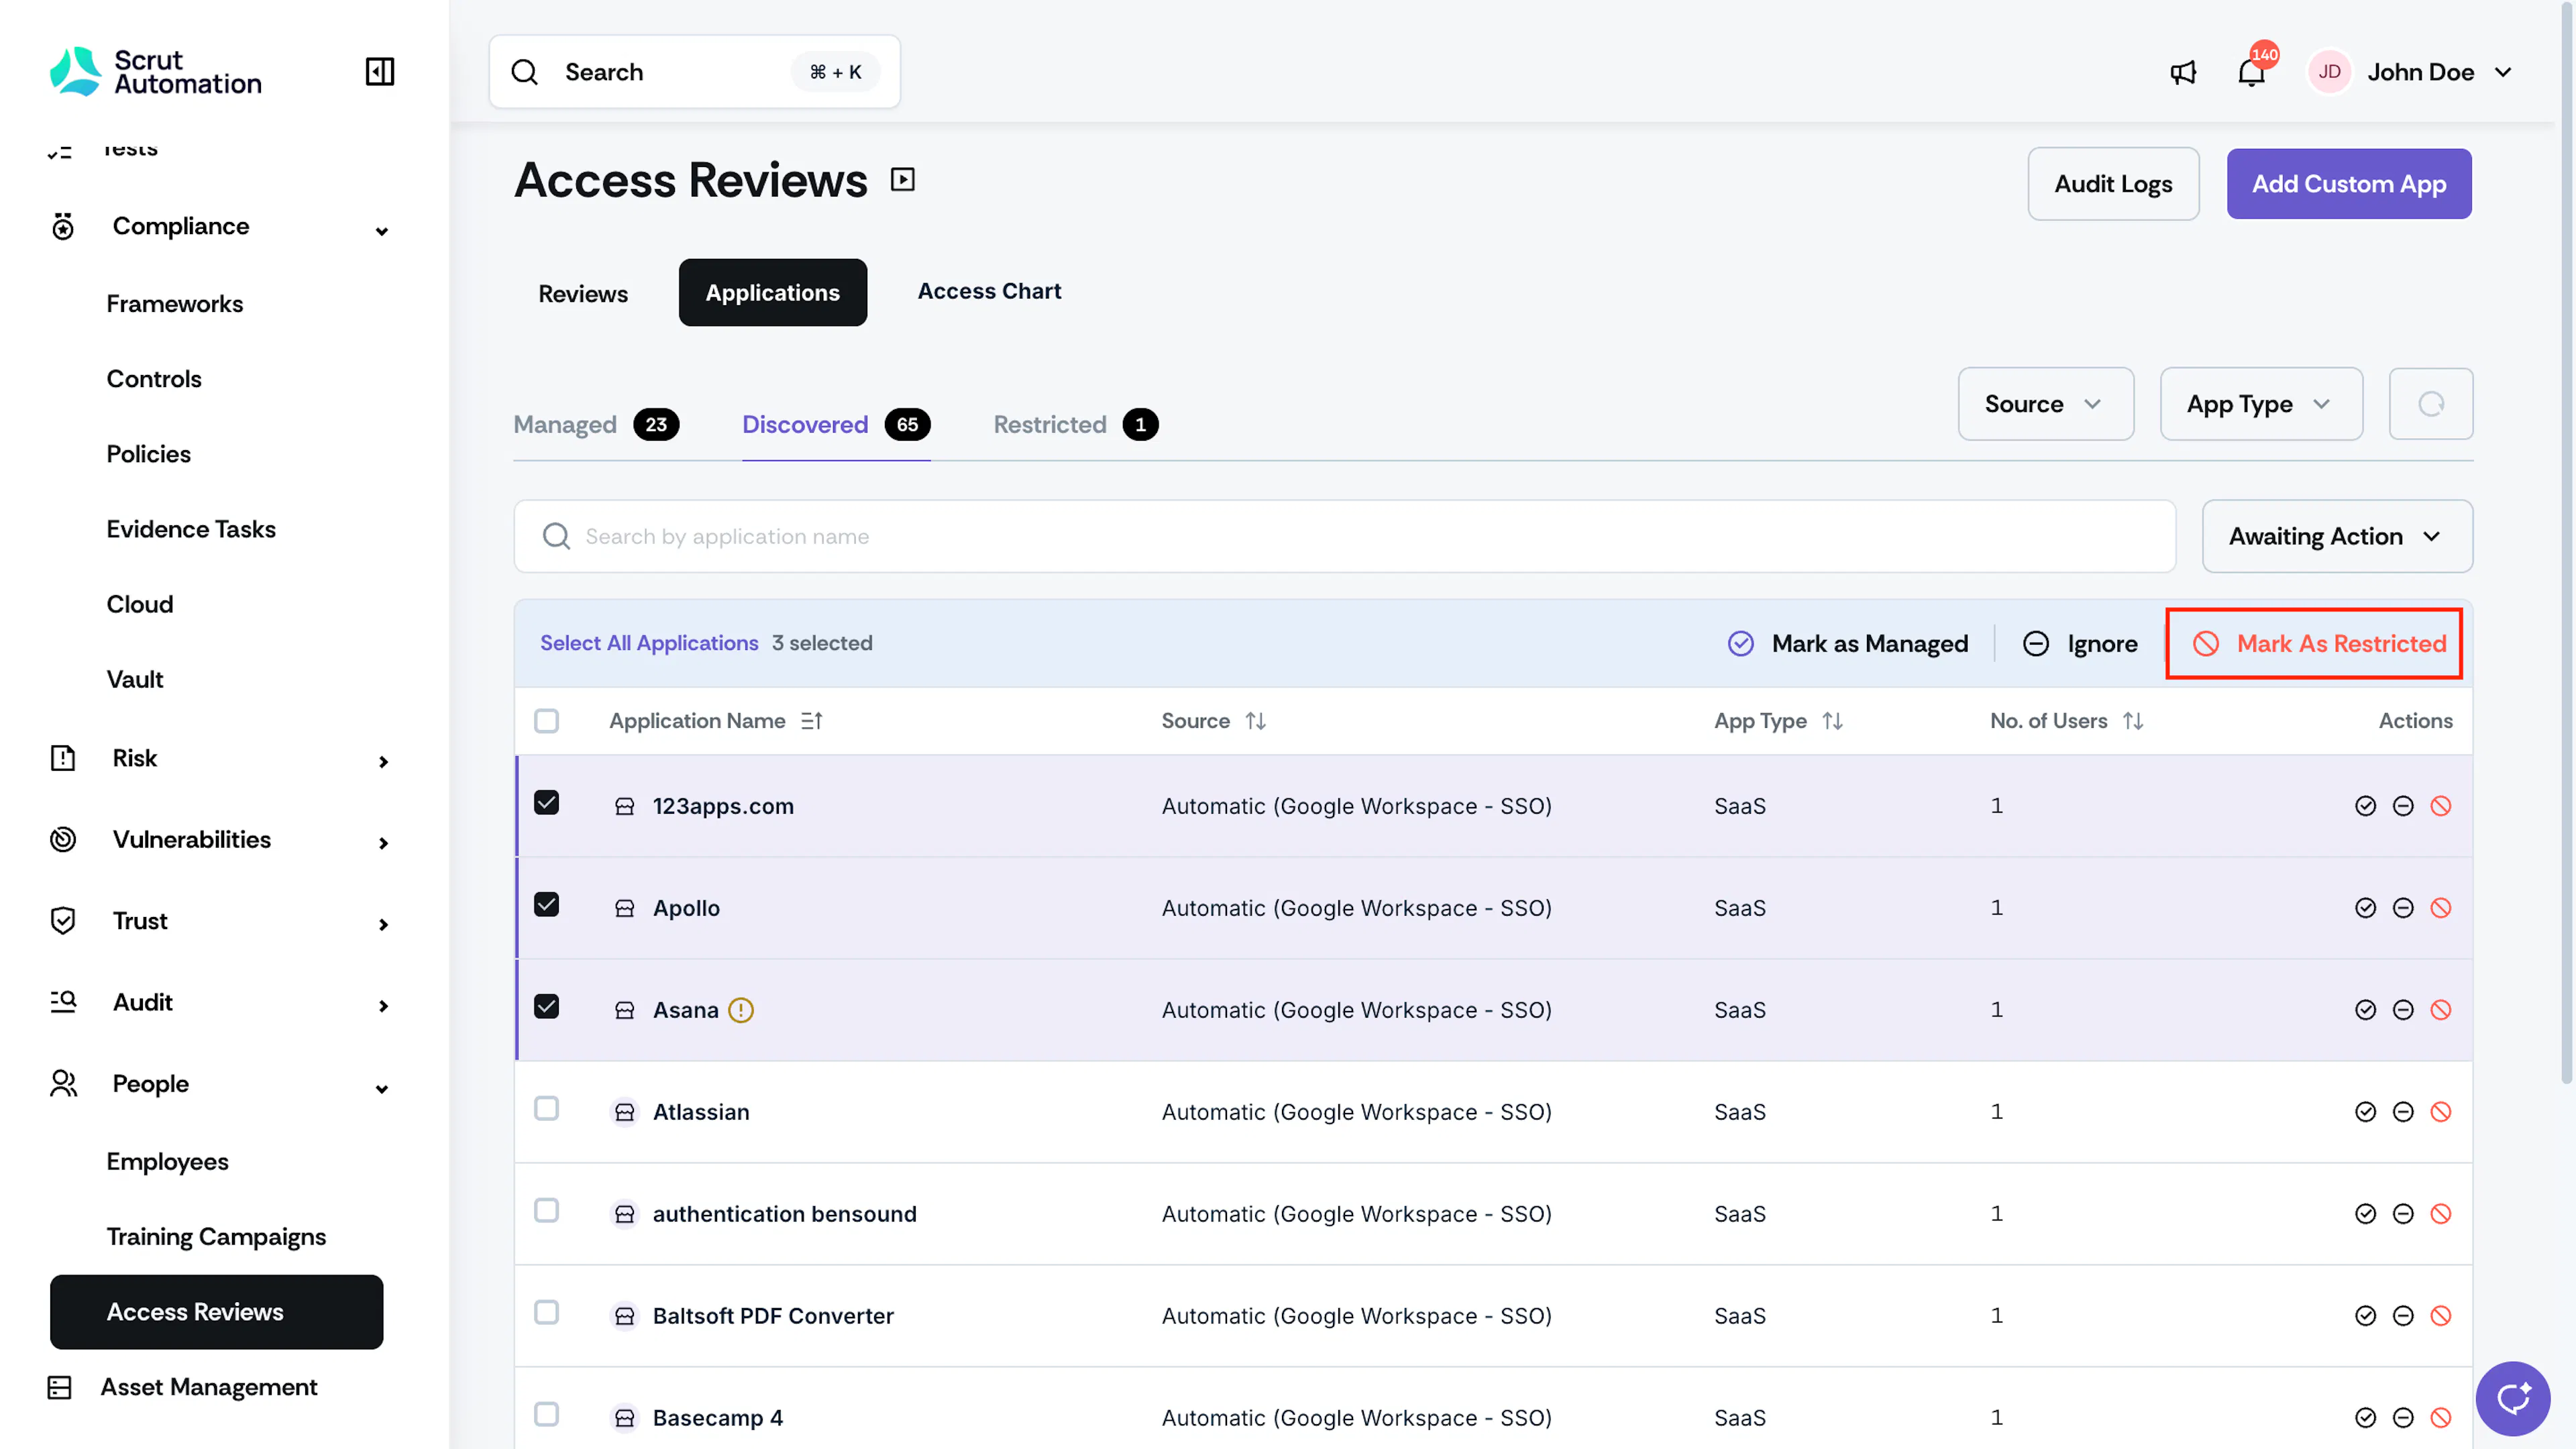
Mark Multiple Applications as Restricted
-
Navigate to Access Review → Applications → Discovered.
-
Select the checkbox next to each application you want to restrict, or select the header checkbox to select all.
-
Click Mark as Restricted on the bulk actions bar.
-
Enter the justification and click Mark as Restricted. All selected apps move to the Restricted tab.
Ignore an Application
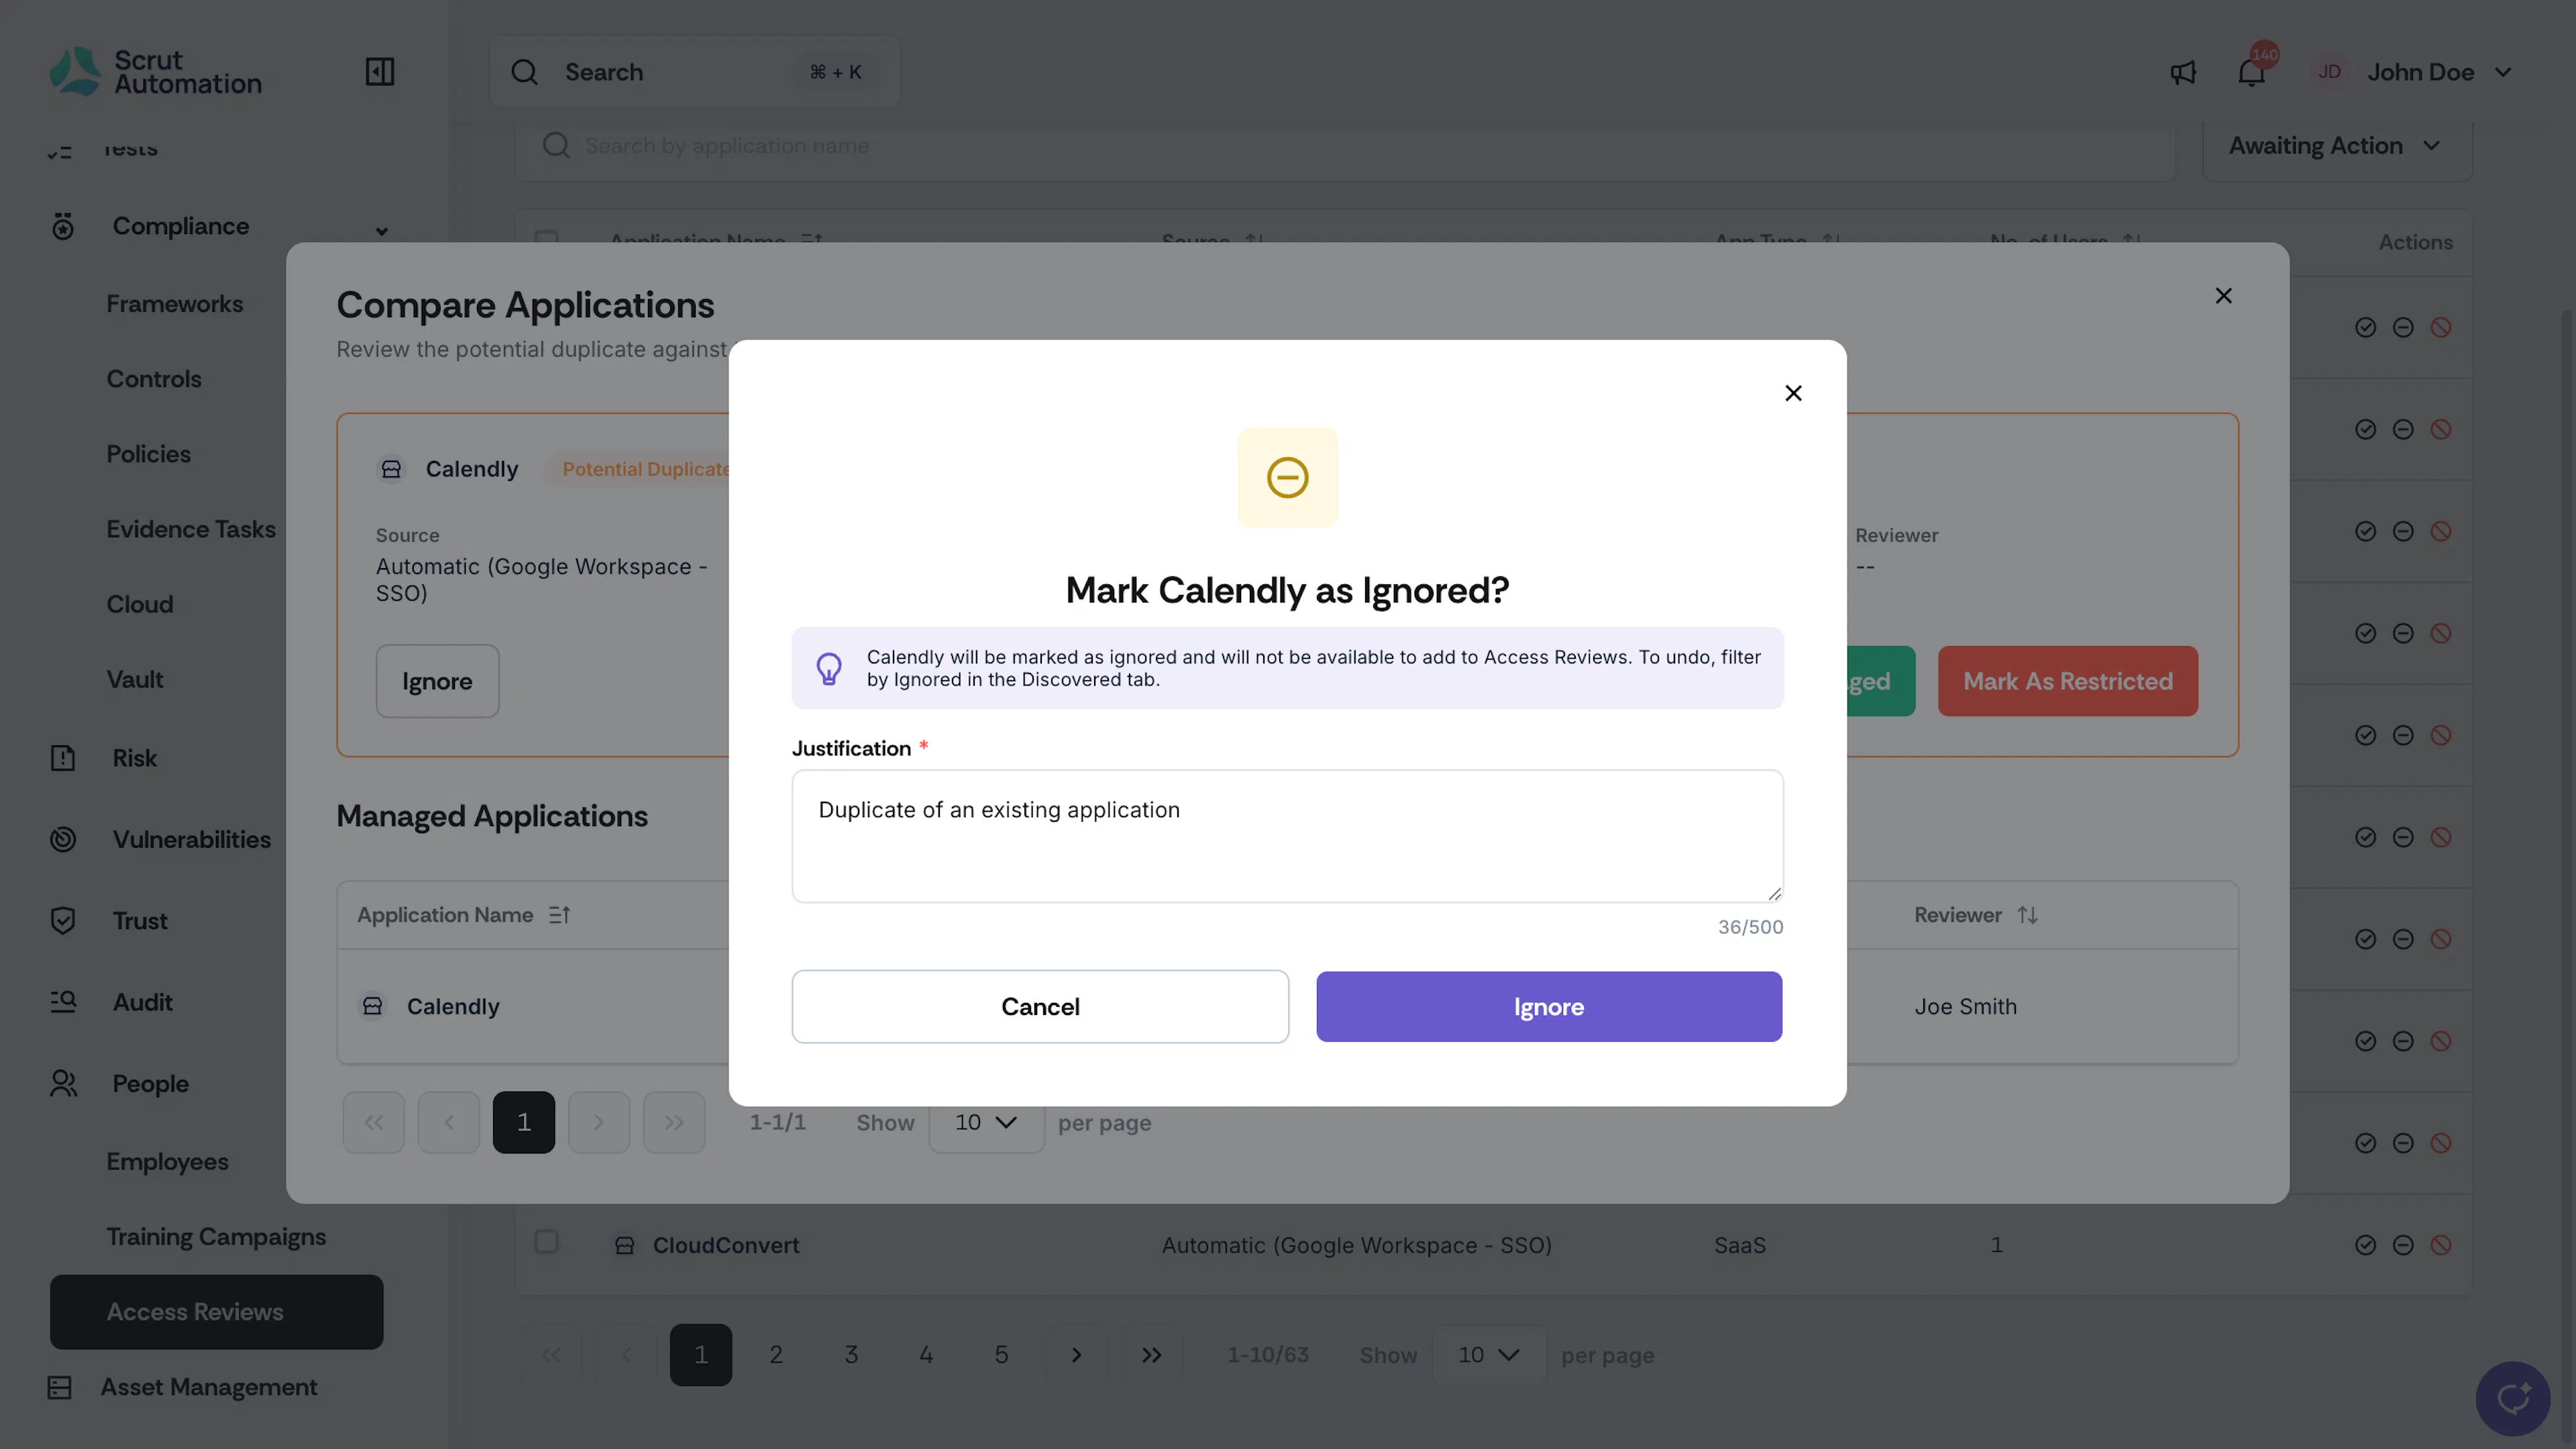
Use this action to hide an application from the Discovered list. Ignored apps are not deleted; you can bring them back anytime.
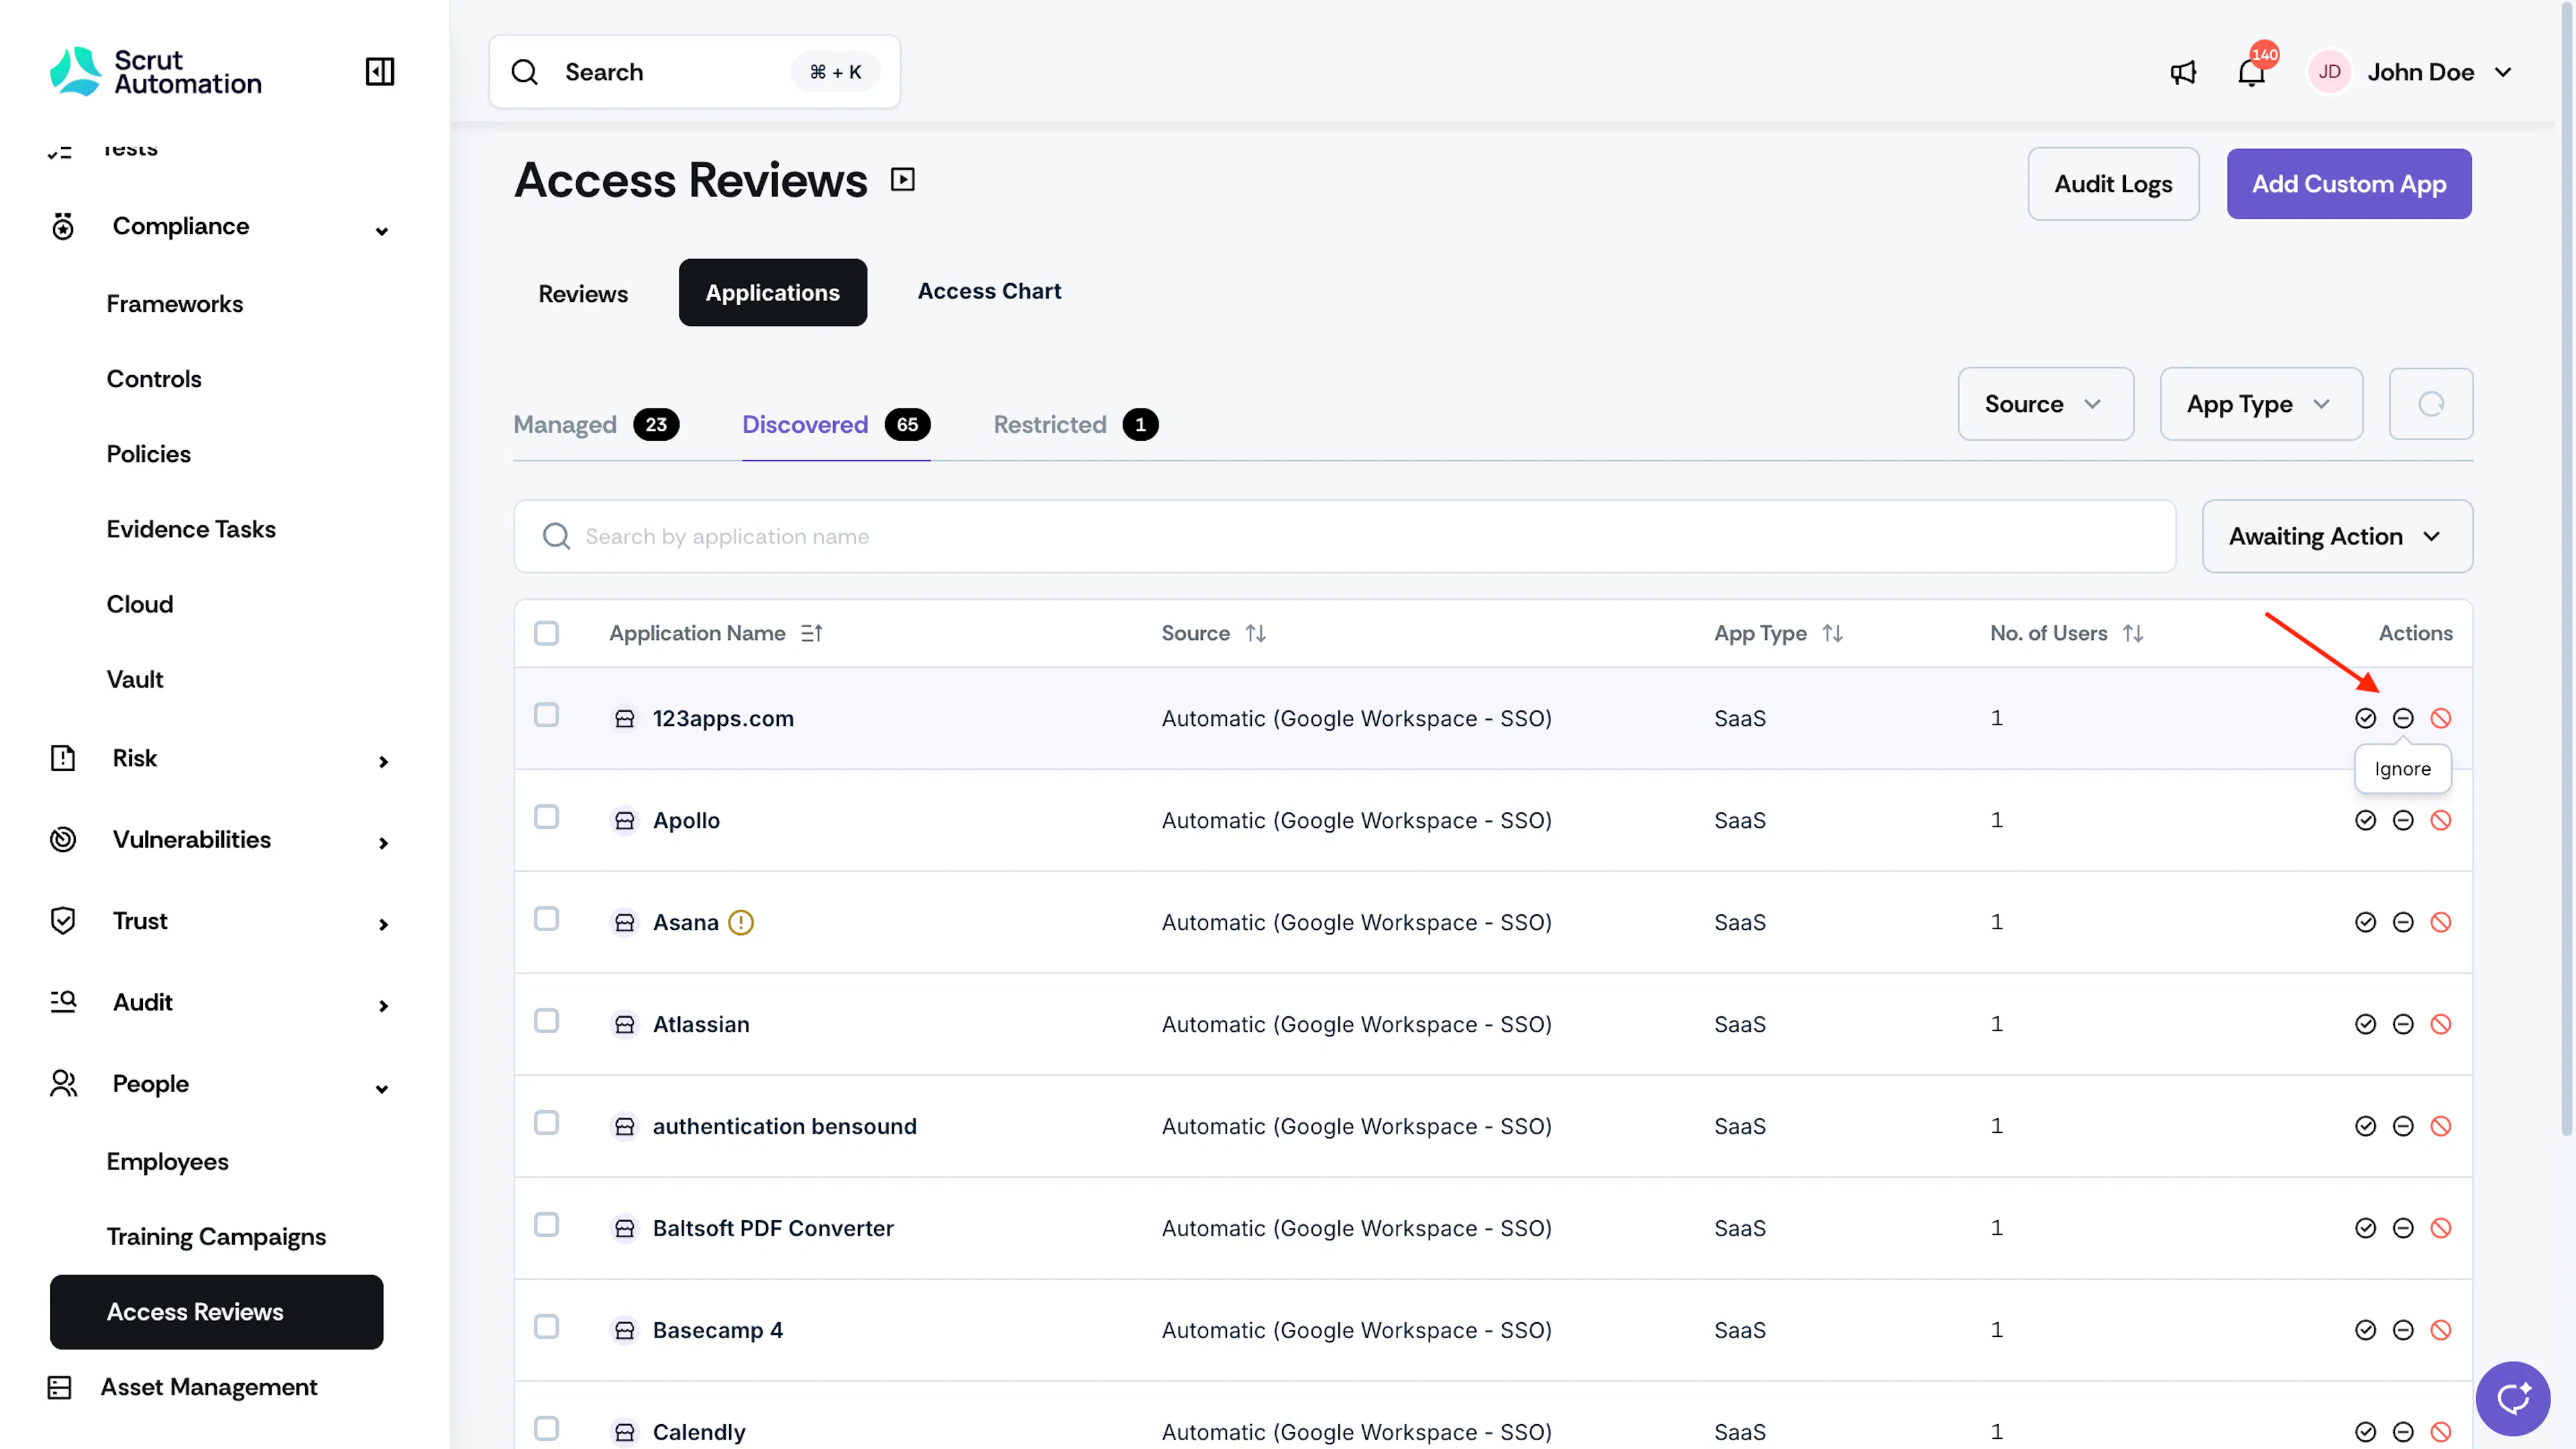
-
Navigate to Access Review → Applications → Discovered.
-
Locate the application.
-
Click the Ignore icon in the Actions column.
-
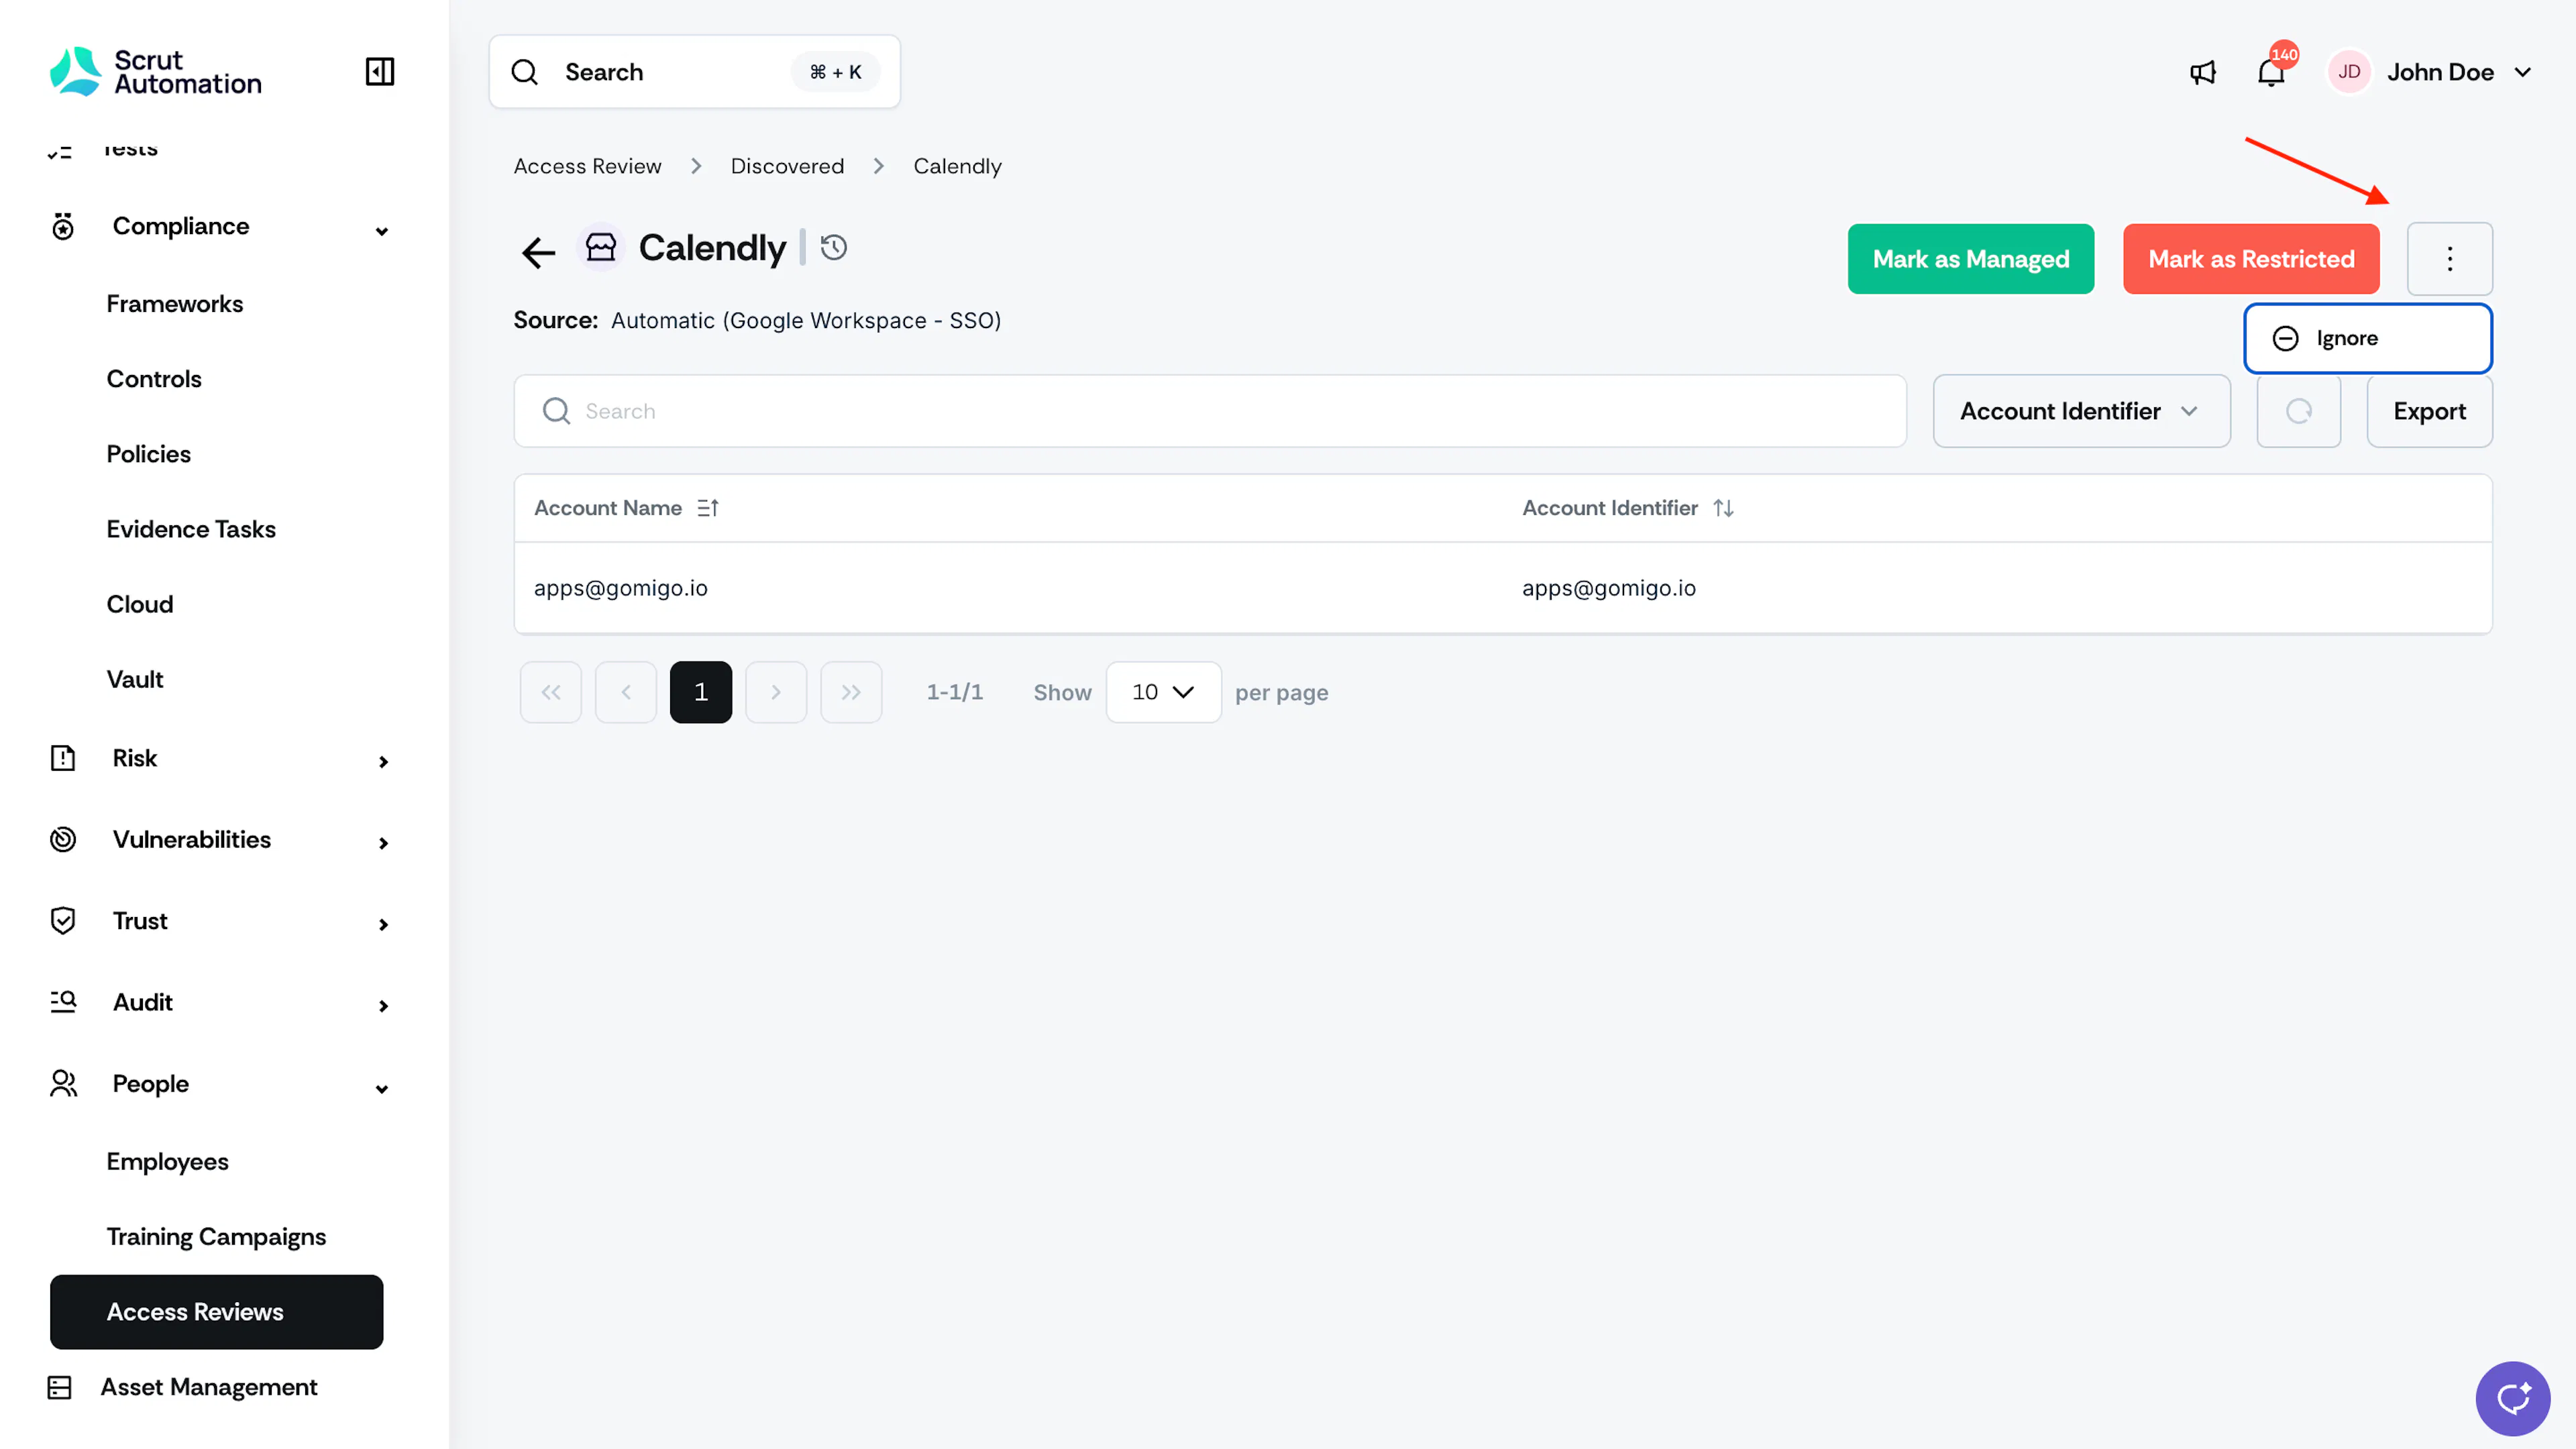
Alternatively, open the app and select Ignore from the three-dot menu.
-
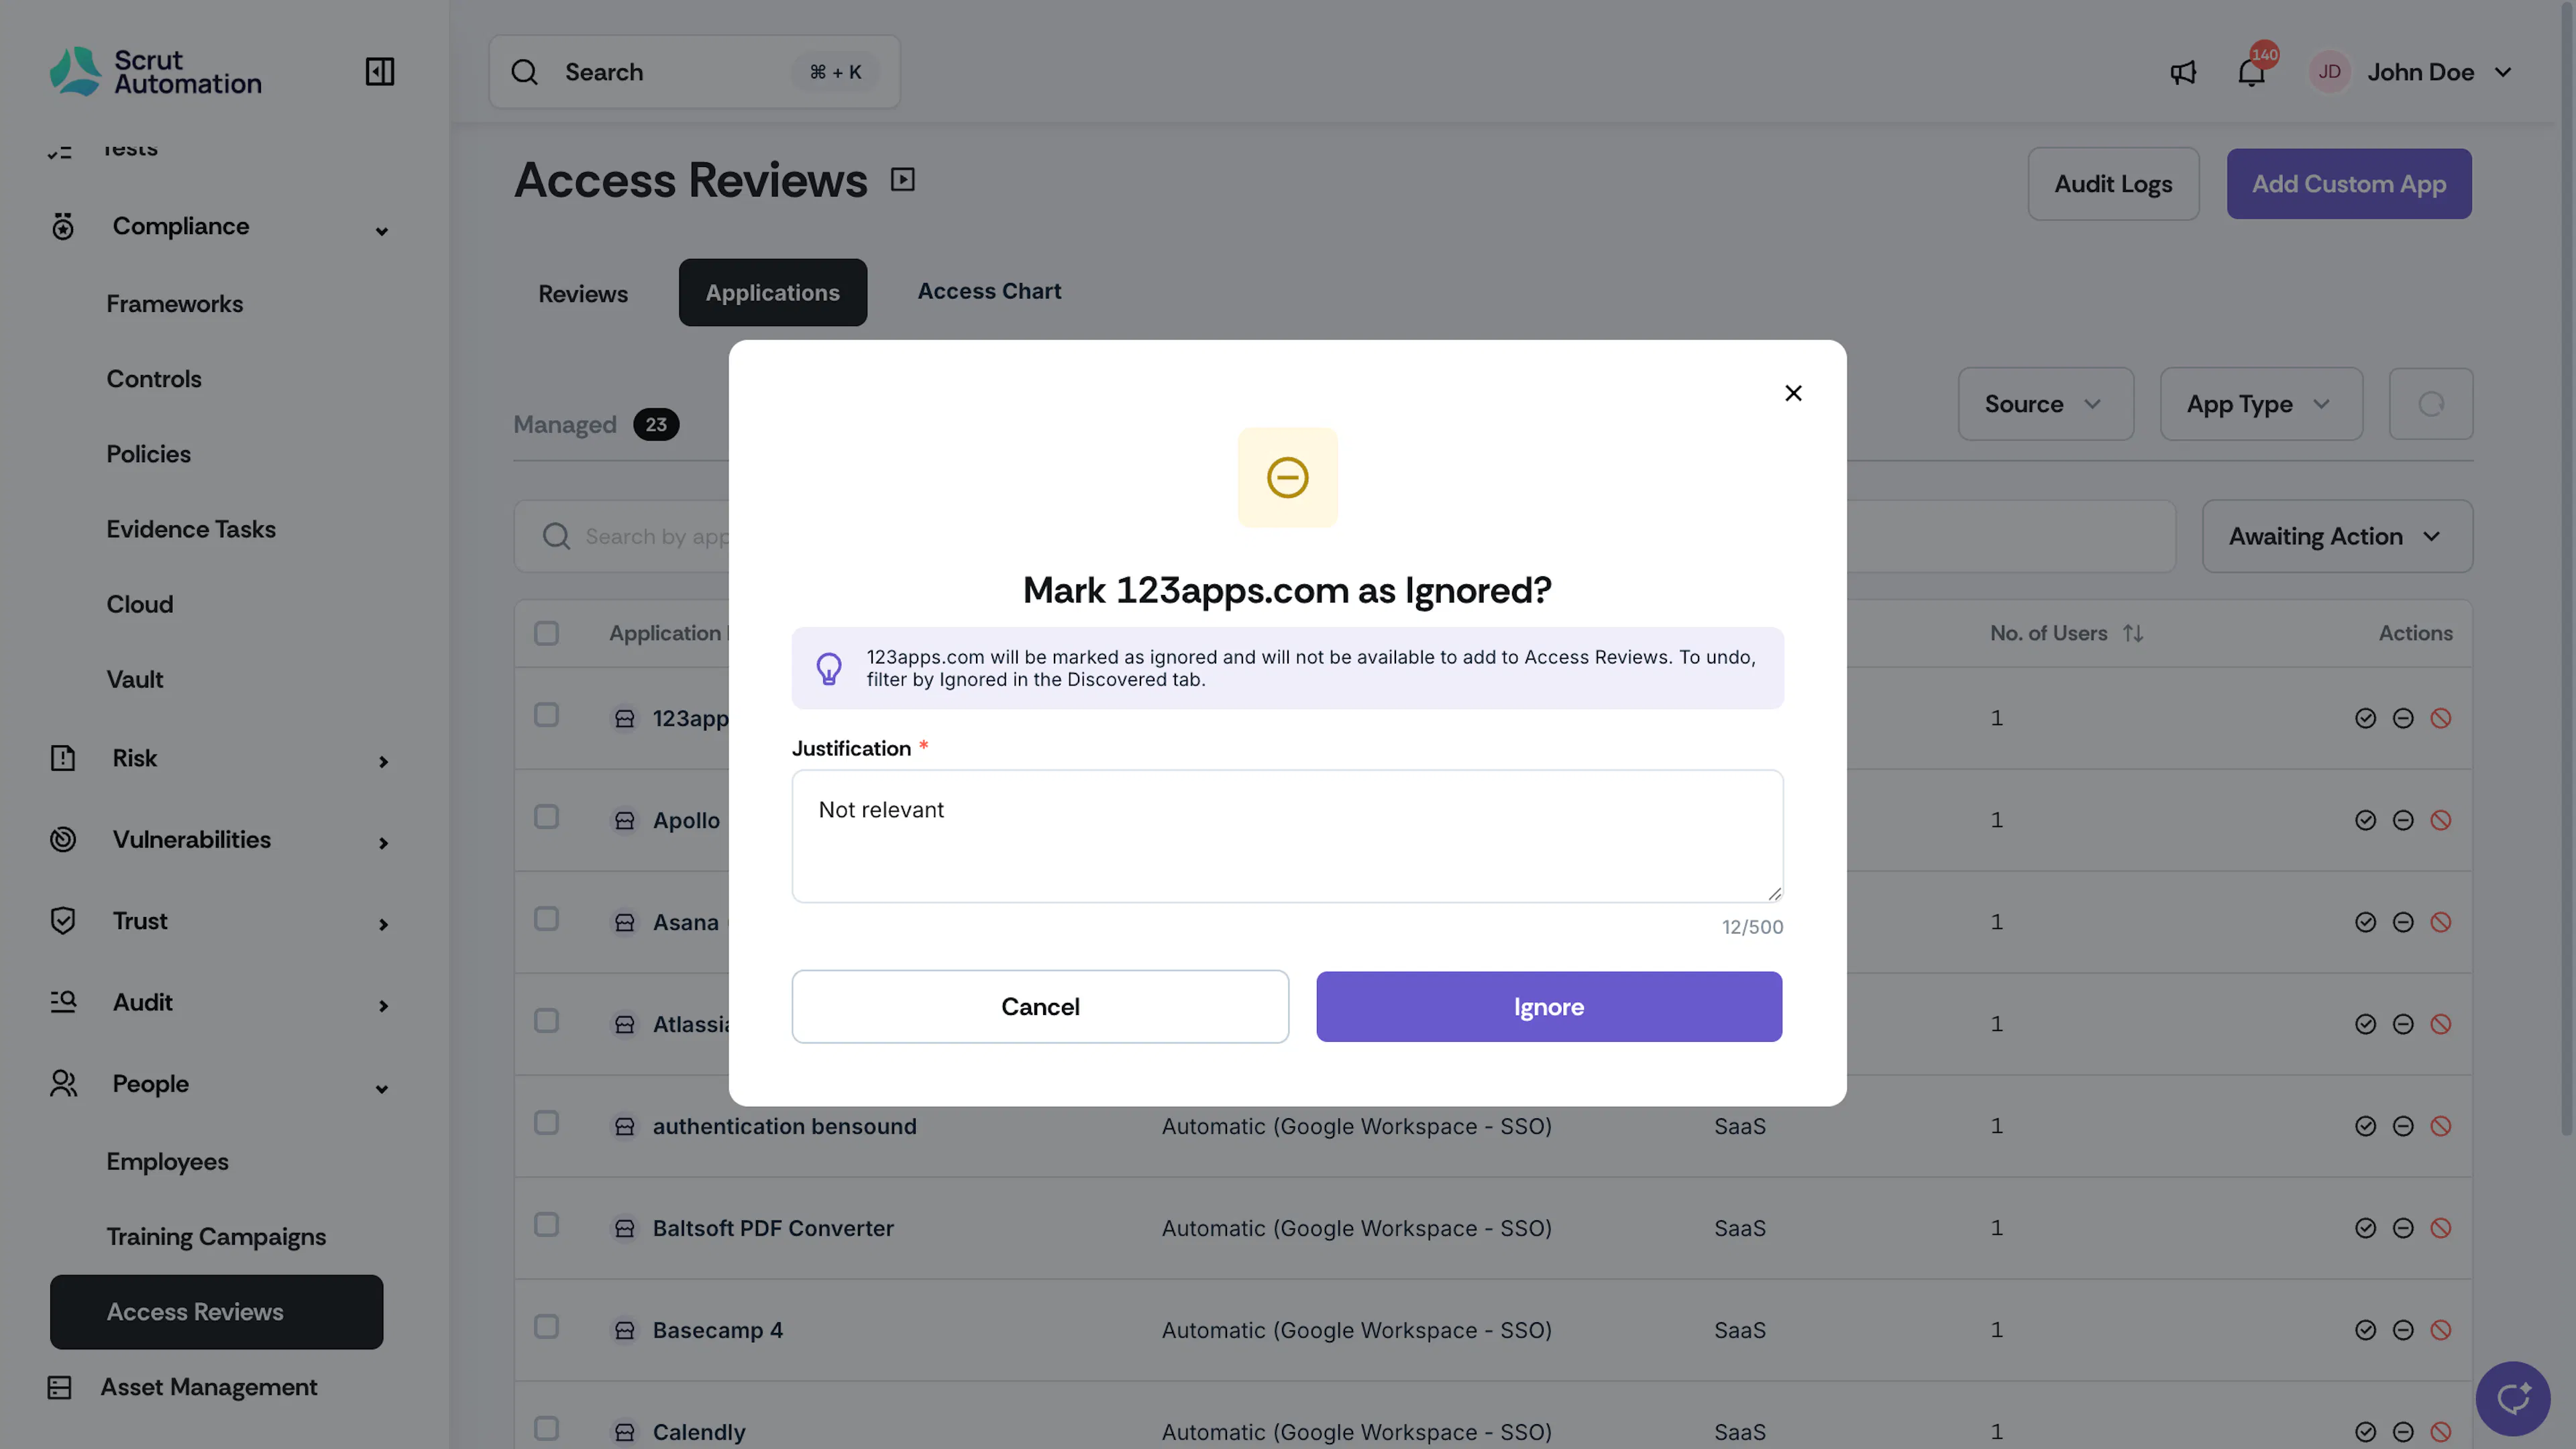
In the confirmation modal, enter a justification. This field is required.
-
Click Ignore.
The application is hidden from the Discovered list, and its count is removed from the Discovered metric.
Note: To view ignored apps, use the Ignored filter.
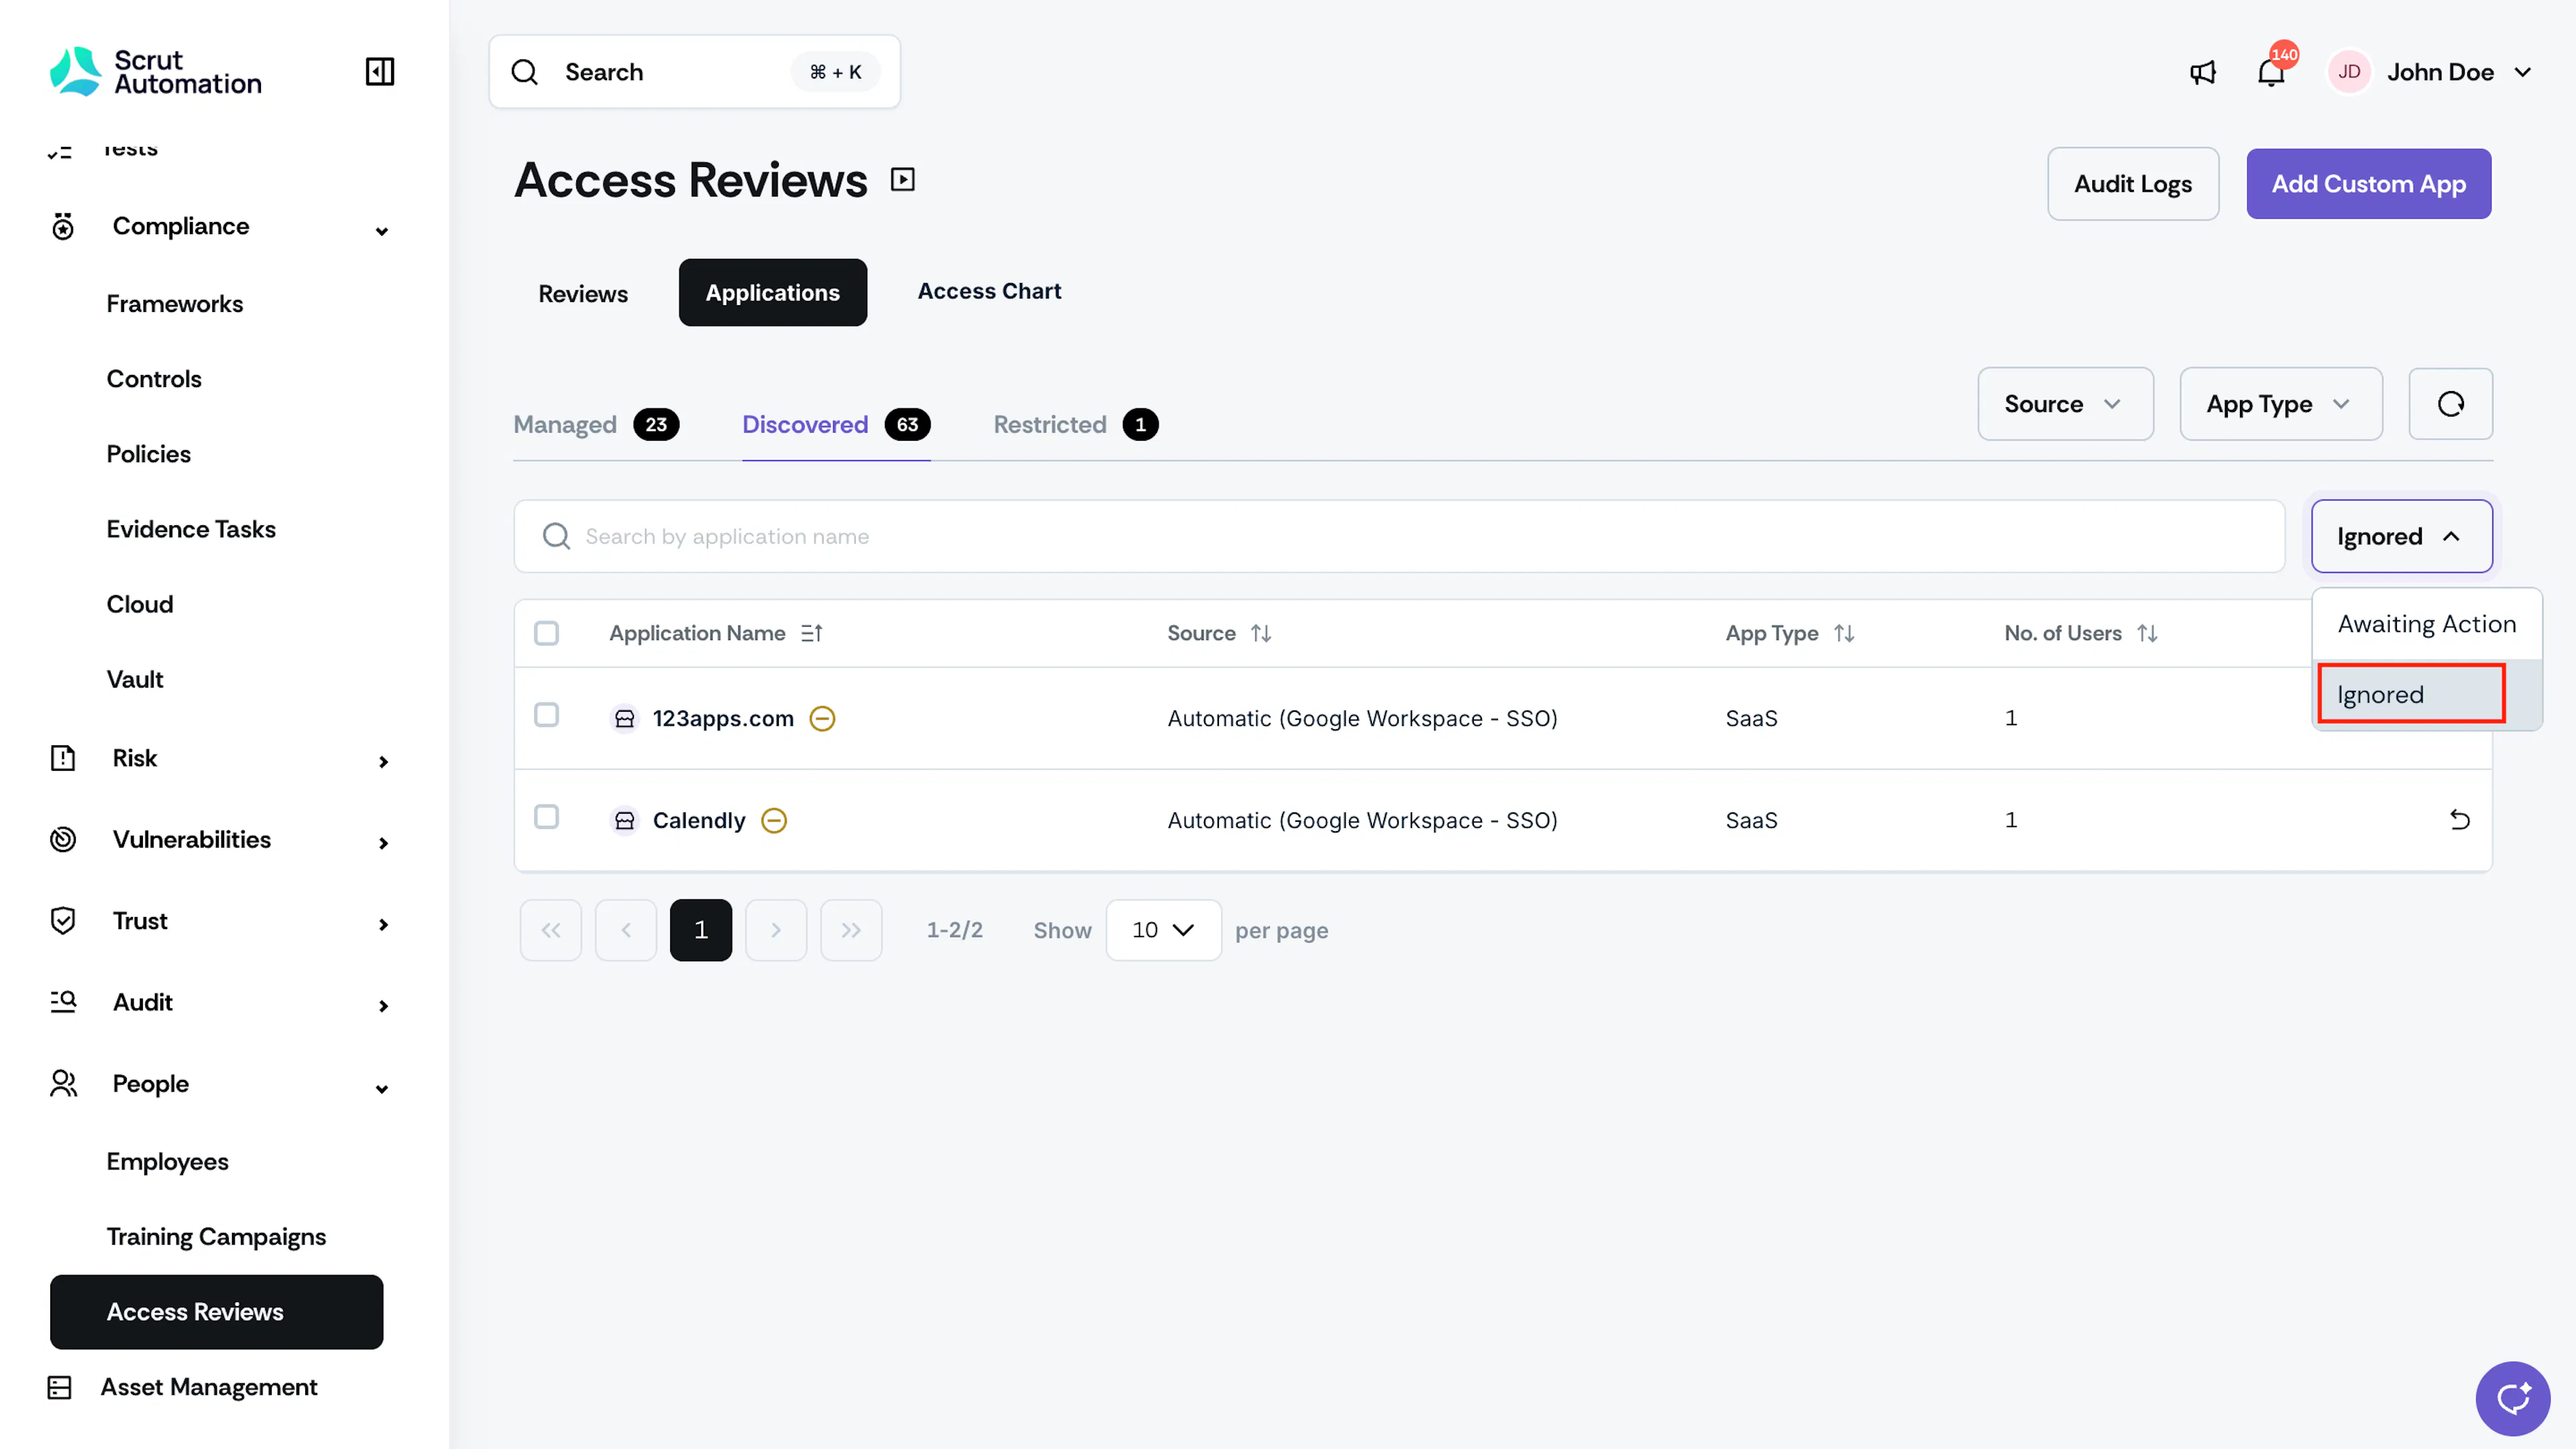
Hover over the icon to see the justification entered at the time of ignoring.
To revert the action, click Undo Ignore. This makes the app visible in the Discovered tab.
Ignore Multiple Applications
-
Navigate to Access Review → Applications → Discovered.
-
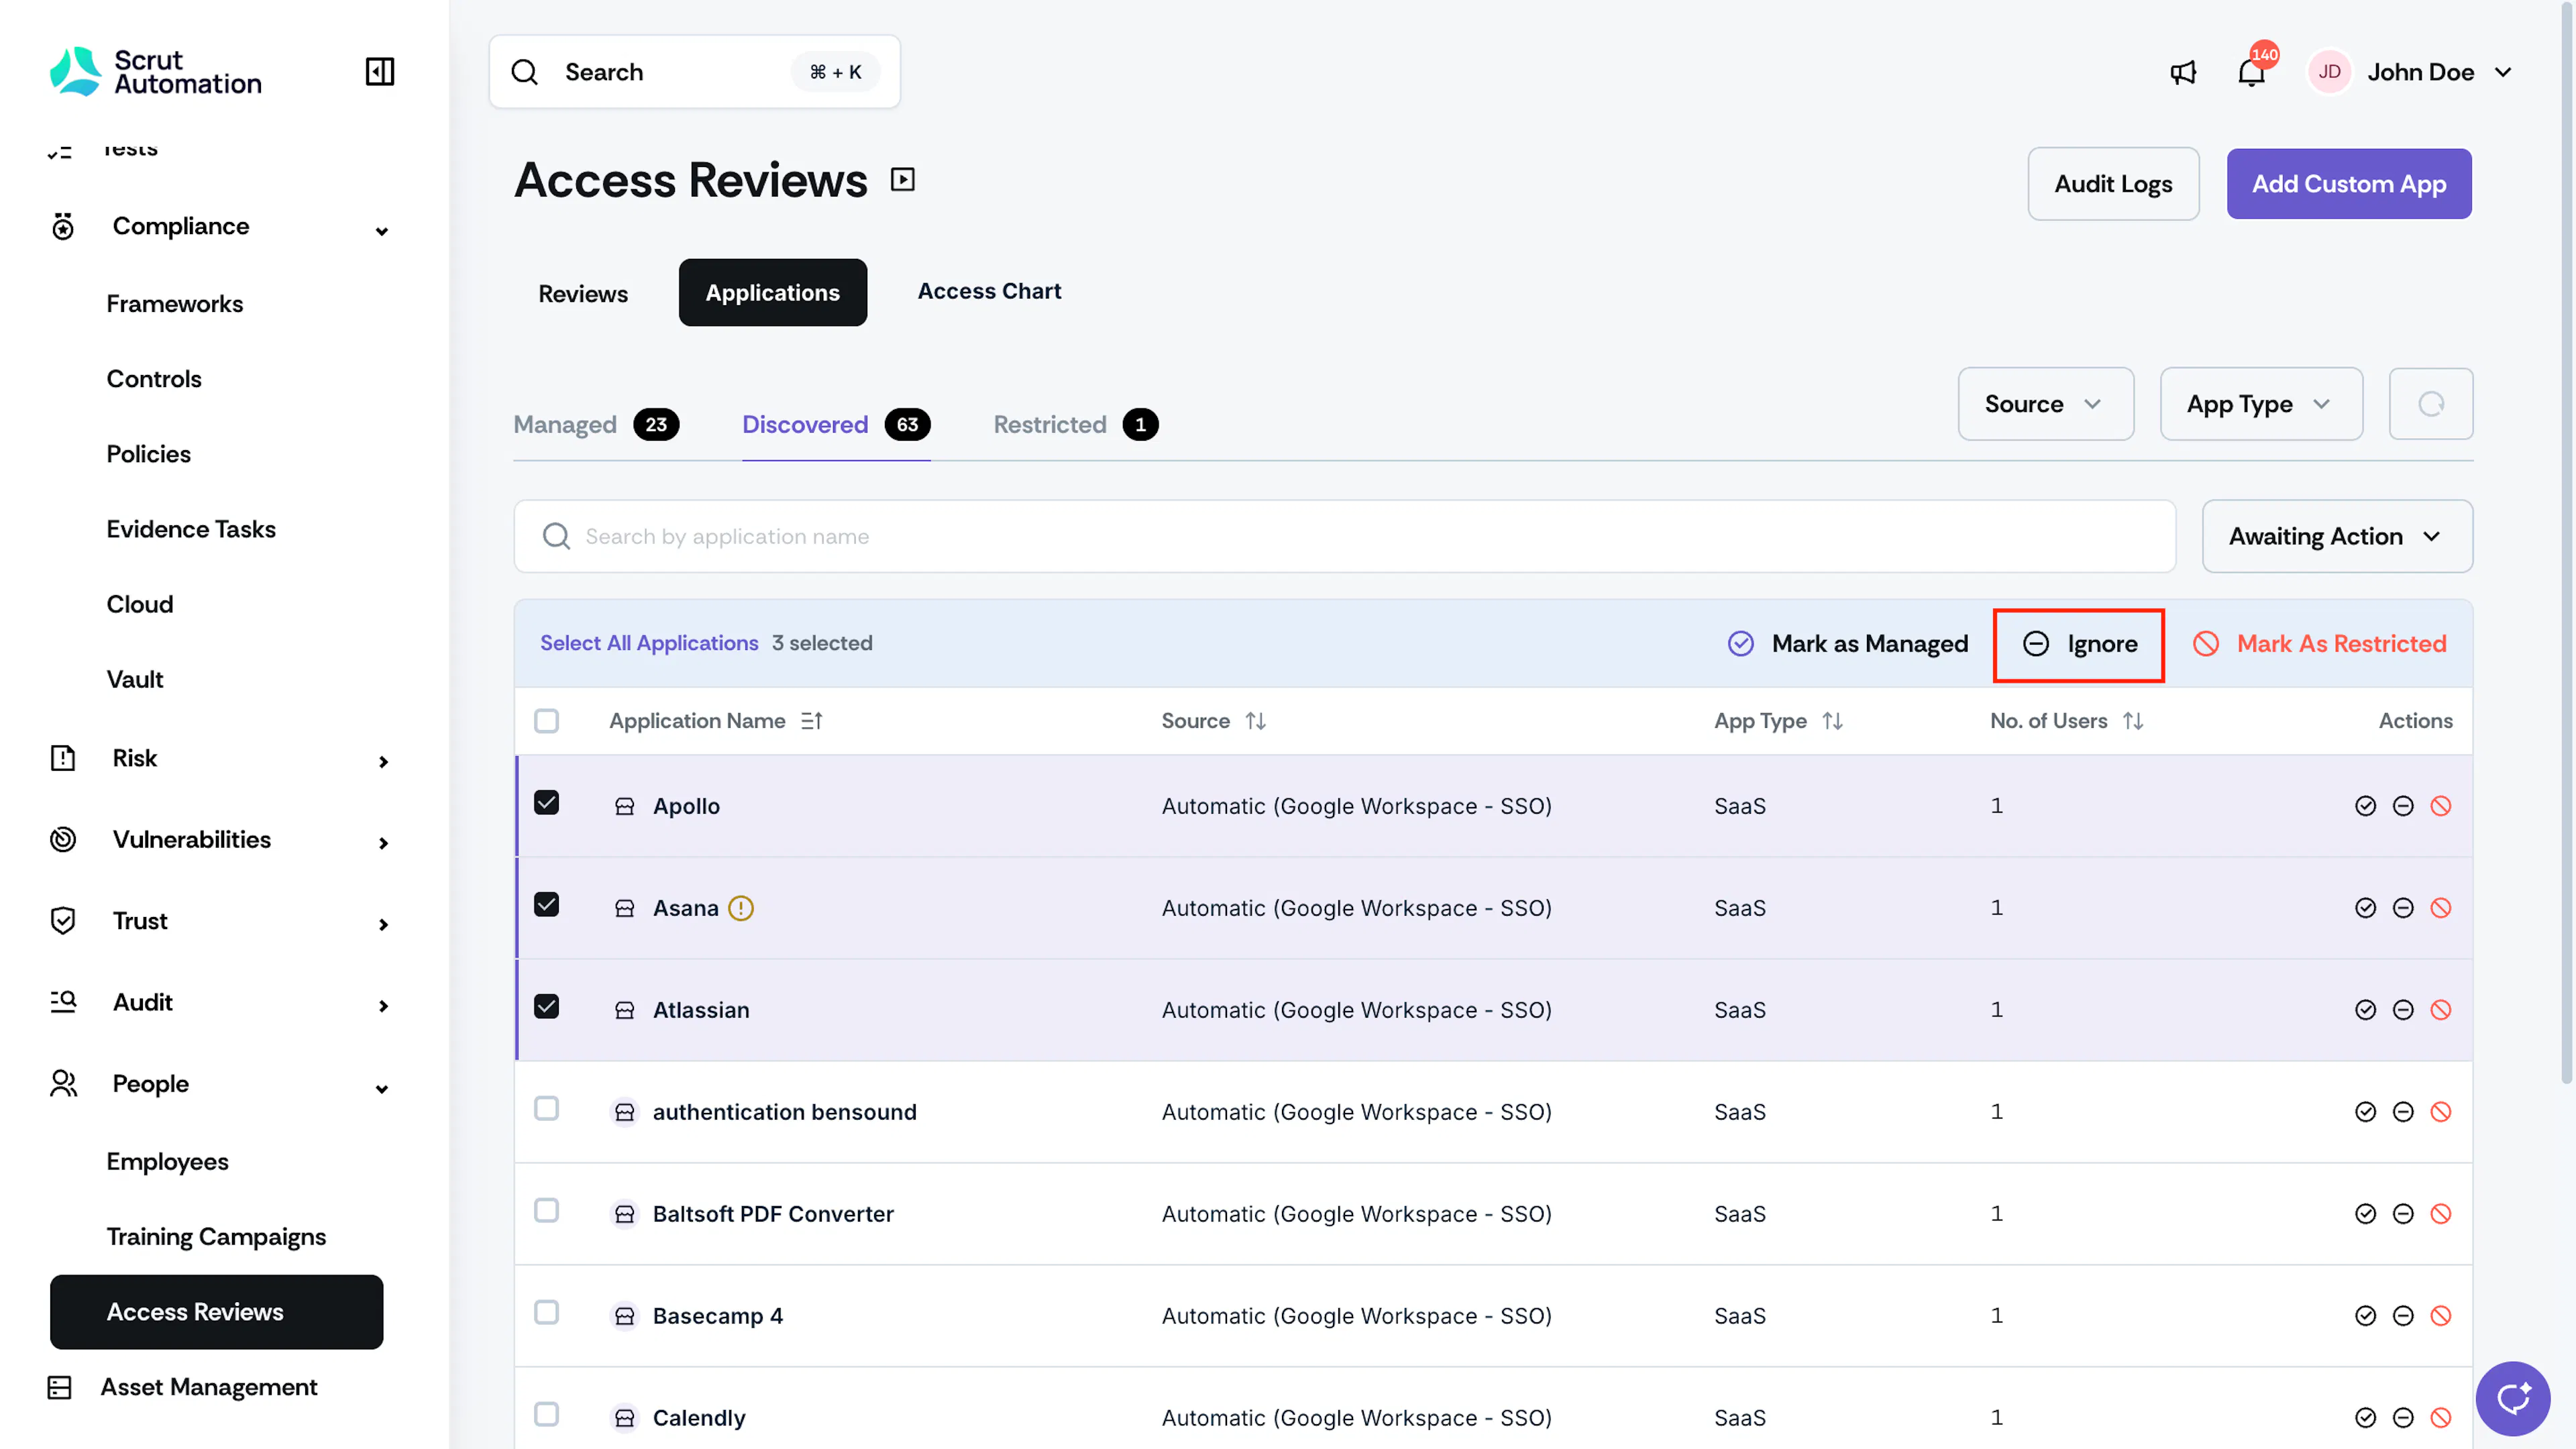
Select the checkbox next to each application you want to ignore.
-
Click Ignore on the bulk actions bar.
-
Enter a justification in the confirmation modal. The same justification applies to all selected apps.
-
Click Confirm.
Restore an Ignored Application to Discovered
-
Navigate to Access Review → Applications → Discovered.
-
Click the Ignored filter.
-
Locate the ignored application.
-
Click Undo Ignore in the Actions column.
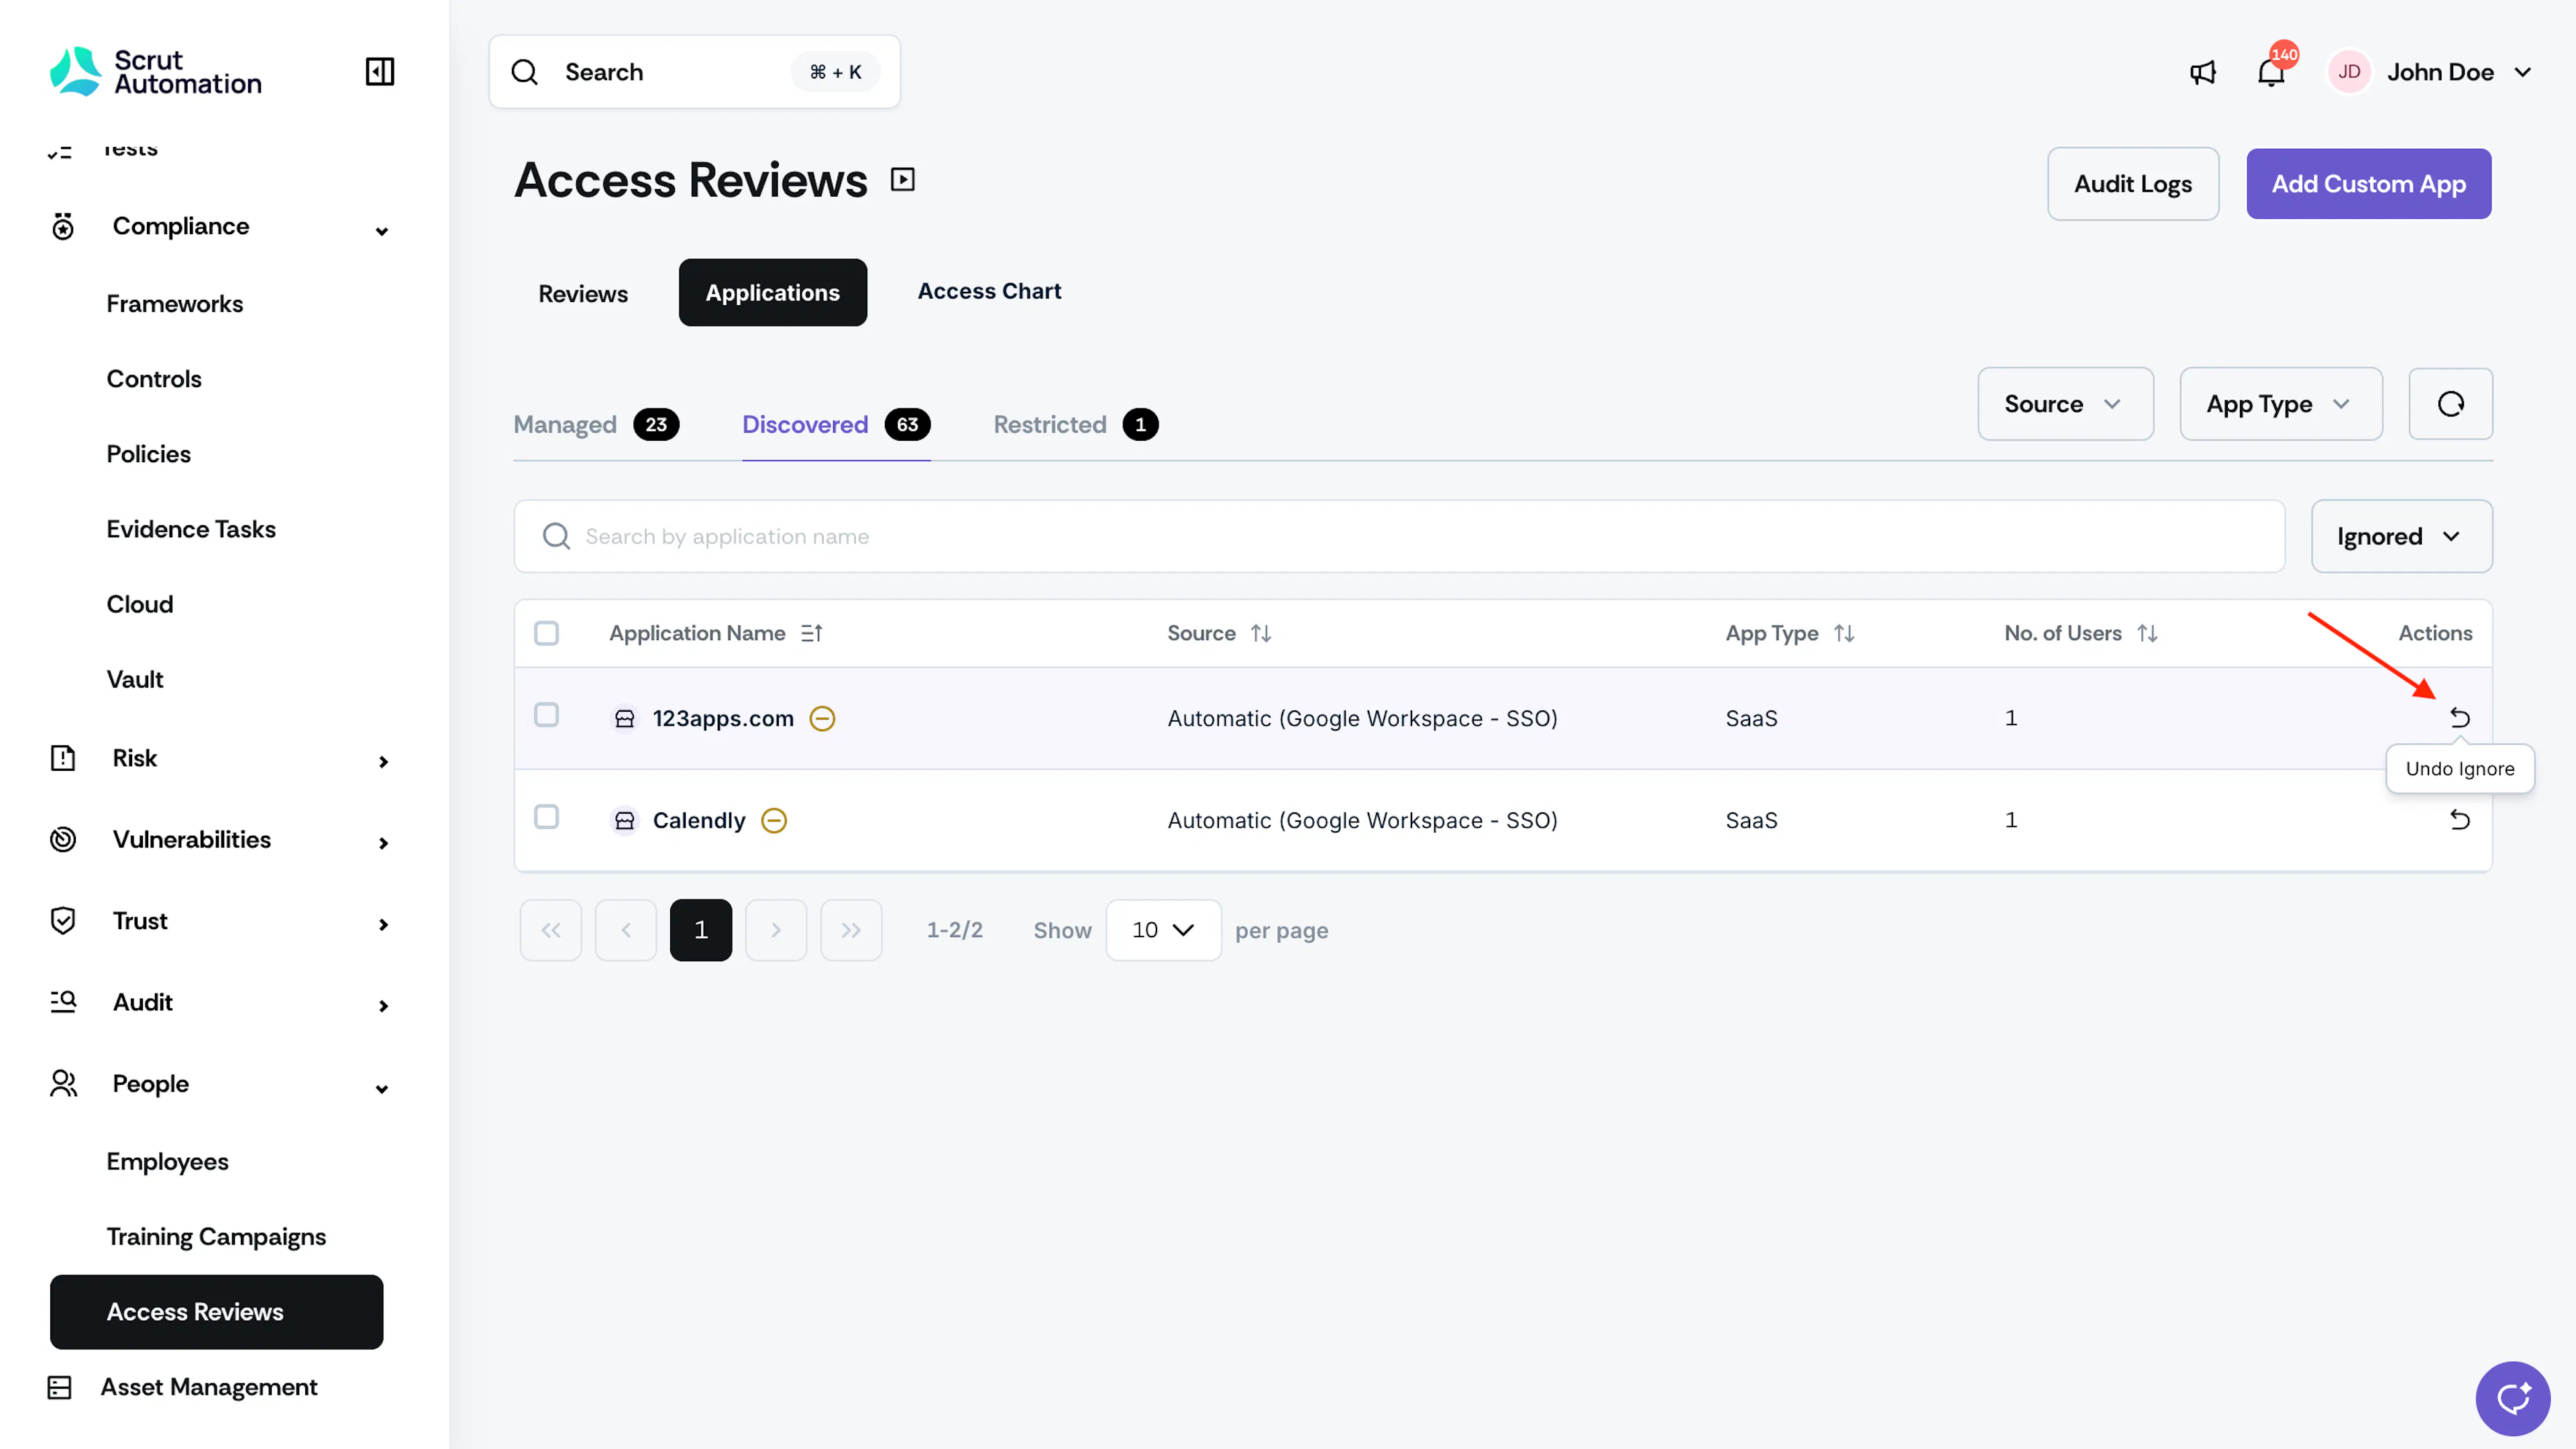
The application returns to the standard Discovered list.
Potential Duplicate Indicator
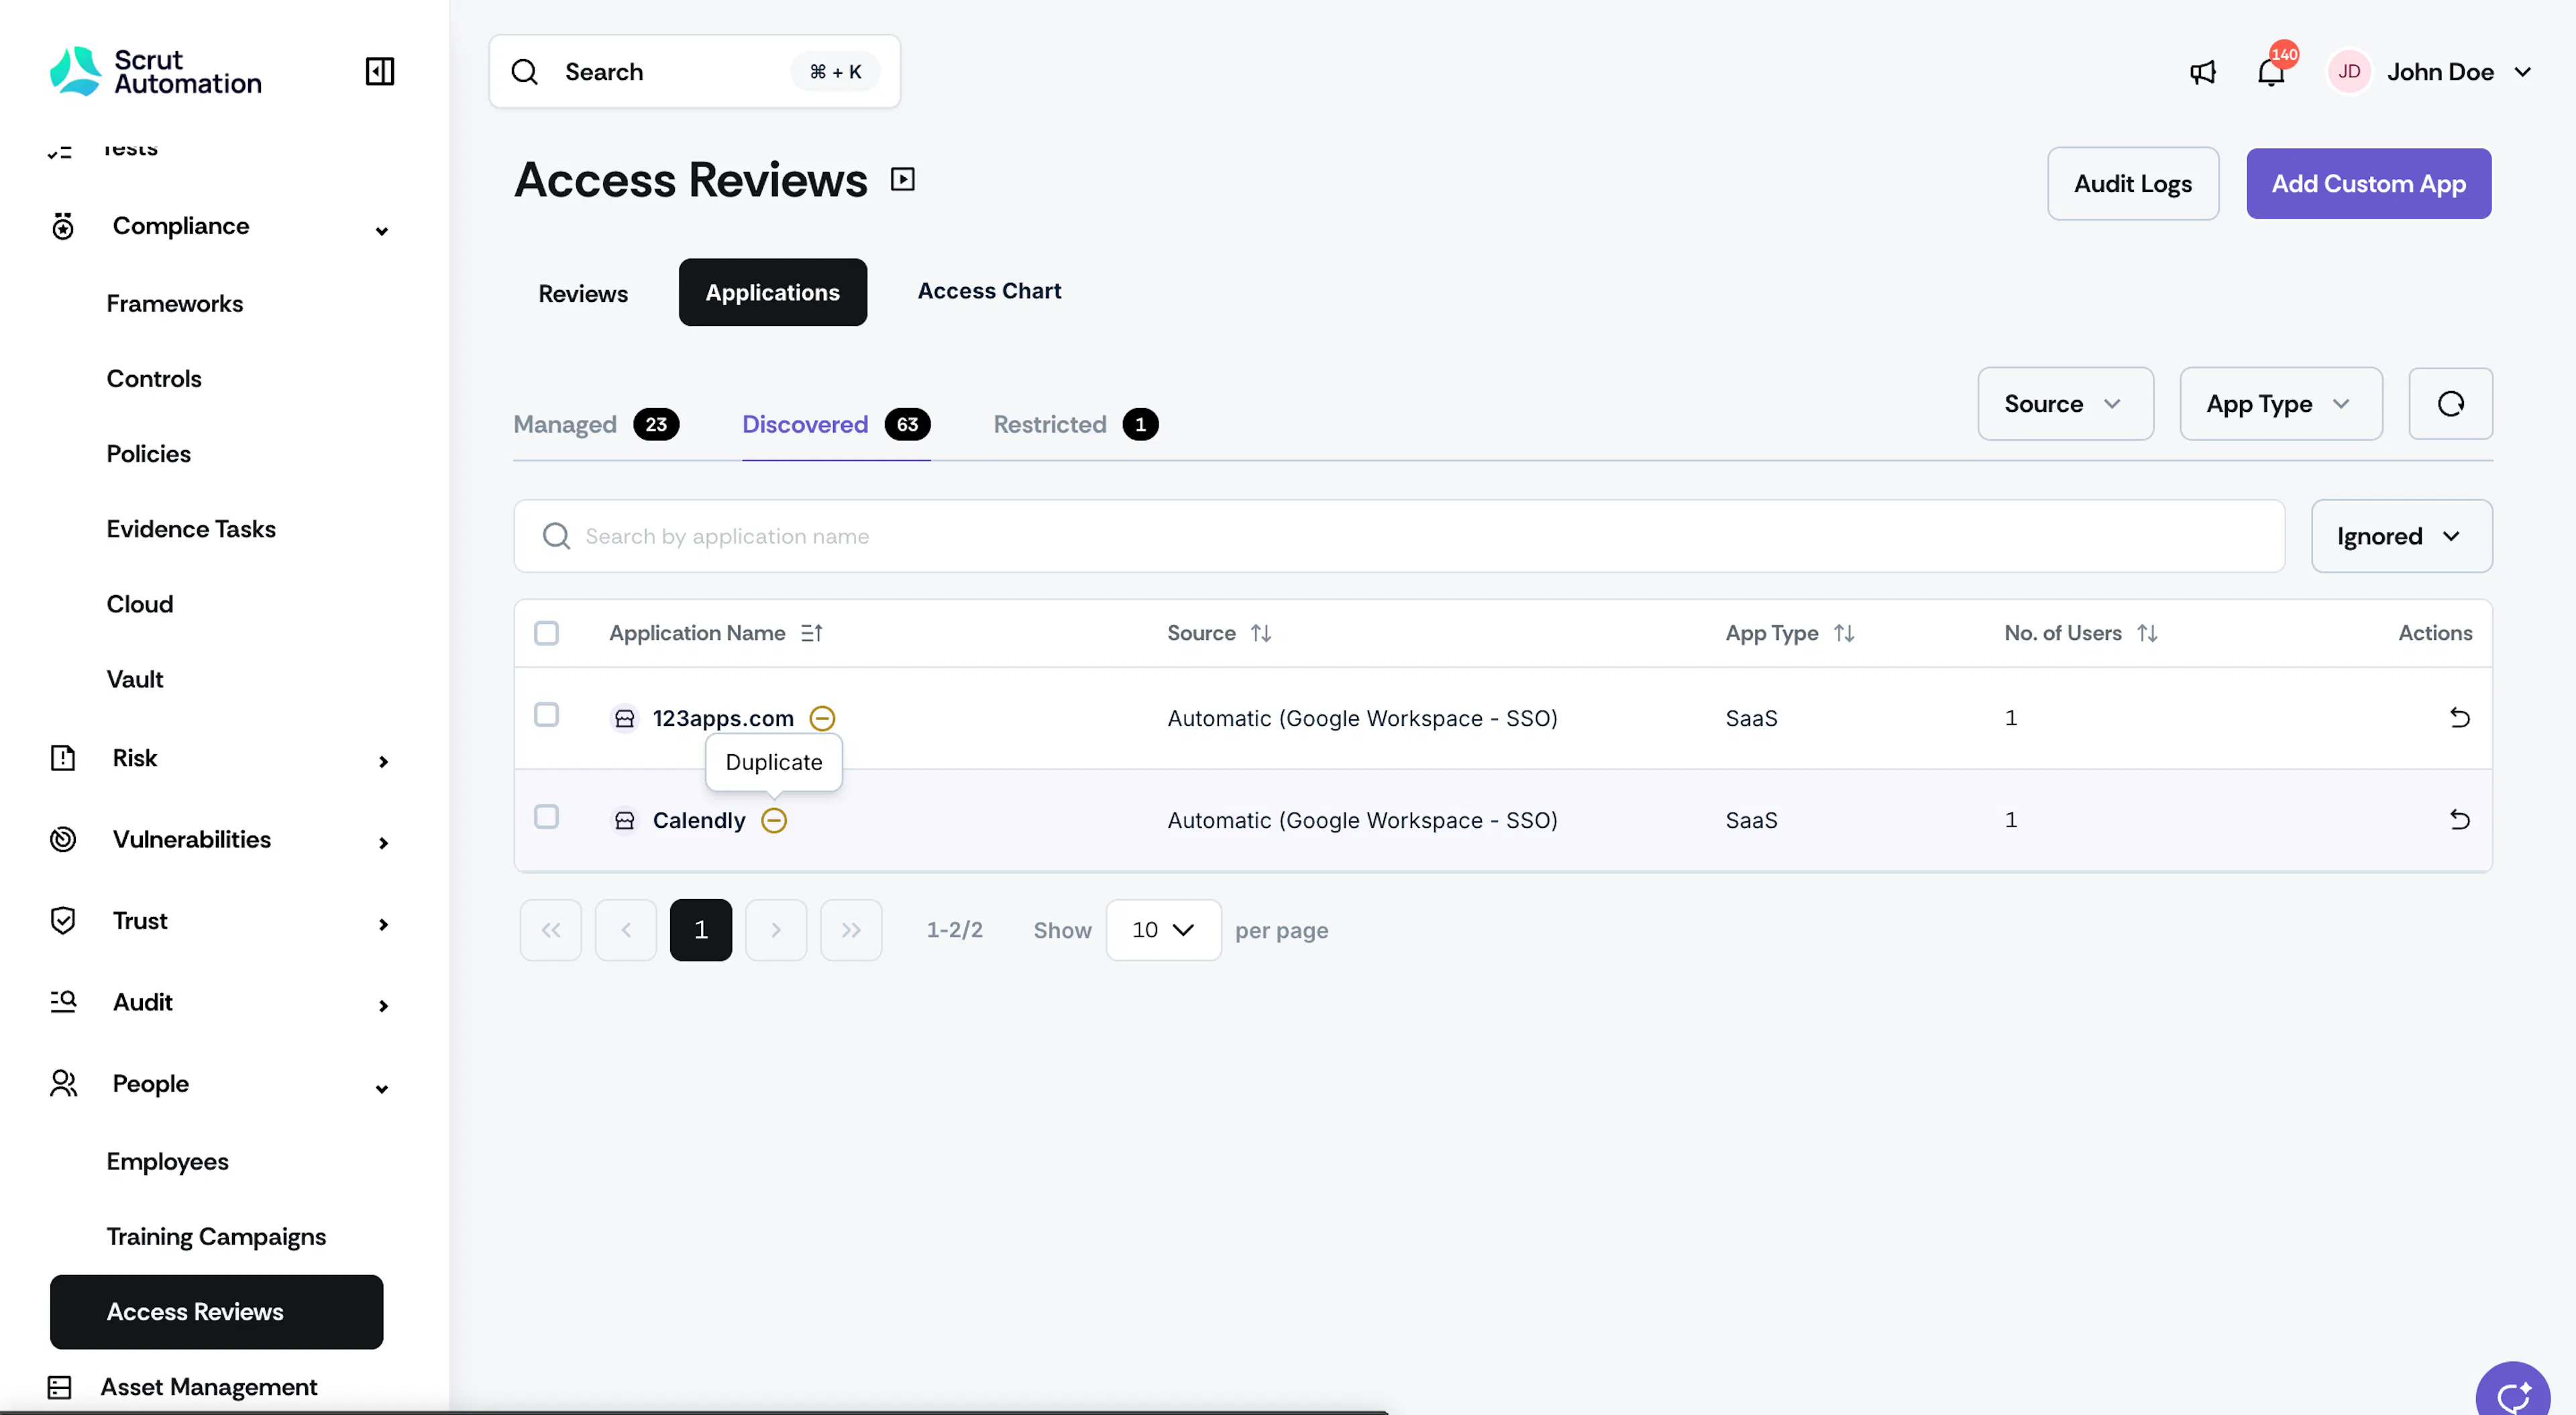
If a Discovered application has the same or a similar name as an existing Managed application, a duplicate indicator icon appears next to the app name. Hover over the icon to see the message "Potential duplicate found in Managed apps" along with the matching app names.
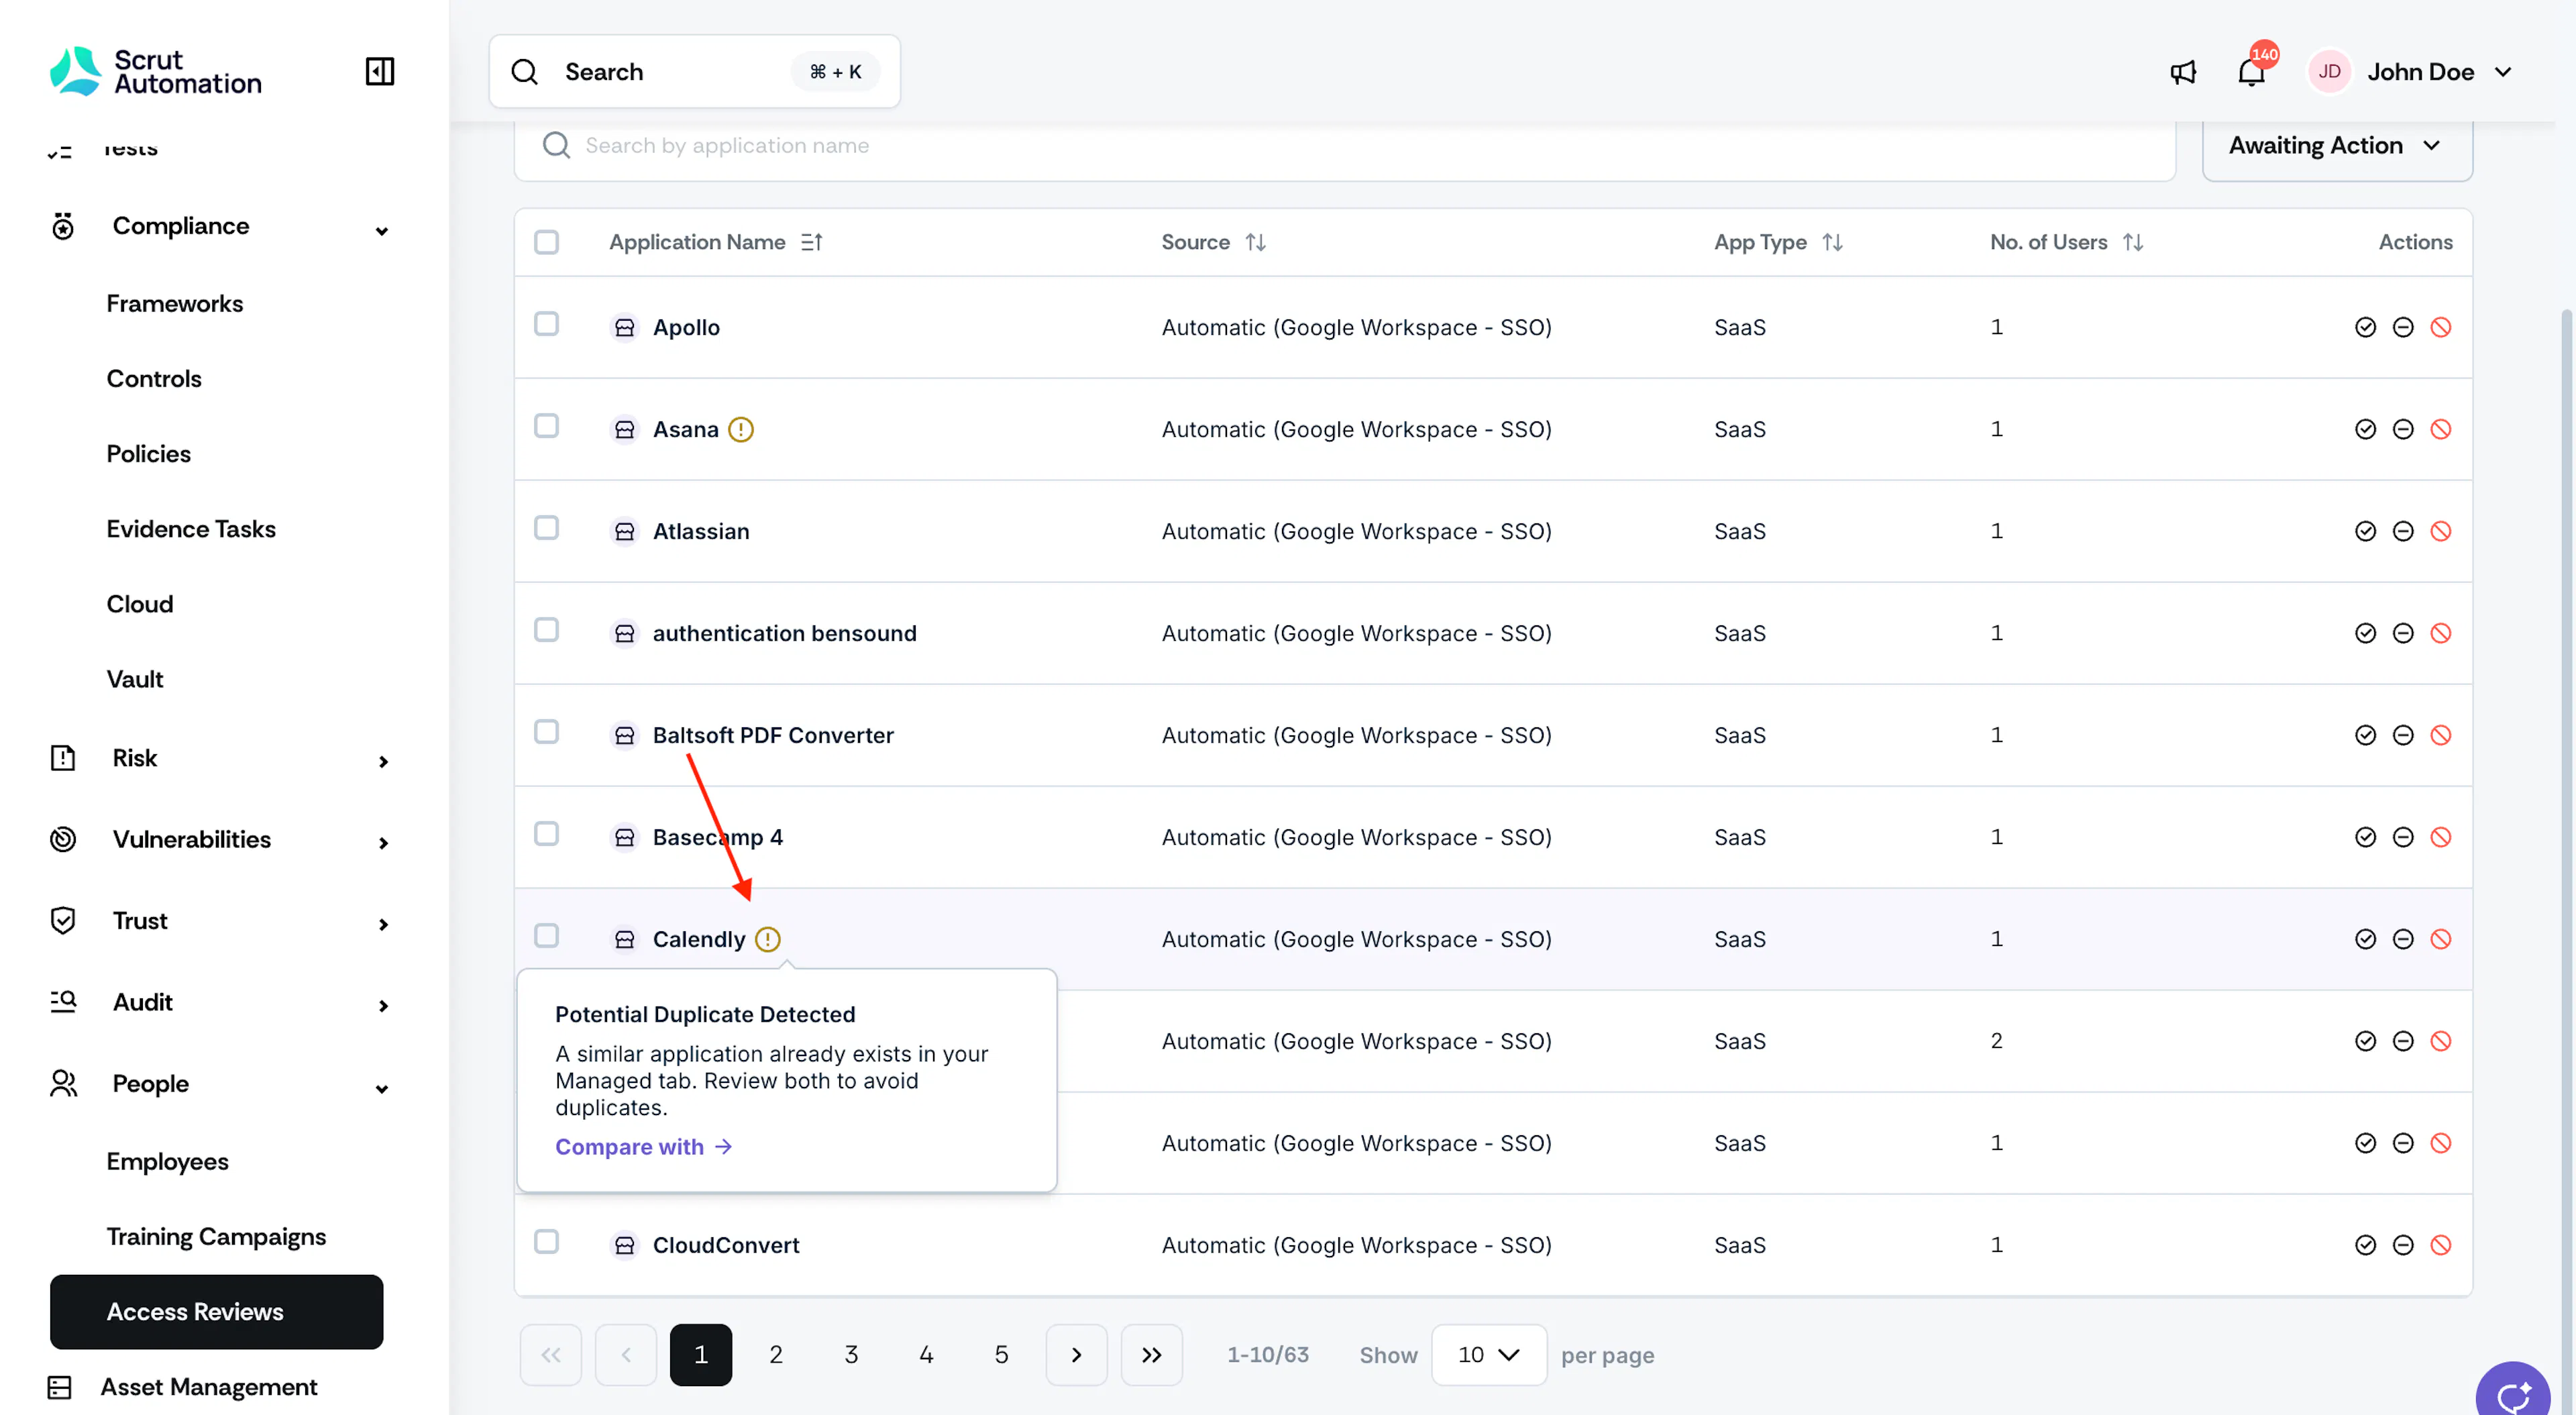
Click the icon to open the matching app's detail page in the Managed tab.
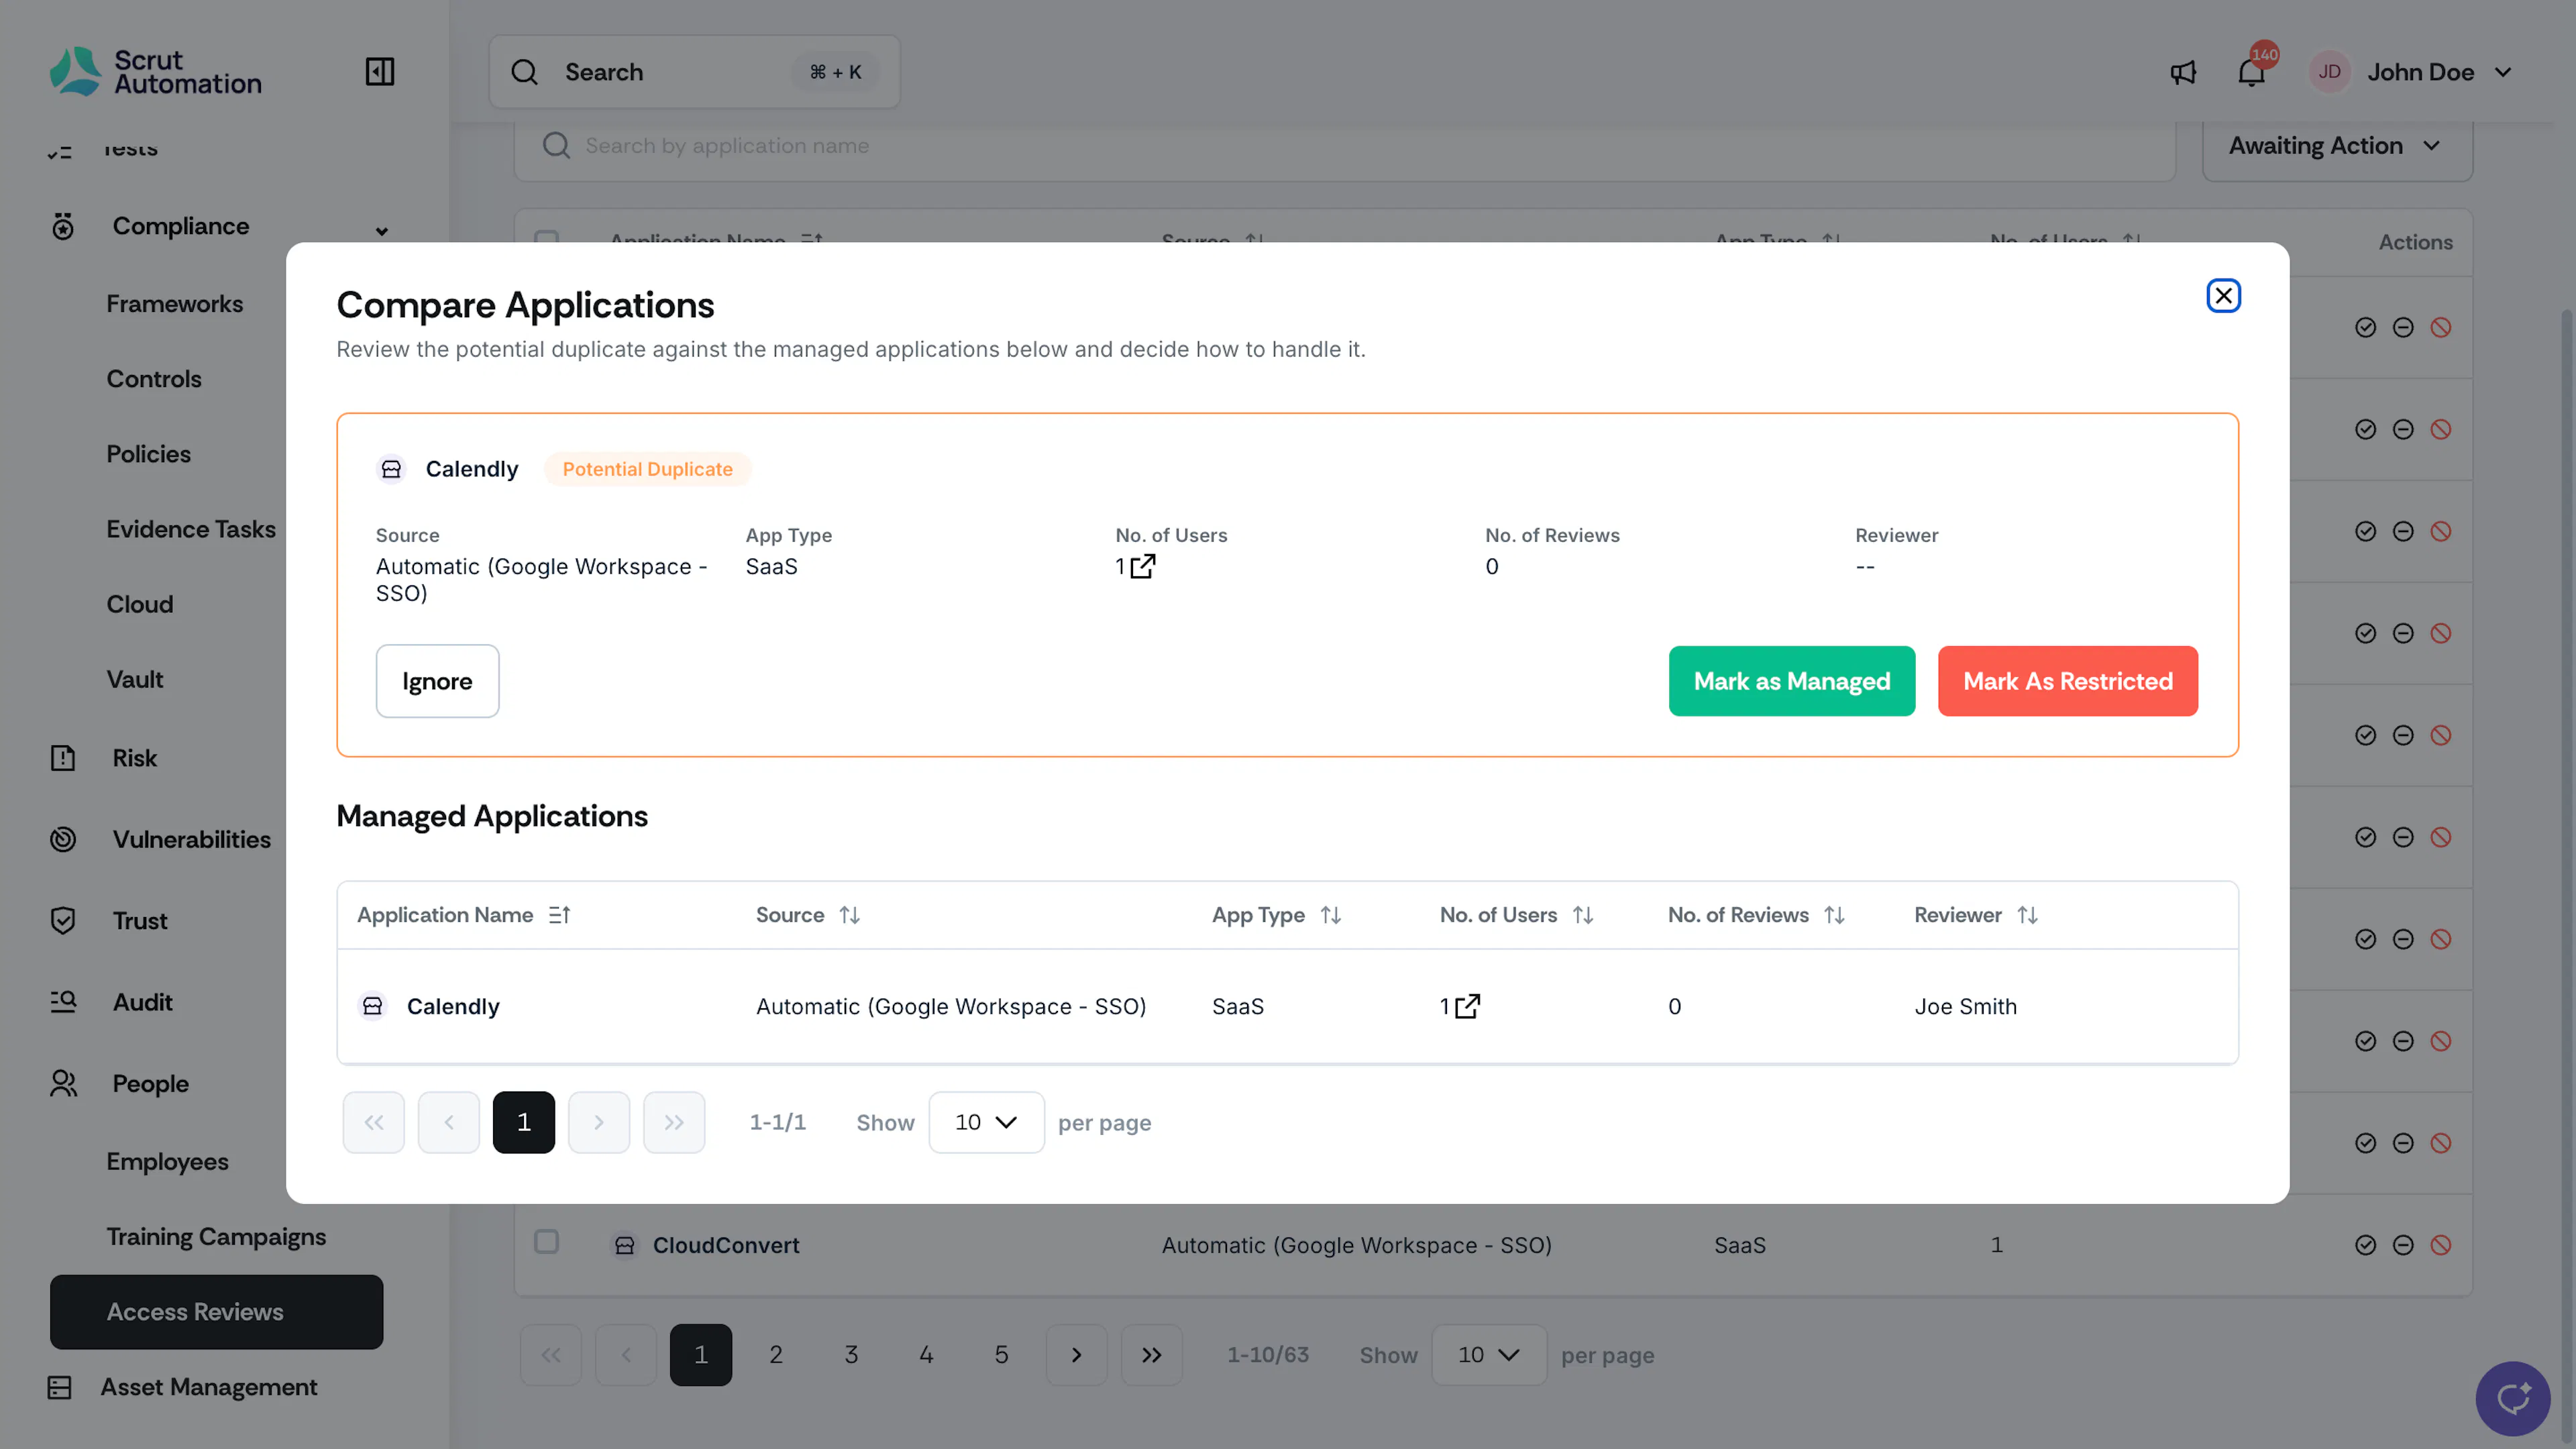
Pro Tip! For a confirmed duplicate, the recommended action is to ignore it with an appropriate justification.
Filtering and Sorting
Use the Source filter to narrow the list by app source.
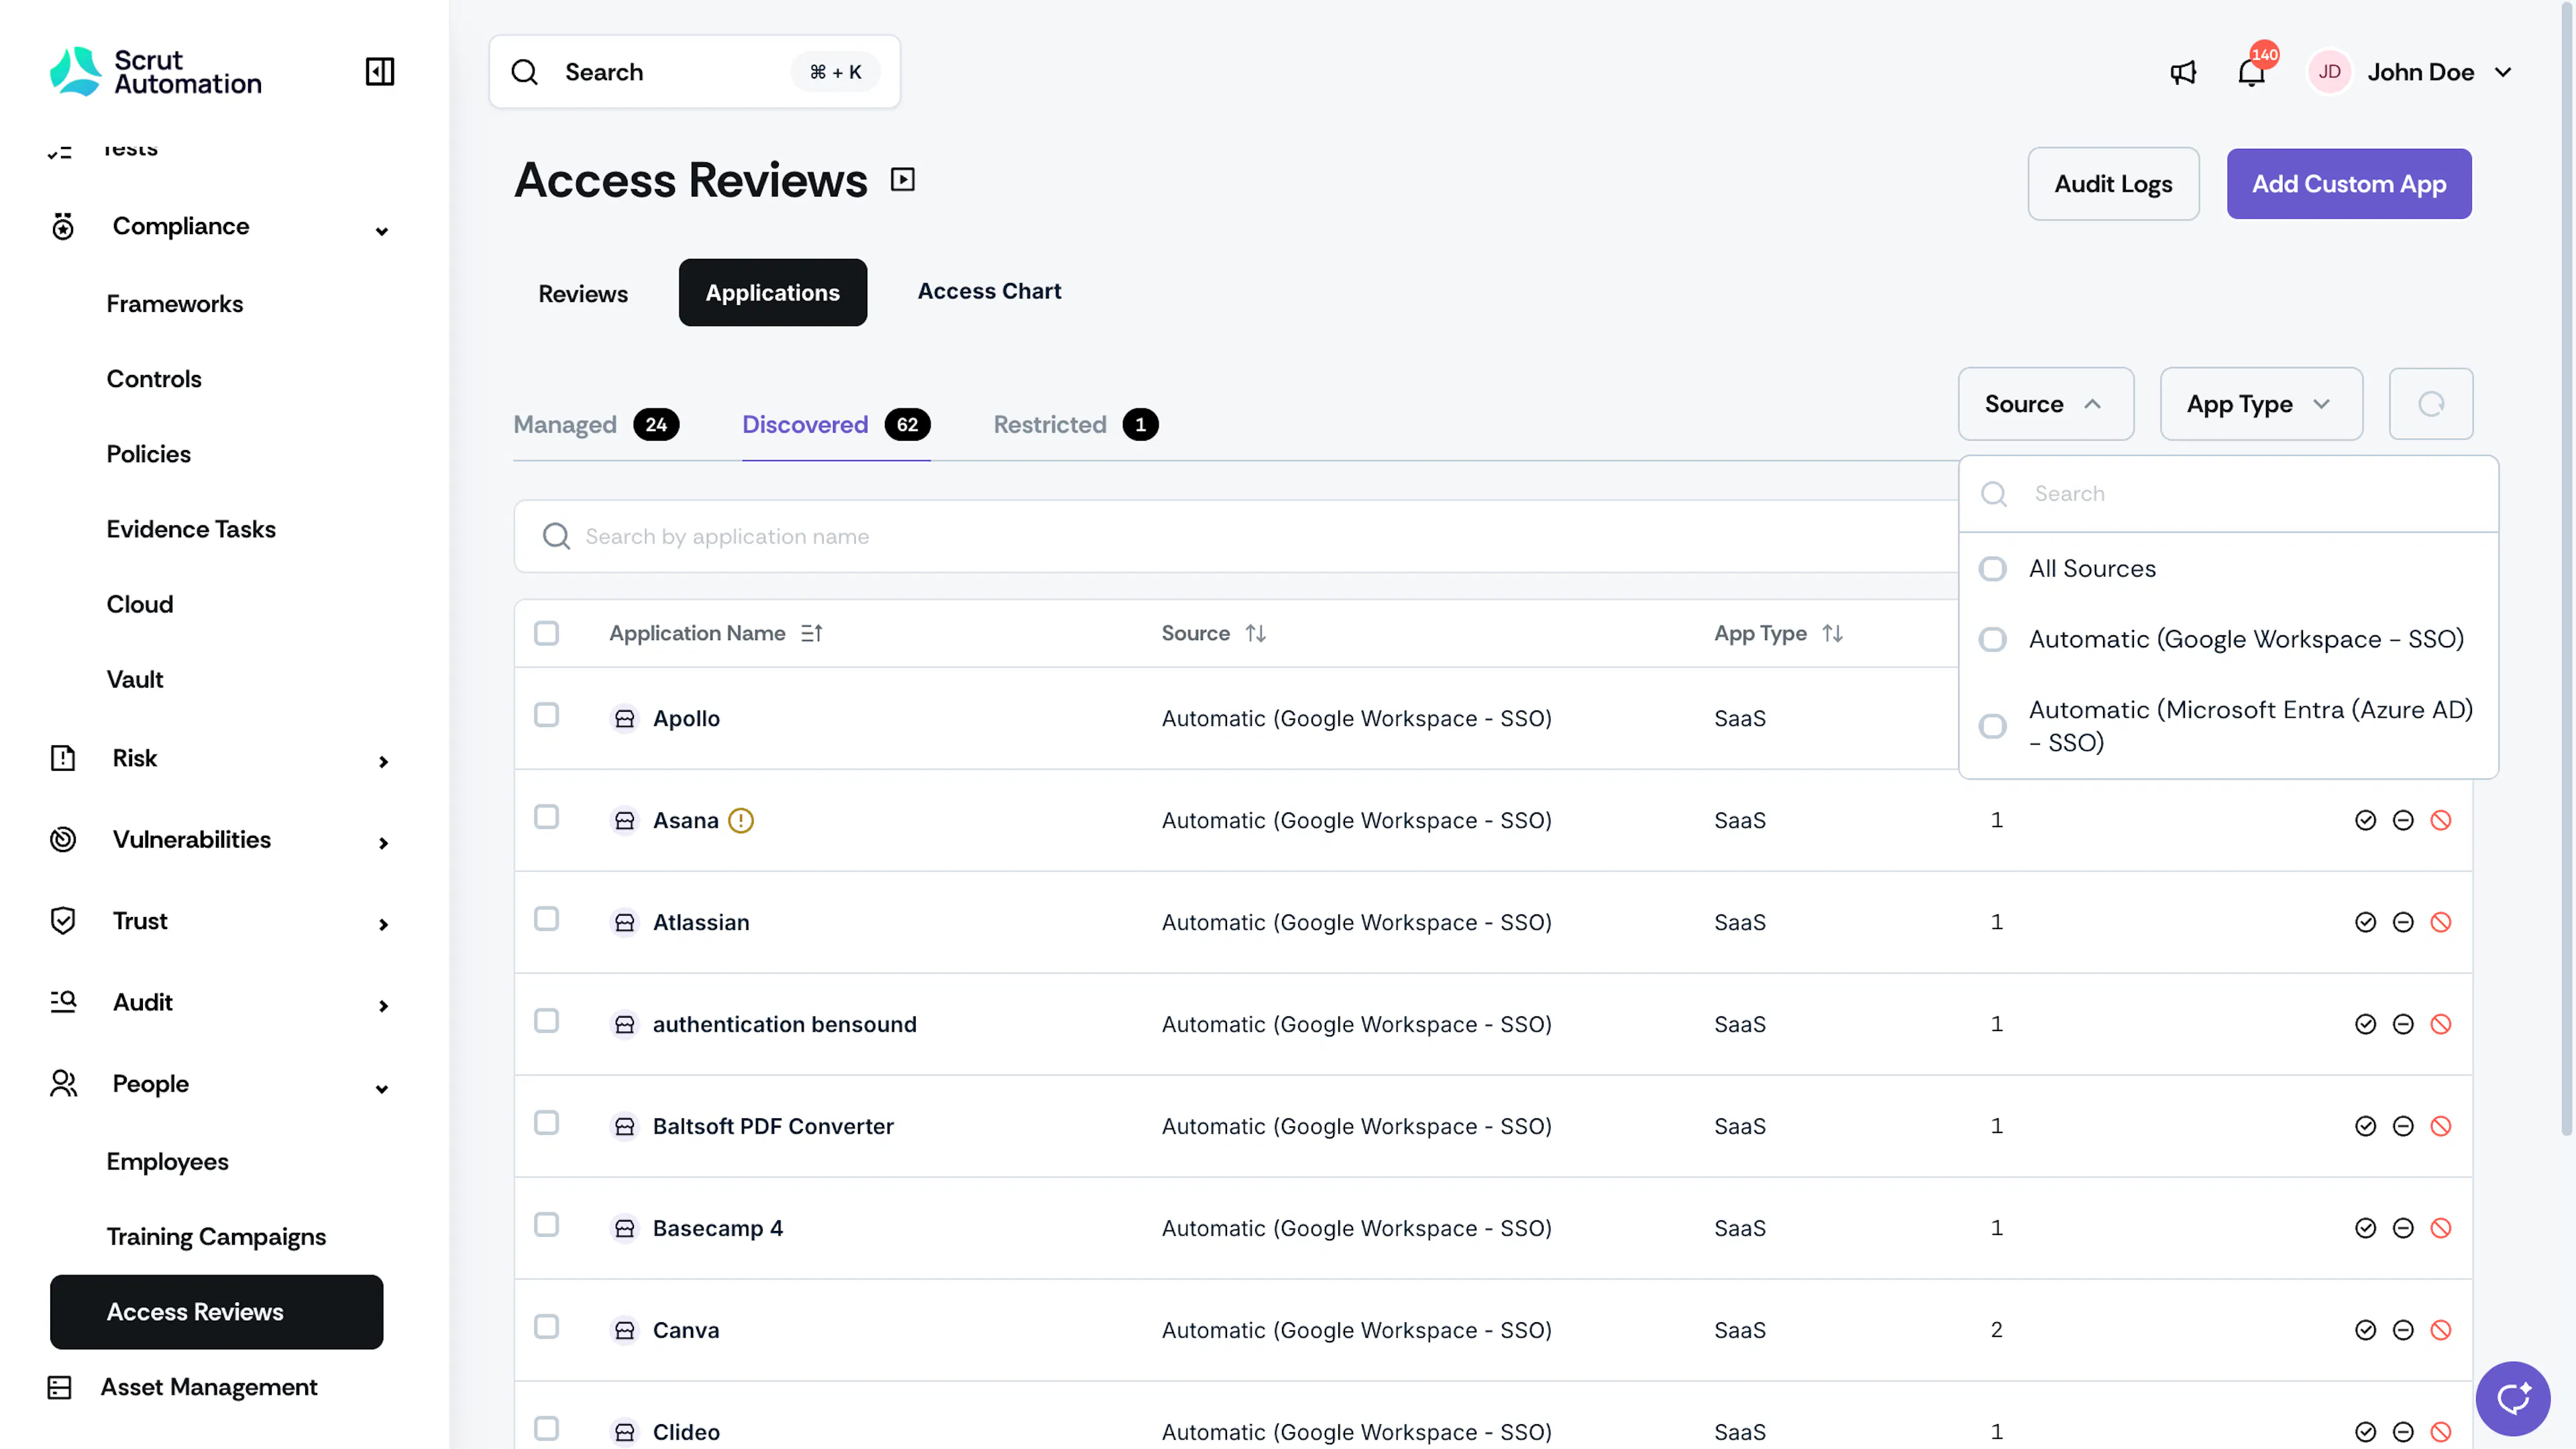
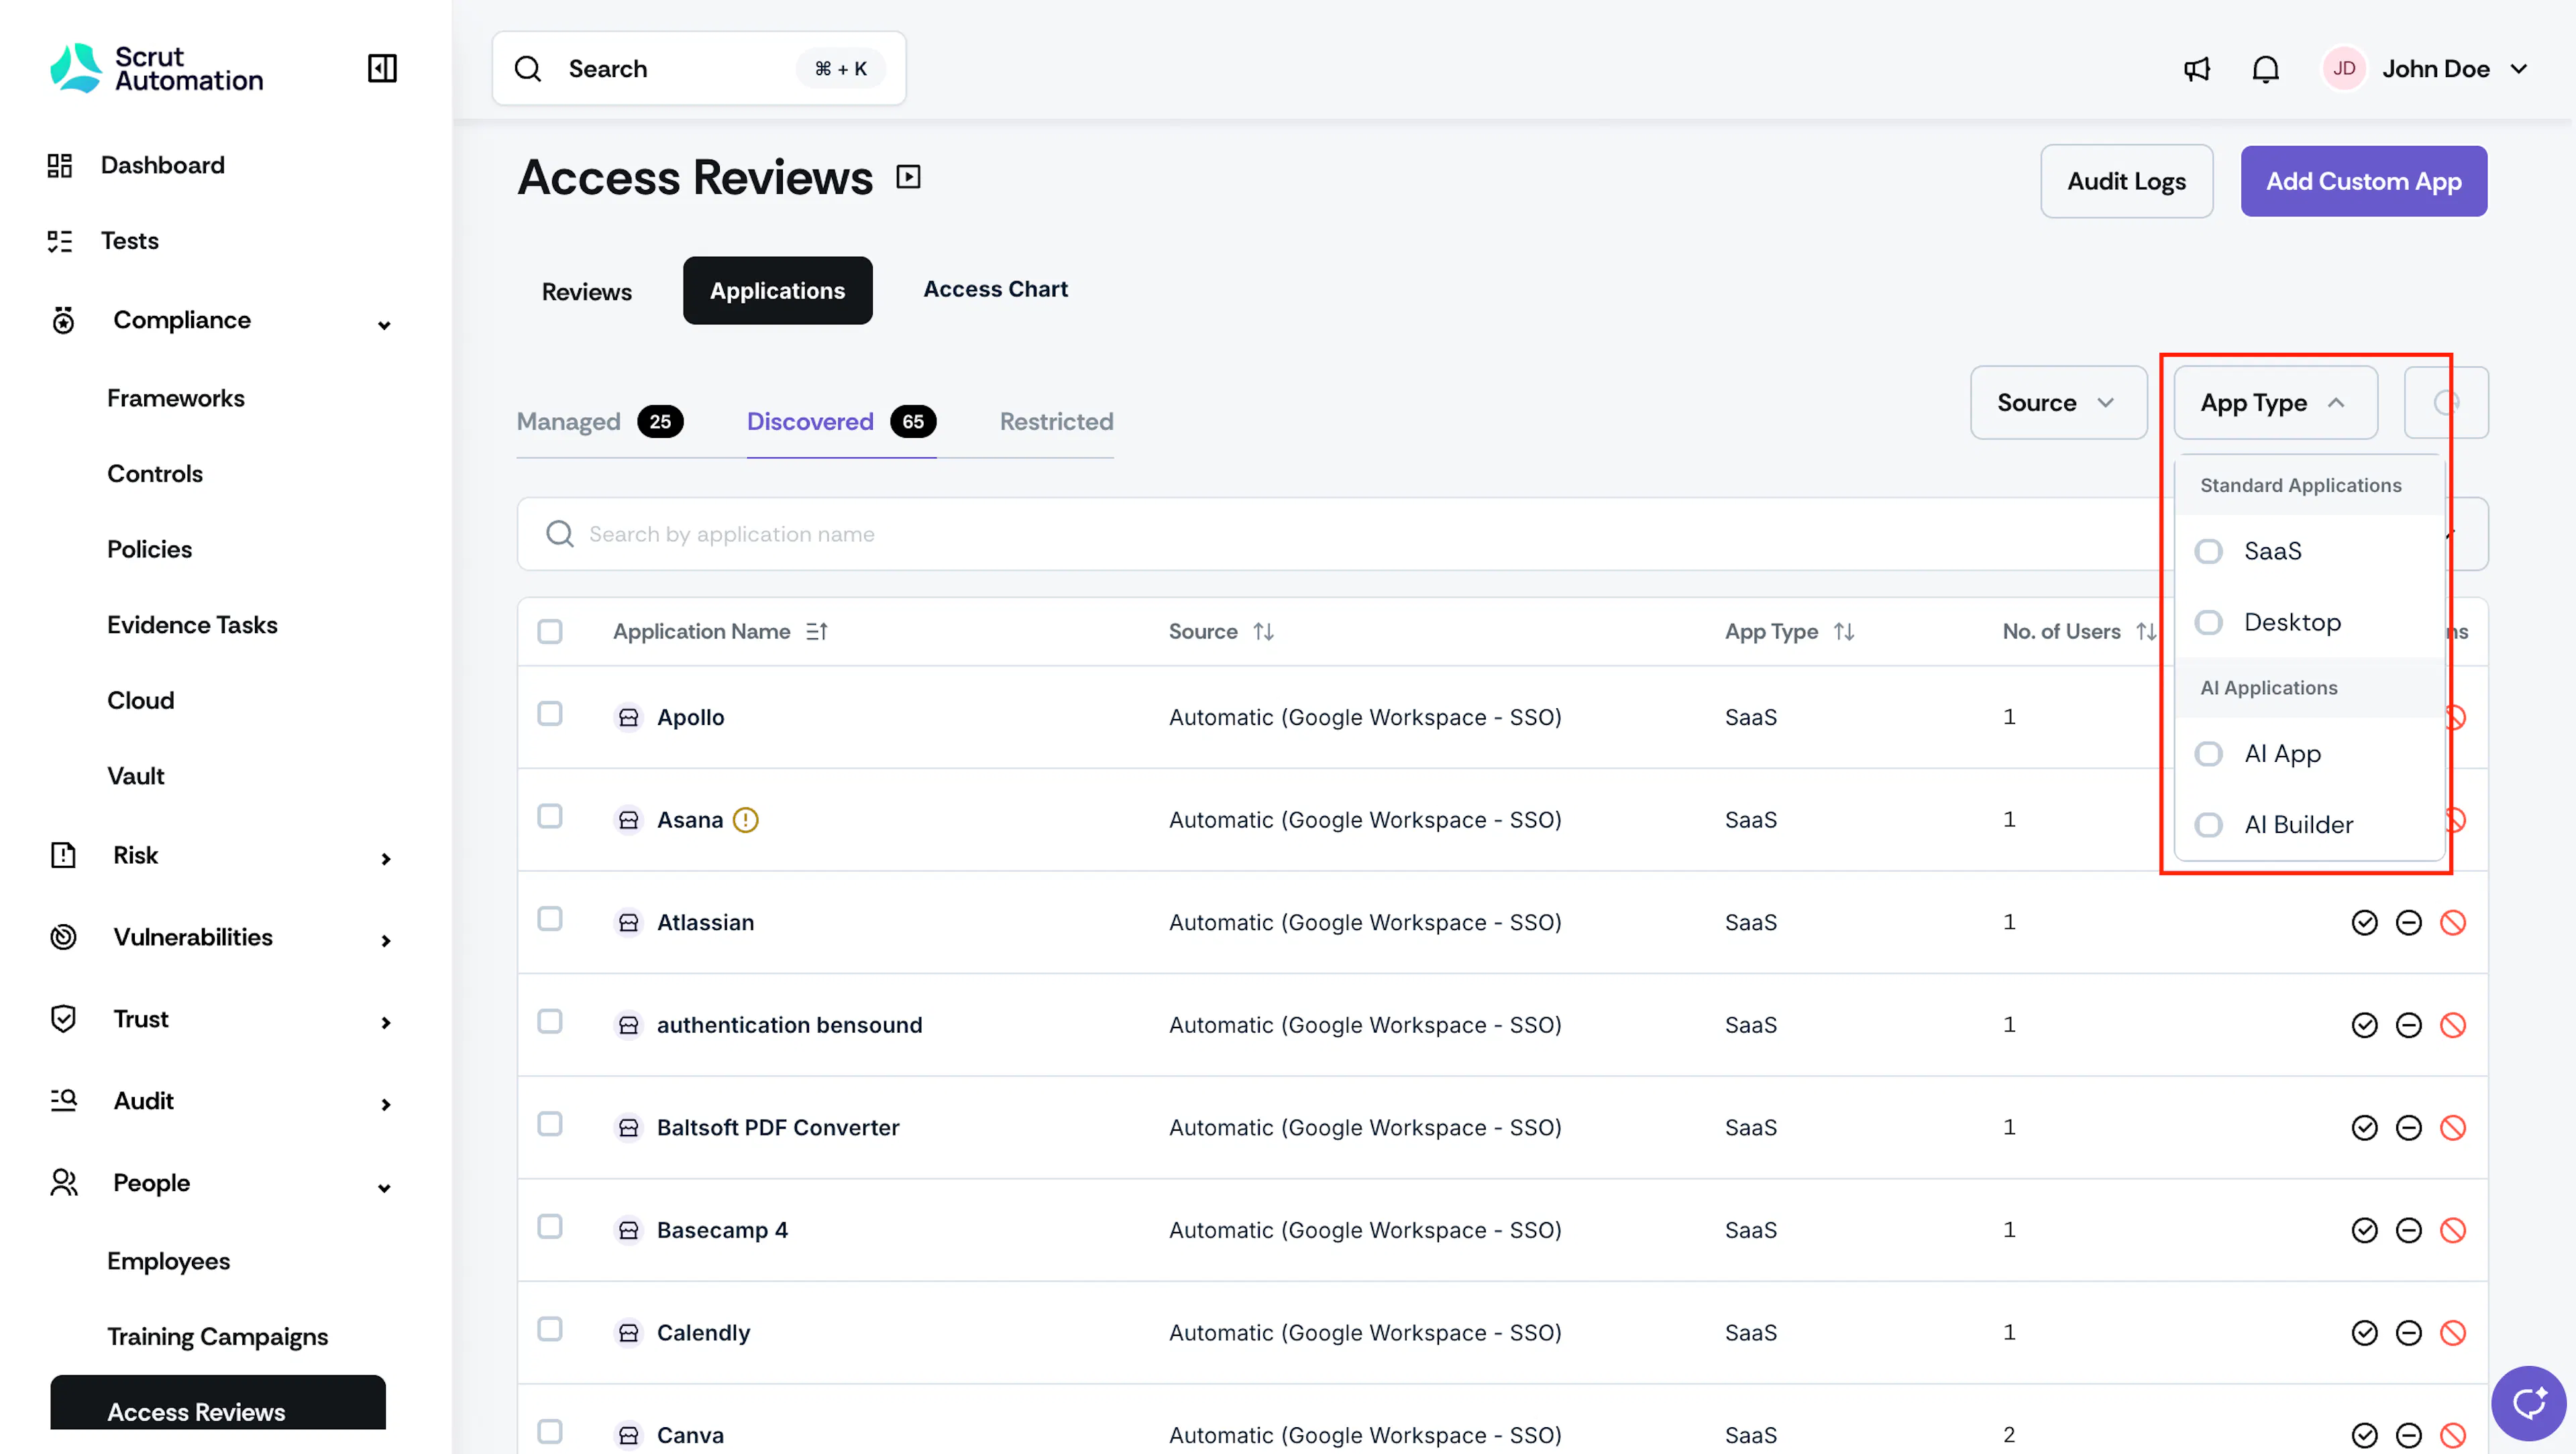
Use the App Type filter to narrow the list by:
- Standard Applications, which includes SaaS and Desktop apps
- AI Applications, which include AI Apps (such as ChatGPT, Claude, Perplexity, etc.) and AI Builder apps (such as Cursor, Codex, etc.)
FAQs
Reach out to support@scrut.io or contact your CSM for further assistance.