

Add Users
In this article, we walk you through adding users to workspaces and managing user permissions.
Add a New User
The Users tab in the Partner Console (console.scrut.io) allows you to create users and control their access to the workspaces console.
-
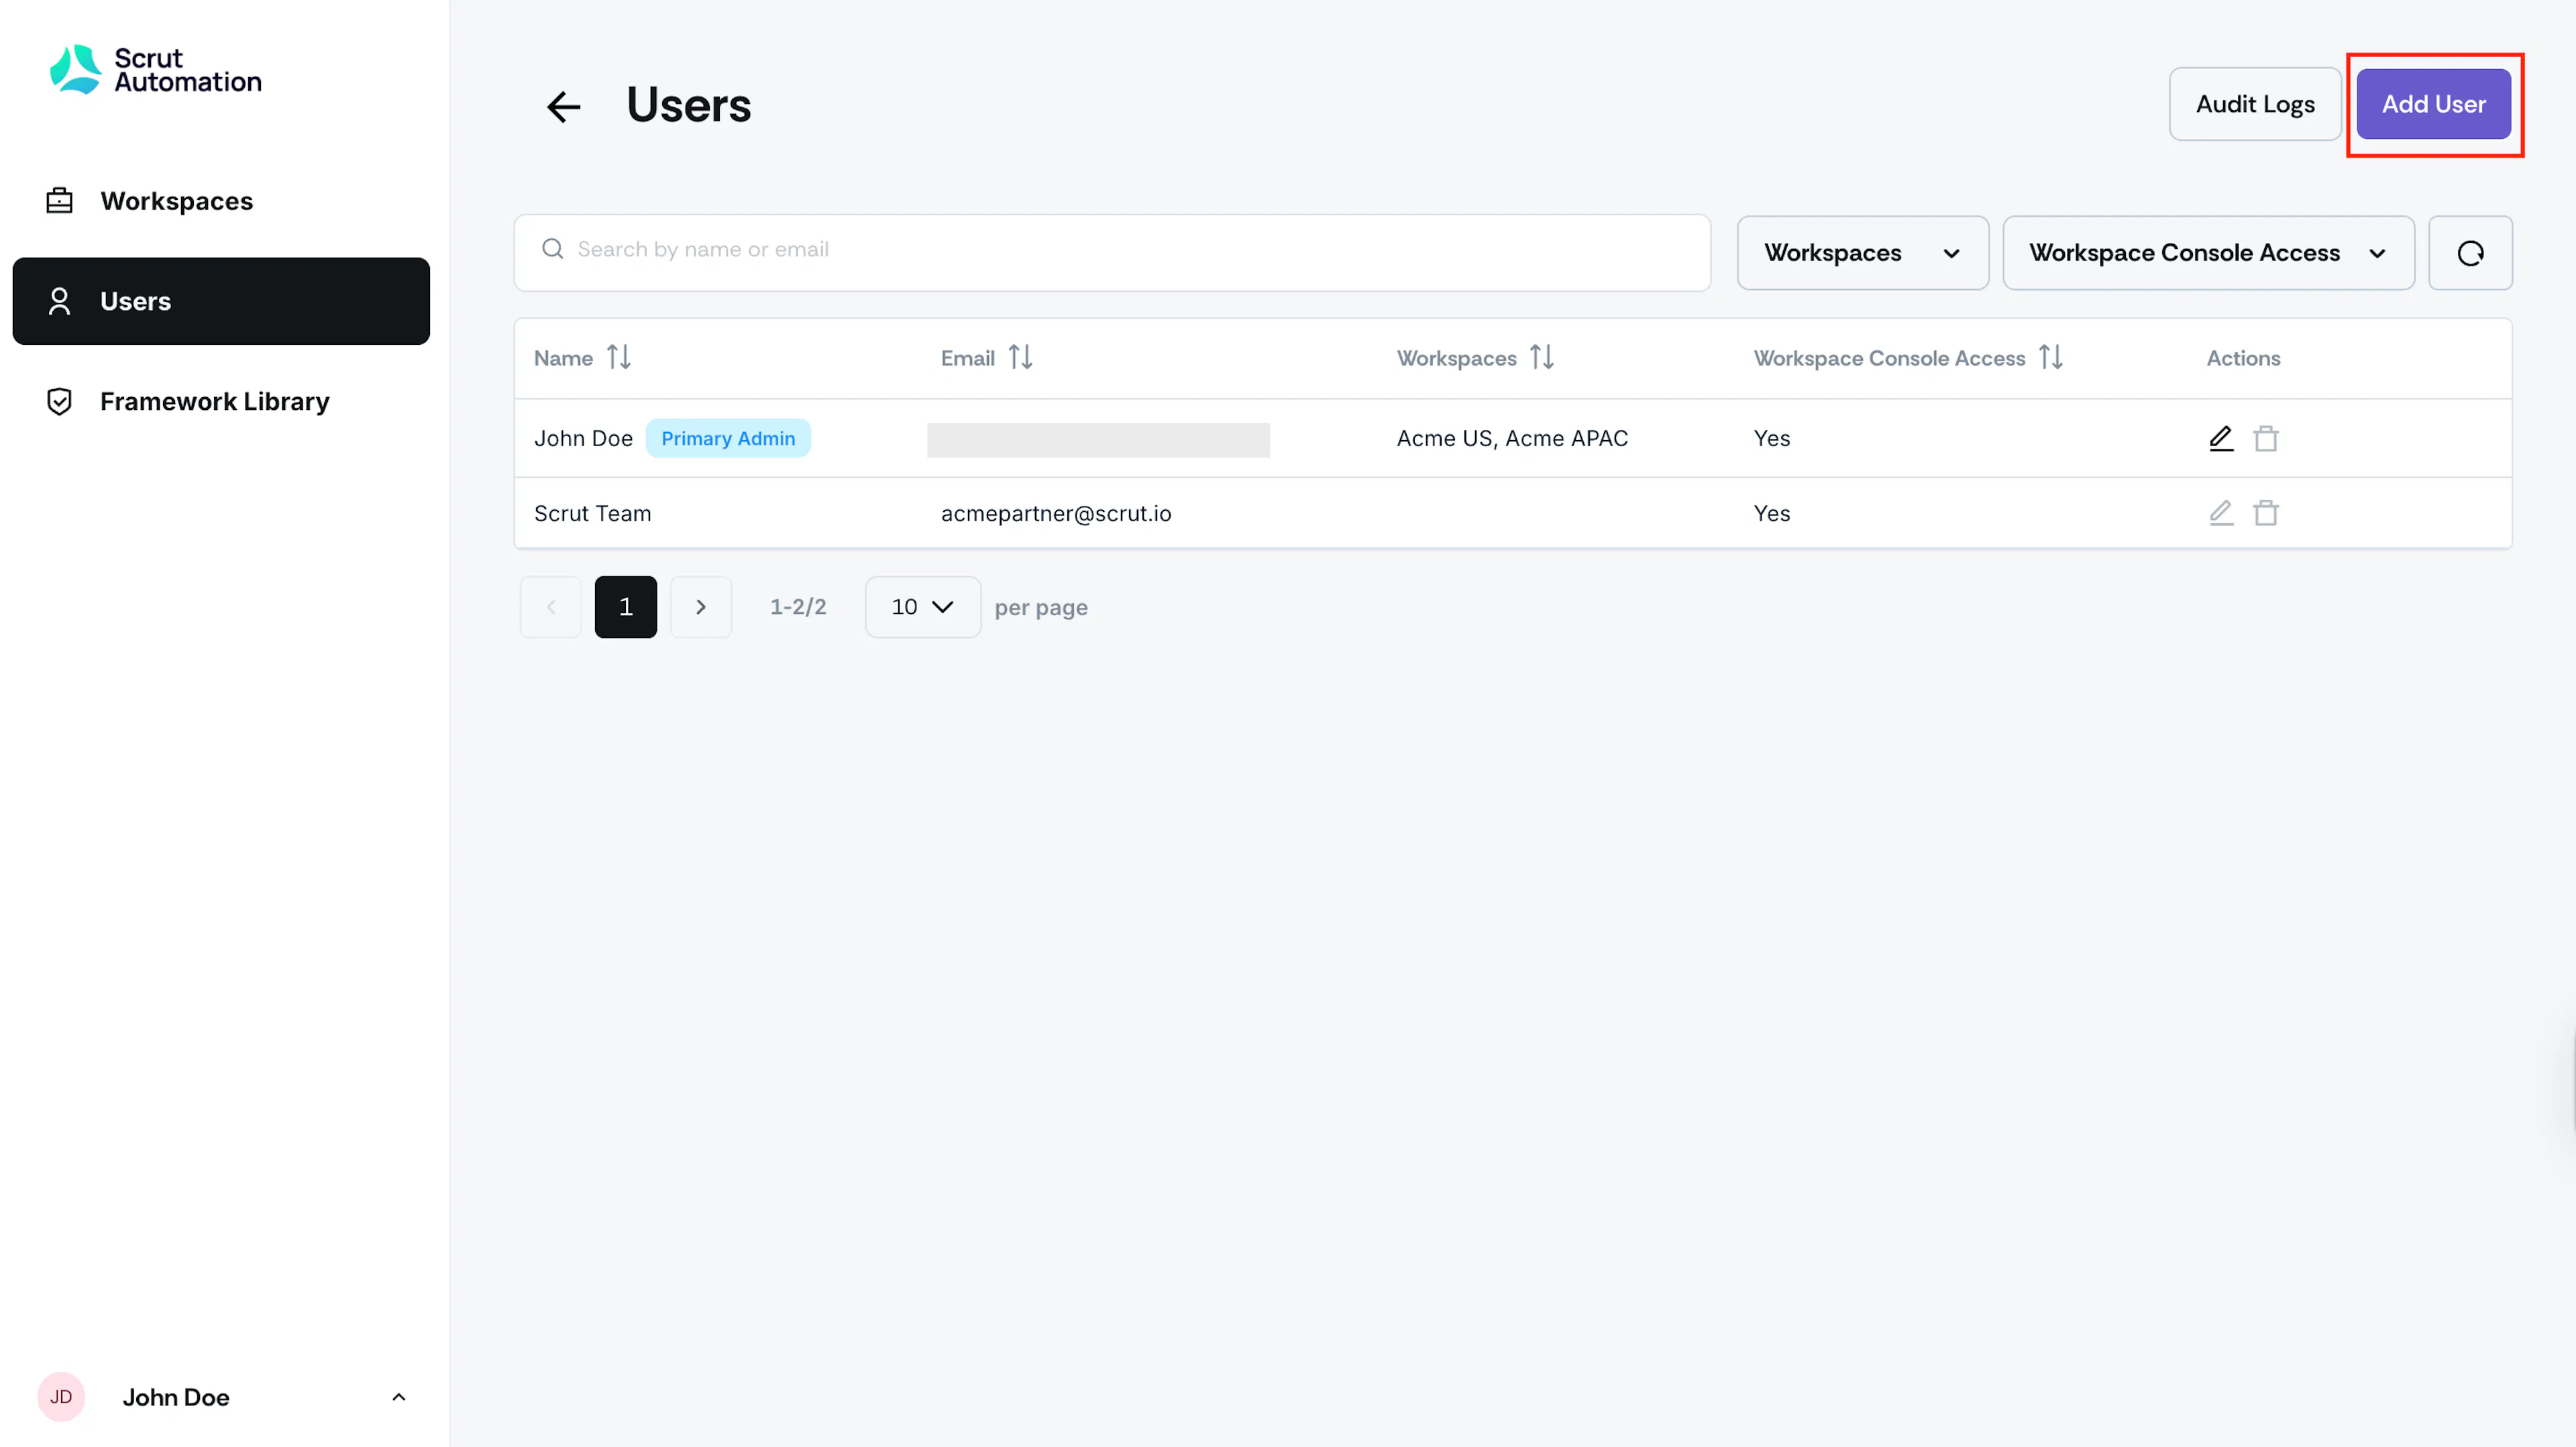
Go to the Users tab.
-
Click Add User.
-
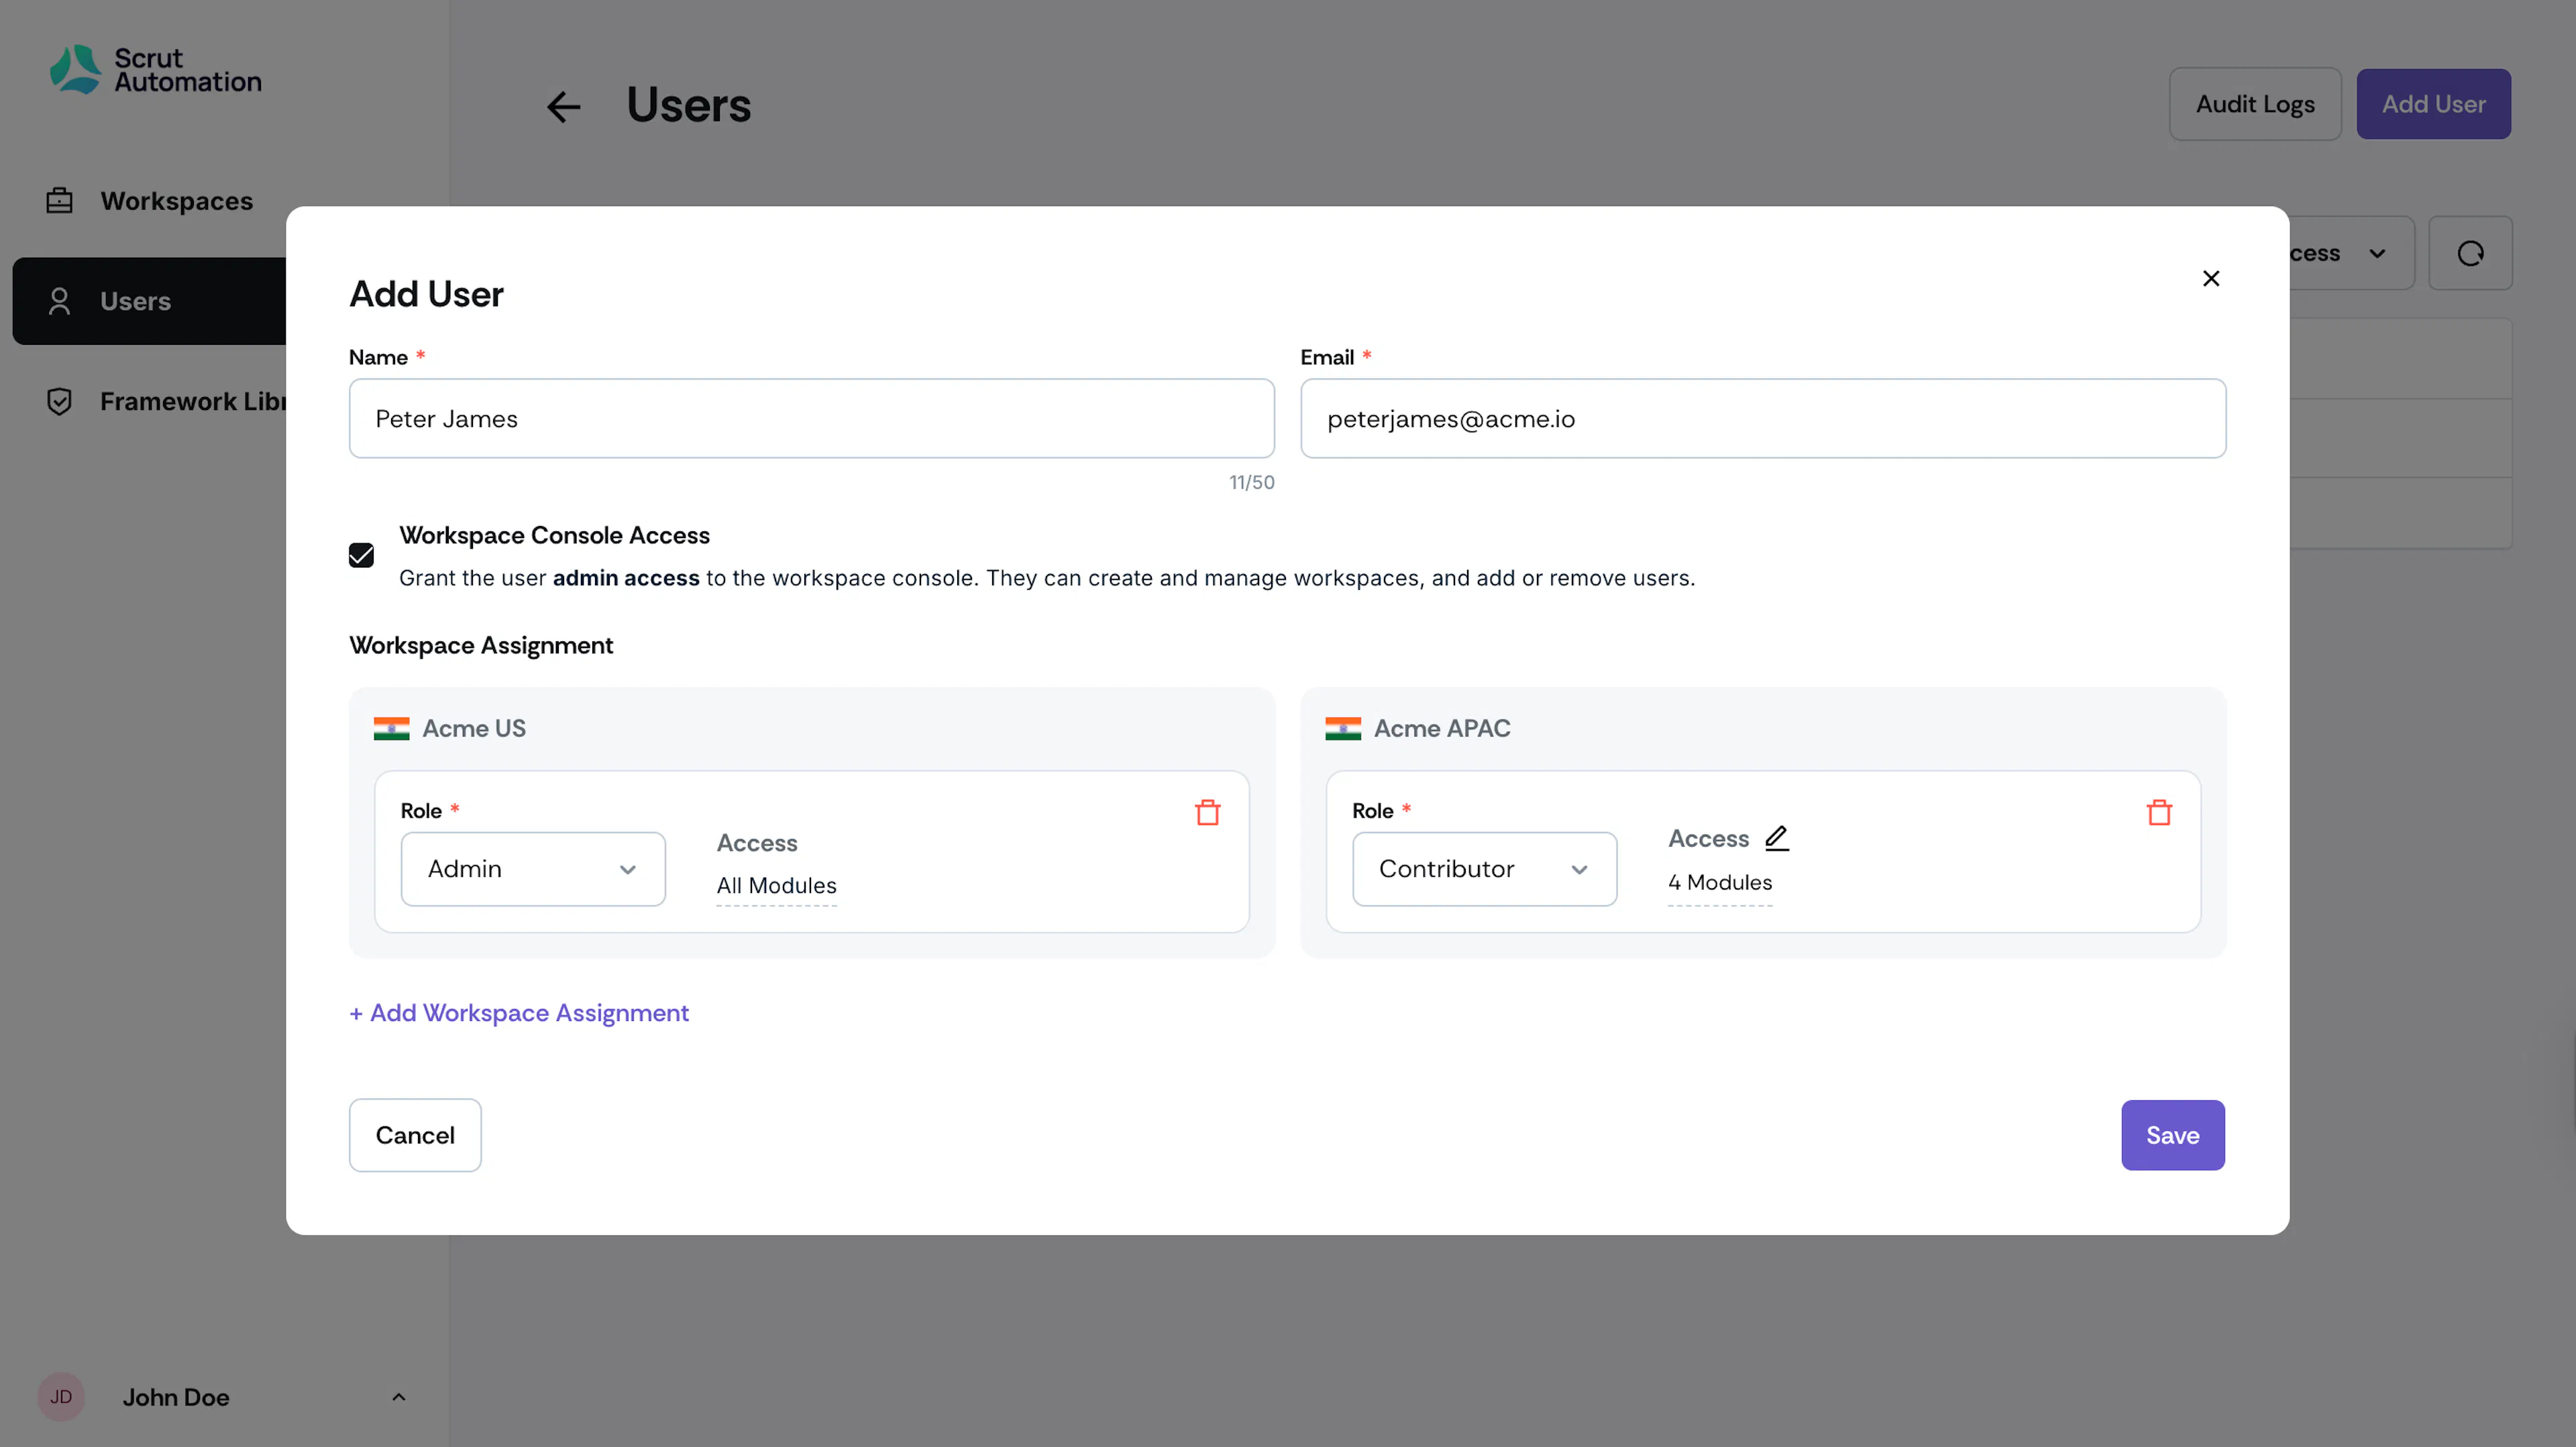
Enter the user's name and email address.
-
Choose the user's access level. You have two options:
Option 1: Grant Console Access
-
Select Workspace Console Access if you want the user to:
- Manage and create workspaces
- Add or remove users
- Access the Partner Portal administration features
-
Click Save to create the user.
Option 2: Grant Workspace-Only Access
In this option, the user will not be able to access the Partner console portal. Instead, they can only access the specific workspaces to which they’ve been added.
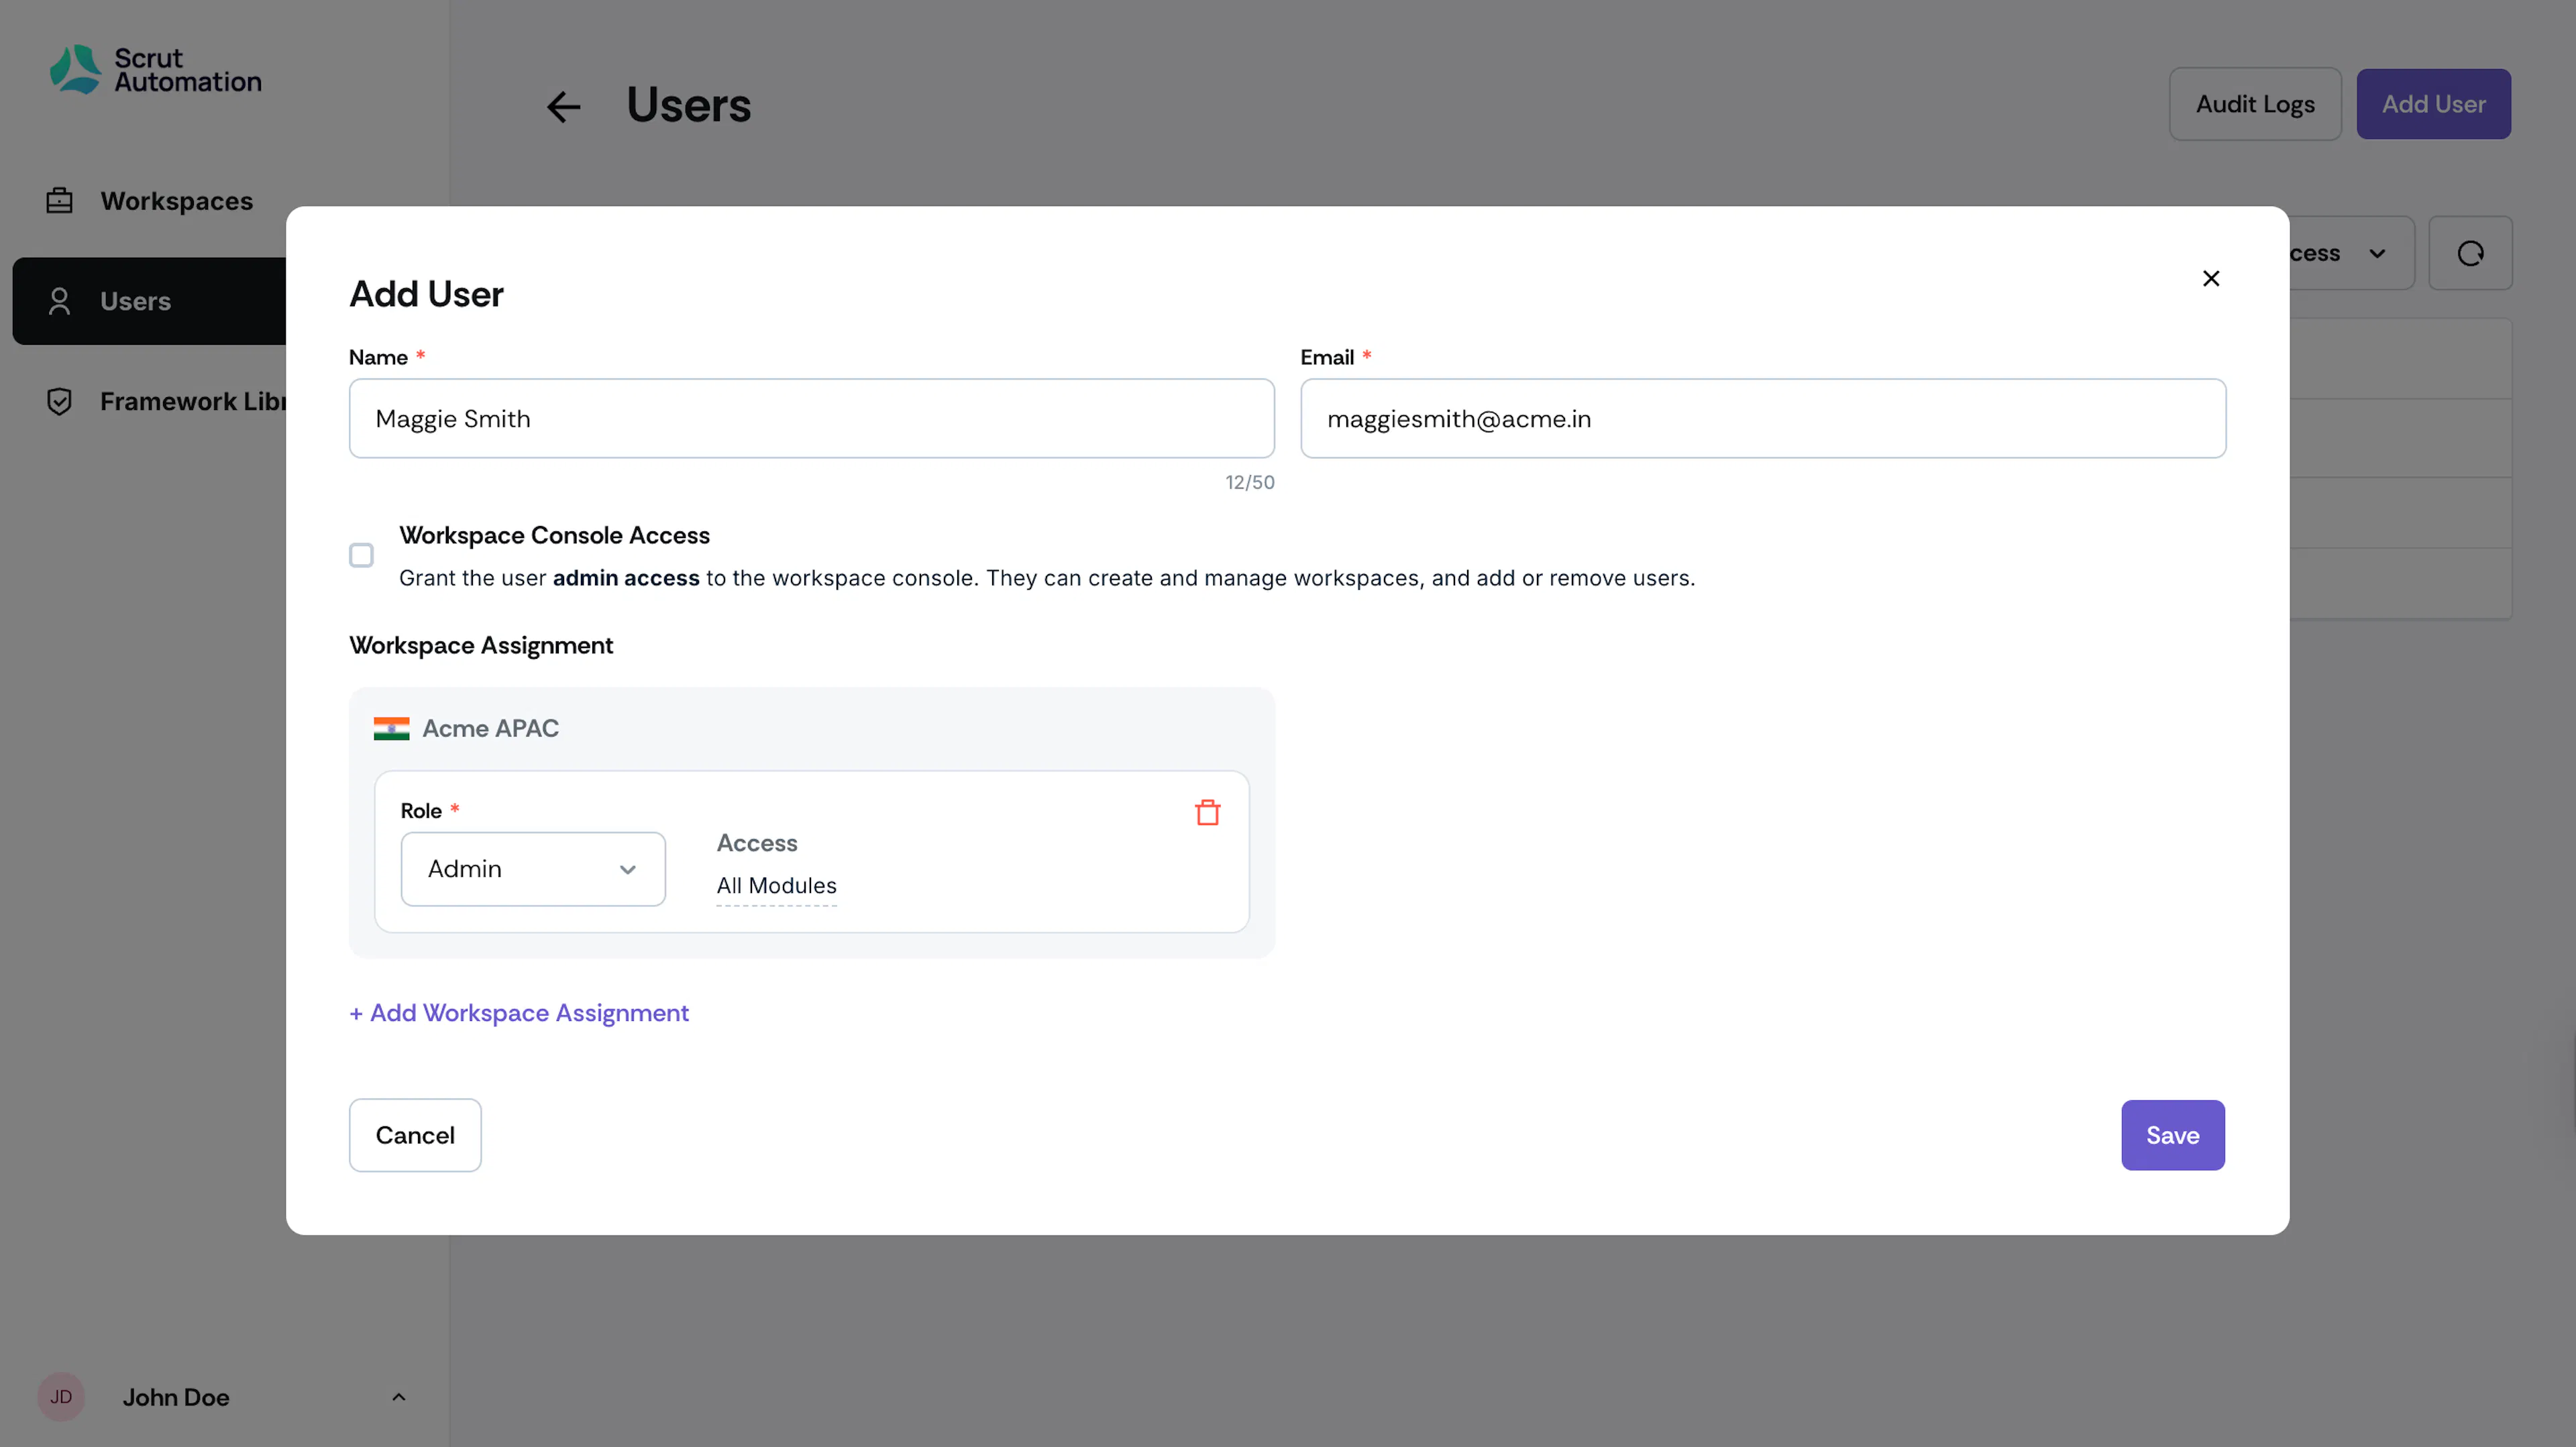
- Click Assign Workspace to give them access to specific customer workspaces.
- Select which workspace(s) they should access.
- Choose their role for each workspace (e.g., Contributor, Admin)
- Customize module permissions if needed. Click Edit to modify module access.
- You can assign different roles for different workspaces (e.g., Contributor in Customer 1, Admin in Customer 2)
- Click Save to create the user.
Pro Tip!
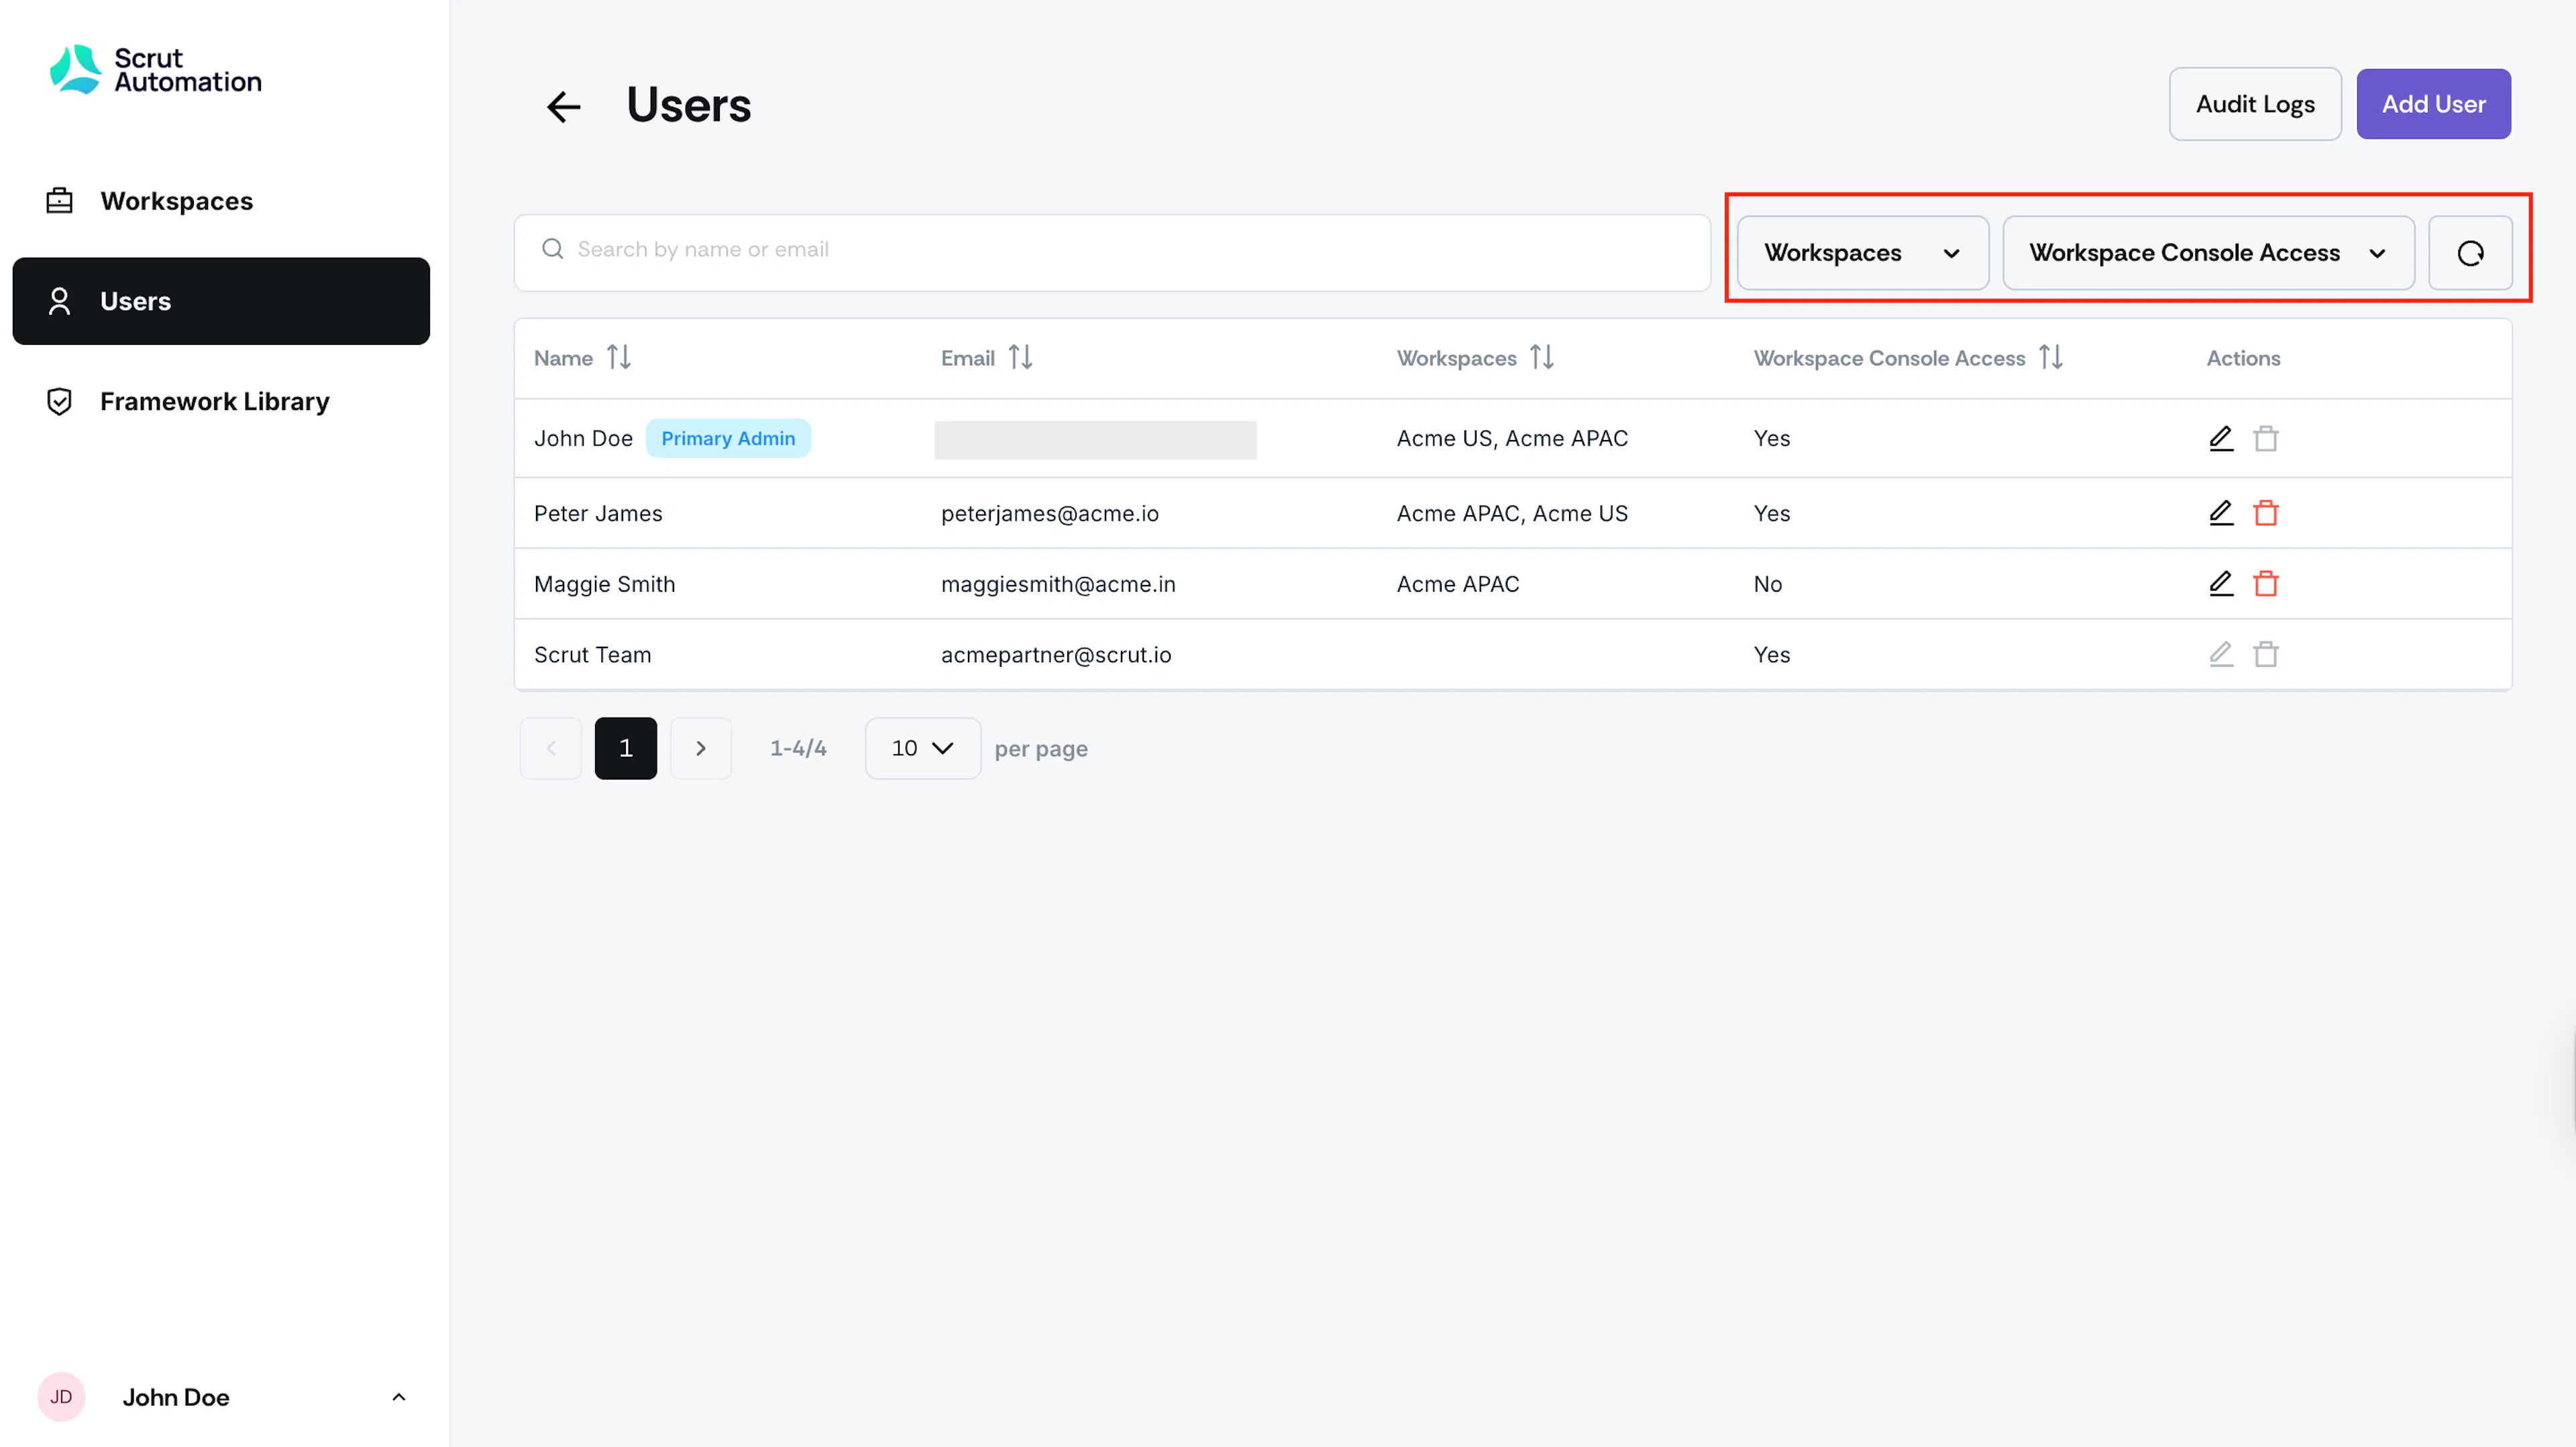
Filter users by Workspaces or Workspace Console Access (Yes/No) using the filters at the top of the Users table.
Was this page helpful?